

Page 1

SM24p-PoE
20-Port 10/100/1000Base-T plus
4 RJ-45/100/1000 SFP Combo Port
Managed PoE Switch
Instruction Manual
Page 2

Page 3

Regulatory Approval
- FCC Class A
- UL 1950
- CSA C22.2 No. 950
- EN60950
- CE
- EN55022 Class A
- EN55024
Canadian EMI Notice
This Class A digital apparatus meets all the requirements of the Canadian Interference-Causing Equipment
Regulations.
Cet appareil numerique de la classe A respecte toutes les exigences du Reglement sur le materiel brouilleur
du Canada.
European Notice
Products with the CE Marking comply with both the EMC Directive (89/336/EEC) and the Low Voltage
Directive (73/23/EEC) issued by the Commission of the European Community Compliance with these
directives imply conformity to the following European Norms:
EN55022 (CISPR 22) - Radio Frequency Interference
EN61000-X - Electromagnetic Imm unity
EN60950 (IEC950) - Product Safety
i
Rev.A1
7-July-12
Page 4

Table of Contents
1. INTRODUCTION....................................................................................................... 2
1-1. OVERVIEW OF THE SM24P-POE.................................................................................. 2
1-2. CHECKLIST .................................................................................................................. 4
1-3. FEATURES .................................................................................................................... 4
1-4. VIEW OF 24-PORT GIGABIT MANAGED POE SWITCH................................................... 6
1-4-1. User Interfaces on the Front Panel (Button, LEDs and Plugs).......................... 6
1-4-2. User Interfaces on the Rear Panel...................................................................... 7
2. INSTALLATION......................................................................................................... 9
2-1. STARTING 24-PORT GIGABIT MANAGED POE SWITCH................................................. 9
2-1-1. Hardware and Cable Installation....................................................................... 9
2-1-2. Cabling Requirements ...................................................................................... 10
2-1-2-1. Cabling Requirements for TP Ports......................................................................... 11
2-1-2-3. Switch Cascading in Topology................................................................................ 11
2-1-3. Configuring the Management Agent of 24-Port Gigabit Managed PoE Switch 1 4
2-1-3-1. Configuring Management Agent of 24-Port Gigabit Managed PoE Switch through
Ethernet Port.........................................................................................................................14
2-1-4. IP Addr ess Assignme nt..................................................................................... 15
2-2. TYPICAL APPLICATIONS............................................................................................... 19
3. BASIC CONCEPT AND MANAGEMENT..................................................... 21
3-1. WHAT’S THE ETHERNET ............................................................................................. 21
3-2. MEDIA ACCESS CONTROL (MAC)............................................................................. 24
3-3. FLOW CONTROL ........................................................................................................ 29
3-4. HOW DOES A SWITCH WORK?..................................................................................... 32
3-5. VIRTUAL LAN........................................................................................................... 36
3-6. LINK AGGREGATION .................................................................................................. 42
4. OPERATION OF WEB-BASED MANAGEMENT ............................................. 44
4-1. WEB MANAGEMENT HOME OVERVIEW ..................................................................... 45
4-2. CONFIGURATION........................................................................................................ 47
4-2-1. System Configuration....................................................................................... 48
4-2-2. Ports................................................................................................................. 51
4-2-3. VLAN Mode Configuration............................................................................... 54
4-2-4. VLAN Group Configuration.............................................................................. 58
4-2-5. PoE................................................................................................................... 60
4-2-6. Aggregation...................................................................................................... 68
4-2-7. LACP................................................................................................................ 69
4-2-8. RSTP................................................................................................................. 71
4-2-9. 802.1X .............................................................................................................. 75
4-2-10 IGMP Snooping............................................................................................... 83
4-2-11. Mirror Configuration...................................................................................... 84
4-2-12. QoS(Quality of Service) Configuration.......................................................... 85
4-2-13. Filter............................................................................................................... 88
4-2-14. Rate Limit....................................................................................................... 90
4-2-15. Storm Control ................................................................................................. 92
4-2-16. SNMP ............................................................................................................. 93
4-3. MONITORING............................................................................................................. 95
4-3-1. Detailed Statistics............................................................................................. 96
4-3-2. LACP Status...................................................................................................... 99
4-3-3. RSTP Status .................................................................................................... 100
4-3-4. IGMP Status ................................................................................................... 101
ii
Rev.A1
7-July-12
Page 5

4-3-5. Ping Status...................................................................................................... 103
4-4. MAINTENANCE ........................................................................................................ 105
4-4-1. Warm Restart.................................................................................................. 106
4-4-2. Factory Default .............................................................................................. 107
4-4-3. Software Upgrade........................................................................................... 108
4-4-4. Configuration File T ransfer............................................................................ 109
4-4-5. Logout..............................................................................................................110
5. MAINTENANCE..........................................................................................................111
5-1. RESOLVING NO LINK CONDITION .............................................................................111
5-2. Q&A........................................................................................................................111
APPENDIX A TECHNICAL SPECIFICATIONS.........................................................112
APPENDIX B MIB SPECIFICATIONS .........................................................................115
ii
Rev.A1
7-July-12
Page 6

Revision History
Date Revision
2011/03/11 A0
2012/07/26 A1
iv
Rev.A1
7-July-12
Page 7

Warning:
• Self-demolition on Product is strictly prohibited. Damage caused by self-
demolition will be charged for repairing fees.
• Do not place product at outdoor or sandstorm.
• Before installation, please make sure input power supply and product
specifications are compatible to each other.
• Before importing / exporting configuration please make sure the firmware
version is always the same.
• After firmware upgrade, the switch will remove the configuration automatically to
latest firmware version.
v
Rev.A1
7-July-12
Page 8

Page 9

User Manual
About this user’s manual
This user’s manual provides instructions on how to install your Managed Switch.
This guide also covers management options and detailed explanation about
hardware and software functions.
Overview of this user’s manual
Chapter 1 “Introduction” describes the features of 24 Gigabit Managed Switch
Chapter 2 “Installation”
Chapter 3 “Operating Concept and Management”
Chapter 4 “Operation of Web-based Management”
Chapter 5 “Maintenance”
1
Publication date: Jan., 2011
Revision A1
Page 10

User Manual
1. Introduction
1-1. Overview of the SM24P-POE
The SM24P-POE which is a 24-port Gigabit Managed PoE Switch, it is a
standard switch that meets all IEEE 802.3/u/x/z Gigabit and Fast Ethernet
specifications. The switch has 20 10/100/1000Mbps TP ports and 4 Gigabit TP/
(100/1000M) SFP slots, It supports Web GUI and SNMP interface for switch
management. The network administrator can logon the switch to monitor, configure
and control each port’s activity. In addition, the switch implements the QoS (Quality
of Service), VLAN, and Trunking. It is suitable for office application.
The switch also support the Power saving for reduce the power consumption
with "ActiPHY Power Management" and "PerfectReach Power Management" two
technique. It could be efficient saving the switch power with auto detect the client
idle and cable length to provide different power.
This PoE switch also complies with IEEE 802.3af, its advanced auto-sensing
algorithm enables providing powered devices (PD) discovery, classification, current
limit, and other necessary functions. It also supports high safety with short circuit
protection and power-out auto-detection to PD.
In this switch, Port 21, 22, 23, 24 includes two types of media --- TP and
(100/1000M) SFP Fiber (LC, BiDi-SC…); this port supports 10/100/1000Mbps TP or
(100/1000M) SFP Fiber with auto-detected function. (100/1000M) SFP Fiber
transceiver is used for high-speed connection expansion.
10/100/1000Mbps TP is a standard Ethernet port that meets all IEEE
802.3/u/x/z Gigabit and Fast Ethernet specifications. (100/1000M) SFP Fiber
transceiver is a Gigabit Ethernet port that fully complies with all IEEE 802.3z and
1000Base-SX/LX standards and 100Base-FX standards.
2
Rev.A1
1-Mar-11
Page 11

• Key Features in the Device
QoS:
switch offers powerful QoS function. This function supports 802.1p
The
VLAN tag priority and DSCP on Layer 3 of network framework.
VLAN:
Supports Port-based VLAN, IEEE802.1Q Tag VLAN. And supports 24 active
VLANs and VLAN ID 1~4094.
Port Trunking:
Allows one or more links to be aggregated together to form a Link
Aggregation Group by the static setting.
IGMP Snooping:
Support IGMP version 2 (RFC 2236): The function IGMP snooping is used
to establish the multicast groups to forward the multicast packet to the
member ports, and, in nature, avoid wasting the bandwidth while IP
multicast packets are running over the network.
Q-in-Q VLAN for performance & security:
Limiting the broadcast traffic to within the same VLAN broadcast domain
also enhances performance. Q-in-Q, the use of double VLAN tags is an
efficient method for enabling Subscriber Aggregation. This is very useful in
the MAN.
User Manual
SNMP:
SNMP agent In the device, SNMP agent is a client software which is
operating over SNMP protocol used to receive the command from SNMP
manager (server site) and echo the corresponded data, i.e. MIB object.
Besides, SNMP agent will actively issue TRAP information when happened.
Power Saving:
The Power saving using the "ActiPHY Power Management" and
"PerfectReach Power Management" two techniques to detect the client idle
and cable length automatically and provides the different power. It could
efficient to save the switch power and reduce the power consumption.
PoE:
24-PoE ports allow power to be supplied to end devices, such as Wireless
Access Points or VoIP Phones, directly through the existing LAN cables,
eliminating costs for additional AC wiring and reducing Installation Cost. It
was compliant with IEEE802.3af standard. It provides the endpoint with
48VDC power through RJ-45 pin 1, 2, 3, 6. SM24P-POEprovides 185 watts
of total power (up 15.4 Watts for 12 ports or 7.7 watts for 24 ports)
3
Rev.A1
1-Mar-11
Page 12

User Manual
1-2. Checklist
Before you start installing the switch, verify that the package contains the
following:
⎯ 24-Port Gigabit Managed PoE Switch
⎯ Mounting Accessory (for 19” Rack Shelf)
⎯ This User's Manual in CD-ROM
⎯ AC Power Cord
Please notify your sales representative immediately if any of the aforementioned
items is missing or damaged.
1-3. Features
The 24-Port Gigabit Managed PoE Switch, a standalone off-the-shelf switch,
provides the comprehensive features listed below for users to perform system
network administration and efficiently and securely serve your network.
Hardware
•
• 20 10/100/1000Mbps Auto-negotiation Gigabit Ethernet TP ports
• 4 10/100/1000Mbps TP or 100/1000Mbps SFP Fiber dual media auto sense
• 500KB on-chip frame buffer
• In SM24P-POE, it supports 185 watts for PoE Power and up to 15.4 watts for 12
ports or 7.7 watts for 24 ports ;
• Jumbo frame support 12.2KB
• Programmable classifier for QoS (Layer 2/Layer 3)
• 8K MAC address and support VLAN ID (1~4094)
• Per-port shaping, policing, and Broadcast Storm Control
• IEEE802.1Q-in-Q nested VLAN support
• Power Saving with "ActiPHY Power Management" and "PerfectReach Power
Management" techniques.
• Full-duplex flow control (IEEE802.3x) and half-duplex backpressure
• Extensive front-panel diagnostic LEDs; System: Power, TP Port1-24:
LINK/ACT/SPD , PoE, SFP Port 21, 22, 23,24: SFP(LINK/ACT)
24 port IEEE802.3af PoE PSE.
Endpoint with 48VDC power through RJ-45 pin 1, 2, 3, 6.
Powered Device (PD) auto detection and classification.
PoE-PSE status and activity LED indicator.
4
Rev.A1
1-Mar-11
Page 13

User Manual
• Management
• Supports concisely the status of port and easily port configuration
• Supports per port traffic monitoring counters
• Supports a snapshot of the system Information when you login
• Supports port mirror function
• Supports the static trunk function
• Supports 802.1Q VLAN
• Supports user management and limits one user to login
• Maximal packet length can be up to 12.2KB for jumbo frame application
• Supports Broadcasting Suppression to avoid network suspended or crashed
• Supports to send the trap event while monitored events happened
• Supports default configuration which can be restored to overwrite the current
configuration which is working on via Web UI and Reset button of the switch
• Supports on-line plug/unplug SFP modules
• Supports Quality of Service (QoS) for real time applications based on the
information taken from Layer 2 to Layer 3.
• Built-in web-based management instead of using CLI interface, providing a more
convenient GUI for the user
5
Rev.A1
1-Mar-11
Page 14

User Manual
1-4. View of 24-Port Gigabit Managed PoE Switch
1-4-
1. User Interfaces on the Front Panel (Button, LEDs and Plugs)
There are 24 TP Gigabit Ethernet PoE ports and 4 (100/1000M) SFP fiber
ports for optional removable modules on the front panel of the switch. LED display
area, locating on the left side of the panel, contains a Power LED, which indicates
the power status and 24 ports working status of the switch.
TP Port Status Indication LEDs
Fig. 1-1 Full View of SM24P-POE MANAGED PoE SWITCH
Gigabit Ethernet Port
SFP Fiber Port
Power Indication
Fiber Port Status Indication LEDs
Fig. 1-2 Front View of SM24P-POE
6
Rev.A1
1-Mar-11
Page 15

• LED Indicators Description
LED Color Function
System LED
POWER Green
10/100/1000Ethernet TP Port 1 to 24 LED
LINK/ACT/SPD
PoE Green
Fiber Port 21, 22, 23, 24 LED
SFP(LINK/ACT)
Green/
Amber
Green/
Amber
Lit when +5V power is coming up
Lit Green when 1000Mbps speed is active
Lit Amber when 100/10Mbps speed is active
Blinks when any traffic is present
Lit when PoE Power is active
Lit Green when 1000Mbps SFP connection with
remote device is good
Lit Amber when 100Mbps SFP connection with
remote device is good
Blinks when any traffic is present
Table1-1
1-4-2. User Interfaces on the Rear Panel
User Manual
AC Line 100-240V 50/60 Hz
Fig. 1-3 Rear View of SM24P-POE
7
Rev.A1
1-Mar-11
Page 16

User Manual
8
Rev.A1
1-Mar-11
Page 17

User Manual
r
2. Installation
2-1. Starting 24-Port Gigabit Managed PoE Switch
This section will give users a quick start for:
-
Hardware and Cable Installation
- Management Station Installation
- Software booting and configuration
2-1-1. Hardware and Cable Installation
First of all:
⇒ Wear a grounding device to avoid the damage from electrostatic discharge
⇒ Be sure that power switch is OFF before you insert the power cord to power
source
Installing Optional SFP Fiber Transcei vers to the 24-Port Gigabit Managed PoE
•
Switch
Note: If you have no modules, please skip this section.
• Connecting the SFP Module to the Chassis:
The optional SFP modules are hot swappable, so you can plug or unplug it
before or after powering on.
1. Verify that the SFP module is the right model and conforms to the chassis
2. Slide the module along the slot. Also be sure that the module is properly
seated against the slot socket/connector
3. Install the media cable for network connection
Fig. 2-1 Installation of Optional SFP FiberTransceive
4. Repeat the above steps, as needed, for each module to be installed into
slot(s)
5. Have the power ON after the above procedures are done
9
Rev.A1
1-Mar-11
Page 18

User Manual
• TP Port and Cable Installation
⇒ In the switch, TP port supports MDI/MDI-X auto-crossover, so both types of
cable, straight-through (Cable pin-outs for RJ-45 jack 1, 2, 3, 6 to 1, 2, 3, 6 in
10/100M TP; 1, 2, 3, 4, 5, 6, 7, 8 to 1, 2, 3, 4, 5, 6, 7, 8 in Gigabit TP) and
crossed-over (Cable pin-outs for RJ-45 jack 1, 2, 3, 6 to 3, 6, 1, 2) can be used.
It means you do not have to tell from them, just plug it.
⇒ Use Cat. 5 grade RJ-45 TP cable to connect to a TP port of the switch and the
other end is connected to a network-aware device such as a workstation or a
server.
⇒ Repeat the above steps, as needed, for each RJ-45 port to be connected to a
Gigabit 10/100/1000 TP device.
Now, you can start having the switch in operation.
• Power On
The switch supports 100-240 VAC, 50-60 Hz power supply. The power
supply will automatically convert the local AC power source to DC power. It does not
matter whether any connection plugged into the switch or not when power on, even
modules as well. After the power is on, all LED indicators will light up and then all off
except the power LED still keeps on. This represents a reset of the system.
ware Loading
• Firm
After resetting, the bootloader will load the firmware into the memory. It will
take about 30 seconds, after that, the switch will flash all the LED once and
automatically performs self-test and is in ready state.
2-1-2. Cabling Requirements
To help ensure a successful installation and keep the network performance
good, please take a care on the cabling requirement. Cables with worse
specification will render the LAN to work poorly.
10
Rev.A1
1-Mar-11
Page 19

User Manual
2-1-2-1. Cabling Requirements for TP Ports
⇒
For Fast Ethernet TP network connection
⎯ The grade of the cable must be Cat. 5 or Cat. 5e with a maximum length of
100 meters.
Gigabit Ethernet TP network connection
⇒
⎯ The grade of the cable must be Cat. 5 or Cat. 5e with a maximum length of
100 meters. Cat. 5e is recommended.
2-1-2-3. Switch Cascading in Topology
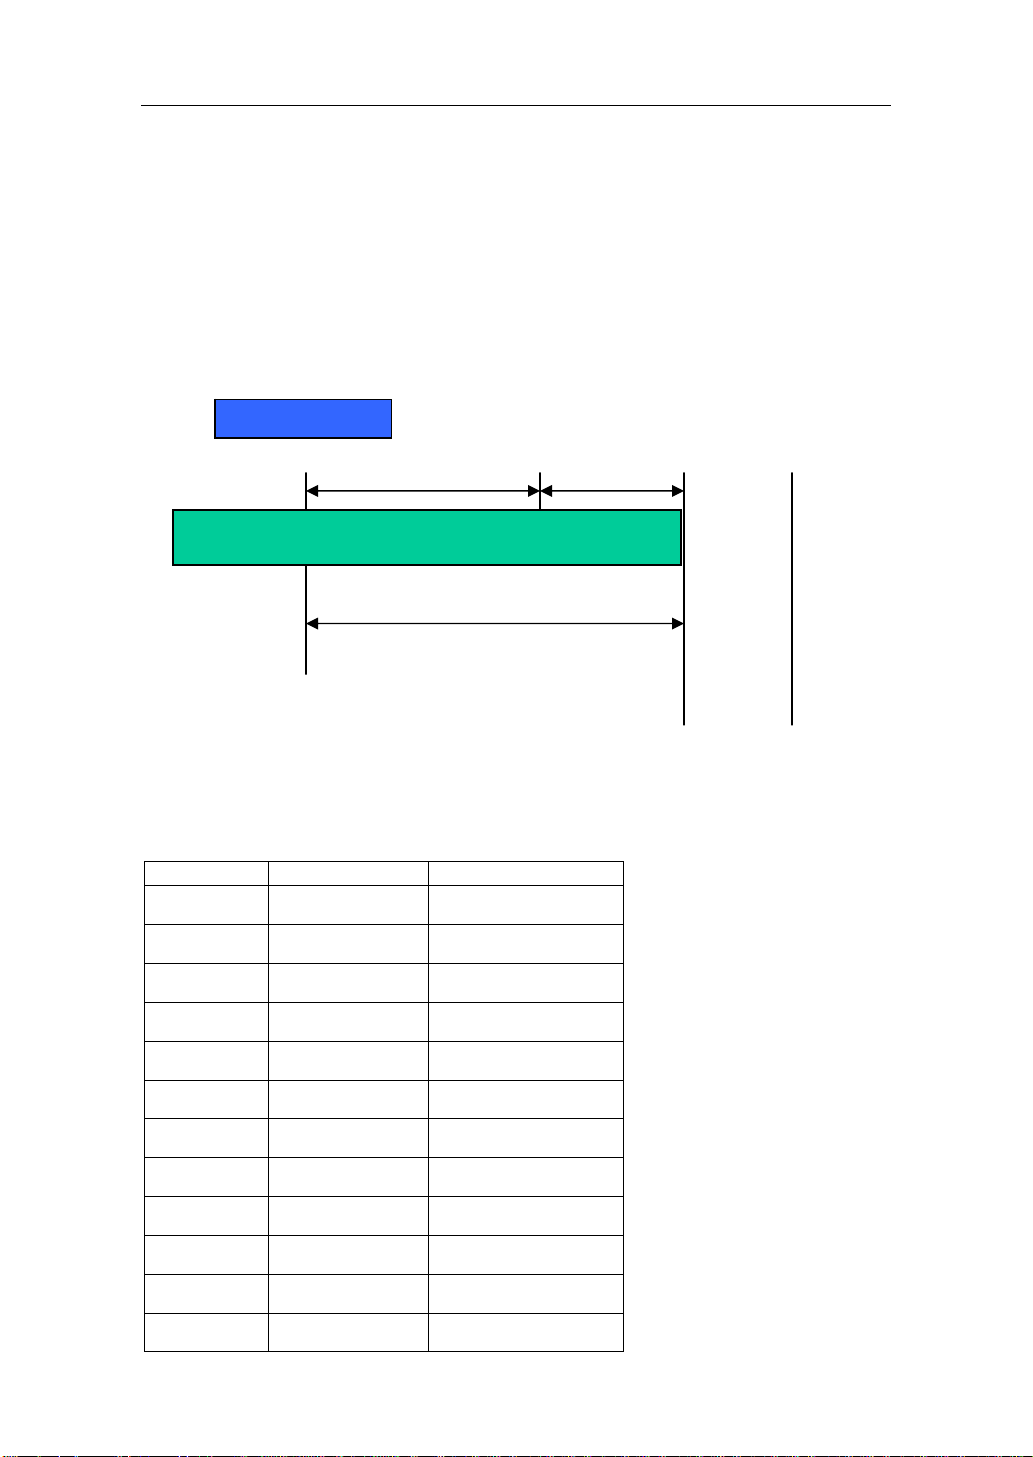
• Takes the Delay Time into Account
Theoretically, the switch partitions the collision domain for each port in switch
cascading that you may up-link the switches unlimitedly. In practice, the network
extension (cascading levels & overall diameter) must follow the constraint of the
IEEE 802.3/802.3u/802.3z and other 802.1 series protocol specifications, in which
the limitations are the timing requirement from physical signals defined by 802.3
series specification of Media Access Control (MAC) and PHY, and timer from some
OSI layer 2 protocols such as 802.1d, 802.1q, LACP and so on.
The fiber, TP cables and devices’ bit-time delay (round trip) are as follows:
1000Base-X TP, Fiber 100Base-TX TP 100Base-FX Fiber
Round trip Delay: 4096 Round trip Delay: 512
Cat. 5 TP Wire: 11.12/m Cat. 5 TP Wire: 1.12/m Fiber Cable: 1.0/m
Fiber Cable : 10.10/m TP to fiber Converter: 56
Bit Time unit : 1ns (1sec./1000 Mega bit)
Bit Time unit: 0.01µs (1sec./100 Mega bit)
Table 2-2
Sum up all elements’ bit-time delay and the overall bit-time delay of
wires/devices must be within Round Trip Delay (bit times) in a half-duplex network
segment (collision domain). For full-duplex operation, this will not be applied. You
may use the TP-Fiber module to extend the TP node distance over fiber optic and
provide the long haul connection.
• Typical Network Topology in Deployment
A hierarchical network with minimum levels of switch may reduce the timing
delay between server and client station. Basically, with this approach, it will
minimize the number of switches in any one path; will lower the possibility of
network loop and will improve network efficiency. If more than two switches are
connected in the same network, select one switch as Level 1 switch and connect all
other switches to it at Level 2. Server/Host is recommended to connect to the Level
1 switch. This is general if no VLAN or other special requirements are applied.
11
Rev.A1
1-Mar-11
Page 20

User Manual
Case1: All switch ports are in the same local area network. Every port can access
each other (See Fig. 2-2).
If VLAN is enabled and configured, each node in the network that can
communicate each other directly is bounded in the same VLAN area.
Here VLAN area is defined by what VLAN you are using. The switch
supports both port-based VLAN and tag-based VLAN. They are different in practical
deployment, especially in physical location. The following diagram shows how it
works and what the difference they are.
Case2a: Port-based VLAN (See Fig.2-3).
Fig. 2-2 No VLAN Configuration Diagram
1. The same VLAN members could not be in different switches.
2. Every VLAN members could not access VLAN members each other.
3. The switch manager has to assign different names for each VLAN groups
at one switch.
Fig. 2-3 Port-based VLAN Diagram
12
Rev.A1
1-Mar-11
Page 21

Case 2b: Port-based VLAN (See Fig.2-4).
User Manual
Fig. 2-4 Port-based VLAN Diagram
1. VLAN1 members could not access VLAN2, VLAN3 and VLAN4 members.
2. VLAN2 members could not access VLAN1 and VLAN3 members, but they could
access VLAN4 members.
VLAN3 members could not access VLAN1, VLAN2 and VLAN4.
3.
4. VLAN4 members could not access VLAN1 and VLAN3 members, but they could
access VLAN2 members.
Case3a: The same VLAN members can be at different switches with the same VID
(See Fig. 2-5).
Fig. 2-5 Attribute-based VLAN Diagram
13
Rev.A1
1-Mar-11
Page 22

User Manual
2-1-3. Configuring the Management Agent of 24-Port Gigabit Managed
PoE Switch
In the way of web, user is allowed to startup the switch management
function. Users can use any one of them to monitor and configure the switch. You
can touch them through the following procedures.
Section 2-1-3-1:
Configuring Management Agent of 24-Port Gigabit Managed PoE
Switch through Ethernet Port
2-1-3-1. Configuring Management Agent of 24-Port Gigabit Managed PoE Switch
through Ethernet Port
There are two ways to configure and monitor the switch through the switch’s
Ethernet port. They are Web browser and SNMP manager. We just introduce the
first type of management interface. Web-based UI for the switch is an interface in a
highly friendly way.
SM24P-POE
Default IP Setting:
IP = 192.168.1.77
Subnet Mask = 255.255.255.0
Default Gateway = 192.168.1.254
Ethernet LAN
Assign a reasonable IP address,
For example:
IP = 192.168.1.100
Subnet Mask = 255.255.255.0
Default Gateway = 192.168.1.254
Fig. 2-6
• Managing 24-Port Gigabit Managed PoE Switch through Ethernet Port
Before you communicate with the switch, you have to finish first the
configuration of the IP address or to know the IP address of the switch. Then,
follow the procedures listed below.
1. Set up a physical path between the configured the switch and a PC
by a qualified UTP Cat. 5 cable with RJ-45 connector.
Note: If PC directly connects to the switch, you have to setup the
same subnet mask between them. But, subnet mask may be
different for the PC in the remote site. Please refer to Fig. 2-6 about
the 24-Port Gigabit Managed Switch default IP address information.
14
Rev.A1
1-Mar-11
Page 23

User Manual
2. Run web browser and follow the menu. Please refer to Chapter 4.
Fig. 2-7 the Login Screen for Web
2-1-4. IP Address Assignment
For IP address configuration, there are three parameters needed to be filled
in. They are IP address, Subnet Mask, Default Gateway and DNS.
IP address:
The address of the network device in the network is used for internetworking
communication. Its address structure looks is shown in the Fig. 2-8. It is “classful”
because it is split into predefined address classes or categories.
Each class has its own network range between the network identifier and
host identifier in the 32 bits address. Each IP address comprises two parts: network
identifier (address) and host identifier (address). The former indicates the network
where the addressed host resides, and the latter indicates the individual host in the
network which the address of host refers to. And the host identifier must be unique
in the same LAN. Here the term of IP address we used is version 4, known as IPv4.
Network identifier Host identifier
Fig. 2-8 IP address structure
With the addressing, it divides IP address into three classes, class A, class B
and class C. The rest of IP addresses are for multicast and broadcast. The bit
length of the network prefix is the same as that of the subnet mask and is denoted
as IP address/X, for example, 192.168.1.0/24. Each class has its address range
described below.
Class A:
Address is less than 126.255.255.255. There are a total of 126 networks can
be defined because the address 0.0.0.0 is reserved for default route and
127.0.0.0/8 is reserved for loopback function.
Bit # 0 1 7 8 31
32 bits
15
Rev.A1
1-Mar-11
Page 24

User Manual
N
0
etwork address Host address
Class B:
IP address range between 128.0.0.0 and 191.255.255.255. Each class B
network has a 16-bit network prefix followed 16-bit host address. There are 16,384
(2^14)/16 networks able to be defined with a maximum of 65534 (2^16 –2) hosts
per network.
Bit # 01 2 15 16 31
10
Network address Host address
Class C:
IP address range between 192.0.0.0 and 223.255.255.255. Each class C
network has a 24-bit network prefix followed 8-bit host address. There are
2,097,152 (2^21)/24 networks able to be defined with a maximum of 254 (2^8 –2)
hosts per network.
Bit # 0 1 2 3 23 24 31
110
Network address Host address
Class D and E:
Class D is a class with first 4 MSB (Most significance bit) set to 1-1-1-0 and
is used for IP Multicast. See also RFC 1112. Class E is a class with first 4 MSB set
to 1-1-1-1 and is used for IP broadcast.
According to IANA (Internet Assigned Numbers Authority), there are three
specific IP address blocks reserved and able to be used for extending internal
network. We call it Private IP address and list below:
Class A 10.0.0.0 --- 10.255.255.255
Class B 172.16.0.0 --- 172.31.255.255
Class C 192.168.0.0 --- 192.168.255.255
Please refer to RFC 1597 and RFC 1466 for more information.
Subnet mask:
It means the sub-division of a class-based network or a CIDR block. The
subnet is used to determine how to split an IP address to the network prefix and the
host address in bitwise basis. It is designed to utilize IP address more efficiently and
ease to manage IP network.
For a class B network, 128.1.2.3, it may have a subnet mask 255.255.0.0 in
16
Rev.A1
1-Mar-11
Page 25
User Manual
N
k
t
default, in which the first two bytes is with all 1s. This means more than 60
thousands of nodes in flat IP address will be at the same network. It’s too large to
manage practically. Now if we divide it into smaller network by extending network
prefix from 16 bits to, say 24 bits, that’s using its third byte to subnet this class B
network. Now it has a subnet mask 255.255.255.0, in which each bit of the first
three bytes is 1. It’s now clear that the first two bytes is used to identify the class B
network, the third byte is used to identify the subnet within this class B network and,
of course, the last byte is the host number.
Not all IP address is available in the sub-netted network. Two special
addresses are reserved. They are the addresses with all zero’s and all one’s host
number. For example, an IP address 128.1.2.128, what IP address reserved will be
looked like? All 0s mean the network itself, and all 1s mean IP broadcast.
128.1.2.128/25
etwor
10000000.00000001.00000010.1 0000000
Subne
In this diagram, you can see the subnet mask with 25-bit long,
255.255.255.128, contains 126 members in the sub-netted network. Another is that
the length of network prefix equals the number of the bit with 1s in that subnet
mask. With this, you can easily count the number of IP addresses matched. The
following table shows the result.
Prefix Length No. of IP matched No. of Addressable IP
/32
/31
/30
/29
/28
/27
/26
25 bits
All 0s = 128.1.2.128
All 1s= 128.1.2.255
1 2 4 2
8 6
16 14
32 30
64 62
1 0000000
1 1111111
/25
/24
/23
/22
/21
128 126
256 254
512 510
1024 1022
2048 2046
17
Rev.A1
1-Mar-11
Page 26

User Manual
/20
/19
/18
/17
/16
According to the scheme above, a subnet mask 255.255.255.0 will partition a
network with the class C. It means there will have a maximum of 254 effective
nodes existed in this sub-netted network and is considered a physical network in an
autonomous network. So it owns a network IP address which may looks like
168.1.2.0.
With the subnet mask, a bigger network can be cut into small pieces of
network. If we want to have more than two independent networks in a worknet, a
partition to the network must be performed. In this case, subnet mask must be
applied.
For different network applications, the subnet mask may look like
255.255.255.240. This means it is a small network accommodating a maximum of
15 nodes in the network.
Default gateway:
For the routed packet, if the destination is not in the routing table, all the
traffic is put into the device with the designated IP address, known as default router.
Basically, it is a routing policy.
4096 4094
8192 8190
16384 16382
32768 32766
65536 65534
Table 2-3
For assigning an IP address to the switch, you just have to check what the IP
address of the network will be connected with the switch. Use the same network
address and append your host address to it.
18
Rev.A1
1-Mar-11
Page 27

User Manual
Fig. 2-9
First, IP Address: as shown in the Fig. 2-9, enter “192.168.1.77”, for instance.
For sure, an IP address such as 192.168.1.x must be set on your PC.
Second, Subnet Mask: as shown in the Fig. 2-9, enter “255.255.255.0”. Any
subnet mask such as 255.255.255.x is allowable in this case.
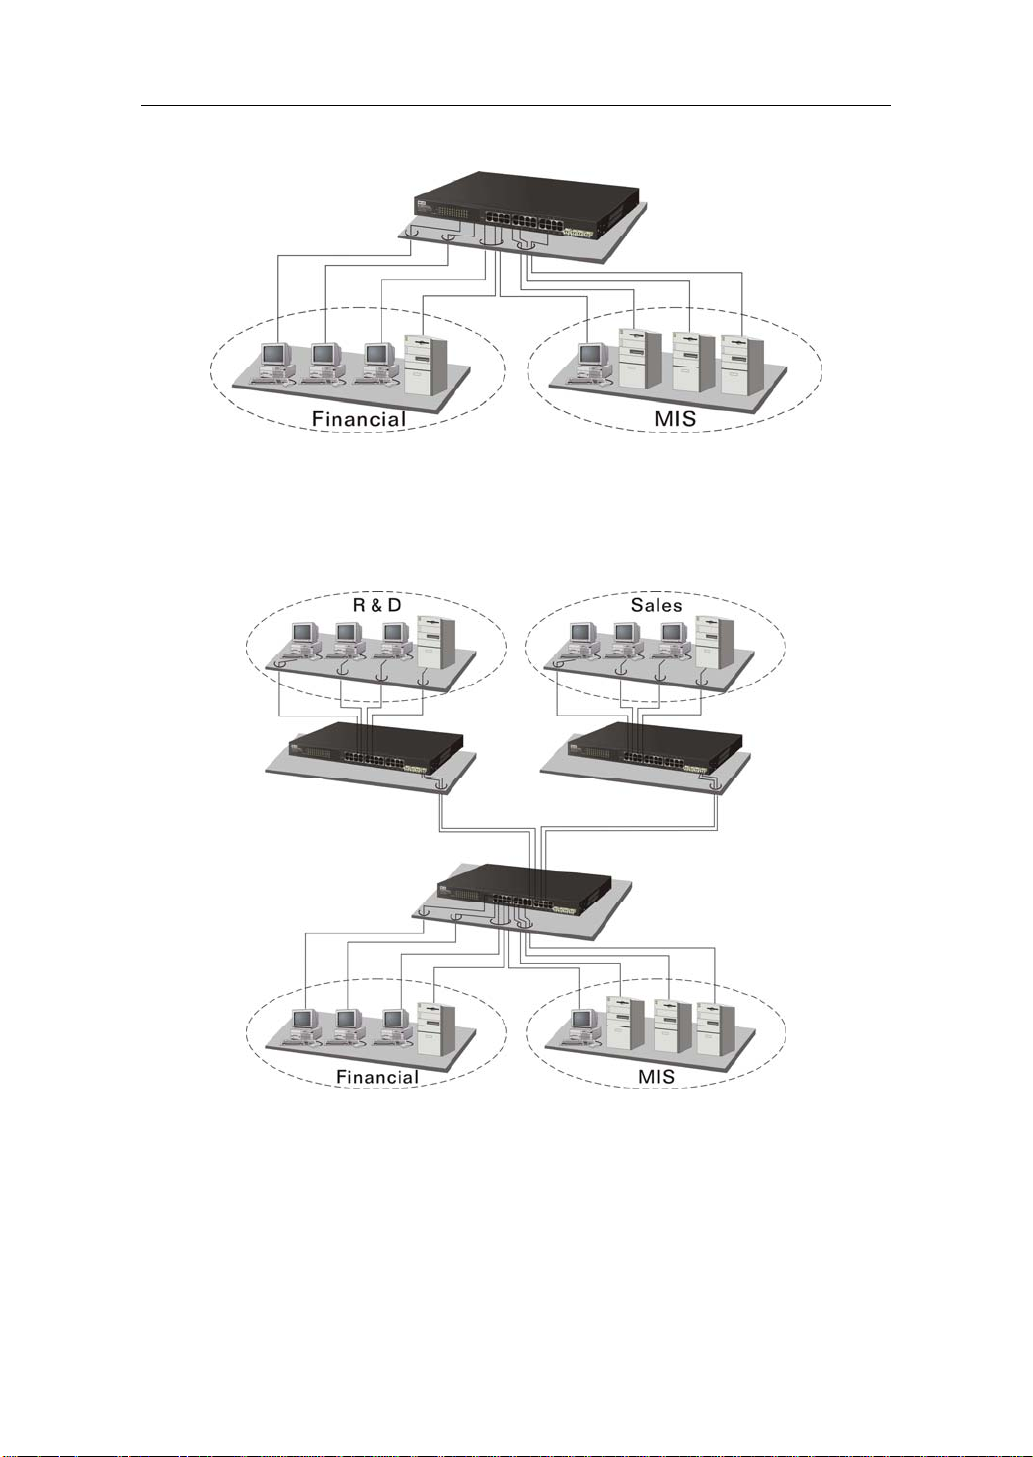
2-2. Typical Applications
The 24-Port Gigabit Managed Switch implements 24 Gigabit Ethernet TP
ports with auto MDIX and four slots for the removable module supporting
comprehensive fiber types of connection, including LC and BiDi-LC SFP modules.
For more details on the specification of the switch, please refer to Appendix A.
The switch is suitable for the following applications.
⎯ Central Site/Remote site application is used in carrier or ISP (See Fig. 2-10)
⎯ Peer-to-peer application is used in two remote offices (See Fig. 2-11)
⎯ Office network(See Fig. 2-12)
Central Site
Fig. 2-10 Network Connection between Remote Site and Central Site
Fig. 2-10 is a system wide basic reference connection diagram. This diagram
19
Rev.A1
1-Mar-11
Page 28
User Manual
demonstrates how the switch connects with other network devices and hosts.
Fig. 2-11 Peer-to-peer Network Connection
Fig. 2-12 Office Network Connection
20
Rev.A1
1-Mar-11
Page 29

3. Basic Concept and
User Manual
Management
This chapter will tell you the basic concept of features to manage this switch
and how they work.
3-1. what’s the Ethernet
Ethernet originated and was implemented at Xerox in Palo Alto, CA in 1973
and was successfully commercialized by Digital Equipment Corporation (DEC), Intel
and Xerox (DIX) in 1980. In 1992, Grand Junction Networks unveiled a new high
speed Ethernet with the same characteristic of the original Ethernet but operated at
100Mbps, called Fast Ethernet now. This means Fast Ethernet inherits the same
frame format, CSMA/CD, software interface. In 1998, Gigabit Ethernet was rolled
out and provided 1000Mbps. Now 10G/s Ethernet is under approving. Although
these Ethernet have different speed, they still use the same basic functions. So they
are compatible in software and can connect each other almost without limitation.
The transmission media may be the only problem.
Fig. 3-1 IEEE 802.3 reference model vs. OSI reference mode
In Fig. 3-1, we can see that Ethernet locates at the Data Link layer and
Physical layer and comprises three portions, including logical link control (LLC),
media access control (MAC), and physical layer. The first two comprises Data link
layer, which performs splitting data into frame for transmitting, receiving
acknowledge frame, error checking and re-transmitting when not received correctly
as well as provides an error-free channel upward to network layer.
21
Rev.A1
1-Mar-11
Page 30

User Manual
r
A
Data
Link
Laye
r
Physica
l
Layer
IEEE 802.2
LLC
IEEE802.3 CSMA/CD MAC
IEEE 802.3 PLS
IEEE
802.3
MAU
C
MI
I
NSI X3T9.5
PMD
This above diagram shows the Ethernet architecture, LLC sub-layer and
MAC sub-layer, which are responded to the Data Link layer, and transceivers, which
are responded to the Physical layer in OSI model. In this section, we are mainly
describing the MAC sub-layer.
Logical Link Control (LLC)
Data link layer is composed of both the sub-layers of MAC and MAC-client.
Here MAC client may be logical link control or bridge relay entity.
Logical link control supports the interface between the Ethernet MAC and
upper layers in the protocol stack, usually Network layer, which is nothing to do with
the nature of the LAN. So it can operate over other different LAN technology such
as Token Ring, FDDI and so on. Likewise, for the interface to the MAC layer, LLC
defines the services with the interface independent of the medium access
technology and with some of the nature of the medium itself.
Coaxial/STP/UTP
Fibe
The table 3-1 is the format of LLC PDU. It
Table 3-1 LLC Format
22
Rev.A1
1-Mar-11
Page 31

User Manual
comprises four fields, DSAP, SSAP, Control and Information. The DSAP address
field identifies the one or more service access points, in which the I/G bit indicates it
is individual or group address. If all bit of DSAP is 1s, it’s a global address. The
SSAP address field identifies the specific services indicated by C/R bit (command or
response). The DSAP and SSAP pair with some reserved values indicates some
well-known services listed in the table below.
0xAAAA SNAP
0xE0E0 Novell IPX
0xF0F0 NetBios
0xFEFE IOS network layer PDU
0xFFFF Novell IPX 802.3 RAW packet
0x4242 STP BPDU
0x0606 IP
0x9898 ARP
Table 3-2
LLC type 1 connectionless service, LLC type 2 connection-oriented service
and LLC type 3 acknowledge connectionless service are three types of LLC frame
for all classes of service. In Fig 3-2, it shows the format of Service Access Point
(SAP). Please refer to IEEE802.2 for more details.
Fig. 3-2 SAP Format
23
Rev.A1
1-Mar-11
Page 32

User Manual
3-2. Media Access Control (MAC)
MAC Addressing
Because LAN is composed of many nodes, for the data exchanged among
these nodes, each node must have its own unique address to identify who should
send the data or should receive the data. In OSI model, each layer provides its own
mean to identify the unique address in some form, for example, IP address in
network layer.
The MAC is belonged to Data Link Layer (Layer 2), the address is defined to
be a 48-bit long and locally unique address. Since this type of address is applied
only to the Ethernet LAN media access control (MAC), they are referred to as MAC
addresses.
The first three bytes are Organizational Unique Identifier (OUI) code
assigned by IEEE. The last three bytes are the serial number assigned by the
vendor of the network device. All these six bytes are stored in a non-volatile
memory in the device. Their format is as the following table and normally written in
the form as aa-bb-cc-dd-ee-ff, a 12 hexadecimal digits separated by hyphens, in
which the aa-bb-cc is the OUI code and the dd-ee-ff is the serial number assigned
by manufacturer.
Bit 47 bit 0
1st byte 2nd byte 3rd byte 4th byte 5th byte 6th byte
OUI code Serial number
Table 3-3 Ethernet MAC address
The first bit of the first byte in the Destination address (DA) determines the
address to be a Unicast (0) or Multicast frame (1), known as I/G bit indicating
individual (0) or group (1). So the 48-bit address space is divided into two portions,
Unicast and Multicast. The second bit is for global-unique (0) or locally-unique
address. The former is assigned by the device manufacturer, and the later is usually
assigned by the administrator. In practice, global-unique addresses are always
applied.
A unicast address is identified with a single network interface. With this
nature of MAC address, a frame transmitted can exactly be received by the target
an interface the destination MAC points to.
A multicast address is identified with a group of network devices or network
interfaces. In Ethernet, a many-to-many connectivity in the LANs is provided. It
provides a mean to send a frame to many network devices at a time. When all bit of
DA is 1s, it is a broadcast, which means all network device except the sender itself
can receive the frame and response.
Ethernet Frame Format
There are two major forms of Ethernet frame, type encapsulation and length
encapsulation, both of which are categorized as four frame formats 802.3/802.2
SNAP, 802.3/802.2, Ethernet II and Netware 802.3 RAW. We will introduce the
basic Ethernet frame format defined by the IEEE 802.3 standard required for all
MAC implementations. It contains seven fields explained below.
24
Rev.A1
1-Mar-11
Page 33

User Manual
PRE SFD DA SA Type/Length Data Pad bit if any FCS
7 7 6 6 2 46-1500 4
Fig. 3-3 Ethernet frame structure
- Preamble (PRE) —The PRE is 7-byte long with alternating pattern of ones
and zeros used to tell the receiving node that a frame is coming, and to
synchronize the physical receiver with the incoming bit stream. The
preamble pattern is:
10101010 10101010 10101010 10101010 10101010 10101010 10101010
- Start-of-frame delimiter (SFD) — The SFD is one-byte long with
alternating pattern of ones and zeros, ending with two consecutive 1-bits. It
immediately follows the preamble and uses the last two consecutive 1s bit to
indicate that the next bit is the start of the data packet and the left-most bit in
the left-most byte of the destination address. The SFD pattern is 1010101 1.
- Destination address (DA) — The DA field is used to identify which
network device(s) should receive the packet. It is a unique address. Please
see the section of MAC addressing.
- Source addresses (SA) — The SA field indicates the source node. The SA
is always an individual address and the left-most bit in the SA field is always
0.
- Length/Type — This field indicates either the number of the data bytes
contained in the data field of the frame, or the Ethernet type of data. If the
value of first two bytes is less than or equal to 1500 in decimal, the number
of bytes in the data field is equal to the Length/Type value, i.e. this field acts
as Length indicator at this moment. When this field acts as Length, the
frame has optional fields for 802.3/802.2 SNAP encapsulation, 802.3/802.2
encapsulation and Netware 802.3 RAW encapsulation. Each of them has
different fields following the Length field.
- If the Length/Type value is greater than 1500, it means the Length/Type
acts as Type. Different type value means the frames with different protocols
running over Ethernet being sent or received.
For example,
0x0800 IP datagram
0x0806 ARP
0x0835 RARP
0x8137 IPX datagram
0x86DD IPv6
- Data — Less than or equal to 1500 bytes and greater or equal to 46 bytes.
If data is less than 46 bytes, the MAC will automatically extend the padding
bits and have the payload be equal to 46 bytes. The length of data field
must equal the value of the Length field when the Length/Type acts as
Length.
- Frame check sequence (FCS) — This field contains a 32-bit cyclic
25
Rev.A1
1-Mar-11
Page 34

User Manual
redundancy check (CRC) value, and is a check sum computed with DA,
SA, through the end of the data field with the following polynomial.
- It is created by the sending MAC and recalculated by the receiving MAC to
check if the packet is damaged or not.
How does a MAC work?
The MAC sub-layer has two primary jobs to do:
1. Receiving and transmitting data. When receiving data, it parses frame to
detect error; when transmitting data, it performs frame assembly.
2. Performing Media access control. It prepares the initiation jobs for a
frame transmission and makes recovery from transmission failure.
Frame transmission
As Ethernet adopted Carrier Sense Multiple Access with Collision Detect
(CSMA/CD), it detects if there is any carrier signal from another network device
running over the physical medium when a frame is ready for transmission. This is
referred to as sensing carrier, also “Listen”. If there is signal on the medium, the
MAC defers the traffic to avoid a transmission collision and waits for a random
period of time, called backoff time, then sends the traffic again.
After the frame is assembled, when transmitting the frame, the preamble
(PRE) bytes are inserted and sent first, then the next, Start of frame Delimiter
(SFD), DA, SA and through the data field and FCS field in turn. The followings
summarize what a MAC does before transmitting a frame.
1. MAC will assemble the frame. First, the preamble and Start-of-Frame
delimiter will be put in the fields of PRE and SFD, followed DA, SA, tag
ID if tagged VLAN is applied, Ethertype or the value of the data length,
and payload data field, and finally put the FCS data in order into the
responded fields.
2. Listen if there is any traffic running over the medium. If yes, wait.
3. If the medium is quiet, and no longer senses any carrier, the MAC
waits for a period of time, i.e. inter-frame gap time to have the MAC
ready with enough time and then start transmitting the frame.
4. During the transmission, MAC keeps monitoring the status of the
medium. If no collision happens until the end of the frame, it transmits
successfully. If there is a collision happened, the MAC will send the
patterned jamming bit to guarantee the collision event propagated to
all involved network devices, then wait for a random period of time, i.e.
backoff time. When backoff time expires, the MAC goes back to the
beginning state and attempts to transmit again. After a collision
happens, MAC increases the transmission attempts. If the count of the
transmission attempt reaches 16 times, the frame in MAC’s queue will
be discarded.
26
Rev.A1
1-Mar-11
Page 35

User Manual
Ethernet MAC transmits frames in half-duplex and full-duplex ways. In halfduplex operation mode, the MAC can either transmit or receive frame at a moment,
but cannot do both jobs at the same time.
As the transmission of a MAC frame with the half-duplex operation exists
only in the same collision domain, the carrier signal needs to spend time to travel to
reach the targeted device. For two most-distant devices in the same collision
domain, when one sends the frame first, and the second sends the frame, in worstcase, just before the frame from the first device arrives. The collision happens and
will be detected by the second device immediately. Because of the medium delay,
this corrupted signal needs to spend some time to propagate back to the first
device. The maximum time to detect a collision is approximately twice the signal
propagation time between the two most-distant devices. This maximum time is
traded-off by the collision recovery time and the diameter of the LAN.
In the original 802.3 specification, Ethernet operates in half duplex only.
Under this condition, when in 10Mbps LAN, it’s 2500 meters, in 100Mbps LAN, it’s
approximately 200 meters and in 1000Mbps, 200 meters. According to the theory, it
should be 20 meters. But it’s not practical, so the LAN diameter is kept by using to
increase the minimum frame size with a variable-length non-data extension bit field
which is removed at the receiving MAC. The following tables are the frame format
suitable for 10M, 100M and 1000M Ethernet, and some parameter values that shall
be applied to all of these three types of Ethernet.
Actually, the practice Gigabit Ethernet chips do not feature this so far. They
all have their chips supported full-duplex mode only, as well as all network vendors’
devices. So this criterion should not exist at the present time and in the future.
The switch’s Gigabit module supports only full-duplex mode.
27
Rev.A1
64 bytes
Fig. 3-4 Gigabit Ethernet Frame
1-Mar-11
Page 36

User Manual
Parameter
value/LAN
Max. collision
domain DTE to
DTE
Max. collision
domain with
repeater
Slot time
Interframe Gap
AttemptLimit
BackoffLimit
JamSize
MaxFrameSize
MinFrameSize
BurstLimit
10Base 100Base 1000Base
100 meters
2500 meters 205 meters 200 meters
512 bit times 512 bit times 512 bit times
9.6us 0.96us 0.096us
16 16 16
10 10 10
32 bits 32 bits 32 bits
1518 1518 1518
64 64 64
Not applicable Not applicable 65536 bits
Table 3-4 Ethernet parameters for half duplex mode
100 meters for UTP
412 meters for fiber
100 meters for UTP
316 meters for fiber
In full-duplex operation mode, both transmitting and receiving frames are
processed simultaneously. This doubles the total bandwidth. Full duplex is much
easier than half duplex because it does not involve media contention, collision,
retransmission schedule, padding bits for short frame. The rest functions follow the
specification of IEEE802.3. For example, it must meet the requirement of minimum
inter-frame gap between successive frames and frame format the same as that in
the half-duplex operation.
Because no collision will happen in full-duplex operation, for sure, there is no
mechanism to tell all the involved devices. What will it be if receiving device is busy
and a frame is coming at the same time? Can it use “backpressure” to tell the
source device? A function flow control is introduced in the full-duplex operation.
28
Rev.A1
1-Mar-11
Page 37

User Manual
3-3. Flow Control
Flow control is a mechanism to tell the source device stopping sending frame
for a specified period of time designated by target device until the PAUSE time
expires. This is accomplished by sending a PAUSE frame from target device to
source device. When the target is not busy and the PAUSE time is expired, it will
send another PAUSE frame with zero time-to-wait to source device. After the source
device receives the PAUSE frame, it will again transmit frames immediately. PAUSE
frame is identical in the form of the MAC frame with a pause-time value and with a
special destination MAC address 01-80-C2-00-00-01. As per the specification,
PAUSE operation can not be used to inhibit the transmission of MAC control frame.
Normally, in 10Mbps and 100Mbps Ethernet, only symmetric flow control is
supported. However, some switches (e.g. 24-Port Gigabit Managed PoE Switch)
support not only symmetric but asymmetric flow controls for the special application.
In Gigabit Ethernet, both symmetric flow control and asymmetric flow control are
supported. Asymmetric flow control only allows transmitting PAUSE frame in one
way from one side, the other side is not but receipt-and-discard the flow control
information. Symmetric flow control allows both two ports to transmit PASUE frames
each other simultaneously.
Inter-frame Gap time
After the end of a transmission, if a network node is ready to transmit data
out and if there is no carrier signal on the medium at that time, the device will wait
for a period of time known as an inter-frame gap time to have the medium clear and
stabilized as well as to have the jobs ready, such as adjusting buffer counter,
updating counter and so on, in the receiver site. Once the inter-frame gap time
expires after the de-assertion of carrier sense, the MAC transmits data. In
IEEE802.3 specification, this is 96-bit time or more.
Collision
Collision happens only in half-duplex operation. When two or more network
nodes transmit frames at approximately the same time, a collision always occurs
and interferes with each other. This results the carrier signal distorted and undiscriminated. MAC can afford detecting, through the physical layer, the distortion of
the carrier signal. When a collision is detected during a frame transmission, the
transmission will not stop immediately but, instead, continues transmitting until the
rest bits specified by jamSize are completely transmitted. This guarantees the
duration of collision is enough to have all involved devices able to detect the
collision. This is referred to as Jamming. After jamming pattern is sent, MAC stops
transmitting the rest data queued in the buffer and waits for a random period of
time, known as backoff time with the following formula. When backoff time expires,
the device goes back to the state of attempting to transmit frame. The backoff time
is determined by the formula below. When the times of collision is increased, the
backoff time is getting long until the collision times excess 16. If this happens, the
frame will be discarded and backoff time will also be reset.
where
k = min (n, 10)
29
Rev.A1
1-Mar-11
Page 38

User Manual
Frame Reception
In essence, the frame reception is the same in both operations of half duplex
and full duplex, except that full-duplex operation uses two buffers to transmit and
receive the frame independently. The receiving node always “listens” if there is
traffic running over the medium when it is not receiving a frame. When a frame
destined for the target device comes, the receiver of the target device begins
receiving the bit stream, and looks for the PRE (Preamble) pattern and Start-ofFrame Delimiter (SFD) that indicates the next bit is the starting point of the MAC
frame until all bit of the frame is received.
For a received frame, the MAC will check:
1. If it is less than one slotTime in length, i.e. short packet, and if yes, it
will be discarded by MAC because, by definition, the valid frame must
be longer than the slotTime. If the length of the frame is less than one
slotTime, it means there may be a collision happened somewhere or
an interface malfunctioned in the LAN. When detecting the case, the
MAC drops the packet and goes back to the ready state.
2. If the DA of the received frame exactly matches the physical address
that the receiving MAC owns or the multicast address designated to
recognize. If not, discards it and the MAC passes the frame to its client
and goes back to the ready state.
3. If the frame is too long. If yes, throws it away and reports frame Too
Long.
4. If the FCS of the received frame is valid. If not, for 10M and 100M
Ethernet, discards the frame. For Gigabit Ethernet or higher speed
Ethernet, MAC has to check one more field, i.e. extra bit field, if FCS is
invalid. If there is any extra bits existed, which must meet the
specification of IEEE802.3. When both FCS and extra bits are valid,
the received frame will be accepted, otherwise discards the received
frame and reports frameCheckError if no extra bits appended or
alignmentError if extra bits appended.
5. If the length/type is valid. If not, discards the packet and reports
lengthError.
6. If all five procedures above are ok, then the MAC treats the frame as
good and de-assembles the frame.
What if a VLAN tagging is applied?
VLAN tagging is a 4-byte long data immediately following the MAC source
address. When tagged VLAN is applied, the Ethernet frame structure will have a
little change shown as follows.
Only two fields, VLAN ID and Tag control information are different in
comparison with the basic Ethernet frame. The rest fields are the same.
The first two bytes is VLAN type ID with the value of 0x8100 indicating the
received frame is tagged VLAN and the next two bytes are Tag Control Information
30
Rev.A1
1-Mar-11
Page 39

User Manual
(TCI) used to provide user priority and VLAN ID, which are explained respectively in
the following table.
Bits 15-13
Bit 12
Bits 11-0
Note: RIF is used in Token Ring network to provide source routing and comprises
two fields, Routing Control and Route Descriptor.
When MAC parses the received frame and finds a reserved special value
0x8100 at the location of the Length/Type field of the normal non-VLAN frame, it will
interpret the received frame as a tagged VLAN frame. If this happens in a switch,
the MAC will forward it, according to its priority and egress rule, to all the ports that
is associated with that VID. If it happens in a network interface card, MAC will
deprive of the tag header and process it in the same way as a basic normal frame.
For a VLAN-enabled LAN, all involved devices must be equipped with VLAN
optional function.
User Priority 7-0, 0 is lowest priority
CFI (Canonical Format Indicator)
1: RIF field is present in the tag header
0: No RIF field is present
VID (VLAN Identifier)
0x000: Null VID. No VID is present and only user
priority is present.
0x001: Default VID
0xFFF: Reserved
Table 3-5
At operating speeds above 100 Mbps, the slotTime employed at slower
speeds is inadequate to accommodate network topologies of the desired physical
extent. Carrier Extension provides a means by which the slotTime can be increased
to a sufficient value for the desired topologies, without increasing the minFrameSize
parameter, as this would have deleterious effects. Nondata bits, referred to as
extension bits, are appended to frames that are less than slotTime bits in length so
that the resulting transmission is at least one slotTime in duration. Carrier Extension
can be performed only if the underlying physical layer is capable of sending and
receiving symbols that are readily distinguished from data symbols, as is the case in
most physical layers that use a block encoding/decoding scheme.
The maximum length of the extension is equal to the quantity (slotTime minFrameSize). The MAC continues to monitor the medium for collisions while it is
transmitting extension bits, and it will treat any collision that occurs after the
threshold (slotTime) as a late collision.
31
Rev.A1
1-Mar-11
Page 40

User Manual
3-4. How does a switch work?
The switch is a layer 2 Ethernet Switch equipped with 24 Fast Ethernet ports
and 2 optional modules which support Gigabit Ethernet or 100M Ethernet. Each port
on it is an independent LAN segment and thus has 26 LAN segments and 26
collision domains, contrast to the traditional shared Ethernet HUB in which all ports
share the same media and use the same collision domain and thus limit the
bandwidth utilization. With switch’s separated collision domain, it can extend the
LAN diameter farther than the shared HUB does and highly improve the efficiency
of the traffic transmission.
Due to the architecture, the switch can provide full-duplex operation to
double the bandwidth per port and many other features, such as VLAN, bandwidth
aggregation and so on, not able to be supported in a shared hub.
Terminology
Separate Access Domains:
As per the description in the section of “What’s the Ethernet”, Ethernet
utilizes CSMA/CD to arbitrate who can transmit data to the station(s) attached in the
LAN. When more than one station transmits data within the same slot time, the
signals will collide, referred to as collision. The arbitrator will arbitrate who should
gain the media. The arbitrator is a distributed mechanism in which all stations
contend to gain the media. Please refer to “What’s the Ethernet” for more details.
In Fig.3-5, assumed in half duplex, you will see some ports of the switch are
linked to a shared HUB, which connects many hosts, and some ports just are
individually linked to a single host. The hosts attached to a shared hub will be in the
same collision domain, separated by the switch, and use CSMA/CD rule. For the
host directly attached to the switch, because no other host(s) joins the traffic
contention, hence it will not be affected by CSMA/CD. These LAN segments are
separated in different access domains by the switch.
Micro-segmentation:
To have a port of the switch connected to a single host is referred to as
micro-segmentation. It has the following interesting characteristics.
- There is no need the access contention (e.g.Collision). They
have their own access domain. But, collision still could happen
between the host and the switch port.
- When performing the full duplex, the collision vanishes.
- The host owns a dedicated bandwidth of the port.
The switch port can run at different speed, such as 10Mbps, 100Mbps or
1000Mbps. A shared hub cannot afford this.
32
Rev.A1
1-Mar-11
Page 41

User Manual
Fig.3-5 Collision Domain
Extended Distance Limitations:
The diameter of a half-duplex LAN segment is determined by its maximum
propagation delay time. For example, in 10M LAN, the most distance of a LAN
segment using yellow cable is 2500 meters and 185 meters when using coaxial
cable. The switch with its per port per collision domain can extend the distance like
a bridge does. And what’s more, when operating in full-duplex mode, the distance
can reach farther than half duplex because it is not limited by the maximum
propagation delay time (512 bits time). If fiber media is applied, the distance can be
up to tens of kilometers.
Traffic Aggregation:
Traffic aggregation is to aggregate the bandwidth of more than one port and
treat it as a single port in the LAN. This single port possesses the features of a
normal port but loading balance. This is a great feature for the port needing more
bandwidth but cannot afford paying much cost for high bandwidth port.
33
Rev.A1
1-Mar-11
Page 42

User Manual
Fig. 3-6
How does a switch operate?
A Layer 2 switch uses some features of the Data Link layer in OSI model to
forward the packet to the destination port(s). Here we introduce some important
features of a switch and how they work.
MAC address table
When a packet is received on a port of switch, the switch first checks if the
packet good or bad and extracts the source MAC address (SA) and destination
MAC address (DA) to find 1) if SA is existed in the MAC address table, if no, puts it
in the MAC address table, if yes, 2) looks up DA and its associated port to which the
traffic is forwarded. If DA does not exist, have the packet broadcasted.
Due to the size of the MAC address limited, MAC address aging function is
applied. When the MAC address has resided and keeps no update in the table for a
long time, this means the traffic using that entry has yet come for a while. If this time
period is more than the aging time, the entry will be marked invalid. The vacancy is
now available for other new MAC.
Both learning and forwarding are the most important functions in a switch.
Besides that, VLAN can be one of the rules to forward the packet. There are ingress
rule and egress rule applied. The ingress rule is used to filter the incoming packet
by VLAN ID and so on and to decide whether the packet is allowed to enter the
switch or not. The egress rule is used to forward the packet to the proper port.
Mac address aging
There is a field in MAC address table used to put the entry’s Age time which
determines how long a MAC entry can reside in a switch. The age time is refreshed
when a packet with that SA. Usually, the age time is programmable.
Transmission schedule
In most layer 2 switches, the QoS is supported. QoS in a switch must
associate a transmission schedule to transmit the packet. This function is much to
do with the priority level a packet has. With the given priority, the scheduler will do
the proper action on it. The scheduler has many ways to implement, and different
chips may support different schedule algorithms. Most common schedulers are:
FCFS: First Come First Service.
34
Rev.A1
1-Mar-11
Page 43

User Manual
Strictly Priority: All High before Low.
Weighted Round Robin:
Set a weight figure to the packet with a priority level, say 5-7, and next, set
another weight to the packet with a priority level, say 2-4 and so on. The WRR will
transmit the packet with the weight. So the packet of each priority level can be
allocated a fixed bandwidth.
Bandwidth rating
Bandwidth rating is the limitation set by administrator, and it can be applied to
those with SLA. Bandwidth rating can be total bandwidth, types of service of a port
with many steps. The switch supports by-port Ingress and Egress total bandwidth
rate control capacity. The bandwidth rate resolution is 0.1 Mbps (100Kbps) and
ranges from 0 to 100Mbps.
35
Rev.A1
1-Mar-11
Page 44

User Manual
3-5. Virtual LAN
What is a VLAN?
It is a subset of a LAN. Before we discuss VLAN, we must understand what
LAN is. In general, a LAN is composed of different physical network segments
bridged by switches or bridges which attach to end stations in the same broadcast
domain. The traffic can reach any station on the same LAN. Beyond this domain,
the traffic cannot go without router’s help. This also implies that a LAN is limited. If
you need to communicate with the station outside the LAN, a router is needed
which always lies on the edge of the LAN.
For a layer 2 VLAN, it assumes it is a logical subset of a physical LAN
separated by specific rules such as tag, port, MAC address and so on. In other
words, they can communicate with each other between separated small physical
LANs within a LAN but can not be between any two separated logical LANs.
In the figure above, all stations are within the same broadcast domain. For
these stations, it is obviously that the traffic is getting congested while adding more
stations on it. With the more and more users joining the LAN, broadcast traffic will
rapidly decrease the performance of the network. Finally, the network may get
down.
Fig. 3-7
36
Rev.A1
1-Mar-11
Page 45

User Manual
Fig. 3-8
Now we apply VLAN technology to configure the system shown as the figure
above. We can partition the users into the different logical networks which have
their own broadcast domain. The traffic will not disturb among these logical
networks. The users 1x (x denotes a ~ d) are members of VLAN 1. Any traffic within
VLAN 1 does not flow to VLAN 2 and others. This helps us configure the network
easily according to the criteria needed, for example, financial, accounting, R&D and
whatever you think it necessary. You can also easily move a user to a different
location or join a new user somewhere in the building to VLAN. Without VLAN, it is
very hard to do. Basically, VLAN can afford offering at least 3 benefits: move and
change users, reduce broadcast traffic and increase performance, Security.
Besides, VLAN can highly reduce the traffic congestion and increase total
performance because there are no more too many users in the same broadcast
domain.
There are two types of VLAN applied. Most popular is port-based VLAN, tagbased VLAN
Port-based VLAN
Some physical ports are configured as members of a VLAN. All stations
attached on these ports can communicate with each other.
Tag-based VLAN
It identifies the membership by VLAN ID, no matter where the packet
comes from. It is also referred to as 802.1Q VLAN.
Terminology
Tagged Frame:
37
Rev.A1
1-Mar-11
Page 46

User Manual
A frame, carrying a tag field following the source MAC address, is four bytes
long and contains VLAN protocol ID and tag control information composed of user
priority, Canonical Format Indicator (CFI) and optional VLAN identifier (VID).
Normally, the maximal length of a tagged frame is 1522 bytes.
802.1Q VLAN-tagged Ethernet frame
6 6 2 2 2
DA SA
VLAN Protocol ID =
0x8100
VLAN Protocol ID: 8100 is reserved for VLAN-tagged frame.
User Priority: 3 bits long. User priority is defined to 7 – 0. 0 is the lowest
priority.
CFI: Canonical Format Indicator. 1 bit long. It is used to encapsulate a
token ring packet to let it travel across the Ethernet. Usually, it is
set to 0.
VLAN ID: 12 bits long. 0 means no VLAN ID is present. 1 means default
VLAN,
4095 reserved.
VLAN Protocol
ID
User Priority CFI VLAN identifier
Fig.3-9 Tag Format
Tag Control
Information
Length/
Type
VLAN-tagged frame:
An Ethernet frame, carrying VLAN tag field, contains VLAN identification
without the value of 0 and 4095, and priority information.
Priority-tagged frame:
An Ethernet frame, carrying VLAN tag field, contains VLAN identification with
the value of 0 and priority information.
Untagged frame:
An Ethernet frame carries no VLAN tag information.
VLAN Identifier:
Also referred to as VID. It is used to identify a member whether it belongs to
the VLAN group with the VID. The assignable number is 1- 4094. If VID=0, the
tagged frame is a priority packet. Both the value of 0 and 4095 also cannot be
assigned in VLAN management.
Port VLAN Identifier:
38
Rev.A1
1-Mar-11
Page 47

User Manual
VLAN identifier of a port. It also can be referred to as PVID. When an
untagged frame or a priority-tagged frame is received, the frame will be inserted the
PVID of that port in the VLAN tag field. The frame with VID assigned by a port is
called PVID. Each port can only be assigned a PVID. The default value for PVID is
1, the same as VID.
Ingress filtering:
The process is to check a received packet and compare its VID to the VLAN
membership of the ingress port. The ingress filtering can be set by per port. When
receiving a packet, VLAN Bridge examines if the VID in the frame’s header
presents.
If the VID of the received packet presents, the VID of the packet is used. And
VLAN bridge will check its MAC address table to see if the destination ports are
members of the same VLAN. If both are members of the tagged VLAN, then the
packet will be forwarded.
If the packet is an untagged or a null tag packet, the ingress port’s PVID is
applied to the packet. VLAN bridge will then look up the MAC address table and
determine to which ports the packet should be forwarded. Next, it will check to see if
the destination ports belong to the same VLAN with that PVID. If the destination
ports are members of the VLAN used by ingress port, the packet will be forwarded.
Note: VID can not be 0 or 4095.
Ingress Rule:
Each packet received by a VLAN-aware bridge will be classified to a VLAN.
The classification rule is described as follows.
1. If the VID of the packet is null VID (VID=0) or this packet is an untagged packet:
a. If there are still some other ways (e.g. protocol, MAC address, application,
IP-subnet, etc.) to classify the incoming packets beside port-based
classification in implement and these approaches can offer non-zero VID,
then, use the value of VID offered by other classifications for VLAN’s
classification.
b. If there is only port-based classification in implement or other classification
approaches cannot offer non-zero VID for the incoming packets, then
assign the PVID to the incoming packets as VID for the classification of
the VLAN group.
2. If the VID is not a null VID (VID≠0), then use the value to classify the VLAN
group.
Egress Rule:
An egress list is used to make the tagging and forwarding decision on an
outgoing port. It specifies the VLANs whose packets can be transmitted out and
specifies if the packet should be tagged or not. It can be configured for port’s VLAN
membership, and tagged or untagged for a transmitted packet. When a packet is
transmitted out, the VLAN Bridge checks the port’s egress list. If the VLAN of the
packet is on the egress list of the port on which the packet transmits out, the packet
will be transmitted with the priority accordingly. If enabled, an egress port will
transmit out a tagged packet if the port is connected to a 802.1Q-compliant device.
If an egress port is connected to a non-802.1Q device or an end station, VLAN
Bridge must transmit out an untagged packet, i.e. the tag has been stripped off in an
egress port. Egress rule can be set by per port.
Independent VLAN Learning (IVL):
39
Rev.A1
1-Mar-11
Page 48

User Manual
It specifies the mode how to learn MAC address. For a specified VLAN, it will
use an independent filtering database (FID) to learn or look up the membership
information of the VLAN and decide where to go.
Shared VLAN Learning (SVL):
It specifies the mode how to learn MAC address. In this mode, some VLAN or
all VLANs use the same filtering database storing the membership information of
the VLAN to learn or look up the membership information of the VLAN. In 24-Port
Gigabit Managed Switch, you can choose a VID for sharing filtering database in
Shared VID field if you wish to use the existed filtering database. For a specified
VLAN, when a MAC address is learned by a switch, VLAN will use this formation to
make forwarding decision.
Filtering Database:
Referred to as FID. It can provide the information where the packet will be
sent to. Filtering database will supply the outgoing port according to the request
from forwarding process with VID and DA. When a packet is received, if it has a
non-zero VID, then FID will offer the associated outgoing ports information to the
packet.
In SVL, VLANs use the same Filtering Database. In IVL, VLANs use different
FIDs. Any VID can be assigned to the same FID by administrator.
How does a Tagged VLAN work?
If the ingress filtering is enabled and when a packet is received, VLAN bridge
will first check if the VID of the packet presents.
1). If the packet has a non-zero VID, VLAN bridge will apply this VID as the VLAN
ID of the packet in the network.
2). For a packet with null tag or no VLAN tag, if VLAN bridge provides rules to
decide its VID, then apply this VID to the packet.
If VLAN bridge does not support any rule for VID, then apply the PVID of the
port to the packet which came from that port. VLAN bridge checks to see if the
ingress port and the received packet are on the same VLAN. If not, drops it. If yes,
forwards it to the associated ports. Meanwhile, this VLAN must be applied to the
egress port, or the packet will be dropped.
If ingress filtering is disabled, VLAN bridge will only check the MAC address
table to see if the destination VLAN exists. If VLAN does not exist, then drop the
packet, and if both DA and VLAN do not exist, forwards the packet. If just knows
VLAN existed, then floods the packet to all the ports the VLAN covers.
If we plan to deploy four VLANs in an office and use a switch to partition
them, we should check which ports belong to which VLAN first. Assuming a 24-port
switch is applied.
40
Rev.A1
1-Mar-11
Page 49

User Manual
Name VID Port Members
Marketing 2 1,2,3,4,5
Service 3 6,7,20,21,22
Sales 4 8,9,10,11,12,13,14,15,16
Administration 1 17,18,19,23,24
Table 3-6
Next, assigns IP address to each VLAN. Usually, we use 10.x.x.x as internal
IP block. Because there are total four VLANs in the network, we must assign 4 IP
blocks to each of them.
Name VID Network Address
Marketing 2 10.1.2.0/24
Service 3 10.1.3.0/24
Sales 4 10.1.4.0/24
Administration 1 10.1.1.0/24
Table 3-7
Here we apply the subnet mask 255.255.255, and each VLAN is capable of
supporting 254 nodes.
41
Rev.A1
1-Mar-11
Page 50

User Manual
3-6. Link Aggregation
Basically, Link Aggregation is to aggregate the bandwidth of more than one
port to an assigned logical link. This highly increases total bandwidth to the targeted
device. There is more than one Link Aggregation technology in many vendors’
switch products already, which may cause the problem of interoperability. This is the
reason why now we have 802.3ad Link Aggregation Control Protocol (LACP).
Why 802.3ad (LACP)?
Network is varying. For example, if a port malfunctioned or unplugged
accidentally in a static trunk port, administrator has to reconfigure it, or the network
will get trouble. Therefore, offering a tool with automatic recovery capability is
necessary for an administrator. LACP is a protocol that allows a switch able to know
whether its partner has the capability to co-setup a trunk between them.
Usually, if administrator wishes to increase the bandwidth of a specific link,
he may:
1. Buy new network equipments with higher throughput, or
2. Aggregate the bandwidth of more than one port to a logical link.
If the item 1 is the case, you will pay much more cost beyond your budget,
and the solution caused by the limitation of hardware performance may not be
scalable.
If the item 2 is the case, now you do not have to pay much more extra cost
and can keep flexible according to the demand of bandwidth because all
equipments are there already. And what’s more, you can avoid worrying about the
interoperability issue. Applying LACP in your network, you will not only gain benefits
below to improve the performance of your network but also have these investments
usable to future new products.
1. Public standardized specification
2. No interoperability issue
3. No change to IEEE 802.3 frame format, no change in software and
management.
4. Increased bandwidth and availability
5. Load sharing and redundancy
6. Automatic configuration
7. Rapid configuration and reconfiguration
8. Deterministic behavior
9. Low risk of duplication or mis-ordering
10. Support existing IEEE 802.3 MAC Clients
11. Backwards compatibility with aggregation-unaware devices
There are also some constraints when applying LACP.
1. LACP does not support inter-switch bandwidth aggregation.
2. The ports aggregated must operate in full-duplex mode.
3. The ports in the same Link Aggregation Group must have the same
speed, for example, all with 100Mbps or all 1000Mbps. You cannot
aggregate a 1000Mbps and two 100Mbps for a 1.2Gbps trunk port.
42
Rev.A1
1-Mar-11
Page 51

User Manual
Terminology
Link Aggregation:
It is a method to have multiple physical links with the same media and speed
bundled to be a logical link forming a Link Aggregation Group with a group ID. With
the viewpoint of MAC client, each Link Aggregation Group is an independent link.
There are three cases of link used in the network, which are switch to switch,
switch to station and station to station. Here station may be a host or a router.
Link Aggregation, called port trunking sometimes, has two types of link
configuration, including static port trunk and dynamic port trunk.
Static Port Trunk:
When physical links are changed, administrator needs to manually
configure the switches one by one.
Dynamic Port Trunk:
When physical links are changed, LACP takes over and automatically
reconfigure. Administrator does not have to do anything and may see the
trap message of LACP changed in NMS.
1-Mar-11
Fig. 3-10 Example of Link Aggregation Application
43
Rev.A1
Page 52

User Manual
4. Operation of Web-based
Management
This chapter would introduce how to manage your Managed Switch and how to
configure the
dual media ports on the switch via
fixed Gigabit Ethernet TP ports and 4 optional Gigabit dual media ports. With this facility, you
can easily access and monitor the status like MIBs, port activity, and multicast traffic through
any ports on the switch.
table below:
10/100/1000Mbps TP Ports and Gigabit TP/(100/1000M) SFP Fiber
web user interfaces. Managed Switch provides 20
The default values of 24-Port Gigabit Managed PoE Switch are listed in the
IP Address
192.168.1.77
Subnet Mask
Default Gateway
Password
When the configuration of your Managed PoE Switch is finished, you can
browse it by the IP address you set up. For instance, type
the address row in a browser, then the following screen (see Fig.4-1) would show
up and ask for your password input for login and access authentication. The default
password is “admin”. For the first time access, please enter the default password,
and click <Apply> button. The login process now would be completed.
Managed PoE Switch supports a simplified user management function which
allows only one administrator to configure the switch at one time.
To optimize the display effect, we recommend Microsoft IE and 1024x768
display resolution.
255.255.255.0
192.168.1.254
admin
Table 4-1
http://192.168.1.77 in
Fig. 4-1
44
Rev.A1
1-Mar-11
Page 53

User Manual
4-1. Web Management Home Overview
After login, System Information would be displayed as Fig. 4-2 illustrated.
This page lists default values and shows you the basic information of the switch,
including “System Information”, “Ports”, “VLANs”, “PoE”, “Aggregation”, “LACP”,
“RSTP”, “802.1X”, “IGMP Snooping”, “Mirror”, “QoS”, “Filter”, “Rate Limit”, “Storm
Control”, “SNMP”, “Monitoring” and “Maintenance” . With this information, you will
know the software version, MAC address, ports available and so on. It would be
helpful while malfunction occurred. For more details, please refer to Section 4-4-1.
45
Rev.A1
1-Mar-11
Fig. 4-2
The Information of Page Layout
•
⎯ On the top part of the information page, it shows the front panel of the switch.
Linked ports will be displayed in green color, and linked-off ones will be in black.
For the optional modules, the slots with no module will only show covered
plates, the other slots with installed modules would present modules. The
images of modules would depend on the ones you insert. Vice versa, if ports are
disconnected, they will show just in black.
⎯ On the left side, the main menu tree for web is listed in the page. According to
the function name in boldface, all functions can be divided into three parts,
including “Configuration”, “Monitoring” and “Maintenance”. The functions of each
folder are described in its corresponded section respectively. As to the function
names in normal type are the sub-functions. When clicking it, the function is
performed. The following list is the main function tree for web user interface.
Page 54

User Manual
Root
Configuration
Monitoring
Maintenance
46
Rev.A1
1-Mar-11
Page 55

User Manual
A
4-2. Configuration
Configuration includes the following functions: System Configuration, Ports
Configuration, VLANs Configuration, PoE Configuration, Aggregation, LACP, RSTP,
802.1X, IGMP Snooping, Mirror, QoS, Filter, Rate Limit, Storm Control and SNMP.
Configuration
System Configuration
Ports
VLANs
PoE
ggregation
LACP
RSTP
802.1X
IGMP Snooping
Mirror
QoS
Filter
Rate Limit
Storm Control
SNMP
47
Rev.A1
1-Mar-11
Page 56

User Manual
4-2-1. System Configuration
System configuration is one of the most important functions. Without a proper
setting, network administrator would not be able to manage the device. The switch
supports manual IP address setting.
Fig. 4-3
Function name:
System Configuration
Function description:
Show system description, firmware version, hardware version, MAC address,
serial number, active IP address, active subnet mask, active gateway, DHCP
server and Lease time left.
Set device name, DHCP enable, fallback IP address, fallback subnet mask,
fallback gateway, management VLAN, password and inactivity timeout.
48
Rev.A1
1-Mar-11
Page 57

User Manual
Parameter description:
System Description:
The simple description of this switch.
Firmware Version:
The firmware version of this switch.
Hardware Version:
The hardware version of this switch.
MAC Address:
It is the Ethernet MAC address of the management agent in this switch.
Serial Number:
The serial number is assigned by the manufacturer.
Active IP Address:
Show the active IP address of this switch.
Active Subnet Mask:
Show the active subnet mask of this switch.
Active Gateway:
Show the active gateway of this switch.
DHCP Server:
Show the IP address of the DHCP server.
Default: 0.0.0.0
Lease Time Left:
Show the lease time left of DHCP client.
Device Name:
Set a special name for this switch. Up to 16 characters are allowed in
this parameter. Any alphanumeric character and null are acceptable.
Default: Giga Switch
DHCP Enabled:
Enable DHCP snooping, Just tick the check box () to enable it.
Default: disable
Fallback IP Address:
Users can configure the IP settings and fill in new values. Then, click
<Apply> button to update.
Default: 192.168.1.77
Fallback Subnet Mask:
Subnet mask is made for the purpose to get more network address
because any IP device in a network must own its IP address, composed
of Network address and Host address, otherwise can’t communicate with
other devices each other. But unfortunately, the network classes A, B,
49
Rev.A1
1-Mar-11
Page 58

User Manual
and C are all too large to fit for almost all networks, hence, subnet mask
is introduced to solve this problem. Subnet mask uses some bits from
host address and makes an IP address looked Network address, Subnet
mask number and host address. It is shown in the following figure. This
reduces the total IP number of a network able to support, by the amount
of 2 power of the bit number of subnet number (2^(bit number of subnet
number)).
Subnet mask is used to set the subnet mask value, which should be the
same value as that of the other devices resided in the same network it
attaches.
For more information, please also see the Section 2-1-4 “IP Address
Assignment” in this manual.
Default: 255.255.255.0
Fallback Gateway:
Set an IP address for a gateway to handle those packets that do not
meet the routing rules predefined in the device. If a packet does not meet
the criteria for other pre-defined path, it must be forwarded to a default
router on a default path. This means any packet with undefined IP
address in the routing table will be sent to this device unconditionally.
Default: 192.168.1.254
Management VLAN:
Show the management VLAN number.
Password:
Set a password for this switch. Up to 16 characters are allowed in this
parameter. Any alphanumeric character is acceptable.
Default: admin
Inactivity Timeout(secs):
Set the auto-logout timer. The valid value is 0 ~ 60 in the unit of minute
and a decimal point is not allowed. The value 0 means auto-logout timer
is disabled.
Default: 0
50
Rev.A1
1-Mar-11
Page 59

User Manual
4-2-2. Ports
Function name:
Port Configuration
Function description:
Port Configuration is applied for the settings of the ports on the switch. By this
function, you can set or reset the values for Mode and Flow Control. Others
you could set the power saving mode for switch power consumption.
Fig. 4-4 Port Configuration
51
Rev.A1
1-Mar-11
Page 60

User Manual
Parameter description:
Enable Jumbo Frames:
This function support jumbo frames of up to 12.2KB, Just tick the check
box () to enable it.
Default: disable
Perfect Reach/Power Saving Mode:
This function supports Power Saving and perfect Reach, Just select with
the Full/ Link-up/ Link-down/ Disable
Default: disable
Power Saving:
The parameter will enable or disable to verify switches have the ability to
consider the length of any Ethernet cable connected for adjustment of
power usage accordingly. Shorter lengths require less power. link-down
mode removes power for each port that does not have a device
attached.
Default: Disable.
Link:
Show link status of this port.
Mode:
Set the speed and duplex of the port. If the media is 1Gbps fiber, there
are three modes to choose: Auto Speed, 1000 Full and Disable. If the
media is TP, the Speed/Duplex is comprised of the combination of speed
mode, 10/100/1000Mbps, and duplex mode, full duplex and half duplex.
The following table summarized the function the media supports.
Media type NWay Speed Duplex
1000M TP ON/OFF 10/100/1000M Full for all, Half for 10/100
1000M Fiber ON/OFF 1000M Full
In Auto Speed mode, no default value. In Forced mode, default value
depends on your setting.
Flow Control:
You can Just tick the check box () to enable flow control. If flow control
is set Enable, both parties can send PAUSE frame to the transmitting
device(s) if the receiving port is too busy to handle. When it is set
Disable, there will be no flow control in the port. It drops the packet if too
much to handle.
Default: Disable
Flow Control status:
52
Rev.A1
1-Mar-11
To display the Flow control status.
Page 61

Port Description:
User Manual
To type the port description for port identity and purpose
53
Rev.A1
1-Mar-11
Page 62

User Manual
4-2-3. VLAN Mode Configuration
Managed Switch supports Port-based VLAN and Tag-based VLAN (802.1q).
Its VLAN mode supports 24 active VLANs and the available VLAN ID range is from
1~4094. VLAN configuration is used to divide a LAN into smaller ones. With proper
configuration, you can gain not only improved security and increased performance,
but also save a lot of VLAN management effort.
Function name:
VLAN Mode Setting
Function description:
The VLAN Mode Selection function includes four modes: Port-based, Tagbased, Metro mode or Disable, you can choose one of them by pulling down
list and pressing the <Downward> arrow key. Then, click <Apply> button, the
settings will take affect immediately.
Fig. 4-5 Select VLAN Mode
Fig. 4-6 Metro mode
Fig. 4-6-1 Double Tag mode
54
Rev.A1
1-Mar-11
Page 63

Parameter description:
VLAN Mode:
Port-based:
Port-based VLAN is defined by port. Any packet coming in or
outgoing from any one port of a port-based VLAN will be accepted.
No filtering criterion applies in port-based VLAN. The only criterion
is the physical port you connect to. For example, for a port-based
VLAN named PVLAN-1 contains port members Port 1&2&3&4. If
you are on the port 1, you can communicate with port 2&3&4. If you
are on the port 5, then you cannot talk to them. Each port-based
VLAN you built up must be assigned a group name. This switch can
support up to maximal 24 port-based VLAN groups.
Tag-based:
Tag-based VLAN identifies its member by VID. This is quite
different from port-based VLAN. If there are any more rules in
ingress filtering list or egress filtering list, the packet will be
screened with more filtering criteria to determine if it can be
forwarded. The switch supports supplement of 802.1q. For more
details, please see the section VLAN in Chapter 3.
Each tag-based VLAN you built up must be assigned VLAN name
and VLAN ID. Valid VLAN ID is 1-4094. User can create total up to
24 Tag VLAN groups.
User Manual
Double-tag:
Double-tag mode belongs to the tag-based mode, however, it would
treat all frames as the untagged ones, which means that tag with
PVID will be added into all packets. Then, these packets will be
forwarded as Tag-based VLAN. So, the incoming packets with tag
will become the double-tag ones
Metro Mode:
The Metro Mode is a quick configuration VLAN environment
method on Port-based VLAN. It will create 21, 22, 23 or 24 Portbased VLAN groups.
55
Rev.A1
1-Mar-11
Page 64

User Manual
Function name:
VLAN Port Configuration (Tag based VLAN mode)
Function description:
In VLAN Tag Rule Setting, user can input VID number to each port. The range
of VID number is from 1 to 4094. User also can choose ingress filtering rules
to each port. There are two ingress filtering rules which can be applied to the
switch. The Ingress Filtering Rule 1 is “forward only packets with VID matching
this port’s configured VID”. The Ingress Filtering Rule 2 is “drop untagged
frame”. You can also select the Role of each port as Access, Trunk, or Hybrid.
Fig. 4-5-1 tag- VLAN Mode
Fig. 4-5-2 Per port configuration
56
Rev.A1
1-Mar-11
Page 65

Parameter description:
Port 1-24:
Port number.
Ingress Filtering Enabled:
Discard other VLAN group packets, only forward this port joined
VLAN group packets.
Packet Type:
All:
Forward all tagged and untagged packets.
Tagged Only:
Forward tagged packets only and discard untagged packets.
Tag Out Enabled:
It means the outgoing packets in this port must carry VLAN tag
header.
Role:
This is an egress rule of the port. Here you can choose Access,
Trunk or Hybrid. Trunk means the outgoing packets must carry
VLAN tag header. Access means the outgoing packets carry no
VLAN tag header. If packets have double VLAN tags, one will be
dropped and the other will still be left. As to Hybrid, it is similar to
Trunk, and both of them will tag-out. When the port is set to Hybrid,
its packets will be untagged out if the VID of the outgoing packets
with tag is the same as the one in the field of Untag VID of this port.
User Manual
Untag VID:
Valid range is 1~4094. It works only when Role is set to Hybrid.
Pvid:
This PVID range will be 1-4094. Before you set a number x as
PVID, you have to create a Tag-based VLAN with VID x. For
example, if port x receives an untagged packet, the switch will apply
the PVID (assume as VID y) of port x to tag this packet, the packet
then will be forwarded as the tagged packet with VID
57
Rev.A1
1-Mar-11
Page 66

User Manual
4-2-4. VLAN Group Configuration
Function name:
VLAN Group Configuration
Function description:
It shows the information of VLAN Groups, and allows administrators to
maintain them by modifying and deleting each VLAN group. User also can add
a new VLAN group by inputting a new VLAN name and VLAN ID.
If you are in port-based VLAN, it will just show the ID、Member of the existed
port-based VLAN group. If you are in tag-based VLAN, it will show the
ID、VID、Member of the existed tag-based VLAN group. The switch can store
the configuration of port-based VLAN and tag-based VLAN separately. When
you choose one of VLAN mode, the switch will bring you the responded VLAN
configuration which keeps the default data. You can easily create and delete a
VLAN group by pressing <Add> and <Delete> function buttons, or click the
Group ID directly to edit it.
Parameter description:
ID (Group ID):
When you want to edit a VLAN group, you must select the Group ID field.
Then, you will enter Tag Base VLAN Group Setting or Port Base VLAN
Group Setting page, which depends on your VLAN mode selection.
VID:
VLAN identifier. Each tag-based VLAN group has a unique VID. It
appears only in tag-based mode.
Member:
In modify function this is used to enable or disable if a port is a member
Fig. 4-7 Port-Based VLAN Configuration
58
Rev.A1
1-Mar-11
Page 67

User Manual
of the new added VLAN, “Enable” means it is a member of the VLAN.
Just tick the check box () beside the port x to enable it.
Add Group:
Create a new port-based VLAN or tag-based VLAN, which depends on
the VLAN mode you choose in VLAN mode function.
Delete Group:
Fig. 4-8 Add or Remove VLAN Member
Just tick the check box (
button to delete the group.
Fig. 4-9 Port-Based VLAN Configuration
) beside the ID, then press the <Delete>
59
Rev.A1
1-Mar-11
Page 68

User Manual
4-2-5. PoE
Power Over Ethernet (PoE) technology allows IP telephones, wireless LAN
access points, and other powered devices (PDs) to receive power and transfer data
over existing LAN cabling.
Function name:
PoE Configuration
Function description:
In PoE Port Management function, user can configure the settings about PoE.
The switch complies with IEEE 802.3af protocol and be capable of detecting
automatically that whether the device linked to the port on the switch is PD
(Powered Device) or not. The switch also manage the power supplement
based on the Class of the PD, and it will stop supplying the power once the
power required by the PD excesses the Class, Short Circuit or over
temperature occurs.
60
Rev.A1
1-Mar-11
Fig. 3-16
Page 69

Parameter description:
Status:
Include “Normal” or “Active” two kinds of status. The former means the
port is ready to link and supply the power to the PD at any time. The
latter means the port is in the condition of supplying the power.
State:
“Enable” means the manager allows the power supplied to the PD is
legal while the port linked to the PD; “Disable” means the port does not
own PoE function.
Priority:
Three options are offered for the user to choose, including Normal, Low
and High. Default is Normal. The switch will stop supplying the power to
the port based on the order of the priority LowNormalHigh in case
total power required by all PDs linked to the switch excesses the power
limit. As the ports have the same priority, then the switch will cease the
power supplement from the port with the highest port id (121).
Power (W):
The power is consumed by the port.
Current (mA):
User Manual
The current is supplied to the PD by the port.
Class:
The Class of the PD linked to the port of the switch.
Delay time:
The Delay time is using for set the time period for PD PoE enable time
delay period. It is a solution to avoid rush current to cause shorter PD.
The available time period is from 0 to 300 seconds and 0 means disable
the function.
61
Rev.A1
1-Mar-11
Page 70

User Manual
Function name:
PoE Status
Function description:
Display the information about the PoE status.
Parameter description:
Vmain:
Fig. 3-15
The volt is supplied by the PoE.
Imain:
The sum of the current that every port supplies.
Pconsume:
The sum of the power that every port supplies.
Power Limit:
The maximal power that the switch can supply (Read Only).
Temperature:
The temperature of the chip on PoE.
Port No:
Port number.
Port On:
Show whether the port is supplying the power to the PD or not.
AC Disconnect Port Off:
Port is turned off due to the AC Disconnect function.
62
Rev.A1
1-Mar-11
Page 71

User Manual
DC Disconnect Port Off:
Port is turned off due to the DC Disconnect function.
Overload Port Off:
The switch will stop supplying the power to the port due to the power
required by the PD that is linked to the port on the switch excesses the
Class setting of the PD.
Short Circuit Port Off:
The switch will stop supplying the power to the port if it detects that the
PD linked to the port is short circuit.
Over Temp. Protection:
The port of the switch will be disabled due to fast transient rise in
temperature to 240
Power Management Port Off:
Due to total power required by all PDs linked to the switch excesses the
power limit, so the switch stops supplying the power to this port after
referring to the information of the priority.
o
C or slow rise in temperature to 200oC.
63
Rev.A1
1-Mar-11
Page 72

User Manual
Function name:
PoE Auto Checking
Function description:
The function is using for PD auto checking. It can allow user to control the PoE
function by using the ping command, in order to turn on or off any PD which
connect with port assign.
Fig. 3-15-1
64
Publication date: Jan., 2011
Revision A1
Page 73

User Manual
Parameter description:
Ping Check:
To scroll and select the Enable or Disable Ping Check function.
Port No.:
To display the Port Index, the maximum is 24.
Ping IP Address:
To set up the PD’s IP address which you need to check it is alive.
Interval Time:
To set up the spacing interval time to do ping check, the default value is
30 seconds. The available range is 10 to 120 seconds.
Retry Time:
To set up the number of times for switch to check PD is alive. The default
is 3. The available range is 1 to 5.
Failure Log:
To display the PD’s Ping result and log. Note down “Ping Check” a result
of movement after starting. The error means switch to ping the PD is
failure or total means total switch to do ping frequency.
Failure Action:
Reboot Time:
To set up when PD is failure and switch action command. The values are
“Nothing” and “Reboot Remote PD”.
Nothing: The switch detects that PD occurs failure and do nothing.
Reboot Remote PD: The switch detect that PD occurs failure and then
reboot it.
The switch ping check PD failure “P.O.E” restarts the buffer time of
switch. The default is 15 seconds. The available range is 3 to 255
seconds..
65
Publication date: Jan., 2011
Revision A1
Page 74

User Manual
Function name:
PoE Scheduling
Function description:
The function provides user to appoint date and time, Enable or Disable PoE
function, switch can with according to the time when is set up, carry on the
designated movements. Managed Switch NTP only supports IP address for
NTP server, no support domain name for NTP server.
Fig. 3-15-2
66
Publication date: Jan., 2011
Revision A1
Page 75

User Manual
Parameter description:
Schedule on:
It provide user to set which port will action the PoE Scheduling function.
Schedule mode:
To set the schedule mode with Enable or Disable. The default is Disable.
Select all:
To select all date and time to enable the PoE function.
Hour/ Day:
To evoke what time to enable the PoE function.
Sunday ~ Saturday:
To set up the enable PoE function Date.
Note: The PoE scheduling will be disabled automatically when NTP sync time
server failure happened.
67
Publication date: Jan., 2011
Revision A1
Page 76

User Manual
4-2-6. Aggregation
The Aggregation (Port Trunking) Configuration is used to configure the
settings of Link Aggregation. You can bundle ports by same speed, MAC, and full
duplex to be a single logical port, thus the logical port can aggregate the bandwidth
of these ports. This means you can apply your current Ethernet equipments to build
the bandwidth aggregation. For example, if three Fast Ethernet ports are
aggregated into a logical port, then this logical port’s bandwidth would be as three
times high as a single Fast Ethernet port’s.
Function name:
Aggregation Configuration
Function description:
Display the current setup of Aggregation Trunking. With this function, user is
allowed to add a new trunking group or modify the members of an existed
trunking group.
Fig. 4-10 Aggregation/Trunking Configuration
Parameter description:
Normal:
Set up the ports that do not join any aggregation trunking group.
Group 1~8:
Group the ports you choose together. Up to 12 ports can be selected for
each group.
68
Publication date: Jan., 2011
Revision A1
Page 77

User Manual
4-2-7. LACP
Smart Web Switch supports link aggregation IEEE802.3ad standard. The
standard describes Link Aggregate Control Protocol (LACP) which dynamically
creates and manages trunk groups.
hen you enable LACP link aggregation on a port, the port can
W
automatically negotiate with the ports at the remote end of a link to
establish trunk groups. LACP also allows port redundancy, that is, if an
operational port fails, then one of the “standby” ports become
operational without user intervention.
Function name:
LACP Port Configuration
Function description:
Enable or disable LACP protocol, user is allowed to set the aggregation key
value.
69
Publication date: Jan., 2011
Revision A1
Page 78

User Manual
Parameter description:
Protocol Enabled:
Just tick the check box (
<Apply> button to apply.
Key Value:
It’s key for an aggregation. This must be an integer value between 1 and
255 or auto select by switch.
Fig. 4-11 LACP Port Configuration
) to enable LACP protocol then press the
70 Rev.A0
1-Mar-11
Page 79

User Manual
4-2-8. RSTP
RSTP detects and resolves network loops, and provides backup links
between switches, bridges and routers. The protocol allows a switch to
communicate with other RSTP compliant switches, and to ensure only one path
existing between two stations in your network environment.
The switch allows you to create multiple STP configurations and assign ports
to a specific tree.
Function name:
RSTP System Configuration
Function description:
This screen is used to display the RSTP system configuration and set the
need of parameters.
Parameter description:
System Priority:
ystem priority is used in determining the root switch, root
S
port and designated port. The switch with the highest priority
(lowest numeric value) becomes the STP root switch. If all
switches have the same priority, the switch with the lowest
MAC address will then become the root switch. Select a vale
from the drop-down list box.
T
he lower the numeric value you assign, the higher the
priority for this system.
Default: 32768
Hello Time:
This is the time interval in seconds between BPDU configuration
message generations by the root switch. T
10 seconds.
Default: 2
Fig. 4-12-1 LACP Port Configuration
he allowed range is 1 to
71
Publication date: Jan., 2011
Revision A1
Page 80

User Manual
Max Age:
This is the maximum time a switch can wait without receiving a BPDU
before attempting to reconfigure. The allowed range is 6 to 40 seconds.
Default: 20
Forward Delay:
This is the maximum time (in seconds) a switch will wait before changing
states. The general rule: 2 * (Forward Delay –
(Hello Time + 1)
Default: 15
Force version:
1) >= Max Age >= 2 *
Select RSTP or STP protocol from the drop-down list box.
72 Rev A1
1-Mar-11
Page 81

User Manual
Function name:
RSTP Port Configuration
Function description:
E
nable or disable RSTP protocol on the ports that are selected
and set path cost.
P
arameter description:
Fig. 4-12-2 RSTP Configuration
73
Rev.A1
1-Mar-11
Page 82

User Manual
Protocol Enabled:
Just tick the check box (
then press the <Apply> button to apply.
Edge:
Just tick the check box (
ath Cost:
P
P
ath cost is the cost of transmitting a frame on to a LAN
through that port. It is assigned according to the speed of the
bridge. The slower the media, the higher the cost, user can
select auto or set the rage from 1 to 200000000.
) beside the port x to enable RSTP protocol,
) beside the port x to enable edge function.
74 Rev A1
1-Mar-11
Page 83

User Manual
4-2-9. 802.1X
802.1x port-based network access control provides a method to restrict users
to access network resources via authenticating user’s information. This restricts
users from gaining access to the network resources through a 802.1x-enabled port
without authentication. If a user wishes to touch the network through a port under
802.1x control, he (she) must firstly input his (her) account name for authentication
and waits for gaining authorization before sending or receiving any packets from a
802.1x-enabled port.
Before the devices or end stations can access the network resources through
the ports under 802.1x control, the devices or end stations connected to a controlled
port send the authentication request to the authenticator, the authenticator pass the
request to the authentication server to authenticate and verify, and the server tell
the authenticator if the request get the grant of authorization for the ports.
According to IEEE802.1x, there are three components implemented. They
are Authenticator, Supplicant and Authentication server shown in Fig. 4-13.
Supplicant:
It is an entity being authenticated by an authenticator. It is used to
communicate with the Authenticator PAE (Port Access Entity) by
exchanging the authentication message when the Authenticator PAE
request to it.
Authenticator:
An entity facilitates the authentication of the supplicant entity. It controls
the state of the port, authorized or unauthorized, according to the result
of authentication message exchanged between it and a supplicant PAE.
The authenticator may request the supplicant to re-authenticate itself at a
configured time period. Once start re-authenticating the supplicant, the
controlled port keeps in the authorized state until re-authentication fails.
A port acting as an authenticator is thought to be two logical ports, a
controlled port and an uncontrolled port. A controlled port can only pass
the packets when the authenticator PAE is authorized, and otherwise, an
uncontrolled port will unconditionally pass the packets with PAE group
MAC address, which has the value of 01-80-c2-00-00-03 and will not be
forwarded by MAC bridge, at any time.
Authentication server:
A device provides authentication service, through EAP, to an
authenticator by using authentication credentials supplied by the
supplicant to determine if the supplicant is authorized to access the
network resource.
The overview of operation flow for the Fig. 4-13 is quite simple. When
Supplicant PAE issues a request to Authenticator PAE, Authenticator and
Supplicant exchanges authentication message. Then, Authenticator
passes the request to RADIUS server to verify. Finally, RADIUS server
replies if the request is granted or denied.
While in the authentication process, the message packets, encapsulated
75
Rev.A1
1-Mar-11
Page 84

User Manual
by Extensible Authentication Protocol over LAN (EAPOL), are exchanged
between an authenticator PAE and a supplicant PAE. The Authenticator
exchanges the message to authentication server using EAP
encapsulation. Before successfully authenticating, the supplicant can
only touch the authenticator to perform authentication message
exchange or access the network from the uncontrolled port.
Fig. 4-13
In the Fig. 4-14, this is the typical configuration, a single supplicant, an
authenticator and an authentication server. B and C is in the internal network, D is
Authentication server running RADIUS, switch at the central location acts
Authenticator connecting to PC A and A is a PC outside the controlled port, running
Supplicant PAE. In this case, PC A wants to access the services on device B and C,
first, it must exchange the authentication message with the authenticator on the port
it connected via EAPOL packet. The authenticator transfers the supplicant’s
credentials to Authentication server for verification. If success, the authentication
server will notice the authenticator the grant. PC A, then, is allowed to access B and
C via the switch. If there are two switches directly connected together instead of
single one, for the link connecting two switches, it may have to act two port roles at
the end of the link: authenticator and supplicant, because the traffic is bi-directional.
D
Fig. 4-14
The Fig. 4-15 shows the procedure of 802.1x authentication. There are steps
for the login based on 802.1x port access control management. The protocol used
in the right side is EAPOL and the left side is EAP.
76 Rev A1
1-Mar-11
Page 85

User Manual
1. At the initial stage, the supplicant A is unauthenticated and a
port on switch acting as an authenticator is in unauthorized state.
So the access is blocked in this stage.
2. Initiating a session. Either authenticator or supplicant can
initiate the message exchange. If supplicant initiates the process, it
sends EAPOL-start packet to the authenticator PAE and
authenticator will immediately respond EAP-Request/Identity
packet.
3. The authenticator always periodically sends EAPRequest/Identity to the supplicant for requesting the identity it wants
to be authenticated.
4. If the authenticator doesn’t send EAP-Request/Identity, the
supplicant will initiate EAPOL-Start the process by sending to the
authenticator.
5. And next, the Supplicant replies an EAP-Response/Identity
to the authenticator. The authenticator will embed the user ID into
Radius-Access-Request command and send it to the authentication
server for confirming its identity.
6. After receiving the Radius-Access-Request, the
authentication server sends Radius-Access-Challenge to the
supplicant for asking for inputting user password via the
authenticator PAE.
7. The supplicant will convert user password into the credential
information, perhaps, in MD5 format and replies an EAP-Response
with this credential information as well as the specified
authentication algorithm (MD5 or OTP) to Authentication server via
the authenticator PAE. As per the value of the type field in message
PDU, the authentication server knows which algorithm should be
applied to authenticate the credential information, EAP-MD5
(Message Digest 5) or EAP-OTP (One Time Password) or other
else algorithm.
8. If user ID and password is correct, the authentication server
will send a Radius-Access-Accept to the authenticator. If not
correct, the authentication server will send a Radius-Access-Reject.
9. When the authenticator PAE receives a Radius-AccessAccept, it will send an EAP-Success to the supplicant. At this time,
the supplicant is authorized and the port connected to the
supplicant and under 802.1x control is in the authorized state. The
supplicant and other devices connected to this port can access the
network. If the authenticator receives a Radius-Access-Reject, it
will send an EAP-Failure to the supplicant. This means the
supplicant is failed to authenticate. The port it connected is in the
unauthorized state, the supplicant and the devices connected to
this port won’t be allowed to access the network.
10. When the supplicant issue an EAP-Logoff message to
Authentication server, the port you are using is set to be
77
Rev.A1
1-Mar-11
Page 86

User Manual
unauthorized.
Fig. 4-15
The 802.1X “Enabled” is the type of authentication supported in the switch. In
this mode, for the devices connected to this port, once a supplicant is authorized,
the devices connected to this port can access the network resource through this
port.
802.1x Port-based Network Access Control function supported by the switch
is little bit complex, for it just support basic “Enabled” mode, which can distinguish
the device’s MAC address and its VID. The following table is the summary of the
combination of the authentication status and the port status versus the status of port
mode, set in 802.1x Port mode, port control state, set in 802.1x port setting. Here
Entry Authorized means MAC entry is authorized.
Port Mode Port Control Authentication Port Status
Disable Don’t Care Don’t Care Port Uncontrolled
Enabled Auto Successful Port Authorized
Enabled Auto Failure Port Unauthorized
Enabled ForceUnauthorized Don’t Care Port Unauthorized
Enabled ForceAuthorized Don’t Care Port Authorized
Function name:
802.1X Configuration
Function description:
This function is used to configure the global parameters for RADIUS
authentication in 802.1x port security application.
78 Rev A1
1-Mar-11
Page 87

---------------- continue -----------------
User Manual
Parameter description:
Mode:
Enable or disable 802.1X function.
RADIUS IP:
RADIUS server IP address for authentication.
Default: 0.0.0.0
RADIUS UDP Port:
The port number to communicate with RADIUS server for the
authentication service. The valid value ranges 1-65535.
Default port number is 1812.
RADIUS Secret:
The secret key between authentication server and authenticator. It is a
string with the length 1 – 15 characters. The character string may contain
upper case, lower case and 0-9. It is character sense. It is not allowed for
putting a blank between any two characters.
Default: None
Admin State:
Fig. 4-16 802.1X Configuration
79
Rev.A1
1-Mar-11
Page 88

User Manual
This is used to set the operation mode of authorization. There are three
type of operation mode supported, Force Unauthorized, Force
Authorized, Auto.
Force Unauthorized:
The controlled port is forced to hold in the unauthorized state.
Force Authorized:
The controlled port is forced to hold in the authorized state.
Auto:
The controlled port is set to be in authorized state or unauthorized
state depends on the result of the authentication exchange between
the authentication server and the supplicant.
Default: Force Authorized
Port State:
Show the port status of authorization.
Re-authenticate:
Specify if subscriber has to periodically re-enter his or her username and
password to stay connected to the port.
Re-authenticate All:
Re-authenticate for all ports in at once.
Force Reinitialize:
Force the subscriber has to reinitialize connected to the port.
Force Reinitialize All:
Force Reinitialize for all ports in at once.
80 Rev A1
1-Mar-11
Page 89

User Manual
Statistics:
Choose the port which you want to show of 802.1X statistics, the screen
include Authenticator counters, backend Authenticator counters, dot1x
MIB counters and Other statistics.
Press the <Refresh> button will fresh the screen and see the newer
counters.
Fig. 4-17 802.1X Statistics
Function name:
802.1x Parameters
Function description:
In here, user can enable or disable Reauthentication function and specify how
often a client has to re-enter his or her username and password to stay
connected to the port.
Parameter description:
Fig. 4-18 802.1X Parameters
81
Rev.A1
1-Mar-11
Page 90

User Manual
Reauthentication Enabled:
Choose whether regular authentication will take place in this port.
Default: disable
Reauthentication Period (1-65535 s):
A non-zero number seconds between the periodic re-authentication of
the supplicant.
Default: 3600
EAP timeout ((1-255 s):
A timeout condition in the exchange between the authenticator and the
supplicant. The valid range: 1 –255.
Default: 30 seconds
82 Rev A1
1-Mar-11
Page 91

User Manual
4-2-10 IGMP Snooping
Function name:
IGMP Snooping Configuration
Function description:
IGMP Snooping lets administrators configure a switch to constrain multicast
traffic by listening to
settings, please press <Apply> button to start up the function.
Internet Group Management Protocol (IGMP). After finishing the
Fig. 4-19 IGMP Configuration
Parameter description:
IGMP Enabled:
Just tick the check box (
Default: disable
Router Ports:
Just tick the check box (
press the <Apply> button to start up.
Default: none
Unregistered IGMP Flooding enabled:
Just tick the check box (
Default: enable
VLAN ID:
At the IGMP Enable mode being selected, it will list the VLAN ID number.
IGMP Snooping Enabled:
After IGMP Enabled function start up then user can tick the check box (
enable this function.
Default: enable
) to enable this function.
) beside the port x to enable router ports, then
) to enable this function.
) to
IGMP Querying Enabled:
After IGMP Enabled function start up then user can tick the check box (
enable this function.
Default: enable
83
Rev.A1
) to
1-Mar-11
Page 92

User Manual
4-2-11. Mirror Configuration
Function name:
Mirror Configuration
Function description:
Mirror Configuration is provided to monitor the traffic in the network. This
switch supports one-port mirror multi-ports. For example, we assume that Port
A and Port B are Source Ports, and Port C is Mirror Port respectively, thus, the
traffic passing through Port A and Port B will be copied to Port C for monitor
purpose.
--------Continue------
Fig. 4-20 Mirror ports configuration
Parameter description:
Source Port:
Set up the port for being monitored. Just tick the check box (
port x and valid port is Port 1~24.
Mirror Port:
Use the drop-down menu to select a mirror port.
) beside the
84 Rev A1
1-Mar-11
Page 93

User Manual
4-2-12. QoS(Quality of Service) Configuration
The
switch offers powerful QoS function. This function supports VLAN-tagged
priority that can make precedence of 8 priorities, and DSCP(Differentiated Services
Code Point) on Layer 3 of network framework.
Function name:
QoS Configuration
Function description:
While setting QoS function, please select QoS Mode in drop-down menu at
first. Then you can use 802.1p Priority and DSCP Priority functions. In this
function, you can enable/disable QoS Mode and set Priority Control, such as:
802.1p and DSCP. The switch only supports Strict Priority. High priority queue
is always passed first.
Fig. 4-21 QoS Configuration
Function name:
802.1p QoS Mode
Function description:
This function will affect the priority of VLAN tag. Based on priority of VLAN tag,
it can arrange 0~7 priorities, priorities can map to 4 queues of the switch (low,
normal, medium, high) and possess different bandwidth distribution according
to your weight setting.
Parameter description:
Prioritize Traffic
Five Prioritize Traffic values are provided: Custom, All Low Priority, All
Normal Priority, All Medium Priority, and All High Priority.
The QoS setting would apply to all ports on the switch if one of the
following values is selected: All Low Priority, All Normal Priority, All
Medium Priority, or All High Priority.
Port Number
When Custom is selected for Prioritize Traffic, you may assign specific
Port Number for 802.1p Configuration.
802.1p Configuration:
85
Rev.A1
1-Mar-11
Page 94

User Manual
Each Priority can select any of Queue. In Default, Priority 0 is mapping to
Queue normal, Priority 1 is mapping to Queue low, Priority 2 is mapping
to Queue low, Priority 3 is mapping to Queue normal, Priority 4 is
mapping to Queue medium, Priority 5 is mapping to Queue medium,
Priority 6 is mapping to Queue high, and Priority 0 is mapping to Queue
high.
Fig. 4-22 802.1p Setting
Function name:
DSCP QoS Mode
Function description:
In the late 1990s, the IETF redefined the meaning of the 8-bit SERVICE TYPE
field to accommodate a set of differentiated services (DS). Under the
differentiated services interpretation, the first six bits comprise a codepoint,
which is sometimes abbreviated DSCP, and the last two bits are left unused.
DSCP can form total 64 (0~63) kinds of Traffic Class based on the
arrangement of 6-bit field in DSCP of the IP packet. In the switch, user is
allowed to set up these 64 kinds of Class that belong to any of queue (low,
normal, medium, high).
Parameter description:
Prioritize Traffic
Five Prioritize Traffic values are provided: Custom, All Low Priority, All
Normal Priority, All Medium Priority, and All High Priority.
The QoS setting would apply to all ports on the switch if one of the
following values is selected: All Low Priority, All Normal Priority, All
Medium Priority, or All High Priority.
Port Number
86 Rev A1
1-Mar-11
Page 95

User Manual
When Custom is selected for Prioritize Traffic, you may assign specific
Port Number for DSCP Configuration.
DSCP Configuration:
64 kinds of priority traffic as mentioned above, user can set up any of
Queue (low, normal, medium, high). In default, Priority 0~63 are mapping
to Queue high.
Fig. 4-23 DSCP Setting
87
Rev.A1
1-Mar-11
Page 96

User Manual
4-2-13. Filter
Function name:
Filter Configuration
Function description:
This function lets administrators easily set management source IP addresses
to the ports on the switch. After completing the settings, please press <Apply>
button to make this function take effect.
Fig. 4-24 Filter Configuration
Parameter description:
Source IP Filter:
Mode:
There are three types of mode in this drop-down menu. Default is
disabled.
Disabled:
Allow all IP Address login to this switch and manage it.
Static:
Just allow the IP Address which set by administrator to login to this
switch and manage it..
DHCP:
Allow the IP Address get from DHCP server can login to this switch
and manage it.
Note: If you choose this mode only an DHCP client could be package
forwarding on the port.
88 Rev A1
1-Mar-11
Page 97

IP Address:
Setting up the IP Address, it can be one IP Address or a LAN.
IP Mask:
Setting up the IP Subnet Mask related with the IP Address.
DHCP Server Allowed:
User Manual
Just tick the check box (
on this port and valid port is Port 1~24.
Default: enable
) under the port x to allow the DHCP Server
89
Rev.A1
1-Mar-11
Page 98

User Manual
4-2-14. Rate Limit
Function name:
Ingress and Egress Bandwidth Setting
Function description:
Ingress and Egress Bandwidth Setting function are used to set up the limit of
Ingress or Egress bandwidth for each port.
----------------Continue--------------
Fig. 4-25 Rate Limit Configuration
90 Rev A1
1-Mar-11
Page 99

Parameter description:
Ingress:
Set up the limit of Ingress bandwidth (Range: 128Kb, 512Kb, 1M, 10M
and 32M) for the port you choose. Incoming traffic will be discarded if
the rate exceeds the value you set up in Data Rate field. Pause frames
are also generated if flow control is enabled. The format of the packet
limits to unicast, broadcast and multicast. Valid value of Port 1~24
ranges is from Rate1 to 29.
Default: No Limit
Egress:
Set up the limit of Egress bandwidth (Range: 128Kb, 512Kb, 1M, 10M
and 32M)for the port you choose. Outgoing traffic will be discarded if the
rate exceeds the value you set up in Data Rate field. Pause frames are
also generated if flow control is enabled. The format of the packet limits
to unicast, broadcast and multicast. Valid value of Port 1~24 ranges is
from Rate1 to 29.
User Manual
Default: No Limit
91
Rev.A1
1-Mar-11
Page 100

User Manual
4-2-15. Storm Control
Function name:
Storm Control
Function description:
Storm Control is used to block unnecessary multicast and broadcast
frames that reduce switch’s performance. When the function is enabled
and Storm Control rate settings are detected as exceeded, the
unnecessary frames would be dropped.
Parameter description:
ICMP Rate:
To enable the ICMP Storm capability. User can use drop-down menu to
select number of frames. Default is No Limit. The setting range is
1k~1024k per second.
Learn Frames Rate:
To enable the Learn Frames Storm capability. User can use drop-down
menu to select number of frames. Default is No Limit. The setting range
is 1k~1024k per second.
Broadcast Rate:
To enable the Broadcast Storm capability. User can use drop-down menu
to select number of frames. Default is No Limit. The setting range is
1k~1024k per second.
Multicast Rate:
To enable the Multicast Storm capability. User can use drop-down menu
to select number of frames. Default is No Limit. The setting range is
1k~1024k per second.
Flooded unicast Rate:
To enable the Flooded unicast Storm capability. User can use drop-down
menu to select number of frames. Default is No Limit. The setting range
is 1k~1024k per second.
NOTE:
After completing the function’s setting, press <Apply> button to have this
function taken effect.
Fig.4-26 Storm Control Configuration
92 Rev A1
1-Mar-11
 Loading...