

Page 1
Installation Instructions
Amax
WARNING
• The installation must only be performed by a licensed electrician.
• To prevent death, injury or damage to property this product must be installed in accordance with
National
Electric Code (NFPA70) in the US or Canadian Electrical Code (CSA22.1) in Canada.
• Disconnect power before installing the product or servicing it.
• Wait until the lamp(s) have cooled down before installing or servicing the fixture.
• Make sure that the lamp fixture is grounded.
• Modification to the EcoNight3 fixture voids its warranty and UL Listing.
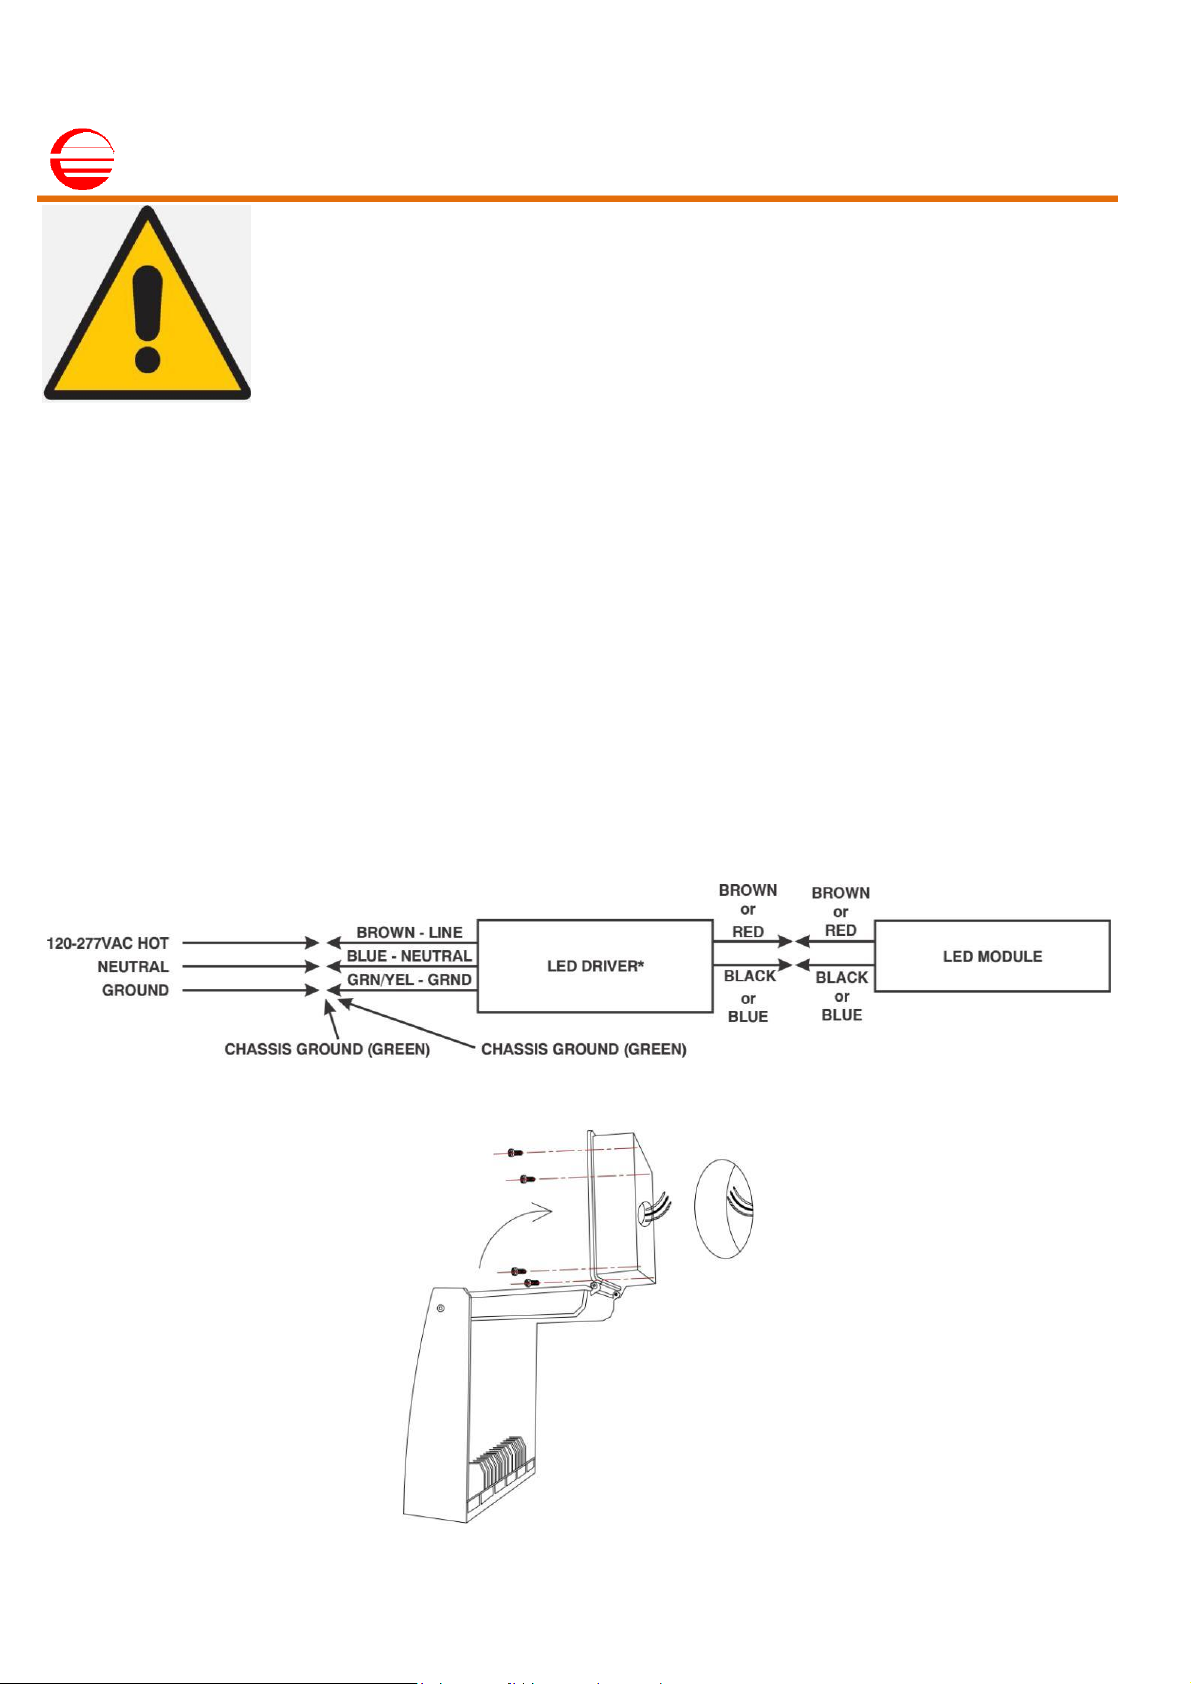
INSTALLATION INSTRUCTIONS
1. Verify power is disabled.
2. Remove fixture from carton.
3. Loosen the two captive screws opposite the hinge side.
4. With hinge to the left, open cover approximately 120 degrees and slide cover away, to remove cover from hinge pins.
5. Disconnect the LED module wire harness from the LED driver.
6. Feed wires from line power through applicable conduit holes and mount fixture base to wall according to local codes using
appropriate mounting hardware. Junction box, conduit, conduit fittings and mounting hardware are not supplied. Use fittings
suitable for wet locations (Type 4 or 4x). Use UL Listed fittings.
7. Slide cover onto base by aligning hinges.
8. Mate LED module wire connections. Connect brown on LED driver to red on LED module and blue on LED driver to black on
LED module.
9. Reconnect ground wire.
10. Close cover, use caution not to pinch wires, and secure with two screws opposite the hinge.
11. Energize fixture.
WIRING DIAGRAM
*Be sure to use the appropriate brown and blue wires of the LED driver for input and output wiring.
See the markings on the LED driver’s label.
MOUNTING DIAGRAM
www.amaxlighting.com
Amax Lighting Inc. 10268 Santa Fe Springs Road, Santa Fe Springs, CA 90670 Tel:888-945-5221
 Loading...