

Page 1
LED VELOCE - Recessed Downlight
LED-SR4P
INSTRUCTIONS PERTAINING TO RISK OF FIRE OR INJURY TO
PERSONS READ ALL INSTRUCTIONS
IMPORTANT SAFETY
INSTRUCTIONS
TOOLS AND MATERIALS REQUIRED:
Wiring supplies
as required by
Phillips
Screwdriver
Wire Cutters
electrical code
SAVE THESE INSTRUCTIONS
Pliers
Drill
SAFETY PRECAUTIONS:
1. TURN OFF ELECTRICAL POWER BEFORE STARTING INSTALLATION OF LIGHT FIXTURE.
2. THIS PRODUCT MUST BE INSTALLED IN ACCORDANCE WITH THE APPLICABLE INSTAL
LATIONS CODE BY A PERSON FAMILIAR WITH THE CONSTRUCTION AND OPERATION OF
THE PRODUCT AND THE HAZARDS INVOLVED.
3. CAUTION – RISK OF ELECTRIC SHOCK. CONSULT A QUALIFIED ELECTRICIAN TO ENSURE
CORRECT BRANCH CIRCUIT CONDUCTOR.
PACKAGE CONTENTS
PART
A
B
DESCRIPTION
LED disc light
Wire nut
QTY
1
3
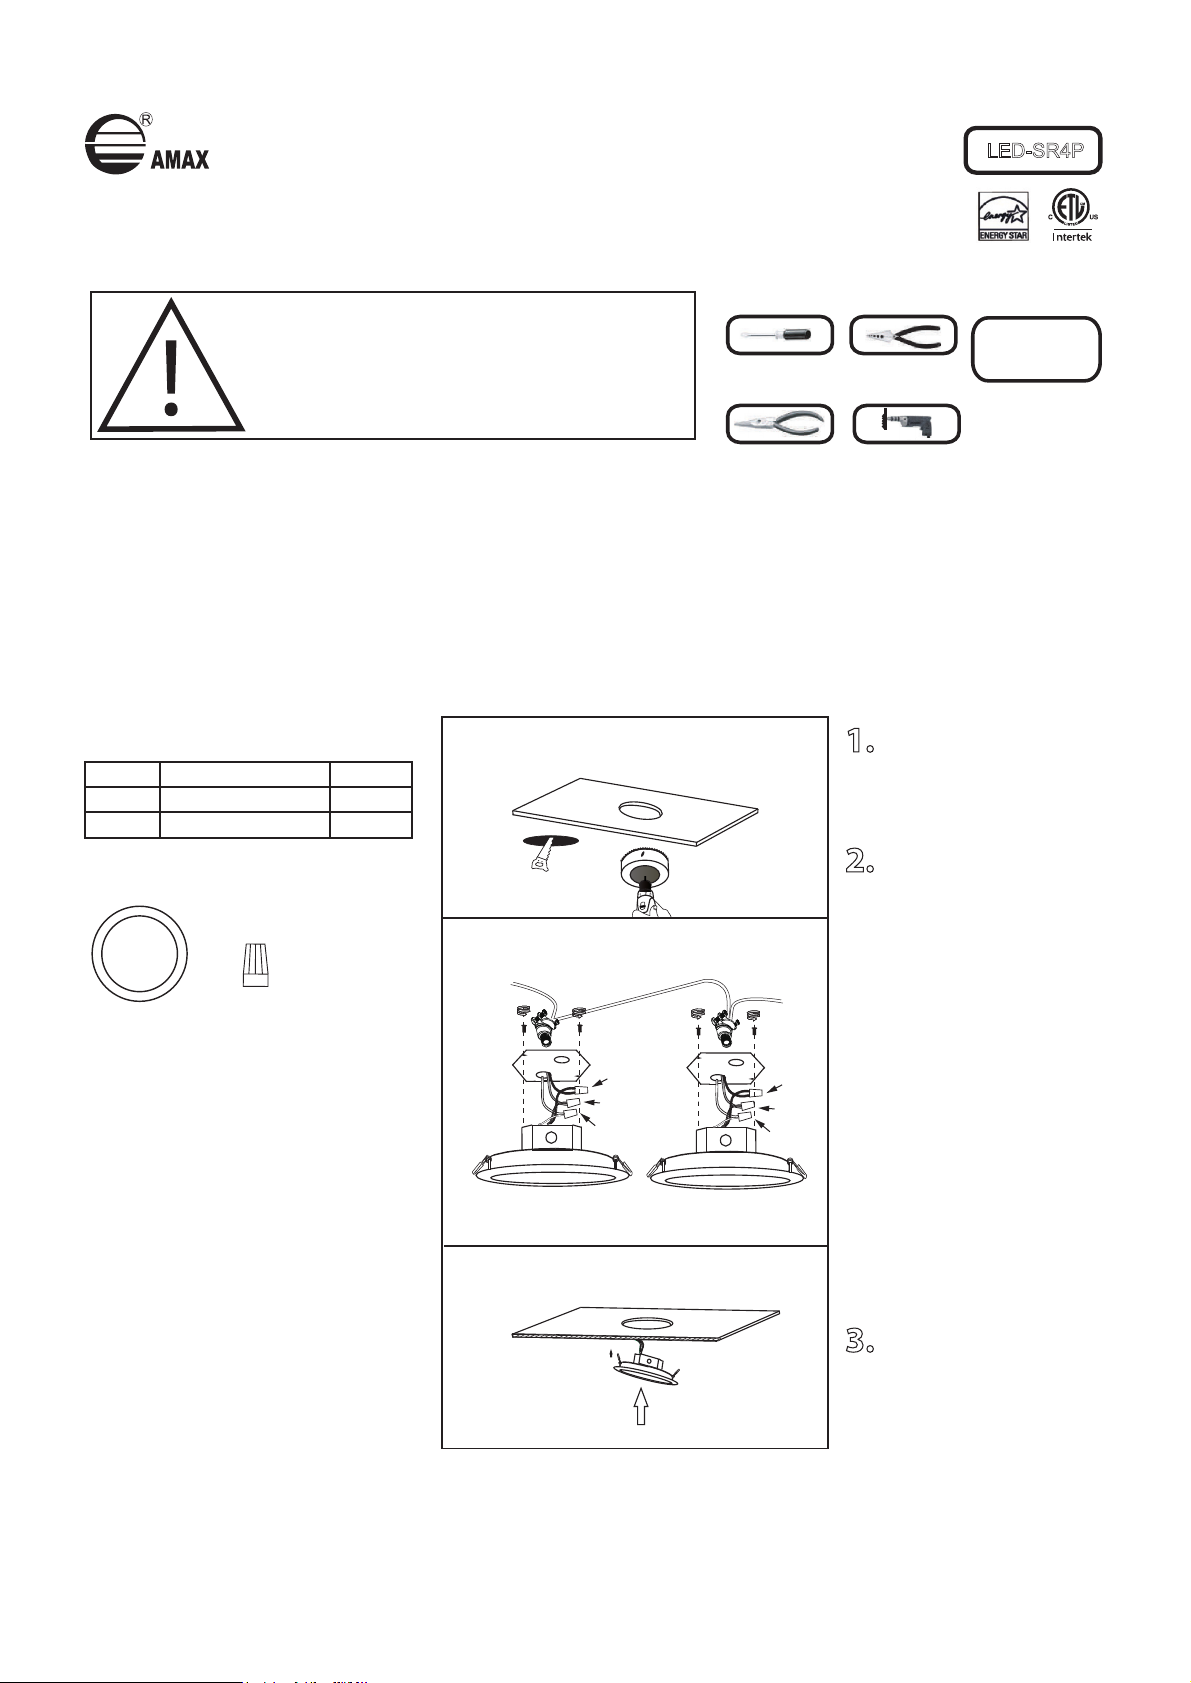
1. Drill hole in ceiling.
(thickness of the sheetrock ≥
1/2”).
2. Knock blind knockout open
A B
This LED light is suitable to be dimmed by
Major Brand model# 6672, Major Brand
model# 6633
Dimming levels may vary by dimmer
Ø 4-1/8”
(105mm)
Black
Ground
White
Ground
White
in your required position and
install the Romex connector if
required (1/2” (not included)).
Open the top cover of the J-box by
unscrewing the screws. Connect
supply wires to wires on fixture
with wire nuts. Connect white to
white, black to black, green or
bare copper grounding wire to
Black
bare copper grounding wire.
Attach the J-box top cover and
secure with self- taping screws.
If wiring to another light, also
connect white to white, black to
black, green or bare copper
grounding wire to bare copper
grounding wire.
3. Bring the light up to the
hole, hold in the spring clips and
push the light into the ceiling. It is
easier to do one spring at one
time.
 Loading...