

Page 1
Page 2
2
UNPACKING THE OVEN
Inspectthe oven for any damage such as damaged gasketing
aroundthe door,dentsor holesinthe screenofthedoorordents
insidethe cavity.
Any dentsor breakageshouldbereportedtoyourAmana Dealer
immediately.You will be told ifthe unitwilloperatecorrectly.
Afterremovingpackingmaterialandliteraturefromaroundtheglass
oventray,place tray inoven so the word "FRONT" is readable.
Do notoperate ovenwithoutglasstray in place.
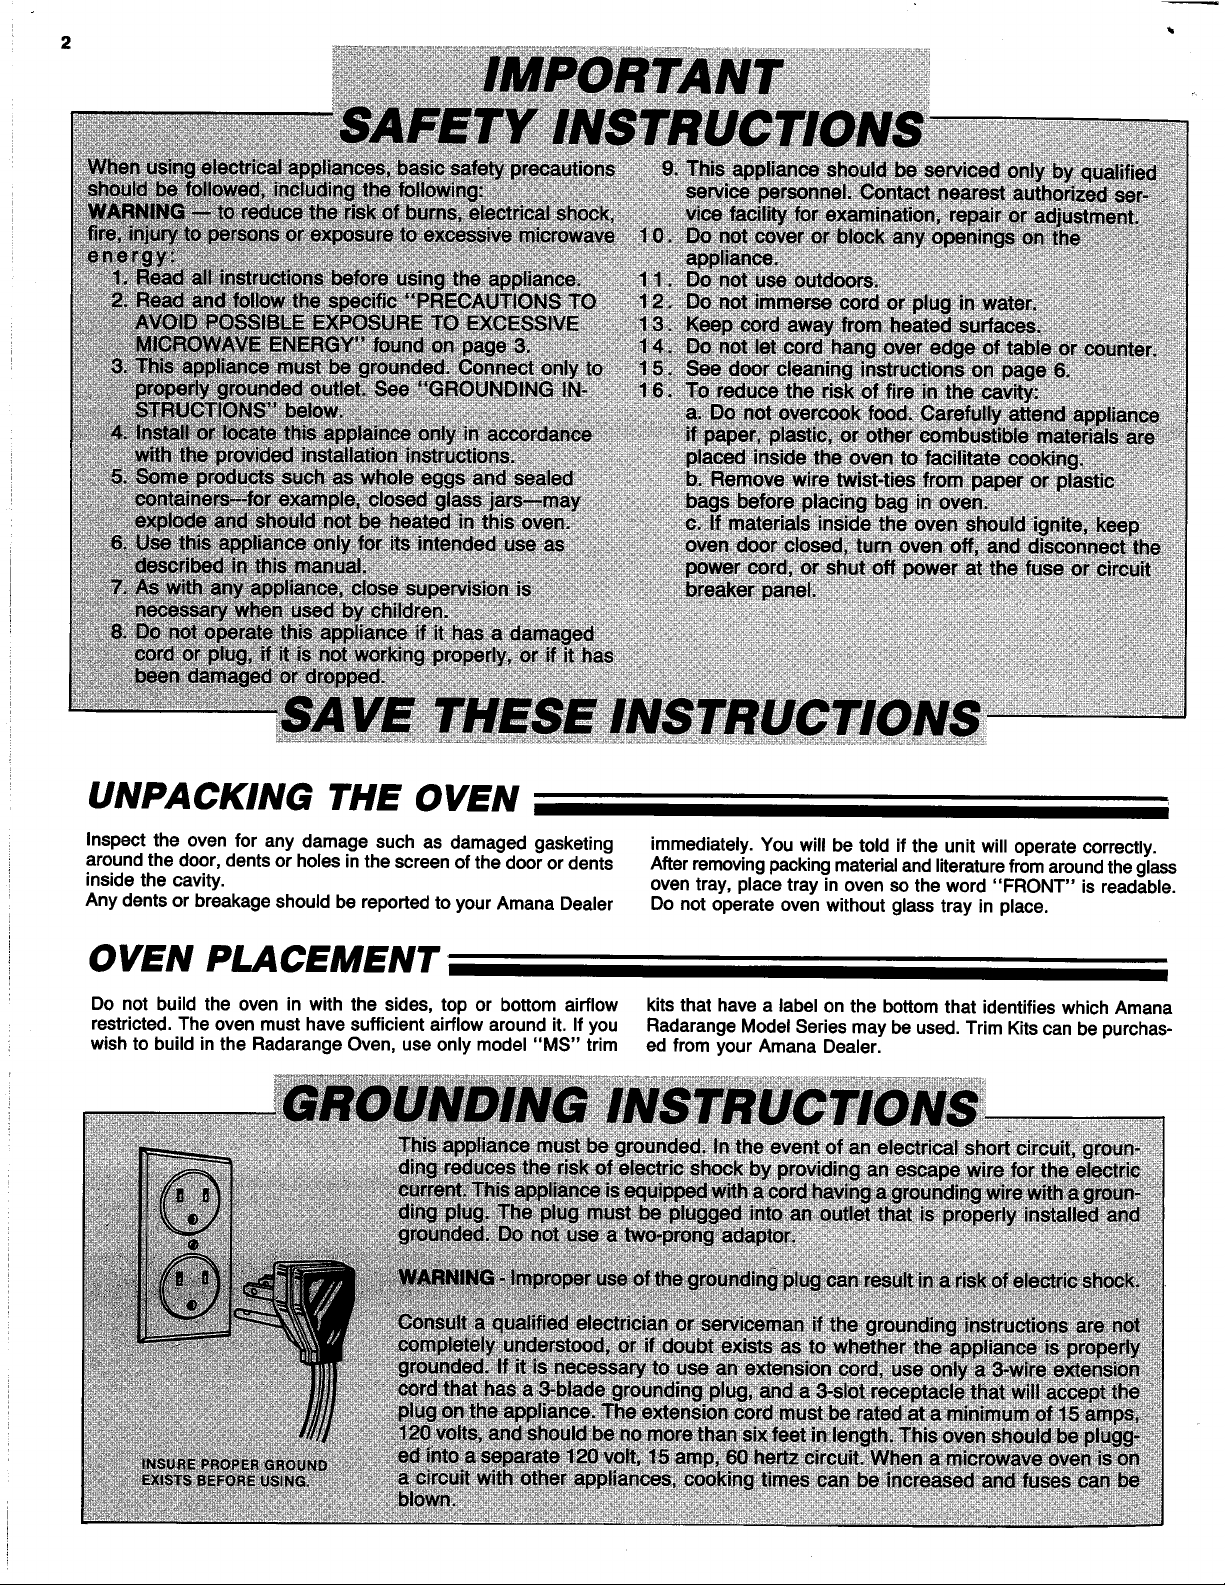
OVEN PLACEMENT
Do not build the oven in with the sides, top or bottom airflow kitsthat have a labelon the bottomthat identifieswhichAmana
restricted.The oven must have sufficientairflowaround it. If you RadarangeModelSeriesmay be used. Trim Kitscanbe purchas-
wishto build inthe RadarangeOven, useonlymodel"MS" trim ed from your Amana Dealer.
Page 3

3
SAFETY INSTRUCTIONS
Read and follow these Rules for Safe Operation
This microwave oven isdesigned to be safe and reliable. As with
all appliances, there are certain rules to follow. Make sure
everyone who cooks is familiar with this product's operation and
with these precautions.
2. PRECAUTIONS
(a)Always press RESET before programming the
oven.
(b) WARNING: Liquids must be briskly stirred or poured (to
mix in air) before being heated in a microwave oven. If
air is not mixed into a liquid, the liquid can erupt in the
oven or after removal from the oven.
(c) Eggs must not be cooked or reheated in the she,, or
with an unbroken yolk. To do so may result in a pressure
build-up and eruption. Pierce the yolk with a fork or knife
before cooking.
Do not reheat previously cooked eggs in the microwave
oven unless finely chopped or scrambled.
(d) Home canning must not be done in a microwave oven.
Home canning is generally done with metal lids. Since
metal lids reflect microwaves, you cannot be assured that
the food product will be heated uniformly to 212°F or
above, and there is a probability of deterioration of the
food product. USDA extension specialists do not recom-
mend home canning in microwave ovens.
(e) Deep fat frying must not be done in any microwave oven.
The fat could overheat and be hazardous to handle.
(f) WARNING: Do not heat sealed containers in any
microwave oven. Containers with restricted openings
such as syrup bottles must not be used for cooking.
Food or liquid could expand quickly and cause the con-
tainer to break.
(g) Regular cooking thermometers must not be used in a
microwave oven. Most cooking thermometers contain
mercury and may cause "arcing", malfunction, and/or
damage to the oven.
(h) Plastic bags (and other air-tight containers) must
always be pierced or opened before heating in a
microwave oven. This is needed to allow steam to
escape during cooking.
(i) Metal or ceramic accessories which have a special
design to absorb microwave energy to provide heat ("ac-
tive" accessories such as browning skillets) may be used
with caution. Be sure to test any such device before use
and to read carefully and follow manufacturer's instruc-
tions provided with the accessory. Any questions con-
cerning these accessory products should be referred to
the accessory manufacturer. Amana Refrigeration, Inc.,
does not endorse any brand of accessory. Remember
that all microwave accessories are not "top quality";
some may not be suitable for microwave cooking. Cau-
tion must be used when purchasing microwave
accessories.
(j) Newspapers must never be used in a microwave oven
since they may ignite.
(k) Paper towels which contain nylon or other synthetic
fibers woven through them must not be used because
the heated synthetics could melt and cause the paper to
ignite.
CHECKING OVEN OPERATION
A,
Oven Light
The oven light will come on when the door is opened. It-
will also come on when the oven is operating.
B,
Check operation of the interlock systems. The
START and STOP padsturntheovenonand
i
i
off. Microwave energy is generated only when door is
closed, cooking time or temperature has been set, and
START has been pressed. In addition, the oven has
interlock switches to assure no microwave energy is
generated when the door is open. To check or remove
food before the cooking time has elapsed, you may
either press STOP or open the oven door to turn the
oven off. Before the oven door opens, hidden interlock
switches sense the motion of the door handle and
automatically turn the oven off.
Here is how you may check the operation of START,
STOP and the interlock switches:
1. Place a glass of water in oven and close oven door.
2.PressRESET.
3. Press 5, then 0.
4. Press START. The oven should operate and the
oven light should come on.
5. Press STOP. The oven should shut off immediately
and the sound of the motor should cease. The oven light
should go out.
6. Open oven door fully. The oven light should come on
when the door is opened.
7. Press RESET.
If under any of the preceding conditions the oven does not
operate as stated do not use it. Call your Amana dealer or
authorized service agency.
Page 4

i
i
THE CONTROL PANEL
READOUT DISPLAY - Remains blank
when oven is not in use. Shows remaining time
when cooking by time. Shows set temperature
F
and actual temperature when cooking to
temperature.
Arrows light up to indicate cooking function.
NUMBERS - Press to program time,
temperature or lower Cookmatic power levels.
They're arranged just like a touch-typetelephone.
COOK LEVEL Press to program or
changea Cookmaticpower level,
RESET - Press to cancel all instructions.
Alwayspressthispad beforeprogrammingoven.
START - Pressto startovenoperation.
STOP - Press to stopoven operation.
|
If You Make a Mistake:
---If the oven is not operating yet, press
RESET. This cancelseverything.You
mustprogramthe oven again.
---If the oven is operating, press STOP,
then press RESET. Thiscancels
everything.You mustprogramtheovenagain.
Page 5

USING THE A UTOMA TIC TEMPERA TURE
CONTROL SYSTEM (CONTINUED)
3. Be sure probe is securely inserted into food. If the
probeaccidentallyfallsout offood, air temperature
will be sensed and food will not cook properly.The probe
could be becomedamaged. If the probetends to slip out
ofthe food, loopthe cord and press it into the slitin the
bead closestto the probe plug, as shownin the
beveragedrawing.
4. Do not use the probe with foil or other metal. Arcing
could result.If the recipesuggestsusingfoil, do not use
the probe.
5. Do not operate the oven if probe is caught in oven
door.
6. Do not use the automatic temperature control system
when cooking different foods at the same time. Dif-
ferent foods cook at differentspeeds,and the results
may be unsatisfactory.
7. Do not force the temperature probe into frozen food.
The sensor tip could be damaged or the probe could
break.
8. Use a hot pad to remove the hot temperature probe.
Duringcooking,the probe couldbecomehot enough to
burn you.
9. Always remove the probe after use. Do not store it in
the oven, Keep it in a place where it won't become lost
or damaged.
10, Wash the probe with hot, soapy water. Do not im-
mersethe probe plug in water nor wash in an automatic
dishwasher.Rinseand dry probethoroughly,
TRY IT! COOKING TO TEMPERA TURE/
HOLDING A T TEMPERA TURE
1. Read the rules and hints above.
2. Place food in oven. Insert temperature probe tip into
food, insert probe plug into oven Interior wall recep-
tacle and close oven door. A display arrow will appear
above "TEMP" if the probe is inserted properly. The ac-
tual temperature sensed by the probe appears at the far
left of the display. The number "0" will appear if the
food temperature is less than 110°F, the lowest
temperature sensed by the probe. The number at the far
right of the display shows the end temperature.
Since temperature has not been set, the number "0"
appears.
Note: The display will remain blank if the probe is not inserted
securely or is damaged. Reinsert probe. If the problem persists,
see page 8 for how to correct it.
3. Press RESET.
4. If less than full microwave power is desired, press
number for Cookmatic Level, then press COOK LEVEL.
5. Press middle number of desired end temperature (to
cook to 140OF, press 4 ).This number will replace the
"0" at the far right of the display. The probe temperature
sensing range is from 110OF to 1900F,
6. Press START and the oven will operate. (You don't
need to program cooking time, because the oven will
cook by temperature only.) A display arrow appears
above "PWR". The actual temperature number in the left
side of the display will increase as food temperature
rises.
7. When end temperature is reached and the displayed
numbers match, the oven will stop, sound a tone and
automatically 'hold" the food at the end temperature until
you press STOP. During the hold period, the
displayed numbers will fluctuate and the "PWR" arrow
will flash as the food cools and is then reheated by
microwave energy cycling on and off.
For: 1100F Press 1 For: 1400F
1200F Press 2 1500F
1300F Press 3 1600F
MAINTENANCE--- CLEANING
The Oven and Door Interior
If the inside walls, floor, door and splatter shield at the top of the
oven become splattered, simply wipe them with a paper towel or
clean mild detergent in warm water using a soft sponge or cloth.
A cup of water can be boiled in the oven to loosen soilbefore clean-
ing. After boiling the water, allow the water vapor to settle on the
oven walls and soften the soil for several minutes before you open
the door.
Do not use an abrasive to clean the inside. It might damage the
finish on stainless steel. Never pour water into the bottom of the
oven.
To Clean The Glass Tray, lift up the tray and remove. Wash in
warm detergent or in a dishwasher. Replace tray so the word
"Front" is readable. Do notoperate the oven withouttray in position.
Press 4 For: 1700F Press 7
Press 5 1800F Press 8
Press 6 1900F Press 9
THE OVEN
To Clean The Splatter Shield Inside Oven
The splatter shield keeps the top of the oven and antenna from
getting dirty. Normally, a damp cloth will remove any splatter from
the shield.
However, ifyou want to clean itmore thoroughly, remove the splat-
ter shield. Be careful not to bend the antenna when removing the
splatter shield. The shield is secured by four screws in recessed
wells in the front underside of the shield and four tabs which fit
into slots in the back oven wall. Remove the four screws. Then
carefully lower the shield and, clearing the antenna, pull the shield
forward out of the back wall slots and out of the oven.
Wash the shieldin hotsoapywater.Do notwash in a dishwasher.
Do not use harshor abrasive cleansers.
Page 6

MAINTENANCE--- CLEANING
THE OVEN (CONTINUED)
When replacing,again be careful not to bendthe antenna.Also
besurethe splattershieldtabsfit snuglyintothe slotsinthe back
of the oven before replacingthe screws.
To check antenna operation,placea glassorcup of water inthe
unit,closetheovendoorandstarttheunit.A rotatingshadowshould
be visible abovethe splattershield.
To Clean The Temperature Probe washthe metalprobein hot,
soapywater. Donot immersethe probeor wiresin water. Do not
wash in a dishwasher.
To Clean The Oven Exterior, use a soft sponge or cloth damp-
ened with mild sudsy water. Do not use abrasive cleaners.
To Clean The Discharge Air Vents
There will be a slight buildup of cooking vapors in the discharge
vent in the upper right hand corner, above the control panel. This
vent should be cleaned occasionally. Do notattempt to remove the
front control; it is an integral part of the oven. Clean the air vent
with a damp cloth.
HOW TO CHANGE THE OVEN LIGHT
(b)Facingthe oven back, removethe screw, allowingthe
To remove the bulb,
Press in end
tum counterclockwise.
The lightbulbfor the insideof the oven canbe changedonlyfrom
the back.Onthe upperrighthandsideof the ovenback is a metal
plate with one screw. The lightbulbis located behind this plate.
Followthese steps to change the bulb:
(a)Unplugthe ovenfrom the electricoutlet.
metal plate and lightto swingoutward.
(c) Removethe bulb,being careful not to burnfingers or
break the bulb. To removethe bulb pressintosocket and
turn counterclockwise.
(d)Replacethe bulbwith a 25-watt 25T8DC bayonetbase
bulb. To replace the bulb press into socket beforeturning
clockwise.
(e) Repositionthe plate, beingcareful not to bendthe hinge
tabs.
(t) Connectthe oven to power outlet.
IF THE GLASS TRAY SHOULD BREAK
Theglassoventraymustbeinplacewhenoperatingtheoven.This
allowsthe microwavestobereflectedupintothebottomofthefood
that isbeing cooked.The tray isa specialtype ofglassand, if it
isaccidentallybroken,itmustbe replacedwiththe sametype of
glasstray fromyour Amana dealer.
BEFORE YOU CALL FOR SERVICE:
Be sure you have read and followedthe operatinginstructions.
Avoidunnecessaryservicecallsfor difficultiesthatarenottheresult
ofdefectiveworkmanshipor materials.You will be chargedfor a
servicer'stravelexpensesandlabor,eventhoughtheproductmay
be in warranty, ifthe difficultyis notcaused by workmanshipor
materials,or if that item is consideredcustomerreplaceable.
The space-age, electroniccontrolmoduleusedin thismicrowave
ovenisthefinest inversatility,qualityandreliability.Inmanycases,
a customercall for moduletimerserviceis caused byconditions
otherthanfailure of the controls.That's whyyou shouldread the
following beforecallingfor service.
Note: A Power InterruptionSignal(dash lines)will appear
inthe displaywheneverthe ovenis initiallypluggedintoan
electricaloutlet.The lineswill also appearwheneverelec-
trical power to the oven has been interruptedand then
restored. When you see these lines, simply press
RESET.
Ifyoufind thatthereadoutdisplaywillnotlightup, appears incor-
rect or garbled, or that the controlwill notaccept instructions,it
couldbe for any of the following reasons:
IF THE READOUT DISPLAY DOESN'T LIGHT UP, PLEASE
CHECK:
IF THE READOUTAPPEARS WRONG:
IF THE CONTROLWILL NOT ACCEPT YOUR INSTRUCTIONS:
IF ANOTHER FEATURE DOESN'T APPEAR TO BE OPERATING
CORRECTLY:
• Electricalstorm
oMomentarypower interruption
• Drills,vacuumcleaners, welders, lightdimmerson
same circuit.
oStatic dischargeto touch pads
• Extraneoussignals:radioor TV transmittingequipment
•Is the oven pluggedsecurelyintothe proper power
outlet?
ols a fuse blownor circuitbreaker open?
elf the conditionremains unchanged,performthe steps
listedin box on the next page.
eDid you remember to press RESET before program-
mingthe oven?
oHave you (or someone else) pressed the controlsafter
cookinghas started?
• If the conditionremainsunchanged,performthe steps
listedin boxon the next page.
oFor cookingto temperature, did the displaylight up
when you connectedthe temperature probe? If not,
checkto see if the probejack is securelyinsertedinto
the oven receptacle.(Review explanation,page 6.)
oFor cookingby time, ifthe conditionremains unchang-
ed, performthe stepslistedin the box on the next page.
oHave you followed the use and care instructionsexact-
ly? Reviewthem to be sure.
 Loading...