

Page 1
Electric Slide-in Smoothtop - Easy Touch Control 700
//
Safety .................................................................... 1=3
Surface Cooking ................................................ 4=6
Surface Controls
Smoothtop Surface
Warming Center
Oven Cooking .................................................. 7-15
Baking Favorite
Cook & Hold Broiling
Delay Cook & Hold Sabbath Mode
Keep Warm Oven Racks
Care & Cleaning ............................................ 16-18
Self-Clean Oven
Cleaning Procedures
Maintenance .................................................. 19=20
Oven Window
Oven Light
Troubleshooting ............................................ 21 =22
Warranty & Service .............................................. 23
Guide d'ntUisation et d'entretien ...................... 24
Gnia de Uso y Cnidado ....................................... 50
Form No. A/01/08 Part No. 8113P769-60 @2006 Maytag Appliances Sales Co. Litho U.S.A
Page 2
ImpomntSefetv
replace any part of your appliance unless it is specifically
recommended in this guide. All other servicing should be
referred to a qualified servicer.
Always disconnect power to appliance before servicing.
To check if device is properly installed, look underneath
range with a flashlight to make sure one of the rear
leveling legs is properly engaged in the bracket slot. The
anti-tip device secures the rear leveling leg to the floor
when properly engaged. You should check this anytime
the range has been moved.
Warning and Important Safety Instructions appearing in
this guide are not meant to cover all possible conditions
and situations that may occur. Common sense, caution,
and care must be exercised when installing, maintaining,
or operating the appliance.
Always contact the manufacturer about problems or
conditions you do not understand.
Recognize Safety Symbols, Words, Labels
Read and follow all instructions before using this
appliance to prevent the potential risk of fire, electric
shock, personal injury or damage to the appliance as a
result of improper usage of the appliance. Use appliance
only for its intended purpose as described in this guide.
To ensure proper and safe operation: Appliance must
be properly installed and grounded by a qualified
technician. Do not attempt to adjust, repair, service, or
To Prevent Fire or Smoke
Damage
Be sure all packing materials are removed from the
appliance before operating it.
Keep area around appliance clear and free from combus-
tible materials. Flammable materials should not be stored
in an oven.
Many plastics are vulnerable to heat. Keep plastics away
from parts of the appliance that may become warm or
hot.
To prevent grease fires, do not let cooking grease or other
flammable materials accumulate in or near the appliance.
In Case of Fire
Use dry chemical or foam-type extinguisher or baking
soda to smother fire or flame. Never use water on a
grease fire.
1. Turn off appliance to avoid spreading the flame.
2. NEVER pick up or move a flaming pan.
3. Smother fire or flame by closing the oven door.
Turn off ventilating hood to avoid spreading the flame.
Extinguish flame then turn onhood to remove smoke
and odor.
Page 3
portentSefetvinstructions
Child Safety
NEVER leave children alone or unsupervised near the
appliance when it is in use or isstiff hot. Children should
never be allowed to sit or stand on any part of the
appliance as they could be injured or burned.
Children must be taught that the appliance and utensils in
it can be hot. Let hot utensils cool in a safe place, out of
reach of small children. Children should be taught that an
appliance is not a toy. Children should not be allowed to
play with controls or other parts of the appliance.
About Your Appliance
NEVER use aluminum foil to cover an oven rack or oven
bottom. Misuse could result in risk of electric shock, fire,
or damage to the appliance. Use foil only as directed in
this guide.
Do not use the cooktop or oven as a storage area for food
or cooking utensils.
Cooking Safety
Never heat an unopened food container in the oven.
Pressure build-up may cause container to burst resulting
in serious personal injury or damage to the appliance.
Use dry, sturdy potholders. Damp potholders may cause
burns from steam. Dish towels or other substitutes should
never be used as potholders because they can trail across
hot elements and ignite or get caught on appliance parts.
Wear proper apparel. Loose fitting or long hanging-
sleeved apparel should not be worn while cooking.
Clothing may ignite and cause burns if garment comes in
contact with heating elements.
Always place oven racks in the desired positions while
oven is cool. Slide oven rack out to add or remove food,
using dry, sturdy potholders. Always avoid reaching into
the oven to add or remove food. If a rack must be moved
while hot, use a dry potholder. Do not let potholder
contact hot element in oven.
To prevent potential hazard to the user and damage to the
appliance, do not use appliance as a space heater to heat
or warm a room. Also, do not use the oven as a storage
area for food or cooking utensils.
Do not obstruct the flow of air by blocking the oven vent.
the oven vent is located at the rear of the cooking surface.
DO NOT TOUCH HEATING ELEMENTS OR INTERIOR
SURFACES OF OVEN. Heating elements may be hot even
though they are dark in color. Interior surfaces of any oven
become hot enough to cause burns. During and after use,
do not touch, or let clothing or other flammable materials
contact heating elements or interior surfaces of oven until
they have had sufficient time to cool. Other surfaces of the
appliance may become hot enough to cause burns -
among these surfaces are: oven vent opening and surface
near this opening, oven door, window of oven door.
Do not touch a hot oven light bulb with a damp cloth as
the bulb could break. Should the bulb break, disconnect
power to the appliance before removing bulb to avoid
electrical shock.
Use racks only in the oven in which they were shipped/
purchased.
Use care when opening the oven door. Let hot air or
steam escape before removing or replacing food.
PREPARED FOOD WARNING: Follow food
manufacturer's instructions. If a plastic frozen food
container and/or its cover distorts, warps, or is otherwise
damaged during cooking, immediately discard the food
and its container. The food could be contaminated.
Do not allow aluminum foil or meat probe to contact
heating element.
Always turn off all controls when cooking is completed.
Utensil Safety
Follow the manufacturer's directions when using oven
cooking bags.
This appliance has been tested for safe performance
using conventional cookware. Do not use any devices or
accessories that are not specifically recommended in this
guide. Do not use add-on oven convection systems. The
use of devices or accessories that are not expressly
2
Page 4
ImpomntSefetv
recommended in this guide can create serious safety
hazards, result in performance problems, and reduce the
life of the components of the appliance.
If pan is smaller than element, a portion of the element
will be exposed to direct contact and could ignite clothing
or potholder.
Only certain types of glass, glass/ceramic, ceramic,
earthenware, or other glazed utensils are suitable for
cooktop or oven service without breaking due to the
sudden change in temperature. Follow utensil
manufacturer's instructions when using glass.
Turn pan handle toward center of cooktop, not out into
the room or over another surface element. This reduces
the risk of burns, ignition of flammable materials, or
spillage if pan is accidently bumped or reached by small
children.
Cooktop
NEVER leave surface units unattended especially when
using high heat. An unattended boilover could cause
smoking and a greasy spillover can cause a fire.
This appliance is equipped with different size surface
elements. Select pans with flat bottoms large enough to
cover element. Fitting pan size to element will improve
cooking efficiency.
GLASS=CERAMIC SURFACE: NEVER cook on broken
cooktop. If cooktop should break, cleaning solutions and
spillovers may penetrate the broken cooktop and create a
risk of electric shock. Contact a qualified technician
immediately.
Deep Fat Fryers
Use extreme caution when moving the grease pan or
disposing of hot grease. Allow grease to cool before
attempting to move pan.
Ventilating Hoods
Clean range hood and filters frequently to prevent grease
or other flammable materials from accumulating on hood
or filter and to avoid grease fires.
When flaming foods under the hood, turn the fan on.
Clean with caution. Use care to avoid steam burns if a wet
sponge or cloth is used to wipe spills on a hot surface.
Some cleaners can produce noxious fumes if applied to a
hot surface.
Clean only parts listed in this guide.
Self-Clean Oven
Do not clean door gasket. The door gasket is essential for
a good seal. Care should be taken not to rub, damage, or
move the gasket.
Do not use oven cleaners or oven liners of any kind in or
around any part of the self-clean oven.
Important Safety Notice
and Warning
The California Safe Drinking Water and Toxic Enforcement
Act of 1986 (Proposition 65) requires the Governor of
California to publish a list of substances known to the
State of California to cause cancer or reproductive harm,
and requires businesses to warn customers of potential
exposures to such substances.
Users of this appliance are hereby warned that when the
oven is engaged in the self-clean cycle, there may be
some low-level exposure to some of the listed substances,
including carbon monoxide. Exposure to these substances
can be minimized by properly venting the oven to the
outdoors by opening the windows and/or door in the room
where the appliance is located during the self-clean cycle.
IMPORTANT NOTICE REGARDING PET BIRDS: Never
keep pet birds in the kitchen or in rooms where the fumes
from the kitchen could reach. Birds have a very sensitive
respiratory system. Fumes released during an oven self-
cleaning cycle may be harmful or fatal to birds. Fumes
released due to overheated cooking oil, fat, margarine and
overheated non-stick cookware may be equally harmful.
Cleaning Safety
Clean cooktop with caution. Turn off all controls and wait
for appliance parts to cool before touching or cleaning.
Save These Instructions for Future Reference
3
Page 5
$.rfece. gg
Surface Controls
Use to turn on the surface elements. An infinite choice of
heat settings isavailable from Low to High. The knobs can
be set on or between any of the settings.
Setting the Controls
1. Place pan on surface element.
2. Push in and turn the knob in either direction to the desired
heat setting.
. The control panel is marked to identify which
element the knob controls. For example, the
graphic at right indicatesleft front element.
3. There isan element indicatorlight on the control panel.
When any surface control knob isturned on, the light will
turn on. The light will turn off when all the surface ele-
ments are turned off.
When a control isturned on, a glow can be seen through
the smoothtop surface. The element will cycle on and off
to maintain the preset heat setting, even on High.
4. After cooking, turn knob to OFF. Remove pan.
Suggested Heat Settings
The size and type of cookware, type and amount of food
being heated, and wattage of individualelements will
determine where to set the knob for cooking
operations. Some elements have a predetermined simmer and
OO
OO
melt setting that will require only minor adjustment up or
down depending on the food being prepared. The other
elements have settings printed around the knobs that are also
unique to those elements. Adjust the heat settings to the
numbers that give the desired cooking results. The following
descriptions will aid in choosing the settings that will give
optimum results.
Hold or Warm: Food maintains a temperature above 140°F
without continuing to cook. Food is initially hot and then heat
is reduced. Never use a hold or warm setting to reheat cold
food.
Simmer: Foodforms bubbles that barely break the
surface. Foods are between 185°F and 200°F.A simmer
setting can also be used to steam or poach foods or continue
cooking covered foods.
Slow Boil: Food forms bubbles at a moderate pace.A slow
boil setting can also be used for most frying and for maintain-
ing the cooking of large amounts of liquids.
Boil: Liquid forms bubbles at a rapid pace. A fast boil setting
can also be used to brown meat, stir fry, saute, and heat oil
for frying before turning to a lower setting. The highest 3 or 4
settings on the knob are used for these cooking
operations. The highest setting isalways used to bring water
to a boil. Some elements offer an even higher speed for
boiling liquids.
4
Page 6
Surfece¢ookin:
Smoothtop Surface
Smoothtop Surface Notes:
Cooktop may emit light smoke and odor the first few
times the cooktop is used. This isnormal.
, Smoothtop cooktops retain heat for a period of time
after the element is turned off. Turn the elements off
a few minutes before food is completely cooked and use
the retained heat to complete cooking. When the hot
surface light turns off, the cooking area will be cool
enough to touch. Because of the way they retain heat, the
smoothtop elements will not respond to changes in
settings as quickly as coil elements.
, In the event of a potential boilover, remove the pan from
the cooking surface.
, Never attempt to lift the cooktop.
, The smoothtop surface may appear discolored when it is
hot. This isnormal and will disappear when the surface
cools.
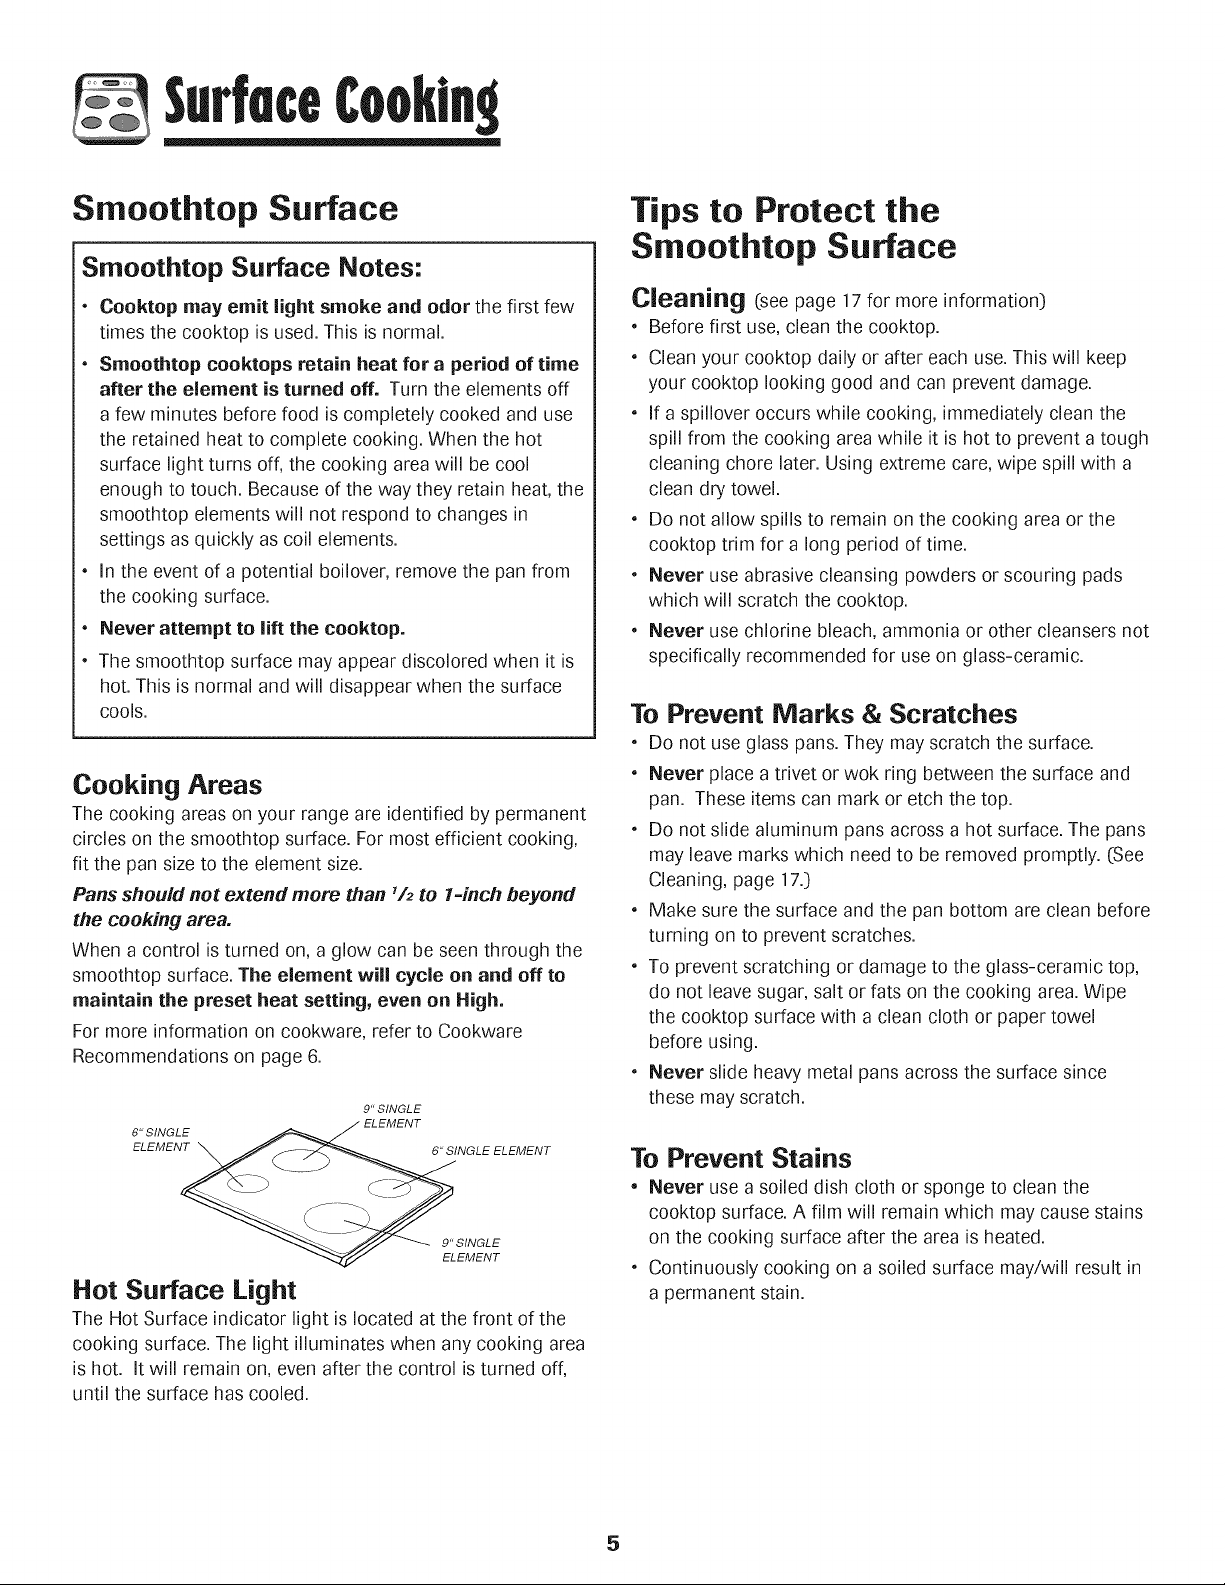
Cooking Areas
The cooking areas on your range are identified by permanent
circles on the smoothtop surface. For most efficient cooking,
fit the pan size to the element size.
Pans should not extend mere than !/2 to 1=inch beyond
the cooking area.
When a control is turned on, a glow can be seen through the
smoothtop surface. The element will cycle on and off to
maintain the preset heat setting, even on High.
For more information on cookware, refer to Cookware
Recommendations on page 6.
9" SINGLE
6" SINGLE
ELEMENT 6" SINGLE ELEMENT
9" SINGLE
ELEMENT
Hot Surface Light
The Hot Surface indicator light is located at the front of the
cooking surface. The light illuminateswhen any cooking area
is hot. It will remain on, even after the control is turned off,
until the surface has cooled.
Tips to Protect the
Smoothtop Surface
Cleaning ([seepage 17 for more information,)
, Before first use, clean the cooktop.
, Clean your cooktop daily or after each use. This will keep
your cooktop looking good and can prevent damage.
, If a spillover occurs while cooking, immediatelyclean the
spill from the cooking areawhile it ishot to prevent a tough
cleaning chore later. Using extreme care, wipe spill with a
clean dry towel.
, Do not allow spills to remain on the cooking area or the
cooktop trim for a long period of time.
, Never use abrasive cleansing powders or scouring pads
which will scratch the cooktop.
, Never use chlorine bleach, ammonia or other cleansers not
specifically recommended for use on glass-ceramic.
To Prevent Marks & Scratches
, Do not use glass pans. They may scratch the surface.
Never place a trivet or wok ring between the surface and
pan. These items can mark or etch the top.
Do not slide aluminum pans across a hot surface. The pans
may leave marks which need to be removed promptly. ([See
Cleaning, page 17.1)
Make sure the surface and the pan bottom are clean before
turning on to prevent scratches.
To prevent scratching or damage to the glass-ceramic top,
do not leave sugar, salt or fats on the cooking area. Wipe
the cooktop surface with a clean cloth or paper towel
before using.
Never slide heavy metal pans across the surface since
these may scratch.
To Prevent Stains
• Never use a soiled dish cloth or sponge to clean the
cooktop surface. A film will remain which may cause stains
on the cooking surface after the area is heated.
Continuously cooking on a soiled surface may/will result in
a permanent stain.
Page 7
Surfece¢ookin:
To Prevent Other Damage
. Do not allow plastic, sugar or foods with high sugar content
to melt onto the hot cooktop. Should this happen, clean
immediately.(See Cleaning, page 17.)
Never let a pan boil dry as this will damage the surface and
pan.
Never use cooktop as a work surface or cutting board.
Never cook food directly on the surface.
Do not use a small pan on a large element. Not only does
this waste energy, but it can also result in spillovers burning
onto the cooking areawhich requires extra cleaning.
Do not use non-flat specialty itemsthat are oversized or
uneven such as round bottom woks, rippled bottom and/or
oversized canners and griddles.
Do not use foil or foil-type containers. Foil may melt onto
the glass. If metal melts on the cooktop, do not use. Call an
authorized servicer.
Cookware Recommendations
Using the right cookware can prevent many problems, such
asfood taking longer to cook or achieving inconsistent
results. Proper pans will reduce cooking times, use less
energy, and cook food more evenly.
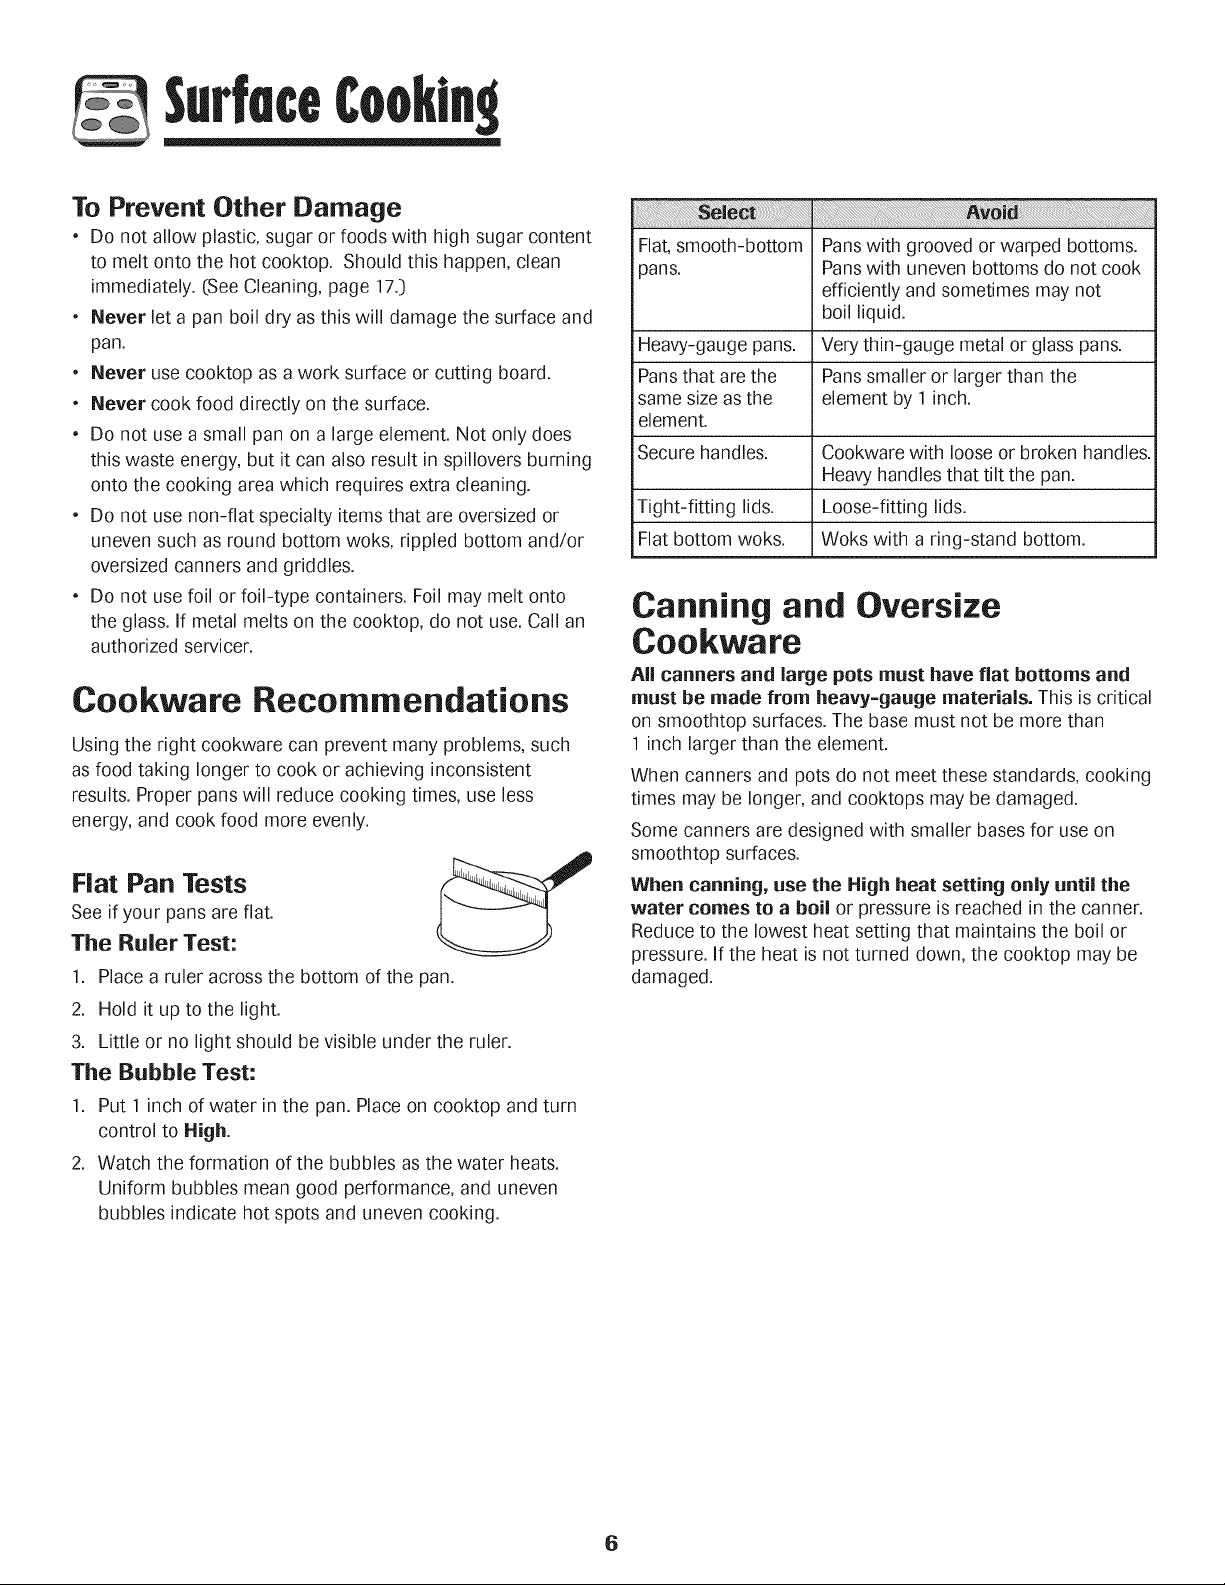
Fiat Pan Tests
See if your pans are flat.
The Ruler Test:
1. Place a ruler across the bottom of the pan.
2. Hold itup to the light.
3. Little or no light should be visible under the ruler.
The Bubble Test:
Flat,smooth-bottom Panswith grooved or warped bottoms.
pans. Panswith uneven bottoms do not cook
efficiently and sometimes may not
boil liquid.
Heavy-gauge pans. Very thin-gauge metal or glass pans.
Pansthat are the Panssmaller or larger than the
same size asthe element by 1 inch.
element.
Secure handles. Cookware with loose or broken handles.
Heavyhandles that tilt the pan.
Tight-fitting lids. Loose-fitting lids.
Flat bottom woks. Woks with a ring-stand bottom.
Canning and Oversize
Cookware
All canners and large pots must have fiat bottoms and
must be made from heavy=gauge materials. This is critical
on smoothtop surfaces. The base must not be more than
1 inch larger than the element.
When canners and pots do not meet these standards, cooking
times may be longer, and cooktops may be damaged.
Some canners are designed with smaller basesfor use on
smoothtop surfaces.
When canning, use the High heat setting only until the
water comes to a boil or pressure isreached in the canner.
Reduce to the lowest heat setting that maintains the boil or
pressure. If the heat isnot turned down, the cooktop may be
damaged.
1. Put 1 inch of water in the pan. Place on cooktop and turn
control to High.
2. Watch the formation of the bubbles as the water heats.
Uniform bubbles mean good performance, and uneven
bubbles indicate hot spots and uneven cooking.
6
Page 8
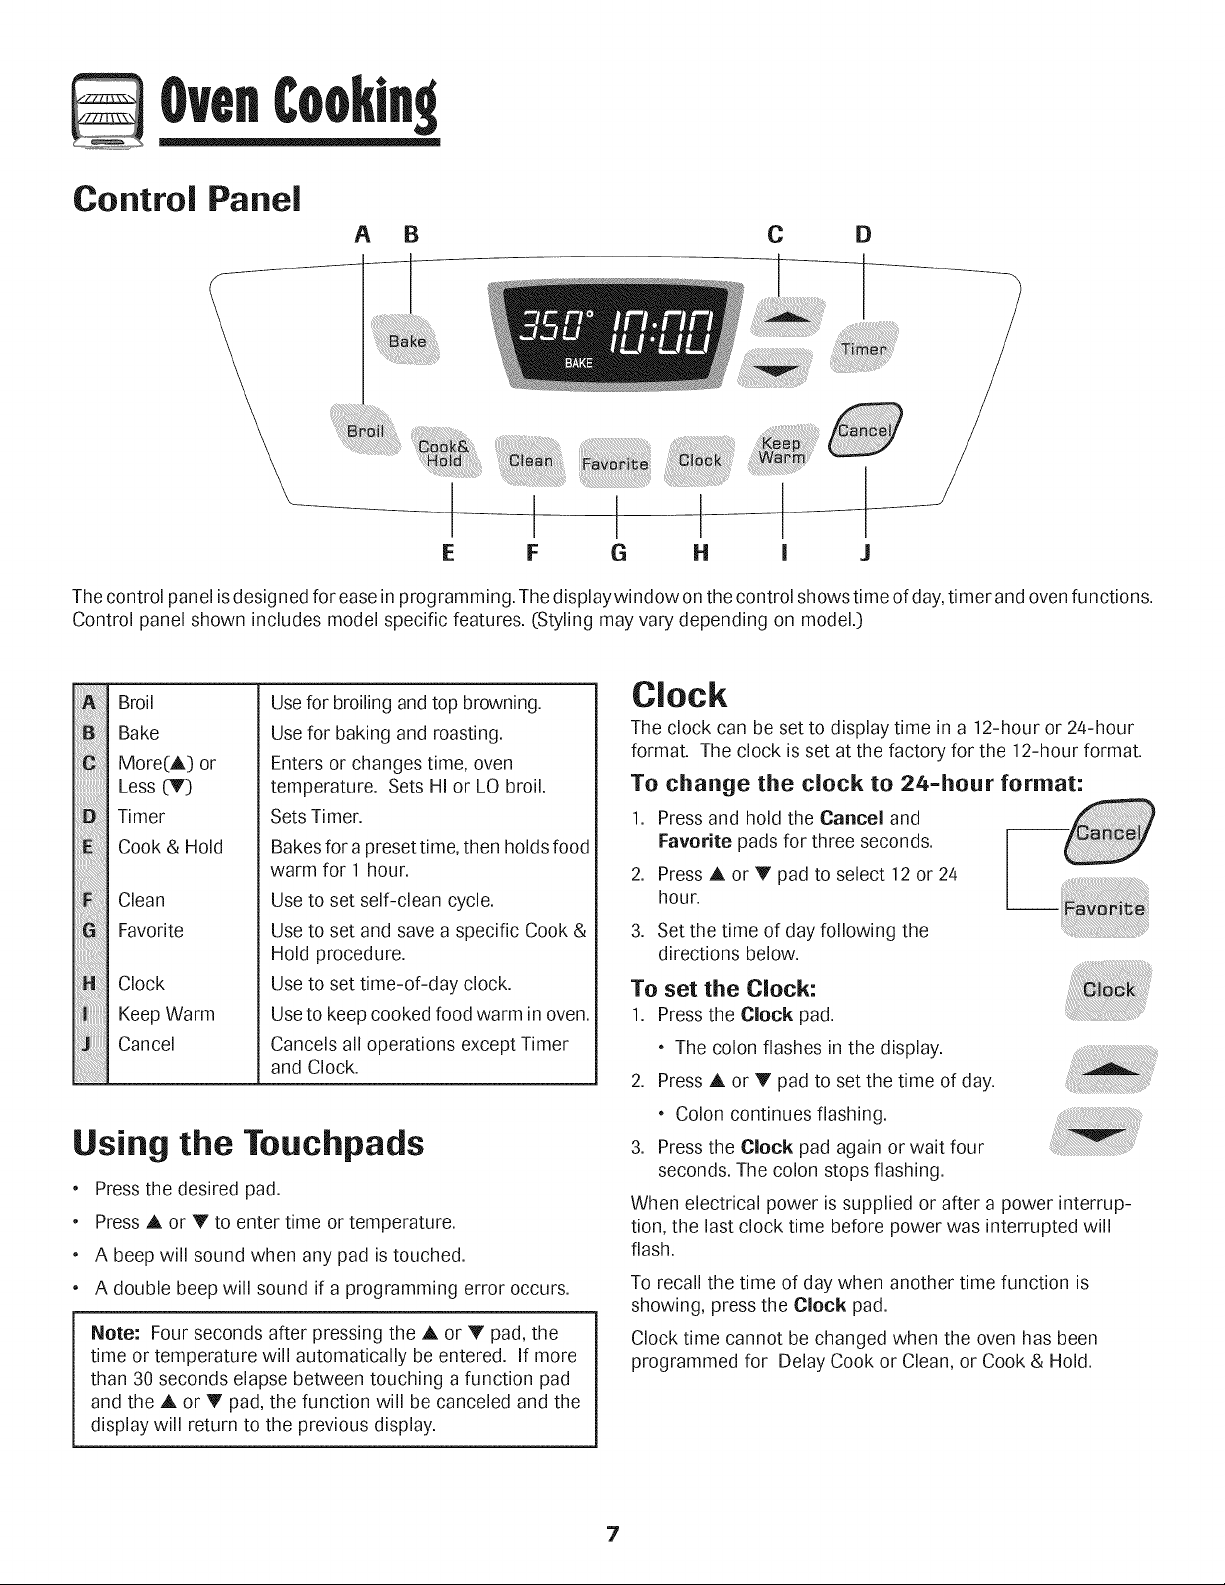
Control Panel
A B
I
E F G
Thecontrol panel isdesigned for easeinprogramming. The displaywindow on the control shows time of day,timer and ovenfunctions.
Control panel shown includesmodel specific features. (Styling may vary depending on model.:)
Broil
!i!!_!!Biiiiiiiiiiiiiiiiiii
Bake
!i!:i!;!;Ciiiiiiiiiiiil;i
More(A:) or
Less (V:)
Timer
i:i;i;iEiiiiiiiiiii!!;!!i!i!i
Cook & Hold
Clean
ii!ii6!i!ii!ii!iiii_il
Favorite
Clock
Keep Warm
Cancel
Use for broiling and top browning.
Use for baking and roasting.
Enters or changes time, oven
temperature. Sets HI or LO broil.
Sets Timer.
Bakes for a preset time, then holds food
warm for 1 hour.
Use to set self-clean cycle.
Use to set and save a specific Cook &
Hold procedure.
Use to set time-of-day clock.
Use to keep cooked food warm in oven.
Cancels all operations except Timer
and Clock.
Using the Touchpads
* Pressthe desired pad.
PressA or Y to enter time or temperature.
A beep will sound when any pad is touched.
A double beep will sound if a programming error occurs.
Note: Four seconds after pressing the A or V pad, the
time or temperature will automatically be entered. If more
than 30 seconds elapse between touching a function pad
and the A or V pad, the function will be canceled and the
display will return to the previous display.
Clock
The clock can be set to display time in a 12-hour or 24-hour
format. The clock is set at the factory for the 12-hour format.
To change the clock to 24-hour format:
1. Pressand hold the Cancel and
Favorite pads for three seconds.
2. Press A or V pad to select 12 or 24
hour.
3. Set the time of day following the
directions below.
To set the Clock:
1. Pressthe Clock pad.
The colon flashes in the display.
2. Press A or V pad to set the time of day.
Colon continues flashing.
3. Press the Clock pad again or wait four
seconds. The colon stops flashing.
When electrical power is supplied or after a power interrup-
tion, the last clock time before power was interrupted will
flash.
To recall the time of day when another time function is
showing, press the Clock pad.
Clock time cannot be changed when the oven has been
programmed for Delay Cook or Clean, or Cook & Hold.
7
Page 9
To cancel the Clock display:
if you do not want the time of day to display:
Press and hold the Cancel and Clock pads for three sec-
onds. The time of day will disappear from the display
When the clock display iscanceled, press the Clock pad to
briefly display the time of day.
To restore the Clock display:
Press and hold the Cancel and Clock
pads for three seconds. The time of day
will reappear in the display.
Timer
The timer can be set from one minute (0:01:)up to 99 hours
and 59 minutes (99:59:).
The timer can be used independentlyof any other oven
activity. It can also be set while another oven function is
operating.
The timer does not control the oven. It only controls a beeper.
To set the Timer:
1. Press the Timer pad.
* 0:00 lights in the display.
* The colon will flash.
Locking the ControJ
The touchpad controls and can be locked for safety, cleaning,
or to prevent unwanted use. They will not function when
locked.
If the oven iscurrently in use, the controls cannot be locked.
The current time of day will remain in the display when the
controls are locked.
To lock:
Press and hold the Cancel and Cook &
Hold pads for three seconds. (Pressthe
Cancel pad first.i)
To unlock:
Press and hold the Cancel and Cook & Hold pads for three
seconds. (Press the Cancel pad first.i)
Fault Codes
BAKE or LOCK may flash rapidly in the display to alert you if
there is an error or a problem. If BAKEor LOCK flash in the
display, press Cancel pad. If BAKE or LOCK continue to
flash, disconnect power to the appliance. Wait a few minutes,
and then reconnect power. If the flashing still continues,
disconnect power to the appliance and call an authorized
servicer.
2. Press the A or Y pad until the
correct time appears in the display.
* The colon will continue to flash.
3. PressTimer pad again or wait four seconds.
* The colon continues flashing and the time begins
counting down.
* The last minute of the timer countdown will be displayed
as seconds.
4. At the end of the set time, one long beepwill sound.
To cancel the Timer:
1. Press and hold the Timer pad for three seconds.
OR
2. Press the Timer pad and set the time to 0:00.
8
Page 10
Baking
To set Bake:
1. Press the Bake pad.
* BAKEwill flash.
000 will light in the display.
2. Select the oven temperature. The oven
temperature can be set from 170° to 550°.
Press or press and hold the A or V pad.
350°will light when either pad is first pressed.
Press the A pad to increase the temperature.
Press the V pad to decrease the temperature.
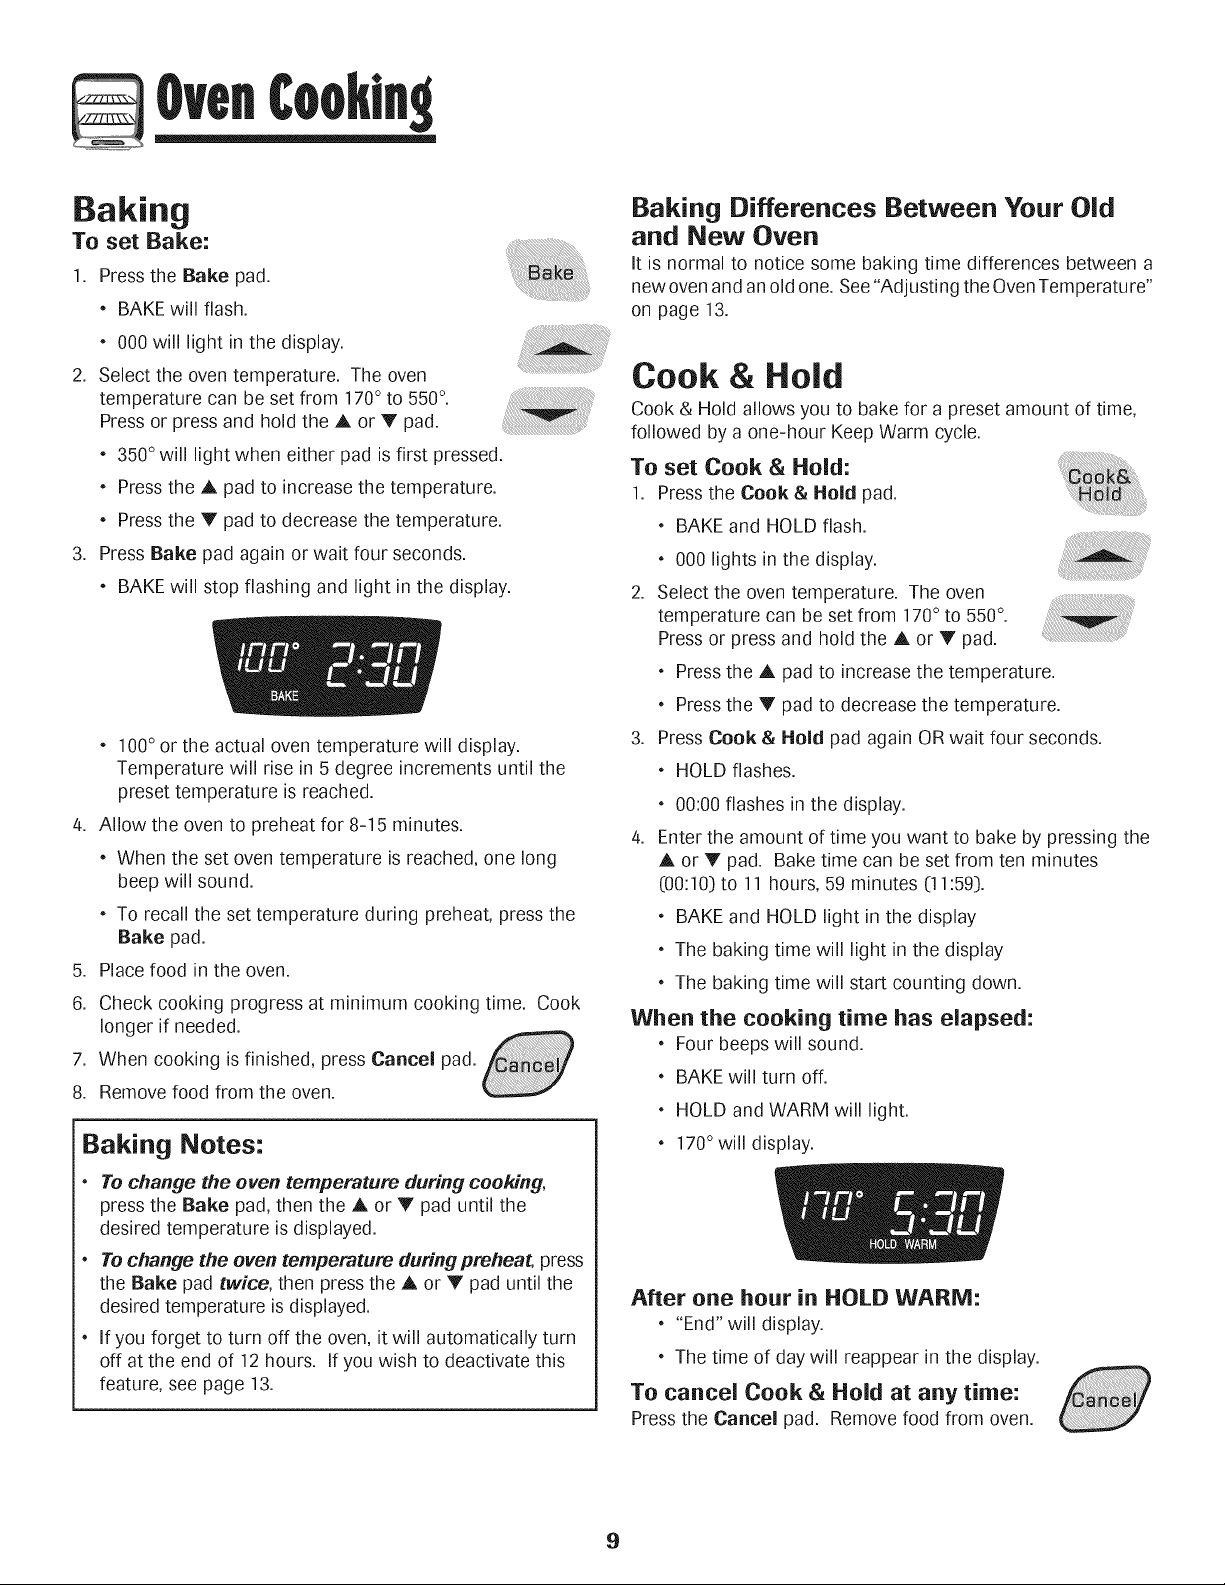
3. Press Bake pad again or wait four seconds.
BAKEwill stop flashing and light in the display.
100° or the actual oven temperature will display.
Temperature will rise in 5 degree incrementsuntil the
preset temperature is reached.
4. Allow the oven to preheat for 8-15 minutes.
When the set oven temperature is reached, one long
beep will sound.
To recall the set temperature during preheat, press the
Bake pad.
5. Placefood in the oven.
6. Check cooking progress at minimum cooking time. Cook
longer if needed.
7. When cooking isfinished, press Cancel pad.
8. Remove food from the oven.
Baking Notes:
* To change the even temperature during cooking,
press the Bake pad, then the A or V pad until the
desired temperature is displayed.
* To change the even temperature during preheat, press
the Bake pad twice, then press the A or V pad until the
desired temperature is displayed.
If you forget to turn off the oven, it will automatically turn
off at the end of 12 hours. If you wish to deactivate this
feature, see page 13.
Baking Differences Between Your Old
and New Oven
it is normal to notice some baking time differences between a
new oven and an old one. See"Adjusting the OvenTemperature"
on page 13.
Cook & Hold
Cook & Hold allows you to bake for a preset amount of time,
followed by a one-hour Keep Warm cycle.
To set Cook & Hold:
1. Pressthe Cook & Hold pad.
BAKE and HOLD flash.
000 lights in the display.
2. Select the oven temperature. The oven
temperature can be set from 170° to 550°.
Press or press and hold the A or V pad.
Pressthe A pad to increase the temperature.
Pressthe V pad to decrease the temperature.
3. Press Cook & Hold pad again ORwait four seconds.
HOLD flashes.
00:00 flashes in the display.
4. Enter the amount of time you want to bake by pressing the
,L or V pad. Bake time can be set from ten minutes
(00:10) to 11 hours, 59 minutes (11:59).
BAKE and HOLD light in the display
The baking time will light in the display
The baking time will start counting down.
When the cooking time has elapsed:
* Four beeps will sound.
BAKEwill turn off.
* HOLD and WARM will light.
170°will display.
After one hour in HOLD WARM:
', "End" will display.
* The time of day will reappear in the display.
To cancel Cook & Hold at any time:
Press the Cancel pad. Removefood from oven.
9
Page 11
Cookin
Delay Cook & Hold
When using Delay, the oven begins to cook later in the day.
Set the amount of time that you want to delay before the oven
turns on and how long you want to cook. The oven begins to
heat at the selected time and cooks for the specified length of
time.
Delay time can be set from 10 minutes (00:10) to 11 hours, 59
minutes (11:59).
To set a Delayed Cook & Hold cycle: ......
1. Pressthe Bake and Timer pads at the
same time.
DELAY lights in the display.
00:00 appears in the display.
2. Pressthe A or V pad to set the delay time.
3. Pressthe Cook & Hold pad.
* 000 lights in the display.
, BAKE and HOLD flash.
4. PressA to set the baking temperature.
* 00:00 and HOLD flash.
, BAKE stays lit.
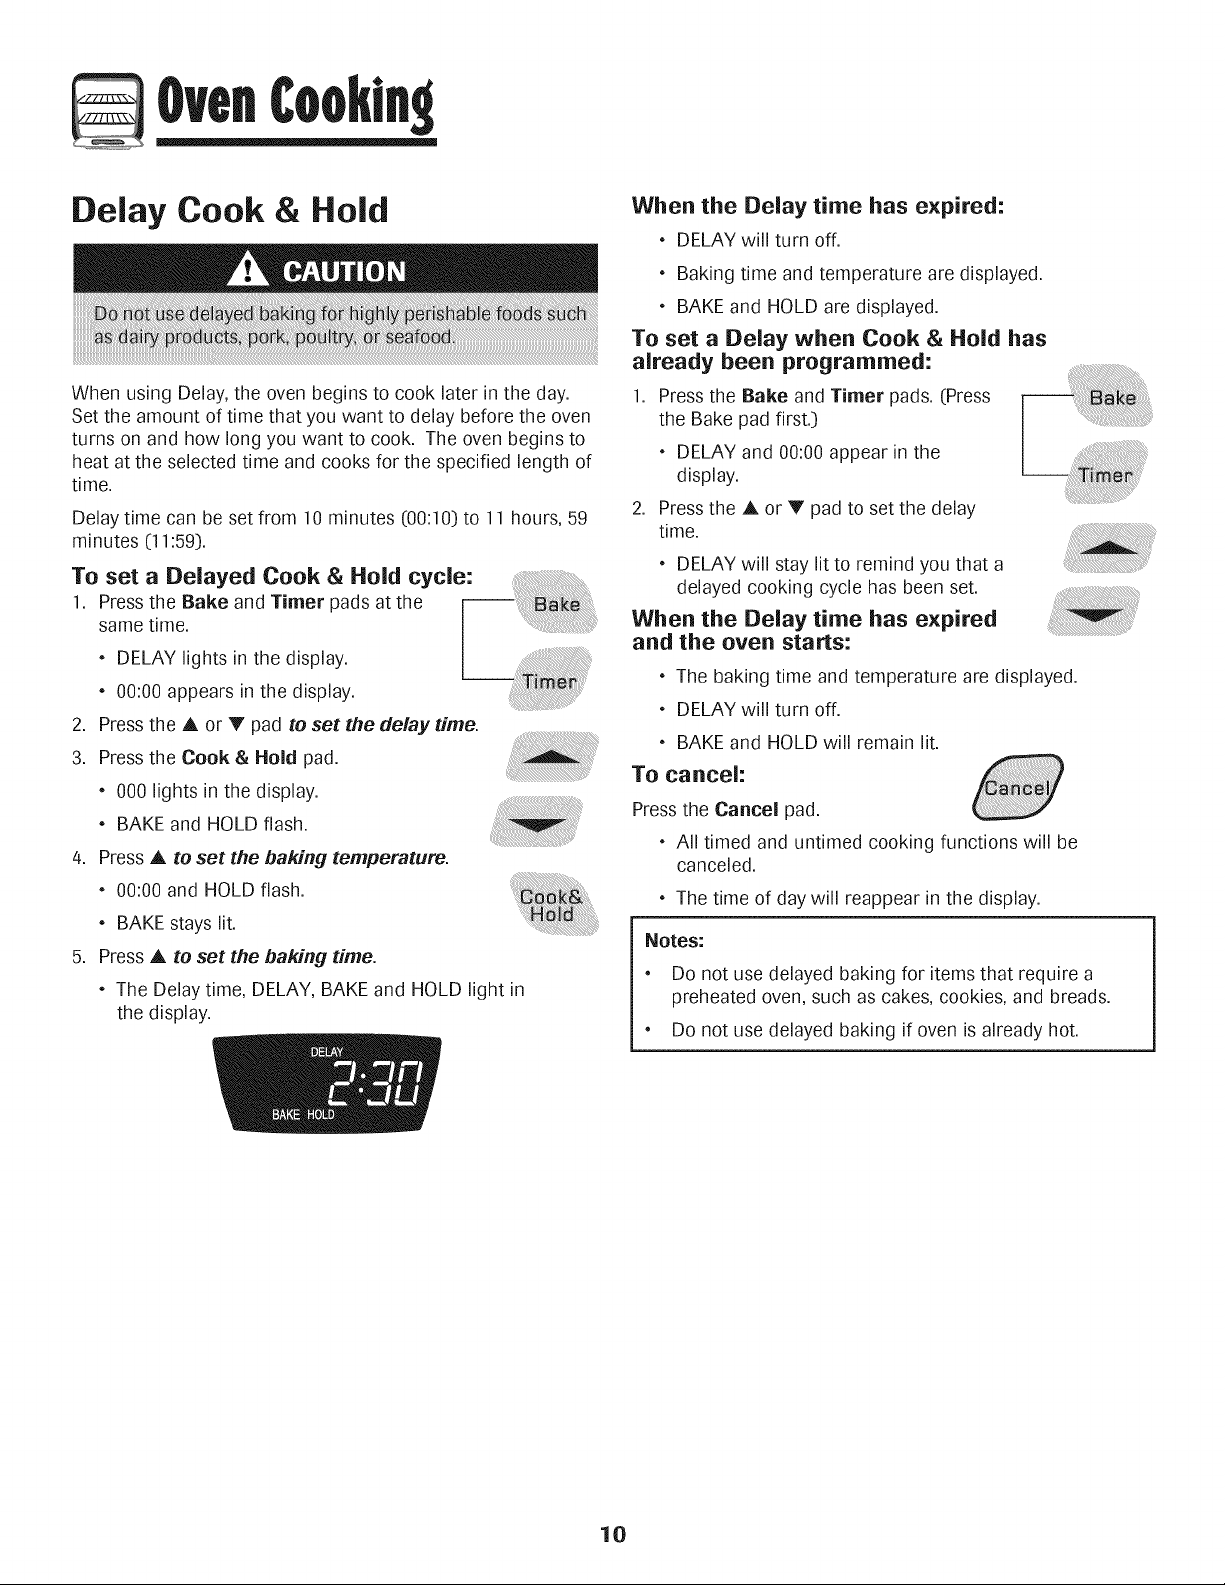
5. PressA to set the baking time.
, The Delay time, DELAY, BAKE and HOLD light in
the display.
When the Delay time has expired:
DELAY will turn off.
Baking time and temperature are displayed.
BAKE and HOLD are displayed.
To set a Delay when Cook & Hold has
already been programmed:
1. Pressthe Bake and Timer pads. (Press
the Bake pad first.)
DELAY and 00:00 appear in the
display.
2. Pressthe A or V pad to set the delay
time.
DELAY will stay lit to remind you that a
delayed cooking cycle has been set.
When the Delay time has expired
and the oven starts:
, The baking time and temperature are displayed.
, DELAY will turn off.
, BAKE and HOLD will remain lit.
To cancel:
Press the Cancel pad.
, All timed and untimed cooking functions will be
canceled.
, The time of day will reappear in the display.
Notes:
Do not use delayed baking for items that require a
preheated oven, such as cakes, cookies, and breads.
Do not use delayed baking if oven is already hot.
10
Page 12
Cookin_ g
Keep Warm
For safely keeping foods warm or for warming breads and
plates.
To set Keep Warm:
1. Press the Keep Warm pad.
. WARM flashes.
.000 appears in the display.
2. Select the Keep Warm temperature. The
Keep Warm temperature can be set from
145° to 190°.Press or press and hold the
A or V pad.
.170 ° will light when either pad is first pressed.
. Press the A pad to increase the temperature.
. Press the Y pad to decrease the temperature.
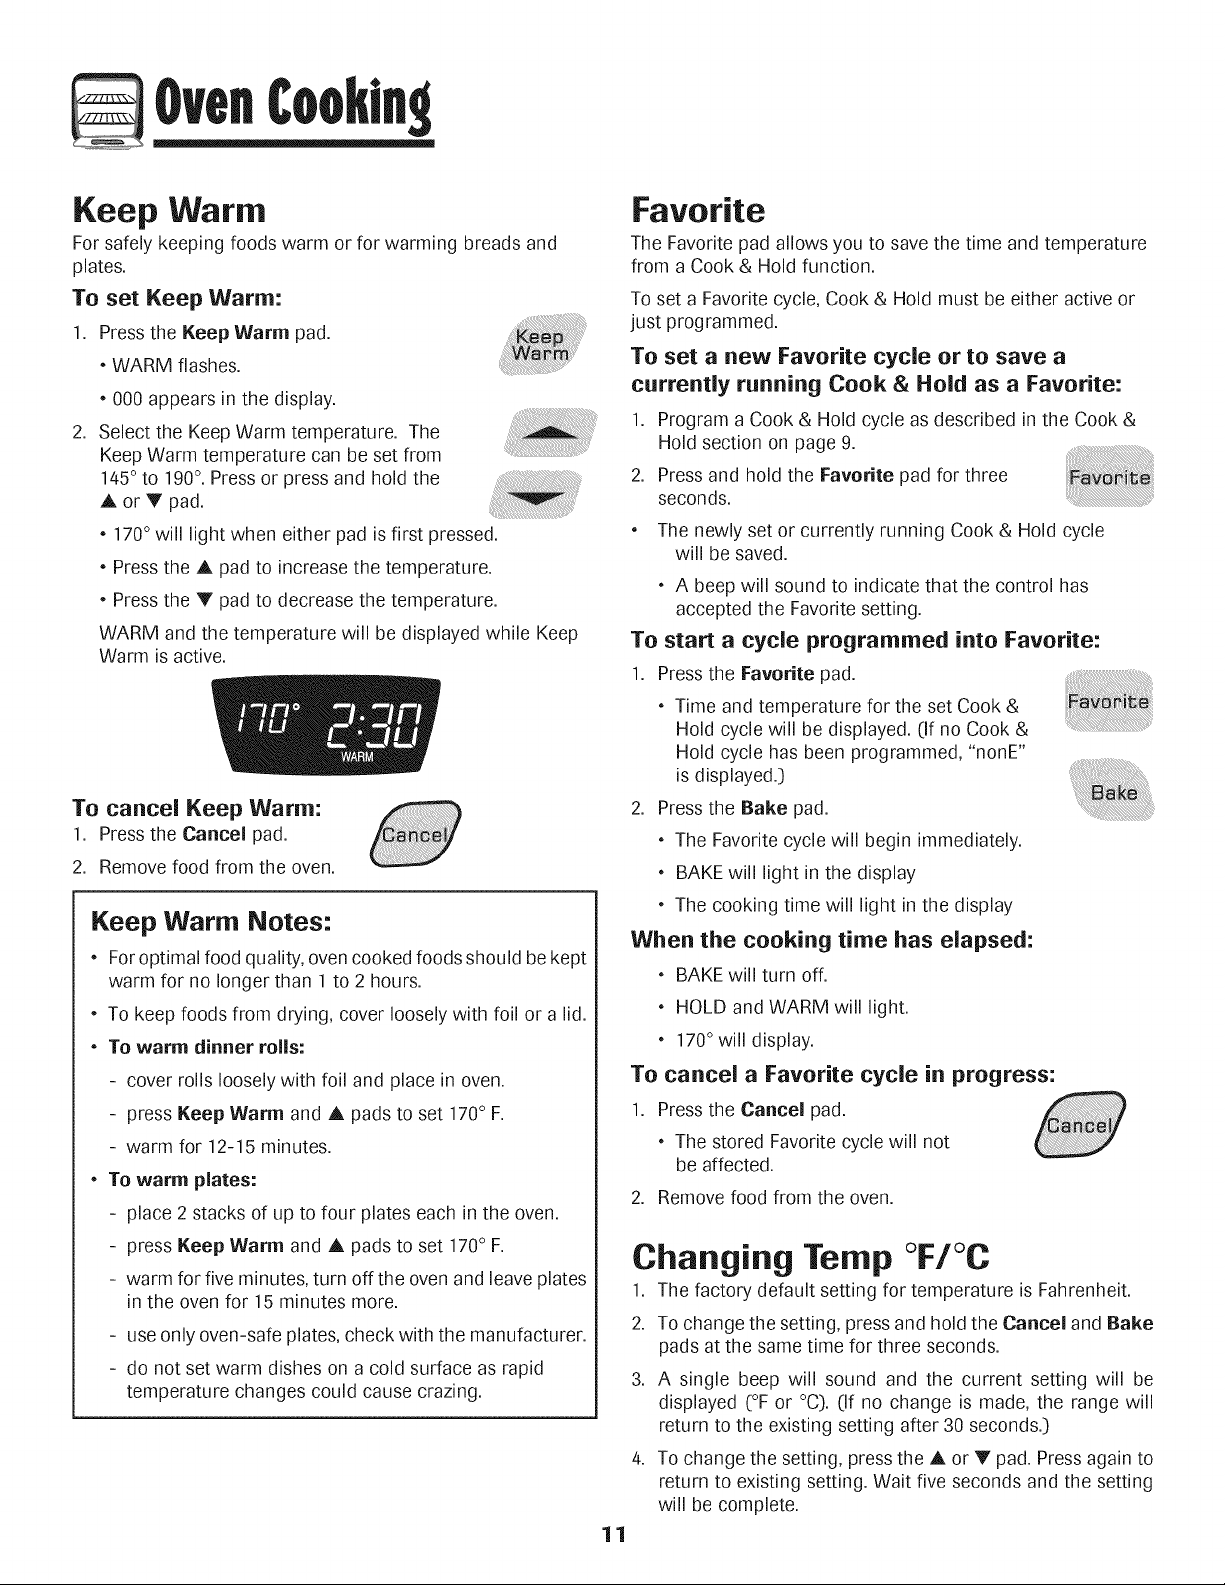
WARM and the temperature will be displayed while Keep
Warm is active.
To cancel Keep Warm:
1. Press the Cancel pad.
2. Remove food from the oven.
Keep Warm Notes:
. Foroptimal food quality, oven cooked foods should bekept
warm for no longer than 1 to 2 hours.
. To keep foods from drying, cover loosely with foil or a lid.
. To warm dinner rolls:
cover rolls loosely with foil and place in oven.
press Keep Warm and A pads to set 170° F.
- warm for 12-15 minutes.
. To warm plates:
place 2 stacks of up to four plates each in the oven.
press Keep Warm and A pads to set 170° F.
- warm for five minutes, turn off the oven and leave plates
in the oven for 15 minutes more.
use only oven-safe plates, check with the manufacturer.
do not set warm dishes on a cold surface as rapid
temperature changes could cause crazing.
Favorite
The Favorite pad allows you to save the time and temperature
from a Cook & Hold function.
To set a Favorite cycle, Cook & Hold must be either active or
just programmed.
To set a new Favorite cycle or to save a
currently running Cook & Hold as a Favorite:
1. Program a Cook & Hold cycle as described in the Cook&
Hold section on page 9.
2. Press and hold the Favorite pad for three
seconds.
. The newly set or currently running Cook & Hold cycle
will be saved.
. A beep will sound to indicate that the control has
accepted the Favorite setting.
To start a cycle programmed into Favorite:
1. Pressthe Favorite pad.
. Time and temperature for the set Cook &
Hold cycle will be displayed. (if no Cook &
Hold cycle has been programmed, "nonE"
is displayed.)
2. Press the Bake pad.
. The Favorite cycle will begin immediately.
. BAKEwill light in the display
. The cooking time will light in the display
When the cooking time has elapsed:
. BAKEwill turn off.
. HOLD and WARM will light.
. 170°will display.
To cancel a Favorite cycle in progress:
1. Pressthe Cancel pad.
. The stored Favorite cycle will not
be affected.
2. Remove food from the oven.
Changing Temp °F/°C
1. The factory default setting for temperature is Fahrenheit.
2. To change the setting, press and hold the Cancel and Bake
pads at the same time for three seconds.
3. A single beep will sound and the current setting will be
displayed (°F or °C). (if no change is made, the range will
return to the existing setting after 30 seconds.)
4. To change the setting, pressthe A or T pad. Press again to
return to existing setting. Wait five seconds and the setting
will be complete.
11
Page 13
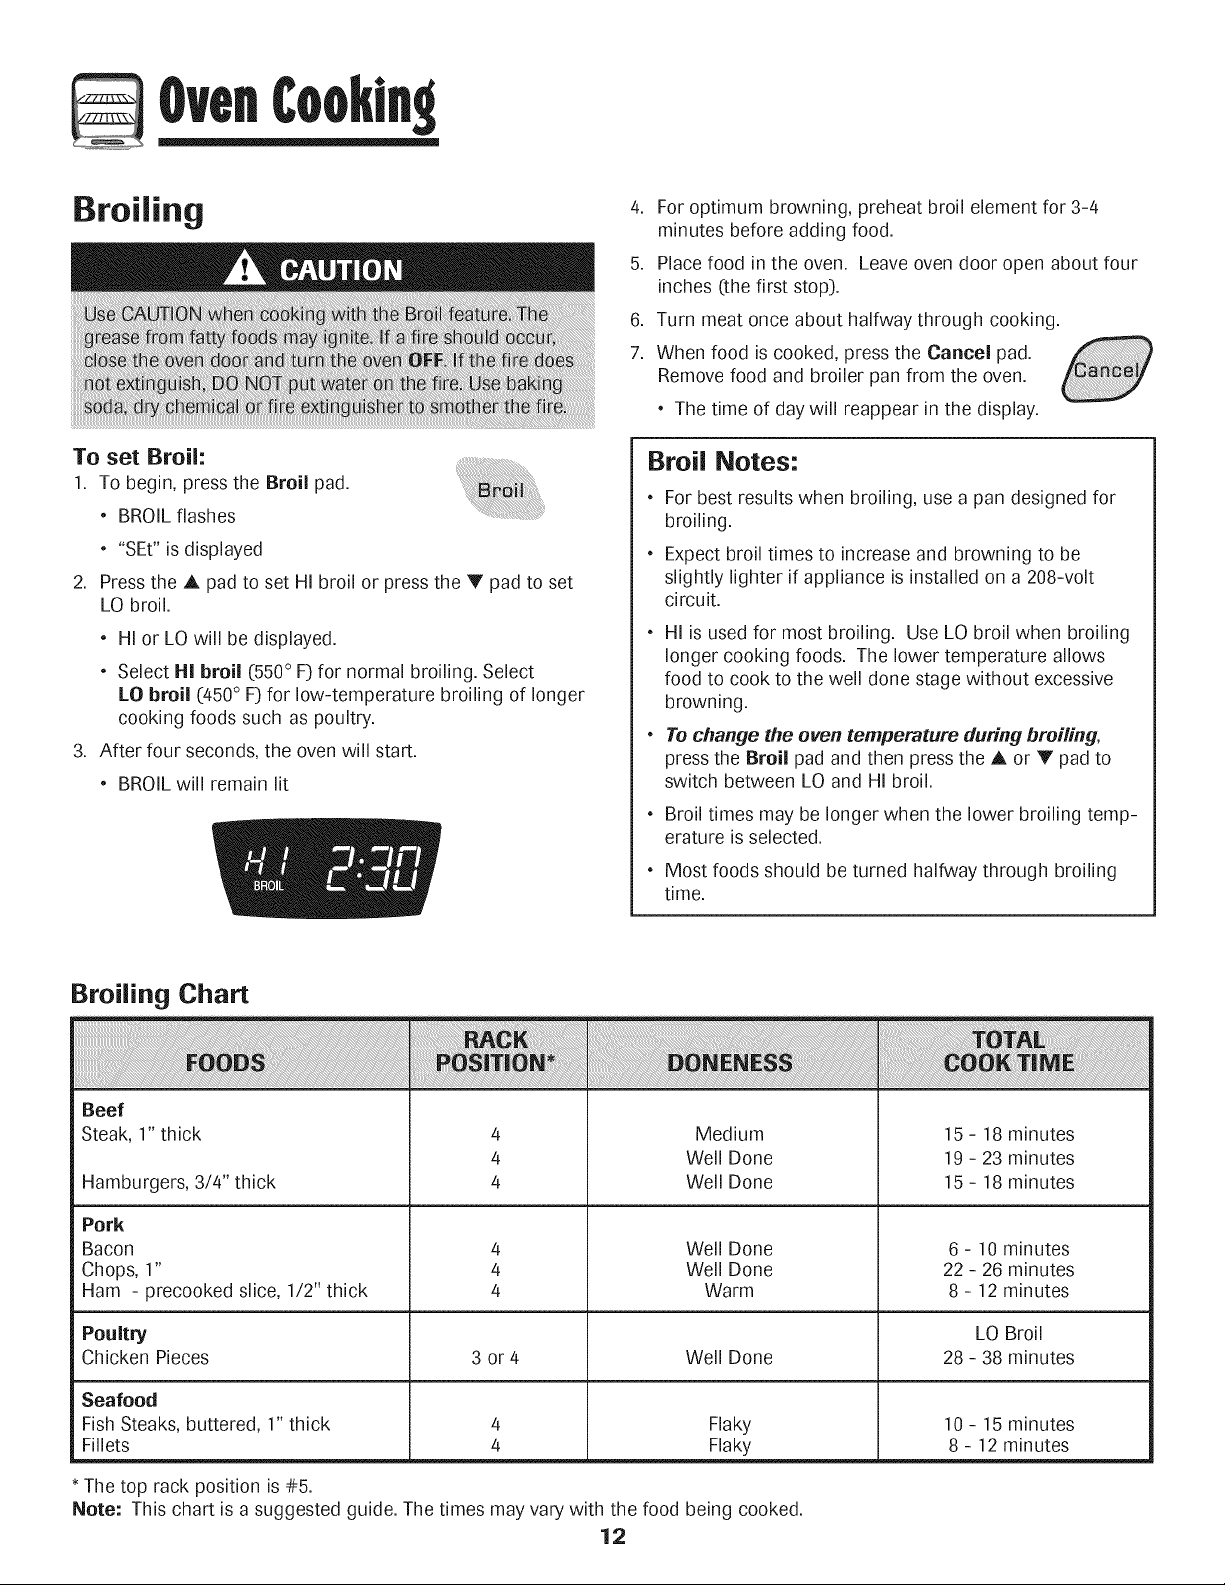
Broiling
4. For optimum browning, preheat broil element for 3-4
minutes before adding food.
5. Place food in the oven. Leave oven door open about four
inches(the first stop).
6. Turn meat once about halfway through cooking.
7. When food iscooked, press the Cancel pad.
Removefood and broiler pan from the oven.
The time of day will reappear inthe display.
To set Broil:
1. To begin, press the Broil pad.
BROIL flashes
"SEt" isdisplayed
2. Press the A pad to set Hi broil or press the V pad to set
LO broil.
Hi or LO will be displayed.
Select HI broil (550° F)for normal broiling. Select
LO broil (450° F)for low-temperature broiling of longer
cooking foods such as poultry.
3. After four seconds, the oven will start.
BROIL will remain lit
Broiling Chart
Broil Notes:
For best results when broiling, use a pan designed for
broiling.
Expect broil times to increase and browning to be
slightly lighter if appliance is installed on a 208-volt
circu it.
HI is used for most broiling. Use LO broil when broiling
longer cooking foods. The lower temperature allows
food to cook to the well done stage without excessive
browning.
To change the oven temperature during broiling,
press the Broil pad and then press the A or V pad to
switch between LO and HI broil.
, Broil times may be longer when the lower broiling temp-
erature is selected.
Most foods should be turned halfway through broiling
time.
Beef
Steak, 1" thick
Hamburgers, 3/4" thick
Pork
Bacon
Chops, 1"
Ham - precooked slice, 1/2" thick
Poultry
Chicken Pieces
Seafood
Fish Steaks, buttered, 1" thick
Fillets
* The top rack position is#5.
Note: This chart is a suggested guide. The times may vary with the food being cooked.
4
4
4
4
4
4
3or4
4
4
Medium
Well Done
Well Done
Well Done
Well Done
Warm
Well Done
Flaky
Flaky
12
15- 18 minutes
19 - 23 minutes
15- 18 minutes
6- 10 minutes
22- 26 minutes
8- 12 minutes
LO Broil
28- 38 minutes
10 - 15 minutes
8- 12 minutes
Page 14
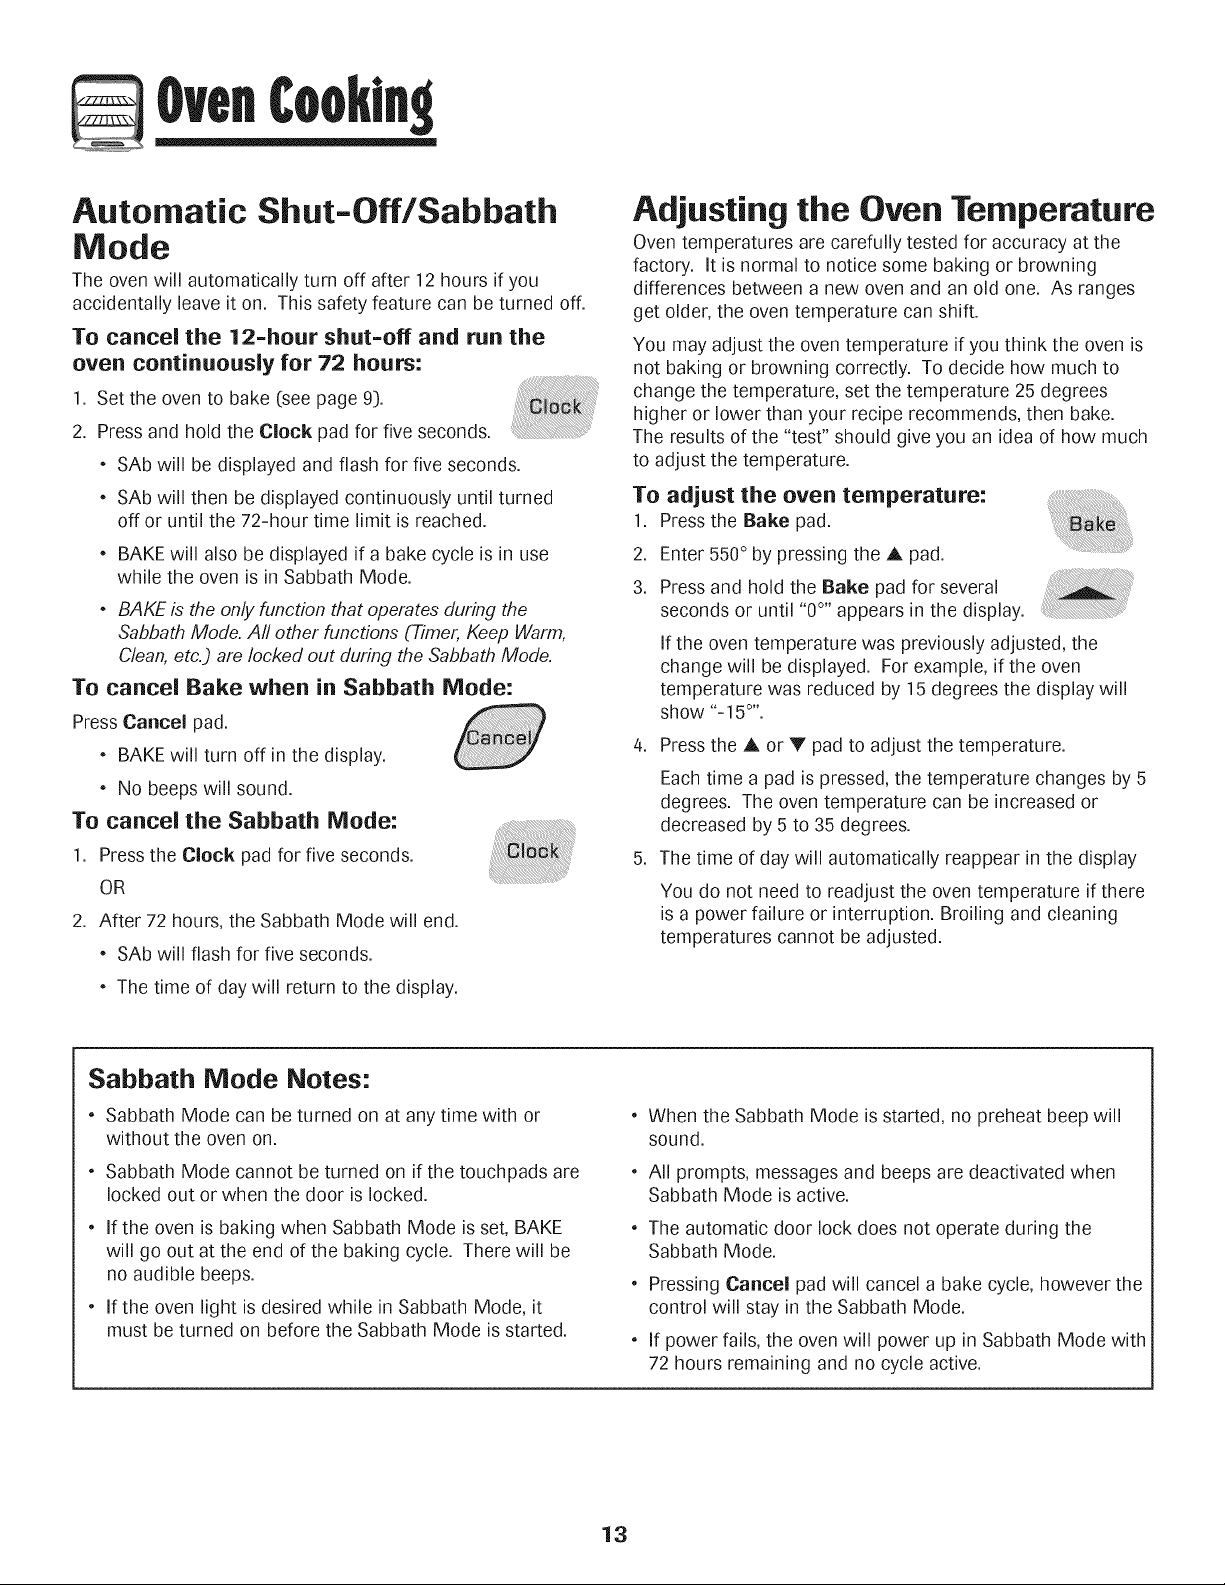
Automatic Shut-Off/Sabbath
Mode
The oven will automatically turn off after 12hours if you
accidentally leave it on. This safety feature can be turned off.
To cancel the 12=hour shut=off and run the
oven continuously for 72 hours:
1. Set the oven to bake (see page 9:).
2. Pressand hold the Clock pad for five seconds.
SAb will bedisplayed and flash for five seconds.
SAb will then be displayed continuously until turned
off or until the 72-hour time limit is reached.
BAKEwill also be displayed if a bake cycle is in use
while the oven is in Sabbath Mode.
BAKE is the only function that operates during the
Sabbath Mode. All other functions (Timer, Keep Warm,
Clean, etc.) are locked out during the Sabbath Mode.
To cancel Bake when in Sabbath Mode:
Press Cancel pad.
, BAKEwill turn off in the display.
, No beeps will sound.
To cancel the Sabbath Mode:
1. Pressthe Clock pad for five seconds.
OR
2. After 72 hours, the Sabbath Mode will end.
SAb will flash for five seconds.
Adjusting the Oven Temperature
Oven temperatures are carefully tested for accuracy at the
factory. It is normal to notice some baking or browning
differences between a new oven and an old one. As ranges
get older, the oven temperature can shift.
You may adjust the oven temperature if you think the oven is
not baking or browning correctly. To decide how much to
change the temperature, set the temperature 25 degrees
higher or lower than your recipe recommends, then bake.
The results of the "test" should give you an idea of how much
to adjust the temperature.
To adjust the oven temperature:
].
Press the Bake pad.
2.
Enter 550° by pressing the A pad.
3.
Press and hold the Bake pad for several
seconds or until "0°'' appears in the display.
If the oven temperature was previously adjusted, the
change will be displayed. For example, if the oven
temperature was reduced by 15 degrees the display will
show "-15°".
4. Press the A or V pad to adjust the temperature.
Each time a pad is pressed, the temperature changes by 5
degrees. The oven temperature can be increased or
decreased by 5 to 35 degrees.
5. The time of day will automatically reappear in the display
You do not need to readjust the oven temperature if there
is a power failure or interruption. Broiling and cleaning
temperatures cannot beadjusted.
The time of day will return to the display.
Sabbath Mode Notes:
Sabbath Mode can be turned on at any time with or
without the oven on.
Sabbath Mode cannot be turned on if the touchpads are
locked out or when the door is locked.
If the oven is baking when Sabbath Mode is set, BAKE
will go out at the end of the baking cycle. There will be
no audible beeps.
If the oven light is desired while in Sabbath Mode, it
must be turned on before the Sabbath Mode is started.
When the Sabbath Mode is started, no preheat beep will
sound.
All prompts, messages and beeps are deactivated when
Sabbath Mode is active.
The automatic door lock does not operate during the
Sabbath Mode.
Pressing Cancel pad will cancel a bake cycle, however the
control will stay in the Sabbath Mode.
If power fails, the oven will power up in Sabbath Mode with
72 hours remaining and no cycle active.
13
Page 15
Oven Fan
A cooling fan will automatically turn on during all broiling and
some baking operations. It is used to keep internalparts on
the control panel cool. The fan will automatically turn off
when parts have cooled. The fan may continue to operate
after the oven has been turned off. This is normal.
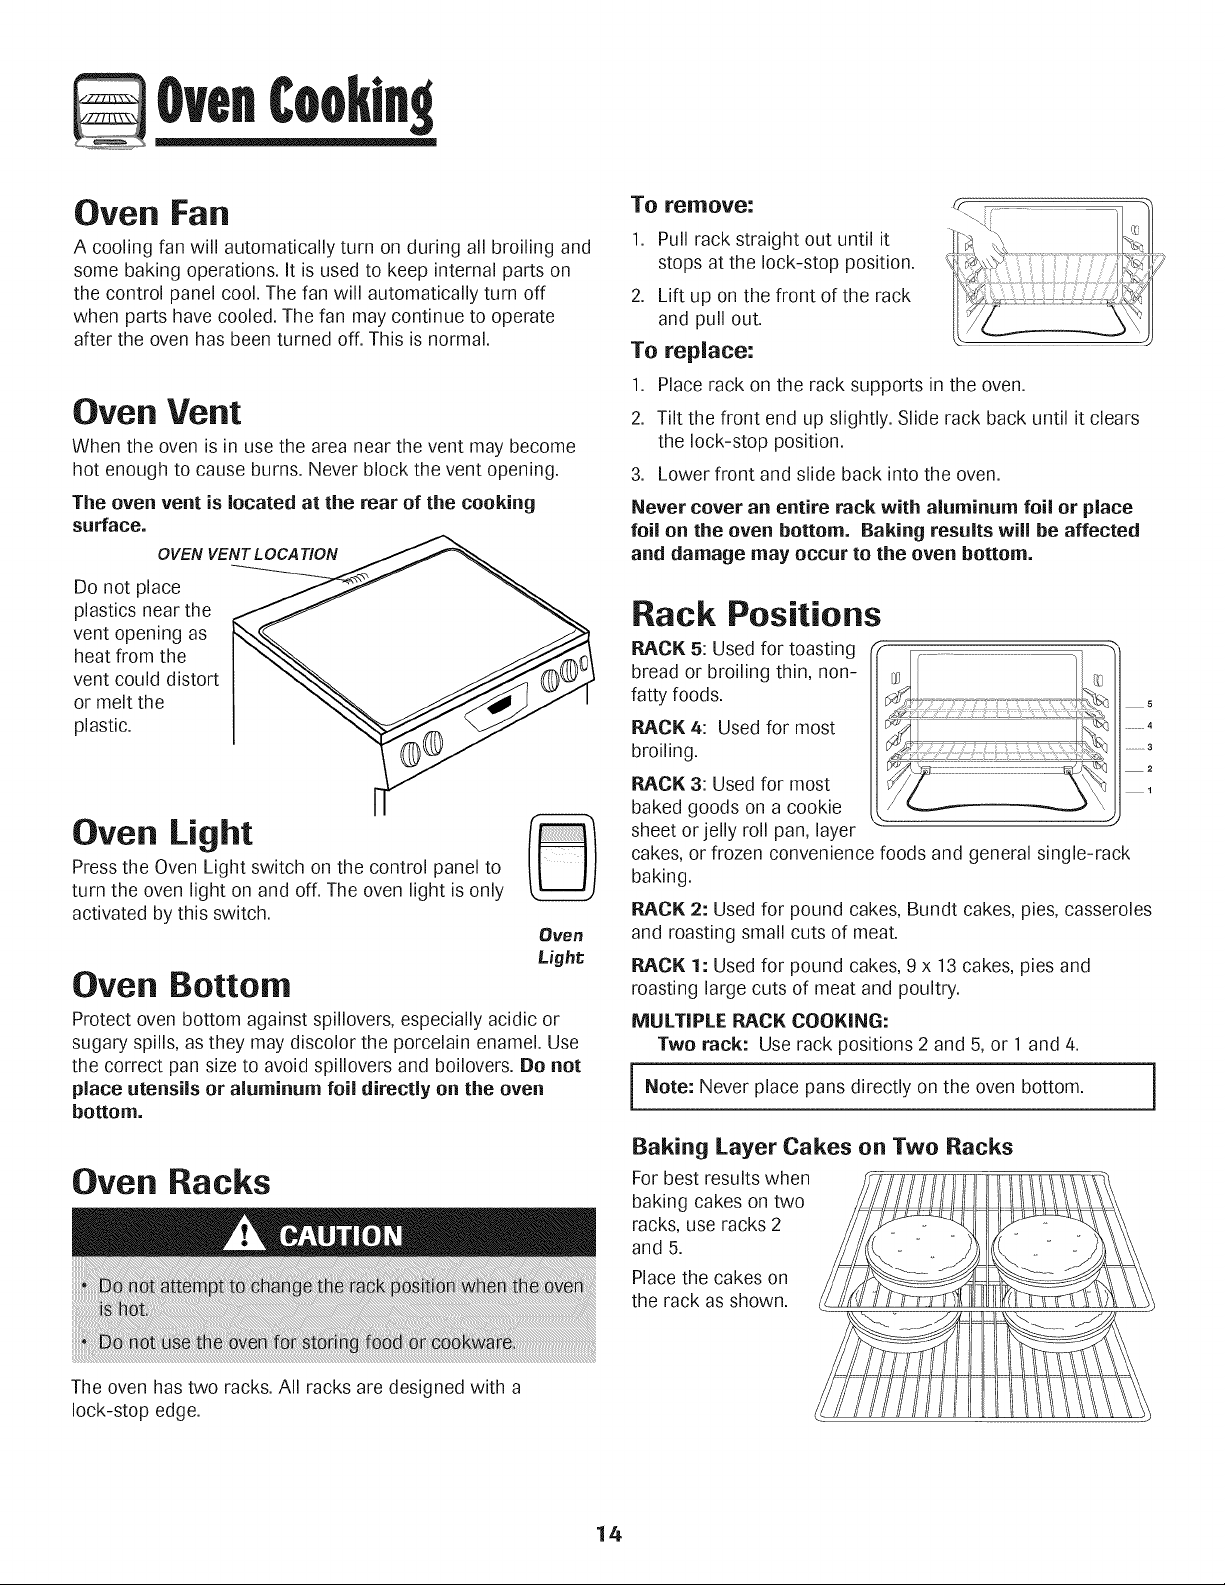
Oven Vent
When the oven is in use the area near the vent may become
hot enough to cause burns. Never block the vent opening.
The oven vent is located at the rear of the cooking
surface.
0 VEN VENT L OCA TION
Do not place
plastics near the
vent opening as
heat from the
vent could distort
or melt the
plastic.
Oven Light
Press the Oven Light switch on the control panel to
turn the oven light on and off. The oven light is only
activated by this switch.
Oven Bottom
Protect oven bottom against spillovers, especially acidic or
sugary spills, as they may discolor the porcelain enamel. Use
the correct pan size to avoid spillovers and boilovers. Be not
place utensils or aluminum foil directly on the oven
bottom.
To remove:
1. Pull rack straight out until it
stops at the lock-stop position.
2. Lift up on the front of the rack
and pull out.
To replace:
1. Place rack on the rack supports in the oven.
2. Tilt the front end up slightly. Slide rack back until it clears
the lock-stop position.
3. Lower front and slide back into the oven.
Never cover an entire rack with aluminum foil or place
foil on the oven bottom. Baking results will be affected
and damage may occur to the oven bottom.
Rack Positions
RACK 5: Used for toasting
bread or broiling thin, non-
fatty foods.
RACK 4: Used for most ............4
broiling.
RACK 3: Used for most
baked goods on a cookie
sheet or jelly roll pan, layer
cakes, or frozen convenience foods and general single-rack
baking.
RACK 2: Used for pound cakes, Bundt cakes, pies, casseroles
and roasting small cuts of meat.
RACK 1: Used for pound cakes, 9 x 13 cakes, pies and
roasting large cuts of meat and poultry.
MULTIPLE RACK COOKING:
Two rack: Use rack positions 2 and 5, or 1 and 4.
Note: Never place pans directly on the oven bottom.
J
2
Oven Racks
The oven has two racks. All racks are designed with a
lock-stop edge.
Baking Layer Cakes on Two Racks
Forbest results when
baking cakes on two
racks, use racks 2
and 5.
Placethe cakes on
the rack as shown.
14
Page 16
Self-Clean Oven
The self-clean cycle uses above-normal cooking temperatures
to automatically clean the oven interior.
The oven should be cleaned regularly by wiping up spillovers
to prevent excessive smoke and flare-ups. Do not allow a
heavy build-up of soil to accumulate inthe oven.
During the cleaning process, the kitchen should be well
ventilated to get rid of normal odors associated with cleaning.
Before Self=Cleaning
1. Turn off the oven light before cleaning. The light may burn
out during the clean cycle.
2.
Remove all oven racks from the oven. The oven racks will
discolor and may not slide easily after a self-clean cycle if
they are not removed.
.
Clean oven frame, door frame, area
outside of gasket, and around the
opening in the door gasket with a
nonabrasive cleaner such as Bon
Ami* or detergent and water. The
self-cleaning process does not
clean these areas. They should be
cleaned to prevent soil from baking on during the clean
cycle. (The gasket isthe seal around the oven door and
window.)
4. To prevent damage, do not clean or rub the gasket around
the oven door. The gasket isdesigned to seal in heat
during the clean cycle.
5. Wipe up excess grease or spillovers from the oven bottom.
This prevents excessive smoking, flare-ups or flaming
during the clean cycle.
.
Wipe up sugary and acidic spillovers such as sweet
potatoes, tomato, or milk-based sauces. Porcelain enamel
isacid-resistant, not acid-proof. The porcelain finish may
discolor if acidic spills are not wiped up before a self-clean
cycle.
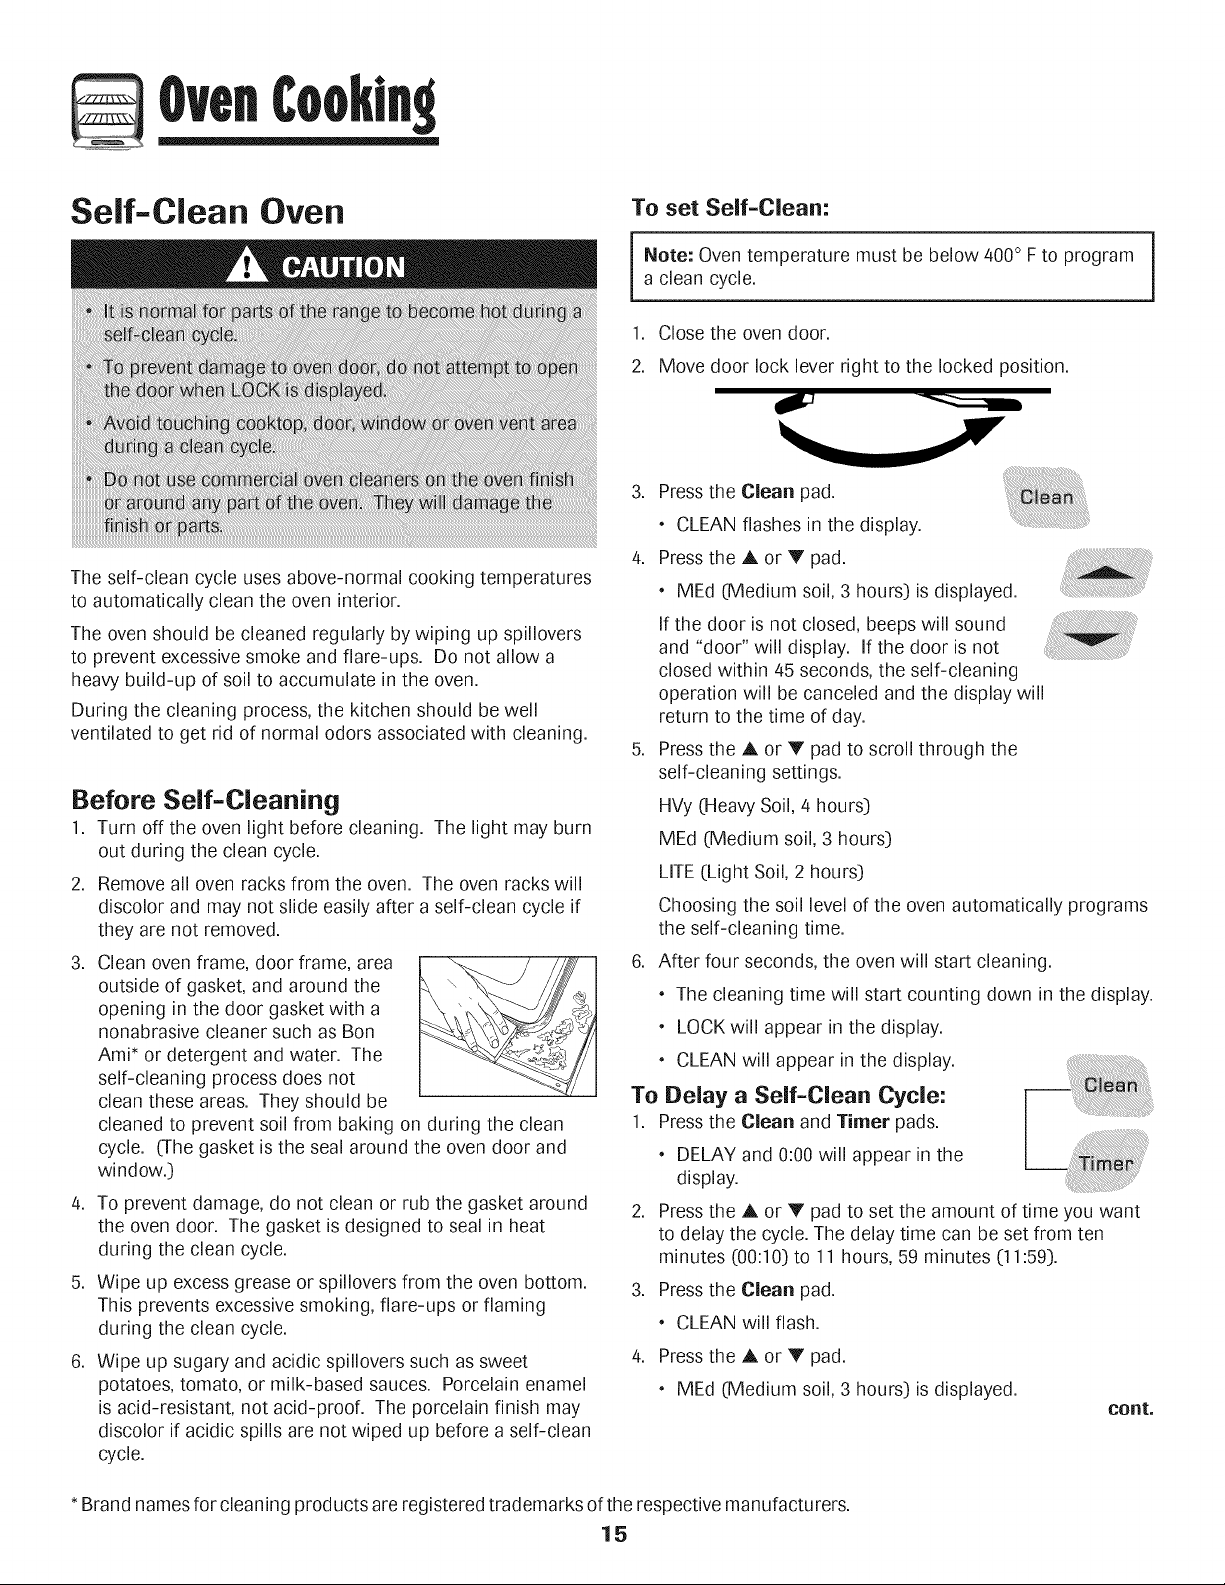
To set Self=Clean:
Note: Oven temperature must be below 400° Fto program
a clean cycle.
1. Closethe oven door.
2. Move door lock lever right to the locked position.
3. Press the Clean pad.
* CLEAN flashes in the display.
4. Press the A or V pad.
* MEd (Medium soil, 3 hours) is displayed.
If the door is not closed, beeps will sound
and "door" will display. If the door is not
closed within 45 seconds, the self-cleaning
operation will be canceled and the display will
return to the time of day.
5. Press the A or Y pad to scroll through the
self-cleaning settings.
HVy (Heavy Soil, 4 hours)
MEd (Medium soil, 3 hours)
LITE (Light Soil, 2 hours)
Choosing the soil level of the oven automatically programs
the self-cleaning time.
6. After four seconds, the oven will start cleaning.
* The cleaning time will start counting down in the display.
LOCKwill appear in the display.
CLEAN will appear inthe display.
To Delay a Self-Clean Cycle:
1. Pressthe Clean and Timer pads.
* DELAY and O:O9will appear in the
display.
2. Press the A or V pad to set the amount of time you want
to delay the cycle. The delay time can be set from ten
minutes (00:10)to 11 hours, 59 minutes (11:59).
3. Press the Clean pad.
* CLEANwill flash.
4. Press the A or V pad.
* MEd (Medium soil, 3 hours) is displayed.
cont.
i
* Brand names for cleaning products are registered trademarks of the respective manufacturers.
15
Page 17
Cleanln
5. Press the A or V pad to scroll through the self-cleaning
settings.
HVy (HeavySoil, 4 hours)
MEd (Medium soil, 3 hours)
LITE (Light Soil, 2 hours)
Choosing the soil level of the oven automatically programs
the self-cleaning time.
6. After four seconds, CLEAN, DELAY and LOCK will appear
in the display to show that the oven is set for a delayed
clean operation. The delay time is displayed.
if the oven has already been set for a clean
cycle and you wish to set a delay:
1. Press the Clean and Timer pads. (Press
the Clean pad first.)
* DELAY flashes.
* 00:00will appear in the display.
2. Press the A or V pad to setthe amount of time you want
to delay the cycle.
After four seconds, CLEAN, DELAY and LOCK will appear
in the display to show that the oven is set for a delayed
clean operation. The delay time is displayed.
When the Self=Clean cycle starts:
* DELAYwill turn off.
* The clean time will appear inthe display.
To cancel the Self=Clean cycle:
Press the Cancel pad.
* All words disappear from the display.
* All functions are canceled.
* The time of day appears in the display.
During the Self=Clean Cycle
When LOCK shows in the display, the door cannot be opened.
To prevent damage to the door, do not force the door open
when LOCK is displayed.
Smoke and Smells
You may see some smoke and smell an odor the first few
times the oven is cleaned. This is normal and will lessen in
time.
Smoke may also occur if the oven is heavily soiled or if a
broiler pan was left in the oven.
Sounds
As the oven heats, you may hear sounds of metal parts
expanding and contracting. This is normal and will not
damage the oven.
After Self=Cleaning
About one hour after the end of the self-clean cycle, LOCK
will turn off. The door can then be opened. Move door lock
lever to the left to unlock.
Some soil may leave a light gray, powdery ash. Remove
itwith a damp cloth. If soil remains after wiping, that means
the clean cycle was not long enough. The soil will be re-
moved during the next clean cycle.
If oven racks were left in the oven and do not slide
smoothly after a clean cycle, wipe racks and rack supports
with a small amount of vegetable oil to make them easier to
move.
Fine lines may appear in the porcelain because it went
through heating and cooling. This is normal and will not
affect performance.
A white discoloration may appear after cleaning if acidic
or sugary foods were not wiped up before the self=clean
cycle. This discoloration is normal and will not affect perfor-
mance.
Notes:
* If the oven door isleft open, "door" will flash inthe
display and a signal will beep until the door isclosed
and the Clean pad is pressed again.
* If more than five seconds elapse between pressing the
Clean pad and the A or Y pad, the program will
automatically return to the previous display.
* The oven door will be damaged if the oven door is
forced to open when LOCK is still displayed.
16
Page 18
Cleaning Procedures
* Brand names are registered trademarks of the
respective manufacturers.
** To order call 1-877-232-6771 USA and
1-800-688-8408 Canada.
Cooktop -
Porcelain Enamel
Clock and
Control Pad
Area
Control Knobs
Cooktop -
Glass=Ceramic
Porcelain enamel is glass fused on metal and may crack or chip with misuse. It isacid resistant, not acid
proof. All spillovers, especially acidic or sugary spillovers, should bewiped up immediatelywith a dry cloth.
* When cool, wash with soapy water, rinse and dry.
* Never wipe off a warm or hot surface with a damp cloth. This may cause cracking or chipping.
* Never use oven cleaners, abrasive or caustic cleaning agents on exterior finish of range.
* To activate control lock for cleaning, see "Locking the Controls" page 8.
* Wipe with a damp cloth and dry. Do not use abrasive cleaning agents as they may scratch the surface.
* Glass cleaners may be used if sprayed on a cloth first. DO NOTspray directly on centrelpad and
display area.
* Remove knobs in the OFF position by pulling forward.
* Wash, rinse and dry. Do not use abrasive cleaning agents as they may scratch the finish.
* Turn on each element to be sure the knobs have been correctly replaced.
Never use even cleaners, chlorine bleach, ammonia er glass cleaners with ammonia. Note: Call
an authorized servicer if the glass=ceramic top should crack, break or if metal or aluminum foil
should melt on the ceektep.
* Allow the cooktop to cool before cleaning.
* General --Clean cooktop after each use,orwhen needed, with adamp paper towel and Cooktop Cleaning
Creme* (Part No. 20000001:)**.Then, buff with a clean dry cloth.
Note: Permanent stainswill develop ffsoil isallowed to cook on byrepeatedly using the cooktop whensoiled.
* Heavy Soils or Metal Marks ==Dampen a "scratchless" or "never scratch" scrubber sponge. Apply
Cooktop Cleaning Creme* (Part No. 20000001:)**and scrub to remove as much soil as possible. Apply a
thin layer of the creme over the soil, cover with a damp paper towel and let stand 30 to 45 minutes (2-3
hours for very heavy soil:).Keep moist by covering the paper towel with plastic wrap. Scrub again, then
buff with a clean dry cloth.
Note: Onlyuse a CLEAN,DAMP "scratchless"pad that b safe for non-stick cookware. Thepattern and glass
will be damaged ff the pad b not damp, ff the pad b soiled, or ff another type of pad b used.
* Burned-on or Crusty Soils ==Scrub with a "scratchless" or "never scratch" scouring pad and Cooktop
Cleaning Creme*.
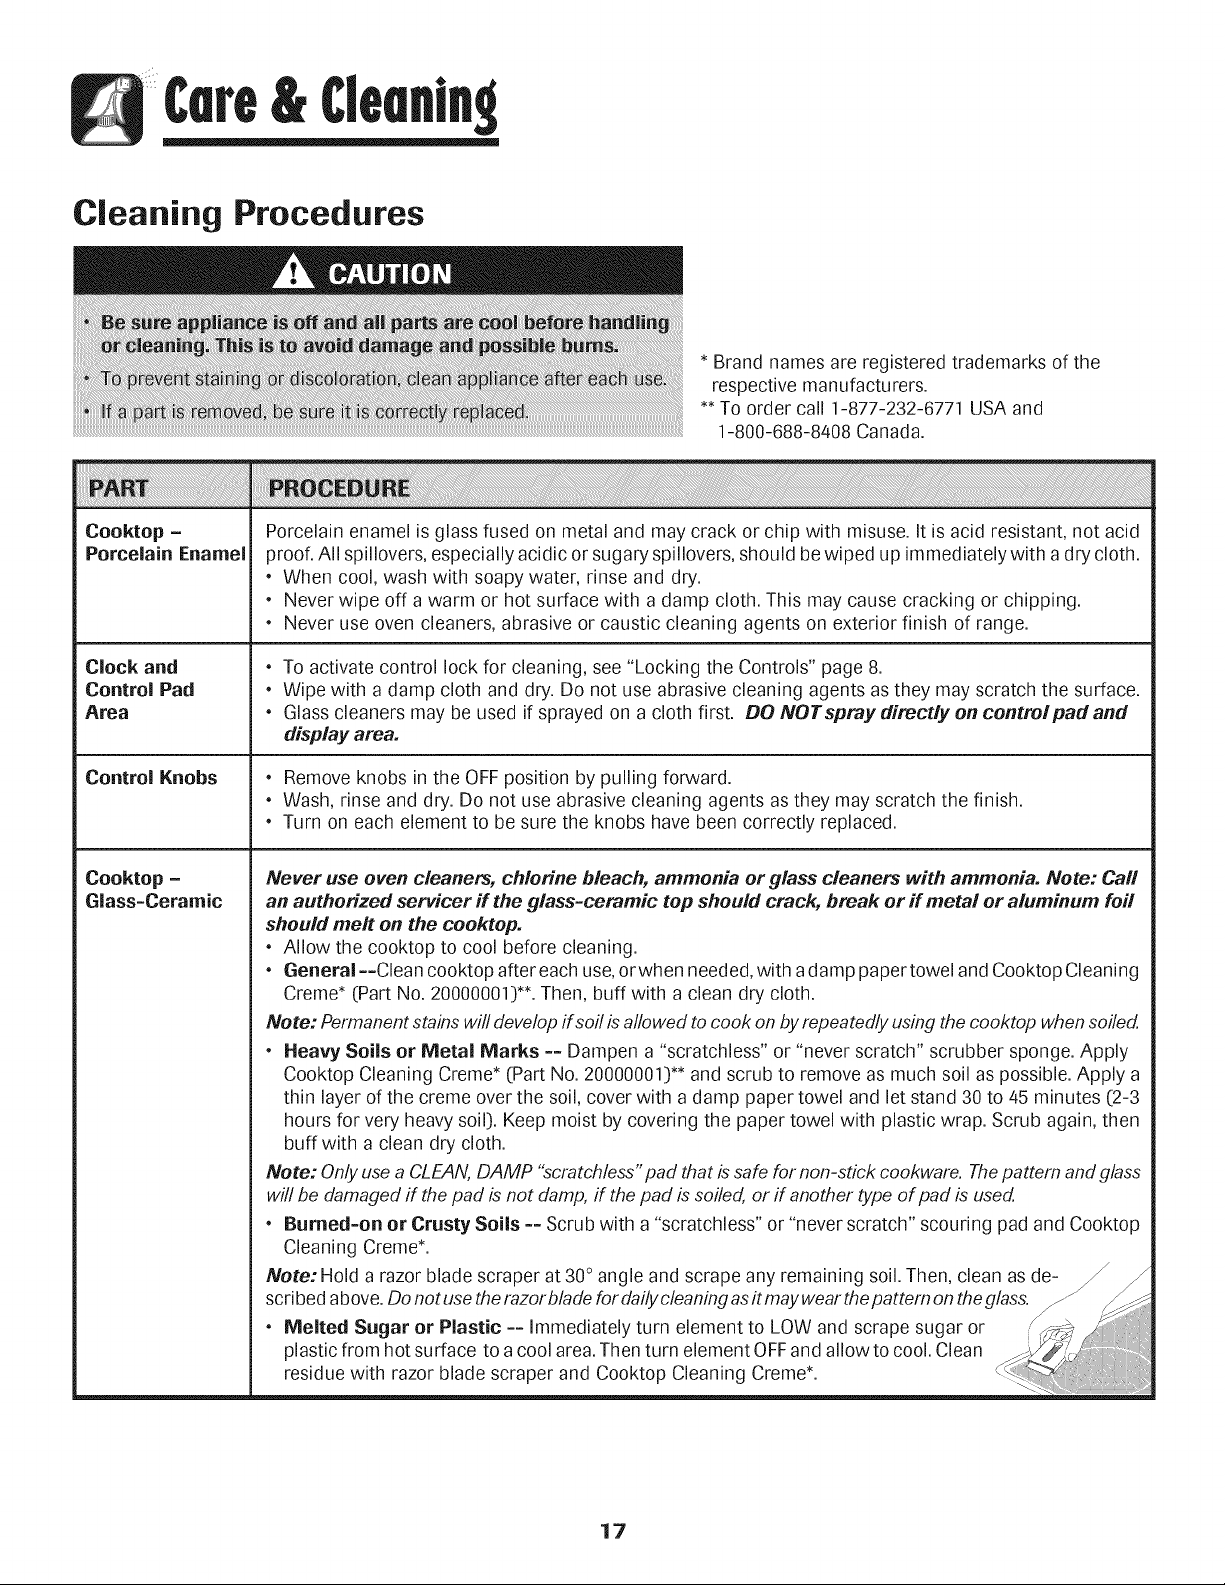
Note: Hold a razor blade scraper at 30° angle and scrape any remaining soil. Then, clean as de- _
scr_bedab_ve_D_n_t use theraz_r blade f_r dai_yc_eaningasitmaywearthe pattern _ntheglass./ //_/ _
* Melted Sugar or Plastic ==Immediately turn element to LOW and scrape sugar or ./#_
plastic from hot surface to a cool area.Then turn element OFFand allow to cool. Clean _L_ ii
residue w,th razor blade scraper and Cooktop Cleaning Creme*. <
17
Page 19
Oven Window
and Door - Glass
* Avoid using excessive amounts of water which may seep under or behind glass causing staining.
* Washwith soap and water. Rinsewith clearwater and dry. Glasscleaner can be used if sprayed on a cloth
first.
* Do not useabrasive materials such as scouring pads, steelwool or powdered cleaners as theywill scratch
glass.
Oven Interior . Follow instructionson pages 15-16 to set a self-clean cycle.
Oven Racks
StainJess Steel
(select models:)
Storage Drawer,
Door Handle -
Painted Enamel
e
Clean with soapywater.
e
Remove stubborn soil with cleansing powder or soap-filled scouring pad. Rinse and dry.
e
Rackswill permanently discolorandmay not slide smoothly if left inthe oven during aself-clean operation.
If this occurs, wipe the rack edge and rack support with a small amount of vegetable oil to restore ease
of movement, then wipe off excess oil.
* DO NOT USE ANY CLEANING PRODUCT CONTAINING CHLORINE BLEACH.
* DO NOT USE ABRASIVE OR ORANGE CLEANERS.
* ALWAYS WIPE WITH THE GRAIN WHEN CLEANING.
* Daily Cleaning/Light Soil --Wipe with one of the following - soapywater, white vinegar/water solution,
Formula 409 Glass and Surface Cleaner* or a similar glass cleaner - using a sponge or soft cloth. Rinse
and dry. To polish and help prevent fingerprints, follow with Stainless Steel Magic Spray* (Part No.
20000008:)**.
* Moderate/Heavy Soil == Wipe with one of the following -Bon Ami*, Smart Cleanser*,or Soft Scrub* -
using a damp sponge or soft cloth. Rinse and dry. Stubborn soils may be removed with a damp multi-
purpose Scotch-Brite* pad; rub evenlywith the grain. Rinseand dry.To restore luster and removestreaks,
follow with Stainless Steel Magic Spray*.
* Discoloration == Using a damp sponge or soft cloth, wipe with Cameo Stainless Steel Cleaner*. Rinse
immediatelyand dry. To remove streaks and restore luster, follow with Stainless Steel Magic Spray*.
When cool, wash with warm soapywater, rinse and dry. Never wipe a warm or hot surface with a damp
cloth as this may damage the surface and may cause a steam burn.
Forstubborn soil, use mildly abrasive cleaning agents such asbaking soda pasteor BonAmi.* Do not use
abrasive,caustic or harsh cleaning agents such as steel wool pads or oven cleaners. Theseproducts will
scratch or permanently damage the surface.
Note: Use a dry towel or cloth to wipe up spills, especially acidic or sugary spills. Surface may
discolor or dull ifsoil isnot immediately removed. This isespecially important for white surfaces.
* Brand names for cleaning products are registered trademarks of the respective manufacturers.
** To order direct, call 1-877-232-6771 USA and 1-800-688-8408 Canada.
18
Page 20
Meintenence
Oven Door
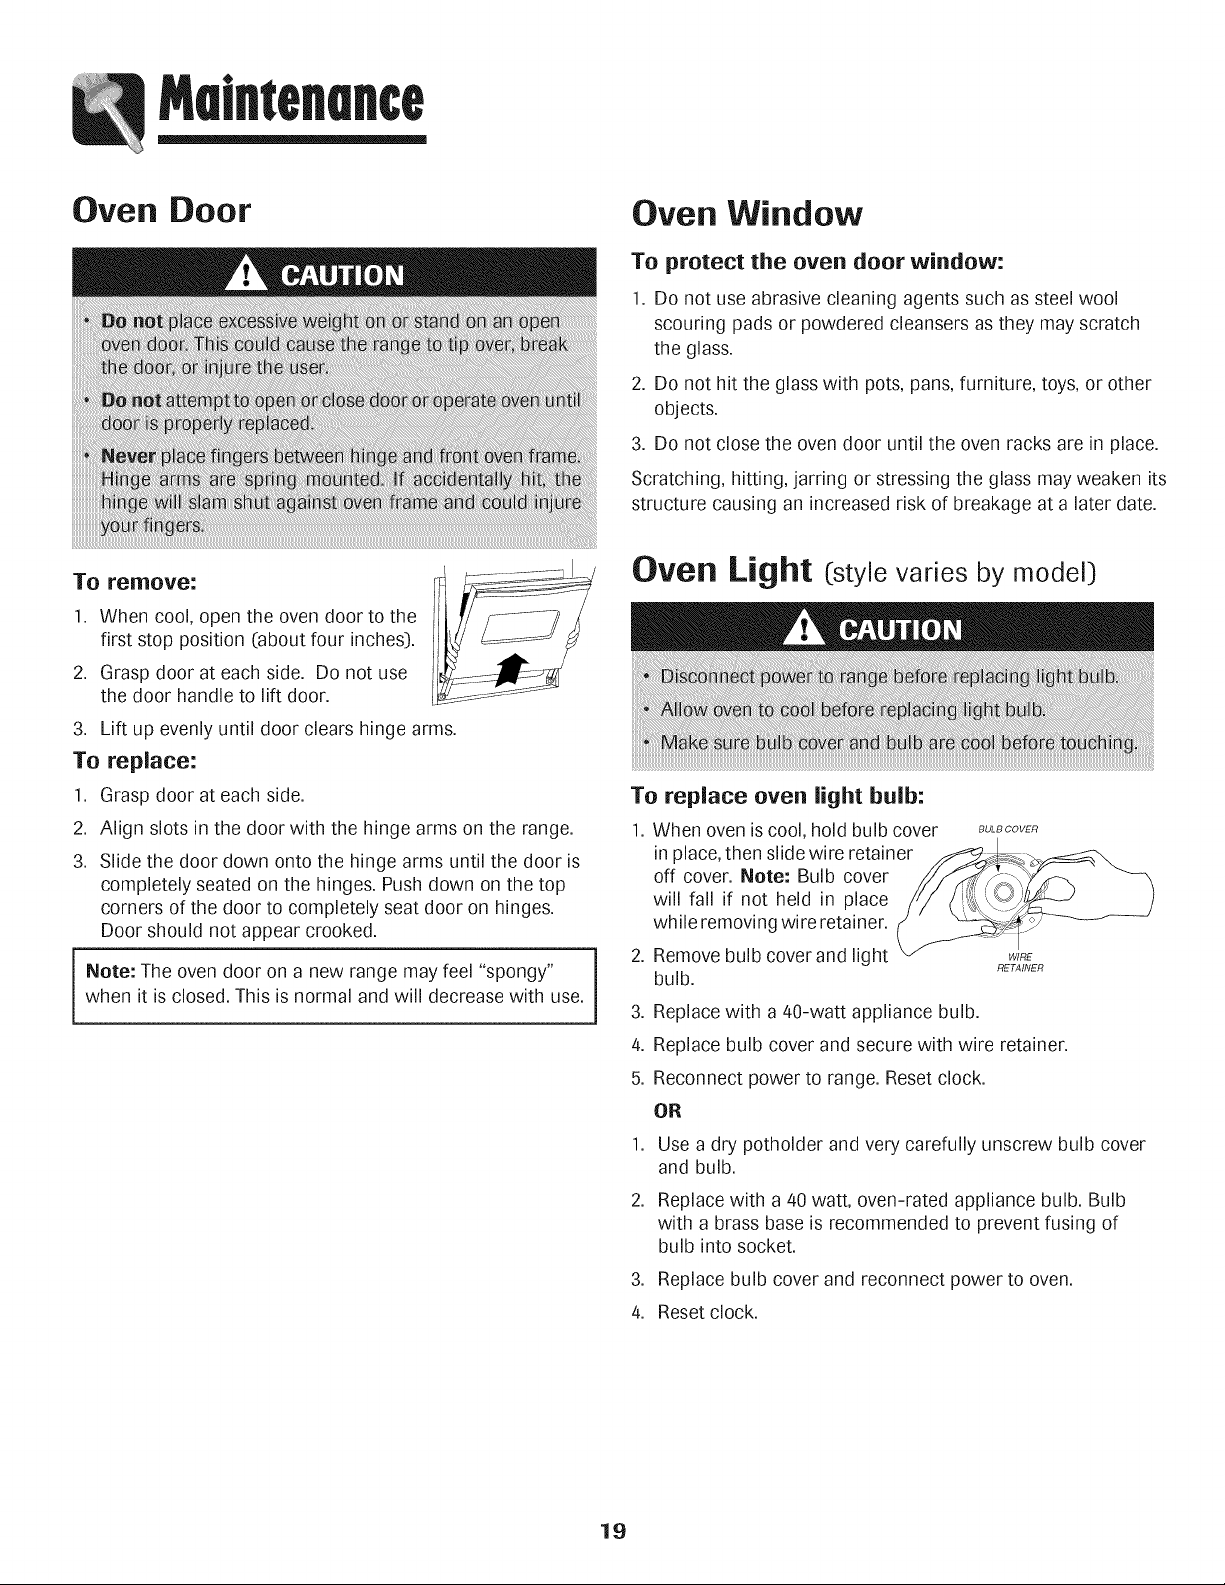
To remove:
1. When cool, open the oven door to the
first stop position (about four inches).
2. Grasp door at each side. Do not use
the door handle to lift door.
3. Lift up evenly until door clears hinge arms.
To replace:
].
Grasp door at each side.
2.
Align slots in the door with the hinge arms on the range.
3.
Slide the door down onto the hinge arms until the door is
completely seated on the hinges. Push down on the top
corners of the door to completely seat door on hinges.
Door should not appear crooked.
Note: The oven door on a new range may feel "spongy"
when it isclosed. This is normal and will decrease with use.
i
Oven Window
To protect the oven door window:
1. Do not use abrasive cleaning agents such as steel wool
scouring pads or powdered cleansers as they may scratch
the glass.
2. Do not hit the glass with pots, pans,furniture, toys, or other
objects.
3. Do not close the oven door until the oven racks are in place.
Scratching, hitting, jarring or stressing the glass may weaken its
structure causing an increased risk of breakage at a later date.
Oven Light (style varies by rnodel_)
To replace oven light bulb:
1. When oven iscool, hold bulb cover BULBOOVER
inplace, then slide wire retainer
off cover. Note: Bulb cover
will fall if not held in place
while removing wire retainer.
2. Remove bulb cover and light
bulb.
i
3. Replace with a 40-watt appliance bulb.
4. Replace bulb cover and secure with wire retainer.
5. Reconnect power to range. Reset clock.
OR
1.
Use a dry potholder and very carefully unscrew bulb cover
and bulb.
2.
Replace with a 40 watt, oven-rated appliance bulb. Bulb
with a brass base is recommended to prevent fusing of
bulb intosocket.
.
Replace bulb cover and reconnect power to oven.
4.
Resetclock.
RETAINER
19
Page 21
Meintenence
Leveling Legs
Be sure the range is leveled when installed.
the range is not level, turn the leveling legs,
located at each corner of the range, until
range islevel.
ANTI-TIP BRACKET
LEVELING LEG
Storage Drawer
The storage drawer can be removed to allow you to clean
under the range.
To remove:
1. Empty drawer and pull out to the first stop position.
2. Lift up the front of the drawer.
3. Pull out to the second stop position.
4. Grasp sides and lift drawer up and out.
To replace:
1. Fit the ends of the drawer glides into the rails in the range.
2. Lift up the front of the drawer and gently push in to the
first stop position.
3. Lift drawer up again and push until drawer is closed.
2O
Page 22
Troublesboofln9
For most concerns, try these first.
Part or all of appliance does not
work.
e
e
e
e
e
e
e
e
e
Check
if oven controls have been properly set.
Check
to be sure plug is securely inserted into receptacle.
Check
or re-set circuit breaker. Check or replace fuse.
Check
power supply.
Check
if surface and/or oven controls have been properly set. See pages 4 & 9.
Check
if oven door is unlocked after self-clean cycle. See page 16.
Check
if oven is set for a delayed cook or clean program. See pages 10 & 15.
Check
if Control Lock is activated. See page 8.
Check
if control is in Sabbath Mode. See page 13.
Clock, indicator words, and/or
lights operate but oven does
not heat.
Baking results are not as
expected or differ from
previous oven.
Food is not broiling properly or
smokes excessively.
Oven will not self=clean.
, Oven may be set for a Cook & Hold or Delay function.
, The Control Lock may have been set.See page 8.
e
Make sure the oven vent has not been blocked. See page 14 for location.
e
Check to make sure range is level.
e
Temperatures often vary between a new oven and an old one.As ovens age,the oven
temperature often "drifts" and may become hotter or cooler. See page 13 for
instructions on adjusting the oven temperature. Note: It is not recommended to
adjust the temperature if only one or two recipes are in question.
, Check oven rack positions. Food may be too close to element.
, Broil element was not preheated.
, Aluminum foil was incorrectly used. Never line the broiler insertwith foil.
, Oven doorwas closed during broiling. Leave the door open to the first stop position
(about 4 inches:}.
, Trim excess fat from meat before broiling.
, A soiled broiler pan was used.
, Voltage in house may be low.
, Check to make sure the cycle is not set for a delayed start. See page 15.
Check if door is closed.
Check if control is in Sabbath Mode. See page 13.
Oven may be over 400° F. Oven temperature must be below 400° F to program a
clean cycle.
Oven did not clean properly.
Oven door will not unlock after
self=clean cycle.
, Longer cleaning time may be needed.
, Excessive spillovers, especially sugary and/or acidic foods, were not removed prior
to the self-clean cycle.
Oven interior is still hot. Allow about one hour for the oven to cool after the
completion of a self-clean cycle. The door can be opened when the LOCK indicator
word is not displayed.
The control and door may be locked. See page 16.
cont.
21
Page 23
Troublesbootln9
Smoothtop surface shows
wear.
Moisture collects on oven
window or steam comes from
oven vent.
There is a strong odor or light
smoke when oven is turned on.
Tiny scratches or abrasions.
- Make sure cooktop and pan bottom are clean. Do not slide glass or metal pans
across top. Make sure pan bottom is not rough. Use the recommended
cleaning agents. See page 17.
Metal marks.
- Do not slide metal pans across top. When cool, clean with Cooktop
Cleaning Creme. See page 17.
Brown streaks and specks.
- Remove spills promptly. Never wipe with a soiled cloth or sponge. Make sure
cooktop and pan bottom are clean.
Areas with a metallic sheen.
- Mineral deposits from water and food. Use recommended cleaning agents.
See page 17.
Pitting or flaking.
- Remove sugary boilovers promptly. See page 17.
This is normal when cooking foods high in moisture.
Excessive moisture was used when cleaning the window.
, This is normal for a new range and will disappear after a few uses. initiating aclean
cycle will "burn off" the odors more quickly.
, Turning on a ventilation fan will help remove the smoke and/or odor.
, Excessive food soils on the oven bottom. Use a self-clean cycle.
Fault Codes
Noises may be heard.
There are no beeps and
no display.
SAb flashing and then
displayed continuously.
BAKE or LOCK may flash rapidly in the display to alert you if there is an error
or a problem. If BAKE or LOCK appear in the display, press Cancel pad.
If BAKE or LOCK continue to flash, disconnect power to the appliance.
Wait a few minutes, and then reconnect power. If the flashing still continues,
disconnect power to the appliance and call an authorized servicer.
If the oven is heavily soiled, excessive flareups may result in a fault code during
cleaning. Pressthe Cancel pad and allow the oven to cool completely, wipe out
excess soil, then reset the clean cycle. If the fault code reappears, contact an
authorized servicer.
The oven makes several low levelnoises. You may hear the oven relays asthey go on
and off. This isnormal.
As the oven heats and cools, you may hear sounds of metal parts expanding and
contracting. This is normal and will not damage your appliance.
A fan sound can be heard. This is the cooling fan and is normal. The fan will
continue to run after use until the oven cools.
Oven may be in Sabbath Mode. See page 13.
Control may be locked. See page 8.
Oven is in Sabbath Mode. To cancel, press and hold the Clock pad for five
seconds.
22
Page 24

AMANA ®MAJOR APPLIANCE WARRANTY
LIM ITED WARRANTY
For one year from the date of purchase, when this major appliance is operated and maintained according to instructions attached to or
furnished with the product, Amana brand of Whirlpool Corporation or Whirlpool Canada LP (hereafter "Amana") will pay for factory
specified parts and repair labor to correct defects in materials or workmanship. Service must be provided by a Amana designated
service company. This limited warranty is valid only in the United States or Canada and applies only when the major appliance is used
in the country in which it was purchased. Outside the 50 United States and Canada, this limited warranty does not apply. Proof of
original purchase date is required to obtain service under this limited warranty.
ITEMS EXCLUDED FROM WARRANTY
This limited warranty does not cover:
1. Service calls to correct the installation of your major appliance, to instruct you on how to use your major appliance, to replace or
repair house fuses, or to correct house wiring or plumbing.
2. Service calls to repair or replace appliance light bulbs, air filters or water filters. Consumable parts are excluded from warranty
coverage.
3. Repairs when your major appliance is used for other than normal, single-family household use or when it is used in a manner that is
contrary to published user or operator instructions and/or installation instructions.
4. Damage resulting from accident, alteration, misuse, abuse, fire, flood, acts of God, improper installation, installation not in
accordance with electrical or plumbing codes, or use of consumables or cleaning products not approved by Amana.
5. Cosmetic damage, including scratches, dents, chips or other damage to the finish of your major appliance, unless such damage
results from defects in materials or workmanship and is reported to Amana within 30 days from the date of purchase.
6. Any food loss due to refrigerator or freezer product failures.
7. Costs associated with the removal from your home of your major appliance for repairs. This major appliance is designed to be
repaired in the home and only in-home service is covered by this warranty.
8. Repairs to parts or systems resulting from unauthorized modifications made to the appliance.
9. Expenses for travel and transportation for product service if your major appliance is located in a remote area where service by an
authorized Amana servicer is not available.
10. The removal and reinstallation of your major appliance if it is installed in an inaccessible location or is not installed in accordance
with published installation instructions.
11. Major appliances with original model/serial numbers that have been removed, altered or cannot be easily determined. This warranty
is void if the factory applied serial number has been altered or removed from your major appliance.
The cost of repair or replacement under these excluded circumstances shall be borne by the customer.
DISCLAIMER OF IMPLIED WARRANTIES; LIMITATION OF REMEDIES
CUSTOMER'S SOLE AND EXCLUSIVE REMEDY UNDER THIS LIMITED WARRANTY SHALL BE PRODUCT REPAIR AS PROVIDED
HEREIN. IMPLIED WARRANTIES, INCLUDING WARRANTIES OF MERCHANTABILITY OR FITNESS FOR A PARTICULAR PURPOSE,
ARE LIMITED TO ONE YEAR OR THE SHORTEST PERIOD ALLOWED BY LAW. AMANA SHALL NOT BE LIABLE FOR INCIDENTAL OR
CONSEQUENTIAL DAMAGES. SOME STATES AND PROVINCES DO NOT ALLOW THE EXCLUSION OR LIMITATION OF INCIDENTAL
OR CONSEQUENTIAL DAMAGES, OR LIMITATIONS ON THE DURATION OF IMPLIED WARRANTIES OF MERCHANTABILITY OR
FITNESS, SO THESE EXCLUSIONS OR LIMITATIONS MAY NOT APPLY TO YOU. THIS WARRANTY GIVES YOU SPECIFIC LEGAL
RIGHTS, AND YOU MAY ALSO HAVE OTHER RIGHTS WHICH VARY FROM STATE TO STATE OR PROVINCE TO PROVINCE.
If outside the 50 United States and Canada, contact your authorized Amana dealer to determine if another warranty applies.
If you need service, first see the "Troubleshooting" section of the Use & Care Guide. After checking "Troubleshooting," you may find
additional help by checking the "Assistance or Service" section or by calling Amana. In the U.S.A., call 1-800-843-0304. In Canada, call
1-800-807-6777. 9/07
Page 25

Cuisini_re eiectrique encastrable _ commandes
Easy Touch 700 - dessus iisse
Cuis[-i
instructions de s_curit_ importantes ................25-28
Cuisson sur la surface ..........................................29=31
Commandes de la surface de cuisson
Surface b dessus lisse
Centre de rechauffage
Cuisson dans le four ............................................. 32=40
Cuisson courante
Cuisson et maintien
Cuisson et maintien differes
Maintien au chaud
Cuisson au gril
Arrete automatique/Mode sabbat
Favori
Grilles du four
Nettoyage ................................................................41=44
Four autonettoyant
Methodes de nettoyage
Entretien ...................................................................45=46
Hublot du four
Lampe du four
Recherche des pannes ..........................................47=48
Garantie et service apr_s=vente ................................49
Guia de Uso y Cuidado ................................................50
Page 26

que pourrait susciter une utilisation incorrecte de I'appareik
Utiliser I'appareil uniquement pour lesfonctions pr6vues,
d6crites dans ce guide.
Pour une utJlisation adequate et en s_curit_, il faut que
I'appareil soit convenablement install6par un technicien
qualifi& et reli6 _ la terre. Ne pas r6gler, r@arer ni remplacer
un composant, _ moins que cela ne soit sp6cifiquement
recommand6 dans ce guide. Toute autre r@aration doit 6tre
effectu6e par un technicien qualifi&
Toujours d6brancher I'appareil avant d'y fake de I'entretien.
Instructionsde
securlteimportentes
Les instructions de s6curit6 importantes et les paragraphes
_avertissement _ de ce guide ne sont pas destin6s _ couvrir
toutes les conditions et situations qui pourraient se pr6senter.
II faut fake preuve de bon sens,de prudence et de soin Iors de
I'installation, de I'entretien ou du fonctionnement de I'appareik
Toujours prendre contact avec le fabficant dans lecas de
probl_mes ou de conditions qui ne seraient pas comprises.
Reconnaitre les _tiquettes, paragraphes et
symboles sur la s_curit_
Utiliser une lampe torche pour d6terminer si la bride
antibasculement est convenablement install6e sous la
cuisiniSre Fun des pieds arriSre de r6glage de I'aplomb doit
6tre convenablement engag6 dans la fente de la bride.
Lorsque la cuisiniSre est convenablement cal6e, la bride
antibasculement immobilise le pied artiste contre le sol.
V6rifier la parfake immobilisation de la cuisini_re par la bride
aprSschaque d@lacement de la cuisiniSre.
Pour viter un incendie ou des
dommages par la furn e
S'assurer que tous ies mat6riaux de conditionnement sont
retir6s de I'appareil avant de le mettre en marche.
Garder les mat6riaux combustibles bien 61oign6sde I'appareik
Ne pas ranger de mat6riaux inflammables dans un four.
De nombreux types de plastique sont affect6s par la chaleur.
Garder les plastiques 61oign6sdes pi_ces de I'appareil pouvant
devenir chaudes.
Life routes los instructions avant d'utiliser cot appareil;
observer toutes les instructions pour 61iminerles risques
d'incendie, choc 61ectrique, dommages mat6riels et corporels
Pour emp6cher qu'un feu de graisse nese d6clare, 6viter toute
accumulation de graisse ou autres mati6res inflammables
dans i'appareil ou au voisinage.
25
Page 27

Instructionsdesecurkelmpomntes
En cas d'incendie
Utiliser du bicarbonate de soude ou un extincteur _ poudre
chimique ou _ mousse pour 6touffer lesflammes. Ne jamais
utiliser d'eau pour eteindre de la graisse enflammee.
1.Interrompre I'alimentation electrique de I'appareil pour
minimiser la propagation des flammes.
2. NE JANIAIS saisir ou d@lacer un ustensile de cuisine
enflamm&
3. Fermer la porte du four pour etouffer les flammes.
Arreter ia hotte pour eviter ia propagation des flammes.
I_teindre ies flammes, puis mettre ia hotte en marche pour
evacuer ia fumee et ies odeurs.
S curit pour les enfants
NE JAMAIS laisser des enfants seuls ou sans supervision
Iorsque I'appareil est en service ou encore chaud. Ne jamais
laisser un enfant s'asseoir ou se tenir sur une partie
quelconque de I'appareil. II pourrait se blesser ou se brQler.
II est important d'enseigner aux enfants que I'appareil et les
ustensiles places dedans peuvent etre chauds. Laisser refroidir
les ustensiles en un lieu sQr,hors d'atteinte des enfants. II est
important d'enseigner aux enfants qu'un appareil menager
n'est pas unjouet, et qu'ils ne doivent toucher aucune
commande ou autre composant de I'appareil.
Farniliarisation avec I'appareil
Ne pas utiliser cet appareil pour chauffer ou pour garder
chaude une piece, sinon des dommages _ i'appareil pourraient
s'ensuivre et cela pourrait etre dangereux pour i'utilisateur.
Aussi, ne pas utiliser le four pour ranger des aliments ou des
ustensiles de cuisine.
Ne pas bloquer ou obstruer I'event du four. L'event defour est
situe _ I'arriere de la surface de cuisson.
NEJAMAIS TOUCHERLESI_LI_MENTSCHAUFFANTSNI LES
PAROISINTI_RIEURESDU FOUR.Les elements chauffants
peuvent etre brOlants meme s'ils ne sont plus rouges. Les
surfaces interieures du four peuvent atteindre une
temperature suffisamment elevee pour infliger des brOlures.
Pendant et apres usage, ne pas toucher les elements
chauffants ni les patois intefieures du four et eviter leur
contact avec des vetements ou autres materiaux inflammables
avant qu'ils n'aient eu le temps de refroidir suffisamment.
D'autres surfaces peuvent egalement atteindre une
temperature suffisamment elevee pour brOler : le ouverture
d'event et le surface avoisinante, ainsi que le porte et le hublot
de four.
Ne pas toucher I'ampoule du four brOlante avec un chiffon
humide car elle pourrait se briser. Si tel est le cas, debrancher
I'appareil avant de retirer I'ampoule pour eviter une decharge
electrique.
NE JAMAIS garnir la sole du four ou une grille du four avec
de la feuille d'aluminium. Ceci pourrait susciter un risque de
decharge electrique ou d'incendie, ou une deterioration de
I'appareil. Utiliser de la feuille d'aluminium uniquement selon
les instructions de ce guide.
Ne pas remiser des aliments ou ustensiles de cuisine sur la
table de cuisson ou dans le four.
Cuisson et s curit
NE JAMAIS faire chauffer un recipient non ouvert dans le
four. L'accumulation de pression dans le recipient pourrait
provoquer son eclatement et de graves dommages materiels
ou corporels.
Utiliser des maniques robustes et seches. Des maniques
humides peuvent provoquer la formation de vapeur brOlante.
Ne jamais utiliser untorchon _ vaisselle ou autre article textile
la place de maniques; un tel article pourrak trainer sur un
element et s'enflammer, ou accrocher un ustensile ou un
composant de I'appareil.
26
Page 28

securitelmportentes
Porter un v6tement appropri& I_viterde porter des v6tements
amples ou _ Iongues manches pendant rutilisation de
rappareil. IIspeuvent prendre feu si le v6tement entre en
contact avec un 616mentde cuisson br01ant.
Placer toujours les grilles _ la position appropriee dans le four
Iorsque le four est froid. Fairecoulisser la grille vers I'exterieur
avant d'ajouter ou enlever un plat; utiliser pour cela une
manique robuste et seche. I_viterd'introduire la main dans le
four pour y placer ou retirer un plat. S'il est necessaire de
deplacer une grille Iorsqu'elle est chaude, utiliser une manique
seche. Ne pas toucher un element chaud avec une manique.
N'utiliser les grilles que dans le four dans lequel elles ont ete
achetees/expediees.
Ouvfir toujours la porte du four tres prudemment. Laisser rair
chaud ou la vapeur s'echapper avant de retirer ou d'introduire
un plat.
AVERTISSENIENT - NIETS PRI::PARI::S: Respecter les
instructions du fabricant. Si le contenant ou le couvercle en
plastique d'un mets surgele se dUorme ou est endommage
durant la cuisson, jeter immediatement le recipient et son
contenu. Les aliments pourraient etre contamines.
Ne pas permettre le contact de papier d'aluminium ou de la
sonde _ viande avec les elements chauffants.
Orienter la poignee de chaque ustensile vers le centre de la
table de cuisson et non vers I'exterieur ou vers un autre
element; ceci reduira le risque de brOlure, inflammation de
matiere inflammable ou renversement (un jeune enfant
pourrait saisir et renverser un ustensile dont le manche est
oriente vers rexterieur).
Table de cuisson
NE JANIAIS laisser un element de surface allume sans
surveillance, particulierement avec chauffage elev& Le
debordement du contenu de I'ustensile pourrait provoquer la
generation de fumee abondante et rinflammation de la
graisse.
Cet appareil comporte des elements chauffants de differentes
tallies. Utiliser toujours un ustensile _ fond plat, de taille
suffisante pour qu'il puisse recouvrir completement relement.
Pour optimiser refficacit& choisir un ustensile de memetaille
que relement.
SURFACE EN VITROCERANIIQUE : NE JANIAIS utiliser une
table de cuisson cassee ou felee: les solutions de nettoyage et
renversements pourraient penetrer dans latable de cuisson en
entrai'nant un risque de decharge electrique. Prendre
immediatement contact avec un technicien qualifi&
Toujours eteindre routes les commandes une fois la cuisson
terminee.
Ustensiles et s curit
Appliquer lesinstructionsdu fabricant lotsde I'emploid'un
sachet pour cuisson au four.
La securite de fonctionnement de cet appareil a ete testee
raide d'ustensiles de cuisine traditionnels. Ne pas utiliser un
ustensile ou accessoire qui n'est pas specifiquement
recommande dans ce guide. Ne pas utiliser de systeme de
convection additionnel. L'utilisation d'un dispositif ou
accessoire qui n'est pas expressement recommande dans ce
guide peut degrader lasecurite de rappareil ou sa perfor-
mance, ou reduire la Iongevite des composants.
Si un ustensile est plus petit que relement utilis& une pattie
de I'elementchauffant est exposee et peut provoquer
rinflammation d'un vetement ou des maniques.
Seuls certains materiaux en verre, vitroceramique, ceramique,
gres, ou certains ustensiles vitrifies/emailles peuvent etre
utilises sur la table de cuisson ou dans le four sans risque de
bfis sous reffet du choc thermique. Observer les instructions
du fabricant lots de I'utilisation d'un ustensile en verre.
Friteuses
Exercer une prudence extreme Iors du deplacement du
recipient de graisse ou Iors de I'elimination de graisse chaude.
Laisser la graisse refroidir avant de deplacer I'ustensile.
Hottes d'extraction
Nettoyer frequemment les flltres et la hotte de la cuisiniere
pour empecher la graisse ou d'autres produits inflammables
de s'accumuler sur lesflltres ou la hotte en provoquant des
feux de graisse.
Pour flamber des aliments sous la hotte, mettre le ventilateur
en marche.
Nettoyage et s curit
Nettoyer prudemment la table de cuisson. Arreter toutes les
commandes et attendre ie refroidissement de tous ies
composants avant de ies toucher ou d'entreprendre ie
nettoyage. Nettoyer i'appareil avec precaution. Travailler
prudemment pour eviter des brOlures par iavapeur en cas
d'utilisation d'un chiffon ou d'une eponge humide iors de
27
Page 29

Instructlonsdesecurltelmpomntes
1'61iminationd'un produit renvers6 sur une surface chaude.
Certains produits de nettoyage peuvent g6n6rer des vapeurs
nocives Iorsqu'on les applique sur une surface chaude.
Nettoyer uniquement les pi_ces mentionn6es dans ce guide.
Four autonettoyant
Ne pas nettoyer le joint de porte; le joint joue un r61eessentiel
quant _ 1'6tanch6it& Ne pasfrotter, endommager ou d@lacer
le joint.
Ne pas utiliser de produits de nettoyage pour four ou enduits
de four, dans le four autonettoyant ou sur les zones voisines.
Avertissement et avis
important pour la s_curit_
La Ioi californienne <<Safe Drinking Water and Toxic Enforce-
ment Act >_de 1986 (proposition 65] stipule la publication par
le gouvemeur de la Californie d'une liste de substances que
1'6tatde Californie considere comme canc6rig@nesou
dangereuses pour le syst@mereproducteur, et impose aux
entreprises commerciales I'obligation de signaler _ leurs
clients les risques d'exposition _ de relies substances.
Nous informons les utilisateurs de cet appareil que lots d'une
op6ration d'autonettoyage, ils peuvent 6tre expos6s _ une
faible concentration de certaines substances figurant dans la
liste mentionn6e ci-dessus, dont le monoxyde de carbone.
Pour minimiser I'exposition, veiller _ ce que la piece o_ se
trouve le four soit convenablement a6r6e durant une op6ration
d'autonettoyage par I'ouverture d'une fen6tre ou d'une porte.
AVIS IMPORTANT = 01SEAUX FAMILIERS : Les oiseaux ont
un systSme respiratoire trSs sensible. Ne pas garder un oiseau
familier dans la cuisine ou dans une piSce o_ il pourrait 6tre
expos6 aux fum6es. Les fum6es 6raises durant une op6ration
d'autonettoyage peuvent 6tre dangereuses ou mortelles pour
un oiseau, de m6me que les fum6es 6raises Iors du chauffage
excessif de graisse, huile, margarine, et du chauffage excessif
dans un ustensile _ rev6tement antiadh6sif.
Conserver ces instructions pour consultation ult_rieure
28
Page 30

Culssonsurlesurfece
Boutons de cornrnande
PermettentI'utilisationdes661(]mentschauffantsdesurface,avecune
progressioncontinuede lapuissanceentrelesr(]glagesextr66mesLow
(Basse)et High ([_lev66e).Onpeut r(]gleronbouton_ toute position
entrecesdeux extr66mes.
R glage des cornrnandes
1. PlacerI'ustensilesur 1'66166ment.
2.
Enfonceret faire tournerle boutonjusqu'_ lapositiond66sir66e
(rotation dartsunsensou dartsI'autre).
Des marquessur letableau de commandeidentifient O O
1'66166meritcommand(]parchaquebouton.Par
exemple,legraphique_ droite indique 1'66166merit O O
avant/gauche.
3. IIy a t66moinlumineuxpour les66166meritssurletableaude
commande.Lorsquerun des boutonsde commanded'un 66166ment
de surfaceest aliment(],let66moins'illumine. Let66moins'66teintd(]s
qu'on interromptralimentationde 1'66166ment.L'66166ment
fonctionneraparintermittence pourmaintenirle r66glagepr6666tabli
de chaleur,m66meau niveauHigh.
/4. Apt(is unecuisson,ramenerle bouton _ la positionOFF(Arr(]t).
Retirerrustensile.
Suggestions de r6glage
Ladimensionet letype d'ustensile,letype etlaquantit66d'aliments
cuire,et la puissancedes(]l(]mentsd(]terminerontcommentr66glerles
boutonspour lesop66rationsde cuisson.Certains661(]mentsont un
r66glagepr6666tablipour lemijotageet lafusion qui ne n66cessiteque
desajustementsmineursdartsun sensou dartsI'autreselonraliment
pr66parer.Lesautres66166meritsont desr66glagesimprim66sautour
desboutonsqui sontsp66cifiquesde ces 66166merits.Ajuster les
r66glagesselon leschiffresqui donnent lesr66sultatsdecuisson
d66sir66s.Lesdescriptionssuivantesaideront _ choisir lesr66glages
donnantles meilleursr66sultats.
Maintien au chaud : Lesalimentsrestent_ unetemp66rature
sup66rieure_ 140°Fsanscontinuer_ cuire.L'alimentestaud66part
unetemp66rature(]lev66e,puissachaleurestr66duite.Nejamais
utiliser le r66glageMaintien au chaudpourr66chaufferdesaliments
froids.
Mijotage : Desbullesseformenttout juste _ lasurface.Lesaliments
sont_ unetemp66raturesitu66eentre 185et200°F.Cer66glagepeut
aussiservirpour66tuverdesalimentsou lespocher ou encorepour
continuerla cuissond'alimentssouscouvercle.
l]bullition lente : Desbullesseforment_unrythmemod66r66.Ce
r66glagepeutaussiservir pourfrire la majorit66desalimentset pour
maintenir1'6ebullitiondegrandesquantit66sdeliquide.
l]bullition : Desbullesseformentdartsle liquide _ un rythmerapide.
Cer66glagepeut aussiservirpour fairebrunir laviande,lafaire sauter
et chauffer rhuile pour fairefrire avantde passer_ un r66glage
inf66rieur.Les3 ou/4 r66glagesles plus66leveessurleboutonservent
cesop66rationsde cuisson.Le r66glagele plus661ev66sert toujours
porterreau _ 6ebullition.Certains66166mentsont m(]meunevitesseplus
661ev66epour1'6ebullitiondesliquides.
29
Page 31

Caissonsurlesurfece
Surface dessus lisse
Remarqaes sar la surface
dessas iisse -
• Lotsdespremieresutilisationsde latablede cuisson,celle=ci
peat 6mettre un pea de fum6e et des odeurs.Ceciest
normal.
• Lessurfaces_ dessuslisseconservent la chaleur pendant
un certaintemps apr_s I'extinctionde 1'616merit.I_teindre
leselementsquelquesminutesavantque la nourriturenesoit
tout _fait cuite etutiliser la chaleur restantepourterminerla
cuisson.Lorsquelevoyantde surfacechaude s'6teint,on peut
toucher lasurfacede cuissonsansdanger.Enraisonde la fa;on
dont les elementsd'unesurface_ dessuslisseretiennentla
chaleur,ceux-cine r@ondrontpasauxchangementsder6glage
aussirapidementque deselementsen spirale.
• Aucaso_lecontenud'un ustensilerisquede d6border,retirer
I'ustensilede la surfacedecuisson.
• Ne jamais essayerde soulever la surface de caisson.
• Lasurface_ dessuslissepeutsemblerd6color6eIorsqu'elleest
tres chaude.Ceciest normalet disparaitunelois que lasurface
refroidit.
Zones de caisson
Leszonesde caissonde lacuisinieresont repr6sent6espar des
cerclespermanentssur lasurface _ dessuslisse.Pouruneefficacit(!
maximum,utiliserunezone decuissondont le diametreconvient
I'ustensile.
te r#cipient ne dolt pas d#passer la zone de cuisson de plus de
12 D25 mm (1/2 DI po).
Lorsqu'unecommandeest raiseenmarche,on peutvoir un
rougeoiement_traverslasurface _ dessuslisse.L'61ement
fonctionnera en intermittencepourmaintenir le r6glage
pr66tablide chaleur, m_me au niveau Hi (l_lev_e).
Pourobtenirplus informationssur les ustensilesdecuisine,se
reporter_ la page36au paragrapheRecommandationssur les
ustensilesde cuisine.
ELEMENT
SIMPLE DE 6 pc
ELEMENT
SIMPLE DE 9 pc
\
ELEMENT
SIMPLE DE 6 pc
Conseils de protection de la
surface dessus lisse
Nettoysige (plusd'informations_ lapage43)
• Avantdes'enservirla premierelois, nettoyerla table de cuisson.
• Nettoyerlatablede cuissonchaquejour ou apreschaque
utilisation.Cesmesurespr6serverontrapparencede latable de
cuissonet 6viterontqu'ellenes'abime.
• Encasde renversementIorsde cuisson,nettoyerimm6diatement
le produitrenvers6sur la surfacede cuisson pendantqu'elleest
encorechaudeafin d'6viterunplusgrand nettoyageparlasuite.
Userde prudence,essuyerlesrenversementsavecun lingepropre
etsec.
• Nepus laisserlesproduits renvers6ssur lasurface decuissonou
surla garniture de latable decuisson pendantune Ionguedur6e.
• Nejamais utiliserde poudrede nettoyageabrasiveou de tampons
r6curerqui raieraientlasurface.
• Nejamais utiliserdejavellisant,ammoniaqueou autresproduits
de nettoyagenonsp6cifiquementrecommand6spour la
vitroc6ramique.
Pour eviter les marques et les rayures
• Nepas utiliserde casserolesenverre.Ellespourraientrayerla
surface.
• Nejamais utiliserde support m6talliqueou anneaudewok entre
un recipientet la surfacede cuisson.Cesobjetspeuventmarquer
ou rayerla surface.
• Nepas faireglisserde recipientsm6talliquessur lasurfacede
cuissonbrQlante.IIspourraientlaisserdes marquesqui devront
6trenettoy6esimm6diatement.(Voir Nettoyage,page43.)
• Veiller_ce que lefond desrecipientset lazonedecuissonsoient
propresavantd'allumer 1'616merit,afind'6viterlesrayures.
• Pourempecherque lasurfacede cuissonen vitroc6ramiquenese
trouve ray6eou abim6e,nepus y laisserdesucre, deselou de
graisse.Prendrerhabitude d'essuyerlasurfacedecuissonavecun
linge propreou un essuie-toutavantde rutiliser.
• Nejamais faire glisserde recipientsm6talliques@aissur la
surfaceau risque de larayer.
ELEMENT
SIMPLE DE 9 pc
Voyant de surface chaade
Le voyant de surface chaude est situ6 _ I'avant de la surface
de cuisson. IIs'allumeraIorsqu'unesurfacede cuisson,quelle
qu'ellesoit,serachaude.IIresteraallum6,m6meapresextinctionde
la commande,jusqu'_ceque lazoneait refroidi.
Pour viter ies taches
• Nejamais utiliserde linge ou d'@ongesale pour nettoyerla
surfacede cuisson.IIs laisseraientunfilm, cequi pourraitd6colorer
lasurfacede cuissonIorsqu'elleestutilis6e.
• L'utilisationcontinued'une surfacede cuissonsaliepeut entrainer
rapparitionde tachespermanentes.
3O
Page 32

eulssonsurlesurfece
Pour viter d'autres dornrnages
• Nepas laisserfondrede plastique,desucre ni d'alimentsrichesen
sucre surla table de cuisson.Sicelase produisaitacciden-
tellement,nettoyerimmediatement.(VoirNettoyage,page 43.)
• Nejamais laisserle contenud'une casserolebouillirjusqu'9 ce
qu'ellesoitvidecar colapourraitabimerlasurfacede cuissonet la
casserole.
• Nejamais utiliserla table de cuissoncommesurfacede travailou
commeplanche9 decouper.
• Nejamais cuired'alimentsdirectementsurla table de cuisson,
sans recipient.
• Nejamais utiliserun petit recipientsur un grand element.Non
seulementil y a ggchisd'energiemaisil pout enresulterdes
projectionsqui vont br_lersur lasurfacede cuissonetdevront¢tre
nettoyees.
• Nepas utiliserdesrecipientsspeciauxnon platsqui seraienttrop
grandsou _ fond inegalcommelos woks_ fond rond,los plaques
chauffantesou recipientsdegrandetaille _ fond ondule.
• Nepas utiliserde recipientsen aluminium.L'aluminiumrisquede
fondre sur leverre.Sile metalfondsur latable de cuisson,nepas
I'utiliser.Appelerun r@arateuragree.
Recornrnandations sur los
ustensiles
L'utilisationdubonustensilepoutempecherdenombreux
problemescommela necessitedecuire plusIonguementla
nourritureet la difficulte _ obtenirdes resultatsuniformes.Debons
ustensilesreduisentlosdureesde cuisson,utilisentmoinsd'energie
etcuisent defagonplus uniforme.
Tests pour v rifier si los
ustensiles ont un fond plat
Verifierque les ustensilessont plats.
Test de la r_gle :
1. Placerune regleentraversdufondde I'ustensile.
2. Latenir face _ la lumiere.
Desustensiles_ fond Desustensiles_ fond rainureou gondole.
lisse,plat Desustensiles_ fondinegal necuisent pas
efficacementet peuventparfois nepas
fairebouillir los liquides.
Desustensilesen Desustensilesenverre ou en metalpeu
materiaux@ais @ais.
Desustensilesde la Desustensilespluspetitsouplusgrands
memedimensionde (de 2,5cm [1 po]) que I'element.
I'element
Despoigneesqui Desustensilesavecdes poigneescassees
tiennent bien ouqui ne tiennent pas.Despoignees
Iourdesqui font serenverserI'ustensile.
Descouverclesqui Descouverclesqui ferment real.
fermentbien
Deswoks _ fond plat Deswoks avecunfond sur anneau.
Ustensiles de grande taille et
pour los conserves
Touteslosmarmites pourlosconserves et losgrandes
casserolesdoiventavoir an fond plat et doiventetre
fabriquees en materiau Opals.Ceciesttres important pour les
surfaces9 dessuslisse.La basene dolt pasd@asserde I'elementde
plusde2,5 cm (1 po).
Si losmarmites9 conserveset lescasserolesnesont pas conformes
ces normes,losdureesde cuissonserontplus Iongueset los
surfacesde cuissonpourrontetre endommagees.
Certainesmarmitespour les conservessont conguesavecdesbases
pluspetitespour etreutiliseessurdes surfaces9 dessuslisse.
Pourla preparationde conserves,ne choisirque le reglage
High jusqu'_ce que I'eau commence _ bouillir ou que la
pressionsuffisantesoit atteinte dansla marmite.Reduireau reglage
le plusfaible, maintenantI'ebullitionou la pression.Silachaleur
n'estpasdiminuee,lasurfacede cuissonpourraitetreendommagee.
3. Aucunelumiereou tres peu nedolt ¢tre visiblesousla regle.
Test de la halle :
1. Mettre 2,5cm(1po)d'eaudansrustensile.PlacerI'ustensilesur
la surfacede cuissonettourner la commandosurHigh (I--levee).
2. Observerlaformationde bulles IorsqueI'eauchauffe.Desbulles
uniformessignifient de bonnesperformanceset desbulles
inegalesindiquent la presencedezonespluschaudesdonnant
une cuissoninegale.
31
Page 33

Culssondenslefour
Tableau de commande
A B C D
E F G H
Letableaude commandeestcongupourfaciliter la programmation.Lafenetre d'affichageindiqueI'heure,lesfonctions avecminuterie
et fonctionsdu four. Letableau de commandorepresentecomprendcaracteristiquesspecifiquesau modele.(Lestyle poutvarier solon
le modele.)
Gril
Cuissoncourante
A (Plus)ou
V (Moins)
Minuterie
Cuissonet
maintien
Nettoyage
Favori
Horloge
Maintienau
chaud
Annulet
S'utilisepourlacuissonaugriletlerissolage
surpattiesuperieure.
S'utilisepourlacuissoncouranteetle
r0tissage.
S'utilisepourentrerouchangerladuroc,la
temperaturedu four. I_tablitle gril
temperatureI_LEVI_EouBASSE.
Programmelaminuterie.
Pourcuirependantunedureepreetablie,avec
maintienauchaudpendantuneheure.
S'utilisepourprogrammerlecycle
d'autonettoyage.
S'utilisepourprogrammeretsauvegarderune
methodeparticulieredecuissonet maintien.
S'utilisepourprogrammerrheuredujour.
S'utilisepourmaintenirauchauddunslefour
lesalimentscults.
Annuletouteslesoperationssaufminuterieet
horloge.
Utilisation des touches
• Appuyersur latouche desiree.
, Appuyersur latouche _,(Plus)ouT (Moins)pourentrer ladurocou
latemperature.
• Un bip retentit IorsqueI'on appuiesurunetouche.
• Un doublebip retentit en casd'erreurde programmation.
Remarque: Quatresecondesapresavoirappuyesur les
touchesA ou T, la durocou la temperatureseraautomatique-
mententree.Si plusde 30secondess'ecoulententre lapression
surunetouche de fonction sur lostouchesA ou T, la fonction
seraannuleeet I'afficheurreviendra9I'affichageprecedent.
Horloge
L'horlogepout etreprogrammeepour afficherladurocdansun
format de 12ou 24heures.L'horlogeestprogrammeeenusinepour
unformat de 12heures.
Changement de I'horloge _ un format de 24 heures :
1. Appuyer sur lestouchesCancel
(Annuler)et Favorite(Favori)et maintenir
la pressionpendanttrois secondes.
2. Appuyersurla touche A ou T pour
programmerun formatde 12ou 24 heures.
3. ProgrammerI'heureensuivantles
instructionsdonneesen dessous.
R_glage de I'horloge
1. Appuyer sur latouche Clock (Horloge).
• Ledeuxpoints clignotent _ I'afficheur.
2. Appuyersurla touche A ou T pour
programmerrheure du jour.
• Deuxpointscontinuent_ clignoter.
Appuyer_ nouveausur latouche Clock ou
attendrequatresecondes.Ledeux points
cessentle clignotent.
suite...
32
Page 34

C.isson(lenslefour
Lorsquele courant(!lectriquearriveou apresune interruptionde
courant,la derniereheureavantI'interruption decourantva
clignoter.
PourrappelerI'heuredujour Iorsqu'uneautrefonction de duree
s'affiche,appuyersur latoucheClock (Horloge).
L'heurede I'horlogene peutetre changeeIorsquele four a ete
programmepour une cuissonou un nettoyagediffereou pour la
fonctionde cuissonet maintien.
Annulation de raffichage de rheure :
Si I'onnedesirepasI'affichagede I'heuredujour :
Appuyersur lestouches Cancel (Annuler)et
Clock et losmaintenirainsi pendanttrois
secondes.L'heuredujour disparaitde
I'afficheur.
LorsqueI'affichagedeI'heureest annule,
appuyersur latoucheClock pour afficher
brievementI'heuredu jour.
R_affichage de rheure :
Appuyersur lestouches Cancel et Clock et les maintenirainsi
pendanttrois secondes.L'heuredujour reapparait9 I'afficheur.
Minuterie
La minuteriepeutetre programmeede uneminute (0:01)jusqu'_
99 heureset 59 minutes(99:59).
La minuteriepeut¢tre utilis(!eind@endammentdetouteautre
activitedu four. Ellepout¢tre aussiprogrammeealorsqu'uneautre
fonctiondu four est encours d'utilisation.
La minuterienecommandopas le four.Eriene sortqu'_ emettredes
bips.
Programmation de la minuterie :
1. AppuyersurlatoucheTimer (Minuterie].
• 0:00clignote_I'afficheur.
• Lesdeuxpointsclignotent.
2. Appuyersur latouche A ou T jusqu'_ceque
I'heurejusteparaisse_I'afficheur.
• Lesdeuxpointscontinuent_clignoter.
3. Appuyer_ nouveausur latoucheTimer ou attendrequatre
secondes.
Annulation de la minuterie :
1. Appuyer surlatouche Timer et la maintenirainsipendanttrois
secondes.
OU
2. AppuyersurlatoucheTimeret reglerI'heure_ 0:00.
Verrouillage des commandos
Lestouches peuventetreverrouilleespour des raisonsde securite,
nettoyageou pouremp_,chertoute utilisationnon souhait(!e.Ellesne
pourront¢tre utiliseessi oliossontverrouillees.
Sile four est encours d'utilisation,loscommandoset laportene
peuvent¢treverrouillees.
L'heureactuelledujour restera_ I'afficheurIorsquelescommandes
serontverrouillees.
Verrouillage :
Appuyersur lestouches Cancelet Cook& Hold (Cuissonet
maintien]et losmaintenirainsi pendanttrois
secondes.(Appuyerd'abordsur latouche
Cancel.)
D_verrouillage :
Appuyersur lestouches Cancel et Cook &
Hold et lesmaintenirainsi pendanttrois
secondes.(Appuyerd'abordsur latouche Cancel.)
Codes d'anomalie
LesrootsBAKE(Cuissoncourante)ou LOCK(Verrouillage]peuvent
clignoter rapidement_ I'afficheurpour prevenirencasd'erreurou de
probleme.Sitel est lecas,appuyersur latouche Cancel. Si los roots
BAKEou LOCKcontinuent_ clignoter,debrancherI'appareil.
Attendrequelquesminutes,puis rebrancherI'appareil.SiFundes
motscontinue_ clignoter,debrancherI'appareilet prendrecontact
avecun r@arateurautorise.
•Les deuxpointscontinuent _ clignoteret le decomptede la
duroccommence.
• Laderniereminutedu decompteseraafficheesousformede
secondes.
4. A lafin de la durocprogrammee,un bip long retentit.
33
Page 35

Caissondens four
Caisson courante
Programmation de la caisson coarante :
1 Appuyer surla toucheBake (Cuissoncourante)
• Lemot BAKEclignote.
• 000clignote 9 rafficheur.
Selectionnerla temperaturedufour. La
temperaturepeut 6tre programmeede759 290°C
(1709 550°E).Appuyerunefois surlatouche
A ou T ouappuyersurla toucheA ou Tet la
maintenirainsi.
• 175° (350°)s'allumeIorsqueronappuielapremierefoissur
I'unedestouches.
• Appuyersur la toucheA pour augmenterla temperature.
• Appuyersur la toucheT pour diminuerlatemperature.
.
Appuyer_ nouveausur latouche Bake ou attendrequatre
secondes.
• Lemot BAKEs'arr_,tede clignoteret s'allume_ I'afficheur.
!
• 38° (100°)ou la temperaturereelledu four seraaffichee.La
temperatureaugmenterapar intervallede 3 °C (5°E)jusqu'_ce
que latemperaturepreprogrammeesoitatteinte.
4. Laisserlefour prechaufferpendant8 9 15minutes.
• Lorsquelatemperatureprogrammeepour lefour estatteinte,
un bip long retentit.
• Pourrappelerla temperatureprogrammeependantle
prechauffage,appuyersur la toucheBake.
5. Placerlanourriture dansle four.
6. VerifierI'avancementde la cuisson9 la dureeminimalede
cuisson.Cuireplus Iongtempsau besoin.
Remarques sur la caisson courante
au four"
* Pour changerla temp#rature du fourpendant la cuisson,
appuyersur latouche Bake, puissur latouche A ou V jusqu'_
ce queI'on obtiennelatemperaturedesiree.
. Pour changer la temp#rature du fourIors dupr#chauffage,
appuyerdeux lois sur la touche Bake, puissur latouche A ou
V jusqu'_ ceque la temperaturedesireesoitaffichee.
. Si I'onoublie d'arr_,terlefour, il s'arr_,teraautomatiquement
apres12heures.Si ron desiredesactivercettefonction,voir
page38.
7. Lorsquela cuissonestterminee,appuyersur
latouche Cancel (Annuler).
8. Retirerla nourrituredu four.
Differences de caisson entre rancien
four et le nouveau
II est normalde remarquerquelquesdifferencesdans laduree de
cuissonentre un four neuf et un four ancien.VoirAjustementde la
temperaturedu four _ la page39.
Caisson et maintien
Lafonction cuissonet maintienpermetdecuire pendantune
dureepredeterminee,suiviepar un cycle de maintienauchaud
d'une heure.
Programmation de la fonction caisson et maintien :
1. Appuyer surlatouche Cook & Hold (Cuissonet
maintien).
* LesmotsBAKEet HOLD(Maintien)
clignotent.
* 000s'allume_I'afficheur.
2.
Selectionnerlatemperaturedu four. La
temperaturepeut 6tre programmeede75_ 290°C
(170_ 550°F).Appuyerunelois surlatouche A
ou T ou appuyersur latouche A ou Tet la
maintenirainsi.
• Appuyersurla toucheA pour augmenterla temperature.
• Appuyersurla toucheT pour diminuerlatemperature.
.
Appuyer_ nouveausur latouche Cook & Hold OUattendre
quatresecondes.
• Lemot HOLDclignote.
• 00:00clignote9 rafficheur.
4.
Entrerla dureependantlaquelleI'ondesireque la cuissonait lieu
enappuyantsurlostouchesA ouT. Ladureedecuissonpout
6treprogrammeededix minutes(00:10)_ 11heures,59minutes
(11:59).
•Les mots BAKEet HOLDs'allument_ I'afficheur.
• Ladureede cuissons'allume_I'afficheur.
• Ladureede cuissoncommencele compte _ rebours.
Lorsqae la dar_e de caisson s'est _coal_e :
• Quatrebipsretentissent.
• Lemot BAKEs'eteint.
•Les rootsHOLDet WARM(Chaud)s'allument.
• 75°(WO°] parait_ I'afficheur.
34
suite ...
Page 36

Culssondenslefour
Apr_s une heure de MAINTIEN AU CHAUD :
• Lemot End(Fin)s'affiche.
= L'heuredu jour reapparaft_ I'afficheur.
Annulation de la fonction cuisson et maintien
tout moment :
Appuyersur latouche Cancel(Annuler). Retirerla
nourrituredu four.
Cuisson et maintien diff r e
Avecla fonctiondifferee,le four se met_ cuire plustard dans la
journee.Programmerladureed'attente desireeavantquelefour
nese motto en marcheet la dureede cuissondesiree.Lefour
commence9 chauffer9 I'heureselectionneeet cult pour laduree
specifiee.
La dureed'attentepeutetre programmeede 10minutes(00:10)
11 heures,59minutes(11:59).
Programmation d'un cycle de cuisson
courante diff_r_e :
1. AppuyersurlestouchesBake (Cuisson
courante)etTimer (Minuterie) en meme
temps.
• Lemot DELAY(Differee)s'allume
rafficheur.
• 00:00clignote9 rafficheur.
2. AppuyersurlatoucheA ou T peurpregrammer
la dur#e d'attente.
5. Appuyersur _.pour programmer la dur#ede cuisson.
• Ladureed'attente,losrootsDELAY,BAKEet HOLDs'allument
rafficheur.
Lorsque la dur_e d'attente s'est _coul_e :
• Lemot DELAYs'eteint.
• Ladureede cuissonet latemperaturesera affichee.
• LosrootsBAKEet HOLDsont affiches.
Pour programmer un temps d'attente Iorsque la
fonction cuisson et maintien a d_j_ _t_
programm_e :
1. Appuyersur los touchesBake etTimer.
(Appuyerd'abordsurla touche Bake.)
• Lemot DELAYet 00:00parait_ I'afficheur.
2. AppuyersurlatoucheA ou T pourprogrammer
laduree d'attente.
• Lemot DELAYresteallume pour rappelerqu'un
cyclede cuissondiffereea et_programme.
Lorsque la dur_e d'attente s'est _coul_e
et que le four se met en marche :
• Ladureede cuissonet latemperaturesera affichee.
• Lemot DELAYs'eteint.
• LosrootsBAKEet HOLDresteallure&
Annulation :
Appuyersur latouche Cancel.
• Touteslesfonctionsde cuissonminuteeet
nonminuteeseront annulees.
Alorsque le mot DELAYclignotetoujours :
3. AppuyersurlatoucheCook& Hold (Cuissonet
maintien).
• 000s'allume_ I'afficheur.
• LesrootsBAKEet HOLD(Maintien) clignotent.
4. AppuyersurA pour programmer la temperature de cuisson.
• 00:00et le mot HOLDclignotent.
• Lemot BAKEresteallum&
• L'heuredu jour reapparait_I'afficheur.
Remarques :
, Ne pasutiliserla cuissondifferee pourdesarticlesqui
necessitentquelefour soit prechauff&commelosg_teaux,
lospetits biscuitset los pains.
• Ne pasutiliserlecyclede cuissonetmaintiendifferessi le
fourest dej_chaud.
35
Page 37

Culssondens four
Maintien au chaud
Pourmaintenirau chaudHanslefour des alimentscuits et chauds
ou pour r6chaufferpains etassiettes.
Programmation du maintien au chaud :
1. AppuyersurlatoucheKeep Warm (Maintien
au chaud).
* Lemot WARM(Chaud)clignote.
, 000parait_ I'afficheur.
2. S61ectionnerlatemperaturede maintienau chaud.
Celle-ci peut6tre r6gl6ede 63_ 90 °C(145
190°F).Appuyerunelois sur latoucheA ou T
ou appuyersur latouche A ou T et la maintenir
ainsi.
, 75° (170°)s'allumeIorsqueron appuiela
premierelois sur I'unedestouches.
, Appuyersur la toucheA pour augmenterla temperature.
, Appuyersur la toucheT pourdiminuerlatemperature.
Lemot WARMet la temperatureserontaffich6spendantque la
fonction maintienau chaud estactive.
Rernarquessat la fonction maintien
au chaud •
• Pourobtenirdes qualit6salimentaireset nutritivesoptimales,
lesaliments cultsaufour nedoiventpus6tre gard6sau chaud
plusde 1_ 2 heures.
• Pouremp6cherlesaliments dedess6cher,lesrecouvrirde
papieraluminium,sanssetter, ou d'un couvercle.
• Pourr6chauffer des petits pains:
recouvrirlespetits painsde papieraluminiumsansserrer et
lesplacerau four.
appuyersur lestouches Keep Warm etA pour
programmer75 °C (170°F).
r6chaufferpendant 12_ 15minutes.
• Pourr6chaufferdesassiettes :
placerdeux pilesde quatreassiettesmaximumdunsle four.
appuyersur lestouches Keep Warm etA pour
programmer75 °C (170°F).
r6chaufferpendantcinq minutes,arr6ter lefour et laisserles
assiettesaufour pendantencore15 minutes.
n'utiliserque desassiettespouvantaller aufour, _ verifier
avecle lubricant.
Annulation du maintien au chaud :
1. AppuyersurlatoucheCancel (Annuler).
2. Retirerla nourrituredu four.
ne pusposer desassiettestiedessur unesurfacefroide, les
changementsrapidesde temperaturepouvantcasser
I'assietteoulafendiller.
36
Page 38

Culssondenslefour
Caisson au gril
Programmation de la caisson au gril :
Pourcommencer,appuyersurlatouche Broil (Gril). ......
• Lemot BROILclignote.
• Lemot SEt(ValideOestaffiche.
Appuyersur la toucheA pour programmerun gril _ temperature
eleveeou sur la toucheT pourprogrammerungril
temperaturebasso.
• LesmotsHI (I--levee}ou LO (Basso}serontaffiches.
• SelectionnerHI broil (Gril9 temperatureelevee)(290°C
[550°F]) pourungril normal.SelectionnerLO broil (Gril
temperaturebasso)(230°C [450°F]) pourun gril
temperatureinferieure d'aliments9cuissonplusIongue
commelavolaille.
.
Apresquatre secondes,le fourse meten marche.
• Lemot BROILresteallume.
4. Pourun rissolagemaximum,prechaufferI'elementdegril
pendant3 ou/4 minutesavantd'ajouterla nourriture.
5. Placerla nourrituredansle four. Laisserla porte du four ouverte
d'environ10cm(4 po)(premierebut(!e).
6. Retournerlaviandeunefois _ la moitiede la dureede cuisson.
7.
Lorsqueraliment estcult, appuyersur latouche
Cancel (Annuler).Retirerla nourriture et la
lechefritedu four.
• L'heuredujour reapparait_I'afficheur.
Rernarques sat la caisson aa gril •
• Pourde meilleursresultatsIorsdu gril,se sepJird'un ustensile
prevupour cetype de cuisson.
• Prevoirdesdureesde cuissonau gril plusIongueset un
rissolagelegerementmoinsdoresi I'appareilfonctionnesurun
circuit de 208volts.
• Le gril au reglageHIest utilise pour la majoritedesoperations
de cuissonau gril. Utiliserle gril au reglageLOpour la cuisson
de metsdevantcuire plusIongtemps,afin de leur permettre
d'etrebiencultssansrissolageexcessif.
• Pourchanger la temp#raturedufourpendantla euisson
au gril, appuyersur latouche Broil, puissur latouche
Autoset 0 pourchanger entrela cuissonau gril atemperature
elevee(HI)et la cuissonau gril 9temperature basse(LO).
• Lesdureesde cuissonau gril peuventetre plusIonguesavec
unetemperaturede gril inferieure.
• Retournerla plupartdes alimentsIorsquela moitiede la duree
prevuepour la cuissonau gril s'estecoulee.
Tableau de caisson aa gril
Boeuf
Pore
Volaille Pouleten morceaux 3 ou/4 Biencult Gril_ temperaturebasso
Fruitsde met 10- 15minutes
Grillesuperieure_ la positionn°5.
Remarque :Ce tableaun'estqu'unguide de suggestions.Lesdureespeuventvarier solonI'aliment_ cuire.
Bifteck,2,5cm (1po) d'epaisseur
Hamburgers,2 cm (3//4po)d'epaisseur
Bacon
C0telettes,2,5cm (1 po)
Jambon- prO-culttranchede 1,3cm (1/2 po)
Damesde poisson,beurrees,
2,5cm (1 po) d'epaisseur
Filetes,1,3cm (1/2 po) d'@aisseur
37
4
4
4
4
4
4
4
4
Cuissonmoyenne
Biencult
Biencult
Bien cult
Bien cult
Tiede
Lachairse detache
i Lachairse detache
15 - 18 minutes
19 - 23 minutes
15 - 18 minutes
6 - 10 minutes
22 - 26 minutes
8 - 12 minutes
28- 38 minutes
8 - 12minutes
Page 39

euisson(lenslefour
Arr t automatique/
Mode sabbat
Lefour s'arreteautomatiquementapres12heuress'il a ete
accidentellementlaiss_enmarche.Cettecaract@istiquedesecurit(!
poutetre arret(!e.
Pour annulet rarr_t 12 heures et faire fonctionner le
four en continu pendant 72 heures :
1. Programmerle four pourune cuissoncourante
(voirpage34).
2. AppuyersurlatoucheClock (Horloge)et la
maintenirainsipendantcinqsecondes.
• SAbseraaffiche etclignotera pendantcinqsecondes.
• SAbseraensuiteaffiche encontinu jusqu'9cequ'on I'arreteou
jusqu'9ceque la duroclimitede72heuressoit atteinte.
• Lemot BAKE(Cuissoncourante)seraaussiaffichesi un
cyclede cuissoncouranteesten coursalorsque lefour est en
modesabbat.
• LaCUISSONAUFOURestla seulefonctionqui est
operafionne//eenmode sabbaLToutes/esautresfonctions
(Minuterie,Maintienauchaud,Nettoyage,etc.)sontverrouill#es
pendantle modesabbat.
Annulation de la cuisson courante alors que le four
est en mode sabbat :
Remarques sat le mode sabbat •
• Le modesabbatpeut etre misen marche_ tout moment,que
le foursoit en marcheou non.
• Le modesabbatne peut pasetre misen marchesi los
commandossontverrouilleesou la porteverrouillee.
• Si lefour esten modecuissonIorsquele modesabbatest
programme,lemot BAKEs'eteint_ la fin ducyclede cuisson.II
n'yauraaucunsignalsonoreaudible.
• Si I'eclairagedufour estsouhaitependantle modesabbat,la
lampedevra ¢treallumeeavantque le modesabbatnedebute.
Lorsquele modesabbata demarre,aucunbip de prechauffage
ne retentit.
Tous losmessageset losbipssont desactivesIorsquele mode
sabbatestactif.
• Leverrouillageautomatiquede la portenefonctionne pas
pendantle modesabbat.
• Si I'onappuiesur latouche Cancel, un cyclede cuisson
couranteaufour sera annule.Cependant,le programmateur
resteraen modesabbat.
• Apres unepannedecourant,le four revientenmodesabbat
avec72 heuresrestanteset aucuncycle actif.
Appuyersur latouche Cancel(Annuler).
• Lemot BAKEs'eteint9 I'afficheur.
• Aucun bipsonorene retentit.
Annulation du mode sabbat :
1. AppuyersurlatoucheClock pendantcinq secondes.
OU
Apres72 heures,le modesabbatsetermine.
• SAb clignotependantcinq secondes.
• L'heuredu jour revient_ I'afficheur.
38
Page 40

Culssondenslefour
Ajustement de la temperature
du four
La precisiondestemperaturesdu four a etesoigneusementverifiee
I'usine.IIestnormalde remarquerquelquesdifferencesdansla
cuissonentre un four neuf et un four ancien.Au fur et 9 mesureque
loscuisinieressont moinsneuves,latemperaturedu four poutvarier.
II estpossibled'ajusterlatemperaturedufoursi I'onpenseque le
four ne cult pasou ne rissolepascorrectement.Pourdecider de
I'ajustement9apporter,reglerlefour9 unetemperaturede15°C
(25°F)pluseleveeouplusbassoque la temperatureindiqueedans
la recette,puisfaire cuirela preparation.Lesresultatsdu <{test >>de
cuissondoiventdonner uneidee du nombrede degresduquel la
temperaturedolt ¢treajustee.
Ajustement de la temperature du four :
1. AppuyersurlatoucheBake (Cuissoncourante].
2. Entrer285°C(550°F)enappuyantsur latoucheA.
.
Appuyersur la toucheBake et la maintenirainsi
pendantplusieurssecondesoujusqu'_ceque 0°
paraisse_ I'afficheur.
Si latemperaturedu four a ate precedemmentajustee,le
changementseraaffiche. Parexemple,si latemperaturedu four
aate reduitede 8 °C (15°F),rafficheur indiquera-8°(-15°).
Appuyersur la toucheA ou T pour ajusterla temperature.
A chaquefois que I'on appuiesur unetouche,latemperature
changede3 °C(5 °F).Latemperaturedu four pout¢tre
augmenteeou diminueede3 _ 20 °C(5 _ 35°F).
5. L'heuredu jour reapparaitautomatiquement_ I'afficheur.
II n'estpasnecessairede reajusterla temperaturedufour encas
de panneou d'interruption de courant.Lostemperaturesde
cuissonaugril et de nettoyagenepeuventetre ajustees.
Changement de la
temperature °F/°C
1. Lereglagepar ddaut de I'usinepourlatemperatureest en
Fahrenheit.
Favori
Latouche Favorite(favori)permetde sauvegarderladuroc et la
temperatured'unefonctionde cuissonet maintien.
Pourprogrammerun cycleFavori,unefonctionde cuissonet
maintiendolt etre activeou tout juste programmee.
Programmation d'un nouveau cycle favori ou
sauvegarde d'un cycle en tours de caisson et
maintien comme favori :
1. Programmeruncyclede caissonet maintiencommeil estdecrit
lasectionCuissonet maintien_ la page3/4.
2. AppuyersurlatoucheFavorite et lamaintenir
ainsipendanttrois secondes.
• Lecyclecuissonet maintiennouvellementprogrammeou en
cours defonctionnernentserasauvegarde.
• Un bipsonoreretentit pourindiquerqueloscommandosont
acceptele reglagefavori.
D_marrage d'un cycle programm_ darts favori :
1. Appuyer surlatouche Favorite.
• Ladurocet latemperaturedu cycleprogramme
de cuissonet maintienserontaffichees(siaucun
cyclede cuissonet maintienn'aateprogramme,
<_nonE7>sera affiche].
2. AppuyersurlatoucheBake.
• Lecyclefavori commenceimmediatement.
• Lemot BAKEs'allume_ I'afficheur.
• Ladureede cuissons'allume_I'afficheur.
Lorsque la duroc de caisson s'est _coul_e :
• Lemot BAKEs'eteint.
• LesrootsHOLD(Maintien] etWARM (Chaud)s'allument.
• 75°(170°) parait_ I'afficheur.
Annulation d'un cycle favori en tours :
1. Appuyer surlatouche Cancel.
• Lecyclefavori sauvegardenesera pasaffecte.
2. Retirerla nourrituredu four.
2. Pourmodifiercereglage,appuyersur lostouches Cancel
(Annule0 et Bake simultanementet maintener-lesenfoncees
pendanttrois secondes.
3. Unbip retentit et le reglagecourant(°Fou °C) parait_ I'afficheur.
(Sivous nefaites pasde changement,lacuisiniereretourneau
reglageexistantapres30secondes.)
4. Pourmodifierle reglage,appuyersur latouche A ouT. Appuyer
nouveausur latouche pour retournerau reglageexistant.
Attender cinqsecondeset le reglageseraeffectue.
39
Page 41

Culsson(lenslefour
Ventilateur du four
Unventilateur de refroidissementse met en marche
automatiquementIorscuissonau gril et de certainesoperationsde
cuisson.IIest utilisepour que lespiecesinternesdu tableau de
commanderestentfraiches.Leventilateurs'arreteautomatiquement
Iorsquelespiecesont refroidi.II peutcontinuer_ fonctionner une
lois que le four s'estarret&Ceciest normal.
u
Event du four
Lorsquele four fonctionne,lessurfacesvoisinesde I'eventpeuvent
devenirassezchaudespour entrainerdes brOlures.Nejamais
bloquerI'event.
L'6ventdu four est situ6 _ I'arri_re de la surfacede caisson.
E'VENT DU FOUR
Nepas mettrede
plastiquesprosde
I'event,la chaleur
pouvantles
ddormer ou los
fairefondre.
u
Eclairage du four
Appuyersur le commutateurd'eclairagedu foursitue
sur letableau de commandopourallumer ou eteindrela
lampe.Lalampedefour est activeeparI'interrupteur
seulement.
Oven
Light
Sole du four
Protegerlasole desproduits renverses,en particulieracidesou
sucres,ceux-cipouvantdecolorerI'emailvitrifi& Utiliserdes
ustensilesde la bonnedimensionpoureviterque losproduitsnese
renversentoupassentpar-dessusrustensileen bouillant.Ne pas
placerd'ustensilesou de feuille d'aluminiumdirectementsur la
sole dufour.
Extraction :
1. Tirer la grille en ligne droite
jusqu'_cequ'elles'arrete_la
positiondecalage.
2. Souleverlagrille _ ravantpour
pouvoirrextraire.
........
R_installation :
1. Placerla grille sur lossupportsdanslefour.
2. SouleverlegerementI'avant.Fakeglisserla grillevers I'arriere
au-del_de la positionde calage.
3. Abaisserlagrille etla faireglisserdanslefour.
Nejamais couvrir la totalit6 d'unegrille de papierd'aluminium
ni mettre d'aluminiumsur la sole du four. Colane donnerait
pasde borisr_sultatsdartsla caisson de g_teau× et la sole
pourrait se trouver abim6e.
Positions de grille
NIVEAU5: Pourgrillerdu pain
ou passerau gril desaliments
peu@aiset nongras.
NIVEAU4 : Pourla majorite
desoperationsde cuissonau
gril.
NIVEAU3 : Pourla majorite
desproduitsde boulangerie "
sur uneplaque9 biscuitsou
un moule9 ggteau roul& ggteaux9 etages,alimentssurgelestout
pretsetla cuissongeneralesur uneseule grille.
NIVEAU2 : Pourquatre-quarts,ggteauxBundt,tartes,platsmijotes
et r0tissagede petitsmorceauxdeviande.
NIVEAU 1 : Pourquatre-quarts,ggteauxde 9x 13,tarteset
r6tissagedegros morceauxdeviande etde volaille.
CUISSONSUR PLUSIEURSGRILLES: Deuxgrilles: Utiliser les
positions2et 5,ou 1 et 4.
Remarques: Nejamais placerlos ustensilesdirectementsur la
soledu four.
............4
..............2
....... 1
5
3
Grilles du four
Le four comportedeuxgrilles avec,pour chacune,un dispositifde
calage.
Caisson de g_teaux _ _tages sar deax grilles
Pourde meilleursresultatspour
la cuissonde g_teauxsur deux
grilles,utiliser lespositions2
et5.
Placerlos g_teauxsurla
grille,commeil estindiqu&
4O
Page 42

autonettoyant
Le cycled'autonettoyageutilisedestemperaturessuperieures9 la
normalepour assurerlenettoyageautomatiquede latotalite du four.
Lefour dolt ¢trenettoyeregulierement.Leseclaboussuresdoivent
¢treessuyeespoureviter une productionexcessivedefumee ou
I'apparitionde flammes.Nelaissezpasde residuss'accumulerdans
le four.
Durant le processusd'autonettoyage,il convientde bienaerer la
cuisinepour eliminerles odeursnormalementCruisesdurant le
nettoyage.
Avant I'autonettoyage
1. I_teindrela lampedu four avant le nettoyage.Ellerisqueraitsinon,
degriller.
2. Enlevertousles plats etlesgrillesdufour.Lesgrillesrisquentde
sedecoloreret de ne plus glisseraussibienapresun cycle
d'autonettoyagesi onnelesenlevepas.
3. Nettoyerle cadredu four, le cadrede la
porte,lazone9 I'exterieurdu joint et
autourde I'ouverturedanslejoint de la
porte,9 I'aided'un produitde nettoyage
nonabrasifcommeBonAmi* ou d'eau
additionneededetergent.Le processus
d'autonettoyagene nettoiepasces
zones.Ellesdoivent¢tre nettoyeespourempecherla saletede
s'incrusterpendantlecyclede nettoyage.(Lejoint assure
I'etancheiteautourdelaporteet duhublot dufour.)
4. Pourempechertout dommage,nepas nettoyerni frotter lejoint
qui setrouve autour de la portedu four.Cejoint estcongu pour
eviterlespertesde chaleur pendantlecycle d'autonettoyage.
5. I_liminerlesresidusde graisseou de produitsrenversessurla
soleavantle nettoyage.Ceciemp_,chelaformationde flammes
ou defumeedurant le nettoyage.
Essuyerles residussucreset acides,commelespatatesdouces,
latomateou lessauces9 basede lait. Laporcelainevitrifiee
possedeunecertaineresistanceauxcomposesacides,maisqui
n'estpaslimitee.Ellepeutsedecolorersi lesresidusacidesou
sucresnesont pas enlevesavantdecommencerI'autonettoyage.
Programmation de rautonettoyage :
de 205°C(400°F)pourprogrammeruncycled'autonettoyage.
i Remarque : Latemperaturedufour dolt etresitueeen dessous
1. Fermerlaporte dufour.
2. Placerlamanettede verrouillage9 la positiondeverrouillage.
3. AppuyersurlatoucheClean (Nettoyage).
• Lemot CLEANclignote9 I'afficheur.
4. Appuyersur latoucheA ou T.
•MEd (Moyen)(Saletemoyenne,3 heures)
est affiche.
Si la porten'est pasfermee,desbips retentissent
etle mot {<door>>(porte)parait9 rafficheur.Sila
porten'estpasfermeedansles45secondes,
roperationd'autonettoyageestannuleeet I'afficheur
revient9 I'heuredujour.
5. AppuyersurlatoucheA ou T pourvoir defiler
lesdifferents reglagesde rautonettoyage.
HVy(Tressale)(Saleteepaisse,4heures)
MEd(Moyen) (Saletemoyenne,3heures)
LITE(Leger)(Saletelegere,2 heures)
Lechoixdu niveaudesaletedu four programme
automatiquementla duree du cycled'autonettoyage.
6. Apresquatresecondes,lefour commencelenettoyage.
• Ladureede nettoyagecommencele decompte9 I'afficheur.
• Lemot LOCKparait9 I'afficheur.
• Lemot CLEANparait9 I'afficheur.
D_marrage diff_r_ d'un cycle d'autonettoyage :
1. Appuyersur les touchesClean etTimer (Minuterie).
• Lemot DELAY(Differee)et00:00parait
rafficheur.
iii
*Lesnomsde marquedes produitsde nettoyagesontdes marquesdeposeesdesdifferentsfabricants.
41
Page 43

2.
Appuyersur latouche A ou T pour
programmerla dur6ed'attenteavantquene
commencele cycle.La dureed'attentepeut6tre
programm6ede 10minutes(00:10)9 11 heures
et 59minutes (11:59).
Alors quele mot DELAY(Diff6r6e)clignote,appuyersur la
touche Clean(Nettoyage).
• Lemot CLEANvaclignoter.
Appuyersur la touche _. ou T.
• MEd(Moyen)(Saletemoyenne,3heures)est affiche.
Appuyersur la touche A ou T pourvoirdefiler losdiff6rents
r6glagesdeI'autonettoyage.
HVy(Tressale)(Salet6@aisse,/4heures)
MEd(Moyen)(Salet6moyenne,3heures)
LITE(L6ger)(Salet616gOre,2 heures)
Lechoix du niveaudesalet6du four programme
automatiquementladur6e du cycled'autonettoyage.
Apresquatre secondes,losmots CLEAN,DELAYet LOCK
(Verrouillage)paraissent9I'afficheurpourindiquerquelefour
est programmepour une operationde nettoyagediffer& Le
tempsd'attente parait9 I'afficheur.
Si le four a dej_ et_ programm_ pour un cycle de
nettoyage et que ron d_sire _tablir un delai :
1. Appuyersur lestouchesCleanet Timer
(Minuterie).(Appuyerd'abordsur latouche
Clean.)
• Lemot DELAYclignote.
• 00:00parait _ I'afficheur.
2. Appuyersur latoucheA ouT pourprogrammerladur6e
d6sir6ede I'attenteavantquened6butele cycle.
Apresquatresecondes,losmotsCLEAN,DELAYet LOCK
paraissent_ I'afficheurpourindiquerquelefour est programme
pour une operationde nettoyagediffer& Letempsd'attente
parait_ I'afficheur.
Lorsque le cycle d'autonettoyage d_bute :
• Lemot DELAYs'6teint.
• Ladur6ede nettoyageparait9 I'afficheur.
Annulation du cycle d'autonettoyage
Appuyersur la touche Cancel (Annuler).
• Tousles rootsdisparaissentde rafficheur.
• Touteslosfonctions sontannul6es.
Pendant le cycle d'autonettoyage
Lorsquele motLOCKparait_ I'afficheur,la portenepeut 6tre
ouverte.Pour6viterd'endommagerlaporte,nepaslaforcer pour
I'ouvrirIorsquele mot LOCKestaffich&
Fum_e et odeurs
Lapremierelois o_ le fourest nettoy6,il peuty avoir production
d'odeur etdefum6e.Ceciestnormalet disparaitra_ I'usage.
Si le fouresttres sale ou si uneustensileau gril a 6t6laiss6edans le
four, il pouty avoirproductionde fum6e.
Bruits
Pendantquelefour chauffe,il poutse produiredesbruitsde metal
en dilatation ou encontraction.Ceciest normalet n'indique pasque
lefour s'abime.
Aprbs le cycle
d'autonettoyage
Environuneheureapresla fin du cycle,le mot LOCKs'6teint.Ace
moment,la portepout 6treouverte.Pousserla manettede la porte
versla gauchepourd6verrouiller.
La salet_peut avoir laiss6 un r6sidugris poudreux.L'enlever
avecun lingohumide.S'ilrestede la salet&colaindiquequelecycle
de nettoyagen'a pas6t6assezlong.Cettesalet6restantesera
enlev6eau prochaincycled'autonettoyage.
Si losgrilles oat 6t6 laiss_es_ I'int_rieurdu four pendantle
cycle d'autonettoyageet qu'ellesglissent realsur leurssup-
ports,los enduire,ainsi quelessupports,d'une finecouched'huile
v6g6tale.
De fines lignespeuvent apparaitre dunsla porcelainepuree
qu'elle a subichaleuret refroidissement.Ceciest normalet
n'affecterapaslaperformance.
Une dbcolorationblanche pout apparaitre apres le nettoyage
si des aliments acides ou sucr6s n'ont pus6t6 enlev_s avant
que ne commence I'autonettoyage.Lad6colorationestnormale
et n'affecterapasla performancedufour.
Rernarques -
• Si laportedu four n'estpasferm6e,le mot<_door >>(porte)
clignote_ I'afficheuret lefour 6metdesbipsjusqu'_ ceque la
portesoitferm6eet que I'onappuie_nouveausur Clean.
• S'ils'6couleplusdecinq secondesentrelemomento_ I'on
appuiesurClean etcelui o_ I'onappuiesur latouche
A ou T, I'afficheurretourneautomatiquement_I'affichage
precedent.
• La portedu four setrouveraendommag6esi I'onforceson
ouverturealorsque le mot LOCKestencoreaffich&
• L'heuredujour parait_ I'afficheur.
42
Page 44

M thodes de nettoyage
* Losnomsde marquesont desmarques
d6pos6esdesdiff6rentsfabricants.
** Pourcommanderdirectement,
composerle 1-877-232-6771I_.-U.ou
1-800-688-8408Canada.
Table de
cnisson =
6mailvitrifi6
Zonede la • PourutiliserlafonctionVerrouillagedescommandespourle nettoyage,voirpage33.
console de • Essuyeravecunlingehumide,puisfaires6cher.Nepasutiliserunagentdenettoyageabrasifsusceptiblederayerlasurface.
commando/ •Onpeututiliserun produitdenettoyageduverre,pulv6ris6d'abordsur unchiffon.NEPASprojeter leproduit directement
horloge sur lostouchesde commando ousur I'afficheur.
Bontons de •Placerchaquebouton_ lapositiond'ARRET,etretirerchaqueboutonenletirant.
commando •Laver,rinceretfaires6cher.Nepasutiliserunagentde nettoyageabrasifsusceptiblederayerlafinition.
Table de
cnisson en
vitroceramique
L'6mailvitrifi6estduverrelieaumetalparfusion.II peutsefissurerous'6cailleren casdemauvaiseutilisation.IIest resistant
auxacides,maispastotalementinattaquableparlosacides.Touslosproduitsrenvers6s,en particulieracidesou sucres,doivent
6treessuy6simm6diatementavecun lingosec.
• Unefoisrefroidi,laveravecdereausavonneuse,rincerets6cher.
• Nejamaisessuyerunesurfacetiede ou chaudeavecunlingohumide.Cecipourraitlafissurerour6cailler.
• Nejamaisutiliserdenettoyantspourfour,d'agentsde nettoyagecaustiquesouabrasifssurlefini ext6rieurde lacuisiniere.
•Fairefonctionnerbrievementchaque6i6mentpourverifierqueleboutona6t6correctementr6instail6.
Nejamais utiliserdeproduitsde nettoyagedufour,javellisant, ammoniaque ouproduits de nettoyageduverre
contenant de I'ammoniaque.Remarque:Prendre contact avec un r6parateur agr66 si la surface en vitroc6ramique
sefendille, se casseou si de I'aluminiumoudu m_tal fond sur la surface.
• Laisserlatabledecuissonrefroidiravantdelanettoyer.
•G6n6ralit6s=Nettoyerlatabledecuissonapreschaqueemploiouau besoin,avecdu papieressuie-touthumidifi6et la
cremedenettoyagepourtable decuisson(pieceno20000001)_. Puis,essuyeravecun lingosecetpropre.
Remarque: Desmarquespermanentesvontseproduiresilasalet_restesurla surfacedecuissonetestcuitedefagonr_p_t_e.
•Salet66paisse on marqnes m6talliqnes =Humidifierune6ponge_ r6curer_<nerayantpas_.Appliquerdelacremede
nettoyagepourtablede cuisson(pieceno20000001)"* et frotterpourretirerautantdesalet6quepossible.Appliquerune
mincecouchedecremesur lasalet6,recouvriravecdu papieressuie-touthumidifi6etlaisserpendant309 45minutes(2ou
3 heurespour lasalet6tresimportante).Garderhumideen recouvrantressuie-toutd'unepelliculeplastique.Frotter
nouveau,puisessuyeravecunlingopropreetsec.
Remarque: N'utiliserqu'untamponDr_curer<<nerayantpas_,PROPREETHUMIDE,sansdangerpourlosustensilesdecuisine
Drev_tementantiadh_sif.Leverreet/e motifserontendommag_ssi/e tamponn'estpashumide,sT/estsoui//_ousiunautretype
de tamponestuti/is_.
•Salet6scnites on dess6ch6es= Frotteravecuntampon9 r6curer_<nerayantpas))et unecremedenettoyage
pourtabledecuisson.
Remarque: TenirunelamederasoirDunanglede300etgratterpourenlevertoutesalet_restante.Puis,nettoyercomme
il estd_critci-dessus.Nepasseservirdelalamederasoirtouslesjours,celapourraituserlemotifdu verre. _
•Plastiqueonsucrefondu =R6glerimm6diatementr616mentsurLOWetgratterlesucreet leplastiquede la _ _
surfacechaudepour espousserversunezonemons chaudePus I_TENDRE'66mentet e asserrefrodr _ _
Nettoyerle r6siduavecungrattoir_lamede rasoiretdela cremede nettoyagepourtable decuisson. ' _
43
Page 45

Hublot el porte
dufour eu verre
lut6rieur du four • Ex6cuterlosinstructionspr6sent6esauxpages41-42pourrautonettoyagedufour.
° I_viterd'utilisertropd'eau,quirisqueraitdes'infiltrersousouderriereleverreet detacher.
° Laver_ reauetausavon.Rinceravecdereaupropreets6cher.Unproduitdenettoyageduverrepout6tre utilis6enle
vaporisantd'abordsurunlingo.
°Ne pusutiliserde produitsabrasifscommetampons_ r6curer,lained'acierouproduitde nettoyageenpoudrequi
risqueraientderayerleverre.
Grillesdufour
Acieriuo×ydable
(certainsmodeles)
Tiroir de
remisage,
poigueede
porte=
6mail peiute
• Nettoyeravecde reausavonneuse.
• Eliminerlossouillurestenacesavecunepoudredenettoyageouuntampon_ recurersavonneux.Rinceretfakesecher.
°Silesgrillessentlaisseesdanslefour pendantlecycled'autonettoyage,ellessedecolorentetpeuventneplustres bien
glisser.Sicolaseproduit,enduirele borddesgrilleset le supportdesgrillesd'unefinecouched'huilevegetale,puisessuyer
rexcedent.
•NEPAS UT#LISERDEPROBU/TSDE NETTOYAGECONTENANTDUJAVELLISANT.
•NEPAS UTILISERBENETTOYANTS<<ORANGE_ OUABRASIFS.
• TOUJOURSESSUYERBANSLESENSDELA TEXTUREDEL'ACIERLORSDU NETTOYAGE.
•Nettoyagejourualier/salet616gbre=Essuyeravecrun desproduitssuivants:eausavonneuse,vinaigreblanc/eau,produit
denettoyagepourverreetsurfaceFormula409_ou unproduitsemblablepourverre- avecun lingesoupleet uneeponge.
Rinceretsecher.Pourpoliret enleverlesmarquesdedoigts,fakesuivrepar unevaporisationde MagicSpraypouracier
inoxydable(pieceno20000008)_*.
•Salet6 moderee/epaisse =Essuyeravecrun desproduitssuivants:BenAmidSmartCleanser*ouSoftScrub*- _raided'un
lingesoupleoud'uneepongehumide.Rinceretsecher.Lestachesrebellespeuventetreenleveesavecuntamponmulti-
usagesScotch-Brite_ humidifie.Frotteruniformementdanslesensdu metal.Rinceretsecher.Pourredonnerdu lustreet
retirerlesrayures,fakesuivrepar unevaporisationde MagicSpraypouracierinoxydable_.
• D_coloration =A raided'une6pongehumidifieeou d'unlingesouple,essuyer_ raidedu nettoyantCameopouracier
inoxydable_.Rincerimmediatementetsecher.Pourenleverlesmarquesetredonnerdulustre,fake suivreparunevaporisation
deMagicSpraypouracierinoxydable_.
• Unefoislespiecesrefroidies,laver9 reausavonneusetiede,rinceretsecher.Nejamaisessuyerunesurfacetiede ouchaude
avecunlingehumide,cecipouvantendommagerlasurfaceetentrainerunebr01urepar lavapeur.
• Pourlestachesrebelles,utiliserdesagentsdenettoyagelegerementabrasifscommelapateaubicarbonatedesoudeouBon
AmR Nepasutiliserd'agentsde nettoyageabrasifs,caustiquesou 6nergiquescommelesnettoyantspourfourou les
tamponsenlained'acier.Cesproduitsraieraientouendommageraientdefagonpermanentelasurface.
Remarque: Utiliserunlingoou untorchonsecpouressuyer losproduitsrenvers_s,surtout s'ils sentacides ou
sucres,La surfacepourrait se d_colorerouse ternirsi lasalet#n'etaitpusimmediatementenlevee,Ceciest
pardculi#rement importantdartsle cas de surfaces blanches.
* Lesnomsde marquesont des marquesdeposeesdesdifferentsfabricants.
** Pourcommanderdirectement,composerle1-877-232-6771I_.-U.ou 1-800-688-8408Canada.
44
Page 46

[ntretlen
Porte du four
D_pose de la porte:
1. Apresle refroidissementdufour,ouvrir la
porte- positiondecuissonaugril (porte
entrouverted'environ10cm [4pouces]).
2. Saisirla portedechaquecote.Nepas
utiliser la poigneede portepour la
soulever.
3. Souleveruniformementpourdegagerla portedescharnieres.
R_installation:
1. Saisirla portedechaquec0t(!.
2. Alignerlesfentesaveclesbrasdecharnieresur lacuisiniere.
3. Fairedescendrelaporte pour la positionnercorrectementsur les
charnieres.Poussersur lesanglessuperieursde la portepour
I'enfoncercompletementsur lescharnieres.IIfautquelaporte
suit parfaitementd'aplomb.
Remarque: On peutpercevoirunecertaine<<(!lasticite>>Iorsde
la fermeturede la porte du four d'unecuisiniereneuve;ceciest
normal;cet effetdisparaitprogressivement.
Lampe du four
(Lestyle peut varier selon le mod61e)
Pour rempiacer rampoule du four :
1. Apres le refroidissementdufour,
maintenirle cabochontout en
enlevantla piecemetalliquequi la
maintienten place.Remarque :
Lecabochontomberasi on ne
le maintientpasen place.
2.
Enleverlecabochonet
I'ampoule.
.
Installerune ampoulede/40watts pourappareilmenager.
4.
Reinstallerlecabochonet le fil metalliquede retenue.
5.
R(!tablirI'alimentationdelacuisiniere.R(!glerde nouveau
I'horloge.
OU
].
Porterune maniquesecheet devissertressoigneusementle
cabochonet rampoule.
2.
RemplacerI'ampouleparuneampoulepour four,de/40watts.II
estrecommanded'utiliseruneampouleavecun culot en laiton
poureviter lafusion du culot dansla douille.
3. Remettre en place le cabochon et rebrancher le four.
4. RemettreI'horloge_ I'heure.
CABOCHON
RESSORTDE RETENUE
(ill m#tallique)
Hublot du four
Pour prot_ger le hublot de la porte du four :
1. Ne pasutiliserdeproduitsnettoyantsabrasifscommedes
tampons_ recurer en lained'acieroudesproduitsde nettoyage
en poudrequi risqueraientde rayerleverre.
2. Ne pasheurterle hublot enverreavecun ustensile,un article de
mobilier,unjouet, etc.
3. Ne pasfermerlaportedu fouravantquelesgrillesnesoienten
placedans lefour.
Toutedegradationdu hublot deverre- rayure,choc,tension,etc. -
peutaffaiblirsa structure etaugmenterle risquede bris_ unedate
ult(!rieure.
45
Page 47

[ntretlen
Pieds de r glage de I'aplomb Tiroir de rernisage
Verifierque la cuisiniereestd'aplomb unefois
installee.Sielle neI'est pas,tournerlespiedsde
reglagede raplomb,9 chacundesanglesde la
cuisiniere,jusqu'9cequecelle-cisoitd'aplomb.
t_IED DE REGLAGE
ANTIBASCULEMENT
DE L'APLOMB
BRIDE
Letiroir de remisagepeut etreenlevepourvous permettrede
nettoyersouslacuisiniere.
D_pose :
1. Vider le tiroir et letirerjusqu'_ la positionde la premierebut(!e.
2. SouleverI'avant.
3. Tirerjusqu'9 la positionde lasecondebut(!e.
4. Saisirletiroir par lesc6t(!set soulever/tirerpour rextraire.
R_installation :
1. InsUrerlesextremit_sdesglissieresdu tiroir danslesrailsde la
cuisiniere.
2. SouleverI'avantdu tiroir etpousserdoucementjusqu'_la
positionde la premierebut(!e.
3. Souleverdenouveaule tiroir et le pousserpour lerefiner.
46
Page 48

Recherchedespennes
Pourla plupartdes problbmes
observes,essayerd'abord les
solutions possibles,_ droite.
Non=fonctionnementde
I'appareil =total ou partiel.
L'horlogeou les lampes
fonctionnent, lesrootsparaissent
I'afficheur,maisle four ne
chauffe pas.
Resultatsde cuissonaufour
differentsdesattentes oudeceu×
produitspar le four ant_rieur.
• Verifierquelescommandesdu four sontcorrectementreglees.
• Verifiersi lefour estbienraccordeaucircuit electrique.
• Inspecter/rearmerle disjoncteur.Inspecter/remplacerlesfusibles.
• Contr01erlasourced'alimentationelectrique.
• Determinersi lescommandesdeselementsdesurface et/ou du four sontconvenablement
reglees.Voir pages29et 34.
• Determinersi la portedu four s'estdeverrouilleeapresuneoperationd'autonettoyage.Voir
page42.
• Determinersi le four estreglepour unecuissondiffereeou un nettoyagediffere.Voir pages
35 et 41.
• Verifiersi leverrouillagedescommandesest en marche.Voirpage33.
• Verifiersi la commandeestenmodesabbat.Voirpage38.
• Lescommandessontpeut-etre programmeespour unefonctionde cuissonet maintienou
de demarragediffere.
• Lafonction deverrouillagedescommandesestpeut-etreactivee.Voir page33.
o
Determinersi I'eventdufour estobstrue.Voirsonemplacementpage40.
o
S'assurerque lacuisiniereest d'aplomb.
o
Lesreglagesdetemperaturevarientsouvententreun four neufet le four qu'il remplace.On
observesouventunederive du reglagede temperatured'un four9 mesurequ'ilvieillit; il peut
devenirpluschaudou moinschaud.Voirpage39 lesinstructionsd'ajustementdelatemperature
du four.Remarque : II n'estpasutile de modifier lereglagedetemperaturesi lavariation
n'affectequ'uneou deux recettes.
ResultatsincorrectsIorsde la
cuissonau gril, ou _mission
excessivede fumee.
Impossibilit_d'autonettoyage
du four.
Le four ne se nettoie pas
correctement.
• Determinerla positiondes grilles.Lesalimentspeuventetretrop presdeI'elementdu gril.
• I'--lementdugrilpasprechauffe.
• Utilisationincorrectedefeuilled'aluminium.Nejamaisgarnirlagrilledelechefriteavecdelafeuille
d'aluminium.
• Portedu four fermeedurantla cuissonau gril.Laisserla porte du four entrouverted'environ
10cm (4 pouces)- premierebutee.
• EnleverI'excesdegraissesur la piecede viandeavant lacuissonaugril.
• Utilisationd'une lechefritesouillee.
• Latensionelectriquede la maisonestpeut-etre basse.
• Determinerque I'appareiln'a paseteprogrammepourun autonettoyagediffere.Voir page43.
• Verifierquelaporteestfermee.
• Verifiersi la commandeestenmodesabbat.Voirpage38.
• Lefourestpeut etre_unetemperaturesuperieure_205°C(400°F).Latemperaturedufourdoit
etreinferieure_ 205°C(400°F)pourpouvoirprogrammerun cycled'autonettoyage.
• Untemps de nettoyagepluslong peut etre necessaire.
• On n'apas elimineavantI'operationd'autonettoyagelesaccumulationsexcessivesde residus,
particulierementlesresidusd'alimentsacidesousucres.
suite ...
47
Page 49

Bechercbedespennes
Laporte du four ne se deverrouille
pasapr_s I'aulonetloyage.
Lasurface_ dessuslisse monlre
dessignes d'usure.
Accumulationd'humidit6 sur le
hublolou vapeursortanl de 1'evenl.
• L'interieurdu four estencorechaud.Attendreenvironune heureapresI'achevementdela
perioded'autonettoyage.IIestpossibled'ouvrirla porte apresla disparitiondu message
LOCK(Verrouillage)sur I'afficheur.
• Lescommandeset la portesont peut-etreverrouillees.Voir page33.
• Finesrayuresou abrasions.
S'assurerque lasurfacedecuissonet lefond desustensilessontpropres.Nepasfaire
glisserd'ustensilesenverreouenmetalsur la surface.S'assurerquele fond des
ustensilesn'estpasrugueux.Utiliserlesagentsdenettoyagerecommandes.Voirpage43.
• Marquesde metal.
Nepasfaireglisserd'ustensilesmetalliquessur lasurface.Unelois lasurfacerefroidie,la
nettoyeravecla cremede nettoyagepourtablede cuisson.Voir page43.
• Marquesettaches brunes.
Enleverrapidementles produitsrenverses.Nejamaisessuyerlasurfaceavecuneeponge
ou un lingesail.S'assurerque latable decuissonetquelefonddes ustensilessont
propres.
• Zonesavecreflet metallique.
DepOtsminerauxen provenancedeI'eauet delanourriture.Utiliserlesagentsde
nettoyagerecommandes.Voir page43.
• Piq0resou ecaillements
Enleverrapidementles produitssucresqui ont deborde.Voirpage43.
o
Ceciest normaldurant lacuissond'alimentscontenantbeaucoupd'eau.
o
Utilisationexcessived'humidit6 Iorsdunettoyagedu hublot.
l[missiond'uneforte odeur ou de
fumee Iorsde la raiseen marche
du four.
Codesd'anomalie.
Desbruils se foal enlendre.
II n'y a ni bip ni affichage.
o
Ceciest normalpourun four neufet disparaitapresquelquesutilisations.
Un cycled'autonettoyage<<br01era_>plusrapidementlesodeurs.
o
La miseen marched'un ventilateuraide_retirerfumeeetodeurs.
o
Presencede saletessur la sole.Proceder9 unautonettoyage.
• LesrootsBAKE(Cuissoncourante)ou LOCKpeuventclignoterrapidement_ I'afficheurpour
prevenird'une erreuroud'un probleme.Si le mot BAKEou LOCKparait _ I'afficheur,appuyer
sur latouche Cancel (Annuler).Si le mot BAKEou LOCKcontinue_ clignoter,debrancher
I'appareil.Attendre quelquesminutes,puisrebrancherI'appareil.Si le motcontinue
clignoter,debrancherI'appareilet prendrecontactavecun reparateurautorise.
• Si lefour esttres sale,lesflammechespeuventproduire un coded'anomalieaucoursdu
cycled'autonettoyage.Appuyersur latouche Cancel et laisserlefour refroidir
completement,essuyerlasaleteen excespuisreprogrammerI'autonettoyage.Silecode
d'anomaliereapparait,prendrecontactavecunreparateurautorise.
• Lefour fait plusieursbruitsfaibles.II est possibled'entendrelesrelaisdufour qui se mettent
en marcheets'arretent.Ceciestnormal.
• Alorsquelefour serechauffeetserefroidit,il estpossibled'entendredesbruitscorrespondanl
la dilatationet 9 lacontractiondes piecesmetalliques.Ceciestnormalet n'endommagepa,_
I'appareil.
• Le bruit d'un ventilateurpeut etreentendu.C'estleventilateurde refroidissementet ceci
est normal. Leventilateurcontinue 9fonctionner tant que le four n'a pasrefroidi.
• Lefour est peut-etre en modesabbat.Voirpage38.
• Lescommandespeuventetre verrouillees.Voirpage 33.
SAb clignote puis • Lefour est en modesabbat.Pourannuler,appuyersur la toucheClock (Horloge)et
resteallure& maintener-laenfonceependantcinq secondes.
48
Page 50

p
GARANTIE DES GROS APPAREILS MENAGERS AMANA ®
GARANTIE LIMITI_E
Pendant un an & compter de la date d'achat, Iorsque ce gros appareil menager est utilise et entretenu conformement aux instructions
jointes a ou fournies avec le produit, la marque Amana de Whirlpool Corporation ou Whirlpool Canada LP (ci-apres designees "Amana")
paiera pour les pieces specifiees par I'usine et la main-d'oeuvre pour corriger les vices de materiaux ou de fabrication. Le service doit
etre fourni par une compagnie de service designee par Amana. Cette garantie limitee est valide uniquement aux 12tats-Unis ou au
Canada et s'applique exclusivement Iorsque I'appareil est utilise dans le pays oQ il a ete achet& A I'exterieur du Canada et des 50 12tats
des 12tats-Unis, cette garantie limitee ne s'applique pas. Une preuve de la date d'achat original est exigee pour obtenir un service dans
le cadre de la presente garantie limitee.
ARTICLES EXCLUS DE LA GARANTIE
La pr6sente garantie limit6e ne couvre pas :
1. Les visites de service pour rectifier I'installation du gros appareil menager, montrer a I'utilisateur comment utiliser I'appareil,
remplacer ou reparer des fusibles ou rectifier le c&blage ou la plomberie du domicile.
2. Les visites de service pour reparer ou remplacer les ampoules electriques de I'appareil, les filtres a air ou les filtres & eau. Les pieces
consomptibles ne sont pas couvertes par la garantie.
3. Les reparations Iorsque le gros appareil menager est utilise &des fins autres que I'usage unifamilial normal ou Iorsque les
instructions d'installation et/ou les instructions de I'operateur ou de I'utilisateur fournies ne sont pas respectees.
4. Les dommages imputables a : accident, modification, usage impropre ou abusif, incendie, inondation, actes de Dieu, installation
fautive ou installation non conforme aux codes d'electricite ou de plomberie, ou I'utilisation de pieces consomptibles ou de produits
nettoyants non approuves par Amana.
5. Les defauts apparents, notamment les eraflures, les bosses, fissures ou tout autre dommage au fini du gros appareil menager, &
moins que ces dommages soient dus a des vices de materiaux ou de fabrication et soient signales a Maytag dans les 30 jours
suivant la date d'achat.
6. Toute perte d'aliments due & une defaillance du refrigerateur ou du congelateur.
7. Les coQts associes au transport du gros appareil menager du domicile pour reparation. Ce gros appareil menager est con£_upour
etre repare & domicile et seul le service & domicile est couvert par la presente garantie.
8. Les reparations aux pieces ou systemes resultant d'une modification non autorisee faite & I'appareil.
9. Les frais de transport pour le service d'un produit si votre gros appareil est situ6 dans une region eloignee oQ un service d'entretien
Maytag autorise n'est pas disponible.
10. La depose et la reinstallation de votre gros appareil si celui-ci est install6 dans un endroit inaccessible ou n'est pas install6
conformement aux instructions d'installation fournies.
11. Les gros appareils menagers dont les numeros de serie et de modele originaux ont ete enleves, modifies ou qui ne peuvent pas etre
facilement identifies. La presente garantie est nulle si le numero de serie d'usine a ete modifie ou enleve du gros appareil menager.
Le coQt d'une reparation ou des pieces de rechange dans le cadre de ces circonstances exclues est & la charge du client.
CLAUSE D'EXONI:!:RATION DE RESPONSABILITI:!: AU TITRE DES GARANTIES IMPLICITES; LIMITATION DES RECOURS
LE SEUL ET EXCLUSIF RECOURS DU CLIENT DANS LE CADRE DE LA PRI2SENTE GARANTIE LIMITI2E CONSISTE EN LA
RI2PARATION PRI2VUE CI-DESSUS. LES GARANTIES IMPLICITES, Y COMPRIS LES GARANTIES APPLICABLES DE QUALITI 2
MARCHANDE ET D'APTITUDE A UN USAGE PARTICULIER, SONT LIMITI2ES A UN AN OU A LA PLUS COURTE PI2RIODE AUTORISI2E
PAR LA LOI. AMANA N'ASSUME AUCUNE RESPONSABILITI 2 POUR LES DOMMAGES FORTUITS OU INDIRECTS. CERTAINES
JURIDICTIONS NE PERMETTENT PAS L'EXCLUSION OU LA LIMITATION DES DOMMAGES FORTUITS OU INDIRECTS, OU LES
LIMITATIONS DE LA DURI2E DES GARANTIES IMPLICITES DE QUALITI 2 MARCHANDE OU D'APTITUDE A UN USAGE PARTICULIER,
DE SORTE QUE CES EXCLUSIONS OU LIMITATIONS PEUVENT NE PAS S'APPLIQUER DANS VOTRE CAS. CE-I-I-EGARANTIE VOUS
CONF#RE DES DROITS JURIDIQUES SPI2CIFIQUES ET VOUS POUVEZ 12GALEMENT JOUIR D'AUTRES DROITS QUI PEUVENT
VARIER D'UNE JURIDICTION A UNE AUTRE.
A I'exterieur du Canada et des 50 12tatsdes 12tats-Unis, cette garantie ne s'applique pas. Contactez votre marchand Maytag autorise
pour determiner si une autre garantie s'applique.
Si vous avez besoin de service, voir d'abord la section "Depannage" du Guide d'utilisation et d'entretien. Apres avoir verifie la section
"Depannage", de I'aide supplementaire peut etre trouvee en verifiant la section "Assistance ou service" ou en appelant Maytag. Aux
E.-U., composer le 1-800-843-0304. Au Canada, composer le 1-800-807-6777. 9/07
Page 51

Estufa Eiectrica Desiizante con
Control 'Easy Touch' 700 - Cubierta Lisa
//
Jnstrucciones Jmportantes
sobre Seguridad .....................................................51-54
Cocinando en la Estufa .........................................55=57
Controles Superiores
Cubiertas Lisas
Area Calentadora
Cocinando en el Homo .........................................58=66
Horneado
'Cook& Hold'
'Cook& Hold'Diferido
MantenerCaliente
Asar a la Parrilla
Cierre Autom_tico/Modo Sab_tico
Favorito
Parrillas del Homo
Cuidado y Limpieza ...............................................67=70
Homo Autolimpiante
Procedimientos de Limpieza
IVlantenim iento ....................................................... 71 =72
LuzdelHomo
VentanadelHomo
Localizaci6n y Soluci6n
de Averias ................................................................73-74
Garantia y Servicio ................................ P_gina _ltima
Page 52

Lea y siga todas ias instrucciones antes de usar este
electrodom_sUco para evitar el riesgo potencial de incendio,
choque elOctrico, lesion personal o da_o al electrodomOstico
como resultado de su uso inapropiado. Utilice este
electrodomOstico solamente para el prop0sito que ha sido
destinado segOnse describe en esta gu[a.
Para asegurar funcionamiento correcto y seguro: El
electrodomOstico debe ser instalado debidamente y puesto a
tierra por un tOcnico calificado. No intente ajustar, reparar,
prestar servicio o reemplazar ninguna pieza de este producto
a menos que sea espedficamente recomendado en estagu[a.
Todas las reparaciones deben ser realizadas por un tOcnico
calificado.
Siempre desenchufe el electrodomOstico antes de efectuar
alguna reparaci6n.
Las advertencias e instruccionesimportantessobre seguridad
que aparecen en esta gu[a no est4n destinadas a cubrir todas
las posibles circunstancias y situaciones que puedan ocurrir.
Se debe ejercer sentido comOn,precauciOn y cuidado cuando
instale, realice mantenimiento o haga funcionar el artefacto.
Siempre pOngase el fabricante si surgen problemas o
situaciones que usted no comprenda.
Reconozca los sirnbolos, advertencias,
etiquetas de seguridad
Para verificar si el dispositivo est4 debidamente instalado, mire
debajo de la estufa con una linterna para asegurarse de que
uno de los tornillos niveladores traseros est6 debidamente
enganchado en la ranura del soporte. El dispositivo antivuelco
asegura el tornillo nivelador trasero al piso cuando est4
debidamente enganchado. Esto debe verificarse carla vez
que la estufa sea movida.
Para Evitar un |ncendio o
Da o Causado pot el Hurno
Aseg_rese de que se hayan retirado todos los materiales de
empaque del electrodom6stico antes de su uso.
No coloque matefiales combustibles cerca del
electrodom6stico. No se deben guardar en el homo
materiales inflamables. Muchos pl4sticos son afectados por el
51
Page 53

InstrucdonesImportentes Segurlded
calor. Mantenga los pl_sticos alejados de las piezas del
electrodom6stico que se pueden entibiar o calentar.
Para evitar incendios de grasa, no permita acumulaci6n de
grasa de cocinar o de otros materiales inflamables en el homo
o en su cercan[a.
En Caso de |ncendio
Use un extinguidor con producto qu[mico seco o del tipo
espuma o bicarbonato para apagar el incendio o las llamas.
Nunca use agua en un incendio de grasa.
1. Apague el homo para evitar que la llama se disperse.
2. NUNCA levante o mueva una sart6n en llamas.
3. Apague el fuego o la llama cerrando la puerta del horno.
Apague la campana de ventilaci6n para evitar que las llamas
se dispersen. Apague las llamas y luego encienda la campana
para expulsar el humo y el olor.
Seguridad para los Ni os
NUNCA deje a los ni_os solos o sin supervisi6n cuando el
homo est6 en uso o cuando est6 caliente. No se debe nunca
permitir que los ni_os se sienten o se paten en ninguna pieza
del electrodom6stico pues se pueden lesionar o quemar.
Se les debe ense_ar a los ni_os que el electrodom6stico y los
utensilios que est_inen 61pueden estar calientes. Deje enffiar
los utensilios calientes en un lugar seguro, fuera del alcance
de los ni_os. Se lesdebe ense_ar a los ni_os que un
electrodom6stico no es un juguete y que no deben jugar con
los controles u otras piezas del artefacto.
instrucciones Generales
Para evitar posibles riesgos para el usuafio y daNo al
electrodom6stico, no use este producto como una estufa para
calentar o entibiar una habitaci6n. Adem_s no use el homo
como un lugar para guardar alimentos o utensilios de cocina.
No obstruya la circulaci6n del aire bloqueando el respiradero
del homo. El respiradero del homo se encuentra en la parte
traserade la superficiede cocci6n.
NO TOQUE LOS ELEMENTOSCALEFACTORESNI LAS
SUPERFICIESINTERIORESDEL HORNO. Los elementos
calefactores pueden estar calientes aOn cuando su color sea
obscuro. Las superficies interiores de cualquier homo se
calientan Io suficiente como para causar quemaduras.
Durante y despu6s del uso, no toque ni permita que las ropas
u otros materiales inflamables entren en contacto con los
elementos calefactores o las superficies intefiores del homo
hasta que no se hayan enffiado. Otras superficies que pueden
estar calientes incluyen la cubierta, la superficie que est_n
difigidas hacia la cubierta, el respiradero del homo, la
superficie cercana a la abertura del respiradero, la puerta del
homo y las _reas que las rodean, y laventanilla del horno.
No toque un foco caliente del homo con un paso h0medo
pues se puede quebrar. Si el foco se quiebra, desenchufe el
electrodom6stico antes de sacar el foco para evitar sufrir un
choque el6ctrico.
NUNgA use papel de aluminio para cubrir las parrillas del
homo ni el panel inferior del homo. El uso incorrecto puede
resultar en un fiesgo de choque el6ctrico, incendio o da_o al
electrodom6stico. Use papel de aluminio solamente como se
indica en esta gu[a.
No use la cubierta o el homo como una _rea para almacenar
alimentos o utensilios de cocina.
Seguridad al Cocinar
Nunca caliente un contenedor de alimento cerrado en el
horno. La acumulaci6n de presi6n puede reventar el
contenedor causando una lesi6n personal grave o da_o al
electrodom6stico.
52
Page 54

InsirucclonesImporienles Segurlded
Use tomaollas secos y gruesos. Los tomaollas hOmedos
pueden causar quemaduras por vapor. No se deben usar
toallas de secar los platos ni otros sustitutos en vez de los
tomaollas porque enospueden pasar sobre los elementos
calientes y prenderse fuego o pueden quedar atrapados en las
piezas del electrodom6stico.
Use vestimentas apropiadas. Las ropas sueltas o ropas con
mangas largas sueltas no se deben usar cuando se est_
cocinando. La ropa se puede prender fuego y causar
quemaduras si entra en contacto con los elementos
calefactores.
Siempre coloque las parrillas del horno en las posiciones
deseadas cuando el homo est6 frfo. DesNcela parrilla del
homo hacia afuera para agregar o retirar alimento usando
tomaollas secos y gruesos. Siempre evite colocar o retirar
aNmentodel homo sin sacar la parrilla hacia afuera. Si una
parrilla debe ser movida cuando est6 caNente,use un
tomaollas seco. No deje que el tomaolla entre en contacto
con el elemento caNente del homo.
Use las parrillas solamente en el homo en que fueron
enviadas/compradas.
Tenga cuidado cuando abra la puerta del horno. Primero deje
que salga el aire o vapor caNenteantes de sacar ovolver a
colocar el aNmentoen el homo.
ADVERTENCIA SOBRE ALllVIENTOS PREPARADOS: Siga
las instrucciones del fabricante del aNmento. Si un contenedor
de alimento congelado de pl_stico y/o su tapa se deforma,
comba o de otra manera se da_a durante la cocci6n,
inmediatamente descarte el alimento y su contenedor. El
aNmento puede estar contaminado.
No permita que el papel de aluminio o la sonda de la came
toque el elemento calefactor.
Siempre apague todos los controles cuando haya terminado
de cocinar.
de dispositivos o accesorios que no sean expresamente
recomendados en esta gufa puede crear peligros graves de
seguridad, afectar el rendimiento y reducir la vida L_tilde los
componentes de este electrodom6stico.
Si el utensilio es m_ispeque_o que el elemento, una porci6n
del elemento quedar_ expuesta y puede encender la ropa o un
tomaollas.
Solamente ciertos tipos de utensiNosde vidrio, vidrio cer_imico,
cer_mica, gres u otros utensiNosvidriados son convenientes
para cocinar en la superficie o en el horno sin quebrarse
debido al repentino cambio de temperatura. Siga las
instrucciones del fabricante del utensiNo cuando use vidrio.
Gire los mangos de los utensiNos hacia el centro de la
cubierta, no hacia la habitaci6n ni sobre otto elemento
superior. Esto reduce el riesgo de quemaduras, encendido de
materiales inflamables o derrames si el utensiNoes tocado
accidentalmente o alcanzado pot ni_os peque_os.
Cubierta
NUNCA deje los elementos superiores sin supervisi6n,
especialmente cuando est_ usando los ajustes de calor altos.
Un derrame sin recibir la debida atenci6n puede causar humo
y un derrame de grasa puede causar un incendio.
Este electrodom6stico tiene diferentes tama_os de elementos
superiores. Seleccione utensiNosque tengan bases planas Io
suficientemente grandes para cubrir el elemento. La relaci6n
adecuada entre el utensiNoy el elemento mejorar_ la
eficiencia al cocinar.
CUBIERTA DE VIDRIO CERAMICO: NUNCA cocine sobre
una cubierta quebrada. Si la cubierta de la estufa se quiebra,
los agentes de Nmpiezay losderrames pueden penetrar y
crear un riesgo de choque el6ctrico. P6ngase en contacto con
un t6cnico caNficado inmediatamente.
Seguridad sobre el Uso
de Utensilios
Siga las instrucciones del fabricante cuando use bolsas para
cocinar en el homo.
El rendimiento y funcionamiento seguro de este
electrodom6stico ha sido comprobado usando utensiNosde
cocina tradicionales. No use ningOndisposkivo o accesorio
que no haya sido especfficamente recomendado en esta gufa.
No use sistemas de convecci6n agregables a hornos. El uso
Ollas Freidoras
Use extremo cuidado cuando mueva la olla con aceite o
descarte la grasa caNente. Deje que lagrasa se enfrfe antes
de intentar mover la olla.
Campanas de Ventilaci6n
Limpie con frecuencia la campana y los filtros a fin de evitar
que se acumule enellos grasa u otros materiales inflamables y
para evitar incendios de grasa.
Cuando prepare alimentos flameados debajo de la campana,
encienda el ventilador.
53
Page 55

InsirucdonesImporienles Segurlded
Seguridad en la Limpieza
Limpie con cuidado lacubierta. Apague todos los controles y
espere que se enfrfen las piezas del electrodom6stico antes de
tocaflas o limpiaflas. Limpie con cuidado. Tonga cuidado
para evitar quemaduras de vapor si usa una esponja o un
paso mojado para limpiar los derrames en una superficie
caliente. AIgunos limpiadores pueden producir vapores
nocivos cuando se aplican en una superficie caliente.
Limpie solamente las piezas indicadas en esta gufa.
Homo Autolimpiante
No limpie lajunta de la puerta. Lajunta de la puerta es
esencial para obtener un buen sello. Se debe tenet cuidado
de no frotar, da_ar ni mover la junta.
No use limpiadores de homo ni forros de homo de ningOn tipo
alrededor ni en ninguna parte del homo autolimpiante.
Aviso y Advertencia
importante Sobre Seguridad
La Propuesta 65 de la Ley de 1986 del Estado de California
Sobre Seguridad y Contaminaci6n del Agua Potable (California
Safe Drinking Water andToxic Enforcement Act of 1986) exige
que el Gobernador de California publique una lista de las
sustancias que seg0n el estado de California causan c_ncer o
da_o al sistema reproductivo y exige que las empresas
adviertan a sus clientes sobre la exposici6n potencial a tales
sustancias.
Se advierte a los usuafios de este electrodom6stico que cuando
el homo est_ funcionando en el ciclo de autolimpieza, puede
haber exposici6n de bajo nivel a algunas de las sustancias
indicadas en la lista, incluyendo mon6xido de carbono. La
exposici6n a estas sustancias puede ser reducida a un mfnimo
ventilando el homo al exterior en forma adecuada, abriendo las
ventanas y/o la puerta en la habitaci6n en donde est,1ubicado
el electrodom6stico durante el ciclo de autolimpieza.
AVlSO IMPORTANTE RESPECTO A LOS PAJAROS
DOMESTICOS: Nunca mantenga los p_jaros en la cocina o en
las habitaciones donde puedan Ilegar los humos de la cocina.
Los p_jaros tienen un sistema respiratorio muy sensitivo. Los
humos producidos durante el ciclo de autolimpieza del homo
pueden ser perjudiciales o mortales para los p_jaros. Los
humos que despide el aceite de cocina recalentado, la grasa,
margarina y los utensilios antiadherentes recalentados pueden
tambi6n ser perjudiciales.
Conserve estas |nstrucciones para Referencia Futura
54
Page 56

Controles Superiores
Useestoscontrolespara encenderloselementossuperiores. Sedis-
ponede una selecci6ninfinita deajustesdel calordesde'Low' (Bajo)
hasta'High' (Alto). Lasperillaspuedencolocarseencualquierade
estosajusteso entreellos.
Prograrnaci6n de los Controles
1. Coloqueel utensiliosobre el elementosuperior.
2. Optimay gire la perilla encualquier direcci6nhastael ajustede
calordeseado.
ajustepeque_ode latemperaturadependiendodel alimentoque
est6 preparando.Losotroselementosmuestranlosajustes
exclusivosdedichoselementosimpresosalrededorde las perillas.
Ajuste latemperaturaa los n_merosqueofrecenlosresultadosde
cocci6ndeseados.Lassiguientesdescripcionesle ayudardnaelegir
el ajusteque le dardlosresultados6ptimos.
'Hold' (MantenerCaliente)o 'Warm' (Calenta0:Losalimentos
mantienenunatemperaturasobre los140° F(60°C)sinquesigan
cocindndose.Losalimentosestdncalientesenprincipio y luegose
reducelatemperatura.Nunca useestosajustespara recalentar
alimentosfrfos.
• Enel panelde controlseencuentramarcadocual O O
elementocontrolacadaperilla. Potejemplo,el dibujo
a laderechaindica el elementodelanteroizquierdo. O O
3. Enel panelde control hayuna luz indicadorade los elementos.
Cuandoseenciendealgunade las perillasdecontrol, la luzse
ilumina. La luzse apagardcuandotodos los elementossuperiores
seapaguen.Cuandoseenciendeun control,sepuede percibirun
brillo a Iolargode la superficie lisa.Elelementopasardpot ciclos
deencendidoy apagadopara mantenerel ajustede calor
seleccionado,inclusiveen el ajuste'High'.
4. Despu6sdecocinarcoloque laperilla en la posici6n'OFF'
(Apagado). Retireel utensilio.
Ajustes de calor sugeridos
Eltama_oy tipo de utensilio,eltipo y cantidadde alimentoqueest6
calentandoy la potenciadecarla elementoindividualdeterminardnla
posici6nidealde la perilla parala cocci6n.Algunoselementostienen
un ajustede cocci6nafuego lentoy paraderretirque requerirdun
'Simmer' (Cocci6naFuegoLento):Losalimentosformanburbujas
que apenasIlegana lasuperficie.Losalimentostienen una
temperaturaentre 185° F (85°C) y 200° F(93°C).Elajustede
cocci6nafuego lentotambi6npuedeset usadopara herviro
escalfaralimentoso seguircocinandoalimentoscubiertos.
'Slow Boil' (HervorLento):Losalimentosforman burbujas
moderadamente.Elajustede hervorlentotambi6n puedeset usado
parala mayorfadelasfriturasy paramantenerla cocci6nde
grandescantidadesde Ifquido.
'Boil' (Hervir):Losalimentosforman burbujasagranvelocidad.Este
ajustetambi6npuedeset usadoparadorarcame, parapreparar
alimentossalteados,parasofrefry paracalentaraceiteparafrefr
antesde reducirla temperatura.Los3 o 4 ajustesrodsaltosde la
perillaseusanparaestostipos de cocci6n.Elajusterodsalto
siemprese usa parahacerhervir el agua.Algunos elementos
ofrecenunavelocidadincluso mayorpara hen/irIfquidos.
55
Page 57

Cubiertas Lisas
Notas sobre las cubiertas lisas:
* La cubiertade la estufapuede emitir un poco de humoy
olor la primeravezque se utiliza. Estoes normal.
• Lascubiertas lisas retienenel calor por un cierto periodo
despu6sque se ha apagado la estufa. Apaguelos elementos
unospocosminutos antesdeque losalimentosest(!n
completamentecocinadosy use el calorrestanteparacompletar
lacocci6n.Cuandola luz de superficiecalientese apaga(veta
continuaci6n),el _readondesecocina estar_frfa altacto.
Debidoa la maneraen que retienenel calor,los elementoslisos
no responder_ntan r@idamentea loscambiosen losajustes
como loselementosespirales.
• Encasode un posiblederrame,retire el utensiliode lacubierta
de la estufa.
• Nuncatrate de levantar la cubierta.
• Lasuperficielisa puedeversedescoloridacuandoest_caliente.
Estoesnormaly desaparecer_cuando lasuperficiese enfrfe.
Consejos para proteger la
cubierta lisa
Limpieza (vet p_gina69para mayorinformaci6n)
• Antesdeusarpot primeravez,limpiela cubierta.
• Limpiela cubiertadiariamenteo despu(!sde carlauso.Estola
mantendr_con unabuenaaparienciay puedeevitarque se da_e.
• Siseproduce un derramecuandoestecocinando,Ifmpielo
inmediatamentede la cubiertacuando(!staestecaliente para
evitaruna limpiezam_sdificil despu(!s.Tengamuchocuidado,
limpieel derrameconunatoalla secay limpia.
• Nodeje que los derramespermanezcansobre la cubiertao sobre
la moldurade la cubierta porun periododetiempo prolongado.
• Nuncause polvosde limpiezaabrasivosniesponjasde restregar
que puedanrayarla cubierta.
• Nuncause blanqueadora basede cloro,amonfaconi otros
limpiadoresque no hayansido especificamenterecomendados
parausaren elvidrio cer_mico.
Elementos Superiores
Loselementossuperioresensu estufaest_nidentificadospor
drculos permanentesenlasuperficie lisa. Paracocinarde manera
m_seficiente,useun utensilioque sea del mismotama_oqueel
elemento.
Losutensiliosno debenextenderse m#sall# de 12 a 25 mm
(1/2 a I pulgada) de/tama#e de/element&
Cuandose enciendeun control,se puedevet un resplandora trav_s
de la superficielisa.Elelemento pasar_potciclos de encendido
y apagado para mantenerel ajuste de calor seleccionado, ann
en el ajuste 'Hi' (Alto).
Paramayorinformaci6nsobre losutensiliosconsultela secci0n
Recomendacionessobre losUtensiliosen la p_gina6/4.
6" ELEMENTO SENCILL O
SENCILLO _ 6" ELEMENTO
\ SENCILLO
9" ELEMENTO
9" ELEMENTO
SENCILLO
Luz indicadora de Superficie Caliente
La luzindicadoradesuperficiecalientese encuentraen la parte
delanterade la superficiede cocci0n.Laluzse iluminar_cuando
cualquierade los elementossuperioresest(!caliente.Permanecer_
encendidaa_n despuesdeque el controlsea apagado,hastaque el
_reasehayaenfriado.
Para evitar marcas y rayaduras
=No useutensiliosdevidrio. Puedenrayarlasuperficie.
• Nunca coloqueun soporteo un aro dewok entre lacubiertay el
utensilio. Estosarticulospuedenmarcaro rayarla cubierta.
• Nodesliceutensiliosde aluminioatrav(!sde una cubiertacaliente.
Losutensiliospuedendejarmarcasquedebenset limpiadas
inmediatamente.(Vet Limpieza,p_gina69.)
• AsegOresede que la cubiertay la parte inferiordel utensilioest(!n
limpiasantesdeencenderlaestufa a fin de evitarrayaduras.
• Paraevitarlasrayaduraso da_oa la cubiertade vidrio cer_mico,
no dejeazOcar,sal o grasassobrelos elementos. Limpiela
cubiertacon un paso limpioo con toallasde papel antesde usarla.
• Nunca desliceutensiliosde metalpesadosatraves de la cubierta
puespuedenrayarla.
Para evitar ias rnanchas
• Nuncause un paso o unaesponjasucia paralimpiarla cubierta
de laestufa. Estopuededejaruna peliculaque puedemancharla
cubiertadespuesque el_reasecalienta.
• SisecontinOacocinandosobre unasuperficiesuciase puede/
podr_produciruna manchapermanente.
56
Page 58

Para evitar otros da os
• Nodeje queen la cubiertacalientese derritanpldsticos,azL_caro
alimentoscon altocontenidode azL_car.Siestosucede,limpie
inmediatamente.(VerLimpieza,p_gina69.)
• Nuncadejeque unaella hiervahastaquedarsecapuesesto
da_ar_lasuperficiey el utensilio.
Nunca use la cubierta come una superficie de trabajo ni
comeunatabla decortar.
• Nuncacocinealimentosdirectamentesobrelacubierta.
• Nouse un utensilio peque_oen un elementogrande. Estono s01o
desperdiciaenergfasine quetambienpuedenproducirsederrames
calientessobrela cubiertaloscualesrequierenlimpiezaadicional.
• Nouse utensiliosespecialesqueno seanplanes,detamale mayor
o desniveladostal comela parteinferior redondade loswoks, con
fondos acanaladosy/o parrillasy eliasde grantamale para
prepararconservas.
• Nouse aluminioni contenedoresde papelde aluminio. El
aluminiose puedederretiren la cubiertade vidrio cer_mico.Si el
metalsederrite en la cubierta,no use la estufa. Llamea un
tecnicoautorizado.
Utensiliosplanesy
suaves.
Utensiliosde material Los utensiliosde metalesdelgadoso de
grueso, vidrio.
Utensiliosque sean Losutensiliosm_speque_oso m_s
del mismotamale grandesque el elementoen 2,5cm
que el elemento. (1 pulgada).
Mangosseguros. Losutensiliosconmangossueltos o rotes.
Tapashermeticas. Lastapassueltas.
Wokscon fondo Loswoks con fondoapoyadoen un are.
plane.
Losutensiliosconfondosacanalados
o arqueados.Losutensiliosconrondos
irregularesno cocinanuniformemente
losalimentosy algunasvecesno
puedenhervirIfquido.
Mangospesadosque puedeninclinarel
utensilio.
Utensilios para preparar
Recomendaciones sobre los
utensilios
Si seusan losutensilioscorrectossepuedenahorrarmuchos
problemas,tal come prolongaci0ndeltiempo decocci0n de los
alimentosu obtenci0nde resultadosno consistentes.Los utensilios
correctosreduceneltiempo de cocci0n,usan menosenergfa
electricay cocinan losalimentosde maneram_suniforme.
Prueba de las Ollas Planas
Verifiquesi suseliasson planas.
La prueba de la regla:
1. Coloqueuna reglaatray,s delfondo delaella.
2. Col0quelaa la luz.
3. Pocao ninguna luz debeversedebajode la regla.
La prueba de la burbuja:
1. Coloqueuna pulgadade agua en laella.Coloquela ella en la
cubiertay gire elcontrol a 'High' (Alto).
2. Observelaformaci0nde burbujasamedidaque el aguase
calienta.Las burbujasuniformessignificanbuenrendimientoy
lasburbujas no irregularesindicanpuntoscalientesy cocci0n
dispareja.
conservas y de tamales
grandes
Todaslas elias para preparar censervasy las elias grandes
debentenor fendes pianosy deben set heches de materiales
gruesos. Estoes muyimportanteparalascubiertaslisas.Labaseno
debeser m_sde 2,5 cm (1 pulgada)m_sgrandeque el elemento.
Cuandolaseliasde prepararconservasy laseliasde tamales
grandesno cumplenestosrequisites,la cocci0npuedendemorar
m_stiempoy se puedenda_arlascubiertasde lasestufas.
Algunaseliasde prepararconservastienenbasespeque_aspara
usarlasen lassuperficieslisasde lasestufas.
Cuandoest_ preparande censervas,useel ajuste de ealer alto
hastaque el agua cemience a hervir o seIogralapresi0nenel
ella.Reduzcael caloral ajustem_sbajoque mantengael hervoro la
presi0n.Si no sereduce elcalor,sepuededaSarla cubiertade la
estufa.
57
Page 59

ndoenelHomo
Panel de Control
A B C D
,,_ii_,:_;_,i_i!_i_i_i_;_!_'_:_il;iiiiiiii@ii_!!i!_ili_ii_ii_ii_iiiiiiiii_iiii_!_!i_i_i!!_i_!i!iii_i_!_i!!il,:_i!ili!i!iii!ii!ii!@_!i!_ii!{_iiiiiiiiiii!i!ilili!i;¸
t
E F G H
Elpanelde control haside dise_adoparasuf4cil programaci0n.Elindicadorvisual enel panelde controlmuestrala hera del dia,el
temporizadory lasfunciones del horno.Elpanelde control mostradoarribaincluyelascaracteristicasespecificasdelmodelo. (Elestilo
del panelde controlvariasegOnel modelo.}
'Broil'(Asara
laParrilla)
'Bake'(Hornea0
i!i!ii:iC!j!ii!ii!ill
A (M4s)o
0Vlenos-)
limer' 0-emporizado0
'Cook& Hold'(CocciOn
y MantenerCaliente)
'Clean'(Limpieza}
'Favorite'0:avorito)
'Clock'(Reloj)
'KeepWarm'
L1VlantenerCaliente)
'Cancel'(Cancela0
Seusaparaasara laparrillaydorarlos
alimentos.
Seusaparahorneary asar.
Programao cambialahera,la
temperaturadelhomo.Programaasara
laparrilla'HI'o'L0'.
Programaaltemporizador.
Seusaparahornearduranteuntiempo
seieccionado,luegomantieneelalimento
calienteduranteunahera.
Seusaparaprogramarunciclode
autolimpieza.
Seusaparaprogramaryguardarun
procedimientoespecificode'Cook&Hold'.
Seusaparaprogramarlaheradeldia.
Seusaparamantenercalienteenel
homoelalimentococinado.
CancelatodaslasfuncionesaexcepciOn
deltemporizadory elreloj.
Use de las Teclas
• Oprimala tecla deseada.
• OprirnaA o Y paraprogramareltiempo o latemperatura.
• Seescuchar4unasepal sonoracadavezque oprimaunatecla.
• Seescuchar4ndosse_alessonorassi ocurre un error en la
programaciOn.
Nora: Cuatrosegundosdespuesde haberoprirnidolatecla A o
_, eltiempoo latemperaturaser4autom4ticamente
programada.Sitranscurrenm4sde 30segundosdespuesde
haberoprimidounatecla defunciOny antesdeoprimir latecla A
o Y, la funciOnser4canceladay el indicadorvisualvolver4al
despliegueanterior.
'Clock' {ReJoj}
Elrelojpuedeserajustadoparadesplegarla herayaseaen formate
de 12horaso 24 horas.Elreloj haside programadoenla f4brica
parael formatede 12horas.
Para cambiar el relej a formate de 2_ heras:
1. Optimay mantengaoprimidaslasteclas
'Cancel' y 'Favorite'durantetres
segundos.
2. Optima A o _ paraseleccionarel formate
de 12horaso24 horas.
3. Programelaheradel dia siguiendolas
instruccionesindicadasabajo.
Pregramaci6n del Relej:
1. Optimalatecla'Clock'.
• Losdos puntosdestellanen el indicador.
2. OptimaA o _ paraprogramarla heradel dia.
• Losdos puntoscontinOandestellando.
3. Optimalatecla 'Clock' nuevamenteoespere
cuatrosegundos.LosdospuntosdiscontinOandestellando.
Cuandose conectaenergiael@tricaal homoodespuesdeuna
interrupciOnde laenergiael@trica,la Oltimaheradel relojpreviaa
la interrupciOndestellar4enel indicador.
58
Page 60

Cocinendoenel
Paradesplegarla horadel dfa cuandoel indicadoreste mostrando
otrafunci0n detiempo, optima latecla 'Clock' (Reloj).
La horadel reloj no puedesercambiadacuando el hornoha sido
programadopara 'DelayCookorClean'(Horneadoo Limpieza
Diferido) o'Cook& Hold' (Cocci0ny MantenerCaliente).
Para cancelar el despliegue del reloj:
Si nodeseaque el indicadorvisualmuestrelahora del dfa:
Optimay rnantengaoprimidalasteclas
'Cancel' (Cancelar)y 'Clock' durantetres
segundos.Lahoradel dfa desaparecer_del
indicador.
Cuandose cancelael desplieguedel reloj,
optima latecla 'Clock' paradesplegar
brevementelahoradel dfa.
Para restaurar el despliegue del reloj:
Optimay mantengaoprimida lasteclas 'Cancel'y 'Clock' durante
tressegundos.Lahora deldfa reaparecer_enel indicador.
'Timer' (Temporizador)
Eltemporizadorpuedeser programadodeun minuto (0:01)hasta99
horasy 59 minutos(99:59).
Eltemporizadorpuedeser usadoindependientementedecualquier
otraactividad delhorno.Adem_spuedeser programadocuandootra
funci0n del homoest6en funcionamiento.
Bloqueo de los Controles
Elteclado puedeserbloqueadoparaseguridad,limpiezao evitarel
usono autorizado.Nofuncionar_ncuando est(!nbloqueados.
Siel homoest_en uso,los controlespuedebloquearse.
La horaactual deldfapermanecer_enel indicador cuandolos
controlesest(!nbloqueados.
Para bloquear:
Optimay mantengaoprimidaslasteclas
'Cancel' y 'Cook& Hold'durantetres
segundos.(Optimaprimero latecla 'Cancel'.)
Para desbloquear:
Oprimay mantengaoprimidaslasteclas'Cancel' y'
Cook& Hold'durantetres segundos.(Optimaprimero
la tecla'Cancel'.)
C6digos de Errores
'BAKE'(Horneado)o 'LOCK'(Bloqueado)puedendestellar
r_pidamenteparaadvertirleque hayun error oun problerna.Si
'BAKE'o 'LOCK'destellanen el indicadorvisual,optima le tecla
'Cancel'. Si 'BAKE'o'LOCK'contin[_andestellando,desconectela
corrienteelectricahacia el artefacto.Espereunospocosminutosy
vuelvaa conectarlacorrienteel_ctrica.Si las palabrasa[_ncontin_an
destellando,desconectelacorrienteel(!ctricahaciael artefactoy
Ilamea unt(!cnico deservicioautorizado.
Eltemporizadornocontrola el horno.Solamentecontrola unasepal
sonora.
Para programar el temporizador:
1. Oprimalatecla 'Timer'.
• '0:00'destellaen el indicadorvisual.
• Losdospuntos destellar_n.
2. Optimalatecla A o Y hastaque el tiempo
correctoaparezcaenel indicadorvisual.
• Losdos puntos contin0andestellando.
3. Optimanuevamentelatecla 'Timer'o esperecuatro segundos.
• Losdos puntos contin0andestellandoy comienzalacuenta
regresivadel tiempo.
• ElOltimominutode la cuenta regresivadel temporizadorse
desplegar_ensegundos.
/4. AI final del tiempo programado,seescuchar_una sepalsonora
larga.
Para cancelar el temporizador:
1. Optimay mantengaoprimida la tecla'Timer' durantetres
segundos.
U
2. Optimalatecla 'Timer'y coloquela horaa 0:00.
59
Page 61

Cocinendoenel
'Bake' (Horneado)
Para programar 'Bake':
1. Optimalatecla 'Bake'.
• 'BAKE'destellar&
• '000'destellardenelindicadorvisual.
Seleccionelatemperaturadel homo. La
temperaturadel homo puedeset programadade
75°a 285°C(170°a550° F).Optimau optimay
mantengaoprimidalatecla ,& o V.
• Cuandocualquierade estasdos teclasse oprime
pot primeravez,'175°,('350°')se iluminard.
• Optimalatecla A paraaumentarla temperatura.
• Optimalatecla V paradisminuirla temperatura.
.
Optimalatecla 'Bake' nuevamenteoesperecuatrosegundos.
• 'BAKE'dejarddedestellaryse iluminarden el indicadorvisual.
• '38° C'('100° F')o latemperaturaactualdel homose
desplegard.Latemperaturase elevardenincrementosde
'3° C'('5° F')hastaquesealcancela temperaturaprogramada.
Espereaque el homo se precalientedurante 8-15minutos.
• Cuandoel homo Ilegaa latemperaturaprogramadase
escuchardunasepalsonoralarga.
• Paraverificar latemperaturaprogramadaduranteel
precalentamientodel homo,optima latecla 'Bake'.
5.
Coloqueelalimentoen el horno.
6.
Verifiqueel progresode lacocciOncuandohayatranscurridoel
tiempo minimorecomendado.ContinUela cocciOnsiesnecesario.
7.
AI t(!rminode la cocci0n,optima la tecla'Cancel'.
8. Retireel alimentodel homo.
Notas sobre Horneado:
Para cambiar la temperaturadel homo durante el
horneado,optima la tecla'Bake', luegooptima latecla A o V
hastaque Ileguea latemperaturadeseada.
• Para cambiar la temperatura de/homo durante 'Preheat',
optimados veces latecla 'Bake', luego optima latecla A o
V hastaquesedesplieguelatemperaturadeseada.
• Si olvidaapagarelhomo,seapagar_autom_ticamentedespues
detranscurrir 12horns.Sideseadesactivarestacaracterfstica,
veala p_gina64.
Diferencias del horneado entre su homo
antiguo y su homo nuevo
Esnormal observaralgunasdiferenciasen el tiempo de horneadode
suhomo antiguoy su homo nuevo.Yea"AjustedelaTemperatura
del Homo"enlap_gina65.
'Cook & Hold' (Cocci6n y
Mantener Caliente)
'Cook& Hold' le permitehornearduranteunacantidaddeterminada
detiempo,seguidode un ciclo 'KeepWarm'de una hora.
Para programar 'Cook & Hold':
1.Optimala tecla 'Cook & Hold'.
• 'BAKE'y 'HOLD'(Mantener)
destellan.
• '000'se iluminaenel indicadorvisual.
2.Seleccionelatemperaturadel horno.Latemperaturadel
homo puedeser programadade75°a285°C (170° a
550° F).Optimau optimay mantengaoprimidala
tecla A o V.
• Optimala tecla A paraaumentarla
temperatura.
• Optimala tecla V paradisminuir latemperatura.
3.Optimala tecla 'Cook & Hold' nuevamenteoesperecuatro
segundos.
• 'HOLD'destella.
• '00:00'destellaenel indicadorvisual.
/4.Programelacantidaddetiempo durante la cualusteddesea
hornearoprimiendola tecla A o Y. Eltiempo de horneado
puedeprogramarsedesdediez minutos(00:10)hasta11horns,
59 minutos(11:59).
• 'BAKE'y 'HOLD'seiluminanenelindicadorvisual.
• Eltiempo de horneadose iluminar_en el indicadorvisual.
• Comenzar_lacuentaregresivadeltiempo de horneado.
Cuando haya expirado el tiempo de cocci6n:
• Seescuchardncuatrose_alessonoras.
• 'BAKE'se apagard.
• 'HOLD'y 'WARM'se iluminardn.
• Enel indicadorse desplegard'75°' ('170%
6O
Page 62

¢odnandoenel
Despu6s de ann hera en 'HOLD WARM'
(Mantener Caliente):
• 'End'sedesplegard.
• La heradel dfavolverda desplegarseenel indicadorvisual.
Para cancelar 'Cook & Hold' (Cocci6n y Mantener
Caliente) en cualquier memento:
Optimala tecla 'Cancel' (Cancelar).Retireel alimento
del homo.
'Delay Cook & Hold' (Cocci6ny
Mantener Caliente Diferido)
Cuandousa 'Delay'(Diferido),el homocomienzaa cocinar rods
tardeen el din. Programelacantidaddetiempo que usteddesea
diferirantes deque se enciendael homo y cuantotiempodesea
cocinarel alimento.Elhomo comienzaacalentaren la hera
seleccionaday cocinaduranteeltiempo especificado.
Eltiempodiferido puedeprogramarsede10 minutes(00:10)hasta
11 horns,59minutes(11:59).
Para pregramar an cido de cocci6n y mantener
caliente diferido:
Oprimalasteclas'Bake' (Horneado)y 'Timer'
ffemporizador)al mismotiempo.
• 'DELAY'seiluminaen el indicadorvisual.
Cuando el tiempo diferido ha expirado:
• 'DELAY'seapagar&
• Sedespliegaeltiempoy latemperaturadehorneado.
• Sedespliega'BAKE'y 'HOLD'.
Para pregramar an tiempo diferido cuando ya se ha
programatic 'Cook & Hold':
1. OptimaInsteclas'Bake' y 'Timer'.(Oprima
primerola tecla 'Bake'.)
• 'DELAY'y '00:00'sedespliegaenel
indicadorvisual.
2. Optimalatecla A o V paraprogramarel
tiempo diferido.
• 'DELAY'permanecerdiluminadopararecordarle
que seha programatic un ciclode horneado
diferido.
Cuando ha expirado el tiempo diferido y
el homo comienza a funcionar:
• Sedesplegardeltiempoy latemperaturadehorneado.
• 'DELAY'seapagar&
• 'BAKE'y'HOLD'permanecerdniluminados.
Para cancelar:
Optimala tecla'Cancel'.
• TodasInsfuncionesdehorneadocontroladaso no per el
temporizadorserdncanceladas.
• Lahera del dinvolverda desplegarseen el indicadorvisual.
No_s:
• '00:00'sedespliegaenel indicadorvisual.
Oprimalatecla A oT para programar el tiempo
diferido.
.
Oprimalatecla 'Cook & Hold'.
• '000'seiluminaenel indicadorvisual.
• 'BAKE'y'HOLD' destellan.
OptimaA para programar la temperatura de
horneado.
• 00:00y'HOLD'destellan.
• 'BAKE'permaneceiluminado.
OprimaA para programar el tiempo de horneado.
• Enel indicadorvisualseiluminan'DELAY','BAKE',y
'HOLD'.
• No use'DelayBake'paraarticulosque requierenun
hornoprecalentado,tales comopasteles,galletasy panes.
• No use'DelayBake'si el homoyaestdcaliente.
61
Page 63

Cocinendoenel
'Keep Warm' (Mantener Caliente)
Paramantenercalientesenforma seguraalimentoscalienteso para
calentarpanesy plates.
Para programar 'Keep Warm':
1. Oprimalatecla 'Keep Warm'.
• 'WARM'(Caliente)destella.
• '000'sedespliegaenelindicadorvisual.
Seleccionelatemperaturade 'KeepWarm'.Latemperatura para
'KeepWarm'puedeser programadade63° a90° C
(145° a 190° F).Optima u optimay mantenga
oprimidala tecla A o V.
• Cuandocualquierade estasdos teclasse
oprimeperprimeravez,'75°' ('170°')se
iluminar&
• Optimalatecla A paraaumentarla temperatura.
• Optimalatecla Y paradisminuirla temperatura.
'WARM'y latemperaturasedesplegar_nen el indicadorcuando
el ciclo'KeepWarm'est(!active.
Para cancelar 'Keep Warm':
Notas sobre 'Keep Warm':
• ParacalidadOptimade los alimentos,losalimentoscocinados
en el homodebenser mantenidoscalientesper no m_sde 1 a
2 horas.
Paraevitarque losalimentossesequen,c0braloslevemente
con papelde aluminio ouna tapa.
Para calentar panecilles:
cubralevementelospanecilloscon papelde aluminioy
col0quelosen el horno.
optima'Keep Warm' y latecla A paraprogramar
75° C (170° F).
calientedurante12a 15minutes.
Para calentar plates:
coloque2 pilas de cuatroplatescadaunaen el horno.
optima'Keep Warm' y latecla A paraprogramar
75° C (170° F).
calientelos platesdurantecinco minutes,apagueel homoy
dejelosplatesen el homo durante15minutesm_s.
usesolamenteplatesresistentesalhomo,verifique con el
fabricante.
1. Oprimalatecla 'Cancel' (Cancelar).
2. Retireel alimentodel horno.
no coloquelos platescalientessobre unasuperficieffia
puesel cambiordpidode temperaturapuedecausarfisuras
superficiales.
62
Page 64

¢odnandoenel
'Broiling' (Asar a la Parrilla)
Para programar 'Broil':
1. Paracomenzar,optimalatecla'Broil'.
• 'BROIL'destella.
• 'SEt'(stablacer)sedespliegaenel indicador.
2. Optimala tecla A paraprogramarasara la parrilla'HI' (Alto)
optima latecla V paraprogramarasarla parrilla'LO' (Bajo).
• Enel indicadorvisualse desplegar_'HI' o 'LO'.
• Selecciones'HIbroil' (290°C [550°F]) paraasadoa la parrilla
normal.Seleccione'LO broil' (230°C[450 °F])paraasara la
parrillacontemperaturabaja alimentosquedebenser
cocinadospor m_stiempo,tal como la camede ave.
3. Despuesdecuatrosegundos,el hornocomenzar_a funcionar.
• 'BROIL'continuar_iluminado.
/4. Paraun dorado6ptimo,precalienteel elementode asara la
parrilladurante3 a/4 minutosantesde colocarel alimento.
5. Coloqueelalimentoen el horno. Dejela puertaabierta
aproximadamente10cm (cuatro pulgadas)(elprimer tope).
6. Devueltaa la cameunavezaproximadamenteamitadde la
cocciOn.
7.
Cuandoelalimentoestecocinado,optima latecla
'Cancel' (Cancelar).Retireel alimentoy laasadera
delhorno.
• Lahora del dfavolver_a desplegarseenel
indicadorvisual.
Notas Sobre Asado a la Parrilla:
• Paramejoresresultadoscuandoasea la parrilla,useunaasadera
disefiadaparaasara la parrilla.
• Lostiemposde asara la parrillaaumentar_ny el doradoser_
m_sclarosi el electrodomesticoesinstaladoen un circuito de
208voltios.
• 'HI' seusaparalamayoriadelosasadosa la parrilla. Use'LO
broil'cuandoasea la parrillaalimentosquenecesitancocciOn
prolongada.Latemperatura inferiorpermitequeel alimentose
cocine hastaquedarbienasadosin dorarsedemasiado.
• Para cambiarla temperaturadel home durantelaasar a la
parrilla, optima latecla 'Broil', luegooprimalatecla A o V para
cambiarel ajustede asadoentre 'LO'y 'HI'.
• Lostiemposde asadoa la parrillapuedenser m_slargoscuando
seseleccionalatemperaturam_sbajade asar a la parrilla.
• Lamayorfadelos alimentosdebenser dadovueltacuandoest_a
mitaddeltiempo de asar.
Tabla de Asar a la Parrilla
Came de Res Biftec,2,5cm (1")
Hamburguesas,1,9cm (3//4")degrosor
Came de Cerdo Tocino
Chuletas,2,5cm (1")
JamOn- Rebanadasprecocidas,
1,3cm (1/2") degrosor
Came de Ave Presasde polio 3 o/4 Bienasado 'LOBroil'
Mariscos Bistecsdepescado,conmantequilla, 10- 15minutos
2,5cm (1") de grosor
Filetesdepescado,1,3cm (1/2") degrosor
La posiciOnde la parrillasuperiores #5.
Nora:
Estatabla es sOIounagufa. Lostiempos puedenvariarcon el tipo de alimentoquese est_cocinando.
4
4
4
4
4
4
4
4
63
A medioasar
Bienasado
Bien asado
Bienasado
Bien asado
Tibio
Desmenuzado
Desmenuzado
15 - 18 minutos
19 - 23 minutos
15- 18 minutos
6- 10 minutos
22 - 26 minutos
8 - 12 minutos
28 - 38minutos
8 - 12 minutos
Page 65

Cierre Autom tico/
Nlodo Sab tico
Elhorno seapagardautomdticamentedesp@sde 12horassi ustedIo
dejaaccidentalmenteencendido. Estacaracterfsticade seguridad
puedeserdesactivada.
Para cancelar el cierre autom;itico de 12 horas y
dejar que el homo funcione continuamente durante
72 horns:
1. Programeelhornopara hornear(verp_gina60).
2. Oprimay mantengaoprimidala tecla
'Clock' (Reloj)durantecinco segundos.
• 'SAb'sedesplegar_y destellar_durantecinco segundos.
• 'SAb'sedesplegar_continuamentehastaque se desactiveo
hastaque transcurrael Ifmitede 72 horas.
• 'BAKE'(Horneado)tambi@ se desplegar_si se est_usandoun
ciclode homeadocuandoel homo est_en Mode Sab_tico.
• Lafuncidn'BAKE'es/a#nicaque sepuedeuti/izarconel mode
sabbtico.Lasdembsfunciones(temporizador,mantenercaliente,
auto/impieza,etc.)seb/oquearbnduranteelmode sabbtico.
Para cancelar 'Bake' cuando el Mode Sab;itico
est;i active:
Notas Sobre el Mode Sab_tico:
• ElMode Sab_ticopuedeser activadoen cualquier memento,
est(!o no el homo encendido.
• ElMode Sab_ticono puedeser activadosi lasteclas est_n
bloqueadasocuando la puertaest_ bloqueada.
• Siel homoest_horneandocuando el ModeSab_ticoes
programado,'BAKE'se apagar_al finaldel ciclo de horneado.
Nose emitir_ns@alessonoras.
• Sisedeseala luzdel horno duranteel ModeSab_tico,(!sta
debeserencendidaantesde quecomienceel Mode Sab_tico.
• Cuandocomienzael ModeSab_tico,noseemitir_ las@al
sonorade precalentamiento.
• Cuandoel Mode Sab_ticoest_active,todos losavisos,
mensajesy s@alessonorasest_ndesactivadas.
• Elbloqueoautom_ticode la puertanofunciona duranteel
ModeSab_tico.
• Sioprimelatecla 'Cancel' se cancelardun ciclo 'Bake',sin
embargoel control permanecerdenMode Sab_tico.
• Sifalla lacorrienteel(!ctrica,cuandovuelvalaenergfael homo
seactivarden ModeSab_ticocon 72 betasrestantesy ning@
ciclo active.
Optimala tecla 'Cancel' (Cancelar).
• 'BAKE'seapagar_en el indicadorvisual.
• Nose oir_ ningunas@alsonora.
Para cancelar el Mode Sab;itico:
1. Oprimalatecla 'Clock' durantecincosegundos.
0
2. Desp@sde72 horas,el ModeSab_ticoterminar&
• 'SAb'destellar_durantecinco segundos.
• Lahera del dfareaparecer_en el indicadorvisual.
64
Page 66

¢oclnandoenel
Ajuste de la temperatura
del homo
La exactitudde lastemperaturasdel homo escuidadosamente
probadaen lafdbrica. Esnormalnotar algunadiferenciaentrela
temperaturade horneado, entreun homo nuevoy un hornoantiguo.
Conel correr deltiempo,latemperaturadel horno puedecambiar.
Ustedpuedeajustar latemperaturadel homo,si consideraquesu
homo noest_ horneandoo dorandoenforma correcta. Paradecidir
cuantodebecambiar latemperatura,programelatemperaturadel
homoa 15°C(25°F)m_saltaom_sbajaquelatemperatura
indicadaensus recetas,luegohornee. Losresultadosde la
"prueba"puedendarleuna ideade cuantoajustar latemperatura.
Ajuste de la temperatura del homo:
1. Oprimalatecla 'Bake' (Horneado).
2. Programe550° oprimiendolatecla A.
3. Oprimay mantengaoprimidala tecla'Bake'
durantevariessegundoso hastaque 0°
aparezcaen el indicadorvisual.
Si latemperaturadel homo ha sidepreviamenteajustada,el
cambioaparecer_enel indicadorvisual. Perejemplo,si la
temperaturadel homo fue reducidaen 8°C (15° F) el indicador
mostrard'- 8°,('-15°').
Oprimalatecla A o V paraajustarlatemperatura.
Cadavezquese oprimeunatecla, latemperaturacambiaen
3° C (5° F). Latemperaturadelhomo puedeser aumentadao
disminuidaen 3°a 20°C(5° a35° F).
Lahera del dfareaparecer_autom_ticamenteen el indicador
visual.
Nonecesitareajustarla temperaturadel homo si hay unafallao
interrupci0nde energfael(!ctrica. Lastemperaturasde asara la
parrillay limpiezano puedenser ajustadas.
Cambio de la temperatura
de °F/°C
1. Elajustedef_brica de la medidadetemperaturaesFahrenheit.
Paracambiarel ajuste,oprimay
'Cancel' (Cancelar)y'Bake' al
segundos.
.
Escucharduna sepalsonoray el
desplegardenla pantalla.(Sino
estufaregresardal ajusteactual
Paracambiarel ajuste,oprimala tecla A o Y. Oprimala
nuevamentepararegresaral ajusteanterior.Esperecinco
segundosy el ajustese guardar&
mantengaoprimidaslasteclas
mismotiempo durantetres
ajusteactual (°Fo°C)se
serealizaningOncambio,la
despuesde 30segundos).
'Favorite' (Favorite)
Latecla 'Favorite'le permiteguardaren memoriael tiempoy la
temperaturade un ciclo 'Cook& Hold'(Cocci0ny Mantener
Caliente).
Paraprogramarun ciclofavorite,debeestaractivao recientemente
programadaunafunci6n de 'Cook& Hold'.
Para programar an nuevo ciclo Favorite o para
guardar come Favorite an ciclo 'Cook & Hold' que
est_ en progreso:
1. Programeun ciclo de'Cook& Hold'comesedescribeenla
secciOn'Cook& Hold'en la p_gina60.
2. Oprimay mantengaoprimidala tecla'Favorite'
durantetressegundos.
• Elciclo'Cook& Hold' recientementeprogramadooen
progresoser_guardadoen memoria.
• Seoir_ unasepalsonorapara indicarqueelcontrolha
aceptadoel ajuste'Favorite'.
Para comenzar un title programatic come Favorite:
1. Oprimalatecla 'Favorite' (Favorite).
• Sedesplegar_eltiempoy latemperaturapara
el ciclo 'Cook& Hold'programado(si no hay
ciclo 'Cook& Hold' programado,en el indicador
visualsedesplegar_'nonE'.)
2. Oprimalatecla 'Bake'.
• Elciclo Favoritecomenzar_inmediatamente.
• 'BAKE'seiluminar_enelindicadorvisual.
• Eltiempo de cocci0nse iluminar_en el indicadorvisual.
Cuando ha expirado el tiempo de cocci6n:
• 'BAKE'seapagar&
• Seiluminar_n'HOLD'(Mantener)y 'WARM'(Caliente).
• Enel indicadorse desplegar_'75°,('170°').
Para cancelar un ciclo favorite en progreso:
1. Oprimalatecla 'Cancel'.
• Elciclofavoriteguardadoen memoriano
ser_afectado.
2. Retireel alimentodel horno.
......%iiiiiiiii!ii!iiiiiiiiiiiiiiiiiiiiiiiii!iii!iiiiiiiiiiiii!iii!iiiiiiiii!i!ili_,
65
Page 67

¢oclna.doenel
Ventilador del homo
Elventiladorde enfriamientoseencenderdautomdticamentedurante
las asadosa laparrillay algunasfuncionesde horneado. Seusa
para mantenerfrias laspiezasinternasdel panelde control. El
ventiladorse apagardautomdticamentecuandolaspiezasse hayan
enfriado.Elventiladorpuedecontinuar operandoa[_ndespuesque
sehayaapagadoel horno. Estoes normal.
Respiradero del Homo
Cuandoel horno estden uso,el dreacercadel respiraderopuede
calentarseIosuficiente cornoparacausarquernaduras.Nunca
bloqueela aberturadel respiradero.
El respiraderodel homo est_ ubieado en la partetrasera de
la superfieie de cocei(_n.
RESPIRADERO DEL HORNO
Nocoloque pldsticos
cercade la abertura
del respiraderopues
el calorquesale
puededeforrnaro
derretirel pldstico.
'Oven Light' (Luz del Homo)
Oprirnael interruptorde la luzdel horno enel panel
de control paraencendery apagarla luzdel horno. La
luzdel homo s01ose puedeencenderusandoel
interruptor.
Oven
Light
Panel inferior del Homo
Protejaelpanelinferior del hornocontra derrames,especialmente
azucaradosoacidicos,pues puedendescolorarla porcelana
esrnaltada.Useel utensiliode tama_ocorrecto afin de evitar
derrarnes.No eoloque utensiliosni papelde aluminio
directamente en la parte inferiordel homo.
Parrillas del Homo
Para retirar la parrilla:
1. Tire de la parrilladerechohacia
afuerahastaquese detengaen
la posici0ndel topede enganche.
2. Levanteel frente de la parrillay
tire de la parrilla haciaafuera.
Para reinstalar la parrilla:
1. Coloquela parrillaen lossoportesde la parrilla enel homo.
2. Inclinelevernentehaciaarribael extrernodelantero;deslicela
parrillahaciaatrdshastaquepasesobrelos topesde enganche.
3. Bajeel frente de la parrillay deslicelahacia adentrodel horno.
No cubrauna parrilla completa con papel de aluminio .i
coloquepapel de aluminio en el panel inferiordel homo. Se
afectar_n los resultadosdel homeadoy se puededa_ar el
panel inferiordel homo.
Posiciones de la Parrilla
PARRILLA5: Useparatostar
pan,asaralirnentosdelgados
nograsos.
PARRILLA4: Useparala
mayoriade losasados.
PARRILLA3: Useparala
mayoriade losalimentos
horneadosenbandejaspara
galletaso parapanecillos,
tortasde capas,alimentosdeconvenienciacongelados,horneadoen
generalcon unaparrilla.
PARRILLA2: Useparatortas,pastelitos,pasteles,cacerolas,asados
peque_osdecame.
PARRILLA1: Useparapastelitos,tortasde 9" x 13"(22,86cmx
33,02cm), pastelesy asadode cortesgrandesdecamey polio.
HORNEADOCONPARRILLASMULTIPLES:
Dos parrillas:Usela posici0n2y 5, o 1y4.
Notas: Nuncacoloqueutensiliosdirectarnenteenel fondo del
horno.
. 1'
....... 5
..............2
...... 1
4
3
J
Elhornotiene dos parrillas. Todaslasparrillastienen un bordecon
topede enganche.
Horneado de Pasteles de Capas en
Dos Parrillas
Paraobtenermejoresresultados
cuandohorneapastelesen dos
parrillas,usela posici0n2y 5.
Coloquelos pastelesenlas
parrillascornose rnuestra.
66
Page 68

CuidadoLimpim
Homo Autolimpiante
El ciclo deautolimpiezausatemperaturasdecocci0nsuperioresalas
normalesparalimpiarautomdticamentetodo el interiordel horno.
Limpieel horno con frecuenciaremoviendolos derramesparaevitar
humoexcesivoy Ilamaradas.Nopermitaque se acumuledemasiado
sucio en el horno.
Duranteel procesode limpieza,lacocinadebeestarbien ventilada
para eliminarlos oloresnormalesasociadosconla limpieza.
Antes de la Autolimpieza
1. Apague la luz del homoantesde la limpieza.Laluzdel homo
puedefundirseduranteel ciclo de limpieza.
2. Retiretodos losutensiliosy lasparrillasdel horno.Lasparrillas
del homose descolorardny no se deslizardnfdcilmentedespues
de un ciclo de autolimpiezasino sonretiradasdel horno.
3. Limpieel marcodel homo,el marcode
la puerta,el dreafuera de lajunta de la
puertay alrededorde laaberturaen la
junta de la puerta,con un agentede
limpiezanoabrasivotal como'Bon
Ami'* o con detergentey agua.El
procesode autolimpiezanolimpia
estasdreas. Eliasdebenser limpiadasparaevitar quela suciedad
sehorneeduranteel ciclo de autolimpieza. (Lajunta es el sello
alrededorde la puertay ventanadel homo.)
/4. Paraevitardaffo no limpieni frote lajunta situadaalrededorde la
puertadel horno.Lajunta estddiseffadaparasellar
hermeticamenteelcalor duranteel ciclo de limpieza.
5. Limpieel excesode grasao derramesde la parte inferiordel
homo. Estoevitahumoexcesivoo Ilamaradasduranteel ciclo de
limpieza.
6. Limpielos derramesazucaradoso dcidostalescomo papadulce
(camote),tomateso salsasa basede leche.Laporcelana
esmaltadaesresistenteal dcidoperono a pruebade dcidos. El
acabadode porcelanapuededescolorarsesi losderramesdcidos
o azucaradosnoson limpiadosantesde un ciclo de autolimpieza.
Para programar 'Self=Clean' (Autolimpieza):
Nora: Latemperaturadel homo debeserinferior a 205° C
(400° F)para programarun ddo delimpieza.
1.
Cierrela puertadel homo.
2.
Muevala palancadebloqueode la puerta a la derechaa la
posiciOnbloqueada.
3. Oprimalatecla 'Clean' (Limpieza).
• 'CLEAN'destellaenelindicadorvisual.
4. Oprimalatecla A o V.
• Sedespliega'MEd' (SuciedadMediana,
3 horns).
Si la puertanose cierra,seoird unaseffalsonoray la palabra
'door'se desplegardenel indicadorvisual. Si la puerta noes
cerradadentro de 45segundos,la operaciOnde autolimpieza
serdcanceladay el indicadorvolverda desplegarla hora deldfa.
Oprimalatecla A o V paradesplazarlosajustesde
autolimpieza.
• 'HVy'(SuciedadIntensa,4 horns)
• 'MEd' (SuciedadMediana,3 horas)
• 'LifE' (SuciedadLeve,2horas)
AIseleccionarel niveldesuciedaddel homo seprograma
automdticamenteel tiempode limpieza.
Despuesde cuatro segundos,el homocomenzarda limpiar.
• Eltiempo de limpiezacomenzardlacuentaregresivaenel
indicador.
• 'LOCK'sedesplegarden el indicadorvisual.
• 'CLEAN'sedesplegardenel indicadorvisual.
Para diferir un cic[o de autolimpieza:
1. Oprimalasteclas'Clean' y'Timer'
(Temporizador).
• 'DELAY'(Diferido)y '00:00'sedesplegard
en el indicadorvisual.
Oprimalatecla A oY paraprogramarla
cantidadde tiempoque usteddeseadiferir el
ciclo.Eltiempodiferido puedeser programadodesde10minutos
(00:10)hasta11horas,59 minutos (11:59).
3. Oprimalatecla 'Clean'.
• 'CLEAN'destellar&
cont.
*Losnombresde losproductosson marcasregistradasdesus respectivosfabricantes.
67
Page 69

CuidadoLimpim
4. Oprimalatecla A o V.
• 'MEd'(SuciedadMediana,3horas)sedespliegaen el
indicador.
5. Oprimalatecla A o V paradesplazarlosajustesde
autolimpieza.
• 'HVy'(SuciedadIntensa,/4horns)
• 'MEd'(SuciedadMediana,3horas)
• 'LITE'(SuciedadLeve,2 horas)
AI seleccionarel niveldesuciedaddel homo se programa
autom_ticamenteel tiempo de limpieza.
Despu(!sde cuatrosegundos,'CLEAN'(Limpieza),
'DELAY'(Diferido)y 'LOCK'(Bloqueado)sedesplegar_nenel
indicadorvisualpara indicarque el horno est_programadopara
un ciclo de limpiezadiferido.Eltiempo diferidotambiense
despliegaenel indicadorvisual.
Si el homo ya ha side pregramado para un cicle de
limpieza y usted desea programar un tiempo
diferido: ;;
1. Oprimalasteclas'Clean' y 'Timer'
(Temporizador).(Oprimaprimero latecla
'Clean'.)
• 'DELAY'destella.
• 00:00sedesplegar_enel indicador
visual.
2. Oprimalatecla A o Y paraprogramarlacantidaddetiempo
queusted deseadiferir el ciclo.
Despu(!sde cuatrosegundos,'CLEAN','DELAY'y 'LOCK'se
desplegar_nen el indicadorvisual paraindicarque el homo est_
programadoparaunaciclo de limpiezadiferido. Eltiempo
diferidotambi(!n sedespliegaen el indicadorvisual.
Cuando cemienza el title de autelimpieza:
• 'DELAY'seapagar&
• Eltiempo de limpiezasedesplegar_en el indicadorvisual.
Para cancelar el title de autelimpieza:
Optimala tecla 'Cancel' (Cancelar).
• Elindicadorvisualquedaen blanco.
• Todaslasfuncionessoncanceladas.
• Lahera del dfase despliegaen el indicadorvisual.
Durante el ciclo de autolimpieza
Cuandoaparece'LOCK'en el indicador,la puertano se puedeabrir.
Paraevitarda_o a la puerta,nofuerce la puertaparaabrirlacuando
la palabra'LOCK'est_desplegadaenel indicadorvisual.
Humo y Olores
Ustedpuedever humoy sentir olor lasprimerasvecesque el horno
eslimpiado. Estoes normaly disminuir_conel tiempo.
Tambi(!npuedeocurrir humosi el hornoest_demasiadosucioo si
seha dejadounaasaderaen el horno.
Sonidos
A medidaqueel hornose calienta,ustedpuedeoir sonidosde
piezasmet_licasque seexpandenycontraen. Estoesnormaly no
da_ar_el horno.
Despu s del ciclo de
autolimpieza
Aproximadamenteunahera despu(!sdel fin del ciclo de limpieza,
'LOCK'desaparecer& La puertaahora puedeser abierta.Muevala
palancade bloqueode la puertaa la izquierdaparadesbloquearla.
Algunasuciedad puede quedar come unaloveceniza gristipo
polvo. Retfrelaconun pa_oh[_medo.Si la suciedadpermanece
despu(!sdelimpiarla,significa que el ciclo de limpiezano fue Io
suficientementelargo. Lasuciedadser_ eliminadaduranteel
proximociclo de limpieza.
SiIns parrillasdel homo fueron dejadas en el homo y no se
deslizansuavemente despu6sde un ciclo de limpieza, limpie
lasparrillasy los soportesdelas parrillascon una peque_acantidad
de aceitevegetalpara hacerdeslizarlasconm_sfacilidad.
Puedenaparecer lineasdelgadas en la porcelanaal pasarper
cities decalentamiento y enfriamiento. Estoesnormaly no
afectar_el rendimiento.
Una descoloraci6nblanca puedeaparecer despuesdel ciclo
de limpieza si los alimentos ;icidoso zucarados no fueron
limpiadosantes del ciclo de autolimpieza. Estadescoloraci0nes
normaly no afectar_el rendimiento.
NOtaS."
• Si sedejaabiertala puertadelhomo,lapalabra'door'
destellar_en el indicadorvisualy seescuchar_unaseSal
sonorahastaque la puertaseacerraday la tecla'Clean'sea
oprimidanuevamente.
• Si transcurrenm_sdecincosegundosdespu(!sde oprimir la
tecla 'Clean' y antesdeoprimir lasteclas,& o V, el programa
volver_autom_ticamenteal despliegueprevio.
• Lapuertadel homo se da_ar_si sefuerzaparaabrirla cuando
la palabra'LOCK'continOadesplegadaenel indicador.
68
Page 70

Culdedoy|implezo
Procedirnientos de Lirnpieza
Losnombresde los productosson marcasregistradas
desus respectivosfabricantes.
** Parahacerpedidos,Ilameal 1-877-232-6771EE.UU.o
1-800-688-8408Canad£.
Cubierta -
porcelana
esmaltada
Areadel Relojy
de lasTeclas
de Control
Perillasde
Control
Cnbierta =
Vidrio
Cer;imico
Laporcelanaesmaltadaesvidriofundidoenmetaly puedeagrietarseo picarsesi noseusacorrectamente.Esresistentea
los9cidos,noa pruebade9cidos.Todoslosderrames,especialmentelosderramesazucaradosoacidicosdebenserlimpiados
inmediatamenteconunpaio seco.
• Cuandose enfrfe,laveconaguajabonosa,enjuagueyseque.
° Nuncalimpieunasuperficietibia o calienteconun paio himedo. Estopuedecausaragrietamientoo picaduras.
° Nuncauselimpiadoresde homo,agentesdelimpiezaabrasivoso c£usticosenelacabadoexteriorde laestufa.
• Parabloquearde loscontrolespara la limpieza,ver 'Bloqueode losControles'enp_gina59.
• Limpieconun paio himedo y secar.Nouseagentesde limpiezaabrasivospuespuedenrayarlasuperficie.
• Sepuedeusarlimpiavidriossise rocfanen el paio primero.NOrocie directamenteen elpanel.
• Retirelasperillascuandoest6nenla posici6n'OFF'(Apagado)tir_ndolashaciaadelante.
° Lave,enjuaguey seque.Nouseagentesdelimpiezaabrasivospuespuedenrayarelacabado.
° Enciendacadaquemadorparaasegurarsedequelasperillasbansidocorrectamentereinstaladas.
Nuncauselimpiadoresde homo,blanqueador concloro,amoniaco o limpiadoresde vidrio quecontenga
amoniaco.Nota:Llameaun reparadorautorizadosi la cubiertade vidrio cer_micose agrieta,quiebmo elpapel
dealuminio sederritesobrela cubierta.
• Dejequelacubiertaseenfrfeantesde limpiarla.
• Generalidades- Limpielacubiertadespu6sdecadausoo cuandoseanecesafiocon unatoallade papelhimeda y con
'CooktopCleaningCreme'_(Cremade LimpiezaparaCubiertas)(PiezaNo.20000001)_*.Lustreconun paio limpioyseco.
Nora:Sedesarrollarbnmanchaspermanentessila suciedadse dejaquesecocineunay otravezusandola cubiertacuando
est#sucia.
• Manchas Rebeldeso Marcas de Metal - Humedezcaunaesponjadegomaquenodejemarcaso queno raye.
Aplique'CooktopCleaningCream_(piezano.20000001)_ y froteparasacartantasuciedadcomoseaposible.Apliqueuna
capadelgadadecremasobrelasuciedad,cubraconunatoalla depapelhimeda y d6jelareposardurante30 a45minutos
(2- 3 horasparamuchasuciedad).Mantengahimedocubriendolatoalladepapelconenvolturadepl_stico.Restriegue
nuevamente,luegolimpiecon unpaio secoy limpio.
Nora:SolamenteuseesponjasLIMPIAS,HUMEDASy quenorayony clueseansegurasparautensiliosconacabado
antiadherente,e dafiarDd disefioy d vidriosilaesponjanoestDmojada,silaesponjaestbsuciaose usaotrotipodeesponja.
• SuciedadesQaemadaso Pegadas - Restrieguecon unaesponjaquenodejemarcasy'CooktopCleaningCreme'_.
Nora: Sostengaunrestregadorconhojadeafeitaraun bngulode30°yrestrieguecualquiersuciedadquepermanezca.Luego
limpiecomosedescribi6anteriormente.Nousela hojadeafeitarparalimpiezadiariapuespuededesgastard
disefiodelvidrio.
, Pl_stico o Azicar Derretida - InmediatamenteenciendaelelementoatemperaturaBAJAyrestriegue _
y raspeel azicar o el pl_sticode lasuperficiecalientehaciaun_reafrfa. LuegoAPAGUEel ,Y_ lJ_
elementoy dejequese enfne. L_mp_eelres_duoconun raspadorconhojade afe_taryCooktop
• ,_ _S _
CleanngCreme .
69
Page 71

CuidadoLimpiem
Ventanay Puerta • Eviteusarcantidadesexcesivasdeaguapuespuedeescurrirsedebajoodetr_sdelvidriocausandomanchas.
del Homo=Vidrio • Laveconaguayjab6n. Enjuagueconagualimpiayseque.Ellimpiadordevidriopuedeusarsesiserociaenun pasoprimero.
• Nousematerialesabrasivostalescomoesponjasderestregar,limpiadoresenpolvooesponjasdelanadeaceropuespueden
rayarelvidrio.
Interior del Homo • Sigalasinstruccionesen lasp%inas67-68paraprogramarun ciclodeautolimpieza.
Parrillasdel • Limpiarconaguaconjab6n.
Homo • Sacarlasmanchasdificilesconpolvode limpiezao unaesponjaIlenaconjab6n. Enjuagueyseque.
• Lasparrillassedescolorar_npermanentementey puedenno deslizarsecon suavidadsisondejadasenel homodurante
unciclodeautolimpieza.Siestosucede,limpielaparrillay lossoportesen relieveconunapeque_acantidaddeaceite
vegetalpararestaurarlafacilidadde movimiento,luegolimpieelexcesode aceite.
Acero laoxidable • NO USEMNGUN PRODUCTODELIMPIEZAQUECONTENGABLANQUEADORA BASEDE CLORO.
(modeJosseiectos) • NO USELIMPIADORES"ORANGE"M LIMPIADORESABRASIVOS.
• SIEMPRELIMPIELASSUPERFICIESDEACEROAFAVORDELGRANO.
• LimpiezaDiaria/SuciedadLeve=Limpieconunode lossiguientes-aguaconjab6n,unasoluci6ndevinagrebianco
conagua,Iimpiadorparasuperficiesyvidrio 'Formula409'_o un limpiavidriossimilar- usandounaesponjao un paso
suave.Enjuaguey seque.Parapuliry evitarmarcasde losdedos,useel producto'StainlessSteelMagicSpray'_
(PiezaNo.20000008)_.
• Suciedad Moderada/Intensa - Limpieconunode lossiguientes- 'BonAmP,'SmartCleansePo'SoftScrub'_- usando
unaesponjahOmedao un pasosuave.Enjuagueyseque.Lasmanchasdificilespuedenserquitadasconunaesponja
multi-uso'Scotch-Brite'_hOmeda;frote afavordel grano.Enjuaguey seque.Pararestaurarel lustreysacarlasvetas,
aplique'StainlessSteelMagicSpray'_.
• Descoloraci6n= Useunaesponjamojadaoun pasosuave,limpieconlimpiadorde acero'CameoStainlessSteel
CleaneP.Enjuagueinmediatamentey seque.Paraeliminarlasestriasyrestaurarellustre,usedespu(!srociadorparaacero
inoxidable'StainlessSteelMagicSpray'_.
Gavetade • Cuandoestefria,laveconaguatibiajabonosa,enjuaguey seque.NuncaIimpieunasuperficietibia ocalienteconunpaso
AImacenamiento, h_medopuesestopuededa_arlasuperficiey causarunaquemaduraa causadelvapor.
Manija de la • Paramanchasrebeldes,useagentesdelimpiezalevementeabrasivostalcomopastadebicarbonatoo 'BonAmP.Nouse
Puerta = agentesde limpiezaabrasivos,c_usticoso_sperostal comoesponjasdelanadeaceroo limpiadoresdehornos.Estos
EsmaltePintado productospuedenrayaro da_arpermanentementelasuperficie.
NOTA:Useunatoallao unpa#e secopare limpiarlosdermmes,especialmentelosderramesacidicos o
azucarados.Lasuperficiesepuede descolomroperder el brillosi el derramenose limpiainmediatamente.Esto
esespecialmente importanteen /assuperficies blancas.
•Loshombresde losproductossonmarcasregistradasdesusrespectivosfabricantes.
•_Parahacerpedidos,Ilameal 1-877-232-6771EE.UU.o 1-800-688-8/408Canad&
7O
Page 72

ManTenimiento
Puerta del Homo Luz del Homo
(Elestilo varfa seg0n el modelo)
Para reemplazar el foco del homo:
1. Cuandoel homoest(!fifo,sujetelatapade labombillaensulugar,
luego desliceel retende alambre fuerade la cubierta.Nora: La
Para s_car:
1.Cuandoest(!frfa, abrala puertadel homo hastalaposici0ntope
de asara la parrilla [abiertaaproximadamente10cm (cuatro
pulgadas)].
2.Sujete lapuertade cada lado. No usela
manijade la puerta paralevantarla.
3. Levanteuniformementehastaque la puerta
sesalga de losbrazosde articulaci0n.
Para volver a colocar:
1.Sujete lapuertade cada lado.
2.Alinee las ranurasde la puertacon los brazosde articulaci0nde la
estufa.
3. Deslicela puertahacia losbrazosde articulaci0n hastaque est(!
completamenteasentadaenlas bisagras.Empujehaciaabajo las
esquinassuperioresde la puertaparaasentarlacompletamenteen
lasbisagras. La puertano debe quedartorcida.
Nora: La puerta del homoen una estufanuevapuedesentirse
"esponjosa"cuandosecierra. Estoes normaly disminuir_conel
USO.
cubiertade la bombillasecaer_si noessujetaen su lugarcuando
est_sacandoel ret(!ndealambre.
2. Saquelacubiertadelfocoy el foco.
3. Coloqueun foco de 40 watts para CUBIERTADEL
electrodomesticos. FOCO
/4. Vuelvaa colocar la cubiertade
la bombillay asegOrelacon el
ret(!nde alambre.
5. Vuelva a enchufar la estufa.
Vuelva a colocar la hora
correcta.
0
1. Useuntomaollassecoycon muchocuidadodestornillela
cubiertadelfoco y elfoco.
2.
Reemplacecon un foco para homode electrodomesticode40
wats. Serecomiendanlosfocos con basede lat0nparaevitar
fusion del foco en el casquillo.
.
Reemplacela cubiertadel focoy vuelvaa conectarlacorriente
electricaal horno.
4. Vuelvaa programarelreloj.
RETEN DE ALAMBRE
Ventana del Homo
Para proteger la ventana de la puerta del homo:
1. Nouse agentesde limpiezaabrasivostalescomoesponjasde
restregarde lanade aceroo limpiadoresen polvopuesellos
puedenrayarelvidrio.
2. Nogolpeeel vidrio conollas,sartenes,muebles,juguetesu otros
objetos.
3. Nocierre la puertadel homo hastaque lasparrillasdel homo no
est(!nensu lugar.
AIgolpear,rayar,hacervibrar o esforzarelvidrio puededebilitarsu
estructuracausandoun mayorriesgode rotura en unafecha
posterior.
71
Page 73

Manlenlmlenlo
Tornillos Niveladores Gaveta de AImacenamiento
Verifiquesi la estufaestdniveladacuandose instala, i7__
Si la estufano est_nivelada,gire lostornillos _._ i4
niveladoresubicadosen cadaesquinade laestufa _/cUi
hastaque quedenve ada _o_ i i
-.._i _-=y\
TORNILLO NIVELADOR
7,1_,
Lagavetade almacenamientopuedeset retiradaparaque usted
puedalimpiardebajode la estufa.
Par8 S8C8r :
1. Vacfelagavetay deslfcelahaciaafuerahastalaprimeraposici6n
tope.
2. Levantela partedelanterade la gaveta.
3. Tfrelahastalasegundaposici6ndetope.
4. Sujetelosladosy levantelagavetapararetirarla.
Para volver a colocar:
1. Insertelos extremosde lascorrederasde la gavetaen los deles
de la estufa.
2. Levantela partedelanterade la gavetay suavementeemp_jelaa
laprimeraposici6ndetope.
3. Levantelagavetanuevamentey emp_jelahastaque quede
completamentecerrada.
72
Page 74

Parala mayoriade losprobiemas,
verifiqueprimero Iosiguiente.
Todala estufa o partede ella no
funciona.
• Revisesi loscontrolesdelhomo est_ndebidamenteajustados.
• Verifiquesi elenchufeest_firmementeinsertadoen eltomacorriente.
• Verifiqueovuelvaa reponerel disyuntor.Verifiqueo reemplaceel fusible.
• Verifiqueelsuministrodeenergfaelectrica.
o
Revisesi la
superficiey/o loscontrolesdelhornoest_ndebidamenteajustados.Verp_ginas
55y 60.
o
Verifiquesi
la puertadelhornose hadesbloqueadodespuesdelciclodeautolimpieza.Ver
p%ina 68.
o
Revisesi el
homoest_ajustadoparahorneadodiferidoo programadelimpieza.Ver p_ginas61
y 67.
o
Verifiquesi
o
Verifiquesi
'ControlLock'(BloqueodeControl)est_activado.Ver p_g.59.
elcontrolest_en ModoSab_tico.Verp_g.6/4.
Elreloj, laspalabrasen ei indicador
visualy/o las lutes funcionan pero
el homono se calienta.
Losresultadosdelhorneado no
soncomo seesperaban o son
diferentesa losdei homoanterior.
Losalimentos no se asan a la
parrillaen formadebidao salen
demasiadohumo.
Elhomo no seautolimpia.
• Elhomopuedeestarprogramadoparaunafunci0nde'Cook&Hold'(Cocci0nyMantenerCaliente)
o unafunci0n diferida.
• Puedeestaractivadalacaracterfsticade bloqueode loscontrolesdel horno.(Verp_g.60.)
o
AsegOresedequeel respiraderodel homo no est(!bloqueado.Verp_gina66 paralaubicaci0n.
o
Verifiqueparaasegurarsedeque laestufaest_nivelada.
o
Lastemperaturasa menudovarfanentreun homo nuevoy uno antiguo. A medidaque pasa
eltiempo,latemperaturadelhornocambiay puedehacersem_scalienteo m_sfrfa. Ver
p_gina65paralasinstruccionescomoajustarlatemperaturadelhorno. Nora: Nose
recomiendaajustarlatemperaturasi hatenidoproblemasconsolouna odos recetas.
• Verifiquelasposicionesdelas parrillasdelhorno.Elalimentopuedeestarmuycercadel
elemento.
• Elelementodeasarnofue precalentado.
• Elpapeldealuminioseus0demaneraincorrecta.Nuncaforreelinsertodelasadorconpapel
de aluminio.
• Lapuertadelhornoestabacerradamientrasseasabaalaparrilla. Dejelapuertaabiertaenla
primeraposici0n(alrededorde 10cm [4 pulgadas]).
• Recorteelexcesode grasadela cameantesde ponerlaa asara laparrilla.
• Seus0unaasaderasucia.
• Elvoltajedel hogar puedeser bajo.
• Verifiqueparaasegurarsedequeel ciclo noest(!ajustadoparauncomienzodiferido.Ver
p_gina67.
• Verifiquesi la puertaest_cerrada.
• Verifiquesi elcontrolest_en ModoSab_tico.Verp_g.6/4.
• Elhomopuedeestaram_sde205° C(/400° F). Latemperaturadelhomo debeserinferiora
205°C(/400° F)paraprogramarun ciclode limpieza.
Elhomo no se limpi6en forma
debida.
Lapue_a del homo no se
desbioqueadespu6sdeiciclo
de autoiimpieza.
• Puedequeseanecesariountiempodelimpiezam_slargo.
• Losderramesexcesivos,especialmentedealimentosazucaradosy/o_cidosnofueronlimpiados
antesdelciclode autolimpieza.
• Elinteriordelhomotodaviaest_caliente.Dejeque paseaproximadamenteunahoraparaque
el homose enfrieantesde quese completeunciclode autolimpieza.La puertapuedeser
abiertacuandodesaparezcala palabra'LOCK'delindicadorvisual.
• Elcontroly lapuertapuedeestarbloqueada.Verp_g.59.
73
Page 75

Lasuperficiesuavemuestra
desgaste.
Abrasioneso rayaduraspeque_as.
- Aseg0resede quelacubiertaylaparteinferiordelutensilioest(!limpia.Nodesliceutensilios
devidrioo demetalatrav(!sdelacubierta.Aseg0resedequelaparteinferiordelutensiliono
seadspera.Uselosagentesdelimpiezarecomendados.Verp_g.69.
Marcasde metal.
- Nodesliceutensiliosde metalatrav(!sdelacubierta.Cuandoest(!frfa,limpielacubiertacon
CremaparaLimpiezadeCubiertas.Ver p_g.69.
Manchasy estrfasmarrones.
- Retirelosderramesrdpidamente.Nuncalimpieconunpasooesponjasucia.AsegOresedeque
la cubiertay laparte inferiordel utensilioest(!limpia.
Areascon un brillomet_lico.
- DepOsitosmineralesdelaguaydelosalimentos.Uselosagentesdelimpiezarecomendados.
Verp_g.69.
Picaduraso descascarillado
- Limpielosderramesazucaradosinmediatamente.Verp_g.69.
Sejunta humedaden laventana
del homo o sale vapor por
el respiraderodel homo.
Hayun olor fuerte o hurnoleve
cuandose enciende el homo.
C6digosde Errores
Se escuchanruidos.
Estoesnormal cuandose cocinanalimentoscon altocontenidode humedad.
Seus0humedadexcesivacuandolimpi6 laventana.
, Estoes normalen una estufanuevay desaparecer_despu6sde unospocosusos.
AIiniciar un ciclo de autolimpiezase "quemar_n"losoloresm_sr@idamente.
• Sise enciendeel ventiladorayudar_a eliminarel humoy/o el olor.
• Suciedadexcesivade alimentosenel panel inferiordel horno. Useun ciclode autolimpieza.
'BAKE'(Horneado)o 'LOCK'(Bloqueado)puedendestellarr_pidamenteenel indicadorpara
avisarleque hayun erroro un problema.Si 'BAKE'o 'LOCK'aparecenenel indicadorvisual,
oprimalatecla 'Cancel' (Cancelar).Si'BAKE'o'LOCK'contin[_andestellando,desconectela
energfael(!ctricaal electrodom6stico.Espereunospocosminutosy vuelvaa reconectarla
energfaelectric&SicontinOandestellando,desconectelaenergfael6ctricadelelectrodom6stico
y Ilameal t6cnico de servicioautorizado.
• Siel homo est_demasiadosucio,puedenocurrir demasiadasIlamaradasIocual resultar_en
un c0digode errordurantela limpieza.Oprimalatecla'Cancel' y dejeque el homose enfrie
completamente,limpieel excesodesuciedadyluegovuelvaa programarel ciclode limpieza.
Si elc6digode error reaparece,Ilamea unt(!cnicoautorizado.
Elhornoemitevariossonidosbajos.Ustedpuedeofr losrel6sdel homocuandoseencienden
yse apagan.Estoes normal.
• A medidaqueel hornosecalientayseenfrfa,ustedpuedeofrsonidosde piezasmetdlicasque
seexpandeny contraen. Estoesnormaly no da_ardsu electrodom6stico.
• Seescuchaelsonidode un ventilador.Esteeselventiladorde enfriamientoyes normal.
Elventiladorseguir9funcionandodespu6sdeapagarel homo hastaqueel mismose enfrfe.
No se escuchanse_ales sonoras
y el indicadorvisualno se activa.
'SAb' destella y luego se
despliegacontinuamente.
El homopuedeestaren Modo Sab_tico. (Verp_g.64).
• Elhornoest_en modosab_tico.Paraanularel modosab_tico,optimay mantengaoprimidala
tecla'Clock' (Reloj)durantecinco segundos.
74
Page 76

p p
GARANTIA DE LOS ELECTRODOMESTICOS PRINCIPALES
DE AMANA ®
GARANTiA LIMITADA
Durante un afio a partir de la fecha de compra, siempre y cuando se de a este electrodomestico principal un uso y mantenimiento de
conformidad con las instrucciones adjuntas o provistas con el producto, la marca Amana de Whirlpool Corporation o Whirlpool Canada
LP (en Io sucesivo denominado "Amana") se harA cargo del costo de las piezas especificadas de fabrica y del trabajo de reparacion
para corregir defectos en los materiales o en la mano de obra. El servicio debera ser suministrado por una compafiia de servicio
designada por Amana. Esta garantia limitada es valida solamente en Estados Unidos o en CanadA, y se aplica solamente cuando el
electrodomestico principal se use en el pals en el que se ha comprado. Esta garantia limitada no tiene vigor fuera de los cincuenta
Estados Unidos y CanadA. Se requiere una prueba de la fecha de compra original para obtener servicio bajo esta garantia limitada.
EXCLUSIONES DE LA GARANTiA
Esta garantia limitada no cubre:
1. Visitas de servicio tecnico para corregir la instalacion de su electrodomestico principal, para ensefiarle a usar su electrodomestico
principal, para cambiar o reparar fusibles domesticos o para corregir la instalacion electrica o de la tuberia de la casa.
2. Visitas de servicio tecnico para reparar o reemplazar focos para electrodomesticos, filtros de aire o filtros de agua. Estas piezas de
consumo estan excluidas de la cobertura de la garantia.
3. Reparaciones cuando su electrodomestico principal se use de un modo diferente al domestico normal de una familia, o cuando se
use de un modo contrario a las instrucciones publicadas para el usuario u operador y/o las instrucciones de instalacion.
4. Dafios causados por accidente, alteracion, uso indebido, abuso, incendio, inundacion, actos fortuitos, instalacion incorrecta,
instalacion que no este de acuerdo con los codigos electricos o de plomeria, o el empleo de articulos de consumo o productos de
limpieza no aprobados por Amana.
5. Dafios esteticos, incluyendo rayaduras, abolladuras, desportilladuras u otro dafio al acabado de su electrodomestico principal, a
menos que el mismo sea debido a defectos en los materiales o la mano de obra y se le informe a Amana en un lapso de 30 dias a
partir de la fecha de compra.
6. Cualquier perdida de comida debido a fallas del refrigerador o del congelador.
7. Costos relativos a la remocion de su electrodomestico principal desde su hogar para obtener reparaciones. Este electrodomestico
principal esta disefiado para ser reparado en el hogar y Qnicamente el servicio de reparacion en el hogar esta cubierto bajo esta
garantia.
8=
Reparaciones de piezas o sistemas como resultado de modificaciones no autorizadas que se hayan efectuado en el
electrodomestico.
9.
Gastos de viaje y transporte para obtener servicio para el producto, si su electrodomestico principal esta ubicado en un lugar
remoto en el cual no haya disponible un tecnico de servicio autorizado por Amana.
10. La remocion y reinstalacion de su electrodomestico principal, si estuviera instalado en un lugar inaccesible o si no estuviera
instalado de conformidad con las instrucciones de instalacion publicadas.
11. Electrodomesticos principales con nQmeros de modelo/serie que se hayan removido, alterado o que no puedan ser identificados
con facilidad. Esta garantia se anularA si el nQmero de serie aplicado en la fabrica ha sido alterado o removido de su
electrodomestico principal.
El costo de la reparacion o el reemplazo bajo estas circunstancias excluidas, correrA por cuenta del cliente.
EXCLUSION DE GARANTiAS IMPLiCITAS; LIMITACION DE RECURSOS
EL UNICO Y EXCLUSIVO RECURSO DEL CLIENTE SEGON LOS TI2RMINOS DE ESTA GARANT[A LIMITADA SERA EL DE REPARAR
EL PRODUCTO SEGON SE ESTIPULA EN LA PRESENTE. LAS GARANT[AS IMPL[CITAS, INCLUYENDO !_AS GARANT[AS DE
COMERCIABILIDAD O DE CAPACIDAD PARA UN PROPOSlTO PAR-i-ICULAR, SERAN LIMITADAS A UN ANO O AL PER[ODO M/_,S
CORTO PERMITIDO POR LEY. AMANA NO SE RESPONSABILIZARA POR DANOS INCIDENTALES O CONSECUENTES. ALGUNOS
ESTADOS Y PROVlNCIAS NO PERMITEN LAS EXCLUSlONES O LIMITACIONES POR DANOS INCIDENTALES O CONSECUENTES, O
LIMITACIONES ACERCA DE CUANTO DEBE DURAR UNA GARANT[A IMPL[CITA DE COMERCIABILIDAD O CAPACIDAD, DE MODO
QUE LAS LIMITACIONES O EXCLUSlONES ARRIBA MENCIONADAS PUEDEN NO APLICARSE EN SU CASO. ESTA GARANT[A LE
OTORGA DERECHOS LEGALES ESPEC[FICOS Y ES POSlBLE QUE USTED TENGA TAMBII2N OTROS DERECHOS QUE PUEDEN
VARIAR DE UN ESTADO A OTRO O DE UNA PROVlNCIA A OTRA.
Si usted se encuentra fuera de los cincuenta Estados Unidos y CanadA, pongase en contacto con su distribuidor autorizado de Amana
para determinar si corresponde otra garantia.
Si necesita servicio, consulte primero la seccion "Solucion de problemas" del Manual de uso y cuidado. Despu6s de consultar la
seccion "Solucion de problemas", puede encontrar ayuda adicional en la seccion "Ayuda o servicio tecnico," o Ilamando a Amana. En
EE.UU., Ilame al 1-800-843-0304. En CanadA, Ilame al 1-800-807-6777. 9/07
Form No. A/01/08 Part No. 8113P769-60 @2006 Maytag Appliances Sales Co. Litho U.S.A.
 Loading...