

Page 1
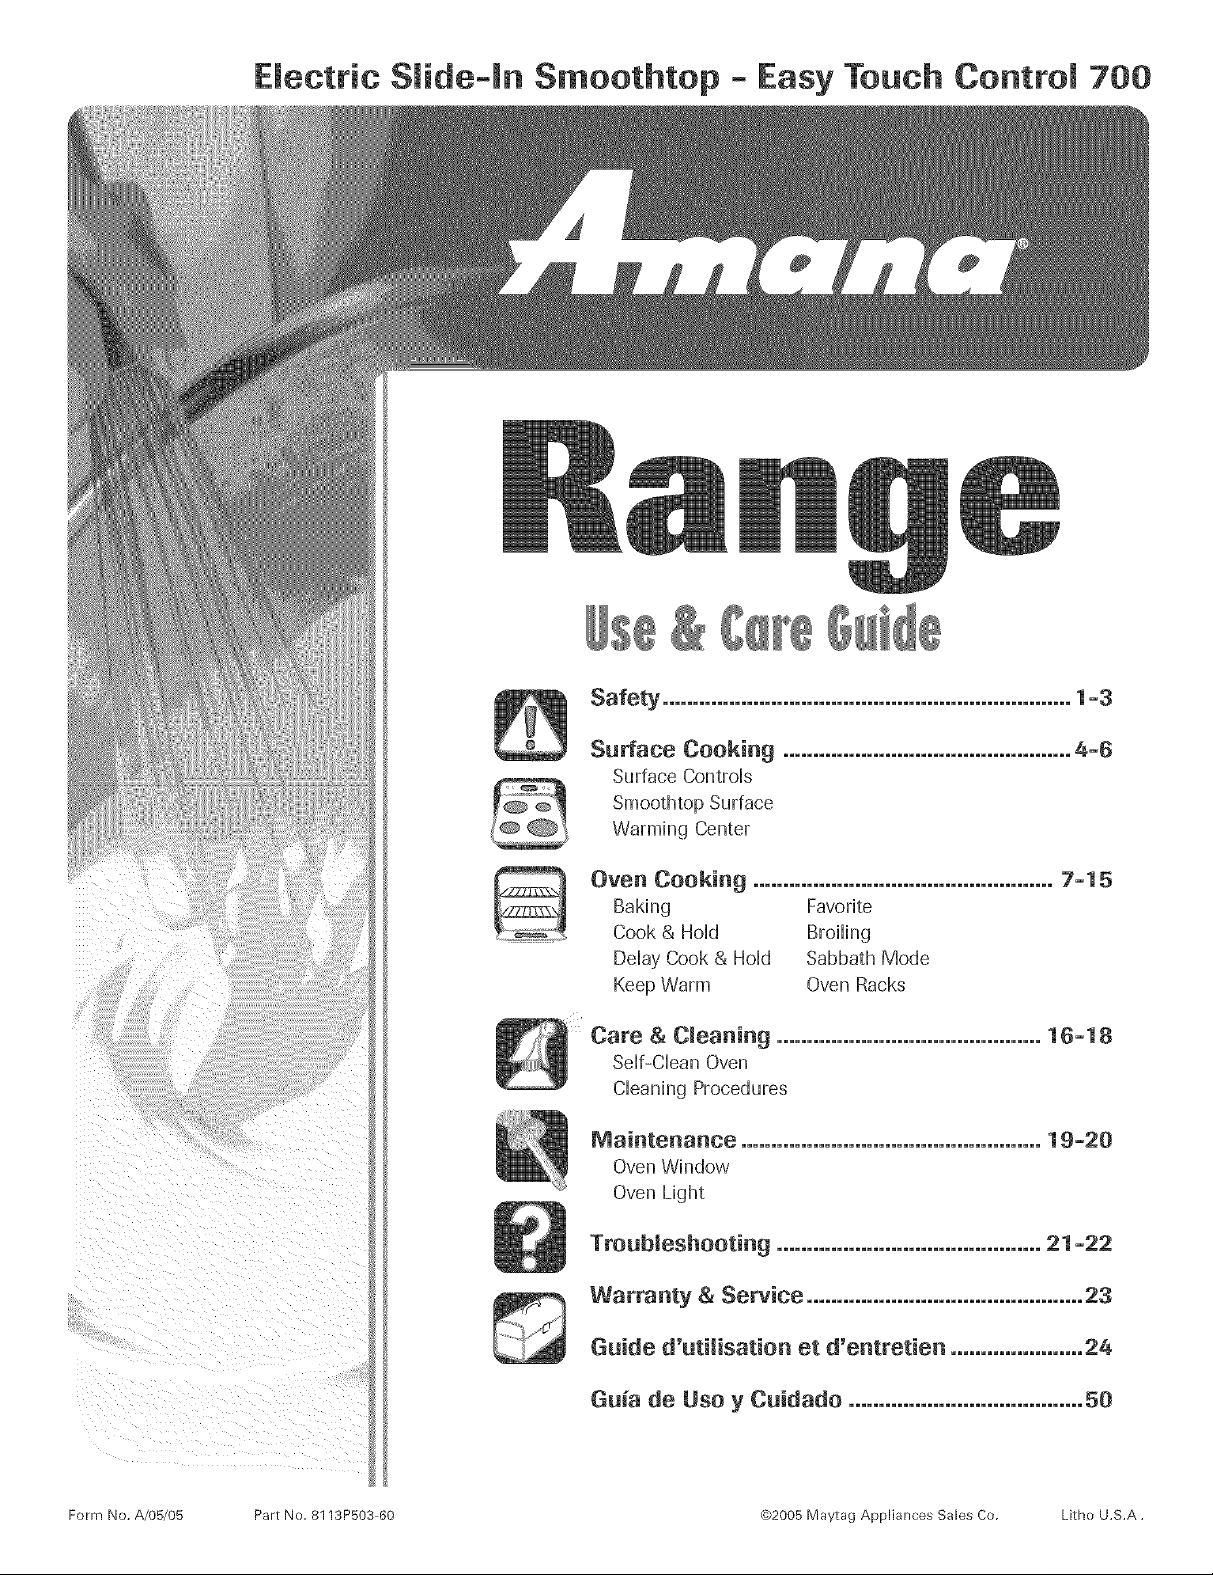
Electric Slide-In S_oothtop - Easy Touch Control 700
Oven Cooking .................................................. 7-15
Bakhg Favorite
Cook & HoHd BroiHing
Dday Cook & HoHd Sabbath Mode
Keep Warm Oven Racks
Care & Cleaning ............................................ 16-18
Sdf-CHean Oven
CHeaningProcedures
Maintenance .................................................. 19-20
Oven Window
Oven Light
Troubleshooting ............................................ 21-22
Warranty & Service .............................................. 23
Guide d'utilisation et d'entretien ...................... 24
Gu_a de Use y Cuidado ....................................... 50
Form No. A/05/05 Part No. 8113P503 60 ®b2005 Maytag Appliances Sales Co. Litho U.S.A.
Page 2
mnstaller: Pleaseleave this guide with this appfiance.
Consumer: Pleaseread and keep this guide for future
reference. Keep sales receipt and/or canceled check as proof
of purchase.
Model Number
Serial Number
Date of Purchase
replace any part of your appliance unless it is specifically
recommended in this guide. All other servicing should be
referred to a qualified servicer.
Always disconnect power to appliance before servicing.
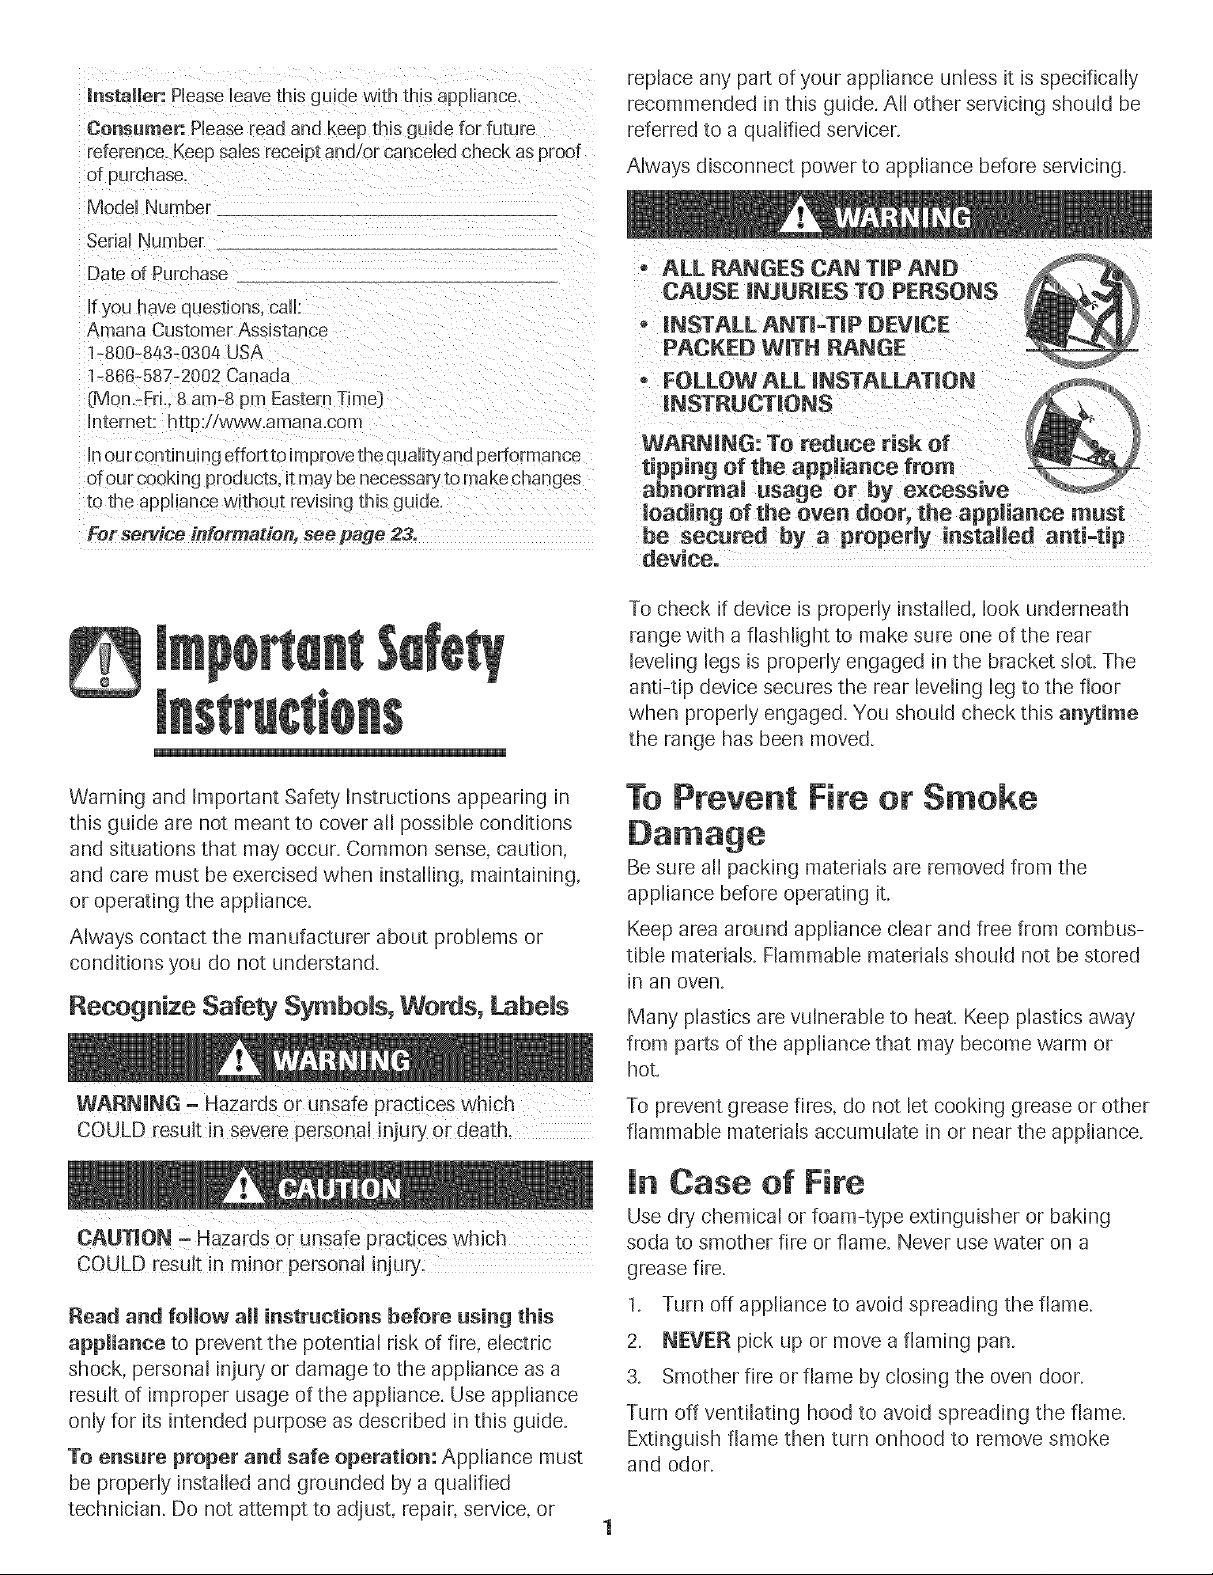
, ALL RANGES CAN TiP AND
Amana Customer Assistance
1-800-843-0304 USA
1-866-587-2002 Canada
(Mon.-FrL 8 am-8 pm Eastern Time]
Internet: http:/!wvvw.amauua.com
in ourcouutinuing effort to improve the quafltyand performance
otour cooking products, it may be necessaryto make changes
1othe appliance without revising this guide.
For setldce #nfermadert, see page 23,
Warning and Important Safety Instructions appearing in
this guide are not meant to cover all possible conditions
and situations that may occur. Common sense, caution,
and care must be exercised when installing, maintaining,
or operating the appliance.
Always contact the manufacturer about problems or
conditions you do not understand.
Recognize Safety Symbols, Words, Labels
• iNSTALL ANTGTIP DEVICE
PACKED WiTH RANGE
FOLLOW ALL iNSTALLATiON
iNSTRUCTiONS
WARNING: To reduce risk of
tipping of the appliance from
abnormal usage or by excessive
loading of the oven door, the appliance must
be secured by a properly instaiJed anti-tip
To check if device is properly installed, look underneath
range with a flashlight to make sure one of the rear
leveling legs is properly engaged in the bracket slot. The
anti-tip device secures the rear leveling leg to the floor
when properly engaged. You should check this anytime
the range has been moved.
To Prevent Fire or Smoke
Be sure all packing materials are removed from the
appliance before operating it.
Keep area around appliance clear and free from combus-
tible materials. Flammable materials should not be stored
in an oven.
Many plastics are vulnerable to heat. Keep plastics away
from parts of the appliance that may become warm or
hot.
WARNING, Hazards or unsafe practices which
COULD result in severe personal injury or death,
CAUTION Hazards or unsafe practices which
COULD result in minor personal injury.
Read and follow aH instructions before using this
appmiance to prevent the potential risk of fire, electric
shock, personal injury or damage to the appliance as a
result of improper usage of the appliance. Use appliance
only for its intended purpose as described in this guide.
To ensure proper and safe operation: Appliance must
be properly installed and grounded by a qualified
technician. Do not attempt to adjust, repair, service, or
To prevent grease fires, do not let cooking grease or other
flammable materials accumulate in or near the appliance.
In Case of Fire
Use dry chemical or foam-type extinguisher or baking
soda to smother fire or flame. Never use water on a
grease fire.
1. Turn off appliance to avoid spreading the flame.
2. NEVER pick up or move a flaming pan.
3. Smother fire or flame by closing the oven door.
Turn off ventilating hood to avoid spreading the flame.
Extinguish flame then turn onhood to remove smoke
and odor.
Page 3
Child Safety
NEVER use aluminum foil to cover an oven rack or oven
bottom. Misuse could result in risk of electric shock, fire,
or damage to the appliance. Use foil only as directed in
this guide.
above an appliance, Chj!dcen climbing Onthe appliance
oton the appliance door to reach items could be
seriousJy injured.
NEVER leave children alone or unsupervised near the
appliance when it is in use or is still hot. Children should
never be allowed to sit or stand on any part of the
appliance as they could be injured or burned.
Children must be taught that the appliance and utensils in
it can be hot. Let hot utensils cool in a safe place, out of
reach of small children. Children should be taught that an
appliance is not a toy. Children should not be allowed to
play with controls or other parts of the appliance.
About Your Appliance
NEVER use an appliance as a step to teach cabinets
teen!rig or sitting On the door', may resu!t in p0ssibie
tipping of the appliance, breakage of door, and serious
injuries,
Do not use the cooktop or oven as a storage area for food
or cooking utensils.
Cooking Safety
Never heat an unopened food container in the oven.
Pressure build-up may cause container to burst resulting
in serious personal injury or damage to the appliance.
Use d_, sturdy potholders. Damp potholders may cause
burns from steam. Dish towels or other substitutes should
never be used as potholders because they can trail across
hot elements and ignite or get caught on appliance parts.
Wear proper apparel. Loose fitting or long hanging-
sleeved apparel should not be worn while cooking.
Clothing may ignite and cause burns if garment comes in
contact with heating elements.
Always place oven racks in the desired positions while
oven is cool. Slide oven rack out to add or remove food,
using d_i, sturdy potholders. Always avoid reaching into
the oven to add or remove food. If a rack must be moved
while hot, use a dry potholder. Do not let potholder
contact hot element in oven.
Use racks only in the oven in which they were shipped/
purchased.
To prevent potential hazard to the user and damage to the
appliance, do not use appliance as a space heater to heat
or warm a room. Also, do not use the oven as a storage
area for food or cooking utensils.
Do not obstruct the flow of air by blocking the oven vent.
the oven vent is located at the rear of the cooking surface.
DO NOT TOUCH HEATING ELEMENTS OR INTERIOR
SURFACES OF OVEN. Heating elements may be hot even
though they are dark in color. Interior surfaces of any oven
become hot enough to cause burns. During and after use,
do not touch, or let clothing or other flammable materials
contact heating elements or interior surfaces of oven until
they have had sufficient time to cool. Other surfaces of the
appliance may become hot enough to cause burns -
among these surfaces are: oven vent opening and surface
near this opening, oven door, window of oven door.
Do not touch a hot oven light bulb with a damp cloth as
the bulb could break. Should the bulb break, disconnect
power to the appliance before removing bulb to avoid
electrical shock.
Use care when opening the oven door. Let hot air or
steam escape before removing or replacing food.
PREPARED FOOD WARNUNG: Follow food
manufacturer's instructions. If a plastic frozen food
container and/or its cover distorts, warps, or is otherwise
damaged during cooking, immediately discard the food
and its container. The food could be contaminated.
Do not allow aluminum foil or meat probe to contact
heating element.
Always turn off all controls when cooking is completed.
Utensim Safety
Follow the manufacturer's directions when using oven
cooking bags.
This appliance has been tested for safe performance
using conventional cookware. Do not use any devices or
accessories that are not specifically recommended in this
guide. Do not use add-on oven convection systems. The
use of devices or accessories that are not expressly
Page 4
recommendedinthisguidecancreateserioussafety
hazards,resultinperformanceproblems,andreducethe
lifeofthecomponentsoftheappliance.
Ifpanissmallerthanelement,apoRionoftheelement
willbeexposedtodirectcontactandcouldigniteclothing
orpotholder.
Onlycertaintypesofglass,glass/ceramic,ceramic,
earthenware,orotherglazedutensilsaresuitablefor
cooktoporovenservicewithoutbreakingduetothe
suddenchangeintemperature.Followutensil
manufacturer'sinstructionswhenusingglass.
Turnpanhandletowardcenterofcooktop,notoutinto
theroomoroveranothersurfaceelement.Thisreduces
theriskofburns,ignitionofflammablematerials,or
spillageifpanisaccidentlybumpedor reachedbysmall
children.
Cleanwithcaution.Usecaretoavoidsteamburnsifawet
spongeorclothisusedtowipespillsona hotsurface.
Somecleanerscanproducenoxiousfumesifappliedto a
hotsurface.
Cleanonlyparslistedinthisguide.
Se f-C ean Oven
D0aot !eave racks, b_0iliag pan, food or cooking
utensils, etc. in the oven during the self-clean cycle.
Do not clean door gaskeL The door gasket is essential for
a good seal Care should be taken not to rub, damage, or
move the gaskeL
Do not use oven cleaners or oven liners of any kind in or
around any par of the self-clean oven.
NEVER leave surface units unattended especially when
using high heat. An unattended boilover could cause
smoking and a greasy spillover can cause a fire.
This appliance is equipped with different size surface
elements. Select pans with flat bottoms large enough to
cover elemenL Fitting pan size to element will improve
cooking efficiency.
GLASS_CERAMUC SURFACE: NEVER cook on broken
cooktop. If cooktop should break, cleaning solutions and
spillovers may penetrate the broken cooktop and create a
risk of electric shock Contact a qualified technician
immediately.
Deep Fat Fryers
Use extreme caution when moving the grease pan or
disposing of hot grease. Allow grease to cool before
attempting to move pan.
Ventimating Hoods
Clean range hood and filters frequently to prevent grease
or other flammable materials from accumulating on hood
or filter and to avoid grease fires.
When flaming foods under the hood, turn the fan on.
Cmeaning Safety
Clean cooktop with caution. Turn off all controls and wait
for appliance parts to cool before touching or cleaning.
Before self-cleaning the oven, remove broiler pan, oven
racks and other utensils, and wipe off excessive spillovers
to prevent excessive smoke or flare ups.
important Safety Notice
and Warning
The California Safe Drinking Water and Toxic Enforcement
Act of 1986 (Proposition 65} requires the Governor of
California to publish a list of substances known to the
State of California to cause cancer or reproductive harm,
and requires businesses to warn customers of potential
exposures to such substances.
Users of this appliance are hereby warned that when the
oven is engaged in the self-clean cycle, there may be
some low-level exposure to some of the listed substances,
including carbon monoxide. Exposure to these substances
can be minimized by properly venting the oven to the
outdoors by opening the windows and/or door in the room
where the appliance is located during the self-clean cycle.
UMPORTANT NOTUCE REGARDUNG PET BURDS: Never
keep pet birds in the kitchen or in rooms where the fumes
from the kitchen could reach. Birds have a very sensitive
respiratory system. Fumes released during an oven self-
cleaning cycle may be harmful or fatal to birds. Fumes
released due to overheated cooking oil, fat, margarine and
overheated non-stick cookware may be equally harmful
Save These instructions for Future Reference
3
Page 5
Surface Controms
Use to turn on the surface elements. An hlfinite choice of
heat settings is avaiiabie from Low to High. The knobs can
be set on or between any of the settings.
Setting the Controls
1. Piace pan on surface dement.
2. Push in and turn the knob in either direction to the desired
heat setting.
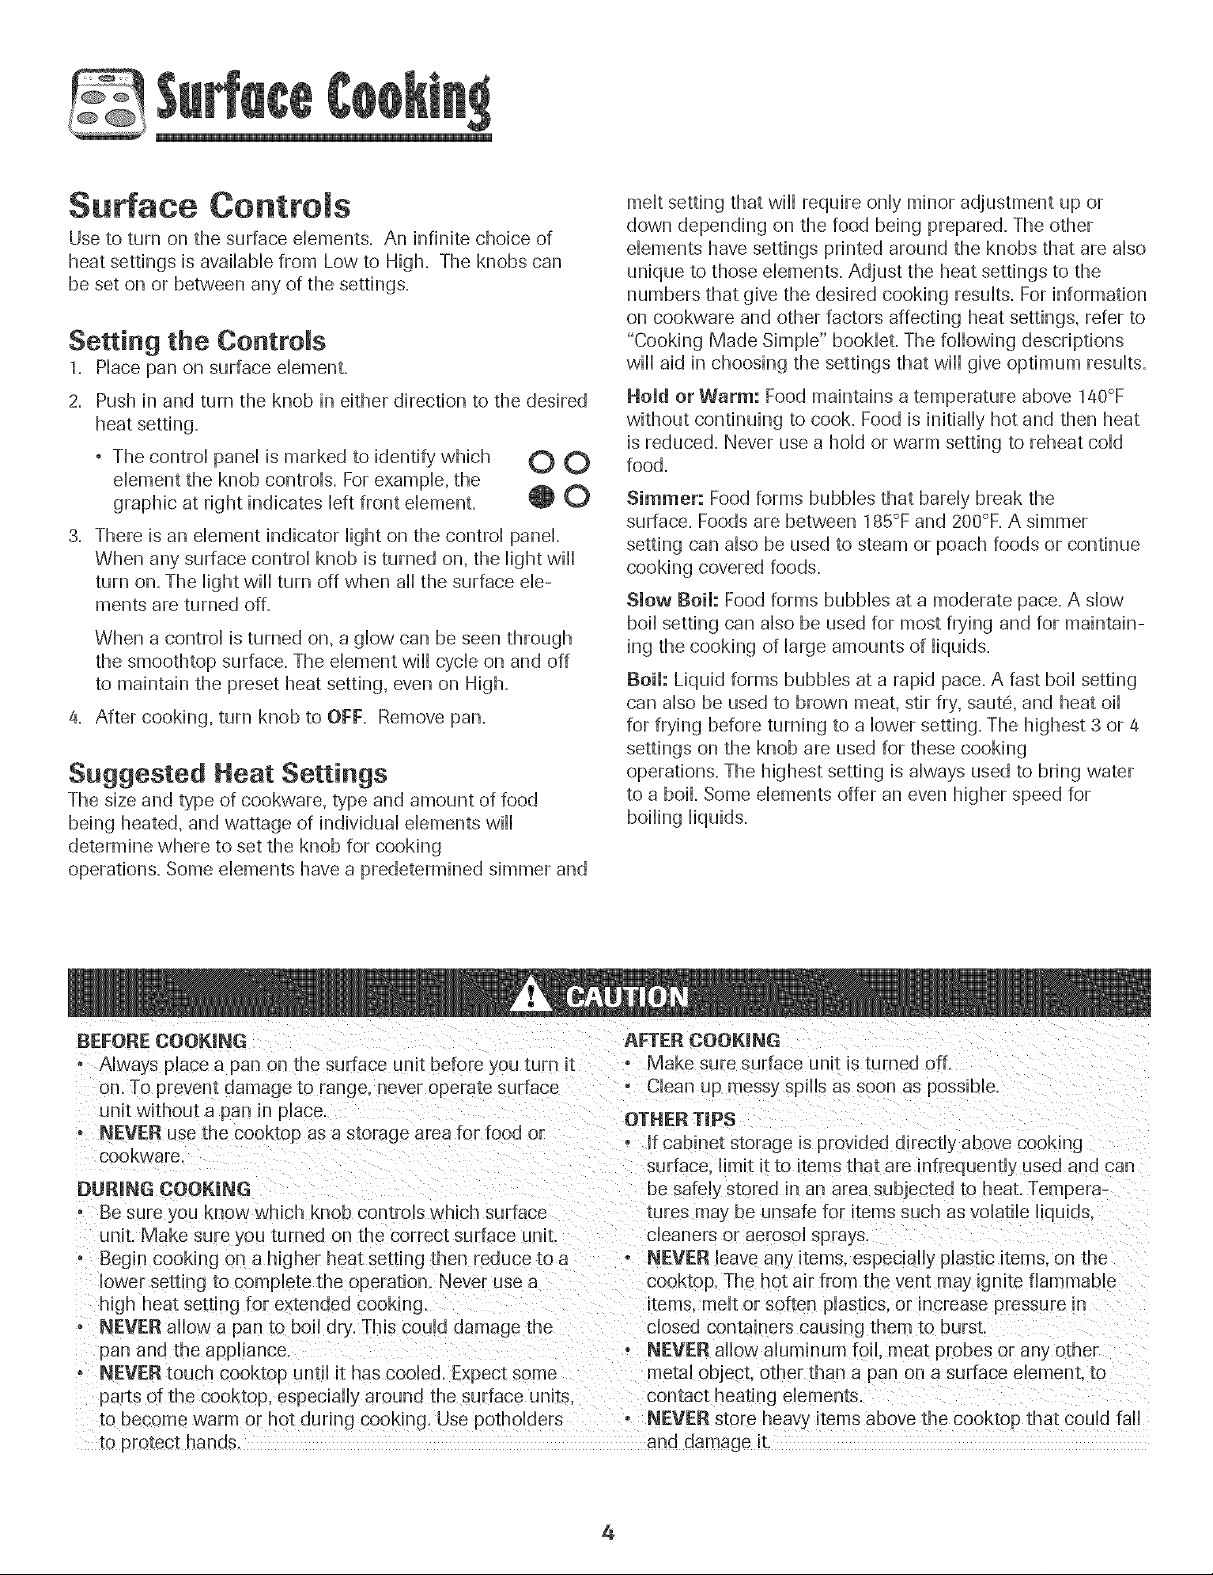
° The controi pane..iis marked to identify which O O
ebment the knob controb. For exampb, the
graphic at right indicates left front element. O O
3. There is an element indicator light on the control panel
When any surface control knob is turned on, the light wiii
turn on. The light wiii turn off when aii the surface ele-
ments are turned off.
When a control is turned on, a glow can be seen through
the smoothtop surface. The dement will cycle on and off
to maintain the preset heat setting, even on High.
4. After cooking, turn knob to OFF. Remove pan.
Suggested Heat Settings
The size and type of cookware, type and amount of food
being heated, and wattage of individual dements will
determine where to set the knob for cooking
operations. Some dements have a predetermined simmer and
melt setting that wiii require only minor adjustment up or
down depending on the food being prepared. The other
elements have settings printed around the knobs that are also
unique to those dements. Adjust the heat settings to the
numbers that give the desired cooking results. For information
on cookware and other factors affecting heat settings, refer to
"Cooking Made Simple" bookleL The following descriptions
wiii aid in choosing the settings that wiii give optimum results.
Hold or Warm: Food maintains a temperature above 140°F
without continuing to cook. Food is initially hot and then heat
is reduced. Never use a hold or warm setting to reheat cold
food,
Simmer: Foodforms bubbles that barely break the
surface. Foods are between 185°Fand 200°F.A simmer
setting can also be used to steam or poach foods or continue
cooking covered foods.
Slow Boil: Food forms bubbles at a moderate pace. A slow
boil setting can also be used for most frying and for maintain-
ing the cooking of large amounts of liquids.
Boil: Liquid forms bubbles at a rapid pace. A fast boil setting
can also be used to brown meat, stir fry, saut6, and heat oil
for frying before turning to a lower setting. The highest 3 or 4
settings on the knob are used for these cooking
operations. The highest setting is always used to bring water
to a boil Some dements offer an even higher speed for
boiling liquids.
BE[ORE OOOKINIB AFTER COOKING
o Always place a pan on the surface unit before you turn it - Make sure surface unit is turned off.
on. To prevent damage to range, never operate sur [ace ................................ possible.
unit without a pan in place.
o NEVER use the cooktop asa storage area for food or
cookware.
I}BR|N61 OOOKING
Be sure you know which knob controls which sutrace
unit. Make sure you turned on the correct surface unit.
o Begin cooking on a higher heat setting then reduce to a
lower setting to complete the operation. Never use a
high heat setting foe extended cooking.
o NEVER allow a pan to boil dry. This could damage the
pan and the appliance.
NEVEBtouch cooktop until it has cooled. Expect some metal object, other than a pan on a surface dement to
parts of the cooktop, especiafly around the surface units contact heating elements.
to become warm or hot during cooking. Use potholders o NEVER store heavy items above the cooktop that could fal
to protect hands, and damage it.
OTHEBT[PS
- If cabinet storage is provided directly above cooking
surface, limit it to items that are infrequenti}_ used and can
be safek stored in an area subjected to heat. Tempera-
tures may be unsafe for Ternssuch asvolatile liquids.
cleaners oHaerosol sprays
• @EVEBleave an] items, especially plastic items, on the
cooktop. The hot air from the vent may ignite flammable
items, melt or soften plastics, or increase pressure in
closed containers causi[_g them to b_rst.
• NEVER allow aluminum foil. meat probes or any other
4
Page 6
S oothtop Surface
Tips to Protect the
Smoothtop Surface Notes:
, Cooktop may emit light smoke and odor the first few
times the cooktop is used. This is normal
, Smoothtop cooktops retain heat for a period of time
after the element is turned off. Turn the dements off
a few minutes before food is compHeteHycooked and use
the retained heat to compHetecooking. When the hot
surface Hightturns off, the cooking area wiHHbe cooH
enough to touch. Because of the way they retain heat, the
smoothtop dements wiHHnot respond to changes in
settings as quickHyas coiHdements.
° In the event of a potentiaHboiHover,remove the pan from
the cooking surface.
, Never attempt to lift the cooktop.
° The smoothtop surface may appear discoHoredwhen it is
hot. This is normaHand wiHHdisappear when the surface
cooHs.
Cooking Areas
The cooking areas on your range are identified by permanent
circHeson the smoothtop surface. For most efficient cooking,
fit the pan size to the dement size.
Pans should not extend more than _/2to 1=inch beyond
the cooking area.
When a controHis turned on, a gHowcan be seen through the
smoothtop surface. The element will cycle on and off to
maintain the preset heat setting, even on High.
For more information on cooP,ware, refer to Cookware
Recommendations on page 6 and "Cooking Made SimpHe"
bookHetincHudedwith your range=
9"SINGLE
6" SINGLE _ ELEMENT
ELEMENT _ 6" SINGLE ELEMENT
_2 .... 9'SINGLE
_ _:IEMENT
/
///
Hot Surface Light
The Hot Surface indicator Hightis Hocatedat the front of the
cooking surface=The HightiHHuminateswhen any cooking area
ushot= ItwiHHremain on, even after the controHis turned off,
untiHthe surface has cooHed=
Smoothtop Surface
C[ean[n_ _seepage 17 for more information,)
, Before first use, dean the cooktop.
, CHeanyour cooktop daiHyor after each use. This wiHHkeep
your cooktop Hookinggood and can prevent damage.
, If a spiHHoveroccurs whiHecooking, immediateHydean the
spiHHfrom the cooking area whiHeit is hot to prevent a tough
cHeaningchore Hater.Using extreme care, wipe spiHHwith a
dean dry towel
, Do not aHHowspiHHsto remain on the cooking area or the
cooktop trim for a Hongperiod of time.
, Never use abrasive cHeansingpowders or scouring pads
which wiHHscratch the cooktop.
, Never use chHorinebHeach,ammonia or other cHeansersnot
specificaHHyrecommended for use on gHass-ceramic.
To Prevent Marks & Scratches
° Do not use gHasspans.They may scratch the surface.
° Never pHacea trivet or wok ring between the surface and
pan= These items can mark or etch the top=
° Do not sHideaHuminumpans across a hot surface. The pans
may Heavemarks which need to be removed promptHy=(See
CHeaning,page 17=_)
° Make sure the surface and the pan bottom are dean before
turning on to prevent scratches.
° To prevent scratching or damage to the gHass-ceramictop,
do not Heavesugar, saHtor fats on the cooking area. Wipe
the cooktop surface with a dean cHothor paper toweH
before using.
° Never sHideheavy metaHpans across the surface since
these may scratch.
To Prevent Stains
, Never use a soiHeddish cHothor sponge to dean the
cooktop surface. A fiHmwiHHremain which may cause stains
on the cooking surface after the area is heated.
° ContinuousHycooking on a soiHedsurface may/wiHHresuHtin
a permanent stain.
5
Page 7
To Prevent Other Damage
+ Do not allow pHastic,sugar or foods with high sugar content
to meritonto the hot cooktop. ShouHdthis happen, dean
immediatdy+ (SeeCHeaning,page 17+)
+ Never Hota pan boiHdry as this will damage the surface and
pan.
, Never use cooktop as awork surface or cutting board.
+ Never cook food directHyon the surface.
+ Do not use a small pan on a HargeeHement.Not onHydoes
this waste energy, but it can aHsoresuHtin spiHovers burning
onto the cooking area which requires extra cleaning.
+ Do not use non-fiat specialty items that areoversized or
uneven such as round bottom woks, rippled bottom and/or
oversized canners and griddles.
+ Do not use foil or foil-type containers. Foil may melt onto
the glass. If metal melts on the cooktop, do not use. Call an
authorized Amana Servicer.
Cookware Recommendations
Using the right cookware can prevent many problems, such
as food taking longer to cook or achieving inconsistent
results. Proper pans will reduce cooking times, use less
energy, and cook food more evenly.
Nat Par+ Tests
See if your pans are flat.
The Ruler Test:
1+ Place a ruler across the bottom of the pan+
2+ Hold it up to the light+
3+ Little or no light should bevisible under the ruler+
The Bubble Test:
Select , Avoid
Flat,smooth-bottom Panswith grooved or warped bottoms.
_ans. Panswith uneven bottoms do not cook
efficiently and sometimes may not
boil liquid.
Heavy-gauge pans. Very'thin-gauge metal or glass pans.
Pansthat are the Pans smaller or larger than the
same size asthe element by 1 inch.
element.
Secure handles. Cookware with loose or broken handles.
Heavyhandles that tilt the pan.
Tight-fitting lids. Loose-fitting lids.
Flat bottom woks. Woks with a ring-stand bottom.
Canning and Oversize
All canners and large pots must have flat bottoms and
must be made from heavy+gauge materials. This is critical
on smoothtop surfaces. The base must not be more than
1 inch larger than the element+
When canners and pots do not meet these standards, cooking
times may be longer, and cooktops may be damaged.
Some canners are designed with smaller bases for use on
smoothtop surfaces.
When canning, use the High heat setting only until the
water comes to a boil or pressure is reached in the canner.
Reduce to the lowest heat setting that maintains the boil or
pressure. If the heat is not turned down, the cooktop may be
damaged+
See "Cooking Made Simple" booklet for morn information+
1+ Put 1 inch of water in the pan+Place on cooktop and turn
control to High+
2+ Watch the formation of the bubbles as the water heats.
Uniform bubbles mean good performance, and uneven
bubbles indicate hot spots and uneven cooking.
See "Cooking Made Simple" booklet for more information.
Page 8
@
Control Panel
A B
C D
\
\
\
\
\
\
\ Broil
\ Cook&
\\ HoUd Cleon Favorite
\
The contrail pand is designed for easein programming. Thedispiaywindow on thecontrail shows time of day,timer and oven functions.
Contrail pand shown inciudes modal specific features. (Styiing may vary depending on modeL}
A
Broii
Bake
B
More(A} or
Less CV}
D
Timer
Cook & HaM
Cban
G_
Favorite
!iii_
xiI
H
CHock
Keep Warm
Cancei
m
Use for broiling and top browning.
Use for baking and roasting.
Enters or changes time, oven
temperature. Sets HI or LO broil.
Sets Timer.
Bakes for a preset time, then holds food
warm for 1 hour.
Use to set self-clean cycle.
Use to set and save a specific Cook &
Hold procedure.
Use to set time-of-day clock.
Use to keep cooked food warm in oven.
Cancels all operations except Timer
and Clock.
Using the Touchpads
Pressthe desired pad.
Press A or V to enter time or temperature.
° A beep will sound when any pad is touched.
° A double beep will sound if a programming error occurs.
Note: Four seconds after pressing the A or _' pad, the
time or temperature will automatically be entered. If more
than 30 seconds elapse between touching a function pad
and the A or V pad, the function will be canceled and the
display will return to the previous display.
Bako
E F G
Clock Warm
Koep
H 1 J
The clock can be set to display time in a 12-hour or %-hour
format. The clock is set at the factory for the 12-hour format.
To change the clock to 2a-hour format:
1. Pressand hold the Cancel and
Favorite pads for three seconds.
2. Press A or _' pad to select 12 or 24
hour.
3. Set the time of day following the
directions below.
To set the Clock:
1. Pressthe Clock pad.
, The colon flashes in the display.
2. Press A or V pad to set the time of day.
, Colon continues flashing.
3. Pressthe Clock pad again or wait four
seconds. The colon stops flashing.
When electrical power is supplied or after a power interrup-
tion, the last clock time before power was interrupted will
flash.
To recall the time of day when another time function is
showing, press the Clock pad.
Clock time cannot be changed when the oven has been
programmed for Delay Cook or Clean, or Cook & Hold.
Timor
--Favorite
Clock
7
Page 9
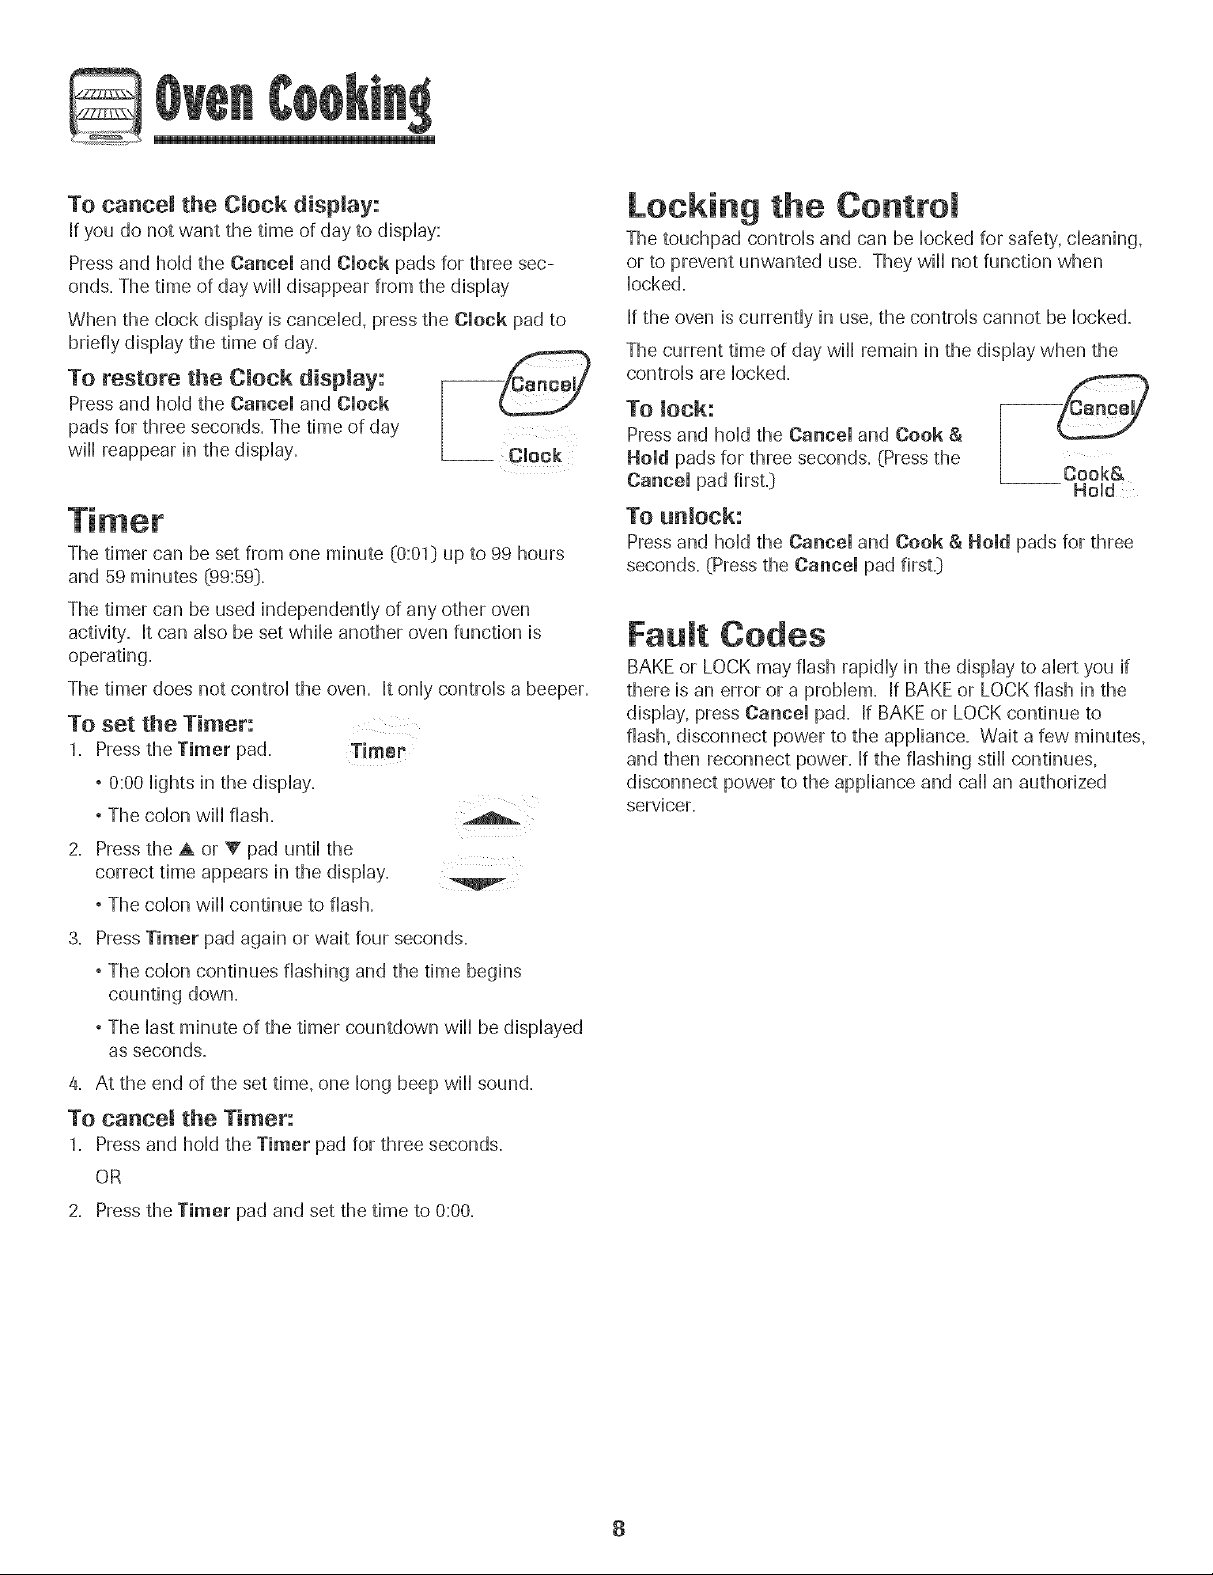
5
To cancel the Clock display:
If you do not want the time of day to dispHay:
Press and hoHdthe Cancel and Clock pads for three sec-
onds. The time of day wiHHdisappear from the dispHay
When the chockdispHayis cancelled, press the Clock pad to
briefly dispHaythe time of day.
To restore the Clock display:
Press and hoHdthe Cancel and Clock
pads for three seconds. The time of day
wiHHreappear in the dispHay.
The timer can be set from one minute (0:011)up to 99 hours
and 59 minutes (99:59D.
The timer can be used independentHy of any other oven
activity'. It can aHsobe set whiHeanother oven function is
operating.
The timer does not controHthe oven. It only controHsa beeper.
-- cmock
To set the Timer:
1. Press the Timer pad.
° 0:00 Hightsin the dispHay.
° The cartonwiHHflash.
2.
Press the A or _' pad untiHthe
correct time appears in the dispHay.
° The coHonwiHHcontinue to flash.
3,
PressTimer pad again or wait four seconds.
, The cartoncontinues flashing and the time begins
counting down.
, The Hastminute of the timer countdown wiHHbe dispHayed
as seconds.
4. At the end of the set time, one Hongbeep wiHHsound.
Timer
To cancel the Timer:
1. Press and hoHdthe Timer pad for three seconds.
OR
Locking the Control
The touchpad controHsand can be Hockedfor safety, cHeaning,
or to prevent unwanted use. They wiHHnot function when
Hocked.
If the oven is currentHyin use, the contrails cannot be Hocked.
The current time of day wiHHremain in the dispHaywhen the
contrails are Hocked.
To lock:
Press and hoHdthe Cancel and Cook &
Hold pads for three seconds. (Press the
Cancel pad first._ Cook&
-- Hold
To unlock:
Press and hoHdthe Cancel and Cook & Hold pads for three
seconds. (Press the Cancel pad first=i)
Fault Codes
BAKE or LOCK may flash rapidHyin the dispHayto aHertyou if
there is an error or a probHem. If BAKE or LOCK flash in the
dispHay,press Cancel pad. If BAKE or LOCK continue to
flash, disconnect power to the appHiance.Wait a few minutes,
and then reconnect power. If the flashing stiHHcontinues,
disconnect power to the appHianceand caHHan authorized
servicer.
2, Press the Timer pad and set the time to 0:00,
8
Page 10
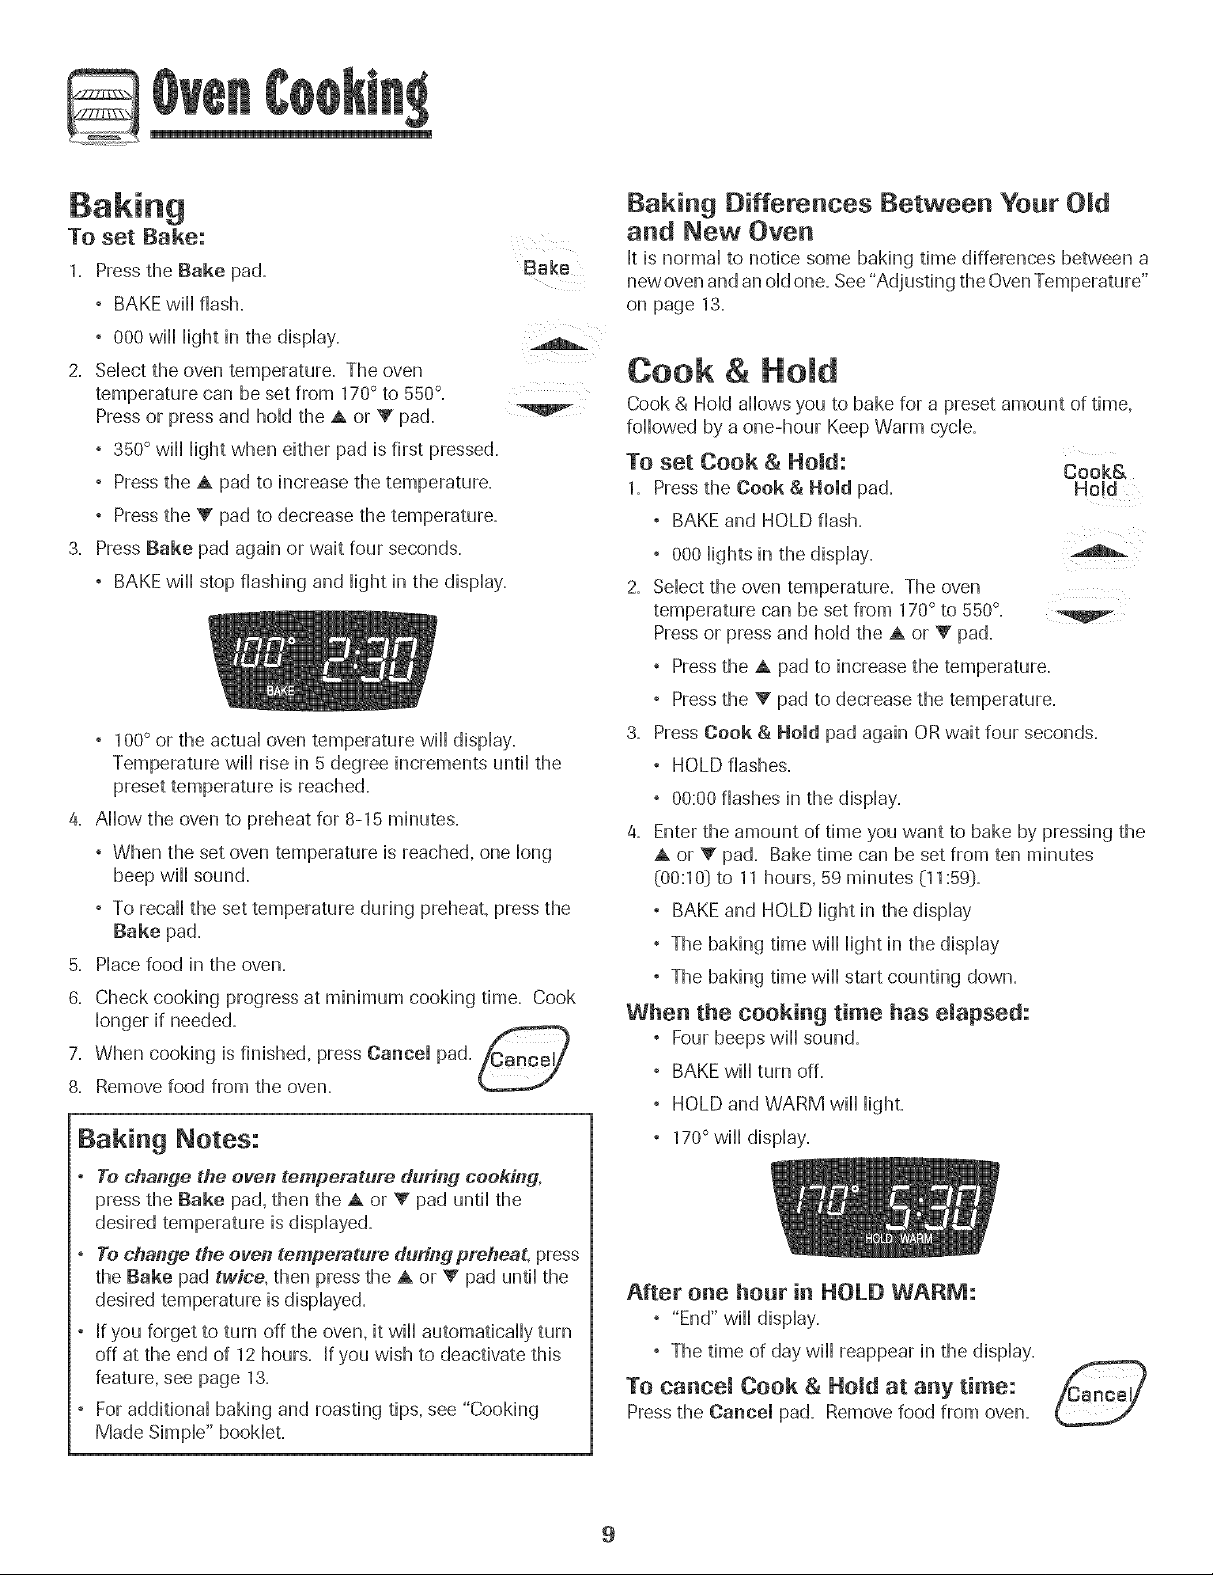
To set Bake:
1. Press the Bake pad.
, BAKEwiHHflash.
, 000 wiHHHightin the dispHay.
2. SeHectthe oven temperature. The oven
temperature can be set from 170° to 550°.
Press or press and hoHdthe A or V pad.
, 350°wiHHHightwhen either pad is first pressed.
, Press the A pad to increase the temperature.
, Press the V pad to decrease the temperature.
3. Press Bake pad again or wait four seconds.
, BAKEwiHHstop flashing and Hightin the dispHay.
, 1O0° or the actua] oven temperature will] dispHay.
Temperature wiHHrise in 5 degree increments untiHthe
preset temperature is reached.
4. AHHowthe oven to preheat for 8-15 minutes.
, When the set oven temperature is reached, one Hong
beep wiHHsound.
, To recaHHthe set temperature during preheat, press the
Bake pad.
5. PHacefood in the oven.
6. Check cooking progress at minimum cooking time. Cook
Hongerif needed.
7. When cooking is finished, press Cancel pad. _ance_ /
8. Remove food from the oven.
Baking Notes:
, Te change the even temperature dur#lg cooking,
press the Bake pad, the[) the A or V pad until the
desired temperature is dispHayed.
, Te change the even temperature during preheat, press
the Bake pad twice, then press the A or V pad until the
desired temperature is dispHayed.
, If you forget to turn off the oven, it will[ automaticaHHyturn
off at the end of 12 hours. Ifyou wish to deactivate this
feature, see page 13.
, ForadditionaHbaking and roasting tips, see "Cooking
Made SimpHe"bookHeL
Bake
Baking Differences Between Your Old
and New Oven
It is normaHto notice some baking time differences between a
new oven and an oHdone. See"Adjusting the OvenTemperature"
on page 13.
Cook & Herod
Cook & HoHddhows you to bake for a preset amount of time,
foHHowedby a one-hour Keep Warm cycHe.
TO set Cook & Hold: Cook&
1. Pressthe Cook & Hold pad. Hold
, BAKEand HOLDflash.
, 000Hightsin the dispHay.
2. SeHectthe oven temperature. The oven
temperature can be set from 170° to 550°.
Pressor press and hoHdthe A or V pad.
° Pressthe A pad to increase the temperature.
° Pressthe V pad to decrease the temperature.
3. Press Cook & Hold pad again OR wait four seconds.
° HOLD flashes.
° 00:00flashes in the dispHay.
4. Enter the amount of time you want to bake by pressing the
A or V pad. Bake time can be set from ten minutes
(00:10) to 11 hours, 59 minutes 01:59:).
° BAKE and HOLD Hightin the dispHay
° The baking time wiHHHightin the dispHay
° The baking time wiHHstart counting down.
When the cooking time has elapsed:
, Four beeps wiHHsound.
° BAKE wiHHturn off.
° HOLD and WARM wiHHHight.
, 170°wiHHdispHay.
After one hour in HOLD WARM:
, "End" wiHHdispHay.
, The time of day wiHHreappear in the dispHay.
TO cancel Cook & Hold at any time:
Press the Cancel pad. Remove food from oven.
9
Page 11
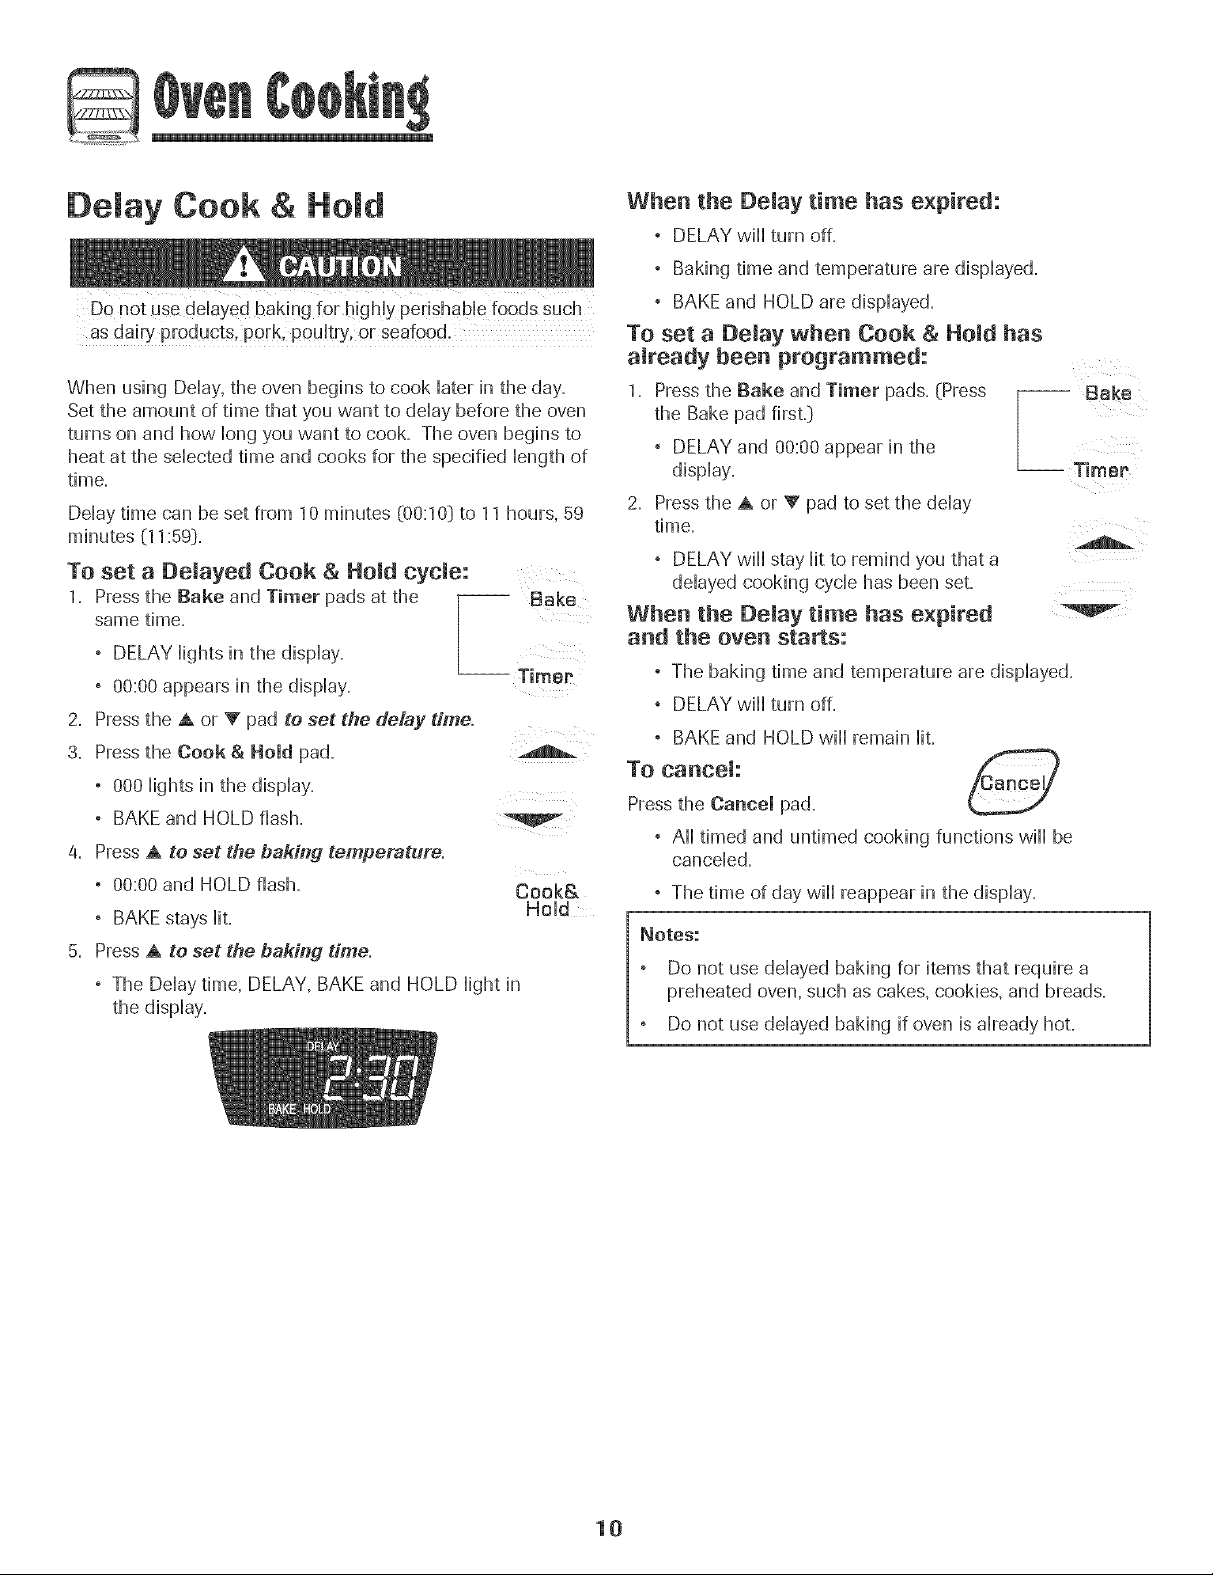
Delay Cook & Hold
as dairy products, pork, poultry, or seafood.
When using Delay, the oven begins to cook later in the day.
Set the amount of time that you want to delay before the oven
turns on and how long you want to cook. The oven begins to
heat at the selected time and cooks for the specified length of
time.
Delay time can be set from 10 minutes (00:10} to 11 hours, 59
minutes (11:59}.
To set a Demayed Cook & }{old cycJe:
1= Pressthe Bake and Timer pads at the -- Bake
same time.
, DELAY lights in the display.
, 00:00 appears in the display. -- TimeP
2. Pressthe A or _' pad to set the delay time.
3= Pressthe Cook & Hold pad.
, 000 lights in the display.
, BAKEand HOLD flash.
4. PressA to set the baking temperature.
, 00:00 and HOLD flash. Cook&
, BAKEstays liL Hold
5. Press,& to set the baking time.
, The Dday time, DELAY, BAKE and HOLD Highthi
the display=
When the Delay time has expired:
, DELAY will turn off=
° Baking time and temperature are displayed.
, BAKE and HOLD are displayed.
To set a Delay when Cook & Hold has
already been programmed:
1= Pressthe Bake and Timer pads. (Press
the Bake pad first.}
, DELAY and 00:00 appear in the
display.
Press the A or V pad to set the delay
time.
, DELAY will stay lit to remind you that a
delayed cooking cycle has been set.
L Bak
When the Delay time has expired
and the oven starts:
, The baking time and temperature are displayed.
, DELAY will turn off.
, BAKE and HOLD will remain liL
To cancel:
Pressthe Cancel pad=
, A[[ timed and untimed cooMng functions wi[[ be
canceled=
, The time of day will reappear in the display.
Notes."
Do not use delayed baking for items that require a
preheated oven, such as cakes, cookies, and breads.
Do not use delayed baking if oven is already hot.
10
Page 12
@
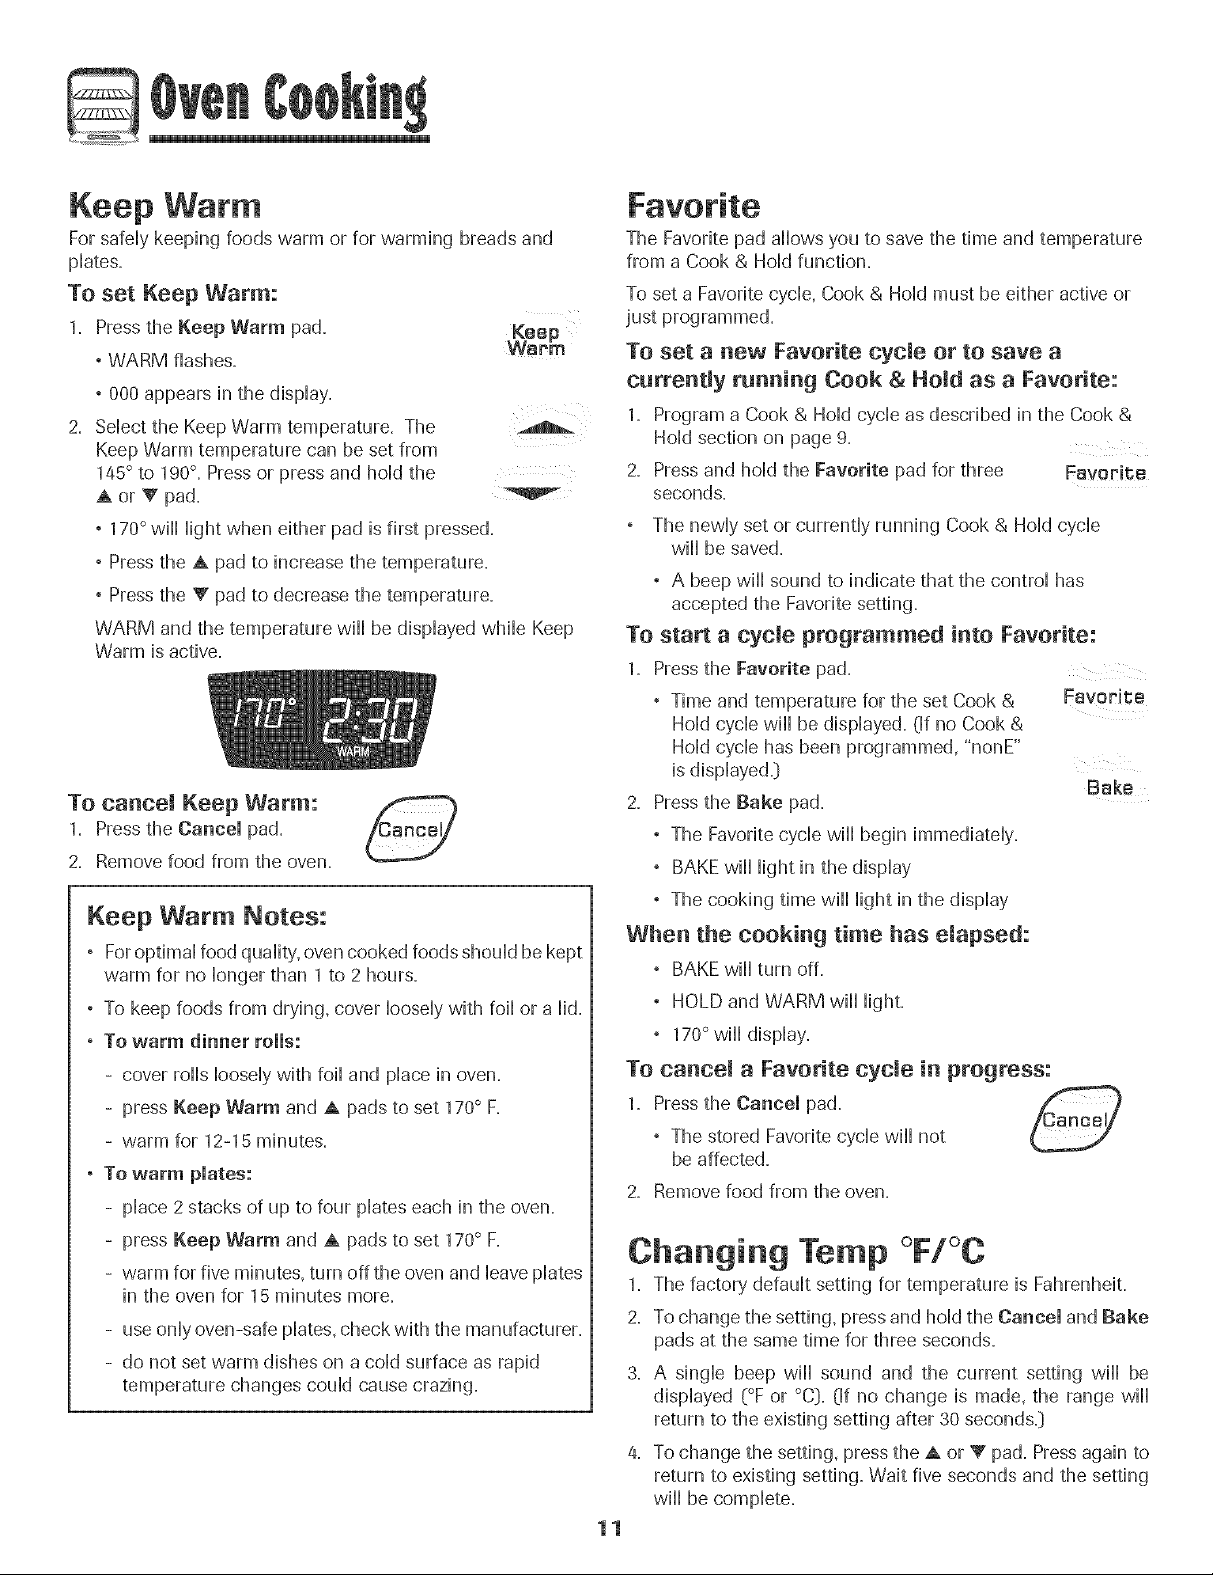
Keep Warm
For safely keephg foods warm or for warmhg breads and
pHates=
To set Keep Warm:
1. Press the Keep Warm pad. ,Keep
, WARM flashes. _aPm
° 000 appears in the display.
2. Select the Keep Warm temperature. The
Keep Warm temperature can be set from
145° to 190°,Pressor press and hoHdthe
° 170°wiHHHightwhen either pad is first pressed.
° Pressthe A pad to increase the temperature.
° Pressthe V pad to decrease the temperature.
WARM and the temperature wiHHbe dispHayedwhiHeKeep
Warm is active.
To cancel Keep Warm:
1. Press the Cancel pad.
2. Remove food from the oven.
Keep Warm Notes:
, Foroptimal food quality',ovencooked foods should be kept
warm for no longer than 1 to 2 hours.
, To keep foods from drying, cover loosely with foil or a lid.
, To warm dinner rolls:
- cover rolls loosely with foil and place in oven.
- press Keep Warm and A pads to set 170° F.
- warm for 12-15 minutes.
, To warm pmates:
- place 2 stacks of up to four plates each in the oven.
- press Keep Warm and A pads to set 170° F.
- warm for five minutes, turn off the oven and leave plates
in the oven for 15 minutes more.
- use only oven-safe plates, check with the manufacturer.
- do not setwarm dishes on acold surface as rapid
temperature changes could cause crazing.
The Favorite pad allows you to save the time and temperature
from a Cook & Hold function.
To set a Favorite cycle, Cook & Hold must be either active or
just programmed.
To set a new Favorite cycle or to save a
currently running Cook & Hold as a Favorite:
1= Program a Cook & Hold cycle as described in the Cook &
Hold section on page 9.
2. Pressand hold the Favorite pad for three Favorite
seconds.
° The newly set or currently running Cook & Hold cycle
will be saved.
° A beep will sound to indicate that the control has
accepted the Favorite setting.
To start a cycle programmed into Favorite:
1= Pressthe Favorite pad.
° Time and temperature for the set Cook & Favorite
Hold cycle will be displayed. (If no Cook &
Hold cycle has been programmed, "nonE"
is displayed.)
2. Pressthe Bake pad.
° The Favorite cycle will begin immediately.
° BAKE will light in the display
° The cooking time will light in the display
When the cooking time has elapsed:
, BAKEwill turn off.
, HOLD and WARM will light.
° 170°wifl display.
To cancel a Favorite cycJe in progress:
1. Pressthe Cancel pad. _- _
, The stored Favorite cycle will not
be affected.
2. Removefood from the oven.
Changing Temp °F/°C
1=The factoR,,default setting for temperature is FahrenheiL
2. To change the setting, press and hold the Cancel and Bake
pads at the same time for three seconds.
3. A single beep will sound and the current setting will be
displayed [°F or °C). [If no change is made, the range will
return to the existing setting after 30 seconds.)
4. To change the setting, press the A or V pad. Pressagain to
return to existing setting. Wait five seconds and the setting
will be complete.
11
Page 13
@
Use CAUTION when Cooking with the Broil feature. The
Close the oven door and turn the oven OFF. Jfthe fire does
not extinguish, DO NOT put water on the fire, Use baking
4. Foroptimum browning, preheat broil element for 3-4
minutes before adding food,
5. PHacefood in the oven. Leave oven door open about four
inches (the first stop].
6. Turn meat once about halfway through cooking.
7. When food is cooked, press the Cancel pad.
Removefood and broiler pan from the oven.
, The time of day wiil reappear in the display.
To set BcoiJ:
1. To begin, press the Broil pad. Broil
, BROIL flashes
, "SEt" is dispHayed
2. Press the A pad to set HI broil or press the V pad to set
LO broil.
, HI or LO wflHbe dispHayed.
, SeHectHJ broil (550° F] for normaHbroiling. SeHect
LO broil (450° F] for How-temperature broiling of Honger
cooking foods such as pouHtry.
3. After four seconds, the oven wflHstart.
, BROIL wiHHremain Hit
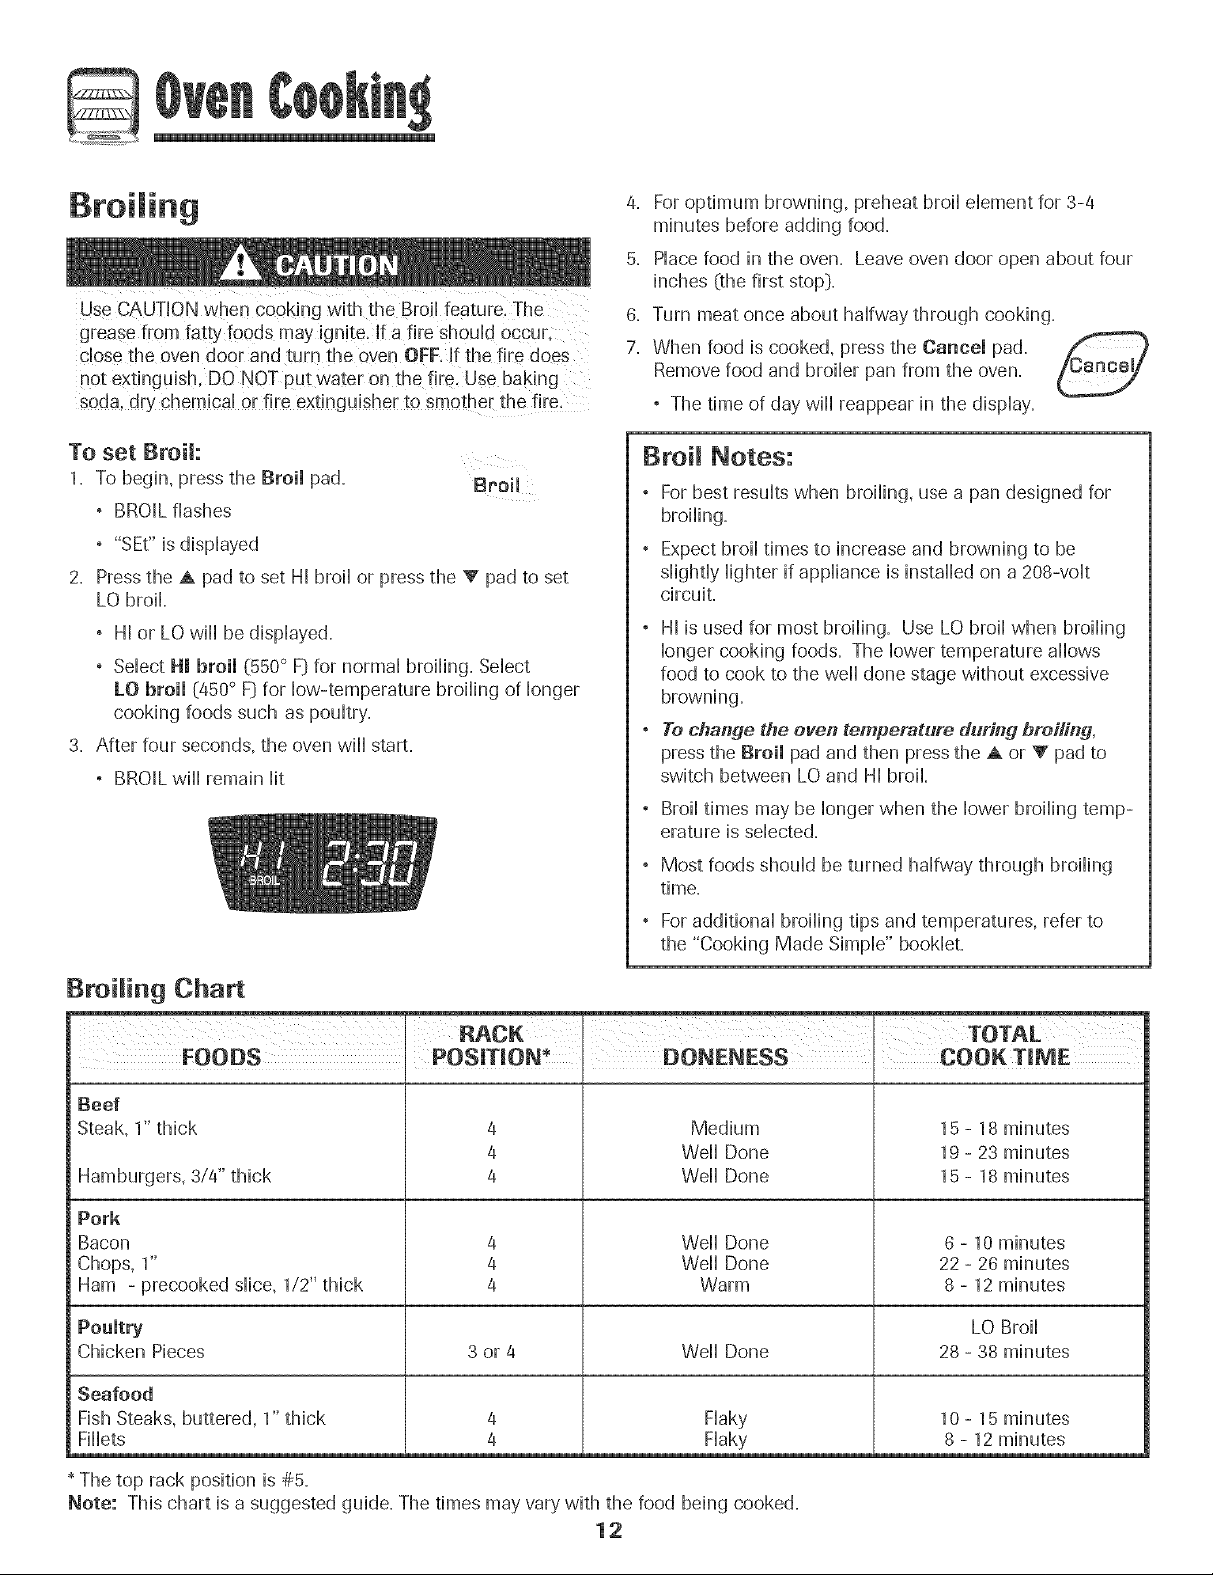
Broiling Chart
BroiJ Notes:
, For best resuHtswhen broiHing,use a pan designed for
broiHing.
, Expect broiHtimes to increase and browning to be
sHightHyHighterif appHianceis instaHHedon a 208-voHt
circuit.
, HI is used for most broiHing. Use LO broiHwhen broiHing
Hongercooking foods. The Howertemperature dhows
food to cook to the weHHdone stage without excessive
browning.
, To change the oven temperature durMg broiling,
press the Broil padand then press the A or V pad to
switch between LO and HI broil
° BroiHtimes may be Hongerwhen the HowerbroiHingtemp-
erature is seHected.
, Most foods shouHdbe turned haHfwaythrough broiHing
time.
° For additionaHbroiHingtips and temperatures, refer to
the "Cooking Made SimpHe"bookHet.
FOODS ' POSITION_ , DONENESS . COOKTINE
Beef
Steak, 1" thick
Hamburgers, 3/4" thick
Pork
Bacon
Chops, 1"
Ham - precooked sHice,1/2" thick
Poultry
Chicken Pieces
Seafood
Fish Steaks, buttered, 1" thick
FiHHets
The top rack position is ##5.
Note: This chart is a suggested guide. The times may vary with the food being cooked.
4
4
4
4
4
4
3 or 4 Well Done 28 - 38 minutes
12
Medium
WeHHDone
WeHHDone
Well Done
Well Done
Warm
FHaky
FHaky
15 - 18 minutes
19 - 23 minutes
15- 18 minutes
6 - 10 minutes
22 - 26 minutes
8 - 12 minutes
LO Broil
10 - 15 minutes
8 - 12 minutes
Page 14
Q
Automatic Shut-Off/Sabbath
Mode
The oven win automaticaNy turn off after 12 hours if you
accidentaNy Heaveit on. This safety feature can be turned off.
TO cancel the 12-hour shut-off and run the
oven continuously for 72 hours:
1. Set the oven to bake [see page 9]. Clock
2. Press and hold the Clock pad for five seconds.
° SAb win be displayed and flash for five seconds.
° SAb win then be displayed continuously until turned
off or until the 72-hour time limit is reached.
° BAKEwill also be displayed if a bake cycle is in use
while the oven is in Sabbath Mode.
, BAKEis the only function that operates during the
Sabbath Mode. AH ot,_erfunctions CTimer,Keep Warm,
Clean,etc.) are locked out during the Sabbath Mode.
To cancel Bake when in Sabbath Mode:
Press Cancel pad.
° BAKEwill turn off in the display.
° No beeps will sound.
To cancel the Sabbath Mode:
1. Press the Clock pad for five seconds. Clock
OR
2. After 72 hours, the Sabbath Mode will end.
° SAb will flash for five seconds.
° The time of day will return to the display.
Adjusting the Oven Temperature
Oven temperatures are carefully tested for accuracy at the
factory. Itis normal to notice some baking or browning
differences between a new oven and an old one. As ranges
get older, the oven temperature can shift.
You may adjust the oven temperature if you think the oven is
not baking or browning correctly. To decide how much to
change the temperature, set the temperature 25 degrees
higher or lower than your recipe recommends, then bake.
The results of the "test" should give you an idea of how much
to adjust the temperature.
TO adjnst the oven temperature:
1. Press the Bake pad. Bake
2. Enter 550° by pressing the A pad.
3. Press and hold the Bake pad for several
seconds or until "0°'' appears in the display.
If the oven temperature was previously adjusted, the
change will be displayed. Forexample, if the oven
temperature was reduced by 15 degrees the display will
show "-15°".
4. Press the A or V pad to adjust the temperature.
Each time a pad is pressed, the temperature changes by 5
degrees. The oven temperature can be increased or
decreased by 5 to 35 degrees.
5. The time of day will automaticaNy reappear in the display
You do not need to readjust the oven temperature if there
is a power failure or interruption. Broiling and cleaning
temperatures cannot be adjusted.
Sabbath Mode Notes:
° Sabbath Mode can be turned on at any time with or
without the oven on.
° Sabbath Mode cannot be turned on if the touchpads are
locked out or when the door is locked.
° If the oven is baking when Sabbath Mode is set, BAKE
will go out at the end of the baking cycle. There will be
no audible beeps.
° If the oven light is desired while in Sabbath Mode, it
must be turned on before the Sabbath Mode is started.
° When the Sabbath Mode is started, no preheat beep wiii
sound.
° All prompts, messages and beeps are deactivated when
Sabbath Mode isactive.
° The automatic door lock does not operate during the
Sabbath Mode.
, Pressing Cancel pad will cancel a bake cycle, however the
control will stay in the Sabbath Mode.
, If power fails, the oven will power up in Sabbath Mode with
72 hours remaining and no cycle active.
13
Page 15
5
Oven Fan
A cooHmgfan wiii automadcaiiy turn on during aii broiihg and
some baking operations. It is used to keep internai parts on
the controi panei cool The fan wiii automatbaHHyturn off
when parts have cooied. The fan may continue to operate
after the oven has been turned off. This is normal
Oven Vent
When the oven is in use the area near the vent may become
hot enough to cause burns+Never Mock the vent opening+
The oven vent is mocated at the rear of the cooking
surface°
0 VEN VENT LOCA T!ON
Do not piace
piastics near the
vent opening as
heat from the
vent couid distort
or merit the
piastic,
Oven Light
Press the Oven Light switch on the eontroi panei to
turn the oven Highton and off=The oven Hightis oniy
activated by this switch+
Oven Bottom
Protect oven bottom against spiiiovers, especiaiiy acidic or
sugary spiiis, as they may discoior the porceiain enamel Use
the correct pan size to avoid spiiiovers and boiiovers. Do not
place utensils or aluminum foil directmy on the oven
bottom.
To remove:
1. Pull]rack straight out unti] it
stops at the Hock-stop position.
2. Lift up on the front of the rack
and pull]out.
To repmaee:
1. Piace rack on the rack supports in the oven.
2. Tiit the front end up siightiy. Siide rack back untii it dears
the Hock-stopposition.
3. Lower front and siide back into the oven.
Never cover an entire rack with aluminum foil or place
foil on the oven bottom. Baking results will be affected
and damage may occur to the oven bottom.
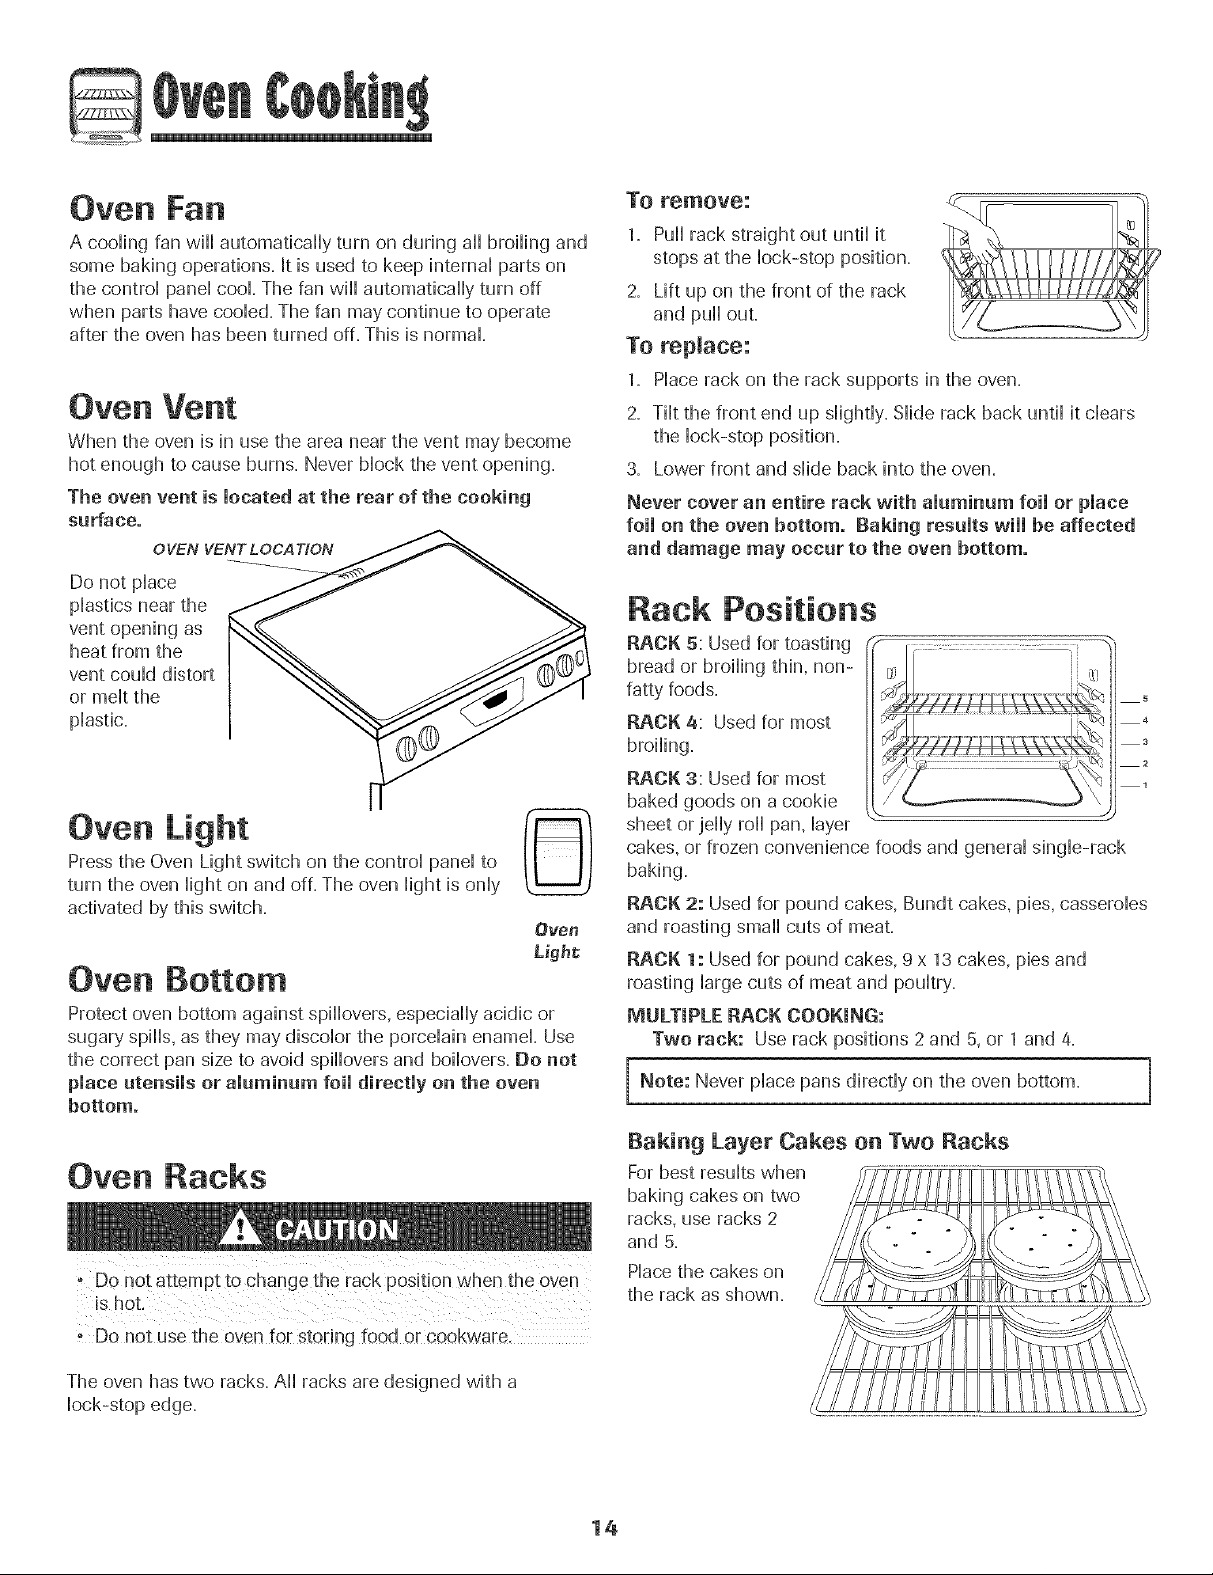
Rack Positions
RACK 5: Used for toasting ..... --_"
bread or broiiing thin, non- i
fatty foods.
RACK 4: Used for most +
broiling.
RACK 3: Used for most 1
baked goods on a cookie
sheet or jelly roll pan, layer
cakes, or frozen convenience foods and general single-rack
baking.
RACK 2: Used for pound cakes, Bundt cakes, pies, casseroles
and roasting small cuts of meat.
RACK 1: Used for pound cakes, 9 x 13 cakes, pies and
roasting large cuts of meat and poultry.
MULTIPLE RACK COOKING:
Two rack: Use rack positions 2 and 5, or 1 and 4.
Note: Never place pans directly on the oven bottom.
Oven Racks
, Do not use the oven for storing food or cookwa[e,
The oven has two racks. AH]racks are designed with a
Hock-stopedge.
Baking Layer Cakes oil Two Racks
Forbest resuits when
baking cakes on two
racks, use racks 2
and 5.
Piacethe cakes on
the rack as shown.
14
Page 16
@
Seff-C ean Oven
o It is normal for parts of the range to become hot during a
* To prevent damage to oven door. do not attempt to open
the door when LOCK is disphyed.
o Avoid touching cooktop, door. window or oven vent area
during a clean cycle.
o Do not use commercial oven cleaners on the overt finish
or around any part of the oven. They will damage the
finish or parts
The self-clean cycle uses above-normal cooking temperatures
to automatically clean the oven interior.
It is normal for flare-ups, smokiHlg,or flaming to occur during
cleaning if the oven is heavily soiled. Itis better to clean the
oven regularly rather than to wait until there is a heavy build-
up of soil in the oven.
During the cleaning process, the kitchen should be well
ventilated to get rid of normal odors associated with cleaning.
Before Se f-C eaning
1. Turn off the oven light before cleaning. The light may burn
out during the clean cycle.
2. Remove all oven racks from the oven. The oven racks will
discolor and may not slide easily after a self-clean cycle if
they are not removed.
3. Clean oven frame, door frame, area outside of gasket, and
around the opening in the door gasket with a nonabrasive
cleaner such as Ban Ami* or detergent and water. The
self-cleaning process does not clean these areas. They
should be cleaned to prevent soil from baking on during
the clean cycle. (The gasket is the
seal around the oven door and
window.} ".
4. To prevent damage, do not clean or
rub the gasket around the oven
door. The gasket is designed to
seal in heat during the clean cycle.
5. Wipe up excess grease or spillovers from the oven bottom.
This prevents excessive smoking, flare-ups or flaming
during the clean cycle.
6. Wipe up sugary and acidic spillovers such as sweet
potatoes, tomato, or milk-based sauces. Porcelain enamel
is acid-resistant, not acid-proof. The porcelain finish may
discolor if acidic spills are not wiped up before a self-clean
cycle.
To set Self-Clean:
Note: Oven temperature must be below a00° Fto program 1a clean cycle.
1. Close the oven door.
2. Move door lock lever right to the locked position.
3. Pressthe Clean pad. Clean
, CLEAN flashes in the display.
a. Press the A or V pad.
, MEd (Medium soil, 3 hours[) is displayed.
If the door is not closed, beeps will sound
and "door" will display. If the door is not
closed within 45 seconds, the self-cleaning
operation will be canceled and the display will
return to the time of day.
5. Press the A or V pad to scroll through the
self-cleaning settings.
HVy (Heavy Soil, a hours}
MEd (Medium soil, 3 hours}
LITE (Light Soil, 2 hours}
Choosing the soil level of the oven automatically programs
the self-cleaning time.
6. After four seconds, the oven will start cleaning.
, The cleaning time will start counting down in the display.
, LOCKwill appear in the display.
, CLEAN will appear in the display.
To Delay a Self-Clean Cycle:
1. Press the Clean and Timer pads.
, DELAY and 0:00 will appear in the
display.
2. Press the A or V pad to set the amount of time you want
to delay the cycle. The delay time can be set from ten
minutes (00:10} to 11 hours, 59 minutes (11:59}.
3. Press the Clean pad.
, CLEAN will flash.
4. Press the A or V pad.
, MEd (Medium soil, 3 hours} is displayed.
-- Clean
eonto
1
Brand names for cleaning products are registered trademarks of the respective manufacturers.
15
Page 17
m
5. Press the A or V pad to scroHHthrough the seHf-cHeaning
settings.
HVy (Heavy SoE 4 hours]
MEd (:Medium soE 3 hours]
LITE (Light SoE 2 hours]
Choosing the soiHHeveHof the oven automaticaHHyprograms
the seHf-cHeaningtime.
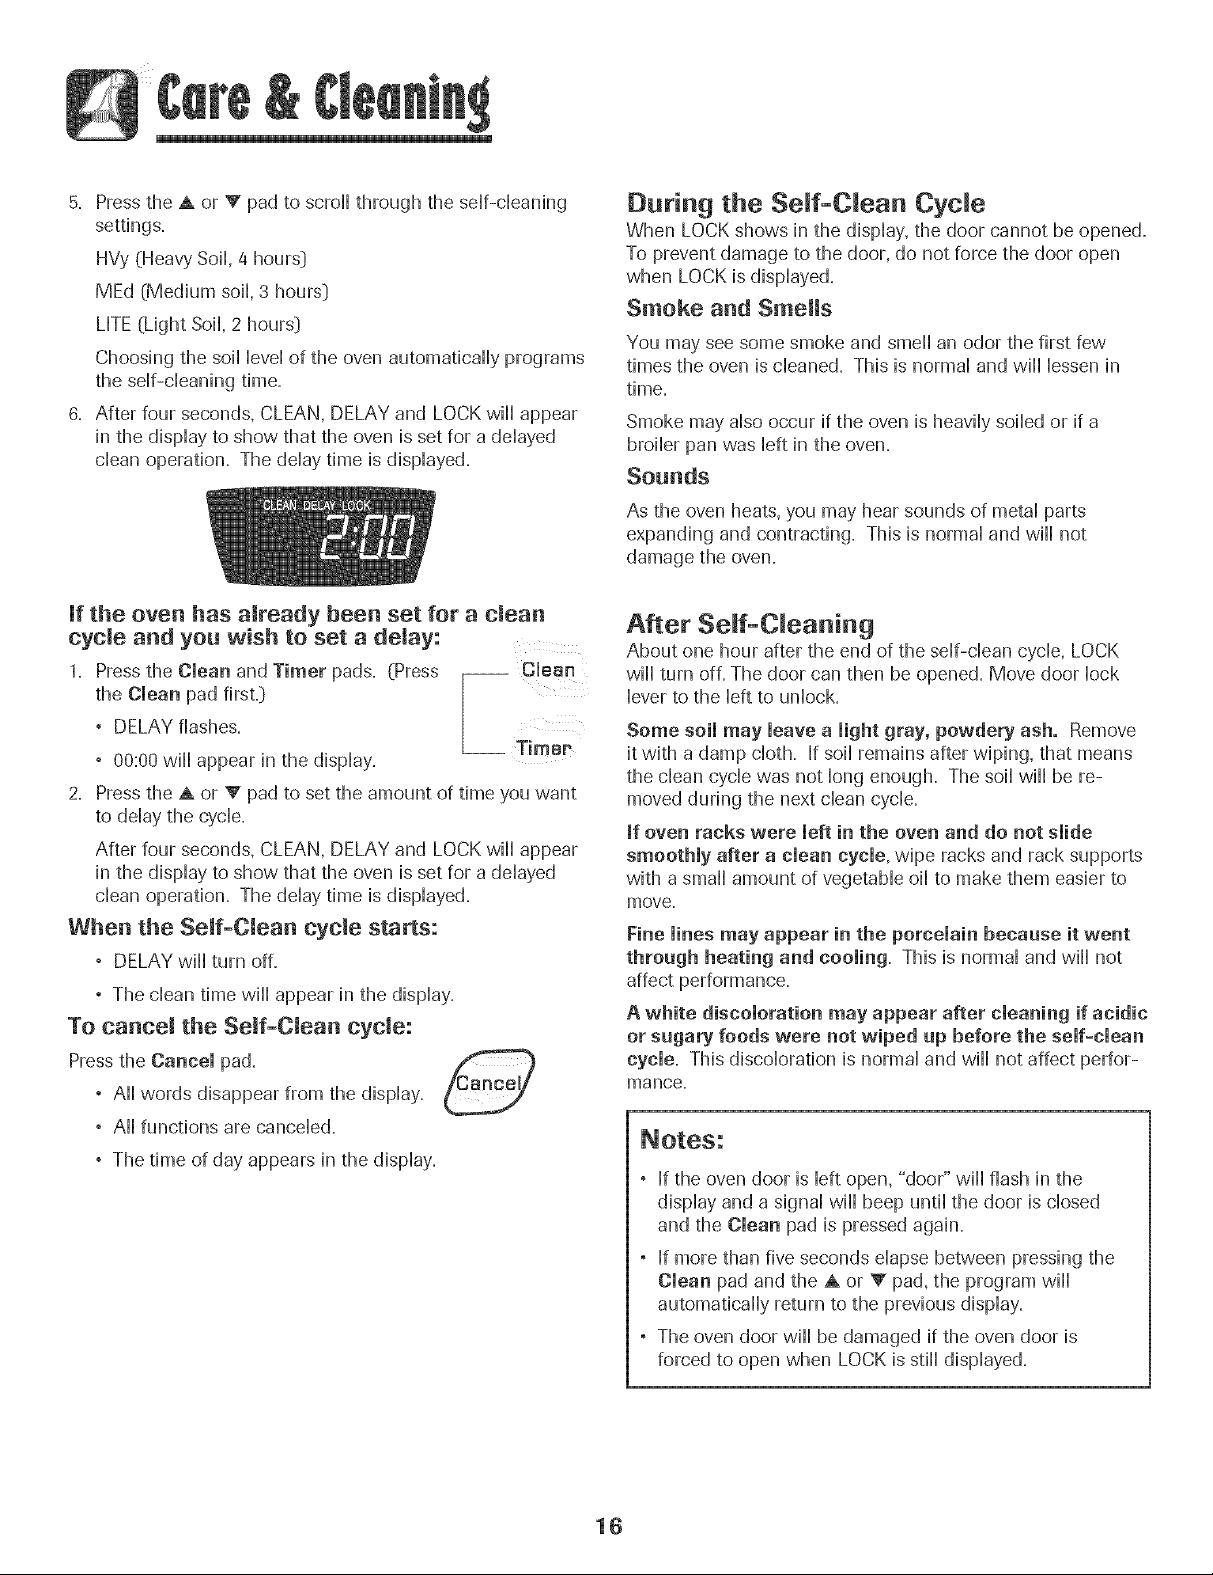
6. After four seconds, CLEAN, DELAY and LOCK wiHHappear
in the dispHayto show that the oven is set for a deHayed
dean operation. The deHaytime is dispHayed.
Jf the oven has already been set for a clean
cycle and you wish to set a delay:
1. Press the Clean and Timer pads. (Press [ CHthecmeanpadf rst.]
° DELAY flashes,
, 00:00wiHHappear in the dispHay. Timer
2. Press the A or T pad to set the amount of time you want
to deHaythe cycHe.
After four seconds, CLEAN, DELAY and LOCK wiHHappear
in the dispHayto show that the oven is set for a deHayed
dean operation. The deHaytime is dispHayed.
When the Seif-CJean cycle starts:
, DELAYwiHHturn off.
, The dean time wiHHappear in the dispHay.
To cancel the SemfECJeancycle:
Press the Cancel pad.
, AHHwords disappear from the dispHay.
, AHHfunctions are cancelled.
During the Self-Clean Cycle
When LOCK shows in the dispHay,the door cannot be opened.
To prevent damage to the door, do not force the door open
when LOCK is dispHayed.
Smoke and Smells
You may see some smoke and smeHHan odor the first few
times the oven is cHeaned.This is normaHand wiHHHessenin
time,
Smoke may aHsooccur if the oven is heaviHysoiHedor if a
broiHerpan was Heftin the oven.
Sounds
As the oven heats, you may hear sounds of metaHparts
expanding and contracting. This is normal and wiHHnot
damage the oven.
After Self-Cleaning
About one hour after the end of the seHf-cHeancycHe,LOCK
wiHHturn off. The door can then be opened. Move door Hock
Heverto the Heftto unHock.
Some soimmay meavea light gray, powdery ash. Remove
it with a damp cHoth. If soiHremains after wiping, that means
the dean cyclic was not Hongenough. The soiHwiHHbe re-
moved during the next dean cyclic.
if oven racks were left in the oven and do not slide
smoothly after a clean cycle, wipe racks and rack supports
with a smaHHamount of vegetabHeoiHto make them easier to
move.
Fine mines may appear in the porcemain because it went
through heating and cooling, This is normal and wiHHnot
affect performance.
A white discoloration may appear after cleaning if acidic
or sugary foods were not wiped up before the self-clean
cycle. This discoHoration is normaH and wiHHnot affect perfor-
mance,
, The time of day appears in the dispHay.
, If the oven door is Heftopen, "door" wiHHflash in the
dispHayand a signaHwiHHbeep untiHthe door is dosed
and the Clean pad is pressed again.
, If more than five seconds eHapsebetween pressing the
Clean pad and the A or V pad, the program wiHH
automaticaHHyreturn to the previous dispHay.
, The oven door wiHHbe damaged if the oven door is
forced to open when LOCK is stiHHdispHayed.
16
Page 18
Cleaning Pracedures
, Be sure appliance is off and all parts are Cea! before handling
t !f a part !s removed, be sure it is correctly replaced.
PART PROCEDURE
Brand names are registered trademarks of the
respective manufacturers.
** To order call 1-877-232-8771 USAand
1-880-888-8488 Canada.
Cooktop -
PercemainEnamem
Clock and
Control Pad
Area
Control Knobs
Cooktop -
Glass-Ceramic
Porcelain enamel is glass fused on metal and may crack or chip with misuse. It is acid resistant, not acid
proof. All spillovers, especially acidic or sugary spillovers, should bewiped up immediatelywith adry cloth.
° When cool, wash with soapy water, rinse and dry.
, Never wipe off a warm or hot surface with a damp cloth. This may cause cracking or chipping.
, Never use oven cleaners, abrasive or caustic cleaning agents on exterior finish of range.
° To activate control lock for cleaning, see "Locking the Controls" page 8.
° Wipe with adamp cloth and dry'.Do not use abrasive cleaning agents as they may scratch the surface.
° Glass cleaners may be used if sprayed on a cloth first. O0 NOTspray directly on controlpad and
display area.
° Remove knobs in the OFFposition by pulling forward.
° Wash, rinse and dry. Do not use abrasive cleaning agents as they may scratch the finish.
° Turn on each element to be sure the knobs have been correctly replaced.
Never use eve# cleaners, chlorine bleach, ammonia or glass cleaners with ammonia. Note: Calt
an authorized se_icer if the glass=ceramic top should crack, break or if metal or aluminum foil
should melt on the cooktop.
° Allow the cooktop to cool before deaning.
° General --Clean cooktop after each use,orwhen needed,with adamp paper towel and Cooktop Cleaning
Creme_{Part No. 20OO0OOl}_*.Then, buff with a clean dry'cloth.
Note: Permanentstains will develop ff soil isallowed to cook on by repeatedly using the eooktop whensoiled.
° Heavy Soils or Metal Marks -- Dampen a "scratchless" or "never scratch" scrubber sponge. Apply
Cooktop Cleaning Creme_ {Part No. 20000001}_*and scrub to remove as much soil as possible. Apply a
thin layer of the creme over the soil, cover with a damp paper towel and let stand 30 to 45 minutes {2-3
hours for very heavy soil}. Keep moist by covering the paper towel with plastic wrap. Scrub again, then
buff with a clean dr}, cloth.
Note: Only use a CLEAN, DAMP 'Scratcbless" pad that £ safe for non-stick cookware. Thepattern and glass
will be damaged if:he pad is not damp, if:be pad is soiled, or ff anotber type of pad is used.
° Bamed=on or Crasty Soils -- Scrub with a "scratchless" or "never scratch" scouring pad and Cooktop
Cleaning Creme_.
17
Page 19
Oven Window
and Door - Glass
, Avoid using excessive amounts of water which may seep under or behind giass causing staining.
, Wash with soap and water. Rinsewith dear water and dry. Giasscieaner can be used if sprayed on acioth
first.
, Donot useabrasive materiais such asscouring pads,steei wooi or powdered cieaners as theywiii scratch
gHass.
Oven Interior , FoHHowinstructions on pages 15-16 to set a seHf-cHeancycHe.
Oven Racks
Stainless Steel
(seHect modems}
Storage Drawer_
Door Handle -
Painted Enamel
Clean with soapy water.
Removestubborn soil with cleansing powder or soap-filled scouring pad. Rinse and dry.
Rackswiii permanently discoior and may not slide smoothly if left in the ovenduring a self-clean operation.
If this occurs, wipe the rack edge and rack support with a small amount of vegetable oil to restore ease
of movement, then wipe off excess oil.
° DO NOT USEANY CLEANING PRODUCT CONTAINING CHLORINE BLEACH.
° DO NOT USEABRAStVE ORORANGE CLEANERS.
° ALWAYS WiPE WiTH THE GRAIN WHEN CLEANING.
, Daily Cleaning/Light Soil -- Wipe with one ofthe following - soapy water, white vinegar/water solution,
Formula 409 Glass and Surface Cleaner* or a similar glass cleaner - using a sponge or soft cloth. Rinse
and dry. To polish and help prevent fingerprints, follow with Stainless Steel Magic Spray* (Part No.
20000008}**.
° ModerateiHea_ Soim-- Wipe with one of the following - Bon Ami*, Smart CleanseP, or Soft Scrub* -
using a damp sponge or soft cloth. Rinse and dry. Stubborn soils may be removed with a damp multi-
purpose Scotch-Brite* pad; rub evenlywith the grain. Rinseand dry.To restore luster and remove streaks,
foIHowwith StainHessSteel Magic Spray*.
, Discomoration -- Using a damp sponge or soft cloth, wipe with Cameo Stainless Steel CleaneP. Rinse
immediately and dry. To remove streaks and restore luster, follow with Stainless Steel Magic Spray*.
When cool, wash with warm soapy water, rinse and dry. Never wipe a warm or hot surface with a damp
cloth as this may damage the surface and may cause a steam burn.
For stubborn soil, use mildly abrasive cleaning agents such as baking soda paste or Bon Ami.* Do not use
abrasive, caustic or harsh cleaning agents such as steel wool pads or oven cleaners. These products will
scratch or permanently damage the surface.
Note: Use a dry towel or cloth te wipe up spills, especially acidic or sugary spills. Surface may
discolor or dull if soil is not immediately removed. This is espec@liy important for white surfaces.
* Brand names for cleaning products are registered trademarks of the respective manufacturers.
** To order direct, call 1-877_232_6771 USA and 1-800_688_8/408 Canada.
18
Page 20
Oven Door
• Do not place excessiveweight on or stand on an open
oven door. This could cause the range to tip over. break
the door or in)ure the usel
o Do not attempt to open or dose door or operate oven until
door Jsproperly replaced.
- Never place fingers between hinge and frol Jtoven frame.
Hinge arms are spring mounted. Jf acddentalk hit. the
hinge will siam shut against oven frame and could injure
your fingers
Oven Window
To protect the oven door window:
1. Do not use abrasive cleaning agents such as steel wool
scouring pads or powdered cleansers as they may scratch
the glass.
2. Do not hit the glass with pots, pans, furniture, toys, or other
objects.
3. Do not close the oven door until the oven racks are in place.
Scratching, hitting, jarring or stressing the glass may weaken its
structure causing an increased risk of breakage at a later date.
1. When cool open the oven door to the
first stop position (about four inches[.
To remove:
2. Grasp door at each side. Do not use
the door handb to Hiltdoor.
3. Lift up evenly until door clears hinge arms.
To replace:
1. Grasp door at each side.
2. Align slots in the door with the hinge arms on the range.
3. Slide the door down onto the hinge arms until the door is
compbtely seated on the hinges. Pushdown on the top
corners of the door to compbtdy seat door on hinges.
Door should not appear crooked.
Note: The oven door on a new range may feel "spongy"
when it is closed. This is normal and will decrease with use.
Oven LighI (style varies by model])
112. ImEIU//
: Disc0nnect P0wer t0 range before _eplacing light bu!b.
- Make sure bu!b c0ver and bulb are c001before touching.
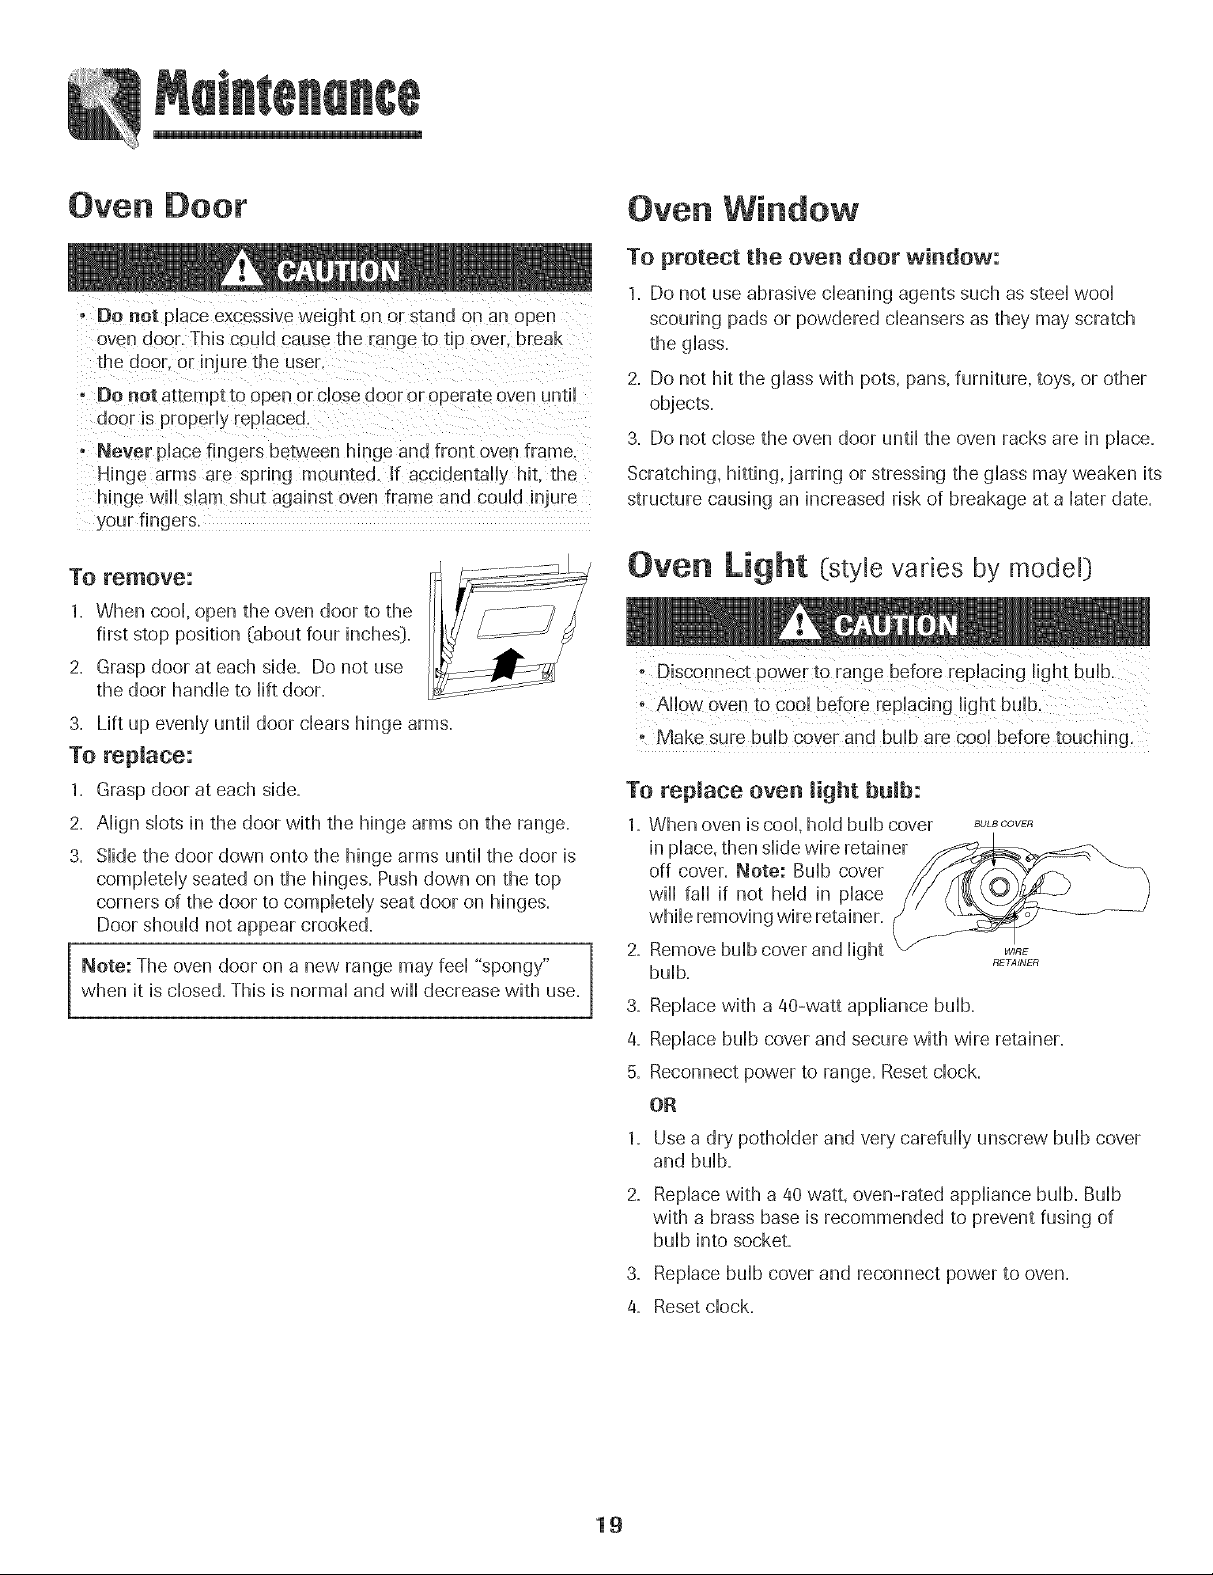
To replace oven light bulb:
1. When oven is cool, hold bulb cover BOLBOOVER
in place, then slide wire retainer
off cover. Note: Bulb cover
will fall if not held in place
while removing wire retainer.
2. Remove bulb cover and light
bulb.
3, Replace with a 40-watt appliance bulb.
4. Replace bulb cover and secure with wire retainer.
5. Reconnect power to range. Reset clock.
OR
1. Use a dry potholder and very carefully unscrew bulb cover
and bulb.
RETAINER
2. Replace with a 40 watt, oven-rated appliance bulb. Bulb
with a brass base is recommended to prevent fusing of
bulb into socket.
3, Replace bulb cover and reconnect power to oven.
4, Resetclock.
19
Page 21
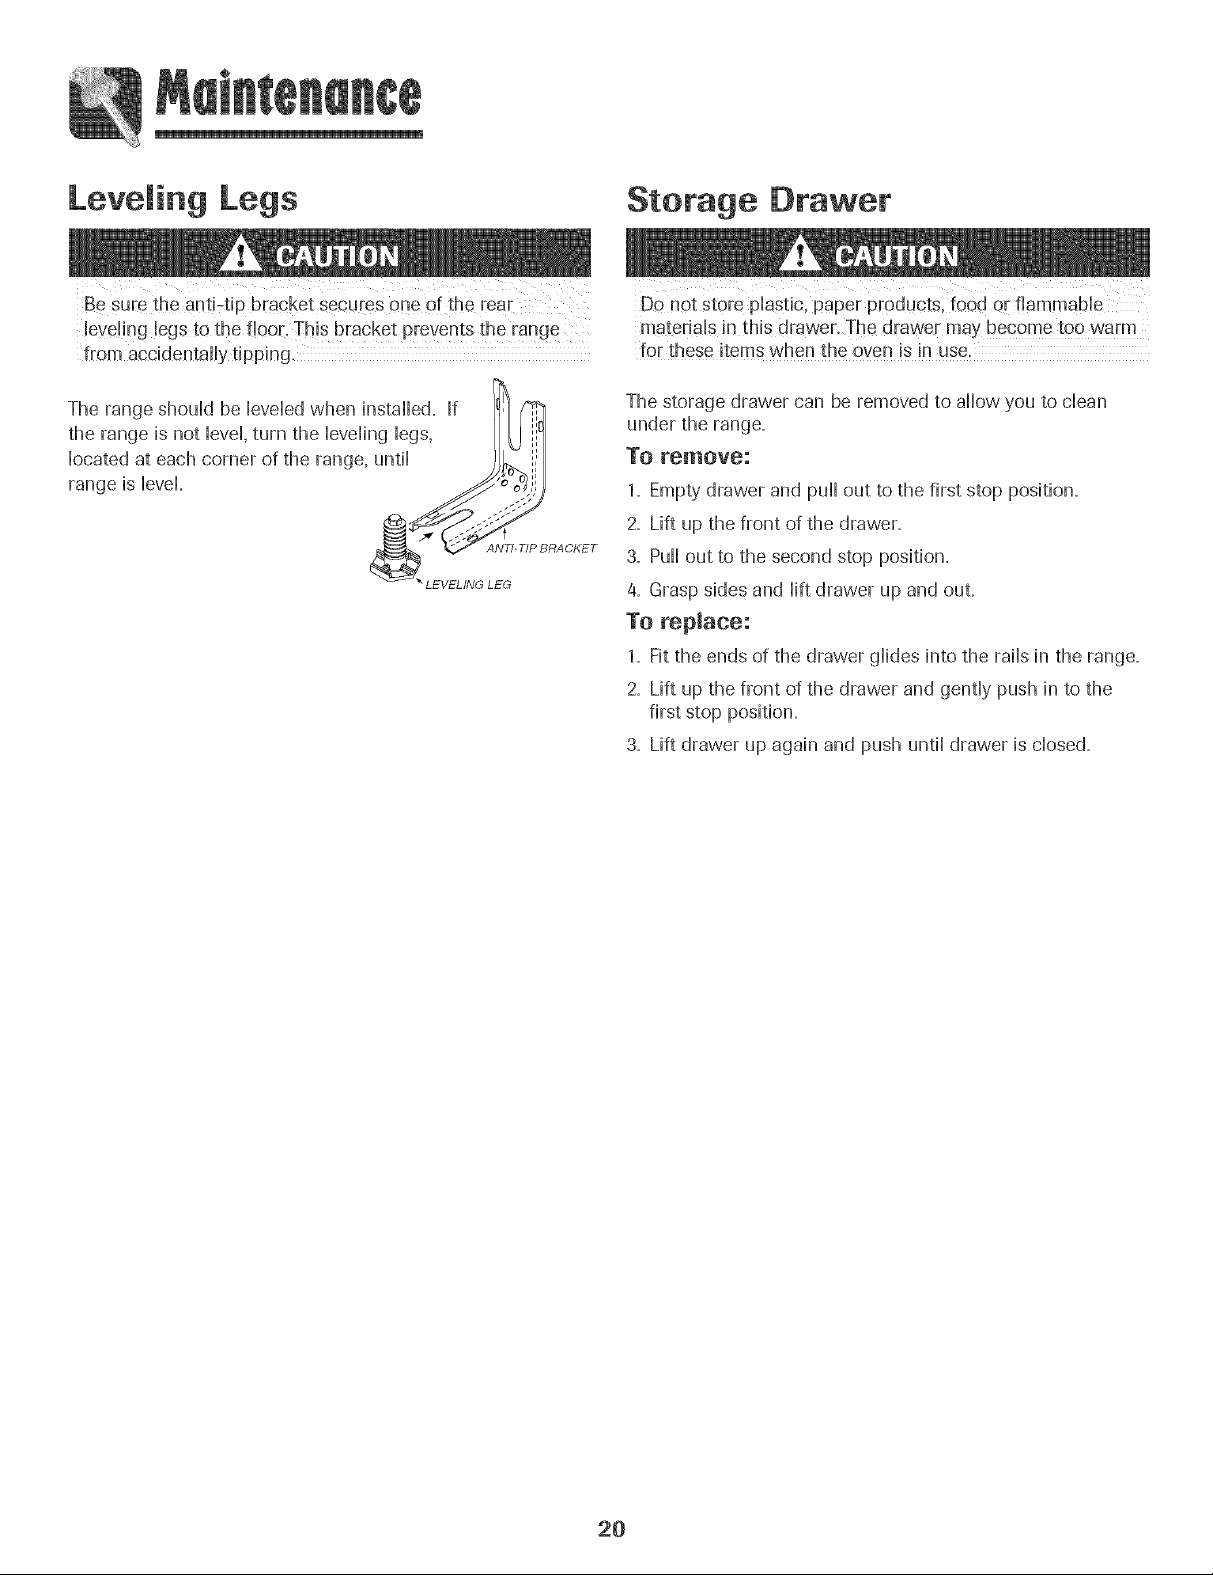
Leve ing Legs
Storage Drawer
leve!ing legs to the flooE,This bracket prevents the range
from accidentally tipping.
materials inthis drawer. The drawer [nay become t0o Warm
for these items when tile oven is in use.
The storage drawer can be removed to allow you to clean
TO remove:
1. Empty drawer and pull out to the first stop position.
2. Lift up the front of the drawer.
3. Pull out to the second stop position.
4. Grasp sides and lift drawer up and out.
To replace:
1. Fit the ends of the drawer glides into the rails in the range.
2. Lift up the front of the drawer and gently push in to the
first stop position.
3. Lift drawer up again and push until drawer is closed.
2O
Page 22

i
PROBLEM $OLUTmDN
For most concerns, try these first. , Check if oven controls have been propedy set=
, Check to be sure plug is securely inserted into receptacle=
, Check or re-set circuit breaker. Check or replace fuse.
° Check power supply=
Part or all of appliance does not
work.
Clock, indicator words, and/or
lights operate but oven does
not heat.
Baking results are not as
expected or differ from
previous oven.
Food is not broiling properly or
smokes excessively.
° Check if surface and/or oven controls have been properly set=See pages 4 & 9=
° Check if oven door is unlocked after self-clean cycle= See page 16=
° Check if oven is set for a delayed cook or clean program. See pages 10& 15=
° Check if Control Lock is activated. Seepage 8=
° Check if control is in Sabbath Mode. Seepage 13=
° Oven may be set for a Cook & Hold or Delay function.
° The Control Lock may have been set. See page 8.
, Make sure the oven vent has not been blocked= See page 14for location=
, Check to make sure range is level=
, Temperatures often vary between anew oven andan oldone. As ovensage, the oven
temperature often "drifts" and may become hotter or cooler= Seepage 13for
instructions on adjusting the oven temperature= Note: It is not recommended to
adjust the temperature if only one or two recipes are in question=
° See"Cooking Made Simple" booklet for more information on bakewam and
baking=
° Check oven rack positions. Food may be too close to element.
° Broil element was not preheated.
° Aluminum foil was incorrectly used. Never line the broiler insert with foil.
° Oven door was closed during broiling. Leavethe door open to the first stop position
(about 4 inches_).
° Trim excess fat from meat before broiling.
° A soiled broiler pan was used.
° Voltage in house may be low.
Oven will not self-clean.
Oven did not clean properly.
Oven door will not unlock after
self-clean cycle.
° Check to make sure the cycle is not set for a delayed start. See page 15.
° Check if door is closed.
° Check if control is in Sabbath Mode. Seepage 13.
° Oven may be over 400° F.Oven temperature must be below 400° Fto program a
clean cycle.
° Longer cleaning time may be needed.
° Excessivespillovers, especially sugary and/or acidic foods, were not removed prior
to the self-clean cycle.
° Oven interior is still hot= Allow about one hour for the oven to cool after the
completion of a self-clean cycle. The door can be opened when the LOCK indicator
word is not displayed.
° The control and door may be locked. See page 16=
cont.
21
Page 23
i
PROBLEM SGLUTmON
Smoothtop surface shows
wear.
Moisture collects on oven
window or steam comes from
oven vent.
There is a strong odor or light
smoke when oven is turned on.
Tiny scratches or abrasions.
- Make sure cooktop and pan bottom are dean. Do not sHidegHassor metaHpans
across top. Make sure pan bottom is not rough. Use the recommended
cleaning agents. See page 17=
, Metal marks.
- Do not sHidemetal pans across top. When cool dean with Cooktop
Qeaning Creme=See page 17=
, Brown streaks and specks.
- Remove spills promptHy.Never wipe with a soiled cloth or sponge. Make sure
cooktop and pan bottom are clean.
, Areas with a metallic sheen.
- Mineral deposits from water and food. Use recommended cleaning agents.
See page 17=
, Pitting or flaking=
- Remove sugary boilovers promptly. See page 17.
, This is normal when cooking foods high in moisture.
, Excessive moisture was used when cleaning the window.
, This is normal for a new range and will disappear after a few uses. Initiating a clean
cycle will "burn off" the odors more quickly=
, Turning on a ventilation fan will help remove the smoke and/or odor.
, Excessivefood soils on the oven bottom. Usea self-clean cycle.
Fault Codes
Noises may be heard.
There are no beeps and
SAb flashing and then
, BAKEor LOCK may flash rapidly in the display to alert you if there is an error
or a problem= if BAKEor LOCKappear in the display, press Cancel pad=
If BAKEor LOCK continue to flash, disconnect power to the appliance.
Wait a few minutes, and then reconnect power, if the flashing still continues,
disconnect power to the appliance and call an authorized servicer.
, If the oven is heavily soiled, excessive fiareups may result in a fault code during
cleaning. Press the Cancel pad and allow the oven to cool completely, wipe out
excess soil, then reset the clean cycle. If the fault code reappears, contact an
authorized servicer.
, Theoven makes several low level noises. You may hear the oven relays as they go on
and off=This is normal
, As the oven heats and cools, you may hear sounds of metal parts expanding and
contracting. This is normal and will not damage your appliance.
, A fan sound can be heard. This is the cooling fan and is normal. The fan will
continue to run after use until the oven cools.
, Oven may be in Sabbath Mode. See page 13.
, Control may be locked. See page 8.
, Oven is in Sabbath Mode. To cancel, press and hold the Clock pad for five
seconds.
22
Page 24

[lectr[c Range Warranty
Fuji One Year Warranty -
Parts and Labor
Forone (1:} year from the original retail
purchase date. any part which fails in
normal home usewii[ be repaired or
_epiacedfree of charge.
Limited Warranties i Parts Only
Second Through FifthYear =Fromthe
original purchase date, parts listedbelow
which fail in normal home use will be
repaired or replaced free of charge fol
tee part itself, with the owner paying all
other costs, includinglabor, mileage anu
[ransportatlon. trip charge and diagnostic
charge, if required.
• Glass=Ceramic Cooktop: Dueto
thermal breakage, discoloration=cracking
of rubber edge seal,paaern wear.
o Electric Heating Elements: Radiant
surface elements on electric cooking
appliances.
Please Note: This full warramy applies
eel} when the appliance is located in the
United Statesor Canada.Appliances
located elsewhere are covered bythe
limited warrantl¢_only, including paris
which fail during the first year.
Canadian Residents
This warramy covers only those appliances
installed in Canada[hat have been listed
with CanadianStandards Association
unlessthe appliances are brought imo
Canadadue Eo_ransferot residencefrom
the United States to Canada.
Thespecific warranttesexpressedabove
amthe ONLYwaffanttes omvidedby the
manufacturer.ThZswarrantygivesyou
specific/egd rights, andyou may alsohave
other rights that vad, from,state to state.
What is Not Covered By These Warranties:
1= Conditions and damages resuIting from anyof the folIowing:
a=ImproperinstaIIation,deIivel%or maintenance.
b=Any repair,modification, aIteration, or adjustment not authorized by the
manufacturer or an authorized servicer=
c=Misuse, abuse, accidents, unreasonabIeuse,oracts of God=
d=Incorrectelectric current, voltage,or supply=
e=Impropersetting of anycontrol.
2= Warrantiesare void if the original serial numbers have beenremoved,altered, or
cannot be readilydetermined.
3= Light bulbs.
4= Products purchased for commercialor industrial use=
5= Thecost of serviceorservice call to:
a=Correct installation errors.
b=Instruct the user on the proper useof the product.
c=Transport the appliance to the servicerand back.
6= Consequential or incidentai damages sustainedby amyperson asa result of amy
breach of these warranties.
Somestates do not allow the exclusion or limitation of consequential or iNcideNtal
damages,so the above exclusion may motapply.
If Yea Need Service
Firstsee the TroubleshootiNgsection in your Useand Care Guide or call Maytag
ServicessM,Amana Customer Assistance at 1-800-843-0304 U=S=A=or
1-866-587-2002 Canada=
To Obtain Warranty Service
To locate an authorized service company in your area contact the dealer from
whom your appliance was purchased or call Maytag ServicessM,Amana
Customer Assistance. Should you not receive satisfactory warranty' service,
call or write:
Maytag ServicessM
Attn: CAIR _Center
P=O=Box 2370, Cleveland, TN 37320-2370
UoSo1-800-843=0304 and Canada 1-866=587-2002
UoSocastomers using TTY for deaf, hearing impaired or speech
impaired, call 1-800-688=2080o
Note: When contacting Maytag ServicessM,Amana CustomerAssistance
about a service problem, pleaseinclude the following:
a. Your name, address and telephone number.
b.Model number and serial number of your appliance.
c. Name and address of your dealer and date appliance was purchased.
d.A clear description of the problem you are having.
e. Proof of purchase.
Use and Care guides, service manuals and parts information are available from Maytag ServicessM,Amana Customer Assistance.
23
Page 25

Cuisini_re electrique encastrable _ commandes
Easy Touch 700 - dessus lisse
instructions de s6curit6 importautes ................ 25-28
Cuissou sur la surface .......................................... 29-31
Commandes de Hasurface de cuisson
Surface 8 dessus Nsse
Centre de r6chauffage
Cuissou daus Jefour ............................................. 32-40
Cuisson courante
Cuisson et maintien
Cuisson et maintien diff6r6s
Maintien au chaud
Cuisson au gril
Arr6te automatique/Mode sabbat
Favori
Grilles du four
Nettoyage ................................................................41-44
Four autonettoyant
M6thodes de nettoyage
Eutretieu ................................................................... 45-46
Hublot du four
Lampe du four
Recherche des pauues ..........................................47-48
Garautie et service apr_s-veute ................................ 49
Guia de Use y Cuidado ................................................1i0
Page 26

Installateur : Remettezce guideaupmpr_eta_re,
Censemmateur :Veui!lezlife le guide etle conserverpour
consultationulterieure.Consewezla [actured'achatoule _heque
encalss6commepreuvede I'achat.
Numerode module
Num_rode serie
Date d'achat
Si vnus avez des quesbons, veuillez nous appeler :
Sewice _ laclientele de Amana
1-800o843-0304 E.-U.
1-866-587-2002 Canada
{lundJau vendredL 8 h _ 20 h. heurs de I'Est}
Intemet: h[_p:/iwvvw.amana.com
Darts le cadre de nobpratiques d'amdlioratton constante de la
qualite et de la performance de nos produits de cuisson, des
modificatic 7s de Fappareil qui ne sore pas menhonnees dans ce
gul_e _nt pu 6tre intrndultes.
Repertez_veus _ la page z_9peur plus d'i_lfermatiel_s
cencema[nt le service aprP.s-vente.
que pourrait susciter une uti[isation incorrecte de ['appareiL
Utfliser Fapparefl uniquement pour les fonctions prevues,
ddcrites darts ce guide,
Pour une utilisation adequate et en s_curit_, fl faut que
I'apparefl soit convenablement instdld par un technicien
qudifie, et relic a la terre, Ne pas regler, reparer ni remplacer
un composant, a moins que cela ne soit specifiquement
recommande darts ce guide, Toute autre reparation doit 6tre
effectude par un technicien qualifid,
Toujours ddbrancher I'apparefl avant d'y faire de I'entretien,
Les instructions de sdcuritd importantes et les paragraphes
_avertissement _ de ce guide ne sont pas destines a couvrir
toutes les conditions et situations qui pourraient se prdsenter,
fl faut faire preuve de bon sens, de prudence et de soin lots de
I'instdlation, de I'entretien ou du fonctionnement de [apparefl,
Toujours prendre contact avec le fabricant darts le cas de
problemes ou de conditions qui ne seraient pas comprises,
_eco_a_tre _es _tiq_ettes, pa_ag_aphes et
sy_bo_es s_t _as_c_tit_
mort,
ATTENTION _ Dangers ou pratiques dangereuses qui
POURRAIENTrdsulter en des blessures mineures,
Life toutes les instructions avant d'utiliser cet appareil;
observer toutes les instructions pour _liminer les risques
d'incendie, choc _lectrique, dommages materiels et corporels
risque de bascu!ement de J'appareil _ I'eCcasien
d'une utilisatien anermale eu d'_ ehargeme_t
e×eessif de la per_e du four, il fa_ t que la bride
antibase_lement seit cenvenablement install_e,
Utfliser une lampe torche pour determiner si la bride
antibasculement est convenablement installde sous la
cuisiniere : [un des pieds arriere de reglage de Faplomb doit
6tre convenablement engage darts la fente de la bride,
Lorsque la cuisiniere est convenablement calee, la bride
antibasculement immobflise le pied arriere contre le sol,
Wrifier la parfaite immobflisation de la cuisiniere par la bride
apres chaque ddplacement de la cuisiniere,
Po r viter i ce die des
dommages par la
S'assurer que tousles matdriaux deconditionnement sont
retires de I'apparefl avant de le mettre en marche,
Garder les matdriaux combustibles bien dloignds de I'apparefl,
Ne pas ranger de matdriaux inflammables darts un four,
De nombreux types de plastique sont affectds par la chdeur,
Garder les plastiques dloignds des pieces de I'apparefl pouvant
devenir chaudes,
Pour empecher qu'un feu de graisse ne se declare, dviter toute
accumulation de graisse ou autres matieres inflammables
darts I'apparefl ou au voisinage,
25
Page 27

En cas d'incendie
Utiliser du bicarbonate de soude ou un extincteur a poudre
chimique ou a mousse pour 6touffer les fiammes, Ne jamais
utiliser d'eau pour 6teindre de la graisse enfiammee,
1,Interrompre I'dimentation electdque de I'appareil pour
minimiser la propagation des fiammes,
2, NE JAMAIS saisir ou deplacer un ustensile de cuisine
enfiamm&
3, Fermer la porte du four pour etouffer les fiammes,
Arreter la hotte pour eviter la propagation des fiammes,
Eteindre les fiammes, puis mettre la hotte en marche pour
evacuer la fumee et les odeurs,
S curit pour les enfants
NE JANIAIS remiser sur le dosseret d'une cuisiniere ou
dans une armoire au:dessus, des articles auxquels les
sur la porte de rappareil pour atteindre un objet pourrai t
Subir de graves blessures.
NE JAMAIS Nsser des enfants seuls ou sans supervision
Iorsque rappareil est en service ou encore chaud, Ne jamais
hisser un enfant s'asseoir ou se tenir sur une pattie
quelconque de rappareil, II pourrait se blesser ou se br01er,
II est important d'enseigner aux enfants que rappareil et les
ustensiles places dedans peuvent etre chauds, Laisser refroidir
les ustensiles en un lieu sQr, hors d'atteinte des enfants, II est
important d'enseigner aux enfants qu'un appareil menager
n'est pas unjouet, et qu'ils ne doivent toucher aucune
commande ou autre composant de rappareil,
Familiarisation avec l'appareil
Ne pas utiliser cet appareil pour chauffer ou pour garder
chaude une piece, sinon des dommages a i'appareii pourraient
s'ensuivre et cela pourrait etre dangereux pour I'utilisateur.
Aussi, ne pas utiiiser ie four pour ranger des aliments ou des
ustensiles de cuisine.
Ne pas bloquer ou obstruer revent du four, L'event de four est
situe a rarriere de la surface de cuisson,
NE JAMAIS TOUCHERLES ELEMENTSCHAUFFANTSNI LES
PAROIS INTERIEURESDU FOUR, Les elements chauffants
peuvent etre br01antsmeme s'ils nesont plus rouges, Les
surfaces interieures du four peuvent atteindre une
temperature suffisamment elevee pour infiiger des brQlures,
Pendant et apres usage, ne pas toucher les elements
chauffants ni les patois interieures du four et eviter leur
contact avec des vetements ou autres materiaux inflammables
avant qu'ils n'aient eu le temps de refroidir suffisamment,
D'autres surfaces peuvent egalement atteindre une
temperature suffisamment elevee pour brQler:le ouverture
d'event et le surface avoisinante, ainsi que le porte et le hublot
de four,
Ne pas toucher rampoule du four brQlante avec un chiffon
humide car elle pourrait se briser, Si tel est le cas, debrancher
rappareil avant de retirer [ampoule pour eviter une decharge
electrique,
NE JAMAIS garnir la sole du four ou une grille du four avec
de la feuille d'duminium, Ceci pourrait susciter un risque de
decharge electrique ou d'incendie, ou une deterioration de
rappareil, Utiliser de la feuille d'duminium uniquement selon
les instructions de ce guide,
Ne pas remiser des aliments ou ustensiles de cuisine sur la
table de cuisson ou darts le four,
Cuisson et s curit6
NE JAMAIS faire chauffer un recipient non ouvert darts le
four, L'accumulation de pression darts le recipient pourrait
provoquer son edatement et de graves dommages materiels
ou corporels,
NE ,]AMAIS utiliser un appareil comme escabeau pour
atteindre es armoires se trouvant au-dessus. Le mauvais
emploi de porte d'appareil comme par exemple entant
qu'escabeau, le fait de s'appuyer ou de s'asseoir sur la porte,
peuvent entrainer le renversement de I'appareil. casser la
porte et gravement blesser,
Utiliser des maniques robustes et seches, Des maniques
humides peuvent provoquer la formation de vapeur brQlante,
Ne jamais utiliser un torchon a vaisselle ou autre article textile
la place de maniques; un tel article pourrait trainer sur un
element et s'enfiammer, ou accrocher un ustensile ou un
composant de rappareil,
26
Page 28

Porter un vetement approprie, Eviter de porter des vetements
ampbs ou a [ongues manches pendant ['utilisation de
['apparei[, [ispeuvent prendre feu si [evetement entre en
contact avec un element de cuisson brQlant,
Placer toujours [es grilles a [a position appropriee darts [e four
[orsque [e four est froid, Fairecouiisser [agrille vers ['exterieur
avant d'ajouter ou enlever un plat; utiliser pour cela une
manique robuste et seche, Eviter d'introduire [a main darts [e
four pour y placer ou retirer un plat, S'i[est n@essaire de
d@lacer une grille Iorsqu'elb est chaude, utiliser une manique
seche, Ne pas toucher un element chaud avec une manique,
N'utiliser lesgrilles que darts le four darts lequel elles ont ete
achetees/expediees,
Ouvrir toujours la porte du four tres prudemment, Laisser Fair
chaud ou la vapeur s'@happer avant de retirer ou d'introduire
un plat,
AVERTISSEMENT - METS PREPARES : Respecter les
instructions du fabricant, Si le contenant ou le couvercle en
piastique d'un mets surgeie se ddorme ou est endommage
durant [a cuisson, jeter immediatement [e recipient et son
contenu, Les aliments pourraient 6tre contamines,
Ne pas permettre [e contact de papier d'aiuminium ou de [a
sonde a viande avec les elements chauffants,
Orienter la poignee de chaque ustensile vers le centre de la
table de cuisson et non vers I'exterieur ou vers un autre
element; ceci reduira [e risque de brqure, inflammation de
matiere inflammable ou renversement (un jeune enfant
pourrait saisir et renverser un ustensile dont le manche est
oriente vers ['exterieuO,
Table de cuisson
NE JAMAIS [aisser un element de surface aiiume sans
surveillance, particu[ierement avec chauffage eieve, Le
debordement du contenu de ['ustensiie pourrait provoquer [a
generation de fumee abondante et ['inflammation de la
graisse,
Cet apparei[ comporte des elements chauffants de differentes
tailles, Utiliser toujours un ustensib a fond plat, de taille
suffisante pour qu'i[ puisse recouvrir comp[etement ['element,
Pour optimiser ['efficacite, choisir un ustensiie de meme taiiie
que ['element,
SURFACE ENVITROCERAMIQUE : NEJAMAIS utiiiser une
table de cuisson cassee ou feiee: ]essolutions de nettoyage et
renversements pourraient penetrer darts[a table de cuisson en
entrai'nant un risque dedecharge eiectrique, Prendre
immediatement contact avec un technicien qualifie,
Toujours eteindre toutes les commandes une lois la cuisson
terminee,
Ustensiles et s curit
Appiiquer [es instructions du fabricant [ors de ['emp[oi d'un
sachet pour cuisson au four,
La securite de fonctionnement de cet appareil a ete testee
I'aide d'ustensibs de cuisine traditionnels, Ne pas utiliser un
ustensib ou accessoire qui n'est pas specifiquement
recommande darts ce guide, Ne pas utiliser de systeme de
convection additionnel, L'utilisation d'un dispositif ou
accessoire qui n'est pas expressement recommande dans ce
guide peut degrader la s@urite de I'appareil ou sa perfor-
mance, ou reduire la Iong@ite des composants,
Si un ustensile est plus petit que I'element utilise, une partie
de I'element chauffant est exposee et peut provoquer
I'infiammation d'un vetement ou des maniques,
Seuls certains materiaux en verre, vitroceramique, ceramique,
gres, ou certains ustensiles vitrifies/emailles peuvent etre
utilises sur la table de cuisson ou darts le four sans risque de
bris sous I'effet du choc thermique, Observer les instructions
du fabricant Iors de I'utilisation d'un ustensile en verre,
Exercer une prudence extreme Iors du d@lacement du
recipient de graisse ou Iors de I'elimination de graisse chaude,
Laisser la graisse refroidir avant de deplacer I'ustensile,
Nottes d'e×traction
Nettoyer frequemment iesfiitres et ia hotte de iacuisiniere
pour empecher ia graisse ou d'autres produits inflammables
de s'accumuier sur ies fiitres ou ia hotte en provoquant des
feux de graisse,
Pour flamber des aliments sous la hotte, mettre le ventilateur
en marche,
Nettoyage et s curit6
Nettoyer prudemment [a table de cuisson, Arreter toutes [es
commandes et attendre [e rdroidissement de tous[es
composants avant de [es toucher ou d'entreprendre [e
nettoyage, Nettoyer I'appareil avec precaution, Travailler
prudemment pour eviter des brQiurespar ia vapeur en cas
d'utiiisation d'un chiffon ou d'une @onge humide iors de
27
Page 29

I'dliminationd'unproduitrenversesurunesurfacechaude,
Certainsproduitsdenettoyagepeuventgenererdesvapeurs
nocivesIorsqu'onlesappliquesurunesurfacechaude,
Nettoyeruniquementlespiecesmentionndesdartsceguide,
Four autonettoyant
!echdrite, etc, dans le four lots de! autonettoyage, operation d'autonettoyage, iis peuvent etre exposes a une
Ne pas nettoyer le joint de porte; le joint joue un rOleessentiel
quant a I'etancheitd, Ne pas frotter, endommager ou deplacer
lejoint,
Ne pas utiiiser de produits de nettoyage pour four ou enduits
de four, darts ie four autonettoyant ou sur ies zones voisines,
Avant d'executer une operation d'autonettoyage, retirer ia
lechefrite, les grilles du four et les autres ustensiles, et eliminer
par essuyage tout exces de residus renverses pour eviter ia
formation de fumee ou i'inflammation de ces residus,
Avertissement et avis
important pour la s curit
La Ioi cdifornienne _Safe Drinking Water and Toxic Enforce-
ment Act >>de 1986 [proposition 65_)stipule la publication par
le gouverneur de la Cdifornie d'une liste de substances que
I'etat de Californie considere comme cancerigenes ou
dangereuses pour le systeme reproducteur, et impose aux
entreprises commerciales I'obligation de signaler a leurs
clients les risques d'exposition a de telles substances,
Nous informons les utflisateurs de cet apparefl que Iors d'une
faible concentration de certaines substances figurant darts la
liste mentionnee ci-dessus, dont le monoxyde de carbone,
Pour minimiser i'exposition, veiiier ace que ia piece oQse
trouve ie four soit convenabiement aeree durant une operation
d'autonettoyage par i'ouverture d'une fenetre ou d'une porte,
AViS iMPORTANT - OISEAU× FAMIUERS : Les oiseaux ont
un systeme respiratoire tres sensible, Ne pas garder un oiseau
famflier dans la cuisine ou dans une piece ou fl pourrait etre
expose aux fumees, Les fumees emises durant une operation
d'autonettoyage peuvent etre dangereuses ou mortelles pour
un oiseau, de meme que les fumees CruisesIors du chauffage
excessif de graisse, hufle, margarine, et du chauffage excessif
dans un ustensfle a revetement antiadhesif,
Conserver ces instructions pout consultation ult6tieute
28
Page 30

Boutons de commande
PermettentI'utflisationdes616mentschauffantsdesurface,avecune
progress+oncontinuedelapuissanceentreIesreglagesextremesLow
(Basse)et High (Etevee)+Oilpeut reglerun bouton_touteposition
entre cesdeuxextremes.
Regta9 e des commandes
1. PlacerI'ustensflesur reiement.
2. Enfonceret faire toumer le boutonjusqu'a la position desiree
(rotationdartsun sansou dartsI'autre}.
o Des marquessur Ietableaude commandeidentifient O O
I'elementcommandepar chaquebouton.Par
example,legraphique_ droite indique I'element O O
avant/gauche.
3. II ya temoln Iumineuxpour lese!ementssur Ietableau de
commande.LorsqueI'un desboutonsdecommanded'un 6lament
de surfaceest alimente,le temoins'illumlne.Letemoins'etelntdes
qu'on interromptI'alimentationde I'element.L'element
fonctionnerapar intermittencepour maintenirle reglagepreetabli
de chaleur,memeau niveauHigh.
4. Apresunecuisson+ramenerle bouton_la position OFF(Arre0.
RetlrerI'ustensile.
Suggestions de reglage
Ladimensionet letype d'ustensiie,ietypeet ia quantit6d'aliments
cuire, et lapuissancedes6iementsdeterminerontcommentreglerles
boutonspour iesoperationsde cuisson.Certains6tementsontun
reglagepreetablipour le mijotageet la fusion qui ne ndcessitequa
desajustementsmineumdansun sensou dans I'autreselonI'aliment
pr6parer.Lesautreselementsont desreglagesimprimesautour
desboutonsqui sontspecifiquesde ces61ements.Ajuster les
r6glagesselonleschiffresqui domlent les resultatsde cuisson
desires.Sereporter_ la brochureLacuissonsimplifieepour obtenir
desinformationssur Iesustensilesetautresfacteursmodifiant les
r6glages.Lesdescriptionssuivantesaideront_ choisir lesreglages
donnantles meilleursresultats.
lVlaintien au ¢haud: Lesalimentsrestent_unetemperature
superieure_ 140°Fsanscontinuer8 cuire.Ualiment estau depart
unetemperature6levee,puissachaleur est reduite.Nejamais
utiliser le regJageMaintien au chaud pour rechaufferdesaliments
froids.
lVlijotage : Des bullesse formenttout juste _ lasurface.Lesaliments
sont_ une temperaturesitueeentre 185et 200°F+Cereglagepeut
aussiservir pouretuverdesalimentsou lespocher ou encorepour
continuerla cuissond'alimentssouscouvercle+
Ebullition lame : Desbulles seforment_ un rythmemodere.Ce
reglagepeutaussisewir pour fdre Iamajorit6des alimentset pour
maintenirI'ebullitionde grandesquantitesde liquide.
¢:bullition : Desbulles seforment dartsIeIiquide _ un ryf:hmerapide.
Cereglagepeut aussiservirpour fairebrunir la viande,Ia fairesauter
etchauffer I'hu+Iepourfairefrireavantdepasser_ unreglage
inferieur.Les3 ou 4 reglageslesplus 61evessur le bouton servent
cesoperationsde cu+sson.LereglageIeplus 61evesert toujours
porterI'eau_ 6bullition.Certains616mentsont mamaunevitesseplus
eleveepour1'ebullitiondesliquides.
AVANT[A CUISSON APRESLA CU_SSON
• Placertoujourst'ustensilesur1'616mentavantd'alinenterIelement.Pour , S'assurerqua1'_+ementestarrate.
ew[erque la cu+s+n+dre+_esuo_ssedesdomma_es,nejamais faire
[onct+(nner un _+ementdesurfacesansy ptacer un ustens+le
• NE_A_AJS utit+serlatable de cu+ssoncomma _+eude remisage
d'aliments ou d'ustensiles.
DUP,ANT LA C_ISSON
+ Veiher_ bienconna+trem corresoon(mnceemre lesboutons de
commandeetles 6laments.Veil+at_ commanderI'aHmen-mt+onae
1'elementvoulu.
+ Ccmmencer la cuisson avecune pu+ssancedechauffagesupeneure, pu+s
redu+r6lapuissancedechauffagepourpoursu_w-emcuisson.Ne amais pourraitprovoqueri'+nflamma_lond'unarticleinflammable,faire [ondrei
um_serunepuissancedechauffageO+eveepourunecu+ssonpro_ongee, amollirunarticteenplastique,ouprovoqueruneaugmemmoHae
o N[.IAMAIS laisserlecontenud'unustens+les'Ova[srercomp_etemem: press+onprovoquantFechtementd'unrecip+entferule.
cec pourraitfairesubirdesdommages_ I'ustensileet _I'appareH. . NEJAIVlAIShisserdelafeuiHed'a,drmnlum,unesondemermomemque
• NEJANIA[Stoucherla [au+eaecu+ssona',an{qu'elleseso[( v+_rideou unobJetmetaihqueau[requ'unustens+tedecu_ssonsurlatao_e
comp_tementrefroie_e.Certaineszonesde+a(soleaecu_sson, deculsson,an-fretenconmc[avecunelementchauffant.
partlcut+erementauvo+s+nagedes616mentsdesurface.Delventdevenir ° NE_ANIAI$rangerau+dessusdela1(ableeecu_ssond'art[clesiourdsqul
treschaudesauramunecu+sson.Utiliserdesmaniques, r+scueralentde[omoeretd'endommagerlatabledecu+sson
, _:iiminerdesqueposs+ble[ouslesres+dusde renversemente(projections.
AUTRESCONSEi/S
• S'i yaune armoirederangementdirectenrentau-dessusaelatablede
cu+sson,onneeoitypincerquedesart+cespeufrequemmemutilisdse[
qw peuvent6treexposes_la shaleur.Lachaleur6mseparlacu+s+nlere
pourrm[susc_er_nproo+emepourdesart+clescommat+qu+desvotatlts.
3rocsitsdenettoyageetflaconsd'a_roso+
• NE.JA_AISla+sseraucunart+desur_amo_edecu_sson,part_cul+eremem
lesart+desenp+as[ique.L'airchaudquis'dchappeparI'Oventdufou
29
Page 31

Surface dessus lisse
Remarques sur la surface
dessus lisse :
oLorsdes premieres_Jtilisationsde Ia tabIede cuisson,celle-ei
peat 8mettre an pea de fum6e et des odears, Ceciest
normal.
oLossurfaces _ dessus lisse conservent la ehaleur pendant
an certain temps apr_s l'e×tinetion de l'_l_ment, Eteindre
Jeselementsqueiquesminutesavantque [a nourriturenesoit
tout _ fait cuiteet utiliser Iachaleur restantepour terminer[a
cuisson.Lorsque[evoyantde surfacechaudes%teint,on peut
toucher Iasurface decuissonsansdanger.En raisonde Jafagon
dont tesei6mentsd'unesurface8dessusIisseretiennent[a
chaleur,ceux-cine r6pondrontpasauxchangementsde r6giage
aussirapidementque desel6mentsen spirale.
oAu cas o8 Iecontenud'un ustensilerisquededeborder,retirer
J'ustensilede Iasurface de cuJsson.
oNe jamais essayer de soalever la satiate de caisson.
oLa surface_ dessus[issepout sembIerdeco[or6e[orsqu'eJJeest
trSschaude.Ceciest normalet disparakunefais que [asurface
refroidit.
Zones de cuisson
Leszonesdecuissonde lacuisinieresont repr6sent6espardes
cercIespermanentssur [asurface_ dessus[isse.Pourroleefficacit6
maximum,utiliserunezonede cuissondont [ediametreconvient
I'ustensi[e.
Le r6cipient ne doit pas d6passer & zone de caisson de plus de
12 _ 25 mm (1/2 _ I po).
Lorsqu'unecommandeest raiseen marche,on peutvoir un
rougeoiement8 traversIasurface_ dessus[isse.['@l_ment
fonctionnera en intermittencepour maintenir mer_gmage
pr_tabii de chameur,m_me au niveaa Hi (Emev_e)o
Pourobtenirplus informationssur [esustensi[esdecuisine,se
reporter_ [apage36 au paragrapheRecommandationssur Ies
ustensilesdecuisineet 8 [a brochureLacuissonsimpIifiee,incIuse
avec[acuisini_re. ELEMENT
ELEMENT SIMPLE DE 6 po
SIMPLE DE 6 po /
SIA4PLE DE 9po ELEMENT
ConseiJs de protection de la
s rface dess s lisse
N@ttOyag@ (plusd'informations_ la page43}
oAvant des'enservir[apremierefais,nettoyer[atabledecuisson.
o Nettoyer[atable de cuissonchaqueiour ou apreschaque
utiIisation.CesmesurespreserverontI'apparencede la table de
cuissonet 6viterantqu'elIe nes'abime.
o Encasde renversement!orsdecuisson,nettoyerimmediatement
le produitrenvers6sur [asurfacede cuissonpendant qu'elIeest
encorechaudeafin d'6viterunplusgrand nettoyagepar[asuite.
Userde prudence,essuyer[esrenversementsavecunlingoprapre
et sac.
o Nepas laisserIesproduits renversessurIasurfacedecuissonou
sur Jagarniturede JatabJede cuissonpendant une Jongueduree.
o Nejamais utiJiserde poudrede nettoyageabrasiveoude tampons
r_curerqui raieraientJasurface.
o Nejamais utiJiserdejaveJlisant,ammoniaqueou autrespraduits
de nettoyagenonsp6cifiquementrecommandSspourJa
vitroc_ramique.
Pour viter lea marques et lea rayures
o Nepas utiliserde casserolesenverre.Ellespourraientrayerla
surface.
o Nejamais uti[iserde supportm_talIJqueouanneaudewokentre
un recipientet Iasurfacedecuisson.Cosobjetspeuventmarquer
ou rayerIa surface.
o Nepas fsire gIisserde recipientsm_taI%uessur Iasurfacede
cuissonbd_Iante.IIspourraient Iaisserdesmarquesqui devront
6tre nettoyeesimmediatement.[VoirNettoyage,page 43.)
oVeilIerbce qua Iefond desrecipientset Iazonedecuissonsoient
propresavantd'aIIumerI%I_ment,afin d%viterlosrayures.
o PourempScherqua [asurface decuissonen vitroceramiquenese
trouve ray_eou abhr_ee,nepasy Iaisserdesucre, deselou de
graisse.Prendre['habituded'essuyer[asurfacede cuissonavecun
lingepropre ou un essuie-toutavantde I'utiIiser.
o Nejamaia faire giisserde r6cipients metalIiques_paissur la
surfaceau risquede la rayer.
ELEMENT
SIMPLE DE 9 po
Voyant de surface chaude
Le voyant de surface chaude est situ6 a Favant de la surface
de cuisson. I1s'aiiumeraIorsqu'unesurfacede cuisson,quelie
qu'eliesoit,sarachaude,li resteraaIIum6,m6meapresextinctionde
la commande,jusqu'b ce que [azone ait refroidL
Pour vitet lea taches
o Nejamais utiIiserde Iingeou d'6pongesalepour nettoyerIa
surfacede cuisson.IIs [aisseraientunfilm, ce qui pourraitdecolorer
lasurfacedecuisson [orsqu'elleest utiIisee.
o L'utiIisationcontinued'unesurface de cuJssonsaIiepoutentratner
I'apparitionde tachespermanentes.
3O
Page 32

Pour 6viter d'autres dommages
, Ne pasIaisserfondrede plastique,de sucre ni d'alimentsrichesen
sucresur Iatable de cuisson+Sicetaseproduisaltacciden-
tellement,nettoyerimm6diatement+07oirNettoyage,page43+)
, Ne jamais Iaissertecontenud'une casserolebouittirjusqu'_ce
qu'ettesolt videcar cetapourraitabimerJasurfacede cuissonet la
casserole+
, Ne jamais utiiiserla tablede cuissoncommesurfacede travailou
commeplanche_ d6couper+
, Ne jamais cuired'alimentsdirectementsur latablede cuisson,
sans r6cipient.
, Ne jamais utiliser un petit r6cipientsur un grand 6!6ment.Non
seulementil y a g_chisd'6nergiemaisiIpeuten r6sulterdes
projectionsqui vent bKJlersur lasurface decuissonet dewont 6tre
nettoy6es.
, Ne pasutiliserdes recipientssp6ciauxnon platsqui seraienttrop
grandsou a fond inegaIcommeleswoks _ fond rend,Iesplaques
chauffantesour6cipientsde grandetaille _fond ondul6.
, Ne pasutiliserde r6cipientsen aluminium.L'aiuminiumrisquede
fondresur le verre.Si le rn6talfond sur latable decuisson,ne pas
I'utiJiser.Appelerun r6parateuragr66Amana.
Recommandations sw" les
L'utilisatlondubenustensllepeutemp6cherdenombreux
problemescommeIa n6cessit6de cuireplus Ionguementla
nourritureet Iadifficult6 _ obtenlr desr_sultatsuniformes.De bons
ustensllesr6duisentlesdur6esde cuisson,utilisentmoinsd'6nergie
et cuisent defa_onplus uniforme.
Tests pout v6r+fier si les
ustensiles ont un fond plat
V6rifierque JesustensJJessent plats+
Test de la rSgle :
1+ Placerune rSg+eentraversdu fond de I'ustensile+
2+ Latenir face_ IaIumiere+
Choisir I Eviter
Desustensiles_ fond Desustensiles_fond rainur6ou gondoI6.
Iisse,plat Desustensiles_fond in6gal necuisent pas
efficacementetpeuventparfoisne pas
fairebouilIir lesIiquides.
Desustensilesen Desustensilesenverre ou en m6talpeu
mat_riaux_pais _pais.
Desustensilesde Ia Desustensilesplus petitsou plus grands
m6medimensionde (de 2,5cm [1 po]} que I'_16ment.
I'6Iement
Despoign_esqui Desustensilesavecdespoign_escassees
tiennent bien ou qui ne tiennentpas.Despoign6es
Iourdesqui font serenverserI'ustensile.
Descouverclesqui Descouverclesqui ferment real.
fermentbien
Deswoks a fond plat Deswoksavecunfond suranneau.
Ustensiles de gra de taille et
poll+" les co serves
To_tes ruesmarmites po_r ruesco_serves et ruesgra_des
casseromesdoive_t avoir u_fo_(J pmatet doive_t _tre
fahriq_es e_ mat_ria_ _pais. Cec[esttr_simportantpour Ies
surfaces_ dessusIisse+Labasenedoit pas d_passerde 1'81ementde
plusde 2,5cm (1 po)+
Si Iesmarmites_ conserveset lescasserolesnesent pasconformes
ces normes,Iesdureesde cuissonserontplus Iongueset les
surfacesde cuissonpourront _tre endommag6es+
Certainesmarmitespour les conservessentcon_uesavecdesbases
plus petitespour 8treutilJseessurdessurfaces_ dessusIJsse+
Po_r mapr_paratio_ de co_serves, _echoisir q_e mer_glage
Highj_sq_'_ ce q_e l'ea_ comme_ee _ be_illir ou que la
pressionsuffisantesoitatteinte dansla marmite+Reduireau r6glage
leplusfaibIe, nmintenantI'_bullit[onou la pression+Sila chaleur
n'estpasdiminu_e,lasurfacedecuissonpourrait_tre endommag6e+
Voir Iabrochure Lacuissonsimpli%e pour obtenir plus
d'informations+
3. Aucunehmiere ou tr6s peu nedolt 6tre visiblesousJar6gle.
Test de la bulle :
1+ Mettre 2,5cm(1po}d'eaudartsI'ustens+Ie+PlacerI'ustensilesur
la surfacede cuissonettourner la commandesurHigh (Elev6e}+
2+ ObserverIa formationde bulles IorsqueI'eauchauffe+Desbulles
uniformessignifient de bonnesperformanceset desbusies
in6gaiesindiquent la presencedezonespluschaudesdonnant
une cuissonin_gaIe+
Voir la brochureLacuissonsimplJfi6epourobtenir plus
d'informations+
31
Page 33

@
Tableau de commande
A
B
\
\
\
\
\
\
\
\
\
\
\
\
\
\
\
Broil
Bake
Cook&
Hold C leSn Favorite Clock
Keep
Warm
I
E F G H
Letableaude commandeestcon_upourfaciliter Iaprogrammation+Lafen6tred'affichageindiqueI'heure,bs fonctionsavecrnhluterie
et fonctionsdu four. Letableau de commanderepr6sent6comprendcaract6ristiquessp6cifiquesau modSle+(Lestyle )eut varierselon
le modeley
A
GrH
Cuissoncourante
B
C ¸
A (Plus)ou
_' [Moins)
ii!!
Minuterie
D
Cuissonet
maintien
ii! !
Nettoyage
Favori
Horloge
Maintienau
chaud
j
Annuler
S'utiiisepourlacuissonaugriletlerissolage
surpattiesup6rieure.
S'utilisepourlacuissoncouranteet le
rOtissage.
S'utilisepourentrerouchangerladur6e,la
temperaturedufour. t'tablit Iegril
temperaturet_LEVt_Eou BASSE
Programmelarninuterie.
Pourcuirependantunedur6epr66tablie,avec
maintienauchaudpendantuneheure.
S'utilisepourprogrammerle cycle
d'autonettoyage.
S'utilisepourprogrammeretsauvegarderune
m_thodeparticuliSredecuissonet maintien.
S'utilisepourprogrammerI'heuredujour.
S'utilisepourmaintenirauchauddonslefour
lesailmentscuits.
Annuletouteslesop6rationssaufminuterieet
hor!oge.
Remarque : Quatresecondesapresavo+rappuyesur Ies
touchesA ou T, Ia dureeou la temperatureseraautomatique-
mententree+S+plusde 30secondess'ecoulententre lapression
surunetouche defonction sur lestouchesA ou V, la fonction
seraannuI6eetI'afficheurreviendra_ I'affichageprecedent+
L'horlogepeut6treprogrammeepour afficherIadureedonsun
formatde 12ou 24heures+L'horlogeestprogramm6eenusinepour
un formatde 12heures+
Changement de l'hodoge _ un format de 24 heures :
1+ Appuyersur IestouchesCancel
(Annub0 et Favorite (Favori]et maintenir
la pressionpendanttrois secondes+
2+ Appuyersur IatoucheA ou _ pour
programmerun formatde 12ou 24 heures+
3+ ProgrammerI'heureen suivantIes
instructionsdonneesen dessous+
R_glage de l'hodoge
Utilisation des touches
• Appuyersur la touchedesiree+
, AppuyersurIatouche ,L[Plus)ouT [Moins] pourentrerladur6eou
latempSrature+
• Un hip retentit IorsqueI'onappuie surunetouche+
• Un doublehip retentit encos d'erreurdeprogrammation+
1. Appuyersur latouche Clock (Horloge]+
o Ledeuxpointsciignotent _ I'afficheur+
2+ Appuyersur latouche,L ou T pour
programmerI'heuredujour+
+ Deuxpointscontinuent_ c%noter+
Appuyer 5 nouveau sur la touche cmock ou
attendre quatre secondes+ Le deux points
cessent le clignotenL
1 J
-- Favoritm
Clock
suite, oo
32
Page 34

Lorsquete courant61ectriquearriveou apr_suneinterruptionde
courant,ta derniSreheureavantFinterruptiondecourantva
clignoter.
PourrappeterI'heuredujour torsqu'uneautre fonctionde dur6e
s'affiche,appuyersur latoucheClock (Hodoge_}.
Uheurede I'horIogenepout 6trechang6eIorsquetefoura _t_
programm6pour unecuissonou un nettoyagediff6r6 ou pour la
fonctionde cuissonet maintien.
Annumation de m'affichage de m'heure:
Si I'onnedesirepasraffichagede I'heuredu iour :
Appuyersur lestouches Cancel (Annule0et
Clock et iesmaintenirainsi pendanttrois
secondes.L'heureduiour disparaitde
I'afficheur.
LorsqueI'affJchagede I'heureestannul6,
appuyersur IatoucheClock pour afficher
briSvementrheuredu ]our.
R_affichage de i'heure :
Appuyersur lostouches Cancel et Clock et los maintenirainsi
pendanttrois secondes.L'heureduiourr6apparait_ I'afficheur.
La minuterie pout 6tre programm_e de une minute [0:01) jusqu'_
99 heures et 59 minutes (99:59),
La minuterie pout 6tre utilisee ind_pendamment detoute autre
activit6 du four, Elle pout 6tre aussi programm6e alors qu'une autre
fonction du four est en cours d'utilisation,
La minuterienecommandopas le four.Elienesert qu'_ 6mettredes
hips.
Programmation de maminuterie : Timer
1. Appuyer surla toucheTimer (Minuterie).
o 0:00c%note _ rafficheur.
o Losdeux pointsclignotent.
Annumation de maminuterie :
1. Appuyersur la toucheTimer et la maintenirainsipendanttrois
secondes.
OU
2. Appuyersur la toucheTimer et reglerI'heure&0:00.
Verrouim age des collar|des
Lostouches peuvent_treverrouilI_espour desraisonsde s_curit_,
nettoyageou pouremp_chertoute utiIisationnon souhaitee.Ellesne
pourront_tre utiIiseessielles sontverrouillSes.
Sile four esten cours d'utilisation,lescommandeset laportene
peuvent6treverrouillees.
L'heureactuelIeduiour restera_I'afficheurIorsqueloscommandes
serontverrouillees.
Appuyersur lostouchesCancel etCook & Hold [Cuissonet
maintien)et ies maintenirainsipendant trois
secondes.[Appuyerd'abordsur latouche
Deverroui_age :
Appuyersur lestouchesCancel etCook &
Hold et losmaintenirainsi pendanttrois
secondes.[Appuyerd'abordsur latoucheCancel.)
Cook&
-- Hold
Codes d'anomalie
LesrootsBAKE(Cuissoncourante)ou LOCK(Verrouillage)peuvent
clignoter rapidement_ I'afficheurpour pr_venirencasd'erreurou de
problSme.Sitel est lecas,appuyersur latouche Cancel=SiIesroots
BAKEou LOCKcontinuent_ clignoter,debrancherI'appareiL
Attendrequelquesminutes,puis rebrancherI'appareiLSi I'un des
rootscontinue_ clignoter,d_brancherI'appareilet prendrecontact
avecun r_parateurautoris_.
2. Appuyer sur Iatouche A ou _' iusqu'_ ceque
I'heureiusteparaisse_I'afficheur.
o Losdeux pointscontinuent_ clignoter.
3. Appuyer _ nouveausur latouche Timer ou attendrequatre
secondes.
o Lesdeux pointscontinuent_ clignoteret le d6comptede la
dur6ecommence.
o Laderni_reminutedu d6comptesera affich6esousformede
secondes.
4. >,lafin de ladur6e programm6e,un hip long retentit.
33
Page 35

CUiSSOn COUrante
Programmation de macuisson courante :
1. Appuyer surla toucheBake (Cuissoncourante)=
o Lemot BAKEc@note. Bake
o 000clignote _ I'afficheur.
2. Selectionnerlatemp6raturedu four. La
temp6raturepeut 6tre programmeede75_ 290°C
(170_ 550°F).Appuyerunelois sur Iatouche
,L ou _' ouappuyersur latoucheA ou_' et la
maintenirainsi.
o 175° (350°) s'allumeIorsqueI'onappuie la premierefoissur
rune destouches.
o Appuyersur Iatouche ,L pour augmenterla temperature.
o Appuyersur la toucheV' pourdiminuerIatemperature.
3. Appuyer _ nouveausur latouche Bake ouattendrequatre
secondes.
o Lemot BAKEs'arretede clignoteret s'a!lume_ I'afficheur.
o 38° (100°)oula temperaturereelledu foursere affichee.La
temperatureaugmenterapar intervalIede 3 °C(5°F)jusqu'_ce
que latemperaturepreprogrammeesoitatteinte.
4. Laisserlefour prechaufferpendant8 _ 15minutes.
o LorsqueIatemperatureprogrammeepour lefour est atteinte,
un hip long retentit.
o Pourrappelerla temperatureprogrammeependantle
prechauffage,appuyersur Iatouche Bake.
5. Placerlanourriture dartsIefour.
6. Verifier I'avancementde la cuisson_ la dureeminimalede
cuisson.Cuireplus Iongtempsau besoin.
Remarques sur Uacuisson courante
au (our :
oPoor chaoger& temp_.mture do footpendant & coisson,
appuyersur Iatouche Bake, puis sur latouche ,A ou V iusqu'_
ceque I'on obtiennelatemperaturedesiree.
oPoorchangerla temperature do foot Iota dopr_chauffage,
appuyerdeux lois surIa touche Bake, puissur latouche ,A ou
V iusqu'_ceque latemperaturedesireesoit affichee.
oSi I'onoublied'arr6terlefour, il s'arreteraautomatiquement
apr_s12heures.Si ron desiredesactivercettefonction,voir
page38.
oPourdesconseilssupplementairessur lacuissoncouranteet le
rOtissage,voir la brochure Lacuissonsimplifiee.
7= LorsqueIacuissonestterminee,appuyersur
latouche Cancel(Annuler).
8. RetirerIanourriture du four.
Diff6rences de cuisson entre I'ancien
four et _e nouveau
IIest normaide remarquerquelquesdifferencesclansladureede
cuissonentre un four neuf et un four ancien.VoirAjustementde la
temperaturedu four _ la page39.
Cuisson et maintien
Lafonction cuissonet maintienpermetdecuire pendantune
dureepredeterminee,suiviepar un cycledemaintienauchaud
d'uneheure.
Programmation de mafonction c_isso_ et _ai_tie_ :
1. Appuyersur la toucheCook & Hom_(Cuissonet Cook&
maintien). Hold
• LesrootsBAKEet HOLD(Maintien}
clignotent.
• 000s'ailume_ I'afficheur.
2. Selectionnerlatemperaturedu four. La
temperaturepeut etreprogrammeede 75_ 290°C
(1708 550°F_).Appuyerune lois sur la touche ,_
ou V ou appuyersur la touche ,_ ou _ et la
maintenirainsi.
• Appuyersur la touche ,_ pouraugmenterIatemperature.
• Appuyersur la toucheV' pour diminuerlatemperature.
3. Appuyer _ nouveausur latouche Cook& Hold OUattendre
quatresecondes.
• Lemot HOLDclignote.
• 00:00ciignote_ rafficheur.
4. Entrerladuree pendant laquelIeI'ondesirequelacuissonait Iieu
en appuyantsur Iestouches _kou _. La dureede cuissonpeut
etreprogrammeede dix minutes(00:10)_ 11heures,59minutes
0 _:59).
• LesrootsBAKEet HOLDs'a%ment _ I'afficheur.
• Ladureede cuissons'ailume_ I'afficheur.
• Ladureede cuissoncommencele compte_ rebours.
Lorsque la duree de cuisso_ s'est ecoulee :
• O,uatre hipsretentissent=
• Lemot BAKEs'eteint.
• LesrootsHOLDetWARM (Chaud)s'allument.
• 75° (170°)parait_ I'afficheur.
34 suite...
Page 36

5
Apr_s une heure de MAINTiEN AU CHAUD :
o Lemot End(Fin}s'affiche=
o L'heuredu jour r6appara_t_ ['afficheur=
Annulation de [a fonction cuisson et maintien
tout moment :
Appuyersur [atouche Cancel (Annulet}.Retirerla /Cancel/
nourrituredu four.
Cuisson et maintien diff r e
Ne pas utiliser[acuiss0nd!ff6r6epourdes denr6estr_s
p6dssab[escommalesproduitslaitiers,leporc,[avolailleou los
fruits de mar.
Avec[afonction diff6rQe,[efourse metbcuire piustard dans[a
journ6e.ProgrammerladurQed'attented_sir6eavantqua[efour
nese matteen marcheet ladur6e decuisson d6sir6e.Lefour
commence_ chauffer_ I'heures6Iectionn6eet cuitpourladur6e
sp6cifi6e.
La dur6e d'attente peut 6tre programm_e de 10 minutes (00:10}
11 heures, 59 minutes (11:59}.
Programmation d'un cycle de cuisson
courante differBe :
1. Appuyer surles touchesBake (Cuisson
courante}etTimer (Minuterie} en m6me
temps.
o Lemot DELAY(Diff6r6e}s'alIume
I'afficheur.
-- Bake
--Timer
5. Appuyersur A peur pre#rammeHa dur#e de cuissen=
• Ladur6ed'attente,lesrootsDELAY,BAKEet HOLDs'aIIument
I'afficheur=
Lorsque [a duree d'attente s'est 6coulee :
• Lemot DELAYs'6teJnt.
• Ladur6e de cuisson et la temperature sera affich_e.
• LosrootsBAKEet HOLDsent affiches.
Peer programmer ea temps d'atteate [orsqae la
foactioa c_issoa et maiatiea a dej_ ere
programm_e :
1. Appuyersur [estouches Bake et Timer. | Bake
(Appuyerd'abordsur,atoucheBake.} [ Ti"mar
o Lemot DELAYet 00:00paratt_ ['afficheur. L_
2. Appuyersur [a touche_ ou T pourprogrammer
Jadur_e d'attente=
, LemotDELAYresteallumepourrappelerqu'un
cyclede cuissondiffer_ea at6programm&
A
Lorsq_e la d_r_e d'atte_te s'est _co_[_e
et q_e [e four se met e_ marche :
• Ladur6e de cuisson et [a temperature sera affich_e.
• Lemot DELAYs'_teint.
o LosrootsBAKEet HOLDresteaHume.
A_ulatio_ :
o 00:00 cIignote _ ['afficheur.
2. Appuyer sur la touche A ou V peurpregrammer
la dur#e d'atte#te.
AJorsque [emot DELAYclignotetouiours :
3. Appuyer surJatoucheCook & Hold (Cuissonet
maintien}.
o 000s'a[[ume_ ['afficheur=
o LosrootsBAKEet HOLD(Maintien} ciignotent=
4= AppuyersurA peur pregrammer & temp#rature de cuissen=
o 00:00 et le mot HOLD clignotent=
o Lemot BAKEtestaallure&
Book&
Hold
Appuyersur [atouche Caace[
• Toutes(asfonctionsde cuissonminut6eet
non minuteeserontannuiees=
• L'heuredujourr_apparait8 ['afficheur=
Bemat'_aes :
Nepas uti[iser[a cuissondiff_r_epour des articlesqui
n6cessitentqua[efour soit prechauffe,comme[asg_teaux,
[aspetitsbiscuitset [aspains.
Nepas utiIiserle cycle decuissonet maintiendiff_r6ss[ [e
four est d_j8chaud=
35
Page 37

@
Maintien au chaud
Pourmaintenirau chaudclansIe four desalimentscuits etchauds
ou pour r@haufferpainsetassbttes.
Programmation du maintien au chaud :
1. Appuyer surla toucheKeep Warm {Maintien Keep
au chaud}.
o Lemot WARM[Chaud}clignote.
o 000parait8 I'afficheur.
2. %bctionner latemperaturede maintienau chaud.
CeIle-cipeut etreregl@ de 63_ 90 °C[145
190°F}.Appuyerunefob surIatoucheA ou T
ou appuyersur latouche ,Lou Yet la maintenir
ainsi.
o 75° (170°}s'aliumeIorsqueron @pub la
premierefoissur I'unedestouches.
o Appuyersur Iatouche ,L pour augmenterla temperature.
o Appuyersur la toucheT pour diminuer latemperature.
Lemot WARMet Iatemperatureseront affbhespendant que la
fonction maintienauchaud est active.
Warm
Remarques sur Uafonction maintien
au chaud :
• Pourobtenirdesqualit@alimentaireset nutritivesoptimales,
bs alimentscuits aufour ne doiventpasetre gardesau chaud
plus de 1a 2 heures.
• Pouremp@herIesalimentsdedess@her,Iesrecouvrirde
papier aluminium,sansserrer,ou d'un couvercle.
• Pourrechauffer des petits pains :
- recouvrirIespetits painsde papbr aluminiumsansserrer et
bs placerau four.
- appuyersur IestouchesKeepWarm et A pour
programmer75°C070 °F}.
- rechaufferpendant12_ 15minutes,
• Pourrechauffer des assiettes :
- placer deux piles de quatre assiettes maximum dans [e four.
- appuyer sur [es touches Keep Warm et ,L pour
programmer 75 °C 070 °F}.
- rechauffer pendant cinq minutes, arreter Iefour et laisser les
assiettes au four pendant encore 15 minutes.
- n'utiliser que des assiettes pouvant aller au four, _ verifier
avec Ie fabncant.
Annumation du maintien au chaud :
1. Appuyer surla toucheCancel (Annub0.
2. Retirerla nourrituredu four.
- nepas poserdes assiettestiedessur une surfacefroide, les
changementsrapidesde temperaturepouvantcasser
['assbtteou [afendilbr.
36
Page 38

Cuisson au gril
Utiliser !a fonction gri! avecpRUDENCELagraissedecertains
alimentspourraits'enfiammer.Siunfeuse decJenche,former Ia
portedu four atARRETERlefour. Si!e feune s'eteint pas,NE
PASmettrede IieausurJefeu. Utiliser du bicarbonatede sodium,
un produ!t ch!m!quesec 0u un extjncteur pour 6touffer!e feu:
Programmation de la cuisson au grii :
1= Pourcommencer,appuyersur latouche Broil [Gril]=
o Lemot BROILciignote=
o Lemot SEt(Valider]est affiche=
2= AppuyersurlatoucheA pourprogrammerungrii_temperature
eleveeou sur IatoucheT pour programmerun gril
temperaturebasse=
o LesrootsHI [Elevee)ouLO (Basso]serontaffiches=
o SeiectionnerHI broil (GriI_ temperatureelevee][290°C
[550OF]]pour un griI normal.SelectionnerLObroil (GriI
temperaturebasso] [230°C [450OF]]pour un griI
temperatureinferieure d'aliments_cuissonplus Iongue
commeiavohiile=
3= Apresquatresecondes,Ie fourse meten marche=
o Lemot BROILresteallume=
Broil
4. Pourun dssoiagemaximum,prechaufferI'elementdegril
pendant3 ou 4 minutes avantd'ajouter[anourdture.
5. Placer[a nourrituredans le four. Laisser[aporte du fourouverte
d'environ10cm [4po) (premierebutee].
6. Retournerlaviandeunelois _ la moitie de laduree decuisson.
7.
LorsqueI'alimentestcuit,appuyersur latouche
Cancel [AnnulerD=Retirerlanourritureetla
lechefritedu four.
L'heuredu jour reapparait_rafficheur.
Remarques sur Uacuisson au grH :
• Pourde mei[[eursresu[tats[orsdu griLse sewir d'un ustensi[e
prevupource type de cuisson=
° Prevoirdesdureesdecuissonau grii plus Iongueset un
rissoiage[egerementmoinsdote si I'appareilfonctionnesur un
circuitde 208volts=
° Le grii au reglageHIest utilisepour la majoHtedesoperations
de cuissonau griLUtiiiser le gri[au reglageLOpour [a cuisson
de metsdevantcuire plus Iongtemps,afin de leur permettre
d'etrebiencuits sansrissolageexcessiL
• Pourcflangerlatemp6raturedtlfourpel_dantlacu_ssen
au get, appuyersur latouche Broil, puis sur[a touche
Autoset e pour changerentre ia cuissonaugri! _temperature
elevee[HI] et [acuisson augril _ temperaturebasso(LO]=
• Lesdurees decuissonaugri[ peuvent6tre plus Ionguesavec
unetemperaturede grit inferieure=
• Retournerla piupartdes alimentsIorsque[a moitiede [aduree
prevuepour la cuissonau gril s'estecouiee=
• Pourdestemperatureset desconseilssupplementairessur[a
cuissonau gril, sereporter _ [abrochureLa cuissonsimpiifiee.
TabUeau de cuisson au grH
DEG. DE TEMPSDECU SSO.
B_euf Bifteck, 2,5cm 0 po] d'epaisseur 4 Cuisson moyenne 15 - 18 minutes
4 Bien cuit 19 - 23 minutes
Hamburgers, 2 cm [3/4 po] d'epaisseur 4 Bien cult 15 - 18 minutes
Pore Bacon 4 Bien cult 6 - 10 minutes
COtelettes, 2,5 cm (1 po] 4 Bien cult 22 - 26 minutes
Jambon - pre-cuit tranche de 1,3 cm 0/2 po) 4 Tiede 8 - 12 minutes
Volaille Pouiet en morceaux Gril _ temperature basso
Fruits de met
Grillesuperieure_ la positionn° 5=
Bemarque : Cetableau n'estqu'un guide de suggestions.Lesdureespeuventvarierselon J'aliment_ cuire=
Dames de poisson, beurrees,
2,5 cm (1 po] d'epaisseur
Filetes, 1,3cm [1/2 po] d'epaisseur
3ou4
4
4
32
Biencult
Lachairse detache
Lachairse detache
28 - 38 minutes
10 - 15 minutes
8 - 12 minutes
Page 39

Arr t automatique/
Mode sabbat
Lefour s'arr6teautomatiquementapr_s12heuress'il a 6t_
accidenteIIementIaiss_enmarche.Cettecaract6ristiquede s6cudt6
peut6tre arr6t6e.
Pour annumer m'arr_t 12 heures et faire fonctionner le
four en continu pendant 72 heures :
1= Programmerlefour pour une cuissoncourante
(voirpage34)=
2, Appuyer surla toucheClock [Horloge)et la Clock
maintenirainsipendant cinqsecondes=
o SAbseraaffich6 etclignoterapendant cinqsecondes=
o SAbseraensuiteaffich6 en continujusqu'_ce qu'on rarr6te ou
iusqu'_ceque la dur6eIimitede72heuressoit atteinte=
o Lemot BAKE(Cuissoncourante)seraaussiaffich#si un
cyclede cuissoncouranteesten coursalorsque lefour est en
modesabbat=
o LaCU/SSONAU FOUResttaseulefonctionqui est
op6rationne/leenmodesabbat,Toutesiesautresfonctions
(Mlnuterie,Maintienauc,_aud,Nettoyage,etc.)sontverroui_;16,es
pendantb mode sabbat,
Annulation de la cuisson courante alors que le four
est en mode sabbat :
Remarques sur Uemode sabbat :
• Le modesabbatpout 6tremis en marche_tout moment,que
lefour soit en marcheou non=
• Le modesabbatne peut pas6tre misen mamhesiles
commandossontverrouilleesou Iaporte verrouill6e.
• SiIefour esten modecuissonIorsqueIe modesabbatest
programm6,Iemot BAKEs'6teint8Iafin ducyclede cuisson.II
n'yauraaucunsignalsonoreaudible.
• SiI'6clairagedu four estsouhaitdpendantIe modesabbat,la
lampedevra 6treallum6e avantquele modesabbatne d6bute.
• Lorsquele modesabbata d6marrS,aucunbip de prechauffage
ne retentit.
• Touslesmessageset leabipssont desactivQsIorsquelemode
sabbatest actif=
• Leverrouillageautomatiquede la portenefonctionne pas
pendantle modesabbat=
• SiI'on appuiesur latouche Cancel, un cyclede cuisson
couranteaufour seraannulS=Cependant,leprogrammateur
resteraen modesabbat=
• Apras une panne de courant, le four revient en mode sabbat
avec 72 heures restantes et aucun cycle actiE
Appuyersur latouche Cancel (Annule0.
o Lemot BAKEs'6teint_ rafficheur=
o Aucun hip sonorene retentit=
Annumation du mode sabbat :
1=AppuyersurlatoucheClock pendantcinqsecondes=
OU
2. AprSs72 heures,le modesabbatsetermine.
o SAbclignote pendantcinq secondes.
o L'heuredu iour revient_ I'afficheur.
Clock
38
Page 40

@
Ajuste ent de la te p6rature
du four
La pr6cisiondestemp6raturesdu four a 6t6soigneusementv6rifi6e
I'usine.IIestnormalde remarquerquelquesdiff6rencesdansIa
cuissonentre un four neuf et un four ancien.Au fur et b mesureque
lescuisini_ressont mainsneuves,latemperaturedu fourpeut varier.
II estpass[hied'ajusterlatemperaturedu foursi I'on penseque Ie
four necult pasou ne rissolepascorrectement.Pourdeciderde
I'aiustement_apporter,reglerlefour _ unetemperaturede 15°C
(25°F)pIuseieveeou plus bassoque la temperatureindiqueedans
la recette,puisfaire cuireIa preparation.Lesresuitatsdu _test >>de
cuissondoiventdonnerune [deedu hombrede degresduquel la
temperaturedolt etreaiustee.
Ajustement de la temperature du four :
1. Appuyer surla toucheBake (Cuissoncourante_. Bake
2. Entrer285°C(550°F)en appuyantsurIatoucheA
3. Appuyer surla toucheBake et la maintenirainsi
pendantplusieurssecondesouiusqu'_ceque 0°
paraisseb I'afficheur.
Si latemperaturedu four a eteprecedemmentaiustee,le
changementseraaffich& Parexemple,si latemperaturedu four
a ete reduitede 8 °C 05 °F},I'afficheurindiquera -8° (-15°}.
4. Appuyer surla toucheA ou T pour ajusterla temperature.
A chaquelois que i'onappuie surunetouche,iatemperature
changede3 °C(5 °F}.Latemperaturedu four peut6tre
augmenteeou diminueede 3 _ 20 °C(5 _ 35°F}.
5. L'heuredu jour reapparaftautomatiquementbI'afficheur.
II n'estpasnecessairede reajusterla temperaturedufour en cas
de panneou d'interruption de courant.Lestemperaturesde
cuissonau gril et de nettoyagenepeuventetre ajustees.
Change ent de la
temperature °F/°C
1. Lereglagepar ddaut de I'usinepour latemperatureesten
Fahrenheit.
Latouche Favorite(favor0permetde sauvegarderIadureeet la
temperatured'unefonctionde cuissonet maintien.
Pourprogrammerun cycleFavori,une fonctionde cuissonet
maintiendolt etre activeou tout juste programmee.
Programmation d'un nouveau cycle favori ou
sauvegarde d'un cycle en tours de cuisson et
maintien comme favori :
1. Programmeruncyclede cuissonet maintiencommeil est decr[t
lasectionCuissonet maintien_ la page34.
2. Appuyersur [a toucheFavorite et [amaintenir Faverit;e
ainsipendanttrois secondes.
• Lecyclecuissonet maintiennouve[[ementprogrammeouen
cours defonctionnementserasauvegard&
• Un hip sonoreretentit pour indiquer que [escommandosant
acceptele reg[agefavorL
Demarrage d'un cycle programme darts favor[ :
1. Appuyersur Ia toucheFavorite,
• Ladureeet latemperaturedu cycleprogramme FavaPite
de cuissonet maintienserontaffichees(siaucun
cyclede cuissonet maintienn'aeteprogramm&
<_nonE>>sera affiche}. Bake
2. Appuyersur Ia toucheBake.
• Lecyclefavor[commenceimmediatement.
• Lemot BAKEs'allume_I'afficheur.
• Laduroc de cuissons'alhme _ I'afficheur.
Lorsque la durae de cuisson s'est 8coulee :
• Lemot BAKEs'eteint.
• LosmatsHOLD(Maintien}et WARM(Chaud}s'allument.
• 75° (170°}parait8 J'afficheur.
Annulation d'un cycle favori en cours :
1. Appuyersur Ia toucheCancel _/_
• Lecyclefavorisauvegardeneserapas affect&
2. Retirerla nourrituredu four.
2. Pourmodifier ceregiage,appuyersur lostouchesCancel
(Annule0 et Bake simukanementet maintener-lesenfoncees
pendanttrois secondes.
3. Unbip retentit et le reglagecourant [°Fou °C_}parait_ I'afficheur.
(Sivous nefaitespas de changement,la cuisiniereretourneau
reglageexistantapres30secondes.)
4. Pourmodifier le reglage,appuyersur latouche A ou _'. Appuyer
nouveausurIatouche pour retoumerau reglageexistant.
Attender cinqsecondeset le reglagesera effectu&
39
Page 41

@
VentiJateur du four
UnventJlateurderefroidissementsemet en marche
automatiquement!orscuissonau griI et de certainesop(!rationsde
cuisson+II est utilis6pour que lespiscesinternesdu tableaude
commanderestentfraiches+Le ventiIateurs'arr6teautomatiquement
Iorsquelespiscesont refroidLlI peut continuer_ fonctionnerune
fois que le fours'est arr6t&Ceciestnormal
1
Event da four
Lorsquele four fonctionne,lessurfacesvoisinesde 1'6ventpeuvent
devenirassezchaudespourentrainerdes brCJlures=Nejamais
bloquer1'6vent=
L'Sventdu four est situ6 _ l'arri_re de masudaee de cuisson,
EVENT DU FOUR
Nepas mettrede
plastiquesprasde
1'6vent,Jachaleur
pouvantles
ddormer ou Jes
faire fondre.
Edamrage da fear
Appuyersur le commutateurd'6clairagedu four situ6
surIe tableaudecommandepour allumerou 6teindre la
lampe.LaIampedefour estactiv6epar J'interrupteur
seulement. Oven
Light
Sole da feat
Prot6gerIasoledes produitsrenvers6s,en particulieracidesou
sucr6s,ceux-cipouvantd6colorerI'6mailvitrifi6. Utiliserdes
ustensilesde la bonnedimensionpour6viterque IesproduJtsne se
renversentoupassentpar-dessusI'ustensileenbouillant.Ne pus
placer d'ustensiles ou de feuille d'amuminiumdireetement sur ma
somedufour°
E×traction :
1+TimrIagrilIeenlignedroite
jusqu'_cequ'elIes'arr6te_ la
position decalage+
2+ Souleverlagrille _ I'avantpour
pouw_irI'extraire+
R_installation :
1+ Placerla grille surIessupportsdartsle four.
2+ Soulever16g6rementI'avant+Faireglisserlagrille vers I'arriere
au-del_de la positionde caiage+
3+ AbaisserIagrille et lafaireglisserdartslefour+
Nejamais couvrir matotamit_d'une gHmmede papier d'amuminium
ni mettre d'amumimumsur masomedu four. Celu ne donnerait
pas de boris r_suhats darts macuisson de g_teau× et masole
Positions de grille
NJVEAU5: Pourgri[ierdu pain
ou passerau gril desaliments
peu @aJset non gras+
NIVEAU4 : Pourla majorJt6
desop6rationsde cuissonau
grfl,
NIVEAU3 : Pourla majorit6
desproduitsde boulangerie "
sur uneplaque_ biscuitsou
un mouie_ g_teau rouid,g_teaux8 _tages,alimentssurge[_stout
pr_tset la cuissongdn_ralesur uneseule grille+
NiVEAU 2 : Pourquatre-quarts,g_iteauxBundt,tares, platsmijot6s
et r0tissagede petitsmorceauxdeviande.
NJVEAU1 : Pourquatre-quarts,gSteauxde9 x 13,tarteset
rOtissagede grosmorceauxdeviandeetde volailie+
CU+SSONSUR PLUS_EURSGRILLES: DeuxgriJles: Utiliser [es
positions2 et 5,ou 1et 4+
Remurques : Nejamais placer lesustensilesdirectementsur la
soledu four.
J
4
3
2
1
Grilles da fear
+ Nepasrangerdenourdtureou d'astens!ledans !efour,
Le fourcomporte deuxgrilles avec,pour chacune,un dispositif de
calage.
C_issoa de g_tea_x _ 8tages s_r de_× grilles
Pourde meilleursr_sultatspour
la cuissonde g_teauxsur deux
grilles,utilJserlespositions2
et5.
PlacerIesg_teauxsur la
grille,commeil est indiqu&
4O
Page 42

Four autonettoyant
, li estnormalquecerlamespi_cesde la cuisini_redev_ennent
tres chaudesIorsdun :',ycJedenettoyage.
o Pourevtterque la portedu tour ne subtssedesdommages,ne
pastenter ae I'ouvrir]orsqueb motLOCK6!errouillageJes_
ws_blesurrafficheur.
o @iterde toucher laporte,le hubk [et lazonede I'@entdu toul
]orsdun cycb d'autonettoyage.
o Nepas utiliserde nettoyantpour tourdu commercesur le fini
ou four ou sur tout autrecomposantdu four. Ceiaabtmeraitle
fini ou les composantsoutour.
Le cycled'autonettoyageutilisedestemperaturessup@eures_ Ia
normalepour assurerle nettoyageautomatiquede latotalite du four.
Si lefour esttr6s sale,il estnormal qu'on observelaformationde
rum@ou de flammesdurant Ienettoyage.Nettoyerlefour
intervalbs reguliersplutOtqued'attendreune accumulation
importantede r@idus.
Durant Ieprocessusd'autonettoyage,il convientde bienaerer la
cuisinepour eliminerlesodeursnormabment Cruises@rant le
nettoyage.
Avant 'autonettoyage
1. Eteindrela Iampedu fouravant lenettoya% Eib risqueraitsinon,
de griller.
2. Enbvertous les platset IesgdIlesdu four. Lesgdllesrisquentde
sed@oloreret deneplusglisseraussibien apresuncycle
d'autonettoyagesi onneIesenlSvepas.
3. Nettoyerle cadredu four, Iecadrede Ia porte,Iazone _ rexterbur
du joint et autourde I'ouverturedansb joint de Iaporte,_ I'aide
d'un pro@it de nettoyagenonabrasifcommeBonAmi*oud'eau
additionn@de detergent.Leprocessusd'autonettoyagene
nettoiepasceszones.EIbsdoiventetre nettoy@spour emp@her
lasaletede s'incrusterpendantiecycIedenettoyage.(Lejoint
assureI'etanch6iteautourdeIaporteet du hublot dufour.}
4. Pouremp@hertout dommage,nepas
nettoyerni frotter leioint qui se trouve
autourde Ia portedu four. Ceioint est
co%u pour eviterles pertesde chabur
pendantle cycb d'autonettoyage.
5. EliminerIesresidusde graisseou de
pro@itsrenvers@sur lasoleavant le
nettoyage.Ceciemp@hela formationdeflammesouderum@
durant le nettoya%
6. Essuyerlesr@idussucreset acides,commeIespatatesdouces,
Iatomate ou Iessauces_ basede Iait.La porceiainevitrifi@
pos@deunecertaineresistanceauxcomposesacides,maisqui
n'estpaslimit@.Etb peutse@colorersi bs r@idusacidesou
sucresnesent pas enlevesavantde commencerI'autonettoyage.
Programmation de m'autonettoyage :
Remarqae :La temp6raturedufour doit 6tre situ@endessous
de 205°C (400°F}pourprogrammeruncycled'autonettoyage.
1. Fermerlaporte du four.
2. Placerlamanettede verrouilIage_ la positiondeverrouillage.
Appuyersur la toucheGlean {Nettoyage}. Clean
• Lemot CLEANclignote_ rafficheur.
4. Appuyersur latouche A ou T.
• MEd {Moyen)(Saletemoyenne,3heures}
est affiche.
Si la porten'estpasferm@,deshipsretentissent
et le mot _door>_(porte}parait_ I'afficheur.Sila
porte n'estpasfermeedansbs 45secondes,
I'operationd'autonettoyageestannul@ etI'afficheur
revbnt _ rheuredu iour.
5. Appuyersur Ia toucheA ou _"pourvoirdefiler
lesdifferents reglagesde I'autonettoya%
HVy {Tressale} {Salete epaisse, 4 heures}
MEd {Moyen}{Saletemoyenne,3heures}
LiTE(Lege0(SaleteIeg6re,2 heures}
Lechoixdu niveaudesaletedu four programme
automatiquementladur@ du cycled'autonettoyage.
6. Apr@ quatre secondes, lefour commence le nettoyage.
• Ladureede nettoyagecommencele@comptea I'afficheur.
• Lemot LOCKparait_ I'afficheur.
• Lemot CLEANparait8 J'afficheur.
A
y
D6marrage differ6 d'un cycmed'autonettoyage :
1. Appuyersur JestouchesGleanet Timer (MJnuterie}.
• Lemot DELAY(Differ@}et 00:00parait
I'af%l eur L O!esn
Timer
*Lesnomsde marquedes pro@itsdenettoyagesontdesmarquesd@os@sdes differentsfabricants.
41
Page 43

2. Appuyersur latouche ,Lou T pour
programmerla dur6ed'attenteavantquene
commenceIecycle.La dur6ed'attente peut6tre
programm@ede10minutes(00:10}_11heures
et59 minutes (11:59}.
3. AIorsque Ie mot DELAY[Diff@@e}clignote,appuyersur la
touche Clean(Nettoyage}.
, Lemot CLEANvaciignoter.
4. Appuyer surIs toucheA ou _.
,MEd (Moyen}(Salet@moyenne,3 heures}estaffich@.
5. Appuyer surla toucheA ou _ pour voir defilerles cliff@rents
r@giagesde I'autonettoyage.
HVy0-r@ssale}(Salet@@paisse,4 heures}
MEd(Moyen}{Salet@moyenne,3 heures}
LITE(L@ger}(Salet@leg@re,2 heures}
Lechoixdu niveaudesalet@du four programme
automatiquementIadur@educycled'autonettoyage.
6. Apr@squatresecondes,IesrootsCLEAN,DELAYet LOCK
G_errouillage}paraissent_ I'afficheurpourindiquerqueIefour
est programmepour une operationde nettoyagediffer@.Le
tempsd'attenteparait8I'afficheur.
Si le fern+a d6j_ 6t6 programm6 pore+un cycle de
nettoyage et que l'on d6sire 6tabiir un d_,lai :
1. Appuyersur lestouchesglean et Timer
glean.}(Minute@}(Appuyerd'abordsur Jatouche [-- Clean
, Le mot DELAYclignote. [ TimeP
, 00:00parait _ I'afflcheur.
2. Appuyersur latouche ,Aou _' pourprogrammerIsdur@e
des+teedeI'attenteavantquened@buteIecycle.
Apr@squatresecondes,IesmotsCLEAN,DELAYetLOCK
paraissent8I'afficheurpourindiquerquelefour estprogramme
pour une op@ationdenettoyagediffer@.Letempsd'attente
parait_ I'afficheur.
Lorsque mecycle d'autonettoyage d_bute :
+ Le mot DELAY s'@teint.
, La dur@ede nettoyageparait_ Fafficheur.
AnnuJation du cycle d'autonettoyage :_
Appuyersur la toucheCannel {Annuler}+
, Tousles rootsdisparaissentdeI'afficheur+
,Toutes Iesfonctionssont annul@es+
Pendant le cycle d'autonettoyage
Lorsquele motLOCKparait_ I'afficheur,Is portenepeut6tre
ouverte+Pour@viterd'endommagerIaporte,ne pas laforcer pour
I'ouvrirIorsqueIemotLOCKestaffich@.
Fum6e et odeurs
Lapremierefois o_ lefour est nettoy@,il peuty avoirproduction
d'odeuret defum@e.Ceciestnormalet disparaitra_ I'usage.
Si Iefour est tr6ssaleou si une ustensileaugril a @t@laiss@edartsle
four, il peuty avoirproductionde fum@e.
Bruits
PendantqueJefour chauffe,il peut seproduJredesbruitsde metal
en dilatation ouen contraction.Ceciest normalet n'indiquepasque
lefour s'abtme.
Apr@s Je cycle
Environ une heure apr@sla fin du cycle, le mot LOCK s'@teint.Ace
moment, Japorte peut 6tre ouverte. Pousser Jamanette de Is porte
vers la gauche pour d@verrouiller.
La samet6peut avoir maiss@un r_sidu gris peudreu×. L'enJever
avec un linge humide. S'il reste de Jasalet@,cela indique que Jecycle
de nettoyage n'a pas @t@assez long. Cette salet@restante sera
enlev@eau prochain cycle d'autonettoya%
Si les grilles grit 6t6 laiss6es _ l'int@rie_r du fear pendant le
cycled'a_tenettoyage et q_'eHesgmissentreal sur leurs sup-
ports, Ies enduire, ainsJ que les supports, d'une fine couche d'huile
v@g@taIe.
De fines lignes pe_vent apparaitre (Jans la percelaine parce
q_'elle a s_bi chale_r et refreidissement. Ceci est normal et
n'affectera pas la performance.
Une d_neleratien blanche pe_t apparaitre aprgs le nettoyage
si des aliments acides e_ s_cr_s n'ent pas _t_ enmev_s avant
que ne commence J'a_tonettoyage. La d@coloration est normale
et n'affectera pas Japerformance du four.
_@marqBes :
• Sila portedufour n'est})asferm@e,Jemot<<door >>(porte]
clignote_ I'afficheuret lefour @metdeshipsjusqu'_ ceque Ja
portesoitferm@eet queI'onappuie_ nouveausurglean+
+ S'ils'@couleplusdecinq secondesentrele momento_I'on
appuiesurglean et celuio_JI'onappuiesur latouche
,_ou _', I'afficheurretourneautomatiquement_I'affJchage
precedent.
+ Laportedu four setrouveraendommag@esiI'on force son
ouverturealorsque Jemot LOCKestencore affich&
, L'heuredujour parait_Fafficheur.
42
Page 44

M6thodes de nettoyage
* Avanttoute manipulation ou operation de netteyage, v_rifier que m,appamimest arr+t_
+ Pour_viter[afo_rnationdetaches0uunchangementde Cou[eur+nettoyer['appareilapr_s
+ AprSstout d6rnontagedecornposants,veilJer_ effectuerun remontagecorrect.
B
PmECE NETTOYAGE
Tam_Jede L'6rnailvitrifi_estduverreli6au rn_talpalfusion=II poutsefissure!ous'6caillerencasdernauvaiseutilisation=IIestr6sistant
cuisson- auxacides,rnaispastotalernentinattaquableparlosacides.Touslosproduitsrenvers_!s,en particulieracidesou sucres,doivent
_maiivitrifi# #treessuy_sirnrnddiatementavecunlingosee.
• Unefoisrefroidi,laveravecde I'eausavonneuse,rincerets6cher.
• Nejarnaisessuyerunesurfaceti6deou chaudeavecun lingehurnide.Cecipourraitlafissurerou1'6cailler.
• Nejarnaisutiliserdenettoyantspourfour,d'agentsde nettoyagecaustiquesou abrasifssurlefini ext6rieurde lacuisini_re.
Zone de ia • PourutiliserlafonctionVerrouillagedes cornrnandespourle nettoyage,voirpage33.
console de +Essuyeravecun lingohurnide,puisfaires6cher.Nepasutiliserunagentdenettoyageabrasifsusceptiblederayerlasurface.
commando/ °Onpoututiliserun produitdenettoyageduverre,pulv_ris_!d'abordsurunchiffon.NEPASprojeter/e produitdirectement
sur lostouches de commando ou sur Fafficheur.
Boutens de +Place!chaquebouton_ lapositiond'ARRCT,etretirerchaqueboutonen letirant=
commando °Laver,rinceretfaires6cher.Nepasutiliserunagentde nettoyageabrasifsusceptiblederayerlafinition.
+Fairefonctionnerbri@vernentchaque@16rnentpourv@rifierque leboutona6t6correcternentr@install@.
TaMede Nejamais utiliserdeprodultsdenettoyaje dufour,]avellisant,ammoniaque ouproduits denettooFagedu verre
cuissenen centenant de Fammeniaque.Remarque :Prendrecontact avecunr6parateur agr_ sila surface en vitroc_mmique
sefendi#e, se easseeu si de I atumink_mou du m_tal fond sur la surface.
° Laisserlatablede cuissonrefroidiravantdelanettoye_=
°G_n_mlit_s - NettoyerlatabledecuissonaprBschaqueernploiouau besoin,avecdu papieressuie-touthurnidifi6et la
cr_rnedenettoyagepourtabledecuisson[pi6cen°20000001)++.Puis,essuyeravecun lingosecetpropre.
_ema_ue : Desmarquespermanentes_ontseproduLresilasabt4restesurb surbcedeeuissonetest cuitedefaconr4p4t4e,
+Samet__paissee_marq_esm_,tammiq_es- Humidifierune_ponge_r6curer<{nerayantpas>>.Appliquerdelacr6mede
nettoyagepourtablede cuisson(piecen°20000001)++etfrotterpourrotiferautantdesaletdquepossible.Appliquerune
mincecouchedecr_rnesurlasalet_,recouvriravecdu papieressuie-touthurnidifidethisserpendant309 45minutes[2ou
3 heurespour lasaletdtr_sirnportante).Garderhurnideen recouvrantI'essuie-toutd'unepelliculeplastique.Rotter
nouveau,puisessuyeravecun lingopropreet sec.
Rema_ue : N'utW_serqu'untamponbr_eurer_nerayantpas_,PROPREETHUMIDE,sansd_ngerpourbs ustensitesdeeubine
rev_tementandadh_sifLeven+eetb motffsemntendommag_ssite tamponn'estpashumide,s'ilestsouitt_ousiunautretype
de tamponestuttis_,
•Sametdse_ites e_ dess_eh_es- Frotteravecuntampon9 r6curer<<norayantpas_et unecr6rnedenettoyage
pourtabledecuisson.
Remar_ue : Ten_!runelamedemsoZrbun andb de30°etdmtterpourenbvertode sabt_restante,Puis,nettoyercomme
_estd_eritei-dessus,Nepasseserv#delatamederasoirtoustesjours,celapourraituserfemotifdbverre.
+Les nomsde marquesont desmarques
d6pos6esdesdiff6rentsfabricants.
++Pourcommanderdirecternent,
composerle 1-877-232-6771€.-U.ou
1-800-688-8408Canada.
43
Page 45

Hubmetet pone +Eviterd'utilisertrop d'eau,quirisqueraitdes'infiltr_l sousouderriereleverreet detacher+
du four en verre +Laver_ I'eauetau savon+Rinceravecde I'eaupropreet s_cher+Unproduitdenettoyageduverrepeut6treutilis6enle
vaporisantd'abordsur unlinge+
, Nepasutiliserde produitsabrasifscornmetampons_ rGcurer,lained'acierouproduitde nettoyageenpoudrequi
risqueraientderayerleverre.
lnt_rieur du feur , ExGcuterlesinstructionsprGsentGesauxpages41-42pourI'autonettoyagedufour.
Grillesdu four , Nettoyeravecde I'eausavonneuse.
(certainsmodeles_}
Tireirde
perte +
6mail peinte
, Eiiminerlessouillurestenacesavecunepoudredenettoyageouuntampon_ rGcurersavonneux+Rinceretfaires_cher+
+SilesgrillessontlaissGesdartslefour pendantlecycled'autonettoyage,e!lessed_colorentetpeuventneplustr_s bien
glisser+Sicelaseproduit,enduireleborddesgrillesetle supportdesgrillesd'unefinecouched'huilev_gGtale,puisessuyer
I'exc_dent+
+NEPASUTIUSERDEPRODUffS DENETTOYAGECONTENANTDU JAVELUSANT.
°NE PASUTIMSERDENETTOYANTS, OP_NGE_ OUABRASIFS.
+TOUJOURSESSUYERDANSLESENSDELA TEXTUREDEL'ACIERLORSDU NETTOYAGE.
+Nettoyagejoumaiieffsaiet_ iGg_re=Essuyeravec!'undesproduitssuivants:eausavonneuse,vinaigreblanc/eau,produit
denettoyagepourverreetsurfaceFormula409* ou unproduitsernblablepourverre- avecun lingesoupleetune_ponge+
R[nceretsGcher+Pourpoliretenleverlesmarquesdedoigts,fairesuivreparunevaporisationdeMagicSpraypouracier
inoxydable[piGcen°20OO0OO8)+*+
+Salet_ mod_r_e/_paisse +EssuyeravecI'undesproduitssuivants:BenArni+,SmartCleanse€ouSoftScrub*- _ I'aided'un
lingesoupteoud'une_pongehumide+Rinceret sGcher+Lestachesrebe[lespeuvent6treenlevGesavecuntamponmulti-
usagesScotch-Brite* humidi% Rotteruniform_rnentdartslesensdurnGtakRinceretsGcher+Pourredonnerdu lustreet
retirerlesrayures,fairesuiw+eparunevaporisationde MagicSpraypouracierinoxydable*+
, D_eeioratie._+A I'aided'une6pongehurnidifiGeoud'unlingesouple,essuyer_ I'aidedu nettoyantCameopouracier
inoxydable++Rincerimm_diaternentets_cher+Pourenleverlesrnarquesetredonnerdu lustre,fairemwre parunevaporisation
deMagicSpraypouracierinoxydable++
+UnefoislespiGcesrefroidies,laver_I'eausavonneusetiGde,finceret sGcher.Nejamaisessuye!unesurfacetiGdeouchaude
avecun lingehumid<cecipouvantendommagerlasurfaceetentraineruneb¢flurepar Isvapeur.
° Pourlestachesrebe!les,utiiiserdesagentsdenettoyage16gGrernentabrasifscornrnela p_teaubicmbonatedesoudeouBon
AmR Nepasutiliserd'agentsde nettoyageabrasifs,caustiquesou 6nergiquescommelesnettoyantspourfour ou les
tamponsenlained'acier+Cesproduitsraieraientouendornrnageraientdefac_onpermanentelasurface.
_emarque : Utiliseru_ HndeeLIun terehe_ secpour essuyer lespreduits re_vers_s,surteu_s'Jlsse_t acides eu
sucres.La surfacepeur_aJtse ddceterereu setemir si la sa_et__'_tait pasimm_diateme_t eetev4e.Ceciest
fmrticuli_rement important dartsle cas de surfaces blanches.
+Les nomsde marquesont des marquesd_posGesdesdifferentsfabricants.
++Pourcommanderdirectement,composerJe1-877-232-6771E.-U.ou 1-800-688-8408Canada.
44
Page 46

Porte du four
o Ne pas grimpersur laportedu four ouverte,ou Iui imposerune
cnargeexcessive.Cecipourrat provoquerun basculen_entde ia
culslnleie,le bris de Japore oudes bbssurespourlapersonne
concernee.
o Ne pas tenter d'ouvriroufermerlapore oud'utilber le four
avantque laporteait riteconvenablementreinstal!ee.
• Nejamais placerlesdoigtsemre a charni_reetle cadreavan[
du four. Lesorasde cnarmeresont montessur ressort.Une
cnarnierepourralt serefermerbrutaiemen[contre le cadredu
four et provoquerdeserbuses bbssures,
Depose de la porte:
1. Apr_s le refroidissementdu four, ouvnr la
porte- position decuissonau griI (porte
entrouverted'environ10cm [4pouces]}.
2. SaisirIaporte de chaquecote. Nepas
utfliserla poigneedeporte pour la
soulever.
3. Souleveruniformementpourdegagerla portedes charnidres.
La pe du four
(LestyJepeutvaderselonJemod ]@
D@rancherlacubini_[e avantderemplacerI'ampoule.
S'assurerque le cabochonet I'ampoubsont froids avantde les
toucher.
Pour rempiacer l'ampouie du four :
1. Apr@ Ierefroidissementdufour,
maintenirIecabochontout en CABOCHON
enbvant IapiScemetailiquequi Ia
maintienten place.Remarque :
Lecabochontomberasi on ne
b maintientpas en place.
2. Enleverlecabochonet RESSORTDERETENUE
fampouie.
3. installeruneampoub de 40 wattspour appareilm@ager.
4. R@lstallerlecabochonet le fil metalliquede retenue.
5. RetablirI'alimentationde lacuisiniere.Reglerde nouveau
I'horloge.
OU
tfLI m#taZlique)
1. Saisirla portede chaquecote.
2. A!igner lesfentesaveclesbras de charniSresur lacuisini_re.
3. FairedescendreIaporte pour IapositionnercorrectementsurIes
charnieres.Poussersur lesanglessuperieursdelaporte pour
I'enfoncercompletementsur lescharniSres.II faut que la porte
soit par%tementd'aplomb.
Iafermeturede la portedu four d'unecuisiniSreneuve;ceci est
r emarque : On peutpercevoirunecertaine_6Iasticite>>lotsde
normal;ceteffet disparaitprogressivement.
Hublot du four
Pour prot6ger mehubmotde maporte du four :
1. Ne pasutiliser de produitsnettoyantsabrasifscomme des
tampons_ r@urer en lained'acierou desproduitsdenettoyage
en poudrequi risqueraientde rayerle verre.
2. Ne pasheurterle hublot en verreavecun ustensib,un article de
mobiIier,unjouet, etc.
3. Ne pasfermerIaporte dufour avantque les grilbs ne soienten
placedans lefour.
Toute@gradationdu hubiot deverre- rayure,choc,tension,etc.-
peutaffaiblirsa structure etaugmenterle risquede bris_ unedate
ulterbure.
1. Porterunemaniques_cheet d@issertr_s soigneusementle
cabochonet I'ampoub.
2. RemplacerI'ampoubparuneampoub pour four,de 40watts.II
est recommanded'utiliseruneampouleavecun culot en laiton
pour@iter lafusion du culot clansla douille.
3. Remettreen placele cabochonet rebrancherlefour.
4. RemettreI'horlogea I'heure.
45
Page 47

Pieds de r glage de.raplomb Tiroir de. temisage
VOdfJerque la bride antJbasculementagdppeconvenablement
Iiun des piedsarriOrederOgJagede I'apJomb,pour que la
cu!siniOrenePuissebascuieraccidenteliement.
LacuisiniOredolt 6tre d'ap!ombune fois instatlOe.Si
elIene t'estpas,tournerIespiedsde rOglagede J
I'aptomb,_ chacundesangtesdetacuisiniere, _ I
jusqu'_ce quecelle-ci soit d'aptomb. _ I
BA ENT
PIED DE REGLAGE
DE L _ PL OMB
Ne pas rangerdartscetiroir desarticJesde plastiqueou de
papier,des p_oduitsinfJammab[esou desproduitsaJimentaires.
Durant Jefonctionnementdu four, uneternpOratureexcess!re
pour cesarticlespeut s!OtabJirdans[etJroir.
Letiroir de remisagepeut 6treenlev6pourvouspermettrede
nettoyersousJacuisiniere.
Depose :
1. Vider letiroir etle tirer iusqu'_ lapositionde lapremierebutee.
2. SouleverI'avant.
3. Tirer iusqu'_lapositiondeIasecondebutOe.
4. Saisir Ietiroir parIescoteset soulever/tirerpour rextraire.
ReinstaJJation :
1. Insererles extrOmitesdes glissJeresdu tiroir dartsles raiJsde la
cuisiniere.
2. SouleverI'avantdutiroir et pousserdoucementjusqu'a la
positionde la premierebutee.
3. Souleverde nouveauletiroir et le pousserpour lerefiner.
46
Page 48

PROBLEME $DLUTIDN
!
Pour mapmupaHdes probm_mes o V6rifierque bs commandesdu four sont correctementr6gl@s.
observ6s, essayer d'abord mes o V6rifiersi Iefour est bien raccord6au circuit61ectrique.
somutionspossibmes,_ droite, o InspecteUr@rmerIedJsjoncteur.Inspecter/repaplacerlesfusJbles.
o ContrOlerlasourced'alimentation61ectrique.
Non=fonctionnement de o D#terminersi bscommandesdesel6ments desurface et!ou du foursont convenablement
l'appareil =total ou partiel, r6gl@s.Voir pages29et 34=
o D6terminersi la portedu four s'estd@errouill6eapresuneop6rationd'autonettoyage.Voir
page42,
o D6terminersi le four estr6gl_ pour unecubson diff6r6eou un nettoyagediff6r6.Voir pages
35 et 41.
o V6rifiersi ieverrouillagedes commandesest en mar@e.Voirpage33.
o V6rifiersi lacommandeest en modesabbat.Voir page38.
Uhorloge ou les lampes o Lescommandessontpeut-6tre programpa6espour une fonction de cuissonet maintienou
fonctionnent, ruesroots paraissent de ddmarragediff6r6.
i'afficheur, mais ie four ne o Lafonctionde vermuillagedescompaandesest peut-6treactiv@.Voir page33.
R_suJtatsde cuisson au four o D6terminersir6ventdufourest obstru6.Voirsonemplacepaentpage40.
ddf_rents des attentes ou tie ¢eux o S'assurerque lacuisiniereestd'aplomb.
produitspar le four ant6rieur, o Lesr@glagesdetemp6raturevadentsouvententreun four neufet b fourqu'il remplace.On
observesouventuned6rivedu r6glagede temp6ratured'un four_ mesurequ'ilvie@t;iIpeut
devenirpluschaudou moinschaud.Voirpage39lesinstructionsd'ajustementde Iatemp6rature
du four. Remarque : II n'estpasutile demodifierJer6glagedetemp6raturesi lavariation
n'affectequ'uneou deux recettes.
o Pourd'autresinformationsausujetdeJacuissonaufour,voirJabrochureLa cuissonsimplifi@.
R_sultats incorrects lots de la o D6terminerIapositiondesgrilles.Lesalimentspeuvent6tretrop prosde r61@aentdugriL
cuisson au grii, ou _mission , E[@rlentdu gri[pas pr6chauff_.
e×cessive de fam_eo o Utilisationincorrectedefeuilled'aluminium.Neiamaisgarnirlagdlledei@hefriteavecdelafeuille
d'aluminium.
o Portedu four ferm6edurant iacuissonau gall Laisserla portedu four entrouverted'envirun
10cm (4pouces}- premierebut@.
o Enleverrexc6sde graissesur Ia pi6cede viandeavantlacuissonau griL
o Utilisationd'une I6chefritesouilI@.
o Latension_lectriquede lamaisonest peut-6tre basse.
[mpossibimit_d'auto_ettoyage o D_terminerque ['appareiIn'a pas6t_prograpam_pour unautonettoyagedifferS.Voirpage43.
da four° o V6rifierque la porte estferm6e.
o Wrifier si Iacommandeest en modesabbat.Voirpage38.
o Lefourestpeut 6tre_ unetemp(!raturesup6rieurea 205°C(400°F}.Latemperaturedufourdoit
6treinferieurea 205°C {400°F}pourpouvoirprogrammerun cycb d'autonettoyage.
Le four ne se _ettoie pas o Un tempsde nettoyagepluslong peut _tre n6cessaire.
correcteme_t, o On n'apas_timin_avantI'op_rationd'autonettoyageIesaccumulationsexcessivesde r@idus,
particulierepaentles r6sidusd'alimentsacidesousucr@.
suite °..
47
Page 49

R
PROBLE_,_E SOLUTION
Lapore du four nese d_verrouille o L'interieur du fourest encorechaud.Attendreenvironune heureapres rachevementde la
perioded'autonettoyage.II estpossibled'ouvrir laporteapresla disparitiondu message
LOCK(Verrouilhge] sur I'afficheur.
o Lescommandeset la portesont peut-#treverrouillees.Voir page33.
Lasarface _ dessas lisse montre
des signes d'asare°
Accamulation d'humidit_ sur le o
habmotoa wpear secant dem'6vent.
emission d'ane forte odear oa de o
famee Jotsde ia raise en marche
da roar. o
o Finesrayuresou abrasions.
- S'assurerquelasurface de cuissonet Iefond desustensilessontpropres.Ne pasfaire
glisserd'ustensilesen verreou enmetalsur Iasurface.S'assurerque lefond des
ustensilesn'estpasrugueux.Utiliserlesagentsde nettoyagerecommandes.Voirpage43.
o Marquesde metal.
- Nepasfaireglisserd'ustensilesmetalliquessur lasurface.Unelois la surfacerefroidie,la
nettoyeravecIa cremede nettoyagepourtable de cuisson.Voirpage43.
o Marquesettaches brunes.
- Enleverrapidementtesproduitsrenverses.NejamaisessuyerIasurfaceavecune eponge
ou un lingosail.S'assurerque latable decuissonetquelefonddesustensilessont
propres.
o Zonesavecrefiet metallique.
- DepOtsminerauxenprovenancede I'eauet delanourriture.Utiliserlesagentsde
nettoyagerecommandes.Voirpage43.
o PiqOresou 6caillements
- Enleverrapidementlosproduitssucresquiont deborde.Voirpage43.
Ceciest normaldurant lacuissond'aJimentscontenant beaucoupd'eau.
Utilisationexcessived'humidit6 Iorsdu nettoyagedu hublot.
Ceciest normalpour un four neufet disparaitapresquelquesutilisations.
Un cycied'autonettoyage_br8lera_>plusrapidementlosodeurs.
La raiseen marched'un ventilateuraide _ retirerfumeeetodeurs.
®
Presencede saletessur lasole.Procederaun autonettoyage.
Codes d'anomalie.
Des braits se font entendre.
Imn'y a ni hip ni affichage.
SAb cmignote pais
reste ammme.
o LesrootsBAKE(Cuissoncourante]ou LOCKpeuventc@noterrapidement_J'afficheurpour
prevenird'une erreuroud'un probleme.SiIe motBAKEou LOCKparak_ rafficheur,appuyel
sur latouche Cancel (Annulet]. Sile mot BAKEou LOCKcontinue_ clignoter,debrancher
I'appareiI.Attendre quetquesminutes,puis rebrancherrappareiLSiIe motcontinue
clignoter,debrancherrappareil et prendrecontactavecun reparateurautorise.
• Sile four esttres sale.Iesfiammechespeuventproduireun coded'anomalieau coursdu
cycled'autonettoyage.Appuyersur IatoucheCancel et hisser Iefour refroidir
compietement,essuyerIasaleteen excespuis reprogrammerrautonettoyage.Si le code
d'anomaliereapparait,prendrecontact avecun reparateurautorise.
®
Lefour fait pIusieursbruits faibles.IJestpossibled'entendm lesrelaisdufour qui semettent
en marcheets'arretent.Ceciest normal.
®
AIorsqueIefour serechauffeetserefroidit,iIest possibled'entendredesbruitscorrespondan
la dilatationet_ lacontractiondes piecesmetaliiques.Ceciest normalet n'endommagepa._
['appareiI.
®
Le br_Jitd'unventilateurpout 6treentendu.C'est leventilateurde refroidissementet ceci
est normal Leventilateurcontinue_ fonctionnertant que [e four n'apasrefroidi.
o Lefour est peut-etreen mode sabbat.Voirpage38.
o Lescommandospeuventetre verrouiJlees.Voir page33.
®
Lefour est en modesabbat Pourannuier,appuyersurJatoucheClock [Horloge] et
maintener-laenfonceependantcinq secondes.
48
Page 50

m
Garantie de ia cuisini te
tecttique
Garantie compJ_te d'une annee =
Pi_ces et main-d'oeuvre
Duramune p_rioded'un (1} an _ compterdela
datede I'achatimtia[aJd6taJJ,toute pi6cequlse
rev61eraitd6tec_ueusedartsdesconditions
normalesd'usagemenagerserar6pareeou
remphc@gratuitement,
Garanties limit6es =PiSces seulement
De Jadee×ieme a laeinqui_me annie =A
comp[erde la datede I'achatinitialaudetail,bs
pi@cesdelaI[stecPdessousqul se r6vebraient
ddectueuses dansdesconditionsnormabs
d'usagemenagerserontrepareesou remplac@s
gratultement(piecesseumment};[eproprietaire
devraassumer[ous lesau[res frais, y comprisfrais
de maJn-d'ceuvre,ded@Bcement,de transport.
de ki[ometrageet dediag_ostic.b cas6ch@nt
oSorface de coisoon en vitroc_ramiqoe:Par
suitede bfisthermique,d@o[orat[on,fissurat[on
au joint en caoutchoucsu_ e rebord,usuredes
motiB
oEl_mento ehanffants_lectriqoes: EIementsde
surfaceradiantssur JesappareJBJecuisson
electriques.
V'eoillezrioter: Cegarantiecomple-[ene
s'appJiquentquesi b appareJlsetrouveauCanada
ou auxEta1_Un[s.Lesappaells sltu@ailleursne
sontcouvertsqueparbs garantieslinfit@sy
comprb de piecesqui ser6veler_.Jentddectueuses
lapremiereannee.
Residents canadiens
LegarantiecPdessoscouvreles appareiBinstalJSs
auCanada.seubmentslJsont6teagr@sparJa
CSA,saulsJcesappareilsontele introduJtsau
Canada_Foccasiond'un chaagementder@idence
desEtats-UnJsversJeCanada.
Lesgamnties@4cifiquesformul@sci-dessussonr
/esSEULESquele labricantaccorde.CefTarantie
vousconf_rentdesdroitsjuridiques_p4cifiquese[
vouspouvezegalementjou/r d'autresdroits,variables
d'un4tata/'autre,d'une#rowncea uneaurre.
Ne sent pas couverts par ces garanties :
1. Lesdommagesouderangementsdus8:
a.Miseenservice,livraisonou entretieneffectuesincorrectement.
b.Toutereparation,modification,ait6rationet tout reglagenonautorisespar
lefabricantou parun prestatairedeserviceaprSs-venteagr66.
c. Mauvaisemploi,emploiabusiflaccidents,usagenonraisonnabb,ou
catastrophenaturelle.
d.Alimentation6iectrique[tension,intensite)incorrecte.
e.Reglageincorrectd'unecommande.
2. Lesgarantbsne peuventetrehonor@ssiIesnum6rosdes6ried'origineont ete
enlev@,modifi6sou ne sontpasfacibment lisibles.
3. Ampoubs.
4. Appareilsachet@auxfins d'usagecommercialou industrieL
5. Lesfraisdevisited'un prestatairedeserviceoude serviceapr6s-venteencourus
pourlesraisonssuivantes:
a.Correctiond'erreursderaiseenservice.
b.initiationde I'utilisateur_I'emploide I'appareiI.
c.TransportdeI'appareiljusqu'_I'entreprisedeserviceapres-venteetsonretour.
6. Dommagessecondairesou indirectssubispartoutepersonnesuiteaunon-respect
decesgaranties.
Certainsetatsouprovincesnepermettentpas[exclusionoulalimitationdes
dommagessecondairesouindirects;parcons6quentles limitationsou exclusionsci-
dessuspeuventnepass'appliquer_votrecas.
Si un service apr s-vente est n cessaire
IJfaut d'abordconsuIterIasectionsurIed@annagedu manueld'utilisationet
d'entretienou appebr MaytagServicesSM/servicea laclienteb deAmanaau
1-800-843-0304E=-U=ou 1-800-587-2002au Canada=
Po r obtenir Jes prestatio s de gara tie
PourIocalberuneagenceagre@deserviceapres-ventedartsvotreregion,prenez
contactavecled6taiJIanto8vousavezachet6I'appareJLou appelezMaytagServicesSM/
service_Iaclient61edeAmana.Sivousn'obtenezpasunservicesatisfaisantenve[tu
de Iagarantie,veuillez@rimou t6l@honera :
M@_agServices"s_
A I'attentiondu CAIR:_Center
P.O.Box2370,Cleveland,TN37320-2370
Eo=Uo1=800=883=030ant Canada1=8e0=587=2002
_e_a_que : Loredetout contactaupresdeMaytagServices%service_ Ia
client6b de Amanaet concernantun probl6me,veuillezfournirI'information
suivante:
a.Vos nora,adresseetnum6rodet61@hone;
b.Num6rode mod6b etnumerodes6riede I'appareil;
c. Noraet adressedu @taillantavecIadateI'appareilachete;
d.Descriptionclairedu problemeobserve;
e.Preuved'achat.
Lesguidesd'utilisation,lesmanuebdeserviceet lesrenseignementssur lespiecessontdisponiblesaupresdeMaytagServices ,service_ la cJient6le.
SM
_9
Page 51

Estufa Electrica Deslizante con
Control 'Easy Touch' 700 - Cubierta Lisa
Instrucciones Importantes
sobre Seguridad .....................................................51-54
Cocinando en la Estufa ......................................... 55-57
Controles Superiores
Cubiertas Lisas
Area Calentadora
Cocinando en emHomo .........................................58-66
Horneado
'Cook & Hold'
'Cook & Hold' Diferido
Mantener Caliente
Asar a ia Parriiia
Cierre Autom_itico/Modo Sab_tico
Favorito
Parrillas del Homo
Cuidado y Limpieza ............................................... 67-70
Horno Autolimpiante
Procedimientos de Limpieza
IViantenimiento ....................................................... 71-72
Luzdei Homo
Ventana del Homo
Locamizaci6ny Soluci6n
de Averias ................................................................73-74
Garantia y Servicio ................................P;_gina _itima
Page 52

mnstalador:Por[avordeje estagalajun[o con e_
emc_rouomOstico.
Oensumidor: Porfavorleay conservees[agula parareferencia
futura. Conserveel recibode compray/o el chequecanceBdo
como comprosameoe compra.
NOmerodeModelo
NOmerodeSede
Fecha de Compra
Si tbne preguntas. IBme a:
Amana Customer Assistance
1-800- B43-0304E.E.U.u.
1-866-587-2002 Canada1
(Lunes a Viernes. 8:00 a.m. a 8:00 p.m Hora del Este[
Internet: http://www.amana.com
En nuestro contmuo alvin de mejorar la caiidad y iendlmten[o de
nues[ros electrodom@t_cos, puede que sea necesario modifLcar
el ebctrodom@tico sin actualizar esta guia.
Para infermaci6s_ sebre set_#cie, vet" la pbgina ultimao
Lea y siga todas las instrucciones antes de usar este
electredem_stice para evitar el riesgo potencN de incendio,
choque electrico, bsiOn personal o daSo al ebctrodomOstico
como resuKado de su uso inapropiado, Utilice este
ebctrodomestico soBmente para el propOsito que hasido
destinado segun se describe en esta guia,
Para asegurar funeionamiente correete y seguro: El
ebctrodomestico debe ser instdado debidamente y puesto a
tierra por un t@nico cdificado, No intente ajustar, reparar,
prestar servicio o reemphzar ninguna pieza de este producto
a menos que sea espedficamente recomendado en esta guia,
Todas hs reparaciones deben ser redizadas por un t@nico
cdificado,
Siempre desenchufe el ebctrodomOstico antes de efectuar
alguna reparaci6n,
,, TODA$ LAS ESTUFAS SEPUEDEN
Lasadvertencias e instrucciones importantes sobre seguridad
que aparecen en esta guia no est_in destinadas a cubrir todas
Bs posibbs circunstancias y situaciones que puedan ocurrir,
Se debe ejercer sentido comuJn,precauciOny cuidado cuando
instab, redice mantenimiento o haga funcionar el artefacto,
Siempre p6ngase el fabricante si surgen probbmas o
situaciones que usted no comprenda,
P,ecomozca los simbolos, advertencias,
etiquetas de seguridad
PODRIAN causar bsiOn personal grave o mortal.
PODRIANcausar lesi6n personal menos grave.
Para verificar si el dispositivo est_ debidamente instalado, mire
debajo de ia estufa con una iinterna para asegurarse de que
uno de los tornillos niveladores traseros este debidamente
enganchado en la ranura del soporte, El dispositivo antivuelco
asegura el tornillo nivelador trasero al piso cuando est_
debidamente enganchado, Esto debe verificarse carla vez
que la estufa sea movida,
Para Evitar ce dio o
[}a o Ca sado per H mo
Asegurese de que se hayan retirado todos los materiabs de
empaque del ebctrodomestico antes de su uso,
No coloque materiabs combustibles cerca del
ebctrodomOstico, No se deben guardar en el homo
materiabs infiamabbs, Muchos plasticos son afectados por el
51
Page 53

caior, Mantenga los pi_sdcos abjados de hs piezas deI
ebctrodom6stbo que se pueden entibiar o cabntar,
Para evitar incendios de grasa, no permita acumuBd6n de
grasa de cocinar o de otros materiabs infiamabbs en eI homo
O en su cercan[a,
En Case de inter|die
Use un extinguidor con producto quimbo seco o deI tipo
espuma o bicarbonate para apagar eI incendio o las llamas,
Nunca use agua en un incendio de grasa,
1, Apague eI homo para evitar que la IBma se disperse,
2, NUNCA bvante o mueva una sartdn en llamas,
3, Apague eI fuego o la IBma cerrando la puerta del homo,
Apague la campana de ventilaci6n para evitar que las llamas
se dispersen, Apague las llamas y luego encienda la campana
para expubar el humo y el olor,
Seguridad para los Ni os
armarios que est_n sobre la estufa o en el protector trasero
seriamente.
NUNCA deje a los nixiessolos o sin supervisi6n cuando el
homo este en use o cuando est6 caliente. No se debe nunca
permitir que los nixies se sienten o se paren en ninguna pieza
del electrodom6stico pues se pueden lesionar o quemar.
Se les debe ensdiar a los nixiesque el electrodom6stico y los
utensilios que est_inen 61pueden estar calientes. Deje enfriar
los utensilios calientes en un lugar seguro, fuera del alcance
de los nixies. Se les debe ense_ar a los nixies que un
eiectrodom6stico no es un juguete y que no deben jugar con
los controles u otras piezas del artefacto.
lnstruccienes Generales
NUNCA use un eiectrodom6stico come un peidano para
aicanzar los armanos supedores. El use incorrecto de la
puerta del electrodom6stico tabs come pisar sobre ella.
apoyarse o sentarse en la puerta puede resultar en que el
electrodomestico se vuelque, se rompa la puerta y se
causen lesiones graves.
Para evitar posibles riesgos para el usuario y da_io al
electrodom6stico, no use este producto come una estufa para
calentar o entibiar una habitaci6n. Adem_s no use el homo
come un lugar para guardar alimentos o utensilios de cocina.
No obstruya la circulaci6n del aire bloqueando el respiradero
del homo. El respiradero del homo se encuentra en la parte
traserade la superficiede cocciOn.
NO TOQUE LOS ELEMENTOSCALEFACTORESNI LAS
SUPERFICIESINTERIORESDEL HORNO, Los eiementos
calefactores pueden estar calientes au_ncuando su color sea
obscure, Las superficies interiores de cuaiquier homo se
calientan Io suficiente come para causar quemaduras,
Durante y despu6s dei use, no toque ni permita que ias ropas
u otros materiales inflamables entren en contacto con los
eiementos caiefactores o ias superficies interiores dei homo
hasta que no se hayan enfriado, Otras superficies que pueden
estar calientes incluyen la cubierta, la superficie que est_in
dirigidas hacia ia cubierta, ei respiradero dei homo, ia
superficie cercana a ia abertura dei respiradero, ia puerta dei
homo y ias _reas que ias rodean, y ia ventaniiia dei homo,
No toque un foco caiiente dei homo con un patio humedo
pues se puede quebrar, Si ei foco se quiebra, desenchufe ei
eiectrodomestico antes de sacar ei foco para evitar sufrir un
NUNCA use papei de aiuminio para cubrir ias parriiias dei
homo ni el panel inferior del homo. El use incorrecto puede
resultar en un riesgo de cheque el@trice, incendio o da_ioal
electrodomestico. Usepapel de aluminio solamente come se
indica en esta guia.
No use la cubierta o el homo come una _rea para almacenar
alimentos o utensilios de cocina.
Seguridad al Ceeinar
Nunca caliente un contenedor de alimento cerrado en el
homo. La acumulaci6n de presi6n puede reventar el
contenedor causando una lesi6n personal grave o da_ioal
electrodom6stico.
52
Page 54

Use tomaoihs secos y gruesos. Los tomaoiBs hLimedos
pueden causar quemaduras por vapor, No se deben usar
todias de secar los piatos ni otros sustitutos en vez de los
tomaoiias porque eiios pueden pasar sobre los ebmentos
caibntes y prenderse fuego o pueden quedar atrapados en hs
pbzas deI ebctrodomestbo.
Use vestimentas apropiadas. Las ropas sueitas o ropas con
mangas largas sueitas no se deben usar cuando se est_
cocinando, Laropa se puede prender fuego y causar
quemaduras si entra en contacto con los ebmentos
cabfactores.
Siempre coioque ias parriiias dei homo en ias posiciones
deseadas cuando el homo este frio. Deslice la parrilla del
homo hacia afuera para agregar o retirar alimento usando
tomaollas secos y gruesos. Siempre evite colocar o retirar
alimento del homo sin sacar la parrilla hacia afuera. Si una
parrilla debe ser movida cuando este caliente, use un
tomaollas seco. No deje que el tomaolla entre en contacto
con el elemento caliente del homo.
Use las parrillas solamente en el homo en que fueron
enviadas/compradas.
Tenga cuidado cuando abra la puerta del homo. Primero deje
que salga el aire o vapor caliente antes de sacar o volver a
colocar el alimento en el homo.
ADVERTENCIA SOBRE RLIMENTOS PREPRRADOS: Siga
las instrucciones del fabricante del alimento. Si un contenedor
de alimento congelado de pl_stico y/o su tapa se deforma,
comba o de otra manera se ddia durante la cocci6n,
inmediatamente descarte el alimento y su contenedor. El
alimento puede estar contaminado.
No permita que el papel de aluminio o la sonda de la came
toque el elemento calefactor.
Siempre apague todos los controles cuando haya terminado
de cocinar.
de dispositivos o accesorios que no sean expresamente
recomendados en esta guia puede crear peiigros graves de
seguridad, afectar el rendimiento y reducir la vida 8tii de los
componentes de este electrodom6stico.
Si el utensilio es m_ispequdio que el elemento, una porci6n
del elemento quedar_ expuesta y puede encender la ropa o un
tomaollas.
Solamente ciertos tipos de utensilios de vidrio, vidrio cer_imico,
cer_mica, gres u otros utensilios vidriados son convenientes
para cocinar en la superficie o en el homo sin quebrarse
debido al repentino cambio de temperatura. Siga las
instrucciones del fabricante del utensilio cuando use vidrio.
Gire los mangos de los utensilios hacia el centro de la
cubierta, no hacia la habitaci6n ni sobre otro elemento
superior. Esto reduce el riesgo de quemaduras, encendido de
materiales inflamables o derrames si el utensilio es tocado
accidentalmente o alcanzado por ni_ios pequdios.
NUNCA deje los eiementos superiores sin supervisi6n,
especialmente cuando est_ usando los ajustes de calor altos.
Un derrame sin recibir la debida atenci6n puede causar humo
y un derrame de grasa puede causar un incendio.
Este electrodom6stico tiene diferentes tamaSos de elementos
superiores. Seleccione utensilios que tengan bases planas Io
suficientemente grandes para cubrir el elemento. La relaci6n
adecuada entre el utensilio y el elemento mejorara la
eficiencia al cocinar.
CUBIERTA DE VIDRmOCERAMICO: NUNCR cocine sobre
una cubierta quebrada. Si ia cubierta de ia estufa se quiebra,
los agentes de limpieza y los derrames pueden penetrar y
crear un riesgo de choque el6ctrico. P6ngase en contacto con
un t@nico calificado inmediatamente.
Segutidad sobre el Use
de Utensi ios
Siga las instrucciones del fabricante cuando use bolsas para
cocinar en el homo.
El rendimiento y funcionamiento seguro de este
electrodom6stico ha sido comprobado usando utensilios de
cocina tradicionales. No use ningSn dispositivo o accesorio
que no haya sido espedficamente recomendado en esta guia.
No use sistemas de convecci6n agregables a hornos. El uso
Ollas Freidoras
Use extremo cuidado cuando mueva la olla con aceite o
descarte la grasa caliente. Deje que la grasa se enfrie antes
de intentar mover ia oiia.
Campanas de Ventilaci6n
Limpie con frecuencia ia campana y los fiitros a fin de evitar
que se acumuie en eiios grasa u otros materiaies infiamabies y
para evitar incendios de grasa.
Cuando prepare alimentos fiameados debajo de la campana,
encienda ei ventiiador.
53
Page 55

Seguridad en [a Li pieza
Aviso y Advertencia
Limpie con cuidado [a cubierta, Apague todos los controIes y
espere que se enfrien hs piezas de[ eIectrodom6stico antes de
tocarIas o [impiarIas, Limpie con cuidado, Tenga cuidado
para evitar quemaduras de vapor si usa una esponja o un
pa_o mojado para [impiar los derrames en una superfide
caIiente, AIgunos [impiadores pueden produdr vapores
nodvos cuando se apIican en una superfide caIiente,
Limpie soIamente hs piezas indicadas en esta guia,
Homo Auto[impiante
coc[na, etc, en e[homo durante e[ cido de auto![mpieza_
No [impie [a junta de [a puerta, La junta de [a puerta es
esencial para obtener un buen sello, Se debe tener cuidado
de no frotar, da_ar ni mover la junta,
No use limpiadores de homo ni forros de homo de ningun tipo
alrededor ni en ninguna parte del homo autolimpiante,
Antes del ciclo de autolimpieza del homo, retire la asadera, las
parrillas del homo y otros utensilios y limpie cualquier derrame
para evitar humo excesivo o Ilamaradas,
[mpertante Sebre Seguridad
La Propuesta 65 de la Ley de 1986 del Estado de California
Sobre Seguridad y Contaminaci6n del Agua Potable (California
Safe Drinking Water and Toxic Enforcement Act of 1986_)exige
que el Gobernador de California publique una lista de las
sustancias que segOn el estado de California causan c_ncer o
da_o al sistema reproductivo y exige que las empresas
adviertan a sus clientes sobre la exposici6n potencial a tales
sustancias,
Se advierte a los usuarios de este e[ectrodomdstico que cuando
el homo estd funcionando en el ciclo de autolimpieza, puede
haber exposici6n de bajo nivel a algunas de las sustancias
indicadas en la lista, incluyendo mon6xido de carbono, La
exposici6n a estas sustancias puede set reducida a un minimo
ventilando el homo al exterior en forma adecuada, abriendo las
ventanas y/o la puerta en la habitaci6n en donde est,1ubicado
el electrodomdstico durante el ciclo de autolimpieza,
AViSO IMPORTANTE RESPECTOA LOS PAJAROS
DO[V]ESTiCOS: Nunca mantenga [os p_jaros en [a cocina o en
las habitaciones donde puedan Ilegar los humos de la cocina,
Los pajaros tienen un sistema respirator[o muy sensitivo, Los
humos producidos durante el ciclo de autolimpieza del homo
pueden ser periudiciales o mortales para los p_jaros, Los
humos que despide el aceite de cocina recalentado, la grasa,
margarina y los utensilios antiadherentes recalentados pueden
tambi6n ser periudiciales,
Conserve estas [nstrucciones para Referencia Futura
54
Page 56

@
Controles Superiotes
UseestoscontrolesparsencenderIoseIementossuperiores. Sedis=
ponede una selecciOninfinita deaiustesdelcalordesde'Low' (Baio)
hasta'High' (Alto). LasperJlJaspuedencoJocarseen cualquierade
estosaiusteso entreelias.
Programad6n de los Controles
1. CoJoqueel utensiIiosabreeI eIementosuperior.
2. Oprimay gire la perJiJaen cuaiquierdirecci6nhastael ajustede
calordeseado.
o Enel paneldecontrol seencuentramarcadocual O O
elementocontrolscads perilIa. Parejemplo,el dibujo
a laderechaindica elelementodelanteroizquierdo. O O
3. Enel paneldecontrol hayuna Iuzindicadorade loselementos.
Cuandoseenciendealgunade las perillasde control, IaIuzse
ihmina. La luzseapagar_icuandotodosloselementossuperiores
seapaguen.Cuandoseenciendeun control,sepuedepercibir un
brillo a Iolargode la superficie lisa.Elelementopasar4par ciclos
de encendidoy apagadopars mantenerel ajustedecalor
seleccionado,inclusiveen el ajuste'High'.
4. DespuesdecocinarcoloqueIaperJllaen laposicidn'OFF'
(Apagado]. Retireel utensilJo.
Ajustes de calor sugeridos
EltamaSoytipo de utensilio,el%o y cantidadde alimentoque est8
calentandoy Ia potenciade cads elementoindividualdeterminar4nIa
posici6nidealde Iaperilla pars la cocciOn.Algunoselementostienen
un ajustede cocciOna fuego lentoy parsderretirquerequerir4un
aiustepeque_ode latemperaturadependiendodet alimentoque
est6preparando.LosotroselementosmuestranJosajustes
exclusivosdedichos etementosimpresosalrededorde lasperilhs.
AjusteIatemperaturaa losm_merosqueofrecenlosresultadosde
cocciOndeseados.ParsinformaciOnsabrelosutensiliosyotros
lactates queafectanlos ajustesdeJcalor,consulteel folIeto "La
cocinaf_icil".LassJguientesdescripcionesIeayudar_na elegirel
aiusteque le dar_Josresultados6ptimos.
'Hold' (MantenerCaliente]o 'Warm' [Calenta0:Losalimentos
mantienenunatemperaturasabrelos 140° F(60° C)sin que sigan
cocin4ndose.Losalimentosest4ncaNentesenprincipioy Iuegose
reducelatemperatura.Nuncauseestosaiustespars recalentar
alimentosfrfos.
'Simme¢ (Cocci6naFuegoLento]:Losalimentosformanburbujas
que apenasIlegana Iasuperficie.Losalimentostienen una
temperaturaentre 185° F(85°C)y 200° F (93° C].Elaiustede
cocci6na fuego lentotambi6npuedeser usadopara herviro
escalfaralimentoso seguircocinandoalimentoscubiertos.
'Slow Boil' (Horror Lento]: Losalimentosforman burbujas
moderadamente.Elaiustedehervorlentotambi6npuedeserusado
pars la mayoriade hs frituras y pars mantenerlacocci6n de
grandescantidadesde Fquido.
'Boil' (Hervi0: Losalimentosforman burbujasa granvelocidad.Este
aiustetambJ6npuedeset usadopars dorarcame,parspreparar
alimentossalteados,parssofreiry paracalentaraceitepars freir
antesde reducirla temperatura.Los3 o 4 ajustesrodsaltosde la
perilIase usanparaestostipos de cocciOn.Etaiustem4salto
siempreseusa pars hacerhewir el agua.Algunoselementos
ofrecenuna velocidadinchsomayorparshervir liquidos.
ANTES DE COCINAR
o SiempFecoJoqueHnutensilioen el elemen[o_upenoran_esde
ensenderlo.Parsevitardalioa la estufa,nuncaenciendaun
elementosuperiorsin tenei un utensiliosoble61
• NUNOAuselacubiertadelaestufacoma unaareapars guardar
alimentoso utensilios,
MIENTRA$ COCJNA
Asegurese(le que ustedsabecual penlla controlacads elemento. Algunas_empera_uraspuedenno setsegurasparsarticuJostaies
Aseguresede que ustedencendi6e elemen_ocorrec[o, comaI[quidosvol4tiles !impiadoreso rociadoresen aerosol
, Cornienceacocmaren un ajustede caloralto luego reauzcaaun o NUNCA dejemngOnarticulo,especialrnentearticuiosdepl4stico.
auste m4sbajopars cc;_pLetarla cocciOn.Nuncauseuns_uste sabrelacubiertaaelaestufa. Elsirecalmn[eprovenientedeJ
de caloralto paracoclnar duranteun tiempo prolongado, respLraderopueaeencenderlos articulosinflamabies,derretir o
• NUNCApermitsque una alia hJervabastssecarse, Estopodria ablandarlospi4sticoso aumen_ariapresi6nen loscontenedores
da_arla alia ,,el eJectrodom6stico, cerradoshacJdndolosreventar,
• NUNCAtoquela super[iciedelaestufabastsquenosenays ,NBNCA permitsqueel papeldealum_mo.lostermOme-[rosae came
enfriado, Posiblememea_gunas4reasde lasuperticie, acumquierotto objeto de metal,a excepciOnde unao!lasabreun
especialmentealrededordeJos91ementos.seent_bmn_calienten emmen[osuperior,_engacontactocon loselementoscalefactores,
mlemrasest,1cocinando. Usetomaollaspars protegersus - NUNCA guardeart[culospesadossabrelacublerta quepueaan
manos, caersey daliarla.
DESPUES DE OOClNAR
• Asegumseaeque losemmen[ossupedoresestenapagados.
• Limpie cudquier derrame tan pronto coma sea posible.
OTHOSCONSEJOS
- Si exis[enarmariosdirectamentesourelacubiertade laestufa.
coloqueen eE_osart[culosde usapocofrecuentey que puedenser
guardadoscon seguridaden un 4tea que estarasujetaaJcalor,
55
Page 57

Cubiertas Lisas
Notas sobre cubiertas isas:
oLacubierta de maestufa puedeemitir un poco tie humo y
oior [aprimeravezquese uti[iza. Estoes normal
oLascubiertas iisas retienen el eaior per un cierto periodo
despu6s que se ha apagado ia estufa. Apaguelos etementos
unospocosminutos antesde que IosalimentosestQn
completamentecocinadosy use etcalor restanteparacompletar
la cocciOn.Cuandola Iuzdesuperficie calienteseapaga [vet a
continuaciOn),eldreadondesecocinaestar_fr[a aItacto.
Debidoa la maneraenque retienenelcalor, loselementoslisos
no responder_intan rdpidamentea loscambiosen losajustes
como Ioselementosespirales.
oEncasode un posiblederrame,retireel utensiliode lacubierta
de la estufa.
oNunea trate de mevantarmacubiertao
oLasuperficielisapuedeversedescoioridacuando est_caliente=
Estoes normaly desaparecer8cuandoIasuperficieseenfr[e=
Consejos para proteger la
cubierta lisa
__iillll_ieZ_ [ver p_gina69para mayorinformaciOn)
oAntes de usarpor pdmera vez,IimpieIa cubierta=
o Limpielacubiertadiariamenteo despudsdecada uso=Estola
mantendr_conuna buenaaparienciay puedeevitarque se daSe=
oSi seproduce un derramecuandoest_cocinando,I[mpielo
inmediatamentede la cubiertacuando_staest_caiientepara
evitar una limpiezam_sdif[ciIdespu_s=Tengatouchecuidado,
limpieei derrameconunatoalla secay Iimpia=
o Nodeieque IosderramespermanezcansobreIa cubiertao sobre
la moldurade Ia cubiertapor un per[edodetiempo prolongado=
o Nu_ca usepoivosde limpiezaabrasivosni esponjasde restregar
que puedan rayarla cubierta=
o Nunea use bianqueadora basede cIoro,amon[aconiotros
limpiadoresque no hayansido especificamenterecomendados
parausaren elvidrio cer_mico=
E[ementos Superiores
Loselementossuperioresensu estufaest_nidentificadospor
circulospermanentesen la superficieIisa=Paracocinarde manera
m_seficiente,useun utensilioque seadel mismotamaSoque el
elemento.
Los utensilios no debe1_exte_tdersemz}saH_de 12 a 25 mm
(1/2 a I pulgada) del tamale del elemente.
Cuandose enciendeun controI,se puedevet un resplandoratrav6s
de Iasuperficielisa.Elelemento pasar_ pot cielos de encendido
y apagado para mantener emajuste de earnersemeecionado,aen
enemajuste'Hi' (Amto:_.
ParamayorinformaciOnsobrelosutensiliosconsultela secciOn
Recomendacionessobre IosUtensiIiosenla p@ina 64y elfoIleto
"LaCocinaFacii"quese incluyeconsu estufa=
6" ELEML3_TO / SENCILLO
SENCILLO 6" ELEMENTO
9" EL£3_,4ENTO
SENCILLO
9" ELEMENTO
SENCILLO
Luz llndicadora de Superficie Caliente
LakJzindicadoradesuperficie calienteseencuentraen la parte
delanterade la superficiede cocci6n=La Iuzseiluminar_cuando
cualquierade Iosetementossuperioresest_caIiente=Permanecer_
encendidaa0ndespu6sde que el controlsea apagado,hastaque el
areasehayaenfriado=
Pata evitar marcas y rayaduras
o Nouse utensiliosdevidrio=Puedenrayarlasuperficie=
o Nu_ca coloqueunsoporteo un arode wok entre Iacubiertay el
utensilio=Estosart[culospuedenmarcaro rayarlacubierta=
o NodesliceutensiIiosde aluminioa tray,s de una cubiertacaliente=
LosutensiIiospuedendejar marcasque debenset Iimpiadas
inmediatamente=(VerLimpieza,p_gina69=)
oAseg_iresedequeIacubiertay Iaparteinferiordel utensilioesten
limpiasantesdeencenderla estufa a fin de evitarrayaduras=
o ParaevitarIasrayadurasodaiio a la cubiertadevidrio cer_mico,
no deieaz0car,salo grasassobrelos elementos=Limpiela
cubierta conun pai_olimpio o contoailasde pape!antesde usaria.
o Nu_ea desliceutensiliosde metalpesadosa tray,s de [acubierta
puespueden rayaria.
Para evitar manchas
o Nu_ca useun pai_oo unaesponjasuciapara Iimpiarla cubierta
de Iaestufa. Estopuededejaruna pe
Para evitar otros dafios
. No dejequeen Iacubiertacalientese derritanpl_sticos,az_caro
alimentoscon attocontenidode az0car.Si estosucede,timpie
inmediatamente.[VerLimpieza,p%ina 69.[
o Nunca dejeque una otlahiewa hastaquedarsecapuesesto
dafiar_Ia superficiey el utensilio.
° BJunca use la cubierta como una superficie de trabajo ni
comounatablade cortar.
o Nunca cocinealimentosdirectamentesobre lacubierta.
+Nouseunutensiliopequefioen un elementogrande. Estonos6Io
desperdiciaenergiasinoque tambi6npuedenproducirsederrames
calientessobreIacubiertalos cualesrequierenlimpiezaadicional.
o Nouse utens+liosespecialesquenoseanpianos,detamafio mayor
o desniveladostalcomoIaparteinferiorredondade loswoks,con
fondos acanaladosy/o parrillasy ollasde grantamafio para
prel)ararconservas.
o Nouse aluminioni contenedoresde papeIde aluminio. El
aluminiose puedederretiren Ia cubiertade vidriocer_mico.Siel
metalsedernte en lacubierta,no use laestufa. Llamea un
t6cnicoautorizadode Amana.
Use ' Evite
Utensiliospianosy Losutensilioscon rondosacanalados
suaves+ o arqueados+Losutens+Iioscon fondos
irregularesno cocinanuniformemente
losalimentosy algunasvecesno
puedenhervirliquido.
Utens+Iiosde material Losutensiliosde metalesdelgadoso de
grueso, viddo.
Utens+Iiosque sean Losutensiliosm_spequefioso m_s
del mismotamafio grandesqueel elementoen 2,5cm
queel elemento. (1 pulgada).
Mangosseguros. Los utensilioscon mangossuekoso rotos.
Mangospesadosquepueden inclinarel
utensiiio.
Tapasherm6ticas. Lastapassuettas.
Wokscon rondo Loswoks con rondoapoyadoen un aro.
piano.
Utensi ios pata ptepatat
Recomendaciones sobre
utensilios
Si seusan Iosutens+Iioscorrectossepuedenahorrarmuchos
problemas,taI comoprolongaci6ndeltiempodecocciOnde los
alimentosu obtenciOnde resukadosnoconsistentes.Losutensilios
correctosreducenel tiempo decocci6n,usan menosenerg[a
electricay cocinanlosalimentosde maneram_suniforme.
Prueba de las OHas P anas
Verifiquesi susollasson planas+
La prueba de maregina:
1+ Coloqueuna reg+aatrav6sdelrondo de la olla+
2+ ColOquelaa la hz+
3+ Pocao ninguna luzdebeversedebajodelaregla+
La prueba de maburbuja:
1. Co[oqueuna pulgadade aguaen [a olla.Co[oque[ao[[aen [a
cubiertaygire el control a 'High' (Alto}.
2. Observelaformaci6nde burbujasa medidaque el aguase
ca[ienta.Lasburbujas uniformess+gnificanbuenrendimientoy
lasburbujas no irregu+aresindicanpuntosca[ientesycocciOn
dispareja.
Vet el folleto"La CocinaF_c[["para mayorinformaciOn.
consetvas y de tama os
Todaslas ullas para preparar eonservas y las ollas grandes
deben tenet rondos pianos y deben set hechos de materiales
gruesos, Estoes muyimportantepara Iascubiertas Iisas.La baseno
debeser rossde 2,5cm (1 pulgada)m_sgrandeque el elemento.
Cuandolasollasde prepararconservasy lasolIasde tamafios
grandesnocumplenestos requisitos,lacocci6npuedendemorar
m_stiempoy se puedendafiarIascubiertasde lasestufas.
AigunasolIasde prepararconservastienenbasespequefiaspara
usarlasen lassuperficieslisasde las estufas.
Cuanduest6 preparando conservas, use el ajuste de careeralto
basra que el agua comierice a hervir o se IogralapresiOnene!
olla.Reduzcael caloral ajusterossbajoque mantengael hervor o la
presiOn.Sinosereduceelcalor,sepuededafiar lacubiertadela
estufa.
ConsulteeJfofleto"La CocinaFacil"para mayorinformaci6n.
57
Page 59

Panel de Control
A
B
C D
\
\
\
\
\
\
\\\\ Cook&Hold Claan Favorite Clock WarmKeep
\
\
Bake
E F G H 1
Elpanelde control hasido dise_adoparssu f_cil programaci6n.Elindicadorvisualen el panelde control muestraIa horadel dFa,el
temporizadory Iasfuncionesdel homo.Elpanelde control mostradoarribaincluyelascaracteristicasespedficasdel modelo. (Elestilo
del panelde controlvariaseg_nel modeioy
A
'Broil'(Asara
il i
laParr+lla)
B!
'Bake'(Hornea0
C ¸
A (M_s)o
V (Menos-)
iii?
'Timer'_emporizador}
ID
'Cook& Hold'(CocciOn
yMantenerCaliente}
'Clean'(Limpieza)
G
'Favorite'(Favorito}
H
'Clock'(Reloj}
m
'KeepWarm'
[Mantener Caliente}
J
'Cancel'{Cancels0
Use de las Teclas
o Oprh_aaIs tecia deseada.
o OprimaA o V paraprogramareltiempooIstemperatura.
o Seescuchar_unaserial sonoracarlavezque oprimaunatecla.
o Seescuchar_ndosse_alessonorassiocurre un erroren Is
programaciOn.
Beusaparsasara laparrillaydorarlos
alimentos.
Beusaparahorneary asst.
Programao cambialahora,la
temperaturadethorno.Programaasara
laparrilla'HI'o'LO'.
Programsa!temporizador.
Beusaparahornearduranteuntiempo
sebccionado,luegomantieneelalimento
calienteduranteunahora.
Seusaparsprogramaruncictode
autolirnpieza.
Seusaparaprogramaryguardarun
procedimientoespecificode'Cook& Hold'.
Seusaparaprogramarlahoradeldis.
Beusaparamantenercalienteene!
hornoelalimentococinado.
Cancelatodaslasfuncionesaexcepci6n
deltemporizadory etreloj.
Nora: Cuatrosegundosdespu6sde haberoprimidolatecla A o
V, e!tiempo o Iatemperaturaser_autom_ticamente
programada.Sitranscurrenm_sde 30segundosdespu6sde
haberoprimidounatecia defunci6n y antes deoprimir Iatecla A
o V, ta funciOnser_eanceladayel indicadorvisualvolver_al
despliegueanterior.
'CmOOk' (Reloj}
El relojpuedeserajustadoparadesplegarla horayaseaen formato
de 12horaso 24 horas+ElreIoj hasidoprogramadoen la f_brica
parsel formato de 12horas+
Pars cambiar el reioj a formate de 24 betas:
1. Optimay mantengaoprimidaslasteclas
'Cancel' y 'Favorite' durantetres
segundos.
2. OprimaA o V paraseteccionarel formato
de 12horaso 24 horas.
3. Programe[ahorade[dis siguiendolas
hlstruccionesindicadasabajo.
Programaci6n del Reloj: Clock
1+ Oprh_aalatecla'Clock'+
+ Losdospuntosdestetlanen eIindicador.
2. OptimaA o V para programarla horadel dis.
+ Losdospuntoscontin_andestellando.
3. OptimaIatecla'Clock' nuevamenteo espere
cuatrosegundos.Losdospuntosdiscontin_andestellando.
Cuandose conectaenerg[ael6ctricaal hornoo despu6sde una
interrupciOnde Iaenerg[ael6ctrica,la Oltimahoradel reloj previaa
la interrupciOndestellar_en el indicador.
58
Page 60

Paradespiegar[a horadei dFacuandoe[indicadorest6mostrando
otrafunci6n detiempo, oprimatatecia 'Clock' (Re[oi).
La horade[reloj no puedeser cambiadacuandoe[ homohasido
programaticpara 'DelayCookorCtean'CHorneadoo Limpieza
Diferido)o 'Cook& HoW (CocciOny MantenerCaiiente_).
Para cancemaremdespmiegue demremoj:
Si nodeseaque el indicadorvisuatmuestre tahora del d[a:
Oprimay mantengaopdmidalasteclas
'Cancel' (CancelaOy 'Clock' durantetres
segundos.Lahoradel d[a desaparecer_del
indicador.
Cuandose cancelael desplieguede[ reloj,
oprimalatecla 'Clock' paradesplegar
b_evemente[a horadel d[a.
__ Clock
Para restaurar emdespmiegue demremoj:
Oprimay mantengaoprimidalasteclas'Cancel' y 'Clock' durante
tres segundos.Lahorade[ d[areaparecer_enel indicador.
'Timer' dremporizador)
Eltemporizadorpuedeser programadode un minuto (0:01)hasta99
horaay 59minutoa(99:59),
Eltemporizadorpuedeset usado independientementedecualquier
otraactividadde!homo,Adem_spuedeser pregramadocuandootra
funci0n del hornoest6en funcionamiento,
Bmoqueo de ruesContromes
Elteclado puedeserbloqueadoparaseguridad,limpiezao evitarel
usono autorizado.Nofuncionar_ncuandoest6nbioqueados.
Siel homoest_en uso,los controiespuedebioquearse.
La horaactua[del d[a permanecer8en e[indicador cuandolos
contro[esest6nbloqueados.
Para bmoquear:
Oprimay mantengaoprimidasIasteoIas
'Cancel' y 'Cook& HoW durantetres
segundo&(Oprimaprimero[atec[a'Cancel'.}
Cook&
Para desbmoquear: -- Hold
Optimay mantengaoprimidasIastecIas'Cancel' y'
Cook& HoW durantetres segundos.(Oprimaprimero
latecla 'CanceR_)
C6digos de Errores
'BAKE'(Horneado)o 'LOCK'(Bloqueado)puedendestellar
r_pidamenteparaadvertirleque hayun error o un problem& Si
'BAKE'o 'LOCK'desteJlaneneIindicadorvisual,oprimaletecla
'Cancel', Si'BAKE'o 'LOCK'continOandestelIando,desconectela
corrJenteel6ctricahaciael artefacto.Espereunospocosminutosy
vueJvaa conectar lacorrienteel6ctrica.Si IaspalabrasaOncontinQan
destelJando,desconecteIacordenteeI6ctricahaciael artefactoy
Ilamea unt_cnico deservJcioautorizado.
Eltemporizadornocontrolael homo.Soiamentecontrolauna se_a[
SO[_ora.
Para programar el temporizador:
1, OprimaIatecia 'Timer', Timer
o '0:00'desteHaene[ indicadorvisual
o Losdos puntosdestellar_n.
2. Oprimalatecla A o V hastaque el tiempo
correctoaparezcaenel indicadorvisual.
o Losdos puntoscontinOandeste[iando.
3. Oprimanuevamente[atec[a 'Timer' o esperecuatrosegundos.
o Losdos puntoscontinOandeste[landoy comienzalacuenta
regresivadel tiempo.
o ElOltimominutode [acuentaregresivade[ temporizadorse
desplegar_ensegundos.
4. AI finaldel tiempo programatic,se escuchar_unase_alsonora
[arga.
Para caacemar emtemporizador:
1, Oprimay mantengaoprimida la tecla'Timer' durantetres
segundos.
U
2. Oprima[atec[a'Timer' y co[oque[a horaa 0:00.
59
Page 61

'Bake' (Horneado)
Para pregramar 'Bake':
1. Oprimalatecia 'Bake'.
, 'BAKE'desteilar_.
, '000'destellar_en el indicadorvisual.
Bake
Diferencias homeado entre st+ homo
antigua y su homo nuevo
Esnormal observaralgunasdiferenciasen el tiempode horneadode
suhomo antiguay su homo nuevo.Vea"Ajustede laTemperatura
del Horno"en la pagina65.
2. Se[eccioneIatemperaturade[homo. La
temperaturadet horno puedeser programadade
75°a 285°C (170°a 550°F).Oprimau oprimay
mantengaoprimidaIatecla A o V.
, Cuandocuatquieradeestasdosteclasseoprime
par primeravez.'175°, ('350°')se ituminar_.
+ OptimalateclaA paraaumentartatemperatura.
, Optimalatecla Y para disminuirla temperatura.
3. Oprimalatecla 'Bake+nuevamenteoesperecuatrosegundos.
, 'BAKE'dejar_de destelIary se iluminaraen el indicadorvisual.
• '38° C' ('100° F')o tatemperaturaactualdel homo se
desplegar_.Latemperaturaseelevar_en incrementosde
'3°C' ('5° F')hastaquesealcancela temperaturaprogramada.
4. Esperea que el hornose precaiientedurante8-15 minutos.
, Cuandoel hornoIlegaa latemperaturaprogramadase
escuchar_unase_al sonoralarga.
, Paraverificarla temperaturaprogramadaduranteel
precalentamientodel homo.optimalatecla'Bake'.
5. ColoqueeIalimentoen el horno.
6. Verifique el progresode IacocciOncuandohayatranscurridoel
tiempo minimarecomendado.Contin_elacocciOnsi es necesado.
7. AI t6rmino de la cocci6n,oprimala tecla'Cancel',
8. Retireel alimentodel homo.
Notas sabre Hemeado:
+ Paracambiar/a temperatura del home duraitte e!
hemeade,oprima Iatecla 'Bake'. Iuegooprima latecla A o V
hastaqua Ileguea Iatemperaturadeseada.
+ Paracambiar/a temperatura de/home durante 'Preheat'.
oprimades veeesIatecla'Bake'. hego optimaIatecla A o
V hastaquasedespliegueIatemperaturadeseada.
, Si olvida apagarel homo. seapagar_automSticamentedespu6s
detranscurrir 12horas.Sideseadesactivarestacaracter[stica.
yeaIa p_gina64.
, Parasugerenciasadicionalessabrehomeadoy asado,consulte
elfoIleto"La CocinaFacil".
'Cook & Herod' (Cocc+ony
Mantener Caliente)
'Cook& Hold' le permitehornearduranteunacantidaddeterminada
detiempo,seguidode un ciclo 'KeepWarm'de una hora.
Para programar 'Cook & Hold':
1.Oprimala tecla 'Cook& Hold'.
, 'BAKE'y 'HOLD'(Mantener) Hold :
destellan.
, '000'se iluminaen el indicador visual.
2.SeJeccione[atemperaturade+horno.Latemperatu+ade[
homo puedeset programadade75°a 285°C (170°a
550° F).Optimau oprimaymantengaoprimidala
tecla A o 'V.
+ OprimaIatecJaA paraaumentarJa
temperatura+
, Oprimala tecla V paradisminuir latemperatura.
3.OprimaIatecia 'Cook & Hold'nuevamenteoesperecuatro
segundos.
, 'HOLD'destella.
, '00:00'destellaenel indicadorvisual.
4.Programela cantidadde tiempoduranteIa cualusteddesea
hornearoprimiendola tecla A o 'V. Eltiempode horneado
puedeprogramarsedesdediez minutos(00:10)hasta11horas.
59 minutos(11:59)+
, 'BAKE'y 'HOLD'seiluminanenelindicadorvisual.
, Eltiempode horneadoseihminar8 en el indicadorvisual.
, Comenzardla cuentaregresivadeltiempo de homeado.
Cuande haya e×pirade el tiempe de cecci(_m
, Seescuchar_ncuatroseSalessonoras+
, 'BAKE'seapagar&
, 'HOLD'y 'WARM'se iluminardn.
, Enel indicadorse despiegar_'75°' ('170°').
Cook&
6O
Page 62

@
Despu6s de una hora en 'HOLD WARM'
(Mantener Caliente):
• 'End'sedesplegar&
• Lahora de[diavolver_a desplegarseenel indicadorvisual=
Para cancelar 'Cook & Hold' (Cocci6n y Mantener
Caliente) en cualquier momento:
Oprima[a tecla 'Cancel' [Cancela().Retireel alimento
de[homo.
tz::J
'Delay Cook & Hold' (Cocciony
Mantener Caiiente Difeddo_)
NOuseh0rnead0dffer!doparealknentosde Cortaduracidntales
comoproductos[dcteos,co[do,came de avee mariscos. Cuarido ha expirado el tiempo diferido y
Cuando ei tiempo diferido ha e×pirado:
• 'DELAY'seapagar_.
• Sedespfiegaeltiempo y [atemperaturede homeado.
• Sedespliega'BAKE'y 'HOLD'.
Pare programar un tiempo diferido cuando ya se ha
programatic 'Cook & Hold':
1. Optima [asteclas 'Bake' y'Timer'. (Of)rime
primero[a tec[a'Bake'._ -- Bake
• 'DELAY'y '00:00'sedespiiegaene[
indicadorvisual
2. Oprima [atecia A o V paraprogramare[
tiempo diferido.
• 'DELAY'permanecer4i[uminadopare recordade
que seha programadoun cic[ode homeado
diferido.
el homo comienza a funoionar:
Cuandousa 'Delay'[Diferido_,e!homo comienzaacocinarm_s
tarde ene[ die.Programelacantidadde tiempoque usted desea
diferir antesde que se enciendael homo y cuantotiempodesea
cocinarel alimento.Ethomo comienzaa calentaren iahora
seleccionaday cocinaduranteeltiempo especificado.
• Sedespiegar_e[tiempoy [a temperaturade horneado.
• 'DELAY'seapagar_.
• 'BAKE'y'HOLD'permanecer_nihminados.
Para canceiar:
Eltiempo diferidopuedeprogramarsede 10minutos(00:10]hasta
11bores,59minutos{11:59}.
Para programar un ciclo de cocci6n y mantener
caliente diferido:
1. Oprima[astechs 'Bake' (Horneado}y 'Timer'
(Temporizado0al mismotiempo.
o 'DELAY'se iiuminaen el indicadorvisual.
o '00:00'sedespiiegaen el indicadorvisual
2. Optima[atecla A o V pare pregramar el dempe
diferide,
3. Oprima[atecia 'Cook & Bomd'.
o '000'se iluminaen e! indicadorvisual
-- Bake
-- Timer
z
Optimala tecIa'Cancel'.
• Todas[asfuncionesde homeadocontroladasono pot e[
temporizadorser_ncanceladas.
• Lahora deIdia voiver_a despiegarseen eI indicadorvisual.
Notas:
No use 'Delay Bake' para articulos que requieren un
homo precaientado, tales como pasteies, gailetas y panes=
No use 'Delay Bake' si e[ homo ya est_ caiiente,
-- Timer
o 'BAKE'y 'HOLD'desteilan.
4. Optima_kpara programar la temperature de
hemeade.
o 00:00y'HOLD'desteflan.
o 'BAKE'permaneceihminado.
5. OptimaA para programar el dempo de hemeade,
o Ene[ indicadorvisualseiluminan 'DELAY','BAKE',y
'HOLD'.
Cook&
Hold
61
Page 63

'Keep Warm' (Mantener Caiiente)
Paramantenercalientesenformasegura alimentosca[ienteso para
calentarpanesy plates+
Para pregramar 'Keep Warm':
1. Oprimalatecla 'Keep Warm'. Kesp
o 'WARM'(Catiente]destella.
o '000'se desptiegaenel indicadorvisual
2. SeteccioneIatemperaturade 'KeepWarm'.Latemperaturapara
'KeepWarm'puedeser programadade63°a 90° C
(145°a 190° F].Optimau optimay mantenga
oprimidaIa tectaA o V.
o Cuandocuatquieradeestasdosteclasse
oprimeper primeravez,'75°' ('170°'] se
i[upainar&
o Optima[atecla A para aumentar[atemperatura.
o Optima[atecla V para disminuirla temperatura.
'WARM'y Iatemperaturase despIegar_nen el indicadorcuando
el ciclo'KeepWarm'est6active.
Para cancelar 'Keep Warm':
WaPm
Notas sobre 'Keep Warm':
+ Paracalidad6ptima de losaIimentos,losalimentoscoc[nados
en el homo debenser mantenkJosca[ientes[)or no m_sde 1 a
2 betas+
o Paraevitar que losaHmentossesequen,c0bralos[evemente
con papelde ahminio o unatapa.
o Para eaientar paneeiiios:
- cubra [evementelos paneci[Iosconpape[de a[uminioy
coIOque[osen e[ homo+
- oprima'KeepWarm' y [atec[aA paraprogramar
75° C [170° F].
- calientedurante 12a 15minutes+
o Para ealentar plates:
- co[oque 2 pi[as de cuatro plates carla una en e[ homo+
- optima 'Keep Warm' y [a tec[a A para programar
75° C [170° F].
- caliente los pIatos durante cinco minutos, apague el homo y
deje los pIatos en el horno durante 15 minutos m_s.
- use soiamente pIatos resistentes aI homo, verifique con e[
fablicante.
1+ Oprima[atecla'Cancel' [Cance[ar]+
2+ Retiree[a[imentode[homo+
- noco[oquelos platescalientessobreuna superficiefffa
puese[ cambiorSpidode temperaturapuedecausarfisuras
superficiaies.
62
Page 64

@
'Broiling' (Asar a la Pardlla)
TengaCUUDADOcuandococmecon la funciOn'Broil'. La gmsa
provenientede losa+imentosgrasosse pueaeencenaer.Si
ocurre un +ncendio.cierre la puerto del homo y APAGUELB. Siel
tuego no se apaga,NO werta agussoure el fuego. Use
bicarbonatode sodio. Jn qdm+cosecoo un extintor deincendlos
para apagarlos Hamas.
Para programar 'Broim':
1+ Paracomenzar+oprima[a tecia'Broil', Broil
, 'BROHL'desteiIa+
, 'SEt'(staMacer)sedesptiegaenel indicador+
2+ OprimaIatectaA paraprogramarasara Ia parriiIa'HH'[Aito)
optima tatecta V para programarasarla parriila 'LO'[Bajo)+
, Enel indicadorvisualse desplegar_'HI' o 'LO'+
, Selecciones'HIbroiI' (290°C [550°F]) paraasadoaIapardlla
normal Seieccione'LObroir [230°C[450°F])paraasara la
pardllacontemperaturabaja aIimentosque debenset
cocinadospor rodstiempo,tal como la camede ave+
3+ Despu6sde cuatrosegundos,elhornocomenzaraa funcionar+
, 'BROIL'continuar_iluminado.
4. Paraun dorado6ptimo,precaiienteel elementode asara la
parriiia durante3 a 4 minutosantesde colocareIalimento.
5. Coloqueel alimentoen el horno. Deje Iapuerto abierta
aproximadamente10cm (cuatropulgadas)(elprimer tope).
6. D6wJeltaa lacame unavezaproximadamenteamitaddela
cocci0n.
7. Cuandoel aiimentoest6cocinado,oprima latecla _._,)
'Cancel' [CanceIar).Retireel alimentoy la asadera
del horno.
+ Lahoradeld[avolver_a desplegarseen el
indicadorvisual
Notas Sobre Asado a Ua£arriHa:
+ ParamejoresresuItadoscuando asea la parrilla, useuna asadera
dise_adaparaasar a la parrilla.
+ Lostiemposdeasara la parrillaaumentar_nyeIdoradoser_
m_sclarosi el electrodom6sticoesinstaladoen un circuito de
208voltios.
+ 'HI' seusapara[amayoriadelosasadosa [aparriiia. Use'LO
broil'cuandoasea [aparriiiaaiimentosque necesitancocci0n
proiongada+Latemperaturainferiorpermitequeelalimentose
cocine hastaquedarbienasadosin dorarsedemasiado+
+ Pamcamfliar/atemperaturade/flomodurantelaasara/a
parriHa, oprimaIatecla 'Broil',IuegooprimaJateclaA o V para
cambiarel ajustede asadoentre 'LO'y 'HI'+
+ Lostiemposdeasadoa Iaparrillapuedenser m_sIargoscuando
seseleccionalatemperaturam_sbajade asar a Iaparrilla+
+ Lamayor[ade Iosa+imentosdebensel dadovueltacuandoest_
mitadde!tiempode asar+
•Para sugerenciasy temperaturasadicionalessobreasara la
parrilla,consulteel foIleto"La CocinaF_cil"+
TabOo de Asar a ParriHa
TERMIND DE i TIEMPOTOTAL DE
AUNENTOS LA PARRILLA+
Came de Bns Biftec,2,5cm[1") 4 A medioasar
4 Bienasado
Hamburguesas,1,9cm (3/4")de grosor 4 Bienasado
Came de Cerdo Tocino 4 Bienasado
Chuletas,2,5cm (1") 4 Bienasado
JamOn- Rebanadasprecocidas, 4 Tibio
1,3cm {1/2")degrosor
Came de Ave Presasde pollo 3 o 4 Bienasado
lViariscos Bistecsde pescado,conmantequi[[a, 4 Desmenuzado
2,5cm [1") degrosor
Filetesdepescado,1,3cm (1/2")degrosor 4 Desmenuzado
Laposici6nde la parrillasuperiores #5.
Nota: Estatabla es s01ounaguFa.Lostiempospuedenvariarconel tipo dealimentoqueseest_cocinando.
63
COCCION COCCION (MINUTOS)
15 - 18 minutos
19 - 23 minutos
15 - 18 minutos
6 - 10 minutos
22 - 26 minutos
8 - 12 minutos
'LO Broir
28 - 38 minutos
10 - 15 minutos
8 - 12 minutos
Page 65

@
Cierre Aute tice/
Mede Sab tiee
Ethornose apagar_autom_iticamentedespu@de 12horassi ustedIo
deiaaccidentalmenteencendido. Estacaracteristicadeseguridad
puedeserdesactivada.
Para eaneemar emeierre autem_tiee de 12 betas y
dejar que el home funcione centinuamente durante
72 horas:
1. Programee! homoparahomear (verp%ina 60}.
2. OprJmay mantengaoprimida Iatecla CJeck
'Clock' (Reloj}durantecinco segundos.
o 'SAb'se desplegar_ydestellar_durantecinco segundos.
o 'SAb'se desplegar_continuamentehastaquese desactiveo
hastaque transcurrael limite de 72betas.
o 'BAKE'(Horneado}tambi@ sedesplegar_si seest_usandoun
ciclode horneadocuandoel borneestaen Mode Sab_tbo.
o Lafuncidn 'BAKE'esla@ieaquesepuedeutitizarcone/mode
sab@'eo.Lasderailsfunciones(temporizador,mantenercaMnte,
autofimpieza,etc.) seb/oquearbnduranted modesab@'co.
Para canceiar 'Bake' cuando el Modo Sab_tico
est_ activo:
Notas Sobre el Mode Sab tico:
• ElModoSab_ticopuedeser activadoen cualquier momento,
est6o no ei homoencendido.
• EIMode Sabaiticonopuedeseractivadosi lasteciasest_n
bloqueadasocuando la puertaestd bloqueada.
• Siel homoest8homeandocuandoel Mode Sab_ticoes
programatic,'BAKE'se apagar_al finaldel ciclo de homeado.
Nose emitirdnseSalessonoras.
Sise@sealaluzdel bornedurante etMode Sab_tico,@ta
debeserencendidaantesde que comienceel Mode Sab_tico.
Cuandocomienzael ModeSab_tico,no seemitir_ [ase_a[
sonorade precaientamiento.
Cuandoe[ ModeSab_ticoest_active,todos [osavisos,
mensajesy se_aiessonorasest_ndesactivadas.
Elbloqueoautom_ticode lapuertano funcionadurante el
ModeSab_tico.
Sioprimelatecla 'Cancel' secancelardun ciclo 'Bake',sin
embargoeI control permanecerdenMode Sabdtico.
SifalIaIacorrienteeI@trica,cuandovuelvalaenerg[aei borne
seactivar8en ModeSab_ticocon 72 betasrestantesy ning_n
ciclo actiw_.
Oprimala tecia 'Cancel' (Cancela0.
o 'BAKE'seapagar_en el indicadorvisual
o Nose oir8 ningunasei_alsonora.
Para canceiar el IViede Sab_tico:
1. Oprimalatecla 'Clock' durantecinco segundos...............
O
2. Despu@de 72horas,el Mode SabSticoterminar&
o 'SAb'destellar_durante cincosegundos.
o Lahera deldia reaparecer_en el indicadorvisual
64
Page 66

Ajuste de [a te peratura
de[ homo
La exactitudde [asternperaturas(Jethornoescuidadosamente
probadaen [af_brica. Esnormal notaralgunadiferenciaentre [a
temperaturade horneado, entreun borne nuevoy un homo antigua.
Cone[ correrde[ tiempo,[atemperaturade[homo puedecambiar.
Ustedpuedeajustar[a temperaturade[ homo,si consideraquesu
homo noest_ horneandoo dorandoenfarina correcta. Paradecidir
cuantodebecambiar[atemperatura,programelatemperaturade[
homo a 15°C_25° F}m_saIta o rossbaiaqua latemperatura
indicadaen sus recetas,luegohornee. LosresuItadosde[a
"prueba"puedendarleuna ideade cuantoajustar[atemperatura.
Ajuste de [a temperatura de[ homo:
1. Oprima[atecia 'Bake' [Horneado). Bake
2. Programe550°opdmiendo[atecIa,A.
3. Oprimay mantengaoprimida[a tecIa'Bake'
durantevariessegundoso hastaque0°
aparezcaen el indicadorvisual
S[latemperaturadot borneha side previamenteajustada,el
cambio aparecer_enel indicadorvisual. Perejemplo,si la
temperaturadel hornorue reducidaen 8°C {15° F}el indicador
mostrar_'- 8°'('-15°'}.
4. Oprima[atecla ,A o V para a}ustar[atemperatura.
Carlavezque se oprimeuna tecla, [atemperaturacambiaen
3° C {5° F}. Latemperaturade[ borne puedeseraumentadao
disminuidaen 3° a 20°C[5° a 35°F}.
5. Laheradel d[areaparecer_autom_ticamenteen el indicador
visual
Nonecesitareajustarlatemperaturadel homos[ hayuna falIao
interrupciOndeenerg[ael6ctdca. Lastemperaturasde asarala
parriIiay limpiezano puedenser ajustadas.
Cambio de [a temperatura
de °F/°C
1_ EIaiustedef_brica de [a medidadetemperaturaesFahrenheit_
2. Paracambiarel ajuste,oprimay mantengaoprimidaslasteclas
'Cancel' {CanceIa0y'Bake' al mismotiempodurante tres
segundos.
3. Escuchar_unaseffalsonorayelajusteactual(°Fo°C}se
despiegar_enla pantaIla.{Sino sereaIizaningOncambio,la
estufaregresar_al ajusteactualdespu6sde 30 segundos}.
4. Paracambiarel ajuste,oprimala tecla ,A o V. Opr[maIa
nuevamentepara regresaralajusteanterior.Esperecinco
segundosy el aiusteseguardar&
'Favorite' (Favorite}
Latecia 'Favorite'le permiteguardaren memoriae[tiempoy [a
temperaturadeun cic[o 'Cook& Hold' {CocciOny Mantener
Caiiente}.
Paraprogramarun cicio favorite,debeestaractivao recientemente
programadaunafunciOnde 'Cook& Hold'.
Para programar un nuevo cicio Favorite o para
guardar come Favorite un cido 'Cook & Herod'qua
est_ en progreso:
1. Programeunciclo de 'Cook& Hold'comesedescribeen [a
secciOn'Cook& HoWen [ap_gina60.
2. Optimay mantengaoprimida[a tecia'Favorite' Favorite
durantetressegundos.
• Elciclo'Cook& Hold'recientementeprogramatico en
progresoser_ guardadoen memoria.
, Seoir_ unaserialsonorapara indicarque el control ha
aceptadoel ajuste'Favorite'.
Para comenzar un cicio programatic come Favorite:
1. Optima [atecia 'Favorite' (Favorito_}.
• Sedesplegar_e[tiempoy [a temperaturapara Favorite
el ciclo 'Cook& HoW programado(sino hay
ciclo 'Cook&Hoid' programatic,en el indicador
visualsedesplegara'nonE'.} Bake
2. Optima [atecla 'Bake'.
• Elcic[o Favoritecomenzar4inmediatamente.
• 'BAKE'seiJuminar4en el indicadorvisual
• Eltiernpode cocci6nse iJuminar4ene[ indicadorvisual
Cuando ha expirado e[ tiempo de cocci6n:
• 'BAKE'seapagarZ
• Seiiuminar_n'HOLD'(Mantener}y'WARM'(CaIiente}.
o Ene[ indicadorsedespIegar_'75°' {'170°'}.
Para cance[ar un cic[o favorite en progreso:
1. Oprima [atecia 'Cancel',
• Elciclofavorite guardadoen memoriano
ser_afectado.
2. Retireel aIimentodel homo.
65
Page 67

Venti[ador de[ homo
ElventHadorde enfriamientoseencender_autom_ticamentedurante
[as asadosa [aparriliay aigunasfuncionesde horneado+Seusa
para mantenerfr[as[aspiezasinternasde[ pane+decontrol E[
ventiiadorseapagar_autom_ticamentecuando[aspiezassehayan
enfdado+Elventiiadorpuedecontinuaroperandoa_n despu6sque
sehayaapagadoel homo+Estoes normal+
Respiradero de[ Homo
Cuandoe[ hornoest_ enuso,e[_reacercade[ respiraderopuede
caIentarse1osuficientecomoparacausarquemaduras+Nunca
bloquee[aaberturadel respiradero+
Emrespiradero demhomo est_ ubicado en maparte trasera de
masupedinie de conci6n.
RESPIRADERO DEL HORNO
Para retirar [a parriHa:
1. Tire de [aparr[Haderechohacia
afuerahastaquese detengaen
[apos[ci6ndettope de enganche.
2+ Levantee[ frente de [aparriHay
tire de [a parri[lahaciaafuera+
Para reinstalar maparrilla:
1+Co[oque[apardIIaen lossoportesde [aparriIIaene[homo+
2+ Incline[evementehaciaarriba el extremodelantero;deslice[a
parri[lahaciaatr_s hastaque pasesobre lostopesde enganche+
3+ Bajeelfrentede[aparriIIaydesIicelahaciaadentrode[homo+
No nubra una parHlla compmetacoil pape[ de atom+toom
nomoquepapel de alum+n+oen el panel inferiordemhomo° Se
afectar_n los resultados de[ homeado y se puede daffar el
panel inferior demhomo,
Nocoloque pI_sticos
cema de la abertura
del respiradempues
el caiorquesale
puededeformaro
derretir el pI_stico.
Oprimael interruptorde [a luzdel homo en e!pane[
'Oven Light' (Luz del Homo} _[}
de control paraencendery apagarla luzdel homo+La
luzdel horno s6Iose puedeencenderusandoel
interruptor+ Oven
Mgh_
Pane[ inferior de[ Homo
Protejae[pane!inferior de[ homo contraderrames,especia[mente
azucaradosoadd[cos,pues puedendescoiorarla porceIana
esmaitada.Useel utensiIiode tamaffocorrectoa fin de evitar
derrames.No coloque utensilios ni papel de aluminio
direntamente en ia parte inferiordei homo°
Parri[[as del Homo
Posiciones de [a Parrilla
PgRR[LLA 5: Useparatostar
pan,asara[imentosde[gados
no grasos+ 5
PARR[LLA4: Usepara[a +
mayoriade losasados+
PARRmLLA3: Usepara[a
mayoffade losaiimentos
horneadosenbandejaspara
gaiIetaso parapaneciiios,
tortasde capas,aiimentosde convenienciaconge[ados,horneadoen
genera[con unaparriIIa+
PARRILLA2: Useparatortas,pasteIitos,pasteIes,cacero[as,asados
pequei_osde came+
PARRmLLA1: Useparapaste[itos,tortasde 9" x 13"(22,86cmx
33,02cm),paste[esy asadode cortesgrandesde camey polio+
HORNEADOCONPARR&LAS MULT+PLES:
Dos parrillas: Use[aposiciOn2y 5,o 1y 4+
Notas: Nuncaco[oqueutensi[iosdirectamenteen e[fondo de[
homo+
, No[ntentecambiar[apos+ci6ndeiasparri[iasCuandoe[homo
"No use el homoparaguardaraliraentosrfiutens+!!0S,
Elhornotiene dos parriIias+Todas[asparrii[astienen un bordecon
topede enganche+
Homeado de Paste[es de Capas en
Dos Parr+Has
Paraobtenermejoresresu[tados
cuandohorneapastelesendos
parriIIas,use[a posici6n2y 5.
Co[oquelospasteIesen[as
parriIIascomose muestra.
66
Page 68

Homo Autolimpiante
, Esnormatque ias plezasde[homo secatlentenduranteel ciclo
de autolimpleza.
, Pareevitarda_oala puer[a,no intenteabrir+acuando lapalabra
'LOCK'(Bioqueado]est6desplegadaen el indicadorv+sual.
. Evitetocar [a 3uerta.iaventanao e+areadel resDraderode!
homoduranteun ciclode limp+eza.
, Nouse limgiadoresde homoscomercialesen el acabadodel
homonLa+rededorde ningunaDezade+homo puespueae
daffar elacabadoo las p_ezas.
E ciclo de autolimaiezausa{em,:)era[urasue cocc_onsLpenoresa as
normaiesparaIimpiarautom_ticamentetodo el interiorde nomo
Esnorma jJe ocurran amaradas,humo o llamasdurantelalin,oleza
si el homo estddemasiadosucio.EsmejorIimpiarel homo
regularmenteen vezdeesperarhastaque se hayaacumulado
demasiadasuciedad.
Duranteel procesode Iimpieza,Iacocinadebeester bienventilada
pare eliminarlos oloresnormalesasociadosconla limpieza.
Antes de ia Autoiimpieza
1. Apagueia luz del hornoantesde la iimpieza.Lahz del homo
puedefundirseduranteel ciclo de limpieza.
2. Retiretodos losutensiliosy ias parriliasdel homo+Lasparriilas
del hornosedescolorar_ny no sedeslizar_nfdciimentedespu6s
de un cicio deautolimpiezasi no sonretiradasdel homo+
3. Limpieel marcode! homo,e!marcode la puerta,el areafuera de
lajunta de la puertay alrededorde laabertura en lajunta de la
puerta,con un agentede limpiezanoabrasivotal como 'Bon
Ami'+ocon detergentey agua.Elprocesode autoiimpiezano
limpiaestasareas+Eliasdebenseriimpiadaspareevitarque ia
suciedadsehorneedurante el ciciode autoiimpieza. (Lajunta es
el seIIoalrededorde la puertay ventanadel homo+]
4. Pareevitardaffo no limpieni frote la
junta situadaalrededorde lapuerta del \,
horno.Lajunta est_dise_adapare
sellarherm6ticamenteel calordurante
el ciclo de limpieza.
5. Limpieelexcesode grasao derrames
de la parteinferior dethorno. Esto
evitahumoexcesivooIlamaradasduranteel ciclode limpieza.
6. Limpielos derramesazucaradoso aicidostales comopapadulce
(camote],tomateso salsasa basede Ieche.Laporcelana
esmaitadaesresistenteal dcidoperono a pruebade _cidos. El
acabadode porcetanapuededescolorarsesi losderramesdcidos
o azucaradosnoson limpiadosantesde un ciclo deautolimpieza.
Pare pregramar 'Self-Clean' (Autolimpieza):
Note: Latemperaturadel homo debeser inferiora 205° C
(400° F]para programaruncicio delimpieza.
1. Cierrela puertadel horno.
2. Mueva lapalancade bloqueode la puertaa[a derechaa [a
posiciOnbloqueada.
Clean
3. Oprimalatecla 'Clean' (Limpieza].
+ 'CLEAN'destellaen el indicadorvisual.
4. Optima [atecia ,& o _'.
• Sedespliega'NEd' (SuciedadMediana,
3 horas].
Si la puertanose cierra,seoird unaseiial sonoray Iapalabra
'door'se desplegardenel indicador visual. Si la puerta noes
cerradadentro de 45segundos,IaoperaciOnde autolimpieza
ser_cancehday el indicadorvolverda desplegarIahoradel dia.
5. Oprima latech ,& o V para desphzarlos ajustesde
autolimpieza.
+ 'HVy'(SuciedadIntense,4horas]
+ 'MEd'(SuciedadMediana,3 horas)
• 'LifE' [SuciedadLeve,2 horas]
A!seleccionare!nivetde suciedaddel hornose programa
autom_ticamenteel tiempode [impieza.
6. Despu6sde cuatro segundos,el homocomenzar_a Iimpian
+ Eltiempode limpiezacomenzar_lacuenta regresivaen el
indicadon
° 'LOCK'se desplegar_enel indicadorvisual.
• 'CLEAN'sedesplegardenelindicadorvisual
Para diferir un title de autolimpieza:
1. Optima [astecias 'Clean' y 'Timer'
• 'DELAY'(Diferido)y '00:00'sedespJegar_
0-emporizado0. [
en el indicadorvisual+
2. Oprima latecla ,& o 'V' pare programarIa
cantidadde tiempoque usteddeseadiferir el
cic[o. El tiempo difeddo puede ser programado desde 10 minutos
{00:10} hasta 11 bores, 59 minutos (11:59].
3.
Oprima [atech 'Clean'.
• 'CLEAN' destellar&
-- Clean
Timer
cont.
*Loshombresde losproductosson marcasregistradasdesus respectivosfabricantes.
67
Page 69

4. Oprima[atecia A o V.
o 'MEd' CSuciedadMediana,3 horas)se despliegaen e]
indicador.
5. Oprima[atecla A o V para desplazarlosajustesde
autolimpieza.
o 'HVy'(Suciedad]ntensa,4 horas)
o 'MEd' [SuciedadMediana,3 betas)
o 'LifE' (SuciedadLeve,2horas)
A[ seleccionarel hive[de suciedadde[homo seprograma
autom_ticamenteel tiempo de [impieza.
6. Despu6sdecuatrosegundos,'CLEAN'(Limpieza),
'DELAY'(Diferido)y 'LOCK'(Btoqueado)se desplegar_nenel
indicadorvisualpara indicarque el homo est_programaticpara
un ciclo de limpiezadiferido.Eltiempodifendotambiense
despliegaen e[ indicadorvisual
Si el homo ya ha side programado para un cicmede
[impieza y usted desea programar un tiempo
diferido:
1. Oprima[astec[as'Oiean'y'Timet" [ Ole+_
[,ira;;
o 'DELAY'desteiJa.
o 00:00sedespIegar_en el indicador
visual
2. Oprimalatecla & o V para pmgramar[a cantidaddetiempo
que usteddeseadiferir el ciclo.
Despu6sdecuatrosegundos,'CLEAN','DELAY'y 'LOCK'se
desplegar_nene! indicadorvisualparaindicar que el hornoest_
programaticpara unacic[o de limpiezadiferido.EItiempo
diferidotambi6n sedespIiegaen el indicadorvisual.
Cuando comienza el tide de autolimpieza:
o 'DELAY'seapagar&
o Eitiempo de limpiezasedespiegar_en e!indicadorvisual
Para canceiar e[ cicio de autoiimpieza:
Oprima[a tecia 'Cance[' (Cance[ar).
o Eiindicadorvisua[quedaen bianco.
o Todas]asfuncionesson canceladas.
o Lahera de[d[a sedespiiegaen el indicadorvisual.
Durante e[ c+c[o de auto[impieza
Cuandoaparece'LOCK'enet indicador,[a puertano se puedeabdr.
Paraevitardatioa [a puerta,no fuerce [apuertapara abrirlacuando
[apaIabra'LOCK'est_desp[egadaen e[indicadorvisual.
Humo y Omores
Ustedpuedever humoy sentir olor lasprimerasvecesque el horno
eslimpiado. Estoes normaly disminuir_conet tiempo.
Tambi_npuedeocurrir humosi e[ borneestademasiadosucioo s[
seha dejadounaasaderaen el homo.
Sonidos
A medidaque e[ horno secaiienta,usted puedeoff sonidosde
piezasmetd[icasquese expandeny contraen. Estoes normaly no
datiar_e[ homo,
[:)espu s de[ cic[o de
auto[impieza
Aproximadamenteunahera despu6sdelfin de] ciclo de limpieza,
'LOCK'desaparecerai.Lapuertaahorapuedeserabierta.Muevala
paIancade bloqueode la puertaa la izquierdapara desbioquearla.
Aiguna suciedad peede quedar come una ieve ceniza gris ripe
poivo. Retffelaconunpatio h_medo. Si [asuciedadpermanece
despuesde limpiarla,significaque el cic[ode [impiezanofue Io
suficientementelargo. Lasuciedadser_eIiminadaduranteel
pr6ximociclo de limpieza.
Siiasparrillasdeihomofueron dejadasenel homo ynose
desmizansuavemente despu_s de un cicio de mimpieza,[impie
lasparrilIasy lossoportesde lasparriiias conuna pequetiacantidad
de aceitevegetalpara hacerdeslizarlascon m_sfacflidad.
Pueden aparecer m+neasdemgadasen maporcemanaampasar per
cities de camentamientoy enfriamiento. Estoesnormaly no
afectarde[ rendimiento.
Una descomoracitn blanca puede aparener despuSs demcinio
de mimpiezasi mosamimentos_cidos o zunarados no fueren
mimpiadosantes demniclo de automimpieza.Estadesco[oracidnes
norma[y no afectar_el rendimiento.
o Si sedejaabierta [apuertade[ horno,[apalabra'door'
destellar_ene[ indicadorvisua[y seescuchar_una serial
sonorahastaque [apuertaseacerraday [atecia'Clean'sea
oprimidanuevamente.
o Si transcurrenm_sde cincosegundosdespu6sde oprimir [a
tecia 'Cmean'yantesdeoprimir [astec[asA o V, elpmgrama
voiver8automdticamentea[despiiegueprev[o.
o Lapuertade[ hornosedatiard sise fuerzaparaabriria cuando
[apa[abra'LOCK'continua desp[egadaene[ indicador.
68
Page 70

Procedi ientos de Li pieza
PIEZA PROCED_MIENTO DE UMP_EZA
Cnbie_a = Laporcelanaesmaltsdaes vidiiofundidoenmetalypuedeagrietarseopicarsesinoseusaCOiTectamente=Esiesistentea
los_cidos,noapruebsde_cidos=Todoslosderrsmes,especislmentelosderrsmesszucsradoso acidicosdebensetlimpiados
esmaltada inmedistamenteconun pasoseco=
• Cuandoseenfr[e,laveconsguajsbonoss,enjusgueyseque=
• Nuncslimpieunasuperficietibiao cslienteconun paiioh0medo=Estopuedecsussragrietsmientoopicadurss=
, Nuncsuselimpiadoresdehomo,sgentesdelimpiezaabrasivosoc_usticosen el acabsdoexteriorde laestufa=
Area del Relnjy , ParsbIoquearde los controIesparsIs limpiezs,ver 'BIoqueodeIosControles'enp_gina59=
de lasTeelas ° Limpieconun paiioht_medoy secar=Nouseagentesdelimpiezaabrasivespuespuedenrayarlasupedicie=
de Cnntrnl ° Sepuedeussrlimpisviddossiseredanenelpaiioprimero=NOrecie directamente eadpaneL
Perillasde , Retirelasperillsscuandoestenenlaposici0n'OFF'(Apagsdo)tir_ndolashaciaadelante=
Control , Lave,enjuaguey seque.Nouseagentesdelimpiezaabrasivospuespuedenrsysrelacsbado.
, Enciendscadsquemadorpars asegurarsedeque lasperillashartsidocorrectamentereinstslsdas.
Cnbierta = Nunca usefimpiaderes dehomo, blanqueadercelt dote, amoniace etimpiaderes de vidriequecentenga
Vidrin ameniace.Nets: Uame alm repamder auterizade si la cubiertade vidde cer_mice se agdeta, quiebm eelpape]
Cer_mico de alumirde sedetHtesabre la cubiertao
° DejequeIscnbie!_aseenfr(eantesdelimpiarls=
° Generalidades- Limpielacubiertadespu6sdecadsusoo cusndoseanecesarioconunatoallsde paps!hOmedaycon
'CooktopCleaningCreme'_(Cremade LimpiezaparsCubiertss}[PiezsNo.20000001}**.Lustrecon un psiiolimpioyseco.
Nets: Sedesarrottardnmanchaspermanentessita suciedadse dejasuese coeineunay otravezusandob cubiertacuando
est#sucia.
, Manehas Rebeides n Marcas de Metal =Humedezcaunaesponjsdegomaquenodejemarcsso queno raye.
Aplique'CooktopCleaningCream_(_iezsno=20000001__ y froteparssscartantssuciedadcomoseaposible=Apliqueuna
capsdelgadadecremasobreIssuciedad,cubraconunatoallsdepapelh0medsy d_jelareposardursnte30 s45minutos
(2- 3 horssparsmuchasuciedad)=Msntengsh0medocubdendolatoalladepapelconenvoltursdep!_stico=Restriegue
nuevsmente,kJegolimpieconunpaiiosecoy limpio=
Nets: SobmenteuseesponjasL/MPIAS,HUMEDASysue norayenySUBseansesuraspars utensZ/}bsconacabado
antiad,_erente,edaflar_d disefloy d vidriod b esponjano est_mojada,sita esponjaest_suciaoseusaotto t_o deesponja.
° Sneie_adesQnemadasoPesadas=Restriegueconunaesponjaquenodejemarcasy'CooktopCleaningCreme'*.
Nets: Sostensaunt_stresadorconhojade..afeitara un_ndu/ode30°yrestn;eduecua/suiersueiedadquepermanezca.Luego
tTmp,,ecomosodeso_;.bi5anten;otTnente.No useb hojadeal_,itarpars fimpiezadiariapunspuededesgastard
diseflode/vidrio. __
° Pi_sticonAzecar Derretida=InmedistamenteenciendselelementoatemperstursBAJAyrestriegue
y raspeel azOcaro e!p!_sticodeIssuperficiecalientehaciaun_resif[s=LuegoAPAGUEel
elementoy dejequeseenfrfe=Limpieel residuoconunraspadorconhojsde afeitary 'Cooktop
C,esn ngC,eme", .....,,,,;, ;
69
Page 71

PJEZA I PROCED[_,_[ENTO DE LIMP_EZA
• Eviteusarcantidadesexcesivasdeaguapuespuedeescungsedebajoodetr_sdelvidriocausandomanchas.
del Homo - Vidrio . Laveconaguayjab6n.Enjuagueconagualimpiayseque.E!limpiadordevidriopuedeusarsesiseroc{aenunpaNoprimero.
,. Nousematerialesabrasivostalescomoesponjasderestregar,limpiadoresenpolvooesponjasdelanadeaceropuespueden
rayarelvidfio.
Interior del Home • Sigalasinstmccionesenlasp_ginas67-68paraprogramarun ciclodeautolimpieza.
Parrillasdel • Limpiarconaguaconjab0n.
Hemo ,. Sacarhs manchasdiffcilesconpoivode limpiezaounaesponjaIlenaconjab6n. Enjuagueyseque.
,. Lasparrillassedescolorar_npermanentementey puedennodeslizarsecon suavidadsisondejadasene!homodurante
unciclode autolimpieza.Siestosucede,IJmpJela parrillay lossopoltesen relieveconunapequefiacantidaddeaceite
vegetalpararestaurarlafacilidadde movimiento,luegolimpieelexcesode aceite.
Acere JnexidabJe
[modelosselectos]
j. NO USENINOUNPRODUCTODELIMPIEZA QUECONTENGABLANQUEADORA BASEDECLORO.
, NO USEMMPIADORES"ORANGE"NI LIMPIADORESABBASIVOS.
,. StEMPRELIMPIELASSUPERFICIESDEACEROA FAVORDELGRANOo
,. Limpieza Diaria/Suciedad Leve- Limpieconunode lossiguientes- aguacon]ab0n,unasoluci0ndevinagrebhnco
conagua,limpiadorparasuperficiesy vidfio'Formula409'*ounlimpiavidriossimilar- usandounaesponjao unpai_o
suave.Enjuagueyseque.Parapuliry evitarmamasde losdedos,useel producto'StainlessSteelMagicSpray'*
(PiezaNo.2OOOOOO8]_t
,. Suciedad Moderada/Intensa - Limpiecon unodelossiguientes- 'BonAmi'*,'SmartCleanser'*o 'SoftScrub"- usando
unaesponjah0medaounpaNosuave.Enjuagueyseque.Lasmanchasdificilespuedensetquitadasconunaesponja
multi-uso'Scotch-Brite'_h0raeda;frote afavordel grano.Enjuaguey seque.Pararestaurarellustreysacarlasvetas,
aplique'StainlessSteelMagicSpray'*.
,° Descoloraci6n - Useunaesponjamojadao unpatiosuave,limpieconlimpiadorde acero'CameoStainlessSteel
Cleaner'*.Enjuagueinmediatamentey seque.Paraeliminarlasestrfasy restaurarel lustre,usedespu_srociadorparaacero
inoxidable'StainlessSteelMagicSpray't
Gaveta de
• Cuandoest6if[a, laveconaguatibiajabonosa,enjuaguey seque.Nuncalimpieunasuperficietibiaocalientecon unpatio
h0medopuesestopuededaiiarlasuperficiey causarunaquemaduraa causadelvapor.
Manija de Ja
Puerta -
EsmaJte Pintado
. Paramanchasrebeldes,useagentesdelimpiezalevementeabrasivestal comopastadebicarbo_mtoo 'BonAmi't No use
agentesdelimpiezaabrasivos,c_usticoso_sperostal comoesponjasde lanadeaceroolimpiadoresdehornos.Estos
productospuedenrayarodafiarpermanentementelasuperficie.
NOTA:UseuI_ateaHao unpahe secepara limpiar ;es derrames, espedalmeltte ;es derrames ac[dJcese
azucarados.La superficie se puede descetet_areperder el bri;;esi el derrame riose;impia hlmediatamente.Este
esespecialme#_teimpertaltte en ;assuperfides b;a#caso
*Los numbresde Iosproductosson marcasregistradasde susrespectivosfabdcantes.
** Parahacerpedidos,Ilameal 1-877-232-6771[EUU. o 1-800-688-8408Canada.
70
Page 72

Puerta del Homo Luz del Homo
(EJestilovariasegQn eJmodeJo
o No co_oquepesoexces_vonl se pareen la puer[adel homo
Estopodr[ahacervolcar laestufa quebrarla puerta o lesLonar
al usuano.
° No intenteabdrocerrar lapueita ni hacerfuncionareLhomo
hastaque la puertono hasido debidamentereempiazada,
o Nunca co_oquelosdedosentrelabisagray elmarcodeiantero
del horno. Los brazosdearticulac_0nson montadosa resor[e.
Si segelpeaaccidentalmentela bisagrase cerrala
bruscamentecontra el marcode!homo y pueoelesionarsus
aedos.
Para $8c8r:
1.Cuandoest6fria, abrala puertodel horno hastaIa posiciOntope
de asara Iaparriila [abiertaaproximadamente10cm (euatro
pulgadas)]=
2=SujeteIapuerto de codalado=Nousela
mani}ade la puerto paralevantarla=
3.Levanteuniformementehastaque la puerto
sesalga de losbrazosdearticulaciOn.
Para vomvera comocar:
1.Sujete[apuerta de codalade.
2.Alinee los ranurasde lapuerto con los b_azosdearticulaciOnde la
estufa.
3=Deslice lapuertohacia losbrazosde articulaciOnhastaque est6
completamenteasentadaenIasbisagras=Empujehaciaabaiolos
esquinassuperioresde la puertoparaasentariacompletamenteen
losbisagras=Lapuertonodebequedartorcida=
i Desconectelaenergiaei6ctdca hacialaestufa antesde
reemplazarei focol
, Deje que e!homo seenfr[eantesde reemp!azarel foco.
+ AsegOresedeque lacubiertade! foc0 y e
Tomillos Niveladores Gaveta de Al acena iento
YerifiquesielsoPo[teantivue!coest_aseguFandoalPiSOunode
los tornillos niveladorestraseros. Estesoporteevitaque]a estufa
Sevue!queaccidentalrnente_
La estufadebeset niveladacuandose insta[a.Si [a #_
estufano est_nivelada,girelos torniHoshive[adores J _
ubicadosen cadaesquinade la estufahastaque
quedenivelada= _,,/J
TORN/LLO N/VELADOR
No guardeproductosde papelo dep!_st!co,a]imentesn!
mater]ales infiamabiesenestagaveta, Lagavetapuede
calentarse demasiadoparaestosart[cu!oscuandoSeest,1usando
el homo.
Lagavetadealmacenamientopuedeserretirada pareque usted
puedalimpiardebajode Ia estufa=
Para sacar :
1= VacFeIagavetay deslicelahaciaafuerahastalaprimera posici6n
tope=
2= LevanteIa partedelanterade Iagaveta=
3= Tirelahastala segundaposici6ndetope.
4= SujetelosIadosylevantelagavetapararetirarla=
Para volver a colocar:
1= Insertelosextremosdelascorrederasde lagavetaen losrieles
de la estufa=
2= LevanteIa partedetanterade la gavetay suavementeempOielaa
laprimeraposici6ndetope.
3= Levantela gavetanuevamentey empOjelahastaquequede
completamentecerrada.
72
Page 74

SOLUC_ON
Parala mayor_ade los problemas, • Revisesi loscontrolesdeIhomoest_ndebidamenteaiustados.
verifiqaeprimero io sigaiente. • Verifiquesi e!enchufeestdfirmementeinsertadoeneltomacorriente.
o Verifiqueovuelvaa reponerel disyuntor.Verifiqueo reemphceel fusible.
• Verifiqueelsuministrodeenerg[ael6ctrica.
Todaia estufa o partede ella no
faneioaa.
Elreioj, ias paiabrasen el indieador
visaaiy/o iaslaces fancionan pero
emhomono seeamienta.
Los resaltados del homeado no
son (:omo se espet'aban o son
diferentes a los demhomo anterior.
Los alimentos no se asan a la
parriiia en forma debida o saien
demasiado hamoo
• Revisesi Issuperficiey/oloscontmlesdelhomoestandebidamenteajustados.Vetpaginas
55y 60.
• Verifiquesilapuertadel hornosehadesbloqueadodespu6sdelciclo deautolimpieza.Vet
p_gina68.
• Revisesielhomoestaajustadoparahorneadodiferidooprogramsdelimpieza.Vetp_ginas81
y87.
o Verifiquesi 'ControlLock'(BIoqueode Control)est_activado.Vet p_g.59.
• Verifiqaesi elcontrolest_enModoSab_tico.Verp_g.64.
• Elhornopuedeestarprogramadoparaunafunci6nde'Cook&Hold'(CocciOnyMantenerCaliente]
o unafunci6ndiferida.
• PuedeestaractivadaIacaracterFsticadebloqueode loscontrolesdelhorno.(Verp_g.60.]
• AsegOresedequeel respiraderodel hornono est6bloqaeado.Verp_gina68parslaubicaciOn.
• Verifiqueparaasegurarsede queIaestufaest_nivetada.
• LastemperaturasamenudovarFanentreun hornonuevoyano antiguo. A medidaquepasa
eltiempo,latemperaturadelhomocambiay puedehacerserosscalienteo m_sif{a. Ver
pagina65paraIasinstruccionescomoajustarIatemperaturadel horno. Neta: Nose
recomiendaaiustarla temperaturasi hatenidoproblemasconsolounao dosrecetas.
• Consulteelfolleto"LaCocinaF_ciI"paramayorinformaciOnsobrelosutensiliosde hornear.
• Verifiquelasposicionesde lasparrillasdelhorno.Elalimentopuedeestarmuycercadel
elemento.
• Elelementode asarnofue precalentado.
• Elpapeldealuminiose us6de maneraincorrecta. Nuncaforte el insertodel asadorconpapel
de aluminio.
• La puertadeI horno estabacerradamientrasseasabaa Iaparrilla. Deiela puerta abiertaen la
primeraposiciOn(alrededorde 10cm [4 palgadas]].
• Recortee!excesodegrasade la carneantesde ponerlaa asara Isparrilla.
• Seus6una asaderasucia.
• Elvoltaiedel hogarpuedeser bajo.
Emhomonoseaatomimpia.
Emhomonosemimpi6enforma
debida.
Lapaerta demhomo no se
desbmoqaeadespa6s demeiemo
• Venfiqaeparaasegurarsede queel ciclo noest6aiustadoparaun comienzodiferido.Ver
p_gina67.
• Verifiquesi lapuertaest_cerrada.
• Verifiquesi e!controlest_enModo Sab_tico.Vetpag.64.
• Elhornopuedeestara m_sde 205° C(400°F). Latemperaturadelhornodebeset inferiora
205° C(400°F)paraprogramarunciclodelimpieza.
• Puedequeseanecesariountiempodelimpiezam_slargo.
• Losderramesexcesivos,especiaimentede alimentosazucaradosy/o _cidosno fueronlimpiados
antesdelciclode autolimpieza.
• Elinteriordel homo todav[aest_catiente.Dejequepaseaproximadamenteunahorapareque
el homose enfrieantesde quese completeanciclode autolimpieza.Lapuerta puedeset
abiertacuandodesaparezcaIspalabra'LOCK'detindicadorvisual.
• Elcontroly Ispuertapaedeestarbloqueada.Verp_g.59.
73
Page 75

PROBLEMA SOLUCION
La supe_icie suave muestm
desgasteo
sejuntahumedadenmaventana
demhomoosamewpor pot
el respiradero demhomo°
Hayunomorfuerte o humo mere
cuando se enciende emhomo.
®
Abmsionesorayadumspequefias=
- Aseg_iresedeque lacubiertay[aparteinferiordelutensliioest6limpia=No desliceutensllios
devidrioo demetalatrav6sde lacublerta=AsegOresedequelaparteinferiordelutensiliono
sea_spera=Uselosagentesde[impiezarecomendados=Vet p%=69=
o Marcasde metal.
- Nodesliceutensiliosde metalatrav6sdelacubierta=Cuandoest6if[a,limpielacubiertacon
CremaparaLimpiezadeCubiertas=Vetp%=69=
o Manchasy estr[asmarrones=
- Retirelosderramesr_pidamente=Nuncalimpieconunpa_ooesponjasucia=AsegOresedeque
la cubiertay laparte inferiordelutensilioest6[impia=
o Areascon un bril[omet_Iico=
- Dep6sitosmineralesdelaguayde losalimentos=Uselosagentesde limpiezarecomendados=
Ver p_g.69.
o Picadurasodescascadllado
- Limpielosderramesazucaradosinmediatamente=Verp%=69=
, Estoesnormalcuandosecocinanalimentosconalto contenidode humedad.
, Seus6 humedadexcesivacuandolimpidla ventana.
° Estoesnormalenunaestufanuevaydesaparecer_despu6sde unospocosusos.
A1iniciar un cicio deautolimpiezase"quemar_n"los oloresm_s r_pidamente.
o Siseenciendee!ventiladorayudar_a eliminarelhumoy/o el olor.
o Suciedadexcesivade alimentosen el panelinferiordel horno. Useunciclo de autolimpieza.
C6digos de Errores
° 'BAKE'(Horneado)o'LOOK'(Bloqueado}puedendesteliarr_pidamenteen el indioadorpara
avisarlequehayun erroro un problema. Si 'BAKE'o 'LOOK'aparecenen el indicadorvisual,
oprirnaIatecla 'Cancel' (Oanceta0.Si'BAKE'o 'LOCK'contimiandestelIando,desconectela
energ[ael_ctricaal electrodom_stico.Espereunospocosminutosyvuelvaa reconectarIa
energiael6ctrica.SicontinOandestelIando,desconectelaenergiael6ctricadelelectrodom6stico
yIlameal t6cnico deservicioautorizado.
o Siel homoest_demasiadosucio,puedenocurdrdemasiadasIlamaradasIocualresuItar_en
un c6digode errorduranteIalimpieza. OptimaIatecla'Cancel' ydejequeel homo seenfr[e
completamente,limpieelexcesodesuciedadyluegovuelvaa programarelciclodelimpieza.
Siel cOdigodeerror reaparece,Ilameaun t6cnico autorizado.
Se escuchan ruidoso
° Elhornoemitevariossonidosbajos.Ustedpuedeo[rlosrel6sdelhomocuandoseencienden
yse apagan.Estoes normal.
o A medidaqueelhomosecaiientayseenfr[a,ustedpuedeo[rsonidosdepiezasmetalicasque
seexpandeny contraen. Estoesnormaly no dafiar_su electrodom6stico.
o Seescuchaelsonidode un ventilador.Esteese!ventiladordeenfriamientoyes normal
Elventiladorseguir_funcionandodespu6sde apagarel horno hastaque el mismoseenfr[e.
No se escuchan seiiales sonoras ° ElhornopuedeestarenModoSab_tico=07erpag=64}=
yel indicadorvisualnoseactivao
'SAb' destella y luego se
despliega continuamenteo
o Elhomoest_enmodosabOt[co.Paraanu[arelrnodosab_tico,oprimaymantengaoprimida[a
tecla 'Clock' (Reloj}durantecinco segundos.
74
Page 76

Y
Garantia de la Estufa Eiectrica
Garant_a CompJeta de Un A_o = £iezas
y Mane de Obra
Durarueun (1) a_o desde[afechaoriginalde
compraa[pot menor,serepararao reemplazar4
£,ratu_tamentecuaJquierpiezaquefa[ledurantesu
usonormalenei hogar.
Garantias Limitadas- Piezas
Solamente
Desde el Segundo hastael QuWntoAl_o=A partw
de lafechaoriginaldecompra,serepararano
reemplazarangratuitamenteJasplezas_ndicadasa
continuac_Onquefallen duranteusonorma_en eJ
hogaren Joque respec[aaJaspJezasy eL
propie[anodeber4pagartodoslosotroscos[os
Jncluyendomanodeobra.kiJome[rajeimfllaje,
transporte,costodeIviajey costodeldiagn0st_co,sl
fuesenecesarlo
* Cubiertade VidrioCe|_mieo: Debidoa rotura
t6rmica,descoloraci6n,agrietamientode lajun[a
degomadel borde,desgastedeldisd_o.
, Elementos CaiefaetoresEl_etrieos:Los
eJementosradiantessuperioresen losartefactos
decocJnareJ6ctdcos.
Note Io siguiente: Es_asgarantiascompJe[asse
apllcanumcamentecuandoel eiectrouom6sticose
encuentraen losEstadosUi idus o Canad&Los
e_ec[roaomesttcosque se encuen[renen otros
pa[seses[ar4ncublertos_Jnlcamen[epot las
garantiaslimJtadas.JncJuyendoia garantiaJimitada
paraJaspJezasque falJenduranteel primera_o.
Residentes Canadienses
LasgalJnt[asanteriorescunrenso_amen[eaquellos
e_ectrodomdsticosJnstaJadusenCanadaquehayan
sidocertifieadosoaprobadospot JasagencJasde
pruebascorrespondientesparacumplimientucon Ja
NormaNacionaldeCanad4amenosqueel
etectrodom6sticohayasidotraido a Canadadesde
losEE.UU.debidoa un cambJoderesidencla.
LUSgarantiasespecfficusexpresudasanteriurmente
sun1asUMCASgarandasprowstuspor d fabrfcante.
Estasgarantiasle ototdanderechoslegales
espedficosyustedpuedetenetademdsotros
derechosquevan#ndeun estadoa otto.
Lo que No Cubren Estas Garantias:
1. SJtuacionesy dai_osresultantesde cualquJeradelassiguJenteseventualidades:
a=hlstaIaci6n,entregaomantenimientoinapropiados=
b=CualquierreparaciOn,modificacidn,aiteraciOno ajusteno autorizadopot el
fabricanteopot uncentrodeservicioautorizado=
c=Mai uso,abuse,accidentes,usoirrazonableo hechosfutuitos=
d=Corrienteel6ctrica,voltajeosuministroincorrecto=
e=ProgramaciOnincorrectade cualquierade Ioscontroles=
2= Lasgarant[asquedannuIassJIosnQmerosde serieoriginaleshansidoretJrados,
alteradoso nosonf4cilmentelegibles=
3= Focos=
4= Productoscompradosparausocomercialo industrial
5= Elcostodel serviciooIlamadadeservJciopara:
a=CorregirerroresdeinstaIacidn=
b=InstruiraIusuariosobreelusecorrectodelartefacto=
c=TransportedeIartefactualestablecimientode servicioy el retomoaI cliente=
6= Losda_osconsecuenteso incidentalessufridospotcuatquierpersonacomo
resultadodecualquierincumplimientodeestasgarantias=
Enaigunosestadosnosepermitelaexclusi6no limitaci6ndelosda_osconsecuenteso
incidentales,porIotanto laexclusiOnanteriorpuedequeno seapliqueen su caso=
Si Necesita Servicio
YeaprimeruIasecciOnde Iocalizaci6ny soluci6nde averiasenIagu[ade usoy
cuJdadooIlameaMaytagServicessr_,ServJcioa losClientesAmanaIlamandoal
1-800-843-0304EE.UU.oal 1-866-587-2002Canad&
Para obtener servicio bajo Ja garantia
Paraubicaruna compa_[adeservicioautorizadoensu Iocalidad,pOngaseencontacto
conel distribuidordondeadquiriOsueIectrodom6stJcoo Ilamea Ma}_agServicessM,
Servicioa losClientesAmana=Si norecibeserviciosatisfactoriobaiola garant[&por
favorliameo escribaa:
Ma}_ag ServicessM
Attn: C/sJR_ Center
P=O=Box 2370, Qeveland, TN 37320-2370
EE.[IEI. l-soe-843-03e_ y Cunud_ 1_866_587_2002
Nota: Cuandosepongaencontactucon MaytagServicessM,Servicioa los
ClientesAmanaacercade un problema,potfavorincluyalasiguienteinformaciOn:
a.Sunombre,direcciOny nOmerodeteldono.
b.Losnt_merosde modeloyde seriedesuelectrodomestico.
c. Nombrey direcci6ndeldistribuidory Iafechade compra.
d. Unadescripci6nclaradelproNemaqueest,1experimentando.
e. Pruebadecompra.
LasguFasde! usuarJo,manualesdeservicioeinformaci6nsobreJaspJezaspuedensoJicitamea MaytagServicess_,ServicJoa losClientesAmana.
Form No. A/0B/05 Part No. 8113P503 60 ®b2OOBMaytag Appliances Sales Co. Litho U.S.A.
 Loading...