

Page 1
Electric S_oothtop - Easy Touch Control 500
Care & Cleaning ............................................ 16-19
Sdf-CHeanOven
CHeaningProcedures
Maintenance ......................................................... 20
Oven Window
Oven Light
Troubleshooting ............................................ 21-22
Warranty & Service .............................................. 23
Guide d'utilisation et d'entretien ...................... 24
Gu_a de Use y Cuidado ....................................... 48
Form No. A/09/03 Part No, 8113P406-60 Q2003 Maytag Appliances Sales Co, Litho U,S,A.
Page 2
installer: Please leave this manual with this appliance.
Consumer: Please read and keep this manua[ for future
reference. Keep sales receipt and/or canceled check as proof
of purchase.
Mode[ Numbe[
Serial Number
Date of Purchase
If you have questions, call:
Amana CustomerAssistance
1-800-843-0304 USA
1-866-587-2002 Canada
Internet: http:i/www.amana.com
Inourcontinuing effort toimprove the quafltyand performance
ofour cooking products.it may benecessaryto make changes
[o the appliance without revising this guide.
For se_ice #ffermaden, see page 23°
To ensure proper and safe operation: AppJJance must
be properly installed and grounded by a qualified techni-
cian. Do not attempt to adjust, repair, service, or replace
any part of your appliance unless it is specificafly recom-
mended in this guide. All other servicing should be
referred to a qualified servicer.
Always disconnect power to appliance before servicing.
* ALL RANGES CAN TiP AND
CAUSE iNJURiES TO PERSONS
iNSTALL ANTi'TIP DEVICE
PACKED WiTH RANGE
FOLLOW ALL iNSTALLATiON
tipping of the appliance from
abnormal usage or by excessive
Joading of the oven door, the appJiance must
be secare by a properJy!aStalled aatiTtip
Warning and Important Safety Instructions appearing in
this guide are not meant to cover a[[ possible conditions
and situations that may occur. Common sense, caution,
and care must be exercised when installing, maintaining,
or operating the appliance.
Always contact your dealer, distributor, service agent, or
manufacturer about problems or conditions you do not
understand.
Recognize Safety Symbols, Words, Labels
COULD result in severe personal injury okdeath.
To check if device is properly [nstaJ[ed, [ook underneath
range with a fJash[Jght to make sure one of the rear
[eveJJnglegs is properly engaged in the bracket sJot.The
anti-tip device secures the rear [eveJJng[eg to the floor
when properJy engaged. You shouJd check this anytime
the range has been moved.
To Prevent Fire or S oke
Be sure a[[ packing materJaJs are removed from the
appJJance before operating it.
Keep area around appJJance dear and free from combus-
tJbJematerJaJs. FJammabJe mater[aJs shouJd not be stored
JR an oven_
Many pJastics are vuJnerabJe to heat. Keep pJastJcsaway
from parts of the appJJance that may become warm or
hot.
To prevent grease fires, do not let cooking grease or other
flammable materials accumulate in or near the appliance.
COULD result in minor personal injury,
Read and follow aH instructions before esing this
appliance to prevent the potential risk of fire, electric
shock, personal injury or damage to the appliance as a
result of improper usage of the appliance. Use appliance
only for its intended purpose as described in this guide.
[n Case of Fire
Use dry chemical or foam-type extinguisher or baking
soda to smother fire or flame. Never use water on a
grease fire.
1. Turn off appliance to avoid spreading the flame.
2. NEVER pick up or move a flaming pan.
3. Smother fire or flame by closing the oven door.
Page 3
CN dSafety
NEVER store items of interest to chitdren in cabinets
above an appliance. Children climbing on the appliance
serieus!y injured,
NEVER leave children alone or unsupervised near the
appliance when it is in use or is still hot. Children should
never be allowed to sit or stand on any part of the appli-
ance as they could be injured or burned.
Children must be taught that the appliance and utensils in
it can be hot. Let hot utensils cool in a safe place, out of
reach of small children. Children should be taught that an
appliance is not a toy. Children should not be allowed to
play with controls or other parts of the appliance.
About Your Appliance
NEVER use aluminum foil to cover an oven rack or oven
bottom. Misuse could result in risk of electric shock, fire,
or damage to the appliance. Use foil only as directed in
this guide.
Cooking Safety
Never heat an unopened food container in the oven.
Pressure build-up may cause container to burst resulting
in serious personal injury or damage to the appliance.
Use dry, sturdy potholders. Damp potholders may cause
burns from steam. Dish towels or other substitutes should
never be used as potholders because they can trail across
hot elements and ignite or get caught on appliance parts.
Wear proper apparel. Loose fitting or long hanging-
sleeved apparel should not be worn while cooking. Cloth-
ing may ignite and cause burns if garment comes in
contact with heating elements.
Always place oven racks in the desired positions while
oven is cool. Slide oven rack out to add or remove food,
using dry, sturdy potholders. Always avoid reaching into
the oven to add or remove food. If a rack must be moved
while hot, use a dry potholder. Do not let potholder contact
hot element in oven.
tean!ng Or' sitting On the door', may resu!t in p0ssible
tipping of the appliance, breakage of door, and serious
injuries,
To prevent potential hazard to the user and damage to the
appliance, do not use appliance as a space heater to heat
or warm a room. Also, do not use the oven as a storage
area for food or cooking utensils.
Do not obstruct the flow of air by blocking the oven vent.
DO NOT TOUCH HEATING ELEMENTS OR INTERIOR
SURFACES OF OVEN. Heating elements may be hot even
though they are dark in color. Interior surfaces of any
oven become hot enough to cause burns. During and
after use, do not touch, or let clothing or other flammable
materials contact heating elements or interior surfaces of
oven until they have had sufficient time to cooL Other
surfaces of the appliance may become hot enough to
cause burns - among these surfaces are: oven vent
openings and surfaces near these openings, oven doors,
windows of oven doors.
Do not touch a hot oven light bulb with a damp cloth as
the bulb could break. Should the bulb break, disconnect
power to the appliance before removing bulb to avoid
electrical shock.
Use racks only in the oven in which they were shipped/
purchased.
Use care when opening the oven door. Let hot air or steam
escape before removing or replacing food.
PREPARE[} FOOD WARNUNG: Follow food
manufacturer's instructions. If a plastic frozen food con-
tainer and!or its cover distorts, warps, or is otherwise
damaged during cooking, immediately discard the food
and its container. The food could be contaminated.
Do not allow aluminum foil or meat probe to contact
heating element.
Always turn off all controls when cooking is completed.
Utensil Safety
Follow the manufacturer's directions when using oven
cooking bags.
This appliance has been tested for safe performance
using conventional cookware. Do not use any devices or
accessories that are not specifically recommended in this
guide. Do not use add-on oven convection systems. The
use of devices or accessories that are not expressly
recommended in this guide can create serious safety
Page 4
hazards,resultinperformanceproblems,andreducethe
lifeofthecomponentsoftheappliance.
Ifpanissmallerthanelement,aportionoftheelement
willbeexposedtodirectcontactandcouldigniteclothing
orpotholder.
Onlycertaintypesofglass,glass!ceramic,ceramic,
earthenware,orotherglazedutensilsaresuitablefor
cooktoporovenservicewithoutbreakingduetothe
suddenchangeintemperature.Followutensil
manufacturer'sinstructionswhenusingglass.
Clean with caution. Use care to avoid steam burns if a wet
sponge or cloth is used to wipe spills on a hot surface.
Some cleaners can produce noxious fumes if applied to a
hot surface.
Clean only parts listed in this guide.
Semf-C ean Oven
Turnpanhandletowardcenterofcooktop,notoutinto
theroomoroveranothersurfaceelement.Thisreduces
theriskofburns,ignitionofflammablematerials,or
spillageifpanisaccidentlybumpedor reachedbysmall
children.
NEVERleavesurfaceunitsunattendedespeciallywhen
usinghighheat.Anunattendedboilovercouldcause
smokingandagreasyspillovercancauseafire.
Thisapplianceisequippedwithdifferentsizesurface
elements.Selectpanswithflatbottomslargeenoughto
coverelement.Fittingpansizetoelementwill improve
cookingefficiency.
G[ASS-CERAMUC SURFACE: NEVER cook on broken
cooktop. If cooktop should break, cleaning solutions and
spillovers may penetrate the broken cooktop and create a
risk of electric shock. Contact a qualified technician
immediateJy.
Deep Fat Fryers
Use extreme caution when moving the grease pan or
disposing of hot grease. Allow grease to cool before
attempting to move pan.
Ventimating Heeds
Clean range hood and filters frequently to prevent grease
or other flammable materials from accumulating on hood
or filter and to avoid grease fires.
When flaming foods under the hood, turn the fan on.
Cmeaning Safety
Clean cooktop with caution. Turn off all controls and wait
for appliance parts to cool before touching or cleaning.
utensils, etc. in the oven during the stir-clean cycle.
Do not dean door gasket. The door gasket is essential for
a good seal. Care should be taken not to rub, damage, or
move the gasket.
Do not use oven cleaners or oven liners of any kind in or
around any part of the self-clean oven.
Before self-cleaning the oven, remove broiler pan, oven
racks and other utensils, and wipe off excessive spillovers
to prevent excessive smoke or flare ups.
important Safety Notice and
The California Safe Drinking Water and Toxic Enforcement
Act of 1986 (Proposition 65} requires the Governor of
California to publish a list of substances known to the
State of California to cause cancer or reproductive harm,
and requires businesses to warn customers of potential
exposures to such substances.
Users of this appliance are hereby warned that when the
oven is engaged in the self-clean cycle, there may be
some low-level exposure to some of the listed substances,
including carbon monoxide. Exposure to these substances
can be minimized by properly venting the oven to the
outdoors by opening the windows and/or door in the room
where the appliance is located during the self-clean cycle.
UMPORTANT NOTUCE REGARDUNG PET BURDS: Never
keep pet birds in the kitchen or in rooms where the fumes
from the kitchen could reach. Birds have a very sensitive
respiratory system. Fumes released during an oven self-
cleaning cycle may be harmful or fatal to birds. Fumes
released due to overheated cooking oil, fat, margarine and
overheated non-stick cookware may be equally harmful.
Save These instructions for Future Reference
3
Page 5
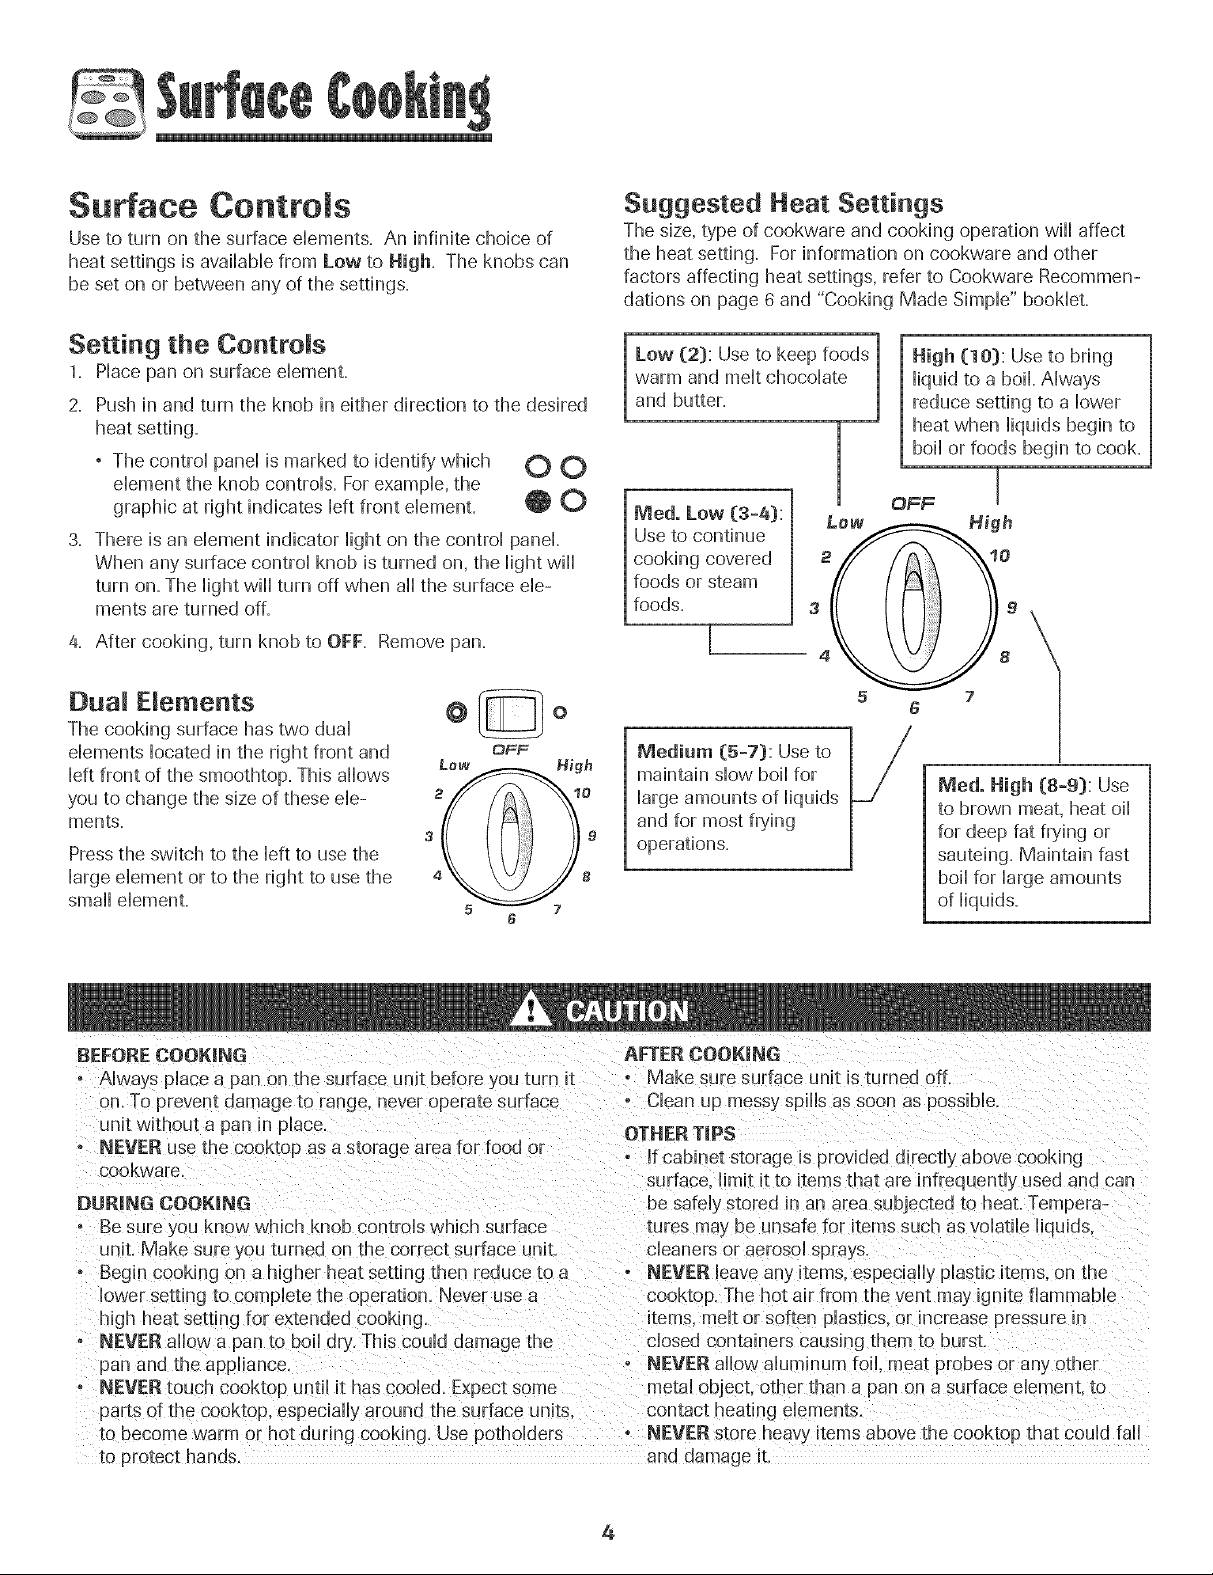
Surface Controms
Use to turn on the surface elements. An hlfinite choice of
heat settings is avaiHabHefrom Low to High. The knobs can
be set on or between any of the settings.
Suggested Heat Settiogs
The size,type of cookware and cooking operation will affect
the heat setting. For information on cookware and other
factors affecting heat settings, refer to Cookware Recommen-
dations on page 6 and "Cooking Made Simple" booklet.
Setting the Controls
1. Place pan on surface element.
2. Push in and turn the knob in either direction to the desired
° The control panel is marked to identify' which O O
element the knob controls. For example, the
graphic at right indicates left front element. O O
3. There is an element indicator light on the control panel.
When any surface control knob isturned on, the light will
turn on. The light will turn off when all the surface ele-
ments are turned off.
4. After cooking, turn knob to OFF. Remove pan.
Dua Elements
The cooking surface has two dual
elements located in the right front and
left front of the smoothtop. This allows
you to change the size of these de-
ments.
Press the switch to the left to use the
large element or to the right to use the
small element.
L_w_High
QFF
7
6
ivied. Low (3-4):
Use to continue
cooking covered
foods or steam
foods.
[
Medium (5°7): Use to
maintain slow boil for
large amounts of liquids
and for most frying
operations.
34
1
JLew
High (10): Useto bring
liquid to a boil. Always
reduce setting to a lower
heat when liquids begin to
boil or foods begin to cook.
OFF i
High
5
7
6
ivied. High (8=9): Use
to brown meat, heat oil
for deep fat frying or
sauteing. Maintain fast
boil for large amounts
of liquids.
BEFORE COOKING
o Always place a pan on the surface unit before you turn it
on. To prevent damage to range, never operate surface
unit without a pan in place.
o NEVER use the cooktop as a storage area for food or
cookware.
DURING COOKING
Be sure you know which knob controls which surface
unit. Make sure } ou turned on the correct surface unit.
o Begin cooking on a higher heat setting then reduce to a
lower setting to cornplete the operation. Never use a
high heat setting for ex_endedcooking.
o NEVER allow a pan to boil dry.This could damage the
pan and the appliance.
• NEVERtouch cooktop unti it has cooled. Expect some
parts of the cooktop, especially around the surface units, contact heating dements.
to become warm or hot during cooking Use potholders o NEVER store heav} items above the cooktop that could fail
_oprotect hands, and damage it.
AFTER COOKING
o Make sure surface unit isturned off.
- Clean up messy spills as soon as possible.
OTHER TiPS
o if cabinet storage is provided directl_ above cooking
surface, limit it to items that are infrequently used and can
be safely stored in an area subjected to heat. Tempera
tures may be unsafe for items such asvolatile liquids.
cleaners ol aerosol sprays
o NEVER leave any items, especially plastic items, on the
cooktop The hot air from the vent may ignite flammable
items, melt or sof[en plastics, or increase pressure in
dosed contaiuiers causing them to burst.
o NEVER allow aluminum foil. meat probes or any other
metal object, other than a pan on a surface element, to
4
Page 6
S oothtop Sucface
Tips to Protect the
Smoothtop Surface Notes:
, Cooktop may emit light smoke and odor the first few
times the cooktop is used. This is normal
, Smoothtop cooktops retain heat for a period of time
after the element is turned off. Turn the dements off
a few minutes before food is compHeteHycooked and use
the retained heat to compHetecooking. When the hot
surface Hightturns off, the cooking area wiHHbe cooH
enough to touch. Because of the way they retain heat, the
smoothtop dements wiHHnot respond to changes in
settings as quickHyas coiHdements.
° In the event of a potentiaHboiHover,remove the pan from
the cooking surface.
, Never attempt to lift the cooktop.
° The smoothtop surface may appear discolored when it is
hot. This is normaHand wiHHdisappear when the surface
cooHs.
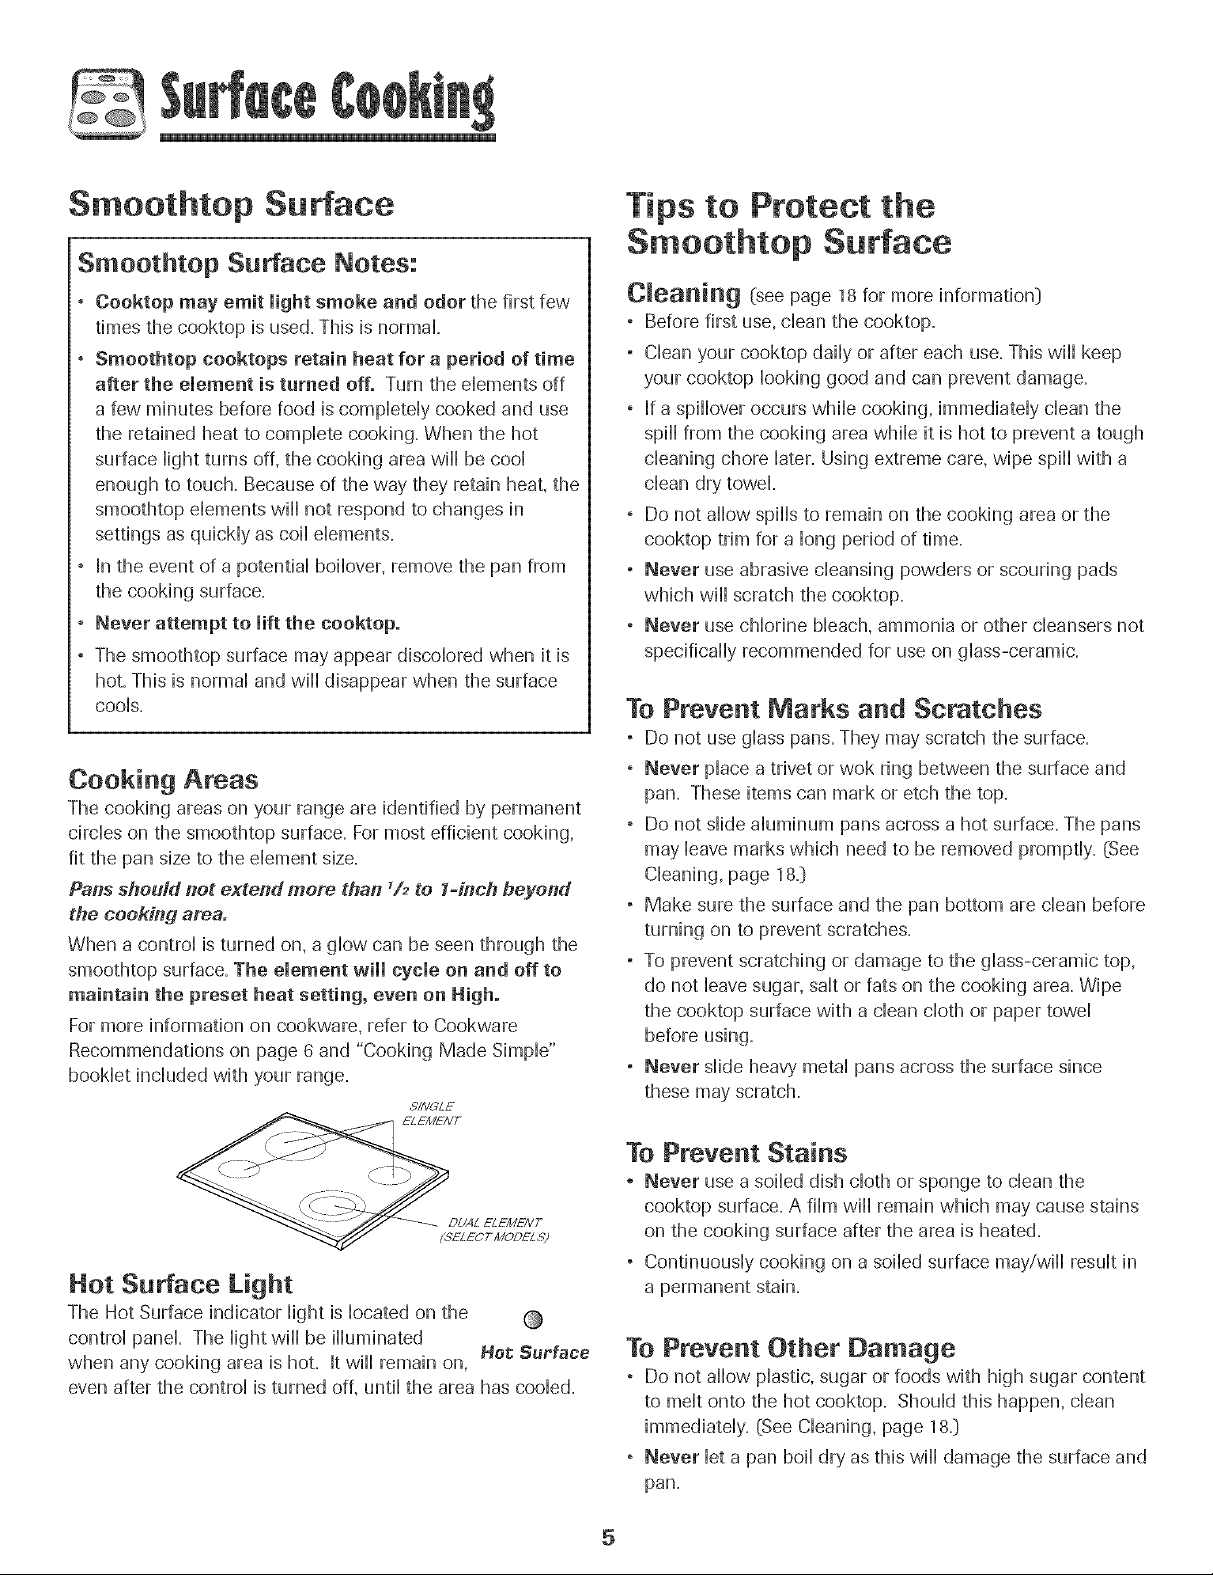
Cooking Areas
The cooking areas on your range are identified by permanent
circHeson the smoothtop surface. For most efficient cooking,
fit the pan size to the dement size.
Pans should not extend more than V2to 7-inch beyond
the cooking area.
When a control is turned on, agHowcan be seen through the
smoothtop surface. The element will cycle on and off to
maintain the preset heat setting, even on High.
For more information on cooP,ware, refer to Cookware
Recommendations on page 6 and "Cooking Made Simple"
bookHetincHudedwith your range.
.911VK_LE
ELb-MEN T
LTU4L ELEMEIVT
{.9ELEO T MODEL 6_
Hot Surface Light
The Hot Surface indicator Hightis Hocatedon the
controHpanel The HightwiHHbe iHHuminated
when any cooking area is hot. It wiHHremain on,
even after the controH is turned off, untiHthe area has cooHed.
Her; Sue'face
Smoothtop Surface
CJeaning (see page 18for more information}
, Before first use, clean the cooktop.
° Clean your cooktop daily or after each use. This will keep
your cooktop looking good and can prevent damage.
° If a spillover occurs while cooking, immediately clean the
spill from the cooking area while it is hot to prevent a tough
cleaning chore later. Using extreme care, wipe spill with a
clean dry towel
° Do not allow spills to remain on the cooking area or the
cooktop trim for a long period of time.
° Never use abrasive cleansing powders or scouring pads
which will scratch the cooktop.
° Never use chlorine bleach, ammonia or other cleansers not
specifically recommended for use on glass-ceramic.
To Prevent Marks and Scratches
° Do not use glass pans. They may scratch the surface.
° Never place a trivet or wok ring between the surface and
pan. These items can mark or etch the top.
° Do not slide aluminum pans across a hot surface. The pans
may leave marks which need to be removed promptly. (See
Cleaning, page 18.}
° Make sure the surface and the pan bottom are clean before
turning on to prevent scratches.
° To prevent scratching or damage to the glass-ceramic top,
do not leave sugar, salt or fats on the cooking area. Wipe
the cooktop surface with a clean cloth or paper towel
before using.
° Never slide heavy metal pans across the surface since
these may scratch.
To Prevent Stains
, Never use a soiHeddish cHothOFsponge to dean the
cooktop surface. A film wiHHremain which may cause stains
on the cooking surface after the area is heated.
° ContinuousHycooking on a soiHedsurface mayiwiHHresuHtin
a permanent stain.
To Prevent Other Damage
° Do not aHHowpHastic,sugar OFfoods with high sugar content
to meritonto the hot cooktop. ShouHdthis happen, dean
immediateHy.(See CHeaning,page 18.}
° Never Hota pan boiHdry as this wiHHdamage the surface and
pan.
5
Page 7
+ Never use cooktop as a work surface or cutting board.
+ Never cook food directly on the surface.
+ Do not use a small pan on a large dement. Not only does
this waste energy, but it can also result in spillovers burning
onto the cooking area which requires extra cleaning+
+ Do not use non-fiat specialty items that areoversized or
uneven such as round bottom wok,s,tippled bottom and/or
oversized canners and griddles+
+ Do not use foil or foikype containers. Foil may me,it onto
the glass+if metal melts on the cooktop+do not use+Call an
authorized Amana Servicer+
Cookware Recommendations
Using the right cookware can prevent many problems, such
as food taking longer to cook or achieving inconsistent
results. Proper pans will reduce cooking times, use less
energy, and cook food more evenly.
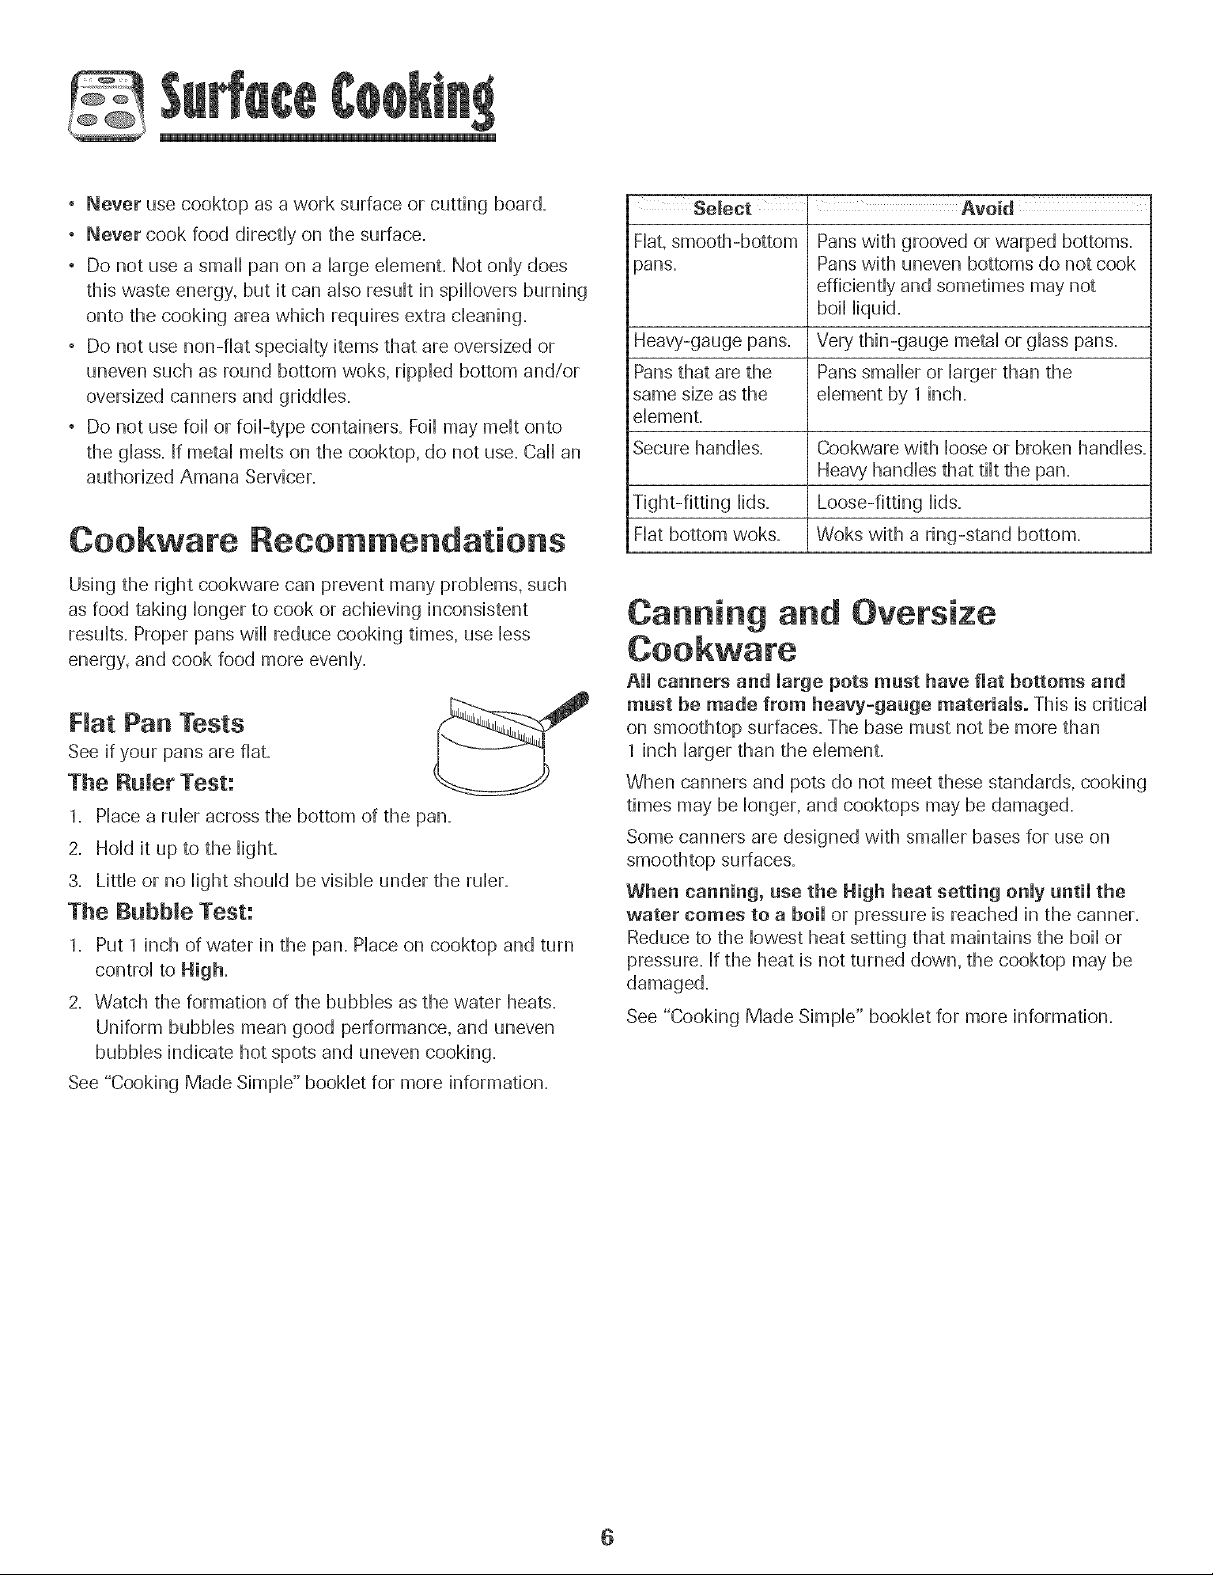
Nat Pan Tests
See if your pans are fiat.
The Ruler Test:
1. Place a ruler across the bottom of the pan.
2. Hold it up to the lighL
3. Little or no light should be visible under the ruler.
The Bubble Test:
1. Put 1 inch of water in the pan. Place on cooktop and turn
control to High+
2. Watch the formation of the bubbles as the water heats.
Uniform bubbles mean good performance, and uneven
bubbles indicate hot spots and uneven cooking.
See "Cooking Made Simple" booklet for more information.
Select i Avoid
Flat,smooth-bottom Pans with grooved or warped bottoms.
-}arts. Panswith uneven bottoms do not cook
efficiently and sometimes may not
boil liquid.
Heavy-gauge pans. Very'thin-gauge metal or glass pans.
Pansthat arethe Panssmaller or larger than the
same size asthe dement by 1inch.
elemenL
Secure handles. Cookware with loose or broken handles.
Heavy handles that tilt the pan.
Tight-fitting lids. Loose-fitting lids.
Fiat bottom woks. Woks with a ring-stand bottom.
Canning and Oversize
All canners and large pots must have fiat bottoms and
must be made from heavy-gauge materials. This is critical
on smoothtop surfaces. The base must not be more than
1 inch larger than the elemenL
When canners and pots do not meet these standards, cooking
times may be longer, and cooktops may be damaged.
Some canners are designed with smaller basesfor use on
smoothtop surfaces.
When canning, use the High heat setting only until the
water comes to a boil or pressure is reached in the canner.
Reduce to the lowest heat setting that maintains the boil or
pressure. If the heat is not turned down, the cooktop may be
damaged.
See "Cooking Made Simple" booklet for more information.
Page 8
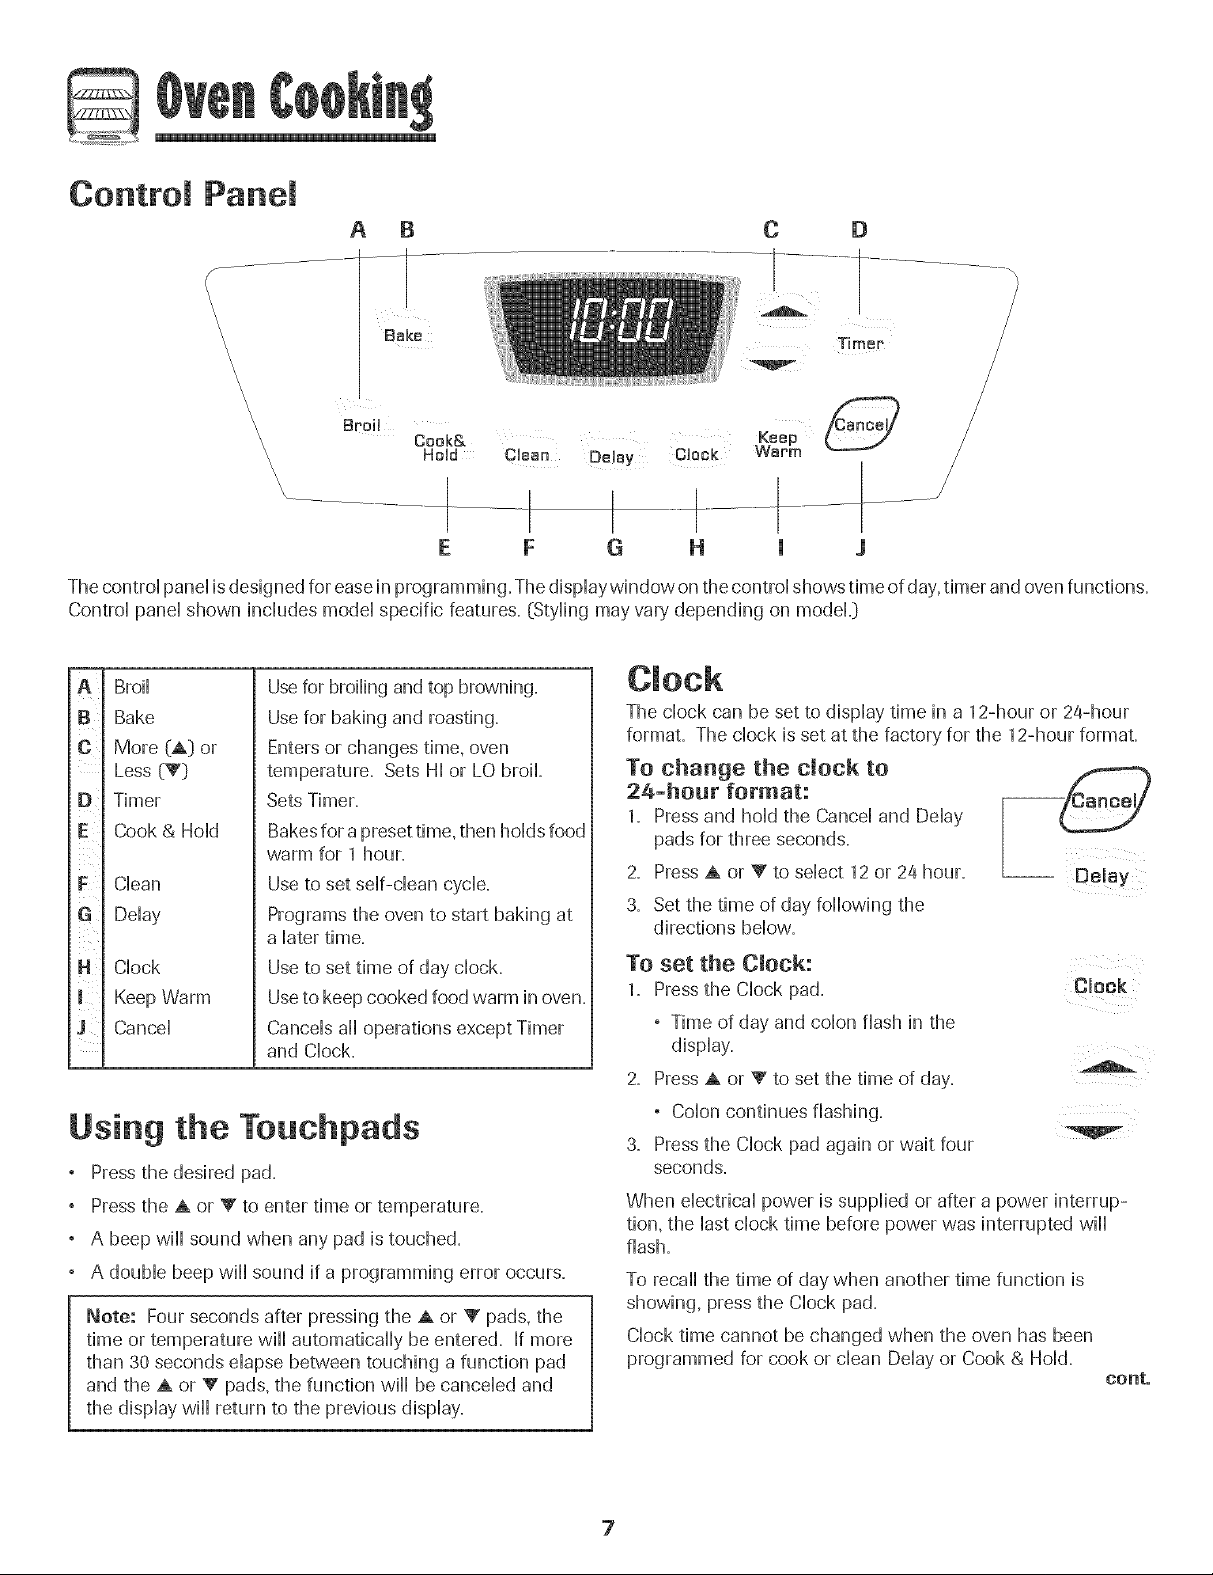
Control Panel
A
f ......
\
\
B
\
\
\
\
\
\
\
\
\
\
\
\
\
\
\
Broil
Bake
Cook&
HeUd
Ciean Deiay CHock
C D
Timer
Keep
WBPm
|
E F G H
The controi panei isdesigned for easein programming. Thedispiaywindow on thecontroi shows time of day,timer and ovenfunctions.
Controi panei shown inciudes modei specific features. (Styiing may vary depending on modeL}
1 J
Broii
B
Bake
More (A} or
c
Less (V}
Timer
E
Cook &Hoid
F
Ciean
Deiay
CHock
Keep Warm
Cancei
m
Usefor broiling andtop browning.
Usefor baking and roasting.
Enters or changes time, oven
temperature. Sets HI or LO broil
Sets Timer.
Bakesfor a presettime, then holds food
warm for 1 hour.
Use to set self-clean cycle.
Programs the oven to start baking at
a later time.
Use to set time of day clock.
Useto keep cooked food warm in oven.
Cancels all operations except Timer
and Clock.
Using the Touchpads
Pressthe desired pad.
Pressthe A or V to enter time or temperature.
, A beep wiii sound when any pad is touched.
, A double beep wiii sound if a programming error occurs.
Note: Four seconds after pressing the A or _' pads, the
time or temperature will automatically be entered. If more
than 30 seconds elapse between touching a function pad
and the A or V pads, the function will be canceled and
the display will return to the previous display.
The clock can be set to display time in a 12-hour or %-hour
format. The clock is set at the factory for the 12-hour format.
To change the clock to
24-hour format:
1. Pressand hold the Cancel and Delay
pads for three seconds.
2. Press A or V to select 12 or 24 hour.
3. Set the time of day following the
directions below.
To set the Clock:
1. Pressthe Clock pad. Clock
. Time of day and colon flash in the
display.
2. Press A or _' to set the time of day.
° Colon continues flashing.
3. Pressthe Clock pad again or wait four
seconds.
When electrical power is supplied or after a power interrup-
tion, the last clock time before power was interrupted will
flash.
To recall the time of day when another time function is
showing, press the Clock pad.
Clock time cannot be changed when the oven has been
programmed for cook or clean Delayor Cook & Hold.
-- Delay
conto
7
Page 9
@
To cancel the Clock display:
If you do not want the time of day to dispHay:
Press and hoHdthe CanceHand CHock
pads for three seconds. The time of day
wiHHdisappear from the dispHay
When the chockdispHayis cancelled, press -- Clock
the CHockpad to briefly dispHaythe time
of day.
To restore the Clock display:
Press and hoHdthe CanceHand CHockpads for three seconds.
The time of day wiHHreappear in the dispHay.
The timer can be set from one minute (00:01_)up to 99 hours
and 59 minutes (99:5d).
The timer can be used independentHyof any other oven
activity'. It can aHsobe set whiHeanother oven function is
operating.
The Timer does not controHthe oven. It onHycontroHsa
beeper.
To set the Timer:
1= Press the Timer pad.
,00:00 Hightsin the dispHay.
, The coHonwiHHflash.
2.
Press the A or V pad untiHthe
correct time appears in the dispHay.
, The coHonwiHHcontinue to flash.
3,
PressTimer pad again or wait four seconds.
, The coHoncontinues flashing and the time begins
counting down.
, The Hastminute of the timer countdown wiHHbedispHayed
as seconds.
Timer
Locking the Contro
and Oven Dooc
The touch pad controHsand oven door can be Hockedfor
safety, cleaning, or to prevent unwanted use. They wiil not
function when Hocked.
If the oven is currentHyin use, the controHsand door cannot be
Hocked.
The current time of day wiHHremain in the dispHaywhen the
controHsare Hocked.
To lock:
Press and hoHdthe CanceHand Cook &
HoHdpads for three seconds.
LOCKflashes in the dispHay.
To unlock:
Press and hoHdthe CanceHand Cook & HoHdpads for three
seconds.
LOCKdisappears from the dispHay.
Faumt Codes
BAKE or LOCK may flash rapidHyin the dispHayto aHertyou if
there is an error or a probHem=If BAKE or LOCKflash in the
dispHay,press the CanceHpad. If BAKEor LOCK continue to
flash, disconnect power to the appHiance.Wait a few minutes,
and then reconnect power. Ifthe flashing stiHHcontinues,
disconnect power to the appHianceand caHHan authorized
servicer.
HoHd
4= At the end of the set time, one Hongbeep wiHHsound.
To cancel the Timer:
1. Press and hoHdthe Timer pad for three seconds.
OR
2. Press the Timer pad and set the time to 00:00.
8
Page 10
To set Bake:
1. Press the Bake pad.
, "BAKE" wflHflash. Bake
, 000 will Hightin the dispHay.
2. Sdect the oven temperature. The oven tempera-
ture can be set from 170° to 550°, Pressor press
and hoHdthe A or V pads.
, 350°will Hightwhen either pad is first pressed.
, Press the A pad to increase the temperature.
, Press the V pad to decrease the temperature.
3. Press Bake pad again or wait four seconds.
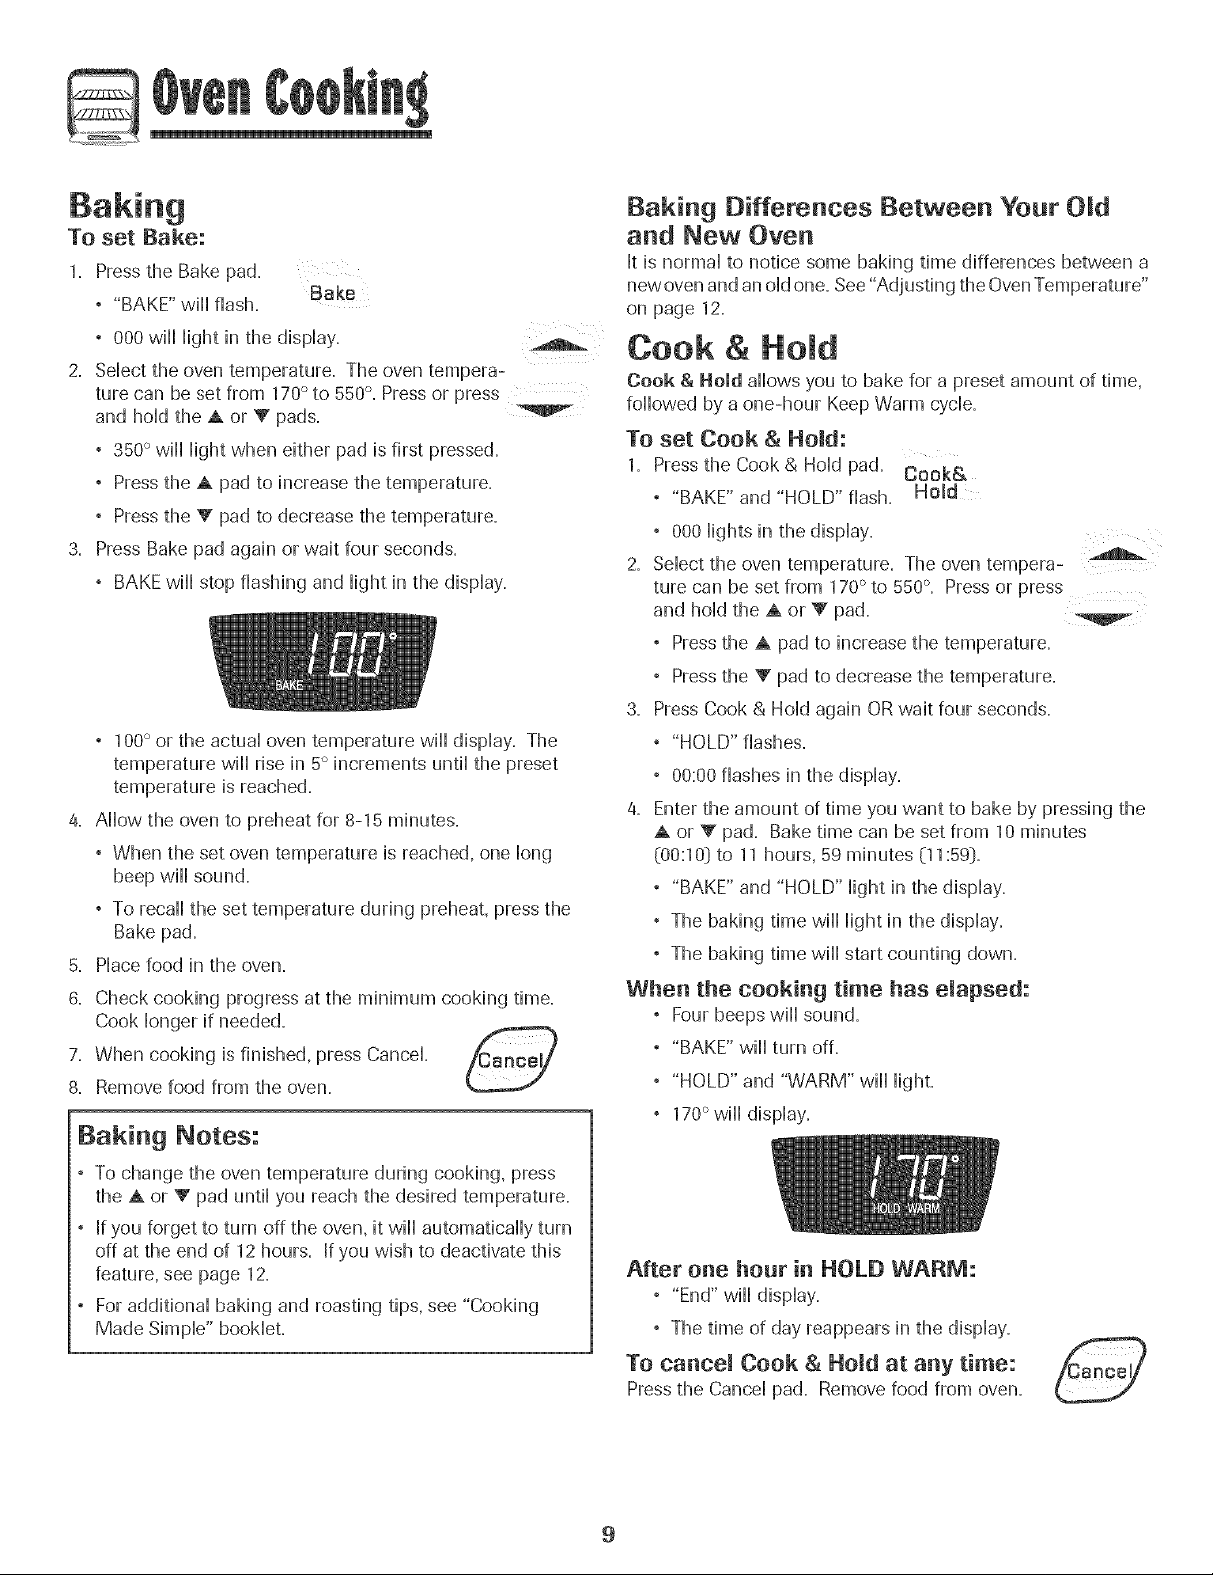
, BAKEwill stop flashing and Hightin the dispHay.
, 1O0° or the actuaHoven temperature will dispHay. The
temperature will rise in 5° increments untiHthe preset
temperature is reached.
4. AHHowthe oven to preheat for 8-15 minutes.
, When the set oven temperature is reached, one long
beep will sound.
, To recall the set temperature during preheat, press the
Bake pad.
5. Place food in the oven.
8. Check cooking progress at the minimum cooking time.
Cook longer if needed.
7. When cooking is finished, press Cancel. /Cancel/
8. Remove food from the oven.
Baking Notes:
° To change the oven temperature during cooking, press
the A or V pad until you reach the desired temperature.
, If you forget to turn off the oven, it will automatically turn
off at the end of 12hours. If you wish to deactivate this
feature, see page 12.
° Foradditional baking and roasting tips, see "Cooking
Made Simple" book]eL
Baking Differences Between Your OJd
and New Oven
It is normal to notice some baking time differences between a
new ovenand an old one. See"Adjusting the OvenTemperature"
on page 12.
Cook & Hold
Cook & Hold allows you to bake for a preset amount of time,
followed by a one-hour Keep Warm cycle.
TO set Cook & Homd:
1. Pressthe Cook & Hold pad. Cook&
° "BAKE" and "HOLD" flash. Hold
° 000 lights in the display.
2. Select the oven temperature. The oven tempera-
ture can be set from 170° to 550°. Press or press
and hold the A or _' pad.
° Pressthe A pad to increase the temperature.
° Pressthe V pad to decrease the temperature.
3. Press Cook & Hold again ORwait four seconds.
° "HOLD" flashes.
° 00:00flashes in the display.
4. Enter the amount of time you want to bake by pressing the
A or V pad. Bake time can be set from 10 minutes
(00:10] to 11 hours, 59 minutes (11:59].
° "BAKE" and "HOLD" light in the display.
° The baking time will light in the display.
° The baking time will start counting down.
When the cooking time has elapsed:
, Four beeps will sound.
, "BAKE" will turn off.
, "HOLD" and "WARM" will light.
, 170°will display.
After one hour in HOLD WARM:
° "End" will display.
, The time of day reappears in the display.
TO cancel Cook & Hold at any time:
Press the Cancel pad. Remove food from oven.
9
Page 11
De ay Bake
as dairy products, pork, poultry, or seafood.
When using Delay, the oven begins to cook Haterin the day.
Set the amount of time that you want to dday before the oven
turns on and how bng you want to cook. The oven begins to
heat at the sebcted time and cooks for the specified bngth of
time,
Deiay time can be set from 10 minutes (00:10) to 11 hours, 59
minutes (11:59).
To set a Delayed Baking cycJe:
1. Pressthe Dday pad.
, "DELAY" flashes.
, 00:00 flashes in the dispiay.
2. Pressthe A or V pad to set the dday time.
Whib "DELAY" is still flashing:
3. Pressthe Cook &Hoid pad.
, 000 iights in the dispiay.
, "BAKE" and "HOLD" flash. Cook&
4. PressA to set the baking temperature. Hold
, 00:00 and "HOLD" flash.
, "BAKE" stays Hit.
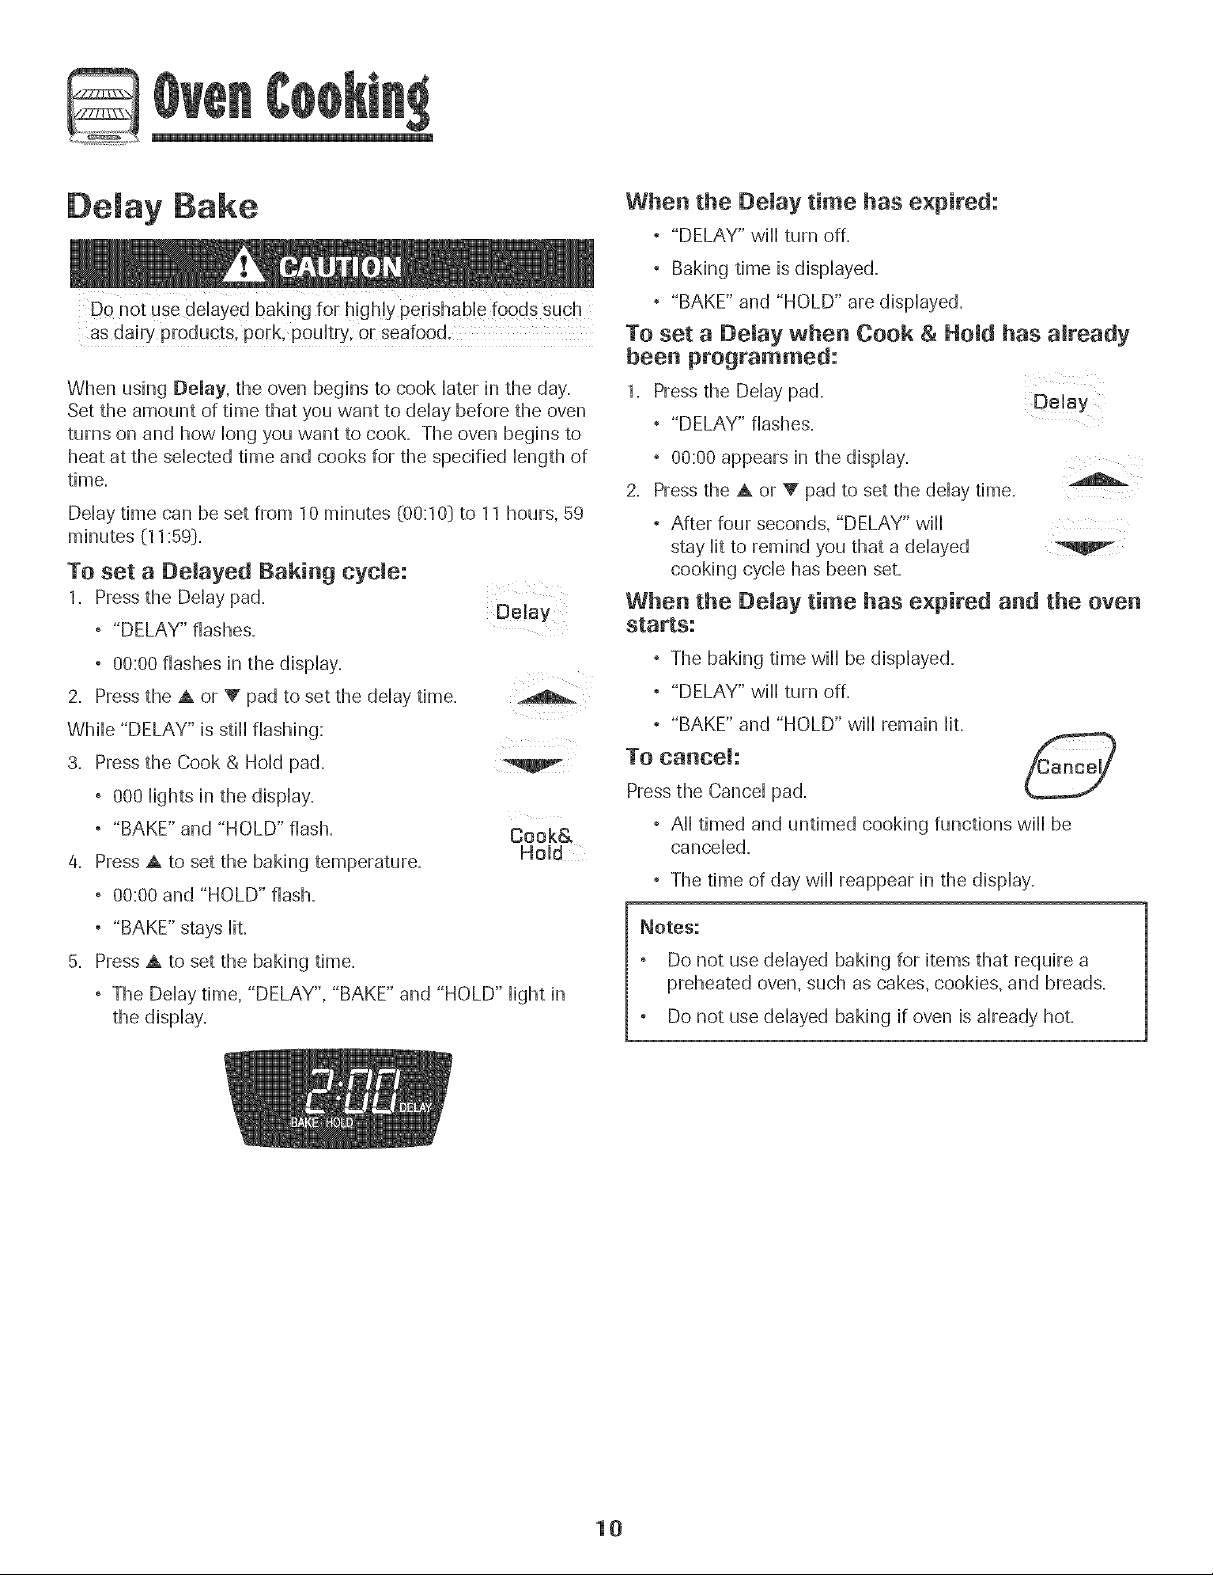
5. PressA to set the baking time.
, The Dday time, "DELAY", "BAKE" and "HOLD" light in
the display.
Delay
When the Delay time has expired:
, "DELAY" will turn off.
° Baking time is displayed.
, "BAKE" and "HOLD" are displayed.
To set a Delay when Cook & Hold has already
been programmed:
1. Pressthe Delay pad. De!ay
, "DELAY" flashes.
, 00:00 appears in the display.
2. Pressthe A or V pad to set the delay time.
, After four seconds, "DELAY" wiii
stay lit to remind you that a delayed
cooking cycle has been set.
When the Delay time has expired and the oven
starts:
, The baking time wiii be displayed.
, "DELAY" wiii turn off.
, "BAKE" and "HOLD" will remain lit.
To cancel:
Press the Cancel pad.
, Aii timed and untimed cooking functions wiii be
canceled.
. The time of day wiii reappear in the display.
Notes:
Do not use delayed baking for items that require a
preheated oven, such as cakes, cookies, and breads.
Do not use delayed baking if oven is already hot.
10
Page 12
Keep War
Forsafdy keephg foods warm or for warmhg breads and
pHates=
To set Keep Warm:
1= Press the KeepWarm pad= ,Keep
° "WARM" flashes.
° 000appears in the dispHay=
2. Sdect the Keep Warm temperature. The
Keep Warm temperature can be set from
145° to 190°- Pressor press and hoHdthe
A or V pads.
° 170° will Hightwhen either pad is first pressed.
, Press the A pad to increase the temperature.
, Press the _' pad to decrease the temperature.
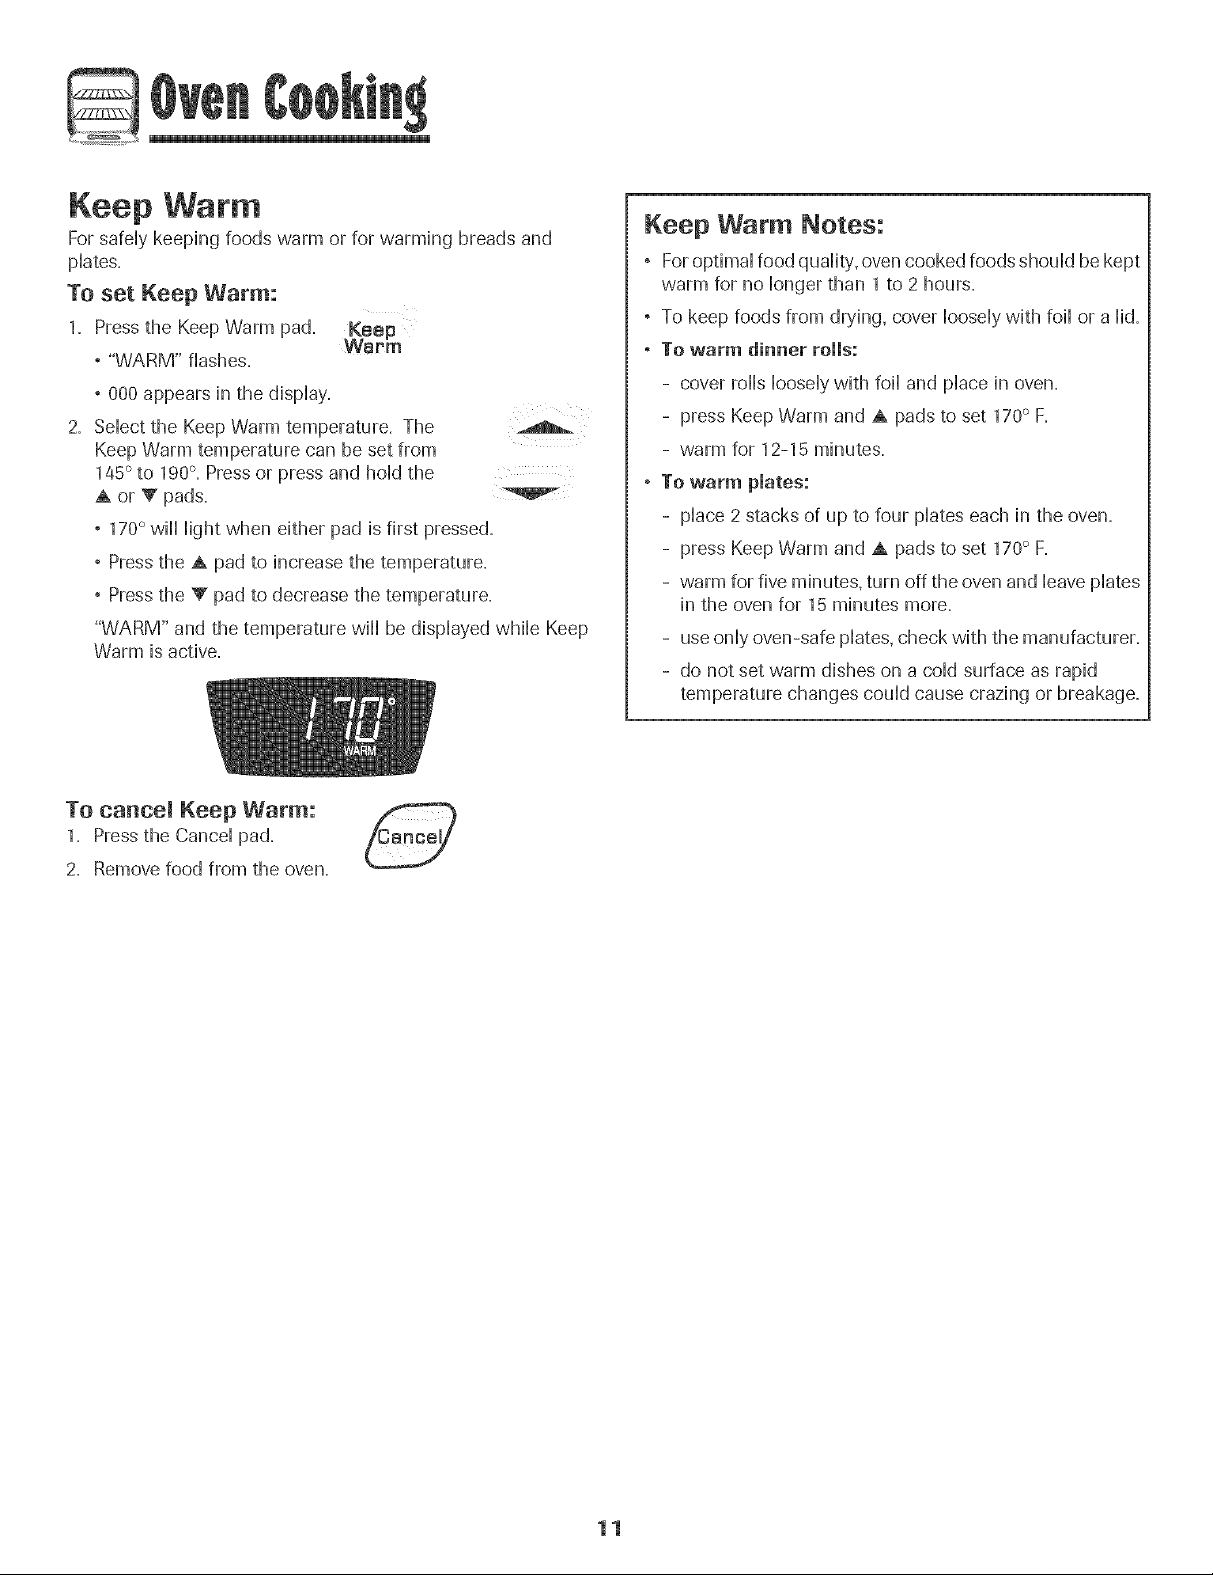
"WARM" and the temperature will be displayed while Keep
Warm is active.
yVSt_m
Keep Warm Notes:
° Foroptimal food quality, oven cooked foods should be kept
warm for no longer than 1 to 2 hours.
° To keep foods from drying, cover loosely with foil or alid.
° To warm dinner rolls:
- cover rolls loosely with foil and place in oven.
- press Keep Warm and A pads to set 170° F.
- warm for 12-15 minutes.
° To warm pmates:
- place 2 stacks of up to four plates each in the oven.
- press Keep Warm and A pads to set 170° F.
- warm for fiveminutes, turn off the oven and leave plates
in the oven for 15 minutes more.
- useonly oven-safe plates, check with the manufacturer.
- do not set warm dishes on a cold surface as rapid
temperature changes could cause crazing or breakage.
To canoe! Keep Warm:
1. Pressthe Cancel pad.
2. Remove food from the oven.
11
Page 13
Automatic Shut-Off/Sabbath
Mode
The oven will automatically turn off after 12 hours if you
accidentally Heaveiton. This safety feature can be turned off.
TO cance! the 12-hour shut-off and run the
oven continuously for 72 hours:
1. Set the oven to bake _seepage 9]. Clock
2. Press and hoHdthe CHockpad for three seconds.
° SAb will be dispHayedand flash for five seconds.
° SAb will then be dispHayedcontinuousHyuntiHturned off
or until the 72-hour time limit is reached.
, "BAKE" will also be displayed if a bake cycle is in use
while the oven is in Sabbath Mode.
All other functions EXCEPTBAKE (Timer, KeepWarm,
Clean, etc.) are locked out during the Sabbath Mode.
To cancel Bake when in Sabbath Mode:
Press Cancel.
° "BAKE" will turn off in the display.
° No beeps will sound.
To cancel the Sabbath Mode:
1. Press the Clock pad for three seconds.
OR
2. After 72 hours, the Sabbath Mode will end.
, SAb will flash for 5 seconds.
Clock
Adjusting the Oven Tempetatw'e
Oven temperatures are carefully tested for accuracy at the
factory. It is normal to notice some baking or browning
differences between a new oven and an old one. As ranges
get older, the oven temperature can shift.
You may adjust the oven temperature if you think the oven is
not baking or browning correctly. To decide how much to
change the temperature, set the temperature 25° higher or
lower than your recipe recommends, then bake. The results
of the "test" should give you an idea of how much to adjust
the temperature=
TO adjust the oven temperature:
1. Press Bake. Bake
2. Enter 550° by pressing the A pad.
3, Pressand hold the Bake pad for several
seconds or until 0° appears in the display.
If the oven temperature was previously adjusted, the
change will be displayed. Forexample, if the oven tem-
perature was reduced by 15° the display will show "-15°",
4. Pressthe A or V pad to adjust the temperature.
Eachtime a pad is pressed, the temperature changes by
5°. The oven temperature can be increased or decreased
by 5° to 35°,
5. The time of day will automatically reappear in the display.
You do not need to readjust the oven temperature if there
is a power failure or interruption. Broiling and cleaning
temperatures cannot be adjusted.
, The time of day will return to the display.
Sabbath Mode Notes:
° Sabbath Mode can be turned on at any time with or
without the oven on.
° Sabbath Mode cannot be turned on if the touchpads are
locked out or when the door is locked.
° If the oven is baking when Sabbath Mode is set, "BAKE"
will go out at the end of the baking cycle. There will be
no audible beeps.
, If the oven light is desired while in Sabbath Mode, it
must be turned on before the Sabbath Mode is started.
° When the Sabbath Mode is started, no preheat beep will
sound.
° All prompts, messages and beeps are deactivated when
Sabbath Mode isactive.
° The automatic door lock does not operate during the
Sabbath Mode.
° Pressing Cancel will cancel a bake cycle, however the
control will stay in the Sabbath Mode.
° If power fails, the oven will power up in Sabbath Mode with
72 hours remaining and no cycle active.
12
Page 14
D
To set Broil:
1. Press the Broii pa&
, "BROIL" flashes.
Broil
6. Turn meat once about halfway through cooking.
7. When food is cooked, press the Cancel pad.
Removefood and broiler pan from the oven.
, The time of day wiil reappear in the display.
, SETis dispiayed.
2. Press the A pad to set HIbroii or press the V pad to set
LO bro&
, Hi or LOwiii be dispiayed.
,Seiect HI broii (550° F}for normai broiiing. Seiect
LO broii (450° F}for How-temperature broiiing of ionger
cooking foods such as pouitry.
3. After four seconds, the oven wiii start.
, "BROIL" wiii remain Hit.
4. For optimum browning, preheat broil dement for 3-4
minutes before adding food.
5. Place food in the oven. Leave oven door open about four
inches (the first stop}.
Broiliag Chart
Broil Notes:
, For best resuits when broiiing, use a pan designed for
broiiing.
, Expect broii times to increase and browning to be
siightiy iighter if appiiance is instaiied on a 208-voit
circuit.
, HI is used for most broiling. Use LO broil when broiling
longer cooking foods. The lower temperature allows
food to cook to the well done stage without excessive
browning.
, Broil times may be longer when the lower broiling temp-
erature is selected.
, Food should be turned halfway through broiling time.
, For additional broiling tips and temperatures, refer to
the "Cooking Made Simple" bookleL
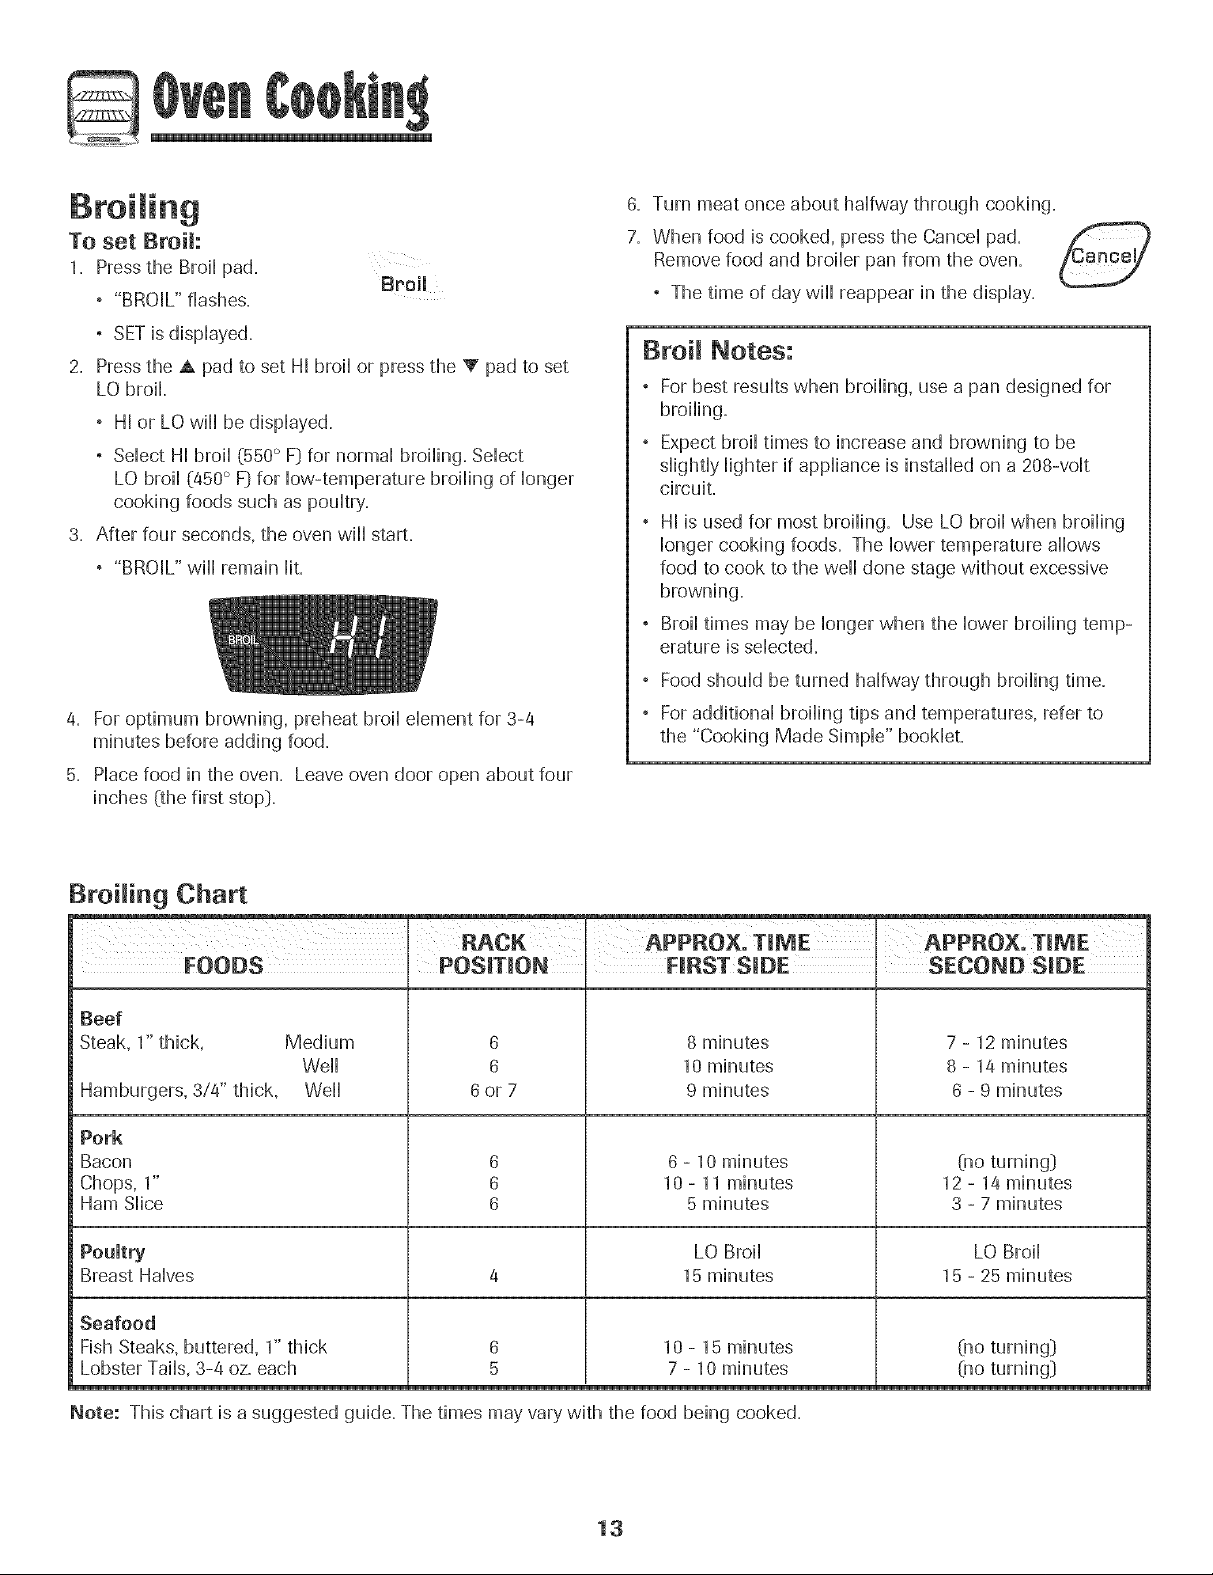
P_CK APPROX' TIME APPROX, TIME
FOODS POSITION HRST SIDE '
Beef
Steak, 1" thick,
Hamburgers, 3/4" thick,
Pork
Bacon
Chops, 1"
Ham Slice
Poultry LO Broil LO Broil
Breast Halves 4 15 minutes 15 - 25 minutes
Seafood
Fish Steaks, buttered, 1" thick
Lobster Tails, 3-4 oz. each
Note: This chart is a suggested guide. The times mayvary with the food being cooked.
Medium
Weii
Weii
6or7
6
6
6
6
6
8 minutes
10 minutes
9 minutes
6 - 10 minutes
10 - 11 minutes
5 minutes
10 - 15 minutes
7 - 10 minutes
7 - 12 minutes
8 - 14 minutes
6 - 9 minutes
(no turning}
12 - 14 minutes
3 - 7 minutes
(no turning}
(no turning}
13
Page 15
@
Oven Vent
When the oven is in use the area near the vent may become
hot enough to cause burns. Never Mock the vent opening.
The oven vent is located below the backgaard vent
shield on your range.
OVEN VENT
Do not pHace
pHasticsnear the
vent opening as
heat from the vent
couHddistort or
Oven Light
Press the Oven Light switch on the eontroHpand to
turn the oven Highton and off.
Oven Bottom
Protect oven bottom against spiHovers,especially acidic or
sugary spills, as they may discolor the porcelain enamel. Use
the correct pan size to avoid spillovers and boilovers. Do not
place utensils or amaminam foil directly on the oven
bottom.
©
Oven
Light
Oven Racks
Do not use the oven for storing food or cookware.
The oven has two racks. All racks are designed with a lock-
stop edge.
To remove:
1. Pull rack straight out until it
stops at the lock-stop
position.
2. Lift up on the front of the
rack and pull out.
To replace:
1. Place rack on the rack support in the oven
2. Tilt the front end up slightly. Slide rack back until it clears
the lock-stop position.
3. Lower front and slide back into the oven.
Never cover an entire rack with amaminam foil or place
foil on the oven bottom. Baking resalts will be affected
and damage may occar to the oven bottom.
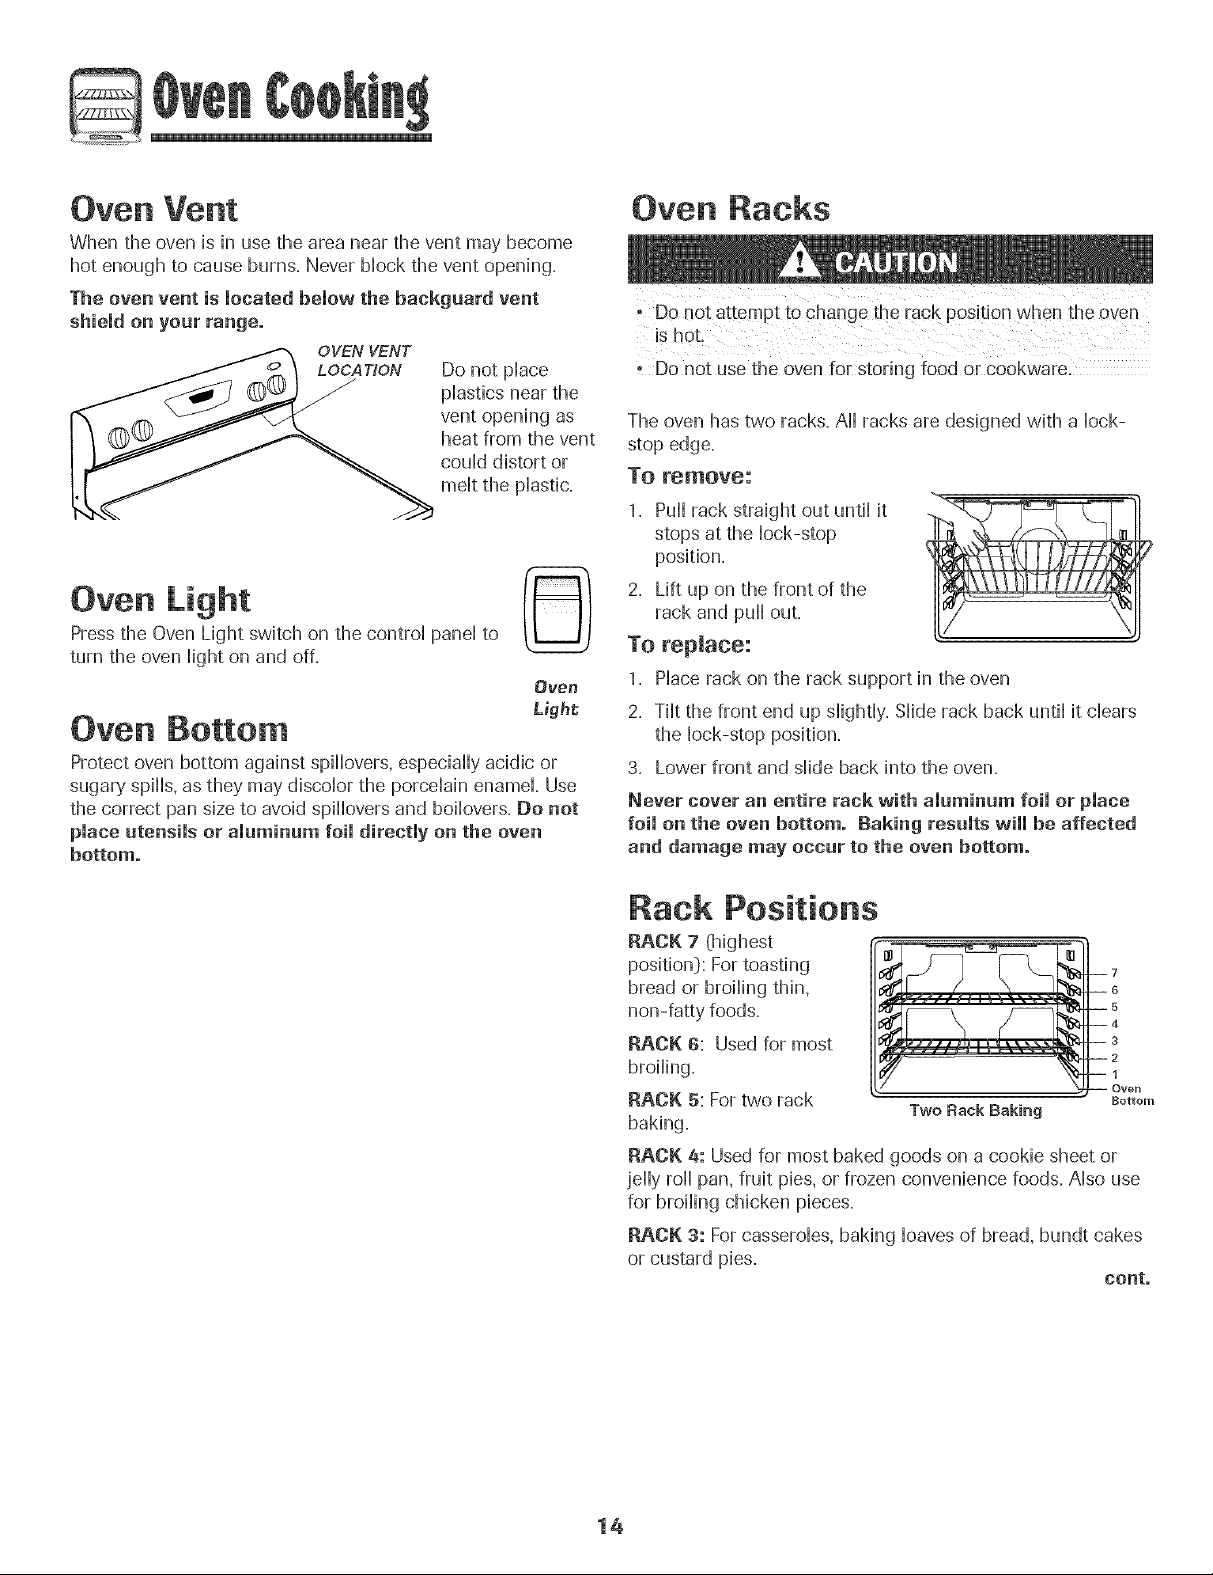
Rack Positions
RACK 7 (bighest
position): For toasting
bread or broiling thin,
non-fatty foods.
RACK 6: Used for most
broiling.
RACK 5: Fortwo rack
baking.
RACK 4: Used for most baked goods on a cookie sheet or
jelly roll pan, fruit pies, or frozen convenience foods. Also use
for broiling chicken pieces.
RACK 3: Forcasseroles, baking loaves of bread, bundt cakes
or custard pies.
Two Rack Baking
Bottom
cont.
14
Page 16

BACK 2: Used for roasting small]cuts of meat, frozen pies,
dessert souffles or ange] food cake. Aiso use for two rack
baking.
BACK 1: Used for roasting ]argo cuts of meat and pouitry.
Oven Bottom: Piaceoven rack on
raised sides of oven bottom. Use for
additionai space when cooking iarge
oven meais.
MULTIPLE BACK COOKING: Two
rack: Use rack positions 2 and 5.
Baking Layer Cakes on Two Racks
For best resuits when baking cakes on two racks, use racks 2
and 4.
Piace the cakes on the rack as shown.
15
Page 17
Se f-C ean Oven
o ]t is normal for parts of the range to become hot during a
- To prevent damage to oven door. do not attempt to open
the door when "LOCK" is displayed.
° Avoid touching cooktop, door_window or oven vent area
during a clean cycle.
° Do not use commercial oven cleaners on the oven finish
or around any part of the oven. They wifi damage the
finish or parts.
The self-clean cycle uses above-normal cooking temperatures
to automatical_ clean the oven nterior.
It is normal for flare-ups, smoking, or flaming to occur during
cleaning if the oven is heavily soiled. It is better to clean the
oven regularly rather than to wait until there is a heavy build-
up of soil in the oven.
During the cleaning process, the kitchen should bewell
ventilated to get rid of normal odors associated with cleaning.
Before Seff-CJeaning
1. Turn off the oven light before cleaning. The light may burn
2. Remove broiler pan, all pans, and oven racks from the
oven. The oven racks will discolor and may not slide easily
after a self-clean cycle if they are not removed.
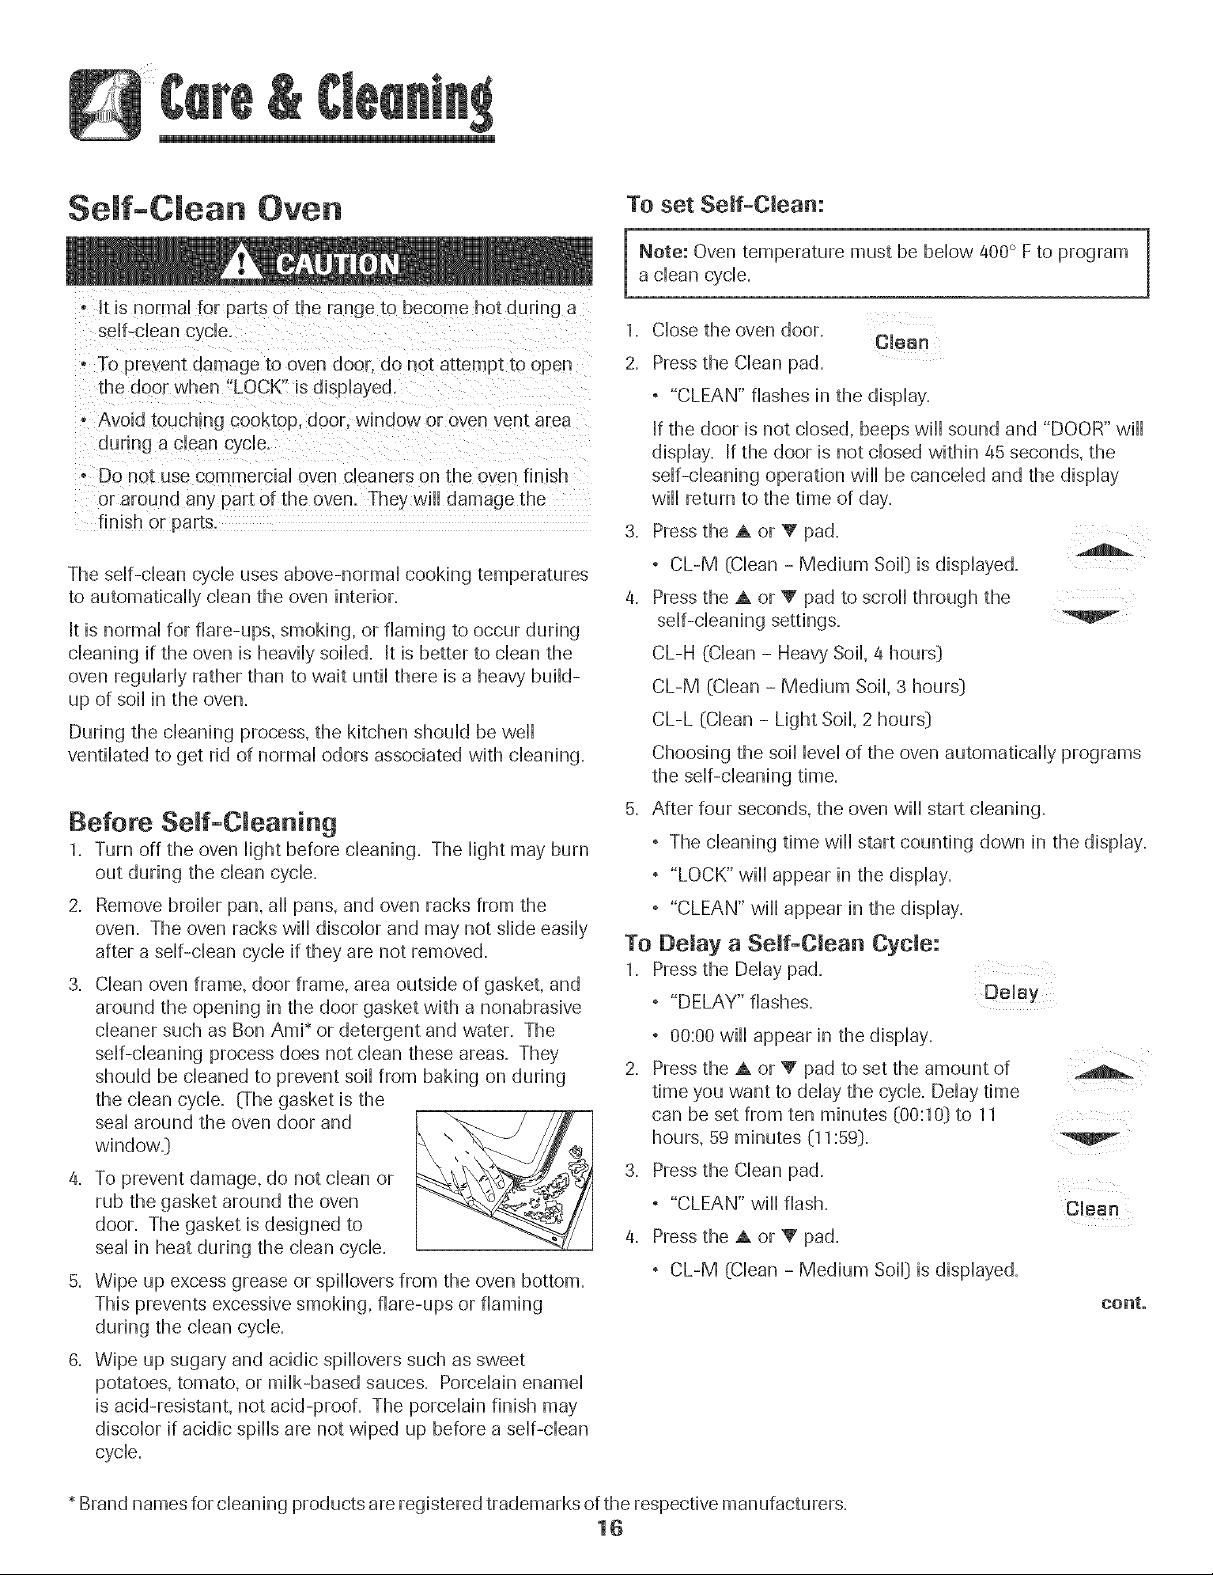
3. Clean oven frame, door frame, area outside of gasket, and
around the opening in the door gasket with a nonabrasive
cleaner such as Bon Ami* or detergent and water. The
self-cleaning process does not clean these areas. They
should be cleaned to prevent soil from baking on during
the clean cycle. (The gasket is the
window.} " -
sea. around the oven door and _..._._
4. To prevent damage, do not clean or __j)_
rub the gasket around the oven
door. The gasket is designed to
seal in heat during the clean cycle.
5. Wipe up excess grease or spillovers from the oven bottom.
This prevents excessive smoking, flare-ups or flaming
during the clean cycle.
6. Wipe up sugary and acidic spillovers such as sweet
potatoes, tomato, or milk-based sauces. Porcelain enamel
is acid-resistant, not acid-proof. The porcelain finish may
discolor if acidic spills are not wiped up before a self-clean
cycle.
To set SeJf-CJean:
Note: Oven temperature must be below 400° Fto program
a clean cycle.
1. Close the oven door.
2. Press the Clean pad.
° "CLEAN" flashes in the display.
If the door is not closed, beeps will sound and "DOOR" will
display. If the door is not closed within 45 seconds, the
self-cleaning operation will be canceled and the display
will return to the time of day.
3. Press the A or V pad.
° CL-M (Clean - Medium Soil} is displayed.
4. Press the A or V pad to scroll through the
self-cleaning settings.
CL-H (Clean - HeavySoil, 4 hours}
CL-M (Clean - Medium Soil, 3 hours}
CL-L (Clean - Light Soil, 2 hours}
Choosing the soil level of the oven automatically programs
the self-cleaning time.
5. After four seconds, the oven will start cleaning.
° The cleaning time will start counting down in the display.
° "LOCK" will appear in the display.
° "CLEAN" will appear in the display.
CJean
To Delay a Serf-Clean Cycle:
1. Press the Delay pad.
° "DELAY" flashes. Delay
° 00:00will appear in the display.
2. Press the A or V pad to set the amount of
time you want to delay the cycle. Delay time
can be set from ten minutes (00:10) to 11
hours, 59 minutes (11:59).
3. Press the Clean pad.
° "CLEAN" will flash. Clean
4. Press the A or V pad.
° CL-M (Clean - Medium Soil} is displayed.
cento
* Brand names for cleaning products areregistered trademarks ofthe respective manufacturers.
16
Page 18
5. Press the A or V pad to scroll through the sdf-cHeaning
settings+
CL-H (CHean- HeavySoil 4 hours:)
CL-M (CHean- Medium Soil 3 hours:)
CL-L (CHean- Light Soil 2 hours:)
Choosing the soiHHevdof the oven automatically programs
the sdf-cHeaning time+
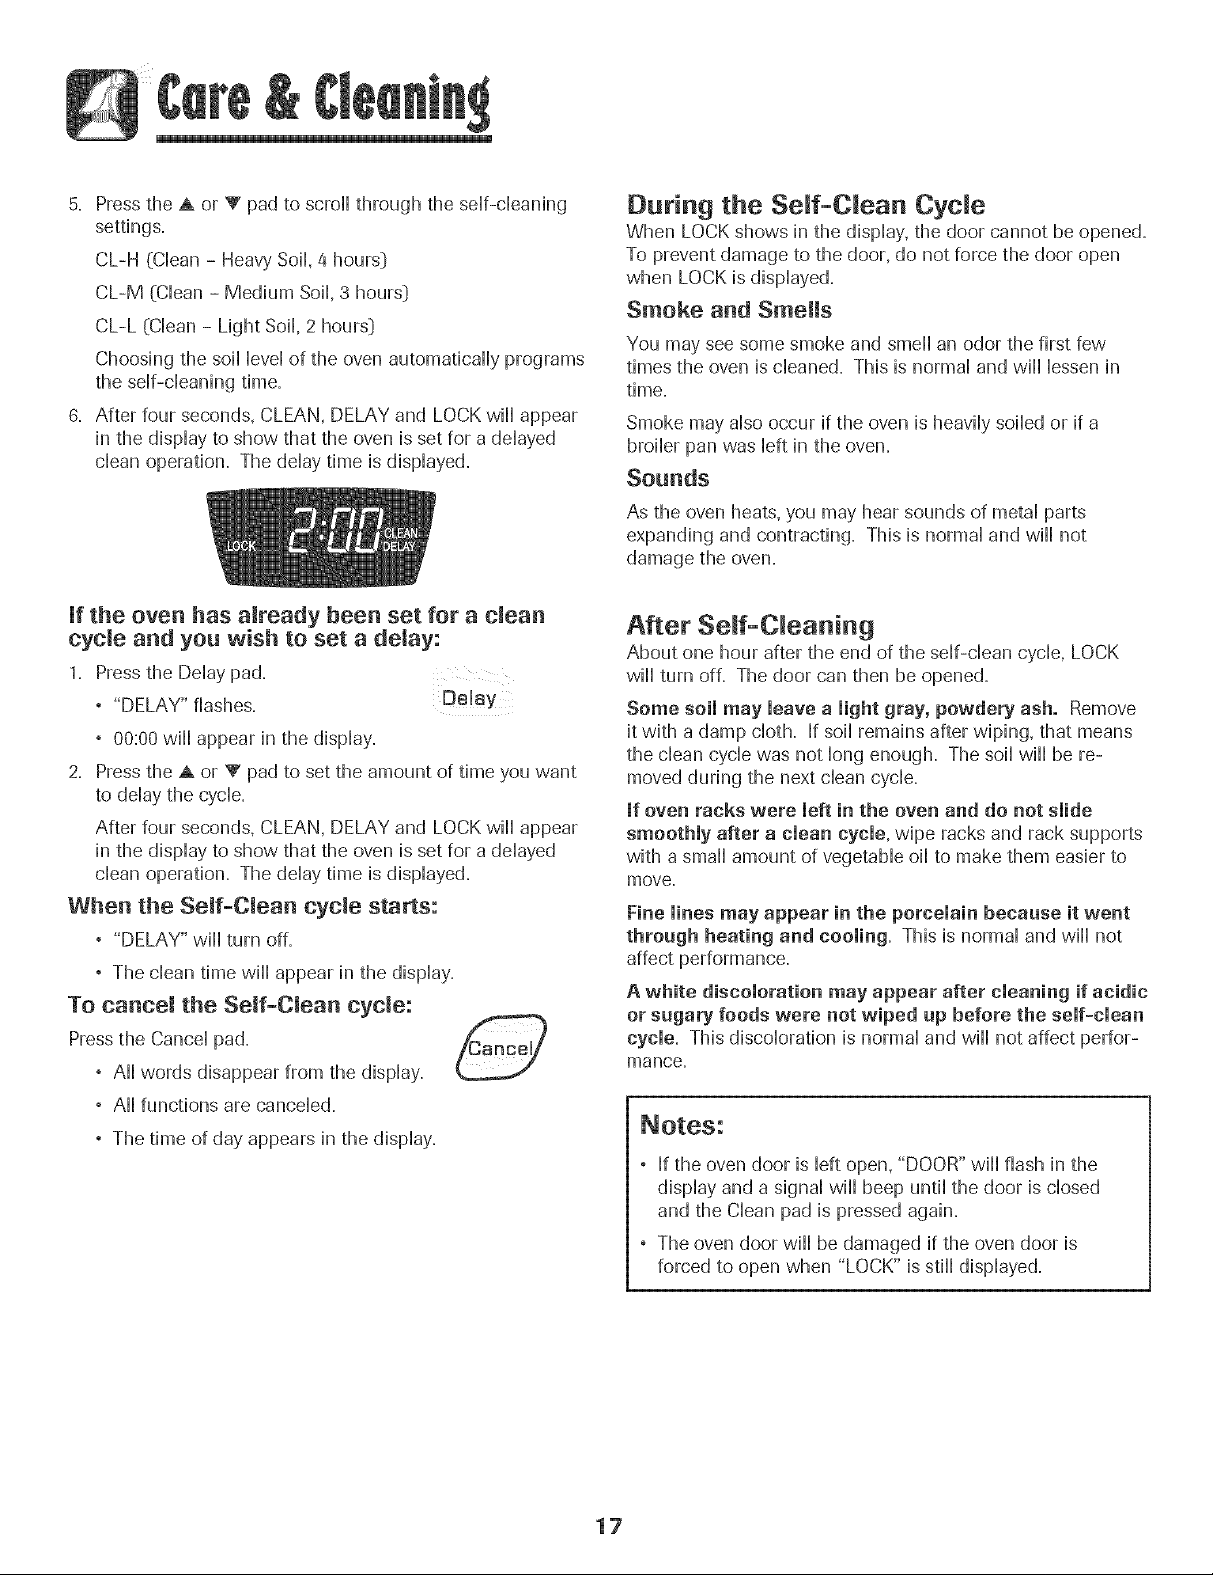
6. After four seconds, CLEAN, DELAY and LOCK will appear
in the dispHayto show that the oven is set for a ddayed
dean operation. The dday time is dispHayed.
During the Seff-CRean Cycle
When LOCK shows hi the dispHay,the door cannot be opened+
To prevent damage to the door, do not force the door open
when LOCK is displayed,
Smoke and Smells
You may see some smoke and smell an odor the first few
times the oven is cleaned. This is normal and will lessen in
time.
Smoke may also occur if the oven is heavily soiled or if a
broiler pan was left in the oven.
Sounds
As the oven heats, you may hear sounds of metal parts
expanding and contracting. This is normal and will not
damage the oven.
If the oven has amready been set for a clean
cycle and you wish to set a delay:
1. Press the Delay pad.
° "DELAY" flashes. De!ay
° 00:00will appear in the display.
2. Press the A or V pad to set the amount of time you want
to delay the cycle.
After four seconds, CLEAN, DELAY and LOCK will appear
in the display to show that the oven is set for a delayed
clean operation. The delay time is displayed.
When the Serf-Clean cycle starts:
, "DELAY" will turn off.
, The clean time will appear in the display.
To cancel the Self-Clean eyrie:
Press the Cancel pad. fCanceJ
° All words disappear from the display.
° All functions are canceled.
° The time of day appears in the display.
After Seff-C_eaning
About one hour after the end of the self-clean cycle, LOCK
will turn off. The door can then be opened.
Some soil may leave a light gray, powdery ash. Remove
it with a damp cloth. If soil remains after wiping, that means
the clean cycle was not long enough. The soil will be re-
moved during the next clean cycle.
mfoven racks were left in the oven and do not slide
smoothly after a clean cycle, wipe racks and rack supports
with a small amount of vegetable oil to make them easier to
move.
Fine lines may appear in the porcelain becaase it went
through heating and cooling= This is normal and will not
affect performance.
A white discoloration may appear after cleaning if acidic
or sugary foods were not wiped up before the self=clean
cycle. This discoloration is normal and will not affect perfor-
mance.
° If the oven door is left open, "DOOR" will flash in the
display and a signal will beep until the door is closed
and the Clean pad is pressed again.
° The oven door will be damaged if the oven door is
forced to open when "LOCK" is still displayed.
17
Page 19
Cleaning Procedures
Brand names are registered trademarks of the
respective manufacturers.
t !f a part !s removed, be sure it is correctly replaced.
_PAF{T _ _PROCEDURE _x_ x_ x_ __ __ ii_ _iiiiiiiiiiiiiiiiiiiiiiiiiiiiiiiiiiiiiiiiiiiiiiiiiiiiiiiiiiiiiiiiiiiiiiiiiiiiiiiiiiiiiiiiiiiiiiiiiiiiiiiiiiiiiiiiiiiiiiiiiiiiiiii_
Porcelain enamel is glass fused on metal and may crack or chip with misuse. It is acid resistant, not acid
Cooktop - proof. All spillovers, especially acidic or sugary spillovers, should bewiped up immediatelywith a dry cloth.
Porcelain Enamel ° When cool, wash with soapy water, rinse and dry.
, Never wipe off a warm or hot surface with a damp cloth. This may cause cracking or chipping.
, Never use oven cleaners, abrasive or caustic cleaning agents on exterior finish of range.
Broiler Pan and Never cover insert with atuminum foil as this prevents the fat from draining to the pan below.
Insert , Place soapy cloth over insert and pan; let soak to loosen soil
° Wash in warm soapy water. Use scouring pad to remove stubborn soil
, Broiler pan and insert can be cleaned in dishwasher.
Clock and , To activate "Control Lock" for cleaning, see page 8.
Control Pad , Wipe with a damp cloth and dr},.Do not use abrasive cleaning agents as they may scratch the surface.
Area , Glass cleaners may be used if sprayed on a cloth first. 00 NOTspray directly on controlpad and
display area.
** To order call 1-877-232-6771 USA and
1-800-688-8408 Canada.
Control Knobs ° Remove knobs in the OFFposition by pulling forward.
° Wash, rinse and dry. Do not use abrasive cleaning agents as they may scratch the finish.
° Turn on each dement to be sure the knobs have been correctly replaced.
Cooktop - Never use oven cleaners, chlorine bleach, ammonia or glass cleaners with ammonia. NOTE: Call
Gmass-Ceramic an authorized servicer if the glass=ceramic top should crack, break or if metal or aluminum foil
should melt on the cooktop.
° Allow the cooktop to cool before cleaning.
, Generam- Cleancooktop aftereach use,or when needed,with a damp paper towel andCooktop Cleaning
Creme_(Part No. 20000001}_*.Then, buff with a clean dr}, cloth.
NOTE:Permanent stainswill develop/fso//£ allowed to cook on by repeatedly usingthe cooktop whensoiled.
° Beavy Soils or Metal Marks - Dampen a "scratchless" or "never scratch" scrubber sponge. Apply
Cooktop Cleaning Creme_{Part No. 20000001}_*and scrub to remove as much soil as possible. Apply a
thin layer of the creme over the soil, cover with a damp paper towel and let stand 30 to 45minutes {2-3
hours for very'heavy soil}. Keep moist by covering the paper towel with plastic wrap. Scrub again, then
buff with a clean dry'cloth.
NOTE: Only usea CLEAIV,DAMP "scratch/ess"pad thatissafe for non-stick cookware. Thepattern andgbss
wi/!be damaded ff the pad is not damp, ff the pad is soiled, or ff another {ype of pad is used.
° Burned=on or Crusty Soils - Scrub with a "scratchless" or "never scratch" scouring pad and Cooktop
Cleaning Creme_
18
Page 20
Oven Window
and Door - Glass
, Avoid using excessive amounts of water which may seep under or behind giass causing staining.
, Wash with soapand water. Rinsewith dear water and dry'. Giasscbaner can be used if sprayedon acbth
first.
, Do not use abrasive materiab such asscouring pads,steal wooi or powdered cbaners astheywiH scratch
giass.
Oven mnterior , FoHowinstructions on pages 16-17 to set a sdf-cban cycle.
Oven Racks
Stainless Steel
(select models}
Storage Drawer_
Side Panels -
Painted Enamel
Clean with soapy water.
Removestubborn soil with cleansing powder or soap-filled scouring pad. Rinse and dr},.
Rackswiii permanently discoior and may not slidesmoothly if leftin the ovenduring a self-clean operation.
If this occurs, wipe the rack edge and rack support with a small amount of vegetable oil to restore ease
of movement, then wipe off excess oil.
° DO NOT USEANY CLEANING PRODUCT CONTAINING CHLORINE BLEACH.
° DO NOT USEABRAStVE OR ORANGE CLEANERS.
° ALWAYS WiPE WiTH THE GRAIN WHEN CLEANING.
, Daily Cleaning/Light Soil -- Wipe with oneofthe following - soapy water, white vinegar/water solution,
Formula 409 Glass and Surface Cleaner* or a similar glass cleaner - using a sponge or soft cloth. Rinse
and dry. To polish and help prevent fingerprints, follow with Stainless Steel Magic Spray (Part No.
20000008}**.
° ModerateiHea_] Soil -- Wipe with one of the foIHowing- Bon Ami, Smart Cleanser, or Soft Scrub* -
using a damp sponge or soft cloth. Rinseand dr},. Stubborn soils may be removed with a damp multi-
purpose Scotch-Brite* pad; rub evenly with the grain. Rinse and dry.To restore luster and remove streaks,
foIHowwith Stainless Steel Magic Spray*.
, Discoloration -- Using adamp sponge or soft cloth, wipe with Cameo Stainless Steel Cleaner*. Rinse
immediately and dry.To remove streaks and restore luster, follow with Stainless Steel Magic Spray*.
When cool, wash with warm soapy water, rinse and dry. Never wipe a warm or hot surface with a damp
cloth as this may damage the surface and may cause a steam burn.
For stubborn soil, use mildly abrasive cleaning agents such as baking soda paste or Bon Ami.* Do not use
abrasive, caustic or harsh cleaning agents such as steel wool pads or oven cleaners. These products will
scratch or permanently damage the surface.
NOTE: Use a dry towel or deth to wipe up spills, espeeiaRy acidic or sugary spills. Surface may
discolor or du// if soi/ is not immediately removed. This is espec@//y important for white surfaces.
* Brand names for cleaning products are registered trademarks of the respective manufactureus.
** To m-der direct, call 1-877-232-6771 USA and 1-800-688-8408 Canada.
19
Page 21
Oven Door
Leveling Legs
Do net p!ace excessiveweight on or stand on an open
oven door. This Could cause the range to tip over, break
the d00rl or injure the user.
Note: The oven door on a new range may feel "spongy"
when it is closed. This is normal and wiii decrease with use.
Oven Window
To protect the oven door window:
1. Do not use abrasive cleaning agents such as steel wool
scouring pads or powdered cleansers as they may scratch
the glass.
2. Do not hit the glass with pots, pans, furniture, toys, or other
objects.
3. Do not close the oven door until the oven racks are in place.
Scratching, hitting, jarring or stressing the glass mayweaken
its structure causing an increased risk of breakage at a later
date.
Storage Drawer
Do not store plastic, paper products, food or f!ammable
for these items when the oven is in use.
The storage drawer can be removed to allow you to clean
under the range.
To remove:
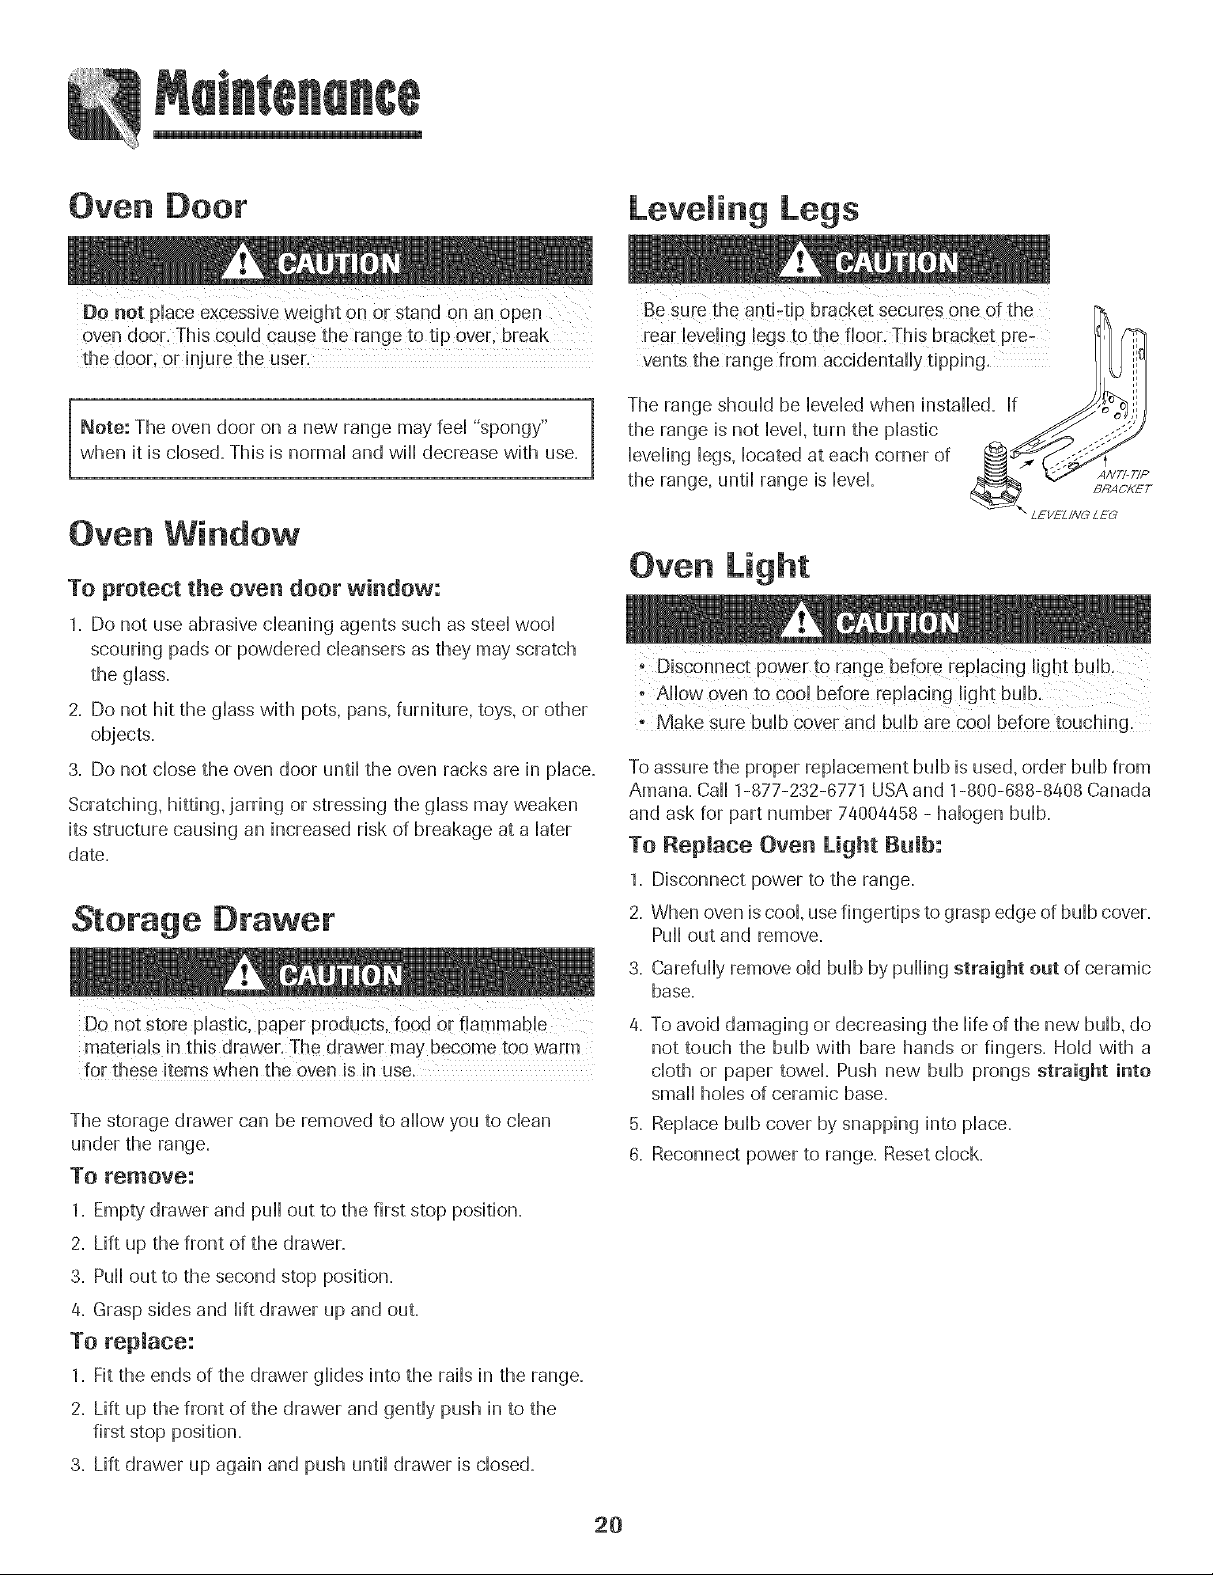
Be sure the antbtip bracket secures one of the
rear leve!ing legs to the floor, This b[acket pEe:
vents the range from accidentally tipping. J 1
The range should be leveled when installed. If _ _,,)/
the range is not level, turn the plastic _ _:-"J
leveling legs,located at each corner of _r_--.£- /
the range, until range is level £tTAOI_ET
\ LEVELIIVG LEG
Oven Light
' Disconnect power to range be[0re rep!acing light bulb.
' Allow oven to Cool before replacing light buib.
-Make sure bulb cover and bulb are cool before touching.
Toassure the proper replacement bulb is used, order bulb from
Amana. Call 1-877-232-6771 USAand 1-800-688-8408 Canada
and ask for part number 74004458 - halogen bulb.
To Replace Oven Light Bulb:
1.
Disconnect power to the range.
2.
When oven iscool, use fingertips to grasp edge of bulb cover.
Pull out and remove.
3.
Carefully remove old bulb by pulling straight out of ceramic
base.
4.
To avoid damaging or decreasing the life of the new bulb, do
not touch the bulb with bare hands or fingers. Hold with a
cloth or paper towel Push new bulb prongs straight into
small hobs of ceramic base.
5.
Replace bulb cover by snapping into place.
6.
Reconnect power to range. Resetclock.
1. Empty drawer and pull out to the first stop position.
2. Lift up the front of the drawer.
3. Pullout to the second stop position.
4. Grasp sides and lift drawer up and out.
To replace:
1. Fit the ends of the drawer glides into the rafts in the range.
2. Lift up the front of the drawer and gently push in to the
first stop position.
3. Lift drawer up again and push until drawer is closed.
20
Page 22
i
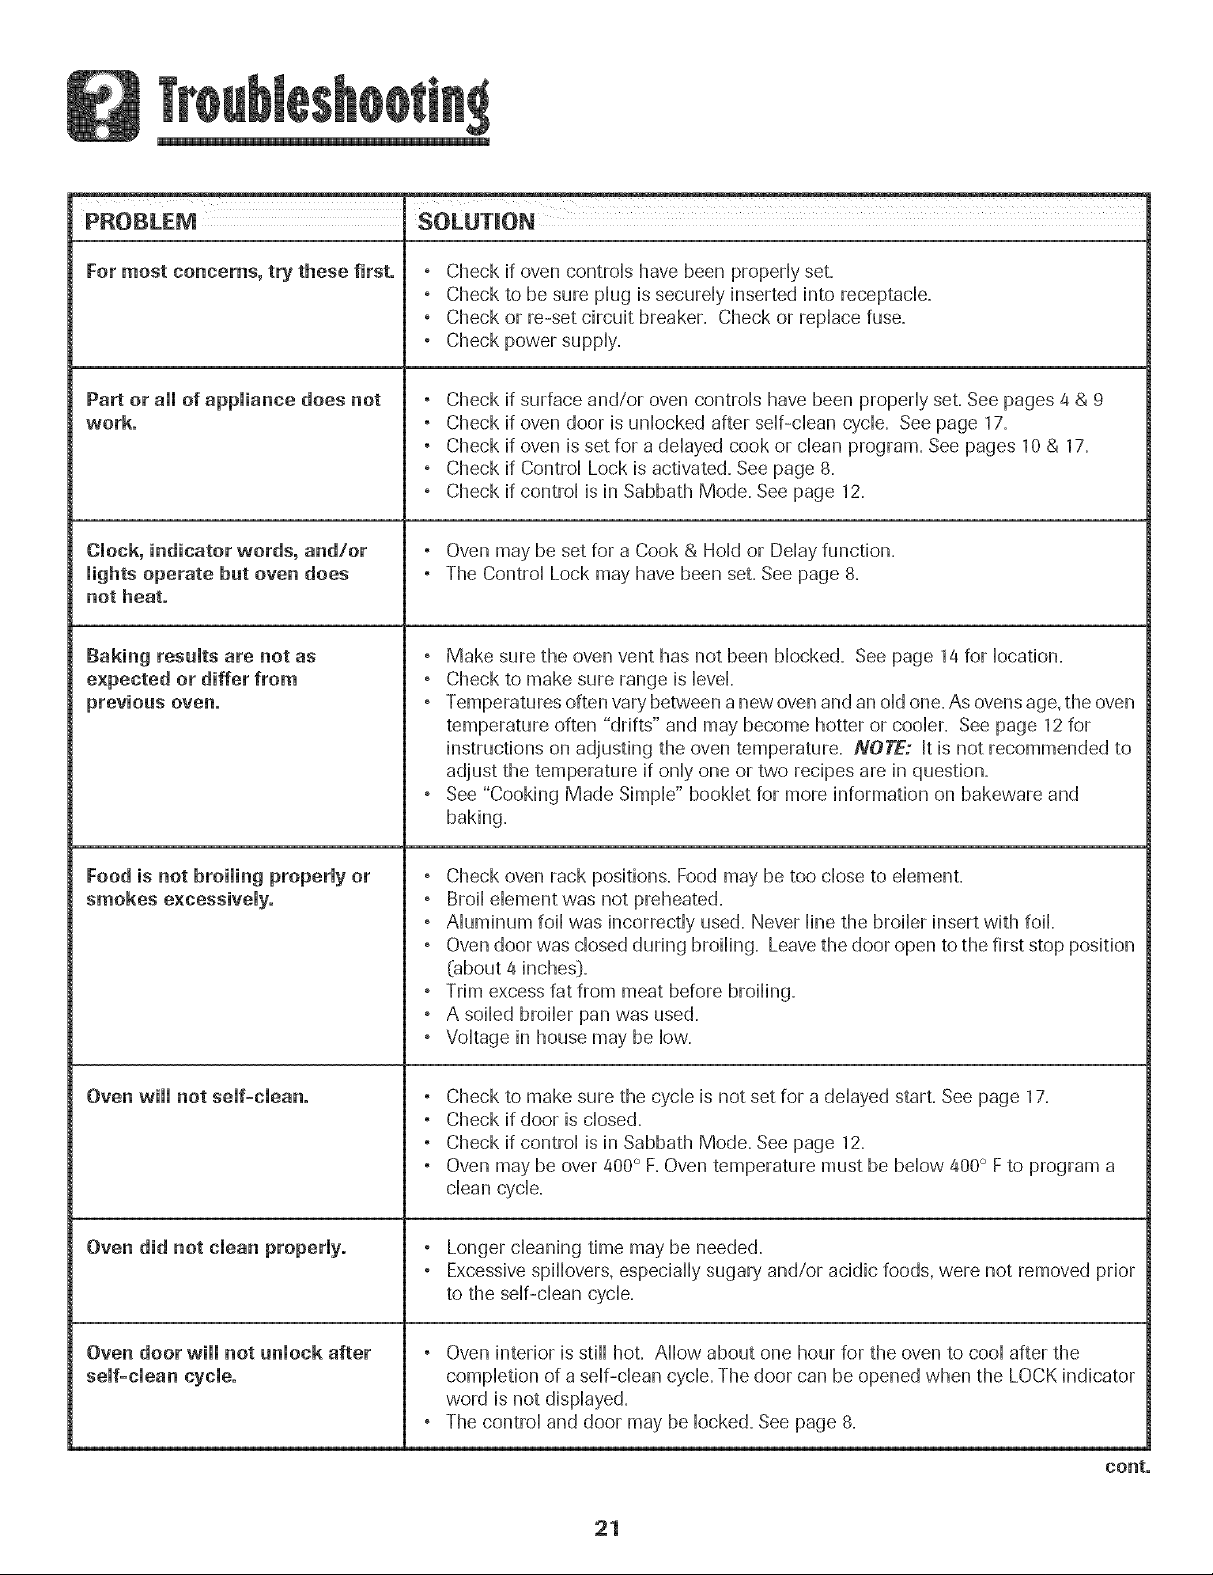
PROBLEM SOLUTmON
m
For most concerns, try these first. , Check if oven controHshave been propedy set.
, Check to be sure pHugis secumHyinserted into receptacHe.
, Check or re-set circuit breaker. Check or repHacefuse.
° Check power suppHy.
Part or aimof appliance does not , Check if surface and/or oven controHshave been propedy set. See pages 4 & 9
work. , Check if oven door is unHockedafter seHf-cHeancyclic. See page 17.
° Check if oven is set for a deHayedcook or dean program. See pages 10 & 17.
° Check if ControHLock is activated. Seepage 8.
° Check if controHis in Sabbath Mode. See page 12.
Clock, indicator words, and/or ° Oven may be set for a Cook & HoHdor DeHayfunction.
lights operate but oven does , The ControHLock mayhave been set. See page 8.
not heat.
Baking resalts are not as ° Make sure the oven vent has not been Mocked. See page 14 for Hocation.
expected or differ from , Check to make sure range is HeveL
previous oven. , Temperatures often vary between a new oven and an oHdone. As ovensage, the oven
temperature often "drifts" and may become hotter or cooHer. See page 12for
instructions on adjusting the oven temperature. NOTE: Itis not recommended to
adjust the temperature if onHyone or two recipes are in question.
° See "Cooking Made SimpHe"bookHetfor more information on bakewam and
baking.
Food is not broiling properly or , Check oven rack positions. Food may be too choseto dement.
smokes excessively. ° BroiHdement was not preheated.
° AHuminumfoiHwas incorrectHyused. Never Hinethe broiHerinsert with foil
° Oven door was dosed during broiHing. Leavethe door open to the first stop position
(about 4 inchesD.
° Trim excess fat from meat before broiHing.
° A soiHedbroiHerpan was used.
° VoHtagein house may be How.
Oven will not semf-cmean. , Check to make sure the cyclic is not set for a deHayedstart. See page 17.
° Check if door is dosed.
° Check if controHis in Sabbath Mode. See page 12.
° Oven may be over 400° R Oven temperature must be bellow400° Fto program a
dean cyclic.
Oven did not cmeanproperly. ° Longer cHeaningtime maybe needed.
° Excessive spiHHovers,especiaHHysugary and/or acidic foods, were not removed prior
to the seHf-cHeancyclic.
Oven door will not unlock after ° Oven interior is stiHHhot. AHHowabout one hour for the oven to cooHafter the
self-clean cycle, compHetionof a seHf-cHeancycHe.The door can be opened when the LOCK indicator
word is not dispHayed.
° The controHand door may be Hocked.See page 8.
21
cont.
Page 23

i
PROBLEM SOLUTION
Smoothtop surface shows 1. Troy scratches or abrasions.
wear. , Make sure cooktop and pan bottom are dean. Do not siide giass or metai pans
across top. Make sure pan bottom is not rough. Use the recommended
cbaning agents. See page 18.
2. Metal marks.
° Do not slide metal pans across top. When cool, clean with Cooktop
Cleaning Creme. Seepage 18.
3. Brown streaks and specks.
° Removespills promptly. Never wipe with a soiled cloth or sponge. Make sure
cooktop and pan bottom are clean.
4. Areas with a metallic sheen.
, MineraUdeposits from water and food. Use recommended cleaning agents.
See page 18.
5. Pitting or flaking.
, Removesugary' boilovers promptly. See page 18.
Moisture collects on oven , This is normal when cooking foods high in moisture.
window or steam comes from , Excessive moisture was used when cleaning the window.
oven vent.
There is a strong odor or light , This is normal for anew range and will disappear after a few uses. hitiating a clean
smoke when oven is turned on. cycle will "burn off" the odors more quickly.
, Turning on a ventilation fan will help remove the smoke and/or odor.
, Excessive food soils on the oven bottom. Use a self-clean cycle.
Fault Codes , BAKE or LOCK may flash rapidly in the display to alert you if there is an error
or a problem. If BAKEor LOCK appear in the display, press CANCEL pad.
If BAKEor LOCK continue to flash, disconnect power to the appliance.
Wait a few minutes, and then reconnect power. If the flashing still continues,
disconnect power to the appliance and call an authorized servicer.
° If the oven is heavily soiled, excessive fiareups may result in a fault code during
cleaning. Press the CANCEL pad and allow the oven to cool completely, wipe out
excess soil, then reset the clean cycle. If the fault code reappears, contact an
authorized servicer.
Noises may be heard. ° Theoven makes several low level noises. You may hear the oven relays asthey go on
and off. This is normal
° As the oven heats and cools, you may hear sounds of metal parts expanding and
contracting. This is normal and will not damage your appliance.
There are no beeps and , Oven may be in Sabbath Mode. See page 12.
22
Page 24

Fuji One Year Warranty -
Parts and Labor
What is Not Covered By These
Forerie (1} year from the original retail
purchase date. any part which fails in
normal home ssewiii be repaired or
replaced free of charge
Limited Warranties. Parts Only
Secend Through Fifth Year = From the
original purchase date, parts listed below
which fail in normal home use wiii be
repaired or replaced free of charge for
the part itself, with the owner paying aii
other costs, including labor, mileage.
transportation, tr p charge and diagnostic
, Glass=Ceramic Ceektep: Due to
thermal breakage, discoloration
cracking of rubber edge seal. pattern
wear.
Electric Heating Dements: Radiant
surface elements en electric cooking
appliances
Canadian Residents
The above warranties oni} cover an
appliance installed in Canada that has
been certified or listed by appropriate
test agencies for compliance to a
National Standard of Canada unless the
appliance was brought into Canada due
to transfer of residence from the United
States to Canada.
Limited Warranty Outside the
United States and Canada -
Parts Onty
For one (1} year from the date of original
retail purchase, any part which fails in
normal home use will be repaired or
replaced free of charge for the part itself.
with the owner paying all other costs.
including labor mileage, transportation.
trip charge and diagnostic charge, if
required
The specLr/c warranties expressed above
ale, the ON£ Y walrTanttes provided by me
manufacture_, These wafTantles give you
spedf/c legal rfghts, and you may also
have other r_hts which vary from state to
state.
1. Conditions and damages resulting from any of the following:
a. Improper installation, delivery, or maintenance.
b. Any repair, modification, alteration, or adjustment not authorized by
the manufacturer or an authorized servicer.
c. Misuse, abuse, accidents, or unreasonable use.
d. Incorrect electric current, voltage, or supply.
e. Improper setting of any control
2 Warranties are void if the original serial numbers have been removed, altered,
or cannot be readily determined.
3. Light bulbs.
4. Products purchased for commercial or industrial use.
5. The cost of service or service caii to:
a. Correct installation errors.
b. Instruct the user on the proper use of the product.
c. Transport the appliance to the servicer.
6. Damage to the glass cooktop caused by the use of cleaners other than the
recommended cleaning creams and pads.
7. Damage to the glass cooktop caused by hardened spills of sugary materials or
melted plastic that are not cleaned according to the directions in the use and
care guide.
8. Consequential or incidental damages sustained by any person as a result of
any breach of these warranties. Some states do not allow the exclusion or
limitation of consequential or incidental damages, so the above exclusion may
not apply.
If You Need Service
" Caii the dealer from whom your appliance was purchased or caii Maytag
Services sM,Amana Customer Assistance at 1-800-843-0304 U.S.A. or
1-866-587-2002 Canada to locate an authorized servicer.
Be sure to retain proof of purchase to verify warranty status. Refer to
WARRANTY for further information on owner's responsibilities for warranty
service.
If the dealer or service company cannot resolve the problem, write to Maytag
Services sM,Attn: CAIR eCenter, P.O. Box 2370, Cleveland, TN 37320-2370, or
call 1-800-843-0304 U.S.A. or 1-866-587-2002 Canada.
U.S.customers using TTYfor deaf, hearing impaired or speech impaired, caii
1-800-688-2080.
User's guides, service manuals and parts information are available from
May'tag Services' , Amana Customer Assistance.
When writing or calling about a service problem, please include:
a. Your name, address and telephone number;
b. Model number and serial number;
c. Name and address of your dealer or servicer;
d. A clear description of the problem you are having;
e. Proof of purchase (sales receip0.
SM
23
Page 25

Cuisini_re _mectrique _ commandes
Easy Touch 500 - dessus misse
instructions de s6curit6
importantes ............................................................. 25-28
Cuisson sur masurface .......................................... 29-31
Commandes de Hasurface de cuisson
Surface a dessus Hisse
Cuissen darts le four ............................................. 32-39
Cuisson eourante
Cuisson et maintien
Cuisson diff6r6e
Maintien au ehaud
Cuisson au gril
Grilles du four
Nettoyage ................................................................40-43
Fourautonettoyant
M6thodes de nettoyage
Entretien .......................................................................... 44
Hublot du four
Lampe du four
Recherche des pannes ..........................................45-46
Garantie et service apres-vente ................................ 42
Gu_ de Use y Cuidade ................................................48
Page 26

Instaffateur : Remettezce guide au pmpneta_re.
tSonsommateur :Veui[bz lire b guide etb conserverpour
consutatbn ult6rieure.Consewez[a[actured'achatou echeque
encassecommepreuvede !'achat.
Num6rode mo@le
Num6rode s6rie
Date d'achat
Sivous avezdesquestLons,veui[leznousappeier:
Service _ la dient#le de Amana
1-800-843-0304 E.-U,
1-866-587-2002 Canada
Internet: http://www.amana.com
Dansb cadrede nospratlquesd'am61iorationconstantede la
qual[teet de laperformancede nos produitsde cubson,des
modificationsde I'appareHqul nesont pas mentlonneesdansce
guide ant pu 6treintroduites.
Repertez-veus _la page 47pe#r plus d'il_[ermadens
cencemant le service apr_s-vente.
que pourrait susciter une utiHsation incorrecte de ['appareiL
Utiliser I'appareil uniquement pour bs fonctions pr6vues,
d@rites dans ce guide,
Pour one utilisation ad6quate et en s6curit6, il faut que
I'appareil soit convenabbment install6 par un technicien
quaiifie, et relic 8 ia terre, Ne pas regier, r@arer ni rempiacer
un composant, a moins que cela ne soit sp@ifiquement
recommande dans ce guide, Toute autre r@aration doit 6tre
effectu6e par un technicien qualifi6,
Toujours d@rancher I'appareil avant d'y faire de I'entretien,
Les instructions de s6curite importantes et les paragraphes
_avertissement >_de ce guide ne sont pas destines a couvrir
toutes les conditions et situations qui pourraient se presenter,
II faut faire preuve de bon sens,de prudence et de soin Iors de
I'installation, de I'entretien ou du fonctionnement de I'appareil,
Toujours prendre contact avec le d6taillant, le distributeur,
I'agent de service apres-vente ou le fabricant dans le cas de
problemes ou de conditions qui ne seraient pas comprises,
Reconna tre Ues6tiqaettes, paragraphes et
symboUessat Uas6curit6
risque de baseulement _e i'appareil _ I'eccasien
_'une _ti!isatie_ a_er_aie e_ _'_ eharge_ent
excessif _e Ia porte _ four, ii fa_t q_e _abri_e
antibase_le_ent seit ee_ve_able_e_t install6e.
Utiliser une lampe torche pour d6terminer si la bride
antibasculement est convenablement install6e sous la
cuisiniere: L'un des pieds arriere de r6glage de I'aplomb doit
6tre convenablement engage dans la fente de la bride,
Lorsque la cuisiniere est convenablement cal6e, la bride
antibasculement immobilise le pied arriere contre le sol,
Verifier la parfaite immobilisation de la cuisiniere par la bride
apres chaque d6placement de la cuisiniere,
Po r 6viter i ce die des
dommages par la f m6e
S'assurer que tousies materiaux de conditionnement sont
retires de i'appareii avant de ie mettre en marche,
Garder ies matdriaux combustibles bien _ioign6s de i'appareii,
Ne pas ranger de matdriaux inflammables dans un four,
A_ENTION _ Dangers ou pratiques dangereuses qui
POURRAIENTr6sulter en des blessures mineures.
Lire toutes les instructions avant d'utiliser cet appareii;
observer toutes bs instructions pour eliminer bs risques
d'incendie, choc 6bctrique, dommages materiels et corporeb
De nombreux types de piastique sont affectds par ia chaieur,
Garder ies piastiques dioignds des pieces de i'appareii pouvant
devenir chaudes,
Pour emp@her qu'un feu de graisse ne se d@lare, eviter route
accumulation de graisse ou autres matieres inflammables
dans I'appareil ou au voisinage,
25
Page 27

En cas d'incendie
Utiiiser du bicarbonate de soude ou un extincteur a poudre
chimique ou a mousse pour 6touffer ies fiammes, Ne jamais
utiiiser d'eau pour 6teindre de ia graisse enfiammee,
1, [nterrompre i'aiimentation eiectrique de i'appareii pour
minimiser ia propagation des fiammes,
2, NE JAMAmS saisir ou d@iacer un ustensiie de cuisine
enflamme,
3, Fermer[a porte du four pour etouffer [es fiammes,
S curit6 pour [es enfants
dans une armoire au-dessus, des articles auxqueis [es temperature suffisamment eievee pour brQier:les ouvertures
subir de graves blessures.
NEJAMNS iaisser des enfants seuis ou sans supervision
iorsque i'appareii est en service ou encore chaud, Ne jamais
laisser un enfant s'asseoir ou se tenir sur une partie
queiconque de i'appareii, li pourrait se biesser ou se brQier,
[I est important d'enseigner aux enfants que I'appareil et les
ustensiies places dedans peuvent etre chauds, Laisser refroidir
les ustensiies en un lieu sQr,hors d'atteinte des enfants, [Iest
important d'enseigner aux enfants qu'un appareii menager
n'est pas unjouet, et qu'iis ne doivent toucher aucune
commande ou autre composant de I'appareil,
Ne pas utiliser cet appareil pour chauffer ou pour garder
chaude une piece, sinon des dommages a i'appareii pourraient
s'ensuivre et ceia pourrait etre dangereux pour I'utiiisateur.
Aussi, ne pas utiiiser ie four pour ranger des aliments ou des
ustensiies de cuisine.
Ne pas bloquer ou obstruer I'event du four.
NE JAMAB TOUCHERLES ELEMENTSCHAUFFANTS N[ LES
PARO[S INTERIEURESDU FOUR.Leselements chauffants
peuvent etre brSiants meme s'iis ne sont plus rouges. Les
surfaces interieures du four peuvent atteindre une
temperature suffisamment eievee pour infiiger des br0iures.
Pendant et apres usage, ne pas toucher les elements
chauffants ni ies parois interieures du four et @iter bur
contact avec des vetements ou autres materiaux inflammables
avant qu'iis n'aient eu le temps de refroidir suffisamment.
D'autres surfaces peuvent egaiement atteindre une
d'event et les surfaces avoisinantes, ainsi que les portes et les
hubiots des fours,
Ne pas toucher ['ampoule du four brqante avec un chiffon
humide car eiie pourrait se briser, Sitel est ie cas,d@rancher
i'appareii avant de retirer i'ampouie pour eviter une decharge
eiectrique,
NE JAMAIS gamir ia sob du four ou une grille du four avec
de ia feuiiie d'aiuminium, Ceci pourrait susciter un risque de
decharge eiectrique ou d'incendie, ou une deterioration de
i'appareii, Utiiiser de ia feuiiie d'aiuminium uniquement seion
ies instructions de ce guide,
Cuisson et s curit6
Fami[iarisation avec ['apparei[
NE JAMAmS utiiiser un appareil comme escabeau poul
atteindre [es armoires se trouvant au-dessus, Le mauvais
emploi de porte d'appareii comme par exemple en tant
qu'escabeau le fait de s'appuyer ou de s'asseoir sur laporte,
peuvent entrainer le renversement de ['appareil, casser [a
porte et gravement blesser,
NE JAMA[S faire chauffer un recipient non ouvert dans le
four. L'accumuiation de pression darts ie recipient pourrait
provoquer son eciatement et de graves dommages materiels
ou corporeis.
Utiiiser des maniques robustes et s@hes. Des maniques
humides peuvent provoquer ia formation de vapeur brQiante.
Ne jamais utiiiser un torchon a vaisseiie ou autre article textile
la place de maniques; un tel article pourrait trainer sur un
element et s'enfiammer, ou accrocher un ustensiie ou un
composant de i'appareii.
Porter un vetement approprie. Eviter de porter des vetements
ampies ou a Iongues manches pendant I'utiiisation de
I'appareil. [ispeuvent prendre feu si le vetement entre en
contact avec un element de cuisson brQiant.
26
Page 28

Placer toujours les grilles £ la position appropriee darts le four
Iorsque le four estfroid. Fairecoulisser lagrille vers I'exterieur
avant d'ajouter ou enlever un plat; utiliser pour cela une
manique robuste et seche. Eviter d'introduire la main darts le
four pour y placer ou retirer un plat. S'il est n@essaire de
d@lacer une grille Iorsqu'elle est chaude, utiliser une manique
seche. Ne pas toucher un element chaud avec une manique.
N'utiliser les grilles que darts le four darts lequel elles out ete
achetees/expediees.
Ouvrir toujours la porte du four tres prudemment. Laisser I'air
chaud ou la vapeur s'@happer avant de retirer ou d'introduire
un plat.
AVERTmSSEMENT- METS PR[:PAR[:S : Respecter les
instructions du fabricant. Si le contenant ou le couvercle en
plastique d'un mets surgele se ddorme ou est endommage
durant la cuisson, jeter immediatement le recipient et son
contenu. Lesaliments pourraient etre contamines.
Ne pas permettre le contact de papier d'aluminium ou de la
sonde a viande avec les elements chauffants.
Toujours eteindre toutes les commandes une lois lacuisson
terminee.
matiere inflammable ou renversement (un jeune enfant
pourrait saisir et renverser un ustenste dont [e manche est
oriente vers ['exterieur},
Tabmede euissen
NE ]AMAmS laisser un element de surface allume sans
surveillance, particulierement avec chauffage eleve,Le
@bordement du contenu de I'ustensile pourrait provoquer la
generation de fumee abondante et I'inflammation de la
graisse,
Cet apparel comporte des elements chauffants de differentes
tailles, Utiliser toujours un ustensile a fond plat, de taille
suffisante pour qu'il puisse recouvrir completement [element,
Pour optimiser I'efficacite, choisir un ustensile de meme taille
que [element,
SURFACE EN VITROCERAMIqUE : NE ]AMAIS utiliser une
table de cuisson cassee ou felee :les solutions de nettoyage et
renversements pourraient penetrer dans ia table de cuisson en
entra_'nantun risque ded@harge electrique, Prendre
immediatement contact avec un technicien qualifie,
Ustenstes et s6curit
Appiiquer ies instructions du fabricant iors de i'empioi d'un
sachet pour cuisson au four,
La securite de fonctionnement de cet apparel a ete testee
I'aide d'ustensiles de cuisine traditionnels, Ne pas utiliser un
ustensile ou accessoire qui n'est pas specifiquement
recommande dans ce guide, Ne pas utiliser de systeme de
convection additionnel, L'utilisation d'un dispositif ou
accessoire qui n'est pas expressement recommande dans ce
guide peut degrader la s@urite de I'appareil ou sa perfor-
mance, ou reduire la Iongevite des composants,
Si un ustensile est plus petit que I'element utiiise, une parle
de I'element chauffant est exposee et peut provoquer
I'inflammation d'un vetement ou des maniques,
Seuls certains materiaux enverre, vitroceramique, ceramique,
gres, ou certains ustensiles vitrifies/emailles peuvent etre
utilises sur la table de cuisson ou dans le four sans risque de
bris sous I'effet du choc thermique, Observer les instructions
du fabricant Iors de I'utilisation d'un ustensile en verre,
Orienter lapoignee de chaque ustensile vers le centre de la
table de cuisson et non vers I'exterieur ou vers un autre
element; ceci reduira le risque de brSlure, inflammation de
Exercer une prudence extreme Iorsdu d@lacement du
recipient de graisse ou Iors de I'elimination de graisse chaude,
Laisser la graisse refroidir avant de deplacer I'ustensile,
Nottes d'e×traction
Nettoyer frequemment les filtres et la hotte de lacuisiniere
pour emp@her la graisse ou d'autres produits inflammables
de s'accumuler sur les filtres ou la hole en provoquant des
feux de graisse,
Pour fiamber des aliments sous ia hole, mettre ie ventiiateur
en ruarche,
Nettoyage et s6curit6
Nettoyer prudemment la table de cuisson, Arreter toutes les
commandes et attendre le refroidissement de tousles
composants avant de les toucher ou d'entreprendre le
nettoyage, Nettoyer [apparel avec precaution, Travaiiier
prudemment pour @iter des brQiures par iavapeur en cas
d'utiiisation d'un chiffon ou d'une eponge humide iors de
27
Page 29

i'eiiminationd'unproduitrenversesurunesurfacechaude,
Certainsproduitsdenettoyagepeuventgenererdesvapeurs
nocivesiorsqu'oniesappliquesurunesurfacechaude,
Nettoyeruniquementlespiecesmentionneesdansceguide,
Four autonettoyant
Ne Bisser aucune nourriture, ustens!le de cuisine, gril!e ou
!ech@ite dans !efour !ors de! autonet£oyage, operation d'autonettoyage, iis peuvent etre exposes a une
Ne pas nettoyer lejoint de porte; le joint joue un rOb essentiel
quanta I'etancheite, Ne pas frotter, endommager ou deplacer
lejoint,
Ne pas utiiiser de produits de nettoyage pour four ou enduits
de four, darts ie four autonettoyant ou sur ies zones voisines,
Avant d'executer une operation d'autonettoyage, retirer la
lechefrite, les grilles du four et les autres ustensiles, et eliminer
par essuyage tout excCsde residus renverses pour eviter ia
formation de fumee ou i'infiammation de ces residus,
Avertissement et avis
important pour la securit6
La Ioi californienne _ Safe Drinking Water and Toxic Enforce-
ment Act >7de 1986 (proposition 65} stipule la publication par
ie gouverneur de ia Caiifornie d'une iiste de substances que
i'etat de Caiifornie consi@re comme cancerigenes ou
dangereuses pour iesystCme reproducteur, et impose aux
entreprises commerciaies i'obiigation de signaler a burs
clients ies risques d'exposition a de teiies substances,
Nous informons les utilisateurs de cet appareil que Iorsd'une
faible concentration de certaines substances figurant dans la
liste mentionnee ci-dessus, dont le monoxyde de carbone,
Pour minimiser I'exposition, veiller ace que la piece ou se
trouve le four soit convenablement aeree durant une operation
d'autonettoyage par I'ouverture d'une fenetre ou d'une porte,
AVIS iMPORTANT _ OISEAUX FAMIUERS : Lesoiseaux ont
un systeme respiratoire tres sensible, Ne pas garder un oiseau
famiiier darts ia cuisine ou darts une piece o8 ii pourrait etre
expose aux fumees, Lesfumees emises durant une operation
d'autonettoyage peuvent etre dangereuses ou morteiies pour
un oiseau, de meme que les fumees emises Iors du chauffage
excessif de graisse, huile, margarine, et du chauffage excessif
darts un ustensile a revetement antiadhesif,
Conserver ces instructions pout consultation ultetieute
28
Page 30

Boutons de commande
Permettenti'utilisationdes616mentschauffantsdesurface,avecune
progressioncontinue dela puissanceentre Iesr6glagesextr6mes
Low (Bas)et High [Eiev6)+Onpeut r6glerun bouton_ toute
positionentrecesdeux extr6mes.
R6gJage des commandos
1. PlacerJ'ustensiiesur F61@aent.
2. Enfonceret faire tourner le boutonjusqu'_ Japosition d6siree
(rotationdansun sensou dansI'autre).
o Des marquessur Ietableaude commandeidentifientI'eJement
commandoparchaquebouton.Parexemple,le O O
graphique_ droiteindique I'el@aentavant/gauche. O O
3. II yaun temoin Iumineuxpour Ieselementssur Ie tabIeaude
commande.LorsqueFundesboutonsde commanded'un
elementdesurface estaliment& IetemoJns'iiJumine.Let@aoin
s'eteintdesqu'on interromptI'alimentationde I'eJ@aent.
4. Apr_s unecuisson,ramenerle bouton_ Japosition OFF(Arr60.
Ret[rerI'ustensJJe.
Suggest+ons pour Je r6glage
Ondolt choisirJapuissancedechauffage enfonctionde divers
facteurs:taille, typede I'ustensileet op6rationdecuisson.Pour
J'informationconcemantIesustensiIesetautresfacteursaffectantJa
puissancedechauffage_ utiliser,se reporterau paragraphe
Recommandationssur lesustensJles_ lapage31 et8 la brochureLa
cuissonsimplifiee.
Low (Bas}(2} :Pourfusion
de chocoJatou beurre,oule
maintiende Jatemp@ature
d'un met&
High (Eleve)(10) : Pour
1'6buJ[Jtiond'un [iquide.Ondolt
toujoursreduire lapuissancede
chauffagedes que Iatemperature
d'ebulIitionestatteinteou que
Me& Low [Moyen
I'alJmentcommence_ cuire.
bas)(3-4) : Pour
continuerla cuisson
de metsen casse-
roles fermeespar
Low
QFF j
igh
couvercleou pour
cuire_ la vapeur.
[
34
EJ6ments doubles
Lasurfacedecuissonest 6quipeededeux
elementsdoubies,situ6s _ I'avantdroitet
J'avantgauchesur Ie dessuslisse.Ces
elementsont unedimensionvariable+
PousserIeselecteur_gauchepour utlliser
Jegrand61ementou _ droite pour utiJiserle
petit 616ment.
Ln_High
5 7
OFF
5
Medium (Moyen)(5-7) :
Pourle maintiende
I'ebullition[ented'une
O
grandequantite de[[quide
ou pour[apiupartdes
op@ationsdefriture.
6
7
6
ivied. High (Moyen6tev6)
(8-9[ : Pourrissolerles
viandes,chaufferI'huile
(grandefriture ou aliments
sautes)et pour Iemaintien
de I'ebullitionrapided'une
grandequantlte deIiquide.
AVANT[A OU+SSON APRESLA CUISSON
° PlacerIOLoursI'ustensJlesur! 616inert[avantd'aJimenter1'6J6ment.Pour ° S'assurerqueJ'616men-[es[arr6t&
@+tercJemcu_sm_erenesublssedesdommages,ne!ammsfaire , EJiminer@squepossJbJetouslosres+dusderenversernen[etprojections.
fonctlonneruu 616mentdesurfacesansy elacerun us_enslle. AUTRESOONSEILS
. NE.IANIAISutilisera[aD_edeculssoncommelieuaereml_age . S'iiy aune armoirederangemen_crectemen[au+aessusdelatableae
da mentsoudustensiJes, cu_sson,onne dolt_ 3+acerquedesarticlespeu%quemmentutmsese+
DHRANT[A CHJSSON qu_peuvent_treexposes_Jachaleur.LachaJeur_miseparlacu+s+n+ere
oVeiJlera bienconnaitrelacJrrespondanceemre_esDOUtOnSde _3urra+tsusciterunprod+dinepourdesarticlescommetlqu+desvomtlts.
.'ommandeetlos_l_men_s.VeiJlera commanderI'alimentationde produltsdenettoyageetflaconsd a_roso
i'elementvoulu. , NE.IA_AIS lasseraucunar[ic+esurlatabledeculsson,particuJi_remen[
oCommencermcu_ssonavecunepuissancedechauffagesuperieure,pu_s tesaR_e+esenpmstlque.L'airchaudquts'_chappeparI'eventdu f( ur
r_dure lapu+ssancedechauffagepourpoursulvrelacuJsson.Ne arums pourra+tprovoquerI'inflammationd'unar[icleinflammable,lairdfo+_dre/
utlt+serunepuissancedechauffageeleveepouruneculssonprolonged, amomrunarticleenptastlque,ouprovoqueruneaugmen[atlonde
. NEJA_AIS Jaisserlecon[enud'unus[ensiles'@aporercompietement: presslonprovoquantI'dcJatementd'unr@ip+entferm&
;eclpoJrraitfare su[_irdesdommagesaI'ustensileet_I'apparelL • NE JA_AIS ]aisserde+afeuiHe_'aum+nlum,onesonde[nermom_trique
. NE_APaAJStoucherlatabledecJ[ssonavan[qu'ellesesoit vlandeou unoojetmetalllq_leau[reqdun ustens+ledeCU_SSOdsurlatable
;onpJetementrefro+die.Certameszonesaelatabledecu+sson, de ;u_sson.entrerencon-[ac_avecun8Jementchauffan[
partlcuti6rementauvolmnagedese+emen[sdesurfacepeuventdevenir . NEJA_AIS rangerau-dessusdetatabledecu+ssond'art+desIourdsq_,
tr6schaudesdurantunecuisson.UtiHserdesmaniques, nsqueraientdetomberetd'endommagerlatabtedecuisson.
29
Page 31

Surface dessus lisse
Remarques sur la surface dessus
lisse :
oLorsdespremieresutilisationsde IatabIede caisson,ceiie-ei
peat 8mettre an pea defum6e et des odears. Ceciest
normal.
oLessurfaces _dessas lisse conservent la chaleur pendant
an certain temps apr_s m'e×tinctiondem'_m_ment.Eteindre
lesel6mentsquelquesminutesavantque la nourriturenesoit
tout _ fait cuiteet utiliser Iachaleur restantepourterminerla
cuisson.Lorsquelevoyantde surfacechaudes'6teint,on peut
toucher Iasurfacedecuissonsansdanger.En raisonde Iafa_on
dont tes618mentsd'unesurface8 dessusIisseretiennentla
chaleur,ceux-cine r6pondrontpasauxchangementsderSglage
aussirapidementque des618mentsen spirale.
oAu caso8 Iecontenud'un ustensilerisquede d6border,retirer
I'ustensilede Iasurfacede cuisson.
oNe ]amaisessayer de soulever la sudace de caisson.
oLa surface_ dessuslissepeutsembIerd6color6eIorsqdelleest
trSschaude.Ceciest normalet disparakunefois quela surface
refroidit.
Zones de caisson
Leszonesdecuissonde lacuisini6resont repr6sent6espardes
cerclespermanentssur lasurface_ dessuslisse.Pouruneefficacit6
maximum,utiliserunezonede cuissondont le diam_treconvient
I'ustensile.
Le r6cipient ne doit pus d6passer & zone de caisson de plus de
12 _ 25 mm (1/2 _ I po).
Lorsqu'unecommandeest raiseen marche,onpeatvoir un
rougeoiement8 traversIasurface_ dessuslisse.['@l_ment
fonctionnera en intermittencepour maintenir mer_gmage
pr_etabmide chameur,meme au niveau High (Emev_)o
Pourobtenirpiusinformationssur lesustensilesdecuisine,se
reporter_ lapage31 auparagrapheRecommandationssur Ies
ustensiIesdecuisineet 8 la brochureLacuissonsimplifi6e,incluse
avecla cuisini_re. EzEM_VT
6YMPL E
Conseils de protection de la
s rface dess s lisse
_ettoya_e (plus d'informations bia page 42}
oAvant des'enservirla premierefois, nettoyerla tablede cuisson.
o Nettoyerlatablede cuissonchaqueiour ou apreschaque
utilisation.CesmesurespreserverantI'apparencedela tablede
cuissonet6viterantqu'elIe nes'abime.
o Encasde renversementlots decuisson,nettoyerimm_diatement
le produit renvers6sur la surfacede cuissonpendant qu'elleest
encorechaudeafin d'6viterun plusgrand nettoyageparla suite.
Userde prudence,essuyerlesrenversementsavecun linge propre
et sec.
o Ne pas IaisserIespmduits renvers_ssurIasurfacede cuissonou
sur la garniture de latablede cuissonpendantune Ionguedurra.
o Ne jamais utiliserde poudrede nettoyageabrasiveou de tampons
r_curerqui raieraientlasurface.
o Ne jamais utiliserdejave!Iisant,ammoniaqueouautresproduits
de nettoyagenon sp_cifiquementrecommand_spour la
vitrocSramique.
Pour viter lea marques et les rayures
o Ne pas utiliserde casserolesenverre.Eilespourraientrayerla
surface.
o Ne ]amais utiliserde supportm_talliqueou anneaude wok entre
un recipientet Iasurface decuisson.Cesobjetspeuventmarquer
ou rayerIasurface.
o Ne pas faire glisserde recipientsm_tal%uessur Iasurfacede
cuissonbd_lante.IIspourraientIaisserdesmarquesqui devront
etre nettoy_esimmediatement.[VoirNettoyage,page 42.)
oVeillerb ce que Iefond desrecipientset Iazonedecuissonsoient
propresavantd'allumerI'8I_ment,afind'_viterlesrayures.
o PourempScherqua lasurfacedecuissonen vitroc_ramiquenese
trouve ray_eou abhr_ee,nepasyIaisserdesucre,desel ou de
graisse.PrendreI'habituded'essuyerlasurfacedecuissonavecun
lingepropre ouun essuie-toutavantde I'utiliser.
o Ne jamaia fake giisserde r_cipients metalliques_paissur la
surfaceau risquede larayer.
Voyant de surface chaude
Levoyantde surfacechaudeestsitu6 surle tableau
de commande.IIs'allumeraiorsqu'unesurfacede Ho_,Surface
cuisson,que!lequ'ellesoit,serachaude.II restera
allure6,m_meaprSsextinctionde lacommande,jusqu'b ceque la
zonenit refroidL
Pour viter lea taches
o Ne jamais utiliserde Iingeou d'6pongesalepour nettoyerIa
surfacede cuisson.IIs laisseraientunfilm, cequi pourraitd_colorer
lasurfacedecuisson Iorsqu'elIeest utilisee.
o UutiIisationcontinued'unesurfacede cuissonsaliepeutentrainer
I'apparitionde tachespermanentes.
3O
Page 32

Pour 6viter d'autres dommages
, Nepas Iaisserfondrede plastique,de sucre ni d'alimentsrichesen
sucresur Iatable de cuisson.Sicelaseproduisaitacciden-
tellement,nettoyerimm6diatement.G/oirNettoyage,page42.]
, Nejamais Iaisserlecontenud'une casserolebouillirjusqu'_ce
qu'ellesoit videcar ceh pourrait abimer la surfacede cuissonet la
casserole.
, Nejamais uti[iser[atamede cuissoncommesurfacede travailou
commepianche_ decouper.
, Nejamais cuired'alimentsdirectementsur latablede cuisson,
sans recipient.
, Nejamais utiiiserun petit recipientsurun grandelement.Non
seulementil y a g_chisd'energiemaisi[pouten resulterdes
projectionsqui vont brQlersur lasurfacedecuissonetdevront6tre
nettoyees.
, Nepas utiliserdesrecipientssp6ciauxnon platsqui seraienttrop
grandsou _ fond inega[commeleswoks _fond fond,[esplaques
chauffantesour6cipientsde grandetaille _fond ondul6.
, Nepas utiliserde rdcipientsen aluminium.L'aiuminiumrisquede
fondresur le verre.Si [emetalfondsur latable decuisson,ne pas
I'uti[iser.Appe[erun reparateuragre6Amana.
Recommandations sur los
L'utilisationdu bon ustensilepeut emp6cherde nombreux
problemescommeIa necessitedecuire plusIonguementla
nourritureetIadifficulte _obtenir desr6sultatsuniformes.Debons
ustensilesr6duisentlesdur6esde cuisson,utilisentmoinsd'6nergie
etcuisentde fa_on plus uniforme.
Tests pour v6rifier si los
ustensHes ont un fond plat
V6rifierque lesustensilessont plats.
Test de la regle :
1. Placerune rSgieentraversdu fond de I'ustensile.
2. La tenirface _IalumiSre.
3. Aucunehmiere ou tr6speu nedoit etrevisiblesousla regle.
Test de la bulle :
Choisir , Eviter
Desustensiles_fond Desustensiles8 fond rainur6ou gondol6.
lisse,plat Desustensiles_ fond inegal necuisentpas
efficacementet peuventparfoisne pas
fairebouillir IesIiquides.
Desustensilesen Desustensilesenverreou enm6taIpeu
mat6riaux6pals Opals.
Desustensilesde la Desustensilespluspetits ou plusgrands
memedimensionde (de 2,5cm [1po]] que relement.
Fel6ment
Despoigneesqui Desustensilesavecdespoigneescass6es
tiennentbien ou quine tiennentpas.Despoign6es
Iourdesqui font serenverserrustensile.
Descouverclesqui Descouverclesqui fermentreal.
fermentbien
Deswoks_ fondplat Deswoksavecun fondsur anneau.
Ustensiles de grande taille et
pour los conserves
Touteslos marmites pourles consewes et losgrandes
casseroles doivent avoir an fon(Jplat et doivent _tre
fahriqa_es en mat_riau _pais, Cec[esttrhs importantpourIes
surfaces_ dessuslisse.Labasene doit pasdepasserde 1'51ementde
plusde 2,5cm (1po).
Si losmarmites_ conserveset lescasserolesnesont pasconformes
cesnormes,Iesduties de cuissonseront plusIongueset los
surfacesde cuissonpourront6treendommagees.
Certainesmarmitespourlesconservessont con_uesavecdesbases
pluspetitespour 5tre utilis_essur dessurfaces_dessuslisse.
Poar mapr_paratio_ de co_serves, _e choisir q_e mer_glage
High (Elev6) jusqu'_ ce que l'eaa eomme_ce _ houillir ou que
la pressionsuffisantesoit atteinteclansla marmite.R_duireau
reglagele plusfaible,maintenantI'_bulIitionou Iapression.Si la
chaleurn'estpasdiminu6e,lasurfacede cuissonpourrait8tre
endommag_e.
Voir la brochureLacuissonsimpli%e pour obtenirplus
d'informations.
1. Mettre 2,5cm (1po} d'eaudansI'ustens+Ie.PlacerI'ustensilesur
la surfacede cu+ssonet tournerla commandosur High (Elev6).
2. Observerlaformationde bullesIorsqueI'eau chauffe.Desbulles
uniformess+gnifientde bonnesperformancesetdesbulles
in6galesindiquent la presencedezonespluschaudesdormant
une cu+ssonin,gale.
VoirIabrochureLa cuissonsimplifi6e pour obtenirplus
d'informations.
31
Page 33

@
Tableau de commande
A B
\
\
\
\
\
\
\
\\\ Hold
\
\
\
Broil
Bak8
Cook&
CUean Oel+Y Clock Wsrm
C D
Timmr'
Keep
t t t........./
F G H I J
Letableaude commandeest congupour faciliter laprogrammation.Lafen_tred'affichageindiqueFheure+les fonctionsavecminuterieet
fonctionsdu four.Letableau decommanderepr6sent6comprenddescaract6ristiquessp6cifiquesau module.(LestylepeutvarJerselonle
module.}
A
Gfi[
iZi
Cuissoncourante
C
A (Phs)ou
_' (Moins)
Minuterie
E
Cuissonet
i_ill
rnaintbn
Nettoyage
G
Demarrage
diff6r6
Horloge
J
Maintienau
chaud
J
Annuler
Utilisation des touches
o Appuyersur Iatouche d6sir6e,
, Appuyersur Jatouche A (PJus)ou _' (Moins) pourentrer[adur6e
ou [atemp6rature.
o Un bip retentitJorsqueI'on appuiesurune touche.
o Un doubJebip retentit en casd'erreurde programmation.
S'utilisepour[a cuissonaugri[et[e rissolage
surpattiesup6fieure.
S'utiIisepourlacuissoncouranteetle
r0tissage.
S'utilisepourentrerouchangerladur6e,la
temp@aturedufour.Etablitb gril
temp6ratureELEVEEouBASSE.
Programme[aminuterie.
Pourcuirependantunedureepr68tabIie,
avecmaintienauchaudpendantuneheure.
S'utiIisepourprograramer[ecycle
d'autonettoyage.
ProgrammelefourpourdSbuterunecuisson
plustar&
S'utilisepourprogrammer['heuredujour.
S'utilisepourmaintenirauchauddanslefour
lesalimentscults.
Annuletoutesleaop@ationssaufmJnuterJe
ethorloge.
Remarque : Quatresecondesapr_savoirappuy6sur Iestouches
A ou T, Iadur6eou Iatemp@atureseraautomatiquemententree.
Si plus de 30secondess'6couiententre [a pressionet sur une
touche defonctionsur [estouchesA ou V, [afonctionsera
annuee et affic]eur reviendra_ affic]age pr6c6dent.
L'horJogepeut 6treprograrnm6epourafficher [adur6e dansun
formatde 12ou 24 heures,L'horIogeestprogrammeeen usinepour
un format de 12heures,
Changement de I'horJoge _ un format de 24 heures :
1, Appuyersur IestouchesCancel
(Annub0 et Delay(D6marragediffer6]et
maintenir[apressJonpendanttrois
secondes.
2. Appuyersur IatoucheA ou _' pour
programmerunformat de 12ou
24 heures.
3. Programmer['heureen suivantlesinstructions
donn6esci-dessous.
-- Delay
R6gJage de I'horJoge
1, Appuyersur la toucheClock(HorIoge],
• L'heuredu jouret deuxpointscIignotent
I'afficheur,
2, Appuyersur iatouche,&ou T pour
programmerI'heuredu jour,
+ Deuxpoints continuent_ ciignoter.
3, Appuyer_ nouveausur latouche Clockou
attendrequatresecondes,
32
Clock
Page 34

Lorsquele courant#lectriquearriveou apresune interruptionde
courant,laderniSreheureavantrinterruption decourantva
cJignoter.
Pourrappelerrheure du jour Iorsqu'uneautrefonctionde dur6e
s'affJche,appuyersur IatoucheClock.
L'heurede I'horlogenepeut 6trechang6eIorsquelefour a 6t6
programm6pour une cuissonou un nettoyagediff6r6ou pourla
fonctionde cuissonet maintien.
Annulation de l'affichage de l'heure :
Si I'on ned6sirepasI'affichagede I'heuredujour :
Appuyersur JestouchesCancel(Annulet)et
Clock(Hodoge)et les maintenirainsipendant
trois secondes.L'heuredujour disparakde
J'afficheur.
LomqueI'affichagede I'heureest annul6,
appuyersur Ia touche Clockpourafficher
briSvementrheuredu ]our.
__ Clock
i I i
Annulation de la minuterie :
1. Appuyersur JatoucheTimeret la maintenirainsipendanttrois
secondes.
OU
2. AppuyersurJatoucheTimeret r6glerI'heure_ 00:00.
Verrouillage des cow.andes
et de Ja porte du four
La porte du four etIestouchespeuvent6treverrouilleespour des
raisonsde s6curit_,nettoyageoupour empechertoute utiJisation
non souhait6e.Ellesne pourront8tre utiJis6essi ellessont
verrouill_es.
Sile four est encours d'utiJisation,les commandeset la portene
peuvent@treverrouill_es.
L'heureactuelledujour restera_ J'afficheurJorsquelescommandes
serontverrouiJJ_es.
R_affichage de l'heure :
Appuyersur Iestouches Cancelet Clocket lesmainteniramsi
pendanttrois secondes.L'heuredu ]our r6apparait_ J'afficheur.
La minuterie peut 6tre programm6e de une minute (00:01] jusqu'_
99 heures et 59 minutes (99:59].
La minuterie peut 6tre utilis6e ind@pendamment de toute autre
activit6 du four, Elle peut 6tre aussi programm@ealors qu'une autre
fonction du four est en cours d'utilisation.
La minuteriene commandopasJefour.Ellene sertqu'8 6mettre
deships.
Programmation de la minuterie :
1. Appuyersur la toucheTimer(MJnuterJe]. Timer
o 00:00s'alIume_ J'afficheur.
o Lesdeuxpointsclignotent.
2. Appuyersurla toucheA ou T ]usqu'_ceque
J'heure]usteparaisse_ I'afficheur.
o Lesdeuxpointscontinuent _ clignoter.
3. Appuyer_ nouveausur JatoucheTimerou attendrequatre
secondes.
Verrouillage :
Appuyersur lestouchesCancelet Cook&
Hold (Cuissonetmaintien)et les maintenir
ainsipendanttrois secondes.
• Lemot LOCK[VERROUILLAGE} Cook&
cIignote_ rafficheur_
-- Hold
D_verrouillage :
Appuyersur lestouchesCancelet Cook& Holdet los maintenirainsJ
pendanttrois secondes.
• Lemot LOCKdisparaitde I'afficheur.
Codes d'a o alie
LesrootsBAKE(CUISSONCOURANTE]ou LOCK07ERROUILLAGE]
peuventclignoter rapidement_ I'afficheurpour pr_veniren cas
d'erreurou de probl6me=Sitel est lecas,appuyersur Iatouche
Cancel Si lesrootsBAKEou LOCKcontJnuent_clignoter,
d_brancherI'appareiI=Attendre quelquesminutes,puisrebrancher
I'appareiI=Sirun desrootscontinue_ clignoter,d6brancherrappareil
et prendrecontactavecun reparateurautoris6=
o Lesdeuxpointscontinuent _ clignoteret le d6comptede la
dur6e commence.
o Laderni6reminutedu d6compteseraaffich6esousforme de
secondes.
4. #,la fin dela dur6eprogrammee,un hip long retentit.
33
Page 35

@
Cuisson COUtante
Programmation de macuisson courante :
1. Appuyersur la touche Bake[Cuissoncourante}.
o Lemot BAKE{CUiSSONCOURANTE}c@note.
o 000c@note _rafficheur.
2. %lectionner latemperaturedu four.La
temperaturepeut 6tre programm@de 75_ 290°C
(170_ 550°F}.Appuyerunefois surIatouche
a, ou V ouappuyersur latouche A ou _' et la
maintenirainsi.
o 175° [350°} s'allumeIorsqueI'onappuie la premierefob sur
rune des touches.
o Appuyer sur la touche a, pour augmenterla temperature.
o Appuyer sur la touche_' pourdiminuerIatemperature.
3. Appuyer_ nouveausur latouche Bakeou attendrequatre
secondes.
o Lemot BAKEs'arretede clignoteret s'allume_ I'afficheur.
+ 38° {100°} ou la temperaturer@Iledu fourseraaffich@.La
temperatureaugmenterapar intervaIIede 3°C {5°F}jusqu'a
ceque Iatemperaturepreprogramm@soitatteinte.
4. Laisserlefour pr@haufferpendant8 _ 15minutes.
o LorsqueIatemperatureprogramm@pour lefour est atteinte,
un hip long retentit.
o PourrappeIerlatemperatureprogrammeependantle
pr@hauffage,appuyersurIa touche Bake.
5. Placerlanourriture dans Ie four.
6. Verifierravancementde lacuisson_la dur@minimaiede
cuisson.CuireplusIongtempsau besoin.
7. Lorsquelacuissonest terrain@,appuyersur Aancel/
latouche Cancel{Annulet}.
8. Retirerla nourrituredu four.
Remarques sur Uacuisson courante
au low" :
oPourchanger latemperaturedu four pendant[acuisson,
appuyersur Iatouche A {Plus}ouT (Moins} jusqu'a ceque
I'onobtiennelatemperaturedesiree.
oSi I'onoublie d'arreterlefour, il s'arreteraautomatiquement
apres12heures.Si I'ondesiredesactivercettefonction,voir
page37.
oPourdes conseilssupplementairessur Iacuissoncouranteet le
rOtissage,voir la brochure Lacuissonsimplifiee.
Bake
Differences de cuisson entre 'ancien
four et nouveau
IIest normaIde remarquerquelquesdifferencesdab ladur@ de
cuissonentre un four neufet un four ancbn. VoirAjustementde la
temperaturedu foura la page37.
Cuisson et maintien
Lafonction cuissonet maintbn permetdecuire pendantune dur@
predeterminee,suivb par un cyclede maintienau chaud d'une
heure.
Programmation de mafonction cuisson et maintien :
1. Appuyersur la toucheCook& Hold{Cuissonet Cook&
maintien}. Hold
• LesrnotsBAKE[CUISSON}et HOLD
[MAINTIEN}clignotent.
+ 000s'alhme a I'afficheur.
2. Selectionnerlatemperaturedu four. La
temperaturepeut etre programm@de 75a 290°C
[170a 550°F}.Appuyerune foissurla touchea,
ou _' ou appuyersur la toucheA ou T et la
maintenirainsL
+ Appuyersurla toucheA pour augmenterlatemperature.
+ Appuyersurla touche_' pourdiminuerlatemperature.
3. Appuyer_ nouveausur latouche Cook& Hold OU attendre
quatresecondes.
+ Lemot HOLDclignote.
+ 00:00ciignote_ I'afficheur.
4. Entrerladur@ pendantlaquelIeI'ondesireque la cuissonait Iieu
en appuyantsur Ia touche a, ou _'. Ladur@ de cuissonpeut
etreprogramm@de 10minutes(00:10}a 11heures,59minutes
O1:59}.
+ LesrootsBAKEet HOLDs'allument _rafficheur.
+ Ladureede cuissons'alhme a I'afficheur.
+ Ladureede cuissoncommencele comptea rebours.
Lorsque madur_e de cuisso_ s'est _cou_e :
+ O,uatrehips retentissent.
+ Lemot BAKEs'eteint.
+ LesrootsHOLDetWARM [CHAUD}s'allument.
+ 75° {W0°}parait_ I'afficheur.
34
Page 36

5
Apr_s une heure de MAINTiEN AU CHAUD :
o Lemot End(Fin)s'affiche,
o Uheuredu jour reapparait_ rafficheur=
Annulation de [a fonction cuisson et maintien _ tout
moment :
Appuyersur [atouche Cancel[AnnulerD=Retirer[a _n_I/
nourrituredu four.
Cuisson diff6r6e
Ne pasut!Iiser[acuissondiffereepour des denreestres
pedssab!escommelos produits laitiers,le porc,[a volailieou los
fruits demer,
AvecIafonctiondiff_r_e, Iefour se met _ cuire plus tard dans la
journee.Programmerla dureed'attentedesireeavantque Ie four
nese metteen marcheet la dureede cuissondesiree.Lefour
commence_ chauffer &I'heureseiectionneeetcult pour laduree
specifiee.
La dureed'attentepeut 6treprogrammeede 10minutes(00:10)
11heures,59 minutes(11:59).
Programmation d'un cycle de cuisson courante
diff6r6e :
Appuyersur[atouche Delay(Demarragediffere).
Lorsque [a durSe d'attente s'est 6coulSe :
• Le mot DELAYs'eteint.
• La dureede cuissonestaffichee=
• Los rootsBAKEet HOLDsent affiches.
Pour programmer un temps d'attente [orsque ma
fonction cuisson et maintien a dSj_ 8tO
programm_e :
1= Appuyersur [atouche Delay(D_marragedifferS)=
• Le mot DELAY(ATTENTEDclignote=
• oo:ooparait_ ['afficheur.
2. Appuyersur Iatouche _ ou_' pourprogrammer
Jadureed'attente.
• Apres quatresecondes,Iemot DELAYreste
aJJum6pour rappeIerqu'un cycle de cuisson
differeea et4programme.
Delay
Lorsque [a d_r_e d'atte_te s'est 6coulee et que
[e four se met e_ marche :
• La dureede cuissonseraaffich_e.
• Le mot DELAYs'_teint=
• Los rootsBAKEet HOLDrestentallum_s.
Appuyersur h touche Cancel(Annule0.
• Touteslosfonctions de cuissonminut_eet non
minut_eserontannuI_es.
o Lemot DELAY(ATFENTE)c%note. Delay
o 00:00clignote8 I'afficheur.
Appuyersurla touche_, ou _' pour program-
merla dureed'attente.
Aiorsque [e mot DELAYciignotetoujours :
3= Appuyersur[atouche Cook& Hold(Cuisson
et maintien}.
o 000s'alIume_ rafficheur.
o LosrootsBAKE(CUiSSONCOURANTE} Held
et HOLD(MAiNTiEN}cIignotent.
AppuyersurA pour programmerlatemperaturede cuisson.
o 00:00et le motHOLDclignotent.
o Lemot BAKErestea[[um6.
5. AppuyersurA pour programmerla dureede cuisson.
o Ladureed'attente,lesrootsDELAY,BAKEet HOLDs'aIiument
I'afficheur.
Cook&
• L'heuredujour reapparait_ rafficheur.
Ne pasuti[iser [a cuissondiffereepour desarticlesqui
necessitentque[efoursoit prechauffS,comme lesg_teaux,
[espetitsbiscuitset [espains.
Ne pasutiliser [ecyclede cuissonet maintiendifferessile
four estdei_ chaud.
35
Page 37

@
Maintien au chaud
Pourmaintenirau chauddans[efour desalimentscuitsetchauds
ou pour r6chaufferpains et assiettes.
Programmation du maintien au chaud :
1. Appuyersur tatouche KeepWarm(Maintien au Keep
chaud].
o Le motWARM (CHAUD]clignote.
o 000parait8 I'afficheur.
%tectionner Iatemp6raturede maintienau chaud.
CelIe-cipeutetreregleede 63 _ 90°C 045 _
190°F).Appuyerunefois surIatouche_kou _'
ou appuyersur latouche A ou _' et lamaintenir
ainsi.
o 75°(WO°} s'alIumeIorsqueI'onappuiela
premierefois sur rune destouches.
o Appuyersur latouche A pouraugmenterla temperature.
o Appuyersur latouche T pourdiminuer latemperature.
Le motWARM (CHAUD}et Iatemperatureserontaffiches
pendantque lafonction maintienau chaudest active.
VVSPIT1
Remarques sur Uafonction maintien au
chaud :
o Pourobtenirdesqualitesalimentairesetnutdtivesoptimales,
lesalimentscuits au four ne doiventpasetre gard6sau chaud
plusde 1_ 2 heures.
o Pouremp6cherlesalimentsde dessecher,lesrecouvrirde
papieraluminium,sanssetter,ou d'un couvercle.
o Pour r_chauffer des petits pains :
- recouvrirIespetits pains depapier aluminiumsansserreret
lesplaceraufour.
- appuyersur lestouchesKeepWarmet A pour
programmer75 °C(170°F).
- rechaufferpendant128 15minutes.
o Pour rSchauffer des assiettes :
- placerdeuxpiles de quatreassiettesmaximumdansle four.
- appuyersur lestouchesKeepWarmet A pour
programmer75 °C(170°F).
- rechaufferpendantcinq minutes,arr6ter lefour et hisser les
assiettesaufour pendantencore 15minutes.
- n'utiliserque desassiettespouvantallerau four, _verifier
avecle fabricant.
Annumation du maintien au chaud :
1. Appuyersur latouche Cancel(Annule0.
2. Retirerla nourrituredu four.
- ne pas poserdesassiettestiSdessur une surfacefroide,les
changementsrapidesdetemp6raturepouvantcasser
rassietteou lafendiller.
36
Page 38

Arr t autornatique/Mode
Lefour s'arr6teautomatiquementapr6s12heuress'ila 6t6
accidentellementhiss6 en marche.Cettecaract6ristiquedes6curit6
peut6trearr6t6e.
Pour annumer m'arr_t 12 heures et faire fonctionner me
four en continu pendant 72 heures :
1= Programmerle four pour unecuissoncourante (voirpage34}.
2= Appuyersur latouche Clock{Horloge}et la CloCk
maintenirainsipendanttrois secondes=
• SAbseraaffiche et clignoterapendantcinq secondes=
• SAbseraensuiteafficheen continuiusqu'_cequ'on I'arr6teou
iusqu'bceque iaduree limitede 72 heuressoit atteinte=
• Le mot BAKE[CUISSONCOURANTE}seraaussiaffiche si un
cycledecuissoncouranteest encoursalorsque le four esten
modesabbat=
Toutesles autresfonctions(Minuterie,Maintienau chaud,Nettoyage,
etc.}sent verrouill6es,saul BAKE,pendantle modesabbat.
Annumationde la cuisson courante amorsque mefour
est en mode sabbat :
Appuyersurla touche Cancel{Annule0=
• Le mot BAKEs'eteint_ I'afficheur=
• Aucun hip sonoreneretentit=
Annumation du mode sabbat :
1. Appuyersur latouche Clockpendant trois secondes Cmeck
OU
2. Apres 72heures,le mode sabbatse termine.
• SAbclignote pendantcinqsecondes.
• L'heuredujour revient_ I'afficheur.
Ajustement de temperature
du four
La precisiondes temperaturesdu foura ete soigneusementverifiee
I'usine=IIest normaIderemarquerquelquesdifferencesdans la
cuissonentre un four neufet un four ancien=Au fur et _ mesureque
Iescuisinieressentmoinsneuves,la temperaturedu four peutvarier=
IIest possibled'ajuster latemperaturedu four siI'onpenseque le
four necuit pasou nerissoiepascorrectement=Pourdeciderde
I'ajustement_apporter,r6gler lefour a unetemperaturede 15°C
(25 °F}pius61ev6eou plus bassoque la temperatureindiqueedans
la recette,puis faire cuire la preparation=Losresultatsdu_<test >7de
cuissondoiventdonnerune ideedu hombrede degr6sduquel la
temperaturedoit etre ajustee=
Ajustement de matemp6rature du four :
1=Appuyersur IatoucheBake(Cuissoncourante}= Bake
2= Entrer285°C(550°F}en appuyantsurla toucheA
3= Appuyersur IatoucheBakeetla maintenirainsi
pendantplusieurssecondesoujusqu'aceque 0°
paraisse_ I'afficheur=
Si Iatemperaturedu four a eteprecedemmentajustee,Ie
changementseraaffich& Parexemple,si Iatemperaturedu four
a ete redukede 8°C 05 °F},rafficheur indiquera-8° (-15°}=
4= Appuyersur IatoucheA ou T pouraiusterIa temperature=
A chaque fois que I'onappuiesur unetouche,latemperature
changede3 °C[5 °F}=Latemperaturedu four peut6tre
augmenteeou diminuee de3 _ 20 °C {5a 35°F}=
5= L'heuredu iour r6apparaitautomatiquement_I'afficheur=
IIn'estpasnecessairedereajusterlatemperaturedu four en cas
de panneou d%terruption de courant=Lestemperaturesde
cuissonau gril et de nettoyagene peuvent6treaiustees=
Remarques sur Uemode sabbat :
• Le modesabbatpeut6tremis en marche_ tout moment,que
le four soit en marcheou non=
• Le modesabbatne poutpas6tremisen marchesi Ies
commandessentverrouilieesou Japorteverrouiliee.
• Sile four esten modecuissonIorsquele modesabbatest
programme,lemot BAKE(CUISSONCOURANTE}s'eteint_ la
fin du cycle decuisson.IJn'yaura aucunsignalsonoreaudible.
• Si 1'6clairagedu four estsouhaitependant le modesabbat,la
Jampedevra6tre aJiumeeavantque le modesabbatnedebute.
• Lorsquele modesabbata d6marre,aucunhip de pr6chauffage
ne retentit.
Tous losmessageset los bips sentdesactives[orsque[emode
sabbatestactif.
LeverrouilIageautomatiquedela portenefonctionnepas
pendantle modesabbaL
Si ton appuiesur Iatouche Cancel,uncyclede cuisson
couranteaufour sera annul& Cependant,le programmateur
resteraen mode sabbat=
Apresunepannede courant,Ie four revienten modesabbat
avec72heuresrestantesetaucuncycleactif.
37
Page 39

Cuisson au gril
Programmation de macuisson au grim :
1. Appuyersur Iatouche Broil (Gr[l}. Broil
o Lemot BROIL(GRIL}ciignote.
o Lemot SET07AUDER]est affiche.
2. Appuyersurla touche_, pourprogrammerun gril _ temperature
elev@ou surIatoucheT pour programmerun gril
temperaturebasse.
o LesrootsHi (ELEVEE}ou LO(BASSE}serontaffich@.
o %Iectionner Hi broil (Gril_ temperatureelevee}(290°C
[550°F]] pourun griI normal SelectionnerLObroil (Gril
temperaturebass@(230°C [450°F]] pour un griI
temperatureinferieure d'aliments_ cuissonplus Jongue
commeIavolaille.
3. Apresquatresecondes,Ie four se meten mar@e.
o Lemot BROILresteallume.
4. Pourun rbso[agemaximum,pr@haufferl'el@Tlentdegril
pendanttrois ou quartre minutes avantd'ajouter lanourdture.
5. PlacerlanourrituredansIefour. Laisserla portedu four ouverte
d'environ10cm (8po] (premierebut@)+
6. Retournerlaviandeune fois8 Ia moitiede Ia dureede cuisson.
7. LorsqueI'alimentestcult, appuyersur latouche Cancel(An-
nule0. Retirerlanourriture et la I@hefritedu four.
o L'heuredujour reapparait_ I'afficheur.
Remarques mJrUacuisson au grH :
o Pourde meilieursr@ultatsIorsdu gdl,seservird'un ustensib
pr@upour ce type de cuisson.
o Pr@oirdesdur@sde cuissonau griIplus Iongueset un
rissolageIeg_rementmoinsdot6 si I'appareilfonctionnesurun
circuitde 208volts.
o LegriI au reglageHi (Elev@est utilisepour la majoritedes
operationsde cuissonau griI.UtiliserIegril au r6glageLO
(Bas]pour lacuissonde metsdevantcuireplus Iongtemps,
afinde bur permettred'6tre bien cultssansrissolageexcessif.
o Lesdureesde cuissonau gril peuvent6treplus Ionguesavec
unetemperaturede gril inferieure.
o Retournerla nourritureIorsquela moitiede la dur@ pr@ue
pour la cuissonau gril s'estecoulee.
o Pourdes temp6ratureset des conseilssupplementairessur Ia
cuissonaugril, sereporter_ labrochureLa cuissonsimplifi@.
TabUeau de cuisson au griU
Posmom ' DUR EAPPROX: '
AUMENTS DES GRILLES PREMBER COTE DEUX[EME COTE
Beauf
Bifteck, 2,5 cm (1 po] d'@aisseur
Hamburgers, 2 cm (3/4 po] d'@aisseur
Porc
Bacon
COtelettes,2,5cm (1po]
Tranchedejambon
A point
Biencuit
Biencults
G
G
Gou7
6
6
6
vomaimme
Demi-poitrine
Fruits de met
Darnesde poisson,beurr@s,2,5cm (1po] d'@aisseu+
Queuesdehomard,85_ 115g (3_ 4 onces}chacune
Remarque : Ce tableau n'est qu'un guide de suggestions. Les durees peuvent varbr selon I'aliment _ cuire.
6
5
8 minutes
10 minutes
9 minutes
6 - 10 minutes
10 - 11 minutes
5 minutes
LO Broil -
Gril _ temp#rature basse
15 minutes
10 - 15 minutes
7 - 10 minutes
7 - 12 minutes
8 - 14 minutes
G- 9 minutes
(sans retourner}
12 - 14 minutes
3 - 7 minutes
LOBroil -
Gril_ temperaturebasse
15- 25minutes
(sansretourner}
(sansretourner]
38
Page 40

@
1
Event du four
Lorsquelefour fonctionne,lessurfacesvoisinesde 1'6ventpeuvent
devenirassezchaudespourentratnerdesbrOlures.Ne]amais
bloquerI'6vent.
L'_ventest sita6 soas meprotecteur d'6vent da dosseret, sat ma
cuisini_re. EVENT
phstiques pr6sde
F6vent,la chaleur
pouvantlosddormer
ou les faire fondre.
Nepasmettrede
Edairage du four
Appuyersurle commutateurd'6ciairagedu four situ6
sur letableaude commandepour allumerou 6teindre
la lampe.
Sole du four
Prot_gerlasoledesproduitsrenvers6s,en particulieracidesou
sucr6s,ceux-cipouvantd6colorer1'6mailvitrifi& Utiliserdes
ustensilesde Iabonnedimensionpour (!viterque losproduits nese
renversentoupassentpar-dessusI'ustensileen bouillant=Ne pas
placerd'ustensiles oa de feuiiie d'aiaminium direetement sat
masomedufour.
Grilles du four
Oven
Mght
Ne jamais eouvrir matotaiit_ d'une grille de papier d'aiaminium
ni mettre d'amaminiam sat masomeda roar, comane donnerait
pas de boris r_samtats darts macaisson de g_teaa× et masome
Positions des gri es
Grimme7 (position[apius
haute): Pourfairegriller du "_
pain ou passerau gril des ,_
alimentsminceset non gras.
Grimme6 : Utiiis_epour ,a ,4_¢A_ _
majorit6desop6rationsde _ %
cuissonau griL /
Grille 5 : Poul Ia cuisson cuisson sur deuxgrilles
surdeuxgrilles=
Grille 4 : PourIaphpart descuissonsde p_tisseriessur unetOle
biscuitsou unmoule8 g_teaurouI_,destartesauxfruitsou mets
surgel8s=Utilis#eaussipour passerau gril desmorceauxdepoulet=
Grille 3 : Pourlosplats miiotes,cuissonde michesde pain,savarins
ou tartes _ lacr6me.
Grille 2 : Pourle r6tissagede petitescoupesde viande,tartes
surgel8es,souf%s ou g_teauxdesanges=Utilis_eaussipour la
cuissonsur deux grilles=
Grille I : Pourle rOtissagede grossespi_cesde viandeet Ia voIaiIle=
Sole d_ four : Placerlagrille sur lescOt_s
relevesde [asole.Donne uneplace
supp!_mentairepour lacuissonde
grandesquantites=
CU_SSONSURPLUSIEURSGR&LES:
Dea× grimmes: Utiliserlospositions2et 5.
de four
• Ne pastenter de changerla PoSitio_ldesgr!HesIorsquelefour
° Nepasrangerde nourdtureou d'ustens!!edauslefour.
Le four comportedeuxgrillesavec,pourchacune,undispositifde
calage=
Extraction :
1. TirerIa grille en Iignedroite
jusqu'_cequ'elles'arr6te_ la
positiondecalage=
2= SouleverIagrille _ I'avantpour
pouvoirI'extraire=
R_installation :
1= Placerlagrille sur lessupportsclansle four.
2= SouleverI6g_rementFavant=Fairegiisserla grilleversI'arriSreau-
del_ de Iapositionde calage=
3= Abaisserlagrille et la faireglisserclanslefour.
Cuisso_ de g_teau× _ 8rages sur deu× gri_es
Pourde meilleursr_sultatspourla cuissonde g_teauxsur deux
grilles,utiliser les positions2 et 4.
PlacerlosgQteauxsur la grille,commeil estindiqu&
39
Page 41

Four autonettoyant
o JJest normaJ que certalnes pieces de la cuisiniere devlennent
tres chaudes Jotsdun cycle de nettoyage.
° Pour dvJter que la porte du four ne sublsse des dommages, ne
pas tenter de Fouvdr Iorsque ie mot LOCK [VERROUULLAGE}es[
visible sur I'afficheur
o Eviter de toucher Japorte, le huNot et la zone de I'event du four
lots d'un cycle d'autonettoyage.
• Ne pas utlllser de ne[[oyan[ pour four du commeme sur lefini
du four ou sur tou[ au[re composant du four. CeB abimeraR Je
fini ou Jescomposants du foul
Lecycled'autonettoyageutilisedes temp@aturessuperieuresa Ia
normalepour assurerle nettoyageautomatiquede la totaiJt6dufour.
SiIefour esttressale,il estnormaIqu'onobservelaformatimsde
rum@ou deflammesdurant Ie nettoyage.Nettoyerle four
intervalIesregulierspiutetque d'attendreune accumulation
importantede r@idus.
Durant b processusd'autonettoyage,il convient de bienaererla
cuisinepoureliminer lesodeursnormalement6raisesdurant le
nettoyage.
Avant J'autonettoyage
1. EteindreIalampedu four avantle nettoyage.EilerJsqueraitsinon,
de griIIer.
2. EnleverlaIechefrite,tousIespiats eties grilbs dufour=LesgriIIes
risquentde se @coloreret de neptusglisseraussJbbn apresun
cycled'autonettoyagesi on ne Iesenl@epas.
3. NettoyerIe cadredu four,Iecadre dela porte,Iazone_ I'extdrbur
du joint et autour de I'ouvertureclanslejoint de Ia porte,_ I'aide
d'un produit denettoyagenonabrasifcommeBonAmP ou d'eau
additionnSededetergent=Leprocessusd'autonettoyagene
nettob pasceszones=EiIesdoiventetre nettoy@spour emp@her
lasaietede s'incmsterpendantle cycb de nettoyage.(Lejoint
assure1'6tanch6it6autourde la porteet du hubJotdufour=}
4. Pouremp6chertout dommage,nepas
nettoyerni frotter lejoint qui setrouve
autourde Ia porte du four. Cejoint est
congupour @iterbs pertesde chabur
pendantIecycled'autonettoyage.
5. Eliminerbs r@idusde graisseou de
produits renvers@surlasob avantle
nettoyage.Ceciemp@hela formationde fiammesoude rum@
durant b nettoyage.
EssuyerIesr@idussucreset acides,commebs patatesdouces,
latomateou lessauces_ basede lait.La porcelainevitrifiee
posse@une certainer@istanceauxcomposdsacides,maisqui
n'estpas limit@.Ellepeut se@colorersi Iesr6sidusacidesou
sucr6sne sont pas enbv@avantde commencerI'autonettoyage.
Programmation de l'autenetteyage :
de 205°C(400°F}pour programmerun cycled'autonettoyage,
[ emarq.e : Latemp@aturedufour doit 6tre situ@ en dessous
1. Fermerlaportedu four.
2. Appuyersur Jatouche Clean(Nettoyage}.
, Le mot CLEAN(NETTOYAGE}clJgnote_ Fafficheur.
Si Ia porte n'estpasferm6e,deships retentissentet lemot DOOR
{PORTE}parait_ I'afficheur.Silaporte n'estpasferm@clansles
45secondes,I'op@ationd'autonettoyageestannul@ et
I'afficheurrevient_ I'heuredu jour.
Appuyersur latouche A ou_'.
• CL-M (Nettoyage- salet6moyenne}estaffichd.
Appuyersur Iatouche A ou _' pourvoir ddiler
lesdiff@entsreglagesde I'autonettoyage.
CL-H {Nettoyage- salete@aisse,4 heures}
CL-M (Nettoyage- salet6moyenne,3heures}
CL-L (Nettoyage - sabt616g@e, 2 heures}
Lechoixdu niveaudesaletedu four programme
automatiquementladur@du cycb d'autonettoyage.
5. Apres quatre secondes,lefour commenceIe nettoyage.
• La dur@de nettoyagecommenceIe@comptea I'afficheur.
• Le mot LOCK{VERROUiLLAGE}parait_ I'afficheur.
• Le mot CLEANparatta Fafficheur.
Clean
D6marrage diff@_ d'un cycJe d'autonettoyage :
1. Appuyersur Jatouche Delay{D6marragedill@e}.
• Le mot DELAY(ATTENTE}cHgnote. Delay
• 00:00paratt_ I'afficheur.
2. Appuyersur Iatouche A ou T pour programmer
ladur@ d'attente avantque necommencele
cycle.Ladur@ d'attente peutetre programm@
de 10minutes (00:10}_ 11heureset 59minutes
O_:59}.
3. Appuyersur latouche Clean(Nettoyage}.
• Le mot CLEAN{NETTOYAGE}vacJignoter. Clean
l
*Lesnomsde marquedes produitsde nettoyagesontdesmarquesd@os@sdesdiff6rentsfabricants.
40
suite..,
Page 42

4. Appuyersurla toucheA ou _'.
o CL-M (Nettoyage- salet6moyenne]estaffich_.
5. Appuyersurla toucheA ou _' pour voirddiJerJesdiff@ents
r6giagesdeFautonettoyage.
CL-H(Nettoyage- salet6@aisse,4 heures)
CL-M (Nettoyage- salet6moyenne,3heures]
CL-L(Nettoyage- salet6I6gSre,2 heures)
Lechoixdu niveaudesalet6du four programme
automatiquementIadur6e ducycled'autonettoyage.
6. Apr_squatresecondes,IesrootsCLEAN,DELAYet LOCK
paraissent_Fafficheurpour indiquerque Jefour est programm6
pourune op6rationde nettoyagediff6r6.Letempsd'attente
parak_ I'afficheur.
Si le four a dej_ et6 programme pour un cycle de
netteyage et que l'on desire 8tablir un delai :
1. Appuyersur la touche Delay[Demurragediffere].
o Lemot DELAYclignote. De!ay
o 00:00parait_ J'afficheur.
2. Appuyersurla toucheA ou T pourprogrammerJadur6e
desir@de I'attenteavantque ned6buteJecycle.
Apr6squatresecondes,IesrootsCLEAN,DELAYetLOCK
paraissent_I'afficheurpour indiquerque Jefour est programm6
pourune op@ationde nettoyagediff6r6.Letempsd'attente
parait_ I'afficheur.
Lersque Jecycle d'autenetteyage debute :
o Lemot DELAYs'eteint.
o Ladurocde nettoyageparak_ I'afficheur.
RnnuJation du cycJe d'autenetteyage :
Appuyersur latouche Cancel[Annule0.
o Tousles rootsdisparaissentde I'afficheur.
o ToutesIesfonctionssont annul@s.
o L'heuredu jour paraR_ J'afficheur.
Pendant Je cycJe d'autonettoyage
Lorsquele mot LOCKparait_ I'afficheur,Japortene peut etre
ouverte.Pour6viterd'endommagerJaporte,ne pusla forcerpour
J'ouvrirIorsqueJemotLOCKest affich6.
Fum6e et odeurs
La premierelois o_ lefour est nettoy6,il pouty avoirproduction
d'odeuret de fum_e.Ceciest normal et disparaitra_ [usage.
Sile four esttres saleou si lalechefritea et6 Jaisseedunsle four,il
poutyavoirproductionde fumee.
Bruits
Pendantque lefour chauffe,il peutse produiredes bruitsde metal
en dilatationou en contraction.Ceciest normalet n%dique pusque
Jefours'abtme.
Aprbs le cycJe
Environuneheureapresla fin ducycle,JemotLOCKs'eteint.Ace
moment,Japortepeut etreouverte.
Lasalet6 pout avoir laiss6 un r6sidu gris poudreu×, L'enlever
avecun lingohumide.S'iJrestede Ia saiet6,celaindiqueque le cycJe
de nettoyagen'a pus6tOassezlong.Cettesalet_restantesera
enleveeauprochaincycJed'autonettoyage.
Si losgrilles ont 6t6 laiss6es_ l'int6rieur du four pendant le
cycle d'auto_ettoyage et qu'eiies giisse_t real surlouts sup-
ports,Iesenduire,ainsJquelessupports,d'unefine couched'huiJe
v_g_tale.
De fi_es iig_es peuve_tapparaitre da_s ia porceiai_epuree
qu'elle asubi chameuret refroidisseme_L Ceciest normal et
n'affecterapusla performance.
U_e d6comorationblanche pout apparaitre aprSs me_ettoyage
si des aliments acides ou sucr6s _'o_t pus 6t6 e_mev6savast
que _e comme_ee J'auto_ettoyage. LadecoJorationest normale
et n'affecterapasla performancedu four.
_e_arqBes:
o si Ia porte du four n'estpus fermSe,le mot DOOR(PORTE)
clignote_ I'afficheuret lefour emetdeshipsjusqu'_ ceque la
portesoitferrule et que I'onappuie_ nouveausurClean.
o Laportedu four se trouveraendommag6esiI'on forceson
ouverturealorsque le mot LOCKestencoreaffJche.
41
Page 43

M6thodes de nettoyage
* Lesnomsde marquesont desmarques
Pour6viter[a foEmationdetaches ou un changementde cou[eur,nettQyer!'aPParei[apE,s
ChaqueutiJisation.
AprSs tout d6montagede composants,veiJler_ effectuerun remontagecorrect.
PIECE NETTOYAGE
Desseret et tame L'6mai[vitrifi_estduverre[J6au m6ta[pa! fusion=[I peutsefissure!ous'6caillerencasde mauvaiseutihsatiorl=[Iestr6sistant
de euisscn - auxacides,maispastotalementinattaquablepar[esacides.Tous[esproduitsrenvers_!s,enparticulieracidesou sucres,doivent
_inai[vitriJi_ 6treessuy6simm_diatementavecun [ingesec=
° Unefoisrefroidi,laveravecde I'eausavonneuse,rincerets6cher=
• Nejamaisessuyerunesurfacetilde ou chaudeavecun[ingehumide=Cecipourrait[afissurerou['@cailler=
• NejamaisutiIiserdenettoyantspourfour,d'agentsdenettoyagecaustiquesou abrasifssurlefini ext@ieurde lacuisini_re=
Lbchefrite et Ncjamais ceuvrff lagri#e depapier d'ahHninium;cela emp_che la graisse de ceuler dansla I_chefrite.
sagrille , Recouwirla [_chefriteetsagrilled'un lingesavonneux;laisseragil pourd_tacherlesr_sidus=
• Laveravecde I'eausavonneuseti6de=Utiliseruntampon_ r_!curerpour@_iner lessouillurestenaces=
•Onpeut placer[esdeuxcomposantsde [aI@chefritedartsun lave-vaisselle=
Zene de la °Pourutihser[afonctionVerrouil[agedescomraandespourle nettoyage,voirpage33=
console de •Essuyeravecun lingehumide,puisfaires6cher=Nepasutiliserunagentdenettoyageabrasifsusceptiblederayerlafinition=
eommande/ °Onpeututiliserun produitdenettoyageduverre,pulv@ris_!d'abordsurunchiffon=NEPASprcjeter le preduit directemcnt
sur tes touches de ccmmande el! sur I'afficheur.
d@os6esdesdiff@entsfabricants.
** Pourcommanderdirectement,
corrlposer[e1-877-232-6771E.-U.ou
1-800-688-8408Canada.
Beutens de • Place!chaquebouton_ [apositiond'ARRET,et retirerchaqueboutonen letirant=
eemmande °Laver,rinceretfaires6cher=Nepasutihserunagentde nettoyageabrasifsusceptiblederayerlafinition=
°Fairefonctionnerbri@vementchaque@16mentpourv@rifierqueleboutona6t6 correctementr@insta!16=
TabJede Nejamais edliser de p_edu_tsdenetteya_e dufce_,javellisa_t, ammcniaque euprcduitsde netteyage du verre
e_isse_e_ centenant deI'ammeniaque. REMARQUE:Prendrc contact avec_mr4parateur a_r_dsila surfaceen vitrec4ramique
sc fend#le, sc casse ell si de Fatuminiumcu dem_tal Fendsurla surface.
, Laisser[atablede cuissonrefroidiravantde [anettoyer=
°G_ralit_s - Nettoyer[atabledecuissonapr_schaqueemploiouau besoin,avecdu papieressuie-touthumidifi6et [a
cr_medenettoyagepourtabledecuisson(_i_cen° 20000001)**=Puis,essuyeravecun lingesecetpropre=
REMARQUE: Desmarquespermanentesvontseproduired la sa/et_restesurlasurfacedecuissonetestcdte defaconr_p4t4e.
, Samet__paisse e_ marques _etaiiiques - Humidifierune@onge_ rdcurer<<nerayantpas>>=Appliquerdelacr6mede
nettoyagepourtablede cuisson(piecen°20000001)**etfrotterpourretirerautantdesalet_quepossible=Appliquerune
mincecouchedecr_mesur [asalet_,recouvdravecdu papieressuie-touthumidifidethisserpendant30_ 45minutes[2ou3
heu_s pour[asaletetr6simportante)=GarderhumideenrecouwantI'essuie-toutd'unepeIliculeplastique=Rotter9 nouveau,
puisessuyeravecun [ingepropreet sec=
REMARQUE: N'utitiserqu'untampon8 r_,curer_nerayantpas_,PROPREETHUMIDF,sansdangerpour/esustens,@sdecuis_!ne
rev4ternentanLiadh_sifLeveneet/emotifserontendommag_sd/e tamponn'estpashumide,s'i/estsou_/_oud unautretype
de tamponestutiLis4
•Samet_seuites eudess_eh_es=Frotteravecuntampon9 r6curer<_nerayantpas>>et unecr6medenetloyage
pourtabledecuisson=
REMARQUE: Ten_!runelamedemso_rbun ang/ede30° et9ratterpour en/evertoutcsa/et4restante.Puis,nettoyercomme
_!1estd4critci-dessus.Nepassese_,__delatamedemso_rtous/esjours,celapounaituser/emotif duve,,_re.
42
Page 44

Hubmetet pone • Eviterd'utilisertrop d'eau,quirisqueraitdes'infiltr_l sousouderriereleverreet detacher.
du four en verre • Laver_ I'eauetau savon.Rinceravecde I'eaupropreet s_cher.Un produitde nettoyageduverrepeut6treutilis6enle
vaporisantd'abordsurunlinge.
• Nepasutiliserde produitsabrasifscommetampons_ rGcurer,lained'acierouproduitde nettoyageen poudrequi
risqueraientderayerleverre.
lnt_rieur du feur , ExGcuterlesinstructionsprGsentGesauxpages40-41pourI'autonettoyagedufour.
Grillesdu feur • Nettoyeravecde I'eausavonneuse.
• Eliminerlessouillurestenacesavecunepoudredenettoyageouuntampon_ rGcurersavonneux.Rinceretfaires_cher.
•Si lesgrillessontlaissGesdartslefour pendantlecycled'autonettoyage,e!lessed_colorentetpeuventneplustr_s bien
glisser.Sicelaseproduit,enduireleborddesgrillesetle supportdesgrillesd'unefinecouched'huilev_gGtale,puisessuyer
I'exc_dent.
•NEPASUTIUSERDEPRODUffSDENETTOYAGECONTENANTDU JAVELUSANT.
(certainsmodelesD
°NE PASUTIMSERDENETTOYANTS. OP_NGE_ OUABRASIFS.
• TOUJOURSESSUYERDANSLESENSDELA TEXTUREDEL'ACIERLORSDUNETTOYAGE.
•Nettoyage joamamieffsaiet_J_g_re=Essuyeravec!'undes produitssuivants: eausavonneuse,vinaigreblanc/eau,p!oduit
denettoyagepourverreet surfaceFormula409*ouunproduitsemblablepourverre- avecun lingesoupleetune_ponge.
R[nceretsGcher.Pourpoliretenleverlesmarquesdedoigts,fairesuivrepar unevaporisationde MagicSpraypouracier
inoxydable(piGcen°20OOOOO8)**.
•Salet_ mod_r_e/_paisse - EssuyeravecI'undesproduitssuivants:BonAmi*,Sin!i1Cleanser*ouSoftScrub*- _ I'aided'un
lingesoupteoud'une_pongehumide.Rinceret sGcher.Lestachesrebellespeuvent6treenlevGesavecuntamponmulti-
usagesScotch-Brite_ humidifi_.Frotteruniform6mentdartslesensdu m_takRinceret s_cher.Pourredonnerdulustreet
retirerlesrayures,fairesuiwe parunevaporisationdeMagicSpraypouracierinoxydable*.
° D_eeloratie,_- AI'aided'une6pongehumidifi_eoud'unIingesouple,essuyer_ I'aidedu nettoyantCameopouracier
inoxydable_.Rincerimm6diatementets6cher.Pourenleverlesmarquesetredonnerdu lustre,faire suiweparunevaporisation
deMagicSpraypouracierinoxydable*.
Tiroirde
• UnefoislespiGcesrefroidies,laver_I'eausavonneusetiGde,fincerets_cher.NejamaisessuyerunesurfacetiGdeouchaude
avecun lingehumid<cecipouvantendommagerlasurfaceetentraineruneb¢flurepar lavapeur.
° Pourlestachesrebe!les,utiliserdesagentsdenettoyageI_g_rementabrasifscornmela p_teaubicarbonatedesoudeouBon
peite_ panneau×
matSrau×=
6maimpeinte
Ami*.Nepasutiliserd'agentsdenettoyageabrasifs,caustiquesou _nergiquescommelesnettoyantspourfourou les
tamponsenlained'acier.Cesproduitsraieraientouendommageraientdefa_onpermanentelasurface.
REMAR_UE: Ud_iserua H_e eu u_ terche_ secpour essuyer_espreduits re_vers_s,surtout s'Hsse_t addes eu
sucres.La surfacepeutraJt se d_co_orereu se remit si iasa_et_n'_tait pasimm_diateme_t e_ev_e. Ceciest
particu/i_rement important darts/e cas de surfaces b/a_cheso
*Les nomsde marquesont desmarquesdepos_esdesdifferentsfabricants.
** Pourcommanderdirectement,composerle 1-877-232-6771E.-U.ou 1-800-688-8408Canada.
_3
Page 45

Porte du four
Lampe du four
Ne pasgrirnpersurlaPOrtedufourQUverte,oulUiimpQsQrune
Chargeexcessive,Ceeipour[ait provoquerUQbasculementde,ia
Cu!sini_re,le,bris de la porte Oudes blessurespour la personne
concern6e.
fermeture de Ia porte du four d'une cuisiniere neuve: ceci est
Remarqae : On peut percevoir une certaine _<61ast[cit_>>Iors de la
normal cet effet disparait progressivemenL
Hublot du four
Pour proteger mehubmotde maporte du four :
1. Nepasutiliserde produits nettoyantsabrasifscommedes
tampons_ r6cureren Iained'acierou desproduitsde nettoyage
en poudrequi risqueraientde rayerleverre.
2. Ne pas heurter le hubloten verreavecun ustensile,un articlede
mobilier,unjouet, etc.
3. Ne pas fermerla porte du four avantque lesgrilles nesoienten
piacedans lefour.
Toutedegradationdu hublot de verre- rayure,choc,tension,etc.-
peutaffaiblir sa structureet augmenterlerisque de brisa une date
uIt6rieure.
' D6brancheria cu!siniSreavantde remPlacer!'ampoule.
' Laisserle four rdroidir avantde,remplaceri,ampoule.
, s'assumEque le Cabochonet!'ampouleS0ntfroidsavantde les
toucher,
PourremplacerI'ampoule,la commanderauprTsdeAmana en
composant[e 1-877-232-8771E.-U.ou 1-800-688-8408 Canada
(fournir [enumQrodepiTce74004458- ampouleauxhalogenes}.
Pour rempmacer m'ampeume du four :
1. D6brancherIacuisini_re.
2. LorsqueIefour estfroid, saisirlebord ducabochonavecles
doigts,tirer et enlever.
3. Enleversoigneusementlavieille ampouleen latirant to_t droit
du socleen cQramique.
4. Pour6viterd'endommagerrampouleneuveou dediminuersa
dur8e,nepasla toucheravecIesdoigtsou Iesmainssans
protection.Latenir avecde I'essuie-toutou un linge.Enfoncer
toat dreit lesbrachesde I'ampouledans les petits trous du socle
en c_ramique.
5. RemettreIecabochonen I'encienchanten place.
8. RebrancherlacuisiniSre.RQglerI'horloge.
Pieds de r6glage de l'aplomb
V6rifierque la brideantibasculementagrippeconvenablement
I'Un despiedsarri_Fede r_g!agede,I'aplQmb,pour que la
cuisinierene puissebascuieraccidentellement.
La cuisiniSredoit 6tre d'aplombune lois install6e.Si
elle neI'estpas,tourner Iespiedsde rQglagede I _
I'aplomben plastique,_ chacundesanglesde Ia
cuisini_re,iusqu'_ce que ce[[e-cisoit d'aplomb. ,jj
P/EE) F)E /TEGLAGE
DE L NPL OMt_
Tiroir de re isage
Ne,pasrangerdanscetirok des artic!esde p!astique,ou de,
papie[,despreduits inflammables0u desp[oduitsaiimentaire,s.
Durant lefoncti_nneme,ntdu [0ur, Unetemperatureexcessive
pour cesarticlespeuts'8tablirdans letiroir.
Letiroir de remisagepeut6tre enlev6 pourvouspermettrede
nettoyersousla cuisiniTre.
D_pose :
1. Viderletiroir et letirer jusqu'_la positionde la premierebutte.
2. Souleverravant.
3. Tirerjusqu'_ laposition delasecondebut6e.
4. SaisirIetiroir par lescOt_set soulever/tirerpour rextraire.
R_iusta_atiou :
1. InsQrerlesextrQmit_sdesglissieresdutiroir danslesrailsde la
cuisini_re.
2. Souleverravantdu tiroir et pousserdoucementiusqu'_ la
position de lapremiSrebutte.
3. Souleverdenouveaule tiroir etle pousserpour lefermeL
44
Page 46

i
PROBLEME ' SOLUTION
Pourmapmupartdes ptomaines • Verifierque Iescommandesdu four sontcorrectementreglees.
observes, essayer d'abord les ° Verifiersi lefour est bienraccord6au circuit 61ectrique.
somutionspossibmes,_ droite. , Inspecter/rearmerle disioncteur.Inspecter/remplacerlesfusibles.
• Contr01erla sourced'alimentationelectrique.
Non-fonctionnement dem'appareim- °
totamou partieL
L'horJogeou ies iampes fonction- °
nent, ies roots paraissent
m'afficheur,mais mefour ne *
R_sumtatsde cuisson uu four •
cliff,rents des uttentes ou de neu× •
prodaitspar ie four untSrieur. *
R_sumtatsinnorrects morsdema ,
nuisson aa grii, oa _misaion °
e×cessive de fum_e. °
Determinersi les commandesdeselementsdesurfaceet!ou dufour sontconvenablement
reglees.Voir pages29 et34.
Determinersi la portedu four s'estdeverrauilleeaprSsuneoperationd'autonettoyage.Voir
page41.
Determinersi le four estregle pourunecuissondiffereeou unnettoyagediffere.Voir pages
35et 41.
Verifiersi leverrouiiiagedescommandesest enmarche.Voirpage33.
Verifiersi la commandeest en modesabbat.Voir page37.
Lescommandessontpeut-etre programmeespourune fonctionde cuissonet maintienou
de demarragediffere.
Lafonction deverrouillagedescommandesest peut-etreactlvee.Voirpage33.
Determinersi !'eventdu four estobstrue.Voirsonemplacementpage39.
S'assurerque lacuisiniereestd'aplomb.
Lesreglagesdetemperaturevarientsouvententreun four neufet le four qu'iIremplace.On
observesouventunederivedu reglagedetemperatured'un four_ mesurequ'iIvieillit;il peut
devenirplus chaud ou moinschaud.Voirpage38 pourIesinstructionsd'aiustementde Ia
temperaturedu four. REMARQUE: IIn'est pasutile de modifierle reglagede temperaturesi la
variation n'affectequ'une oudeuxrecettes.
Pourd'autresinformationsau sujetde lacuissonaufour, voir labrochureLacuissonsimplifiee.
Determinerla positiondesgrilles.Lesalimentspeuvent6tretrappresde ['elementdu gril.
['lementdu grilpasprechauffe.
Utilisationincorrectedefeuilled'aluminium.Nejamaisgarnirlagrillede16chefriteavecdelafeuille
d'aluminium.
Portedu four fermeedurant la cuissonau griLLaisserla porte du four entrouverted'environ
10cm [4 pouces}- premierebutee.
EnteverI'excesdegraissesur la piecede viandeavant lacuissonau gdL
Utilisationd'unelechefritesouillee.
Latensionelectdquede la maisonestpeut-etre basse.
Imposaibiiit6d'uutonettoyage *
du four. *
Le four ne se nettoie pas
correctement.
Determinerque Fappareiln'a pasete programmepour un autonettoyagediffere.Voir page40.
Verifierque Ia porte estfermee.
Verifiersi la commandeest en modesabbat.Voir page37.
Lefourestpeut etre _unetemperaturesuperieure_205°C(400°F}.Latemperaturedufourdoit
etreinferieure_ 205°C [400°F}pour pouvoirprogrammerun cycle d'autonettoyage.
Untempsde nettoyageplus longpeutetre necessaire.
On n'apaselimineavanti'operationd'autonettoyagelesaccumulationsexcessivesde residus,
particuliSrementlesresidusd'alimentsacidesousucres.
45
Page 47

PROBLEME SOLUTION
La porte du four ne se d6verrouiiie
Lasurface _ dessus iisse montre
des signes d'usure.
Accumumation d'humidit6 sur me ,
hum)motou vupeurso,ant de m'_vent. *
* L'interieur du fourest encorechaud.Attendreenviron une heureapr_sI'ach6vementde [a
perioded'autonettoya% [[estpossibled'ouvrir[aporteaprSs[adisparitiondu messageLOCK
0/ERROU[LLAGE]sur ['aff[cheur.
° Lescommandeset [a porte sont peut-etreverroui[[ees.Voir page33.
1.Rnesrayuresou abrasions=
* S'assurerque[asurface de cuissonet [efond desustensilessont propres.Ne pasfaire
glisserd'ustensilesenverreou en m6ta[sur [asurface.S'assurerque lefond des
ustensilesn'estpas rugueux.Utiiiser les agentsde nettoyagerecommandes.Voir
page42.
2.Marquesde metal
, Ne pas faire giisserd'ustensilesmetaliiquessur lasurface.Unelois [asurfacerefroidie,la
nettoyeravec[acr6mede nettoyagepour tamede cuisson.Voirpage42.
3.Marquesettachesbrunes.
, Enieverrapidementiesproduitsrenverses.Nejamaisessuyer[asurfaceavecune 6ponge
ou un lingesail.S'assurerquelatable decuissonetque [e fond des ustensilessont
propres.
4.Zonesavecrefiet metallique.
, DepOtsminerauxen provenancede['eauet de la nourriture.Uti[iserlesagentsde
nettoyagerecommandes.Voir page42.
5.Piq0resou ecailiements
, Enieverrapidement[esproduitssucresqui ont deborde.Voirpage42.
Ceciest normaldurant lacuissond'a[imentscontenant beaucoupd'eau.
Uti[isationexcessived'humidite Iorsdu nettoyagedu hub[ot.
f_mission d'une forte odeur ou de °
fum_e morsde maraise en marehe
du iour. °
Codes d'anomamie.
Des bruits se font entendre°
[mn'y a ni hip ni affichage°
Ceciest normalpour unfour neufet disparaitapr_squeiquesutilisations.
Un cycled'autonettoyage_(brOlera>>plusrapidementlesodeurs.
La raiseen marched'un ventilateuraide hretirerfumee et odeurs.
, Presencedesaletessur lasole.Proceder_un autonettoyage.
, LesrootsBAKEou LOCKpeuventclignoterrapidement_['afficheurpour prevenird'uneerreur
oud'un prob[eme.SilemotBAKEouLOCKparaith['afficheur,appuyersur[atoucheCANCEL.
Si le mot BAKEouLOCKcontinueh clignoter,debrancherI'appareiLAttendre queiques
minutes,puisrebrancherI'appareil.Si le motcontinue h ciignoter,debrancher['apparel[et
prendrecontactavecun reparateurautorise.
, Silefouresttressale,lesfiammechespeuventproduireun coded'anomalieaucoursducycle
d'autonettoyage.Appuyersur [atouche CANCELet iaisser[e four refroidir compiStement,
essuyer[asaleteenexc6spuisreprogrammer['autonettoyage.Si[ecoded'anomaliereapparatt,
prendrecontactavecun reparateurautorise.
, Lefour fait piusieursbruitsfaibies.I1estpossibled'entendreles relaisdu four quisemettent
en marcheets'arr6tent.Ceciest normal.
, Aiorsque[efourserechauffeetserefroidit,il estpossibled'entendredesbruitscorrespondant
[adilatationeth [acontractiondespi_cesmetailiques.Ceciestnormalet n'endommagepas
['appareiL
* Lefour est peut-6treen mode sabbat.Voir page37.
46
Page 48

Garantiecompleted'uneannee-
Pieces et main-d'oeuvre
Duramline p6rioded'un (1) an a compterde la
datede rachat initial aud6tail,toute piecequ_se
reveleraitddec_ueusedansdesconditions
normaLesd'usagem_nagerserar@areeOd
remplac6egra_ultement
Garanties Jimitees - Pieces seumement
De la deuxW_me_ macinqui_raeann6e - A
compterde la datede I'achatinitial au d6tail,les
piacesde lalistecL-dessousqui seraveleraient
ddectueuses dans desconditionsnormales
d'usagemenagerseron__parees oH[emplacees
gratuitement(piecesseulemen0;le propfietaire
devraassumertousles autresfrais,y comprisfrais
de main-d'ceuvre,de daulacement,detransport,ae
kilomatrageet de diagnostic,lecas echaant.
° Sdrfaee de cdissenen vitroc_ramique: PaJ
suitede uristherm_que,decoloration,fissuration
au joint en caoutchoucsur le rebord,usureues
motiB
oEI6ments chauffants_lectriqdes: Elamentsde
surfaceradiantssurlesappareilsde cuisson
electnques.
Residents canadiens
Lesgarantiesci-dessuscouvren[un apparel!
installeau Canada.seulemen_s'il aata agreepar
lesagencesde test habflit6es(verificationdela
conform[ta_ une norme na[Ionaiedu Canada},sauf
sJI'appareila ate introdult au Canada_ i'occaslon
d'un changemen[de rasidencedesEtats-Unisvers
le Canada.
Garantie limited hers des Etats-Unis et
du Canada = Pieces seulement
%n_]an_une perioded'un _1}an _compeerde la
datede l'achat initialau dataiLtoute piecequl st
reveleraitddec[ueuseclansdes conditions
normalesd'usagemenagerserarepareeou
remplaceegratu_tement(pieceseulement};[e
sropdatairedevraassumer-[ous_esau[restrais, y
compdsfrais de main_d'ceuvre,de daplacemen[,de
[ransport.de kilome[rageet de diagnostic,[e c_s
achean-[
Lesgatanrlesspdcifiquestbrmuleescl-dessussun[
lesSEUL£$quele fabric'antaccorde.Cesgaranties
vousconffirentdesdroitsjuddiquessp#cifiquese[
_zouspouvezegalementjouir d'autresdroits.
variablesd'un #tata/'autre, d'uneprowncebune
8U[Fe
Ne sont #as couverts par ces
1. Lesdommagesou derangementsdus_ :
a.Miseen sewice,livraisonou entretieneffectuasincorrectement.
b.Touter@aration,modification,alterationettout reglagenonautorisaspar
lefabricantou parun prestatairedeserviceapras-venteagre&
c. Accidents,mauvaiseutilisationou usageabusifou daraisonnable.
d.Alimentationelectrique(tension,intensitd)incorrecte.
e. Raglageincorrectd'une commande.
2. Lesgarantiesnepeuventetrehonoreessi les numerosde saried'origine ont eta
enIeves,modifiesou nesont pasfacilementlisibles.
3. AmpouIes.
4. AppareiIsachetesauxfins d'usagecommercialou industrieL
5. Lesfrais devisited'un prestatairede serviceou de serviceapres-venteencourus
pour les raisonssuivantes:
a.Correctiond'erreursde raiseen service.
b.initiationde I'utiIisateur_I'emploide I'appareiL
c. Transportde I'appareiiauxIocauxdu prestatairedeservice.
6. LesdommagesdeIatabIede cuissonenverre causespar I'utilisationde
nettoyantsautresque Iescramesettamponsde nettoyagerecommandes.
7. LesdommagesdeIatabIede cuissonenverre causespardes produitssucresou
du piastiquefondu qui ont durci parcequ'iIs n'ont pasete nettoyesconformement
auxhlstructionsdonnaesdartsle guided'utilisationet d'entretien.
8. Dommagessecondairesou indirectssubis partoute personnesuite au non-
respectde cesgaranties.Certainsatatsouprovhscesne permettentpasI'exclusion
ou Ia limitation desdommagessecondairesou indirects;par consequentles
limitationsou exclusionsci-dessuspeuventnepass'appliquer_votre cas.
Si re'intervention d'u r parate r est
o ContacterIedatailhnt chezqui I'appareilaeteachet& ou contacter Maytag
ServicesSM/service_ IaclientaledeAmanaau 1-800-843-0304auxE.-U.ou
1-866-587-2002au Canada,pourobtenirlescoordonneesd'uneagencede
serviceagreed.
• Veiller_ conserverla facture d'achatpouriustifier de Iavaliditede lagarantie.Pour
d'autresinformationsen cequi concerneles responsabilitesduproprietaire
I'egarddu servicesousgarantie,voir letextede la GARANTIE.
o Si IedetailIantou I'agencede serviceapras-ventenepeut resoudreIeprobleme,
acrire_ MaytagServicessM,attentionCAIR:_Center,P.O.Box2370,Cleveland,TN
37320-2370ou tel@honer au 1-800-843-0304 ad× ¢.-U. od 1-866-587-2002
ad Canada,
• Les guidesd'utiIisation,Iesmanuetsde serviceet Iesrenseignementssur Iespieces
sont disponiblesaupresde MaytagServicessM,service_ la clientalede Amana.
Re_arq_es :
Lorsdetout contactconcernantun probiame,fournir I'informationsuivante:
a. Nora,adresseet numarode tel@honedu cIient;
b. Numerode modaleet numarode seriede I'appareil;
c. Nora et adressedu detaillantou deI'agencede service;
d. Descriptionclairedu problameobserve;
e. Preuved'achat(facturede vente:}.
47
Page 49

Estufa E[6ctrica con Control
'Easy Touch' 500 - Cubierta Lisa
[nstrucciones [mportantes
sobre Seguridad .....................................................49-52
Cocinando en [a Estufa ......................................... 53-55
Controies
Cubiertas Lisas
Cocinando en e[ Homo ......................................... 56-63
Horneado
'Cook & Hold'
'Cook & Hold' Diferido
Mantener Ca[iente
Asar a [a Parri[[a
Parri[[asde[ Homo
Cuidado y Limpieza ............................................... 64-67
Homo Auto[hY_piante
Procedimientos de Limpieza
Mantenimiento .............................................................. 68
Ventana del Homo
Luzdel Homo
Locaiizaci6n y Soiuci6n
de Avefias ................................................................69-70
Garantia y Servicio ....................................................... 71
Page 50

mnstalador:Por[avordeje estagu[ajunto cone_
emc[rouomOstico.
Censumidor: PorfavorJeay conservees[agufaparareferencia
futura. Conserveel recibode compray/o el chequecancelado
como comprosameoe compra.
NOmerode Modelo
NOmerode Sede
Fechade Compra
Sitbne preguntas,IBmea:
AmanaCustomerAssistance
1-800-B43-0304E.E.U.u.
1-886-587-2002Canada1
(LunesaViernes.8:00a.m.a 8:00p.m.Horadel Este}
Internet:http://www.amana.com
Ennuestrocontmuoalvinde mejorarla calidady rendimientode
nues[roselectrodom@tmos,puedeque seanecesariomodificar
el ebctrodom@ticosin actuaJizarestagufa.
ParainfermaciOs_sebre set_#de, vet pbgina 71.
Lea y siga todas las instrucciones antes de usar este
electredem_stice para evitar el riesgo potencN de incendio,
choque electrico, bsiOn personal o daSoal ebctrodomOstico
como resuKado de su uso inapropiado, Utflice este
ebctrodomestico soBmente para el propOsito que hasido
destinado segun se describe en esta guia,
Para asegurar funeionamiente correete y seguro: El
ebctrodomestico debe ser instdado debidamente y puesto a
tierra por un t@nico cdificado, No intente ajustar, reparar,
prestar servicio o reemphzar ninguna pieza de este producto
a menos que sea espedficamente recomendado en esta guia,
Todas hs reparaciones deben ser redizadas por un t@nico
cdificado,
Siempre desenchufe el ebctrodomOstico antes de efectuar
alguna reparaci6n,
' TODAS LAS ESTUFAS SE PUEDEN
Lasadvertencias e mstrucciones umportantes sobre seguridad
que aparecen en esta guia no estan destinadas a cubrir todas
las posibbs circunstancias y situaciones que puedan ocurrir,
Se debe ejercer sentido com_n, precauciOn y cuidado cuando
instab, redice mantenimiento o haga funcionar el artefacto,
Siempre p6ngase en contacto con su distribuidor, agente de
servicio o fabricante si surgen probbmas o situaciones que
usted no comprenda,
P,ecomozca los simboJos, advertencias,
etiquetas de seguridad
PODRIAN causar bsi6n personal grave o mortal.
causar lesi6n personal menos grave.
INSTALE EL DISPOSITIVO
ANTIVUELCO INCLUIDO CON LA
, SIGATODAS LAS INSTRUCCIONES
DE INSTALACION
ADVERTENCIA: Para redueir el riesge de vuelee dem
eleetredemOstiee a eausa de use anermal e debide a
pese e×eesive en la puerto dei heine, es neeesarie
asegurarle mediante un dispesitive antiwelce
debidamente instaJade.
Para verificar si el dispositivo est_ debidamente instalado, mire
debajo de iaestufa con una iinterna para asegurarse de que
uno de los tornillos niveladores traseros estd debidamente
enganchado en la ranura del soporte. El dispositivo antivuelco
asegura el tornillo nivelador trasero al piso cuando est,1
debidamente enganchado. Esto debe verificarse eada vez
que la estufa sea movida.
Para Evitar un lncendio o
[}a o Causado per eJ Homo
Asegurese de que se hayan retirado todos los materiabs de
empaque del ebctrodomestico antes de su uso,
No coloque materiabs combustibles cerca del
ebctrodomOstico, No se deben guardar en el homo
materiabs inflamabbsMuchos pldsticos son afectados por el
49
Page 51

caior, Mantenga los pi_sdcos abjados de hs piezas deI
ebctrodom6stbo que se pueden entibiar o cabntar,
Para evitar incendios de grasa, no permita acumuBd6n de
grasa de cocinar o de otros materiabs infiamabbs en eI homo
O en su cercan[a_
En Case de lncendie
Use un extinguidor con producto quimbo seco o deI tipo
espuma o bicarbonate para apagar eI incendio o las llamas,
Nunca use agua en un incendio de grasa,
1, Apague eI homo para evitar que laIBma se disperse,
2, NUNCA bvante o mueva una sartdn en llamas,
3, Apague eI fuego o la IBma cerrando la puerta del homo,
Seguridad para los Ni es
de la estufa, LOSnifi0S que se trepan en la puerta de la
seriamente,
NUNCA deje a los nihos solos o sin supervisi6n cuando el
homo estd en use o cuando est6 cdiente, No se debe nunca
permitir que los nihos se sienten o se paren en ninguna pieza
del ebctrodomdstico pues se pueden bsionar o quemar,
Se bs debe ensehar a los nihos que el ebctrodomdstico y los
utensilios que est_inen el pueden estar cdientes, Deje enfriar
los utensilios calientes en un lugar seguro, fuera del abance
de los nihos, Se bs debe ensehar a los nihos que un
ebctrodomestico no es un juguete y que no deben jugar con
los controbs u otras piezas del artefacto,
lnstruccienes Generales
NUNCA use un eiectrodom6stico come un peidano para
alcanzar los armanos superiores, El use incorrecto de las
puertas del electrodom6stico tales come pisar sobre elias.
apoyarse o sentarse en la puerta puede resultar en que el
electrodomestico se vuelque, se rompa lapuerta y se
causen lesiones graves,
Para evitar posibles riesgos para el usuario y da_ioal
electrodom6stico, no use este producto come una estufa para
calentar o entibiar una habitaci6n, Ademas no use el homo
come un lugar para guardar alimentos o utensilios de cocina,
No obstruya la circulaci6n del aire bloqueando el respiradero
dei homo,
NO TOQUE LOS ELEMENTOSCALEFACTORESNI LAS
SUPERFICIESINTERIORESDEL HORNO, Los eiementos
calefactores pueden estar calientes aLincuando su color sea
obscure, Las superficies interiores de cuaiquier homo se
calientan Io suficiente come para causar quemaduras,
Durante y despu6s dei use, no toque ni permita que ias ropas
u otros materiales inflamables entren en contacto con los
eiementos caiefactores o ias superficies interiores dei homo
hasta que no se hayan enfriado, Otras superficies dei
electrodomdstico pueden estar Io suficientemente calientes
para causar quemaduras - entre estas superficies est_n las
aberturas dei respiradero dei homo y ias superficies cerca de
estas aberturas, ias puertas dei homo y iasventanas de ias
puertas dei homo,
No toque un foco caiiente dei homo con un patio hLimedo
pues se puede quebrar, Si ei foco se quiebra, desenchufe ei
eiectrodomdstico antes de sacar eifoco para evitar sufrir un
NUN(}A use papei de aiuminio para cubrir ias parriiias dei
homo ni el panel inferior del homo, El use incorrecto puede
resultar en un riesgo de cheque el@trice, incendio o daho al
electrodomestico, Use papel de aluminio solamente come se
indica en esta guia,
Seguridad al Coeinar
Nunca caliente un contenedor de alimento cerrado en el
homo, La acumuiaci6n de presi6n puede reventar ei
contenedor causando una lesi6n personal grave o daHioal
eiectrodomestico,
5O
Page 52

Use tomaoihs secos y gruesos. Los tomaoiBs hLimedos
pueden causar quemaduras por vapor, No se deben usar
todias de secar los piatos ni otros sustitutos en vez de los
tomaoiias porque eiios pueden pasar sobre los ebmentos
caibntes y prenderse fuego o pueden quedar atrapados en hs
pbzas deI ebctrodomestbo.
Use vestimentas apropiadas. Las ropas sueitas o ropas con
mangas largas sueitas no se deben usar cuando se est_
cocinando, Laropa se puede prender fuego y causar
quemaduras si entra en contacto con los ebmentos
cabfactores.
Siempre coioque ias parriiias dei homo en ias posiciones
deseadas cuando el homo este frio. Deslice la parrilla del
homo hacia afuera para agregar o retirar alimento usando
tomaollas secos y gruesos. Siempre evite colocar o retirar
alimento del homo sin sacar la parrilla hacia afuera. Si una
parrilla debe ser movida cuando este caliente, use un
tomaollas seco. No deje que el tomaolla entre en contacto
con el elemento caliente del homo.
Use las parrillas solamente en el homo en que fueron
enviadas/compradas.
Tenga cuidado cuando abra la puerta del homo. Primero deje
que salga el aire o vapor caliente antes desacar ovolver a
colocar el alimento en el homo.
ADVERTENCIA SOBRE RLIMENTOS PREPRRADOS: Siga
las instrucciones del fabricante del alimento. Si un contenedor
de alimento congelado de pl_stico y/o su tapa se deforma,
comba o de otra manera se ddia durante la cocci6n,
inmediatamente descarte el alimento y su contenedor. El
alimento puede estar contaminado.
No permita que el papel de aluminio o la sonda de lacame
toque el elemento calefactor.
Siempre apague todos los controles cuando haya terminado
de cocinar.
de dispositivos o accesorios que no sean expresamente
recomendados en esta guia puede crear peiigros gravesde
seguridad, afectar el rendimiento y reducir la vida 8tii de los
componentes de esteelectrodom6stico.
Si el utensilio es m_ispequdio que el elemento, una porci6n
del elemento quedar_ expuesta y puede encender la ropa o un
tomaollas.
Solamente ciertos tipos de utensilios de vidrio, vidrio cer_imico,
cer_mica, gres u otros utensilios vidriados son convenientes
para cocinar en la superficie o en el homo sin quebrarse
debido al repentino cambio de temperatura. Siga las
instrucciones del fabricante del utensilio cuando use vidrio.
Gire los mangos de los utensilios hacia el centro de la
cubierta, no hacia la habitaci6n ni sobre otro elemento
superior. Esto reduce el riesgo de quemaduras, encendido de
materiales inflamables o derrames si el utensilio es tocado
accidentalmente o alcanzado por ni_ios pequdios.
NUNCA deje los eiementos superiores sin supervisi6n,
especialmente cuando est_ usando los ajustes de calor altos.
Un derrame sin recibir la debida atenci6n puede causar humo
y un derrame de grasa puede causar un incendio.
Este electrodom6stico tiene diferentes tamaSos de elementos
superiores. Seleccione utensilios que tengan bases planas Io
suficientemente grandes para cubrir el elemento. La relaci6n
adecuada entre el utensilio y elelemento mejorara la
eficiencia al cocinar.
CUBIERTA DEVIDRmOCERAMICO: NUNCR cocine sobre
una cubierta quebrada. Si ia cubierta de iaestufa sequiebra,
los agentes de limpieza y los derrames pueden penetrar y
crear un riesgo de choque el6ctrico. P6ngase en contacto con
un t@nico calificado inmediatamente.
Segutidad sobre el Use
de Utensi ios
Siga las instrucciones del fabricante cuando use bolsas para
cocinar en el homo.
El rendimiento y funcionamiento seguro de este
electrodom6stico ha sido comprobado usando utensilios de
cocina tradicionales. No use ningSn dispositivo o accesorio
que no haya sido espedficamente recomendado en esta guia.
No use sistemas de convecci6n agregables a hornos. El uso
Ollas Freidoras
Use extremo cuidado cuando mueva la olla con aceite o
descarte la grasa caliente. Deje que la grasa se enfrie antes
de intentar mover ia oiia.
Campanas de Ventilaci6n
Limpie con frecuencia ia campana y los fiitros a fin de evitar
que se acumuie en eiios grasa u otros materiaies infiamabies y
para evitar incendios de grasa.
Cuando prepare alimentos fiameados debajo de la campana,
encienda ei ventiiador.
51
Page 53

Seguridad en [a Li pieza
Aviso y Advertencia
Limpie con cuidado [a cubierta, Apague todos los controIes y
espere que se enfrien hs piezas de[ eIectrodom6stico antes de
tocarIas o [impiarIas, Limpie con cuidado, Tenga cuidado
para evitar quemaduras de vapor si usa una esponja o un
pa_o mojado para [impiar los derrames en una superfide
caIiente, AIgunos [impiadores pueden produdr vapores
nodvos cuando se apIican en una superfide caIiente,
Limpie soIamente hs piezas indicadas en esta guia,
Homo Automimpiante
coc[na, etc, en e[homo durante e[ cido de auto![mpieza_
No [impie [a junta de [a puerta, La junta de [a puerta es
esencial para obtener un buen sello, Se debe tener cuidado
de no frotar, da_ar ni mover la junta,
No use limpiadores de homo ni forros de homo de ningun tipo
alrededor ni en ninguna parte del homo autolimpiante,
Antes del ciclo de autolimpieza del homo, retire laasadera, las
parrillas del homo y otros utensilios y limpie cualquier derrame
para evitar humo excesivo o Ilamaradas,
[mpertante Sebre Seguridad
La Propuesta 65 de la Ley de 1986 del Estadode California
Sobre Seguridad y Contaminaci6n del Agua Potable (California
Safe Drinking Water and Toxic Enforcement Act of 1986_)exige
que el Gobernador de California publique una lista de las
sustancias que segOn el estado de California causan c_ncer o
da_o al sistema reproductivo y exige que lasempresas
adviertan a sus clientes sobre la exposici6n potencial a tales
sustancias,
Se advierte alos usuarios de este e[ectrodomdstico que cuando
el homo estd funcionando en el ciclo de autolimpieza, puede
haber exposici6n de bajo nivel a algunas de las sustancias
indicadas en la lista, incluyendo mon6xido de carbono, La
exposici6n aestas sustancias puede set reducida a un minimo
ventilando el homo al exterior en forma adecuada, abriendo las
ventanas y/o la puerta en la habitaci6n en donde est,1ubicado
el electrodomdstico durante el ciclo de autolimpieza,
AViSO IMPORTANTE RESPECTOA LOS PAJAROS
DO[V]ESTiCOS: Nunca mantenga [os p_jaros en [acocina o en
las habitaciones donde puedan Ilegar los humos de la cocina,
Los pajaros tienen un sistema respirator[o muy sensitivo, Los
humos producidos durante el ciclo de autolimpieza del homo
pueden ser periudiciales o mortales para los p_jaros, Los
humos que despide el aceite de cocina recalentado, la grasa,
margarina y los utensilios antiadherentes recalentados pueden
tambi6n ser periudiciales,
Conserve estas [nstrucciones para Referencia Futura
52
Page 54

Controies Superiores
Useestoscontrolesparaencenderinseiementossuperiores. Sedis=
ponede unaseNcciOninfinita deaiustesde[caiordesde'Low' {Baio)
hasta'Nigh' (Alto). Lasperillaspuedenco[ocarseen cualquierade
estosaiusteso entreolios.
Ajustes de Ca{or Sugeridos
EItamaffo,tipo de utensflioy [acocciOnafectar_nelaiustede[ caIor.
ParainformaciOnsobre INSutensiIiosyotrosfactoresque afectanINS
ajustesdet caior,consulteel folleto Recomendacionessobrelos
Utensiliosen la p_gina55y el folleto "La CocinaF_cir'.
Programad6n de los ControRes
1. Co[oqueel utensiiiosobree[eiementosuperior.
2. Oprimay gire [a periliaen cuaiquier direcci6nhastael ajustede
calordeseado.
o Enel paneldecontrol seencuentramarcadocual O O
Nementocontroiacarlaperiiia. Porejemplo,el dibujo
a laderechaindicaNelementodNanteroizquierdo. O O
3. Enel paneldecontrol hayuna [uzindicadoradel elemento.
Cuandoseenciendeaigunade las perillasde control,[a [uzse
ihmina. La luzseapagar8cuandotodos insNementossuperiores
seapaguen.
4. Despuesde cocinarcoloque[a perilla en la posicidn'OFF'
(Apagado). Retireel utensilio.
Dementos nobles
La cubiertaest_equipadacondos
eIementosdobIessituadosen [a parte
deIanteraderechay delanteraizquierdade[a
cubierta.EstoN permitecambiarel tamario
de estoseIementos.
Girela perfliaa laizquierdaparausarel
elementom_sgrandeo a laderechapara
usarel eiementom_spequei_o.
QFF
Low__High
5 7
_J
'Low' (Baio)(2}: Seutiliza
paramantenerlosaIimentos
caIientesy derretirchocolatey
mantequiila.
'Meal. Low'
{MedianoBajo)
(3-4]: Usepara
continuar
cocinando
alimentos
tapadoso para
cocinara[vapor.
[
'Medium' {Mediano) (5-
7): Usadoparamantener
un hen/or lento para
O
grandescantidadesde
ffquidoy parala mayoffa
de las frituras.
'Nigh' {Alto) {:1{)}: Seusapara
hacerhervir un [iquido. Siempre
reduzcae!aiustea un caior m_s
bajocuandolos ffquidos
comiencena herviro cuando los
aiimentoscomiencena
cocinarse.
OFF
High I
/
10
'iVied°Nigh'
(MedianoAlto)
(8-9): Seusa
dorar
7 ca[entar
aceiteparafrdr
en una sart_n
hondao para
saitear.
Tambi6npara
mantenerun
hen/orr_pido
paracantidades
grandesde
[[quidos.
ANTESDECOO{NAn DESPHESBE COCiNAN
Slemprecoloqueun u_enslhoen ele[ememosuperiorantesde
encenoedo.Paraevitarda_oa laestufa,nuncaenciendaun
eIernentosu9eriorsintenor un utensillosobleel
• NUNCA usela cubiertade laestufacomo unaareapara guarda[
a[imentoso utensi[ios.
MIENTPJ_SCOC[NA
• AsegOresede que loselementossuperioresest6napagaaos.
- Limpie cualquier derrame tan pronto como sea posible.
OTNOSCONSFJOS
, S{ek[stenarmariosd[rectamentesobrelacubierta de [a estufa.
co[oqueeneflos art[culosdeusopocofrecuenteyque puedenset
guardadosconseguridadenun areaque esta[_sujeta a[calor.
Asegureseae que ustedsabecua[perilh contro[acadaelemento. Aigunastemperaturaspuedennoserseguraspara articulostales
AsegL_resede que u_tedencendioe elemen[ocorrec-[o, como [quidosvoi_tiles,llmptadoresorocladoresenaerosol.
° Commencea coclnaren un ajustede taint altoluego reouzcaaun o NNNCA defenlngunartfculo,especiaimentearticulos de pi_stico.
ajustemasbajopara corripletar[a cocciOn.Nuncauseun ajus_e
de cmoraltoparacocmarduranteun tiernpo prolongado.
• NUNCA permltaque una ouahiervahastasecarse. Estopodria
daffar[ao[lay el electrodom6stico.
• NUNCA toquela superficiede laestufa hastaque no se haya
enfriado. PosiblementeaIgunas_reasde [asuperficie,
especLalmentealrededorde loseiementos se ent_b_eno calienten
mlentrasest_cocinando. Usetomao!laspara protegersus
nlanos.
soDre[acubiertade [aestufa. EIaire caiienteprovenientedel
respiraderopuedeencenderlosaRlcu[osinf[amabies,derrebro
ablandarlos plastLcoso aumemarlapresionen !osconteneoores
cerradoshaci6ndolosreventar.
• NUNCA permitaque el pape[de alum[n[o,lostermometrosde came
o cualqulerotro objetode me_aLa excepc16nde unao _asoDreun
elementosuperior,[engacontactocon ,oselementoscalefactores.
- NNNCA guardearticulospesadossobre [a cubiertaque pueoan
caersey da[iada.
53
Page 55

Cubiertas Lisas
Notas sobre cubiertas isas:
oLacubierta de maestufa puedeemitir un pocotie humo y
oior [a primeravezquese uti[iza. Estoesnormal
oLas cuhiertas iisas retienen el eaior pot an cierto periodo
despu6s qae se ha apagado ia estafa. Apaguelosetementos
unospocosminutosantesde queIosalimentosest@
completamentecocinadosy useetcalorrestanteparacompletar
la cocci6n.Cuandola Iuzdesuperficb calientese apaga [veta
continuaciOn},el dreadon@ se cocinaestar_fr[a aItacto.
Debidoa la maneraenque retienen elcalor, loselementosIisos
no responder_intan r@idamentea los cambiosen losajustes
como Ioselementosespirales.
oEncasode un posiblederrame,retireel utensiliode lacubbrta
de la estufa.
oNanea trate de mevantarmacuhiertao
oLasuperficb lisapuedeversedescoloridacuando est_caliente.
Estoes normaly desaparecer8cuando Iasuperficieseenfr[e.
Consejos para proteger la
cubierta lisa
Limpieza @er p_gina 66 para mayor informaci6n}
oAntes de usar por pnmera vez, limpie Ia cubierta.
o Limpie lacubierta diariamente o despu@ de cada uso. Esto la
mantendr_ con una buena apariencia y puede evitar que se da_e.
oSi se produce un derrame cuando est6 cocinando, I[mpielo
inmediatamente de la cubierta cuando 6sta est6 caiiente para
evitar una limpieza m_s dif[ciI despu6s. Tenga mucho cuidado,
limpie ei derrapae con una toaIla seca y Iimpia.
o No de}e que Ios derrames permanezcan sobre Ia cubierta o sobre
la moldura de Ia cubierta por un periedo de tiempo prolongado.
o Nu_ca use poivos de limpieza abrasivos ni esponjas de restregar
que puedan rayar la cubierta.
o Nunea use bianqueador a base de cloro, amon[aco ni otros
limpiadores que no hayan sido especificapaente recopaendados
para usar en el vidrio cer_mico.
E[ementos Superiores
Loselementossuperioresensu estufaest_nidentificadospor
circulospermanentesenla superficielisa. Paracocinardemanera
m_seficbnte, useun utensilioque seadel mismotamaSoque el
elemento.
Los utensi,%s no deben exte_tdersemz}saH_de f2 a25 mm
(1/2 a f pulgada) del tamale del elemente.
Cuandose enciendeun contmI,sepuedevet un resplandoratray@
de Ia superficb lisa.Elelemento pasar_ pot cielos de encendido
y apagado para mantener el ajuste de ealor seleeeionado, aen
enel ajuste'High' (Alto).
ParamayorinformaciOnsabrelosutensiliosconsultela secciOn
RecomendacionessobreIosUtensiIiosen la p@ina55y el folbto
"LaCocinaFacii"que seincluyeconsu estufa.
Luz llndicadora de Superficie Caliente
La luz indicadoradesuperficie ealienteseencuentrae_ el panelde
control.Laluzseiluminar4cuandocualquierade Iosebmentos
superioresest6caliente.Permanecer4encendida
aOndespu@deque el controlsea apagado,hasta
queel arease hayaenfrJado. Her Surface
Pata evitar marcas y rayaduras
o No use utensiliosdevidrio. Puedenrayarlasuperficie.
o Nu_ca coloqueunsoporteo un arode wok entreIacubiertay el
utensilio. Estosart[culospuedenmarcaro rayarla cubbrta.
o No desliceutensiIiosde aluminioa tray@de una cubiertacaliente.
LosutensiIiospueden@jar marcasque@ben serIimpiadas
inmediatamente.(VerLimpieza,p%ina 66.}
oAsegOresede queIacubbrta y Iaparte inferior del utensilioest@
limpiasantesdeencenderla estufaa fin de evitarrayaduras.
o ParaevitarIasrayadurasodaiio a la cubiertadevidrio ceMmico,
no deieazOcar,sal o grasassobreloselementos. Limpie la
cubierta con un pai_olimpioo con toailasde pape!antesde usar[a.
o Nu_ea desliceutensiliosde metalpesadosa tray@de [acubierta
puespueden rayar[a.
Para evitar a chas
o Nu_ea use un pai_oo unaesponjasuciapara Iimpiarla cubierta
de Iaestufa. Estopuede@jar una pe
Para evitar otros da os
o No dejequeen la cubiertacalientese derritan pkisticos,az_caro
aIimentoscon altocontenidode az0car.Si estosucede,limpie
inpaediatapaente.07erLimpieza,p4gina66.}
o Nunca dejeque unaolla hiewahastaquedarsecapuesesto
dafiar_la superficiey el utensilio.
, Nunca use la cubierta come una superficie de trabajo ni
comeunatabla de cortar.
o Nunca cocinealimentosdirectamentesobrelacubbrta.
o No use un utensiliopequefioen unebmento grande. Estonos6Io
desperdiciaenergiasine que tambi6npuedenproducirsederrames
calientessobreIacubbrta loscualesrequbren IimpiezaadicionaL
o No use utenslliosespecialesquenosean pianos,detamafio mayor
o desniveladostalcome Iaparte inferior redondade loswoks, con
fondos acanaladosy/oparrillasy elias de grantamafiopara
prepararconservas.
o No use aluminio ni contenedoresdepapeIde aluminio. El
aluminiose puedederretiren Ia cubbrta de vidrio cer_rnico.Siel
metalsederriteen lacubierta,no use laestufa. Llamea un
t@nicoautorizadode Maytag.
EVite
Utensiliosplanesy Losutensiliosconfondosacanalados
suaves, o arqueados.Losutensiliosconrondos
irregularesno cocinanuniformemente
losaIimentosy aIgunasvecesno
puedenhervirI[quido.
Utensiliosde material Losutensiliosde metaIesdeIgadosode
grueso, vidrio.
Utensiliosque sean Losutensiliosm_spequefioso m6s
detmismotamafio grandesque el elementoen 2,5cm
queel elemento. (1 pulgada}.
Mangossegums. Losutensiliosconmangossueltoso rotes.
Mangospesadosque puedeninclinarel
utensilio.
Tapashermdticas. Lastapassueltas.
Wokscon fondo Loswoks confondoapoyadoen un aro.
piano.
Utensi ios para preparar
Recomendaciones sobre
SiseusanIosutensilioscorrectossepuedenahorrarmuchos
probbmas,taIcome proiongaci6ndeltiempo de cocci@de los
alimentosu obtenci6nde resultadosno consistentes.Losutensilios
correctosreducenel tiempode cocci6n,usanmenosenergia
el@tricay cocinanlosalimentosde manerapassuniforme.
Prueba de OHas P anas
Verifiquesisus ollassonplanas.
La prueba de maregina:
1. Coloqueunareglaa trav6sdel fondode la ella.
2. ColOquelaa laluz.
3. Pocao ningunahz debeversedebajode la regla.
La prueba de maburbuja:
1. Coloqueunapulgadade aguaen la oila.ColoqueIaolla enla
cubiertay gire elcontrola 'High' (Alto}.
2. ObserveIaformaciOnde burbujasa medidaqueel aguase
calbnta. Lasburbujasuniformessignificanbuen rendimbnto y
lasburbujasno irregularesindican puntoscalbntesy cocci@
dispareja.
Ver el folbto "La CocinaF_cil"paramayorinforpaaci6n.
conservas y de tamales
Todas las elias para preparar conservasy laselias grandes
deben tener rondos planes y deben ser hechos demateriames
graesosoEstoesmuy importanteparaIascubbrtas lisas.La baseno
debeserm_sde 2,5cm (1pu+gada}m_sgrandeque eIeIemento.
Cuandolas eliasde prepararconservasy lasoIIasdetamafios
grandesno cumplenestosrequisites,la cocci6n puedendemorar
m_stiempoy se puedendafiar Iascubiertasde Iasestufas.
AigunasoIlasde prepararconservastbnen basespequefiaspara
usarlasen las superficbs Ibas de lasestufas.
Caandoest8 preparande consewas,use emajuste de careeramte
basra que el agaa comience a hervir oseIograIapresiOnen el
ella.Reduzcaelcaloral ajusterossbajo quemantengael hervoro la
presiOn.Si nose reduceel calor,sepuededafiarla cubbrta de la
estufa.
ConsulteelfoIleto"LaCocinaF_cil"paramayorinformaciOn.
55
Page 57

Pane de Gontro
A B
G [3
\
\
\
\
\
\
\
\
\
\\\ Cook&
\\ Homd CUeaa DaUay Clack
\
BroiH
Bake
E
F {3 H
A /
Timer
Keep
Warm
1 J
Elpanelde control hasido disefiadoparssu f_cil programaci6n.Elindicadorvisualen el panelde controlmuestraIahoradel dFa,el
temporizadory Iasfuncionesdel horno.Elpanelde control mostradoarribaincluyelascaracteristicasespedficasdel modelo. (Elestilo del
panelde controlvariasegOnel modelo.)
A
'Broil'(Asara
laPar@a)
B
'Bake'(Homes0
G ¸
A (l'v1_s)o
(
V (Menos)
'Timer'_emporizsdo0
E
'Cook& Hold'(Cocci@
yMantenerCaliente}
'Clean'(Limpieza}
G
'Delay'(Diferido}
H ¸
'Clock'(Reloj}
m
'KeepWarm'
[MantenerCaliente}
'Carlcel'[Cancels0
m
Beusaparsasara laparrillaydorarlos
alimentos.
Beusaparshomeary asst.
Programsocambialahera,la
temperaturadelhorno.Programsasara
laparrilla'HI'o 'LO'.
Programsa!temporizador.
Seusaparshornearduranteuntiempo
seleccionado,luegomantieneelalimento
calienteduranteunahora.
Seusaparsprogramarancictode
auto[irap[eza.
Programsethomoparscomenzara
homearolimpiarsea unahoraposterior.
Beusaparsprogramarlahoradetdis.
Beusaparsmantenercalienteene!
hornoe!alimentococinado.
Cancelstodaslasfuncionesaexcepci6n
deltemporizadory e!reloj.
Nots: Cuatrosegundosdesp@sde haberoprimidolatecla A o
'_',se programar_autom_ticamenteel tiempoo Iatemperatura.
Si transcurrenm_sde30 segundosdesp@sde haberoprimido
unatecla defunci6n y antesde oprimir latecla A o V, la
funci@ ser_canceladayel indicadorvisualvolveraal despliegue
anterior.
'Clock' (Reloj}
El relojpuedeserajustadopars desplegarla horayaseaen formato
de 12horaso 24 horas.Elreloi hasidoprogramadoen la f_brica
parsel formato de 12horas.
Pars cambiar emremoja formate de 24 horas:
1. Optimay mantengaoprimidaslasteclas
'Cancery 'Delay'durantetressegundos.
2. OpdmaA o V pars seleccionarel
formatode 12horaso 24 horas.
3. ProgrameIahoradel dis siguiendolas
instruccionesindicadasabajo.
i( i
--Delay
Programaci6n dei Reioj:
Uso de masTedas
o Oprimala tecia@sea@.
o OprimaA o V pars pregramareltiempo oIatemperatura.
o Seescuchar_unas@al sonoracadsvezque optima unatecla.
o Seescuchar_ndosse_alessonorassiocurreun erroren la
programaciOn.
1, Oprimalatecla'Clock',
• Lahora det dis y dos puntosdestellanen el
indicador.
2. OptimaA o V pars programarJahoradel dis.
• Losdospuntos continLiandestellando.
3. OprimaIatecia'Clock' nuevamenteo espere
cuatrosegundos.
Clock
A
conto
56
Page 58

Cuandose conectaenerg[aeI6ctricaaIhornoo despu6sdeuna
interrupciOnde laenerg[aeI6ctdca,Ia0Itimahoradel reloj previaa
la interrupcidndesteUar8en el indicador.
Paradesplegarla horadeId[acuandoel indicadorest6 mostrando
otrafuncidn detiempo,optima latech 'Clock'.
La horadel reloj no puedeset cambiadacuandoel hornohasido
programadopara'DelayCook','DelayClean'o'Cook& Hold'.
Para cancemar el temporizador:
1. Oprimay mantengaoprimidala tecla'Timer'durantetres
segundos.
U
2. Optima latecla'Timer'y coloquelahoraa 00:00.
Para cancemar el despmiegue demremoj:
Si nodeseaque e+indicadorvisualmuestrelahora deldia:
Oprimay mantengaoprimida lasteclas
'Cancel'y 'Clock' durantetres segundos.La
horadel diadesaparecerdenel indicador.
Cuandose cancelael desplieguedel reloj,
oprimalatecla 'Clock'paradesplegar
brevementelahoradel dia.
__ Clook
Para restaurar el despliegue del reloj:
Oprimay mantengaopdmida lastechs 'Cancel'y 'Clock'durante
tres segundos.La horadel d[a reaparecer8enel indicador.
'Timer' (Temporizador}
E!temporizadorpuedeserprogramadodeun minuto {00:01}hasta
99 horasy 59 minutos {99:59}.
Eltemporizadorpuedeset usado independientementedecualquier
otraactividaddeI horno.Adem_spuedeser programadocuandootra
funci6n del hornoest6en funcionamiento.
Eltemporizadornocontrolael homo.Solamentecontmla una serial
sorlora.
Para programar el temporizador:
1+ OptimaIatecla 'Timer'0-emporizador_+ "rimeP
o '00:00'destellaen el hldicadorvisual.
o Losdospuntosdestellar_n.
2. OprimaIatecla A o V hastaque el tiempo
correctoaparezcaen elindicadorvisual
o Losdospuntoscontin0andestellando.
3. Oprimanuevamentelatecla 'Timer'o esperecuatrosegundos.
o Losdospuntoscontin0andestellandoy comienzala cuenta
regres+vadeltiempo.
o El0Itimom+nutode Ia cuentaregresivadel temporizadorse
desplegar_ensegundos.
4. AI finaldel tiempoprogramado,se escuchar8una serialsonora
larga.
Bloqueo de los Controles y de
la Puetta del Homo
Eltecladoy la puertadet horno puedenser bloqueadospara
seguridad,Iimpiezaoevitarel usono autorizado.Nofuncionar_n
cuandoest6n bloqueados.
Siel homoest_en uso,loscontrolesni la puerta puedenbloquearse.
La horaactualdel d(apermanecer_en elindicadorcuandolos
controlesest6nbloqueados.
Para bloquear:
Optimay mantengaoprimidasIasteclas
'Cancel'y 'Cook& Hold'durante tres
segundos.
Cook&
'LOCK'destellaenel indicadorvisual -- Hold
Para desbloquear:
Oprimay mantengaoprimidaslas teclas 'Cancel'y 'Cook& HoW
durantetres segundos.
'LOCK'desaparecedel indicadorvisual.
C( digos de Ettotes
'BAKE'o 'LOCK'puedendestellarr4pidamenteparaadvertirleque
hayun error o un problema.Si'BAKE'o 'LOCK'destetlanen el
indicadorvisual,optima latecla'Cancel'. Si'BAKE'o 'LOCK'
contin0andestellando,desconectelacorrienteel6ctricahaciael
artefacto.Espereunospocosminutosyvuelvaa conectarla
corrienteel_ctrica.Si Iaspalabrasa0ncontin_andestellando,
desconectelacordenteeJ6ctricahaciael artefactoy Hamea un
t6cnicodeservicioautorizado.
57
Page 59

@
'Bake' (Horneado}
Para pregramar 'Bake':
1. Oprimalatecia 'Bake'.
, 'BAKE'destellar_.
, '000'destetiar8enel indicadorvisual
2. Se[eccioneIatemperaturade[ homo. La
temperaturade[ homo puedeset programadade
75°a 285°C (170° a 550° F}.Opdmau oprima y
mantengaoprimida[atecia A o V.
, Cuandocuatquierade estasdosteciasseoprime
per primeravez,'175°' {'350°'}seiturninar_.
+ Optima[atecia _¶aumentar[atemperatura.
, Optima[atecia _' paradisminuirla temperatura.
3. Oprimalatecla 'Bake' nuevamenteo esperecuatrosegundos.
, 'BAKE'dejar_de desteiiary seiIuminar_en el indicadorvisual
+ '100°'o ia temperaturaactualdel homo se desplegara.La
temperaturase elevar_en incrementosde 5° hastaquese
aicancela temperaturaprogramada.
4. Esperea quee[bornese precalientedurante8-15 minutes.
, Cuandoel borneHegaa latemperaturaprogramadase
escuchar_unasepal sonoralarga.
, Paraverificarla temperaturaprogramadaduranteel
precaientamientodel borne,optima latecia 'Bake'.
5. Coloqueel aiimentoen el homo.
6. Vedfiqueel progresode [acocciOncuandohayatranscurridoel
tiempo minimorecomendado.Contimiela cocciOnsi esnecesario.
7. Ai t6rminode lacocciOn,oprimala tecia'Cancer
8. Retireel alimentodel homo.
Notas sobre Homeade:
Paracambiar[atemperaturade[ borne duranteel horneado,
oprima[a tecia _&o '_ hastaque lieguea la temperatura
deseada.
+ Si oMda apagarelhomo, seapagar_automa4ticamentedespu6s
detranscurrir 12betas.Si deseadesactivarestacaracteffstica,
vea[apdgina61.
+ ParasugerenciasadicionaIessobrehomeadoy asado,consuite
elfoiIeto"La CocinaFacil".
Bake
A
Diferencias de[ homeado entre su homo
antiguo y su homo nuevo
Esnorma[observaraIgunasdiferenciasen el tiempode horneadode
suhomo antiguoy su homo nuew_+Vea'%uste de laTemperatura
de[Homo"en [ap_gina61.
'Cook & Hold' (Cocci6n y
Mantener Caliente}
'Oeek & Hold'[epermitehorneardurante unacantidad
determinadadetiempo,seguidodeun ciclo 'KeepWarm'de una
hera.
Para pregramar 'Cook & Hold':
1.Oprima[atec[a'Cook& HoW.
, 'BAKE'y 'HOLD'deste[ian. Hold
, '000'se iIuminaen e[indicador visual
2.SeIeccione[atemperaturade[ homo.Latemperatura
del homo puedeserprogramadade 75°a 285°C
070° a 550°F}.Oprimau optimay mantenga
oprimida[atec[a A o V.
, Oprima[atecia A paraaumentar[a
temperatura.
, Oprima[atecia '_ paradisminuir [atemperatura.
3.Oprima[a tec[a 'Cook& HoW nuevamenteoesperecuatro
segundos.
, 'HOLD'deste[ia.
, '00:00'desteIIaene[ indicadorvisual
4.Programe[acantidadde tiempodurante[acua[usteddesea
hornearoprimiendo[atec[a A o V Eltiempode horneado
puedeprogramarsedesde 10minutes(00:10}hasta11betas,
59 minutes(11:59}.
, 'BAKE'y 'HOLD'se iIuminanen el indicadorvisual
, E[tiempode horneadosei[uminaraien e[ indicadorvisual
, Comenzar_[acuentaregresivade[tiempo dehorneado.
Cuande haya expirade el tiempe de cecei6m
, Seescuchar_ncuatroserialessonoras+
, 'BAKE'seapagar&
, 'HOLD'y 'WARM'se i[uminar_n+
, Enel indicadorsedesplegar_'75°' ('WO°'}.
Cook&
58
Page 60

@
Despu6s de una hora en 'HOLD WARM' (Mantener
Caliente):
• 'End'sedesplegar&
• La horadel diavoIver_a desplegarseen elindicadorvisuaI.
Para cancemar 'Cook & Homd'en cuamquier momento:
Oprimala tecla 'Cancer Retireel alimentodel homo. #rice#
'Demay Bake' (Horneado
DFeddo]
NOusehornead0diferido paraalimentosde C0rtadurac!dnt#les
Cornoproductosi_icteos,cerdo,came de aveo manscos.
Cuandousa 'Delay', el homo comienzaa cocinarm4stardeen el
d[a.ProgrameIacantidaddetiempo que usteddeseadiferirantes
de queseenciendael hornoycuantotiempo deseacocinarel
alimento.Elhomocomienzaa calentaren la horaseleccionaday
cocinaduranteeltiempo especificado.
Eltiempo diferidopuedeprogramarsede 10minutos(00:10]hasta
11horas,59minutos [11:59].
Para programar un cido de homeado diferido:
I. Oprimalatecia 'Delay'.
o 'DELAY'destefla.
o '00:00'destellaen el indicadorvisual.
2. Oprimalatecla A o V para programarel
tiempo diferido.
Cuando'DELAY'est6todavFadestellando:
3. Oprimalatecla 'Cook& Hold'.
o '000'seiluminaen e]indicadorvisual
o 'BAKE'y 'HOLD'desteHan.
4. OprimaA paraprogramarla temperaturade horneado.
o '00:00'y'HOLD' destellan.
o 'BAKE'permaneceiluminado.
5. OprimaA paraprogramarel tiempo de horneado.
o Enel indicadorvisualseiluminan'DELAY','BAKE',y
'HOLD'.
Delay
A
Cook&
Hold
Cuando emtiempo diferido ha expirado:
• 'DELAY'se apagar&
• Sedespliegaeltiempo de horneado.
o Sedespliega'BAKE'y 'HOLD'.
Para programar un tiempo diferido cuando ya se ha
programatic 'Cook & Homd':
1. Optimalatecia 'Delay'.
• 'DELAY'destella.
• '00:00'sedespliegaen elindicadorvisuaI.
2. Optima latecla_&o V paraprogramarel
tiempo diferido.
• Despu6sdecuatm segundos,'DELAY'
permanecer_iiuminadopararecordarleque se
haprogramadoun ciclo de horneadodiferido.
Ue!aY
Cuando ha e×pirado emtiempo diferido y emhomo
comieaza a fuacioaar:
• Sedespiegar_eltiempo de horneado.
• 'DELAY'se apagar&
• 'BAKE'y'HOLD'permanecer_nihminados.
Para cancemar:
Optimala tecla'Cancel'.
• Todaslasfuncionesde horneadocontroladaso no pot el
temporizadorser_ncanceladas.
• Lahoradel d{avolver8a desplegarseen el indicadorvisual.
Notas:
• Nousehorneadodiferidopara Iosart[culosque necesitan
precalentamientodel homo,tal como pasteies,gafletasy panes.
• Nousehorneadodiferidodiferidosiei hornoyaest_caliente.
59
Page 61

'Keep Warm' (Mantener
Caliente])
Paramantenercalientesenformasegura alimentoscatientesopara
catentarpanesy piatos.
Pare pregramar 'Keep Warm':
1. OprJmalatecla 'KeepWarm'. Keep
. 'WARM'destelia.
. '000'sedesptiegaenel indicadorvisual+
2, Se[eccioneIatemperaturade 'KeepWarm'.La
temperaturepare 'KeepWarm'puedeser
programadade63°a 90° C(145° a 190° F).
Oprimau oprimay mantengaoprimida JatecJa
AoV.
. Cuandocuatquierade estasdosteclasseoprime por primera
vez,'75°,('W0°'}seituminar_.
+ OptimaIatecla A pare aumentarlatemperature.
. Oprimalatecla '_ paredisminuirla temperatura.
'WARM'y Iatemperaturesedesplegar_neneIindicadorcuando
el ciclo'KeepWarm'est6activo.
Warm
Notes sobre 'Keep Warm':
. Paracalidad 6ptima de losalimentos,losalimentoscocinados
en et horno debensermantenidoscalientespor nom_sde I a
2 horas.
+ Paraevitar quelosalimentosse sequen,c0braloslevemente
con papelde aluminioo unatape.
, Pare cementerpaneciHos:
- cubra ievementelospanecillosconpapelde ahminio y
col6quelosen el homo.
- oprima'KeepWarm'y latecla A pare programar
75° C {170° F}.
- calientedurante 12a 15minutos.
+ Pare caJentar pJatos:
- coloque2 pilesde cuatroplatoscarla unaen el horno.
- oprima'KeepWarm'y latecla A pare programar
75° C {170° F}.
- calienteIosplatosdurante cinco minutos,apagueel hornoy
deje Iosplatosen elhornodurante 15minutosm_s.
- usesoIamenteplatos resistentesal homo,verifique con el
fabricante.
Pare caffcemar 'Keep Warm':
1. OprJmaJatecJa'Cancer. _P,anP._l]
2. Retireel alimentodel horno.
- nocoloque los platoscalientessobreuna superficiefr{a
puesel cambior_pidode temperaturapuedecauserfisuras
superficiales.
60
Page 62

@
Cierre Auto tico/Modo
Elhornose apagar_autom_ticamentedespu_sde 12betassi usted1o
dejaaccidentalmenteencendido. Estacaracteffsticade seguridad
puedeset desactivada.
Para cancemar e[ cierre autom_tico de 12 horas y
dejar que e[ homo funcione continuamente durante
72 horas:
1= Programee! homoparahornear (verp%ina 59}=
2= Oprimay mantengaoprimida[atecIa'Clock' Clec[(
durantetressegundos=
o 'SAb'sedespiegar_ydesteIiar_durantecinco segundos.
o 'SAb'sedesplegar_continuamentehastaquesedesactiveo
hastaque transcurrae[limite de72betas.
o 'BAKE'tambi6nsedespIegar_si se est_usandoun cic[ode
horneadocuandoel borneestaen ModeSab_tico.
TodaslasotrasfuncionesEXOEPTO'BAKE'['Timer','KeepWarm',
'Clean',etc.}est_nbIoqueadasduranteel Mode Sab_tico.
Para cancemar 'Bake' cuando e[ Mode Sab_tico
est_ active:
Oprima[atecia 'Cancer
o 'BAKE'seapagar8en el indicadorvisual
o No se oir_ ningunasehalsonora=
Para cancemare[ Mode Sab_tico:
1= Oprima[atecia 'CLOCK'durantetres segundos=
0
2. Despu6sde 72horas,el Mode Sab_ticoterminar&
o 'SAb'desteliar_durante5 segundos.
o Lahera deld[a reaparecer8enel indicadorvisual
Clock
A uste de [a te peratura de[
Laexactitudde lastemperaturasdel homoescuidadosamente
probadaen [af_brica=Esnormainotar aigunadiferenciaentrela
temperaturade horneado,entreun bornenuevoy unborne antiguo=
Conel correrdel tiempo, [atemperaturadel homo puedecambiar=
Ustedpuedeaiustar[atemperaturadel homo,si consideraquesu
homo noest8 homeandoo dorandoenforma correcta=Paradecidir
cuantodebecambiarla temperatura,programelatemperaturade[
homoa 15° C _25° F) m_salta o m_sbajaque latemperatula
indicadaen sus recetas,luegohornee=LosresuItadosdela
"prueba"puedendarIeuna ideade cuantoajustar[atemperatura.
Ajuste de [a temperatura de[ homo:
1=Oprimalatecia 'Bake'. Bake
2= Programe285° C[550° F}oprimiendola tecIaA
3. Optimay mantengaoprimida[atecia'Bake'
durantevariessegundoso hastaqueO°aparezca
en el indicadorvisual
Si [atemperaturadel horno haside previamenteaiustada,e!
cambioaparecer8enel indicadorvisual. Pere}emplo,si la
temperaturadel bornefue reducidaen 8°C 05° F}el indicador
mostrar_'- 8°, ['-15°'}.
OprimalatecIaA o _' paraajustarlatemperatura.
Cadavezqueseoprimeuna tecIa,[atemperaturacambiaen
3° C(5° F}. Latemperaturadel bornepuedeseraumentadao
disminuidaen 3°a 20° C[5° a 35° F}.
Laheradel dia reaparecer8autom_ticamenteenel indicador
visual
Nonecesitareajustarla temperaturade[ bornesi hayuna fallao
interrupciOnde energ[ae!6ctrica. Lastemperaturasdeasara ]a
parriila y limpiezano puedenserajustadas.
Notas Sobre e( Mode Sab tico:
• ElModeSab_ticopuedeseractivadoen cua[quiermemento,
estdo noel borneencendido.
• ElModeSab_ticono puedeseractivadosi [asteciasest_n
bIoqueadaso cuando[apuertaest_ bIoqueada.
• Sie[borne est_horneandocuandoel Mode Sab_ticoes
programado, 'BAKE'seapagar_al final del cicio de horneado.
Noseemitir_nseffaIessonoras.
• Sisedesea[a [uzde[hornoduranteel Mode Sab_tico,6sta
debeserencendidaantesde que comiencee[Mode Sab_tico.
• CuandocomienzaelModeSab_tico,noseemitir_ [aserial
sonorade preca[entamiento.
Cuandoel ModeSab_iticoest_active,todos losavisos,mensaies
y sehaiessonorasest_ndesactivadas.
E(b[oqueoautom_ticode [apuerta nofuncionadurantee(
ModeSab_tico.
o Sioprime[atecla'Cancel'secance[ar8uncic[o'Bake',sin
embargoe[ centre[ permanecer_enModeSab_tico.
o SifaIIa[acorrienteeIectrica,cuandow[eiva[aenerg[ae[ homo
seactivar_enMode Sab_ticocon72 horasrestantesy ningOn
cic[oactive.
61
Page 63

'Broiling' (Asar a la Parrilla}
Para programar 'Broil':
1. Paracomenzar,opnma la tecla'Broil'+
o 'BROIL'destefla.
o 'SET'sedespliegaenel indicador.
2. OprimaIateda A paraprogramarasar a la parrflB 'HVu oprima
latecla V para programarasarB parrilB 'LO'.
o Enel indbador visualsedespbgar_'HI' o 'LO'.
o Sebcciones'HIbroil' 285°C {550° F}para asadoa IaparrilIa
normal. Sebccione'LObroil' 230° C {450° F}paraasar a la
parriflacon temperaturabajaalimentosque @ben set
cocinadospor m_stiempo,tal como la camede ave.
3. Despu@de cuatrosegundos,elhorno comenzar_a funcionar.
o 'BROIL'continuar_i[uminado.
4. Paraun doradoOptimo,precalienteeIebmento deasara la
parrilla durante3 a4 minutosantesdecolocarel alimento.
Broil
5. Coloqueel alimentoen elhomo. DejeIapuertaabierta
aproximadamente10cm {cuatropulgadas}{elprimer tope}.
6. Devueltaa lacame unavezaproximadamentea mitadde la
cocci@.
7. Cuandoel alimentoestecocinado,oprimalatecla /Cancel!
'Cancel'. Retireel alimentoy laasaderadeIhorno.
• Lahoradel d[avolver8a despbgarseen el hldicadorvisual.
Notas Sobce Asado a la Paccilla:
o Paramejoresresultadoscuandoasea la parrflla,useuna
asaderadis@ariaparaasara Iaparrilla.
o Los tiemposde asara laparriIBaumentar_ny el doradoser_
mSsclaros+el ebctmdomesticoeshsstaladoen un circuito de
208voltios.
o 'Hi' seusapara la mayoffade losasadosa Ia parrilla. Use'LO
broil' cuandoasea laparrilla alimentosque necesitancocci@
prolongada. Latemperaturainferiorpermite queel alimentose
cocine hastaquedar bienasadosindorarsedemasiado.
o Los tiemposde asadoa laparrillapuedenser rnSslargos
cuandoseseleccionalatemperaturam_sbajade asara la
parri[[a.
o Elalimentodebeset dadovuelta cuandoest_a mitaddel
tiempo deasar.
o Parasugerenciasytemperaturasadbionalessobreasara la
parrilla,consulteel folbto "La CocinaF_cfl".
Tabla de Asar a la Parrilla
PGSICIGNDE TIEM PO APPP,OX, TIEMPO APPP,OX,
ALIMENTOS LA PARRILLA
Came de Res
Biftec,2,5cm {1"}
Hamburguesas,1,9cm {3/4"} degrosor
Came de Cerdo
Tocino
Chuletas,2,5cm {1"}
Rebanadade jam@
Came de Ave 'LO Broil' 'LO Broil'
Mitadesde pechugas 4 15 minutos 15 - 25 minutos
_Wariscos
Filetesdepescado,con mantequiIIa,2,5cm {1"} degrosor
CoBsde langosta,85-115g (3-4onzas}cadauna
Nora: Esta tabla es sOlo una gu/a. Los tiempos pueden variar con el tipo de alimento que se est_ cocinando.
A medio asar
Bien asado
Bien asado
6
6
607
6
6
6
6
5
PP,IPVIER_DO
8 minutos
10 minutos
9 minutos
6 - 10 minutos
10 - 11 minutos
5 minutos
10 - 15 minutos
7 - 10 minutos
SEGUNDO _DO
7 - 12 minutos
8 - 14 minutos
6 - 9 minutos
{no se d_ vuelta}
12 - la minutos
3 - 7 minutos
{nosed_ivueka}
{nosed_vuelta}
62
Page 64

@
Respiradero de[ Homo
Cuandoel homoest8en use,el _reacercade[respiraderopuede
calentarsetosuficientecome paracausarquemaduras.Nunca
bloqueela aberturadel respiradero.
Elrespiraderodemhomoseencuentra debajodemrespamdo
protector de su estufa,
RESPIRADERO
cercade [aabertura
de[respiraderopues
el calor que sale
No coloquept_sticos
puededeformaro
derretirel plastico.
{}
'Oven Light' (Luz del Homo)
Oprimael interrupter de [a[uzdel hornoen el pane[
de controlpara encendery apagar[aluzdel homo=
Panel inferior Homo
Protejael panelinferiordel bornecontraderrames,especiaimente
azucaradoso addicos, puespuedendescoIorar[aporceIana
esmaItada.Useel utensiIiodetama_ocorrecto a fin de evitar
derrames.No coioque utensilios ni papei de aiuminio
direetamente en mapare inferiordemhomo,
Parri[[as de[ Homo
. No[ntentecambiarla posiciOnde [aspardliascuando e! homo
Oven
Light
2= h_ciinelevementehaciaarriba e[ extremedeiantero;desiicela
parriiia haciaatr_s hastaquepasesobre[ostopesde enganche=
3= Bajeel frentede laparrillay desiicelahaciaadentro de[ homo.
No eubra una parrimmacompieta con papel de amuminioni
eomoquepapemde aluminio en el paneminferiordemhomo° Se
afeetar_n mosresumtadosdemhomeado y se puede da_ar em
paneminferior demhomo,
Posicior|es de [a Parri[[a
PARRiLLA7 (taposiciOn
m_salta): Paratostarpan
o asara [aparriiia
a[imentosde[gados,no
_rasosos=
PARRiLLA6: Seusapara
[amayoffade los asadosa
[aparriIIa.
PARR[ELA5: Para
horneadocon dospari[[as=
PARRILLA4: Seusaparahornear[a mayoffade losalimentosen
una bandejade horneargalletaso unmoidepara roilo de
mermeiada,paysdefrutaso alimentoscongeiadosdepreparaciOn
r_pida.Tambi6nse puedeusarparaasarpresasde polio a la parrilla.
PARRILLA3: Paracacerolas,horneadode pan,toltas en moidesde
tubeo paysde natilla.
PARRm[LLA2: Seusaparaasartrozospequefiosde came,pays
congelados,sufi6s de postreo pasteiesesponjososyhorneadocon
dosparrilias.Tambi6nseusaparahorneadocon parrillasm_itipies.
PARRILLA1: Seusaparaasartrozosgrandesde cameycame de
ave.
Panel inferior dei Homo: Co[oque[a
parrillade[homo en[os soportesen relieve
de[panelinferiordei homo.Usepara
disponerde espacioadiciona[cuando
cocinecoronas grandesen e[homo.
HORNEADOCONPARR&LAS
MULTIPLES:
Dos parriiias:Use[asposiciones2y 5=
Horneado con dos d_uhomo
parri[[as
7
Panel
inferier
E[homo tiene dos parri[[as=Todas[asparri[[astienen unbordecon
tope de enganche=
Para retirar [a parrimma:
1. Tirede [aparril[aderecho hacia
afuerahastaquese detenga en
[aposiciOnde[topede
enganche.
2= Levanteelfrente de [a parriilay
tire de [a parrilia haciaafuer&
Para reinstaiar [a parriiia:
1= ColoquelaparrilIaen elsoportede la parriIIaenel homo,
Norneado de Paste[es de Capas en
Dos ParriHas
Paraobtenermejoresresu[tados
cuandohorneapastelesendos
parril[as,use[aposiciOn2y 4.
Co[oquelospastelesen[as
parril[ascomese muestra.
63
Page 65

Homo Autoii piante
- D norma[queJasDezasde[ homosecalientendurantee[cLcIo
ae autoHmpleza.
- Paraevi[ardar_oa lapuer_a,no intenteabririacuandoJapalabra
'LOCK'est6despiegadaenel indicadorvisual.
• Evitetocar Jacubierta,[apuerta.[aventanao elareadel
respiraderode[ homo au[an[e unciclo de I_mpleza.
• No use Iimpiadoresde hornoscomercLalesen el acabadooe_
homo ni airededorde mngunapiezade[ homo pues puede
dar_arel acabadoo las Dezas.
El ;iclode autolimplezausate[r Deraturasde cocciOnsuoerioresalas
normalesData imE)larautom_ticamentetodo e[ tteriordel homo.
Esnorma[queocurran[[amaradas,numoo _amas:lurante[a ,_pieza
siel hornoest_demasiadosucio=Esmejorlimpiarel homo
regularmenteenvezde esperarhastaquesehayaacumulado
demasiadasuciedad=
Durantee[procesode limpieza,lacocina debeestarbienventilada
paraeliminarloso[oresnormalesasociadoscon la [impieza=
Antes de [a Autoiimpieza
1=Apague la[uzde[ homo antesde la limpieza=La luzdel horno
puedefundirse duranteel cic[ode [impieza=
2= Retire[aasadera,todos losutensiIiosy las parriJJasdelhomo. Las
parriIIasde[hornose descoJorarainy no se desiizar_nf_ciJmente
despu6sde un ciclo de autoJimpiezasi no son retiradasde[ homo.
3= Limpiee[ marcode! homo, el marcode [apuerta,e[_reafuerade
[ajunta de la puertay aIrededorde laaberturaen [ajunta de la
puerta,con un agentede [impiezanoabrasivota[ como'Bon
Ami'* ocon detergentey agua=EI procesode autoIimpiezano
[impiaestas_reas=Eliasdebenser limpiadasparaevitarque la
suciedadsehorneeduranteel ciclode autoIimpieza=[Lajunta es
el seIIoairededorde [apuertay ventanade[ homo.)
4. Paraevitarda_o no[impie nifrote la _-_ _
junta situadaalrededorde [apuertade[ \
homo.Lajunta est_dise_adapara
sellarherm6ticamenteelcalordurante
el ciclo de Iimpieza=
5. Limpleetexcesodegrasao derrames
de laparte inferiordel homo. Esto
evita humo excesivooIlamaradasduranteel ciclo de limpieza=
6. Limpie losderramesazucaradosodcidostalescomo papadulce
{camote],tomateso salsasa basede leche=La porcelana
esmaltadaes resistentealacidopero no a pruebade 8cidos=El
acabadode porcelanapuededescolorarsesi los derrames_cidos
o azucaradosno sonIimpiadosantesde unciclo de autolimpieza=
Para programar 'Self-Clean' (Autolimpieza):
Nota: Latemperaturade[homo debeset inferior a205° C[400° F)para programarun cic[ode limpieza=
1. Cierre[a puertade[homo.
2. Oprimalatecia 'Clean'. Clean
• 'CLEAN'destellaen elindicadorvisual.
Si [a puerta nosecierra,seoirdnsefialessonoresy [apalabra
'DOOR'sedesplegar_ene[ indicadorvisual. Si [apuerta noes
cerradadentro de45 segundos,[aoperaciOnde autolimpieza
ser8canceladay el indicadorvoiver_a despiegar[a hora de[d[a.
3, Optima lateciaA o V,
• Sedespiiega'CL-M (Limpieza- Suciedad
Mediana).
4. Optima lateciaA o V paradesplazarlos
ajustesde autolimpieza.
'CL-H' (Limpieza- SuciedadIntensa,4 horas)
'CL-M' (Limpieza- SuciedadMediana,3 horas)
'CL- L' (Limpieza- SuciedadLeve,2 horas)
A[seleccionare[ nive[desuciedadde[ hornose programa
autom_ticamentee[tiempode [[mpieza.
5. Despuesdecuatro segundos,ei hornocomenzarda[impiar.
• Eltiempo de [[mpiezacomenzard[acuentaregresivaen e[
indicador.
• 'LOCK'se desplegar_en el indicadorvisual=
o 'CLEAN'se desp[egar_en elindicadorvisual
Para diferir un cicio de autoiimpieza:
1=Optima latecia 'Delay'=
• 'DELAY'destella=
• '00:00'sedespiegar_enel indicadorvisual.
Optima latecia A o V paraprogramar[a
cantidadde tiempoqueusted deseadiferir e[
ciclo=Eltiempodifeddo puedeserprogramado ...................................
de 10minutos[00:10}a 11horas,59 minutos
De!ay
0 _:59),
3. Optima [atecla 'Clean'.
• 'CLEAN'destellar&
Oprima[ateda A o V=
. 'CL-M' (Limpieza- SuciedadMediana_se
despiiegaen el indicador=
conto
*Losnombresde losproductosson marcasregistradasde sus respectivosfabricantes=
64
Page 66

5. Oprima Iatecla A o V para desplazar los ajustes de
auto[impieza.
'CL-H' {Limpbza - Suciedad intensa, 4 horas}
'CL-M' (Limpieza - Sucbdad Mediana+ 3 horas}
'CL-L' (Limpieza - Suciedad Leve, 2 horas}
At sebccionar et nivet de suciedad dei homo se programa
autom_ticamente et tiempo de timpieza.
6. Despu@ de cuatro segundos+ 'CLEAN', 'DELAY' y 'LOCK' se
despiegar_n en et indicador visuat para indicar que el homo est_
programado para unciclo de Iimpieza difeddo. El tiempo diferido
tambi6n se despliega en el +nd+cadorvisual.
Si emhomo ya ha sido programado para un ciclo de
limpieza y usted desea programar un tiempo
1. OprimaJatecIa 'Delay'.
. 'DELAY'destetla.
+ '00:00'sedespbgar8en eI indicadorvisual.
2. OprimaIatecia A o V para programarla cantidaddetiempo
que usted@seadiferir el ciclo.
Despu@decuatrosegundos,'CLEAN','DELAY'y 'LOCK'se
despbgar_nen el indicadorvisuaIparaindicar que eIhomo est_
programadoparaunacicio delimpiezadiferido.Eltiempo
d+feridotambi@ sedespliegaen el indicadorvisual
De!ay
Cuando comienza el cido de autoiimpieza:
. 'DELAY'seapagar&
. Eltbmpo delimpiezasedesplegar_enei indicadorvisual
Para canceiar el ciclo de autoiimpieza:
Durante el ciclo de autolimpieza
Cuandoaparece'LOCK'eneI indicador,Ia puerta no sepuedeabrir.
Paraevitarda_oa la puerta,no fuerce Ia puertapara abdrlacuando
la palabra'LOCK'est_desplegadaenel indicadorvisual.
Humo y OIores
Ustedpuedevet humo y sentir olor las primerasvecesque elhomo
eslimpiado. Estoes normaly disminuir_con el tiempo.
Tambi@puedeocurrir humosi el homo est_demasiadosucioo si
seha dejadounaasaderaenel homo+
Sonidos
A medidaque e[horno secalienta,usted puedeoir sonidosde
piezasmet_[icasquese expandenycontraen. Estoesnormaly no
daffar_e[homo.
DespuOs del ciclo de autolimpieza
Aproximadamenteunahora despu@deIfin del ciclo de limpieza,
'LOCK'desaparecer& Lapuertaahorapuedeser abierta.
Alguna suciedad puede quedar como una mereceniza gris tipo
polvo° Retirelaconun patio hOmedo.Siia suciedadpermanece
despu@de limpiarla,significaque el ciciode iimpiezanofue Io
suficientementelargo. Lasucbdad ser_eliminadaduranteel
proximociclo delimpieza.
SimasparriHasdemhomo fueron dejadasen el homo yno se
desmizansuavemente despuds de un cicmode mimpieza,Iirnpb
lasparriIlasy lossoportesde lasparrilIasconuna pequ@acantidad
de aceitevegetaIpara hacerdeslizarlascon m_sfacilidad.
Pueden aparecer l+neasdelgadas en la porcelana al pasar pot
cicmosde camentamientoy enfriamientoo Estoesnormaly no
afectar_e! rendimiento.
Una descomomc+6_bma_cap_ede aparecer despots _emc+cmo
de mimpbzasi mosamime_tos_cidos o az_carados _o f_ero_
limpiados a_tes demci_modea_tomimpieza°EstadescoloraciOnes
normaly no afectar_el rend+miento.
Oprimala tecia 'Cancel'. _+,_
. ElindicadorvisuaIquedaen blanco.
. Todaslasfuncionesson canceladas.
. Lahora deld[asedespliegaen el indicadorvisuaL
. Si sedejaabierta [a puertade[ horno,[apa[abra'DOOR'
destellar_enel indbadorvisua[yse escuchar_una seffal
sonorahastaque [apuertaseacerraday la tecia'Clean'sea
oprimidanuevamente.
. Lapuertadel hornosedaffar_sisefuerzaparaabrirla cuando
la paiabra'LOCK'contim_adesp[egadaene[ indicador.
65
Page 67

Procedi ientos de Li pieza
fr[as antesde tecarie e iimpiario. De este modo se evitar_i da_o y
* Losnombresde Iosproduotossonmarcasregistradas
o Paraevitar manchasodeco[oracJ0n[jrnpJeei homodespu6sde cadauso.
, Sise ret[raalgunapieza,aseg[iresede quesea reinstaladaenforma correcta: 1-800-688-8408Canad&
P[EZA PROCEDIMJENT0 DE LJM P[EZA
desus respectivosfabricantes=
** Parahacerpedidos,[lamea[ 1-877-232-6771EEUU=o
Protectortrasero
esmaitada
Baodeja de Asar
e ioser_o
Area dei Reiojy
de losTeeJas
de Cootrol
Cubielta =
Vidrio
Cer,imico
La porce[anaesrnaltadaes vidriofundidoenmetalypuedeagrietarseo picarsesi noseusacorrectamente.Esresistentea
losdcidos,noa pruebade_cidos.Todoslosderrames,especia[mentelosderramesazucaradoso acidicosdebenserlimpiados
inmediatamenteconun patioseco.
, Cuandose enfr[e,[aveconaguajabonosa,enjuaguey seque.
, Nunca[impieunasuperficietibiao ca[ientecon un patiohOmedo.Estopuedecausaragrietamientoopicaduras.
, Nuncause[impiadoresdehomo,agentesde[impiezaabrasiveso c_usticosen e[acabadoexteriordelaestufa.
Nlmca cuhm el &seRe con papal de ah_mildepues este evita que la gmsa se escurra a & haodeja&ferie_
° Co[oqueun patioenjabonadosobree[insertoy la bandeja;dejeremojarparasokar[asuciedad=
• Laveenaguajabonosatibia.Useunaesponjadefregarparaquitar lasuciedadpersistente.
• Labandejadeasaryel insertopuedenser[avadosene[ lavavajil[as.
, Paraactivar'ControlLock'(B[oqueode loscontroles}para[alimpieza,vet pdgina57.
, Limpieconun patioh0rnedoy secar.Nouseagentesdelimpiezaabrasivespuespuedenrayar[asuperficie.
, Sepuedeusarlimpiavidriossiseredanenel patioprimero.NOroe[edireotamente en etpaneL
• Retire[asperil[ascuandoest6nenlaposici6n'OFF'tirdndolashaciaadelante.
, Lave,enjuaguey seque.No useagentesde[impiezaabrasivespuespuedenrayar[asupefficie.
, Enciendacadaquernadorparaasegurarsedeque losperi[lashartsidecorrectamentereinsta[adas.
Nlmeausefire, adores dehome, blanqueador con dote, amen[ace eHmpiadomsde vidrie quecolttengaamen[ace.
NOTA:Uame a uo reparodor auterizade si la cuhierta de vidde cerdmico se agrieta, quiehra o el papd de ahHninio
sederdte sebm la cubiertao
, Dejequelacubiertaseenfrfeantesde limpiarla.
, Geoeralidades_Lirnpie[acubiertadespu6sdecodauseo cuandoseanecesarioconunatoallade pape!h0medaycon
'CooktopCleaningCreme'(Cremade LhopiezaparaCubie!tas)(PiezaNo.2000000!)**.Lustrecon un patio[impioy seco.
NOTA:Sedesan_'ar#nmanehaspermanentesd /asuciedadsedejaquesecoc,_neunay otravezusandoiacub/ertacuando
eS[_ sueia
, Maochas Rebeldeso Marcas de l_e_l - Humedezcaunaesponjade gomaqueno dejemarcasoque noraye=Aplique
'CooktopCleaningCream*(CrernadeLimpiezaparaCubiertas)[piezano.2OOO0001]**yfroteparasacartantasuciedadcome
seaposib[e=Ap[iqueunacapade[gadadecremasobre[asuciedad,cubraconunatoal[adepape[hOmeday ddje[areposar
durante30a45minutes(2- 3 horasparamuchasuciedad]=MantengahOmedocubriendolatoalladepope[conenvo[turade
p[dstico=Restrieguenuevamente,[uegolirnpieconun patiosecoy limpio=
NOTA:SotamenteuseesponjasLIMP/AS,HUMEDASyquenorayonyquescansegurasparautensitiosconacabadoantiadherente.
Sedafiar4d disefioyd vidriod b espo_'anoest4mojada,si taesponjaest4suciao seusaotto tipodeespoi#_a.
, SaciedadesQuemadaso Pegadas=Restriegueconunaesponjaquenodejemarcasy 'CooktopCleaningCreme'*
(CremadeLimpiezaparaCubie!tas)=
NORA: Sostengaunrestregadorconhojadeafeitara unbogu_bde30°yrestrieguecs_lquiersueiedadquepermanezca.Luego
66
Page 68

PJEZA I PROCED_M_ENTO DE LIMP_EZA
• EviteusarcantidadesexcesivasdeaguapuespuedeescLmgsedebajoodetr_sdelvidriocausandomanchas.
del Home - Vidrie , Laveconaguayjab6n=Enjuagueconagualimpiayseque=E!limpiadordevidriopuedeusarsesiseroc{aenunpatioprimero=
,, Nousematerialesabrasivestalescomeesponjasderestregar,limpiadoresenpolvooesponjasdelanadeaceropuespueden
rayarelvidrio=
interiordel Home • Sigalasinstruccionesen lasp_ginas64-65parsprogramarunciclodeautolimpieza=
Parriiiasdei • Limpiarconaguaconjab0n.
Heine ,, Sacarhs manchasdificilesconpolvodelimpiezao unaesponjaliensconjab6n=Enjuaguey seque=
,, Lasparrillassedesco!orar4npermanentementeypuedennodeslizarseconsuavidadsisondejadasene!homodurante
uncic!ode autolimpieza=Siestosucede,IJmpJela parrillay lossopoltesenrelieveconunapequetiacantidaddeaceite
vegetalparsrestaurarlafacilidadde movimiento,luegolimpieelexcesode aceite=
Acere lnnxidabie
[modelosseleetos]
Gavnta de
Manija de la
Puerta, Panemes
Laterames-
Esmaite Pintado
j. NO USENINOUNPRODUCTODELIMPIEZA QUECONTENGABLANQUEADORA BASEDECLORO.
, NO USEMMPIADORES"ORANGE"Nl LIMPIADORESABBASIVOS.
,, StEMPRELIMPIELASSUPERFICIESDEACEROA FAVORDELGRANOo
,, Limpieza Diaria/Saciedad Leve=Limpieconunode lossiguientes- aguacon]abOn,unasoluciOndevinagrebhnco
conagua,limpiadorparssuperficiesyviddo'Formula409'_o unlimpiavidriossimilar- usandounaesponjaounpatio
suave=Enjuagueyseque=Parspuliry evitarmamasde losdedos,useel producto'StainlessSteelMagicSpray'_
(PiezaNo.2OOOOOOS]_*`
,, Saciedad Mediana/lntensa - Limpieconuno delossiguientes- 'BenAmi'?'Sma!tCleanser'_o 'SoftScrub'_- usando
unaesponjahOmedao un patiosuave=Enjuagueyseque=Lasmanchasdificilespuedensetquitadasconunaesponja
multi-use'Scotch-Brite'_hOraeda;frote afavordel grano. Enjuaguey seque.Parsrestaurarel lustrey sacarlasvetas,
aplique'StainlessSteelMagicSpray't
,° Descoloraci6n - Useunaesponjamojadaounpatiosuave,limpiecon limpiadorde acero'CameoStainlessSteel
Cleaner'*.Enjuagueinmediatamentey seque.Parseliminarlasestrfasy restaurarel lustre,usedespu_srociadorparsacero
inoxidable'StainlessSteelMagicSpray't
Cuandoest6if[a, laveconaguatibiajabonosa,enjuaguey seque=Nuncalimpieunasuperficietibiao calienteconunpatio
h0medopuesestopuededatiarlasuperficiey causarunaquemaduraa causadelvapor=
i°
Parsmanchasrebeldes,useagentesde limpiezalevementeabrasivestal comepastadebicarbo_mtoo'BenAmi't Nouse
agentesdeIimpiezaabrasives,c_usticoso_sperostat comeesponjasde lanadeaceroo limpiadoresdehomes=Estos
productospuedenrayaro datiarpermanenternentelasuperficie=
NOTA:Useuna teaHaeun parlesece paraHmpiarlos derrames, espeda]lnerlte los dermmes addices e
azucaradesoLa superficie sepuede descelorar e perder etbdHesi el derrame aeselimpia iamediatameate.Este
es especialmente impe_ante en;assuperficies Hancas.
*Losnombresde losproductosson marcasregistradasde sus respectivosfabdcantes=
** Parshacerpedidos,Ilameal 1-877-232-6771EEULLo1-800-688-8408Canada=
67
Page 69

Puerta del Homo
No Co[oque Peso exeesivo ni se pare en la puerta de[ horn0, Esto
podda hacer vo[car [a estufal quebrar la puerta 0 [esionar a[
usuario.
"esponjosa"cuandosecierra. Estoesnormaly disminuir8con e[
Nora: La puertade[ homo en unaestufanuevapuedesentirse
USO.
Ventana dem Homo
con un patio o con unatoaIIade papeLhlserte lascIavijasdel
foco nuevoderecho en los agujerospequei_osde la basede
cer_mica.
5. Vuelvaa colocara presi6nIacubiertade! foco ensu Iugac
6. Vuelvaa conectarla energ[ael6ctricahaciala estufa.Vuelvaa
poner el reloj a la horadel d[a.
Tomillos Niveladores
Vefifique Sie[soporte antique[c0estdasegurandoa[pb0 uno de
!OStorni[bS nive[ad0restraseros. Estesoporteevita que [aestufa
sevuelque accidenta[mente.
Para proteger la ventana de la pueHa dei homo:
1. Nouseagentesde rimpiezaabrasivostabs comoesponjasde
restregarde Bna de aceroo timpiadoresenpotvopuesetbs
puedenrayaretvidrio.
2. No goIpeeel viddocon ollas,sartenes,muebles,juguetes u otros
obietos.
3. No cierre la puertadel homohastaque lasparrillasdel homo no
est@en su lugar.
Ai golpear,rayar,hacervibraro esforzarel vidrio puededebilitarsu
estructuracausandoun mayorriesgode roturaen unafecha
posterior.
Luz del Homo
° Desconec[e la energia e!@trica hacia la estuta antes o_
reempiazar el toco.
, Deje que el homo se enfr[e antes de reempBzar e[ foco.
, AsegOrese de que lacubierta de[ foco _ el foco est6n fr[os
antes de tocarbs.
Paraasegurarelusode un foco de repuestocorrecto,soliciteel foco
a Amana. Ltameal 1-877-232-677!EE.UU.o 1-800-688-8408
Canaday pida la PbzaNo.74004458- focode halOgeno.
Para reempiazar el fete demhomo:
1. Desconectelaenerg[ael@trica hacialaestufa.
2. Cuandoel homoest6fr[o, use layemade losdedospara
sostenerelborde de lacubiertadel foco.Tirede lacubbrta hacia
afueray ret[reta.
3. CuidadosamentesaqueeIfoco antiguo,tirdndoloderecho haeia
afuerade labasede cer_mica.
4. A fin de evitarda_oo reducirlavida_itildel foco nuevo,no toque
el foco conlasmanosdesnudaso con los@dos.Suieteel foco
Laestufadebeser niveladacuandose instaia. Si [a ]I]]
estufanoest_ nivelada,gire lostornillos niveladores ii//r _
de pl_sticoubicadosencada esquinade [aestufa J_,,hastaquequede nivelada. _,-_'_c' ,:
£_'PON'ITZVO
_\ AIVTIVUEL O0
TORIVIL L0/VIVELAE)OE_
Gaveta de Al acena iento
Noguardeproductosde papeio de piastico,alimentosni
materiales Jnfiarnablesen estagaveta,Lagavetapuede
Ca!entarsedemasiadoparaestosartieulosCuandoseest_usando
el homo.
Lagavetade almacenamientopuedeser retiradaparaque usted
puedalimpiardebajode laestufa.
Para sacar:
1. Vade lagavetay desl[celahaciaafuerahastalaprimeraposiciOn
tope.
2. LevanteIa partedelanteradeIa gaveta.
3. T[relahastaIasegundaposiciOndetope.
4. SuietelosIadosy Ievantela gavetapararetirarla.
Para volver a colocar:
1. hlserteIosextremosdelascorrederasde la gavetaen losrieles
de la estufa.
2. LevanteIa partedelanteradela gavetay suavementeempOielaa
laprimeraposicidndetope.
3. LevanteIagavetanuevamentey emp0ielahastaquequede
completamentecerrada.
68
Page 70

PROBLEMA SOLUCmON
Para mamayor_ade mosprobmemas, • RevisesiloscontraIesdelhomoest_ndebidamenteajustados,
verifiqueprimero mesiguiente, • Verifiquesi el enchufeest_firmementeinsertadoenel tomacorriente,
• Verifiquea vuelvaa reponerel disyuntor,Verifiqueo reemphceel fusible,
• Verifiqueel sumhistrode energ[ael_ctdca,
Todala estufa o paite de ella no , Revisesila superficiey/o loscantrolesdel hornaest_ndebidamenteajustados,Verp_ginas
funcienao 53y 56,
• Verifiquesi lapuertadel harnaseha desbloqueadodespuesdelciclode autolimpieza,Vet
p_gina65,
• Revisesiel homoestaajustadoparahomeadodifeddoa programade limpieza,Verp_ginas59
y 65
• Verifiquesi'ControlLock' (BlaqueodeControl)est_activado,Vetp_g,57,
• Verifiquesiel centralest_en ModeSab_tico,Vet p_g,61,
Elrelej, las palabrasen el indieader , ElharnapuedeestarprogramadoparaunafunciOnde'Cook& HaWo unafunciOndiferida,
visualy/o las lutes funcionan pete , Puedeestaractivadalacaracter(sticadebloqueode las contralesdel harno,07erp_g,57,)
el homo no se eaiienta.
Losreaultados del horneado no • Aseg0resede queel respiraderodel harnonoest6blaqueado,Vetp_gina63parala ubicaciOn,
sen come ae eaperaban o son • Verifiqueparaasegurarsedeque Iaestufaest_nivelada,
diferentea a los del homo anterior° • Lastemperaturasa menudovat[anentreun hamonuevoy unoantiguo, A medidaquepasa
eltiempa,Iatemperaturadel harnocambiay puedehacerserodscalientea m_sif[a, Vet
p_gina61 paralasinstruccionescomeajustarIatemperaturadeIhamo, NOTA:Nose
recomiendaajustarlatemperaturasihatenidoproblemascon sotounao dosrecetas,
o Consulteelfolleto"La CocinaF_cil"paramayorinfarmaci0nsob_elosutensiliosdehomear,
Losalimentes no se asana la o VerifiqueIasposicianesde lasparrillasdelharna.Elalimentopuedeestarmuycercadel
parrilla en forma debida o salen elemento.
demasiado humo. o EleIementadeasarnofue precaientado=
o Elpapelde aluminiaseus0de maneraincorrecta.Nuncafarreel insertadelasadarcon papeI
deaiuminia,
. Lapuertadetharnoestabacerradamientrasseasabaa la parrilla. Deje[apuertaabiertaen [a
primeraposici6n (atrededorde10cm [4 pulgadas]).
o Recorteelexcesodegrasade Iacame antesdeponerlaaasara laparrilla.
o Seus6unaasaderasucia.
o Elvaltajedel hogarpuedeset baja.
Emhomo no se automimpia, o Verifiqueparaasegurarsedeque elcicla noest6ajustadaparaun comienzodiferida.Ver
p_gina64,
o Verifiquesi lapuertaest8cerrada,
o Verifiquesiel centralest_en Mode Sab_tico,Vetp_g,61,
o Elhornapuedeestara m_sde 205° C (400° F), Latemperaturadel homo debeser inferior a
205°C (400°F)parapragramaruncic[ode[impieza,
Elhomo no se Jimpi6 en forma o Puedeque seanecesariountiempade limpiezarn_slargo.
debida, o Losderramesexcesivas,especialmentedealimentosazucaradosy/o _cidasnofueranlimpiadas
antesdelciclo deautalimpieza,
Lapueita del homo no ae o ElinteriordeI harnotodavFaest_caliente,Dejeque paseaproximadamenteunaharaparaque
desMoqaea deapa_s del cinlo e[ hornose enfr[eantesdequesecompleteunciclo deautaiimpieza,Lapuertapuedeset
de autoiimpieza, abiertacuandadesaparezcala palabra'LOCK'del indicadarvisual
o Elcantroly la puertapuedeestarbloqueada.Vetp_g.57.
69
Page 71

PROBLEMA SOLUCION
Lasupedicie suave muestra
desgaste.
Sejunta humedaden maventana
demhomoosamevaporpot
emrespiradero demhomo.
Hayun omorfuerte o humomere
cuando se enciende emhomo.
1. Abmsionesorayaduraspequefias.
o Aseg_imsedeque Iacubiertaylapare inferiordelutensiIioest6Iimpia.Nodesliceutensilios
devidr[oo demetalatrav6sdeIacubierta.Aseg0resedequelaparteinferiordelutensiliono
sea_spera.Uselosagentesdelimpiezarecomendados.Vet p_g.66.
2. Marcasde metal
o No desliceutensiIiosdemetalatrav6sde Iacubierta.Cuandoest6if[a, limpiela cubiertacon
CremaparaLimpiezadeCubiertas.Verp_g.66.
3. Manchasy estdasmarrones.
o Retirelosderramesr_pidamente.Nuncalimpieconunpasooesponjasucia.Aseg0resedeque
Iacubiertay laparteinferiordelutensilioest6limpia.
4. Areascon un briliomet_Iico.
o DepOsitosmineralesdelaguayde losalimentos.Uselosagentesde limpiezarecomendados.
Vet p_g.66.
5. Picaduraso descascadiIado
o Limpielosderramesazucaradosinmediatamente.Verp_g.66.
° Estoes normal cuandosecocinanalimentosconalto contenidode humedad.
° Seus0humedadexcesivacuandolimpi6la ventana.
° Estoes normal en unaestufanuevaydesaparecer4despu6sde unospocosusos.
AIiniciar un ciclo deautolimpiezase"quemar4n"losoioresm4s r4pidamente.
o Siseenciendeel ventiladorayudar4aeJiminarelhumoy/o elclot.
o Suciedadexcesivade aJimentosen el panelinferiordel homo. Useunciclo de autoJJmpieza.
C6digosde Errores
Se escuchan ruidos.
NO se escuchan sesames sonora'as
y emindicador visuamno se activao
° 'BAKE'o 'LOCK'puedendestellarr4pidamenteenel indicador paraavisarleque hayun error
o un probiema.Si'BAKE'o 'LOCK'aparecenen elindicadorvisual,oprimala tecla'CANCEL'.
Si'BAKE'o'LOCK'contin0andestellando,desconecteIaenerg[aeI6ctricaalelectrodom6stico.
Espereunospocosminutosyvuelvaareconectarlaenerg[ael6ctdca.Sicontin0andestellando,
desconectelaenerg[ael6ctricadeielectrodom6sticoyIlameal t6cnicodeservicioautorizado.
o Siethomoest4demasiadosucio,puedenocurrirdemasiadasIiamaradasIo cual resultaraen
unc6digodeerrorduranteIaIimpieza.Oprimalatecla'CANCEL'ydejequeel hornoseenfr[e
completamente,iimpieelexcesodesuciedadyluegovuelvaa programarelciclode JJmpieza.
Siel c6digode error reaparece,Jlamea un t6cnico autorizado.
, Elhornoemitevariossonidosbajos. Ustedpuedeo[rlosre[6sdel homocuandoseencienden
yseapagan.Estoes normal.
o A medidaqueel hornosecalientayseenfr[a,ustedpuededr sonidosdepiezasmet_licasque
seexpandeny contraen. Estoes normaly no daffar_su e[ectrodom6stico.
° Elhomo puedeestaren ModoSab_tico. (Verp_g.61).
7O
Page 72

#
Garant_a Completa de Un Afio - Piezas
y Mano de Obra
Durant_un (1) afio desdeIafechaoriginalde
compraal pot menor,serepararao reemplazaff{
gra[uitamentecua[quierpiezaquefa[[eauran-[e
usonorma[en el hogar.
Garant_as Limitadas = Piezas
Solamente
Desdeel Segundo basrael Quiato Afio =A
partirde Jafechaoriginalde compra,sereparar4n
o reemplazar4ngratultamentehs piezasJndicadas
a coniinuaciOnquefallenauran[euso normalenel
hogaren Ioque respectaaias p_ezasye_
proI:_etariodeberapagartodosloso[roscos[os
JncJuyendo_anode obr& K ometraje/miHaje,
transpor[e,costodeLviajeycostodeldiagnOstico,
si fuesenecesano.
- Cabierta de Vidrio Cer_mieo:Debidoa ro[ura
t6rmica.descoloracbn,agrietamientodeisjuntade
gomadeiborde,desgastedel disefio.
oEmementosCalefaetoresEl_,etrieos:LoseIementos
r_dlantessupenoresen % artefactosde cocmar
eldddcos=
Residentes Canadienses
Lasgarantiasanteriorescubrenso_amen[e
aquelloselectrodomdst_cosmstaladosenCanada1
que hansidocertificadosoaprobadospot las
agenciasdepruebascon-espondientespara
cumplLm_entoconla NormaNaciona!deCanad_a
menosqueel electrodom6sticohayasldotraiqoa
Canad_desoelosEE.UU.debidoa uncambiode
residencia.
Garant_a Limitada Faera de los
Estados Unidos y Canad_ = Piezas
Solamente
Duran-[eun (1) aSodesdea fechadecompra
originala[pot menor,cualqulerplezaquefaIle
ourameusonormalen el hogarserareemp_azada
o reparadagratuitamenteen Ioque respectaala
piezayel propietariodeber_pagartodosloso_ros
costosincluyendomanode obra.kflometraje/
millaje,transporte,costodel viaje} costodeJ
diagn6stico,sifuesenecesario.
LasgarantiasespecificaseApresadasanteriormenre
son/asUHICAS_Taranttasprowstaspor eJ
fabric'ante.£stasgarant[asle omgnanderechos
lega/esespecfficosy ustedpuedetoneradembs
otrosderechosquevaffande unestadoa otto.
Lo que No Cubren Estas Garantias:
1. Situacionesy dat_osresultantesde cualquierade lassiguienteseventualidades:
a. hlstalaciOn,entregao mantenimientoinapropiados.
b. CualquierreparaciOn,modificaci0n,alteraciOno aiustenoautorizadopor
el fabricanteo porun centrode servicioautorizado.
c. Mal uso,abuso,accidenteso uso irrazonable.
d. Cordenteelectric&voltajeo suministroincorrecto.
e. Programacidnincorrectade cualquierade loscontroles.
2. Lasgarant[asquedannulassi losnOmerosde serieoriginalesbansido retirados,
alteradoso no sonf_cilmentelegibles.
3. Focos.
4, ProductoscompradosparausoeomereiaIo industrial
5. EIcostodelservicioo Ilamadade serviciopara:
a. Corregirerroresde instalaciOn.
b. hlstruir al usuariosobre el usocorrectodel artefacto.
c. Transportedel artefactoal establecimientode servicio.
& DaSodela cubiertade vidrio causadopor eI usode limpiadoresque no hansido
lascremasy esponjasde limpiezarecomendadas.
7. Dat_ode la cubiertade vidriocausadopor derramesendurecidosde materiales
azucaradoso plasticoderretidoy que nohan sidolimpiadosdeacuerdoconlas
instruccionesindicadasen lagu[ade usoy cuidado.
8. Losda_osconsecuenteso incidentaIessufridosper cuaIquierpersonacomo
resuItadodecualquierincumplimientode estasgarant[as.EnaIgunosestadosno
se permitela excIusi6no limitaci0nde Iosdat_osconsecuenteso incidentales,por
Iotanto la exclusi0nanteriorpuedeque noseaplique ensu case.
Si Necesita Servicio
• Llameal distdbuidordondecomprOsu electrodom6sticoo Ilamea Maytag
ServicessM,Servicioa los ClientesAmanaIIamandoal 1-800-843-0304EE.UU.o al 1-
866-587-2002Canaddparaubicara unt6cnicoautorizado.
• AsegOresedeconservarei comprobantedecompraparaverificarel estadodeIa
garanti& ConsulteIasecci0nsobre la GARANTIAparamayorinformaci0nsobrelas
responsabilidadesdel propietarioparaserviciobajo la garant[a.
• Si eldistribuidor ola compa_[adeserviciono puedenresoIverelprobiema,escriba
a Maytag ServicessM,Attn: CAIR_Center,P.O.Box2370,CIeveland,TN 37320-2370
o flameal 1_800_843_0304EE.UU.o al 1_866_587_2e02Canad&
• Las guiasdel usuario,manuaIesde sewicioe informaciSnsobreJaspiezaspueden
solicitarsea Ma}_agServicesst'4,Servicioa los ClientesAman&
Notas:
CuandoIlameo escribaacercade un problemade servicio,por favorh_chyala
siguienteinformacidn.
a.Su nombre,direcciOny nOmerodeteldono;
b.NOmerode modeloy nOmerode sede;
c. Nombrey direcci0ndesu distribuidoro tdcnico de servicio;
d.Unadescripci0nclara del problemaqueest_experimentando;
e.Comprobantedecompra(recibodecompra).
Form No. A/09/03 Part No, 8113P406-60 Q2003 Maytag Appliances Sales Co. Litho U.S.A.
 Loading...