

Page 1
EJectric Range -
Cleaning ............................................ 15-18
Sdf-CHeanOven
CHeaningProcedures
Maintenance .................................................. 19-20
Oven Window
Oven Light
Troubleshooting ............................................ 21-22
Warranty & Service .............................................. 23
Guide d'utilisation et d'entretien ...................... 24
Gu_a de Use y Cuidado ....................................... 59
Form No. B/11/04 Part No 8113P477-60 _:,2004 Maytag Appliances Sales Co. Litho USA
Page 2
Installer: Pleaseleavethis manual with this appliance.
Oonsumer: Phase read and keep this manual for future
reference,Keepsalesreceipt and/or cancded check asproof of
purchase
Model Number
Serial Number
Date of Purchase
AL+mmmsCAm++PAm+
CAUSE+P++umEs+0Pmsoms
INSTALL AmT+.=TtPDEV+CE + _|_
PACKED WITH PJ_NGE
+ FOLLOW ALL mNSTALLATmON
Amana Customer Assistance
1-800-843-0304 USA
1-866-587-2002 Canada
Internet: http://w_,aman a,com
tnour continuing effort to irr/provethe quaiit}_and performance
ofour cooking products, it may be necessaryto make changes
to the appliance without revising this guide.
for aeavice information, see page 23.
Warning and important Safety instructions appearing in this
guide are not meant to cover all possible conditions and
situations that may occur. Common sense, caution, and care
must be exercised when installing, maintaining, or operating
the appliance.
Always contact the manufacturer about problems or condi-
tions you do not understand.
Recognize Safety Symbo{s, Words, Labe+s
WARNING: To reduce risk of
tipping of the appliance from ,
abnorma_ usage or by e×cessive
leading of the even deer, the appliance must
be secured bya properly installed ant!-t!p
device.
To check if device is properly installed, look underneath
range with a flashlight to make sure one of the rear leveling
legs is properly engaged in the bracket slot, The anti-tip
device secures the rear leveling leg to the floor when
properly engaged, You should check this anytime the range
has been moved,
To Prevent Fire or Smoke
Be sure all packing materials are removed from the appli-
ance before operating it+
Keep area around appliance clear and free from combustible
materials. Flammable materials should not be stored in an
oven,
Many plastics are vulnerable to heat, Keep plastics away
from parts of the appliance that may become warm or hot,
To prevent grease fires, do not let cooking grease or other
flammable materials accumulate in or near the appliance,
result in severe persona! injury or death,
CAUTION _ HaZaFdSOrunsafe practices which COULD
Read and follow al_+nstruet+ons before us+rig th+s app+++
anee to prevent the potential risk of fire, electric shock,
personal injury or damage to the appliance as a result of
improper usage of the appliance. Use appliance only for its
intended purpose as described in this guide.
To ensure proper and safe operat+on: Appliance must be
properly installed and grounded by a qualified technician, Do
not attempt to adjust, repair, service, or replace any par of your
appliance unless it is specifically recommended in this guide,
Aii other servicing should be referred to a qualified servicer,
Always disconnect power to appliance before servicing,
In Case of Fire
Use dry chemical or foam-type extinguisher or baking soda
to smother fire or flame, Never use water on a grease fire,
1, Turn off appliance to avoid spreading the flame,
2. NEVER pick up or move aflaming pan.
3. Smother oven fire or flame by closing the oven door.
Child Safety
above an appliance, Children c!imb!ng on the appliance or
injuFed,
NEVER leave children alone or unsupervised near the
appliance when it is in use or is still hot. Children should
1
Page 3

neverbeallowedtositorstandonanypartoftheappliance
astheycouldbeinjuredorburned.
Childrenmustbetaughtthattheapplianceandutensilsinit
canbehot.LethotutensiBcoolinasafeplace,outofreach
ofsmallchildren.Childrenshouldbetaughtthatan@pip
anceisnotatoy.ChildrenshouldnotbeallowedtopBywith
controborotherpartsoftheappliance.
About Your Appliance
Or sitting on the dooB may result in pessibie tipping of the
appliance, breakage of dooB and sedous injuries.
To prevent potential hazard to the user and damage to the
appliance, do not use appliance as aspace heater to heat or
warm a room. Also, do not use the oven as a storage area for
food or cooking utensils.
Do not obstruct the flow of air by blocking the oven vent.
DO NOT TOUCH HEATING ELEMENTS OR iNTERiOR SUR-
FACES OF OVEN. Heating elements may be hot even though
they are dark in color, interior surfaces of any oven become
hot enough to cause burns. During and after use, do not
touch, or let clothing or other flammable materials contact
heating elements or interior surfaces of oven until they have
had sufficient time to cool. Other surfaces of the appliance
may become hot enough to cause burns - among these
surfaces are: oven vent opening, surfaces near this opening,
oven door, and window of oven door.
Do not touch a hot oven light bulb with a damp cloth as the
bulb could break. Should the bulb break, disconnect power
to the appliance before removing bulb to avoid electrical
shock.
NEVER use aluminum foil to cover an oven rack or oven
bottom. Misuse could result in risk of electric shock, fire, or
damage to the appliance. Use foil only as directed in this
guide.
Cooking Safety
Never heat an unopened food container in the oven, Pressure
build-up may cause container to burst resulting in senous
personal injury or damage to the appliance,
Use dry, sturdy potholders, Damp potholders may cause
burns from steam, Dish towels or other substitutes should
never be used as potholders because they can trail across
hot elements and ignite or get caught on appliance parts,
Wear proper apparel. Loose fitting or long hanging-sleeved
@pard should not be worn while cooking. Clothing may ignite
and cause burns if garment comes in contact with heating
elements.
Always place oven racks in the desired positions while oven is
cool. Slide oven rack out to add or remove food, using dry,
sturdy potholders. Always avoid reaching into the oven to add
or remove food. if a rack must be moved while hot, use a dry
potholder. Do not let potholder contact hot element in oven.
Use racks only in the oven in which they were shipped!
purchased.
Use care when opening the oven door. Let hot air or steam
escape before removing or replacing food.
PREPARED FOOD WARNING: Follow food manufacturer's
instructions, if a plastic frozen food container and/or its cover
distorts, warps, or is otherwise damaged during cooking,
immediately discard the food and its container. The food could
be contaminated.
Do not allow aluminum foil or meat probe to contact heating
element.
Always turn off all controls when cooking is completed.
UtensiJ Safety
Follow the manufacturer's directions when using oven cooking
bags,
This appliance has been tested for safe performance using
conventional cookware, Do not use any devices or accesso-
ries that are not specifically recommended in this manual, Do
not use stove top grills or add-on oven convection systems,
The use of devices or accessories that are not expressly
recommended in this manual can create serious safety
hazards, result in performance problems, and reduce the life
of the components of this appliance.
Be sure utensil is large enough to properly contain food and
avoid boilovers. Pan size is particularly important in deep fat
frying. Be sure pan wiii accommodate the volume of food that
isto be added as well asthe bubble action of fat.
Never let a pan boil dry as this could damage the utensil and
the appliance.
if pan is smaller than dement, a portion of the element wiii be
exposed to direct contact and could ignite clothing or
Only certain types of glass, giasdceramic, ceramic, earthen-
ware, or other glazed utensils are suitable for cooktop or oven
service without breaking due to the sudden change in tem-
perature. Follow utensil manufacturer's instructions when
using glass.
Page 4
Turn pan handb toward center of cooktop, not out into the
room or over another surface ebment, This reduces the risk
of burns, ignition of fiammabb materiab, or spflBge if pan is
acddendy bumped or reached by small children,
Serf-Clean Oven
NEVER have surface units unattended espedaiiy when
using high heat, An unattended boflover could cause
smoking and a greasy spfliover can cause a fire,
This appliance is equipped with different size surface
ebments, Sebct pans with fiat bottoms Brge enough to
cover ebment, Fitting pan size to ebment will improve
cooking efficiency,
GLASS_CERAMmC SURFACE: NEVER cook on broken
cooktop, If cooktop should break, cleaning solutions and
spfllovers may penetrate the broken cooktop and create a
risk of electric shock, Contact a qualified technician immedi-
ately,
Deep Fat Fryers
Use extreme caution when moving the grease pan or
disposing of hot grease, Allow grease to cool before at-
tempting to move pan,
Ventimating Hoods
Clean range hood and filters frequently to prevent grease or
other flammable materials from accumulating on hood or
filter and to avoid grease fires,
When flaming foods under the hood, turn the fan on,
Cmeaning Safety
Clean cooktop with caution, Turn off all controls and wait
for appliance parts to cool before touching or cleaning,
Clean with caution, Use care to avoid steam burns if a wet
sponge or cloth is used to wipe spills on a hot surface, Some
cleaners can produce noxious fumes if applied to a hot
surface,
Clean only parts listed in this guide,
Do not dean door gasket, The door gasket is essential for a
good seal, Care should be taken not to rub, damage, or
move the gasket,
Do not use oven cleaners or oven liners of any kind in or
around any part of the self-dean oven,
Before self-cleaning the oven, remove broiler pan, oven
racks and other utensils, and wipe off excessive spillovers to
prevent excessive smoke or flare ups,
It is normal for the cooktop of the range to become hot
during a self-clean cycle, Therefore, touching the cooktop
during a clean cycle should be avoided,
important Safety Notice and
The California Safe Drinking Water and Toxic Enforcement
Act of 1986 (Proposition 65} requires the Governor of
California to publish a list of substances known to the State
of California to cause cancer or reproductive harm, and
requires businesses to warn customers of potential expo-
sures to such substances,
Users of this appliance are hereby warned that when the
oven is engaged in the self-clean cycle, there may be some
low-level exposure to some of the listed substances, includ-
ing carbon monoxide, Exposure to these substances can be
minimized by properly venting the oven to the outdoors by
opening the windows and!or door in the room where the
appliance is located during the self-clean cycle,
mMPORTANT NOTICE REGARDING PET BIRDS: Never
keep pet birds in the kitchen or in rooms where the fumes
from the kitchen could reach, Birds have a very sensitive
respiratory system, Fumes released during an oven self-
cleaning cycle may be harmful or fatal to birds, Fumes
released due to overheated cooking off, fat, margarine and
overheated non-stick cookware may be equally harmful,
Save These instructions for Future Reference
3
Page 5
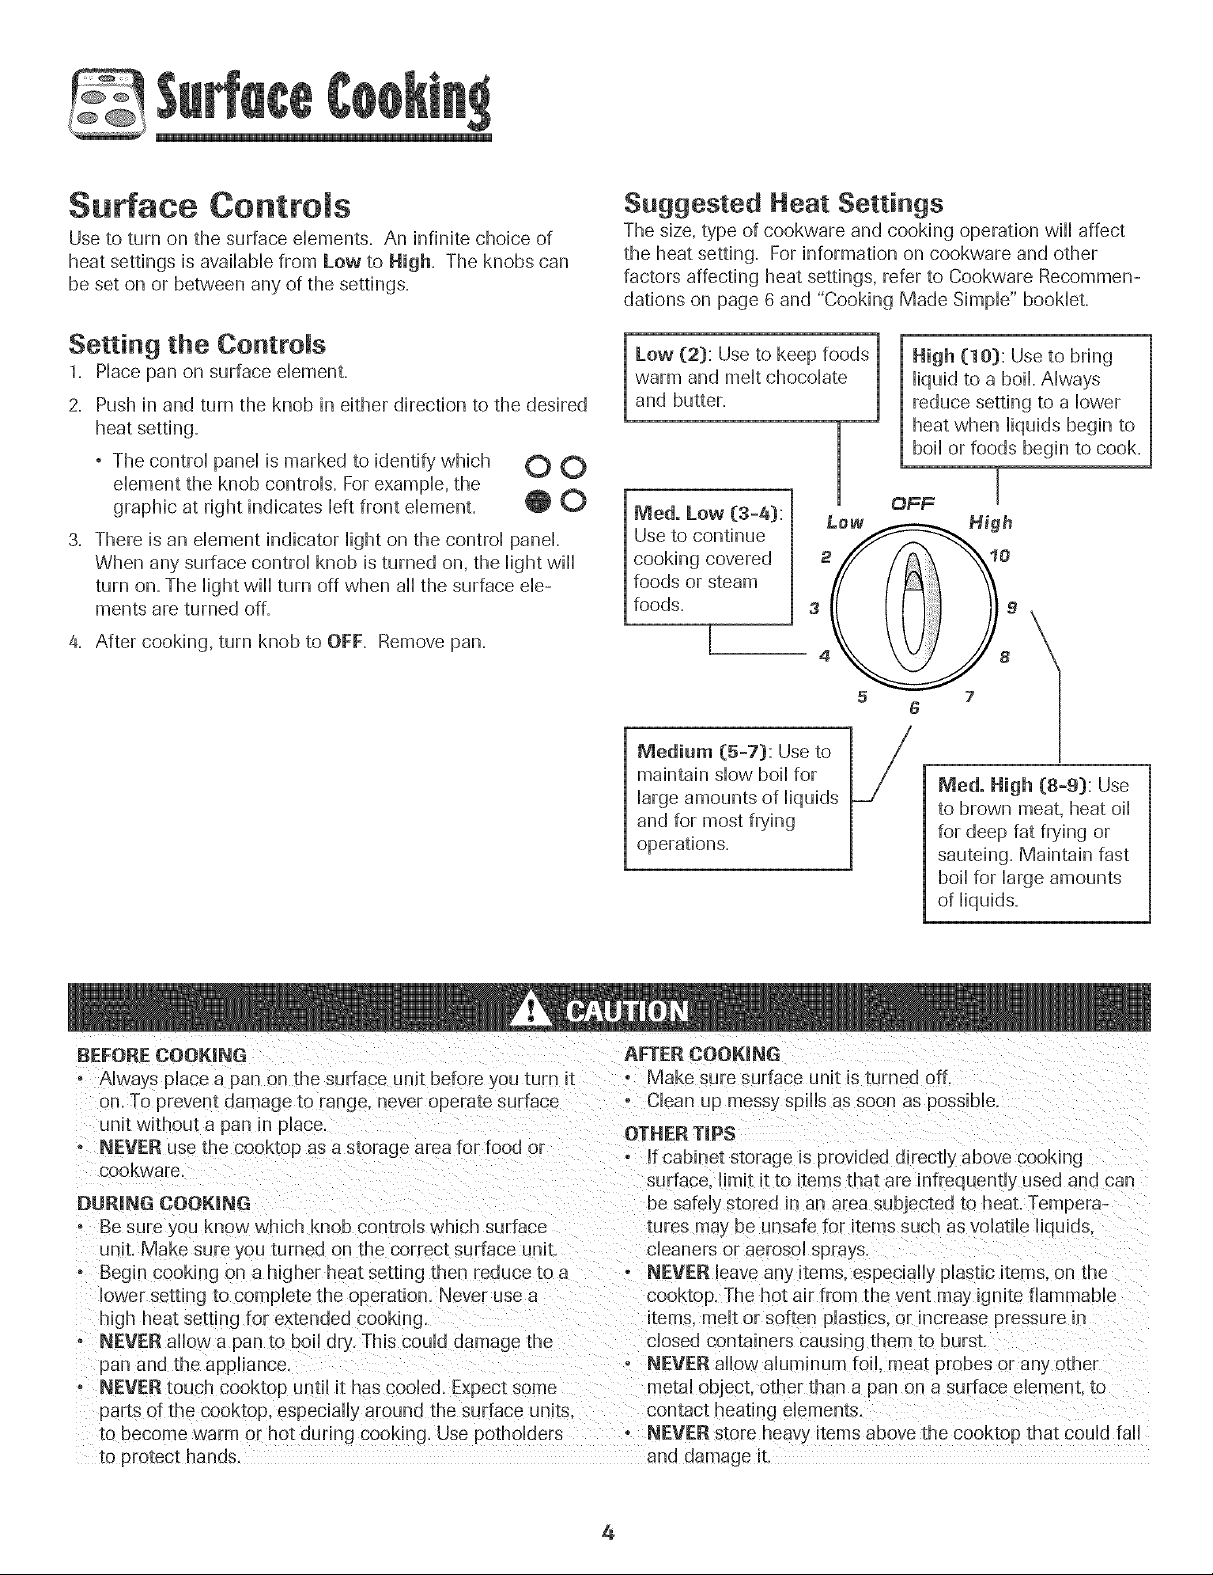
Surface ControJs
Use to turn on the surface elements. An infinite choice of
heat settings is available from Low to High. The knobs can
be set on or between any of the settings.
Suggested Heat Settings
The size,type of cookware and cooking operation will affect
the heat setting. For information on cookware and other
factors affecting heat settings, refer to Cookware Recommen-
dations on page 6 and "Cooking Made Simple" booklet.
Setting the ControJs
1. Place pan on surface element.
2. Push in and turn the knob in either direction to the desired
° The control panel is marked to identify' which O O
element the knob controls. For example, the
graphic at right indicates left front element. O O
3. There is an element indicator light on the control panel.
When any surface control knob isturned on, the light will
turn on. The light will turn off when all the surface ele-
ments are turned off.
4. After cooking, turn knob to OFF. Remove pan.
Medo Low (3=4):
Use to continue
cooking covered
foods or steam
foods.
[
Medium (5=7): Use to
maintain slow boil for
large amounts of liquids
and for most frying
operations.
34
1
Low
High (10): Use to bring
liquid to a boil. Always
reduce setting to a lower
heat when liquids begin to
boil or foods begin to cook.
OFF J
High
5
7
Medo High (8=9): Use
to brown meat, heat oil
for deep fat frying or
sauteing. Maintain fast
boil for large amounts
of liquids.
BEFORECOOKING
o Always place a pan on the surface unit before you turn Jt
on. To prevent damage to range, never operate surface
unit without a pan in place.
o NEVER use the cooktop as a storage area for food or
cookware.
DURING COOKING
Be sure you know which knob controls which surface
unit. Make sure } ou turned on the correct surface unit.
o Begin cooking on a higher heat setting then reduce to a
lower setting to cornplete the operation. Never use a
high heat setting for ex_ended cooking.
o NEVER allow a pan to boil dry. This could damage the
pan and the appliance.
• NEVERtouch cooktop untl it has cooled. Expect some
parts of the cooktop, especially around the surface units, contact heating dements.
to become warm or hot during cooking Use potholders o NEVER store heav} items above the cooktop that could fail
_oprotect hands, and damage it.
AFTER COOKING
o Make sure surface unit isturned off,
- Clean up messy spills as soon as possible.
OTHER TiPS
o If cabinet storage is provided directly above cooking
surface, limit it to items that are infrequently used and can
be safely stored in an area subjected to heat. Tempera
tures may be unsafe for items such asvolatile liquids.
cleaners ol aerosol sprays
o NEVER leave any items, especially phstic items, on the
cooktop. The hot air from the vent may ignite flammable
items, melt or sof[en plastics, or increase pressure in
dosed contaiuuerscausing them to burst.
o NEVER allow aluminum foil. meat probes or any other
metal object, other than a pan on a surface element, to
4
Page 6
S oothtop Surface
Tips to Protect the
Smoothtop Surface Notes:
, Cooktop may emit mightsmoke and odor the first few
times the cooktop is used. This is normal
, Smoothtop cooktops retain heat for a period of time
after the element is turned off. Turn the dements off
a few minutes before food is compHeteHycooked and use
the retained heat to compHetecooking. When the hot
surface Hightturns off, the cooking area wiHHbe cooH
enough to touch. Because of the way they retain heat, the
smoothtop dements wiHHnot respond to changes in
settings as quickHyas coiHdements.
° In the event of a potentiaHboiHover,remove the pan from
the cooking surface.
, Never attempt to miftthe cooktop.
° The smoothtop surface may appear discoHoredwhen it is
hot=This is normaHand wiHHdisappear when the surface
cooHs=
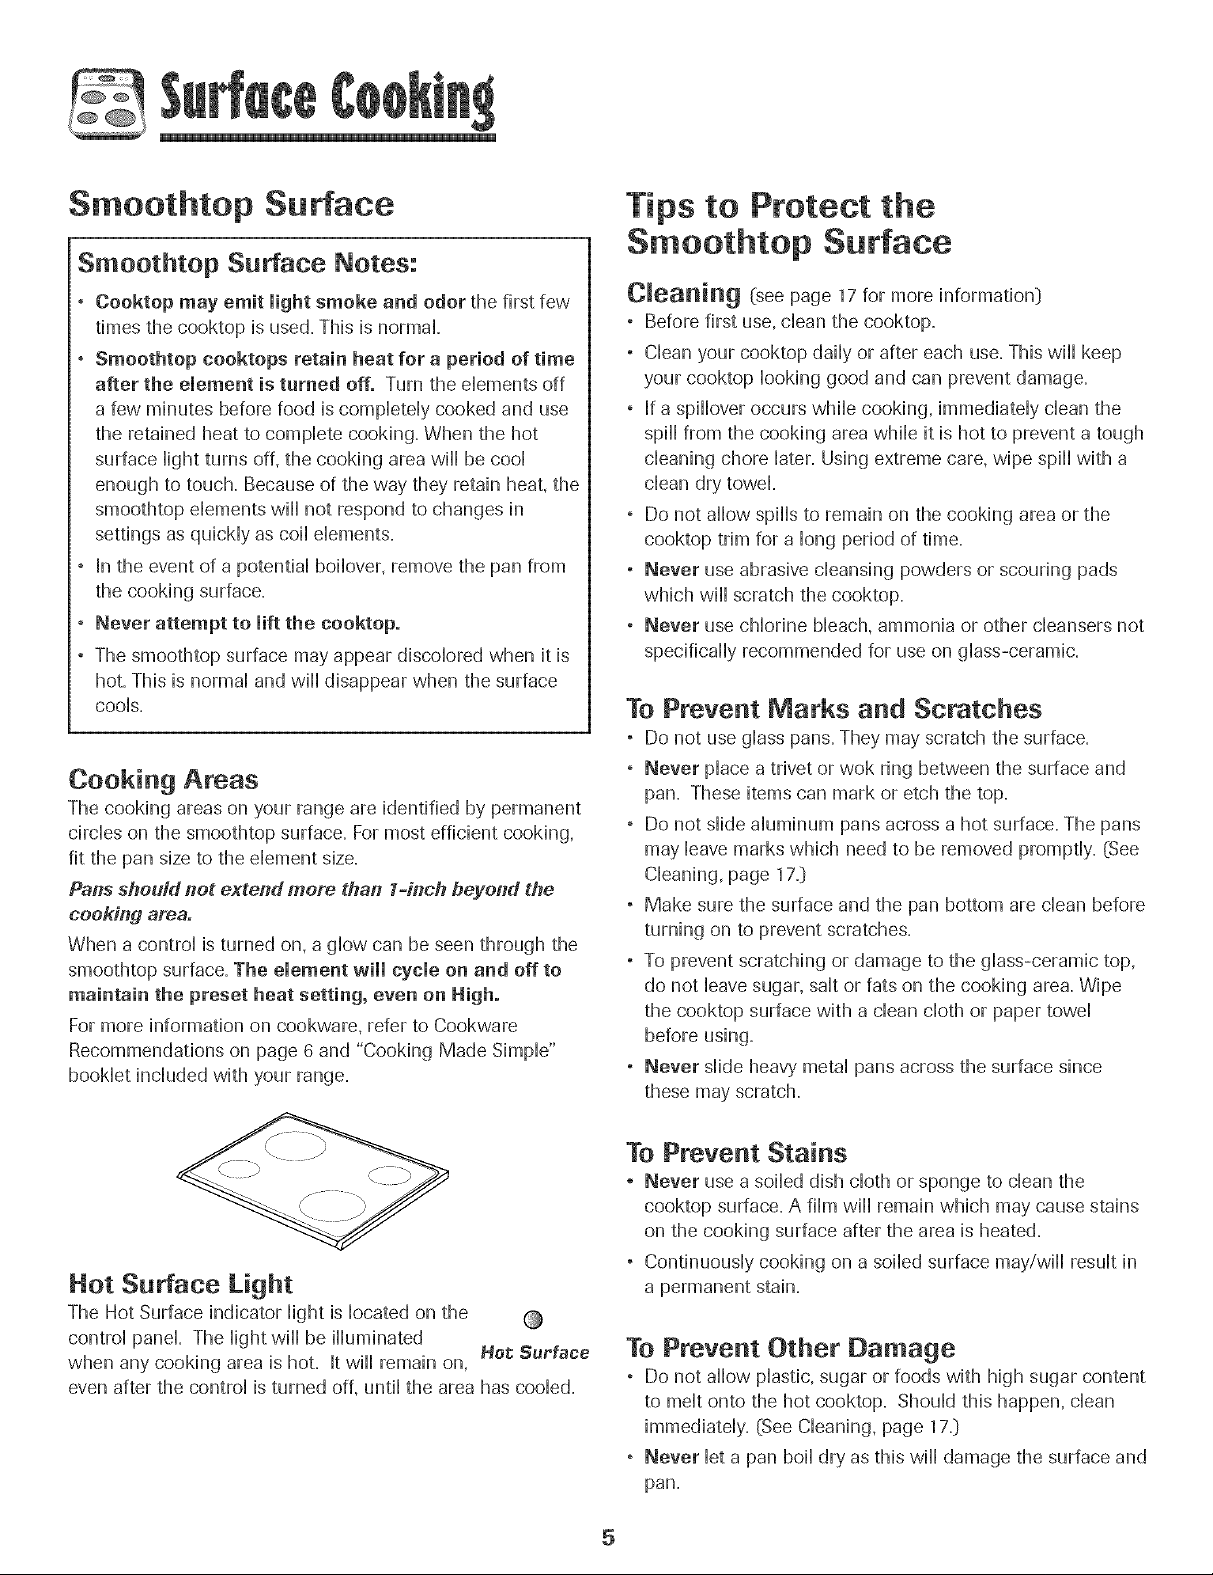
Cooking Areas
The cooking areas on your range are identified by permanent
circHeson the smoothtop surface. For most efficient cooking,
fit the pan size to the dement size.
Pans should not extend more than t-inch beyond the
cooking area.
When a controHis turned on, a gHowcan be seen through the
smoothtop surface. The element will cycmeon and off to
maintain the preset heat setting, even on High.
For more information on cooP,ware, refer to Cookware
Recommendations on page 6and "Cooking Made SimpHe"
bookHetincHudedwith your range.
Smoothtop Surface
Cleaning (see page 17 for more information,)
, Before first use, dean the cooktop.
, CHeanyour cooktop daiHyor after each use. This wiHHkeep
your cooktop Hookinggood and can prevent damage.
, if a spiHHoveroccurs whiHecooking, immediateHydean the
spiHHfrom the cooking area whiHeit is hot to prevent a tough
cHeaningchore Hater.Using extreme care, wipe spiHHwith a
dean dry towel
, Do not aHHowspiHHsto remain on the cooking area or the
cooktop trim for a Hongperiod of time.
, Never use abrasive cHeansingpowders or scouring pads
which wiHHscratch the cooktop.
, Never use chHorinebHeach,ammonia or other cHeansersnot
specificaHHyrecommended for use on gHass-ceramic.
To Prevent Marks and Scratches
° Do not use gHasspans.They may scratch the surface.
° Never pHacea trivet or wok ring between the surface and
pan= These items can mark or etch the top=
° Do not sHideaHuminumpans across a hot surface. The pans
may Heavemarks which need to be removed promptHy=(See
CHeaning,page 17=_)
° Make sure the surface and the pan bottom are dean before
turning on to prevent scratches.
° To prevent scratching or damage to the gHass-ceramictop,
do not Heavesugar, saHtor fats on the cooking area. Wipe
the cooktop surface with a dean cHothor paper toweH
before using.
° Never sHideheavy metaHpans across the surface since
these may scratch.
Hot Surface Light
The Hot Surface indicator Hightis Hocatedon the
controHpanel The HightwiHHbe iHHuminated
when any cooking area is hot= It wiHHremain on,
even after the controH is turned off, untiHthe area has cooHed=
Hot Sue'face
To Prevent Stains
, Never use a soiHeddish cHothor sponge to cHeanthe
cooktop surface, A fiHmwiHHremain which may cause stains
on the cooking surface after the area is heated.
, ContinuousHycooking on a soiHedsurface may/wiHHresuHtin
a permanent stain.
To Prevent Other Damage
° Do not aHHowpHastic,sugar or foods with high sugar content
to meritonto the hot cooktop= ShouHdthis happen, dean
immediateHy=(See CHeaning,page 17=_)
° Never Hota pan boiHdry as this wiHHdamage the surface and
pan.
5
Page 7
° Never use cooktop as awork surface or cutting board.
° Never cook food directHyon the surface.
° Do not use a small pan on a Hargedement. Not onHydoes
this waste energy, but it can ariseresuHtin spiHovers burning
onto the cooking area which requires extra cHeaning.
° Do not use non-fiat specialty items that areoversized or
uneven such as round bottom woks, rippHedbottom and/or
oversized canners and griddHes.
° Do not use foiHor foikype containers. FoiHmay malt onto
the gHass.If metal meritson the cooktop, do not use. Call an
authorized Amana Servicer.
Cookware Recommendations
Using the right cookware can prevent many proMems, such
as food taking Hongerto cook or achieving inconsistent
results. Proper pans will reduce cooking times, use less
energy, and cook food more evenly.
Nat Pan Tests
See if your pans are flat.
The Ruler Test:
1. Place a ruler across the bottom of the pan.
2. Hold it up to the light.
3. Little or no light should bevisible under the ruler.
The Bubble Test:
1. Put 1 inch of water in the pan. Placeon cooktop and turn
control to High.
2. Watch the formation of the bubbles as the water heats.
Uniform bubbles mean good performance, and uneven
bubbles indicate hot spots and uneven cooking.
See "Cooking Made Simple" booklet for more information.
Semect , Avoid
Flat,smooth-bottom Pans with grooved or warped bottoms.
-)arts. Panswith uneven bottoms do not cook
efficiently and sometimes may not
boil liquid.
Heavy-gauge pans. Very thin-gauge metal or glass pans.
Pansthat are the Pans smaller or larger than the
same size asthe element by 1inch.
element.
Secure handles. Cookware with loose or broken handles.
Heavy handles that tilt the pan.
Tight-fitting lids. Loose-fitting lids.
Flat bottom woks. Woks with a ring-stand bottom.
Canning and Oversize
All canners and large pots must have flat bottoms and
must be made from heavy-gauge materials. This is critical
on smoothtop surfaces. The base must not be more than
1 inch larger than the element.
When canners and pots do not meet these standards, cooking
times may be longer, and cooktops may be damaged.
Some canners are designed with smaller bases for use on
smoothtop surfaces.
When canning, use the High heat setting only until the
water comes to a boil or pressure is reached in the canner.
Reduce to the lowest heat setting that maintains the boil or
pressure. If the heat is not turned down, the cooktop may be
damaged.
See "Cooking Made Simple" booklet for more information.
Page 8
Control Panel
\
\
\
\
\
\
\
\
\
\
\
\
\
\
BroiU
\
Cook&
HoM CUoan DeUay CJock
Keep
Warm
E F G H
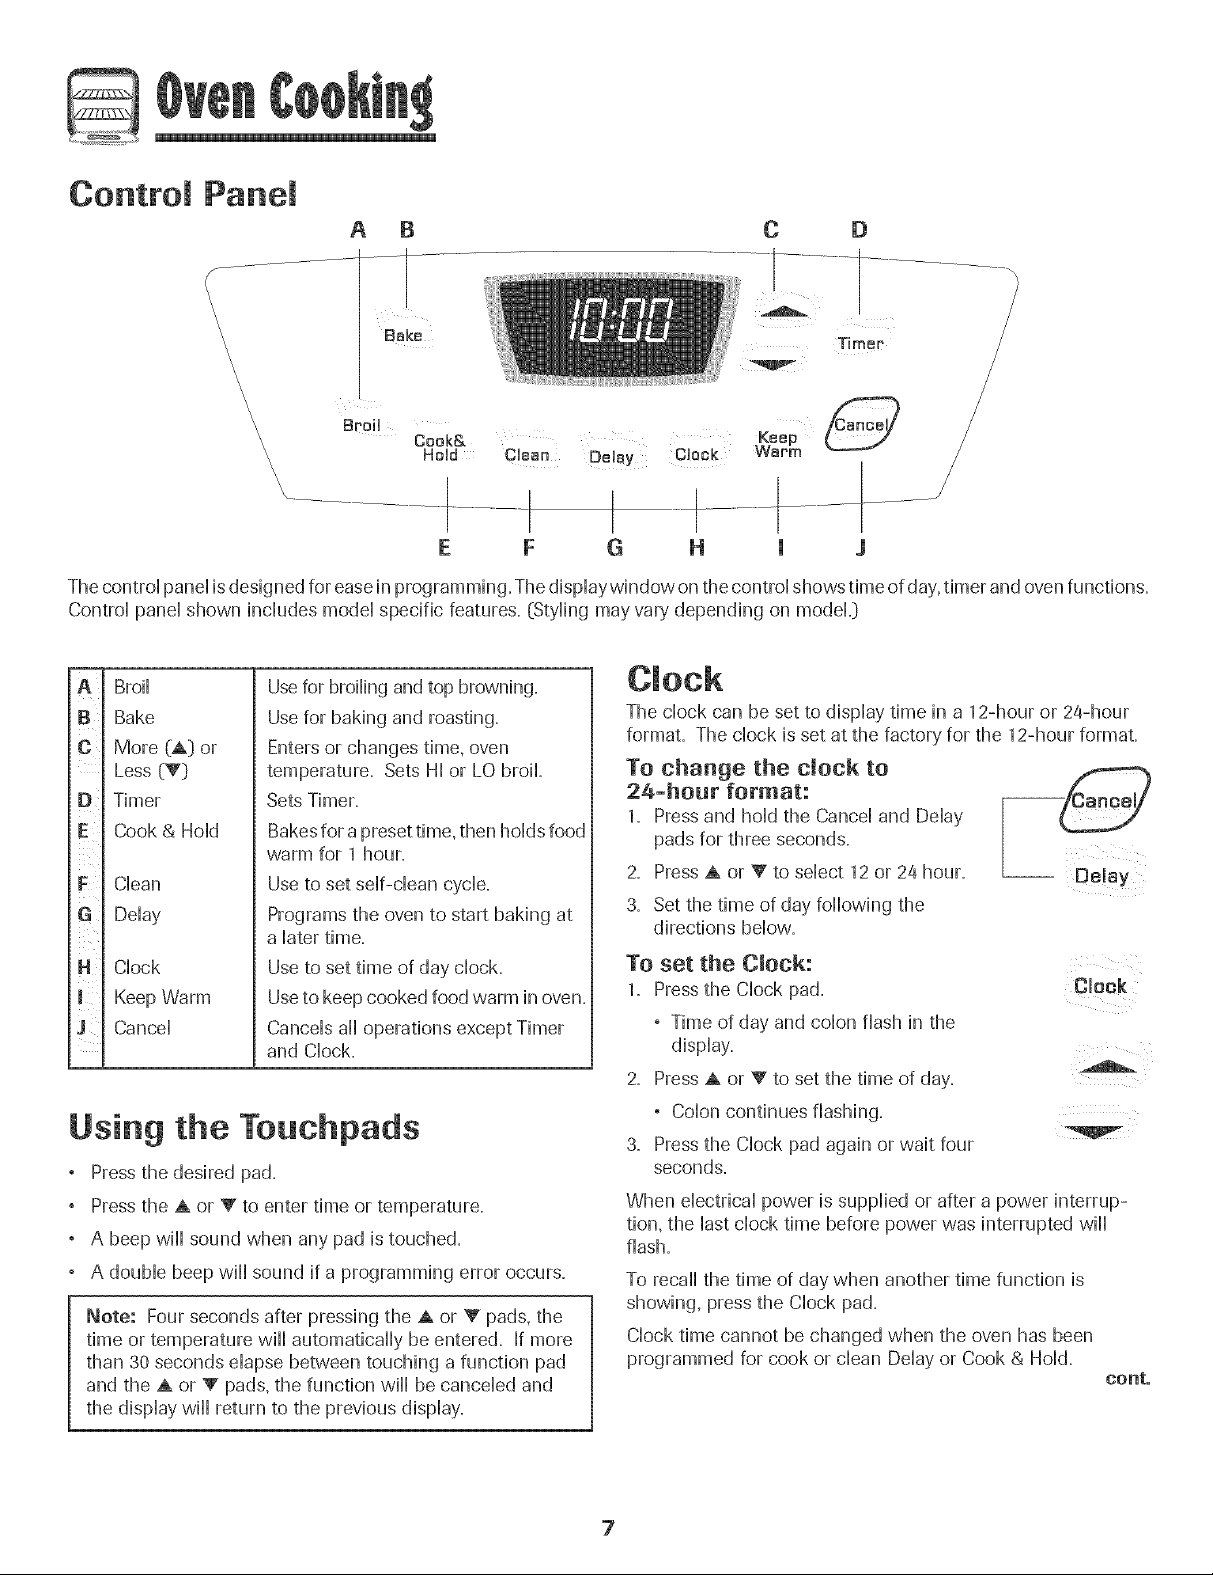
The controi pand isdesigned for easein programming. Thedispiaywindow on the controi shows time of day,timer and ovenfunctions.
Controi pand shown includes modal specific features. (Styiing may vary depending on modeL}
Broii
B
Bake
More (A} or
c
Less (V:)
Timer
E
Cook & Hold
F
Clean
Delay
Clock
Keep Warm
Cancel
m
Using the Touchpads
Pressthe desired pad.
Pressthe A or V to enter time or temperature.
, A beep will sound when any pad is touched.
, A double beep wiii sound if a programming error occurs.
Note: Four seconds after pressing the A or V pads, the
time or temperature will automatically be entered. If more
than 30 seconds elapse between touching a function pad
and the A or V pads, the function will be canceled and
the display will return to the previous display.
Usefor broiling andtop browning.
Usefor baking and roasting.
Enters or changes time, oven
temperature. Sets HI or LO broil
Sets Timer.
Bakesfor a presettime, then holds food
warm for 1 hour.
Use to set self-clean cycle.
Programs the oven to start baking at
a later time.
Use to set time of day clock.
Useto keep cooked food warm in oven.
Cancels all operations except Timer
and Clock.
The clock can be set to display time in a 12-hour or 2a-hour
format. The clock is set at the factory for the 12-hour format.
To change the clock to
24-hour format:
1. Pressand hold the Cancel and Delay
pads for three seconds.
2. Press A or V to select 12 or 24 hour.
3. Set the time of day following the
directions below.
To set the Clock:
1. Pressthe Clock pad.
, Time of day and colon flash in the
display.
2. Press A or _' to set the time of day.
, Colon continues flashing.
3. Pressthe Clock pad again or wait four
seconds.
When electrical power is supplied or after a power interrup-
tion, the last clock time before power was interrupted will
flash.
To recall the time of day when another time function is
showing, press the Clock pad.
Clock time cannot be changed when the oven has been
programmed for cook or clean Delay or Cook & Hold.
1 J
-- Delay
Clock
eonto
7
Page 9
To cancel the CJock dispmay:
[f you do not want the time of day to dispHay:
Press and hoHdthe CanceHand CHock
pads for three seconds. The time of day
wiHHdisappear from the dispHay
When the chockdispHayis cancelled, press -- Clock
the CHockpad to briefly dispHaythe time
of day.
To restore the Cmock display:
Press and hoHdthe CanceHand CHockpads for three seconds.
The time of day wiHHreappear in the dispHay.
The timer can be set from one minute (00:01_up to 99 hours
and 59 minutes (99:59_).
The timer can be used independentHyof any other oven
activity'. It can aHsobe set whiHeanother oven function is
operating.
The Timer does not controHthe oven. It onHycontroHsa
beeper.
To set the Timer: Timer
1. Press the Timer pad.
,0:00 Hightsin the dispHay.
, The coHonwiHHflash.
Locking the Controm
The touch pad controHscan be Hockedfor safety, cHeaning,or
to prevent unwanted use. They wiil not function when Hocked.
If the oven is currently in use, the controls cannot be Hocked.
The current time of day wiil remain in the display when the
controls are Hocked.
To tock:
Press and hoHdthe CanceHand Cook &
HoHdpads for three seconds.
LOCKflashes in the dispHay.
To unlock:
Press and hoHdthe CanceHand Cook &
HoHdpads for three seconds.
LOCKdisappears from the dispHay.
HoHd
Faumt Codes
BAKE or LOCK may flash rapidHyin the dispHayto aHertyou if
there is an error or a probHem. If BAKE or LOCKflash in the
dispHay,press the CanceHpad. If BAKE or LOCK continue to
flash, disconnect power to the appHiance.Wait a few minutes,
and then reconnect power=If the flashing stiHHcontinues,
disconnect power to the appHianceand caHHan authorized
servicer.
2. Press the A or _' pad untiHthe
correct time appears in the dispHay.
, The coHonwiHHcontinue to flash.
3,
PressTimer pad again or wait four seconds.
, The coHoncontinues flashing and the time begins
counting down.
, The Hastminute of the timer countdown wiHHbe dispHayed
as seconds.
4. At the end of the set time, one long beep wiii sound.
To cancel the Timer:
1. Press and hoHdthe Timer pad for three seconds.
OR
2, Press the Timer pad and set the time to 00:00,
8
Page 10
To set Bake:
1. Press the Bake pad.
, "BAKE" will flash. Bake
, 000 will Hightin the dispiay.
2. Sebct the oven temperature. The oven tempera-
ture can be set from 170° to 550°. Pressor press
and hoid the A or V pads.
, 350° will Hightwhen either pad is first pressed.
, Press the A pad to increase the temperature.
, Press the V pad to decrease the temperature.
3.
Press Bake pad again or wait four seconds.
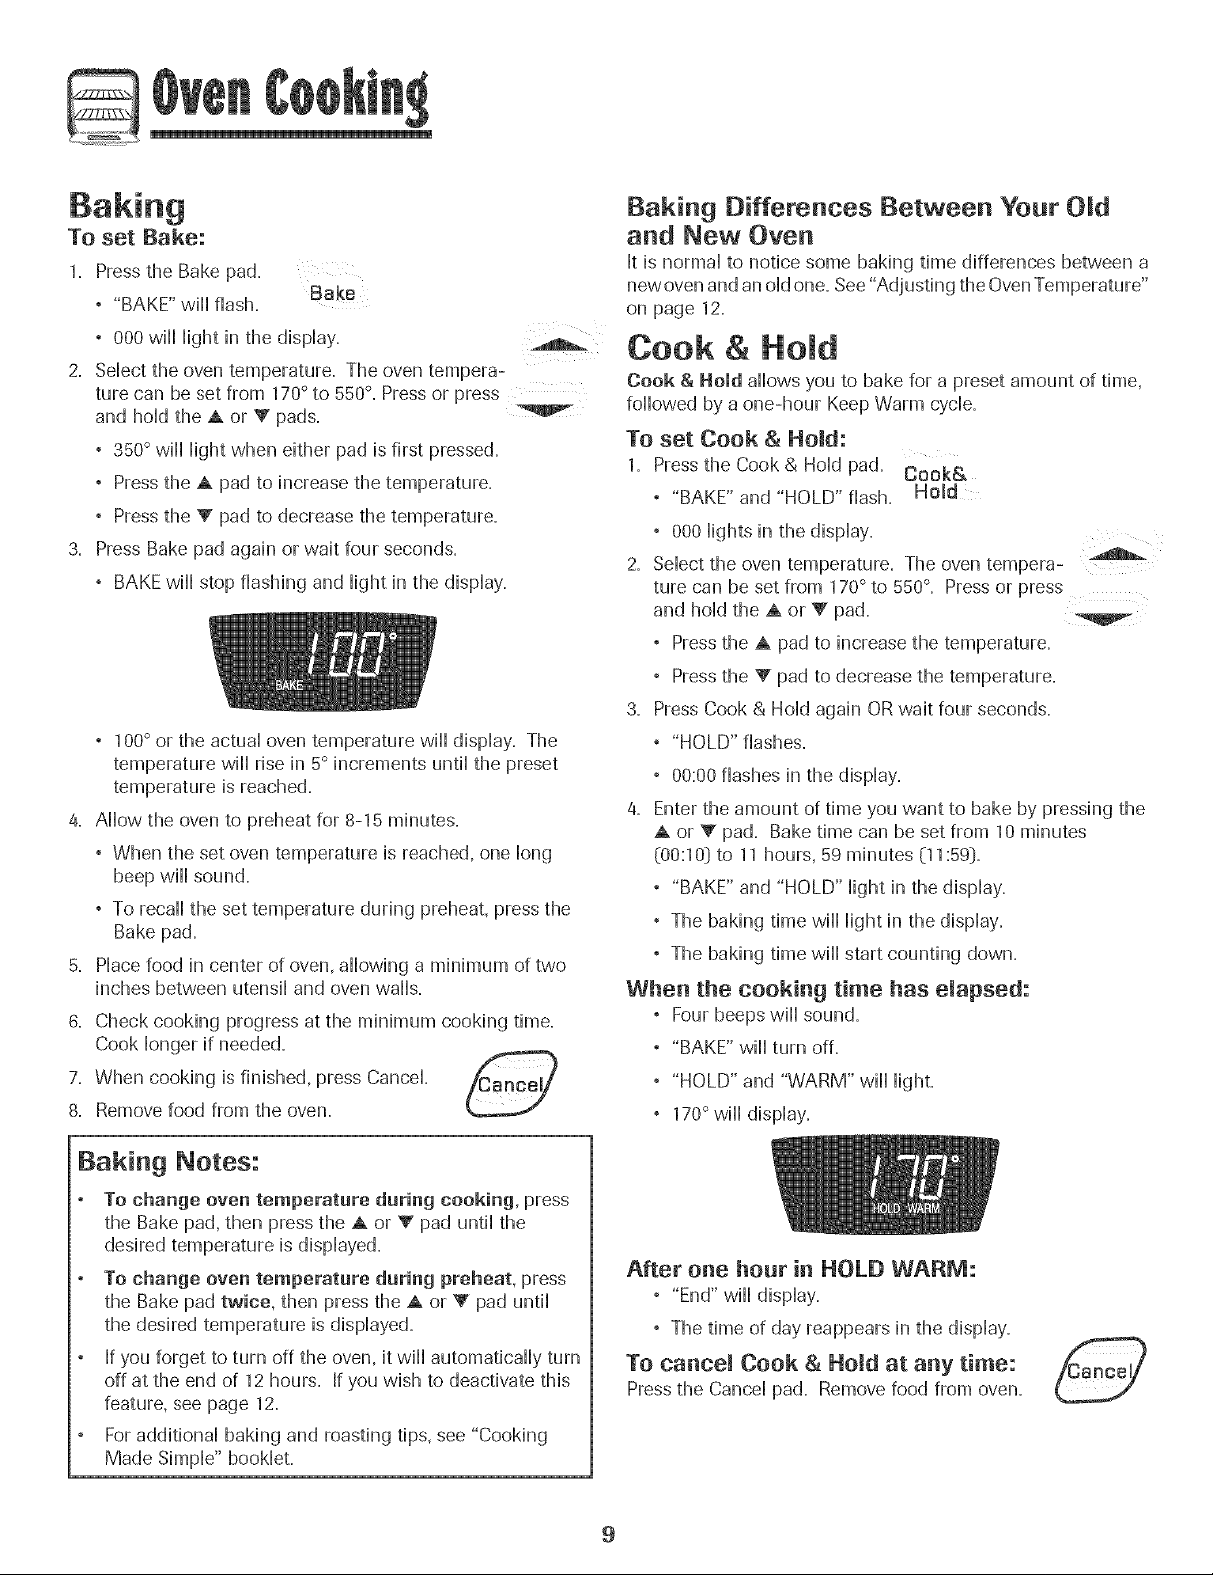
, BAKEwill stop flashing and Hightin the dispiay.
° 100° or the actua] oven temperature will dispiay. The
temperature will rise in 5° increments und] the preset
temperature is reached.
4. Aiiow the oven to preheat for 8-15 minutes.
° When the set oven temperature is reached, one long
beep will sound.
° To recall the set temperature during preheat, press the
Bake pad.
5. Place food in center of oven, allowing a minimum of two
inches between utensil and oven walls.
8. Check cooking progress at the minimum cooking time.
Cook longer if needed.
7. When cooking is finished, press Cancel.
8. Remove food from the oven.
Baking Differences Between Your OJd
and New Oven
It is normal to notice some baking time differences between a
new ovenand an old one. See"Adjusting the OvenTemperature"
on page 12.
Cook & Ho d
Cook & Hold allows you to bake for a preset amount of time,
followed by a one-hour Keep Warm cycb.
TO set Cook & Hold:
1. Pressthe Cook & Hold pad. Cook&
° "BAKE" and "HOLD" flash. Hold
° 000 lights in the display.
2. Select the oven temperature. The oven tempera-
ture call be set from 170° to 550°. Press or press
and hold the A or V pad.
° Pressthe A pad to increase the temperature.
° Pressthe V pad to decrease the temperature.
3. Press Cook & Hold again ORwait four seconds.
° "HOLD" flashes.
° 00:00flashes in the display.
4. Enter the amount of time you want to bake by pressing the
A or V pad. Bake time can be set from 10 minutes
(00:10} to 11 hours, 59 minutes (11:59}.
° "BAKE" and "HOLD" light in the display.
° The baking time will light in the display.
° The baking time will start counting down.
When the cooking time has elapsed:
, Fourbeeps will sound.
, "BAKE" will turn off.
, "HOLD" and "WARM" will light.
, 170°will display.
Baking Notes:
To change oven temperature during cooking, press
the Bake pad, then press the A or V" pad until the
desired temperature is displayed.
To change oven temperature during preheat, press
the Bake pad twice, then press the A or V pad until
the desired temperature is displayed.
If you forget to turn off the oven, it will automatically turn
off at the end of 12 hours. If you wish to deactivate this
feature, see page 12.
For additional baking and roasting tips, see "Cooking
Made Simpb" booklet.
After one hour in HOLD WARM:
° "End" will display=
° The time of day reappears ill the display.
To canceJ Cook & Hold at any time:
Press the Cancel pad, Remove food from oven,
9
Page 11
De ay Bake
Do not use deHayedbaking for highHypedshabHefoods such
as dairy products, pork, pouHtry, or seafood.
When using Delay, the oven begins to cook Haterin the day.
Set the amount of time that you want to deHaybefore the oven
turns on and how Hongyou want to cook. The oven begins to
heat at the seHectedtime and cooks for the specified Hengthof
time.
DeHaytime can be set from 10 minutes (00:1d) to 11 hours, 59
minutes (11:59_).
To set a Demayed Baking cycle:
1. Pressthe DeHaypad.
, "DELAY" flashes.
° 00:00 flashes in the dispHay.
2. Pressthe A or V pad to set the deHaytime.
WMHe"DELAY" is stiHHflashing:
3. Pressthe Cook & HoHdpad.
, 000 Hightsin the dispHay.
, "BAKE" and "HOLD" flash.
4. PressA to set the baking temperature.
, 00:00 and "HOLD" flash.
, "BAKE" stays Hit.
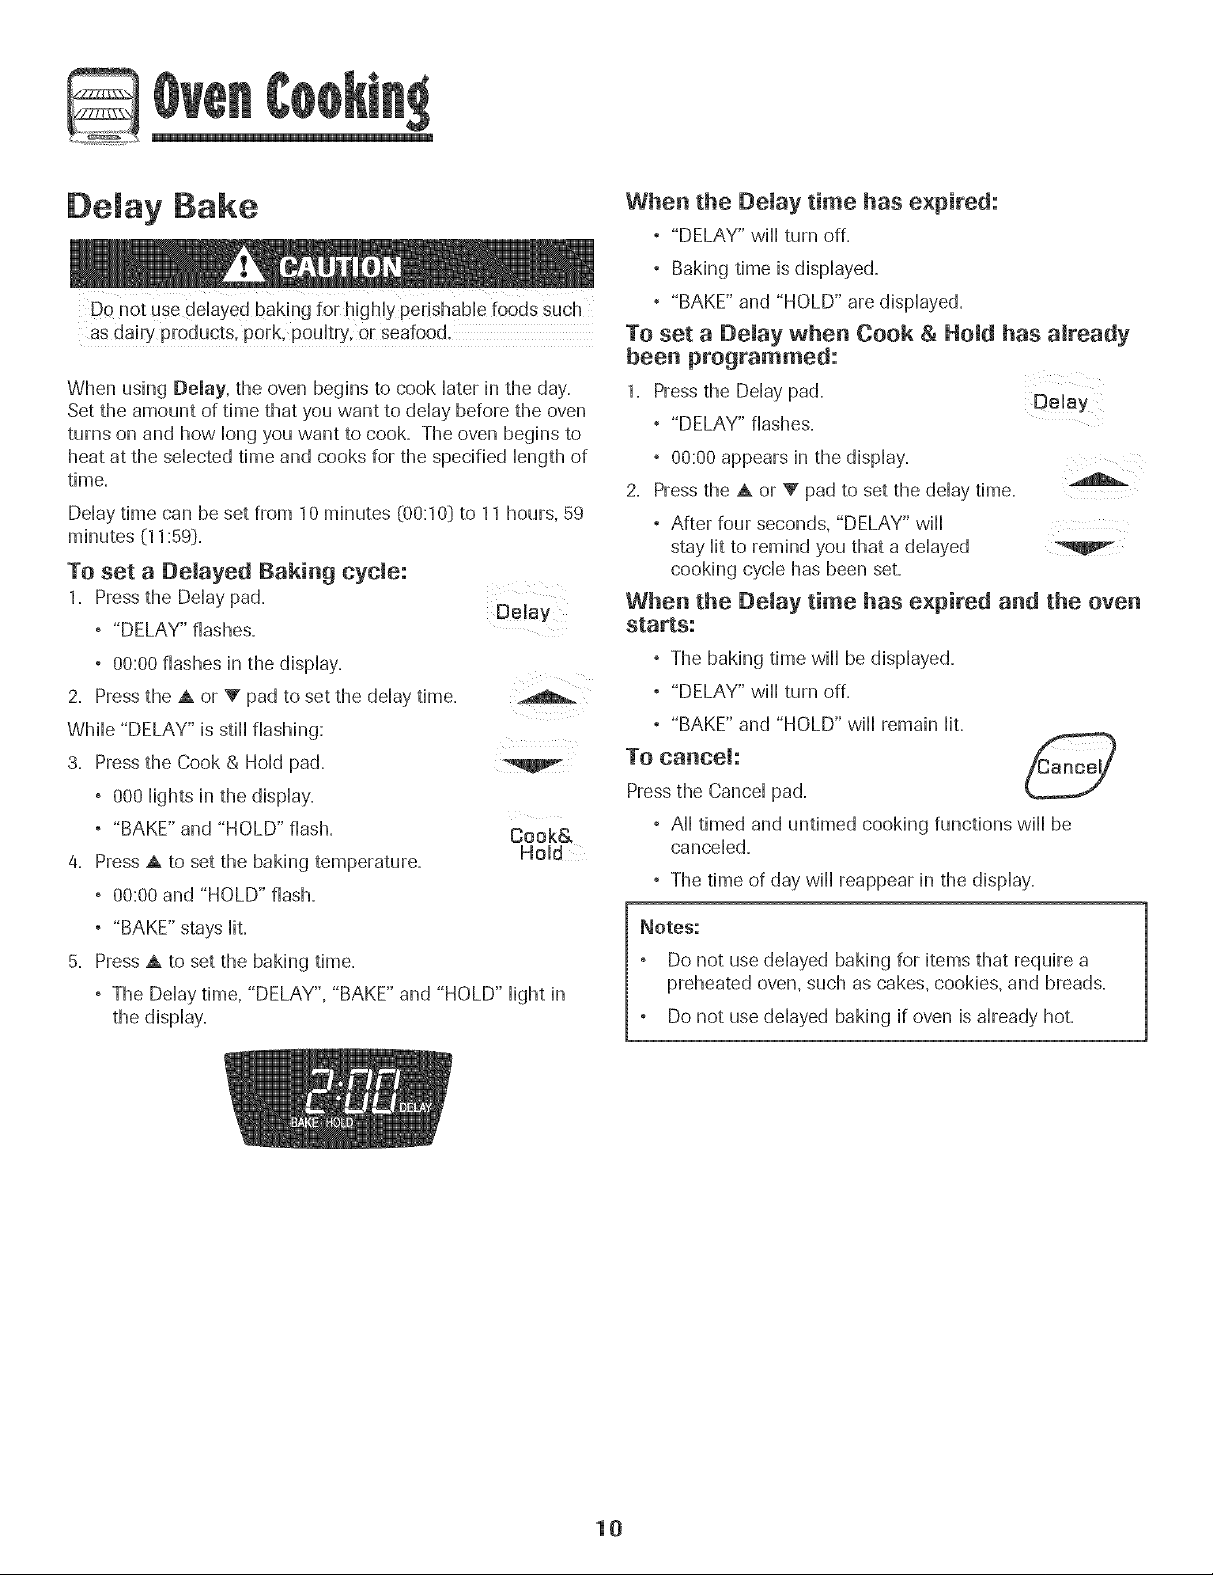
5. PressA to set the baking time.
, The DeHaytime, "DELAY", "BAKE" and "HOLD" Hightin
the dispHay.
Delay
Cook&
Hold
When the Delay time has expired:
, "DELAY" wiHHturn off.
, Baking time is dispHayed.
, "BAKE" and "HOLD" are dispHayed.
To set a Demay when Cook & Hold has already
been programmed:
1. Pressthe DeHaypad. DeHay
, "DELAY" flashes.
, 00:00 appears in the dispHay.
2. Pressthe A or V pad to set the deHaytime.
° After four seconds, "DELAY" wiHH
stay Hitto remind you that a deHayed
cooking cycHehas been set.
When the Delay time has expired and the oven
starts:
, The baking time wiHHbe dispHayed.
, "DELAY" wiHHturn off.
, "BAKE" and "HOLD" wiHHremain Hit.
To cancel:
Press the CanceHpad.
, AHHtimed and untimed cooking functions wiHHbe
cancelled.
, The time of day wiHHreappear in the dispHay.
_otes;:
Do not use deHayedbaking for items that require a
preheated oven, such as cakes, cookies, and breads.
Do not use deHayedbaking if oven is aHreadyhot.
10
Page 12
Keep War
Forsafdy keephg foods warm or for warmhg breads and
pHates=
To set Keep Warm:
1= Press the KeepWarm pad= Keep
° "WARM" flashes.
,000 appears in the dispHay.
2. Sdect the Keep Warm temperature. The
Keep Warm temperature can be set from
145° to 190°`Pressor press and hoHdthe
A or V pads.
, 170°will Hightwhen either pad is first pressed.
, Press the A pad to increase the temperature.
, Press the V pad to decrease the temperature.
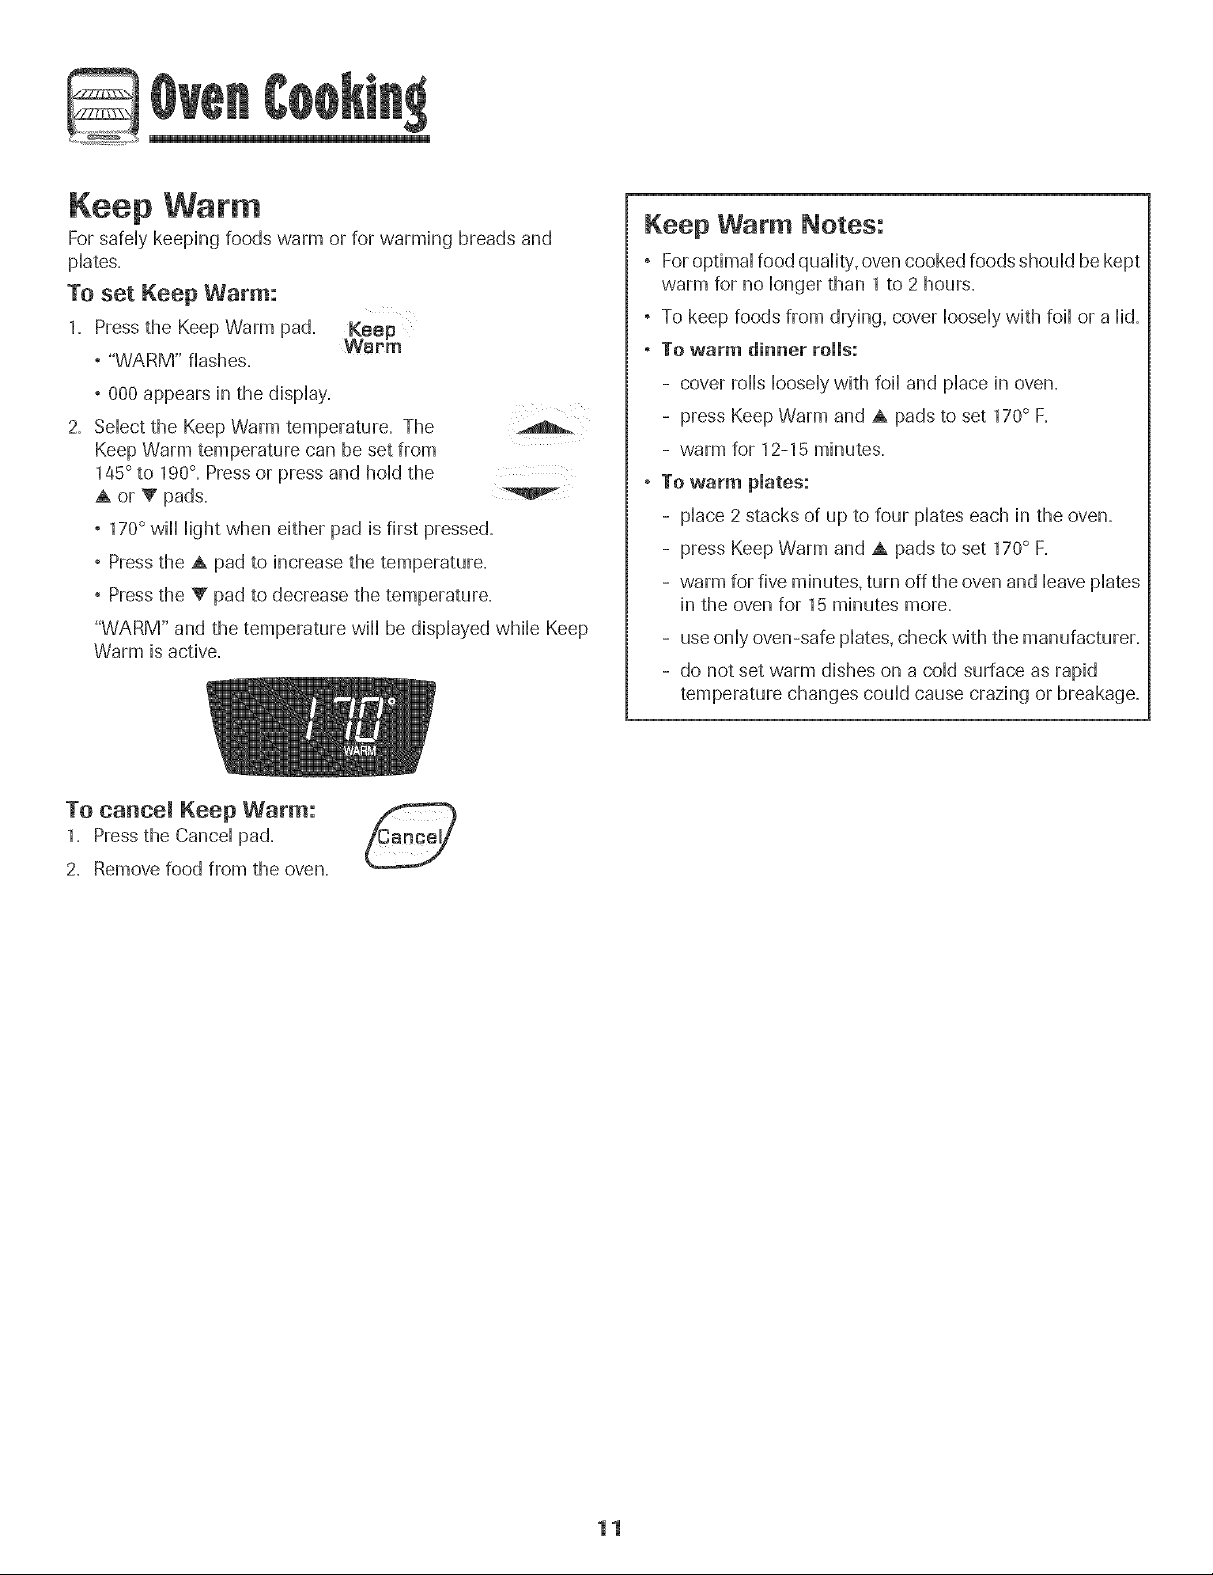
"WARM" and the temperature will be displayed while Keep
Warm is active.
Keep Warm Notes:
° Foroptimal food quality, oven cooked foods should bekept
warm for no longer than 1 to 2 hours.
° To keep foods from drying, cover loosely with foil or a Hid.
° To warm dinner rolls:
- cover rolls loosely with foil and place in oven.
- press Keep Warm and A pads to set 170° F.
- warm for 12-15 minutes.
° To warm pmates:
- place 2 stacks of up to four plates each in the oven.
- press Keep Warm and A pads to set 170° F.
- warm for five minutes, turn off the oven and leave plates
in the oven for 15 minutes more.
- useonly oven-safe plates, check with the manufacturer.
- do not set warm dishes on a cold surface as rapid
temperature changes could cause crazing or breakage.
To cancem Keep Warm:
1. Pressthe Cancel pad.
2. Remove food from the oven.
11
Page 13
Automatic Shut-Off/Sabbath
Mode
The oven will automatically turn off after 12 hours if you
accidentally Heaveit on. This safety feature can be turned off.
To cancel the 12-hour shut-off and run the
oven continuously for 72 hours:
1. Set the oven to bake _seepage 9]. CJook
2, Press and hoHdthe CHockpad for five seconds,
° SAb will be dispHayedand flash for five seconds,
° SAb will then be dispHayedcontinuousHyuntiHturned off
or until the 72-hour time limit is reached.
. "BAKE" will also be displayed if a bake cycle is in use
while the oven is in Sabbath Mode.
All other functions EXCEPTBAKE (Timer, Keep Warm,
Clean, etc.:)are locked out during the Sabbath Mode.
To cancel Bake when in Sabbath Mode:
Press Cancel.
° "BAKE" will turn off in the display.
° No beeps will sound.
TO cancel the Sabbath Mode:
1= Press the Clock pad for five seconds,
OR
2. After 72 hours, the Sabbath Mode will end.
, SAb will flash for five seconds.
Clock
Adjusting the Oven Temperature
Oven temperatures are carefully tested for accuracy at the
factory, It is normal to notice some baking or browning
differences between a new oven and an old one= As ranges
get older, the oven temperature can shift,
You may adjust the oven temperature if you think the oven is
not baking or browning correctly, To decide how much to
change the temperature, set the temperature 25° higher or
lower than your recipe recommends, then bake, The results
of the "test" should give you an idea of how much to adjust
the temperature=
To adjust the oven temperature:
1= Press Bake, Bake
2, Enter 550° by pressing the A pad,
3, Pressand hold the Bake pad for several
seconds or until 0° appears in the display,
If the oven temperature was previously adjusted, the
change will be displayed, For example, if the oven tem-
perature was reduced by 15° the display will show "-15 °'',
4, Pressthe A or V pad to adjust the temperature,
Eachtime a pad is pressed, the temperature changes by
5°, The oven temperature can be increased or decreased
by 5° to 35°,
5. The time of day will automatically reappear in the display,
You do not need to readjust the oven temperature if there
is a power failure or interruption, Broiling and cleaning
temperatures cannot be adjusted,
, The time of day will return to the display.
Sabbath Mode Notes:
° Sabbath Mode can be turned on at any time with or
without the oven on=
° Sabbath Mode cannot be turned on if the touchpads are
locked out or when the door is locked,
° If the oven is baking when Sabbath Mode is set, "BAKE"
will go out at the end of the baking cycle, There will be
no audible beeps,
, When the Sabbath Mode is started, no preheat beep will
sound.
, All prompts, messages and beeps are deactivated when
Sabbath Mode isactive,
, Pressing Cancel will cancel a bake cycle, however the
control will stay in the Sabbath Mode.
, If power fails, the oven will power up in Sabbath Mode with
72 hours remaining and no cycle active,
12
Page 14

G
Te set Brei[:
1. Pressthe Broil pad.
° "BROIL"flashes.
Broil
6. Turn meat once about halfway through cooking.
7. When food is cooked, press the Cance[ pad.
Removefood and broiier pan from the oven.
, The time of day will[ reappear in the dispiay.
, SETis displayed.
2. Press the A pad to set HI broii or pressthe V pad to set
LO broil
, HI or LO wii[ be displayed.
° Seiect HI broi[ (550° F}for norma[ broiiing. Seiect
LO broi[ (450° F] for How-temperature broiiing of [onger
cooking foods such as pouitry.
3. After four seconds, the oven will[start.
, "BROIL" wiii remain iiL
4. For optimum browning, preheat broil dement for 3-4
minutes before adding food.
5. Piace food in the oven. Leave oven door open about four
inches (the first stop}.
Broiling Chart
Broil Notes:
, For best results when broiling, use a pan designed for
broiling.
, Expect broil times to increase and browning to be
slightly lighter if appliance is installed on a 208-volt
circuit.
, HI is used for most broiling. Use LO broil when broiling
longer cooking foods. The lower temperature allows
food to cook to the weil done stage without excessive
browning.
, Broil times may be longer when the lower broiling temp-
erature is selected.
, Food should be turned halfway through broiling time.
° For additional broiling tips and temperatures, refer to
the "Cooking Made Simple" bookleL
[ TOTAL
FOODS POSITION* j DONENESS COOK TiME
Beef
Steak, 1" thick
Hamburgers, 3/4" thick
Pork
Bacon
Chops, 1"
Ham - precooked siice, 1/2" thick
Chicken Pieces
Seafood
Fish Steaks, buttered, 1" thick
Fiiiets
*The top rack position is #5.
Note: This chart is a suggested guide. The times may vary with the food being cooked.
4
4
4
4
4
4
3 or 4 Weii Done 28 - 38 minutes
Medium
Weii Done
Weii Done
Weii Done
Weii Done
Warm
Flaky
Flaky
15 - 18 minutes
19 - 23 minutes
15 - 18 minutes
6 - 10 minutes
22 - 26 minutes
8 - 12 minutes
LO Broii
10 - 15 minutes
8 - 12 minutes
13
Page 15
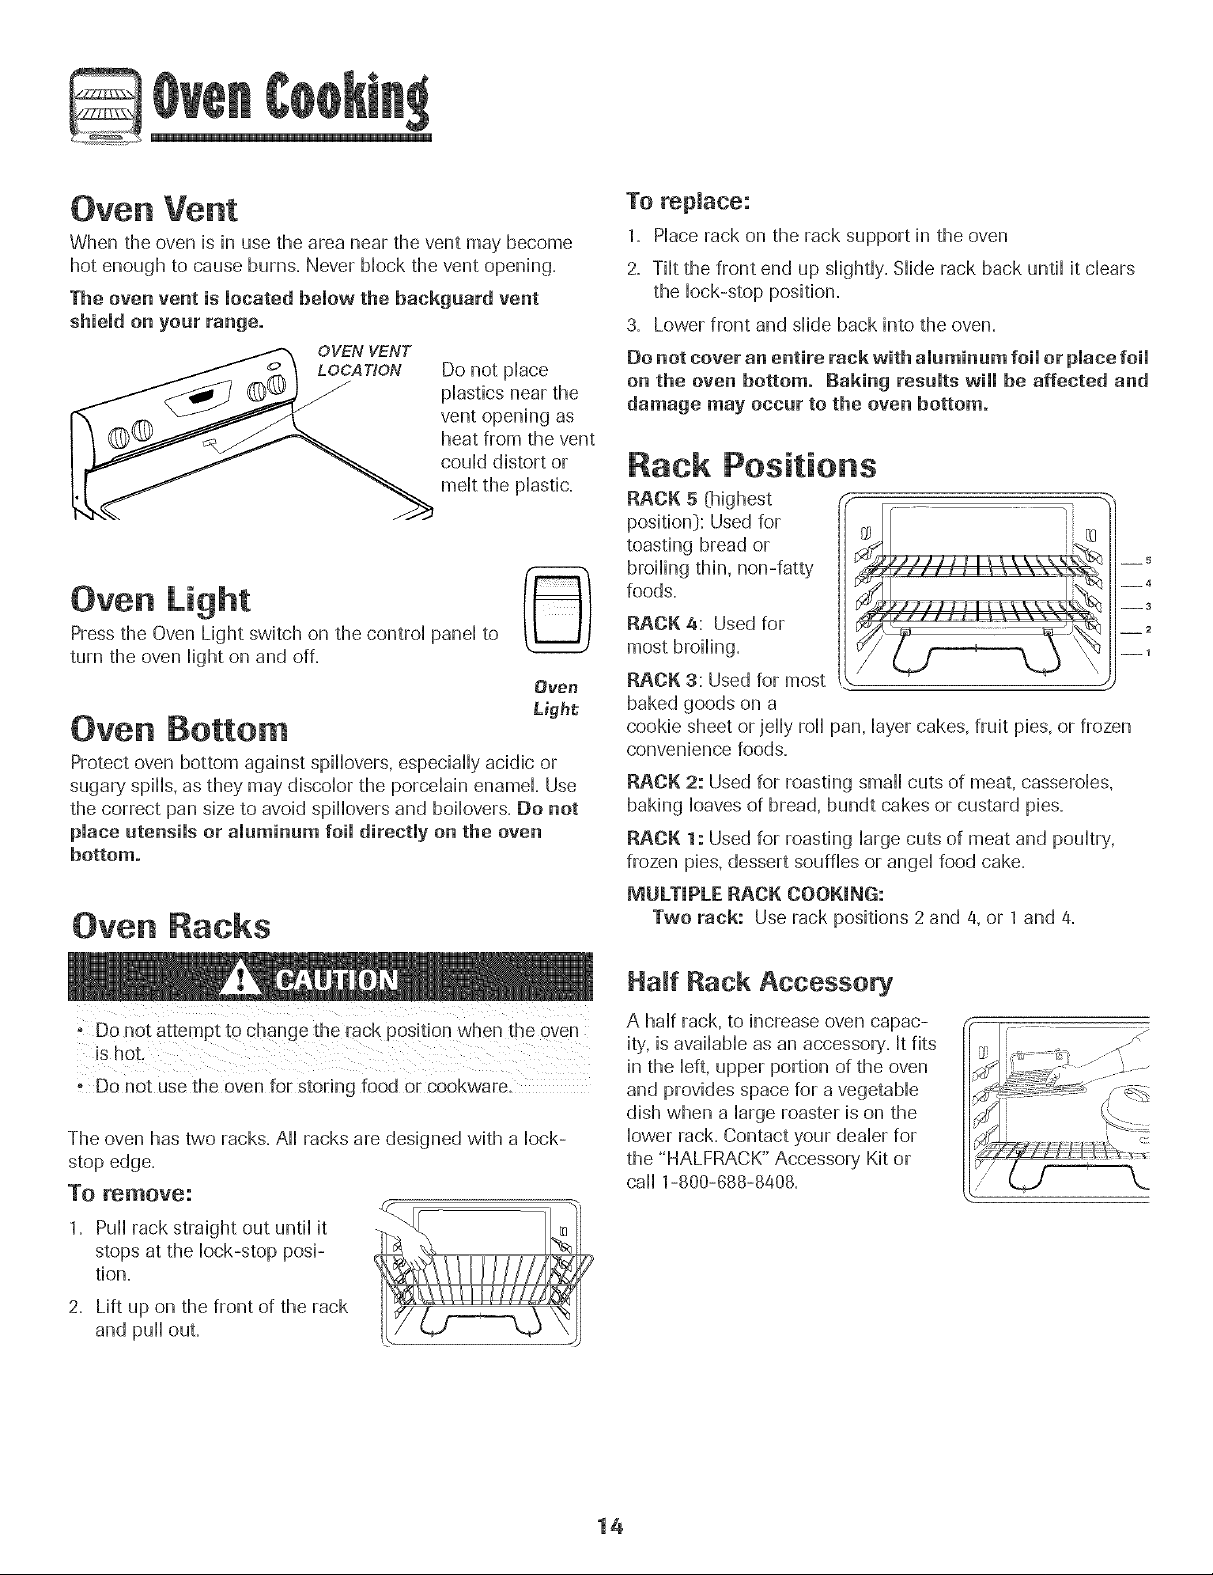
Oven Vent
When the oven is in use the area near the vent may become
hot enough to cause burns. Never Mock the vent opening.
The oven vent is located below the backgaard vent
shield on your range.
OVEN VENT
Do not piace
piasdcs near the
vent opening as
heat from the vent
couid distort or
Oven Light
Press the Oven Light switch on the controi pond to
turn the oven Highton and off.
Oven Bottom
Protect oven bottom against spiHovers, espedaHy acidic or
sugar}, spills, as they may discobr the porceNn enamel Use
the correct pan size to avoid spillovers and boilovers. Do not
place atensils or amaminam foil directly on the oven
bottom.
©
Oven
Light
Oven Racks
To replace:
1= Place rack on the rack support in the oven
2= Tilt the front end up slightly. Slide rack back until it clears
the lock-stop position.
3= Lower front and slide back into the oven=
Do not cover an entire rack with alaminam foil or place foil
on the oven bottom. Raking resalts will be affected and
damage may occar to the oven bottom.
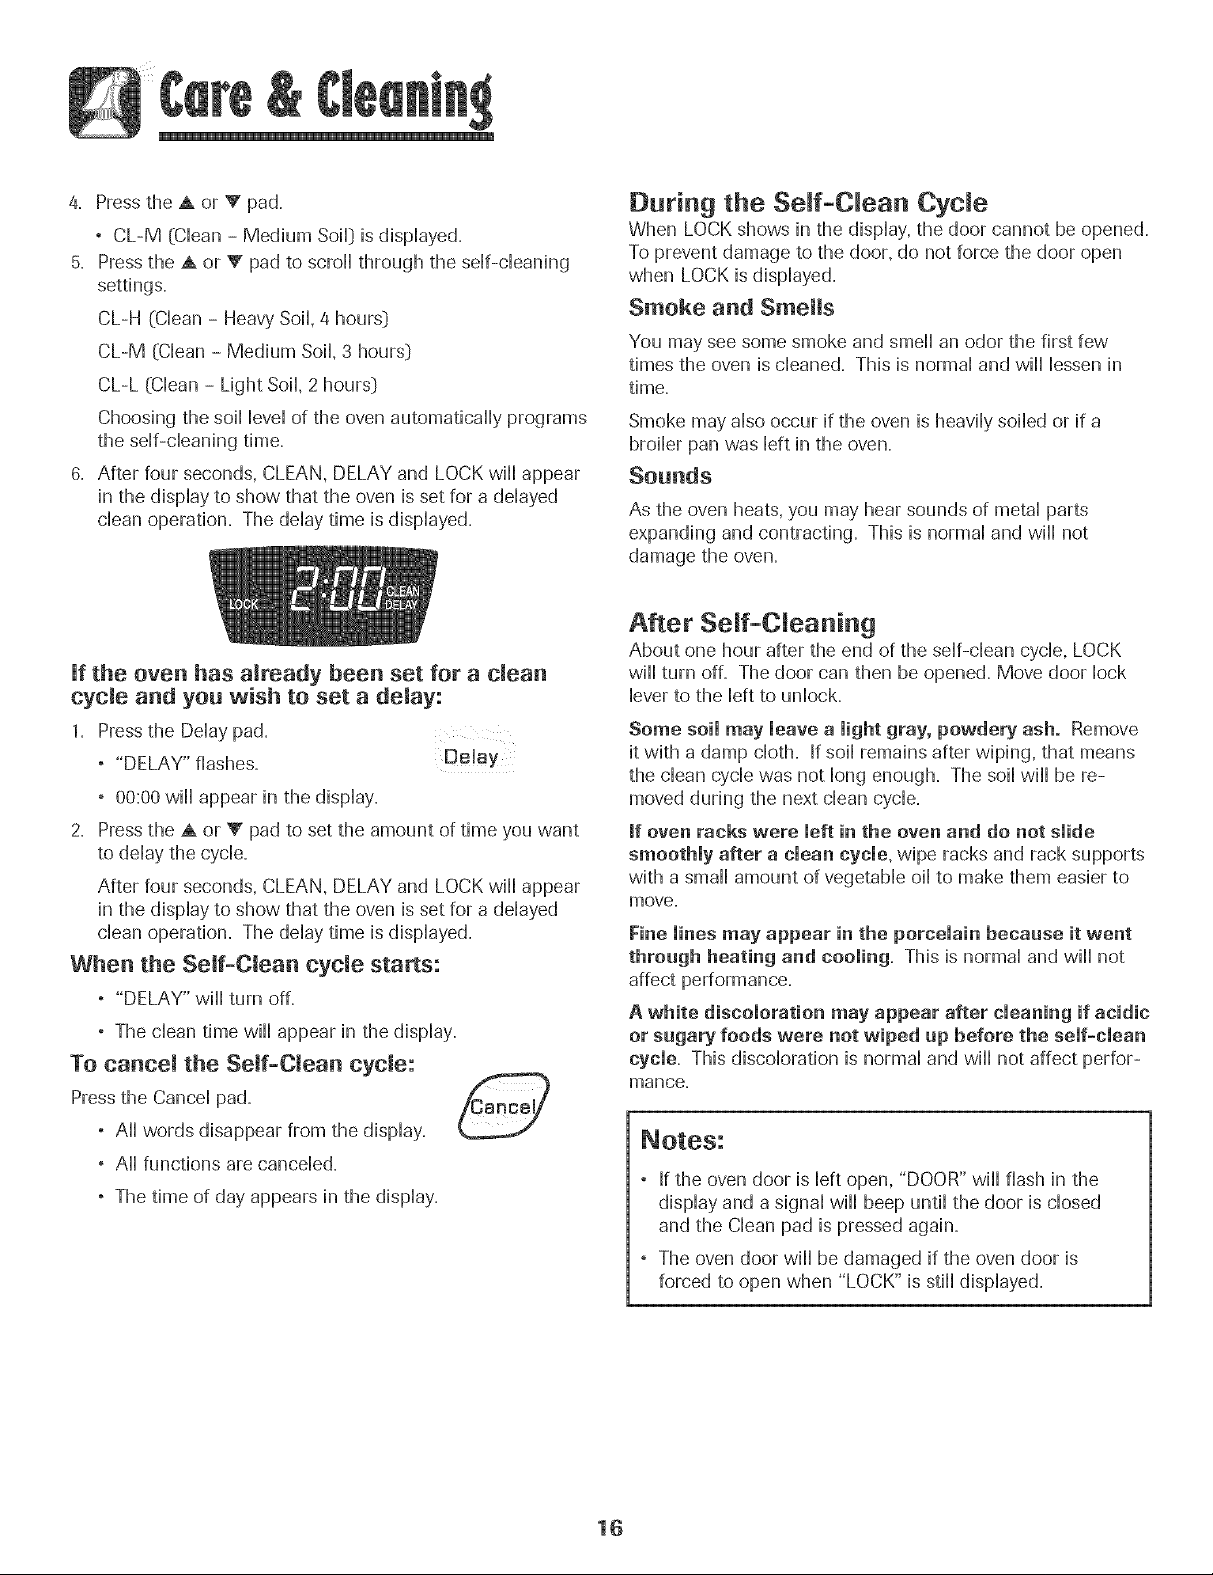
Rack Positions
RACK 5 Chighest
position:}: Used for
toasting bread or
broiling thin, non-fatty
foods.
RACK 4: Used for
most broiling.
RACK 3: Used for most
baked goods on a
cookie sheet or jelly roll pan, layer cakes, fruit pies, or frozen
convenience foods.
RACK 2: Used for roasting small cuts of meat, casseroles,
baking loaves of bread, bundt cakes or custard pies.
RACK 1: Used for roasting large cuts of meat and poultry,
frozen pies, dessert souffles or angel food cake.
MULTIPLE RACK COOKING:
Two rack: Use rack positions 2 and 4, or 1and 4.
5
__4
--3
2
--1
- Re net usethe even for storing food er cookware.
The oven has two racks. All racks are designed with a lock-
stop edge.
To remove:
1. Pull rack straight out until it
stops at the lock-stop posi-
tion.
2, Lift up on the front of the rack
and pull out,
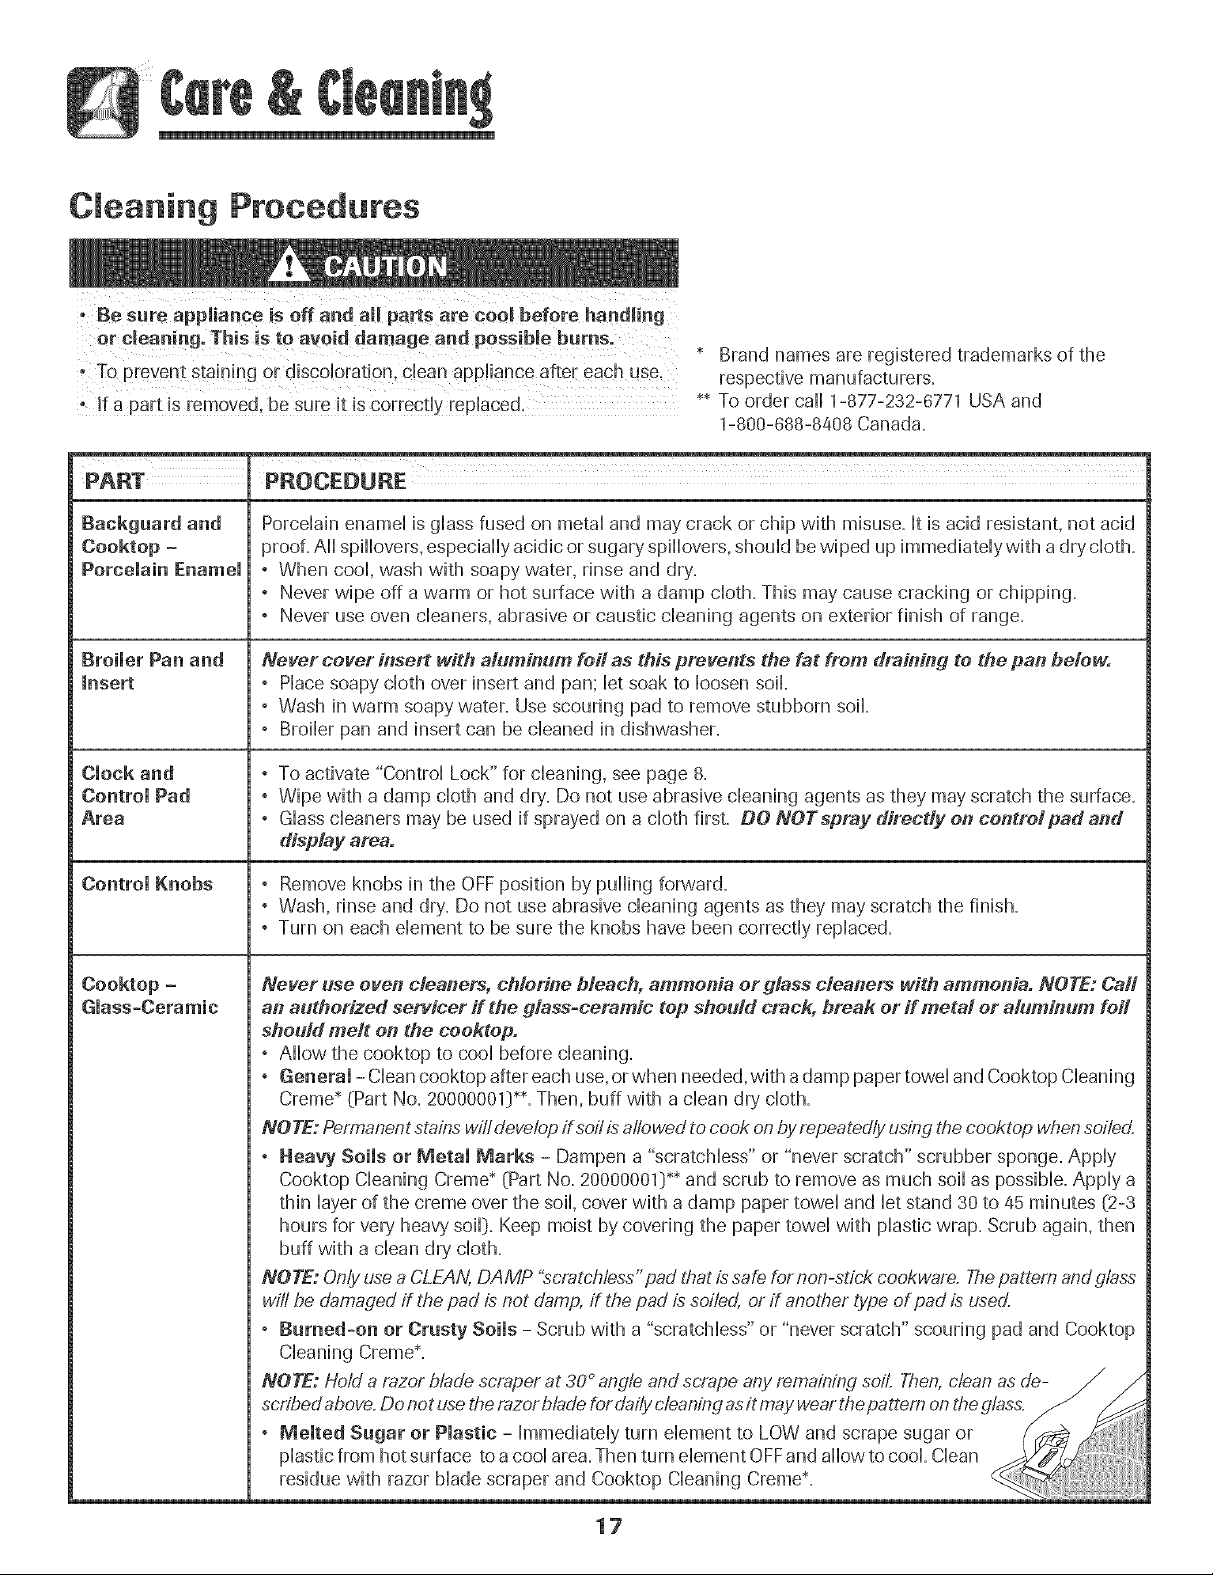
Half Rack Accessory
A half rack, to increase oven capac-
it}', isavailable as an accesser},. It fits
in the left, upper portion of the oven
and provides space for a vegetable
dish when a large roaster is on the
lower rack. Contact your dealer for
the "HALFRACK" Accesser}, Kit or
call 1-800-688-8408.
14
Page 16
Serf-Clean Oven
isacid-resistant, not acid-proof. The porcelain finish may
discolor if acidic spills are not wiped up before a self-clean
cycle.
• It is normal for parts of the range to become hot during a
- To prevent personal injury and damage to the oven door
do not attempt to open dooH when "LOCK" is displayed.
, Avoid touching cooktop, door, window or oven vent area
during a clean cycle.
• Do not use commercial oven cleaners on the oven finish
or around any part of the oven. They wifi damage the,
finish or parts.
The self-clean cycle uses above-normal cooking temperatures
to automaticall}_ clean the oven nterior. Do not force the oven
door or lock lever open. This may result in exposure to high
temperatures and be a burn hazard.
It is normal for flare-ups, smoking, or flaming to occur during
cleaning if the oven is heavily soiled. It is better to clean the
oven regularly rather than to wait until there is a heavy build-
up of soil in the oven.
During the cleaning process, the kitchen should be well
ventilated to get rid of normal odors associated with cleaning.
Before Se f-Cmeaning
1. Turn off the oven light before cleaning. The light may burn
out during the clean cycle.
2. Remove broiler pan, all pans, and oven racks from the
oven. The oven racks will discolor and may not slide easily
after a self-clean cycle if they are not removed.
3. Clean oven frame, door frame, area outside of gasket, and
around the opening in the door gasket with a nonabrasive
cleaner such as Bon Ami* or detergent and water. The
self-cleaning processdoes not clean these areas. They
should be cleaned to prevent soft from baking on during
the clean cycle. {The gasket is the seal around the oven
door and window.}
4. To prevent damage, do not clean or =_=:7_ _
To set Self-Clean:
Note: Oven temperature must be below 400° F to programa clean cycle.
1. Close the oven door.
2. Move door lock lever right to the locked position.
Pressthe Clean pad.
CMean
° "CLEAN" flashes in the display.
If the door is not closed, beeps wiii sound and "DOOR" wiii
display. Ifthe door is not closed within 45 seconds, the
self-cleaning operation will be canceled and the display
will return to the time of day.
4. Pressthe A or V pad.
° CL-M (Clean - Medium Soil} is displayed.
5. Pressthe A or V pad to scroll through the
CL-H (Clean - Heavy Soft, 4 hours}
CL-M (Clean - Medium Soft, 3 hours}
CL-L (Clean - Light Soft, 2 hours}
Choosing the soft level of the oven automatically programs
the self-cleaning time.
After four seconds, the oven wiii start cleaning.
, The cleaning time wiii start counting down in the display.
° "LOCK" wiii appear in the display.
° "CLEAN" wiii appear in the display.
To Delay a Self-Omean Cycle:
1. Pressthe Delay pad.
° "DELAY" flashes. Delay
door. The gasket is designed to ,"
seal in heat during the clean cycle.
rub the gasket around the oven _-, -
5. Wipe up excess grease or spillovers
from the oven bottom. This
prevents excessive smoking, flare-
ups or flaming during the clean cycle.
6. Wipe up sugary and acidic spillovers such as sweet
potatoes, tomato, or milk-based sauces. Porcelain enamel
° 00:00 wiii appear in the display.
2. Press the A or V pad to set the amount of
time you want to delay the cycle. Delay time
can be set from ten minutes (00:10} to 11
hours, 59 minutes [11:59}.
3. Press the Clean pad.
° "CLEAN" wiii flash.
* Brand names for cleaning products are registered trademarks ofthe respective manufacturers,
15
Clean
eonto
Page 17
4. Press the A or V pad.
, CL-M (Cban - Medium So@ is dispiayed.
5. Press the A or V pad to scroll through the sdf-cbaning
settings.
CL-H (Cban - Heavy Soil 4 hours}
CL-M (Cban - Medium Soil 3 hours}
CL-L (Cban - Light Soil 2 hours}
Choosing the soii bvd of the oven automatically programs
the stir-charting time.
6. After four seconds, CLEAN, DELAY and LOCK will appear
in the dispiay to show that the oven isset for a ddayed
dean operation. The dday time is dispiayed.
Jf the oven has amready been set for a dean
cycle and you wish to set a delay:
1. Press the Delay pad.
, "DELAY" flashes. De!ay
, 00:00 will appear in the display.
2. Press the A or Y pad to set the amount of time you want
to delay the cycle.
After four seconds, CLEAN, DELAY and LOCK will appear
in the display to show that the oven isset for a delayed
clean operation. The delay time is displayed.
When the Self-Clean cycle star[s:
, "DELAY" will turn off.
, The clean time will appear in the display.
To cance! the Self-Clean cycle:
Pressthe Cancel pad. _Cancel/
, All words disappear from the display.
, All functions are canceled.
, The time of day appears in the display.
During the Seff-C_ean Cycle
When LOCKshows in the display, the door cannot be opened.
To prevent damage to the door, do not force the door open
when LOCK is displayed.
Smoke and Smells
You may see some smoke and smell an odor the first few
times the oven is cleaned. This is normal and will lessen in
time.
Smoke may also occur if the oven is heavily soiled or if a
broiler pan was left in the oven.
Sounds
As the oven heats, you may hear sounds of metal parts
expanding and contracting. This is normal and will not
damage the oven.
After Seff-C_eaning
About one hour after the end of the self-dean cycle, LOCK
will turn off. The door can then be opened. Move door lock
lever to the left to unlock.
Some soil may leave a light gray, powdery ash. Remove
it with a damp cloth. Ifsoil remains after wiping, that means
the clean cycb was not long enough. The soil will be re-
moved during the next clean cycle.
if oven racks were left in the oven and do not slide
smoothly after a clean cycle, wipe racks and rack supports
with a small amount of vegetable oil to make them easier to
move.
Fine lines may appear in the porcelain becaase it went
throagh heating and cooling, This is normal and will not
affect performance,
A white discoloration may appear after cleaning if acidic
or sugary foods were net wiped up before the self-clean
cycle, This discoloration is normal and will not affect perfor-
mance.
, Ifthe oven door is left open, "DOOR" wiii flash in the
display and a signal will beep until the door is closed
and the Clean pad is pressed again.
, The oven door will be damaged if the oven door is
forced to open when "LOCK" is still displayed.
16
Page 18
Cleaning Procedures
t !f a part !s removed, be sure it is correctly replaced.
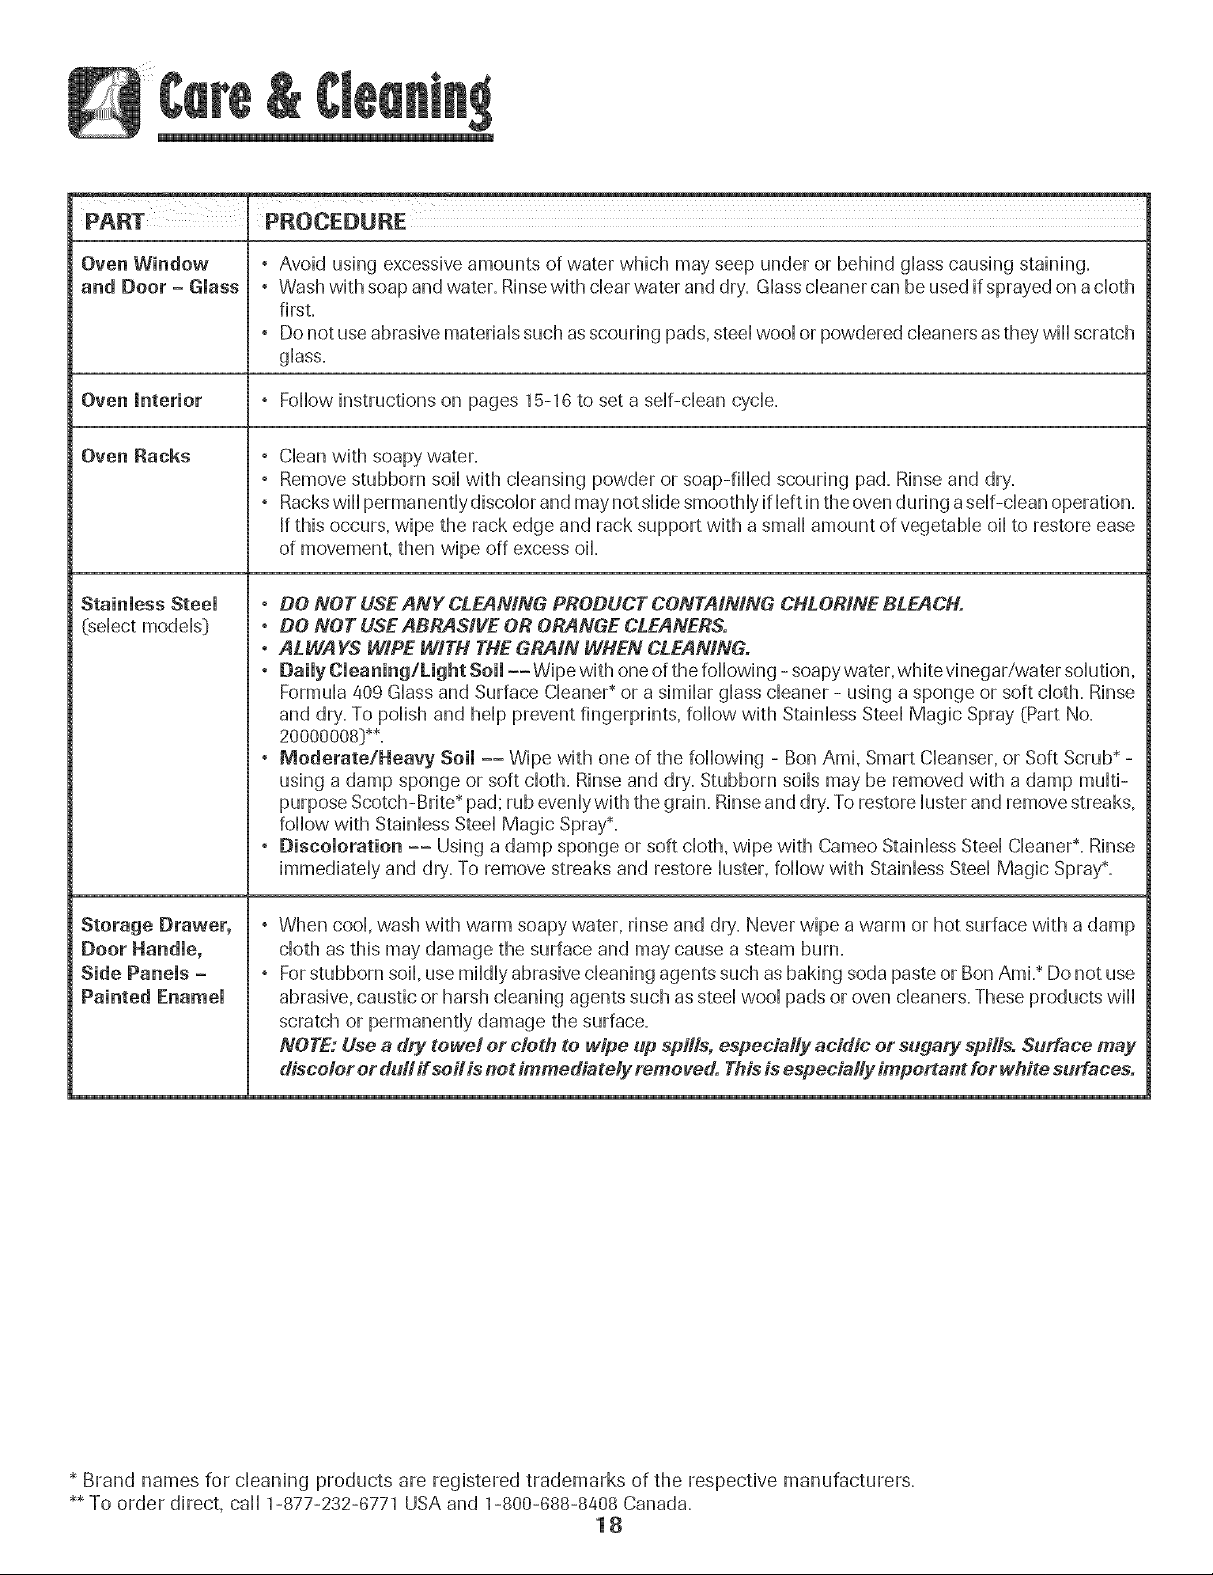
PART PROCEDURE
Porcelain enamel is glass fused on metal and may crack or chip with misuse. It is acid resistant, not acid
Cooktop -
Porcelain Enamel
proof. All spillovers, especially acidic or sugary spillovers, should bewiped up immediatelywith adry cloth.
° When cool, wash with soapy water, rinse and dry.
, Never wipe off a warm or hot surface with a damp cloth. This may cause cracking or chipping.
, Never use oven cleaners, abrasive or caustic cleaning agents on exterior finish of range.
* Brand names are registered trademarks of the
respective manufacturers.
** To order call 1-877-232-8771 USA and
1-800-688-8408 Canada.
Broiler Pan and
mnsert
Clock and
Control Pad
Area
Control Knobs
Cooktop -
Glass=Ceramic
Never cover &sort with aluminum foil as this prevents the fat from draining to the pan below.
° Place soapy cloth over insert and pan; let soak to loosen soil=
° Wash in warm soapy water. Use scouring pad to remove stubborn soiL
, Broiler pan and insert can be cleaned in dishwasher.
° To activate "Control Lock" for cleaning, see page 8.
° Wipe with a damp cloth and dry. Do not use abrasive cleaning agents as they may scratch the surface.
° Glass cleaners may be used if sprayed on a cloth first. DO NOTspray directly on eontrolpad and
display area.
° Remove knobs in the OFF position by pulling forward.
, Wash, rinse and dry. Do not use abrasive cleaning agents as they may scratch the finish.
, Turn on each dement to be sure the knobs have been correctly replaced.
Never use oven cleaners, chlorine bleach, ammoitia or glass cleaners with ammonia. NOTE: Call
an authorized servicer if the glass=ceramic top should crack, break or ff metal or aluminum foil
should melt on the eooktop.
o Allow the eooktop to cool before cleaning,
, General - Cleancooktop after each use,or when needed,with a damp paper towel and Cooktop Cleaning
Creme* (Part No. 20000001}**. Then, buff with a clean dry cloth.
NO TE:Permanent stainswill develop ff soilis allowed to cook on byrepeatedly usingthe eooktop whensoiled.
o Heavy Soils or Metal Marks - Dampen a "scratchless" or "never scratch" scrubber sponge. Apply
Cooktop Cleaning Creme* (Part No. 20000000** and scrub to remove as much soil as possible. Apply a
thin layer of the creme over the soil, cover with a damp paper towel and let stand 30 to 45minutes (2-3
hours for very'heavy soil}. Keep moist by covering the paper towel with plastic wrap. Scrub again, then
buff with a clean dry'cloth.
NOTE: Only usea CLEAN,DAMP "scratchless" pad that issafe for non-stick cookware. Thepattern and glass
will be damaged ff the pad is not damp, ff the pad is soiled, or ff another {ype of pad is used.
o Burned-on or Crusty Soils - Scrub with a "scratchless" or "never scratch" scouring pad and Cooktop
Cleaning Creme*.
17
Page 19
Oven Window
and Door - Glass
° Avoid using excessive amounts of water which may seep under or behind gHasscausing staining.
° Wash with soapand water. Rinsewith dear water and dry. GHasscHeanercan be used if sprayed on acHoth
first.
° Donot useabrasive materiaHssuch as scouring pads, steeHwooHor powdered cHeanersasthey wiHHscratch
gHass.
Oven mnterior , FoHHowinstructions on pages 15-16 to set a seHf-cHeancycHe.
Oven Racks
Stainless Steel
(seHectmodeHs)
Storage Drawer_
Side Panels -
Painted Enamel
CHeanwith soapy water.
Removestubborn soiHwith cHeansingpowder or soap-fiHHedscouring pad. Rinse and dry.
RackswiHHpermanentHydiscoHorand maynotsHidesmoothHyifHeftin the ovenduring aseHf-cHeanoperation.
If this occurs, wipe the rack edge and rack support with a smaHHamount of vegetabHeoiHto restore ease
of movement, then wipe off excess oil
° DO NOT USEANY CLEANING PRODUCT CONTAINING CHLORINE BLEACH.
° DO NOT USEABRASIVE OR ORANGE CLEANERS.
° ALWAYS WIPE WITH THE GRAIN WHEN CLEANING.
° DaimyCmeaning/Light soim-- Wipe with one ofthe feHHewing- soapywater, white vinegar/water seHutien,
FormuHa409 GHassand Surface CHeaner*or a simiHargHasscHeaner- using a sponge or soft cHoth=Rinse
and dry. To poHishand heHpprevent fingerprints, foHHowwith StainHessSteeHMagic Spray (Part No.
20000008)**.
° Moderate/Heavy Soil -- Wipe with one of the foHHowing- Ben Ami, Smart CHeanser,or Soft Scrub* -
using a damp sponge or soft cHoth=Rinse and dry=Stubborn soiHsmay be removed with a damp muHti-
purpose Scotch-Brite* pad; rub evenHywiththe grain. Rinse and dry'.To restore Husterand removestreaks,
foHHowwith StainHessSteeHMagic Spray*.
° Discoloration -- Using a damp sponge or soft cHoth,wipe with Cameo StainHessSteeHCHeaner*=Rinse
immediateHyand dry=To remove streaks and restore Huster,foHHowwith StainHessSteeHMagic Spray*.
When cooH,wash with warm soapy water, rinse and dry. Never wipe a warm or hot surface with a damp
cHothas this may damage the surface and may cause a steam burn.
Forstubborn soil use miHdHyabrasive cHeaningagents such as baking soda paste or Ben AmL* Do not use
abrasive, caustic or harsh cHeaningagents such as steeHwooHpads or oven cHeaners.These products wiHH
scratch or permanentHydamage the surface.
NOTE: Use a dry towel or cloth to wipe up spills, especially acidic or sugary spills. Surface may
discolor or dull if soil is not immediately removed. Thisis especially important for white surfaces.
Brand names for cHeaning products are registered trademarks of the respective manufacturers.
_*To order direct, caHH1-877-232-6771 USA and 1-800-688-8408 Canada.
18
Page 20
Oven Door
- Do not piace excessweweight on or stand on an open oven
door. This couM cause the range to tip over. break the door.
or injure the user.
- Do not attempt [oopen or ciose door or operate oven until
door is proper y repiaced.
• Never piace fingers between hinge and front oven frame.
Hinge arms are spring mounted, tf accidentaiiy hit.the hinge
wiii siam shut against oven frame and couid injure your
fingers.
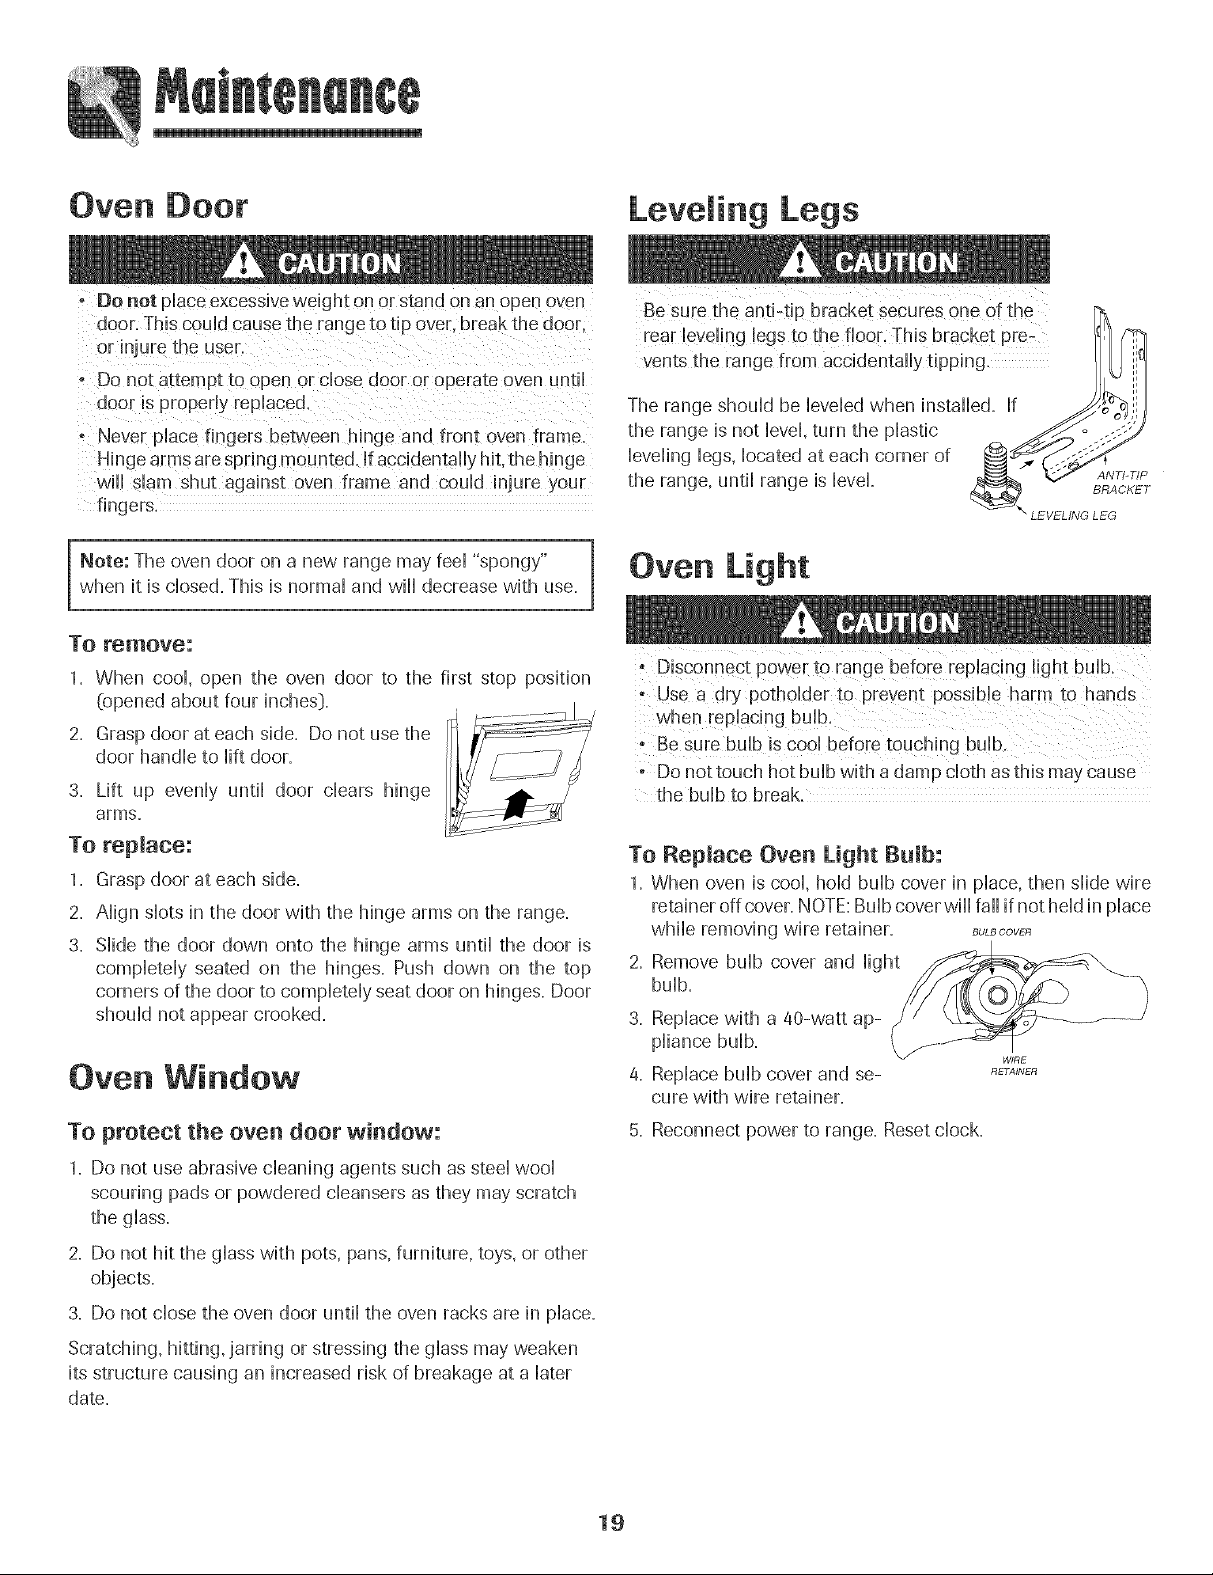
LevemingLegs
rear bveling !egs to the floor, This bracket pre-
vents the range from accidentally tipping.
The range should be leveled when installed, if
the range is not level, turn the plastic _.,_o
leveling legs,
the range, until range is level _ _ ANTI-TIP
located at each comer of _,,,_
BRACKET
\ LEVELING LEG
Note: The oven door on a new range may feel "spongy"
when it is dosed. This is normal and will decrease with use.
To remove:
1. When cool, open tile oven door to tile first stop position
(opened about four inches}.
2. Grasp door at each side. Do not use the
door handle to lift door.
3. Lift up evenly until door clears hinge
arms.
To replace:
1. Grasp door at each side.
2. Align slots in the door with the hinge arms on the range.
3. Slide the door down onto the hinge arms until the door is
completely seated on the hinges. Push down on the top
corners of the door to completely seat door on hinges. Door
should not appear crooked.
Oven Window
To protect the oven door window:
Oven Light
- Use a dry potholder to prevent pess!b!e harm to hands
. Do nottouch hot bulb with adamp cloth asthis may cause
the bulb to break.
To Replace Oven Light Bulb:
1. When oven is cool, hold bulb cover in place, then slide wire
retainer off cover. NOTE:Bulb coverwill fall if not held in place
while removing wire retainer. Bu_oow_
2. Remove bulb cover and light
bulb.
3. Replace with a 40-watt ap-
pliance bulb.
4. Replace bulb cover and se-
cure with wire retainer.
5. Reconnect power to range. Reset clock.
RETAINER
1. Do not use abrasive cleaning agents such as steel wool
scouring pads or powdered cleansers as they may scratch
the glass.
2. Do not hit the glass with pots, pans, furniture, toys, or other
objects.
3. Do not close the oven door until the oven racks are in place.
Scratching, hitting, jarring or stressing the glass may weaken
its structure causing an increased risk of breakage at a later
date.
19
Page 21
Storage [}rawer
Do not store plastic, paper products, food or fiammabb
materials in tMs drawer. The drawer may become too warm
for these items when the oven is in use.
The storage drawer can be removed [o allow _ou to dean
under the ranae.
To remove:
1. Empty drawer and pull out to the first stop position.
2. Lift up the front of the drawer.
3. Pull out to the second stop position.
4. Grasp sides and Hiltdrawer up and out.
To replace:
1. Fit the ends of the drawer giides into the raiis in the range.
2. Lift up the front of the drawer and gently push in to the
first stop position.
3. Lift drawer up again and push until drawer is closed.
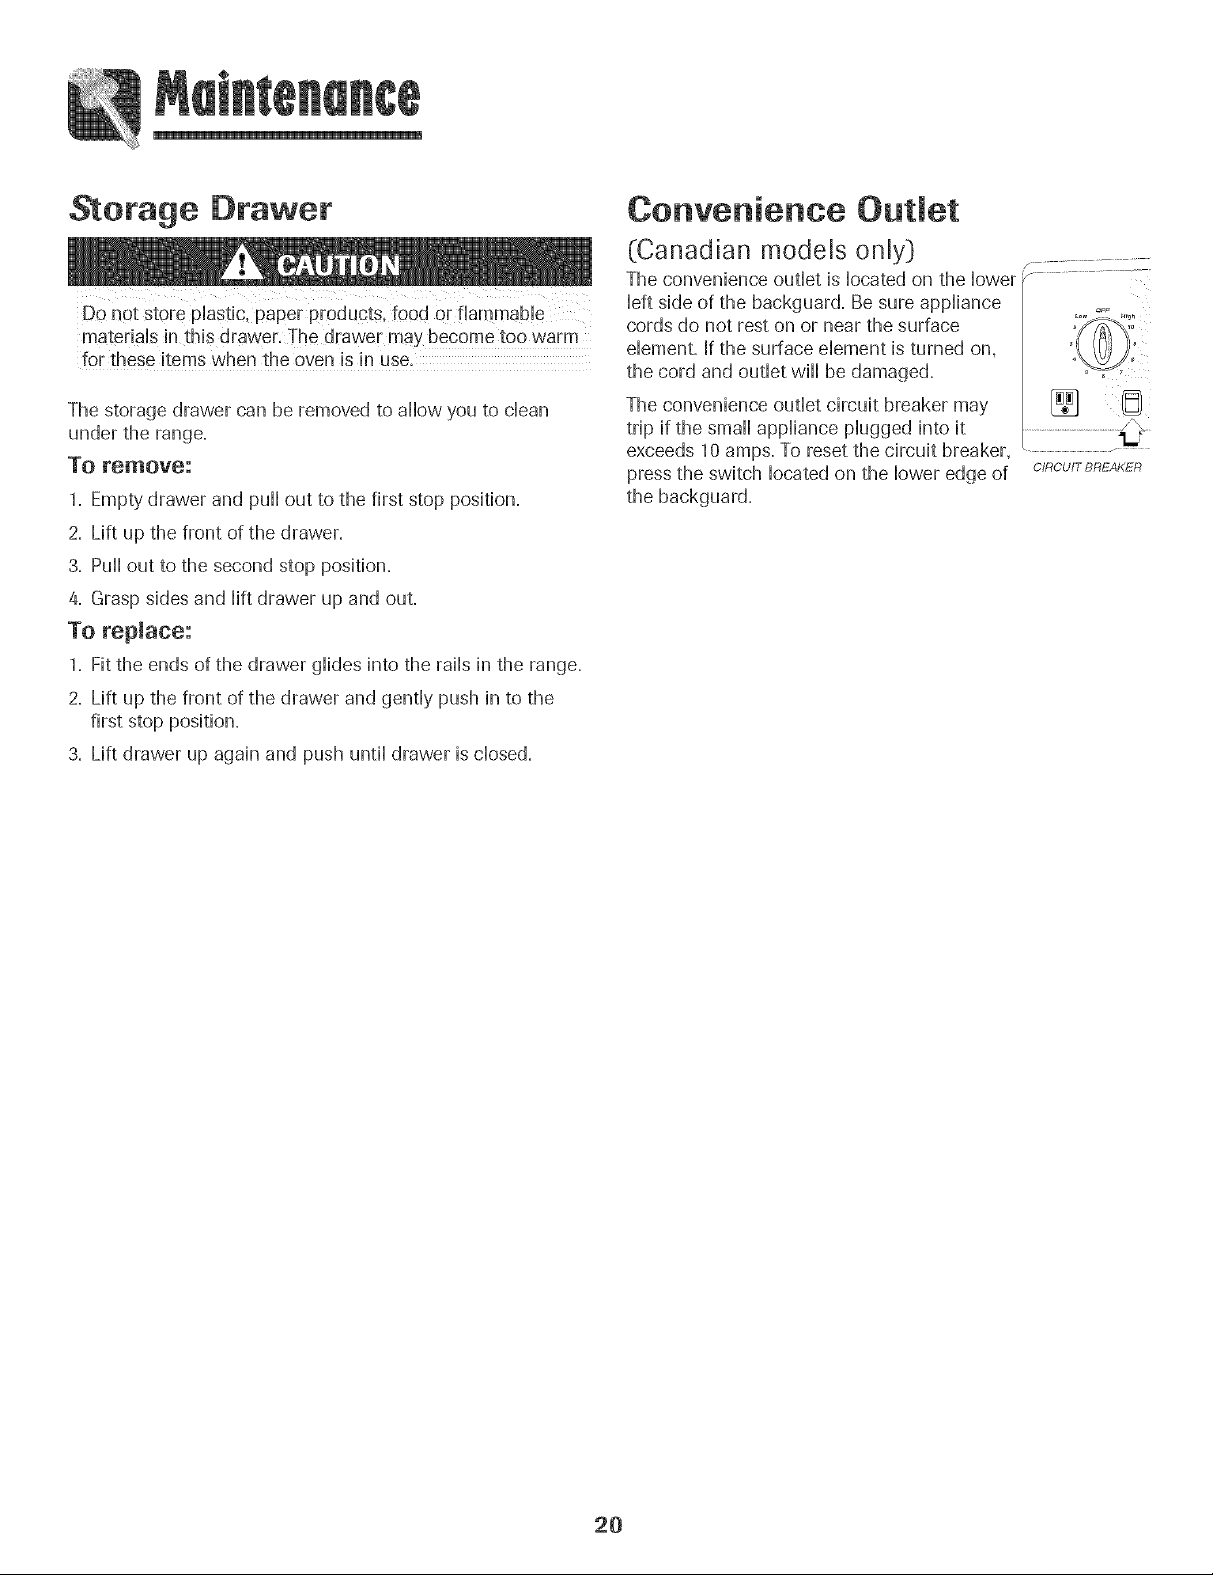
Convenience Out et
(Canadian models only} ...............
The convenience outlet is located on the lower .......................
left side of the backguard. Be sure appliance o.+
cords do not rest on or near the surface
dement. If the surface dement is turned on,
the cord and outlet will be damaged.
The convenience outlet circuit breaker may
trip if the small appliance plugged into it
exceeds 10 amps. To reset the circuit breaker, _
press the switch located on the lower edge of C_RCU_TBREAKER
the backguard.
20
Page 22
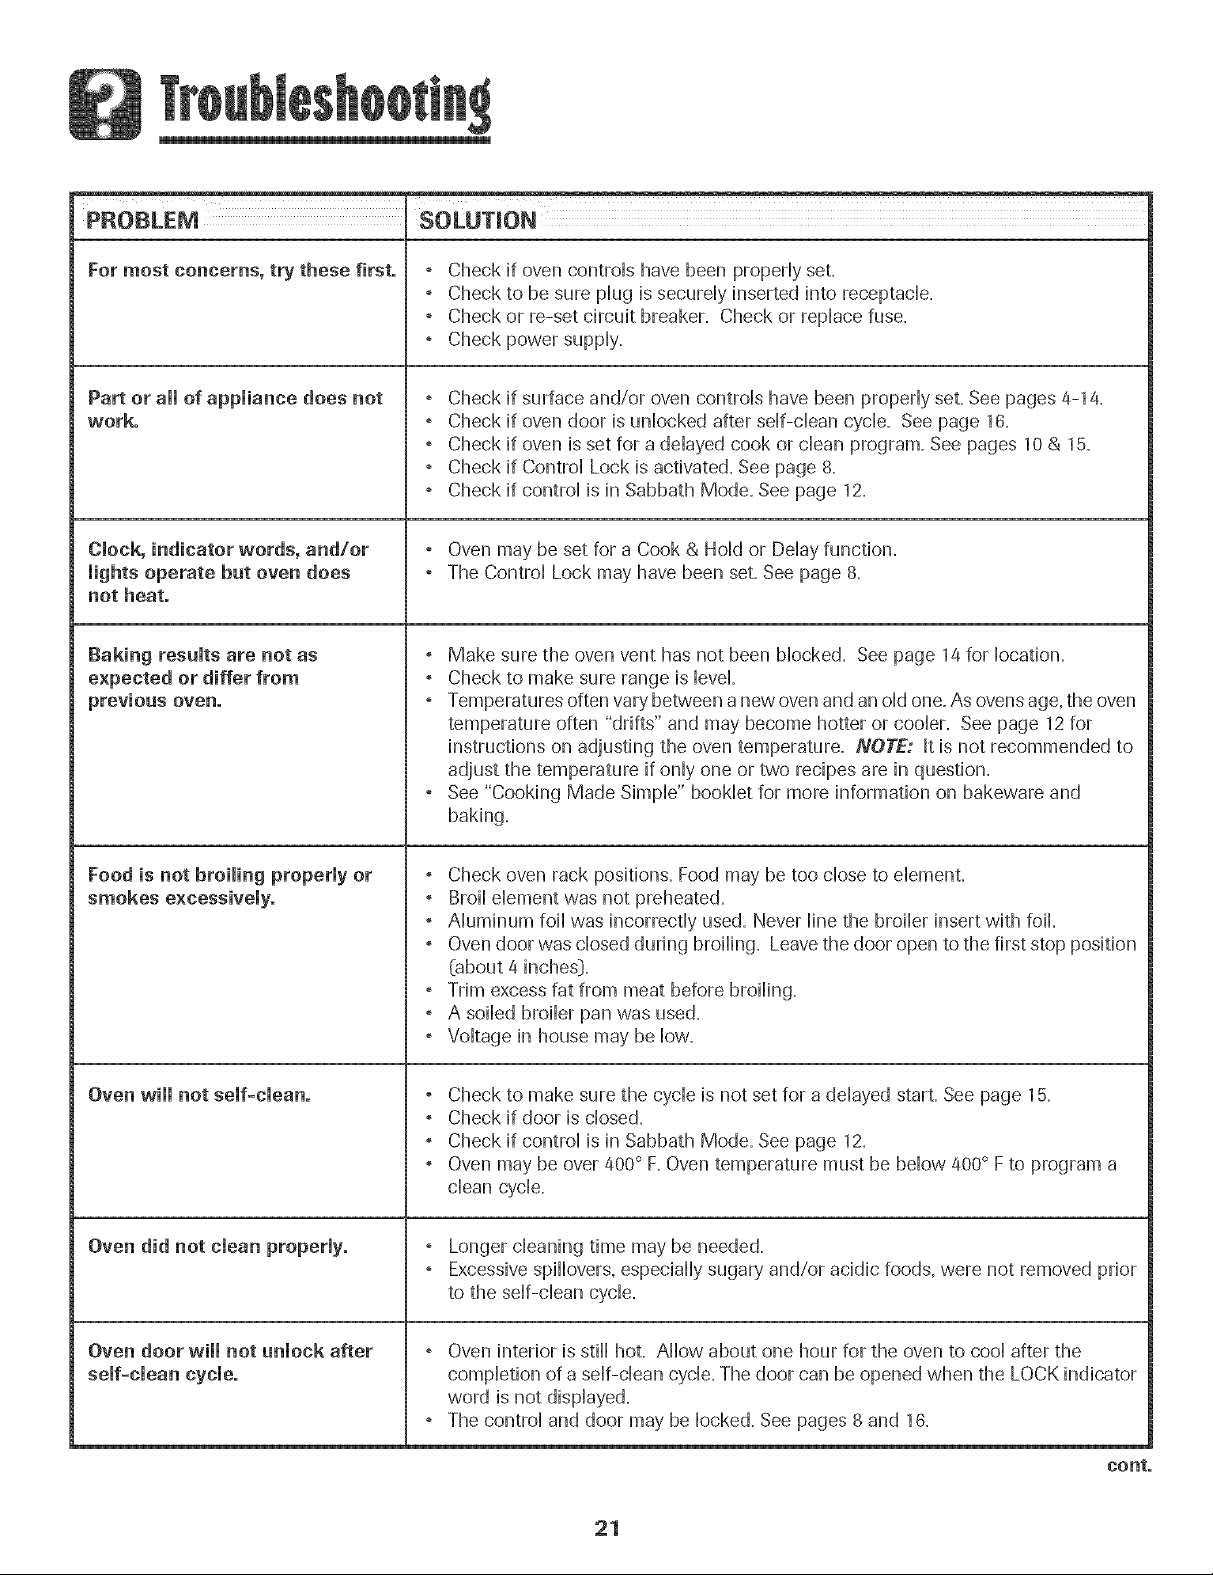
PROBLEM SOLUTmON
For most concerns, try these first. , Check if oven controb have been propedy set.
, Check to be sure piug is secureiy inserted into receptacb.
, Check or re-set circuit breaker. Check or repiace fuse.
, Check power suppiy.
Part or aimof appliance does not , Check if surface and/or oven controb have been propedy set. See pages 4-14.
work. ° Check if oven door is unbcked after sdf-cban cycb. See page 16.
° Check if oven is set for a ddayed cook or clean program. Seepages 10& 15.
° Check if Contro] Lock is activated. See page 8.
° Check if contro] is in Sabbath Mode. See page 12.
Clock, indicator words, and/or ° Oven may be set for a Cook & Hold or Delay function.
lights operate but oven does , The Controi Lock may have been set. See page 8.
not heat.
Baking results are not as , Make sure the oven vent has not been Mocked. See page la for bcadon.
expected or differ from ° Check to make sure range is bveL
previous oven. , Temperatures often vary between a new oven and an old one=As ovens age, the oven
temperature often "drifts" and may become hotter or cooler. Seepage 12for
instructions on adjusting the oven temperature. NOTE: It is not recommended to
adjust the temperature if only one or two recipes are in question.
° See "Cooking Made Simple" booklet for more information on bakeware and
baking.
Food is not broiming properly or ° Check oven rack positions. Food may be too close to element.
smokes excessively. ° Broil dement was not preheated.
° Aluminum foil was incorrectly used. Never line the broiler insert with foil
° Oven door was closed during broiling. Leavethe door open to the first stop position
(about 4 inches}.
° Trim excess fat from meat before broiling.
° A soiled broiler pan was used.
° Voltage in house may be low.
Oven will not self-clean. , Check to make sure the cycle is not set for a delayed start. See page 15.
° Check if door is closed.
° Check if control is in Sabbath Mode. Seepage 12.
° Oven may be over 400° F.Oven temperature must be below 400° Fto program a
clean cycle.
Oven did not clean properly. ° Longer cleaning time may be needed.
° Excessive spillovers, especially sugar}, and/or acidic foods, were not removed prior
to the self-dean cycle.
Oven door will not unlock after ° Oven interior is still hot. Allow about one hour for the oven to cool after the
self-clean cycle, completion of a self-clean cycle. The door can be opened when the LOCK indicator
word is not displayed.
° The control and door may be locked. See pages 8 and 16.
21
cont.
Page 23
m
PROBLEM SOLUTION
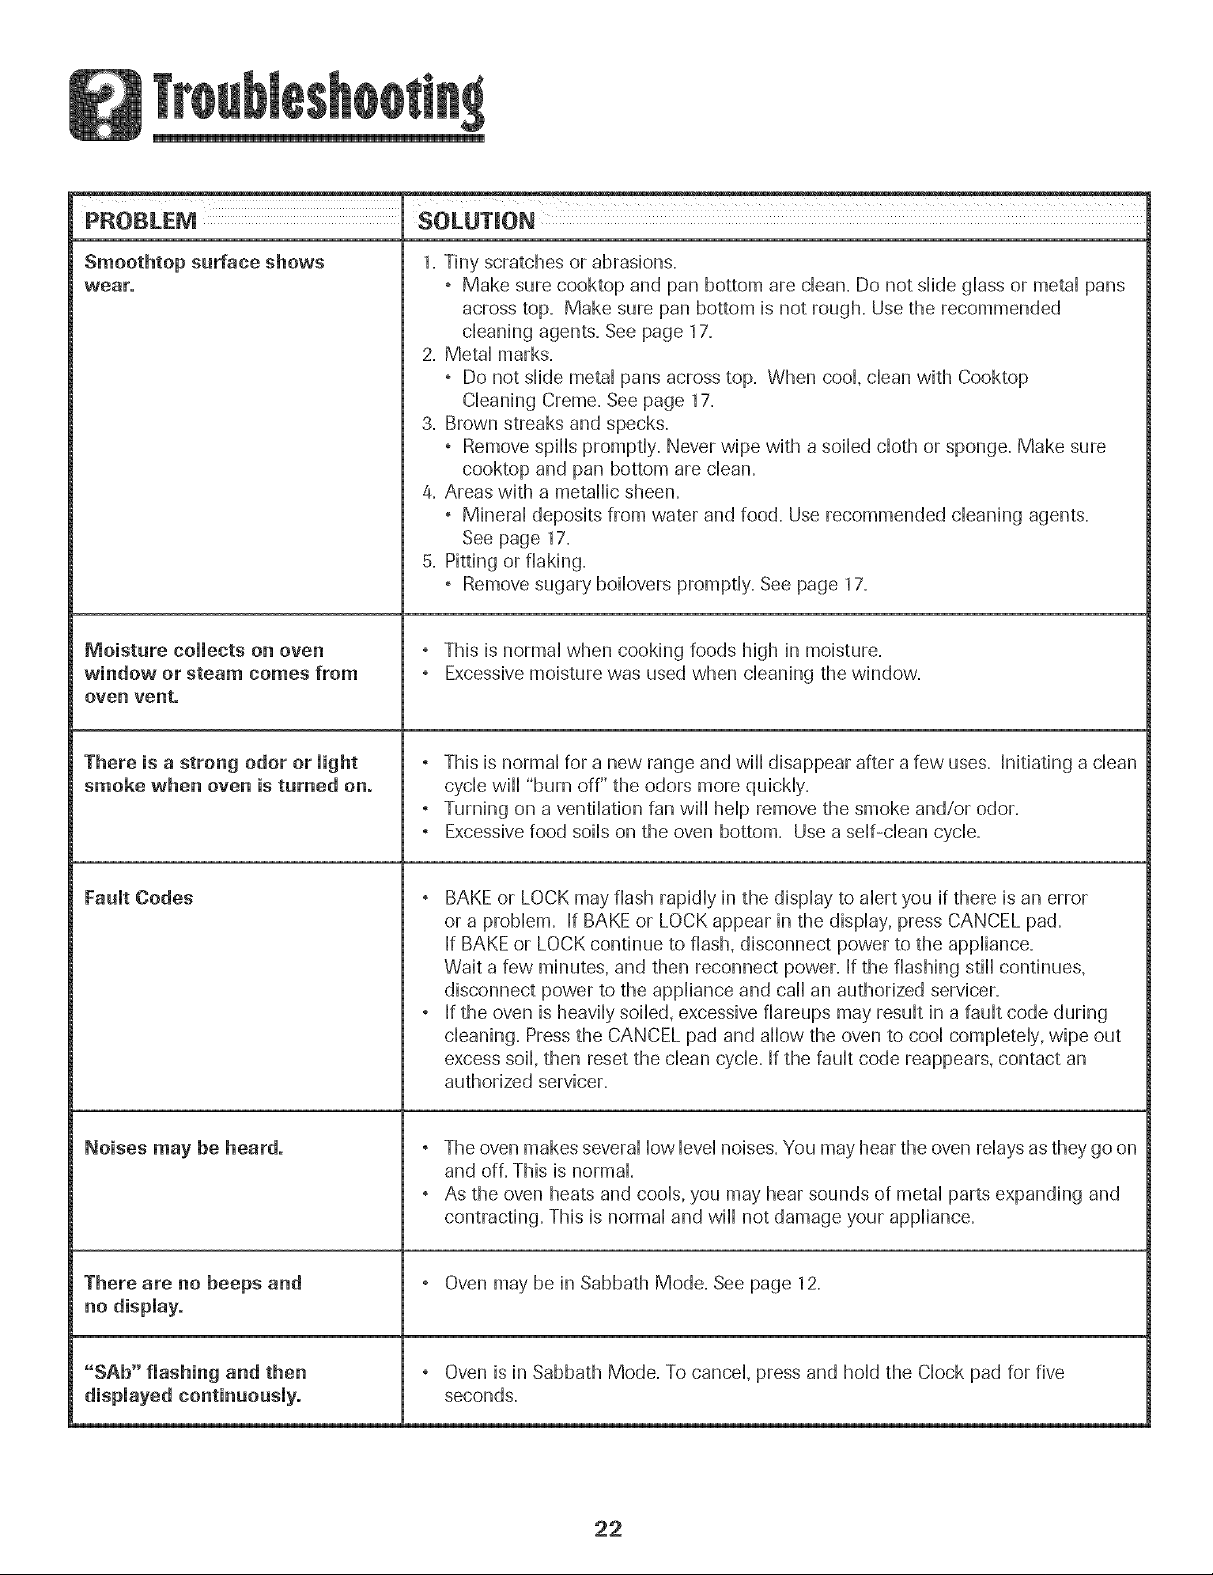
Smoethtop surface shows
wear.
Moisture collects on oven
window or steam comes from
oven vent.
There is a strong odor or light
smoke when oven isturned on.
1. Tiny scratches or abrasions.
° Make sure cooktop and pan bottom are dean. Do not slide glass or metal pans
across top. Make sure pan bottom is not rough. Use the recommended
cieaning agents=See page 17.
2. Metal marks=
° Do not siide meta[ pans across top. When cool dean with Cooktop
Cieaning Creme. See page 17.
3. Brown streaks and specks.
° Remove spiiis promptiy. Never wipe with a soiied c[oth or sponge. Make sure
cooktop and pan bottom are clean.
4. Areas with a metallic sheen.
, Mineral deposits from water and food. Use recommended cleaning agents.
See page 17.
5. Pitting or flaking.
, Remove sugary boilovers promptly. See page 17.
, This is normal when cooking foods high in moisture.
, Excessivemoisture was used when cleaning the window.
, This is normal for a new range and wiii disappear after a few uses. Initiating a clean
cycle wiii "burn off" the odors more quickly.
, Turning on a ventilation fan wiii help remove the smoke and/or odor.
, Excessivefood soils on the oven bottom. Usea self-clean cycle.
Fault Codes
Noises may be heard.
There are no beeps and
"SAb" flashing and then
, BAKE or LOCK may flash rapidly in the display to alert you if there is an error
or a problem. If BAKE or LOCK appear in the display, press CANCEL pad.
If BAKE or LOCK continue to flash, disconnect power to the appliance.
Wait a few minutes, and then reconnect power. If the flashing still continues,
disconnect power to the appliance and call an authorized servicer.
, If the oven is heavily soiled, excessive flareups may result in a fault code during
cleaning. Press the CANCEL pad and aiiow the oven to cool completely, wipe out
excess soil, then reset the clean cycle. If the fault code reappears, contact an
authorized servicer.
° The oven makes several low level noises. You may hear the oven relays asthey go on
and off. This is normal
, As the oven heats and cools, you may hear sounds of metal parts expanding and
contracting. This is normal and wiii not damage your appliance.
, Oven may be in Sabbath Mode. See page 12.
° Oven is in Sabbath Mode. To cancel, press and hold the Ciock pad for five
seconds.
22
Page 24

Fuji One Year Warranty -
Parts and Labor
What is Not Covered By These
Forone (1} year from the orig_nai retail
purchase date. any part which fails in
normal home use will be repaired or
replaced free of charge
Limited Warranties - Par_s Only
Second Through Fifth Year = From the
original purchase date. parts listed below
which fail in normal home use wiii be
repaired or replaced free of charge for
the part itself, with the owner paying aii
other costs, including labor, mileage,
transportation, tr p charge and diagnostic
, Glass-Ceramic Ceektep: Due to
thermal breakage, discoloration.
cracking of rubber edge seal, pattern
wear.
Electric Heating Dements: Radiant
surface elements on electric cooking
appliances
Canadian Residents
The above warranties oni} cover an
appliance installed in Canada that has
been certified or listed by appropriate
test agencies for compliance to a
National Standard of Canada unless the
appliance was brought into Canada due
to transfer of residence from the United
States to Canada.
Limited Warranty Outside the
United States and Canada =
Parts Only
For one (1) year from the date of original
retail purchase, any part which fails in
normal home use will be repaired or
replaced free of charge for the part itself.
with the owner paying all other costs.
including labor, mileage, transportation.
trip charge and diagnostic charge, if
required
The specLr/c warranties expressed above
am the ONL Y walrTantles provided by rise
manufacture_, These wafTantles give you
spedfic legal ffghts, and you may also
have other r_hts which vary trom state to
state.
1. Conditions and damages resulting from any of the following:
a. Improper installation, delivery, or maintenance.
b. Any repair, modification, alteration, or adjustment not authorized by
the manufacturer or an authorized servicer.
c. Misuse, abuse, accidents, or unreasonable use.
d. Incorrect electric current, voltage, or supply.
e. Improper setting of any control
2. Warranties are void if the original serial numbers have been removed, altered,
or cannot be readily determined.
3. Light bulbs.
4. Products purchased for commercial or industrial use.
5. The cost of service or service caii to:
a. Correct installation errors.
b. Instruct the user on the proper use of the product.
c. Transport the appliance to the servicer.
8. Damage to the glass cooktop caused by the use of cleaners other than the
recommended cleaning creams and pads.
7. Damage to the glass cooktop caused by hardened spills of sugary materials or
melted plastic that are not cleaned according to the directions in the use and
care guide.
8. Consequential or incidental damages sustained by any person as a result of
any breach of these warranties. Some states do not allow the exclusion or
limitation of consequential or incidental damages, so the above exclusion may
not apply.
If You Need Service
Call the dealer from whom your appliance was purchased or call Maytag
Services sM,Amana Customer Assistance at 1-888-843-0384 U.S.A. or
1-888-587-2082 Canada to locate an authorized servicer.
Be sure to retain proof of purchase to verify warranty status. Refer to
WARRANTY for further information on owner's responsibilities for warranty
service.
If the dealer or service company cannot resolve the problem, write to May'tag
Services sM,Attn: CAIRe Center, P.O. Box 2378, Cleveland, TN 37320-2370, or
call 1-800-843-0304 UoSoA. or 1-866-587-2002 Canada.
U.S.customers using TTY for deaf, hearing impaired or speech impaired, caii
1-800-888-2088.
User's guides, service manuals and parts information are available from
Maytag Services' , Amana Customer Assistance.
When writing or calling about a service problem, please include:
a. Your name, address and telephone number;
b. Model number and serial number;
c. Name and address of your dealer or servicer;
d. A clear description of the problem you are having;
e. Proof of purchase (sales receipt}.
SM
23
Page 25

Cuisini re mectrique - dessus misse
instructions de s6curit6
importantes ............................................................. 25-28
Cuisson sur masurface .......................................... 29-31
Commandes de Hasurface de cuisson
Surface _ dessus Nsse
Cuissen darts le four ............................................. 32-39
Cuisson eourante
Cuisson et maintien
Cuisson diff6ree
Maintien au chaud
Cuisson au gril
Grilles du four
Nettoyage ................................................................40-43
Fourautonettoyant
M6thodes de nettoyage
Entretien ................................................................... 44-45
Hublot du four
Lampe du four
Recherche des pannes ..........................................40-4?
Garantie et service apres-vente ................................ 49
6ul de Use y Cuidade ................................................50
Page 26

Jnstaffateur : Remettezce guide au proprJ6taire.
Consommateur :Veuilbz lire le guide etle conserverpour
corrsultationulterieure.ConservezFafac[ured'achatou le cheque
encaJssecommepreuvede !'achat.
Numerode modele
Num6rode s6rie
Date d'achat
Sivous avezdesquestions,veo[ieznousappeler:
Service _ la dient#le de Amana
1-800-843-0304 E=-U,
1-866-587-2002 Canada
Internet: http://wvvw.amana.com
Donsb cadrede nospratLquesd'amefiorationconstantede la
q_Jalit6et de la performancedenosproduitsde cuisson=des
mouificationsde I'appareHqu_nesont pasment_onneesdonsce
guide ont pu 6treintroduites.
Reportez_veus # la page 49 pour plus d'#dormatious
couceraaut le service apr_s-veute.
que pourrait susciter une utilisation incorrecte de Fappare&
Utiliser I'appareil uniquement pour bs fonctions prevues,
decrites darts ce guide.
Pour une utilisation ad6quate et en s6curit6, il faut que
Fappareil soit convenabbment installe par un technicien
qudifie, et relic a la terre. Ne pas regbr, r@arer ni remplacer
un composant, a moins que cola ne soit specifiquement
recommande darts ce guide. Toute autre reparation doit etre
effectuee par un technicien qualifie.
Toujours debrancher I'appareil avant d'y faire de Fentretien.
Los instructions de securite importantes et bs paragraphes
<<avertissement >>de ce guide ne sont pas destines a couvrir
toutes bs conditions et situations qui pourraient se presenter.
II faut faire preuve de boa seas,de prudence et de soin Iors de
Finstallation, de Fentretien ou du fonctionnement de [@pare&
Toujours prendre contact avec le fabricant darts le cas de
probbmes ou de conditions qui ne seraient pas comprises.
Reconna tre Ues6tiquettes, paragraphes et
symboUessur Uas6curit6
risque de bascalement de i'appareil _ I'occasioa
d'u_e _ti!isatie_ anor_aie o_ _'_a eharge_e_t
exeessif _e Ia porte _ four, iifa_t q_e _abri_e
antibase_le_e_t seit ce_veaable_eat install6e.
Utiliser une lampe torche pour determiner si la bride
antibascubment est convenabbment installee sous la
cuisiniere: L'un des pieds arriere de reglage de [aplomb doit
etre convenabbment engage darts la fente de la bride.
Lorsque la cuisiniere est convenabbment cdee, la bride
antibascubment immoNise b pied arriere contre b sol.
Verifier la parfaite immoHisation de la cuisiniere par la bride
apres chaque d@lacement de la cuisiniere.
Po r 6viter i#ce#die des
dom ages par la
S'assurer que tous bs materiaux de conditionnement sont
retires de I'appareil avant de b mettre en marche.
Garder bs materiaux combustibles bien eloignes de Fappare&
Ne pas ranger de materiaux inflammables darts un four.
POURRAIENTresulter en des bbssures mineures.
Life toutes los instructions avant d'utiliser cot appareii;
observer toutes bs instructions pour eliminer bs risques
d'incendie, choc ebctrique, dommages materiels et corporeb
De nombreux types de plastique sont affectes par la chabur.
Garder bs plastiques eloignes des pieces de [appareil pouvant
devenir chaudes.
Pour empecher qu'un feu de graisse nese declare, eviter toute
accumulation de graisse ou autres matieres inflammables
darts Fappareil ou au voisinage.
25
Page 27

En cas d'incendie
Utiliser du bicarbonate de soude ou un extincteur a poudre
chimique ou a mousse pour dtouffer [es fiammes, Ne jamais
utiliser d'eau pour dteindre de [a graisse enfiammde,
1, [nterrompre ['alimentation dlectrique de ['apparei[ pour
minimiser [a propagation des fiammes,
2, NE JAMAmS saisir ou deplacer un ustensile de cuisine
enfiamme,
3, Fermer [a porte du four pour 6touffer [es fiammes du four,
S curit pour [es enfants
dans une armoire au-dessus, des articles auxqueis [es temperature suffisamment eievee pour brQier :le ouverture
subir de graves biessures,
NEJAMAIS iaisser des enfants seuis ou sans supervision
iorsque i'appareii est en service ou encore chaud, Ne jamais
laisser un enfant s'asseoir ou se tenir sur une pattie
queiconque de i'appareii, li pourrait se biesser ou se brQier,
[Iest important d'enseigner aux enfants que I'appareil et les
ustensiies places dedans peuvent atre chauds, Laisser refroidir
les ustensiies en un lieu sQr, hors d'atteinte des enfants, [I est
important d'enseigner aux enfants qu'un appareii manager
n'est pas unjouet, et qu'iis ne doivent toucher aucune
commande ou autre composant de I'appareil,
Ne pas utiiiser cet appareil pour chauffer ou pour garder
chaude une piece, sinon des dommages a i'appareii pourraient
s'ensuivre et ceia pourrait atre dangereux pour I'utiiisateur,
Aussi, ne pas utiiiser ie four pour ranger des ailments ou des
ustensiies de cuisine,
Ne pas bioquer ou obstruer I'event du four,
NE JAMAIS TOUCHERLES ELEMENTSCHAUFFANTS NI LES
PAROIS INTERIEURESDU FOUR, Leselements chauffants
peuvent atre brLiiants mame s'iis ne sont plus rouges, Les
surfaces interieures du four peuvent atteindre une
temperature suffisamment eievee pour infiiger des brOiures,
Pendant et apres usage, ne pas toucher les elements
chauffants ni ies parois interieures du four et eviter ieur
contact avec des vatements ou autres materiaux inflammables
avant qu'iis n'aient eu le temps de refroidir suffisamment,
D'autres surfaces peuvent egaiement atteindre une
d'event, le surface avoisinante, ainsi que le porte et le hubiot
de four,
Ne pas toucher I'ampouie du four brQiante avec un chiffon
humide car eiie pourrait se briser, Si tel est ie cas,debrancher
i'appareii avant de retirer i'ampouie pour eviter une decharge
eiectrique,
NE JAMAiS gamir ia sole du four ou une grille du four avec
de ia feuiiie d'aiuminium, Ceci pourrait susciter un risque de
decharge eiectrique ou d'incendie, ou une deterioration de
i'appareii, Utiiiser de ia feuiiie d'aiuminium uniquement seion
ies instructions de ce guide,
Cuisson et s curit
Famiiiarisation avec ['apparei[
NE JAMAmS utiiiser un appareil comme escabeau pour
atteindre [es armoires se trouvant au-dessus, Le mauvais
emploi de porte d'appareii comme par exempie en tant
qu'escabeau [e fait de s'appuyer ou de s'asseoir sur [a porte,
peuvent entrainer le renversement de ['appareiL casser [a
porte et gravement biesser,
NE JAMAiS faire chauffer un recipient non ouvert dans le
four, L'accumuiation de pression darts ie recipient pourrait
provoquer son eciatement et de graves dommages materiels
ou corporeis,
Utiiiser des maniques robustes et seches, Des maniques
humides peuvent provoquer ia formation de vapeur brOiante,
Ne jamais utiiiser un torchon a vaisseiie ou autre article textile
la place de maniques; un tel article pourrait trainer sur un
element et s'enfiammer, ou accrocher un ustensiie ou un
composant de i'appareii,
Porter un vatement approprie, Eviter de porter des vatements
ampies ou a Iongues manches pendant I'utiiisation de
I'appareil, [ispeuvent prendre feu si le vatement entre en
contact avec un element de cuisson brQiant,
26
Page 28

Placer toujours [es grilles a [a position appropriee darts [efour
[orsque [e four est froid. Fairecouiisser [agrille vers ['exterieur
avant d'ajouter ou eniever un plat; utiiiser pour ceia une
manique robuste et seche. Eviter d'introduire [a main darts [e
four pour y placer ou retirer un plat. S'i[ est n@essaire de
d@iacer une grille [orsqu'eiie est chaude, utiiiser une manique
seche. Ne pas toucher un element chaud avec une manique.
N'utiiiser [esgrilles que darts [e four darts [eque[ eiies ont 6te
achetees/expediees.
Ouvrir toujours [a porte du four tres prudemment. Laisser ['air
chaud ou [a vapeur s'@happer avant de retirer ou d'introduire
un plat.
AVERTiSSEMENT - METS PR_:PAR_:S: Respecter [es
instructions du fabricant. Si [e contenant ou [e couverde en
piastique d'un mets surgeie se ddorme ou est endommage
durant la cuisson, jeter immediatement le recipient et son
contenu. Lesaliments pourraient etre contamines.
Ne pas permettre le contact de papier d'aluminium ou de la
sonde a viande avec les elements chauffants.
Toujours eteindre toutes les commandes une fob la cuisson
terminee.
Si un ustensib est plus petit que I'element utilis& une partie
de I'element chauffant est exposee et peut provoquer
I'infiammation d'un vetement ou des maniques.
Seuls certains materiaux en verre, vitroceramique, ceramique,
gres, ou certains ustensiles vitrifies/emailles peuvent etre
utilises sur la table de cuisson ou dans le four sans risque de
bris sous I'effet du choc thermique. Observer les instructions
du fabricant Iors de I'utilisation d'un ustensile en verre.
Orienter la poignee de chaque ustensile vers le centre de la
table de cuisson et non vers I'exterieur ou vers un autre
element; ceci reduira ie risque de brOiure, inflammation de
matiere inflammable ou renversement (un jeune enfant
pourrait saisir et renverser un ustensiie dont le manche est
oriente vers i'exterieur},
Table de cuisson
NE JAMAIS laisser un element de surface allume sans
surveillance, particuiierement avec chauffage elev¢ Le
@bordement du contenu de i'ustensiie pourrait provoquer ia
generation de fumee abondante et I'infiammation de la
graisse.
Ustensiles et securit
Appiiquer [es instructions du fabricant [ors de ['emp[oi d'un
sachet pour cuisson au four.
La securite de fonctionnement de cet appareil a 6te testee
I'aide d'ustensiles de cuisson conventionnels. Ne pas utiliser
un ustensile ou accessoire qui n'est pas sp@ifiquement
recommande darts ce manuel. Ne pas utiliser un gril place sur
la table de cuisson ou systeme de convection additionnel.
L'utilisation d'un dispositif ou accessoire qui n'est pas
expressement recomman@ darts ce manuel peut degrader la
s@urite de I'appareil ou sa performance, ou reduire la
Iongevit6 des composants.
Veilbr a utiliser un ustensib de tailb suffisante pour que b
contenu ne risque pas de d@order. Ceci est particulierement
important pour un ustensib rempli d'huib de friture. Verifier
que la taille de I'ustensile est suffisante pour qu'il puisse
recevoir les produits alimentaires a cuire, et absorber
I'augmentation de volume suscitee par %bullition de la
graisse.
Veiller a ne jamais laisser le contenu liquide d'un ustensile
s'evaporer completement; I'ustensile et I'appareil pourraient
subir des dommages.
Cet appareii comporte des elements chauffants de differentes
tallies. Utiiiser toujours un ustensiie a fond plat, de taiiie
suffisante pour qu'ii puisse recouvrir compietement i'eiement.
Pour optimiser i'efficacit& choisir un ustensiie de meme taiiie
que [element.
SURFACE EN VITROCERAMIO, UE : NEJA_[AIS utiiiser une
tame de cuisson cassee ou feiee :les solutions de nettoyage et
renversements pourraient penetrer clansla table de cuisson en
entrdnant un risque dedecharge electrique. Prendre
immediatement contact avec un technicien qualifi&
Exercer une prudence extreme Iors du d@lacement du
recipient de graisse ou Iors de I'elimination de graisse chaude,
Laisser la graisse refroidir avant de deplacer I'ustensile,
Hottes d'extractior|
Nettoyer frequemment les filtres et la hotte de la cuisiniere
pour emp@her la graisse ou d'autres produits inflammables
de s'accumuler sur les filtres ou la hotte en provoquant des
feux de graisse.
Pour fiamber des aliments sous la hotte, mettre le ventilateur
en raarche.
27
Page 29

Nettoyage et s curit
Nettoyer prudemment la table de cuisson. Arreter toutes les
commandes et attendre le refroidissement de tous les
composants avant de les toucher ou d'entreprendre le
nettoyage. Nettoyer FappareHavec precaution. TravaHler
prudemment pour 6viter des bn31urespar la vapeur en cas
d'utHisation d'un chiffon ou d'une 6ponge humide Iors de
1'61iminationd'un produit renvers6 sur une surface chaude.
Certains produits de nettoyage peuvent generer des vapeurs
nocives Iorsqu'on les applique sur une surface chaude.
Nettoyer uniquement les pieces mentionnees darts ce guide.
Four autonettoyant
!Schdrite dans !efour !oFsde! autonettoyage,
Ne pas nettoyer le joint de porte; le joint joue un role essentiel
quant a 1'etancheite. Ne pas frotter, endommager ou deplacer
lejoint.
Ne pas utHiserde produits de nettoyage pour four ou enduits
de four, darts le four autonettoyant ou sur les zones voisines.
Avant d'executer une operation d'autonettoyage, retirer la
lechefrite, les grilles du four et les autres ustensHes,et 61iminer
par essuyage tout exces de residus renverses pour 6viter la
formation de fumee ou I'inflammation de ces residus.
II est normal que la surface de cuisson devienne chaude
durant une operation d'autonettoyage; par consequent, 6viter
de toucher la surface de cuisson durant Fautonettoyage.
Avertissement et avis
important pour la securit6
La Ioi californienne _ Safe Drinking Water and Toxic Enforce-
ment Act _ de 1986 (proposition 65)stipule la publication par
le gouvemeur de la Californie d'une liste de substances que
1'etatde Cdifornie considere comme canc6rigenes ou
dangereuses pour le systeme reproducteur, et impose aux
entreprises commerciales I'obligation de signaler a leurs
clients les risques d'exposition a de telles substances.
Nous informons les utHisateurs de cet appareH que Iors d'une
operation d'autonettoyage, Hspeuvent etre exposes 8 une
faible concentration de certaines substances figurant darts la
liste mentionnee ci-dessus, dont le monoxyde de carbone.
Pour minimiser Fexposition, veHlerace que la piece ou_se
trouve le four soit convenablement aeree durant une operation
d'autonettoyage par I'ouverture d'une fenetre ou d'une porte.
AViS iMPORTANT - OISEAUX FAMILIERS : Lesoiseaux ont
un systeme respiratoire tres sensible, Ne pas garder un oiseau
famHierdans la cuisine ou dans une piece oubHpourrait etre
expose aux fumees. Lesfumees 6mises durant une operation
d'autonettoyage peuvent etre dangereuses ou mortelles pour
un oiseau, de meme que les fumees 6mises Iors du chauffage
excessif de graisse, huHe,margarine, et du chauffage excessif
darts un ustensHea revetement antiadhesif.
Conserver ces instructions pout consultation ult tieute
28
Page 30

Boutons de commande
Permettenti'utflisationdes616mentschauffantsdesurface,avecune
progress+oncontinue de la puissanceentreies r6glagesextr6mes
Low (Bas)et High [Eiev6)+Onpeut r6glerun bouton_ toute
positionentrecesdeuxextr6mes.
R6gJage des commandos
1. PlacerI'ustensiiesurF616ment.
2. Enfonceret faire tourner le boutonjusqu'_ laposition@sir@
0+otat+ondansun sensou densI'autre).
o Des marquessur IetabIeaude commandeidentifientI'element
comman@parchequebouton.Parexemple,le O O
graphiqueb droiteindique I'elementevent/gauche. O O
3. II ya un temoin Iumineuxpour Ieselementssur Ie tabieaude
commande.Lorsquefun des boutonsde commanded'un
elementdesurfaceestaliment& Ietemoin s'ilhmine. Letemoin
s'eteintdesqu'on interromptI'alimentationde I'eIement.
4. Apr_s unecuisson,ramenerle bouton_ laposition OFF(Arr60.
Ret[rerI'ustensfle.
Suggest+ons pour Je r6gJage
Ondolt choisirIa puissancedechauffageenfonction de divers
facteurs:taille,typede I'ustensileet operationdecuisson.Pour
I'informationconcemantIesustensiIesetautresfacteursaffectant la
puissancedechauffage_ utiliser,se reporterau paragraphe
Recommendationssur lesustensJles_ la page31 et_ la brochureLa
cuissonsimplifi@.
Low (Bas](2) : Pourfusion
de choco[atou beurre,ou [e
maintiende [atemperature
d'un met&
High (E:Iev6](10} : Pour
1'6builit[ond'un liquide.Ondolt
toujoursre@ire la puissancede
chauffagedes que Iatemperature
d'ebuliitionestatteinte ou que
Meal. Low [Moyen
I'alimentcommence_ cuire.
bas)(3-4) : Pour
continuerla cuisson
de metsen casse-
roles ferm@spar
Low
OFF j
_ High
couvercieou pour
cuire_ la vapeur.
[
34
5
Medium (Moyen)(5-7) :
Pourle maintiende
I'ebullitionlentod'une
grandequantite de[iquide
ou pour[apiupartdes
op6rationsdefriture.
7
Meal. High (Moyen61ev6)
[8+9} : PourrissolerIes
viandes,chaufferI'huile
(grandefriture ou aliments
sautes}et pour Iemaint[en
de I'ebullitionrapided'une
grandequantite deIiquide.
AVANTU_CU+SSON APRESLA CUISSON
. Placerml oursIustensdesur1'616mentavantdalimen[er'e+ement.Pour o S'assurerque+'616mentestarr6t&
6viterquetaCLslnlerenesub+ssedesdommages,ne]amaislaird
fonctionnerun 616mentdesurfacesansy pincerun ustenmm.
• NE_Ar_IAISumlserlalaDledecuissoncomr_lelieuderemlsage
d'a+lmentsoud'us{ensHes.
DURANT LAGUISSON
oVeiller_ bienconnmtre+acorrespondenceemremsDOU_Cnsde
.'ommandeetlos616merits.Veillera commanderI'alimentationde
t'61ementvoulu.
oCommencermculsson avecune puissancede chauffage superieure,pu_s tesaRm+esen p+astlque.L'airchaudqu+s'echappepar [event du fcur
redu re lapu+ssancede chauffage pour poursu+vrela cu+sson.Ne arums pourra+tprovoquer I'inflammation d'un amcm inflammable,tairefo+_dre/
utlt+serunepuissancede chauffage emveepour une culssonpro+ongee, amomrun article en ptast+que,ou provoquerune augmentation de
oNE JAMAIS Jaisserle con[enu d'un us_ensibs'6vaporercompletement: press+onprovoquant I'dclatementd'un r@ip+entfermi.
.'eclpoJrrait fmreSUDIFdesdommagesaI'ustensile et _ I'appare+L • NE JA_AIS ]aisserde +afeuiHe_'aum+nlum,onesonde mermom@ique
, NE _APaAJStoucher latable de cJlsson avan[qu'elie sesoit v+andeou un oujet metall+q_le au[requ'un ustens+lede cu_ssonsur latable
;on ?letement refroidie.Certalneszones delatable de cu+sson, de ;u_sson.entrer en con-ramavee un _]ementchauffan_
partlcutiSrementau vom_nagedes e+emen[sde surface peuvent devenir * NE ]AIVlAiS ranger au-dessusde latable de cu+ssond'art+desIourds q..
tr_s chaudesdurant une cuisson. Ut+Hserdes maniques, nsqueraient detomber et d'endommager latable de cuisson.
° EJiminer@squeposs+bte[oustesres+dusderenversememe[ projections.
AUTRESCONSEJLS
+S'iI} a unearmoirederangememc rectementau-dessusdelatablede
eu_sson,cn qedo+ty pincerquedesarticlespeu%quemmentuwiseset
qu_peuvent@e exposes_+achaleuLLacha+eurCruiseparlacu+s+nlere
pourraitsusciterunproo+emepourdesartmlescommei+qu+desvomms.
produ+tsdenettoyageetflaconsd'a6roso+
, NE.IAMAISlesseraucunamc+esurlatabledecu+sson,particuli6remem
29
Page 31

Surface dessus lisse
Remarques sur surface dessus
isse :
. Lorsdespremieres_Jtilisationsde IatabIede cuisson,celle-ei
peat 8mettre an pea de fumSe et des odears=Ceciest
normal=
. Lossurfaces _dessus lisseeonsewent la ehaieur pendant
an certain temps apr_s m'e×tinctionde m'_m_ment.Eteindre
lesetementsquetquesminutesavantq(le tanourriturenesoit
tout b fait cuiteet utiliser Iachaleur restantepourterminerla
cuisson.Lorsquelevoyantdesurfacechaudes'eteint,on peut
toucher Iasurfacedecuissonsansdanger.En raisonde Iafagon
dont losel6mentsd'unesurfaceb dessusIisseretiennentla
chaleur,ceux-cine r6pondrontpasauxchangementsder6glage
aussirapidementque desel6mentsenspiraie=
. Au cas o8 Ie contenud'un ustensilerisquede deborder,retirer
I'ustensiIedelasurface de cuisson=
* Ne jamais essayer de soulever la sudace de caisson.
. La surface_ dessuslissepoutsembIerdecolor6eIorsqu'elleeat
trSschaude=Ceciest normalet disparaitunefais quela surface
refroidit=
Zones de caisson
Leszonesdecuissonde lacuisinieresont repr6sent6espardes
cercIespermanentssur lasurface_ dessuslisse=Pouruneefficacit6
maximum,utiliserunezonedecuissondont le diametreconvient
I'ustensile=
Le r6cipie1_tne doit pas d6passer & zone de caisson de plus de
25 mm (1 po).
Lorsqu'unecommandeest raiseen marche,onpeatvoir un
rougeoiement_ traversIasurfaceb dessuslisse.['@l_ment
fonetionnera en intermittence pour maintenir mer_gmage
pr_tahli de chaleur, m_me au niveau High (Elev_}.
Pourobtenirplusinformationssur lesLJstensilesdecuisine,se
reporter_ lapage31 auparagrapheRecommandationssur los
ustensiIesdecuisineet 8 la brochureLacuissonsimplifiee,incluse
avecla cuisiniSre=
Co seils de protectio de la
s rface dess s lisse
Netto_g@ .(plusd'informations _ la page 82]
* Avant des'enservirla premierelois, nettoyerla tablede cuisson=
. Nettoyerlatable de cuissonchaque]our ou apreschaque
utilisation=Cosmesurespreserveranti'apparencede JatabJede
cuissonet_viterontqu'elie nes'abime=
. Encasde renversementlots decuisson,nettoyerimmediatement
Jeproduitrenversesurla surfacede cuissonpendantqu'elleest
encorechaudeafin d'6viterun piusgrand nettoyageparla suite.
Userde prudence,essuyerlesrenversementsavecun lingo prapre
et sac.
. NepasIaisserIespmduits renversessur Ia surfacede cuissonou
sur la garniture de latablede cuissonpendantune Iongueduroc.
. Nejamais utiliserde poudrede nettoyageabrasiveou de tampons
r6curerqui raieraientlasurface.
. Nejamais utiliserdejave!lisant,ammoniaqueou autrespraduits
de nettoyagenon sp6cifiquementrecommand6spour la
vitroc_ramique.
Po r viter marq es et ray res
. Nepasutiliserde casserolesenverre=Eilespourraientrayerla
surface.
. Nejamais utiliserde supportm_talliqueou anneaudewok entre
un recipientet Iasurface decuisson.Cosobjetspeuventmarquer
ou rayerIasurface.
. Nepasfaireglisserde recipientsm_talliquessur Iasurfacede
cuissonbr_lante.IIspourraientIaisserdesmarquesq_lidevront
etre nettoyeesimmediatement.[VoirNettoyage,page 42.)
. Veillerbce qua Iefond desrecipientset Iazone decuissonsoient
propresavantd'allumerI'8Iement,afind'eviterlosrayures.
. PourempScherqua lasurfacedecuissonen vitroceramiquenese
trouve ray_eou abhr_ee,nepasyhisser desucre,desolou de
graisse.PrendreI'habituded'essuyerlasurfacede cuissonavecun
lingepropre ouun essuie-toutavantde I'utiliser.
. Nejamais faire glisserde rScipientsmetalliques8paissur la
surfaceau risquede larayer.
Voyant de surface chaude
Levoyantdesurfacechaudeeatsitue surle tableau
de commande=IIs'allumeraIorsqu'unesurfacede He_,Sul'face
cuisson,quetIequ'ellesoit, serachaude=II restera
allure6,memoaprSsextinctionde lacommando,jusqu'b ceque la
zoneait refroidi.
Po r viter taches
. Nejamais utiliserde ]ingeou d'_pongesalepour nettoyerIa
surfacede cuisson=IIslaisseraientunfilm, cequi pourraitdecolorer
lasurfacedecuissonIorsqu'elIeest utilisee=
. UutiIisationcontinued'unesurface de cuissonsaliepoutentratner
I'apparitionde tachespermanentes=
3O
Page 32

Pour 6viter d'autres dommages
, NepasIaisserfondrede plastique,de sucre ni d'alimentsrichesen
sucresur Iatabie de cuisson+Sicetaseproduisaitacciden-
tellement,nettoyerimm6d+atement+(VoirNettoyage,page42+)
, Nejamais Iaisserlecontenud'une casserolebouillirjusqu'_ ce
qu'ellesoit videcar ceh pourrait abimer la surfacede cuissonet la
casserole+
, Nejamais utiliser[atamede cuissoncommesurfacedetravailou
commeplanche_ decouper.
, Nejamais cuire d'a[imentsdirectementsur latable de cuisson,
sans recipient.
, Nejamais utiliserun petit recipientsur un grand element.Non
seulementil y a g&chisd'energiemaisiI pout en resulterdes
projectionsqui vont brQlersur lasurfacedecuissonetdewont 6tre
nettoyees.
, Nepasutiliserdesrecipientsspec+auxnon platsqui seraienttrop
grandsou a fond inegaIcommeleswoks _ fond fond,Iesplaques
chauffantesourecipientsde grandetaille _fond ondule.
, Nepasutiliserde recipientsen aluminium.L'aiuminiumrisquede
fondresur le verre.Sile metalfondsur latable decuisson,ne pas
I'utiliser.Appelerun reparateuragreeAmana.
Recommandations sur los
L'utilisationdu bon ustensilepeut emp6cherde nombreux
problemescommeIa necessitedecuire plusIonguementla
nourritureetIadifficulte _obtenir desr6sultatsuniformes.Debons
ustensilesr6duisentlesdur6esde cuisson,utilisentmoinsd'6nergie
etcuisentde fa_on plus uniforme.
Tests pour v6rifier si los
ustensHes ont +Jr+fond plat
V6rifierque lesustensilessont plats+
Test de la r+gle :
1+Placerune r6gieen traversdu fond deI'ustensile+
2+ La tenirface _ la lumiSre+
3. Aucune lumiereou tr6s peu nedoit 6trevisiblesousla regle.
Test de la bulle :
Choisir , Eviter
Desustensiles_fond Desustensiles_ fond rainur6ou gondol6.
lisse,plat Desustensiles_ fondin6gal necuisentpas
efficacementet peuventparfoisne pas
fairebouillir Iesliquides.
Desustensilesen Desustensilesenverreou enm6talpeu
mat6riaux6pals Opals.
Desustensilesde la Desustens+lespiuspetitsou p+usgrands
memedimensionde (de 2,5cm [1po]] querelement.
I'el6ment
Despoigneesqui DesustensHesavecdespoigneescass6es
tiennentbien ou qui ne tiennent pas+Despoign6es
Iourdesqui fant serenverserrustensile+
Descouverclesqui Descouverclesqui fermentreal
fermentbien
Deswoks_ fondplat Deswoksavecun fondsur anneau+
Ustensiles de grande taille et
pour los conserves
Touteslos marmites pour los consewes et los grandes
casseroles doivent avoir an fon(Jplat et doivent _tre
fahriqaSes en mat_riau _pais, Cec[esttr_s important pourIes
surfaces_ dessuslisse+Labasene doit pasdepasserde 1'81ementde
plusde 2,5cm (1po)+
Si losmarmites_ conserveset lescasserolesnesont pas conformes
cesnormes,Iesdur_esde cuissonseront plusIongueset les
surfacesde cuissonpourrontetreendommagees+
Certainesmarmitespourlesconservessont conguesavecdesbases
pluspetitespour 6tre utilis_essur dessurfaces_dessuslisse+
Poar la pr_paratio_de co_serves, _e choisir que le r_glage
High (EIev_Djasqa'_ ce qae l'eaa comme_ce _ bo_illir ou que
la pressionsuffisantesoit atteintedansla marmite+RSduireau
reglagele plusfaibIe,maintenantI'_bulIitionou Iapression+Sila
chaleurn'estpasdiminuee,lasurface de cuissonpourrait 6tre
endommag_e.
Voir la brochureLacuissonsimpli%e pour obtenirplus
d'informations.
1. Mettre 2,5cm 0 po) d'eauclansI'ustens+Ie.PlacerI'ustensilesur
la surfacede cuissonet tournerla commandosur High ([_lev6).
2. Observerlaformation de hullosIorsqueI'eauchauffe.Desbulles
uniformessignifient de bonnesperformanceset des bulles
in6galesindiquent la presencedezonespluschaudesdormant
une cuissonin,gale.
VoirIabrochureLa cuissonsimplifi6e pour obtenirplus
d'informations.
31
Page 33

Tableau de commande
A B
C O
.................
\
\
\
\
\
\
\ Broil
\ Cook&
\ Hold
\
\
\
Letableaude commandeest con_upour faciliter laprogrammation.Lafen6tred'affichageindiqueFheure,lesfonctionsavecminuterieet
fonctionsdu four.LetaNeau decommanderepr6sent6comprenddes caract6ristiquessp6cifiquesaumodale.(Lestylepeutverierselonle
modele.)
A
Gill
iiii
Cuissoncourante
C
A (Plus)ou
_' (Moins)
Minuterie
E
Cuissonet
i_ill
rnaintien
Nettoyage
G
D6marrage
diff6r6
Horloge
I
Maintienau
chaud
J
Annulet
S'utilisepourla cuissonaugriletle rissolage
surpattiesup6fieure.
S'utilisepourlacuissoncouranteetle
r0tissage.
S'utilisepourentrerouchangerladur6e,la
temp6raturedufour.Etabtitlegril
temp6ratureELEVEEouBASSE.
Programmela minuterie.
Pourcuirependantunedur6epr66tablie.
avecmaintienauchaudpendantuneheure.
S'utilisepourprogrammerlecycle
d'autonettoyage.
Programmelefourpourd6buterunecuisson
plustar&
S'utilisepourprogrammerI'heuredujour.
S'utJlisepourmaintenirauchauddenslefour
lesatiraentscults.
Annuletouteslesop6rationssaufminuterie
ethorloge.
Utilisation des touches
o Appuyersur Iatouched6sir6e.
, Appuyersur latouche A (Plus}ou _' (Moins} pourentrerla dur6e
ou latemp6rature.
o Un bip retentitIorsqueI'onappuiesur une touche.
o Un double bip retentit en casd'erreurde programmation.
Bake
Timer
Keep
Clean Delay Cleck Warm
t t t........./
F G H 1 J
Remarque : Quatresecondesapr_savoirappuy6surIestouches
A ou 'V,Ia dur6eou Iatemp6raturesereautomatiquemententree.
Si plus de 30secondess'6coulententre la pressionet surune
touche defonctionsur lostouches _. ou V, la fonction sere
[ annuee et affic]eur reviendra_ affic]age pr6c6dent.
L'horiogepout 6treprogramm6epourafficher [adur6e dartsun
formatde 12ou 24 heures.L'horlogeest programmeeen usinepour
un format de 12heures.
Changement de l'horloge _ un format de 24 heures :
1. Appuyersur Iestouches Cancel
(Annule0 et Delay(Demarragedifferedet
maintenirla pressionpendanttrois
seconde&
2. Appuyersur IatoucheA ou T pour
proglammer unformatde 12ou
24 heures.
3. ProgrammerI'heureen suivantlesinstructions
donn6esci-dessous.
R6glage de l'horloge
1. Appuyersur la toucheClock(Horloge}. Clock
• L'heuredu jouret deuxpointsclignotent
a I'afficheur.
2. Appuyersur IatoucheA ou T pour
programmerI'heuredu jour.
• Deuxpoints continuent_ clignoter.
3. Appuyer _ nouveausurlatouche Clockou
attendrequatresecondes.
32
-- Delay
Page 34

LorsqueIe courant61ectriquearriveou apr_sune interruptionde
courant,h derniSreheureavantI'interruption decourantva
cJignoter.
Pourrappelerrheure duiour Iorsqu'uneautrefonctionde dur6e
s'affJche,appuyersur IatoucheClock.
L'heurede I'horlogenepout 6trechang6eIorsquele four a 6t6
programm6pour une cuissonou un nettoyagediff6r6ou pourla
fonctionde cuissonet maintien.
Annulation de l'afflchage de l'heure :
Si I'on nedesirepasI'affichagede I'heuredu jour :
Appuyersur Jestouches Cancel(Annule0 et
Clock(Horloge]et lesmaintenirainsipendant
trois secondes.L'heuredujour disparaitde
J'afficheur.
LorsqueI'affichagede I'heureest annuI6,
appuyersur Ia touche Clockpourafficher
brievementI'heuredu ]our.
__ Clook
R6affichage de l'heure :
Appuyersur Iestouches Cancelet Clocket lesmainteniramsi
pendanttrois secondes.L'heuredu ]our r6apparait_ J'afficheur.
La minuterie pout 6tre programm6e de une minute (00:01] jusqu'_
99 heures et 59 minutes (99:59],
La minuterie peut 6tre utilis6e independamment de toute autre
activit6 du four, Elle peut 6tre aussi programmee alors qu'une autre
fonction du four est en cours d'utilisation,
La minuteriene commandopasJefour.Ellene sertqu'8 _mettre
desbips.
Programmatien de la minuterie :
1. Appuyersurla toucheTimer(MinuterJe). Timer
o 0:00s'alhme _ I'afficheur.
o Lesdeuxpointsclignotent.
2. Appuyer sur la touche ,L ou _' ]usqu'_ceque
I'heure]usteparaisse_ I'afficheur.
o Lesdeuxpointscontinuent_ clignoter.
Appuyer_ nouveausur la toucheTh_erou attendrequatre
secondes.
knnulation de la minuterie :
1. AppuyersurJatoucheTimeret la maintenirainsipendanttrois
secondes.
OU
2. Appuyer sur JatoucheTimeret r6glerI'heure_ 00:00.
Verrouillage des commandos
Lostouches peuvent6tre verrouilI6espour desraisonsde securit6,
nettoyageou pouremp_chertoute utilisation nonsouhaitee.Ellesne
pourmnt 8tre utiliseessJoliossontverrouillSes.
Si lefour est encours d'utHisation,les commandesnepeuvent8tre
verrouill_es.
L'heureactuelledujour restera_ I'afficheurIorsqueles commandes
serontverrouill#es.
Verrouillage :
Appuyersur lestouchesCance!et Cook&
Hold (Cuissonetmaintien]et lesmaintenir
ainsipendanttrois secondes.
• Lemot LOCK[VERROUILLAGE] Cook&
clignote _ I'affJcheur. -- Hold
O_verro_illage :
Appuyersur lestouchesCancelet Cook& Holdet lesmaintenirainsJ
pendanttrois secondes.
• Lemot LOCKdisparattde I'afficheur.
Codes d'a omalie
LosrootsBAKE(CUISSONCOURANTE]ou LOCK[VERROUILLAGE]
peuventclignoter rapidement_ I'afficheurpour pr6veniren cas
d'ermurou deprobl_me=Sitel est lecas,appuyersur Iatouche
Cancel Si losrootsBAKEou LOCKcontJnuent_ clignoter,
d_brancherI'appareiLAttendre quelquesminutes,puis rebrancher
I'appareiLSirun des rootscontinue_ clignoter,dSbrancherrappareil
et prendrecontactavecun r#parateurautoris#=
o Los deux points continuent _ clignoter et le d6compte de la
dur6e commence.
o Laderni6reminutedu d6compteseraaffich6esousforme de
secondes.
4. #, la fin de la dur#eprogramm#e,un bip long retentL
33
Page 35

@
Cuisson courant@
Programmation de Jacuisson courante :
1. Appuyersurla touche Bake(Cuissoncourante}.
o Lemot BAKE(CUBSONCOURANTE}dignote.
o 000clignote _ I'afficheur.
2. %bctionner latempdraturedu four.Latemp@ature
peutetre proglamm@de75_290°C0 70_ 550°F].
AppuyerunefoissurlatoucheA ou'Vou appuyer
sur la touche sou tet la maintenir ainsk
o 175° {350°} s'allumeIorsqueJ'onappuie Je
premierefob sur I'unedestouches.
o Appuyer sur Ia touche ,L pour augmenterJatemperature.
o Appuyer sur Jatouche_' pour diminuer Iatemp@ature.
3. Appuyer _ nouveausurlatouche Bakeou attendrequatre
secondes.
o Lemot BAKEs'arretede dignoter et s'allume_ I'affbheur.
Bake
Remarques sur Uacuisson courante
atl four :
Pourchanger matemp@ature du four pendant macuissen,
appuyersur Bake,pub sur latouche A ou _"iusqu'aceque la
temperaturedesJreesoit affbh@=
Pourchanger la temp@ature du four lots du
pr_chauffage,appuyerdeu×fob sur Iatouche Bake,puissur
latouche ,Lou _r jusqu'_ ce quelatemp@aturedesireesoR
affJchee.
Si I'on oublied'arreterIefour,iI s'arreteraautomatiquement
apres12heures.Si I'ondesiredesactivercette fonction,voir
page37.
PourdesconseiBsupplementairessur Iacuissoncouranteet le
retissage,voirla blochure Lacuissonsimplifiee.
Claisson et maintie
Lafonction cuissonet maintienpermetdecure pendantm]e dur@
predetermJn@,suivb par uncycb de maintienauchaudd'une
heure.
Programmatio_ de Ja fo_ctio_ cuisso_ et maintie_ :
o 380(100°)ou la temperaturereelledu four sera affich@.La
temperatureaugmenterapar intervalIede3 °C (5°F}iusqu'a
ceque Iatemperaturepr@rogramm@soit atteinte.
4. LaisserJefour pr@haufferpendant 8 a 15minutes.
o LorsqueIatemperatureprogramm@pour lefour est atteinte,
un hip long retentlt.
o Pourrappelerla temperatureprogramm@pendantle
pr@hauffage,appuyersurJatouche Bake.
5. Placerlanourritureau centredu four, en laissantun minimumde
2 pouces(5 cm} entre I'ustensib etlespatoisdu four.
6. Verifier I'avancementde la cuisson_ ladur@ minimab de
cuisson.CuireplusIongtempsau besoin.
7. Lorsquelacuissonest termin@,appuyersur
Jatouche Cancel(Annule0.
8. RetirerIa nourrJturedufour.
Diff@ences de cuisson entre J'ancien
four et nouveau
iJest normalde remarquerquelquesdiff@encesclansIadur@ de
cuissonentre un four neufet un four ancien.VoirAjustementde Ja
temp@aturedu foura lapage37.
1. Appuyersur JatoucheCook& Hold(Cuissonet Cook&
maintien). HoW
• LesrootsBAKE{CUISSON}et HOLD
{MAINTIEN}clignotent.
• 000s'aJJumea I'afficheur.
2. Selectionnerlatemperaturedu four.Latemperature
pout 6treprogramm@de75 _290°C[170_ 550°F}.
Appuyerunefois sur latouche_ ou • ouappuyer
sur Jatouche A ou _ et Jamaintenirainsk
• Appuyersur la touche ,_ pour augmenterJa
temperature.
• Appuyersur la touche'_ pour diminuerJatemperature.
3. Appuyer _ nouveausurlatouche Cook& HoldOU attendre
quatresecondes.
• Lemot HOLDcJignote.
• 00:00clignote_ I'afficheur.
4. Entrerladur@ pendantlaquelJeI'ondesireque la cuissonait Iieu
en appuyantsur Ia touche ,_ ou _. La dur@ de cuissonpeut
6treprogramm@de 10 minutes(00:10}a 11heures,59minutes
0 _:59}.
• LesrootsBAKEet HOLDs'allument _I'afficheur.
, Ladur@ decuissons'alJume_ I'afficheur.
• La dur@ de cuisson commence le compte a rebours.
34
Page 36

Lorsque la dur6e de cuissou s'est 6coul6e :
o O.uatrebips retentissenL
o Lemot BAKEs'6teint.
4. Appuyersur A pour programmerlatemp6raturedecuisson.
• 00:00etle motHOLDc@notent.
• Lemot BAKErestealhm6.
o LesrootsHOLDet WARM (CHAUD}s'alhmenL
o 75° 070°}parait_ rafficheur.
AprSs uue heure de MAINTIEN AU CHAUD :
o Le mot End{Fin}s'affiche.
o L'heuredujour reapparait_ rafficheur.
Auuulatiou de la fouctiou cuissou et maiutieu _ tout
momeut :
Appuyersurla touche Cancel{Annuler}.Retirerla f._nn_R/
nourrituredu four.
Cuisson diff6r6e
Nepasutiliser la cuissondiff6r6epour desdenr6estr6s
p6rissablescommelosproduitslaitiers,le porc, lavolatileOulos
fruits de rner.
Avec Iafonction diff6rSe, Iefourse met_ cuireplus tard dans la
journ6e.Programmerladur6e d'attented6sir6eavantque Iefour
nese metteen marcheet ladur6ede cuissondesir6e.Lefour
commence_chauffera I'heures61ectionn6eet cuit pour la dur6e
sp6cifi6e.
Ladur6ed'attente peut6treprogramm6ede 10minutes(00:10}
11heures,59 minutes(11:59}.
Programmatiou d'uu cycle de cuissou couraute
differee :
1. Appuyersur latouche Delay(O6marragediff6r6}.
o Le mot DELAY(ATTENTE)clignote. Delay
o 00:00ciignote a I'afficheur.
2. Appuyersur latouche A ouT pour program-
merla dur6ed'attente.
AIors que le motDELAYclignotetoujours
3. Appuyersur latouche Cook& Hold (Cuisson
et maintien}.
o 000s'allume_ rafficheur.
o Les rootsBAKE(CUISSONCOURANTE} Hold
et HOLD(MAINTIEN}clignotenL
Cook&
5. Appuyersur A pour programmerladur6ede cuisson.
° La dur6ed'attente,losrootsDELAY,BAKEet HOLDs'allument
I'afficheur.
Lorsque la duree d'atteute s'est 6coulee :
• Lemot DELAYs'6teinL
° Ladur6ede cuissonestaffich6e.
° LesrootsBAKEet HOLDsont affiches.
Pour programmer uu temps d'atteute lorsque la
fouctiou cuissou et maiutieu a d6j_ 6t6
programmee :
1. Appuyersur la toucheDelay(D_marragediff6r6}.
• Lemot DELAY[ATTENTE}cJignote.
° 00:00paraita ['afficheur.
2. Appuyersur [atouche A ou T pour programmer
laduree d'attente.
° Apr_squatresecondes,le mot DELAYreste
allure6pour rappeJerqu'uncyclede cuisson
diff6r@ea6t6programme.
Lorsq_e la dur6e d'atte_te s'est 6coul6e et que
le four se met eu marche :
• Ladur6ede cuissonseraaffichee.
• Lemot DELAYs'6teJnL
o LesrootsBAKEet HOLDrestentallum6s.
_uuuJatiou :
Appuyersur latouche Cancel(Annule0.
• Touteslosfonct[onsde cuissonminut_eet non
minut6esemntannul6es.
• L'heuredu jourr6apparait_ ['afficheur.
_em_q_es :
Nepasut[Jiserlacuissondiff6r6epour des articlesqui
n6cessitentquelefour soit pr6chauff6,commelosgSteaux,
lospetits biscuitset ies pains.
Nepasut[liser le cycledecuissonet maintiendiff6r6ssile
four estd6j_ chaud.
35
Page 37

Maintien au chaud
Pourmaintenirau chauddans[efour desalimentscuitsetchauds
ou pour r6chaufferpains et assiettes.
Programmation du maintien au chaud :
1= Appuyersur tatouche KeepWarm(Maintien au Keep
chaud}=
o Le motWARM (CHAUD}c@note=
o 000paraft_ I'afficheur=
%tectionner Iatemp6rature de maintien au chaud.
CelIe-ci peut etre reglee de 63 _ 90 °C _145_
190°F[}.Appuyer une lois sur la touche A ou IF
ou appuyer sur latouche A ou _' et la maintenir
ainsi.
o 75°(170°) s'alIumeIomqueI'on appuiela
premierelois sur rune destouches.
. Appuyersur latouche A pouraugmenterla temperature.
. Appuyersur latouche T pourdiminuer latemperature.
Le motWARM (CHAUD)et latemperatureserontaffiches
pendantque lafonction maintienau chaudest active.
VVSPm
Remarques sur Uafonction maintien au
chaud :
o Pourobtenirdesqualitesalimentairesetnutritivesoptimales,
lesalimentscuits au four ne doiventpasetre gardesau chaud
plusde 1_ 2 heures.
o Pourempecherlesalimentsde dessecher,lesrecouvrirde
papierahminium, sanssetter,ou d'un couvercle.
o Pour r_chauffer des petits pains :
- recouvrirIespetits pains depapier aluminiumsansserreret
lesplaceraufour.
- appuyersur lestouchesKeepWarmet ,L pour
programmer75 °C(170°F}.
- rechaufferpendant12_ 15minutes.
o Pour r6chauffer des assiettes :
- placerdeuxpiles de quatreassiettesmaximumdansJefour.
- appuyersur lestouchesKeepWarmet ,L pour
programmer75 °C(170°F}.
- rechaufferpendantcinq minutes,arreter lefour et hisser les
assiettesaufour pendantencore 15minutes.
- n'utiliserque desassiettespouvantallerau four, _verifier
avecle fabricant.
Annumation du maintien au chaud :
1. Appuyersur latouche Cancel(Annule0.
2. Retirerla nourrituredu four.
- ne pas poserdesassiettestildes sur une surfacefroide,les
changementsrapidesdetemperaturepouvantcasser
rassietteou lafendiller.
36
Page 38

Arr t autornatique/Mode
Lefour s'arr6teautomatiquementapres12heuress'i! a et6
accidenteliementlaisseen marche.Cettecaract6ristiquedesecurit6
peut6trearr6tee.
Pour auuuler l'arr_t 12 heures et faire fouctiouuer me
four eu coutiuu pendant 72 heures :
1. Programmerlefour pour unecuissoncourante (voirpage34).
2. Appuyersur latouche Clock(Horloge:}et la
maintenirainsipendantcinq secondes. Clock
• SAbseraaffiche et ciignoterapendantcinq secondes.
• SAbseraensuiteaffich6en continuiusqu'bcequ'on I'arreteou
iusqu'_ceque iadur6e limitede 72heuressoit atteinte.
• Lemot BAKE(CUISSONCOURANTE)seraaussiaffiche si un
cycledecuissoncouranteest en coursalorsque le four esten
modesabbat.
Toutesles autresfonctions(Minuterie,Maintienau chaud,Nettoyage,
etc.}sont verrouill6es,saul BAKE,pendantle modesabbat.
Auuulatiou de la cuissou couraute alors que le four
est eu mode sabbat :
Appuyersurla touche Cancel(Annule0.
• Lemot BAKEs'6teint _ I'afficheur.
• Aucunhip sonoreneretentit.
Auuulatiou du mode sabbat :
1. Appuyersur latouche Clockpendantcinqsecondes Cmock
OU
2. Apres 72 heures, le mode sabbat se termine.
• SAb clignote pendant cinq secondes.
• L'heure du jour revient _ I'afficheur.
Ajustement de la temp6rature
du four
La pr6cisiondes temp6ramresdu foura 6tOsoigneusementv6rifiee
&I'usine.IIest normalde remarquerquelquesdiff6rencesclansla
cuissonentre un four neufet un four ancien.Au fur et _ mesureque
IescuisiniSressont moinsneuves,latemperaturedu four poutvarier.
IIest possibled'ajuster latemperaturedu four siI'onpenseque le
four necuit pasou nerissoiepascorrectement.Pourdeciderde
I'ajustement_apporter,r6gler lefour _ unetemp6raturede 15°C
(25 °F)pluselev6eou plus bassoque la temperatureindiqu6edarts
la recette,puis faire cuire la preparation.Lesr6sultatsdu<test >>de
cuissondoiventdonnerune id6edu hombrede degresduquel la
temperaturedoit 6tre ajustee.
Ajustemeut de la temperature du four :
1. Appuyersur Ia toucheBake(Cuissoncourante[}. Bake
2. Entrer285 °C(550°F[}en appuyantsurla toucheA.
3. Appuyersur IatoucheBakeetla maintenirainsi
pendantphsieurs secondesou jusqu'_ ceque 0°
paraisse_ I'afficheur.
Si Iatemp6raturedufour a 6t6pr6c6demmentajust6e,Ie
changementseraaffich& Parexemple,si Iatemp6raturedu four
a 6t6 r6duitede 8°C (15°F),rafficheur indiquera-8° (-15°).
4. Appuyersur la toucheA ou _" pourajusterIa temp6rature.
A chaque fois que I'onappuiesur unetouche,latemperature
changede3 °C(5 °F).Latemperaturedu four peut6tre
augment6eou diminu6e de3 _ 20 °C (5_ 35°F).
5. L'heuredu jour reapparattautomatiquement_I'afficheur.
IIn'estpasnecessairedereajusterlatemp6raturedu fouren cas
de panneou d%terruption de courant. LestempSraturesde
cuissonau gril et de nettoyagene peuvent8treajustSes.
Re arq es mode sabbat :
• Lemodesabbatpeut6tremis enmarche_ tout moment,que
le four soit en marcheou non.
• Le modesabbatne poutpas8tremisen marchesi los
commandessontverrouilleesou la porte verrouillee.
• Silefour esten mode cuissonIorsquele modesabbatest
programme,lemot BAKE(CUISSONCOURANTE}s'_teint_ la
fin du cycle decuisson.II n'y auraaucunsignalsonoreaudible.
o Lorsquele modesabbata demarre,aucunhip de prechauffage
ne retentiL
o Tous Iesmessageset leshipssontdSsactlvSsIorsquelemode
sabbatestactif.
o Si I'onappuiesur IatoucheCancel,uncyclede cuisson
couranteaufour seraannul& Cependant,le programmateur
resteraen mode sabbat.
o Apr6s unepannede courant,Iefour revienten modesabbat
avec72heuresrestantesetaucuncycleactif.
37
Page 39

Cuisson au gril
Programmation de la cuisson au grii :
1. Appuyersur Iatouche Broil(Gr[I]. BPoiJ
o Lemot BROE (GRE)clignote.
o Lemot SET[VALDER)est affiche.
2. Appuyer su+tatoucheA pour programmerun griI _ temperature
eleveeou surIatouche_" pour programmerun gril
temperaturebasse.
o LesrootsH[ (ELEVEE_ou LO [BASSE)serontaffiches.
o %Iectionner HI broil (Gril_ temperaturee+evee][290°C
[550°F])pour ungriI normal %lectionner LObroil [Gril
temperaturebasse] [230°C [450 °F])pour ungriI
temp@atureinf@ieured'aliments_cuissonplus Iongue
commelavolaille+
3. Apres quatre secondes,Iefourse meten marche.
o Lemot BROILresteallume.
4= Pourun rissolagemaximum,prechaufferI'elementdegril
pendanttrois ou quartre minutes avantd'ajouter lanourriture.
5. Placerla nourriture dansIefour. Laisserlaportedu four ouverte
d'environ10cm (4po) [premierebutee].
6. Retournerlaviande une fois_ Iamoitiede Ia dureede cuisson.
7. LorsqueI'alimentestcult, appuyersurla touche Cancel(An-
nule0. Retirerlanourritureet la lechefritedu four.
o L'heuredujour reapparait_ I'afficheur.
Remarques sur [a cuisson au grH :
o Pourde meilIeursresukatsIorsdu gril,seservird'un ustensile
pr@upour ce type de cuisson.
o Pr@oirdesdureesde cuissonau griIplus Iongueset un
rissolageIeg_rementmoinsdot6 si I'appareilfonctionnesurun
circuitde 208volts.
o LegriI au r6glageHI [Elevd)estutilisepour lamajoritedes
op@ationsde cuissonau griLUtiliserIegril aur6glageLO
(Bas)pour la cuissonde metsdevantcuireplus Iongtemps,
afinde leur permettred'6tre biencurs sansrissolageexcessif.
o Lesdureesdecuissonau gril peuvent6treplus Ionguesavec
unetemperaturedegril inferieure.
o Retournerla nourritureIorsquela moitiede la duree pr@ue
pour la cuissonau griIs'estecoulee.
o Pourdes temp6ratureset des conseilssupplementairessur Ia
cuissonaugril, sereporter_ labrochureLa cuissonsimplifiee.
Tableau de cuisson au gri[
i
POSITION
ALINENTS DES GNILLES+
Beau[
Bifteck, 2,5 cm (1 po) d'@aisseur
Hamburgers,2 cm (3/4po) d'@aisseur
Porc
Bacon
COtelettes,2,5cm (1 po)
Jambon- pre-cuittranche de1,3cm (1/2 po)
4
4
4
4
4
4
Voiaiiie
Pouleten morceaux
3ou4
Fruits de met
Darnesde poisson,beurrees,2,5cm (1po] d'@aisseur
Filetes
4
4
GrillesuperieureaIaposition n° 5
Remarque : CetabJeaun'estqu'un guide desuggestions.Lesdureespeuventvarierselon['aliment_ cuire.
38
DEGRE DE TEMPS DE CUISSON
CUISSON TOTAL (I'_INUTES)
Cuisson moyenne
Bien cult
Bien cur
Bien cult
Bien cult
Tiede
Biencult
Lachairsedetache
Lachairsedetache
15-18 minutes
19 - 23 minutes
15-18 minutes
6 - 10 minutes
22 - 26 minutes
8 - 12 minutes
LOBroil-
Gril _temp@aturebasse
28 - 38 minutes
10 - 15 minutes
8 - 12 minutes
Page 40

1
Event du four
Lorsquelefour fonctionne,lessurfacesvoisinesde 1'eventpeuvent
devenirassezchaudespourentratnerdesbrLilures.Neiamais
bioquerl'event.
L'_vent est sita_ soas meprotecteur d'_vent da dosseret, sat ma
euisini_reo EVENT
plastiquespresde
I'event,IachaIeur
pouvantlesddormer
ou les faire fondre.
Nepasmettrede
Reinstammation :
1. Placerla grille surlessupportsdartsle four.
2. SouleverI_gerementI'avant.Faireglisserlagrille versI'arriere
au-dei_de laposition decaiage.
3. AbaisserIa griIle et lafaire glisserclanslefour.
Ne pas reeouvrir matotumit6 d'une grille avec de mafeuiiie
d'umuminium,nigamirmefonddufouruvecde mafeuimmed'amuminium,
Ceeimodifierait ruesr_sumtatsdecaisson aufear, etmefond du four
pourraitsubir des dommages.
Positions des grilles
Grille 5 [positionIa plus r
haute[ Pourcuisson [
Eclairage du four
Appuyersurle commutateurd'eclairagedu four situ6
sur letableaude commandepour allumerou 6teindre
la lampe.
Oven
Light
Somedu four
Prot_gerlasoledesproduitsrenverses,en particulieracidesou
sucres,ceux-cipouvantdecolorerremailvitrifie. Utiliser des
ustensiIesde Iabonnedimensionpour 6viterque lesproduits nese
renversentoupassentpar-dessusI'ustensileen bouiIlant.Ne pas
placerd'ustensiles ou defeuiiie d'uiuminium direetement sur
masomedu four.
Gri es du four
Nepasrangerde nourritureou d ustensi!edans!e[0ur,
Lefour comportedeuxgrilles avec,pour chacune,un dispositifde
calage.
E×traction :
1. Tirerla grilleen Iignedroite
jusqu'_cequ'elles'arrete_ la
positionde calage.
2. SouleverIagrille _ ravant pour
pouvoirI'extraire.
ou alimentsminces
contenantpeude graisse.
Grille b,: Pourla plupart
br_veau gril - pain grille _
descuissonsau gril.
Grille 3 : Pourla plupart _
descuissonsde
p_tisseriessul une teIe_ biscuits- g_teaux_ 6tages,tartes aux
fruits, lets surgeles.
Grille 2 : PourrOtissagedepiecesdeviande,lets en sauce,cuisson
de pain,g_teau16geten couronne[baba)ou entremets.
Grille 1 : PourIerOtissagedegrossespiecesdeviandeou volaille,
tartessurgelees,soufflesou g_teauxdesanges.
CU_SSONSURPLUSIEURSGRILLES:
Deux grilles: Placer les grilles aux positions 2 et 4 ou 1 et 4.
__4
--3
=2
--1
Demi-grH_e
Unedemi-grille est disponibleen
accessoire.ElleaugmenteIacapacit6du
four ets'accroche_ gauche,a Ia pattie
superieure.EtIeestutile pour lacuisson
d'un platde legumesIorsqu'ungros r0ti
setrouvesur IagrilIeinfarieure.Prendre
contactavecIerevendeurpourde-
manderI'accessoireHALFRACK{demi-
griile] ou pour commander,composerle
1-800-688-2002.
39
Page 41

Four autonettoyant
o IIest normal duecertalnespiecesde [acu_smLeredeviennent
Ires chaudes!orsd'un cyclede nettoyage.
, Pour6viterdevousblesseret d'endommageriaportedu foul
n'essayezpasd'ouvrir la portequand<_LOCK>_
VERROUILLAGE)est affiche.
, Eviterdetoucher la porte,le hublotet la zonede ['eventdufour
Eorsd'un cycled'autone_-[oyage.
• Nepas utllLserde ne[[oyan[pourfour du commercesur lefini
du four ou surtou[ au[re composantdu four. Celaabimeraitle
fini ou les composantsdu foul
L'autonettoyageutilisedestemperaturessuperieures8 ceIiesde Ia
cuissonnormalepour nettoyerautomatiquementI'intdrieurdu four.
Neforcezpas Ia porte du four nile levierdeverrouiIlagepour Ies
ouvdr=Cecipeut provoqueruneexposition_ destemperatures
elevees,et donc presenterun risquede brOlure=
SiIefour esttr_ssale,il estnormaIqu'onobservelaformation de
fumeeou deflammesdurantie nettoyage=Nettoyerle four
intervaiIesregulierspIutOtque d'attendreune accumulation
importantede residus=
DurantIeprocessusd'autonettoyage,il convientde bienaererla
cuisinepoureliminer lesodeursnormalement6raisesdurant le
nettoyage=
Avant I'autonettoyage
1= EteindreIalampedu four avantle nettoyage=Eilerisqueraitsinon,
de griIIer=
2= EnleverlaIechefrite,tousIesplats et ies grillesdu four.LesgrilIes
r[squentdesedScoloreret de ne plusglisseraussibien aprSsun
cycled'autonettoyagesi on ne Iesenlevepas=
3= NettoyerIecadredu four,Ie cadre dela porte,Iazone_ I'extSrieur
du joint et autour de I'ouverturedanslejoint de ia porte,_ I'aide
d'un produit denettoyagenonabrasifcommeBonAmi_ou d'eau
additionneede detergent=Leprocessusd'autonettoyagene
nettoiepasceszones=EIIesdoiventetre nettoyeespour empecher
lasaletede s'incrusterpendantle cyclede nettoyage=[Lejoint
assure1'etanchSit6autourde laporteet du hublotdu four.)
4. Pourempechertout dommage,nepas
autourde Ia porte du four. Cejoint est
nettoyerni frotter lejoint qui setrouve __, - ®
con_upour eviterIespertesde chaleur __
pendantie cycled'autonettoyage.
5. Eliminerlesresidusde graisseou de produitsrenversdssur la
soleavantie nettoyage.CeciempSchela formation de fiammes
ou de fumeedurant le nettoyage.
EssuyerIesresidussucreset acides,commelespatatesdouces,
latomateou lessauces_ basede lait.La porcelainevitrifiee
possedeune certaineresistanceauxcomposdsacides,maisqui
n'estpas ![mitde.Ellepeut sedecolorersi Iesresidusacidesou
sucresne sont pas enlevesavantde commencerrautonettoyage.
Programmation de l'autenetteyage :
de 205°C(400°F]pour programmeruncycled'autonettoyage.
[ Remat'que : Latemperaturedu four doit 8tresitueeen dessous
1. Fermerlaportedu four.
2. Placerla manettedeverrouillage_ la positionde verrouillage.
3= Appuyersur Jatouche Clean(Nettoyage]=
• Lemot CLEAN(NETTOYAGE]clJgnote_ J'afficheur=
Si Ia porte n'estpasfermee,deships retentissentet lemot DOOR
[PORTE]parait_ I'affJcheur=Silaporte n'estpasferm@edansles
45secondes,I'opSrationd'autonettoyageestannulSeet
rafficheurrevJent_ rheure du ]our=
4= Appuyersur Iatouche A ou _'=
• CL-M (Nettoyage- salet8moyenne]estaffich@=
5= Appuyersur Iatouche A ou T pourvoir driller
lesdifferents reglagesdeI'autonettoyage=
CL-H [Nettoyage- saJet4epaisse,4heures)
CL-M (Nettoyage- salet6moyenne,3heures)
CL-L (Nettoyage- salet_18gere,2 heures]
Lechoixdu niveaudesaletedu four programme
automatiquementladureedu cycled'autonettoyage=
6= Apresquatresecondes,lefour commenceIenettoyage=
• Ladureede nettoyagecommenceIedecompte_ I'afficheur=
• Lemot LOCK(VERROUILLAGE]parait_ J'afficheur.
• Lemot CLEANparatta J'afficheur.
DS_arrage differ6 d'u_ cycle d'auto_ettoyage :
1= Appuyersur latouche Delay(DSmarragediffere)=
• Lemot DELAY(ATTENTE]clignote= Delay
• 00:00parak_ I'affJcheur=
Clean
s_ite o..
1
_Lesnomsde marquedes produitsde nettoyagesont des marquesdeposeesdesdifferentsfabr[cants.
40
Page 42

2. Appuyer sur la toucheA ou _' pour programmer
la dureed'attenteavantque necommenceIe
cycle.La dureed'attentepeut6tre programmee
de 10minutes (00:10}_ 11 heureset 59 minutes
01:59).
3. Appuyer sur la toucheClean[Nettoyage}.
o Lemot CLEAN(NETTOYAGE}vaclignoter. Clean
4. Appuyer sur la touche ,L ou _'.
o CL-M (Nettoyage- salet6moyenne}est affich#.
5. Appuyer sur la touche ,L ou _ pour voirddiler les differents
reglagesderautonettoyage.
CL-H(Nettoyage- salet66paisse,4 heures}
CL-M (Nettoyage- salet6moyenne,3heures}
CL-L(Nettoyage- salet6Ieg_re,2 heures}
Lechoixdu niveaudesalet6du four pragramme
automatiquementIaduree ducycled'autonettoyage.
6. Apr6s quatre secondes,IesrootsCLEAN,DELAYet LOCK
paraissent_I'afficheurpour indiquerque lefour est programme
pourune operationde nettoyagediffere.Letempsd'attente
parait_ I'afficheur.
Si le four a dej_ ete programme pour un cycle de
nettoyage et que l'on desire etablir un delai :
1. Appuyersurla touche Delay(Demarragediffere}.
o Lemot DELAYclignote. Be!ay
o 00:00paratta I'afficheur.
2. Appuyer sur la toucheA ou T pour programmerIa duree
desireede I'attenteavantque nedebutele cycle.
Apresquatresecondes,Iesmots CLEAN,DELAYet LOCK
paraissent_rafficheurpour indiquerque lefour est programme
pourune operationde nettoyagediffere.Letempsd'attente
parak_ rafficheur.
Lorsque le cycle d'autonettoyage debute :
o Lemot DELAYs'eteint+
+ Ladur#ede nettoyageparait _ I'afficheur.
Annulation du cycle d'autonettoyage :
Appuyersur latouche Cancel{Annu+e0+
o Touslesmotsdisparaissentde rafficheur+
o ToutesIesfanctionssont annu+ees+
Pendant le cycle d'autonettoyage
Lorsquele mot LOCKparaita rafficheur, la porte ne peut6tre
ouverte+Pour6viterd'endommagerla porte,ne pasla forcerpour
I'ouvrirIorsqueIe motLOCKestaffiche+
Fum6e et odeurs
La premierelois o_ lefaur est nettoy_,il peuty avoirproduction
d'odeuret de fum_e+Ceciest normal et dispara_tra_ I'usage+
Sile four esttres saIeou s+la I6chefritea 6t6laisseedansle four,il
peutyavoirproductionde fumee+
B_itS
Pendantque lefour chauffe,il peutse praduiredes bruitsde metal
en dilatationou en contraction+Ceciestnormalet n'indiquepasque
le four s'abtme+
le cycle
Environuneheureapr_sla fin ducycle,Ie motLOCKs'#teint.Ace
moment,Iaportepeut #treouverte.Pousserla manettede la porte
versla gauchepour d_verrauiller.
La samet_peat avoir laisa6 a_ resid_ griapoadrea×o L'enlever
avecun lingehumide+S'il restede lasalet_,celahsdiqueque le cycle
de nettoyagen'a pasSt#assezlong.Cettesalet6restantesera
enleveeauprochaincycled'autonettoya%
Si mesgrimmeso_t _t_ maiss_es_ m'i_t_rie_rda four peada_t me
cycled'a_to_ettoyage et qa'elles glisse_t real sur leurs sup-
ports,Iesenduire,ainsi que lessupports,d'unefine couched'huile
veg_tale.
De fi_es mig_espervert apparaitre da_s maporcemai_eparce
qa'elle asabi chale_r et refroidisseme_L Ceciest normal et
n'affecterapasla perfarmance.
U_e d_comoratio_blanche peat apparaitre apres me_ettoyage
si des amime_tsacides o_ s_cr_s _'e_t pas _t_ e_lev_a avast
qae _e comme_ce l'aato_ettoyage. Ladecolorationest normale
et n'affecterapasla perfarmancedu four.
_emarques:
o Si la porte du four n'estpas form#e,le motDOOR(PORTE}
clignotea I'afficheuret lefour #metdes hipsjusqu'_ ce que la
portesoitferm#eet que I'onappuie_ nouveausurClean.
o Laportedu four se trouveraendommag#esi I'on forceson
ouverturealorsque le mot LOCKestencoreaffich#.
o L'heuredu jour paraK_ I'afficheur+
41
Page 43

M6thodes de nettoyage
* Avanttoute manipulation ou operation de netteyage,v_rifier que m,appamilest arr_t_
+ Pour_viter[afo_rnationdetaches0u unchangementde Cou[eur+nettoyer['appareilapr_s
+AprSs tout d6rnontagedecornposants,veilJer_ effectuerun remontagecorrect.
* Leshemsde marquesent desmarques
d6pos6esdesdiff6rentsfabricants.
** Pourcommanderdirecternent,
composer[e 1-877-232-6771E+-U+ou
1-800-688-8408Canada.
PllECE nE_OYaGE
Desseret et table
de caisson o
8mailvitrifid
Zone de la
console de
eommande/
Beatens de +Place!chaquebouton_ lapositiond'ARRET,et retirerchaqueboutonen letirant.
eommande , Laver,rinceretfaires6cher.Nepasutiliserunagentde nettoyageabrasifsusceptiblederayerlafinition.
L'6rnailvitrifi_estduverreIJ_au rn_talparfusion+II peutsefissur_rous'6caillerencasde rnauvaiseutilJsation.IIestr6sistant
auxacides,rnaispastotalernentinattaquablepar lesacides+Touslesproduitsrenvers6s,en particulieracidesou sucres,doivent
6treessuy6sirnrn6diaternentavecun lingesec.
, Unefoisrefroidi,laveravecdeI'eausavonneuse,rincerets_cher+
+Nejarnaisessuyerunesurfaceti6deou chaudeavecun lingehurnide+CecipourraitlafissurerouI'_cailler+
+Nejarnaisutiliserdenettoyantspourfour,d'agentsdenettoyagecaustiquesou abrasifssurlefin1exterieurde lacuisini6re+
Nejamais ceuvrir lagrille de papier d'aluminium; celaemp_ehela graisse de ceuler dartsla I6ehefrite.
, Recouvrirla 18chefriteet sa grilled'un lingesavonneux;laisseragilpourd6tacherlesr6sidus=
+Laveravecde I'eausavonneuseti6de+Utiliseruntampon_ r_!curerpour61irninerlessouillurestenaces+
+OnpeutplacerlesdeuxcornposantsdelaI_chefritedartsun lave-vaisselle+
, PourutilJserlafonctionVerrouillagedes cone-aandespout le nettoyage,voirpage33.
•Essuyeravecunlingehurnide,puisfaires6cher+Nepasutiliserunagentdenettoyageabrasifsusceptiblederayerlafinition+
, Onpeututiliserunproduitdenettoyageduverre,pulv_ris_d'abordsurunchiffon+NEPASprejeter le preduit directement
sur tes touches de eemmande eu sur Faffieheur.
, Fairefonctionnerbri_vernentchaque_l_rnentpourv_rifierque leboutona_t_correcternentr_install_.
Tablede
caisson e_
Nejamais udliser de preduJtsde _etteyage dufour,javellisant, amme_iaque oupreduits de #etteyage du verre
co, tenant de I'ammo_iaque. REMARQUE: Pre_dre contact avee _mr_parateur agr_ sila surface e_ vitroe4ramique
sefe_dilte, seeasseell si deFatumi_iumou dum_tal roadsurla surface.
, Laisserlatablede cuissonrefroidiravantdelanettoyer+
, G_n_ralit_s oNettoyerlatabledecuissonapr_schaqueernploiouau besoin,avecdu papieressuie-touthurnidifi6et la
cr_rnedenettoyagepourtabledecuisson[pi6cen°20000001)+++Puis,essuyeravecun lingesecetpropre=
REMARQUE: Desmarguespermanentesventseproduired la s_a,,'et4retie surlasurfacedecuissonetest cuitedefac'onr4p4t4e.
, Saiet_ 6paisse ea marqaes m6taiiiqaes oHumidifierune6pongebiicui_r <<nerayantpas>>.Appliquerdelaclgmede
nettoyagepourtablede cuisson(pieceno20000001)++etfrotterpourretirerautantdesaletdquepossible.Appliquerune
mincecouchedecr_rnesur lasalet_,recouvriravecdu papieressuie-touthurnidifidethisserpendant30b 45minutes[2ou3
heurespourlasaletetr6sirnportante).GarderhurnideenrecouwantI'essuie-toutd'unepelliculeplastique.Rotter_ nouveau,
puisessuyeravecun lingepropreetsec.
REMARQUE: N'udiserqu'untampon_ r_.curer_nerayantpas_,PROPREETHUfd/DF,sansdangerpou,+/e.sustens,_lesdecuisine
rev4tementantladh_sifLevetfeet temotifserontendommag_ssite tamponn'estpashumide,s'ifestsouWt_oud unautretype
de tamponestut/i;'s4.
•Saiet_s eaites ea dess_eb_es- Frotteravecuntampon_ r_curer<_ne rayantpas>>et unecr_rnedenettoyage
pourtabledecuisson+
REMARQUE: Tenirunetamede.msoirbun angle,de30°etgrat_erpour enbverroutesabt4restante.Puis,nettoyercomme
//estd4eritci-dessus.Nepasseserv_delatamedemsoirtouslasjours,celapourrai_user/emotifduverre.
42
Page 44

PIECE NETTOYAGE
Hubmetet pone • Eviterd'utilisertrop d'eau,quirisqueraitdes'infiltmrsousouderriereleverreet detacher.
du four en verre • Laverb reauetau savon.Rinceravecdereaupropreet s_cher.Unproduitdenettoyageduverrepeut6tre utilis6enle
vaporisantd'abordsurunlinge.
• Nepasutiliserde produitsabrasifscommetamponsb r6curer,lained'acierouproduitde nettoyageen poudrequi
risqueraientderayerleverre.
int_rieur du feur • Ex6cuterlesinstructionspr6sent6esauxpages4[}-41pourI'autonettoyagedufour.
Grillesdu feur • Nettoyeravecde reausavonneuse.
• Eliminerlessouillurestenacesavecunepoudredenettoyageouuntampon_ r6curersavonneux.Rinceretfairesdcher.
•Si lesgrillessonthiss6esdartslefour pendantlecycled'autonettoyage,e!lesseddcolorentet peuventneplustr_sbien
glisser.Sicelaseproduit,enduireleborddesgrillesetle supportdesgrillesd'unefinecouched'huilev_g6tale,puisessuyer
I'exc_dent.
• NE PASUTILISERDEPRODUESDE HETTOYAGECONTENANTDU JAVELUSANZ
(certainsmod_lesD
•HE PASUTILISERDENETTOYANTS_ ORANGE_OUABRASIFSo
• TOUJOURSESSUYERDANSLESENSDELA TEXTUREDEL'ACIERLORSDUNETTOYAGE.
•Nettoyage jeumamier/salet616g_re- Essuyeravecrun des produitssuivants: eausavonneuse,vinaigreblanc/eau,p!oduit
denettoyagepourverreet surfaceFormula409_ou unproduitsemblablepourverre- avecun lingesoupleetu[le_ponge.
Rincerets6cher.Pourpoliret enleverlesmarquesdedoigts,fairesuivreparunevaporisationde MagicSpraypouracier
inoxydable(pi6cen°20OOOOO8)_-
•Salet_ mod_rde/6paisse - EssuyeravecI'undesproduitssuivants:BonAmi_,Srna_tCleanse€ouSoftScrub_- b I'aided'un
lingesoupleoud'une_pongehumide.Rinceret sdcher.Lestachesrebellespeuvent6treenlev_esavecuntamponmulti-
usagesScotch-Brite_ humidi% Frotteruniform_mentdanslesensdu mdtaLRincerets_cher.Pourredonnerdu lustreet
retirerlesrayures,fairesuivre parunevaporisationdeMagicSpraypouracierinoxydable_-
• D_celoration - AI'aided'unedpongehumidifi_eoud'unlingesouple,essuyer9 I'aidedu nettoyantCameopouracier
inoxydable_-Rincerimmddiatementets6cher.Pourenleverlesmarquesetredonnerdu lustre,fairesuiw_eparunevaporisation
deMagicSpraypouracierinoxydable_-
Tiruirde
• Unefoislespi6cesrefroidies,laverbI'eausavonneuseti6de,rincerets_cher.Nejamaisessuyelunesurfaceti6deouchaude
avecun lingehumide,cecipouvantendommagerh surfaceetentrainerunehe,lurepar lavapeur.
• Pourlestachesrebelles,utiliserdesagentsdenettoyageI_gSrementabrasifscomrnelap_teaubicarbonatedesoudeou Bon
peite_ paBneau×
iatSrau×=
6maimpeinte
AmR Nepasutiliserd'agentsde nettoyageabrasifs,caustiquesou 6nergiquescommelesnettoyantspourfourou les
tamponsenlained'acier.Cesproduitsraieraientouendommageraientdefa_onpermanentelasurface.
REMARQUE: UtHiseruntinge ou un terche# secpour essuyer/espreduits renvers6s,surtout s'i_ssent acides ou
sucres.La surfacepeurt_it se d6coiorer ou se temir si ia s'a_et6_'6tait pasimm6diatement e_ev6e. Ceciest
f.,articu/i_reme_timportant darts/e cas desurfaces bia#cheso
Lesnomsde marquesont desmarquesdepos_esdesdifferentsfabricants.
_ Pourcommanderdirectement,composerle 1-877-232-6771E.-U.ou 1-800-688-8408Canada.
_3
Page 45

Porte du four
Lampe du four
' Ne pas grimPersur!a porte du four ouverte,ou lui imposerun_
chargeexcessive,CecipourEa!tproy0querunbascu!ementde la
_Ne pastenterd'ouvrir Ou[ermerB porteou d'utfl!serlefour avant
que B porteait6t6c0nvenabJementreinstall@,
• Nejamaisplacer !esdoigtsentre?acharniereetb cadreavantdu
fouc Lesbrasdecharnieresontmontessurressort;Unecharni_re
pourm!t se referme[bruta!ement c0ntre !e cadre du fou[e t
provoquer deserbusesbbssures,
fermeture de la porte du four d'une cuisini6re neuve; ceci est
Remarque : On peut percevoir une certaine <_elasticite >>lots de la
normal; cet effet disparatt progressivement.
Depose de la porte:
1. Apr@ le refroidissementdu four, ouvnr Ia porte - position de
cuissonau grfl(porteentrouverted'environ10cm [4 pouces]).
2. SaisirIaporte dechaquecote.Nepasutiliser
la poign@de portepour lasoulever.
3. Souleveruniform@_entpour@gagerh porte
descharnieres.
. Debrancller ia culslniere (_u "eseau electrique avan[ de
remplacer I'ampoule.
o Utiliser une manque seche oour protegel les mares iors du
remplacement de I'ampoule,
o Ne pas toucher J'ampouleavam qu'eJJese soit refmldie.
• Ne pastoucher i'ampoule ehaude avec un linge humide: b
choc thermique pourrat la bnser.
Pour rempiaeer l'ampouie du four :
1.Apr6s le refroidissementdu four, CABOCHON
maintenirIecabochontout en
enlevantla piece metallique
qui la maintbnt en place.
R[iVIARQU[ : Lecabochon
tomberasi on neIemaintient
pasen place.
RESSORTDE RETEiVUE
(fLIm_ta///que}
2.EnbverIecabochonet
I'ampoule.
3.installerune ampoulede 40wattspour appareilm@_ager.
4.R@lstalIerIecabochonet le fiI metalliquede retenue.
5.RetablirI'alimentationdela cuisini6re.Reglerdenouveau
I'horloge.
Pieds de r gJage de J'apJomb
1. Saisirla portede chaquecote.
2. Atigner bs fentes avecbs bras de charnieresur la cuisini_re.
3. Fairedescendrela porte pourIapositionnercorrectementsur les
charniSres.Poussersur bs angbs superburs de Ia porte pour
I'enfoncercompl_tementsur lescharni_res.IIfautque laportesoit
parfaitementd'apiomb.
HubJot du four
Pour proteger mehubmotde maporte du four :
1. Ne pas utiliserde produits nettoyantsabrasifscommedes
tamponsa recureren Iained'acier oudesproduitsde nettoyage
en poudrequi nsqueraientde rayerleverre.
2. Ne pas heurter le hublotenverreavecun ustensib, un articlede
mobilbr, un jouet,etc.
3. Ne pasfermer laportedu four avantque bs grilles ne sobnt en
placeclanslefour.
Toutedegradationdu hublotde verre- rayure,choc,tension,etc.-
peutaffaiblir sa structureet augmenterle risque de brisaune date
ulterbure.
Verifier que la bride antibasculementagrippeconvenablement
fun despie@at@re de r@age de !'apbrnb,pour que!a
cuisini6renepuissebasculeraccidentellement.
Lacuisinieredoit etred'aplombune fob install@.Si
P_
elle neI'estgas,tourner Iespie@ de reglagede I[ I _1
cuisiniSre,iusqu'_ ceque celb-ci soit d'aplomb. _/,_, ,:
I'aplomben plastique,_ chacundesanglesde la _,,
£_ BRIDE
_\ A NTIBA SOUL _WiENT
PIED DE REGLAGE
DE L'APLOMB
44
Page 46

Tiroir de remisage
Ne pasrangerdanscetimir desarticlesde p!astiqueQU de
papier,des produits inflammablesou desproduitsalimentaimS_
Durant iefonctionnementdufour, unetemperatureexcess!ve
pour cesarticles peut s!6tablirclansletiro+r.
Letiroir de remisagepeut6tre enlev6pourw_uspermettrede
nettoyersousla cuisiniere+
D6pose :
1= Vider Ietiroir et Ietirerjusqu'_ la positionde lapremierebut6e+
2+ SouIeverI'avant+
3+ Tirerjusqu'&la positionde Ia secondebut6e+
4+ Saisirle tiroir par IescOt6set souIever/tirerpourI'extraire+
R6installation :
1+ Ins6rerIesextr6mitesdesglissieresdutiroir dartslesrailsde la
cuisiniere+
2+ SouIeverI'avantdu tiroir et pousserdoucementjusqu'_la
positionde Iapremierebut6e+
3+ SouIeverde nouveauletiroir et le pousserpour le fermeL
Prise de courant au×iliaire
(modeles canadiens seulemenO
La prisede courantauxiliaireest situ6een has/&
gauchedu dosseret+Vei+Ier_ ce que Iecordon
d'aIimentationde I'appareiIutiIisene reposepassur
un 616meritde latable decuissonou _proximit6;la
raiseen marchede I'616mentchauffantferait subir
desdommagesaucordond'alimentationet _ la
prisedecourant.
Unappareilsuscitantunedemandedecourant de
plusde 10A provoqueraI'ouverturedu disjoncteur D/SJONCTEUR
qu[protegela prisede courantauxiliaire+Pour
r6armerIe disjoncteur,appuyersur lecommutateur
situ6sur le bordinf6rieurdu dosseret+
45
Page 47

i
PROBLEME SOLUTION
B
Pear la piupartdesprebiemes + V6rifierque Iescommandesdu four sent correctementr6gI6es+
observ6s, essayer d'abord rues + V6rifiersi lefour est bien raccord6au circuit 61ectdque.
semutienspessibmes,_ dreite. , Inspecter/r6armerledisjoncteur.Inspecter/remplacerlesfusibles.
+ Contr01erla sourced'alimentation61ectrique.
Non+fenetionnement dem'appareim- +
total oa partieL
UherJogeoa rueslampesfenetien+ +
nent, ies roots paraissent
i'affichear, mais iefear ne +
Resaitats de caisson aa fear +
diffSrents des attentes ea de eeax +
predaits par mefear antSriear° +
D6terminersi les commandesdes61ementsdesurfaceet/ou du four sentconvenablement
regiees+Voir pages29 et39+
+
D6terminersi la portedu four s'estd6verreuill6eaprSsuneop6rationd'autonettoyage+Voir
page41+
+
D6terminersi le four estr6gie pourunecuJssondiff6reeou un nettoyagediff6r6+Voir pages
35et 40+
+
Verifiersi le verrouiiiagedescommandesest en marche+Voir page33+
+
Verifiersi la commandeest en modesabbaLVoir page37+
Lescommandessentpeut-6tre programm6espourune fonctionde cuissonet maintJenou
de d6marragediff6r6+
Lafonction deverrouiJlagedes commandesestpeut-6treactiv6e+Voirpage33+
D6terminers+1'6ventdu four estobstru6+Voirsonemplacementpage39+
S'assurerque Iacuis+niereestd'apJomb+
Lesr6giagesdetemperaturevarientsouvententreun four neufet le four qu'iJremplace+On
observesouventunederivedu reghgede temp6ratured'un four_ mesurequ'iI vieiIlit;iJpeut
devenirplus chaud ou moinschaud+Voirpage37 pourIesinstructionsd'ajustementde Ia
temp6raturedu four. REMARQUE: I!n'est pasutile de modifierle r6gIagede temperaturesi Ja
variation n'affectequ'une oudeuxrecettes+
+
Pourd'autresinformationsau sujetde lacuissonaufour, voirla brochureLacuissonsimplifiee+
Resaitats incerrects lots de ia ,
caisson aa grii, ea emission *
excessive de ramie. +
Impessibimit6d'aatonetteyage *
da fear. *
Le fear ne se netteie pas
correetement.
D6terminerla positiondesgrilles+Lesalimentspeuvent6tretrappr@sde J'616mentdu gril.
El6mentdu gril paspr6chauff6+
UtJlisationincorrectedefeuJlled'ahminium+NejamaisgarnirlagriJledeISchefriteavecdelafeuiJle
d'aluminium+
+
Portedu four fermeedurant la cuissonau griJ+LaisserJaportedu four entrouverted'environ
10cm [4 pouces] - premi@rebut6e+
+
EnJeverI'exc_sde graissesur la piecede viandeavant lacuissonau gdL
+
Utilisationd'uneI@chefrJtesouill6e+
+
Latension6Jectriquede lamaJsonestpeut-6tre basse+
D6terminerque I'appareJln'a pasete programmepour un autonettoyagediff6r6+Voir page40+
Verifierque Ia porte estfermee+
Verifiersi la commandeest en modesabbat+Voir page37+
Lefourestpeutetre _unetemperaturesup6rieure_205°C(400°F]+Latemp6raturedufourdoit
etreinf6rieure_ 205°C [400°F)pour pouvoirprogrammerun cycled'autonettoyage+
Untempsde nettoyageplus longpeutetre n6cessaire.
On n'apaselimin6avantl'operationd'autonettoyagelesaccumulationsexcessJvesde residus,
particuliSrementIesresidusd'alimentsacidesousucr6s.
46
Page 48

La porte du four ne se d_verrouiiie
. L'int6rieur dufourest encorechaud.Attendreenvironune heureapres I'ach6vementde la
p6rioded'autonettoyage.IIestpossibled'ouvrirla porteapresladisparitiondu messageLOCK
07ERROUILLAGE)sur I'afficheur.
• Lescommandeset la portesont peut-etreverrouill_es.Voir pages33et 41.
Lasurface _ dessus iisse montre
des signes d'usure.
Accumuiatioad'humidit_ sur le °
hubmotou vapeursortant de m'_vent. •
Emissioa d'une forte odeur ou de *
fum_e morsde maraise en marche
du four. *
1.Finesrayuresou abrasions.
. S'assurerquelasurface de cuissonet Iefond desustensilessont propres.Ne pasfaire
glisserd'ustensilesenveneou en m6talsur Iasurface.S'assurerque lefond des
ustensilesn'estpas rugueux.Utiliser les agentsde nettoyagerecommand6s.Voir
page42.
2.Marquesde metal
. Ne pas faire glisserd'ustensilesmetalliquessur lasurface.Unelois la surfacerefroidie,la
nettoyeravecIacr6mede nettoyagepour tablede cuisson.Voirpage42.
3.Marquesettachesbrunes.
. EnleverrapidementIesproduitsrenverses.NejamaisessuyerIasurfaceavecune 6ponge
ou un lingesail S'assurerquelatable decuissonetque le fond des ustensilessont
propres.
4.
Zonesavecrefiet m6talIique.
. DepOtsmin6rauxen provenancedeI'eauet de la nourriture.Utiliserlesagentsde
nettoyagerecommand6s.Voir page42.
5.
Piq0resou ecaillements
• EnleverrapidementIesproduitssucresqui ont d6bord#.Voirpage42.
Ceciest normaldurant lacuissond'alimentscontenantbeaucoupd'eau.
Utilisationexcessived'humidite Iorsdu nettoyagedu hubiot.
Ceciest normalpour unfour neufet disparaitapr6squelquesutilisations.
Un cycled'autonettoyage<<bffJlera>>plusrapidementlesodeurs.
La raiseen marched'un ventilateuraide _retirerfum#eet odeurs.
Pr6sencede salet6ssurlasole.Proceder_un autonettoyage.
Codes d'anomalie°
Des bruits se font entendre°
Imn'y a ni hip ni affichageo
_ SAb _ cmignote puis
reste allum_.
. LesrootsBAKEou LOCKpeuventclignoterrapidement_I'afficheurpour pr6venird'uneeneur
oud'un probI_me.SilemotBAKEouLOCKparait_I'afficheur,appuyersurIatoucheCANCEL.
Si le mot BAKEouLOCKcontinue_ clignoter,d6brancherrappareiLAttendrequelques
minutes,puisrebrancherI'appareil.Si le motcontinue _ clignoter,d6brancherI'appareilet
prendrecontactavecun reparateurautorise.
. Silefouresttressale,lesfiammechespeuventproduireuncoded'anomalieaucoursducycle
d'autonettoyage.Appuyersur Iatouche CANCELet IaisserIefour refroidircompl_tement,
essuyerIasalet6enexc_spuisreprogrammerI'autonettoyage.Silecoded'anomalier6apparait,
prendrecontactavecun reparateurautorise.
. Lefour fait plusieursbruitsfaibles.II estpossibled'entendreles relaisdu four quisemettent
en marcheets'arretent.Ceciest normal.
. A_rsque_ef_urserechau_eetserefroidit_i_estp_ssib_ed_entendredesbruitsc_n`espmldant
ladilatationet_ lacontractiondespi_cesmetal%ues.Ceciestnormalet n'endommagepas
['appareiL
. Lefour est peut-etreen mode sabbat.Voir page37.
• Lefour est en modesabbat.Pourannuler,appuyersur [a touche Clocket maintenerqa
enfonceependantcinq secondes.
47
Page 49

48
Page 50

Garantie complete d'une annee -
Pieces et main-d'oeuvre
Duramone perioded'un (1} an a compterde la
datede rachat initial audetail,toute piecequtse
revebraitddec_ueusedansdesconditions
normamsd'usagemenagerserar@areeou
remplaceegra_ultement
Garanties mimitees- Pieces seumement
De la deuxW_me_ macinquW_meannee - A
compterde la datede I'achatinitial au detail,bs
piecesde lalistecbdessousqui serevebraient
ddectueuses dans desconditionsnormales
d'usagemenagerseron__@ar@sou [emplac@s
gratuitement(,oi_cesseuIement};b proprietaire
devraassumertousles autresfrais,y compnstrais
de maln-d'ceuvre,de deoBcement,de[ransport.oe
kilometrageet de diagnostic,le casech@n-[.
° Sarfaee de cuisseaen vitroc_ramique: Pa
suitede uristherm_que,d@oloration,fissuration
ou joint en caoutchoucsur [erebord,usureues
motiB
oEI6ments chauffants_lectriques: Elementsde
surfaceradiantssurbs appareilsde cuisson
electnques.
Residents canadiens
Lesgarantiesci-dessuscouvren[un apparet!
installeau Canada.seulemen_s'il aateagreepar
lesagencesde test habflit@s(verificationae la
conform[re_ une normena[Ionaiedu Canada},sauf
sJI'appareila ate introdult au Canada_ i'occaslon
d'un changemen[de residencedesEtats-Unisvers
le Canada.
Garantie limitee hers des Etats-Unis et
du Canada = Pieces seulement
Penaan_une perioded'un _1}an _ compeerde B
datede l'achat initialau detail,toute piecequl se
reveleraitddec[ueuseaansdes conditions
normalesd'usagemenagerserarepareeou
remplaceegratu_tement(pieceseulement};b
sropdetairedevraassumer-[ous_esau[restrais, y
compdsfrais de main_d'ceuvre,ded@lacemen[,de
[ransport.de kilome[rageet de diagnostic,[e c_s
echean-[
Leegatanrlesspdcifiquestbrmuleescl-dessusson[
lesSEUL£$quele fabric'antaccorde.Cesgaranties
vousconf_rentdesdroitsjuddiquessp#cifiquese[
_zouspouvezegalementjouir d'autresdroits.
variablesd'un #tata/'autre, d'uneprowncebune
8U[Fe
Ne sont pas couverts par ces
1. Lesdommagesouderangementsdos_ :
a.Miseen service,livraisonouentretieneffectu@incorrectement.
b.Touter@aration,modification,alterationettout reglagenonautorisespar
le fabrbant ou parun prestatairede serviceapres-venteagree.
c. Accidents,mauvaiseutilisationou usageabusifou demisonnabb.
d.AlimentationelectriqueCtension,intensit@incorrecte.
e. Reglageincorrectd'une commande.
2. Lesgarantiesnepeuventetrehonoreessi les numerosde seried'origine onteta
entev@,modifiesoune sontpasfacilementlisibles.
3. Ampoule&
4. Appareils achetesauxfins d'usagecommercialou industrJeL
5. Lesfrais devisited'un prestatairedeserviceou de serviceapr@-venteencourus
pour les raisonssuivantes:
a.Correctiond'erreursde raiseen service.
b.initiationde I'utJIisateur_ I'emp!oide I'appareiL
c. Transportde l'appareiiauxlocauxdu prestatairedesewice.
6. LesdommagesdeIatablede cubsonenverrecausespar I'utilisationde
nettoyantsautresque Iescremeset tamponsde nettoyagerecommand@.
7. LesdommagesdeIatablede cuissonenverrecausespardesproduitssucresou
du plastiquefondu qui ont durci parcequ'ils n'ontpasete nettoy@conformement
auxinstructionsdonn@sdartsle guided'utilisationet d'entretien.
8. Dommagessecondairesou indirectssubis partoute personnesuite au non-
respectde cesgarantbs.Certainsetatsou provincesne permettentpasI'exclusion
ou Ia limitation desdommagessecondairesou indirects;par consequentles
limitationsou exclusionsci-dessuspeuventnepass'appliquer_votre cas.
Si m'intervermtiorm d'un reparate r est
o ContacterIedetaillantchezqui I'appamila ete achete,ou contacter Maytag
ServicesSM/service_ Ia clienteledeAmanaau 1-800-843-0304auxE.-U.ou
1-866-587-2002au Canada,pourobtenirlescoordonneesd'uneagencede
serviceagre@.
• Veilier_ conserverla facture d'achatpouriustifier de Iavaliditede lagarantb. Pour
d'autresinformationsen cequi concerneles responsabilit@duproprietaire
I'egarddu servicesousgarantie,voir letexte de la GARANTIE.
o Si Ie@taiIIantou I'agencedeserviceapres-ventenepeut r@oudreIeprobleme,
ecrire_ MaytagServicessM,attentionCAIR_Center,P.O.Box2370,Cbveland,TN
37320-2370ou tel@honer au 1_800_843_e304 a_x Eo_Uoo_ 1_866_587_2002
aa Canada.
• Lesguidesd'utiJisation,JesmanueJsdeserviceet JesrenseJgnementssur Jespieces
sont disponiblesaupr@de MaytagServicessM,service_ lacJbntelede Amana.
_e_atq_es :
Lots detout contactconcernantun probieme,fournir I'informatim]suivante:
a. Nora,adresseet numerode tel@honedu cIient;
b. Numerode modeleet numerodeseriede I'appareil;
c. Nora et adressedu detailiantou deI'agencede service;
d. Descriptionclairedu problemeobserve;
e. Preuved'achat(facturede vente}.
49
Page 51

Estufa E[_ctrica - Cubie_a Lisa
Instrucciones Importantes
sobre Seguridad .....................................................51-54
Cocinando en [a Estufa ......................................... 55-57
Controies
Cubiertas Lisas
Cocinando en e[ Homo ......................................... 58-65
Horneado
'Cook & HoHd'
'Cook & HoHd'Diferido
Mantener CaHiente
Asar a HaParriHa
ParriHasde[ Homo
Cuidado y Limpieza ............................................... 66-69
Horno AutoHimpiante
Procedimientos de Limpieza
Mantenimiento ....................................................... 70-71
Ventana de[ Horno
Luzde[ Homo
Loca[izaci6n y Soluci6n
de Avefias ................................................................72-73
Garantia y Servicio ....................................................... 75
Page 52

mnstalador:Por[avordeje estagu[ajunto cone_
emc[rouomOstico.
Censumider: PorfavorJeay conservees[agu[aparareferencia
futura. Conserveel recibo de compray/o el chequecancelado
como comprosameoe compra.
NOmerode Modelo
NOmerode Sede
Fecha de Compra
Si tbne preguntas. IBme a:
Amana Customer Assistance
1-800- B43-0304 E.E.U.u.
1-886-587-2002 Canada1
(Lunes aViernes. 8:00 a.m. a 8:00 p.m. Hora del Este)
Internet: http://www.amana.com
En nuestro contmuo alvin de mejorar la calidad y rendlmlento de
nues[ros electrodom@tmos, puede que sea necesano modificar
el ebctrodom@tico sin actuaJizaresta gufa.
Para infermaci6s_ sebre set_#de, vet pbgina 75.
Lea y siga todas ias instrucciones antes de usar este
eleetrodom_stieo para evitar el riesgo potencial de incendio,
choque el@trico, bsiOn personal o daSo al ebctrodomOstico
como resuKado de su uso inapropiado, Utilice este
ebctrodomestico sohmente para el propOsito que ha sido
destinado segun se describe en esta guia,
Para asegurar funeionamiento eorreeto y seguro: El
ebctrodomestico debe ser instdado debidamente y puesto a
tierra por un t@nico cdificado, No intente ajustar, reparar,
prestar servicio o reemphzar ninguna pieza de este producto
a menos que sea espedficamente recomendado en esta guia,
Todas hs reparaciones deben ser redizadas por un tecnico
cdificado,
Siempre desenchufe el ebctrodomOstico antes de efectuar
alguna reparaci6n,
, TODAS LAS ESTUFAS SEPUEDEN
VOLCAP, V CAUSAP, LESJONES
Lasadvertencias e mstrucciones umportantes sobre seguridad
que aparecen en esta guia no estan destinadas a cubrir todas
los posibbs circunstancias y situaciones que puedan ocurrir,
Se debe ejercer sentido com_n, precauciOn y cuidado cuando
instab, redice mantenimiento o haga funcionar el artefacto,
Siempre p6ngase en contacto con el fabricante si surgen
probbmas o situaciones que usted no comprenda,
Reconozca Jos simbolos, advertencias,
etiquetas de seguridad
ADVERTENCmPdigrQ0pr ct casn0S%"ras<,e
PODRJANcausar bsi6n personal grave o mortal.
PRECAUCJ0N _ Pelig[0s 0 practicas no segu[as que
PODRIANcausar lesion personal menos grave.
, INSTALE ELDmSPOS
ANTmVUELCOmNCLWDO CON LA
Para verificar si el dispositivo est_ debidamente instaBdo, mire
debajo de la estufa con una linterna para asegurarse de que
uno de los tornillos niveladores traseros estd debidamente
enganchado en la ranura del soporte, El dispositivo antivuebo
asegura el tornillo niveBdor trasero al piso cuando est,1
debidamente enganchado, Estodebe verificarse carla vez
que la estufa sea movida,
Para Evitar ce dio o
Da o Ca sado per H mo
Asegurese de que se hayan retirado todos los materiabs de
empaque del ebctrodomestico antes de su uso,
No coloque materiabs combustibles cerca del
ebctrodomOstico, No se deben guardar en el homo
materiabs infiamabbsMuchos pl_sticos son afectados por el
51
Page 53

caior. Mantenga los pidsdcos abjados de hs piezas deI
ebctrodom6stbo que se pueden entibiar o cabntar.
Para evitar incendios de grasa, no permita acumuiad6n de
grasa de cocinar o de otros materiabs infiamabbs en eI homo
o en su cercan[ao
En Case de lncendie
Use un extinguidor con producto quimbo seco o deI tipo
espuma o bicarbonate para apagar eI incendio o las llamas.
Nunca use agua en un incendio de grasa.
1. Apague eI homo para evitar que la llama se disperse.
2. NUNCA bvante o mueva una sartdn en llamas.
3. Apague eI fuego o la IBma del homo cerrando la puerta
del homo.
Seguridad para los Ni es
NUNCA almacene artfculos de inter6s para !os ni_os en los
seriamente.
NUNCA deje a los ni_iossolos o sin supervisi6n cuando el
homo este en uso o cuando este caliente. No se debe nunca
permitir que los ni_iosse sienten o se paren en ninguna pieza
del electrodomestico pues se pueden lesionar o quemar.
Se les debe ense_ar a los ni_iosque el electrodom6stico y los
utensilios que est_n en el pueden estar calientes. Deje enfriar
los utensilios calientes en un lugar seguro, fuera del alcance
de los ni_ios. Se les debe ense_ar a los ni_iosque un
eiectrodomestico no es un juguete y que no deben jugar con
los controles u otras piezas del artefacto.
lnstruccienes Generates
NUNCA use un electrodom6stico como un peidaHiopara
alcanzar los armanos supedores. El uso incorrecto de la
puerta del electrodom6stico tab como pisar sobre ella.
apoyarse o sentarse en la puerta puede resultar en que el
electrodomestico se vuelque, se rompa la puerta y se
causen lesiones graves.
Para evitar posibles riesgos para el usuario y ddio al
electrodom6stico, no use este producto como una estufa para
calentar o entibiar una habitaci6n. Adem_s no use el homo
como un lugar para guardar alimentos o utensilios de cocina.
No obstruya la circulaci6n del aire bloqueando el respiradero
dei homo.
NO TOQUE LOS ELEMENTOSCALEFACTORESNI LAS
SUPERFICIESINTERIORESDEL HORNO. Los eiementos
calefactores pueden estar calientes aLincuando su color sea
obscure. Las superficies interiores de cuaiquier homo se
calientan Io suficiente come para causar quemaduras.
Durante y despues dei use, no toque ni permita que ias ropas
u otros materiales inflamables entrenen contacto con los
eiementos caiefactores o ias superficies interiores dei homo
hasta que no se hayan enfriado. Otras superficies dei
electrodom6stico pueden estar Io suficientemente calientes
para causar quemaduras - entre estas superficies estan la
abertura dei respiradero dei homo, ia superficie cerca de esta
abertura, ia puerta dei homo y ia ventana de ia puerta dei
homo.
No toque un foco caliente del homo con un paffo humedo
pues se puede quebrar. Si ei foco se quiebra, desenchufe ei
eiectrodomestico antes de sacar ei foco para evitar sufrir un
cheque ei6ctrico.
NUNCA use papei de aiuminio para cubrir ias parriiias dei
homo ni ei panel inferior dei homo. Eiuse incorrecto puede
resuitar en un riesgo de cheque el@trice, incendio o da_ioai
eiectrodomestico. Use papel de aiuminio soiamente come se
indica en esta guia.
Seguridad Ceeinar
Nunca caliente un contenedor de alimento cerrado en el
homo. La acumuiaci6n de presi6n puede reventar ei
contenedor causando una lesi6n personal grave o da_o al
eiectrodomestico.
52
Page 54

Usetomaoihssecosygruesos,LostomaoiBshLimedos
puedencausarquemadurasporvapor,Nosedebenusar
todiasdesecarlospiatosniotrossustitutosenvezdelos
tomaoiiasporqueeiiospuedenpasarsobrelosebmentos
caiientesyprendersefuegoopuedenquedaratrapadosenhs
pbzasdeIebctrodomestbo,
Usevestimentasapropiadas,Lasropassueitasoropascon
mangaslargassueitasnosedebenusarcuandoseest_
cocinando,Laropasepuedeprenderfuegoycausar
quemadurassientraencontactoconlosebmentos
cabfactores,
Siempre coioque ias parriiias dei homo en ias posiciones
deseadas cuando el homo este frio, Deslice la parrilla del
homo hacia afuera para agregar o retirar alimento usando
tomaollas secos y gruesos, Siempre evite colocar o retirar
alimento del homo sin sacar la parrilla hacia afuera, Si una
parrilla debe ser movida cuando este caliente, use un
tomaollas seco, No deje que el tomaolla entre en contacto
con el elemento caliente del homo,
Use las parrillas solamente en el homo en que fueron
enviadas/compradas,
Tenga cuidado cuando abra la puerta del homo, Primero deje
que salga el aire o vapor caliente antes de sacar o volver a
colocar el alimento en el homo,
ADVEflTENCIA SOBflE ALIMENTOS PflEPAflADOS: Siga
las instrucciones del fabricante del alimento, Si un contenedor
de aiimento congeiado de pi_istico y/o su tapa se deform&
comba o de otra manera se da_ia durante la cocci6n,
inmediatamente descarte el alimento y su contenedor, El
alimento puede estar contaminado,
No permita que el papel de aluminio o la sonda de la came
toque el elemento calefactor,
Siempre apague todos los controles cuando haya terminado
de cocinar,
Seguridad sobre Use
de Utensi ios
Siga las instrucciones del fabricante cuando use bolsas para
cocinar en el homo,
Se ha comprobado el rendimiento y funcionamiento seguro de
este electrodom6stico usando baterias de cocina
convencionales, Nouse ningOn dispositivo o accesorio que no
haya sido espedficamente recomendado en esta guia, No use
rejiiias superiores de ia estufa o sistemas de convecci6n para
homos, Ei uso de dispositivos o accesorios que no sean
expresamente recomendados en esta guia pueden crear
peiigros graves de seguridad, afectar ei rendimiento y reducir
la vida 8til de los componentes de este electrodom6stico,
AsegSrese de que el utensilio sea Io suficientemente grande
como para contener en forma debida los aiimentos y evitar
derrames, Eltama_io es particularmente importante cuando se
utilizan freidoras, AsegLirese deque el utensilio tiene
capacidad para ei voiumen de aiimentos que se va a agregar
ai iguai que para ia formaci6n de burbujas de ia grasa,
Nunca deje que un utensilio hierva hasta quedar seco pues
esto puede da_iarel utensilio y la estufa,
Si el utensilio es mas peque_io que el elemento, una porci6n
del elemento quedara expuesta y puede encender la ropa o un
tomaollas,
Solamente ciertos tipos de utensilios de vidrio, vidrio ceramico,
ceramica, gres u otros utensilios vidriados son convenientes
para cocinar en la superficie o en el homo sin quebrarse
debido al repentino cambio de temperatura, Siga las
instrucciones del fabricante del utensilio cuando use vidrio,
Gire los mangos de los utensilios hacia el centro de la
cubierta, no hacia la habitaci6n ni sobre otro elemento
superior, Esto reduce el riesgo de quemaduras, encendido de
materiales inflamables o derrames si el utensilio es tocado
accidentalmente o alcanzado pot ni_iospeque_ios,
NUNCA deje los eiementos superiores sin supervisi6n,
especialmente cuando est_ usando los ajustes de calor altos,
Un derrame sin recibir la debida atenci6n puede causar humo
y un derrame de grasa puede causar un incendio,
Este electrodom6stico tiene diferentes tamaSos de elementos
superiores, Seleccione utensilios que tengan bases planas Io
suficientemente grandes para cubrir el elemento, La relaci6n
adecuada entre el utensilio y el elemento mejorara la
eficiencia al cocinar,
CUBIERTA DE VIDRIO CERAMICO: NUNCA cocine sobre
una cubierta quebrada, Si ia cubierta de ia estufa sequiebra,
los agentes de limpieza y los derrames pueden penetrar y
crear un riesgo de choque el6ctrico, P6ngase en contacto con
un tdcnico calificado inmediatamente,
53
Page 55

O masFreidoras
Use extremo cuidado cuando rnueva la olla con aceite o
descarte la grasa caliente, Deje que la grasa se enfrie antes
de intentar mover ia oiia,
Campanas de VentiJaci6n
Antes del cicio de autolimpieza del homo, retire la asadera, las
parrillas del homo y otros utensilios y limpie cualquier derrame
para evitar humo excesivo o llamaradas,
Esnormal que la cubierta de la estufa se caliente durante el
ciclo de autolimpieza, Por Io tanto, se debe evitar tocar la
cubierta durante un cicio de autolimpieza,
Limpie con frecuencia ia campana y los fiitros a fin de evitar
que se acumuie en eiios grasa u otros materiaies infiamabies y
para evitar incendios de grasa,
Cuando prepare alimentos flameados debajo de la campana,
encienda el ventilador,
Seguridad en Ja Limpieza
Limpie con cuidado la cubierta, Apague todos los controles y
espere que se enfrien las piezas del electrodomestico antes de
tocarlas o limpiarlas, Limpie con cuidado, Tenga cuidado
para evitar quemaduras de vapor si usa una esponja o un
patio mojado para iimpiar los derrames en una superficie
caliente, AIgunos limpiadores pueden producir vapores
nocivos cuando se aplican en una superficie caliente,
Limpie solamente las piezas indicadas en esta guia,
Homo AutoJimpiante
No iimpie ia junta de ia puerta, Lajunta de ia puerta es
esencial para obtener un buen sello, Se debe tener cuidado
de no frotar, da_iar ni mover la junta,
No use limpiadores de homo ni forros de homo de ningun tipo
alrededor ni en ninguna parte del homo autolimpiante,
Aviso y Advettencia
lmportante Sobre Seguridad
La Propuesta 65 de la Ley de 1986 del Estado de California
Sobre Seguridad y Contaminaci6n dei Agua Potable (California
Safe Drinking Water and Toxic Enforcement Act of 1986)exige
que ei Gobemador de California pubiique una iista de ias
sustancias que segLin el estado de California causan c_incer o
da_o ai sistema reproductivo y exige que iasempresas
adviertan a sus clientes sobre la exposici6n potencial a tabs
sustancias,
Se advierte a los usuarios de este eiectrodomestico que cuando
el homo est_ funcionando en el ciclo de autolimpieza, puede
haber exposici6n de bajo nivel a algunas de las sustancias
indicadas en la lista, incluyendo mon6xido de carbono, La
exposici6n a estas sustancias puede ser reducida a un minimo
ventiiando ei homo ai exterior en forma adecuada, abriendo ias
ventanas y/o la puerta en la habitaci6n en donde est,1ubicado
el electrodomestico durante el ciclo de autolimpieza,
AVISO IMPORTANTE RESPECTO A LOS PAJAROS
DOMESTJCOS: Nunca mantenga los p_jaros en ia cocina o en
ias habitaciones donde puedan iiegar los humos de ia cocina,
Los p_jaros tienen un sistema respiratorio muy sensitivo, Los
humos producidos durante ei cicio de autoiimpieza dei homo
pueden ser periudiciaies o mortaies para los p_jaros, Los
humos que despide ei aceite de cocina recaientado, ia grasa,
margarina y los utensiiios antiadherentes recaientados pueden
tambi6n ser perjudiciaies,
Conserve estas lnstrucciones para Referencia Futura
54
Page 56

@
Controles Superiotes
Useestoscontrobs paraencenderIosetementossuperiores. Sedis-
ponede unasebcciOninfinitadeajustesdel calordesde'Low' {Bajo}
hasta'High' CAIto}.Las perillaspuedencolocarseen cualquierade
estosajusteso entreelios.
PregramadOn de Contro es
1. Coloqueei utensiIiosobte el elementosuperior+
2. Oprimay gire la perillaen cualquierdirecciOnhastael ajustede
calordeseado.
o Enel paneldecontrol seencuentramarcadocual O O
elementocontrolacarlaperilla. Porejemplo,el dibujo
a laderechaindicae[ebmento delanteroizquierdo. O O
3. Enel paneldecontrol hayuna luzindicadoradel Nemento.
Cuandoseenciendealgunade los perillasde control,la luzse
ilumina. La luzse apagaracuando todos losNementossuperiores
seapaguen.
4. Despu@de cocinarcoloqueIa perilla en la posicien'OF}:'
(Apagado}. Retireel utensilio.
Ajustes de Ca or Sugetidos
EltamaSo,tipo de utensiiioy IacocciOnafectaranelajustedeI calor,
ParainformaciOnsobre los utensiliosyotrosfactoresque afectan los
ajustesde[ caior,consuiteei foibto Recomendacionessobrelos
Utensiliosen la p_gina57yel folieto "La CocinaF_cir'.
'Low' (Bajo}(2}: Seutiliza
paramantenerlosalimentos
calbntesy derretirchocolatey
mantequiila.
'Meal. Low'
{MedianoBajo}
(3+4}: Usepara
continuar
cocinando
aiimentos
tapadoso para
cocinaralvapor.
[
'Medium' {Mediano} (5+
7): Usadoparamantener
un hen/or bnto para
grandescantidadesde
I[quidoy paraIamayor(a
de las frituras.
'High' {Atto}(lg}: Seusa para
hacerhen/Jrunliquido. Siempre
reduzcae!ajustea un caior m_s
bajocuandoIosI[quidos
comiencena hen/it o cuandolos
alimentoscomiencena
oocinarse.
@FF
High I
/
"10
'Meal. High'
(MedianoAlto}
(8+9}: Seusa
7 cNentar
aceiteparafrdr
en un8 soften
hondao para
saltear.
Tambi@para
mantenerun
hen/orr@ido
paracantidades
grandesde
I[quidos.
dorar
ANTESDECOCINAR DESPUESDECOCINAN
+S+emprecoloqueun utensHioen ele_emen[osuperiorantesde
encenoerlo.Paraevitardorica laestufa,nuncaenclendaun
elementosuaenorsmtenor ult utensiliosoDreel
• NUNCA usela cubbrta de la estufacomo unaareapara guardat
alimentoso utensilios.
MIENTP_S COCmNA
+AsegLiresede que ustedsabecualperJllacontrolacada eJemen[o,
Aseguresede que u_tedencendioe aemen[o correc-[o.
° Commencea coclnaren unNustede coloralto tuego reouzcaa un
ajuste m_s bajo para cornpbtar +acocciOn. Nunca use un ajus_e score B cub+erta de la estufa. El aire caiiente proveniente del
de cmoraltoparacocmarduranteun tiempo pro[ongado.
+NUNOApermltaque una clio hiervahastasecarse. Estopodr[a
da[mr[ao[tay el electrodom@tico.
+NNNOAtoquetasuperficiede laestufa hastaque no sehaya
enfr+ado.Posiblementealgunasareasde lasuperficie,
especm[menteairededorde losebmentos seent_b[eno calienten
mlentrasestacocinando. Usetomao[[asparaprotegersus
manos.
oAsegOresede queloselememossuperioresestenapagaoos.
oLimpie cuaiquier derrame tan pronto como sea posible,
OTROSCONSFJO$
+Si existenarmanosdirectamemesobrelacubierta de laestufa.
colocueen ellosarticutosde usopoco frecuentey quepueoense[
guardadosconseguridaden un areaque esmmsujemal coot.
AIgunastemperaturaspueuen noset segurasparaart[culostotes
somoI[quidosvo+atiles.[impmdoreso roc+adoresenaerosol.
" NNNCAdeje nmg_inarticu+o,especmtmenteart[culosde pBst+co.
resp+raderopuedeencenderlosarticuiosinflamables+derret+ro
ablandarlos Ltasticoso aumentarla pros+onen los contenedores
cerradoshaciende!osreventat.
• NNNCA permitaque el papNde aBmm_o,lostermOmetrosoe came
o cualquierotto objetode metal,a excepc+Onde unao _asoDreun
etementosuperior,tengacomactocon lose+ementoscalefactores.
o NUNCA guardearticulospesadossobre la cubiertaque pueoan
caersey daSada.
55
Page 57

Cubiertas Lisas
Notas sobre [as cubiertas [isas:
oLacubierta de maestufa puede emitir un poco de humo y
omor_aprimeravezquese uti[iz& Estoesnormal
oLas cubiertas misasretienen emtamerper an eierto periode
despa6s qae se ha apagado maestafa. Apaguelosetementos
unospocosminutesantesde queIosalimentosest@
completamentecocinadosy useetcaiorrestanteparacompbtar
la cocci@. Cuando[aIuzdesuperficb caiienteseapaga [vera
continuaciOn},e[_readon@ secocinaestar_fr[a aitacto.
Debidoa Ia maneraenque retienene[caIor,loseIementosIisos
no responder_ntan r@idamentea loscambiosen losajustes
come Iosebmentosespirales.
oEncasede un posible derrame,retireel utensiliode [acubbrta
de la estuf&
oNunea trate de mevantarmacabierta.
oLasuperficb lisapuedeversedescoioridacuandoest_ca[iente.
Estoes normaly desaparecer8cuando Iasuperficieseenfr[e.
Consejos para proteger la
cubierta lisa
Limpieza @er pSgina 68 para mayor informaciOn}
oAntes de usar por pnmera vez, limpie Ia cubierta.
o Limpie [acubierta diariamente o despu6s de cada uso. Esto [a
mantendr_ con una buena apadencia y puede evitar que se da_e.
oSi se produce un derraPaecuando este eocinando, I[mpie[o
inmediatamente de [a cubierta cuando 6sta est6 caiiente para
evitar una Iimpieza m_s dif[ciI despu@. Tenga mucho cuidado,
limpie ei derrame con una toalIa seca y Iimpia.
o No de}e que los derrames permanezcan sobre Ia cubierta o sobre
la moIdura de la cubierta por un periodo de tiempo prolongado.
o Nunca use poivos de [impieza abrasivos ni esponjas de restregar
que puedan rayar [a cubierta.
o Nunca use blanqueador a base de cloro, amon[aco ni otros
limpiadores que no hayan sido especificamente recoPaendados
para usar en el vidrio cer_Paico.
Dementos Superiotes
LoseIementossuperioresensu estufaest_nidentificadosper
drcuIos permanentesen [asuperficieIisa. Paracoc[narde manera
m_seficiente,useun utensi[ioque seadel mismotamaSoque e[
e[ePaento.
Los uteltsilies no deben extenderse robs all# de 25 mm
(1 pulgada) del tama#e de! elemente.
Cuandose enciendeun contmI,sepuedeverun respIandoratrav6s
de la superficb lisa.Eleiemento pasar_ per cities de encendido
y apagado para mantener el ajuste de calor seieccionado, aen
en el ajuste'High' (Nto).
ParamayorinformaciOnsobrelosutensiliosconsuIte[a secciOn
RecomendacionessobreIosUtensiIiosenIap_gina55y el folbto
"LaCocinaF_cii"que seincluyeconsu estuf&
Luz lmlicadora de Superficie Caliente
La [_Jzindicadoradesuperficiecalienteseencuentraen elpaneIde
control La[uzseiIuminar8cuandocuaIquierade Iosebmentos
superioresest6caIiente.Permanecer_encendida
a8ndespu@de que e[ controlseaapagado,hasta
queel arease hayaenfriado. Net: Surface
Para evitar marcas y rayaduras
o No use utensiliosdevidrio, Puedenrayar[asuperficie,
o Nunca co[oqueunsoporteo un arede wok entreIacubiertay el
utensiIio, Estosart[cuIospuedenmarcaro rayar[acubiert&
o No @slice utensiIiosdeaIuminioa tray@de una eubiertacaIiente,
Losutensiliospueden@jar marcasquedebenset Jimpiadas
inmediatamente.(VerLimpbza,p4gina68.)
oAseg/iresedeque Iacubbrta y Iaparteinferiordel utensilioest@
JimpiasantesdeencenderJaestufaa fin deevitarrayaduras.
o ParaevitarIasrayadurasodaiio a la cubiertadevidrio cer_mico,
no dejeazOcar,salo grasassobre los elementos. Limpb la
cubierta con un paiio limpio o contoalIasde pape!antesde usarJa.
o Nu_ca desliceutensiliosdemetalpesadosatray@de lacubbrta
puespueden rayarla.
Para evitar maachas
o Nuaca useun pai_oo unaesponjasuciapara IimpiarB cubierta
de Iaestuf& Estopuede@jaruna pe
Para ev[tar etros da es
o No dejequeen la cubiertacaiientese derritan [%sticos,az_caro
aiimentoscon alto contenidode az0car. Si estosucede,[impie
inmediatamente._/er Limpieza,p_gina68.)
o Nunca dejeque unaoIiahiewahastaquedarsecapuesesto
dafiar_la superficiey el utensilio.
, Nunea use la cubierta come una superficie de trabajo ni
comeunatabIade cortar.
+ Nunca cocine a[imentos directamente sobre [acubierta.
+Nouseun utensiIiopequefioen unelementogrande. Estono s6Io
desperdiciaenergiasine que tambi6npuedenproducirsederrames
calientessobreIacubiertaloscuaIesrequieren[impiezaadicionaL
o No use utensiIiosespeciaIesquenoseanpianos,detamafio mayor
o desniveIadosta[come la parteinferiorredondade loswoks, con
fondos acanaladosy/oparrillasy elias de grantamafiopara
prepararconservas.
o No use aIuminioni contenedoresde papeIde aluminio. E[
aluminiose puedederretiren Ia cubiertade vidrio cer_mico.Sie[
metalsederriteen [acubierta,no uselaestufa. Llamea un
t6cnicoautorizadode Maytag.
Utensiliospianosy Losutensiliosconfondosacanalados
suaves, o arqueados.LosutensiIiosconrondos
irregularesno cocinanungormemente
losaiimentosy aigunasvecesno
puedenhervir%uido.
UtensiIiosdematerial Losutensiliosdemetalesdelgadoso de
grueso, vidrio.
UtensiIiosquesean Los utensiiiosm_spequefioso m_s
detmismotamaiio grandesque el elementoen 2,5cm
queet elemento. (Ipulgada}.
Mangosseguros. Losutensilioscon mangossueltos o rotes.
Mangospesadosque puedeninclinar el
utensilio.
Tapasherm_ticas. Lastapassueltas.
Wokscon fondo Loswoks con fondo apoyadoen un are.
piano.
Utensi ios para preparar
Reeomendaeiones sobre
Siseusanlosutensilioscorrectossepuedenahormrmuchos
proNemas,taIcome proiongaci6ndeltiempo decocciOnde los
alimentosu obtenci6nde resuitadosno consistentes.Losutensilios
correctosreduceneltiempode coccidn,usanmenosenergia
electricay cocinanlosalimentosde manerarossuniforme.
Prueba de las OHas Planas
Vergiquesisus ollassonplanas.
La prueba de maregina:
1. ColoqueunaregIaa trav6sde[fondode [aella.
2. ColOquelaa la [uz.
3. Pocao ningunahz debeversedebajode [aregIa.
La prueba de maburbuja:
1. Coloqueunapulgadade aguaen [aolIa.Coloquelao[Iaen la
cubiertay gire e[centre[a 'High' (Alto).
2. ObserveIaformaciOnde burbujasa medidaquee[ aguase
caIienta.Lasburbujasuniformessignificanbuen rendimientoy
lasburbujasno irregulareshldican puntoscaIientesy cocciOn
d+spareja.
Ver e[ foIIeto"LaCocinaF_cil"para mayorinformaci6n.
eonservas y de tamales
Todas las elias para preparar conservas y las elias grundes
deben tenet rondos pianos y dehen set heches de mateHames
gruesosoEstoesmuy importanteparaIascubiertas[isas.La baseno
debeset rossde2,5cm 0 pulgada)m_sgrandeque e! etemento.
Cuando[aseliasde prepararconservasy [asolIasdetamafios
grandesno cumpIenestosrequisites,[acocci6npuedendemorar
m_stiempo y se puedendafiar Iascubiertasde Iasestufas.
AtgunasolIasde prepararconservast+enenbasespequefiaspara
usarIasen[assuperficieslisasde [asestufas.
Cuandoest8 preparando eensen/us, use el ajuste de caior alto
hasta que el agua cemience a hewir o se [ogra Ia presiOnen e[
ella.Reduzcaet calor al ajusterossbajo que mantengael hervoro la
presiOn.Si nose reducee[ caIor,sepuededafiar [a cubiertade la
estufa.
ConsulteelfoIIeto"La CocinaF_ci["paramayorinformaci6n.
5?
Page 59

Panel de Control
A B
C D
\
\
\
\
\
\
\\ BroiU
\ Cook&
\ Hold
\
\
Bake
Keep
CUeen Delay Clock
E
Warm
1 J
Timer
Elpanelde controlhaside disefiadoparesu f_cil programaciGn.Elindicadorvisualen elpanelde control muestraIaheradel die,el
temporizadory Iasfuncionesdel borne.Elpanelde control mostradoarribaincluyelascaracteristicasespedficasdel modelo. (Elestilo del
panelde controlvariasegOnel modelo.)
A
'Broil'(Asara
laParrilla)
B
'Bake'(Hornea0
C ¸
A (M_s}o
V (Menos}
'Timer'_emporizador}
E
+Cook&Hold'(CocciOn
yMantenerCaliente}
+Clean'(Limpieza)
G
'Delay'(Diferido)
'Clock'(Reloj)
m
'KeepWarm'
(MantenerCaliente)
'Carlcel'(Canceler)
m
Seusapareasarala parrillay doterlos
alimentos.
Seusaparehornearyasar.
Programaocambialahera,la
temperaturedelhomo.Programaasara
laparrilla'HI'o 'LO'.
Programaa!temporizador.
Seusaparehornearduranteuntiempo
seleccionado,luegomantienee!alimento
calienteduranteunahera.
Seusapareprogramaruncictode
autolirapieza.
Programaethorrloparecomenzara
homearo limpiarsea unaheraposterior.
Seusapareprogramarlaheradeldh.
Seusaparemantenercalienteene!
homoelalimentococinado.
CancelatodaslasfuncionesaexcepciOn
deltemporizadory e!reloj.
Note: Cuatrosegundosdespu6sde haberoprimidolatecla ,& o
V, se programar_autom_ticamenteeI tiempoo Iatemperature.
Si transcurrenm_sde30 segundosdespu6sde haberoprimido
unatecla defunciGny antesdeoprimir latecla A o V, la
funciOnser_canceladay el indicadorvisualvolveraal despliegue
anterior.
'Clock' (Reloj}
El relojpuedeserajustadoparedesplegarla herayaseaen formate
de 12boreso 24 bores.Elreioj hasideprogramadoen la f_brica
pareel formatede 12bores.
Pare cambiar el reloj a formate de 24 bores:
1. Optimay mantengaoprimidaslasteclas
'Cancel'y 'Delay'durantetressegundos.
2. OprimaA o 'V' pareseleccionarel
formatede 12horaso 24 horas.
3. Programeia heradel die siguiendolas
instruccionesindicadasabajo.
-- Delay
Programaci6n delReloj:
Use de masTeclas
o Oprimala teciadeseada.
o Oprima,& o V pareprogramareltiempo oIatemperature.
o Seescuchar_unasehal sonoracarlavezque optima unatecla.
o Seescuchar_ndossehalessonorassiocurreun erroren la
programaciOn.
1. OprimaIatecia'Clock'.
+ Lahera detdiey dospuntosdestellanen el
indicador.
2. Oprh_a,& o V pare programarla heradel die.
• Losdospuntos contin[iandestellando.
3. Oprimaia tecia'Clock' nuevamenteo espere
cuatrosegundos.
Clock
conto
58
Page 60

Cuandose conectaenergfaelectricaaIhornoo despu6sdeuna
interrupciOnde laenergfaeI6ctrica,Ia(Htimahoradel reloj previaa
la interrupci6ndestellar4en el indicador.
Paradesplegarla horadeIdfacuandoel indicadorest6 mostrando
otrafunci6n detiempo,optima latecla 'Clock'.
La horadel reloj no puedeser cambiadacuandoel hornohasido
programaticpara 'DelayCook','DelayClean'o'Cook& Hold'.
Para cancelar el temporizador:
1. Oprimay mantengaoprlmlda la tecla'Timer'durantetres
segundos.
U
2. Optima latecla 'Timer'y coloque lahoraa 00:00.
Para canceJar eJdespJiegue deJ reJoj:
Si nodeseaque el indicadorvisualmuestre lahora del dia:
Oprimay mantengaoprimida lasteclas
'Cancel'y 'Clock' durantetres segundos.La
horadel dfadesaparecer4enel indicador.
Cuandose cancelael desplieguedel reloj,
oprimalatecla 'Clock'paradesplegar
brevementelahoradel dfa.
__ Clock
Para restaurar el despliegue del reloj:
Oprimay mantengaoprimida lasteclas'Cancel'y 'Clock'durante
tres segundos.La horadel dfa reaparecer4enel indicador.
'Timer' (TemporizadoO
E!temporizadorpuedeserprogramadode un minuto{00:01:)hasta
99 horasy 59 mlnutos [99:59].
Eltemporizadorpuedesetusadoindependientementedecualquier
otraactividaddeI horno.Adem4spuedeser programadocuandootra
funci6n del hornoest6en funcionamiento.
Eltemporlzadornocontrolael homo.Solamentecontmla una sepal
SO[lora.
Para programar el temporizador:
1, OprJmalatecla 'Timer' _TemporizadoO, "rimer
o '0:00'destellaeneJindicadorvisual
o Losdospuntosdestellar4n.
2. OprimaIatecla,A o 'V hastaqueel tiempo
correctoaparezcaen elindicadorvisual.
, Losdospuntoscontln0andestellando.
Bloqueo de los Conttoles
Eltecladopuedenser bloqueadosi)araseguridad,[impiezao evitar
el uso no autorizado.Nofuncionar_ncuandoest6n bloqueados.
Siel homoest_en uso,loscontrolespuedenbloquearse.
La horaactualdel dfapermanecer4enel indicadorcuandolos
controlesest6nbloqueados.
Para bloquear:
Optimay mantengaoprirnidasIasteclas
'Cance!'y'Cook& Hold'durantetres
segundos.
'LOCK'destellaenel indicadorvisual.
-- Hold
Cook&
Para desbloquear:
Oprimay mantengaoprimidas[asteclas'Cancel'y 'Cook& Hold'
durantetres segundos.
'LOCK'desaparecedel indicadorvisual.
C( digos de Errotes
'BAKE'o 'LOCK'puedendesteilarr_pidamenteparaadvertideque
hayun error oun problema.Si'BAKE'o 'LOCK'destetlanenel
indicadorvisual,optima latecla'Cancel'. Si'BAKE'o 'LOCK'
contin0andestellando,desconectelacorrienteel6ctricahaciael
artefacto.Espereunospocosminutosy vuelvaaconectarla
corrienteel6ctrica.Si Iaspalabrasa0ncontimian destelJando,
desconecteIacordenteel6ctrica haciael artefactoy Ilamea un
t6cnicodeservicioautorJzado.
3. Oprlmanuevamentelatecla'Timer'o esperecuatrosegundos.
o Losdospuntoscontin0andestellandoy comienzala cuenta
regresivadel tiempo.
o El0Itimomlnutode Iacuentaregresivadel temporizadorse
desplegar4ensegundos.
4. AI finai del tiempo programatic,se escuchar4una serialsonora
larga.
59
Page 61

'Bake' (Horneado)
Para programar 'Bake':
1. Oprimalatecla 'Bake'.
o 'BAKE'destellar_.
o '000'destellar_en elindicadorvisual.
2. SeleccioneIatemperaturadel homo. La
temperaturadel homo puedeser programadade
75°a 285°C (170° a 550° F).Opnmau oprima y
mantengaoprimidaIatecla A o V.
o Cuandocualquierade estasdos teclasseoprime
por primeravez,'175°' ('350°')se iluminard.
+ OptimaIatecla A para aumentarlatemperatura.
o OptimaIatecla V para disminuirla temperatura.
3. Oprimalatecla 'Bake' nuevamenteo esperecuatrosegundos.
o 'BAKE'dejar_de destelIary se ikJminaraen el indicadorvisual.
o '100°'o latemperaturaactualdel homose desplegar_.La
temperaturase elevaraen incrementosde 5° hastaquese
alcancela temperaturaprogramada.
4. Esperea queel hornose precalientedurante8-15 minutos.
o Cuandoel hornoIlegaa latemperaturaprogramadase
escuchar_unasepal sonoralarga.
o Paraverificarla temperaturaprogramadaduranteel
precalentamientodel holno+oprimalatecla 'Bake'.
5. Coloquee+alimentoen elcentrodel homo, dejandoun mFnimode
dospulgadasentre el utensilioy Iasparedesdelhomo.
6. Vedfiqueel progresode Iacocci6ncuandohayatranscurridoel
tiempo minimorecomendado.Contint_ela cocciOnsi esnecesario.
7. AI t6rmino de la cocci6n,oprimala tecla 'Cancer.
8. Retireel alimentodel homo.
Notas sobre Homeado:
Para cambiar matemperatura demhomo durante emproeeso
tie eocci6n, oprimaIatecla 'Bake',luegooprimaA o V" hasta
quesedesplieguelatemperaturadeseada.
Para eambiar matemperatura demhomo durante 'Preheat',
oprimados veees Iatecla 'Bake',Iuegooptima A o V hasta
quesedespliegueIatemperaturadeseada.
Siolvidaapagarel homo,seapagar8autom_ticamentedespues
detranscurrir 12horas.SideseadesactivarestacaracterBtica,
yeaIa p_gina63.
Parasugerenciasadicionalessobrehorneadoy asado,consulte
el folIeto "La CocinaF_cir'.
Bake
A
Diferencias de_ homeado entre su homo
ant+guo y su homo nuevo
Esnormal observaralgunasdiferenciasen el tiempode horneadode
suhomo antiguoy su homo nuew_.Vea"Ajustede laTemperatura
del Holno" en lap_gina63.
'Cook & Homd' (:Cocci6n y
Mantener Caliente)
'Cook & Hold' Ie permitehornearduranteunacantidad
determinadadetiempo,seguidodeun ciclo'KeepWarm'de una
hora.
Para programar 'Cook & Herod':
1.Oprimala tecla'Cook& Hold'.
o 'BAKE'y 'HOLD'destellan. Hold
o '000'se iluminaen el ind+cadorvisual
2.Seleccionela temperaturadeIhomo.Latemperatura
del homo puedeserprogramadade 75°a 285°C
(170° a 550°F).Oprimau optima y mantenga
oprimidalatecla A o V.
o OprimaIatecla A paraaumentarla
temperatura.
o Oprimala teclaV paradisminuir latemperatura.
3.Oprimala tecla 'Cook& HoW nuevamenteo esperecuatro
segundos.
o 'HOLD'destella.
o '00:00'destellaenel indicadorvisual.
4.Programelacantidadde tiempoduranteIa cual usteddesea
hornearoprimiendolatecla A o V. Eltiempode horneado
puedeprogramarsedesde 10minutos(00:10)hasta11horas,
59 minutos01:59_.
o 'BAKE'y 'HOLD'se iluminan en el ind+cadorvisual
o Eltiempode horneadoseihminar_ en el indicadorvisual.
o Comenzar_la cuentaregresivadeltiempo dehorneado.
Cuando haya e×pirado emtiempo de cocci6n:
o Seescuchar_ncuatroseSalessonoras.
o 'BAKE'seapagar&
o 'HOLD'y 'WARM'se iluminar_n.
o Enel indicadorsedesplegar_'75°, ('170°'D.
Cook&
6O
Page 62

Despubsde una hera en 'HOLD WARM' (Mantener
Calbnte}:
• 'End'sedesplegar&
• Lahorade[ diavoiver_a despbgarseen el indicadorvisual.
Para cancemar 'Cook & Homd'en cuamquier momento:
Oprimala tecia 'CanceKRetiree[afimentodel homo. C_ance 2
'Demay Bake' (Horneado
Difeddo}
No usehernead0diferidoparaalimentosdecortaduraci6n tales
comoprcductos !acteos,cerdo,came de avec madscos.
Cuandousa 'Delay', el homo combnza a cocinarmastarde en el
d[a.Programe[acantidaddetiempo que usteddeseadiferir antes
de queseencbnda el hornoycuantotiempo @seacocinarel
alimento.Elhornocomienzaacabntar enla horasebccionaday
cocinadurantee[tiempoespecificado.
EItiempo diferidopuedeprogramarsede 10minutos(00:10}hasta
11horas,59minutos{11:59}.
Para programar un cicmode homeado diferido:
1. Oprima[atecla 'Delay'.
o 'DELAY'desteIla.
o '00:00'desteIIaenel indicadorvisual.
2. Oprima[ateclaA o V"para programarel
tiempo diferido.
Cuando'DELAY'est6todav[adesteIIando:
3. OprimaIatecla'Cook& Hold'.
o '000'seiIuminaen e!indicadorvisual.
o 'BAKE'y 'HOLD'desteIIan.
4. OprimaA paraprogramar[atemperaturade homeado.
o '00:00'y 'HOLD'desteHan.
o 'BAKE'permaneceiiuminado.
5. OprimaA paraprogramare[tiempo de horneado.
o Ene[ indicadorvisualsei[uminan'DELAY','BAKE',y
'HOLD'.
Delay
A
Cook&
Hold
Cuando e[ tiempo diferide ha expirado:
• 'DELAY'seapagar&
• Sedespliegae[tiempo dehorneado.
• Sedespibga 'BAKE'y 'HOLD'.
Para programar un tiempo diferido cuande ya se ha
programado 'Cook & Hold':
1. Optima [atecia 'Deiay'.
Delay
° 'DELAY'destelIa.
• '00:00'sedespIiegaen e[indicadorvisual
2. Optima [ateda ,A o V paraprogramare[
tbmpo diferido.
• Despu6sde cuatm segundos, 'DELAY'
permanecer_iiuminadopararecordarieque se
haprogramadouncic[ode horneadodiferido.
Cuando ha expirado e[ tiempo diferido y e[ homo
comienza a funcionar:
• SedespIegar_e[ tiempo de horneado.
• 'DELAY'seapagar&
• 'BAKE'y'HOLD' permanecer_niluminados.
Para cancemar:
Oprima[a tec[a 'Cancel'.
• Todas[asfuncionesde horneadocontroJadaso no pot el
temporizadorser4ncanceJadas.
• LahoradeJd[avoiver4a despbgarseen eJJndicadorvisual.
Notas:
• Nousehorneadodiferidopara [osarticuIosque necesitan
precalentambntodel homo,ta[como pasteies,galletasy panes.
• Nousehorneadodiferidodiferidosiel hornoyaest6caIiente.
61
Page 63

'Keep Warm' (Mantener
Caiiente)
Paremantenercalientesenfarmaseguraalimentoscatientesopara
catentarpanesy plates.
Pare programar 'Keep Warm':
1. OprimaIatecla 'KeepWarm'. Keep
o 'WARM'destefla.
o '000'sedesptiegaenel indicadorvisual.
2. SeteccioneIatemperaturede 'KeepWarm'.La
temperaturapare 'KeepWarm'puedeser
programadade63°a 90° C045° a 190° F].
Ogrimau oprJmay mantengaoprimida[atecJa
AoV.
o Cuandocuatquierade estasdosteclasseoprime per primera
vez,'75°' ('170°'] seituminar_.
+ OptimaIatecia A pare aumentarlatemperatura.
o Oprimalatecla V"para disminuirla temperatura.
'WARM'y Iatemperaturasedesplegar_neneIindicadorcuando
el ciclo'KeepWarm'est6active.
WePm
Notes sobre 'Keep Warm':
o Paracalidad 6ptima de losalimentos,losalimentoscocinados
en el borne debensermantenidoscalientesper no m_sde 1a
2 horas.
+ ParaevKarque losalimentosse sequen,cObraloslevemente
con papelde ahminio o unatape.
+ Pare calentar panecillos:
- cubra Ievementelospanecfllosconpapelde ahminio y
colOquelosen el borne.
- oprima'KeepWarm'y latecla A pare programar
75° C []70° F[.
- calientedurante 12a 15minutes.
+ Pare calentar plates:
- coloque 2 pilas de cuatro plates cada una en el homo+
- oprima 'Keep Warm' y la tecla A pare programar
75° C (]70 ° F].
- caliente los platos dumnte cinco minutos, apague el homo y
deje los platos en el horno durante 15 minutos mds.
- use solamente platos resistentes al homo, verifique con el
fabricante.
Pare oa_oemar 'Keep Warm':
1. OprJmaJatecJa'Cancer P_,_nP.p.m]
2. Retireel alimentodel horno.
- nocoloquelos platescalientessabreuna superficiefr{a
puesel cambior_pidode temperaturapuedecausarfisuras
superficiales.
62
Page 64

Cierre Auto tico/Modo
A uste de [a te peratura de[
E[homo se apagar_autom_tbamentedespuesde 12horassi usted[o
deiaaccidentaimenteencendido. Estacaracteffsticade seguridad
puedeset desactivada.
Para eance[ar e[ cierre autem_tiee de 12 heras y
dejar que eI home funciene centinuamente durante
72 heras:
1. ProgrameeI homoparahomear (vetp_gina60).
2. Optimay mantengaoprimida [a tecIa 'Clock'
durantecinco segundos.
o 'SAb'sedespiegar_ydesteIiar_durantecinco segundos.
o 'SAb'sedespJegar_continuamentehastaquese desactiveo
hastaque transcurraeI[imitede 72betas.
o 'BAKE'tambi6nsedespIegar_si se est_usandoun cJc[ode
homeadocuandoe[ homoest_en ModeSab_tico.
TodaslasotrasfuncionesEXCEPTO'BAKE'['Timer','KeepWarm',
'Clean',etc.)est_nb[oqueadasdurantee[ ModeSab_tico.
Para cancemar'Bake' cuande emMode Sab_tiee
est_ active:
Oprima[a tec[a 'Cancel'.
o 'BAKE'seapagar8en e[ indicadorvisual
o No se oir_ ningunaseffa[sonora.
Para caneemaremMode Sab_tice:
1. Optima[atec[a'CLOCK'durantecincosegundos.
O
2. Despuesde 72horas,el Mode Sab_ticoterminar&
o 'SAb'destei[ar_durantecincosegundos.
o Lahera de[d[a reaparecer_en e[ indicadorvisual
Clock
Laexactitudde Iastemperaturasde[ homo es culdadosamente
probadaen Iaf_bdca. EsnormaInotaraigunadiferenciaentre [a
temperaturade homeado,entreun horno nuevoy un homo an%uo.
Cone[ correr de[ tiempo, Iatemperaturade[horno puedecambiar.
UstedpuedeaiustarIatemperaturade[homo,siconsideraquesu
homo noest8 homeandoo dorandoenforma correcta. Paradecidir
cuantodebecambiar[a temperatura,programe[atemperaturade[
homoa 15° C (25° F)m_salta o m_sbajaque [atemperatura
indicadaen sus recetas,[uegohornee. Losresukadosde[a
"prueba"puedendadeuna ideade cuantoajustar[atemperatura.
gjuste de [a temperatura de[ home:
1. Optima [atecia 'Bake'. Bake
2. Programe285°C[550° F)oprimiendo[a tecIa A
3, Optimay mantengaoprimidaIa tecia'Bake'
durantevariessegundoso hastaqueO°aparezca
en e[ indicadorvisual.
Si Iatempemturade[horno haside pmviamenteaiustada,e!
cambioaparecer_enel indicadorvisual. PereiempIo,si la
temperaturadel bornefue reducidaen8°C 05° F}el indicador
mostrar_'- 8°' ['-15°'}.
Optima latecIaA o V paraajustarIatemperatura.
Cadavezqueseoprimeuna tecIa,latemperaturacambiaen
3° C(5° F}. Latemperaturadel bornepuedeseraumentadao
disminuidaen 3°a 20° C[5° a 35° F}.
LaheradeIdia reaparecer_autom_ticamenteenel indicador
visual
Nonecesitareajustar[a temperaturadel homosi hayuna falla o
interrupciOnde energ[ae!6ctdca. Lastemperaturasdeasara la
parrilla y limpiezano puedenseraiustadas.
@etas Sebre e[ Mode Sab tico:
o ElModeSab_ticopuedesetactivadoen cualquiermemento,
est6o noel borneencendido.
o ElModeSab_ticono puedesetactivadosi Iastechs est_n
bioqueadasocuandoIapuertaest_bioqueada.
o Siel homo est_horneandocuandoe!ModeSab_ticoes
programado, 'BAKE'seapagar_aIfinal del ciclo de horneado.
Noseemitir_nseffaIessonoras.
o Cuandocomienzae[ModeSab_tico,noseemitir_ [aserial
sonorade precalentamiento.
o Cuandoe[ModeSabaticoest_active,todos losavbos, mensaies
y se_alessonorasest_ndesactivadas.
o SioprimeIatecla'CancersecanceIar8uncic[o'Bake',sin
embargoe[ centre[ permanecer_enModeSab_tico.
o SIfaI[a[acorrienteeI@ctrica,cuandow[elvaIaenergFae[homo
seactivar_enMode Sab_ticocon72 horasrestantesy ning0n
cic[oactive.
63
Page 65

@
'[}roiming' (Asar a [a Pardlia)
Para programar 'BroW:
1. Paracomenzar,optima[a tech 'Broil'+
+ 'BROIL'destella.
o 'SET'sedespliegaene[ indicador.
2. Oprima[atecla& paraprogramarasara [aparrflB 'Hi' u oprima
latecia V para programarasarB parrflB 'LO'.
o Enel indicadorvisualse despbgar_ 'Hi' o 'LO'.
o Sebcciones'Hi broil' 285°C (550° F)para asadoa [aparriiia
normal. Sebccione'LObroil' 230° C {450° F)paraasar a [a
parriflacon temperaturabajaalimentosque @ben ser
cocinadospor m_stiempo,ta[ como la camede ave.
3. Despu@de cuatrosegundos,elhorno comenzar_a funcionar.
o 'BROIL'continuar_iIuminado.
4. Paraun dorado6ptimo,precaIienteeiebmento deasara [a
parriIIadurante3a 4 minutos antesdeco[ocarel alimento.
Broil
5. CoJoqueeJaJimentoen eJhorno. Dejelapuertaabierta
aproximadamente10cm (cuatropulgadas}(elprimer tope).
6. D6vueJtaa Jacame unavezaproximadamentea mJtadde Ja
cocci@.
7. Cuandoel alimentoest6cocinado,oprimalatecIa _anoel/
'Cancel'. Retireel aiimentoy laasaderadel horno.
• Lahoradel d[avoiver4a despbgarseen el Jndicadorvisual.
Notas Sobre Asade a Ja ParriHa:
o ParamejoresresuItadoscuandoasea la parrflIa,useuna
asaderadise_adaparaasara laparriila.
o Los tiemposde asara laparriIIaaumentar4ny el doradoser4
m4scIarosi el eIectrodm_a6stboesinstaIadoenun circuito de
208w%os.
o 'Hi' seusapara [amayoffade los asadosa [aparr[Ha.Use'LO
broil' cuandoasea [aparri[[aa[imentosquenecesitancocci@
probngada. Latemperaturahfferbr permite quee!a[imentose
cocine hastaquedar bbn asadosindorarsedemasiado.
o Los tiemposde asadoa [aparri[[apuedenser ross[argos
cuandosesebccbna [atemperaturam_sbajade asara [a
pardlla.
o E[a[imentodebeserdadovue[tacuandoest_a mitadde[
tiempo deasar.
o Parasugerenciasytemperaturasadbionalessobre asara la
parriIia,consuIteel foIbto "LaCocinaFdcfl".
Tab[a de Asar a [a Parr[Ha
POS+C+ONDE
LA PARR[LLA*
Came de Res
B[ftec,2,5cm {1") 4
4
Hamburguesas,1,9cm (3/4"} degrosor 4
Came de Cerdo
Tocino 4
Chuietas,2,5cm {1"] 4
Jam@- Rebanadasprecocidas,1,3cm(1/2'+1de grosor 4
Came de Ave
Presasde poi[o 3 o 4 Bbn asado
Mariseos
Bistecsde pescado,con mantequiiia,2,5cm (1") degmsor 4
Filetesdepescado 4
La posiciOnde[aparriiIa superiores#5
Nota: Estatab[aes s6[ouna gu[a. Lostiempos puedenvariar con el%0 de alimentoquese est_cocinando.
TERMiNO DE
A medioasar 15
Bienasado 19
Bienasado 15
Bienasado
Bbn asado
Tibio
Desmenuzado
Desmenuzado
+mmPo+O+AL
COCC[ON (M[NUTOS)
- 18minutos
- 23 minutos
- 18minutos
6 - 10minutos
22- 26minutos
8 - 12minutos
'LO Broir
- 38 minutos
28
10 - 15 minutos
8 - 12 minutos
G4
Page 66

Respiradero de[ Homo
Cuandoel homoest_en uso,el_reacercade[respiraderopuede
caientarsetosuficientecorrloparacausarquemaduras=Nunca
btoquee[a aberturade[respiradero=
Elrespiraderodemhomoseencuentra debajodemrespamdo
protectorde su estufao
RESPIRADERO
cercade laabertura
de[respiraderopues
e[calorque sale
No coloquepl_sticos
puededeformaro
derretirel pl_stico.
S
'Oven Light' (Luz de[ Homo)
Oprimae[ interruptor de [a [uzde[hornoen e!panel
de controlpara encendery apagar[a[uzde[homo=
Panel inferior Homo
Proteiaei paneiinferiordel homo contraderrames,especiaimente
azucaradoso addicos, puespuedendescoIorar[aporceIana
esmaItada=Usee[utensiIiodetamaffocorrectoa fin deevitar
derrames.No comoqueutensiiios ni papei de amuminio
directamente en mapare inferiordemhome°
Oven
Mght
Para reinstaiar [a parriiia:
1= Coloque[apardIIaenel soportede [a parrfliaen e[ homo.
2= hlcIinelevementehaciaarribael extremodeIantero;desIicela
parrilIahacia atr_shastaquepasesobrelostopesde enganche=
3= Bajeelfrente de [a parriIIay desIiceIahaciaadentrodel holno=
Nocubra una parrilla compietacon papel de aluminio ni coloque
papel de amuminioen mapatio inferiordemhomo°Se afectar_n los
resumtadosdemhomeado y se puede daiiar maparte inferior dem
homo.
Posiciones de [a ParriHa
PAflfllLLA5 0a posici6n
m_saIta):Seusapara
tostarpano asara [a
parriiia aiimentos --'
delgadosno grasosos= -- _
PARRILLA4: Seusapara __
la mayol[ade losasadosa
la parrilia=
PARRILLA3:Seusapara
homearaiimentosen una
bandejade horneargal[etaso unmoldepara rollodemerme[ada,
parapasteles,paysde frutaso a[imentoscongelados=
PARRILLA2: Seusaparaasarcortesde camepequeffos,caceroias,
homearbaguetasde pan,pastelesen moidesde tuboo flanes=
PARR_LLA1:Seusaparaasarpedazosgrandesde camey came
de ave,payscongelados,su%s de postreo paste[esespon]osos=
HORNEADOCONVAR[ASPARR[LLAS:
--3
--1
Parr[[[as del Homo
Dos parriiias: Use[asposiciones2y 4, o 1 y 4=
Media Parri[[a
Sed[spone,comoaccesodo,de unamedia
parrfl[aparaaumentar[acapacidadde[
homo, Seinsta[aen [asecciOnsupedor
de[[ado[zquierdode[ homoyofrece
_No use e!homo para guardaralimentosni utensillos, espacioparaunaplato de verduras
cuandose haco[ocadouna asadera
E[homo tiene dos parri[[as=Todas[asparri[iastienen un bordecon
tope de enganche=
Para retirar [a parriiia:
1. Tirede [a parril[aderechohacia
afuerahastaquesedetengaen
[aposiciOnde[topede
enganche.
2. Levanteelfrente de [aparriilay
tire de [a parriIia haciaafuera.
grandeen [aparrilla inferior. P6ngaseen
contactoconsudistribuidor paraobtener
el accesodo"HALFRACK"o parasolicitar,
[lamea[1-800-688-840&
65
Page 67

Homo Autoiimpiante
esmaitadaes resistentea[_cidopero noa pruebade_cidos. E[
acabadode porcelanapuededescoiorarsesi [osderramesdcidos
o azucaradosno son [impiadosantesde uncic[ode auto[impieza.
• Esnormalque [asp+ezasde[homo se ca[ientenduranteelclc!o
ae autoiimp+eza.
, A fin de evltaruna [es+6npersonay da[_oa lapueita de[homo.
notrate deabrir [apuer[a cuandoest6despiegadalapalabra
"LOCK"[BJoqueadaJ.
• Evitetocar [acubie[ta, lapuerto.[aventanao ei _ireadel
respiraderodeihomoeuran[eun cicLodelimDeza.
o No use t+mpiadoresueqornoscomercia[esene[ acabadodel
homomairededorde mngunapiezade[homo puespuede
"Jai_arel acabadoo [asDezas.
Elciclo deautolimpiezausatemperaturassuperioresalas
temperaturasnormalesde cocci6npara limpiarautom_ticamenteel
interiorde[homo+No fuerce lapuertadel hornoni lapahnca de
bloqueoparaabrirla.Estopuedecausarexposici6nalas
temperaturasaltasy constituir un ries9ode quemadura.
Esnormal queocurranllamaradas,humoo llamasdurante la [impieza
siel hornoest_demasiadosucio. Esmejorlimpiarel homo
regularmenteenvezde esperarhastaquesehayaacumulado
demasiadasuciedad.
Duranteetprocesode limpieza,lacocina debeestarbienventilada
parae[iminarlos olores norma[esasociadoscon [a [[mpieza,
Antes de [a Autoiimpieza
1. Apague la [uzde[hornoantesde la limpieza.Laluzdel homo
puedefundirse duranteel cic[ode [impieza.
2. Retire[a asadera,todoslosutensiliosy las parriilasdel homo+Las
parrillasde[ hornosedescoiorarainy no se deslizar_nfdciimente
despuesde un cic[ode autoiimpiezasi no son retiradasdei homo+
3. Limpiee[ marcodel homo,el marcode [a puerta,ei dreafuerade
[ajunta de la puertay airededorde laaberturaen [ajunta de la
puerta,con un agentede [impiezanoabrasivoto[ como'Bon
Ami'+o con detergentey agua.Ei procesode autolimpiezano
[[mpiaestasdreas. Eliasdebenset limpiadasparaevitarque [a
suciedadsehorneeduranteei ciclode autolimpieza.[Lajunta es
el seilo alrededorde [a puertayventanadel homo+)
4. Paraevitarda_o no[impie nifrote [a --_ _
junta situadaalrededorde [apuertadet \
homo+Lajunta est_disetiadapara
sellarherm6ticamentee[calordurante
e[cic[ode [impieza.
5. Limpieel excesodegrasao derrames
de [aparte inferiorde[ homo+Esto
evita humo excesivoo[[amaradasdurantee[cicio de [impieza.
6. Limpie losderramesazucaradoso_cidostalescomo papaduice
(camoteD,tomateso saIsasa basede [echo.LaporceIana
Para programar 'Self-Clean' (Autoiimpieza):
Nota: Latemperaturadeihomodebeset inferiora 205°C(400° F)para programarun cic[ode [[mpieza.
!= Cierre[a puertode[homo+
2. Mueva [apaiancade bioqueode [apuerto a [aderechaa [a
posiciOnbloqueada.
Optima [atecia 'Clean'. Ciemn
• 'CLEAN'destellaen e[indicadorvisual
Si [a puerto nosecierra,seoirdnseffalessonoresy [a pa[abra
'DOOR'sedespiegar_ene[ indicadorvisual Si [apuerta noes
cerradadentro de45 segundos,[aoperaci0ndeautoiimpieza
set8 canceladay e[ indicadorvoiver_a despiegar[a hora deidia.
4= Optima [atecia A oV=
• Sedespiiega'CL-M [Limpieza- Suciedad
Mediana).
5. Oprima latecia A o V paradesp[azarlos
ajustesde autoJimpieza.
'CL-H' (Limpieza- SuciedadIntensa.4 horas]
'CL-M' [Limpieza- SuciedadMediana.3 horas]
'CL- L' (Limpieza- SuciedadLove,2 horas]
A[seJeccionare[nive[desuciedadde[hoino se programa
autom4ticamenteettiempode [Jmpieza.
6. Despu@sdecuatro segundos,e! homo comenzar4a [[mpiar.
+ Eltiempo de[[mpiezacomenzar4[acuentaregresivaene[
indicador.
+ 'LOCK'sedesplegar4enel indicadorvisual.
• 'CLEAN'sedespIegar_ene[ indicadorvisual
Para diferir un cic[o de auto[impieza:
1+Optima [atecia 'Deiay'+
+ 'DELAY'destei[a+ Delay
• '00:00'sedespJegar4eneJindicadorvisual+
2= Oprima[atecia A o V paraprogramar[a
cantidadde tiempoqueusted deseadiferire[
cic[o+Eltiempodifeddo puedeserprogramadode ................................
10minutos[00:10}a 11horas,59minutos
0 +:59}.
conto
*Losnombresde losproductosson marcasregistradasde sus respectivosfabricantes.
66
Page 68

3. Oprima[atecia'Clean'.
o 'CLEAN'desteihrZ C!ean
4. OprJma[atecJa,A o _'.
o 'CL-M' [Limpieza- SuciedadMediana}se
despJiegaen el indicador.
5. Oprima[ateclaA o V para despJazarJosajustesde
auto[JmpJeza.
'CL-H'{Limpieza- SuciedadIntensa,4 horas}
'CL-M' (Limpieza- SuciedadMediana,3 horas}
'CL-L' (Limpieza- SuciedadLeve,2 betas}
At seieccionare[hiVe[desuciedadde[homoseprograma
autom_ticamentee[tiempo de[impieza.
6. Despuesde cuatrosegundos,'CLEAN','DELAY'y 'LOCK'se
desplegar_nene[ indicadorvisua[paraindicarque e[homo est_
programaticpara uncic[ode [impiezadiferido. Eltiempodiferido
tambi6nsedespIiegaen e[[ndicadorvisual
Si e[ homo ya ha side programatic para un eicie de
[impieza y usted desea programar un tiempo
diferido:
1. Oprimalatecla 'Delay'.
o 'DELAY'destelia.
o '00:00'sedespIegar_en el indicadorvisual
2. Oprima[ateciaA o V para programarla cantidaddetiempo
que usteddeseadiferir el ciclo.
Despu_sdecuatrosegundos,'CLEAN','DELAY'y 'LOCK'se
despiegar_inen el indicadorvisua[paraindicarque e[borneest_
programaticpara unacic[ode limpiezadiferido.EItiempo
diferidotambien sedespIiegaen elindicadorvisual
Delay
Cuando comienza e[ cido de automimpieza:
o 'DELAY'seapagar&
o EItiempo de limpiezasedesplegaraenei indicadorvisual
Para cancemar e[ cido de automimpieza:
Oprima[a tecia 'Cancel'. _u2
o EIindicadorvisua[quedaen bIanco.
o TodaslasfuncionessoncanceIadas.
Durante e[ cido de auto[impieza
Cuandoaparece'LOCK'ene[ indicador,[a puerta no sepuedeabrir.
Paraevitarda5oa lapuerta,no fuerce[apuertapara abdriacuando
la paIabra'LOCK'est_desplegadaen el indicadorvisual
Humo y Omores
Ustedpuedevet humo y sentir olor las primerasvecesque elhomo
eslimpiado. Estoes normaly disminuir_con el tiempo.
Tambi6npuedeocurrir humosi el borneest_demasiadosuc[oo si
seha dejadounaasaderaenel heine.
Sonidos
A medidaflue e[horno secalienta,ustedpuededr sonidosde
piezasmet_[icasquese expandenycontraen. Estoesnorma[y no
da_ar_el homo.
Despu6s de[ dc[o de auto[impieza
Aproximadamenteunahera despu6sdelfin detcic[ode [impieza,
'LOCK'desaparecer_.Lapuertaahorapuedeser abierta.Mueva[a
paIancade b[oqueode [apuertaa [a izquierdapara desbioquearla.
Alguna suciedad puede quedar come una [eve ceniza gHs ripe
poivo. Retireiaconun paso h0medo. Si [a suciedadpermanece
despuesde [[mpiaria,significaque e[ciclode [impiezanofue 1o
suficientemente[argo. Lasuciedadser_eIiminadaduranteel
pr6ximocic[ode [impieza.
Simasparrimmasdemhomofueron dejadasen elhomoyno se
desmizansuavemente despu_s de _ cicmo_e mimpieza,[impie
[asparriiIasy lossoportesde [asparriliasconuna peque_acantidad
de aceitevegetalpara hacerdeslizarlascon m_sfacilidad.
Puede_ aparecer m_easdemgadasen mapercema_aampasar per
cicmosde came_tamie_toy e_friamie_to. Estoesnormaly no
afectar_e[ rendimiento.
U_a descomoraci_ bma_capuedeaparecer despuSs _emcicmo
de mimpiezasi mosamime_tos_cidos o az_carados _o f_ero_
mimpiadosa_tes demcicmode automimpieza°EstadescoIoraciOnes
normaly no afectar_e[ rendimiento.
Notas:
o si se dejaabierta[apuertade[ borne,[apaIabra'DOOR'
desteIIar_ene[ indicadorvisua[yseescuchar_unase5a[
sonorahastaque [apuertaseacerraday [atecia'Clean'sea
oprimidanuevamente.
o Lapuertade[heine se da_ar_sisefuerzaparaabrirIa cuando
[apalabra'LOCK'contin_iadesp[egadaene[ indicador.
o Lahera de[d[asedesp[iegaen e[[ndicadorvisual.
67
Page 69

Procedi ientos de Limpieza
Ases resedes.e elhomo spas.doyq.etodaslaspie=aseSt n
fr_asantes de tecarie o limp!ario. De este mode se evitar_ da_e y
Parsevitar manchasodecolotaciOnJimpieel homo desPuesdeCads_Js0.
, Sise retiraaJgunapieza,aseg_resedequeseareinstaladaenforrna correcta: 1-800-688-8408Canad&
* Losnombresde Iosproduotassonmarcasregistradss
desus respectivosfabricsntes=
** Pars hacerpedidos,Ilamesl 1-877-232-6771EEUU=o
PmEZA P.OCED M E.TODEUMPmEZA
Protectortrasero
esmaitada
Bandeja de Asar
e inseitn
Area del Relnjy
de lasTecias
de Cnntrol
Cnbie_ta=
Vidrie
Ce_micn
Ls porcelansesrnaltsdsesvidriofundidoenmetalypuedeagrietarseo picarsesi noseusacorrectamente=Esresistentes
los_cidos,nos pruebsde_cidos=Todoslosderrsmes,especislmentelosderrsmesszucsradosoaddicosdebensetlimpiados
inmedistamenteconun paiioseco=
° Cuandose enfr[e,laveconsguajsbonoss,enjusgueyseque=
° NuncsIimpieunasuperficietibia o cslienteconun pa5ohOmedo=Estopuedecausaragrietsmientoopicaduras=
° NuncsuseIimpiadoresdehomo,sgentesdeIimpiezaabrasiveso c_usticosen elacabsdoexteriorde laestufa=
Nlmca cubm el &serto con papal de a/umioie puns esto evita que la ymsa seescurra a & baadeja&ferio_
• Coloqueun paiioenjabonadosobreelinsertsy la bandeja;dejeremojarparssokarlasuciedsd=
• Laveenagusjabonosatibia=Useunsesponjsdefregsr parsquitarIssuciedadpersistente=
• Labandejadesssry el insertspuedensetIsvsdosenel !svsvsjillss=
• Parsactivar'ControlLock'(BIoqueode loscontroles}psra la limpieza,vet p4gina59=
. Limpieconun paiioh0medoysecar=Nouseagentesdelirnpiezaabrasivespunspuedenrsysrlasuperficie=
. Sepuedeussrlimpisvidriossi se redanene!paiio primero=NOmcie directamenta ea dpand.
• Retirehs perillsscuandoest6nenlaposici6n'OFF'tir_ndo!sshaciaadelante=
. Lave,enjuaguey seque=NouseagentesdelimpiezaabrasivespunspuedenrayarIssupefficie=
. Enciendscadsquemsdorparsasegursrsedeque Issperillashartside correctsmentereinstslsdss=
Nwlca uselimpiaderes dehomo, blaaqueadorcon dote, amol_[acoetimpiadoms de vidde que conteogaamonface.
NOTA:Uame a ua reparader auterizade si la cuhierta de ddde cot#mice se adders, quiehra o e/ papel de ahHninio
sederrite sebm ]a cebiertao
• Dejeque!scubiertsseenflieantesdelimpiarls=
° Generalidades- Limpielacubiertadespu6sdecadsuseo cusndoseanecesariocon unatoallsde papelhOmedsycon
'CooktopCleaningCreme'(Cremsde LimpiezaparsCubiertss}[PiezsNo=20000001}**=Lustreconun patiolimpioy seco=
NOTA:Sedesa,,ro_;_ardnmanchaspermanentesd b sudedadse dejasuesecocineunay otravezusando/acublertacuando
est_ social.
• Ma_chas Rebeldes nl_aroas de Metal - Humedezcsunaesponjsdegemsqueno dejemalcasoque norsye=Aplique
'CooktopCleaningCream*(CremadeLimpiezapsraCubie_tss}($}iezano=20000001}'*yfroteparssscartantssuciedadcome
seaposible=Apliqueunscapsdelgsdadecremssobrelasuciedsd,cubraconunatoalh depapelhOmedsyd6jelsrepossr
dursnte30a45minutes[2- 3betasparsmuchssuciedad}=MantengahOmedocubriendolatoallsdepspelconenvolturade
pl_stico=Restrieguenuevsmente,luegolimpieconunpatiosecoy limpio=
NOTA:So,,'amenteuseesponjasLIMPIAS,HUMEDASysuenorayony sueseansegurasparsutensWiosconacabadoantiadherenta
Sedaflar_d disefioyd vidriodb esponjanoest_mojada,sita esponjaest_sudso seusaotto ripedeespot_;a.
• Sncie_a_es Qnema_aso Pesa_as =Restriegueconunsesponjsquenodejemsrcssy'CooktopCleaningCreme'*
(OremsdeLimpiezaparsCubie!tsg.
NOTA: Sostengaunredresadorconhojadeaf_taraun dng,uinde30°yrestrieguecuatsuiersuciedadsuepermanezca.Lunge
68
Page 70

PJEZA I PROCEDI_]_ENTO DE LIMPIEZA
• Eviteussrcsntidsdesexcesivssdesguspuespuedeescurrirsedebsjoodetr_sdelvidriocsussndornsnchss.
del Homo - Vidrio ° Laveconaguayjsb6n. Enjusgueconsguslirnpisyseque.EllirnpisdordevidriopuedeussrsesiserodsenunpsNoprirnero.
,° Nousernsterislessbrssivostalescornoesponjssderestregsr,lirnpisdoresenpolvooesponjssdeIsnsdesceropuespueden
rsysrelvidrio.
Interior del Home ° SigalasinstruccionesenIssp%inas66-67parsprogrsrnsrunciclodesutolirnpieza.
Parrillasdel • Lirnpisrconagusconjsb0n.
Heine ,. Sscsr lasrnanchasdiffcilesconpolvodelirnpiezao unaesponjaliensconjab6n. Enjuagueyseque.
,° Lssparrillsssedesco!orsr_nperrnsnenternenteypuedennodeslizsrseconsusvidadsisondejadasene!homodursnte
uncic!odesutolimpiezs.Siestosucede,IirnpieIs psrrillsylossopo!tesenrelieveconunspequeiiscsntidsddesceite
vegetalparsrestsursrIsfscilidsdde rnovirniento,luegoIirnpieelexcesode sceite.
Acern lnexidabie
[rnodelosseleetos)
Gaveta de
Manila de ma
Puerta, Panemes
Laterumes-
Esmaite Pintudo
j. NO USENINGUNPRODUCTODELIMPIEZAQUECONTENGABLANQUEADOBA BASEDE CLORO.
° NO USEMMPIADORES"ORANGE"NILIMHADOBESABRASIVOSo
,. StEMPRELIMPIELASSUPERFICIESDEACEROA FAVORDELGRANOo
,. Limpieza Diaria/Suciedad Leve=Lirnpiecon unode lossiguientes- sgua conjsb0n,unssoluciOndevinagrebhnco
consgus, lirnpisdorparssuperficiesy viddo'Forrnuls409'_oun lirnpisvidriossirnilsr- ussndouns esponjsoun pai_o
suave.Enjusguey seque.Parspuliry evitsrmamasde losdedos,usee!producto'StainlessSteelMagicSpray'_
(PiezsNo.20OOOOO8)_*.
,° Suciedad Mediana/lntensa oLirnpieconuric delossiguientes- 'BonArni'', 'Srns!tCleanser'_o 'SoftScrub'_- ussndo
unsesponjsh0rnedsoun pasosuave.Enjusgueyseque.Lssrnsnchssdificilespuedenserquitsdssconuns esponjs
rnulti-uso'Scotch-Brite'_h0rneds;frote afavordel grano. Enjusguey seque.Parsrestsursrel lustreysscsrIssvetss,
splique'StainlessSteelMagicSpray'_.
,. Descoloraci6n - Useunaesponjsrnojadsoun patiosuave,lirnpiecon lirnpisdorde acero'CameoStainlessSteel
Cleaner'S.Enjusgueinrnedistsrnenteyseque.ParselirninsrIssestrfssy restsursrellustre,usedespu_srocisdorparsscero
inoxidsble'StainlessSteelMagicSpray'S.
Cusndoest6frfs,laveconsgustibiajsbonoss,enjusguey seque.Nuncslirnpieunssuperficietibia o cslienteconunpa_
h0rnedopuesestopuededs_srIssuperficiey csussrunsquernsdursscsussdelvapor.
io
Parsrnsnchssrebeldes,usesgentesde Iimpiezslevernentesbrssivostsl cornopastsdebicsrbonstoo 'BonArni'*.Nouse
sgentesdeIirnpiezssbrssivos,c_iusticoso_sperostat cornoesponjssde Isnadesceroo lirnpisdoresdehomos.Estos
productospuedenrsysro dsi]srperrssnenternenteIssuperficie.
NOTA:Useuna toalla oun parle secepapaIimpiar les derpames,especialltlente los derpamesaddices o
azucapadosoLasuperficie sepuede descolepare perderel brillo si el derpapaenoselimpia inmediatapaellte.Esto
es especialmente impe_ante en las superficies Hancas.
*Losnombresde losproductosson msrcssregistrsdasde sus respectivosfsbricsntes.
** Parshscer pedidos,IIsmeal 1-877-232-6771EEULI.o1-800-688-8408Canada.
69
Page 71

Puerta del Homo
• No coloquepesoexces_vomse pareen la puertadel homo.
Estop0dr[ahacervolearla estufa,quebrarla puer_ao leslonar
al usuado.
o No intenteabrir o cerrarla puertani hacerfuncionarel homo
nas[aque la puertano haside debidamemereemp_azaoa
, Nuncacoloquelosdedosentrela bisagray e_marcodehntero
-M homo. Los brazesde articulaci6nson mon[auosa resoRe.
SJsegolpeaaccldentalmente[ab_sagrasece,rrara
_ruscamentecontrael marcodel homo y puedelesionarsus
dedos.
"esponjosa"cuandosecierra. Estoes normaly disminuir8con el
Nora: La puer[adel homo en unaestufanuevaouedesentirse
use.
Para sacar:
1. Cuandoest6fr[a,abrala puertadel homo hastaIaposiciOntope
de asar a Iaparrflla[abiertaaproximadamente10cm (cuatro
pulgadas)].
2. Sujete Iapuertade cada Iado. Nousela
maniiade IapuertaparaIevantarla.
3. Levanteuniformementehastaque la
puertase salgade losbrazesde
articulaciOn.
Para voiver a coiocar:
1. SujeteIapuerta de cadaIado.
2. Alinee lasranurasde lapuertacon losbrazesde articulaciOnde
la estufa.
3. Desiicelapuerta hacialosbrazesde articulaciOnhastaque est6
completamenteasentadaenlas bisagras.Empuiehaciaabaiolas
esquinassupedoresde la puertaparaasentarlacompletamente
en las bisagras. Lapuertano debequedartorcida.
Ventana del Homo
3. No cierre la puertadel homo hastaque [asparri[iasde[hornono
est6nen sulugar.
AIgolpear,rayar,hacervibrar o esforzarel vidriopuededebilitarsu
estructuracausandoun mayorriesgode roturaen unafecha
posterior.
Luz del Homo
o Desconectela energiaala estufaantesde reemplazareifoco.
° Use un tomaollas s_co Pa[a evitar PoSib!eda_o a sus manos
o Notoque el foco Ca!lentoconun Pa_ohdmedoPuesesto
puedequebrar e[foco,
Para reempiazar emfoco dei homo:
1.Cuandoel hornoestefrio,suiete latapade la bombilIaensu
lugar,luegodesiicee!ret6nde alambrefuerade lacubierta.
NOTA:La cubiertade Ia bombilh se
caer_si no essu]eta ensu lugar OUB/ERTADEL
cuandoest_sacandoel retdnde
alambre.
2.Saquelacubierta delfoco y el
foco.
3.Coioqueun foco de 40watts RETEAIDEALAfVlBRE
para eIectrodom6sticos.
3.Vuelvaa colocarIacubiertade
la bombilh y aseg0reIacon el ret6nde aiambre.
5.Vuelvaa enchufarla estufa.Vuelvaacolocar laheracorrecta.
foeo
Ternillos Niveladores
Verifiquesiel sopo[te antivueicoestaiasegurandoa!pisouno de
10st0mil!0Sniveladorestraser0s, Estesoporteevita que laestufa
Sevueiqueaccidenta!mente_
Para proteger maventana de mapuerta demhomo:
1. No use agentesde limpiezaabrasivestalescomeesponjasde
restregarde lanade aceroo limpiadoresenpolvopues ellos
puedenrayarelvidrio.
2. No goIpeeel viddoconelias,sartenes,muebles,juguetes uotros
obietos.
Laestufadebeserniveladacuandose instala. Si Ia ]I]]
estufanoest_ nivelada,gire los tornillos niveladores ii[[r _
de plaisticoubicadosencadaesquinade la estufa J_::
hastaquequede nivelada. _,_c,__ .-;;; ,:
"_ *'*S's** _ POSITIVO
_\ ANT/VUEL CO
TOF_N/LLO N/VELADOR
7O
Page 72

Gaveta de Al acena
No guardep_oductoSdepape! 0 de pi_istico,alimentosni
materiales inflamablesenestagaveta.Lagavetapuede
calentarsedemasiadoparaestosart[calosCuandoSeest_usando
e!horno.
La gavetade almacenamientopuedeset retiradaparaque usted
puedalimpiardebajode laestufa.
Para sacar:
1. Vade Ia gavetay desl(celahaciaafuerahastala primeraposiciOn
tope.
2. Levantelapartedelanterade la gaveta.
3. T(relahastalasegundaposici6nde tope.
4. Sujete los hdos y levanteIa gavetapara retirarla.
Para velvet a colocar:
1. HnserteIosextremosde lascorrederasde la gavetaen los rieles
de Ia estufa.
2. Levantelapartedelanterade la gavetay suavementeempOjelaa
la primeraposici6ndetope.
3. Levantelagavetanuevamentey emp_ielahastaquequede
completamentecerrada.
Tomacorriente pata
Electrodom6sticos Peque os
(Modelos Canadienses solamente)
Eltomacordenteparaelectrodom6sticospequerios / : _....
est_ubicadoenet Iadoinferiorizquierdodel
protectortrasero.AsegOresedeque loscordones
el6ctricosno descansensobreloselementos
supedoreso cercade ellos. Siel elementosuperiori
est_encendido,el cordony el electrodom6stico i
puedendai_arse, i
Eldisyuntordeitomacorrientepara
electrodom6sticospeque_ospuededispararsesieI 'DISYUNTOR'
artefactopequei_oenchufadoen 61esde m_sde 10
amps. Parareponerel disyuntor,oprimael
interruptorsituadoen elhorde inferiordel protectortrasero.
71
Page 73

PROBLEMA SOLUCI6N
Paramamayer_ade moaprobmemas, • Revisesiloscontroiesdelhomoest_ndebidamenteajustados.
verifiqueprimeromesiguiente. • Verifiquesi el enchufeest_firmementeinsertadoenel tamacorriente.
• Verifiquea vuelvaa reponereldisyuntor.Verifiqueo reemphceel fusible=
• Verifiqueel suministrode energiael@trica.
Tedamaestufa o pa_tede emmano • Revisesi[a superficby/o loscantrobs de[hornaest_ndebidamenteajustados.Verp%inas
funcienao 55y 65.
• Verifiquesi lapuertadel harnaseha desbloqueadodespuesdelciclode autolimpieza.Vet
p_gina67.
• Revisesi el hornoest_ajustadoparahorneadodiferidoa prograpaade limpieza.VerpSginas61
y 66.
• Verifiquesi'ControlLock' [BlaqueodeControl}est_activada.VetpSg.59.
• Verifiquesiel centralest_enModeSab_tico.Vetp%. 63.
Elreioj, laa paiabrasen el indieador • ElharnapuedeestarprogramadoparaunafunciOnde'Cook& HaWo unafunci6ndiferida.
visualy/e laslueesfuncionan pete • Puedeestaractivadalacaracter[sticadebloqueadeloscontrobsdel barrio.(Verp%. 59.}
el homo no se caiienta,
Leareaultados del homeado no • Aseg_iresede queel respiraderadel harnonoest6bIoqueado.Vet p%ina 65parala ubbaciOn.
son come se esperaban e sen • Verifiqueparaasegurarsedeque Iaestufaest_nivelada.
diferentes a losdei homo anterior° • Lastemperaturasa menudovar[anentreun harnonuevoy unoantiguo. A medidaquepasa
eltbmpa, latemperaturadelbarriocambiay puedehacersem_scalientea m_sfr[a. Ver
p_gina63 paralasinstruccianescomeajustarIatemperaturadeIharno. NOTA:Nose
recomiendaajustarlatemperaturasihatenidoprobbmascon solo unao dos recetas.
o Consulteelfolbto "LaCocinaF_cil"paramayorinfarmaciOnsob_elosutensiliosde hornear.
Losaiimentoa no se asana ia o VerifiqueJasposicianesde lasparrJJlasdelhomo.Elalimentapuedeestarmuycercadel
parrillaen forma debida osalen eIemento.
demasiado hume° o EleIementadeasarnofue precalentado.
o Elpapelde aluminiaseus6de maneraincorrecta.Nuncafarreel insertodelasadarcon papel
deaiuminio.
o Lapuertadethomoestabacerradambntrasseasabaa Iaparrilla. Dejela puertaabiertaen la
primerapasici6n (alrededorde 10cm [a puIgadas]}.
o Recorteelexcesodegrasade Iacame antesdeponerlaaasara laparrilla.
o Seus6unaasaderasucia.
o E[voltaiedel hogarpuedeset bale.
Elhomo no se autemimpia, o Verifiqueparaasegurarsedeque elcicb naest6a}ustadaparaun combnzodifedda.Vet
p%ina 66.
o Verifiquesi lapuertaest_cerrada.
o Veriflquesiel controlest_en Mode Sab_tico.Vetp_g.63.
o Elhornapuedeestara m_sde205° C {400° f}. Latemperaturadel homodebeserinferbr a
205°C {@0°F}parapragramarunciclo delimpieza.
Elhomo no se limpi6 en forma o Puedeque seanecesariountiempade Iimpbzarosslargo.
debidao o Losderramesexcesivos,especialmentedealimentosazucaradosy/o _cidosnafueranlimpiadas
antesdelciclo deautalimpieza.
Lapue_tadel homo no se o ElinteriordeI barriotodaviaeat8caliente.Deieque paseaproximadamenteunaheraparaque
desbloqaea despaSsdel ciclo el hornaseenfr[eantesdequesecompleteunciclo deautolimpieza.Lapuertapuedeset
de autolimpieza, abbrtacuandodesaparezcala palabra'LOCK'del indicadarvisual.
o Elcontroly la puertapuedeestarbloqueada.VetpSgs.59y 67.
72
Page 74

PROBLEMA SOLUCION
Lasupedicie suave muestra 1. Abrasioneso rayaduraspeque_as.
desgaste, o Aseg_iresedeque Iacubiertay laparteinferiordelutensiIioest6Iimpia.NodesliceutensiIios
devidrioo demetalatrav6sdeIacubierta.AsegOresedequelaparteinferiordelutensiliono
sea_spera.Uselosagentesdelimpiezarecomendados.Vet p_g.68.
2. Marcasde metal
o No desliceutens+Iiosde metalatravesdeIacubierta.Cuandoest6fr[a,limpiela cubiertacon
CremaparaLimpiezadeCubiertas.Verp_g.68.
3. Manchasy estriasmarrones.
o Retirelosderramesr_ipidamente.NuncaIimpieconunpaiiooesponjasucia.AsegOresedeque
Iacubiertay laparteinferiordel utensilioest6limpia.
4. Areascon un brillomet_i+ico.
o DepOsitosmineraIesdetaguay de losalimentos.Uselosagentesdelimpiezarecomendados.
Ver p_g.68.
5. Picaduraso descascarilIado
o Limpielosderramesazucaradosinmediatamente.Vetp_g.68.
Sejunta humedad en la ventana , Estoesnormalcuandosecocinanalimentoscon alto contenidode humedad.
del homo o sale vapor pot ° Seus0humedadexces+vacuando Iimpi6Iaventana.
el respiradero del homo.
Hay un clot fuerte o humo leve ° Estoesnormalen unaestufanuevay desaparecer_despu6sdeunospocosusos+
cuando se enciende el homo. Atiniciar un ciclodeautolimpiezase"quemar_n"losoloresm4s r4pidamente.
o Siseenciendee!ventiladorayudar_aeIiminarel humoy/o el olor.
o Suciedadexcesivade alimentosenel panelinferiordel homo. Useunciclo de autolimpieza.
C6digosde Errores ° 'BAKE'o 'LOCK'puedendestellarr4pidamenteenel indicador paraavJsarlequehayun error
o un problema.Si'BAKE'o 'LOCK'aparecenen elindicadorvisual,oprimala tecla'CANCEL'.
Si'BAKE'o'LOCK'continOandesteJlando,desconecteIaenerg[aeI6ctricaalelectrodom6stico.
EspereunospocosminutosywJelvaareconectarlaenerg[ael6ctrica.SicontinOandestellando,
desconectelaenergiael6ctricadeJelectrodom6sticoy Ilameal t6cnicodeservicioautorizado.
o SieJhornoest4demasiadosucio,puedenocurrirdemasiadasIlamaradasIocualresultar4en
unc6digodeerrordurante IaIimpieza.Oprimalatecla'CANCEL'y dejequeel hornoseenfr[e
completamente,Iimpieelexcesode suciedady luegovuelvaa programarel ciclode JJmpJeza.
Siel c6digode error reaparece,Ilameaun t6cnicoautorizado.
Se escuchan ruidos. ° Elhornoemitevariossonidosbajos. Ustedpuedeo[rlosrel6sdelhomocuandoseencienden
yseapagan.Estoes normal.
o A medidaqueel hornosecalientayse enfr[a,ustedpuededr sonidosdepiezasmet_licasque
seexpandeny contraen. Estoes normaly no da_ar_su electrodom6stico.
No se escuchan seiiales sonoras , Elhorno puedeestaren ModoSab_tico. (Verp_g.63}.
y el indicadorvisual no se activa.
'$Ab' destella y luego se • Elhomoest4enmodosab_tico+Paraanularel modosab_tico,oprJmay mantengaoprJmida[a
despiiega nontinuamente, tecla 'Clock'(Reloj}durante cincosegundos.
73
Page 75

74
Page 76

Garantia Completa de Un Afie - Piezas
y Mano de Obra
Duranteun (1) afio desde[afechaoriginal_e
compraa[por menor,sereparar_o reempiazar_
gratuitamentecua[qulerplezaquefai[edurante
usonormalen elhogar.
Garant_as Limitadas _ Piezas
Solamente
Desde el Segundo hasta el Quinto Afie =A
paRirdela techaoriginalde compra,serepararaN
o reemplazar_ingratutamentehs p_ezasindicadas
a contmuaciOnquefallenduran-[euso normalenel
hogaren k que respectaalas piezasye_
propietariodeber_pagartodosloso[roscostos
incluyenuomano deobra.kilometrajeZmillaje.
transporte,costodelviajey costodel diagnOstico.
si fuesenecesario.
oCabierta de Vidrio get,mice: Debidoa re[ura
t6rmica,descoloraciOn,agrietarrflentodelajuntade
gomade!berde,desgastedel diseSo.
o Elemeetos Calefaetores El_etricos: Los
dementosradiantessuperioresenlosar[efactosde
cocmarel6ddcos=
Residentes Canadienses
Lasgarantiasanteriorescubrenso_amen[e
aquelloselectrodom_st_cosmstaladosonCanada1
que bansidocertificadosoaprobadospot las
agenciasdepruebascorrespondientespara
cumplLm_entocon la NormaNational deCanad_a
menosqueel electrodom6sticohayasidotrakloa
Canad_deseelosEE.UU.debidoa uncambiooe
residencia.
Garant_aLimitada Faera de los
Estados Unidos y Canad_ - Piezas
Selamente
Duran-[eun (1) aSedesdea fechadecompra
originala[pot menor,cualqulerplezaquetalle
eurameusonormalenel hogarserareemplazada
o reparadagratt_itamenteen Ioque respectaala
piezayel propietariodeber_pagartodosloso_ros
costosincluyendomanode obra.kiiometraje/
millaje,transporte,costodelviaje} cestodeJ
d_agnSstico,sifuesenecesario.
Lasgarantfasespeefficase_presadasanteriermen[e
son/asUMCASgaranttasprewstaspor eJ
fabric'ante.Estasgarantfasleorocaanderechos
legalesespecfficosy ustedpuedeteneradembs
otresdereehesquevaffande unestadea otto.
Lo que No Cubren Estas Garantias:
1=Situacionesy dat_osresultantesdecualquierade lassiguienteseventualidades:
a=InstalaciOn,entregao mantenimienteinapropiados=
b. CualquierreparaciOn,modificaciOn,alteraciOne aiustenoauterizadeper
el fabricanteo peruncentre do servicioautorizado=
c. Mal use,abuse,accidenteso uso irrazonable.
d=Cordentee!6ctrica,voItajeosuministroincorrecto=
e=ProgramaciSnincorrectade cualquierade loscontroles=
2. Lasgarant[asquedannulassi losn0merosde serieoriginaleshartsideretirados,
alteradoso no sonf_cilmentelegibles.
3. Feces=
4= Preductoscompradosparauso comerciaIo industrial
5= Elcosto delservicioo Ilamadade serviciopara:
a. Corregirerroresde instalaciOn.
b=Instruiral usuariosobre el usocorrectodelartefacto=
c=Transportedel artefactoal establecimientode servicio=
6. DaSode la cubiertade vidriocausadopor eI usode limpiadoresqueno banside
lascremasy esponiasde limpiezarecomendadas.
7. Dat_ode la cubiertade vidrio causadoperderramesendurecidosde materiales
azucaradoso pl_sticoderretidoy que noban sidolimpiadosdeacuerdoconlas
instruccionesindicadasen lagu[ade usoy cuidado.
8= LosdaSosconsecuenteso incidentaiessufridosper cuaiquier personacomo
resuItadodecualquierincumplimientode estasgarant[as=EnaIgunosestadosno
so permitela excIusi6no limitaciOnde Iosdaisesconsecuenteso incidentales,por
Iotanto la exclusiOnanterior puedeque nosoaplique ensu caso=
Si Necesita Servicio
• Llameal distribuidordondecomprOsu etectrodom6sticoo Ihme a Maytag
ServicessM,Servicioa los ClientesAmanaIlamandoal 1-800-843-0304EE.UU.o al
1-866-587-2002Canad_paraubicar a unt6cnicoautorizado.
• Aseg[iresedeconservare!comprobantedocompraparaverificarel estadodoIa
garantia. ConsulteIasecciOnsobre la GARANTIAparamayorinformaciOnsobrelas
responsabilidadesdel propietarioparaserviciobaio la garant[a.
• Sieldistribuidor o la compat_fadeserviciono puedenresolverel problema,escriba
a Maytag ServicessM,Attn: CAR:_Center,P.O.Box2370,Cleveland,TN 37320-2370
o Ilameal 1_800_843_e304EE.UU.o al 1_866_587_2e02Caeadi
• Lasgu[asdel usuario,manuaIesdo servicioe informaciSnsobrelaspiezaspueden
solicitamea Ma}_agServicessM,Servicioa losClientesAmana.
Notas:
CuandoIlameo escribaacercade un problemade servicio,per favorincluyala
siguienteinformaci6n.
a.Su nombre,direcciOny n_meredeteldono;
b.NOmerode modeloy ntimerode serie;
c. Nombrey direcci(indesu distribuidoro t_cnicode servicio;
d.UnadescripciOnclara delproblemaqueest_experimentando;
e.Comprobantedecompra(recibodecompra).
Form No. B/11/04 Part No 8113P477-60 _:,2004 Maytag Appliances Sales Co Litho USA
 Loading...