


M-PDP95X
INSTRUCTION MANUAL
06.10
M004

● General Instruction
- Read carefully and completely before proceeding.
- This shower door should be installed by a recommended installer.
- It is recommended that you wear safety glasses at all times during installation.
● Installation over ceramic tiles
- Silicone should be used to seal the line where ceramic tiles meets the side panels.
- If your shower door is to be installed over ceramic tiles, tiles should be completely under both wall jambs.
- A threshold made of aluminum is included and should be siliconed underneath the door panels in order to ensure optimal
leak protection.
● Notice
- Caulking: no sealant is required inside the shower.
- All models are equipped with transparent sealing gaskets and magnetic closure gaskets.
- Threshold for leak protection is included and recommended on base without lip and ceramic base tile.
● Care for your frameless shower door
- Never use scouring powder pads or sharp instruments on metal work or glass panels.
An occasional wiping down with a mild detergent diluted in water is all that is needed to keep the panels and aluminum
parts looking new.
P
Use installation instructions supplied with product.

PACKAGING CHECK LIST & HARDWARE
9
1
12 4
11
10
10
9
1
2
3
4
5
1
2
SIDE PANEL WITH HINGES (1)
3
THRESHOLD (1)
6
87
5
DOOR PANEL (1)
6
BOTTOM DOOR GASKET (1)
7
LEVELING BLOCKS (2)
3
9
SUPPORT BAR (2)WALL JAMB (2)
10
MAGNETIC DOOR GASKET (2)
11
KNOB (1)
4
HINGE (2)
8
SIDE PANEL (1)
12
SIDE PANEL GASKET (1)
PAGE 1
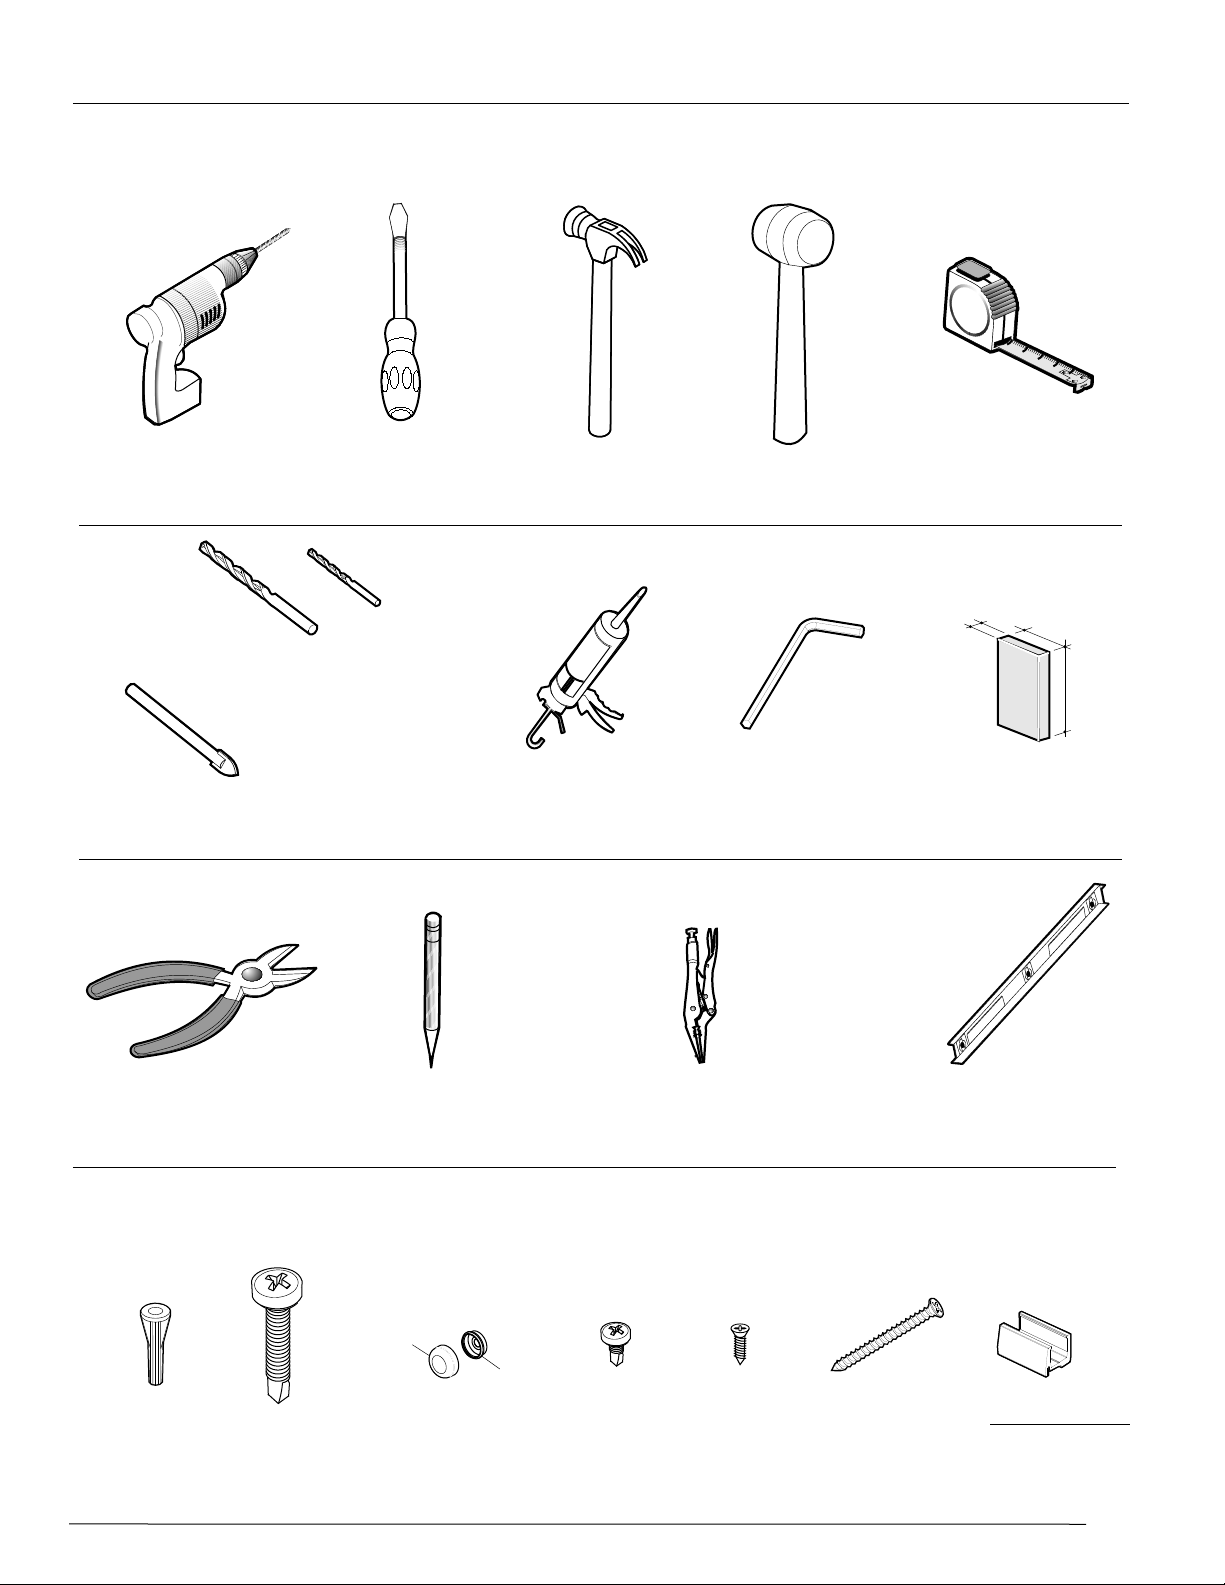
TOOLS AND MATERIALS REQUIRED
DRILL
1/4”
CERAMIC DRILL BIT TILE
SCREWDRIVERS
1/8”
1/4”
ACRYLIC DRILL BIT
HAMMER
SILICONE
MALLET
ALLEN KEY
MEASURE TAPE
½’’
(APROX.DIM)
WOODEN BLOCK
2’’
6’’
X 6
WALL PLUG
SCREW 1 1/4" LG
PENCILCUTTING PLIER
LONG NOSELOCKING PLIER
PACKAGING CHECK LIST & HARDWARE
a
SCREW CAP
X 6
b
SCREW 3/8" LG
X 6X 6
X 1 X2
SCREW 3/4" LG
SCREW 2 1/2” LG
X 1
BOTTOM GLASS CLIP
(BTM GL CLIP 1.5)
LEVEL
PAGE 2

SHOWER DOOR INSTALLATION STEPS
WARNING
Wall jamb must be supported and fastened with provided anchors into a stud framing.
ON BOTH SIDES
1A
Step
1
MOUNT THE WALL JAMB (2)
1B
2A
2B
Step
2
WALL PLUG (6)
ON BOTH SIDE
2C
PAGE 3

Step
SHOWER DOOR INSTALLATION STEPS
3
SLIDE THE FIXED PANEL
OVER THE WALL JAMB
ON BOTH SIDE
3A
3B
COVER THE PLIER’S TEETH
BEFOREHAND TO AVOID
SCRATCHING THE ALUMINIUM PARTS.
4A
3C
Step
5
FASTEN (TEMPORARILY)FIXED PANELS (1)
Step
4
FASTEN THE THRESHOLD (1)
PAGE 4

SHOWER DOOR INSTALLATION STEPS
IT IS RECOMMENDED TO HAVE TWO PEOPLE
FOR THE FOLLOWING INSTALLATION STEP.
Step
7
HINGE (2)
PU
LEVEL GLASS PANELS TO ALIGN HOLES
6B
6A
REMOVE LEVELING BLOCKS
6C
AFTER HINGES INSTALLATION
INTERIOR
SHOWER SIDE
Step
6
BOTTOM DOOR GASKET (1) + LEVELING BLOCKS (2)
PAGE 5

EXTERIOR HANDLE (1)
SHOWER DOOR INSTALLATION STEPS
INTERIOR HANDLE (1)
AH / PU TU
8C
Step
HANDLE INSTALLATION
8
8A
8B
PAGE 6

SHOWER DOOR INSTALLATION STEPS
PU
Step
MAGNETIC DOOR GASKET (1)
9
PAGE 7

INSTALLATION GUIDE
Loosen the glass clip (#1d). Align the slotte to the
1
fixed panel. The slotted screw head should be on the
inside of the shower.
ADDENDUM
1
Rest the support bar on the fixed panel inside the
2
tub. Level it and trace an arc on the wall.
Isolate the wall bracket and drill a hole, using a 1/4˝
3
drill bit through the wall. Locate the position of this
hole by way of the wall bracket. Insert a wall plug.
Secure the wall bracket to the wall by way of the
4
screw. Assemble the cylindrical joint to the wall
bracket.
2
3
4
Secure the glass fastener and wall bracket screws
5
to complete the installation process.
5

Step
11
GASKET ON FIXED PANEL (1)
SHOWER DOOR INSTALLATION STEPS
A
B
C
D
Step
SUPPORT BAR(1)
12
PU
INTERIOR
SHOWER SIDE
B
Step
SCREW 3/8" LG + SCREW CAP (6)
10
A
INTERIOR
SHOWER SIDE
PRIOR TO FASTENING DOOR ASSEMBLY,
VERIFY MAGNETIC DOOR GASKET ALIGNMENT
AND ALL PANELS SHOULD BE LEVELED.
PAGE 8

Step
SHOWER DOOR INSTALLATION STEPS
PU
13
SILICON SEAL EXTERIOR
Step
INTERIOR
SHOWER SIDE
24
Hours
14
THRESHOLD (1)
Recommended:
To ensure optimal leak protection, it is recommended to install the aluminum threshold
by running a bead of silicone under the part and position it between the fixed panels
and underneath door panel.
PAGE 9
 Loading...