

Page 1
Alti-IP 600 Phone
™
Administration Manual
05/2004 4290-0010-5.0
Page 2

WARNING!
Toll fraud is committed when individuals unlawfully gain access to
customer telecommunication systems. This is a criminal offense.
Currently, we do not know of any telecommunications system that is
immune to this type of criminal activity. AltiGen Communications, Inc.
will not accept liability for any damages, including long distance charges,
which result from unauthorized and/or unlawful use. Although AltiGen
Communications,Inc.hasdesigned security features intoitsproducts, it is
your soleresponsibilitytouse thesecurityfeatures and to establish security
practices within your company,including training,security awareness, and
call auditing.
NOTICE
While every effort has been made to ensure accuracy, AltiGen
Communications, Inc. will not be liable for technical or editorial errors or
omissions contained within the documentation. The informationcontained
in this documentation is subject to change without notice.
This documentation may be used only in accordance with the terms of the
AltiGen Communications, Inc. License Agreement.
AltiGen Communications, Inc.
4555 Cushing Pkwy.
Fremont, CA 94538
Telephone: 510-252-9712
Fax: 510-252-9738
E-mail: [email protected]
Web site: www.altigen.com
TRADEMARKS
AltiGen, AltiServ, AltiWare, AltiSpan, AltiReach, AltiLink, AltiConsole,
AltiAdmin, Alti-IP 600, Zoomerang, and Dynamic Messaging are
trademarks or registered trademarks of AltiGen Communications, Inc.
All other brand names mentioned are trademarks or registered trademarks
of their respective manufacturers.
Copyright © AltiGen Communications, Inc. 2004. All rights reserved.
Printed in U.S.A. 05/2004 4290-0010-5.0
Page 3

Contents
Contents...........................................i
Warranty..........................................v
Preface:AboutThisManual.........................vii
C
HAPTER 1
AnOverviewoftheAlti-IP600........................1
HardwareComponents...................................4
NewinVersionLevel12.0.0 ..............................4
CHAPTER 2
System&NetworkRequirements......................5
SystemRequirements....................................5
NetworkRequirements ..................................5
AltiAdmin/ACM Admin Configuration Requirements . . . . . . . . . . 5
AltiGen IP Phone Service . . . . . . . . . . . . . . . . . . . . . . . . . . . . . . . . 6
PlugandPlayFeature ...................................6
BasicMode ...........................................6
NormalOperation ......................................6
CHAPTER 3
Installation.........................................7
ManualSetup..........................................7
ApplyToButton ..................................11
CopyFromButton .................................11
PlugandPlaySetup ....................................13
PlugandPlaySetupBeforeIPPhoneisStarted.............14
PlugandPlaySetupAfterIPPhoneisStarted..............14
RemoteInstallation ....................................15
VerifyingthePhoneStartupProcess .......................17
ResolvingErrorsUponStartup .......................17
Alti-IP 600 Manual i
Page 4

Active Logon While Another Handset is Already Logged On To the
SameExtension.....................................17
RestoringDefaultSettings...............................18
RebootingtheAlti-IP600 ...............................18
Configuring“PhoneSetting”SoftKeys ....................18
Dialing an IP Number Directly from the Alti-IP 600 . . . . . . . . . . 18
OperationNotes.......................................19
CHAPTER 4
ConfiguringPhoneSettings..........................21
SystemSettings .......................................21
NetworkSettings ......................................22
ModifyingDHCPSettings...............................23
EnablingDHCP.....................................23
DisablingDHCP.....................................23
ConfiguringIPSettings .................................24
AssigningaLocalIPAddress ..........................24
AssigningaTFTPServer..............................24
UpdatingPhoneFirmware.............................25
ResolvingErrorsUponStartup .......................26
ConfiguringNAT .....................................26
AssigningNAT .....................................27
SettingRingTones...................................27
DistinctiveRingingSupport .........................28
WorkgroupStatusDisplay...............................28
ActivityDisplay.......................................29
CHAPTER 5
Phone Functions . . . ................................31
AppendixA .......................................35
Specifications.......................................35
FirewallConsiderations.................................36
Troubleshooting.......................................37
LCDMessages........................................39
Alti-IP 600 Manual ii
Page 5

LocalMenuConfigurationMessages.....................39
Alti-IP 600H/600PH Running Messages . . . . . . . . . . . . . . . . . . 39
IPPhoneBootMessages ..............................41
UserReference........................................41
Glossary..........................................47
Index.............................................53
Alti-IP 600 Manual iii
Page 6

Alti-IP 600 Manual iv
Page 7

Warranty
What The Warranty Covers
AltiGen Communications warrants its hardware products to be free from defects in material
and workmanship during the warranty period. If a product proves to be defective in material
or workmanship during the warranty period, AltiGen Communications will, at its sole option,
repair, refund or replace the product with a like product.
How Long the Warranty Is Effective
All AltiGen Communications products are warranted for one (1) year for all parts from the
date of the first end user purchase.
Whom the Warranty Protects
This warranty is valid only for the first end user purchaser.
What the Warranty Does Not Cover
1. Any product on which the serial number has been defaced, modified or removed.
2. Damage, deterioration or malfunction resulting from:
a) Accident, misuse, neglect, fire, water, lightning, or other acts of nature,
unauthorized product modification, or failure to follow instructions supplied with
the product.
b) Repair or attempted repair by anyone not authorized by AltiGen Communications.
c) Any damage of the product due to shipment.
d) Removal or installation of the product.
e) Causes external to the product, such as electric power fluctuations or failure.
f) Use of supplies or parts not meeting AltiGen Communications’ specifications.
g) Normal wear and tear.
h) Any other cause which does not relate to a product defect.
3. Shipping, installation, set-up and removal service charges.
How to Obtain Service
End user customers should contact your Authorized AltiGen Dealer for service.
Authorized AltiGen Dealers must follow the steps below for service:
Alti-IP 600 Manual v
Page 8

1. Take or ship the product (shipment prepaid) to your AltiGen distributor or to AltiGen
Communications, Inc.
All materials being returned to AltiGen musthave an associated RMAnumber. RMA numbers
are issued by AltiGen Customer Service and can be obtained by calling 1-888-ALTIGEN
(258-4436) or faxing an RMA form, available from the AltiGen website at http://
www.altigen.com/partner/product.htm, to 510-252-9738, attention to Customer Service.
AltiGen reserves the right to refuse return of any material that does not have an RMA number.
The RMA number should be clearly marked on the outside of the box in which the material is
being returned. For example:
Attn.: RMA # 123
AltiGen Communications, Inc.
4555 Cushing Pkwy.
Fremont, CA 94538
Upon authorization of return, AltiGen will decide whether the malfunctioning product
will be repaired or replaced.
2. To obtain warranty service, you will be required to provide:
a) the date and proof of purchase
b) serial number of the product
c) your name and company name
d) your shipping address
e) a description of the problem.
3. For additional information contact your AltiGen Dealer or AltiGen Communications, Inc.
via e-mail at [email protected].
Effect of State Law
This warranty gives you specificlegal rights, and you may also have other rights which vary
from state to state. Some states do not allow limitations on implied warranties and/or do not
allow the exclusion of incidental or consequential damages, so the above limitations and
exclusions may not apply to you.
Sales Outside the U.S.A.
For AltiGen Communications products sold outside of the U.S.A., contact your AltiGen
Communications dealer for warranty information and services.
vi Alti-IP 600 Manual
Page 9

Preface: About This Manual
This document provides the required steps to get the Alti-IP 600 phone up
and running on a Voice over IP (VoIP)network. For complete and detailed
information on procedures that you need to perform on AltiGen’sAltiWare
application or other network devices, refer to the AltiWare OE System
Installation and Administration Manual or AltiContact Manager System
Administration Manual.
Another document, the Alti-IP 600 Quick Reference Card, covers basicend
user phone features and AltiServ functions such as call handling, voice
mail, and web interface.
This guide contains the following chapters and appendices:
Chapter 1, An Overview of the Alti-IP 600, provides an overview and
description of the Alti-IP 600.
Chapter 2, System and Network Requirements describes configuration
requirements.
Chapter 3, Installation,describes how to properly install the Alti-IP 600,
how to configure network settings, and operation notes.
Chapter 4, Configuration,describes how to configure phone settings for
the Alti-IP 600.
Chapter 5, Phone Functions, provides on overview of the Alti-IP 600
basic functions.
Appendix A, provides phone specifications, tips for troubleshooting the
Alti-IP 600, LCD message information and user reference
information.
Glossary
Index
Overview
The Alti-IP 600 Administration Manual providesinformation about how to
set up, connect cables to, and configure an Alti-IP 600 phone. It also
provides information on how to configure the network and IP settings, and
how to change the settings and options of the Alti-IP 600 phone. The
administrator guide also includes reference information such as IP phone
call flows and compliance information.
Alti-IP 600H/600PH Manual vii
Page 10

Related Documentation
• Alti-IP 600 Quick Reference Card
• AltiWare OE/ACC System Installation and Administration Manual or
AltiContact Manager System Administration Manual
viii Alti-IP 600H/600PH Manual
Page 11
C
1
5
6
7
8
9
10
11
12
13
14
15
16
17
18
19
23 4
HAPTER
An Overview of the Alti-IP 600
TheAlti-IP 600class of AltiGen IP phonesis an H.323-compliant,business
telephone that provides voice communication over an IP network.
The Alti-IP 600 provides functionality similar to traditional analog phones,
including automatic redial, on-hook dialing, hands-free operation, 10
programmable keys and LCD display.
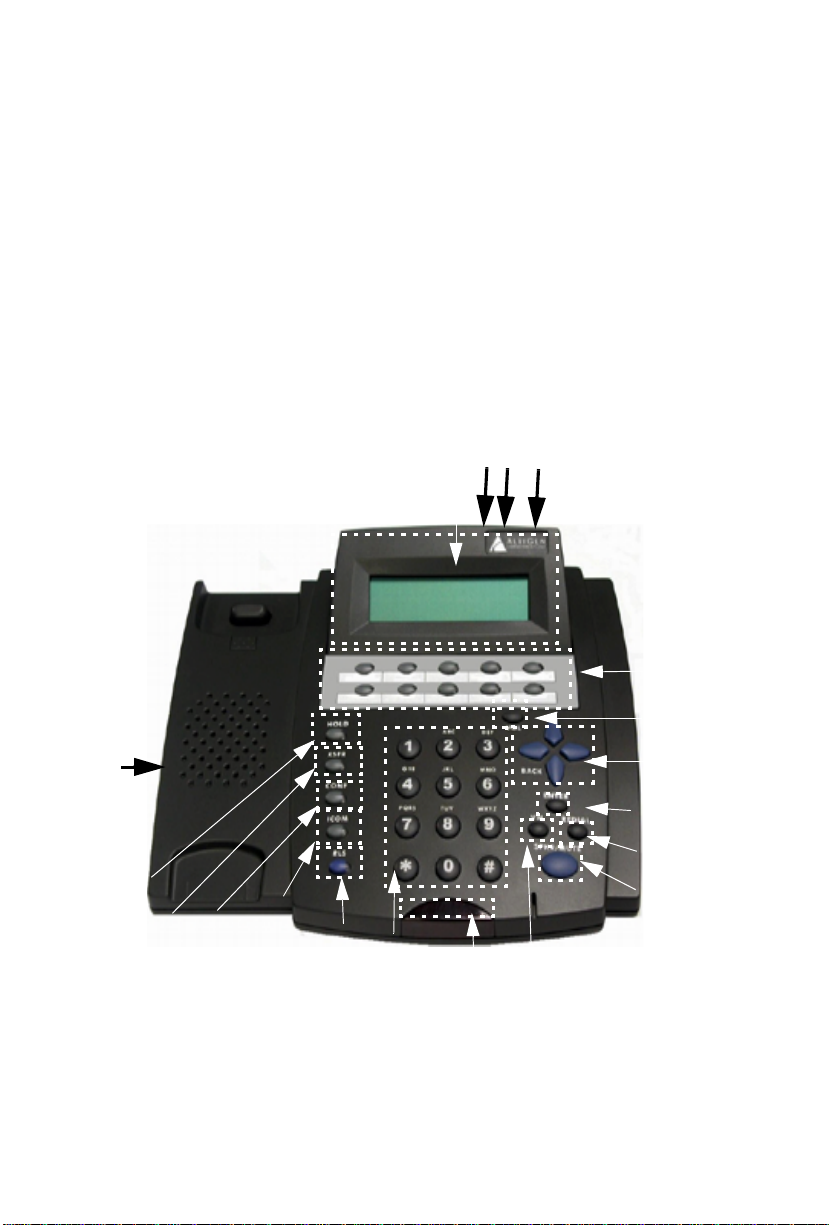
The main components of the phone are illustrated below (Figure 1) and
defined in the following table.
1
Figure 1. Alti-IP 600
Alti-IP 600 Manual 1
Page 12
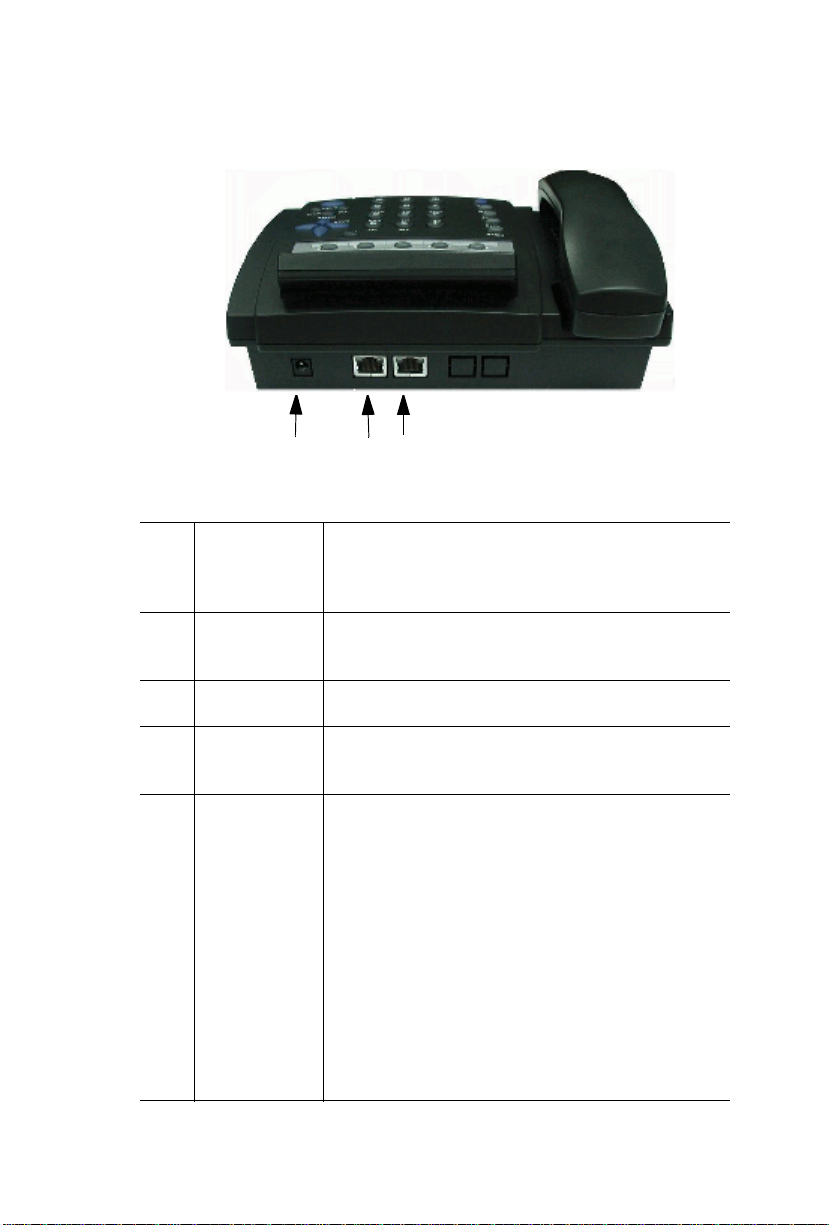
Figure 2. Alti-IP 600, Top View
4
32
1 LCD Screen Multi-use: displays features such as time, phone
number, caller ID, call waiting, line/call status and
call time.
2 PC Access
Port
3 Network Port Connects to network (10/100 SW)
4 AC Adapter
Port
5 Soft Keys
1-10
Connects to PC (10/100 PC)
Connects to power outlet.
10 soft keys can be configuredas a BLF (Busy
LampField)key, an AltiServfeature code,aspeed
dialkey,ora phone setting key, set up by theSystem
Administrator in AltiAdmin.
Note: The lower left Soft Key is set up as FLASH
by default. This can be re-assigned in
AltiAdmin (AltiGen IP Phone
Configuration).
The phone setting key, once set up by the
system administrator, can be configured as a
feature code or speed dial key directly from
the user’s IP Phone using **6ENTER.
Alti-IP 600 Manual 2
Page 13

6 Volume Increases/decreases volume of ringer, speaker and
handset/headset.
7 Navigation
keys
8 ENTER Finishes input for menu selection.
9 REDIAL Redialsuptolast16callsandupto32digits.
10 SPK/MUTE Enables speaker or mute.
11 VM Voice mail access button.
12 Main
Indicator
Light
13 Dial Pad Functions exactly as a dial pad on a traditional
14 RELEASE Releases a call.
!/"(UP/DOWN keys) allow you to scroll through
text and select features displayed on the LCD screen.
#(FORWARD key) is for menu selection.
$(BACK key) returns to previous configuration
menu or deletes the last digit input.
Note: When a voice mail is deleted, the number of
voicemails displayed on the LCDwill not be
updated until the next call is finished.
Slow blink when holding, mute or message waiting;
fast blink for ringing; always on when on speaker
phone.
telephone
15 ICOM* Incoming voice path through speaker, indicated by
the button’s blinking indicator light.
16 CONF* Initiates a conference call, indicated by the button’s
blinking indicator light.
17 XSFR* Transfers a call, indicated by the button’s blinking
indicator light.
18 HOLD* Places a call on hold, indicated by the button’s
blinking indicator light.
Alti-IP 600 Manual 3
Page 14

19 Receiver
Jack
Note: * indicates a normal operating mode key feature, which is only
available after registering the Alti-IP 600H/600PH with the phone
server and logged in as an extension.
Connects to receiver.
Hardware Components
The following hardware items are included in this package:
• Alti-IP 600 Set
• Phone receiver
• AC Adapter (Input: 100-240V; Output: DC 5V, 2A)
• Power cord
• Network cable
New in Version Level 12.0.0
• Configurable BLF ringer
• Distinctive ringing support
• Activity display
• Auto answer mode
• Workgroup queue status display
Alti-IP 600 Manual 4
Page 15

C
HAPTER
System & Network Requirements
System Requirements
• AltiWare OE 4.5A or higher
Note: A lower version of AltiWare may cause the IP phone to lose
several advanced features, resulting in use as a very basic
H.323 phone.
• AltiGen OE 4.5A Gatekeeper or higher (to support Plug and Play
functionality)
Network Requirements
• Networkconnection — the IP phone must have TCP/IP connection to
the related AltiWare system
Important:Make surea switch is used, rather than a hub, in the corporate
LAN.
• DHCP Server (to get dynamically IP address when necessary)
• TFTP Server (to update the IP phone firmware when necessary)
• GATEKEEPER (for Plug and Play feature)
2
AltiAdmin/ACM Admin Configuration
Requirements
• The Alti-IP 600 requires a virtual extension to be created as an IP
extension in AltiAdmin to handle call processing. Refer to the“Setting
Up IP Extensions” chapter in the AltiWare OE/ACC System
Installation & Administration Manual or ACM System Administration
Manual for detailed instructions on how to set up an IP Extension to
manage the IP phone.
• The IP Phone settings must be pre-configured in AltiAdmin/ACM
Admin before setting up configuration for the Alti-IP 600.
Alti-IP 600 Manual 5
Page 16

AltiGen IP Phone Service
AltiGen IP Phone Service is installed together with AltiServ, runs on the
same system as AltiServ, and connects to AltiServ through enhanced
AltiLink+ protocol on behalf of Alti-IP 600 phones. This service must be
running for the Alti-IP 600 to operate. If IP Phone Service stops while the
Alti-IP 600 is on a call, the call will be disconnected.
Plug and Play Feature
The Alti-IP 600 supports a plug and play feature when running AltiWare.
When the phone is first booted up, this feature will enable the phone to
automatically register itself to AltiServ, instead of having to program the
phone manually. Refer to “Configuring Startup Network Settings” on page
12 for requirements and setup.
Note: The Plug and Play feature requires AltiGateK eeper Discovery and
a single gatekeeper on the LAN.
Basic Mode
The Alti-IP 600 operates in Basic mode if it fails to register with AltiWare
during the startup mode. When in basic mode, the IP Phone’s LCDdisplay
shows “(BASIC) IDLE”. No AltiWare switching features are available
in this operating mode. H owever, the phone user can enter a destination IP
address followed by #, and make an outgoing call through the IP network
to reach AltiWare or another Alti-IP 600 phone. Also, the IP phone can
accept incoming calls originating from AltiWare or another Alti-IP 600
phone.
Normal Operation
Innormal operating mode, the Alti-IP 600 should have been registered with
the phone server and logged in as an extension. The time and extension
appear in the LCD screen and all phone features are enabled.
Note: To make the Alti-IP 600 work in normal operating mode, open the
firewallport 10032 for the phoneserver. Refer to the AltiWare OE/
ACC System Installation & Administration Manual or ACM
System Administration Manual for information on other firewall
ports for H.323.
Alti-IP 600 Manual 6
Page 17

C
HAPTER
Installation
These steps describe procedures for installing and configuring the Alti-IP
600 locally — through manual setup or plug and play. To install and
configure the phone remotely, refer to “Remote Installation” on page 15.
Manual Setup
To manually set up the Alti-IP 600 phone, perform the following steps:
1. Network Setup
Find out the settings for the following (this information will be needed
later to configure the Alti-IP 600):
• AltiWare Server IP Address
• DHCP - if DHCP is not used, obtain the Alti-IP 600 phone’s IP
address from the System Administrator.
• Gatekeeper Auto Discovery - if gatekeeper auto discover is not
used, obtain the AltiWare IP address.
• Firewall - Refer to “Firewall Considerations” on page 36.
3
2. AltiAdmin/ACM Admin Setup - AltiGen IP Phone Configuration
Window
To configure the Alti-IP 600 phone with AltiAdmin/ACM Admin,
select AltiGen IP Phone Configuration from the Management
menu.
Alti-IP 600 Manual 7
Page 18
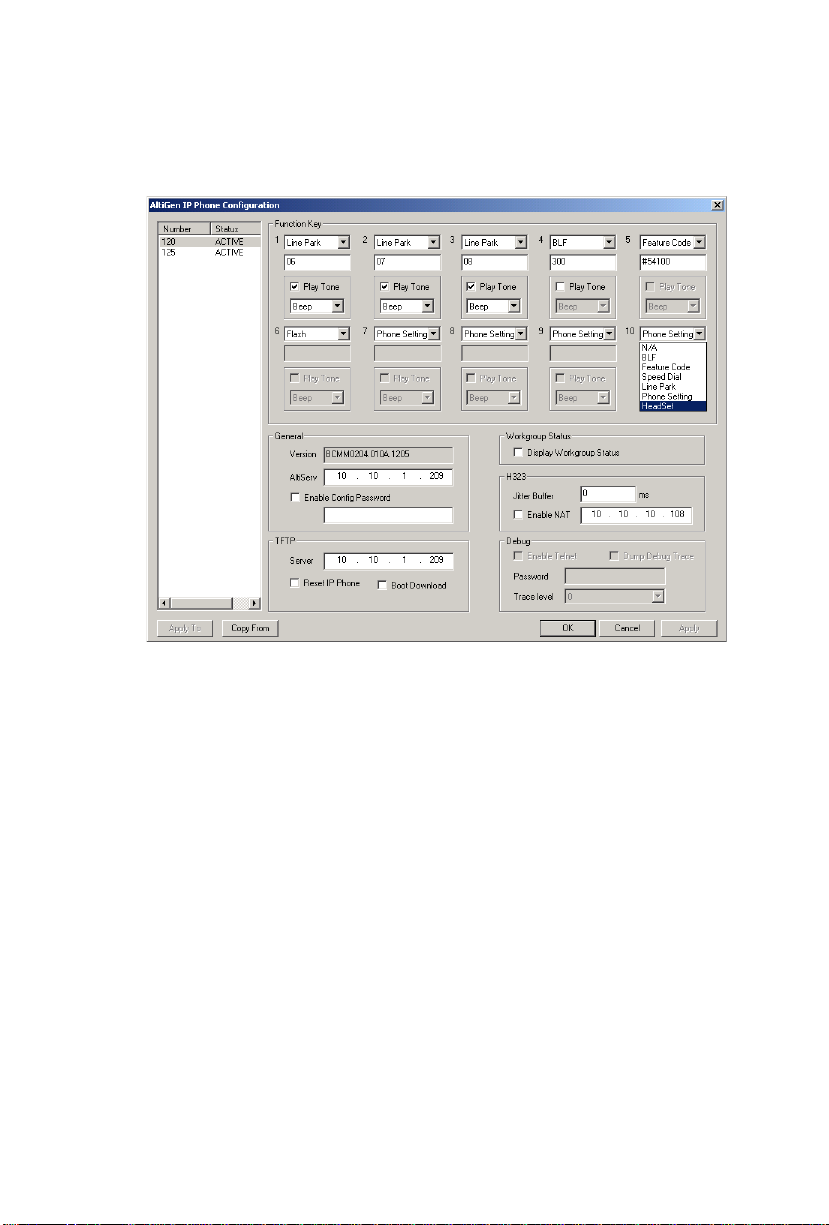
Thisopensthe AltiGen IPPhone Configuration window where,after
setting up an IP extension, you can set the following parameters for the
IP extension:
The left side of the IP Phone Configuration window displays all the
Alti-IP phone extensions that have been set up in the system. After
creating the IP extensions, you can set the following parameters:
Alti-IP 600 Manual 8
Page 19

Parameter Description
Soft Key 1 - 10 Corresponds to the 10 soft keys on the Alti-IP 600. Use the
drop down list to assign one of the following functions to the
desired keys:
• N/A - when selected, the corresponding soft key cannot
be used.
• BLF (Busy Lamp Field) - when selected, enter an
extension number in the field below; this will be
associated with the corresponding soft key to
automaticallydial thisextensionnumber;the button light
next to this soft key indicates that the extension number
is busy. You can select the Play Tone check box to also
have the IP phone play an audible beep or one of 6
different ring tones when the extension number is
ringing.
Note:TheBLF feature can only be assigned to
internal extension numbers, not outside numbers.
• Feature Code - when selected, enter an AltiContact
Manager feature code in the field below; this will be
associated with the corresponding soft key to dial this
feature code.
• Speed Dial - when selected, enter the speed dial code in
the field below; this will be associated with the
corresponding soft key to dial this speed dial code.
• Line Park - when selected, use the drop-down listto the
desired Line Park line ID. You can select the PlayTone
checkbox to alsohave the IP phone play an audible beep
or one of 6 different ring tones when the extension
number is ringing. When a call is parked, the LED will
blink.
• Phone Setting - when selected, the IP phone user will be
able to program the corresponding soft key, as a speed
dial or feature code key,directly from the IP phone (using
**6,thenENTER).
Note: Thelower left softkeyissetup asFLASH by default.
This key can be re-assigned in ACM Admin, using
the AltiGen IP Phone Configuration window. No
other soft keys can be configured to FLASH.
Alti-IP 600 Manual 9
Page 20

Parameter Description
General Allows you to specify the IP address of the AltiServ system
the Alti-IP 600 phone is connected to. The version of
softwareassociated with AltiServis automatically displayed
in the Version field.
To allow the extension user to have password-protected
configuration functionality from the phone itself, check the
Enable Config Password checkbox and assign a numerical
password. When the extension user attempts to configure
features, the user will need to enter the assigned password to
proceed.
Display
Workgroup
Status
H.323 Allowsyou to set theJitter Buffer in milliseconds,thedelay
TFTP Allowsyou to assign the TFTP Server to which the IP phone
Debug When enabled, allows the Alti-IP 600 phone to connect to
When enabled, allows the Alti-IP 600 phone to display
workgroup queue status. While the agent is in idle state, the
firstlineof the LCD displaysthe numberof queuedcalls, the
current longest queue time, and the last four digits of the
workgroup number; the second line shows the agent state.
(See “Workgroup Status Display” on page 28 for detailed
information).
used to buffer voice packets received from the IP network.
The Jitter Buffer should be adjusted according to the WAN
bandwidth allocated to data traffic.
To allow NAT support for the IP extension, check the
Enable NAT button and enter the public IP address of the
NAT router.
can connect to for updating firmware when necessary. Enter
the IP address of the TFTP Server in the Server field.
To update IP phone image, the administrator can check the
Reset IP Phone and Boot Download checkbox options to
reset and download image to update the phone.
Telnet for debugging.
Alti-IP 600 Manual 10
Page 21

Apply To Button
The Apply To button works with the following parameters: General,
H.323, TFTP (Server field only; Reset IP Phone and Boot Download
options cannot be applied to multiple extensions), Display Workgroup
Status and Debug.
Copy From Button
The Copy From button allows you to copy Function Key settings from
one Alti-IP 600 phone setting to another. No other settings are carried over.
Important:When updating the Alti-IP 600 phone’s firmware, it is
recommended that administrators perform any updates after
normalbusiness hoursor when the IP phone is not inuse. Ifthe
Alti-IP 600 phone is in use during an update, the call will be
disconnected.
Notes:
• IMPORTANT!Please note that the configuration in AltiWare will
override the Alti-IP 600 phone’s local configuration after the IP
Phone is registered. If the IP phone’s local configurationis changed
while in Basic mode, these changes will be overwritten by
AltiAdmin/ACM Admin settings. Also, after the IP Phone is
successfully registered with the system, the IP phonewill overwrite
the AltiWare IP address and network-related settings on the server.
• IMPORTANT!When updating the Alti-IP 600 phone’s firmware,
it is recommended that administrators perform any updates after
normal business hours or when the IP phone is not inuse. If the AltiIP 600 phone is in use during an update, the call will be
disconnected.
•TheApply To button works with the following parameters:
General, H.323, TFTP (Server field only; Reset IP Phone and
Boot Download options cannot be applied to multipleextensions),
and Debug.
• This only works when the Alti-IP 600 is operating in basic mode.
3. Set Up Alti-IP 600 Connections
You must connect the Alti-IP 600 tothe network and to apower source
before using it.
Alti-IP 600 Manual 11
Page 22

Notes:
• When the Alti-IP 600 is booted up without the PC port plugged in,
the PC port defaults to 10Mbps.
• If the PC port is to be used, the user should plug in both the LAN
port and PC port before the IP phone is booted.
• The user should reboot the Alti-IP 600 under any of the following
conditions:
— after disconnecting the LAN cable to the phone
— after changing the IP address or DHCP setting
— after rebooting the PC
Note: If the PC i s rebooted during a connected call, the voice
path willbe interrupted for 4-5 seconds to reinitialize the
TCP/IP protocol stack.
To connect the Alti-IP 600H/600PH:
a. Connect an Ethernet cable from the IP-PBX to the network port on
the phone.
b. Connect the handset to the receiver jack.
c. Connect an Ethernet cable from another network device, such as a
desktop computer, to the access PC port on the phone.
d. Connect the power plug to the AC Adapter port.
4. Configuring Startup Network Settings
If you are using DHCP
Proceed to Step 5.
If you are not usingDHCP
on the Alti-IP 600 after installing the phone on the network:
• Local IP address
• IP subnet mask
• Default gateway IP address
5. Configuring the AltiWare IP Settings
If you are using Gatekeeper Auto Discovery
configure anything. Proceed to Step 6.
Alti-IP 600 Manual 12
, you do not need to configure anything.
, y ou must configure these network settings
, you do not need to
Page 23
If you are not using Gatekeeper Auto Discovery
configure theAltiWare IP address setting into the Alti-IP 600. Refer to
“Configuring IP Settings” on page 24.
6. Activate the IP Extension
Once the device is initialized, the user must follow these steps to
activate the IP Extension.
Note: The user must be running AltiGen’sGatekeeper servicefor full
functionality.
a. With the handset onhook, press #27, then the ENTER button.
b. Enter your extension number and password when prompted.
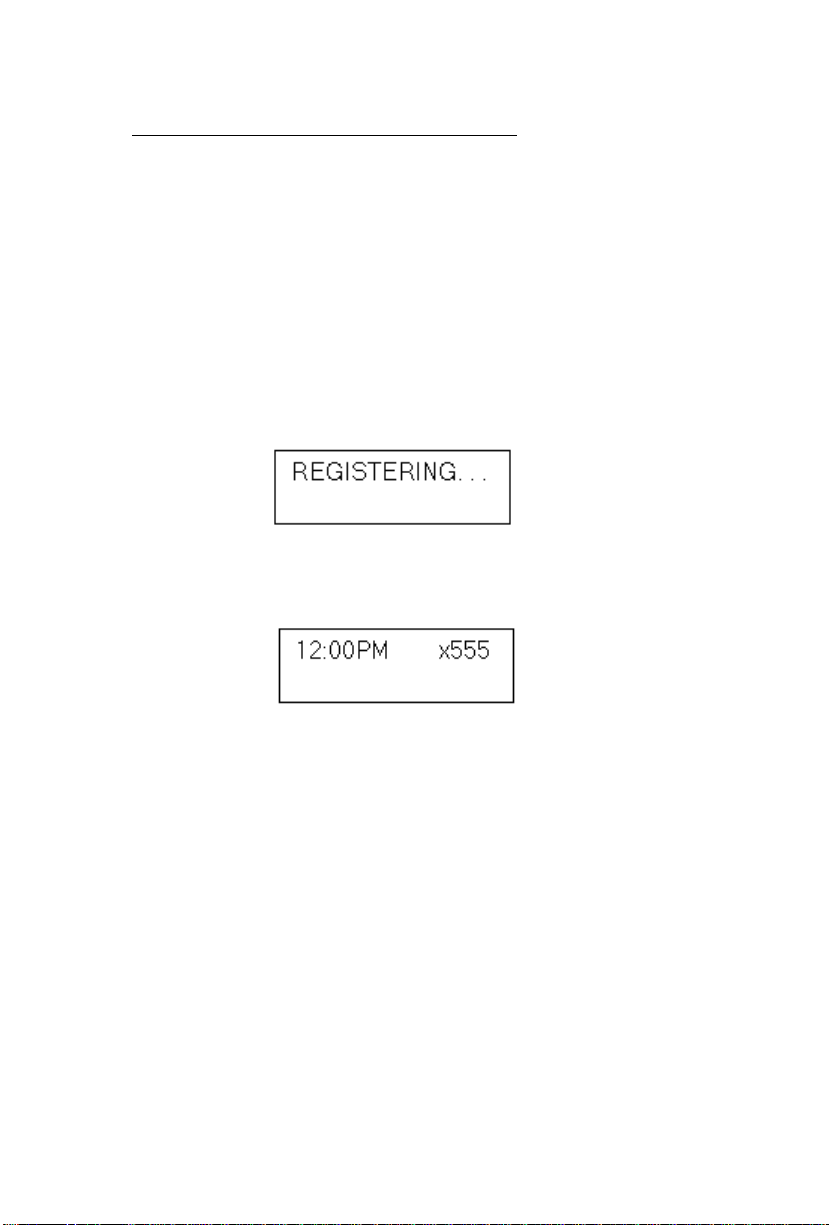
c. The phone will attempt to register as shown in the LCD screen.
Ifthe phone successfully passes throughthese stages,the phone shows
the time and extension in the LCD screen and is now in normal
operating mode.
, you must manually
Otherwise, refer to “Troubleshooting” on page 37.
Plug and Play Setup
Thesteps for plug and play setup will vary depending on whether or not the
Alti-IP 600 Phone has been started. When the Alti-IP 600 is started for the
first time, it can support plug and play to enable the phone to auto matically
register itself to AltiServ. If the Alti-IP 600 has already been started, follow
theinstructions “Plug and Play SetupAfter IPPhone is Started” on page 14.
Important Notes:
• To use the Plug and Play feature, the user’s IP Phone must be on the
local LAN with AltiServ
• There can only be one (1) AltiServ on the LAN.
Alti-IP 600 Manual 13
Page 24
• Gatekeeper auto discovery uses broadcast UDP packets which work in
the LAN or VPN environment, but not through the public IP network.
Plug and Play Setup Before IP Phone is Started
To set up your IP Phone to properly execute the Plug and Play feature,
perform the following steps BEFORE YOU START THE PHONE:
1. Ensure the AltiGen GateKeeper is running and configured to point to
the AltiWare system.
2. Ensure DHCP server is up and running.
3. Ensure that there are enough IP addresses.
4. Ensurethat thereis anavailable virtual extensionwith the IP extension
feature enabled and dynamic IP address is selected.
5. Power up the IP Phone.
6. Enter the extension number and password.
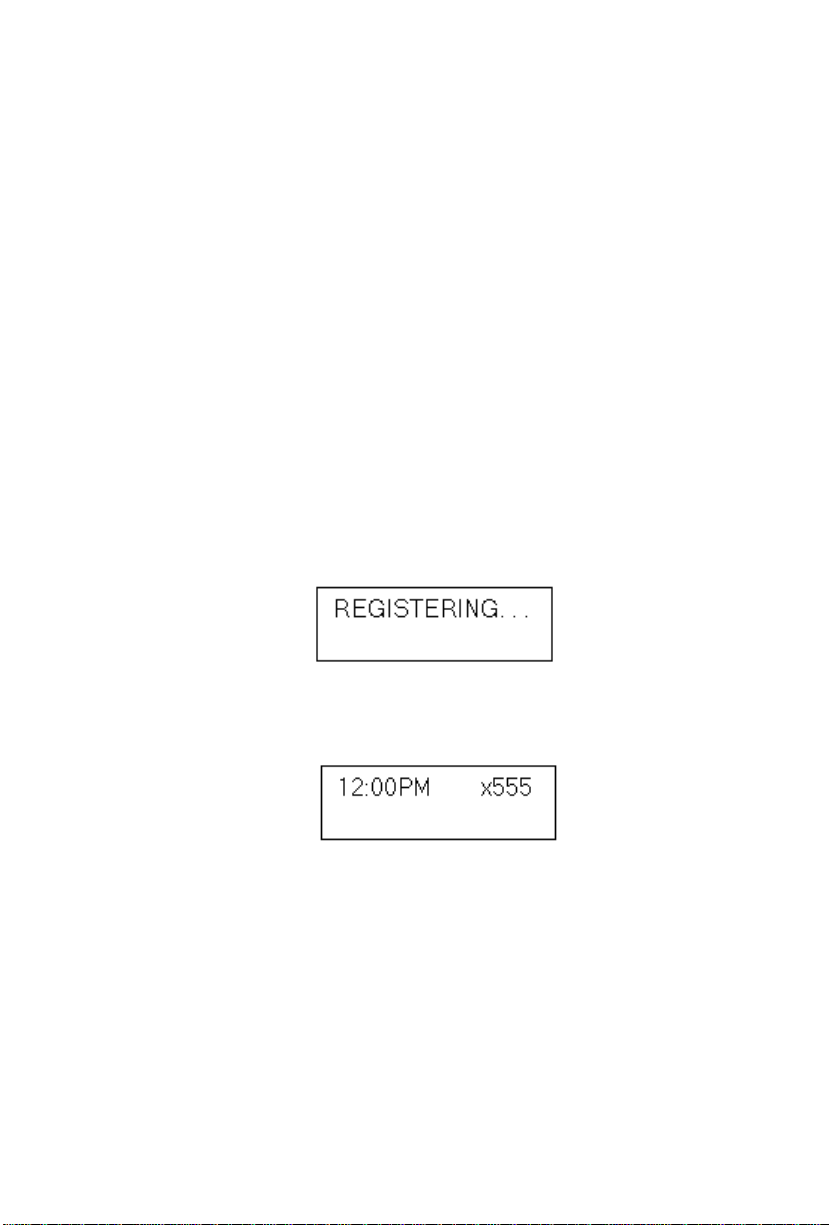
7. The phone will attemp t to register as shown in the LCD screen.
Ifthe phonesuccessfully passes throughthese stages,the phone shows
the time and extension in the LCD screen and is now in normal
operating mode.
Otherwise, refer to “Troubleshooting” on page 37.
8. If you wish to change soft keys, you can set up IP Phone properties in
AltiWare as described in Step 2 - “AltiAdmin/ACM Admin Setup AltiGen IP Phone Configuration Window” on page 7.
Plug and Play Setup After IP Phone is Started
If you have already started your phone, and wish to execute the Plug and
Play feature, perform the following steps:
Alti-IP 600 Manual 14
Page 25
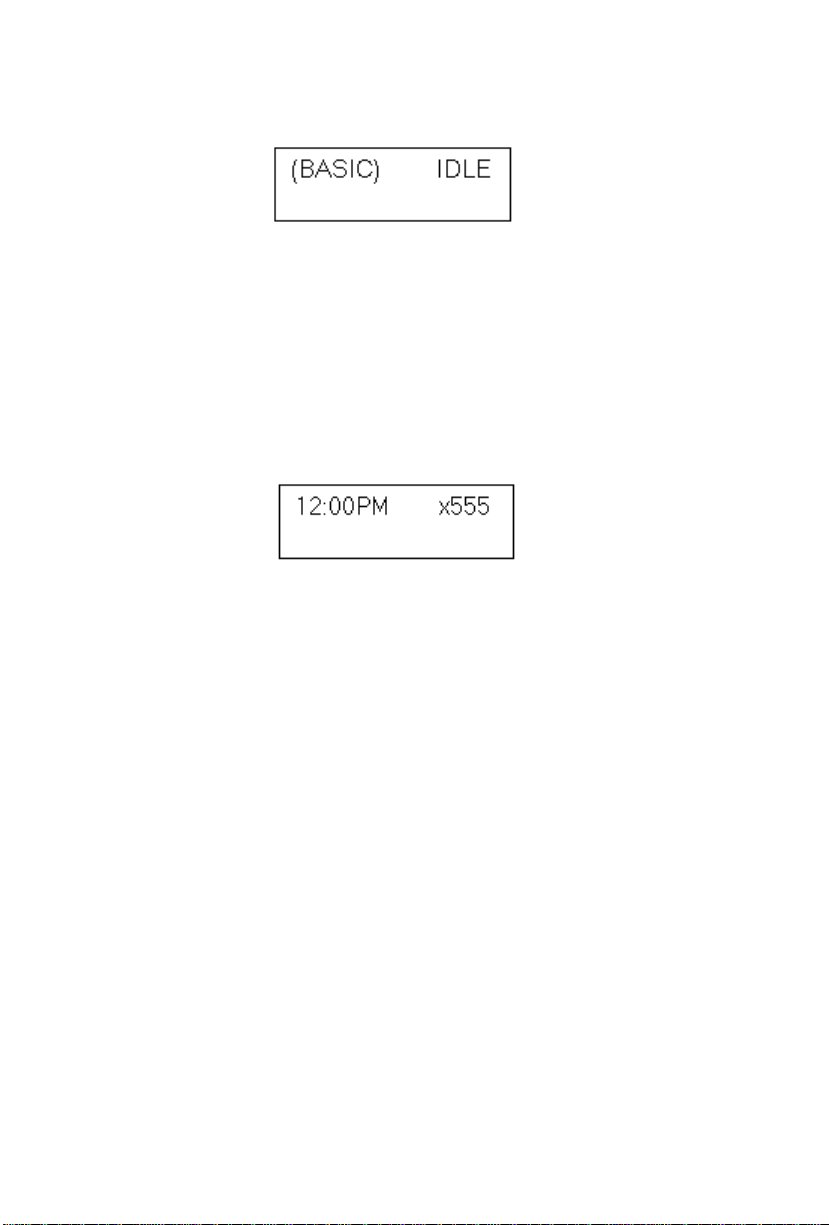
1. Power up the IP phone (the phone should be in basic mode).
2. Press **7+ ENTER to go to the IP phone configuration menu.
3. Press **2+ ENTER to restore default settings.
4. Reboot the phone (by unplugging the power and replugging OR
pressing $(BACK key) until in Basic mode. The IP phone will
automatically go to normal operating mode after reboot.
5. Enter extension number and password.
6. Thetime and extension is displayed in the LCD screen after the phone
has been successfully logged on to AltiServ.
7. Set up IP Phone properties in AltiWare as described in Step 2 -
“AltiAdmin/ACM Admin Setup - AltiGen IP Phone Configuration
Window” on page 7.
8. Setup is complete. For further configuration of settings for the Alti-IP
600H/600PH, refer to “Configuring Phone Settings” on page 21.
Remote Installation
To install the Alti-IP 600 at a remote location, using a DSL connection with
or without a router hub:
1. Checkthe firewall settings at thecorporate network to open TCP/UDP
ports required by the Alti-IP 600. (For more information on firewall
settings, refer to “Firewall Considerations” on page 36.)
2. Check the AltiWare server’s IP extension settings (make sure the IP
extension is enabled, enough IP licenses are available, etc.)
3. Press **7ENTERon the Alti-IP 600 phone to configure the phone’s
local IP address and Gateway IP address. (Depending on the DSL
provider’s recommendations, you may or may not want to use DHCP.)
4. Configure the Alti-IP 600 phone’s AltiWare address.
Alti-IP 600 Manual 15
Page 26
5. If NAT server is used, access NETWORK settings in the configuration
menu. Change ENABLE NAT setting to YES and assign the NAT
server’s public IP address in the NAT Address setting.
6. Ifconfiguring with an H.323 NAT router, the NAT router can forward
IP traffic to a specified private IP address based on the destination port
in the TCP/IP or UDP packets. When an H.323 endpoint is behind the
H.323 NAT, you should set up the forwarding to a private IP address
of this H.323 endpoint.
If this H.323 endpoint is AltiWare, the NAT router must be configured
to forward to following ports to the H.323 endpoints private IP
address:
• TCP port 10032 (for phone service)
• TCP port 1720 (for H.225)
• TCP/UDP 49152 ~ N (for H.245 and RTP/RTCP); where N =
49152 + (62 * number of VoIP boards) - 1.
7. Use #27 + ENTER to initiate logging onto AltiServ.
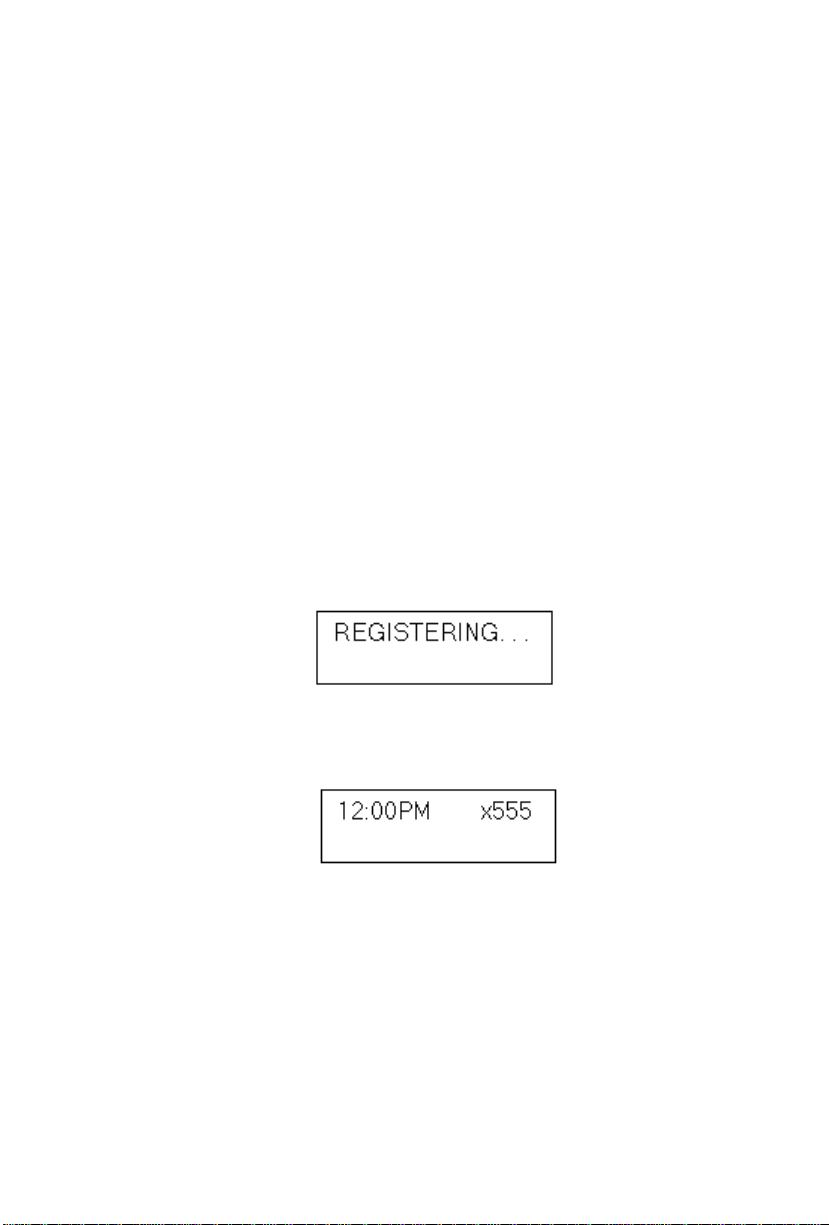
8. The phone will attemp t to register as shown in the LCD screen.
Ifthe phonesuccessfully passes throughthese stages,the phone shows
the time and extension in the LCD screen and is now in normal
operating mode.
Note: The Alti-IP 600 AltiWare IP address, TFTP (IP) address and other
network related configuration parameters will override the
AltiAdmin’s settings when the phone registers with AltiServ.
Otherparameters will stillbe overridden by the AltiAdmin settings
as before.
Otherwise, refer to “Troubleshooting” on page 37.
9. Set up IP Phone properties in AltiWare as described in Step 2 -
“AltiAdmin/ACM Admin Setup - AltiGen IP Phone Configuration
Window” on page 7.
Alti-IP 600 Manual 16
Page 27

Verifying the Phone Startup Process
After the Alti-IP 600 has power connected to it, the phone begins its
automatic booting process by cycling through these steps:
1. All LED lights will be on.
2. The LCD screen displays [ATGN BOOT] on the first line.
3. On the second line of the LCD screen, the following messages are
displayed in succession:
— CHECK MEMORY (RAM checking state)
— CHECK FW (Firmware checking state)
— BOOTING NOW (Initialization ofhardware - LCD, network, DSP,
etc.)
— INITIALIZING
Resolving Errors Upon Startup
If an error occurs during booting, the LED light of Soft Keys 1 through 4
will remain on to indicate an error status. These errors represent hardware
failures within the IP Phone.
• LED 1 light on = memory check failed
• LED 2 light on = network failed
• LED 3 light on = DHCP failed
• LED 4 light on = attached IP address failed
If the phone successfully passes through these stages, it has started up
properly. Otherwise, refer to “Troubleshooting” on page 37.
Active Logon While Anot her Handset is Already
Logged On To the Same Extension
If another analog phone or IP phone is already logged on to the same
extension, rebooting the Alti-IP 600 will not register the phone
successfully. The user must press #26 on the associated physical phone/IP
phone, then on the IP phone, use #27 + ENTER to actively log onto
AltiServ. Once the extension is logged on and activated, the calls will then
be redirected to this IP Phone.
Alti-IP 600 Manual 17
Page 28

Important:Also, the user should not use the VM option to logon the
Alti-IP 600.
Restoring Default Settings
To automatically restore the original default settings for the Alti-IP 600:
1. Press **7,thenpresstheENTER button
2. Press **2,thenpresstheENTER button.
Rebooting the Alti-IP 600
To reboot the Alti-IP 600, press * * 3, then press the ENTER button.
Note: When the Alti-IP 600 is rebooted, the AltiWare IP address setting
is set back to the original configuration.
Configuring “Phone Setting” Soft Keys
When the soft key is set to “Phone Setting” (in the IP Phone Configuration
window of AltiAdmin), the IP Phone user can configure the soft key to
store a speed dial number or feature code.
To configure a soft key with phone setting enabled:
1. Press **6,thentheENTER button.
2. Scroll to the program key to configure.
3. Enter the appropriate digits for the speed dial number or feature code.
The digits will be automatically dialed when this function key is pressed.
Dialing an IP Number Directly from the Alti-IP
600
To dial an IP number directly from the Alti-IP 600 phone set, enter the IP
address using the * key to enter periods followed by the # key.
Notes:
• This only works when the Alti-IP 600 is operating in basic mode.
Alti-IP 600 Manual 18
Page 29

• If the Alti-IP 600 is configured for a public IP address, you can call
other public IP address devices.
If the Alti-IP 600 is configured for a private IP address, you can call other
private IP address devices that you can “see” or that are on your s ubnet.
Operation Notes
• The Alti-IP 600 does not work with TAPI as the source phone (caller).
• When using #26 and #27 to log out/in, the Alti-IP 600 must be onhook.
Using the speaker button to use #26 or #27 will not work.
• Two dial tones are always heard when going offhook on the Alti-IP
600.
• If two calls ring into the Alti-IP 600 at the same time and the user
attempts to answer the second call, the IP phone will automatically
connect the user to the first call.
• The user should reboot the Alti-IP 600 after disconnecting the LAN
cable to the phone.
• The user should reboot the Alti-IP 600 after changing the IP address or
DHCP setting.
• If the Alti-IP 600 is configured for a public IP address, you can call
other public IP address devices.
• If the Alti-IP 600 is configured for a private IP address, you can call
other private IP address devices that you can “see” or that are on your
subnet.
• The daisy chaining of Alti-IP 600 phones is not supported.
Alti-IP 600 Manual 19
Page 30

Alti-IP 600 Manual 20
Page 31

C
HAPTER
4
Configuring Phone Settings
A set of phone related parameters — system settings and network settings
— can be configured through the IP phone’s setup menu by pressing “**
7,” then the ENTER button.
!/"(UP/DOWN keys) selects YES or NO in the LCD display.
#(FORWARD key) selects menu.
$(BACK key) returns to previous menu.
The following tables describe each setting and corresponding the menu
path.
Important:Please note that the configuration in AltiAdmin will override
the Alti-IP 600 phone’s local configuration after the IP Phone
is registered. If the IP Phone’s local configuration is changed
while in Basic mode, these changes will be overwritten by
AltiAdmin settings. Also, after the IP Phone is successfully
registered with AltiServ, the IP Phone will overwrite the
AltiWare IPaddress and network-related settings on the server.
Note: Several of these settings can be configured through AltiAdmin by
the System Administrator.
System Settings
Setting Menu Path {Sub Me nu} Description
Extension
Number
Extension
Password
AltiWare
Server
System>Ext Number
{Set IP Extension
Number}
System>Ext
Password {Set IP
Extension Password}
System>AW Server
{AltiWare IP Address}
Sets the IP phone’s extension
number
Sets the IP phone’s extension
password
Sets the AltiWare server’s IP address
Alti-IP 600 Manual 21
Page 32

TFTP Server System>TFTP Server
{Save TFTP Server IP
Address}
Sets the TFTP server IP address for
updating firmware.
Boot
Download
Version
Information
System>Boot
Download
System>Version
Info {Read only, version
information}
After firmware image upgrade,
submenu changes to {No}. Used
mainly for upgrading or
troubleshooting. On the next boot,
the phone will download the n ew
firmware from the TFTP server, if
set to [YES].
Note: Make sure to launch
TFTP32.exe.
When downloading, the
phone key pad is disabled.
Indicates the version number of the
IP Phone.
Network Settings
Setting Menu Path {Sub Menu} Description
Enable DHCP Network>Enable
DHCP
Set YES or NO to indicate whether
Dynamic Host Configuration
Protocol (DHCP) i s being used by the
IP phone to retrieve new IP address
upon boot up.
Local
Address
Network
Mask
Gateway Network>Gateway Sets the Gateway IP address.
Enable
Gatekeeper
Network>Local
Address
Network>Network
Mask
Network>Enable/
Disable
GateKeeper
Sets the IP phone’s local address;
onlyshowsifDHCPisdisabled.
Sets the IP phone’s network mask;
onlyshowsifDHCPisdisabled.
Setwhether GateKeeperis enabledor
disabled.
Alti-IP 600 Manual 22
Page 33

GateKeeper
Discovery
Network>GK
Discovery
Set to YES or NO to indicate whether
GateKeeperdiscovery is enabled. IP
Phone will automaticallyfind
GateKeeper.
Enable NAT Network>Enable/
Disable NAT
NAT Address Network>NAT
Address
Set whether NAT is enabled or
disabled.
Sets the NAT server’s public IP
address.
Modifying DHCP Settings
Dynamic Host Configuration Protocol (DHCP) automatically assigns IP
addresses to devices when they are connected to the network.
Enabling DHCP
The Alti-IP 600 automatically enables DHCP by default, but you can reset
the protocol if it becomes disabled using the following steps:
1. Press **7+ ENTER button.
2. Use !/" to select Network,thenpresstheEnter key.
3. Scroll to Enable DHCP.
If DHCP is disabled, the option displays as DHCP Enabled NO.
4. Press " (DOWN key) to enable DHCP.
Disabling DHCP
If you do not use DHCP in your network, you can disable DHCP before
manually assigning an IP address to the Alti-IP 600. To disable DHCP, use
the following steps:.
Note: Proceduresinvolving configuring IP settings cannot be completed
when DHCP is enabled in your network.
1. Press **7+ ENTER button.
2. Use !/" to select Network,thenpresstheEnter key.
3. Scroll to Enable DHCP.
If DHCP is enabled, the option displays as DHCP Enabled YES.
Alti-IP 600 Manual 23
Page 34

4. Press " (DOWN key) to disable DHCP.
Configuring IP Settings
Use these guidelines when manually configuring the IP settings:
• Ensurethe default gateway IP addressin onthe same subnet as thehost
IP address.
• When inputting IP addresses into theAlti-IP 600, use the * keytoenter
periods. For example, “209.120.12.8” would be inputted as
“209*120*12*8”.
Assigning a Local IP Address
TheIP address is the unique logicaladdress identifyingeach hostcomputer
on a TCP/IP network. An IP address is a 32-bit number expresses as four
decimal numbers from 0 to 255 separated by periods.
To assign an IP address, use the following steps:
1. Press **7+ ENTER button.
2. Use !/" to select Network,thenpresstheENTER button.
3. Scroll to Local Address.
4. Press the ENTER button or#(FORWARD key).
5. Use the buttons on the dial pad to enter a new IP address, using the *
key to enter periods. Use the $(BACK key) to correct any mistakes.
6. Press the ENTER button.
Assigning a TFTP Server
The default TFTP S erver is set to 0.0.0.0.
To assign the TFTP server, use the following steps:
1. Press **7.
2. Use !/" to select System,thenpresstheENTERbutton.
3. Scroll to TFTP Server.
4. Press ENTER button or#(FORWARD key).
Alti-IP 600 Manual 24
Page 35

5. Use the buttons on the dial pad to enter the new TFTP server address,
using the * key to enter periods. Use the $(BACK key) to correct any
mistakes.
6. Press the ENTER button.
Updating Phone Firmware
Note: If using TFTP Server Application, TFTPD32, included in the CD-
ROM, copy the following files — tftpd32.exe and <hlp>
files —to your local directory; once copied, you can launch the
TFTP Server application from the executable file.
Obtain app_mid.bin and dsp.bin files from the AltiGen
website and copy to your local directory.
Important:When updating the Alti-IP 600 phone’s firmware, it is
recommended that administrators perform any updates after
normalbusiness hoursor when the IP phone is not inuse. Ifthe
Alti-IP 600 phone is in use during an update, the call will be
disconnected.
You must have a TFTP server to have the Alti-IP 600 toconnect to in order
update the firmware.
If the Alti-IP 600 phone is registered with AltiServ, to update the phone
firmware from AltiAdmin:
1. Launch IP Phone Configuration in AltiAdmin Main Menu.
2. Set TFTP Server address.
3. Select Boot Download and Reset IP Phone check boxes, then click
Apply.
4. TheAlti-IP 600H/600PHshould reboot and download image from the
specified TFTP server.
To update the phone firmware directly from the Alti-IP 600 Phone:
1. Press **7,thenpresstheENTER button to access the Configuration
Menu.
2. Use !/"to scroll to System >TFTP Server.
3. EnterTFTPserveraddress.
4. TheAlti-IP 600 will download the firmware fromthe TFTPon thenext
reboot.
Alti-IP 600 Manual 25
Page 36

5. Once the IP Phone is rebooted, all LED lights will be on.
6. The LCD screen displays [ATGN BOOT] on the first line.
7. On the second line of the LCD screen, the following messages are
displayed in succession:
— CHECK MEMORY (RAM checking state)
— CHECK FW (Firmware checking state)
— BOOTING NOW (Initialization ofhardware - LCD, network, DSP,
etc.)
— INITIALIZING
—
update APP(S1-S5)
8. You m ay verify the new version of firmware in the phone’s
configuration menu (**7ENTER, then scroll to
System>Version Info).
Resolving Errors Upon Startup
If an error occurs during rebooting, the LED light of Soft Keys 1 through4
will remain on to indicate an error status. These errors represent hardware
failures within the Alti-IP 600.
• LED 1 light on = memory check failed
• LED 2 light on = network failed
• LED 3 light on = DHCP failed
• LED 4 light on = attached IP address failed
If the phone successfully passes through these stages, it has started up
properly. Otherwise, refer to “Troubleshooting” on page 37.
Configuring NAT
NAT (Network Address Translation) is the translation of an IP address
used within one network to a different IP address known within another
network. One network is designated as the inside network, the other is the
outside. The A lti-IP 600H ca n be enabled to suppor t H.323 behind NAT.
The Alti-IP 600 w ill be able to work behind a regular NAT router without
any special implementation for H.323.
Alti-IP 600 Manual 26
Page 37

Formoredetailed information regarding NATconfigurationguidelines and
implementation, refer to the AltiWare OE/ACC or ACM System
Administration Manual.
Note: If more than one Alti-IP 600 phone sits behind NAT, a VPN tunnel
is required to connect between the NAT router and the corporate
router.
Assigning NAT
By default, NAT is not enabled. If you connect the Alti-IP 600 behind a
NAT router, you may manually assign the NA T router’s public IP address
to this field.
To assign the NAT address, use the following steps:
1. Press **7+ ENTER button.
2. Use !/" to select Network,thenpresstheENTER button.
3. Scroll to Enable NAT.
4. Press " (DO WN key) to select YES.
5. Press the ENTER button.
6. Use $(BACK k ey) to return to the Network menu, then select NAT
Address.
Use the buttons on the dial pad to enter the new NAT address, using
the * key to enter periods. Use $(BACK key) to correct any mistakes.
7. Press the ENTER button.
Setting Ring Tones
The Alti-IP 600 Phone has three (3) ringing tones available. To set the ring
tone:
1. Press **6ENTER.
2. Scroll to SELECT RING and press ENTER or #(FORWARD key).
3. Scroll to desired ring tone (0-2), or press 0, 1 or 2 on the dialing pad,
then press ENTER.
Alti-IP 600 Manual 27
Page 38

Distinctive Ringing Support
If the Distinctive Call Waiting Tone option is enabled in AltiAdmin/ACM
Admin, you may have three different call waiting tone cadences that
distinguish the types of calls:
• Internal call = two ring
• External call = one ring
• Operator call = three rings
Workgroup Status Display
The Alti-IP 600 can display an agent’s workgroup queue status. While the agent is
in idle state, the first line in the LCD displays:
• QL = number of workgroup queued calls (up to 99)
• QT = current longest queue time (in minutes)
• WG = last four digits of the workgroup number
The second line in the LCD displays one of the following agent states:
• LOUT - logout
• NRDY - not ready
• DND - do not disturb
• FWD -forwarding
Note: The area is blank if the agent is in any other state.
Figure 3. Alti-IP 600 Workgroup Display example
In the workgroup display example, QL5 indicates there are five calls in the queue,
QT12 indicates the one of the calls has been queued for 12 minutes, WG2000
indicates Workgroup 2000, NRDY indicates the agent is not ready.
When a call rings the agent or the when the agent is making an outgoing
call, the second line of the LCD is changed to Caller ID or dialed digits
display,and thefirst line stays the same.However, whenmore thanone call
is outstanding, the first line shows the Call n/n display.
If the agent is a member of multiple workgroups, you can use !/" to view the
queue status of all workgroups the agent belongs to.
Alti-IP 600 Manual 28
Page 39

Network,thenpresstheENTER button.
This feature can be enabled or disabled through the Display Workgroup Status
check box in the AltiGen IP Phone Configuration Page in AltiAdmin/ACMAdmin,
Activity Display
When the Alti-IP 600 user calls an extension in the system which has
Activity codes set up, if the call goes into RNA handling or the destination
user has DND enabled, the Activity code is displayed on the IP phone.
Note: This feature is not available in Basic Mode. Also, the activity
displayed on the IP phone may truncate the caller ID/caller n ame.
Alti-IP 600 Manual 29
Page 40

Alti-IP 600 Manual 30
Page 41

C
HAPTER
Phone Functions
TheAlti-IP 600provides a broad range ofcall handlingand dialing features
directly on the phone and through the AltiWare system. The following
section lists the supported telephony features, a brief description and
additional configuration notes where applicable.
Feature Description Configuration Notes
5
Auto Answer When a call comes in, the
Busy Lamp
Field (BLF)
IP phone will ring for a
specified number of
seconds, connect the call,
and automatically answer
through the speaker or
headset.
Associates Soft Key with
an extension that can be
automaticallydialedwhen
selected; the
corresponding button
light indicates that the
extensionisbusyand
blinks when ringing.
The BLF ring tone is only
played when the phone is
idle state. It is stopped
when the destination
phone stops ringing or the
local phone exits idle
state.
When multiple BLF
extensionsring
simultaneously,the IP
phone will play the first
BLF extension ringer and
beep tones and ignore
other BLF extensions.
• Press **6ENTER,scrollto
enable/disable Auto Answer
Mode, set number of seconds to
ring before answering (1 - 20),
and select from speaker or
headset as the Auto Answer
device.
• During ringing, the user can
manually pick up the call from
headset, handset or speaker.
• From AltiAdmin/ACM Admin,
go to AltiGen IP Phone
Configuration on the
Management Menu, go to the
desired extension, and set the
appropriate function key to BLF
and enter the extension in the field
below.Selectthe PlayBeepTone
checkbox to have the IP Phone
play an audible beep or one of six
different ring tones when the
extension is ringing.
• TheBLFFeaturecanonlybe
assigned to internal extension
number, not outside numbers.
• The feature is not available in
Basic Mode.
Alti-IP 600 Manual 31
Page 42

Conference
(CONF)
Initiates a conference and
adds in other parties one at
atime.
• Single Call Waiting, Multiple Call
Waitingor Live Call Waiting must
be enabled in AltiAdmin/ACM
Admin in order to conference
incoming calls.
• The user who first initiates the
conference call can select another
conferencemember’scall anddrop
it from the conference simply by
disconnecting the call. If the
conference initiator hangs up, this
feature becomes unavailable to all
other conference members.
Display
Workgroup
Status
Flash Signals PBX that special
Headset When selected, the user
Displays the workgroup
status of the user in the
LCD
instructions will follow.
will be able to activate a
third-party handset
(certified by AltiGen)
• From AltiAdmin/ACM Admin, go
to AltiGen IP Phone
Configuration on the
Management Menu, go to the
desired extension, and select the
DisplayWorkgroupStatus check
box.
• By default, the lower left Soft Key
issetupasFLASH.Thiscanbereassigned in AltiAdmin through the
AltiGen IP Phone Configuration
window. Only this key can be
configured as FLASH.
• Bydefault,the lowerrightSoftkey
is set up as Headse t.From
AltiAdmin/ACM Admin, go to
AltiGen IP Phone Configuration
on the Management Menu, go to
the desired extension,and set the
lower right soft key (#10) to
Headset.
Alti-IP 600 Manual 32
Page 43

Hold Places an active call on
hold.
• When multiple Call Waiting
Feature is enable at the extension,
the use can put multiple incoming
calls on hold and retrieve using the
phone’s !/"(UP/DOWN keys)
and ENTER button.
• Pressing HOLD while onhook will
retrieve last hold call.
• Supports up to 9 hold calls.
Intercom
(ICOM)
Line Park Parks a call on aLine Park
Mute Whileon a call, mutes
Program Soft
Keys
Connects you directly to
the callee’sintercom after
exactly one ring.
line using a #51 <line
number> or a preprogrammed key.
conversation.
Associates Soft Key with
a speed dial number or
feature code that can be
configured directly on the
IP Phone.
• Feature does not require special
configuration to work.
• Go to AltiGen IP Phone
Configuration on the
Management Menu, go to the
desired extension, and set the
appropriate function key to Line
Park.
• The LED for Line Park soft key
will be lit up and turns off when the
parked call is picked up, the caller
hangs up, or the call is routed to
voice mail.
• Feature does not require special
configuration to work.
• Go to AltiGen IP Phone
Configuration on the
Management Menu, go to the
desired extension, and set the
appropriate function key to Phone
Setting. The user will be able to
configure this key directly fromthe
IP Phone by pressing **6
ENTER.
Redial Redials the last number
dialed.
Release Releases a call from the
connected state.
• Feature does not require special
configuration to work.
• Redialsuptolast16calls.
• Redialsupto32digits.
• Feature does not require special
configuration to work.
Alti-IP 600 Manual 33
Page 44

Ring Tones Select from one of three
ring tones.
• Press **6ENTER, scroll to
SELECT RING, and select from 0
-2.
Soft Keys
1-10
Speaker Enables use of speaker
Speed Dial Quickly dials a specified
Transfer
(XSFR)
Quickly performs a
specified function (Busy
Lamp Field, AltiServ
Feature Code, Phone
Setting or Speed Dial)
previously configured by
theSystem Administrator.
(Soft key #6 is configured
as FLASH by default. All
other soft keys are set to
Phone Setting by default.)
phone.
number that has been
previously stored.
Transfers an active call to
another number.
• In AltiAdmin, go to Extension
Configuration >Station Speed
and enter the Speed Dial entries
for the appropriate extension(s).
Then, go to Alti Gen IP Phone
Configuration on the
Management Menu, go to the
desired extension, and set the
appropriate soft key to the desired
function (BLF, Feature Code,
Phone Setting, Speed Dial).
• Feature does not require special
configuration to work.
• In AltiAdmin, go to Extension
Configuration >Station Speed
and enter the Speed Dial entries
for the appropriate extension(s).
Then, go to Alti Gen IP Phone
Configuration on the the
Management Menu, go to the
desired extension, and set the
appropriate function key to Speed
Dial and enter the speed dial code
in the field below.
• Feature does not require special
configuration to work.
• You cannot use this button to
“flash” after using it to transfer a
call. If you want to reconnect to a
call after using the XSFR button,
you must use the $(BACK key).
Voice Mail
(VM)
Enables access to voice
messages.
Alti-IP 600 Manual 34
• The VM count that appears in the
LCD displays new messages
(previously heard messagesare not
included).
Page 45

Appendix A
Specifications
Network
Protocols
Call Control
Protocols
Audio
Standards
Keypad
Features &
Handset
LCD
LED
• H.323, RTP, RTCP, TFTP, TCP, UDP, DHCP, DNS, ARP,
ICMP, Telnet
• H.323
• Vocoder: ITU G.711 (PCM), one low bit rate (G.723.1)
• Acoustic Echo cancellation supporting high-quality
speakerphone
• 12 standard dialing keys: 0-9, *, #
• 6 Feature keys: Redial, Voicemail, Intercom, Conference,
Transfer, Hold.
• 10 Function k eys: can be set to Busy Lamp Field, AltiServ
feature code, speed dial or flash.
• Adjustable Speaker/Ring/Handset volume control
• 2x16CharacterLCDDisplay
• Provide features such as time, calling party name, calling party
number, digits dialed, extension number, number of new voice
mails, DND/FWD and system information.
• Hold, Mute, Speaker, Conference, Forward, Intercom and
Release.
• Message waiting indicator
LAN
Memory
Additional
Features
• 2 Standard 10/100Base-T RJ-45 Ports:One for network to phone
connection, and one hub port for connection from phone to PC
• Flash ROM: 4M, stores boot ROM, software imaging and
configuration data, DSP images.
• DRAM: 8M, stores runtime program and data.
• Remote configuration and upgrade through web browser
• PPPoE Auto Redial capability
• 1 RJ-11 port (FXS) for analog telephone connections (Option)
• 1 RJ-11 port (FXO) for PSTN connection (Option)
Alti-IP 600 Manual 35
Page 46

Firewall Considerations
Dimensions • 210x175x75mm
Power
• External power brick, 5 VDC, 1.5A
Firewall Considerations
If using a firewall in the AltiWare environment, the following network
ports are used:
Client Server TCP UDP
AltiAdmin
AltiConsole AltiLink + 10025
AltiControl AltiLink+ 10025
AltiReach AltiLink 10015
AltiView/AltiAgent AltiLink+
Supervisor AltiLink+
CDRSearch AltiLink+
TAPI Client TAPI Gateway 10026
Alti-IP 600H/
600PH
VoIP H.323/H.225
VoIP Message
Waiting
VoIP H.245 VoIP H.245
VoIP RTP VoIP RTP
VoIP ATPS VoIP ATPS 10032
Web Client AltiLink+
a
AltiWare DCOM 135 135
10025
VM Service
Internal/External CDR
Logger
Internal/External CDR
Logger
AltiGen IP Phone Service 10032
Gatekeeper
VoIP H.323/H.225 1720
VoIP Message Waiting 49151
NetMeeting Chat
plus VoIP ports described
above
10028
10025
10027
10025
10027
From 49152 to N
10025
1720
1718, 1719
b
a. It is recommended that this be run only in an intranet.
b. N=49152+ (62*number of boards)–1
36 Alti-IP 600 Manual
Page 47

Appendix A
Troubleshooting
The following table provides the most common problems an end user may
encounter. For Alti-IP 600 phone questions or problems not listed here,
contact AltiGen Technical Support.
Problem/Symptom Solution
AltiWare is unreachable.
Imageupdatefailed.If
settingBoot Download
to YES, after the phone
reboots and if the setting
still says YES, the boot
failed.
IP Phone registered then
goesbacktoBasicmode
• Check to make sure the AltiWare IP address in the
IP Phone is set up correctly.
• Check the Alti-IP 600 phone’s IP address, network
mask and default gateway.
• Check to make sure you can ping the Alti-IP 600
phone’s address from AltiWare.
• Check to make sure the IP PhoneServices is started
in AltiWare.
• Check AltiWare IP address in AltiAdmin IP Phone
Configuration menu.
• Check the Alti-IP 600 phone’s IP address, network,
default gateway settings.
• Check the network connection.
• Check the TFTP server IP address and make sure the
TFTP server is running.
• PING from the TFTP server to the Alti-IP 600.
• Checktomakesureapp_mid.bin and dsp.bin files
exist in TFTP server directory.
• Check network connectivity by pinging from
AltiServ to the IP Phone.
• Check if IP Phone Service is running.
• Check if there is a duplicate IP address by
unplugging the Ethernet cable on the IP Phone, then
pinging the Alti-IP 600 phone’s IP address.
• Check the extension’s IP address in AltiAdmin to
find out if another user is trying to login using the
same extension number.
• Use#27+ENTER to login again and see if problem
persists.
Alti-IP 600 Manual 37
Page 48

Troubleshooting
No IP Address • Check if DHCP is enabled. If YES, check network
connection. If NO, check DHCP Server setting.
• Check if Alti-IP600 phone’s IP address is
configured.
One way connection.
• Make sure firewall setting has all the TCP/UDP
ports required by AltiWare opened.
• If NAT is used, make sure NAT is enabled and NAT
address is set up correctly.
Phone does not show
anything on LCD display.
Poor voice quality.
Check the power source to be sure the Alti-IP 600 phone
is receiving power.
• Make sure a switch is used, rather than a hub, in the
corporate LAN.
• G.711 provides better voice quality.
• If VoIP is set up over WAN, set priorityqueuing on
the WAN router.
• Make sure WAN QoS is okay by pinging a few
hundred packets from remote site and observe
packet loss and network latency.
• Adjust jitter buffer to accommodate network
latency.
Register failed.
• Check to make sure the extension number and
extension password is set up properly and that the IP
extension is enabled.
• Check to make sure the IP PhoneServices is started
in AltiWare.
• If IP Phone is associated with a physical phone (with
the same extension number), use #27 to activate the
IP Phone to normal operating mode.
38 Alti-IP 600 Manual
Page 49

Appendix A
LCD Messages
Local Menu Configuration Messages
The following messages may be displayed in the LCD when accessing
Menu Configuration:
Message Definition
conf timeout! After 2 minutes inside the configuration menu, if no
conf exception! During configuration, an unknown exception occurred.
Saved! The changed configuration was saved into memory.
Write Fail! Error occurred when saving the changed options into
Wrong Ext Number! The inputted extension number is invalid.
Wrong input! User inputted an invalid value or string during
wrong password! User is trying to configure an invalid password from the
action is taken, LCD will show this message and then
quit the menu.
flash ROM.
configuration.
phone menu.
Alti-IP 600H/600PH Running Messages
The following messages may be displayed in the LCD when running the
Alti-IP 600H/600PH:
Message Definition
Alti-IP 600 Manual 39
Page 50

LCD Messages
AW UNREACHABLE! Failed to connect to the AltiGen phone server. The user
Basic-Idle! IP phone is operating in Basic Mode.
DHCP FAIL! Although DHCP was enabled, the Alti-IP 600 was not
INVALID IP!
INPUT AGAIN...
INVALID VAL! During register of IP extension, an invalid response
is trying to register the IP phone with an invalid IP
phone’s IP address or the AltiGen Phone Server's IP
addressisinvalid.
Or, the network connection is lost in offhook or connect
state.
Refer to “AltiWare is unreachable.”section
of “The following table provides the most common
problems an end user may encounter. For Alti-IP 600
phone questions or problems not listed here, contact
AltiGen Technical Support.” on page 37.
Execute #27 again to reactivate.
Check IP Phone Service
Verify extension is configured for dynamic.
able to receive the IP address from the DHCP server.
The inputted IP address is invalid.
(return value) returned from phone server.
NO IP ADDR! Alti-IP 600 cannot attach an IP address due to network
No Network! Phone has lost Ethernet connection.
REGISTER FAIL! Cannot register to the AltiGen phone server.
REGISTER OKAY! IP extension registered successfully.
REGISTERING! User entered #27 to manually register the IP extension.
REMOVE OLD EXT. When #27 is entered, the extension/password
WRONG PASSWORD! Registration failed because of invalid extension
failure.
configuration in the IP Phone is removed.
password.
40 Alti-IP 600 Manual
Page 51

Appendix A
IP Phone Boot Messages
The following messages may be displayed in the LCD when booting the
Alti-IP 600H/600PH:
Message Definition
CHECK FW Checking firmware.
CHECK MEMORY Checking memory.
INIT NETWORK Initializing network.
LOAD FAILED Failure to load the image into memory.
NETWORK FAILED. Network initialization failed.
TFTP FAIL! Failure downloading TFTP.
UPDATE FAILED. Firmware update failed.
UPDATE OK Firmware update successfu l.
update APP(S1) Appears when Boot Download is set to TRUE. The Alti-
IP 6 00H/600PH will show this message when it is
rebooted.
User Reference
Basic Phone Operation
* indicates a normal operating mode phone feature, which is only available after
registering the Alti-IP 600 with the phone server and logged in as an extension.
FUNCTION KEY SEQUENCE
Auto Answer 1) Press **6, then ENTER button.
2) Use the navigation buttons to enable/disable Auto
Answer mode, set number or seconds to ring before
answering (1-20), and select from speaker or headset as
the Auto Answer device.
Alti-IP 600 Manual 41
Page 52

User Reference
Conference*
Configuration
Menu*
Handset/
Headset/
Speaker
Hold*
Intercom*
During a call:
1) Press CONF button (this automatically selects a new line
and places the other party on hold)
2) Enter target telephone number
3) When the call connects, press CONF button again OR
$(BACK key) to cancel conference and return back t o original
party.
• The number of parties allowed in a conference call
dependson the AltiServsystem. In general, upto 6 parties
are allowed.
1) Press **7, then ENTER button.
2) Use the navigation buttons to select configuration menu.
• !/"(UP/DOWN keys) allows you to scroll through text and
select features displayed in LCD screen.
• #(FORWARD key) is for menu selection.
• $(BACK key) returns to previous configuration menu or
deletes the last digit input.
3) Press ENTER button to access selected menu setting
Toswitch between handset,headset and speaker,the user can
go offhook, press the Speaker button or press the Headset
button (#10 soft key)
During a call:
1) Press HOLD button to put current call on hold and make a
new call.
To retrieve a single call on hold:
1) Press HOLD button
To retrieve multiple calls on hold:
1) Use !/" to select a hold call to be retrieved.
2) Press ENTER button
OR
1) Press HOLD button to retrieve last hold call.
Incoming Intercom:
Incoming voice path is heard through the speaker, indicated by
the button’s blinking indicator light
Outgoing Intercom:
1) Press ICOM button + <EXT>
42 Alti-IP 600 Manual
Page 53

Appendix A
Line Park
Mute
Program Soft
Key
Reboot 1) Press **3, then ENTER button
Redial
During a call:
1) Press #51 or Line Park soft key (if configured)
2) Enter two-digit Line Park line.
The LED for Line Park soft key will be lit up and turns off when
the parked call is picked up, the caller hangs up, or the call is
routed to voice mail.
While on a call with Speaker on
1) Press SPKR/MUTE button.
2) To disengage mute, press SPKR/MUTE button again.
1) Press **6, then ENTE R butt on; scroll to desired
programmable key to configure; enter appropriate digits for the
speed dial number or feature code.
Phone is onhook
1) Press REDIAL button.
2)Use !/" to scroll tothe desired entry. (! scrolls to previous
entry, " scrolls to first entry.)
3) Press SPRK/MUTE button or raise handset.
:
• Redial up to 16 last calls
• Redial up to 32 digits.
Release
Restore
Default
Settings
Ring Tones 1) Press **6, then ENTER butt on; scroll to SELECT RING.
Soft Key*
• BLF
• Feature
Code
• Speed Dial
For a connected call:
1) Press RELEASE to hang up the call.
1) Press **7, then ENTER button, **2, then ENTER button
1) Press SOFT KEY 1-10 to initiate one of the following
functions(Busy Lamp Field,A ltiSe rv featurecode,speed dial or
Phone Setting) pre-assigned by the System Administrator.
Note: Lower left SOFTKEY is set up asFLASH by default. Only
this key can be configured for FLASH. All other SOFT KEYS
are set up as Phone Setting by default.
• Phone
Setting
Speaker
To use the speakerphone:
1) Press the SPKR button
Alti-IP 600 Manual 43
Page 54

User Reference
Transfer*
During a call:
1) Press XSFR button, which places the call on hold
2) Dial the number you wish to transfer the call to
3) Hang up if the party answers the call.
4) If the party refuses the call, return to the original call by
pressing$(BACK key).
Voice Mail
Phone is onhook
1) Press VM button
2) Enter voice mail password
3) Press VM button again or ENTER button.
• The main LED light also blinks when a voice mail message
is waiting.
• The LCD displays the VM count (which includes only
unheard messages) when onhook.
Volume To adjust volume on handset/speakerphone:
1) Take phone offhook by pressing SPKR/MUTE button or
lifting the handset.
2) Press VOL button, volume bar appears in LCD
3) Press!/" to increase/decrease volume, then press VOL
again.
To adjust ringer volume:
1) Phone on idle
2) Press VOL button, sample ring plays and volume bar
appears in LCD
3) Press!/" to increase/decrease volume, then press VOL
again.
* * Feature Codes
**2...........................Restoredefaultsettings(whenuserisin
**3...........................Reboot
**6...........................ProgramSoftKey
**7...........................ConfigurationMenu
Configuration Menu)
AltiServ Feature Codes
##<pwd>.......................Logintovoicemailatyourownstation
###<ext><pwd>.................Logintovoicemailatanotherstation
AltiGen Voice Mail System Quick Features
#11 ...........................GreetingMenu
#28 ...........................PasswordMenu
Making Calls
#34 ...........................DialByName
1
Feature must be enabled by system administrator.
44 Alti-IP 600 Manual
1
Page 55

#35............................VirtualLogIn(StationPrivilegeOverride)
#69............................DialLastCaller
#77............................StationSpeedDial
#88............................SystemSpeedDial
#99............................LastNumberRedial
#93<ext>.......................IntercomCall
2
Answering Calls
#29<ext>.......................IndividualCallPickup(aspecificstation)
#30............................SystemCallPickup(anystationringing)
XSFRbutton#31.................PersonalCallPark
#31<ext>.......................PersonalCallParkPickup
XSFRbutton#41.................SystemCallPark
#41<loc.#>.....................SystemCallParkPickup
#51<lineparkline>...............LineParkPickup
#81. . . . ........................HandsFreeIntercomMode
#82............................HandsFreeManualAnswerMode
Call Management
#26............................StationLogOut(Phone must be onhook)
#27............................StationLogIn(Phonemustbeonhook)
#32<acctcode>.................EnterAccount Code (before dialing)
XSFR button #32 <acct code> . . . . . . Enter Account Code (mid-call)
#33............................DoNotDisturb
#36............................CallForwarding
#37............................RemoteCallForwarding
Other Features
#22............................FeatureStatusCheck
#25............................StationSpeedDialSetup
#38............................OutsideCallBlocking(operatoronly)
#39............................OperatorOff-Line(operatoronly)
#44............................OverheadPaging
#45............................OverheadPagingbyTrunk
#46............................GroupPaging(forAlti-IPphoneusers)
#55. . . . ........................ListFeatureTips
#73............................SilentSystemCallPark
#90............................Readytoreceiveworkgroupcalls
#91............................Notreadytoreceiveworkgroupcalls
XSFRbutton#40.................TransfertoAltiGenVoiceMailSystem
XSFRbutton#15<
AA#>...........TransfertoAutoAttendant
XSFRbutton##<ext>............TransfertoaUser’sVoiceMail
XSFR button <ext> XSFR button. . . . . Consultation
Appendix A
2
Feature available only on systems with Triton Analog Extension board.
Alti-IP 600 Manual 45
Page 56

User Reference
46 Alti-IP 600 Manual
Page 57

Glossary
A
Alti-IP 600H/600PH - AltiGen’s H.323-compliant, business telephone that
provides voice communication over an IP network.
ASCII - American Standard Code for Information Interchange.
B
Boot - to cause the computer to start executing instructions.
BPS - Bits Per Second. The number of bits transmitted per second.
C
configure - to determine and assign the equipment cabinet or chassis contents and
location of each card, as well as software parameters.
D
DHCP (Dynamic Host Configuration Protocol) - a protocol that lets network
administrators manage centrally and automate the assignment of Internet Protocol
(IP) addresses in an organization’s network.
DNS - Domain name system used to address translation to convert H.323 IDs,
URLs, or e-mail IDs to IP addresses. DNS is also used to assist in locating remote
gatekeepers and to reverse-map raw IP addresses to host names of administrative
domains.
Do Not Disturb (DND) - when this feature is selected, all incoming calls to the
user’s extension are denied. If the station has system forwarding instructions, the
calls will be automatically redirected to another extension, Attendant, or operator.
DTMF - Dual Tone Multi Frequency are the low and high frequency tones that
comprise touch tone signals.
DSP - Digital S ignal Processor. A microprocessor with a n architecture that is
particularly optimized to perform mathematical algorithms that manipulate digital
signals.
Dynamic IP Address - An IP address that is automatically assigned to a client
stationinaTCP/IPnetwork,typicallybyaDHCPserver.Networkdevicesthat
serve multiple uses, such as server and printers, are usually assigned static IP
addresses.
Dual Tone Multi Frequency -seeDTMF.
Alti-IP 600 Manual 47
Page 58

E
extension number - an arbitrary number of two to five digits that matchesa station
to a particular user.
F
Firewall - a set of related programs, located at a network gateway server, that
protects the resources of a network from users of other networks.
FLASH - a sudden brief signal. Activated by depressing the flash key on the
telephone pad if one has been configured, or by a quick press and release of the
receiver button (switch hook).
FXS - Foreign Exchange Subscriber. An analog interface for direct connection of a
telephone set to a digital multiplexer.
G
Gateway - allows H.323 terminals to communicate with terminals configured to
other protocols by converting protocols. A gateway is the point where a circuitswitched call is encoded and repackaged into IP packets.
GMT - Greenwich Mean Time. Mean solar time of the meridian at Greenwich,
England, used as the basis for standard time throughout the world.
H
H.323 - An International Telecommunications Union (ITU-T) standard that
describes packet-based video, audio and data conferencing.
httpor HTTP- Hypertext Transfer Protocol. The Internet protocol used to manage
communications between Web clients (browsers) and servers.
I
IMAP4 - Internet Message Access Protocol - Version 4.
IP Address - a 32-binary digit number that identifies each sender or receiver of
information that is sent in packets across the Internet.
ISP - Internet Service Provider.
J
jack - the mate for a plug. Used to connect two pieces of equipment together.
48 Alti-IP 600 Manual
Page 59

K
keyboard - system interfacefor communication.A group of numeric keys,
alphabetic keys, or function keys used for entering information into a terminal and
into the system. Usually patterned after the QWERTY keyboard layout. This term
is derived from the sequence of the first six keys in the first row of alphabetic keys.
L
Localaddress -an address used in a peripheral node or station in place of anetwork
address and transformed to or from a network address for delivery purposes.
Logoff - the procedure by which a user disconnects from a program or session.
Logon - the procedure by which a user begins a program or terminal session and
gains access to the AltiServ or Quantum system.
M
MHz - Megahertz.
ms - millisecond.
N
NAT (Network Address Translation) - translation of an Internet Protocol address
(IPaddress) used withinone network toa different IP address known withinanother
network. Once network is designated the inside network, the other is the outside.
network - A configuration of data processing and/or telecommunication devices
and software connected for information exchange.
network address - An identifier for a node, station, or unit of equipment in a
network.
network domain - a set of workstations and servers that share a security account
manager database and can be administered as a group. A user with an account in a
particular network domain can log onto and access his or her account from any
system in the domain.
network mask - also known as the “subnet mask.”
network server - networking software that responds to I/O or computes requests
from a client machine. Windows NT network servers can be implemented either as
server processes or as drivers.
O
offhook - refers to a telephone set when the receiver is not resting in the base. This
usually initiates a dial tone from the receiver.
Alti-IP 600 Manual 49
Page 60

One Number Access - a feature of AltiWare that allows users to create a list of
phone numbers that the system can use to track users and connect them with an
incoming call if they are not at their extension desk.
onhook - the term used to describe a telephone in the idle state or with the receiver
still resting in the base.
P
physical extension - is associated with a physical port and device. An extension is
created, by default, as a physical extension (as opposed to a virtual or workgroup
extension) unless there are no more physical ports available.
ping (Packet INternet Groper) - a unit of data routed between an origin and a
destination in a network.
port -a communication channel through which a client process communicates with
a protected subsystem.
protocol - A set of rules and conventions by which two computerspass messages
across a network medium. Networking software generally implements multiple
levels of protocols layered one on top of the other.
Q
queue - a collection of calls waiting to be served. Queued calls in AltiWare are
handled on a first-in, first-out basis.
R
RAS - Remote Access Service.
RJ-11 - The “common” telephone jack.Usually wired with four wires, the red and
green signify the tip and ring circuits.
RJ-45 - The “common” telephone jack. Usually wired with eight wires, the red and
green signify the tip and ring circuits.
router - protocol-dependent device that connects subnetworks together.
S
server - any computer whose function in a network is toprovide user access to files,
printing, communication, and other services.
static IP address - a permanent IP address that is assigned to a node in an IP or
TCP/IP network.
50 Alti-IP 600 Manual
Page 61

subnet mask - themethod used for splitting IP networks into a series ofsubgroups,
or subnets. The mask is a binary pattern that is matched up with the IP address to
turn part of the host ID address field into a field for subnets.
System Speed Dialing - this feature allows the user to access a system wide
directory of commonly called numbers that have been “condensed” into a two- or
three-digit code on the telephone dial pad.
T
TCP/IP - Transmission Control Protocol/Internet Protocol. A full set of protocols
used on the Internet.
TDM - Time Division Multiplexing.
TFTP(Trivial File TransferProtocol) - aversion of the TCP/IPFTP protocol that
has no directory or password capability.
transfer - this feature redirects a call to another extension,
Mail System
, or operator.
the AltiGen Voice
U
UDP (User Datagram Protocol) - a communications protocol that offers a limited
amount of service when messages are exchanged between computers in a network
that uses the Internet Protocol.
URL (Uniform Resource Locator) - the address that defines the route to a file on
the Web or any other Internet facility.
user(s) - the person or persons accessing the features and functions of the AltiWare
product.
V
virtual extension - an extension not associated with a physical port that allows for
guest access to
environments. Users of a virtual extension have to log in before accessing the
system features assigned to it.
the AltiGen Voice Mail System features and telephone sharing
W
workgroup - telephones arrangedin groups within a particular organizational
function (for example, marketing, sales, service, etc.). Each workgroup is assigned
a pilot number. When the pilot number is dialed, the system scans the list of
extensions comprising the workgroup and connects the call to the first available idle
extension number. If no extensions are available, the call is placed in that
workgroup’s queue.
Alti-IP 600 Manual 51
Page 62

workgroup pilot number - an extension designated to a workgroup that is not
associated with aphysical portand may consist of upto 64 members. When thepilot
number is dialed, the call is distributed to the workgroup members.
52 Alti-IP 600 Manual
Page 63

Index
Index
A
activating IP extension 13
active logon while another handset is
already logged on 17
activity display 29
additionalfeatures 35
address
AltiGen Communications, Inc. ii
AltiAdmin
setup 12
AltiAdmin configuration
requirements 5
AltiAdmin setup 7
AltiGen Communications
phone numbers ii
AltiGen Communications, Inc.
address ii
AltiGen IP Phone Service 6
Alti-IP 600
AltiAdmin setup 7
connectionsetup 11
illustration 1
AltiWare Server 21
ARP 35
Assigning 24
assigning a local IP address 24
assigning a network mask 26
assigning a TFTP server 24, 26
assigning NAT 27
audio standards 35
auto answer 31
tables 35
call control protocols 35
CONFERENCE button 3
Configuring 26
configuring IP settings 24
configuring NAT 26
configuring phone settings 21
configuring startup network
settings 12
configuring TFTP options 24, 26
connection setup 11
copy from
IP phone 11
D
DHCP 35
dial pad 3
dimensions 36
disabling DHCP 23
display workgroup status 32
distinctive ringing 28
DNS 35
E
enable DHCP 22
enable gatekeeper 22
enable NAT 23
enabling DHCP 23
ENTER button 3
extension number 21
extension password 21
F
firewall considerations 36
firewall port configuration 6
B
basic mode 6
BLF 31
Boot Download 22
C
call accounting
G
GateKeeper Discovery 23
gateway 22
glossary 47
H
hardware components 4
Alti-IP 600 Manual 53
Page 64

Index
headset 32
headset port support 29
HOLD button 3
I
ICMP 35
ICOM button 3
installation 7
IP extension
activation 13
IP phone
copy from 11
IP settings
configuration 24
K
keypad features 35
known limitations 41
L
LAN 35
LCD 2, 35
LCD messages 39
LED 35
Line Park 33
local address 22
M
main indicator light 3
memory 35
N
NAT address 23
NAT configuration 26
navigation buttons 3
network mask 22, 26
network protocols 35
network requirements 5
network settings 22
network setup 7
normal operation 6
O
overview
Alti-IP 600
overview 1
P
phone functions 31
standard 34
phone setting
soft keys 18
phone settings 21
plug and play 6
setup 12
power 36
R
rebooting 18
REDIAL button 3
RELEASE button 3
remote installation
DSL 15
restoring default settings 15, 18
ring tones 27
RTCP 35
RTP 35
S
setting up the network 7
soft keys 2
phone setting 18
SPK/MUTE button 3
standard phone functions 34
system requirements 5
system settings 21
T
TCP 35
Telnet 35
TFTP 35
TFTP configuration options 24, 26
TFTP Server 22
54 Alti-IP 600 Manual
Page 65

U
UDP 35
updating phone firmware 25
using DSL 15
V
verifying phone startup process 17
version information 22
VM button 3
volume 3
W
warranty v
how to get service v
workgroup status display 28
X
XSFR button 3
Index
Alti-IP 600 Manual 55
 Loading...