

Page 1

WMP-G02V
High-Speed 2.4GHz WLAN Mini PCI Card
User’s Manual
First Edition (November, 2003)
Page 2

Contents
List of Figures .......................................................... v
List of Tables .......................................................... vii
Preface ..................................................................... ix
About this Document ..................................................................................... ix
Audience......................................................................................................... x
Additional Resources...................................................................................... x
1 Introduction ........................................................... 1-1
Package Contents .......................................................................................1-1
System Requirements .................................................................................1-2
Hardware Installation.............................................................................................1-2
2 Windows 2000 ....................................................... 2-1
Driver Installation (First-time Install) ............................................................2-1
Driver Installation (Previous Driver Installed)...............................................2-5
Driver Uninstallation ..................................................................................2-14
Device Configuration .................................................................................2-17
Infrastructure Mode .............................................................................2-22
Ad Hoc Mode.......................................................................................2-23
TCP/IP Setup ......................................................................................2-24
Page 3

3 Windows Millennium Edition ................................3-1
Driver Installation......................................................................................... 3-1
Driver Uninstallation ....................................................................................3-5
Device Configuration ...................................................................................3-7
Infrastructure Mode ...............................................................................3-9
Ad Hoc Mode.......................................................................................3-10
TCP/IP Configuration ..........................................................................3-12
4 Windows 98 Second Edition.................................4-1
Driver Installation......................................................................................... 4-1
Driver Uninstallation ....................................................................................4-5
Device Configuration ...................................................................................4-8
Infrastructure Mode ...............................................................................4-9
Ad Hoc Mode.......................................................................................4-11
TCP/IP Setup ......................................................................................4-13
5 Windows XP ...........................................................5-1
Driver Installation (First-time Install) ............................................................5-1
Driver Uninstallation ....................................................................................5-6
Device Configuration .................................................................................5-10
Infrastructure Mode .............................................................................5-12
Ad Hoc Mode.......................................................................................5-13
TCP/IP Setup ......................................................................................5-15
Windows XP Wireless Network Configuration ...........................................5-20
Infrastructure Mode ............................................................................. 5-22
Ad hoc mode .......................................................................................5-24
Connect to an Available Wireless Network.......................................... 5-26
6 Windows NT 4.0 .....................................................6-1
Driver Installation and TCP/IP Setup........................................................... 6-1
Device Configuration ................................................................................... 6-7
Page 4

Infrastructure Mode ...............................................................................6-8
Ad Hoc Mode.......................................................................................6-11
Verify Connection ................................................................................6-13
Driver Uninstallation ..................................................................................6-15
7 LinkMon ................................................................. 7-1
Installation ...................................................................................................7-1
Features ......................................................................................................7-5
8 RFSilent.................................................................. 8-1
System Requirements .................................................................................8-1
Windows 98SE Environment .................................................................8-1
RFSilent Setup ............................................................................................8-2
Operation..................................................................................................... 8-2
9 Troubleshooting.................................................... 9-1
Page 5

List of Figures
Figure 2-1. Infrastructure Mode.............................................................. 2-17
Figure 2-2. Ad Hoc Mode ....................................................................... 2-18
Figure 8-1. RFSilent Icon ......................................................................... 8-2
Figure 8-2. RFSilent Menu Selections...................................................... 8-2
Page 6

Page 7

List of Tables
Table 8-1. RFSilent Menu Descriptions .................................................. 8-3
Page 8

Page 9

Preface
This user’s guide provides the necessary information for first-time users to
successfully install the Alphanetworks Driver Interface Specification (NDIS)
driver, for the purpose of evaluating and/or operating the
AlphanetworksWMP-G02V Station Reference Design in a Microsoft Windows
environment. This guide also provides information for users who wish to
upgrade the AlphanetworksNDIS driver from previous releases.
This guide describes the steps required to install NDIS drivers for the
AlphanetworksWMP-G02V Wireless Network mini PCI Card in Windows
2000, Windows Millennium Edition, Windows 98 Second Edition, Windows
XP, and Windows NT 4.0. This guide also includes detailed instructions for
configuring the PC Card device, or IEEE 802.11b/g station (STA), to interact
with an access point (AP) in infrastructure mode and with other STAs in ad
hoc mode. Instructions for installing or upgrading the diagnostic utility
LinkMon are also included. You should also read this before proceeding to
install the AlphanetworksWMP-G02VV Wireless Network mini PCI Card and
NDIS driver in the targeted operating system (OS) environment.
About this Document
The document consists of the following chapters and appendixes:
Chapter 1 Introduction—Hardware, Software, and System
Requirements needed to setup AlphanetworksWMP-G02V
Station Reference Design.
Chapter 2 Windows 2000—Installation/Uninstallation Procedures and
Device/Network Configurations for Windows 2000.
Chapter 3
Chapter 4 Windows 98 Second Edition—Installation/Uninstallation
Chapter 5 Windows XP—Installation/Uninstallation Procedures and
Windows Millennium Edition—Installation/Uninstallation
Procedures and Device/Network Configurations for Windows
Millennium Edition.
Procedures and Device/Network Configurations for Windows
98 Second Edition.
Device/Network Configurations for Windows XP.
Page 10

Chapter 6 Windows NT 4.0—Installation/Uninstallation Procedures
and Device/Network Configurations for Windows NT 4.0.
Chapter 7 LinkMon—Graphical User Interface for Operational Status
and Statistics of AlphanetworksWMP-G02VStation
Reference Design.
Chapter 8 RFSilent—RFSilent application that allows you to enable or
disable the RF Signal (radio) on all AlphanetworksSTA
Reference Designs.
Chapter 9 Troubleshooting—Hints on fixing common
Installation/Uninstallation and Device/Network
Configurations issues.
Appendix 錯誤!
找不到參照來
源。
錯誤! 找不到參照來源。—Describes how to select Fixed
Data Rate and/or Channel Frequency for specific testing.
Audience
This document is intended for Alphanetworkscustomers who wish to install
and evaluate the AlphanetworksWMP-G02V Station Reference Design in the
supported Microsoft Windows environments.
Additional Resources
AlphanetworksSTA Reference Design hardware, software, and
documentation contain proprietary information of
AlphanetworksCommunications, Inc., and are provided under a license
agreement containing restrictions on use and disclosure, and are also
protected by copyright law. Reverse engineering of this hardware, software,
or documentation is prohibited.
The following resources should be referenced regarding topics that are not
addressed in this document:
AR2112 Radio-on-a-Chip for 5-GHz Wireless LANs data sheet
AR5212 MAC/Baseband Processor for IEEE 802.11b/g 5-GHz Wireless
LAN data sheet
AP User’s Guide
STA Reference Design Functional Specification
Page 11

Package Contents
Make sure the following materials are available before you begin:
One 802.11b/g PCI Card
One Installation CD-ROM containing software and utilities and this user’s
guide
One 802.11b/g PCI Card Quick Start Guide
1
Introduction
One warranty registration card
1-1
Page 12

System Requirements
A computer that meets the following specifications:
-Windows 2000,Windows ME, or Windows 98SE
PCI expansion slot
At least 64 MB of memory
A 300 MHz processor or higher
At least one other IEEE 802.11b/g-compliant device
Hardware Installation
Follow these steps to install the 802.11b/g PCI Card in a computer’s PCI slot:
1. Turn off your computer and unplug its power cord from the wall outlet for
safety purposes.
2. Remove the computer cover.
3. Locate an unused PCI slot and refer to your PC ’s manual for
instructions on how to remove the plate that covers the slot (if
applicable).
4. Align the Harmony 802.11b/g PCI Card over the empty slot.
5. Firmly insert the card into the slot, as illustrated below.
6. Secure the card’s metal bracket to the computer following the directions
provided in your PC’s manual.
7. Replace the computer cover.
8. Plug the computer’s power cord back into the wall outlet.
9. Place the antenna with the longer cable on top of your desk, computer,
or monitor.
1-2
Page 13

PRELIMINARY Chapter錯
誤! 尚未定義樣式。
10. Turn on the computer.
Atheros Communications, Inc. Introduction •1-3
COMPANY CONFIDENTIAL 錯誤! 找不到參照來源。
Page 14

Page 15
Windows 2000
Driver Installation (First-time Install)
Insert the AlphanetworksWMP-G02V Wireless Network mini PCI Card into a
32-bit CardBus slot and follow these steps to install the NDIS driver:
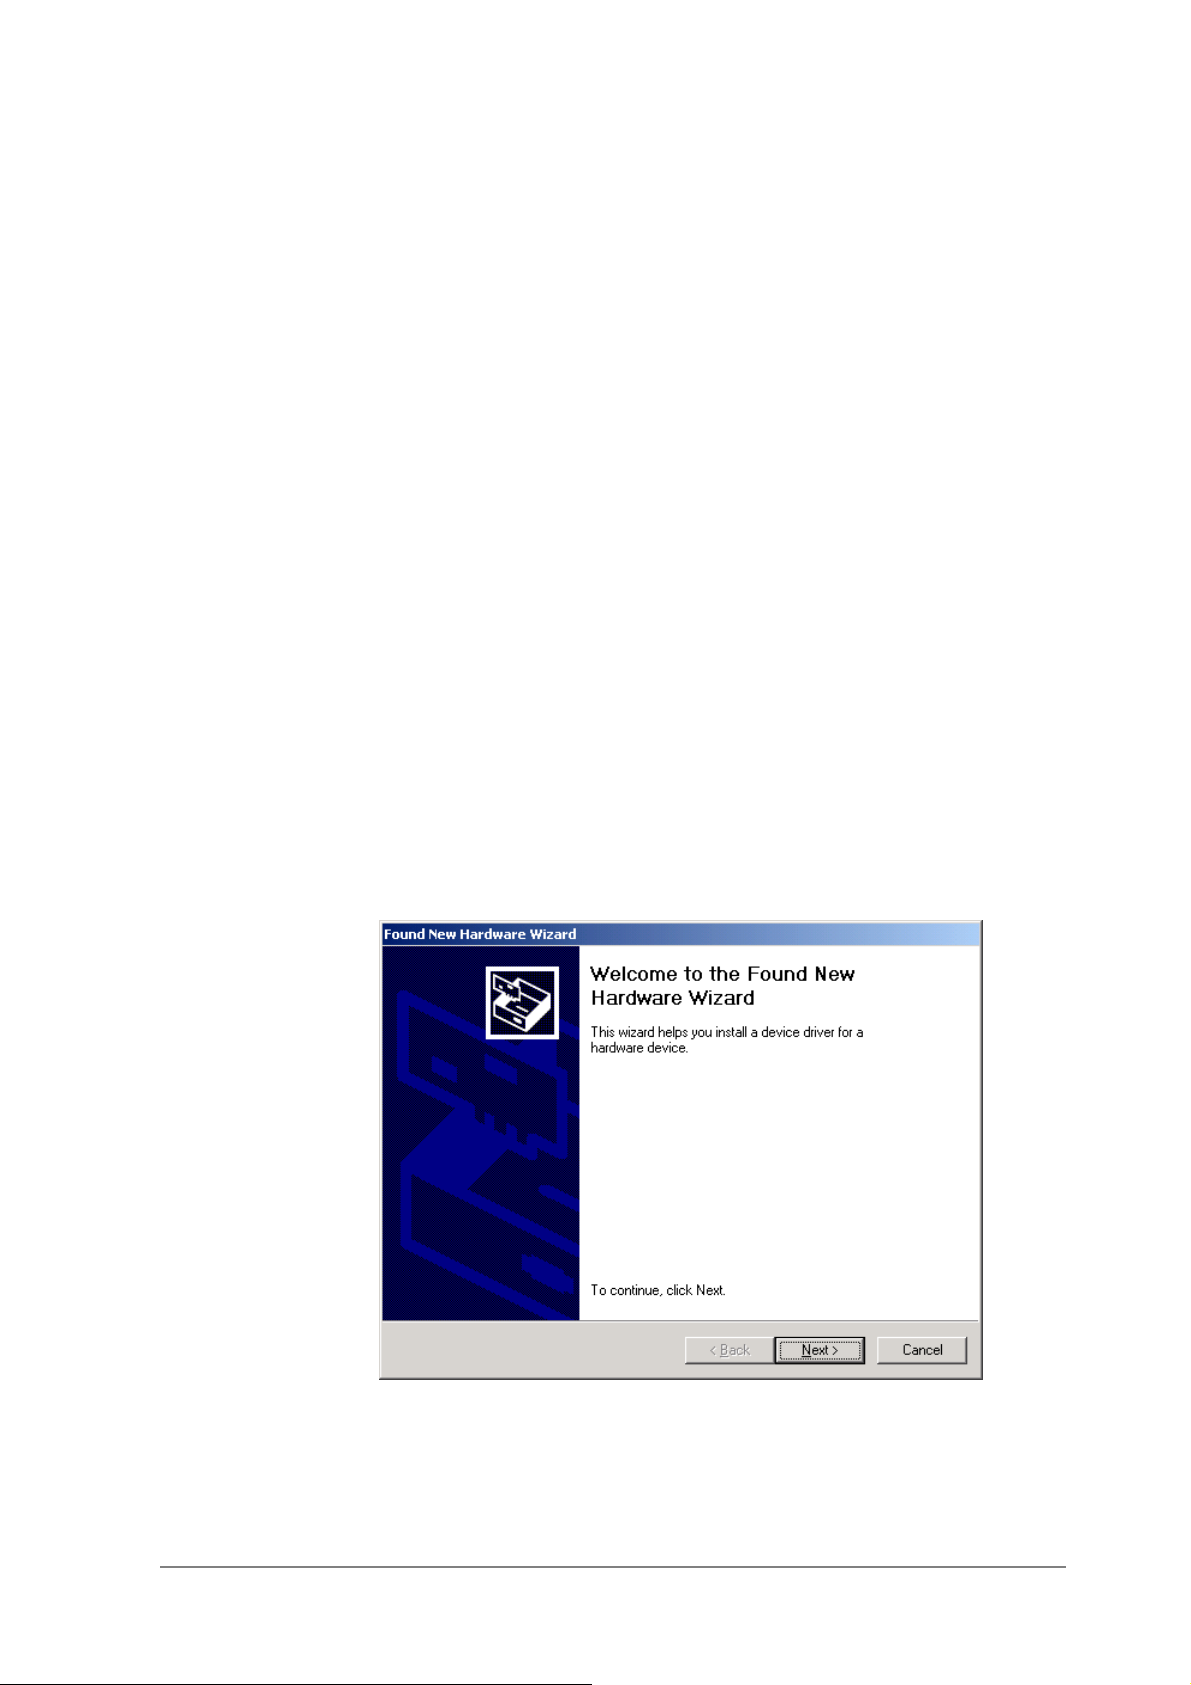
1. Wait for the following dialog box to display, and click Next to continue.
2
2-1
Page 16
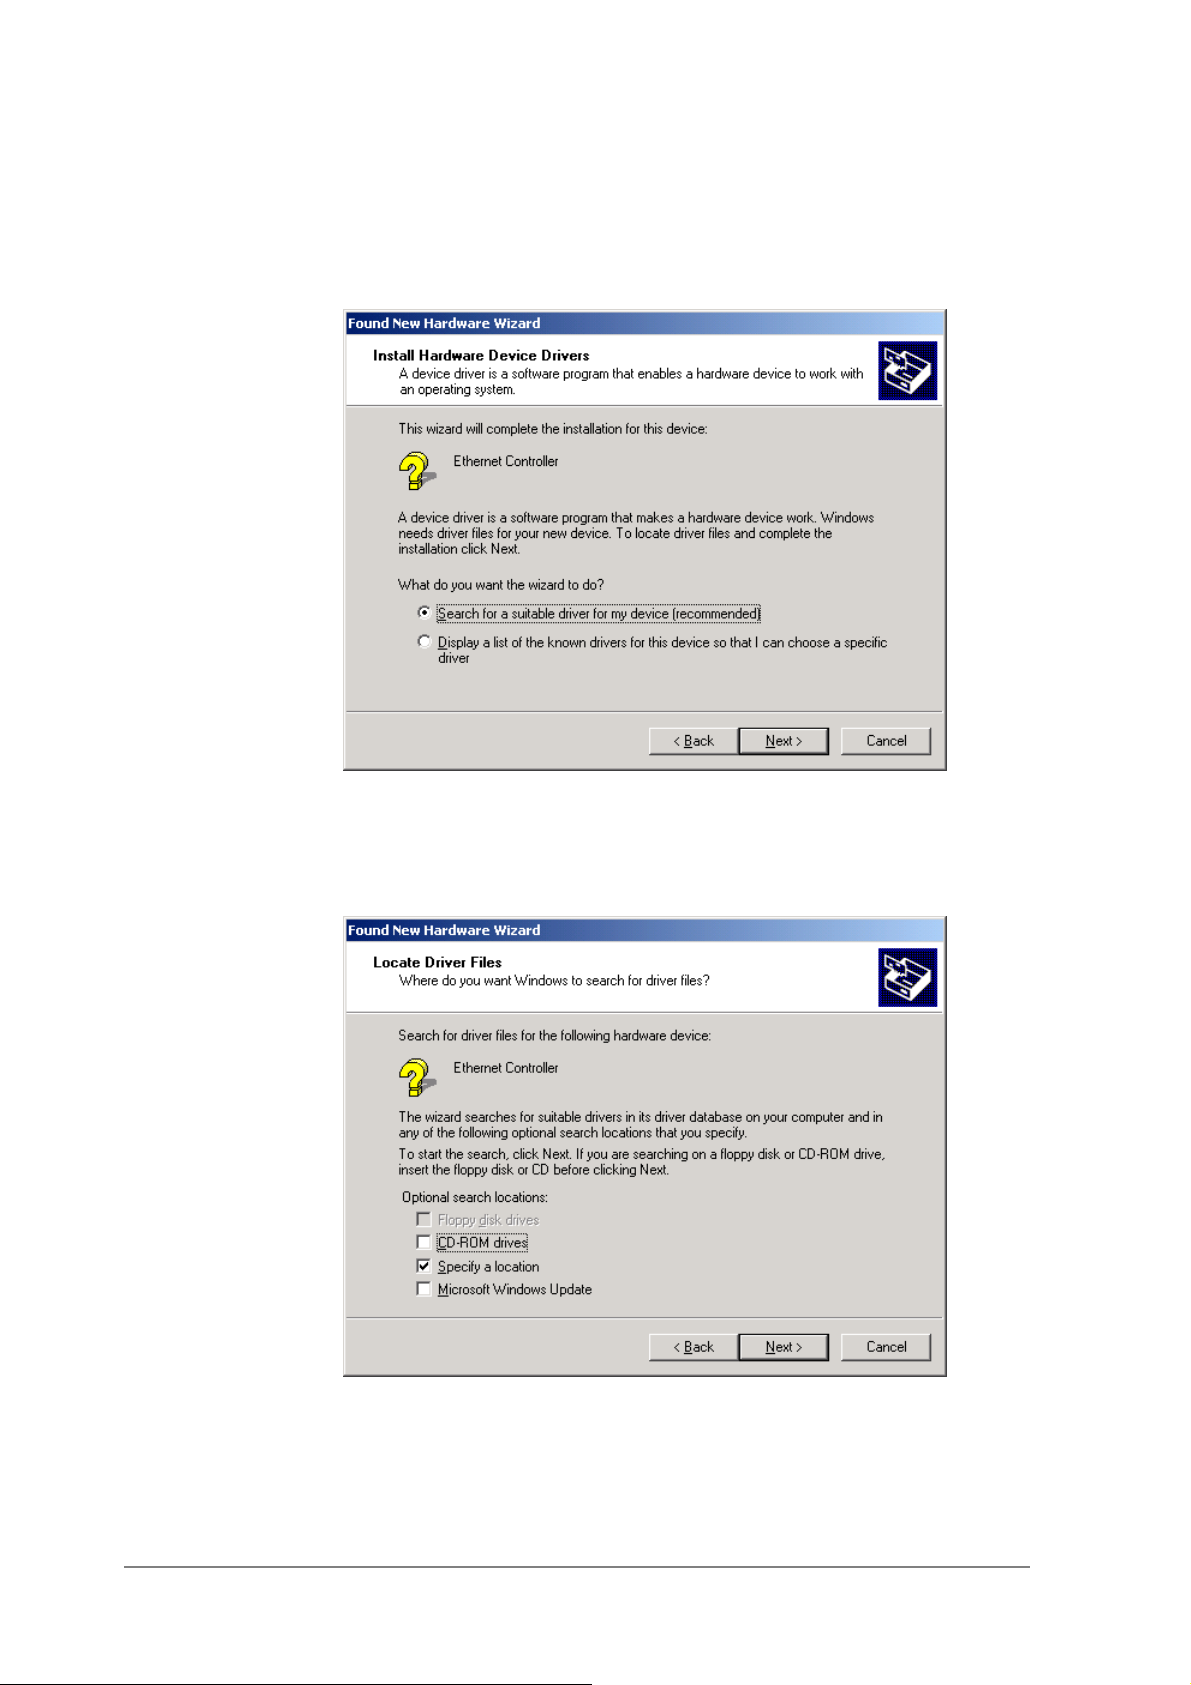
2. Choose “Search for a suitable driver for my device (recommended),” and
click Next.
3. Insert the installation CD in your CD-ROM drive. Choose “Specify a
location” under “Optional search locations,” and click Next to continue.
2-2
Page 17
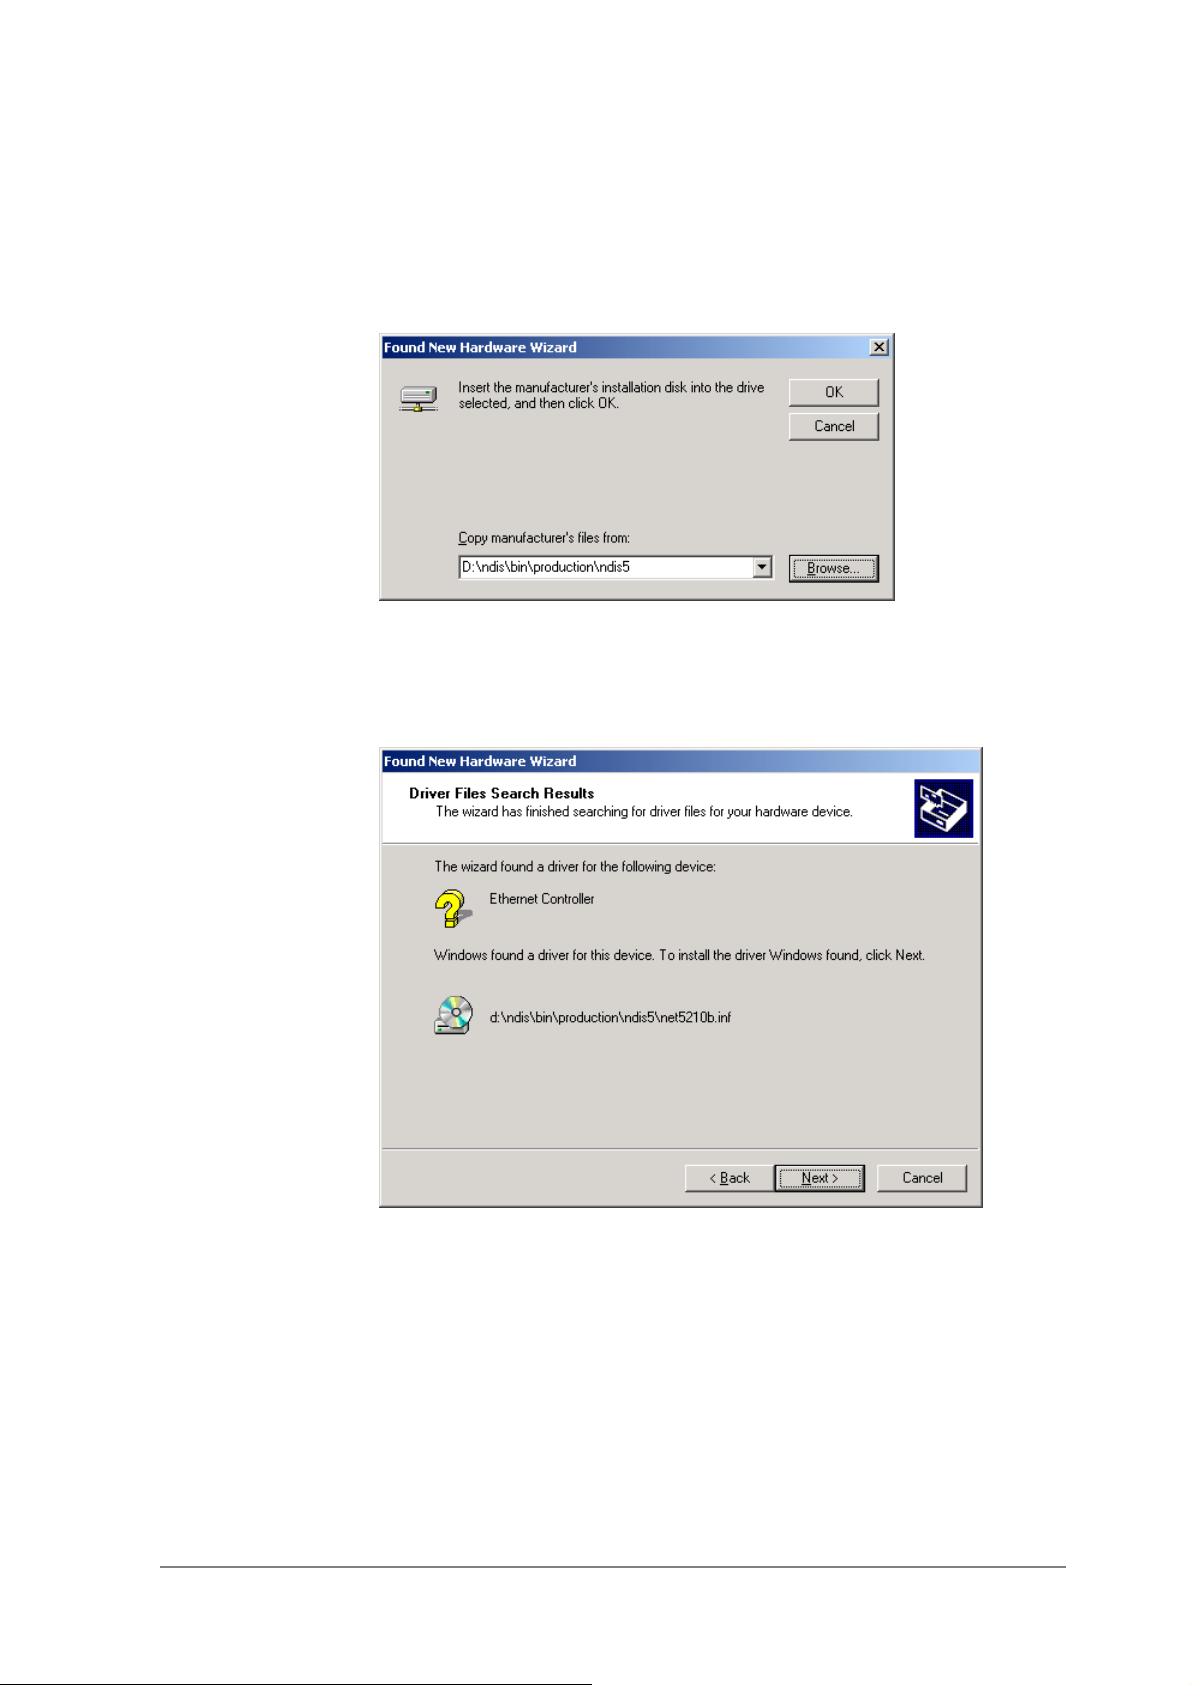
4. Browse to the location where the NDIS driver is located (assuming D is
the CD-ROM drive), the default folder is D:\ndis\bin\production\ndis5.
Click OK to continue.
5. When you find the Alphanetworksdriver installation file (net5210b.inf),
click Next to continue.
2-3
Page 18
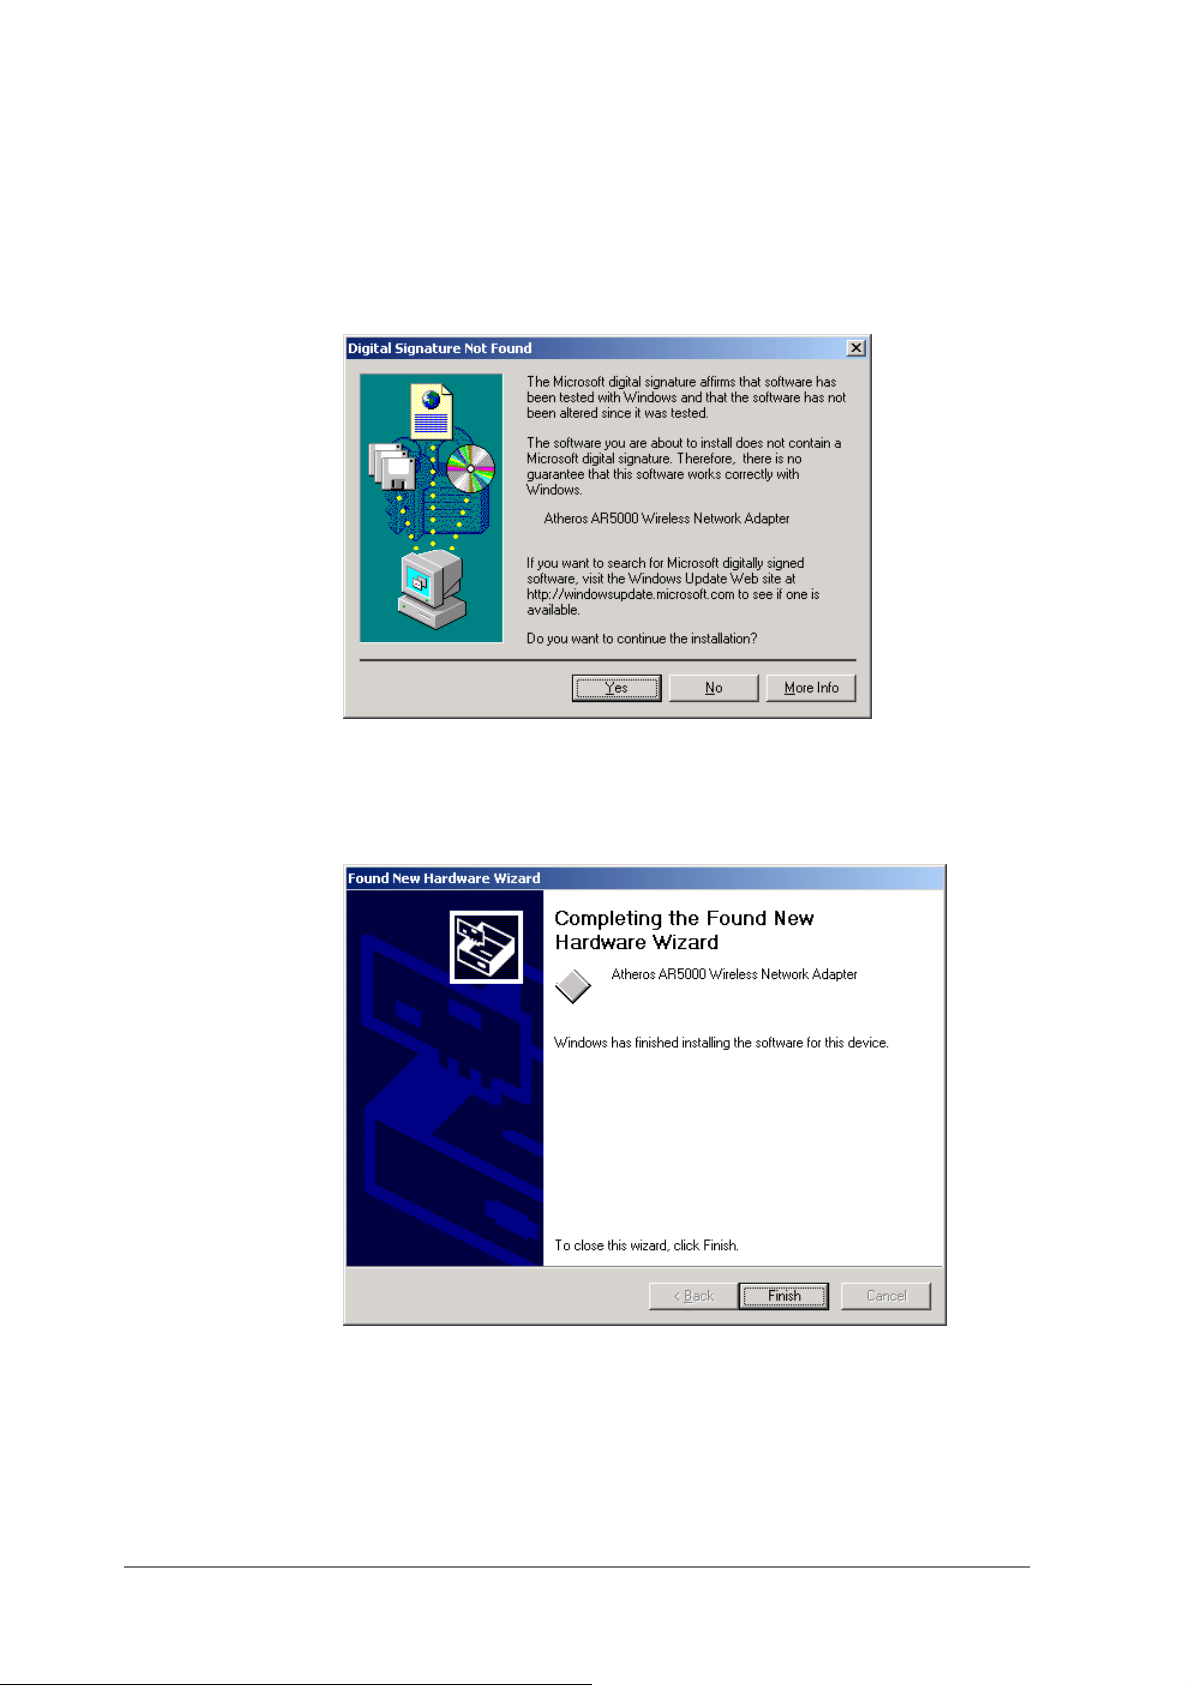
6. The AlphanetworksNDIS evaluation driver currently does not have a
digital signature from Microsoft. Therefore, Windows 2000 shows a
warning message. Click Yes to proceed with driver installation.
7. Click Finish to complete the driver installation. See Section “Device
Configuration” for the device configuration.
2-4
Page 19
Driver Installation (Previous Driver Installed)
If the system already has a previous release of the AlphanetworksNDIS
installed, Windows does not prompt for the device driver when the WLAN
Card is inserted. Follow the steps below to update the NDIS driver:
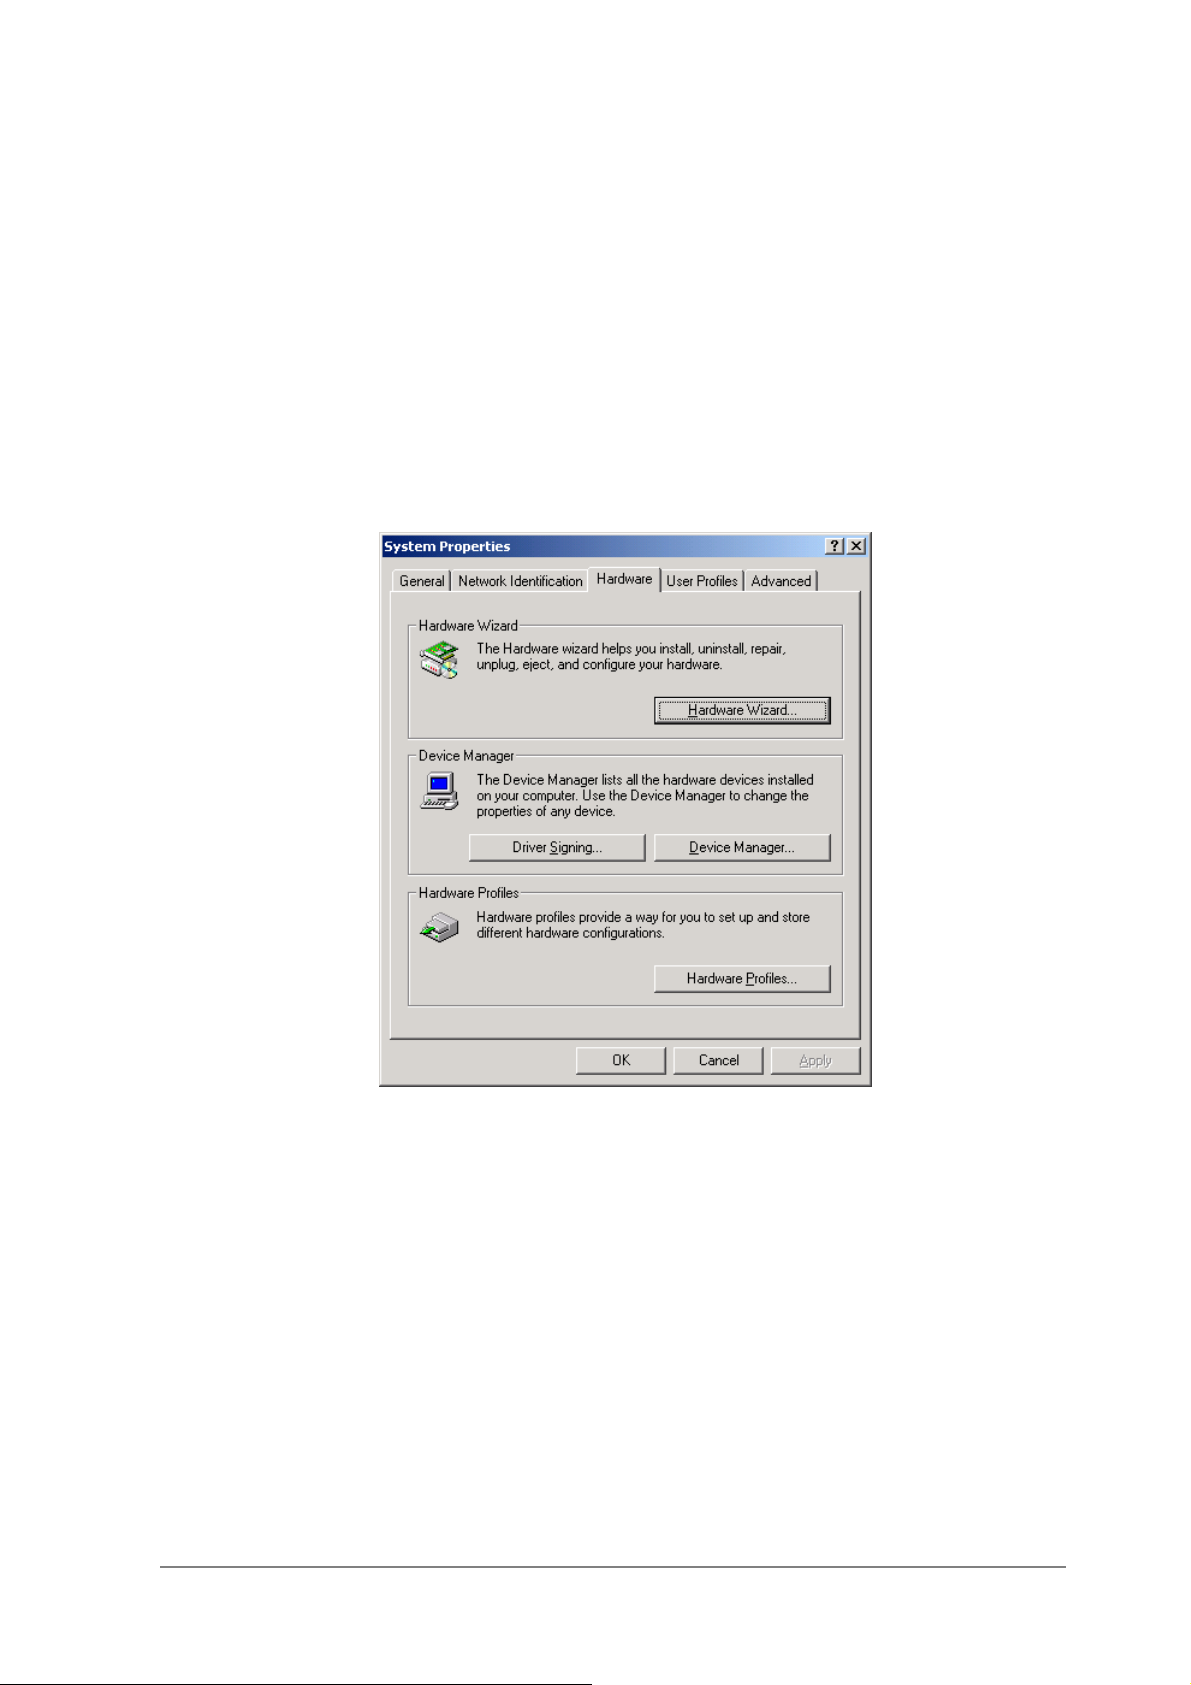
1. Start System Properties from Control Panel. Under Hardware tab, click
Device Manager.
2-5
Page 20
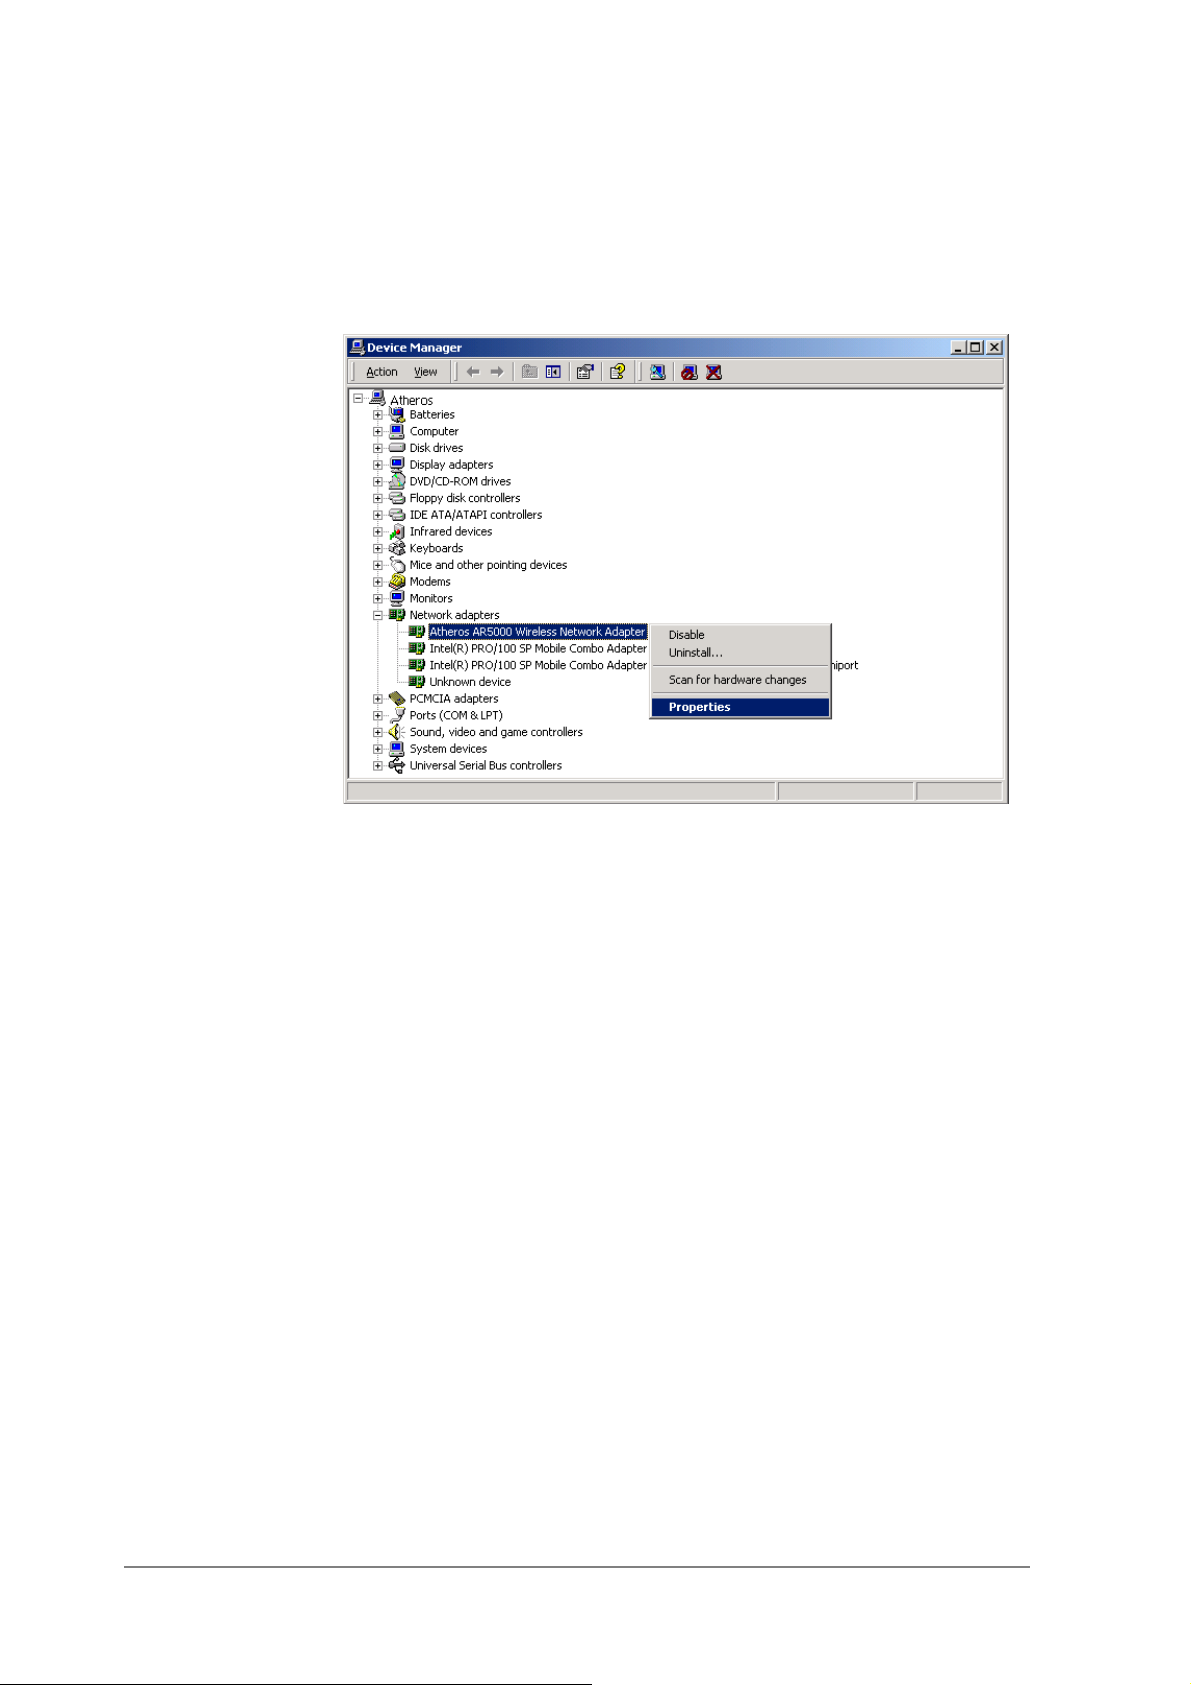
2. Within Device Manager, right-click “AlphanetworksWMP-G02V Wireless
Network mini PCI Card” under “Network adapters” device node, and click
Properties.
2-6
Page 21
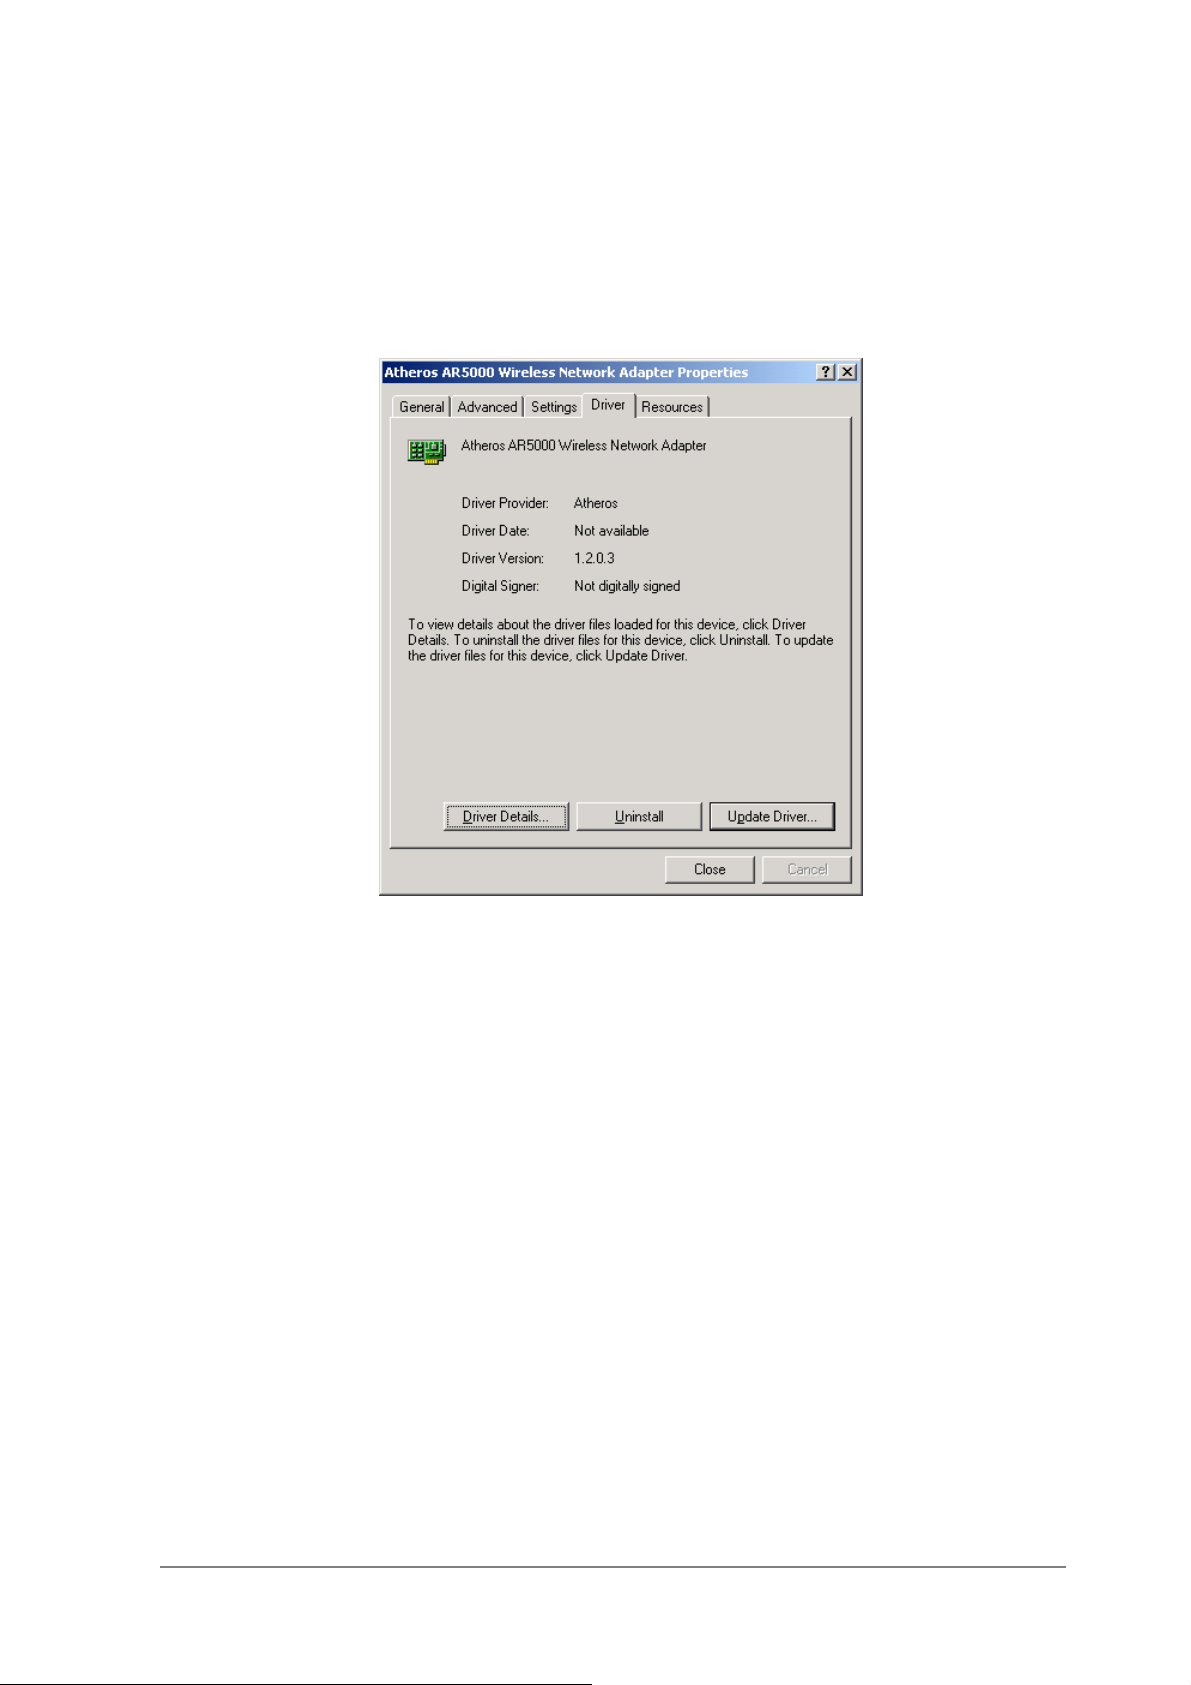
3. Click “Update Driver…” from the Driver tab. Note the Driver Version that
you are updating from. You may need to verify this field again after driver
update completes to make sure Release 1.3 driver has been updated
correctly.
4. Click Next to continue.
2-7
Page 22
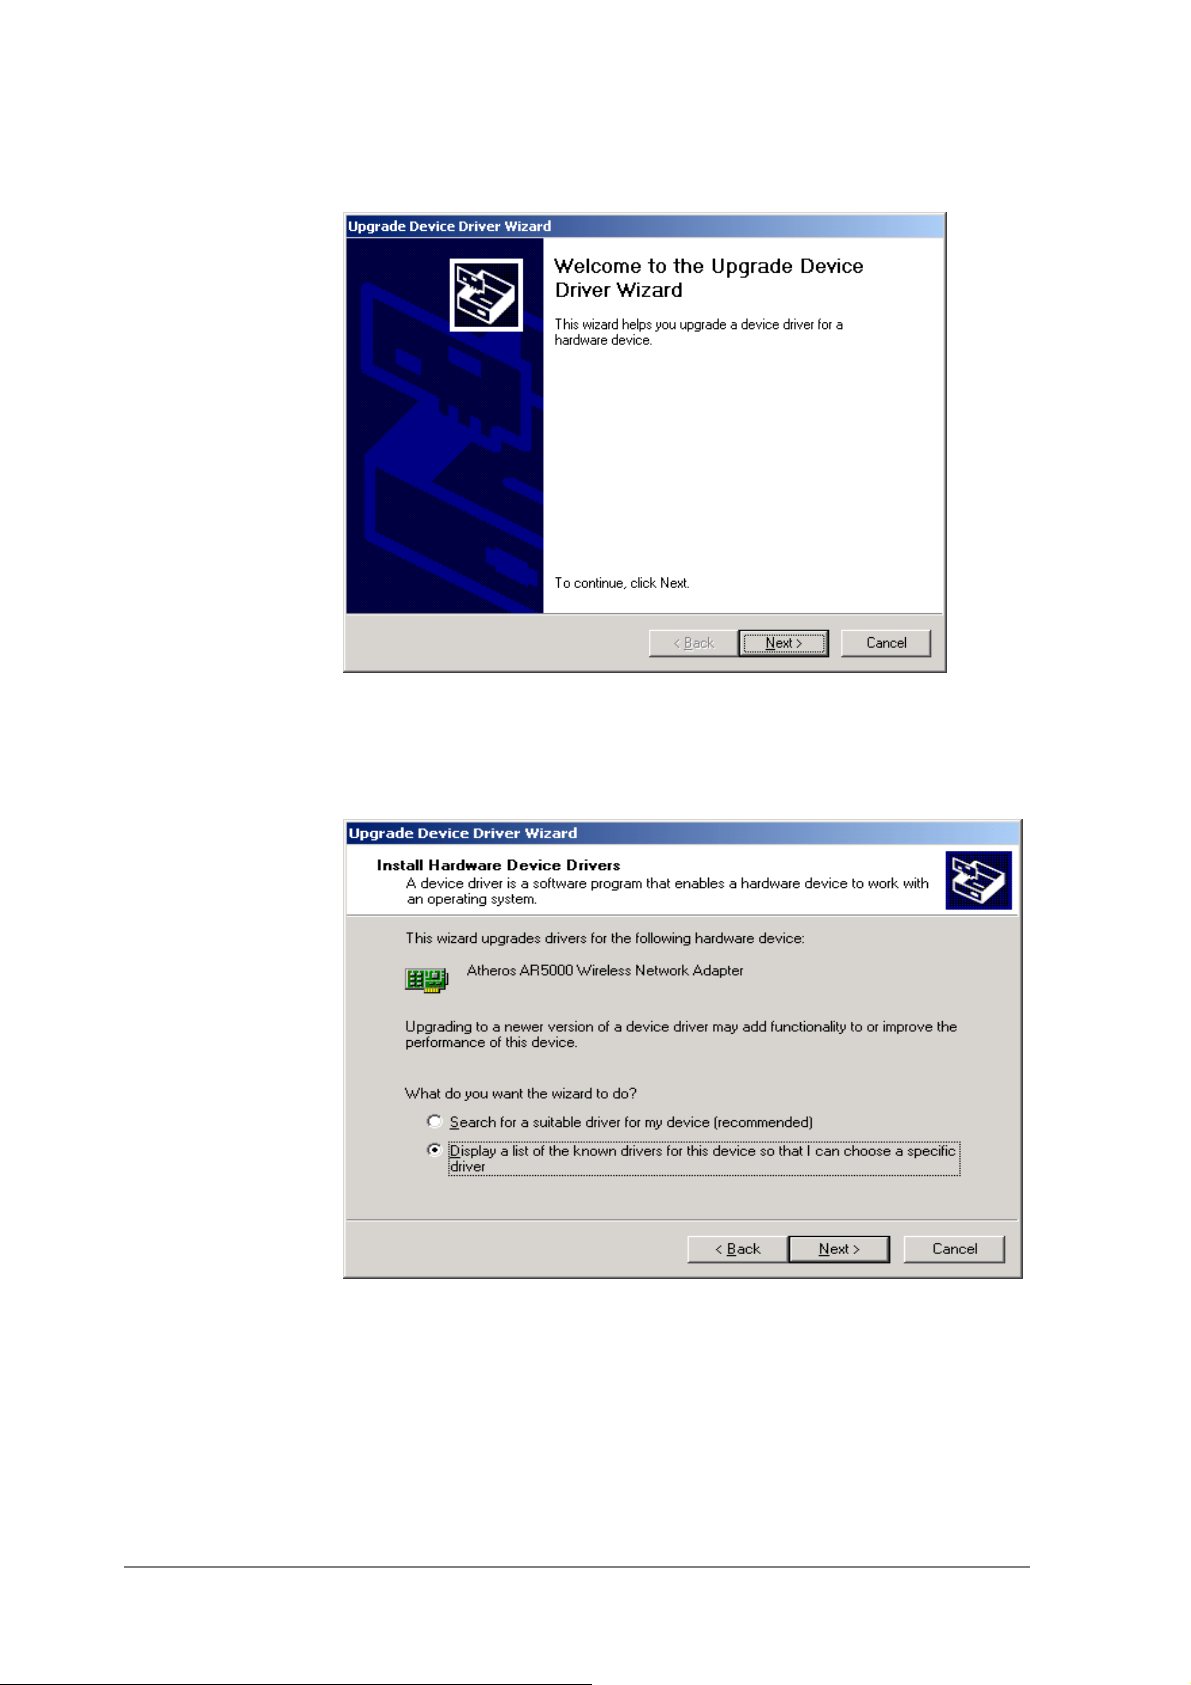
5. Choose “Display a list of the known drivers for this device so that I can
choose a specific driver,” and click Next to continue.
6. Insert the Release 1.3 CD into your CD-ROM drive. Click “Have Disk…”
to continue.
2-8
Page 23
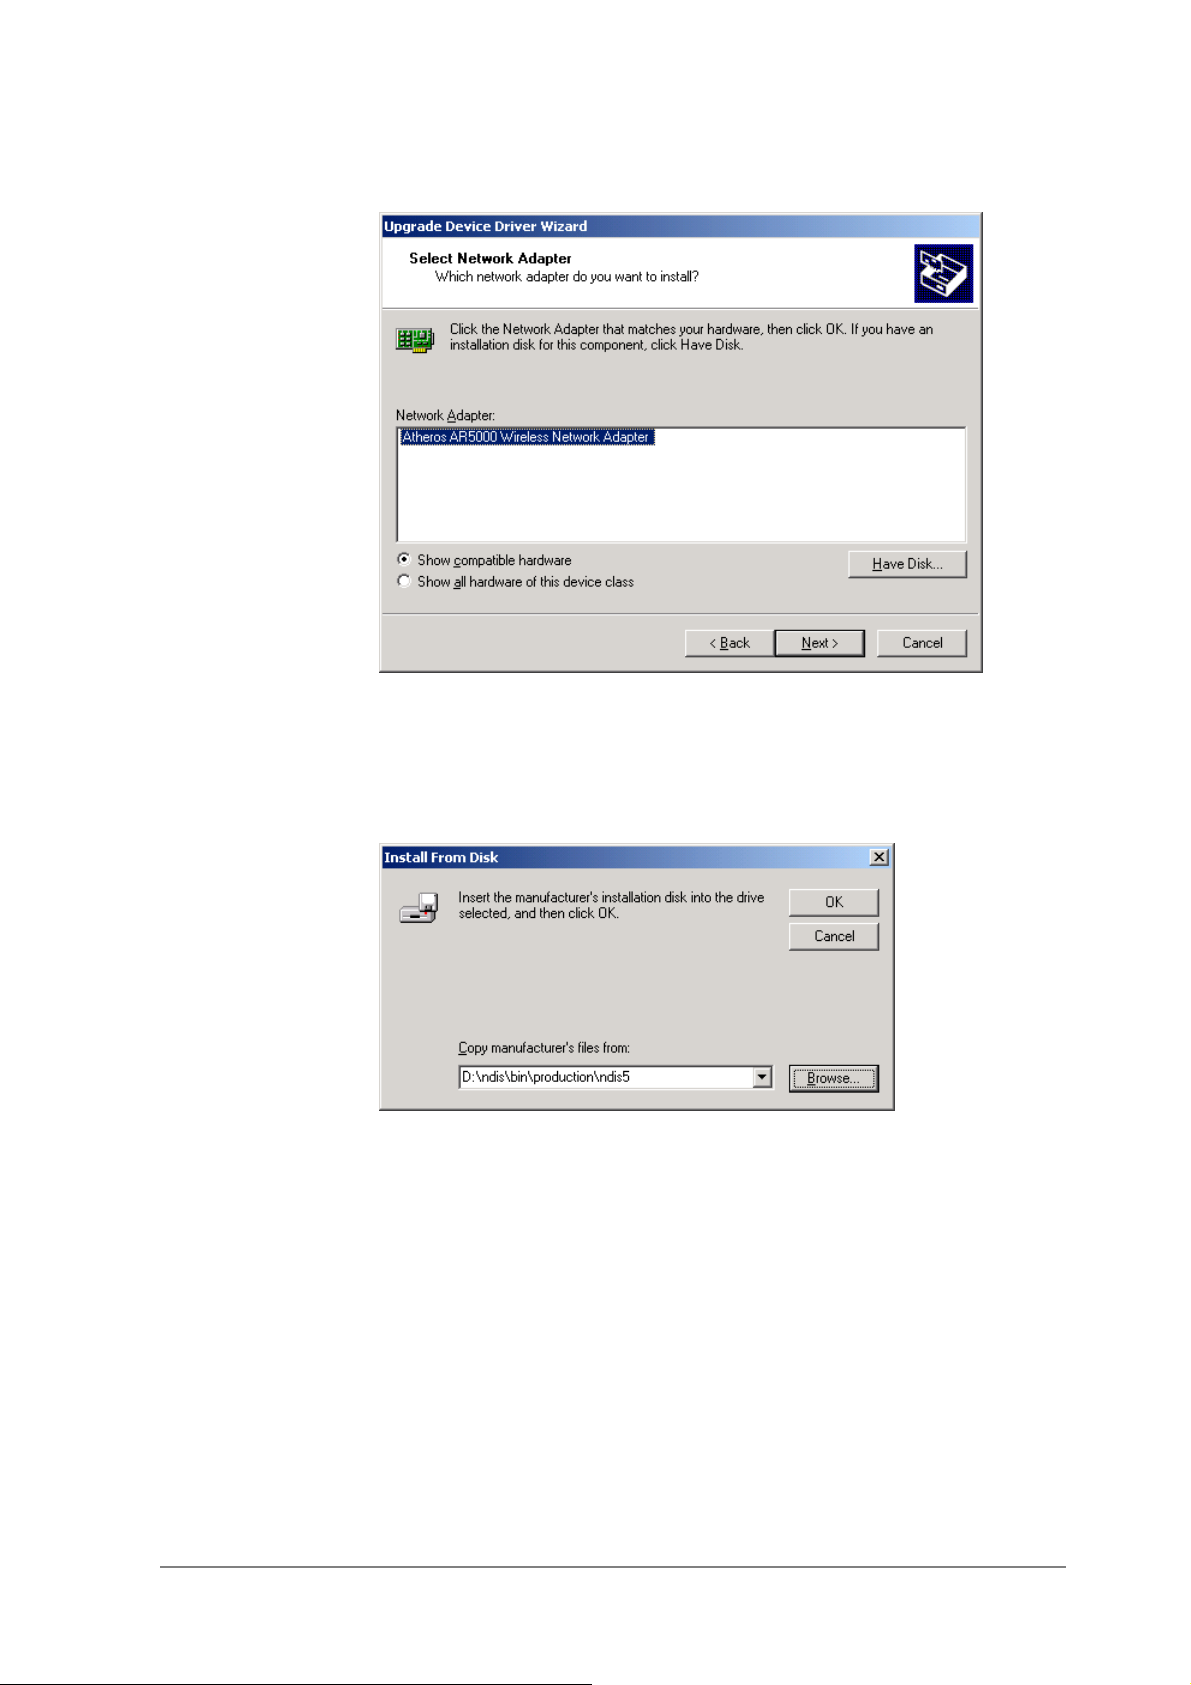
7. Browse to the location where the NDIS driver is located (assuming D is
the CD-ROM drive), the default folder is “D:\ndis\bin\production\ndis5”.
Click OK to continue.
8. Select “AlphanetworksWMP-G02V Wireless Network mini PCI Card” from
the list and click Next to continue.
2-9
Page 24
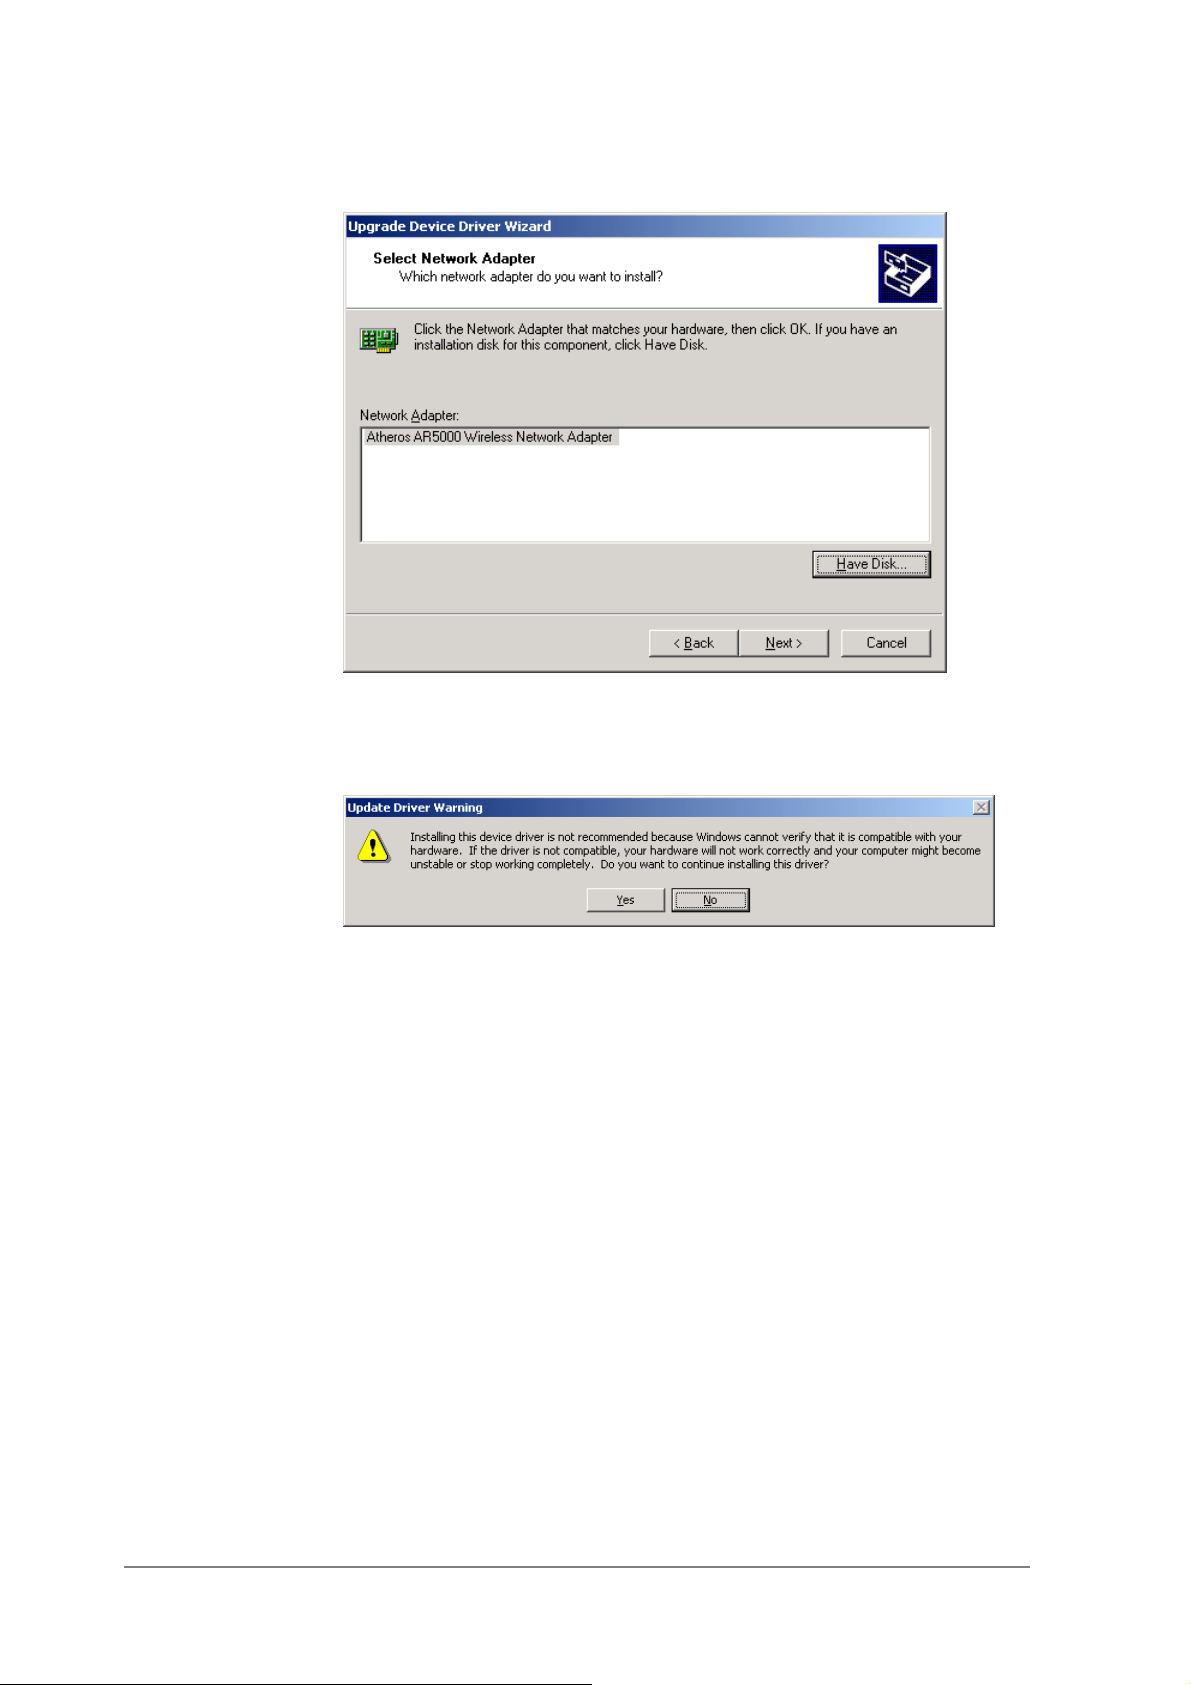
9. Click Yes to continue when Windows displays the warning message.
2-10
Page 25
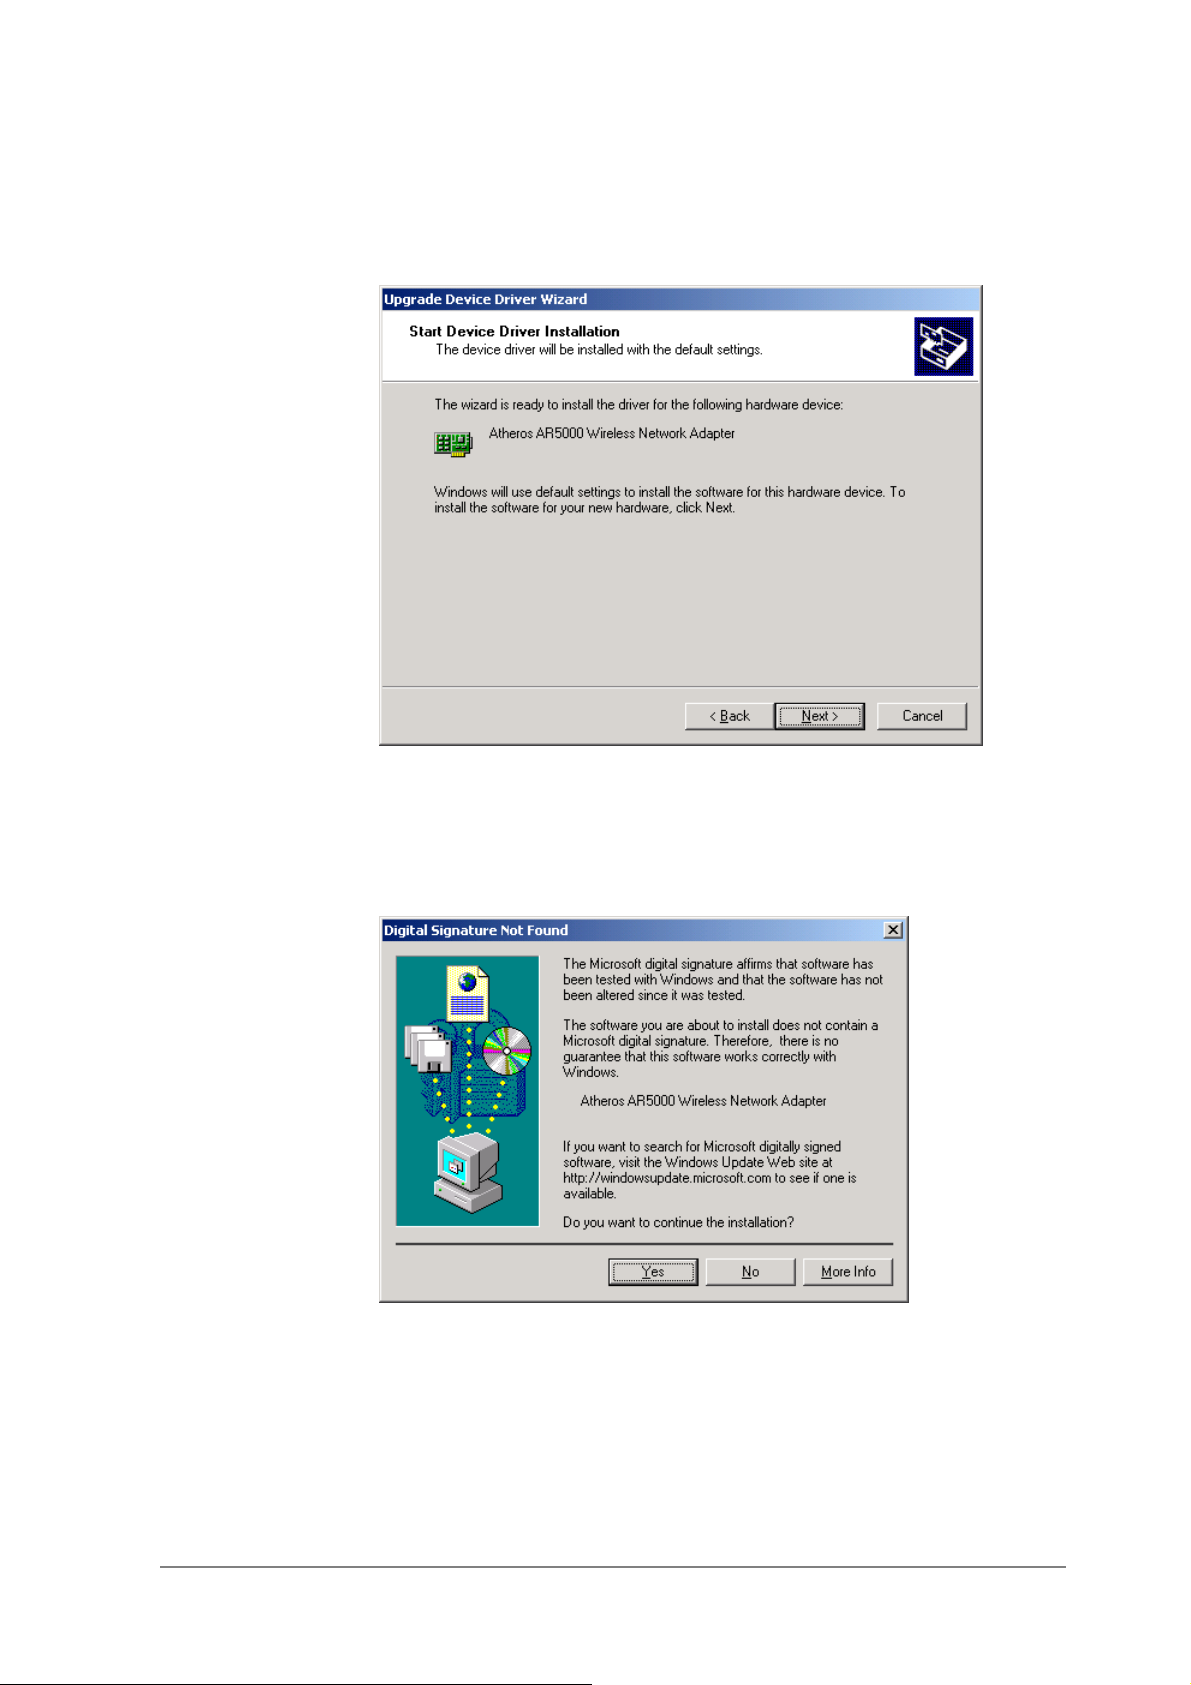
10. Click Next to proceed with installation.
11. The AlphanetworksNDIS evaluation driver currently does not have a
digital signature from Microsoft. Therefore, Windows 2000 shows a
warning message. Click Yes to proceed with driver installation.
2-11
Page 26

12. Click Finish.
13. Note that Driver Version should display 1.3 as the major revision number.
Click OK to continue.
2-12
Page 27
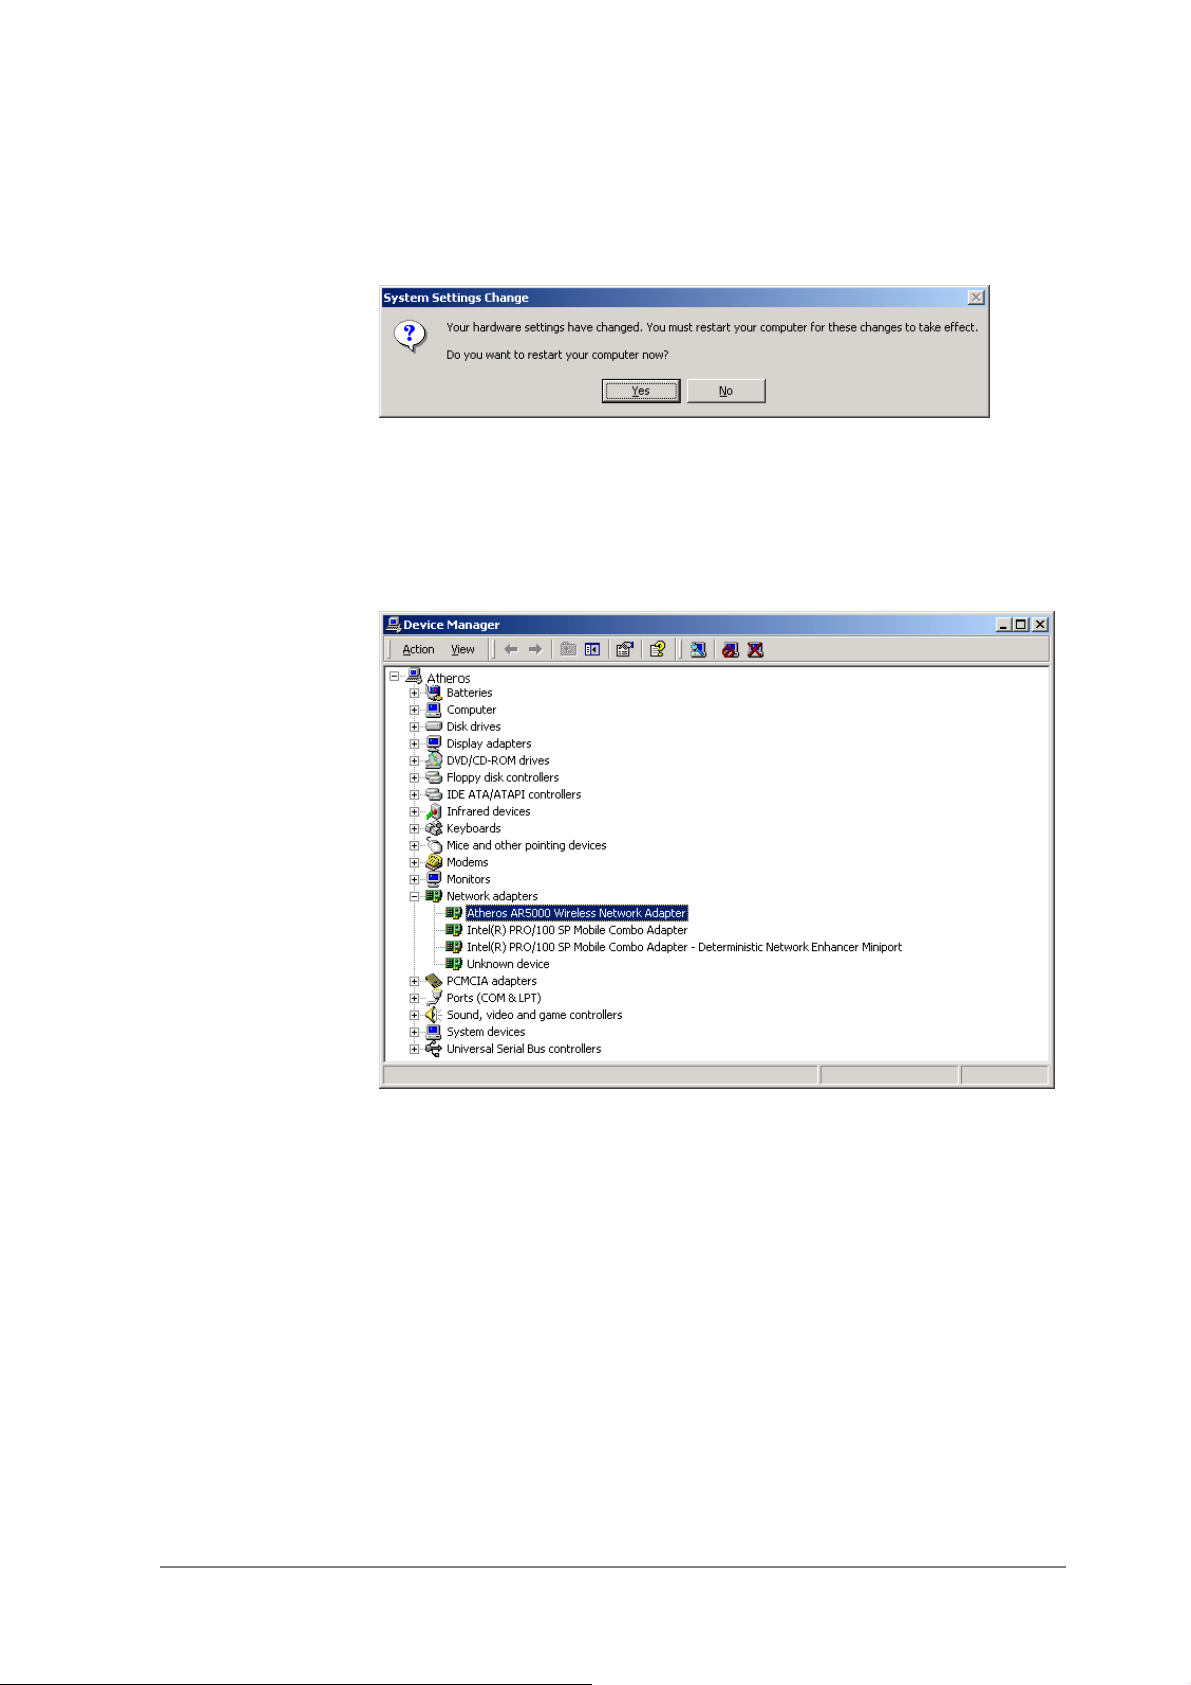
14. Click Yes to restart system.
15. After system restarts, the “AlphanetworksWMP-G02V Wireless Network
mini PCI Card” now displays under “Network adapters” in the Device
Manager. Proceed to Section “Device Configuration” for device
configuration information.
2-13
Page 28
Driver Uninstallation
This section provides information about uninstallation procedures required for
upgrading the NDIS driver from previous Alphanetworkssoftware releases.
If the system does not have previously installed versions of the NDIS driver
and you wish to remove the newly installed driver from the system, proceed
to Step 4.
The NDIS driver since Release 1.0 no longer leverages the Transport Driver
Interface (TDI) protocol to provide the LinkMon programming interface. The
TDI protocol should be uninstalled. Follow these steps to uninstall the TDI
protocol:
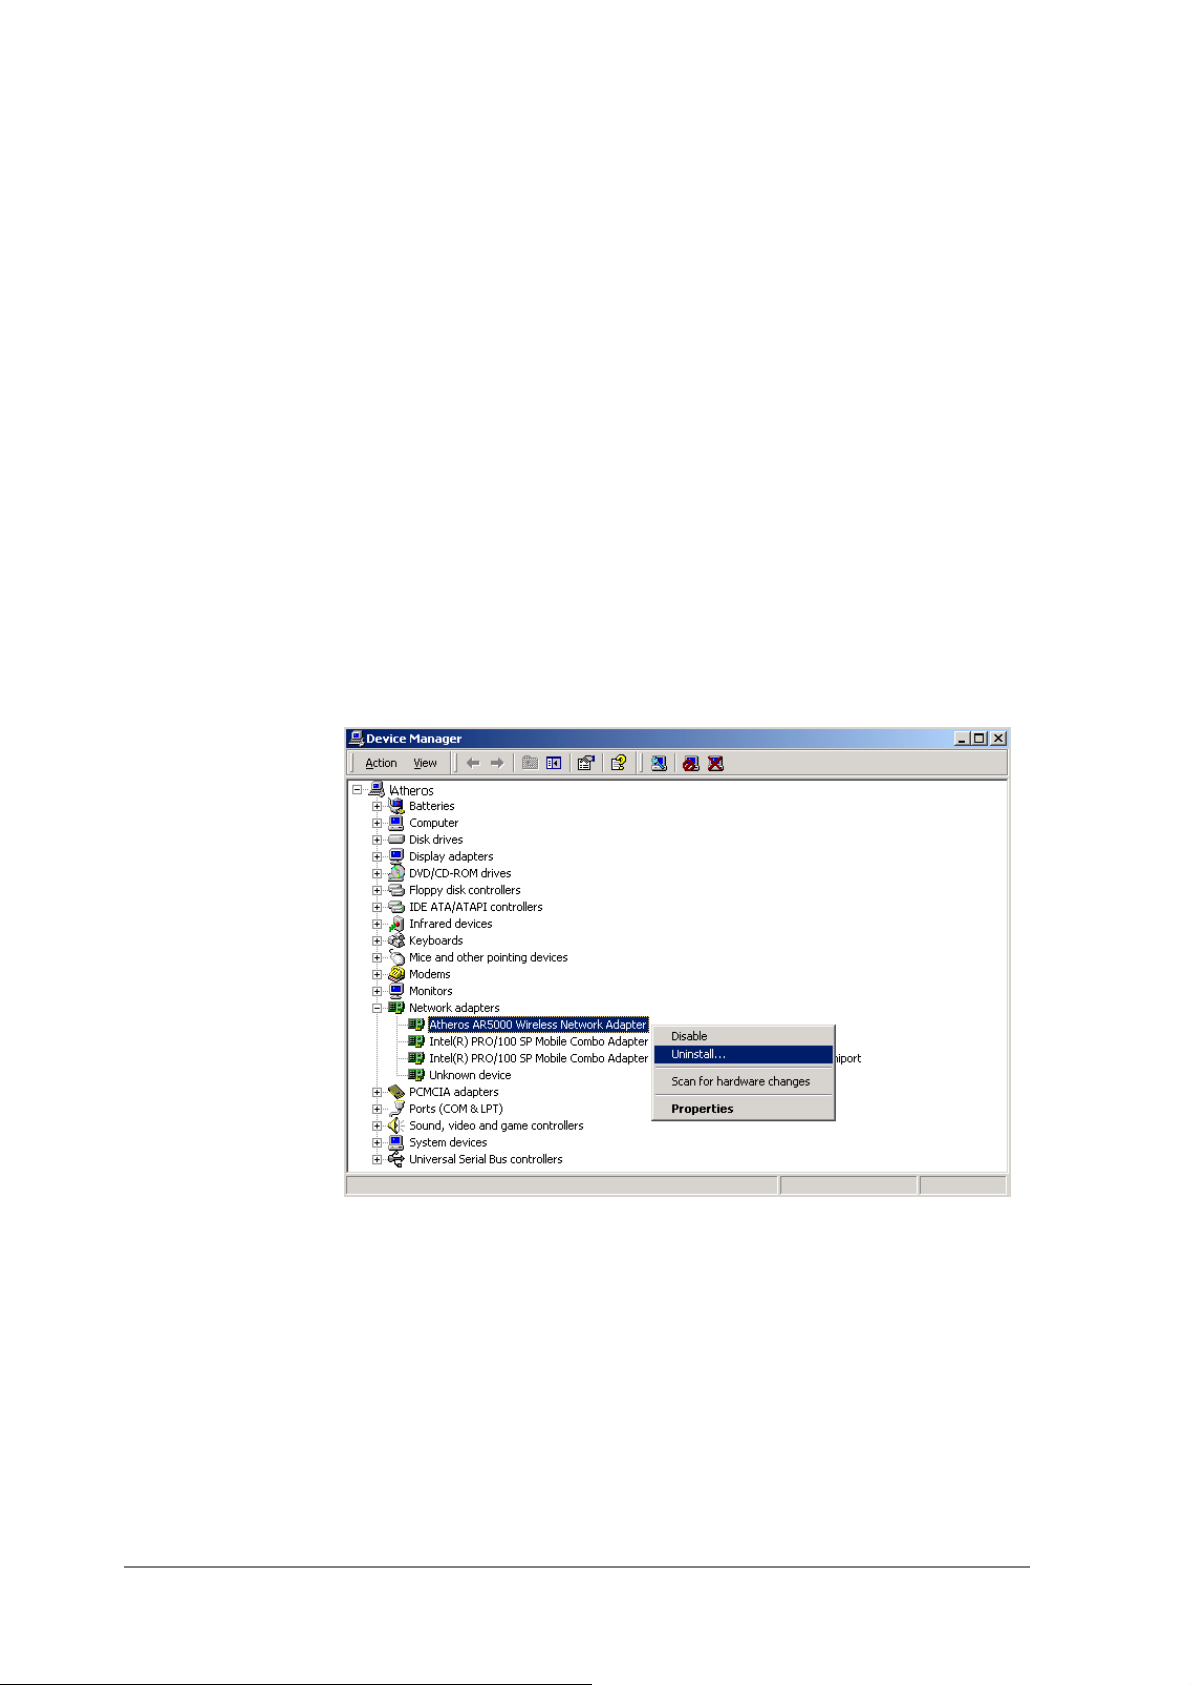
1. To remove the NDIS driver from the OS, go to Device Manager, rightclick “AlphanetworksWMP-G02V Wireless Network mini PCI Card,” and
choose Uninstall.
2-14
Page 29

2. Click OK to uninstall the device.
3. When the device is uninstalled from Device Manager, search for and
delete the driver files that reside in the system. To do so, go to the Start
menu and choose Search For Files or Folders…, enter “oem*.inf” in the
“Search for files or folders named:” field, and enter “Alpha” in the
“Containing text:” field. Click Search Now. A few files matching these
criteria are possible, if previous drivers have not been removed properly.
Choose the files that have been found and delete them from the system.
2-15
Page 30
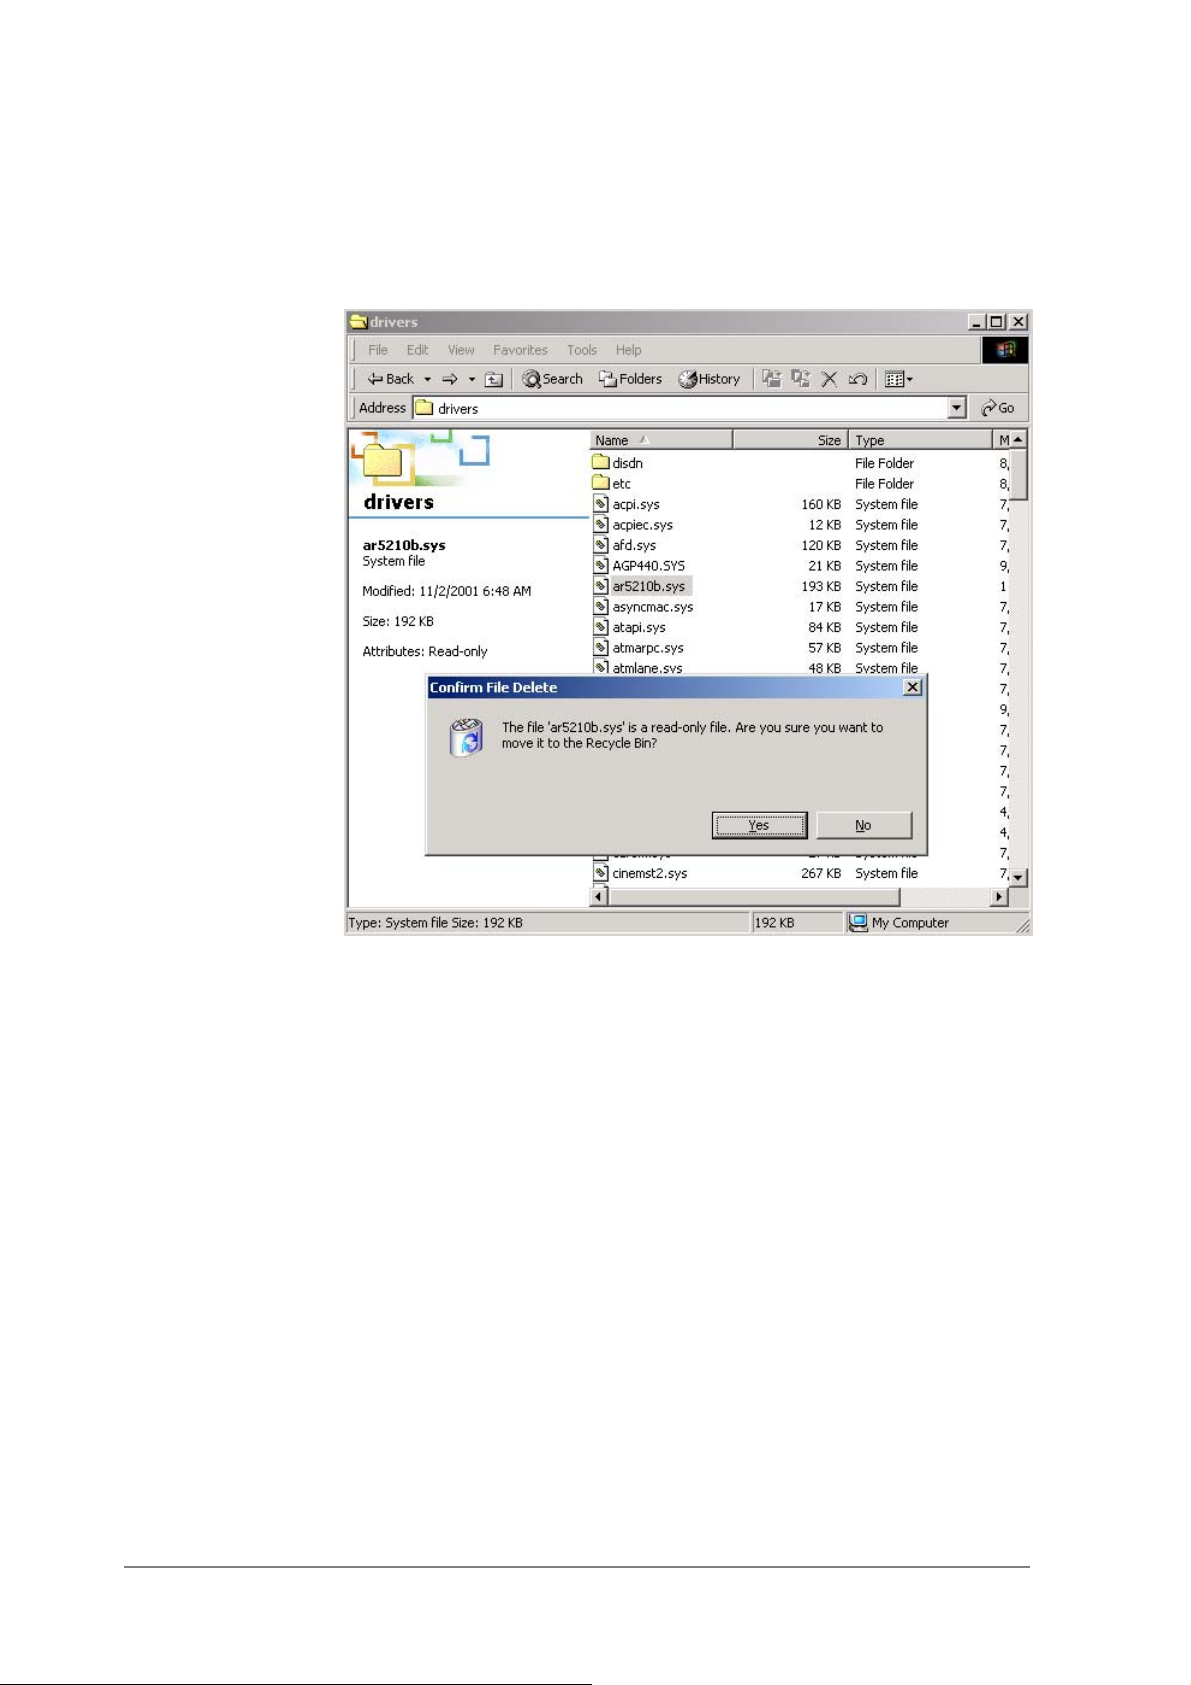
4. To complete the uninstallation, “AR5212b.sys” should also be removed
from the “\WINNT\system32\drivers” folder.
2-16
Page 31

Device Configuration
Configuration of the AlphanetworksWMP-G02V Wireless Network mini PCI
Card can be done through the Network Control Panel (NCP) in adapter
properties. You can set the Wireless Network mini PCI Card to work in one of
two modes, either infrastructure mode (which leverages an AP) or ad hoc
mode (which consists of a group of stations participating in the WLAN).
In infrastructure mode, the Wireless Network mini PCI Card participates in a
basic service set (BSS) as a station, and communicates with the other
stations through an AP, as illustrated in Figure 2-1.
STA1
AP
Figure 2-1. Infrastructure Mode
STA2
Ethernet
2-17
Page 32

In ad hoc mode, a Wireless Network mini PCI Card works within an
independent basic service set (IBSS), as illustrated in Figure 2-2. All stations
communicate directly with other stations without an AP.
STA1
STA3
STA5
STA2
STA4
Figure 2-2. Ad Hoc Mode
To configure the WMP-G02V Wireless Network mini PCI Card:
1. In the Device Manager, right-click “AlphanetworksWMP-G02V Wireless
Network mini PCI Card,” and click Properties to access the properties of
the adapter.
2-18
Page 33

2. Configuration additions, modifications, and deletions are made under the
“Settings” tab of the “AlphanetworksWMP-G02V Wireless Network mini
PCI Card” properties.
3. Select one of the configurations under the configuration list, and click
Modify to show the “Network Configuration Settings” screen. This
property sheet has two pages: General and Security. The General page
has the following fields:
− Configuration Name: This field identifies the configuration. This name
must be unique. Configuration names are case insensitive.
− Network Name (SSID): This is the name of the IEEE 802.11b/g
wireless network, for example, “Alphanetworks802.11b/g Wireless
Network.” This field has a maximum limit of 32 characters.
− Network Connection: This field defines whether the STA is configured
for an ad hoc or infrastructure network.
2-19
Page 34

− Power Saving: This field allows the configuration of power
management options. The options are Off, Normal, and Maximum.
Power management is disabled when ad hoc mode is selected in the
Network Connection field. When the Power Saving setting is Off, the
adapter receives full power from the PC. When the Power Saving
setting is Normal, the driver turns off power to the adapter for brief
periods over briefly-spaced time intervals. When the Power Saving
setting is Maximum, the driver turns off power to the adapter for
longer periods over more widely-spaced time intervals.
− Turbo Mode: This field enables or disables Alphanetworksturbo mode.
− Locally Administered Address: This field defines the locally
administered MAC address (LAA). To enter a value in the address
field, the check box needs to be selected. Typically, an LAA is not
required, because the driver automatically loads a unique, globally
administered address from the EEPROM.
4. The next tab on this property sheet allows for the selection of security
features. The fields on this page are as follows:
− Enable Security: This field completely enables or disables the IEEE
802.11 wired equivalent privacy (WEP) security feature.
− Default Encryption Key: This field defines the type of encryption key
to use (either Unique Key or Shared Keys). This field allows you to
select only a key (Unique, First, Second, Third, or Fourth) whose
corresponding field has been completed.
2-20
Page 35

− Unique Key: This field defines the unique encryption key for security
for the current network configuration. In ad hoc mode, this encryption
key type is not used. To enable security using a Unique Key, this field
must be populated.
− Shared Keys: These fields define a set of shared encryption keys.
To enable security using Shared Keys, at least one Shared Key field
must be populated.
− Key Length: This field defines the length for each encryption key.
As the Key Length is changed, the number of available characters in
the field is changed automatically. If after a key is entered the length
is adjusted to a smaller number, the key is automatically truncated to
fit. If the length is increased again, the field is not automatically
updated to its previous value.
All encryption key fields are displayed only when initially entered. On
subsequent entry into the security property page, the fields are masked.
The keys must be entered as hexadecimal digits.
2-21
Page 36

Infrastructure Mode
To configure an AlphanetworksWMP-G02V Wireless Network mini PCI Card
in infrastructure mode:
1. Ensure that the “Locally Administered Address” checkbox is unchecked.
2. Choose the following settings:
− Configuration Name: This field identifies the configuration. This name
must be unique. Configuration names are case insensitive.
− Network Name (SSID): This is the name of the IEEE 802.11b/g
wireless network, for example, “Alphanetworks802.11b/g Wireless
Network.” This field has a maximum limit of 32 characters. If this field
is left blank, the STA connects to the AP with the best signal strength.
− Network Connection: AP (infrastructure).
− Power Saving: This field allows the configuration of power
management options. The options are Off, Normal, and Maximum.
− Turbo Mode: This field enables or disables Alphanetworksturbo mode.
− Locally Administered Address: This field defines the locally
administered MAC address (LAA). To enter a value in the address
field, the check box needs to be selected.
2-22
Page 37

Ad Hoc Mode
Usually infrastructure mode is used in an enterprise environment where APs
are installed and maintained by corporate IT staff. Much of the data in the
enterprise network is confidential. It is important to configure security to make
sure only stations with appropriate keys can receive sensitive data.
The AlphanetworksWMP-G02V Wireless Network mini PCI Card and NDIS
driver support key lengths of 40 bits, 104 bits, and 128 bits. Typically, the
appropriate encryption and decryption keys are supplied by the corporate IT
staff.
An ad hoc network usually is a short-lived network with a small number of
stations. The network is usually created for a special purpose such as
exchanging data between friends, or between customer and client. Because
the duration of the ad hoc network tends to be limited, Power Saving and
Security features are not typically a requirement. For ad hoc network activity,
the Power Saving and Security features can be disabled. Currently, shared
key security is supported in ad hoc mode. Future Alphanetworkssoftware
implementations will provide unique key support.
In ad hoc mode, a station scans the air for an existing BSS. If no BSS is
found, the station establishes a BSS for other stations to join. When other
stations scan the air and find an established BSS in place, they join that BSS
to form an ad hoc network. If a specific set of stations requires ad hoc
network connectivity, it is recommended to have one station establish a BSS
first before configuring the remaining stations. This prevents the scenario of
several stations trying to form a BSS at the same time, which can result in
multiple singular BSSs being established, rather than a single BSS with
multiple stations.
Configuration Name: This field identifies the configuration. This name
must be unique. Configuration names are case insensitive.
Network Name (SSID): A Network Name is mandatory for ad hoc mode.
The SSID for all stations in a single ad hoc network must be the same.
Network Connection: Ad Hoc.
Power Saving: Power saving mode is not currently supported in an ad
hoc network.
Turbo Mode: All stations participating in the ad hoc network must have
the same rate setting.
Locally Administered Address: This field defines the locally administered
MAC address (LAA). To enter a value in the address field, the check box
needs to be selected.
2-23
Page 38

TCP/IP Setup
After configuring the AlphanetworksWMP-G02V Wireless Network mini PCI
Card through the Network Control Panel, the TCP/IP address for the network
device must be configured.
1. Open the “Control Panel” and click “Network and Dial-up Connections.”
2. Find the “Local Area Connection” that is associated with the
AlphanetworksWMP-G02V Wireless Network mini PCI Card. Right-click
that connection, and click Properties.
2-24
Page 39

3. Select “Internet Protocol (TCP/IP)” and click Properties.
4. Click “Use the following IP address” and input an IP address and Subnet
mask. Assigning an IP address and Subnet mask allows stations to
operate in infrastructure mode and to have Internet access. “Default
gateway” and “DNS server” information is also required. IP configuration
information (DHCP or assigned IP address, Gateway and DNS server IP
addresses) is usually obtained from the corporate IT staff.
5. After obtaining IP configuration information from the appropriate IT staff,
click OK in both “Internet Protocol (TCP/IP) Properties” and “Local Area
Connection Properties” to complete the IP configuration.
2-25
Page 40

6. Choose Start > Programs > Accessories > Command Prompt to open the
DOS command prompt window. Type “ipconfig” at the C:\> prompt to
determine if the TCP/IP configuration has taken effect. To test IP
connectivity in ad hoc or infrastructure mode, use the “ping <ipaddress>”
command. When a TCP/IP connection is established, the LinkMon utility
(See Chapter 7) can be used to monitor the AlphanetworksWMP-G02V
Wireless Network mini PCI Card operating status.
2-26
Page 41

7. To map the drive on another machine to your computer, right-click “My
Computer” and click “Map Network Drive….”
8. After mapping the drive, you can perform file transfers, use video
streaming applications, and all other network data transfers that are
normally performed with wired 10/100 Ethernet connections.
2-27
Page 42

Page 43

Windows Millennium
Driver Installation
Alphanetworksrecommends that you remove any existing
AlphanetworksNDIS driver on the PC system before installing Version
release of the NDIS driver. See Section “Driver Uninstallation” on page 3-5
for the instructions on how to remove previous driver releases. When the
system no longer has the AlphanetworksNDIS driver installed, insert the
WMP-G02V Wireless Network mini PCI Card into a 32-bit CardBus slot, and
follow these steps to install the NDIS driver:
3
Edition
1. Wait for the following dialog box to appear. Choose “Specify the location
of the driver (Advanced),” and click Next to continue.
3-1
Page 44

3-2
Page 45

2. Choose “Search for the best driver for your device. (Recommended)” and
select “Specify a location.” Click Browse to locate the NDIS driver. The
default folder is “E:\ndis\bin\production\ndis5” (assuming E: is the CDROM drive). Click Next to continue.
3. When the Alphanetworksdriver installation file (NET5210B.INF) has been
found, click Next to continue.
3-3
Page 46

4. Click Finish to continue, and restart the system to complete driver
installation. Refer to Section “Device Configuration” on page 3-7 for
device configuration.
3-4
Page 47

Driver Uninstallation
This section provides uninstallation procedures for removing the
AlphanetworksNDIS driver from the system. Uninstallation is recommended
for upgrading the NDIS driver from previous Alphanetworksdriver releases.
1. To remove the NDIS driver from the OS, go to Start > Search > For Files
or Folders…, and search for the INF file containing the “Alpha” text string
under the \WINDOWS\INF folder. Be sure to include subfolders in the
search criteria. When “Alphanet5210b.inf” has been found, delete it by
right-clicking the file and choose Delete.
3-5
Page 48

2. From Control Panel, launch the System Properties window. Select
“AlphanetworksWMP-G02V Wireless Network mini PCI Card” from
Device Manager, and click Remove to uninstall the device.
3. Click OK to confirm the removal of the device. Restart the system to
complete un-installation.
3-6
Page 49

Device Configuration
Configuration of the AlphanetworksWMP-G02V Wireless Network mini PCI
Card can be done through the AlphanetworksNIC Configuration utility found
in the Windows Control Panel. Similar to Windows 2000, the device can be
set to work in one of two modes: infrastructure mode or ad hoc mode. Please
refer to Section “Device Configuration” beginning on page 2-17 for more
details on these network connection types.
To launch the configuration utility, go to Control Panel and double-click on
the AlphanetworksNIC Configuration icon.
3-7
Page 50

The configuration utility allows addition, modification, and deletion of the
configuration profiles. Select one of the existing configuration profiles under
the configuration list to modify, or click New to add a new configuration profile.
Follow Section “Infrastructure Mode” on page 3-9 and Section “Ad Hoc
Mode” on page 3-10 to set up the station to work in infrastructure mode and
ad hoc mode.
3-8
Page 51

Infrastructure Mode
This section defines the process of configuring an AlphanetworksWMP-G02V
Wireless Network mini PCI Card in infrastructure mode. See Section “Device
Configuration” beginning on page 2-17 for detailed descriptions of each
option in the Network Configuration Settings.
1. Under the “General” tab, make sure the “Locally Administered Address”
checkbox is unchecked. Use the following information as a guideline to
choose the values of each field in the configuration window:
− Configuration Name: This field identifies the configuration. This name
− Network Name (SSID): This is the name of the IEEE 802.11b/g
− Network Connection: AP (Infrastructure)
− Power Saving: This field allows the configuration of power
must be unique. Configuration names are case insensitive.
wireless network. This field has a maximum limit of 32 characters. If
this field is left blank, the STA connects to the AP with the best signal
strength.
management options. The options are Off, Normal, and Maximum.
− Turbo Mode: This field enables or disables Alphanetworksturbo mode.
3-9
Page 52

2. Usually, infrastructure mode is used in an enterprise environment where
APs are installed and maintained by corporate IT staff. Much of the data
in the enterprise network is confidential. It is important to configure
security to make sure only stations with appropriate keys can receive
sensitive data. The AlphanetworksWMP-G02V Wireless Network mini
PCI Card and NDIS driver support key lengths of 40 bits, 104 bits and
128 bits. Typically, the appropriate encryption and decryption keys are
supplied by the corporate IT staff.
Ad Hoc Mode
This section defines the process of configuring an AlphanetworksWMP-G02V
Wireless Network mini PCI Card in ad hoc or IBSS mode. See Section “Ad
Hoc Mode” on page 2-23 for descriptions of ad hoc operation.
1. Similar to the set-up of AP Infrastructure mode described in the previous
section, ad hoc mode is also configured by changing the options in the
Network Configuration Settings of the AlphanetworksNIC Configuration
utility. Use the following information as a guideline to choose the values
of each field in the configuration window:
− Configuration Name: This field identifies the configuration. This name
must be unique. Configuration names are case insensitive.
− Network Name (SSID): A Network Name is mandatory for ad hoc
mode. The SSID for all stations in a single ad hoc network must be
the same.
− Network Connection: Ad Hoc.
3-10
Page 53

− Power Saving: Power saving mode is not currently supported in an ad
hoc network.
− Turbo Mode: All stations participating in the ad hoc network must
have the same rate setting.
− Locally Administered Address: This field defines the locally
administered MAC address (LAA). To enter a value in the address
field, the check box needs to be selected.
2. You can optionally set up other properties, but because the duration of
the ad hoc network tends to be limited, Power Saving and Security
features are not typically a requirement. For ad hoc network activity, the
Power Saving and Security features can be disabled. Currently, shared
key security is supported in ad hoc mode. Future Alphanetworkssoftware
implementations will provide unique key support.
3. Click OK when the properties are set correctly. The system needs to
reboot in order for the changes to take effect.
Note that in ad hoc mode, a station scans the air for an existing BSS. If no
BSS is found, the station establishes a BSS for other stations to join. When
other stations scan the air and find an established BSS in place, they join that
BSS to form an ad hoc network. If a specific set of stations requires ad hoc
network connectivity, it is recommended to have one station establish a BSS
first before configuring the remaining stations. This prevents the scenario of
several stations trying to form a BSS at the same time, which can result in
multiple singular BSSs being established, rather than a single BSS with
multiple stations.
3-11
Page 54

TCP/IP Configuration
After configuring the AlphanetworksWMP-G02V Wireless Network mini PCI
Card network adapter properties, the TCP/IP address for the network device
needs to be configured.
1. From Control Panel, launch the Network properties window. Select
“TCP/IP → AlphanetworksWMP-G02V Wireless Network mini PCI Card”
and click Properties. Depending on the type of network the station
connects to, Gateway and DNS Configuration information can also be
required. IP configuration information (DHCP or assigned IP address,
Gateway and DNS server IP addresses) is usually obtained from the
corporate IT staff. For a simple demonstration, the station is assigned a
static IP address. From “TCP/IP Properties,” choose “IP Address” and
select “Specify an IP address.” Input an IP address and subnet mask.
Assigning an IP address and subnet mask allows the station to interact
with the AP or other stations in the same IP subnet. Click OK to complete
the TCP/IP configuration, and restart the system for the changes to take
effect.
3-12
Page 55

2. Choose Start > Programs > Accessories > Command Prompt to open the
DOS command prompt window. Type “ipconfig” to determine if the
TCP/IP configuration has taken effect. To test IP connectivity in ad hoc or
infrastructure mode, use the “ping <ipaddress>” command. When a
TCP/IP connection is established, the LinkMon utility (see Chapter 7) can
be used to monitor the AlphanetworksWMP-G02V Wireless Network mini
PCI Card operating status.
3-13
Page 56

3. To map the drive on another machine to your computer, right-click “My
Computer” and click “Map Network Drive….” Specify the path of a
network-shared folder.
4. After mapping the drive, you can perform file transfers, video streaming,
and all other network data transfers that are normally performed with
wired 10/100 Ethernet connections.
3-14
Page 57

Windows 98 Second
Driver Installation
Alphanetworksrecommends that you remove any existing
AlphanetworksNDIS driver on the PC system before installing Version 1.3
release of the NDIS driver. See Section “Driver Uninstallation” on page 4-5
for the instructions on how to remove previous driver releases. When the
system no longer has the AlphanetworksNDIS driver installed, insert the
WMP-G02V Wireless Network mini PCI Card into a 32-bit CardBus slot, and
follow these steps to install the NDIS driver:
4
Edition
1. Wait for the following dialog box to appear, and click Next to continue.
4-1
Page 58

4-2
Page 59

2. Choose “Search for the best driver for your device. (Recommended),”
and click Next.
3. Insert the AlphanetworksSoftware Release CD in your CD-ROM drive.
Choose “Specify a location” and browse to the location where the NDIS
driver is located. The default folder is D:\ndis\bin\production\ndis5
(assuming D: is the CD-ROM drive). Click Next to continue.
4-3
Page 60

4. When the Alphanetworksdriver installation file (NET5210B.INF) has been
found, click Next to continue.
5. Click Finish to continue.
4-4
Page 61

6. Click Yes to restart the system and complete driver installation.
See Section “Device Configuration” on page 4-8 for device configuration.
Driver Uninstallation
This section provides uninstallation procedures for removing the
AlphanetworksNDIS driver from the system. Uninstallation is recommended
for upgrading the NDIS driver from previous Alphanetworksdriver releases.
1. To remove the NDIS driver from the OS, go to Start > Search > For Files
or Folders…, and search for the INF file containing the “Alpha” text string
under the \WINDOWS\INF folder. Be sure to include subfolders in the
search criteria.
4-5
Page 62

2. When “Alphanet5210b.inf” has been found, delete it by right-clicking the
file and choose “Delete.”
4-6
Page 63

3. From Control Panel, launch the Network properties window. Select
“AlphanetworksWMP-G02V Wireless Network mini PCI Card” from the list,
and click Remove to uninstall the device.
4. Click OK to confirm the removal of the device. Restart the system to
complete uninstallation.
4-7
Page 64

Device Configuration
Configuration of the AlphanetworksWMP-G02V Wireless Network mini PCI
Card can be done through the AlphanetworksNIC Configuration utility found
in the Windows Control Panel. Similar to Windows 2000 the device can be
set to work in one of two modes: infrastructure mode or ad hoc mode. Please
refer to Section “Device Configuration” beginning on page 2-17 for more
details on these network connection types.
To launch the configuration utility, go to Control Panel and double-click on
the AlphanetworksNIC Configuration icon.
The configuration utility allows addition, modification, and deletion of the
configuration profiles. Select one of the existing configuration profiles under
the configuration list to modify, or click New to add a new configuration profile.
Follow Section “Infrastructure Mode” on page 4-9 and Section “Ad Hoc
Mode” on page 4-11 to set up the station to work in infrastructure mode and
ad hoc mode.
4-8
Page 65

Infrastructure Mode
This section defines the process of configuring an AlphanetworksWMP-G02V
Wireless Network mini PCI Card in infrastructure mode. See Section “Device
Configuration” beginning on page 2-17 for detailed descriptions of each
option in the Network Configuration Settings.
1. Under the “General” tab, make sure the “Locally Administered Address”
checkbox is unchecked. Use the following information as a guideline to
choose the values of each field in the configuration window:
− Configuration Name: This field identifies the configuration. This name
− Network Name (SSID): This is the name of the IEEE 802.11b/g
− Network Connection: AP (Infrastructure)
− Power Saving: This field allows the configuration of power
must be unique. Configuration names are case insensitive.
wireless network. This field has a maximum limit of 32 characters. If
this field is left blank, the STA connects to the AP with the best signal
strength.
management options. The options are Off, Normal, and Maximum.
− Turbo Mode: This field enables or disables Alphanetworksturbo mode.
4-9
Page 66

2. Usually, infrastructure mode is used in an enterprise environment where
APs are installed and maintained by corporate IT staff. Much of the data
in the enterprise network is confidential. It is important to configure
security to make sure only stations with appropriate keys can receive
sensitive data. The AlphanetworksWMP-G02V Wireless Network mini
PCI Card and NDIS driver support key lengths of 40 bits, 104 bits, and
128 bits. Typically, the appropriate encryption and decryption keys are
supplied by the corporate IT staff.
4-10
Page 67

Ad Hoc Mode
This section defines the process of configuring an AlphanetworksWMP-G02V
Wireless Network mini PCI Card in ad hoc or IBSS mode. See Section “Ad
Hoc Mode” on page 2-23 for descriptions of ad hoc operation.
1. Similar to the setup of the AP infrastructure mode described in the
previous section, ad hoc mode is also configured by changing the
Network Configuration Settings of the AlphanetworksNIC Configuration
utility. Use the following information as a guideline to choose the values
of each field in the configuration window:
− Configuration Name: This field identifies the configuration. This name
must be unique. Configuration names are case insensitive.
− Network Name (SSID): A Network Name is mandatory for ad hoc
mode. The SSID for all stations in a single ad hoc network must be
the same.
− Network Connection: Ad Hoc.
− Power Saving: Power saving mode is not currently supported in an ad
hoc network.
− Turbo Mode: All stations participating in the ad hoc network must
have the same rate setting.
− Locally Administered Address: This field defines the locally
administered MAC address (LAA). To enter a value in the address
field, the check box needs to be selected.
4-11
Page 68

2. You can optionally set up other properties, but because the duration of
the ad hoc network tends to be limited, Power Saving and Security
features are not typically a requirement. For ad hoc network activity, the
Power Saving and Security features can be disabled. Currently, shared
key security is supported in ad hoc mode. Future Alphanetworkssoftware
implementations will provide unique key support.
3. Click OK when the properties are set correctly. The system needs to
reboot in order for the changes to take effect.
Note that in ad hoc mode, a station scans the air for an existing BSS. If no
BSS is found, the station establishes a BSS for other stations to join. When
other stations scan the air and find an established BSS in place, they join that
BSS to form an ad hoc network. If a specific set of stations requires ad hoc
network connectivity, it is recommended to have one station establish a BSS
first before configuring the remaining stations. This prevents the scenario of
several stations trying to form a BSS at the same time, which can result in
multiple singular BSSs being established, rather than a single BSS with
multiple stations.
4-12
Page 69

TCP/IP Setup
After configuring the AlphanetworksWMP-G02V Wireless Network mini PCI
Card network adapter properties, the TCP/IP address for the network device
needs to be configured.
1. From Control Panel, launch the Network properties window. Select
“TCP/IP → AlphanetworksWMP-G02V Wireless Network mini PCI Card”
and click Properties. Depending on the type of network the station
connects to, Gateway and DNS Configuration information can also be
required. IP configuration information (DHCP or assigned IP address,
Gateway and DNS server IP addresses) is usually obtained from the
corporate IT staff. For a simple demonstration, the station is assigned a
static IP address. From “TCP/IP Properties,” choose “IP Address” and
select “Specify an IP address.” Input an IP address and subnet mask.
Assigning an IP address and subnet mask allows the station to interact
with the AP or other stations in the same IP subnet. Click OK to complete
the TCP/IP configuration, and restart the system for the changes to take
effect.
4-13
Page 70

2. Choose Start > Programs > Accessories > Command Prompt to open the
DOS command prompt window. Type “ipconfig” to determine if the
TCP/IP configuration has taken effect. To test IP connectivity in ad hoc or
infrastructure mode, use the “ping <ipaddress>” command. When a
TCP/IP connection is established, the LinkMon utility (see Chapter 7) can
be used to monitor the AlphanetworksWMP-G02V Wireless Network mini
PCI Card operating status.
4-14
Page 71

3. To map the drive on another machine to your computer, right-click “My
Computer” and click “Map Network Drive….” Specify the path of a
network-shared folder.
4. After mapping the drive, you can perform file transfers, video streaming,
and all other network data transfers that are normally performed with
wired 10/100 Ethernet connections.
4-15
Page 72

Page 73

Windows XP
Driver Installation (First-time Install)
Alphanetworksrecommends that you remove any existing
Alphanetworksdrivers on the PC system before installing Version release of
the NDIS driver. See Section “Driver Uninstallation” on page 5-6 for the
instructions on how to remove previous driver releases. With no existing
AlphanetworksNDIS driver installed, insert the AlphanetworksWMP-G02V
Wireless Network mini PCI Card into a 32-bit CardBus slot, and follow these
steps to install the NDIS driver:
5
1. Wait for the following dialog box to appear. Choose “Install from a list or
specific location (Advanced),” and click Next to continue.
5-1
Page 74

5-2
Page 75

2. Under “Search for the best driver in these locations,” choose “Include this
location in the search” and click Browse to find the location of the NDIS
driver. When the driver location has been identified, click Next to continue.
5-3
Page 76

3. The AlphanetworksNDIS evaluation driver currently does not have a
digital signature from Microsoft. Therefore, Windows XP shows a warning
message. Click Continue Anyway to proceed with driver installation.
4. Click Finish to complete driver installation, and refer to Section “Device
Configuration” on page 5-10 for device configuration.
5-4
Page 77

5-5
Page 78

Driver Uninstallation
This section provides uninstallation procedures for removing the
AlphanetworksNDIS driver from the system. Uninstallation is recommended
for upgrading the NDIS driver from previous Alphanetworksdriver releases.
1. To remove the NDIS driver from the OS, go to Device Manager, right
click “AlphanetworksWMP-G02V Wireless Network mini PCI Card,” and
choose Uninstall.
2. Click OK to uninstall the device.
5-6
Page 79

5-7
Page 80

3. When the device is uninstalled from Device Manager, search for and
delete the driver installation file that resides in the system. To do so, go to
Start and choose Search > All files and folder, enter “oem*.inf” in the “All
or part of the file name” field, and enter “Alpha” in the “A word or phrase
in the file” field. Enter “C:\WINNT\INF” in the “Look in” field, where C: is
the drive letter of where Windows XP is installed. Click Search to find the
driver installation file.
4. A file matching the search criteria is displayed. Choose this file and
delete it from the system.
5-8
Page 81

5-9
Page 82

Device Configuration
Windows XP zero-configuration functionality allows the user to select and join
a wireless network without having to configure the device separately. You
can decide to choose the default parameters and directly proceed to zeroconfiguration in Section “Windows XP Wireless Network Configuration” on
page 5-20.
Similar to Windows 2000, configuration of the AlphanetworksWMP-G02V
Wireless Network mini PCI Card can be done through the Network Control
Panel (NCP) in adapter properties. You can set the Wireless Network mini
PCI Card to work in one of two modes: infrastructure mode or ad hoc mode.
See Section “Device Configuration” beginning on page 2-17 for more details
on these network connection types.
To launch NCP go to Device Manager, right-click “AlphanetworksWMP-G02V
Wireless Network mini PCI Card,” and select Properties to access to the
properties of the adapter.
5-10
Page 83

Configuration additions, modifications, and deletions are made under the
“Settings” tab of “AlphanetworksWMP-G02V Wireless Network mini PCI Card
Properties.” Select one of the configurations under the configuration, click
Modify or New and complete the steps in Section “Infrastructure Mode” on
page 5-12 or Section “Ad Hoc Mode” on page 5-13 to set up the station to
work in infrastructure mode or ad hoc mode, respectively.
5-11
Page 84

Infrastructure Mode
This section defines the process of configuring an AlphanetworksWMP-G02V
Wireless Network mini PCI Card in infrastructure mode. See Section “Device
Configuration” beginning on page 2-17 for detailed descriptions of each
option in the Network Configuration Settings.
1. Under the “General” tab, make sure the “Locally Administered Address”
checkbox is unchecked. Use the following information as a guideline to
choose the values of each field in the configuration window:
− Configuration Name: This field identifies the configuration. This name
− Network Name (SSID): This is the name of the IEEE 802.11b/g
− Network Connection: AP (Infrastructure).
− Power Saving: This field allows the configuration of power
must be unique. Configuration names are case insensitive, for
example, “Infrastructure.”
wireless network, for example, “AP_Network.” This field has a
maximum limit of 32 characters. If this field is left blank, the STA
connects to the AP with the best signal strength.
management options. The options are Off, Normal, and Maximum.
− Turbo Mode: This field enables or disables Alphanetworksturbo mode.
5-12
Page 85

2. Usually, infrastructure mode is used in an enterprise environment where
APs are installed and maintained by corporate IT staff. Much of the data
in the enterprise network is confidential. It is important to configure
security to make sure only stations with appropriate keys can receive
sensitive data. The AlphanetworksWMP-G02V Wireless Network mini
PCI Card and NDIS driver support key lengths of 40 bits, 104 bits and
128 bits. Typically, the appropriate encryption and decryption keys are
supplied by the corporate IT staff.
Ad Hoc Mode
This section defines the process of configuring an AlphanetworksWMP-G02V
Wireless Network mini PCI Card in ad hoc or IBSS mode. See Section “Ad
Hoc Mode” on page 2-23 for descriptions of ad hoc operation.
1. Similar to the setup of AP Infrastructure mode described in the previous
section, ad hoc mode is also configured by changing the options in the
“Network Configuration Settings” window. Use the following information
as a guideline to choose the values of each field in the configuration
window:
− Configuration Name: This field identifies the configuration. This name
must be unique. Configuration names are case insensitive, for
example, “Ad Hoc.”
5-13
Page 86

− Network Name (SSID): A Network Name is mandatory for ad hoc
mode. The SSID for all stations in a single ad hoc network must be
the same.
− Network Connection: Ad Hoc.
− Power Saving: Power saving mode is not currently supported in an ad
hoc network.
− Turbo Mode: All stations participating in the ad hoc network must
have the same rate setting.
− Locally Administered Address: This field defines the locally
administered MAC address (LAA). To enter a value in the address
field, the check box needs to be selected.
2. You can optionally set up security features, but it is not typically a
requirement because the duration of the ad hoc network tends to be
limited. Currently, shared key security is supported in ad hoc mode.
Future Alphanetworkssoftware implementations will provide unique key
support.
5-14
Page 87

TCP/IP Setup
3. In ad hoc mode, a station scans the air for an existing BSS. If no BSS is
found, the station establishes a BSS for other stations to join. When other
stations scan the air and find an established BSS in place, they join that
BSS to form an ad hoc network. If a specific set of stations requires ad
hoc network connectivity, it is recommended to have one station establish
a BSS first before configuring the remaining stations. This prevents the
scenario of several stations trying to form a BSS at the same time, which
can result in multiple singular BSSs being established, rather than a
single BSS with multiple stations.
After configuring the AlphanetworksWMP-G02V Wireless Network mini PCI
Card through the Network Control Panel, the TCP/IP address for the network
device needs to be configured.
1. From the Start menu, choose Programs > Accessories >
Communications > Network Connections. Find the “Local Area
Connection” that is associated with the AlphanetworksWMP-G02V
Wireless Network mini PCI Card. Right-click that connection and click
Properties.
5-15
Page 88

2. Select “Internet Protocol (TCP/IP)” and click Properties. Click “Use the
following IP address” and input an IP address and Subnet mask.
Depending on the type of network the station connects to, Gateway and
DNS Configuration information can also be required. IP configuration
information (DHCP or assigned IP address, Gateway and DNS server IP
addresses) is usually obtained from the corporate IT staff. For a simple
demonstration, the station is assigned a static IP address. Click OK in
both “Internet Protocol (TCP/IP) Properties” and “Local Area Connection
Properties” to complete the IP configuration.
5-16
Page 89

3. Choose Start > Programs > Accessories > Command Prompt to open a
command prompt window. Type “ipconfig” to determine if the TCP/IP
configuration has taken effect. To test IP connectivity in ad hoc or
infrastructure mode, use the “ping <IP address>” command. When a
TCP/IP connection is established, the LinkMon utility (see Chapter 7) can
be used to monitor the operating status of AlphanetworksWMP-G02V
Wireless Network mini PCI Card.
5-17
Page 90

4. To map the drive on another machine to your computer, from the Start
menu, choose My Computer and right-click to select “Map Network
Drive….”
5-18
Page 91

5. Assign the drive letter that maps to the network-shared folder and specify
the shared folder information. Click Finish to map the drive.
6. After mapping the drive, you can perform file transfers, video streaming,
and all other network data transfers that are normally performed with
wired 10/100 Ethernet connections.
5-19
Page 92

Windows XP Wireless Network Configuration
Aside from using the Network Control Panel (NCP) to configure the
AlphanetworksWMP-G02V Wireless Network mini PCI Card, Windows XP
provides zero-configuration functionality that automatically tries to connect
the STA to available wireless networks in the following order:
a. Infrastructure mode with valid WEP keys
b. Infrastructure mode with unauthenticated access for stations without
WEP keys
c. Ad hoc mode
To configure wireless network settings through the Windows XP user
interface, open Network Connections from Control Panel. Right-click the
Local Area Network Connection icon (pertinent to AlphanetworksWMP-G02V
Wireless Network mini PCI Card), click Enable to enable the device first, and
then click Properties. On the Wireless Networks tab, select the “Use
Windows to configure my wireless network settings” check box to enable
automatic wireless network configuration. Follow Section “Infrastructure
Mode” on page 5-12 or Section “Ad Hoc Mode” on page 5-13 to set up the
station to connect to an infrastructure or ad hoc network.
If you want to use non-default settings for power saving and turbo mode, you
should set those parameters through the NCP method described in Section
“Device Configuration” on page 5-10. Then use Wireless Networks tabs to
select network name, network type, and encryption keys.
5-20
Page 93

Note that you can disable automatic wireless network configuration, and
revert back to using AlphanetworksNCP configuration settings, by clearing
the “Use Windows to configure my wireless network settings” check box.
5-21
Page 94

Infrastructure Mode
To set up automatic wireless network configuration to connect to an existing
Access Point (infrastructure network):
1. Click the network name under “Available networks” in the Wireless
Networks tab, and click Configure. You can update the list of available
networks that are within range of your computer by clicking Refresh
under Available Networks.
5-22
Page 95

2. If the network requires WEP, then the “Data encryption (WEP enabled)”
check box is selected by default in Wireless Network Properties. Select
the “The key is provided for me automatically” check box if the WEP key
is automatically provided for you. The driver will then use the Default
Encryption key from the current AlphanetworksNCP configuration profile
irrespective of the network name. You may choose to enter the WEP key
by clearing this check box and manually entering the network key and
key length. Note that the key format must be hexadecimal digits and the
key length is limited to 104-bit in Windows XP, as opposed to 128-bit key
supported by AlphanetworksNDIS driver in the NCP configuration
interface. If the network that you are connecting to requires 128-bit WEP
key, then it is recommended that you disable Windows XP automatic
wireless network configuration and use AlphanetworksNCP configuration
instead.
5-23
Page 96

Ad hoc mode
To connect to an existing computer-to-computer (ad hoc) network:
1. Click the ad hoc network name under “Available networks” in the
Wireless Networks tab, and click Configure.
5-24
Page 97

2. In Wireless Network Properties, the “This is a computer-to-computer (ad
hoc) network; wireless access points are not used” check box is selected
by default. You may choose to enable WEP by selecting the “Data
encryption (WEP enabled)” check box and the “Network Authentication
(Shared mode)” check box. Select the “The key is provided for me
automatically” check box if the shared key is automatically provided for
you. The driver will then use the Default Encryption key from the current
AlphanetworksNCP configuration profile irrespective of the network name.
You may choose to enter the shared key by clearing this check box and
enter the key and key length manually. Note that the key format must be
hexadecimal digits and the key length is limited to 104-bit in Windows XP
as opposed to 128-bit key supported by AlphanetworksNDIS driver in the
NCP configuration interface. If the network that you are connecting to
requires 128-bit WEP key then it is recommended that you disable
Windows XP automatic wireless network configuration and use
AlphanetworksNCP configuration instead.
5-25
Page 98

3. If you want to connect to an ad hoc network, but both ad hoc and
infrastructure networks are within range of your computer, then click
Advanced in the Wireless Networks tab and then select “Computer-tocomputer (ad hoc) networks only”. Note that if you want the station to
start its own ad hoc network, the “Computer-to-computer (ad hoc)
networks only” option should be selected. There should be no network
active from the preferred list and the “Automatically connect to nonpreferred networks” check box should be cleared.
Connect to an Available Wireless Network
When there is more than one available network detected by Windows XP, the
OS will prompt the user to select and connect to a preferred network.
To connect to an available wireless network, right-click the network
connection icon in the notification area, and then click “View Available
Wireless Networks”.
5-26
Page 99

In Connect to Wireless Network, under “Available networks”, select the
wireless network that you want to connect to. If a network key is required and
is automatically provided for you, then leave “Network key” blank. If the
network key is not automatically provided for you, then type the key in
“Network key”. Click Connect to establish the network connection.
5-27
Page 100

If you are either unable to make a connection to the wireless network that
you selected or need to configure additional wireless network connection
settings, click Advanced in Connect to Wireless Network, and the Wireless
Networks tab will appear.
5-28
 Loading...