

Alphacool Eisblock Aurora Acryl GPX-N RTX 3090 ROG Strix with Backplate, Eisblock Aurora Acryl GPX-N RTX 3080 ROG Strix with Backplate operation manual
Page 1
Read the safety instructions before starting the installation.
Lesen Sie die Sicherheitshinweise, bevor Sie mit der Installation beginnen.
Lisez les instructions de sécurité avant de commencer l‘installation.
EN
DE
FR
1.
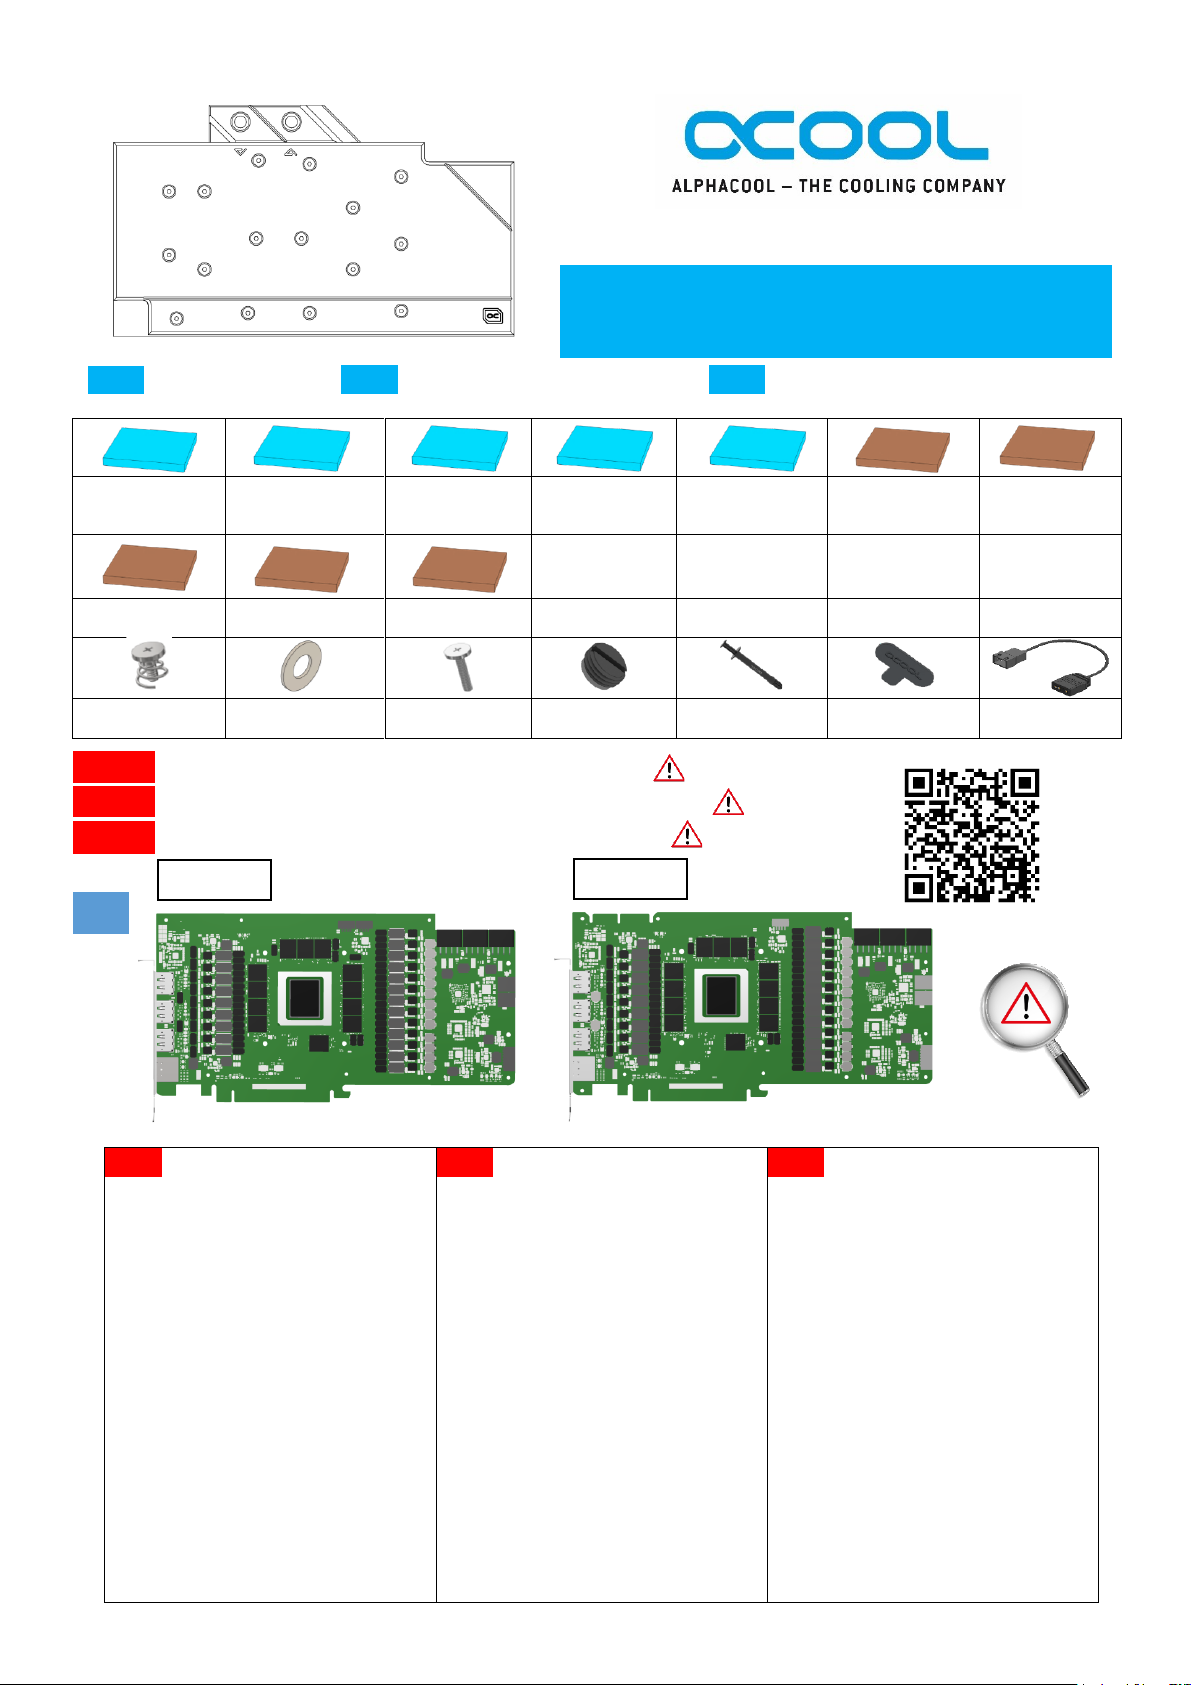
ACCESSORIES
ZUBEHÖR
ACCESSOIRES
1x
8x84x1mm pad
2x
15x51x1mm pads
1x
15x40x1mm pad
2x
15x15x1mm
pads
1x
8x105x1mm pad
2x
15x51x2mm pads
1x
8x84x2mm pad
1x
15x40x2mm pad
1x
15x15x2mm pad
1x
8x105x2mm pad
6x M2x5 screws
6x M2x5 washers
6x M2x11 screws
2x Screw plugs
1x Thermal
grease
1x Plug tool
1x Digital – RGB
adaptor
Put the hardware on an antistatic mat.
Begin dismantling the original cooler.
Depending on the structure of the cooler, remove
the screws at the back of the card and carefully
unhook the fan connector first. If the original
cooler uses thermal glue, extreme care should be
taken as you can easily damage parts. Pick up all
the items carefully. Next, clean the hardware of
thermal paste or pad residues with a solvent (e.g.
isopropanol alcohol).
Before starting the cooler assembly, compare
your card with the picture above. The cooler is
constructed specifically for this layout.
Occasionally, graphics card manufacturers may
revise the design of their card slightly, causing
the cooler not to fit on later models. During
assembly, please make sure taller parts have
enough space around them and that the cooler
does not damage your graphics card.
Alphacool International GmbH is not liable for
assembly errors occurring due to negligence,
such as selecting an incompatible cooler.
Legen Sie die Hardware auf eine
antistatische Unterlage. Beginnen Sie
mit der Demontage des Original-Kühlers. Je nach
Aufbau des Kühlers sind zuerst die Schrauben
des Lüfters zu entfernen und die Blenden zu
lösen. Bei aufgeklebten Kühlern ist äußerste
Sorgfalt geboten. Es können leicht Bauteile
abgerissen werden. Heben Sie alle Einzelteile
sorgfältig auf. Reinigen Sie anschließend die
Hardware von Resten der Wärmeleitpaste oder
Pads mit einem Lösemittel (z.B. IsopropanolAlkohol).
Bevor Sie mit der Montage des Kühlers beginnen,
vergleichen Sie Ihre Platine mit dem vorliegenden
Foto. Der Kühler wurde speziell für dieses Layout
konstruiert. Es kommt vor, dass
Grafikkartenhersteller über Revisionen den
Aufbau leicht abändern und damit der Kühler auf
spätere Modelle nicht mehr passt. Achten Sie
auch bei der Montage darauf, dass hohe Bauteile
frei liegen und der Kühler die Grafikkarte nicht
beschädigt.
Alphacool International GmbH haftet nicht bei
fahrlässigen Montagefehlern, wie die Wahl eines
inkompatiblen Kühlers.
Posez le matériel sur un tapis
antistatique. Commencez par le
démontage du refroidisseur d’origine. Selon la
configuration du radiateur les vis du ventilateur et
les caches doivent être enlevés d’abord. S’il s’agit
d’un refroidisseur collé il faut travailler très
doucement. Sinon des composants peuvent
s’arracher. Conservez tous les pièces
soigneusement. Ensuite, nettoyer le matériel de
résidus de la pâte thermique ou de pads avec un
solvant (alcool isopropanol par ex.).
Avant de commencer l’installation merci de
vérifier que votre carte ressemble bien a celle sur
l’image. Le refroidisseur a été conçu
spécialement pour cette disposition des
composants. Il est possible que le fabricant
change des détails dans la disposition de ses
composants lors d’une révision et que le bloc de
refroidissement ne soit plus compatible. Veillez
lors de l’installation au fait que les composants
hauts ne touchent pas le bloc de refroidissement
et que le bloc n’endommage pas la carte
graphique.
Alphacool International GmbH n’est pas
responsable ni des erreurs d’installation ni du
choix d’un refroidisseur incompatible.
EN
ALPHACOOL EISBLOCK AURORA PLEXI
GPX-N RTX ASUS ROG STRIX 3080 / 3090
DE
FR
DE
FR
EN
1
2
3 4 5
6
7
8
9
10
3080
3090
Page 2
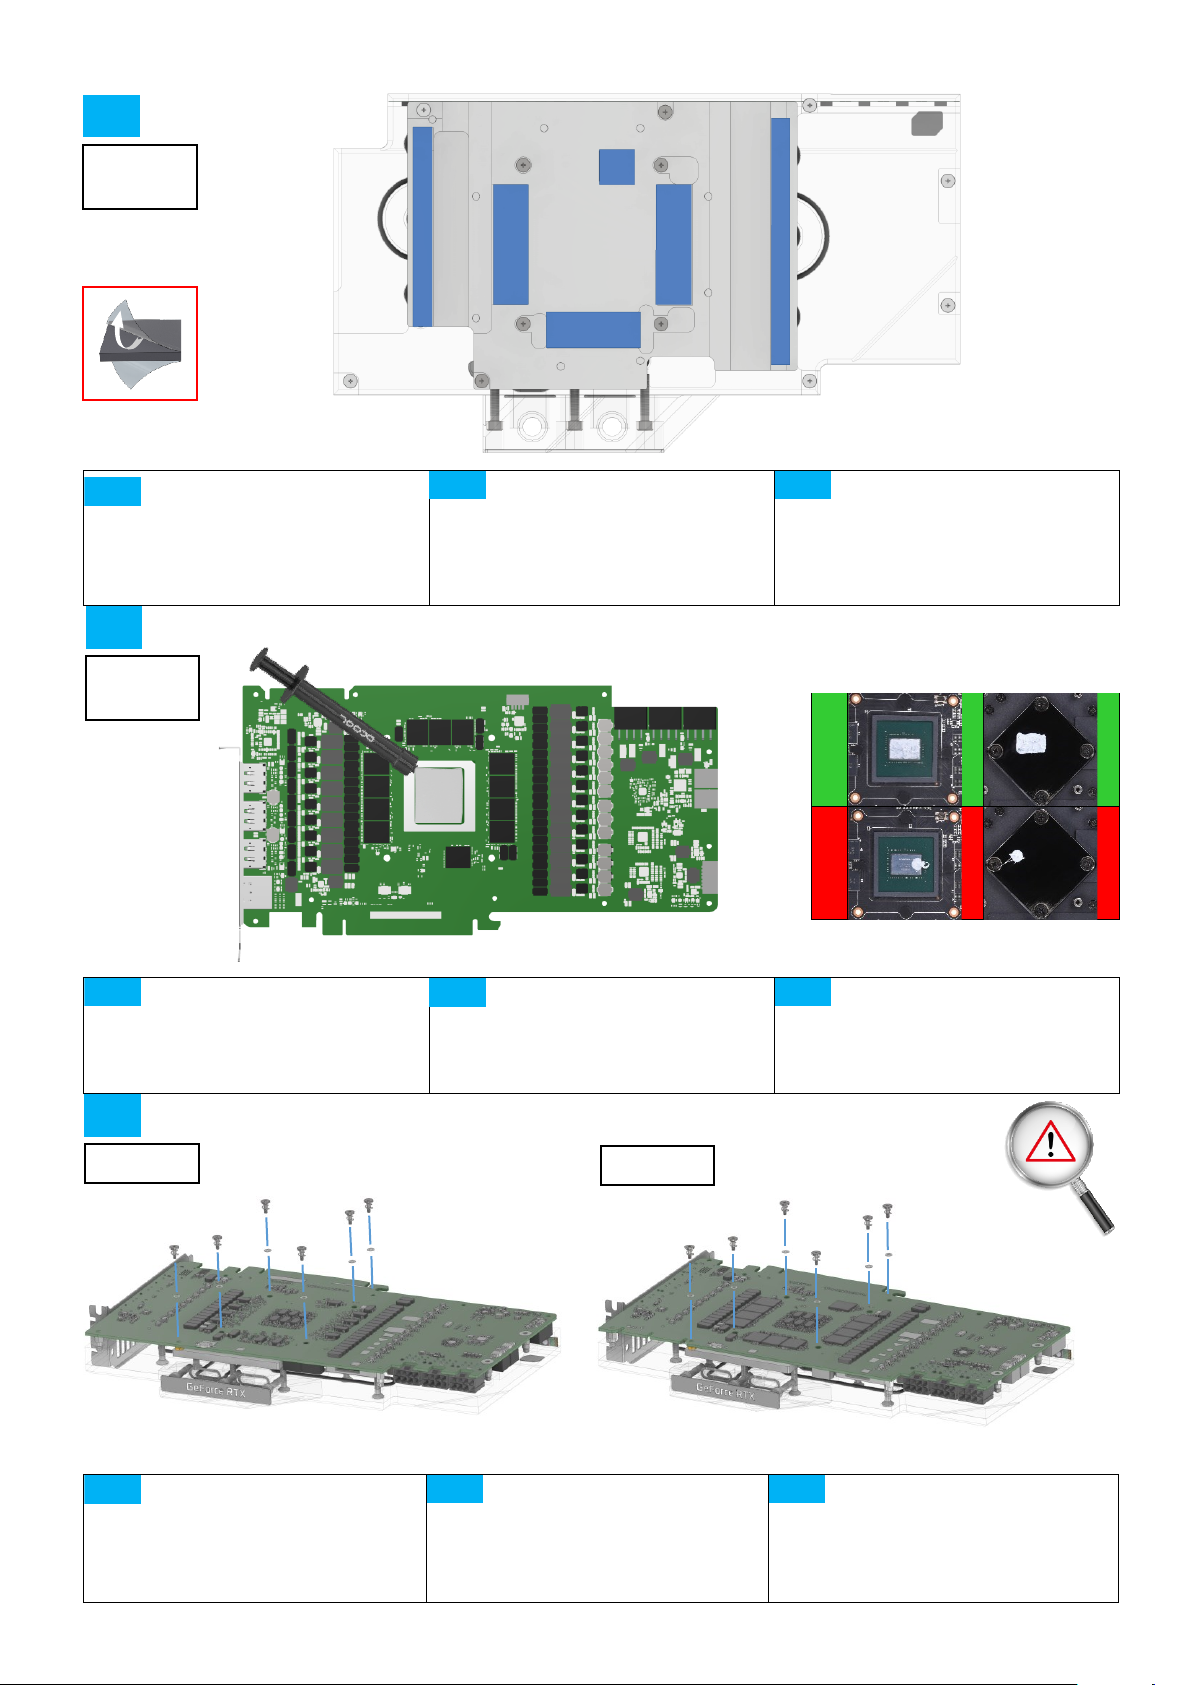
Clean the contact surfaces on the
bottom side of the cooler with
alcohol or similar. The surface must be free
of contaminants.
Remove the protective foils from the thermal
pads and place the pads on the copper block
as shown.
Reinigen Sie die Kontaktflächen auf
der Bodenseite des Kühlers mit
Spiritus oder ähnlichen Mitteln. Die Fläche
muss frei von Verunreinigungen sein.
Entfernen Sie die Schutzfolien der
Wärmeleitpads und platzieren Sie die Pads
wie dargestellt auf dem Kupferblock.
Nettoyez les surfaces de contact (la
face inférieure du bloc de
refroidissement) avec de l’alcool. La surface
doit être propre sans aucune pollution.
Retirez les feuilles de protection des pads
thermiques et placez les pads sur le bloc de
cuivre comme indiqué.
✓
With the help of a plastic strip or
similar spread a thin layer of
thermal paste on the GPU. The layer should
be less than a millimeter thick, otherwise the
surrounding components may be
contaminated unnecessarily.
Tragen Sie nun eine gleichmäßige
Schicht Wärmeleitpaste auf die GPU
auf. Die Schicht sollte weniger als einen
Millimeter dick sein, da die umliegenden
Bauteile ansonsten verunreinigt werden
können.
Appliquez maintenant la pâte
thermique sur le processeur
graphique à refroidir. Etalez-la à l’aide d’une
bande en plastique. Afin d’éviter de salir les
composants autour la couche doit rester
inférieure à un millimètre d’épaisseur.
Place the graphics card on the
prepared cooler. Fasten the card as
shown with the 6 M2x5 screws with M2
washers. Hand-tighten the screws crosswise,
one turn at a time.
Legen Sie die Grafikkarte auf den
vorbereiteten Kühler. Verschrauben
Sie die Karte wie dargestellt mit den 6 M2x5
Schrauben. Ziehen Sie die Schrauben
kreuzweise, mit je einer Umdrehung,
handfest an.
Posez ensuite la carte graphique sur
la glacière préparée. Vissez la carte
comme indiqué avec les 6 vis M2x5. Serrez
les vis à la main en croix, un tour à la fois.
2.
4.
DE
FR
EN
3.
3
1
2
DE
FR
EN
EN
DE
FR
4
2
5
3080
3090
3080
3090
3080
3090
Page 3
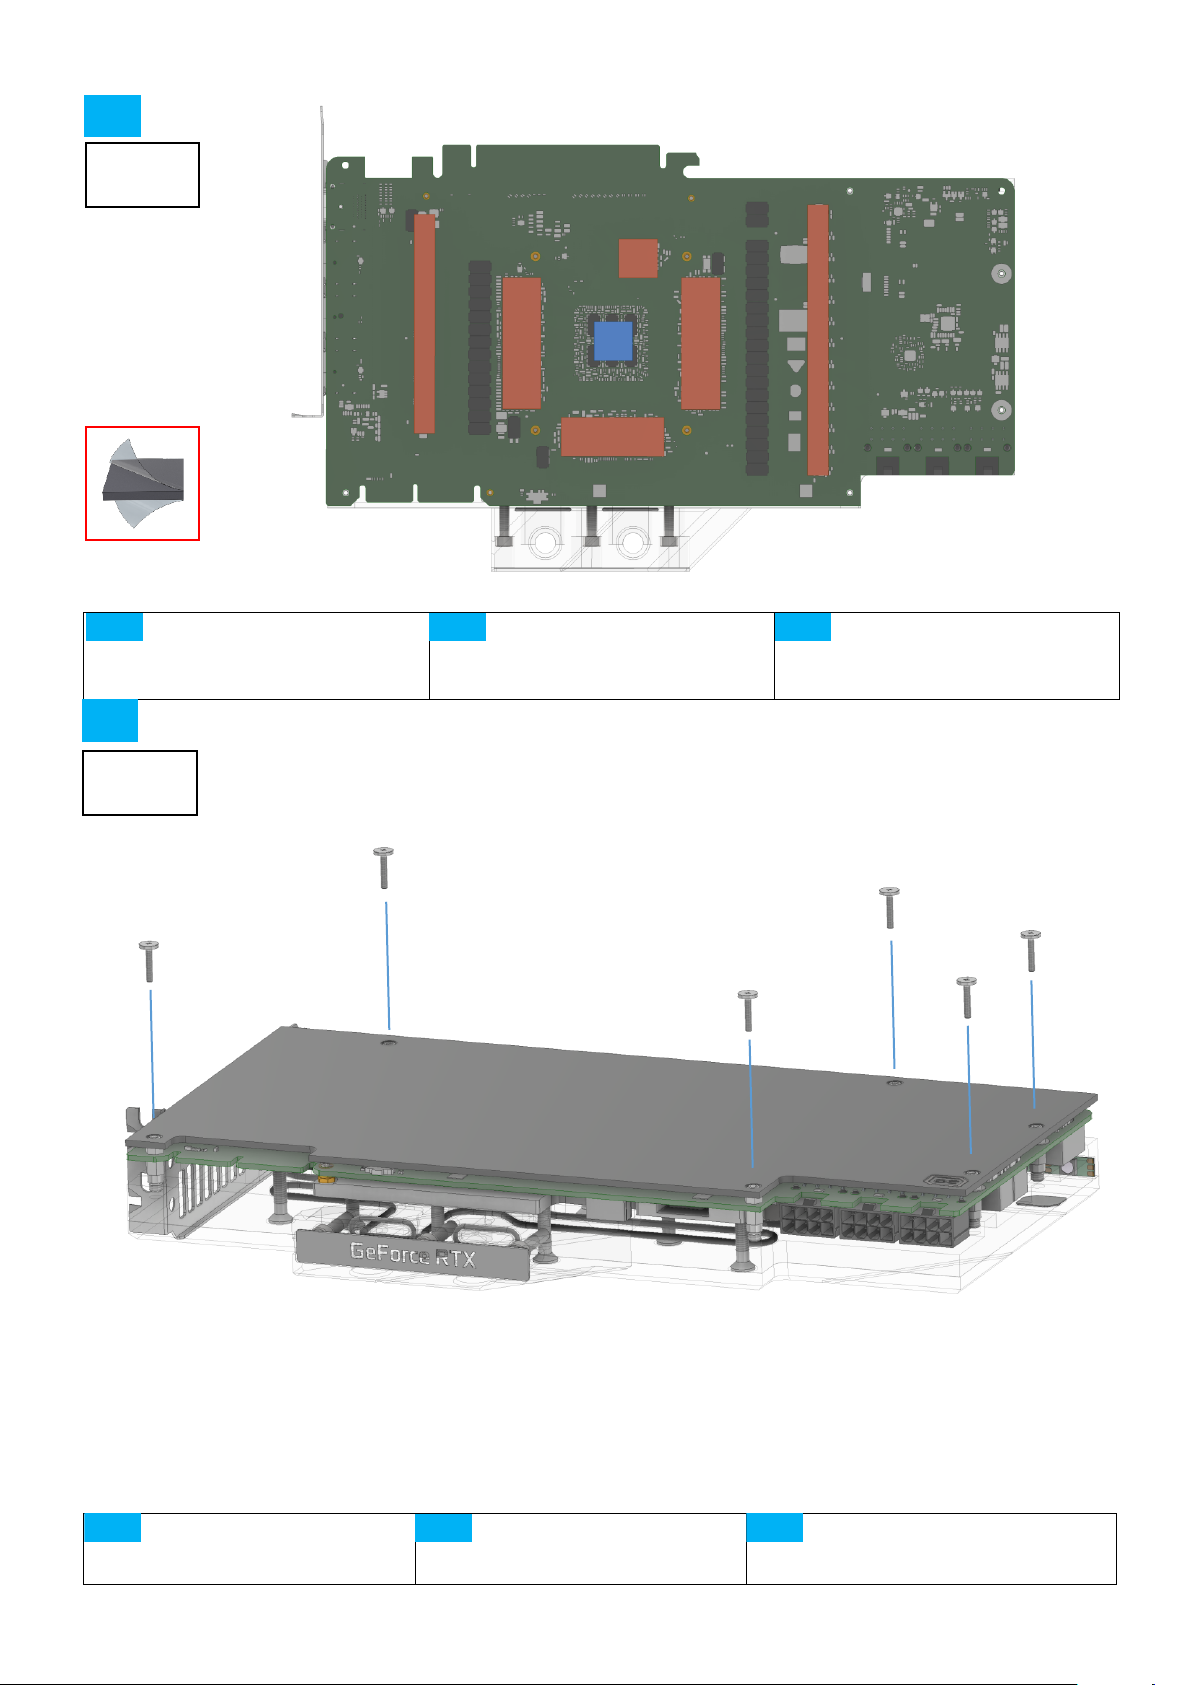
M
Remove the protective foils from
the thermal pads and place the
pads on the PCB as shown.
Entfernen Sie die Schutzfolien der
Wärmeleitpads und platzieren Sie
die Pads wie dargestellt auf der Platine.
Retirez les feuilles de protection des
pads thermiques et placez les pads
sur la carte comme indiqué.
Put the backplate on and screw it
together with the 6 M2x11 screws
as shown.
Legen Sie nun die Backplate auf
und verschrauben Sie diese mit
den 6 M2x11 Schrauben wie dargestellt.
Remettez maintenant la plaque arrière
en place et vissez-la avec les 6 vis
M2x11 comme indiqué sur l'illustration.
5.
6.
7
4
DE
FR
EN
10 6 8
6
9
DE
FR
EN
3080
3090
3080
3090
Page 4
V.1.00-09.2020
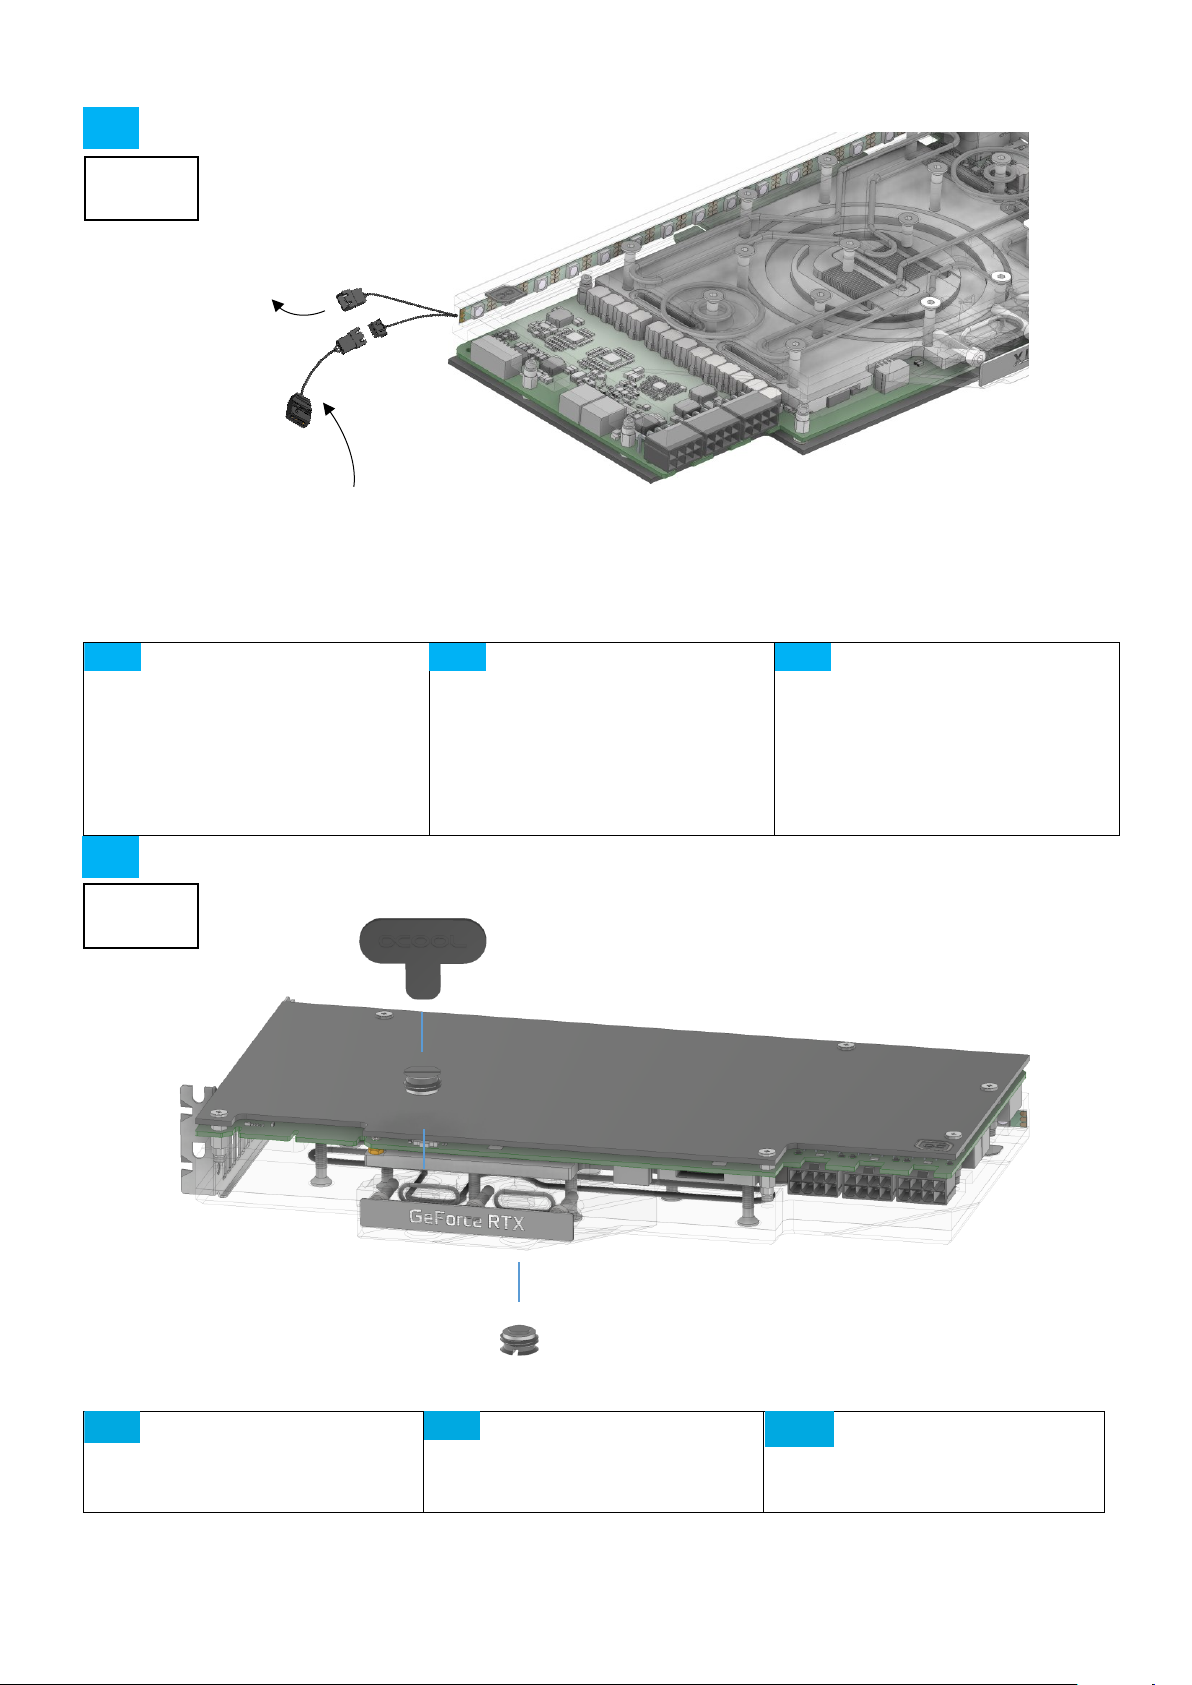
Close the inlets which you do not
need for tubing. Screw in the screw
plugs with the enclosed tool.
Verschließen Sie alle Einlässe, die Sie
nicht für die Anschlüsse benötigen.
Drehen Sie die Verschlussschrauben mit dem
beiliegenden Werkzeug ein.
Fermez les entrées dont vous
n'avez pas besoin pour les tuyaux.
Vissez les bouchons à l'aide de l'outil fourni.
To control the digital - RGB lighting,
connect the included adapter to the
3 - pin female connector and plug it to a
digital - RGB controller (e.g. Alphacool Aurora
Eiscontrol, Art.: 15360, not included). You can
connect additional digital - RGB LEDs to the
remaining 3 - pin male connector.
Um die Digital - RGB Beleuchtung zu
steuern, schließen Sie den
beiliegenden Adapter an den 3-Pin female
Stecker an und verbinden Sie diesen mit
einem Digital - RGB Controller (z.B. Alphacool
Aurora Eiscontrol, Art.: 15360, nicht im
Lieferumfang enthalten).
An den übrigen 3-Pin male Stecker können
Sie zusätzliche Digital - RGB LEDs
anschließen.
Pour contrôler l'éclairage Digital -
RGB, connectez l'adaptateur fourni
au connecteur femelle 3 broches et
branchez-le à un contrôleur Digital - RGB
(par ex. Alphacool Aurora Eiscontrol, Art.
15360, non fourni).
Vous pouvez connecter des LEDs Digital RGB supplémentaires au connecteur mâle 3
broches restant.
Digital – RGB Controller
Digital – RGB LEDs
+
7.
EN
DE
FR
8.
DE
FR
EN
3080
3090
3080
3090
 Loading...