

Page 1
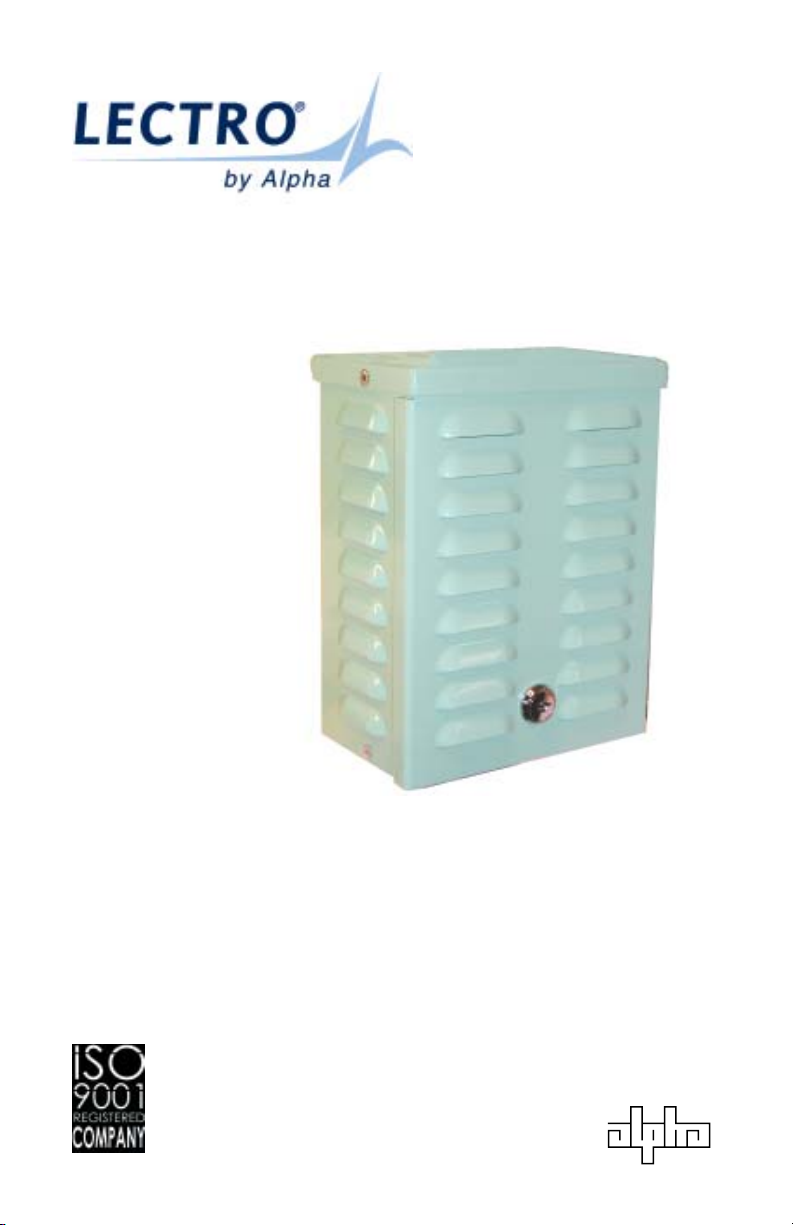
Mini-Mite Ferro Power Supply
30/60Vac Output
Operator’s Manual
Effective: August, 2003
Alpha Technologies
®
Page 2

Alpha Technologies
Power
®
Page 3
Mini-Mite Ferro Power Supply — 30/60Vac Output
Operator’s Manual
Effective: August, 2003
CM003101, Rev. B0 — © 2003 Alpha Technologies
NOTE
Photographs contained in this manual are for illustrative purposes only. These
photographs may not exactly match your installation.
NOTE
Review the drawings and illustrations contained in this manual before
proceeding. If there are questions regarding the safe operation of this powering
system, please contact Alpha Technologies or your nearest Alpha representative.
NOTE
Alpha denies responsibility for any damage or injury involving its enclosures,
power supplies, generators, batteries, or other hardware when used for an
unintended purpose, installed or operated in an unapproved manner, or
improperly maintained.
Contacting Alpha Technologies:
For general product information and customer service
1-800-863-3930
(7:00 AM to 5:00 PM Pacific Time )
For complete technical support
1-800-863-3364
(7:00 AM to 5:00 PM Pacific Time, or 24/7 emergency support)
CM003101 Rev. B0
3
Page 4

Table of Contents
Warnings & Cautions ...................................................................... 5
Unpacking and Inspection ............................................................... 6
1. OVERVIEW
1.1 Introduction ............................................................................ 7
2. SPECIFICATIONS
2.1 Nominal ................................................................................. 8
2.2 General ................................................................................. 8
3. CABINET INSTALLATION
3.1 Mounting ................................................................................ 9
3.2 Electrical Connections ........................................................... 10
3.3 Disassembly .......................................................................... 10
4. OPERATION
4.1 Changing Output Voltage ....................................................... 11
4.2 Service ................................................................................. 12
4.3 Maintenance .......................................................................... 13
4
CM003101 Rev. B0
Page 5

WARNINGS & CAUTIONS
WARNINGS
A “Warning” identifies conditions and actions that pose a hazard to the user.
NOTE
This power supply and its associated hardware (enclosure, cabling) may contain
equipment(s), or parts which have accessible hazardous voltage or currents.
To avoid injury
• This power supply and its associated hardware must be serviced by authorized
personnel only.
• Verify AC line power is de-energized prior to installation or service.
• Remove all conductive jewelry or personal equipment prior to servicing equipment,
parts, connectors, wiring, or batteries.
• Read and follow all installation, equipment grounding, usage, and service instructions
included in this manual.
:
CAUTIONS
A “Caution” identifies conditions and actions that may damage the power
supply or associated equipment.
NOTE
Enclosure, equipment or parts may be damaged or cause damage if used or
installed improperly.
To avoid damage
• An agency-approved service disconnect switch with overcurrent protection must be
provided by the installer. It shall be connected between the power source and the
power supply. Subject to local codes, the service disconnect switch shall be in an
outdoor enclosure rated @ 120Vac with a noninterrupted neutral termination and shall
have a 15A circuit breaker. Due to the ferroresonant transformer, the circuit breaker
should be a high inrush magnetic type that will withstand short duration inrush currents
• Overcurrent protection and disconnecting means for the AC output are to be supplied
by the installer as required by local codes.
• Use #16AWG minimum Copper, 75C, for all utility input wiring.
• Prior to installation, verify that the output voltage from the enclosure or its equipment
match the voltage requirements of the connected equipment (load).
• Verify the enclosure which houses the power supply has sufficient ventilation to
maintain the power supply in its specified operating temperature range
(-40°C to +55°C).
• Do not operate the power supply in an environment containing corrosive or
conductive gas, vapor, liquid, or dust.
• When servicing the power supply, use only specified replacement parts.
• Servicing is to be performed only by authorized personnel.
:
CM003101 Rev. B0
5
Page 6

Unpacking and Inspection
Carefully remove the module or unit from its shipping
container. Inspect the contents. If items appear to be
damaged or missing, contact Alpha Technologies and the
shipping company immediately. Most shipping companies
have only a short claim period. Verify the following items
have been included:
1. System module or unit
2. Operator’s Manual
3. Any other ordered options
Save the original shipping container.
In the event a module or unit needs to be returned for
service, it should be packaged in its original shipping
container. If the original container is unavailable, pack the
unit with at least three inches of shock-absorbing material on
all sides and is properly supported to prevent shipping
damage.
NOTE
Do not use popcorn-type packing material. Alpha
Technologies is not responsible for damage caused
by the improper packaging of returned units.
After inspection by the shipping company and a written
appraisal of the damage has been received, contact Alpha
Technologies and request a return authorization number.
Return items promptly with the return authorization and
invoice numbers clearly shown on the shipping label.
Alpha Technologies will either repair or replace the
equipment depending upon the extent of damage.
Warranty Notice
Contact Alpha Technologies for further information regarding
warranty details for this product.
6
CM003101 Rev. B0
Page 7

1. Introduction
The Lectro Mini-Mite Ferro Power Supply brings the CATV
industry a new performance standard. Lectro’s proprietary
design provides excellent regulation over varying AC input
and load conditions, providing the user with the most
efficient and trouble-free ferroresonant system on the
market. Careful physical and thermal design ensure a longer
life, while allowing chassis replacement with minimum tools
and effort.
This manual provides information related to the installation,
operation, and service of specific Lectro equipment. For
personnel training or specific problems or questions relating
to applications please call 1-800-863-3930 and ask for
customer service, or 1-800 863-3364 and ask for Technical
Support. The information in this manual is restricted to
customers of Alpha Technologies, and use by unauthorized
persons is strictly prohibited.
Prior knowledge of good CATV system construction practice
and a working knowledge of electrical safety practices are
minimum qualifications for installation and operation.
However, for equipment servicing, the technician should also
be well versed in basic electronics.
It is recommended that you carefully read this manual prior
to leaving your office to perform any work on the Lectro
Mini-Mite Ferro Power Supply.
CM003101 Rev. B0
7
Page 8

2. Specifications
2.1 Nominal Specifications
Electrical
AC Input Voltage Range
AC Input Voltage Regulation
AC Output Frequency Range
AC Output Voltage
AC Output Voltage Regulation @ nom . fr eq.
Efficiency @ Full Load
Output Configurati ons
Input Current, Nominal (A m p s )
Mechanical
2A 4A
Height: in / mm
Width: in / mm
Depth: in / mm
Weight: in / mm
8.25 / 210
6.19 / 158
4.00 / 102
10 / 4.5
2.2 General Specifications
2A
1.3
8.25 / 210
6.19 / 158
4.00 / 102
13 / 5.9
120Vrms
+ 10% / -20%
60Hz
60Vrms
± 3%
80%
4A
2.8
Overload Protection
Ferroresonant Output Foldback limited @ 150% of output rating
Environmental
Operating Range -40°C to + 55°C (-40°F to +131°F)
Operating Storage -40°C to + 55°C (-40°F to +131°F)
Humidity 0 to 95% (noncondensing)
8
CM003101 Rev. B0
Page 9

3. Installation
3.1 Mounting
The Mini-Mite Ferro Power Supply is designed to be wallmounted using the provided bracket.
INSTALLATION PROCEDURE:
1. A minimum clearance of 1.75” should be allowed
above, below, and along the sides and front of the unit
for adequate cooling.
2. Attach mounting bracket in desired location.
3. Mount on the mounting bracket as required. Slide the
Mini-Mite into position on the bracket.
Rear View
CM003101 Rev. B0
Lid Rivet
Notch
Keyed Slot
Screw Head
Press Unit
Against Plate
And Slide
Down to
Engage
Tighten Screw
From Inside
Side View
9
Page 10

3. Installation
3.2 Electrical Connections
1. Remove the front cover with the key
provided.
2. Install the output cable connector in
the chassis adapter provided on the
bottom of the cabinet.
3. Plug the AC line cord into a 120Vac
utility receptacle.
4. If desired, a direct earth ground may
be connected using the small copper
lug on the bottom of the unit.
5. Replace the cover.
The Mini-Mite is now operational.
3.3 Disassembly
DISCONNECTION PROCEDURE:
1. Unplug the unit from the utility outlet.
2. Disconnect the output connector.
3. Remove the unit from the mounting bracket.
10
CM003101 Rev. B0
Page 11

4. Operation
4.1 Changing the output voltage
(PSF-MMP-AXX only)
The Lectro Mini-Mite Ferro Power Supply is designed to
provide regulated 30V or 60V from the 120Vac power line.
The power output is normally configured for 60V and can be
changed to provide 30V via the following procedure.
60V – 30V CONVERSION PROCEDURE
1. Verify AC is disconnected.
2. Cut yellow wire 2” from end of heat shrink tubing, strip 1/
2” from end.
3. Remove the wire nut from the blue wire, twist ends of
Yellow, Blue wires together. Secure Yellow/Blue splice
with wire nut.
4. Cover end of Yellow wire with customer-supplied wire nut.
5. Reatore AC power.
6. Measure voltage between capture screw and chassis.
The measured value should be 30VAC.
7. Secure cabinet. Unit is ready for 30V operation.
60V wire (Yello w)
60VAC operation
CM003101 Rev.B0
30V wire
(Blue)
30VAC operation
30Vac
between screw
and chassis.
11
Page 12

4. Operation
4.2 Service
CAUTION
Lethal voltages are present within the chassis
when the unit is in operation. For safety, be certain to
unplug the input cord and the output cable connector
before attempting service.
NOTE
Part of the unit’s thermal design is heat conduction
from the transformer brackets to the cabinet of the
power supply. A thin coating of silicone grease is
applied to the bracket contact area during
manufacture. Be sure to apply a fresh coat of silicone
grease and tighten all four retaining nuts securely
during reassembly.
12
CM003101 Rev. B0
Page 13

4. Operation
4.3 Maintenance
Proper operation and longer system life can be ensured by
performing the following maintenance:
1. Before opening the cabinet, inspect it for external
damage or tampering, including the grounding circuit.
2. Unlock and open the cabinet.
3. Inspect the air vents for obstructions
4. Inspect the connectors and cable for damage or
corrosion.
5. Close and relock the cabinet.
CM003101 Rev.B0
13
Page 14

Page 15

Page 16

Corporate
Alpha Technologies
3767 Alpha Way
Bellingham, WA 98226
USA
Tel: (360) 647-2360
Fax: (360) 671-4936
Web: www.alpha.com
Alpha Technologies
Power
®
Alpha Technologies Ltd.
4084 McConnell Court
Burnaby, BC, V5A 3N7
CANADA
Tel: (604) 430-1476
Fax: (604) 430-8908
Alpha Technologies
Europe Ltd.
Cartel Business Estate
Edinburgh Way
Harlow, Essex CM20 2TT
UNITED KINGDOM
Tel: +44-1279-422110
Fax: +44-1279-423355
Alpha Technologies
Hansastrasse 8
D-91126 Schwabach
GERMANY
Tel: +49-9122-79889-0
Fax: +49-9122-79889-21
Alphatec
339 St. Andrews Street
Suite 101
Andrea Chambers
Limassol, Cyprus
CYPRUS
Tel: +357-25-375675
Fax: +357-25-359595
Alpha Technologies
Units R5-R7 Regents Park Estate
Cnr. Park Rd. and Prince’s Rd. East
Regents Park, NSW 2143
AUSTRALIA
Tel: +61-2-9722-3320
Fax: +61-2-9722-3321
Copyright © 2003 Alpha Technologies, Inc. All rights reserved. Alpha is a registered trademark of Alpha Technologies. CM003101 Rev.B0
Due to continuing product improvements, Alpha reserves the right to change specifications without notice.
 Loading...