

Page 1

PC Relocator Ultra Control User Guide 3
End User License Agreement
In this license agreement (the “License Agreement”), you (either
individually or an entity), the purchaser of the license rights granted by
this License Agreement are referred to as the “Licensee” or “You.”
Eisenworld, Inc. is referred to as the “Licensor.” The current version of
the accompanying software (“Software”) and documentation
(“Documentation”) are collectively referred to as the “Licensed
Product.” Licensor may furnish hardware with the Licensed Product
(“Hardware”).
1. License.
1.1. In accordance with the terms and conditions of this License
Agreement, the Software is the property of the Licensor and is
protected by copyright law. While the Licensor continues to own the
Software, the Licensor grants the Licensee, after Licensee's
acceptance of this License Agreement, the limited, non-exclusive
license to use one copy of the current version of the Licensed Product
as described below. The software is "used" on a computer when it is
loaded into the temporary memory (i.e., RAM) or installed into the
permanent memory (e.g., hard disk, CD-ROM, or other storage device)
of that computer, except that a copy installed on a network server for
the sole purpose of distribution to another computer is not considered
"in use."
Except as may be modified by a license addendum which
accompanies this License Agreement, the Licensee's rights and
obligations with respect to the use of this Software are as follows:
You may:
i. Use the Software to migrate applications, settings, and data to
one and only one Target computer (“New PC”) used for commercial or
business purposes in the manner described in the Documentation
ii. Use the Software to migrate applications, settings, and data to
multiple New PC Computers in the same Household (as hereinafter
defined) in the manner described in the Documentation, provided that
such New PC Computers are not used primarily for business or
commercial purposes.
iii. Use the Software on the New PC Computer to create a storage
file containing applications, settings, and data (“Digital Moving File”) on
removable media or network file server ("Intermediate Storage") for
disaster recovery purposes.
Page 2

4 PC Relocator Ultra Control User Guide
iv. Use the Software on the New PC Computer to restore
applications, settings, and data from a Digital Moving File saved on
Intermediate Storage for disaster recovery purposes
v. Use the Software to migrate applications residing on the Source
(“Old PC”) computer that are legally licensed and paid for
You may not:
i. Use the Software to migrate computer applications, settings, and
data to more than one New PC Computer used primarily for business
or commercial purposes.
ii. Use the Software to migrate applications residing on the Old PC
to the New PC that are not legally licensed and paid for
iii. Use the Software to create more copies of a licensed application
than the application's license agreement allows
iv. Copy the documentation that accompanies Software
v. Sublicense or lease any portion of the Software
vi. Use a previous version or copy of the Software after you have
received a disk replacement set or electronically downloaded
replacement or an upgraded version as a replacement of the previous
version.
1.2 As used in this Agreement, the term “Household” means a
residential unit, whether an apartment or a free-standing residence.
“Household” does not include any commercial business premises.
1.3. Licensee shall not transfer or distribute the Licensed Product to
others under any circumstances. This Agreement shall automatically
terminate in the event of (i) such a transfer or distribution or (ii)
Licensee’s migration of an application that is not legally licensed and
paid for, which migration constitutes a breach of the license granted
hereby and of this Agreement.. Under no circumstances shall Licensee
copy or modify the Licensed Product, except that Licensee may copy
the Software for the sole purpose of creating a single backup copy,
provided all copyright and other notices are reproduced and included
on the backup copy.
2. Copyright and Trade Secrets. All rights in and to the Licensed
Product including, but not limited to, copyrights and trade secret rights,
belong to Licensor, and Licensor holds title to each copy of the
Software. The Licensed Product is protected by United States
copyright laws and international treaty provisions.
Page 3

PC Relocator Ultra Control User Guide 5
3. Term. This License Agreement is effective until terminated. Licensee
may terminate this License Agreement by returning the Licensed
Product to Licensor or by destroying the Licensed Product. Licensor
may terminate this License Agreement if Licensee breaches any of the
terms and conditions herein. Upon termination of this License
Agreement for any reason, Licensee shall return to Licensor or
otherwise destroy the Licensed Product and all copies of the Licensed
Product. Upon request of Licensor, Licensee agrees to certify in writing
that all copies of the Software have been destroyed or returned to
Licensor. All provisions of this Agreement relating to disclaimers of
warranties, limitation of liability, remedies, or damages, and Licensor's
proprietary rights shall survive termination.
4. Executable Code. The Software is delivered in executable code
only. Licensee shall not reverse engineer, compile or otherwise
disassemble the Software.
5. Limited Warranty.
5.1. Licensor does not warrant that the functions contained in the
Licensed Product and Hardware will meet Licensee's requirements or
that the operation of the Software and Hardware will be uninterrupted
or error-free. Licensor does warrant that the media on which the
Software is furnished and the Hardware will be free from defects in
materials and workmanship under normal use for a period of thirty (30)
days from the date of delivery ("Warranty Period"). This Limited
Warranty is void if failure of the media on which the Software is
furnished has resulted from accident, abuse, or misapplication.
5.2. Licensee's exclusive remedy under this limited warranty is the
replacement of any defective physical media on which the Software is
furnished or replacement of the Hardware. To receive a replacement
for defective media or Hardware under this limited warranty, return the
defective media or Hardware to Supplier during the Warranty Period,
with proof of payment and an accompanying statement with your
contact information. Some states and jurisdictions do not allow
limitations on duration of an implied warranty, so the above limitation
may not apply to You.
5.3. EXCEPT AS PROVIDED ABOVE, THE LICENSED PRODUCT IS
PROVIDED "AS IS" WITHOUT WARRANTY OF ANY KIND, EITHER
EXPRESS OR IMPLIED INCLUDING, BUT NOT LIMITED TO,
IMPLIED WARRANTIES OF MERCHANTABILITY AND FITNESS
FOR A PARTICULAR PURPOSE, AND THE ENTIRE RISK AS TO
Page 4

6 PC Relocator Ultra Control User Guide
THE QUALITY AND PERFORMANCE OF THE LICENSED PRODUCT
AND HARDWARE IS WITH LICENSEE.
6. Limitation of Liability.
6.1. LICENSOR'S SOLE OBLIGATION OR LIABILITY AND
LICENSEE'S EXCLUSIVE REMEDY UNDER THIS AGREEMENT
SHALL BE THE REPLACEMENT OF THE DEFECTIVE MEDIA ON
WHICH THE SOFTWARE IS FURNISHED AND/OR THE
HARDWARE ACCORDING TO THE LIMITED WARRANTY ABOVE.
6.2. IN NO EVENT WILL LICENSOR BE LIABLE FOR ANY
CONSEQUENTIAL, INCIDENTAL OR INDIRECT DAMAGES
INCLUDING, WITHOUT LIMITATION, ANY LOSS OF DATA OR
INFORMATION, LOSS OF PROFITS, LOST SAVINGS, BUSINESS
INTERRUPTION OR OTHER PECUNIARY LOSS, ARISING OUT OF
USE OF OR INABILITY TO USE THE SOFTWARE OR
DOCUMENTATION OR ANY HARDWARE, EVEN IF LICENSOR HAS
BEEN ADVISED OF THE POSSIBILITY OF SUCH DAMAGES, OR
FOR ANY CLAIM BY ANY THIRD PARTY.
6.3. Some states and jurisdictions do not allow the exclusion of
limitation of liability for consequential or incidental damages, so the
above limitation may not apply to You.
7. General.
7.1 Any software and hardware provided to Licensee by Licensor shall
not be exported or re-exported in violation of any export provisions of
the United States or any other applicable jurisdiction. Any attempt to
sublicense, assign or transfer any of the rights, duties or obligations
hereunder is void. This Agreement shall be governed by and
interpreted under the laws of the State of Florida, United States of
America, without regard to its conflicts of law provisions. Licensor and
Licensee agree that the U.N. Convention on Contracts for the
International Sale of Goods shall not apply to this License Agreement.
7.2. This License Agreement may only be modified or amended by a
written license addendum that accompanies this License Agreement or
by a written document that has been signed by both You and Licensor.
Site licenses and other types of enterprise licenses are available upon
request. Please contact Licensor or your Supplier for further
information.
7.3. Any controversy or claim arising out of or relating to this
Agreement, or the breach of this Agreement, shall be settled by
arbitration administered by the American Arbitration Association in
accordance with its Commercial Arbitration Rules and judgment upon
Page 5

PC Relocator Ultra Control User Guide 7
the award rendered by the arbitrator may be entered in any court
having jurisdiction thereof. The arbitration shall be held in Miami-Dade
County, Florida.
If you have any other questions concerning this License Agreement, or
if you desire to contact Licensor for any reason, please contact
Eisenworld.
Eisenworld Inc.
13798 NW 4th Street
Suite 315
Sunrise, FL 33325
Copyright 1999-2004
All Rights Reserved
U.S. Patents Pending
Page 6

8 PC Relocator Ultra Control User Guide
Table of Contents
END USER LICENSE AGREEMENT ...................................3
WELCOME ..........................................................................10
About Different Versions of PC Relocator .......................11
What’s New in 2004? .......................................................12
PC Relocator Documentation and Help...........................13
SYSTEM REQUIREMENTS................................................14
HELPFUL ICONS AND WINDOW GUIDE..........................16
Helpful Icons ....................................................................16
The PC Relocator Interface .............................................17
RELOCATION TERMS .......................................................18
OVERVIEW OF STEPS ......................................................19
RELOCATION MODES.......................................................20
PREPARATION AND CONNECTIVITY STEPS.................21
Preparing your Computers...............................................21
Connectivity Options and Steps.......................................23
Alohabob High-speed Transfer Cable Connections ........23
Network Crossover Cable Connections...........................24
CD, Removable Media, or Other Storage Device............24
Standard Parallel Transfer Cable Connections ...............26
USB Data Transfer Cable Connections ...........................27
Existing Local Area Network Connections.......................27
AUTOMATIC RELOCATION TUTORIAL...........................29
Step-by-Step: An Automatic Relocation .........................31
STANDARD SELECTIVITY TUTORIAL.............................43
Step-by-Step: A Standard Selectivity Relocation............44
EXPERT SELECTIVITY TUTORIAL...................................51
Step-by-Step: An Expert Selectivity Relocation..............51
AFTER THE RELOCATION................................................61
Contacting Technical Support..........................................61
Viewing the Relocation Report.........................................61
Page 7

PC Relocator Ultra Control User Guide 9
Cleaning Up..................................................................... 62
Undoing Your Relocation................................................. 63
Support Policy ................................................................. 64
FREQUENTLY ASKED QUESTIONS................................ 65
How do I use PC Relocator with a single monitor? ......... 65
What is an officially installed application? ....................... 66
How can I use PC Relocator for disaster recovery? ....... 66
What do the program ratings mean?............................... 67
What do all the icons on the screen mean? .................... 69
How can I transfer a program PC Relocator didn’t find?. 69
Can I still transfer data related to a program?................. 70
Which programs are compatible with Windows XP?....... 70
How are user profiles relocated?..................................... 71
What is a setting or preference? ..................................... 71
What should I do about security programs?.................... 73
What should I do about Windows version conflicts?....... 74
What should I do about Internet Explorer conflicts?........ 75
Can I relocate my data if my locale settings differ?......... 76
What should I do if the transfer stops?............................ 77
What if I don’t have enough disk space?......................... 77
What happens if I cancel my relocation?......................... 79
What post-relocation problems could occur? .................. 79
Why are there three extra directories on my New PC?... 84
How can I resolve connectivity issues?........................... 84
How can I perform an UNDO of the relocation?.............. 90
How can I find out more about error codes? ................... 92
What are required and forbidden files? ........................... 92
APPENDIX.......................................................................... 94
GLOSSARY ........................................................................ 95
Page 8

10 PC Relocator Ultra Control User Guide
Welcome
Before PC Relocator Ultra Control came along,
transferring your programs, files, and preferences from
one PC to another was a time-consuming, exhausting,
and difficult task. Anybody who has gone through the
procedure of manually recreating their computer after an
upgrade knows the feeling. With PC Relocator Ultra
Control, the task is greatly simplified. Transferring your
existing software environment to your new computer
(minus all the old clutter, of course) is suddenly a
breeze! Right from the beginning, you’ll feel at home on
your new PC.
PC Relocator Ultra Control transfers applications (either
in groups or selectively), documents, e-mail messages
from most popular e-mail programs, bookmarks and
favorites, Internet connection settings, Windows user
profiles, digital signatures stored on disk, and lots more.
PC Relocator Ultra Control is safe to use and does not
change your Old PC in any way and won’t overwrite your
data like a cloning or imaging utility does. On your New
PC, PC Relocator transfers and merges entries into your
PC’s system databases. This is what sets PC Relocator
Ultra Control apart from file transfer, partition/disk
imaging, and back-up utilities. Additionally, PC
Relocator Ultra Control works on any manufacturer's
hardware, with the supported Windows operating
systems, laptop or desktop, stand-alone or networked
computers.
Additionally, when it comes to protecting your data, PC
Relocator Ultra Control goes the extra mile to assure the
process goes smoothly. Our software leaves critical
software drivers alone to avoid affecting the hardware on
your new PC.
Page 9

PC Relocator Ultra Control User Guide 11
Transferring data has become even easier than ever
before. Our new Connectivity Wizard helps you get your
Old and New PC’s communicating with each other, and
we’ve got a wide variety of ways (including USB,
parallel, and TCP/IP) you can get your data successfully
relocated.
PC Relocator Ultra Control also can help you plan for
disasters. With our new DMV (Digital Moving File)
technology, you can store your files, settings, and even
your applications in DMV storage files for later retrieval.
With DMV file creation, you’ll never have to worry about
losing data again – PC Relocator Ultra Control can keep
it safe for you!
NOTE: Windows NT and Windows 95 do not support
USB.
About Different Versions of PC Relocator
The technology deployed in PC Relocator is a revolution
in Windows software technology. Never before have
users had the opportunity to move files, settings, and
applications from one PC to another without having to
re-install their programs from scratch, and seldom has
the average user had the power to move the exact files,
settings, and programs desired to their New PC. These
features (along with speed and dependability) make our
flagship product PC Relocator Ultra Control the de facto
standard in relocation technology.
However, not all users need the power of PC Relocator
Ultra Control version. Our companion product, named
simply PC Relocator, gives users a solid relocation
product without the power features associated with our
Ultra Control version.
With PC Relocator Ultra Control, users receive the most
sophisticated and customizable version of our relocation
Page 10

12 PC Relocator Ultra Control User Guide
software. PC Relocator Ultra Control offers enhanced
connectivity choices (including the ability to relocate data
using your existing Local Area Network or via a Network
Crossover Cable), the ability to create DMV (Digital
Moving) files for backup purposes, and expanded
options for selecting files, settings and programs that
includes three relocation modes (Automatic, Standard
Selectivity, and Expert Selectivity) to enhance the
number and type of items that can be moved.
PC Relocator Ultra Control is our most advanced
product yet, and we continue to improve it every day!
What’s New in 2004?
We are constantly working to update our technology and
make our software powerful, robust, and easy to use. In
the 2004 version, we have made numerous
improvements and additions that help to make PC
Relocator Ultra Control the number one digital moving
tool on the market. The following are some of the many
improvements that have been made to PC Relocator
Ultra Control:
• Improved the graphical user interface (GUI)
• Created a simpler relocation process flow
• Added Standard and Expert relocation modes
• Added support for Network Crossover Cables
• Added support for high-speed parallel data transfers
• Improved Internet software update functionality
• Automated numerous preparation steps
• Increased number of supported USB bridge cables
• Added a new Networking Assistant wizard
Page 11

PC Relocator Ultra Control User Guide 13
PC Relocator Documentation and Help
Relocating programs, settings, and files from one
computer system to another, especially programs, is not
a trivial task. In order to ensure a relocated program
works after being transferred from an Old PC to a New
PC, years of research, development, and quality
assurance testing work were required to “get it right”
more often than not. Despite our best efforts, things can
go wrong, and that’s where our documentation and help
come in.
Instead of loading down this manual with a lot of
troubleshooting tips that may never happen to YOU,
we’ve included step by step tutorials to help you get the
most out of PC Relocator Ultra Control. If you run into
problems, have a question about a procedure, or would
like more information, we’ve gone the extra mile by
providing you with help from multiple sources.
First, if your question cannot be answered in this
manual, try the online Help file that ships with PC
Relocator. Online Help (not to be confused with help
you can get online from our website) contains a list of
error codes and troubleshooting tips for more common
issues. Additionally, information on restrictions that
apply to PC Relocator Ultra Control, special tips and
tricks to save you time, and more answers to frequently
asked questions can be found in the online Help.
If you are still having a problem or an unanswered
question, check out our Alohabob Support website at
www.alohabob.com/support
thorough site has a large database of case studies,
relocation tests, notes, ideas, and tips for anyone
interested in performing a successful relocation.
Finally, if all else fails call Alohabob Technical Support.
For the first 90 days after purchase, your technical
. This comprehensive and
Page 12

14 PC Relocator Ultra Control User Guide
support is free. After that there’s a charge, so if you
purchase the product it’s best to perform your relocation
as soon as possible so you can gain access to Alohabob
Support.
System Requirements
In order to run PC Relocator Ultra Control, the following
requirements must be met:
• Either two separate PCs (PC-to-PC relocation) OR a
PC and an intermediate storage device (PC to or
from an “intermediate storage” device such as a Zip
disk, CD-R/RW disc, an external portable hard drive,
etc.).
• The operating system on each PC must be a version
of Windows 95, 98, Me, NT4 Workstation* (see
restrictions, below), 2000 Professional, or XP.
• For relocation of programs, the following restrictions
also apply (these restrictions do not apply if no
programs are being relocated):
• The version and release of Windows on the New PC
must be the same or higher as compared to the
version and release on the Old PC. In order from
lowest to highest, the order of supported Windows
versions is:
o 95 (original)
o 95a
o 95b
o 95c
o 98
o 98 Second Edition
o Millennium Edition ("Me")
o NT4 Workstation* (see note below)
o 2000 Professional
Page 13

PC Relocator Ultra Control User Guide 15
o XP Home
o XP Professional
NOTE: *Windows NT is not supported as a New PC
operating system when relocating programs.
• Windows NT4/2000/XP Professional users: The
"Service Pack" level on the New PC must be the
same or higher as compared with the Service Pack
on the Old PC.
• The version and release of Internet Explorer (e.g.,
5.50.4134.0600 vs. 5.50.4522.1800) on the New PC
must be the same or higher as compared to the
version and release on the Old PC. This is important
even if you do not use Internet Explorer as your web
browser.
• There must be enough space on the New PC to hold
the data to be transferred from the Old PC.
• For PC-to-PC transfers, you must have a PC-to-PC
Standard Parallel Transfer Cable, Alohabob Highspeed Transfer Cable, a USB bridge cable, TCP/IP
network, or crossover cable.
NOTE: No other equipment or software is required to
perform relocations between your two connected PC’s.
Page 14

16 PC Relocator Ultra Control User Guide
Helpful Icons and Window Guide
We recognize how important it is for PC Relocator Ultra
Control to communicate useful tips, shortcuts, and other
helpful information to users. The paragraphs and chart
below review our list of helpful icons, and the Window
guide shows you where things are and how they work.
Please read these sections carefully before you proceed
with your data relocation project.
Helpful Icons
PC Relocator uses helpful icons to let you know where
you are in the relocation process. There are three
versions of each icon, one gray, one dark blue, and one
light blue. If an icon is grayed out, you are no longer on
that step or have already completed that step. If the
icon is dark blue, you are currently in the process of
completing the associated task. Finally, if the icon is
light blue, the task has yet to be completed.
Icon Definition and Associated Tasks
Install and Setup icon. When you see this
icon, you are working with initial installation
and setup tasks.
Select Items icon. This icon appears when
you are on a screen that requires you to make
selections.
Transfer Items icon. You will see this icon
when PC Relocator is moving data from your
Old PC to your New PC.
Review and Complete icon. This icon appears
when you are finished selecting items and are
ready to relocate your data.
Page 15

PC Relocator Ultra Control User Guide 17
The PC Relocator Interface
The PC Relocator Ultra Control interface is roughly
divided into two frames, a left side (appearing mostly in
shades of blue) and a right side (the white background
area).
Left pane
shows
useful tips,
ways to find
and view
help, and
links to
online
support
topics
Right pane
provides
program
specific
information,
selectivity
choices, and
Window
control
buttons
Page 16

18 PC Relocator Ultra Control User Guide
Relocation Terms
You need to know what the following items are before
you attempt a relocation on your own. Please remember
that our definitions for certain items (specifically related
to the usage of the word settings) are somewhat
different depending on where they are used. For
example:
Files – Data files and documents. Even though certain
items such as DLL (data link library) files are still files,
PC Relocator generally avoids moving them unless they
are required to run an application. Some files (like
certain .EXE files) can only be moved using Expert
mode because they could cause problems on the New
PC if moved incorrectly.
Settings – Windows, program settings, and preferences.
Application settings refer to things such as the custom
location of toolbars in Microsoft Word (or any other
program), etc. If we move an application, we also
attempt to move the specialized settings you may have
customized. Windows settings generally refer to items
you might have customized in your Control Panel, such
as mouse pointers, display settings, accessibility
preferences, and more.
Applications – Entire programs, including installation
files and settings. This term is pretty straight-forward –
an application is considered to be any logically installed
program that has been registered with the Windows
operating system using a certified, Microsoft Windows
logo-compliant installation program such as InstallShield,
Wise Solutions, etc. Generally speaking, any program
that has been officially installed (and not just copied
manually onto your hard drive) can be relocated using
PC Relocator Ultra Control.
Page 17

PC Relocator Ultra Control User Guide 19
Overview of Steps
Your part of a relocation session consists of a few simple
steps. You set up your Old PC and the New PC as
follows. Note that each PC has some similar steps, but
when you start to select items and begin transferring
data, the majority of this work takes place on the New
PC:
• Install and Setup (both Old and New PC’s)
o Install and setup PC Relocator on both PCs
o Prepare and connect the two PC’s
o Start PC Relocator on both PC’s
o Update Old PC copy of PC Relocator
o Update/Sync New PC copy of PC Relocator
o Allow each PC to perform it’s own scan
o Old PC waits for New PC to connect
• Select the items you want to relocate (New PC)
• Transfer the items you want to relocate (Old PC
transfers data to New PC)
• Review and complete the relocation (New PC)
PC Relocator Ultra Control does all the hard work by
Scanning and comparing contents of both PCs,
transferring (copying) your data, and then merging
important system entries from your Old PC to your New
PC.
At the end of the relocation, your New PC reboots and is
ready for use!
Page 18

20 PC Relocator Ultra Control User Guide
Relocation Modes
PC Relocator Ultra Control now offers three relocation
modes to allow for Automatic, Standard, or Expert
selectivity. Here’s a brief description of each.
In Automatic mode, PC Relocator Ultra Control makes
most of the choices for you. This mode is similar to the
functionality found in our basic product (named simply
PC Relocator), and allows for limited item selection
during the relocation process.
In Standard Selectivity mode, you will have better
control over what gets transferred and what does not.
Standard Selectivity helps you choose items to move
based on Category selections, but does not permit more
advanced selection features found in the Expert
Selectivity mode.
In Expert Selectivity mode, you have the ultimate
amount of control over what files, settings, and
applications get relocated to your New PC. You will be
able to “drill down” to find individual files and even
miscellaneous programs you might have copied onto
your hard disk but not “officially” installed. If properly
selected, PC Relocator Ultra Control can move even
these items, saving you the trouble of having to move
them in some other manner.
Page 19

PC Relocator Ultra Control User Guide 21
Preparation and Connectivity Steps
Preparing your Computers
PC Relocator Ultra Control now does a lot more to help
you perform relocation tasks than previous versions.
Some of the big improvements include new wizard
pages to help you prepare your PC’s, plus additional
connectivity choices designed to help you speed up your
relocation project.
That said, you can do your part by completing the
following tasks on both the Old and New PC’s before
starting PC Relocator Ultra Control. Note that PC
Relocator Ultra Control will attempt to ensure you’ve
already done them (think of it as a second chance to
prevent something from going wrong). In any case, it’s
still best to do them now if you can.
• Check online for updates. The latest version of PC
Relocator Ultra Control should always be running on
both machines. Update your Old PC first, and then
start and run PC Relocator Ultra Control on your
New PC. The New PC will then synchronize its
copy with the copy running on the Old PC.
• Run virus scan software on both computers. This
ensures that both machines are virus free, and
ensures you don’t accidentally move a virus or other
infected file by mistake.
• Disable your screen saver using the Display
Properties window (set the Screen Saver field to
None).
• Run Scandisk and/or Checkdisk to fix any
problems on your hard drive. On most Windows
operating systems, instructions for performing this
Page 20

22 PC Relocator Ultra Control User Guide
procedure are available by clicking Help from the
Start menu.
• Close all running applications, processes, or
services that could interfere with the relocation.
Common programs that should be shut down
include software firewalls and anti-virus programs.
• Uninstall any programs you do not wish to either
keep on your Old PC and/or do not wish to relocate
to your New PC. Of course, if you use Expert
Selectivity mode, you can de-select the programs
you do not wish to relocate and can view a rating of
how effective PC Relocator will be in relocating the
application.
• Check the partition structure on your Old PC, and
determine if you wish to replicate it on your New PC.
If you have partitions on your Old PC that do not
match those on your New PC, a special folder
named C:\Drive_X (where X represents the drive
letter associated with the Old PC partition) will be
created on the New PC to hold the data relocated
from that partition.
For more information on recommended and optional prerelocation preparation steps, check the online Help file or
visit http://www.alohabob.com/support
for details.
Page 21

PC Relocator Ultra Control User Guide 23
Connectivity Options and Steps
Depending on the type of migration you are performing,
your options for connecting Old PC and New PC will
vary. PC Relocator Ultra Control offers six (6)
connection options:
• High-speed parallel data cable (available only from
Alohabob, check our website for details)
• Standard parallel data transfer cable
• USB (Universal Serial Bus) "bridge" cable
• TCP/IP network
• Crossover cable
• DMV (Digital Moving) file
NOTE: DMV files are also known as “intermediate
storage” relocations. Relocating data to a DMV file can
be done via removable storage devices, such as Zip and
Jazz drives, and CD-R/RW, or via other storage
locations, such as network drives, local (internal) hard
drives, or portable external hard drives.
Alohabob High-speed Transfer Cable
Connections
Most boxed versions of PC Relocator Ultra Control come
with our new high-speed transfer cable that works using
your PC’s parallel port.
If for any reason you do not have this cable, we strongly
recommend you call Alohabob and order one. This
cable will allow you to transfer data at a much higher
rate, something approaching USB transfer speeds and
generally in the range of 300 to 500 KB/s. With this
cable, you can finish your relocation work a lot faster,
plus you don’t have to worry about driver issues, NIC
Page 22

24 PC Relocator Ultra Control User Guide
cards, USB ports, etc., since the high-speed parallel
cable still uses your computers regular parallel port.
NOTE: ECP must be turned on in the BIOS in order for
the high-speed parallel cable to function. Check the
Alohabob Support site
(http://www.alohabob.com/support/ecpmode
information.
) for more
Network Crossover Cable Connections
The latest version of PC Relocator Ultra Control allows
you to use an inexpensive CAT-5 crossover cable to
connect your two PC’s. In order to do this, you should
be familiar with general networking concepts, configuring
and troubleshooting these kinds of networks, and IP
address schemes. If you are NOT familiar with these
concepts, please use a high-speed or standard parallel
cable (the setup is simpler).
For those of you who are familiar with common home
networks, try to set up your two PC’s to create a mini
network.
To set up your PC’s for data transfer using a crossover
cable, you need to have two NIC cards and a crossover
cable. Plug in the cards, load the drivers, and connect
the crossover cable.
After doing so, choose the Network Crossover Cable
connection on both the Old PC and the New PC. PC
Relocator Ultra Control will help you by starting the
Networking Assistant wizard. The wizard starts
automatically when you choose Network Crossover
Cable as your connection option of choice.
Follow the prompts to establish connectivity between
your two PC’s.
CD, Removable Media, or Other Storage Device
Page 23

PC Relocator Ultra Control User Guide 25
PC Relocator Ultra Control now gives you the ability to
pack up your files, settings, and applications and store
them in a format known as DMV, for Digital Moving File.
Basically, a DMV file is simply a compressed collection
of your files, settings, or applications that you can use for
storage or backup purposes. If you choose the CD,
Removable Media, or Other Storage Device option,
you will be asked to browse for a location to store your
DMV file (like a writeable CD, DVD, portable external
hard drive, or folder location) and configure some simple
options. In any case, it’s important to note that later on,
after creating the DMV file, you can restore the contents
of the file to the same or another PC of your choice. We
also refer to this relocation option as intermediate
storage.
NOTE: Some storage devices, most notably writeable
Compact Discs (CD-R/RW), may require you to perform
additional, manual steps before you can copy files to the
device. For example, a CD-R/RW drive may require you
to open and close a “session” in order to copy files to a
CD. PC Relocator Ultra Control cannot perform these
steps for you, so you will need to do them at the
appropriate time. Refer to your CD-R/RW manufacturer's
instructions for details.
To work with CD’s, removable media or other storage
devices, perform the follow preparation steps:
1) Install the intermediate storage hardware and
configure its software (if any) according to
manufacturer's instructions.
2) Verify that you can manually copy files to the device
using Windows Explorer.
3) If using a CD or DVD as your backup medium,
ensure you are familiar with the process of “closing a
session” on the disc media and/or “finalizing the
Page 24

26 PC Relocator Ultra Control User Guide
write process.”
NOTE: For removable hard drives under Windows 95, 98,
98SE, and ME, ensure you have the proper drivers.
Standard Parallel Transfer Cable Connections
If you prefer, you can use a standard, PC-to-PC parallel
data cable. You can find this type of cable at your local
computer store, but be aware the standard cable is the
slowest way to transfer your data. The time for
transferring one gigabyte of data via the parallel port
using the old, standard parallel cable is between two
and five hours. This isn’t very fast!
NOTE: Again, we recommend you order our Alohabob
High-speed Transfer cable from
http://www.alohabob.com
If you downloaded PC Relocator Ultra Control from the
Internet and wish to use a standard parallel data transfer
cable, you need to purchase the correct type at your
local computer store. Be sure to look for Direct Cable
Connection or PC-to-PC Parallel Transfer on the cable
package. Cables designed for connecting PCs to
peripheral devices such as printers, external drives, or
switch boxes will not work.
Connect the proper cable to the parallel port (25 pin
female) on each PC. Most boxed versions of PC
Relocator Ultra Control now contain a high-speed
parallel cable for even faster data transfers! If for some
reason you do not have either a high-speed or standard
parallel cable, you can order one from Alohabob at
http://www.alohabob.com
.
.
Page 25

PC Relocator Ultra Control User Guide 27
USB Data Transfer Cable Connections
Transferring via USB "bridge" or "data link" cables takes
approximately 1 hour per gigabyte.
NOTE: PC Relocator Ultra Control will automatically
install appropriate drivers for the USB Bridge cable.
Also, please note that Windows 95 and Windows NT 4
DO NOT support USB connections. Visit the Alohabob
Support site for USB troubleshooting information.
Generally, the procedure to connect via USB bridge
cable is as follows:
1) Install PC Relocator Ultra Control on both PC’s
2) Connect the USB bridge cable to both PC’s
3) Follow the Connectivity Wizard instructions
4) Follow all other on-screen instructions until the
two PC’s establish communication with each
other
One of the big improvements in the latest version of PC
Relocator is the Connectivity Wizard. This wizard can
help you figure out what might be wrong if you are
having connectivity issues. The program will know when
you are in trouble, so follow the Connectivity Wizard
prompts and check the online Help file for additional tips
and tricks.
Existing Local Area Network Connections
A high-speed network interface is significantly faster
than a both the standard parallel port and USB
connections. The average transfer time for one gigabyte
of data is approximately fifteen to twenty minutes.
Exception: networks that use the USB port will have
similar transfer rates as found with a USB bridge cable.
Page 26

28 PC Relocator Ultra Control User Guide
To connect the PCs using a TCP/IP network, both PCs
must be equipped with Ethernet (also known as NIC)
cards correctly configured for TCP/IP. These
components are not included with PC Relocator Ultra
Control.
To connect via TCP/IP network, follow these steps:
1) Install and configure network hardware and
software according to manufacturer's
instructions.
2) Use the ping command to verify TCP/IP network
communication between Old PC and New PC.
NOTE: For more information on TCP/IP connections,
refer to the Connectivity Issues topic in the online Help
file, or for the most updated information and an excellent
tutorial, visit http://www.alohabob.com/support
and
perform a search using the keyword TCP/IP.
Page 27

PC Relocator Ultra Control User Guide 29
Automatic Relocation Tutorial
One of the best things about PC Relocator is the ability
to customize a data relocation to fit your needs. Along
these lines, we’ve created three relocation modes
designed to help you simplify how your data gets moved.
Before we start the tutorial, let’s talk a minute about how
your physical PC’s are arranged.
During this tutorial, we switch back and forth between
the Old PC and the New PC. If you have any type of
keyboard/video/mouse (also known as a KVM) switching
device, the process will be much easier – you can simply
switch back and forth using the KVM device. Alternately,
you might have two PC’s, each with it’s own monitor,
keyboard and mouse – this makes running a PC
Relocator Ultra Control relocation even easier. Finally, if
you just have a single monitor and nothing else, you can
manually switch back and forth between the two
computers by physically plugging and unplugging the
video cable into each PC’s video card.
The last method is the hard way, but if you simply have a
single monitor then we recommend you look at the
Quick Start Guide, perform all of the Old PC steps first,
then plug the monitor into the New PC and proceed with
the New PC steps. The Quick Start Guide is ideally
suited for users who have a single monitor setup.
Now, let’s proceed with our first tutorial.
The first mode for relocating your data is called
Automatic mode. Selecting Automatic mode gives PC
Relocator control over most of the heavy duty decision
making, and restricts your allowable choices. This mode
is handy for folks who have only a few programs,
documents, and files to relocate and/or know exactly
where these programs are, what they do, and are
confident that everything that can be transferred from
Page 28

30 PC Relocator Ultra Control User Guide
their old machine should be transferred to the New PC.
NOTE: Even though PC Relocator makes the selections
for you, there are both Summary and Details tabs
available for viewing just before you are prompted to
start the relocation. At this time, if you don’t like the
selections made, you can go back and choose another
relocation mode.
Page 29
PC Relocator Ultra Control User Guide 31
Step-by-Step: An Automatic Relocation
Let’s step through a sample Automatic relocation to get
a feel for the program. During this example, we will
move back and forth between the Old and New PC’s.
NOTE: If you are using a single monitor to do your
relocation, we recommend (if possible) you use a KVM
switch so you don’t have to physically plug and unplug
the monitor cable between the two computers. If you
DO have a way to effectively switch back and forth, you
can perform the steps described on BOTH PC’s at the
same time – just switch back and forth.
However, if you DO NOT have a KVM switch, follow the
instructions (as clearly identified below) for the Old PC
first, then return here and start performing the steps for
the New PC.
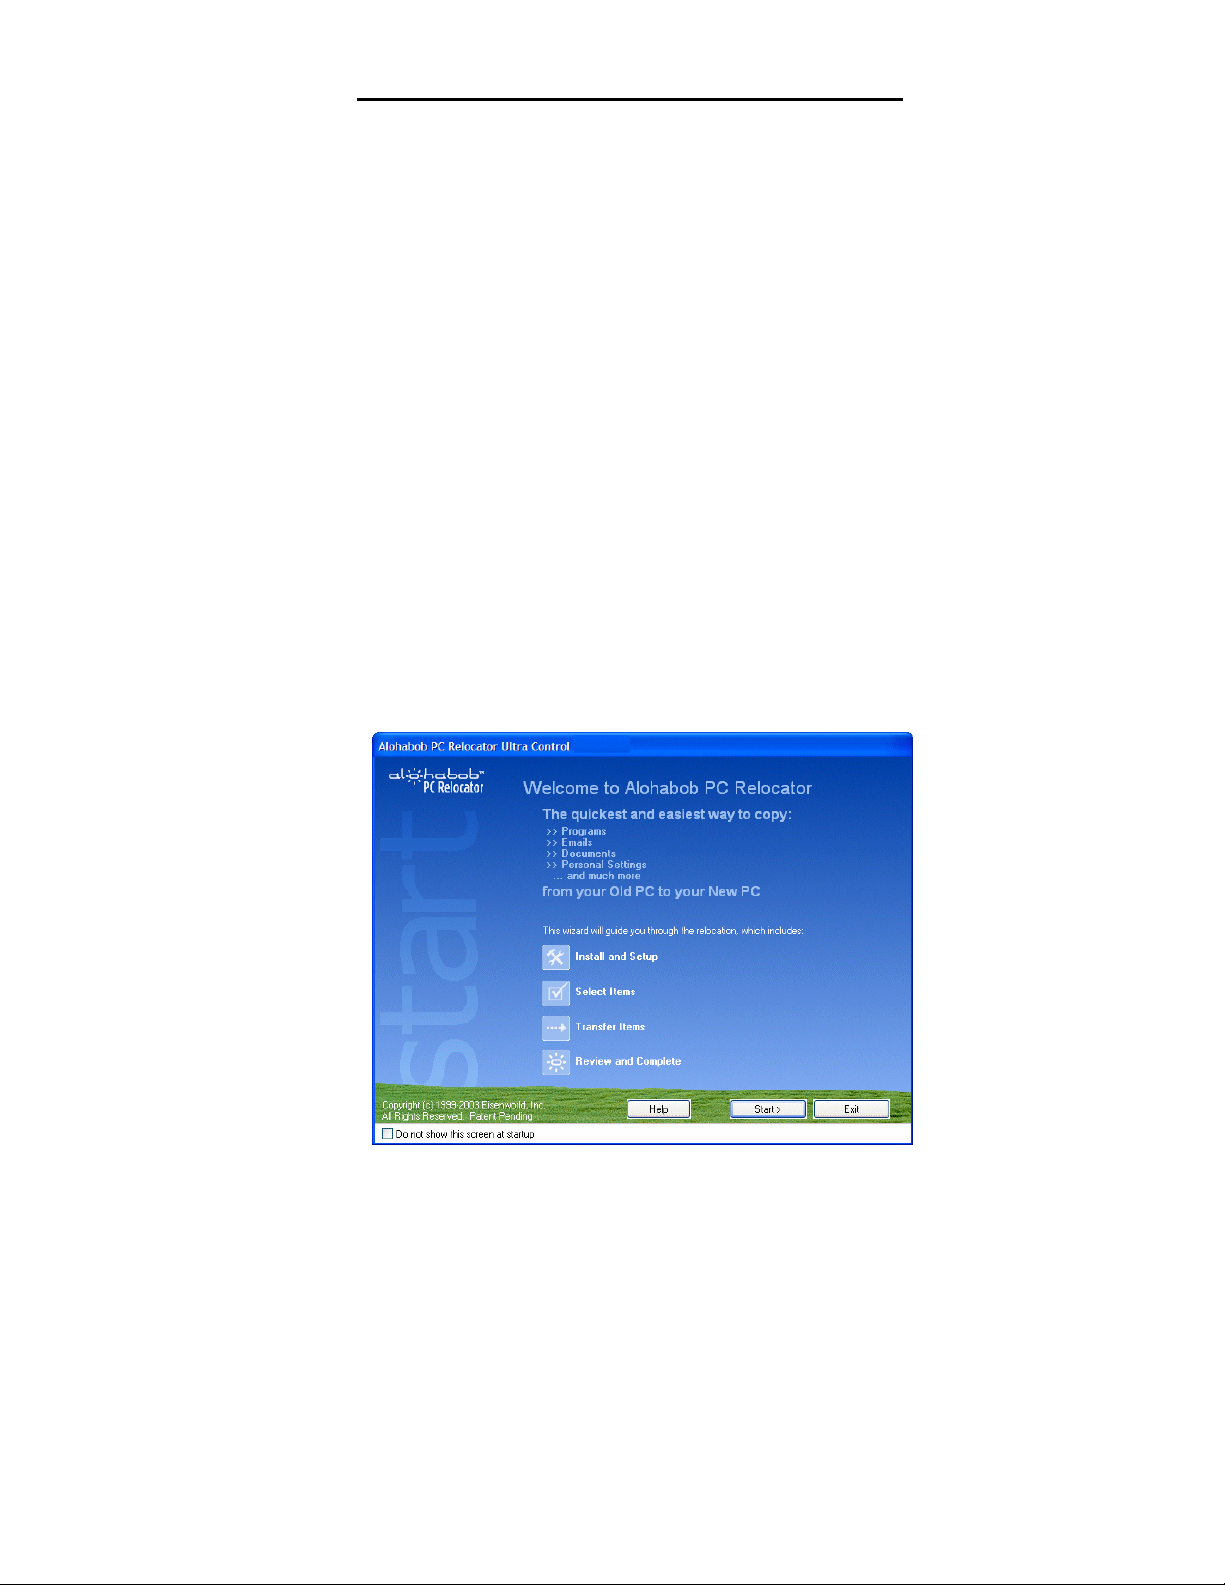
1) Start PC Relocator on both the Old and New PC’s.
The relocation “wizard” begins. At the Welcome
screen, click Start to continue.
Page 30

32 PC Relocator Ultra Control User Guide
2) On both PC’s, the Installation and Setup Program
screen appears. Here you will be given the
opportunity to get answers to questions or read
about recommended extra preparation steps. There
is also an Expert Setup check box at the bottom of
the window for users who wish to bypass the setup
wizard. For now, let’s follow the wizard on both
PC’s.
Page 31

PC Relocator Ultra Control User Guide 33
3) On both PC’s, you should close all running programs
when given the opportunity. Click Yes to continue.
NOTE: You may recognize this as one of the optional
preparation steps we recommend you perform before
running PC Relocator Ultra Control. One of the
improvements we have made include the ability to
automatically close running programs and processes that
could interfere with your connectivity or relocation.
If you have not done so previously, you should let PC
Relocator Ultra Control shut down these programs and
processes at this time.
Page 32

34 PC Relocator Ultra Control User Guide
4) Please accept the terms of a standard license
agreement. Click I Accept on both PC’s to continue
with your relocation.
Page 33

PC Relocator Ultra Control User Guide 35
5) Running the latest version of PC Relocator is highly
recommended! Click Automatically Download
Latest Version button, follow the instructions, and
return to this screen. Click Next to continue.
NOTE: We recommend updating the copy of PC Relocator
on the Old PC first. If you perform this task on the Old PC
and successfully download and install a new version of PC
Relocator, the New PC “discovers" this and will ask you to
synchronize versions. Follow the synchronization prompts
on the New PC and return to this step.
Page 34

36 PC Relocator Ultra Control User Guide
6) You will be asked which PC you are currently setting
up. The Old PC has a shorter wizard and fewer
setup steps because almost all relocation options of
consequence are selected on the New PC (the place
where you are sending your data).
On the Old PC, simply click the option button next to
Old PC. Switch to the monitor on the New PC and
click the option button next to New PC. After you
have made your selection on each PC, click Next.
If you need more information on this step, click the Help
button or click the View Help link located in the left hand
information frame.
Page 35

PC Relocator Ultra Control User Guide 37
7) On both the Old PC and the New PC, you need to
select how you will relocate your data (basically, how
you will connect the two PC’s). You have six
connectivity options, the first three of which appear
on this wizard page (the second set of options
appears when you click “more options…” at the
bottom of the screen). The first set includes
Alohabob High-speed Transfer Cable (high-speed
parallel, which is strongly recommended for ease of
use and simplicity), Network Crossover Cable, and
CD/ Removable Media / Other Storage Device.
Click “more options…” and you will see Standard
Parallel Transfer Cable, PC to PC USB Bridge
Cable, and TCP/IP Network. Click “previous
options…” to return to the first wizard page.
Select matching options on both the Old PC and
the New PC (yes, the options MUST be the same or
you will not be able to establish a connection). Click
Next to continue.
Page 36

38 PC Relocator Ultra Control User Guide
NOTE: For this example, we will assume you
successfully connected via high-speed parallel or
standard parallel cable. TCP/IP and Crossover Cable
connections can be more difficult to establish, but
provide nice advantages for those running home
networks. Check out our Frequently Asked Questions
section if you run into problems, or use the Alohabob
Connectivity Wizard to help you get connected.
Also note that the option for CD/ Removable Media /
Other Storage Device is the one you choose if you are
interested in using Alohabob to backup files, settings,
and applications to a DMV (Digital Moving) file. More
information on creating and using DMV files can be
found in the online Help file (click the Help button on any
Alohabob screen) or on the Alohabob web site
(www.alohabob.com/support
).
8) After you select the relocation option and establish
the Old PC to New PC connection, Alohabob will run
a scan of the Old PC hard drive and gather
information on files, settings, and applications. You
should see the Old PC is ready window. The
remaining tutorial steps take place on the New PC.
Page 37

PC Relocator Ultra Control User Guide 39
9) Now let’s move to the New PC. You will see the
Initial Setup Complete screen. Click Next to
complete the setup.
NOTE: In order to move applications, the New PC must
have a “newer” version (or the same) of Windows, must
have matching language and locale settings, and the version
of Internet Explorer must be the same or newer on the New
PC. These restrictions do not apply to files transfers. You
can click View testing results to learn more about the
requirements for moving applications.
Page 38

40 PC Relocator Ultra Control User Guide
10) After the Initial Setup is Complete window appears
on the New PC, it’s time to select your current
licensing mode. If you have already purchased PC
Relocator Ultra Control, click the appropriate option
button, enter the serial number in the box, and click
Next. If you are evaluating the software for
purchase, click the second option button for trial
users and click Next.
NOTE: Trial mode expires after a set number of days.
Contact Alohabob for more information on Trial Mode
functionality. Also note that PC Relocator Ultra Control
saves a backup copy of replaced files and system
databases. If you install additional software on your
New PC after running PC Relocator Ultra Control, then
decide to UNDO the operation, the UNDO process will
overwrite many of the changes you made to your
system. If you evaluate PC Relocator but decide not to
purchase, please UNDO your relocation sooner rather
than later.
Page 39
PC Relocator Ultra Control User Guide 41
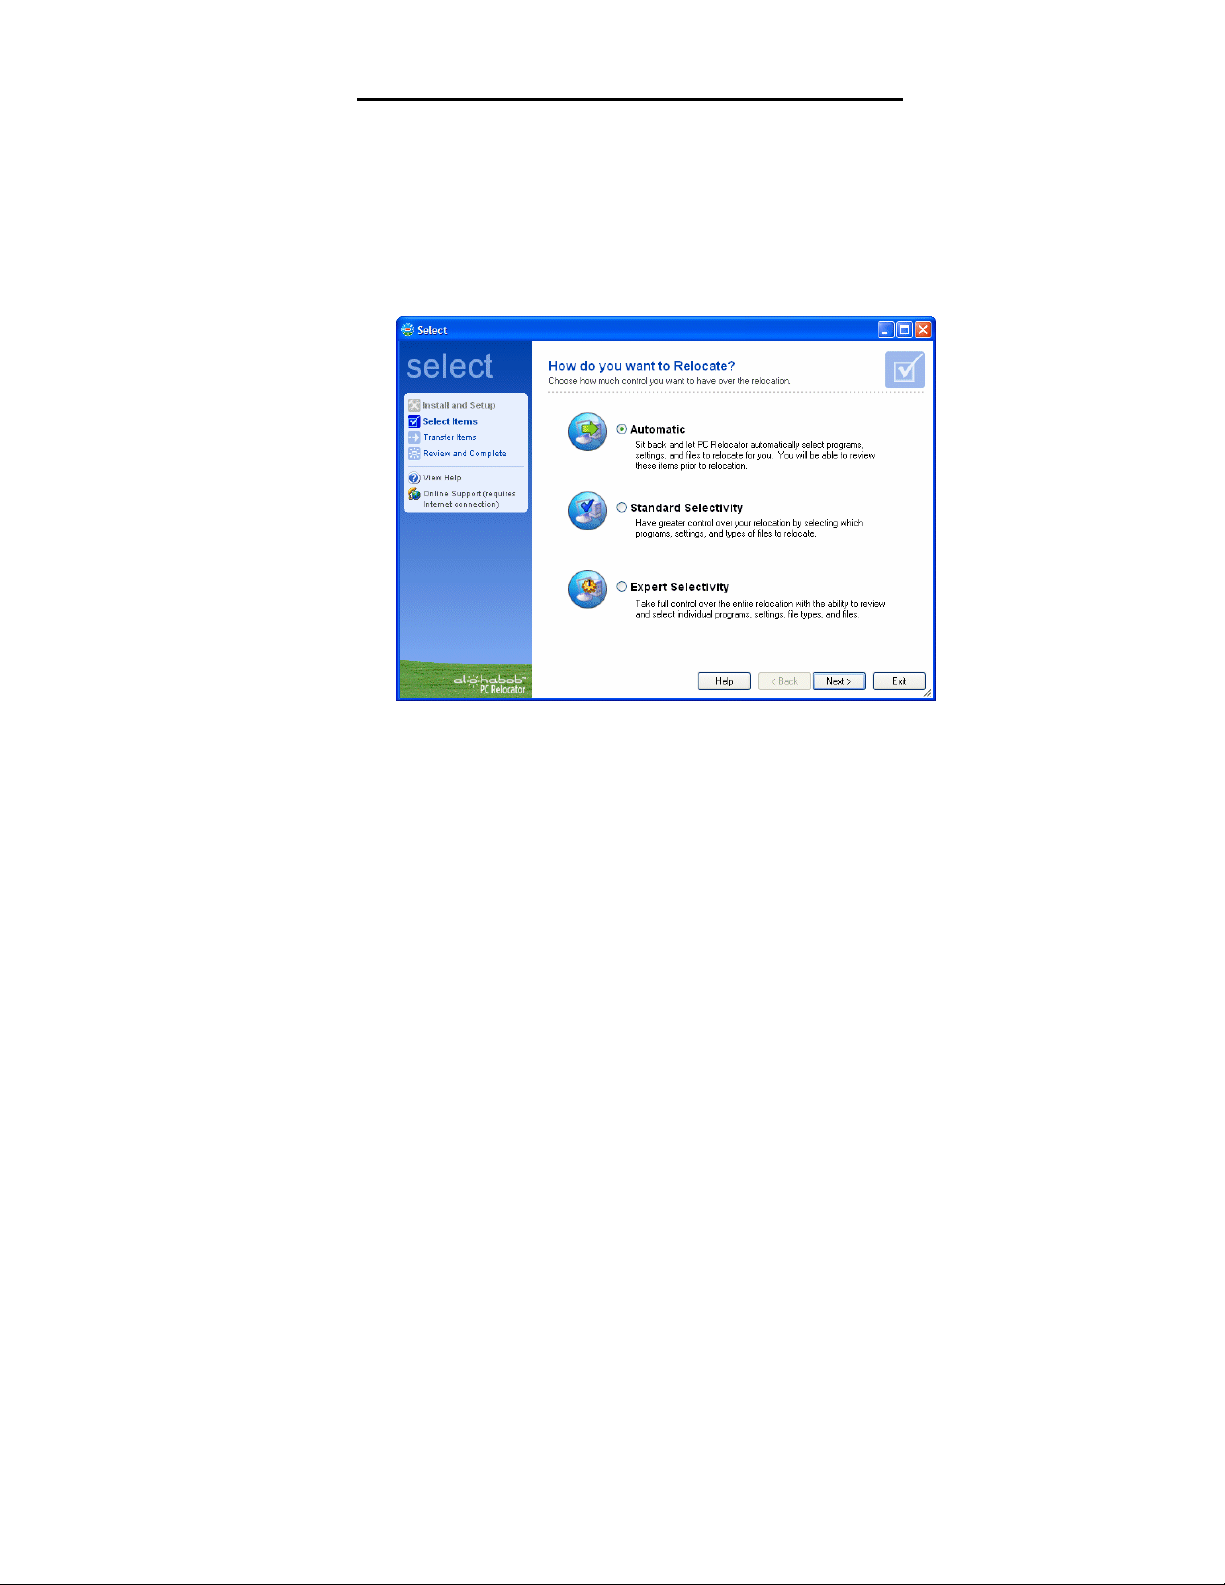
11) Now you can focus solely on the New PC. The next
screen that appears asks you to choose your
“relocation mode.” Each choice gives you various
degree of control over how (and what) you relocate.
For this example, let’s select the option button for
Automatic and click Next.
NOTE: You can find tutorials for running both Standard
Selectivity and Expert Selectivity relocations in the next
two sections of this manual. These alternative relocation
modes are more powerful than the Automatic mode. With
Standard and Expert Selectivity, you get the flexibility to pick
and choose individual programs for relocation, view ratings
on how individual programs are expected to perform on the
New PC after transfer, and drill down to select individual files
(or file types) for transfer.
Page 40

42 PC Relocator Ultra Control User Guide
12) PC Relocator analyzes your files, folders, and
applications, then creates an optimal relocation
scan. After the analysis finishes, the Pre-
Relocation Review screen appears. Read the
Summary, Details, and Recommendations, then
click Next to begin relocating your data.
The Pre-Relocation Review screen is designed to
provide you with as much information on the proposed
relocation as possible. You still have the option to go
back, change your relocation mode, and make
adjustments to the items you wish to relocate.
NOTE: If you forget which type of relocation you are
performing, look below the large blue select label in the
top of the left pane. Beneath select is the name of your
relocation mode (in this case, Automatic).
Again, Automatic mode is the least sophisticated (but
simplest to use) method for relocating your data. Ready
to move on to something more challenging? Read on.
Page 41

PC Relocator Ultra Control User Guide 43
Standard Selectivity Tutorial
Now that you’ve had some experience going through the
Automatic (and easiest) relocation mode, it’s time to
explore PC Relocator Ultra Control in it’s second most
powerful mode: Standard Selectivity.
Generally, you choose Standard over Automatic in order
to gain more choices on how to handle the relocation of
your data. Standard differs from Automatic in several
notable ways.
First, you get to choose which kinds of items to relocate
to your PC. By “kinds of items” we specifically mean
three groups of items, namely, Programs, Settings, and
Files. As you will see, one of the first things Standard
Selectivity mode asks you to do will be to select any (or
all) of these groups of items to be relocated.
Second, you’ll be asked to select which categories of
items you would like to relocate. The category choices
include Desktop, Windows Settings, Office and
Productivity, Finance, System, My Documents,
Internet and E-mail, Music Pictures and Video, Other
Programs and Data, and Unclassified.
Of these categories, the System and Unclassified
category items contain data that may not need to be
relocated. To read more about them, click the check box
next to the item when you see it on the Categories
window or click Help at any time.
Finally, you will be presented with a window that reviews
the programs PC Relocator intends to reinstall on the
New PC. Here you can view ratings for each application
(High, Medium, or Low), find out if PC Relocator feels it
will be able to successfully reinstall the program on the
New PC, and make any desired changes.
Page 42

44 PC Relocator Ultra Control User Guide
Step-by-Step: A Standard Selectivity
Relocation
If you followed the tutorial we presented in the Step-byStep: An Automatic Relocation section, you should be
ready to perform a Standard Selectivity relocation. If
you have not already done so, please review the steps
before continuing with this section.
1) When you are ready to begin your Standard
Selectivity relocation, start PC Relocator on both
PC’s. On the Old PC, you can stop on the Old PC
is Ready window. On the New PC, step through the
relocation wizard until you reach the How do you
want to Relocate? screen (shown below). This
time, click the option button next to Standard
Selectivity.
Again, remember that Standard Selectivity gives you more
control and selectivity than the Automatic relocation mode.
However, if you want the most control over the files, settings,
and applications PC Relocator can move for you, read the
tutorial section on performing Expert Selectivity relocations.
Page 43

PC Relocator Ultra Control User Guide 45
2) Next, you will need to select from a short list of
kinds of items to relocate. You can select
Programs, Settings, Files, or any combination of the
three. For this relocation, make sure you put a
check mark in all three checkboxes. Click Next to
continue.
NOTE: By default, the My Documents folder gets
transferred every time a relocation is performed. If you want
to make absolutely sure an item comes over (even an item
that PC Relocator would normally restrict you from
transferring, like DLL files or miscellaneous EXE programs),
throw them into My Documents and they will relocate to the
New PC.
Page 44

46 PC Relocator Ultra Control User Guide
3) The Categories window appears next. The power of
PC Relocator Ultra Control is evident on this
selection window. From here you can select specific
categories of items that you wish to relocate. If you
want to move your Desktop wallpaper and shortcut
items plus your MP3 collection, simply select (place
a check mark in) the boxes for Desktop and Music,
Pictures, and Video. You can then de-select
(uncheck) everything else and just move those
items. When ready, click Next to continue.
NOTE: Users who wish to create DMV files should probably
de-select the System and Unclassified items check boxes.
These two folders contain numerous extra files like fonts and
miscellaneous DLL’s that (especially for those creating DMV
files for backup or archive purposes) do not need to be
stored. If you de-select these two items, you can save
significant disk space and relocation time.
Page 45

PC Relocator Ultra Control User Guide 47
4) Provided you selected Programs in the previous
step, you will now see the Review programs to
reinstall screen. Here, you get a good look at the
application rating system that makes PC Relocator
Ultra Control exceptional. Select applications you
wish to relocate using the check boxes to the left of
the Rating column, or de-select the box if you do not
wish for the program to be moved. Click Next.
NOTE: This window does not give you the ability to
change the rating an application is given – only PC
Relocator can determine the rating an individual application
receives and how successfully it will transfer.
Use the drop list in the top left to filter your view. The default
view is <All>, and this view shows ratings for every
application PC Relocator found registered with Windows.
Each application that can be transferred gets a High (green),
Medium (yellow), or Low (Red) rating, depending on what
PC Relocator can discover about the program. Applications
that are inappropriate for re-installation, already exist, or do
not need to be re-installed on the New PC get a black
rating.
Page 46

48 PC Relocator Ultra Control User Guide
5) After you click Next, PC Relocator generates an
optimal relocation plan. This scanning window is
seen at various points during any given relocation as
PC Relocator Ultra Control compares and analyzes
your relocation choices.
During the analysis phase, adjustments are made to the
overall relocation plan. You have the option of canceling the
operation here, but for this tutorial, let’s let the process
complete successfully.
Page 47

PC Relocator Ultra Control User Guide 49
6) If you went through the Automatic relocation tutorial,
you have already seen this window. PC Relocator
provides you with one last look at the relocation
options you have chosen. You can scroll down
through the list to review your selections. When you
are ready to relocate your data, click Next.
NOTE: If you want, you can either Save or Save and Print
a copy of your pre-relocation review report. We highly
suggest printing this report so later, after you reboot your
New PC, you can compare your selections with the results of
the relocation and ensure you asked PC Relocator to
transfer everything important to you.
Page 48

50 PC Relocator Ultra Control User Guide
7) After your data has finished relocating to your New
PC, you will receive the Relocation is Complete
screen. After twenty seconds, the New PC will
automatically reboot in order to perform some house
cleaning.
NOTE: You have two additional check boxes here. You can
Exit PC Relocator on the Old PC, Shutdown the Old PC,
or do both if you choose.
Page 49

PC Relocator Ultra Control User Guide 51
Expert Selectivity Tutorial
The most powerful relocation mode is Expert
Selectivity. When you perform a relocation using
Expert Selectivity mode, you have much wider selection
of options available. The tutorial below gives you an
idea of how powerful PC Relocator Ultra Control is, and
how you can take full control over the relocation process.
Step-by-Step: An Expert Selectivity Relocation
1) Let’s start our tutorial on Expert Selectivity. Again,
you should have already completed (and cancelled)
the demo relocation we did for the Automatic
relocation tutorial. Restart PC Relocator Ultra
Control on your New PC, and follow the wizard
through the screens until you arrive at the relocation
mode selection window.
Page 50

52 PC Relocator Ultra Control User Guide
2) Here, you can select or de-select what kinds of items
you wish to relocate. For this example, check each
box (Programs, Settings, and Files), and click Next.
NOTE: If you ever lose track of which relocation mode you
are in, check the small blue label in the top left side of the
left frame. You will see the label reads Select and below it,
Expert. This label indicates you are selecting files using
Expert mode.
Page 51
PC Relocator Ultra Control User Guide 53
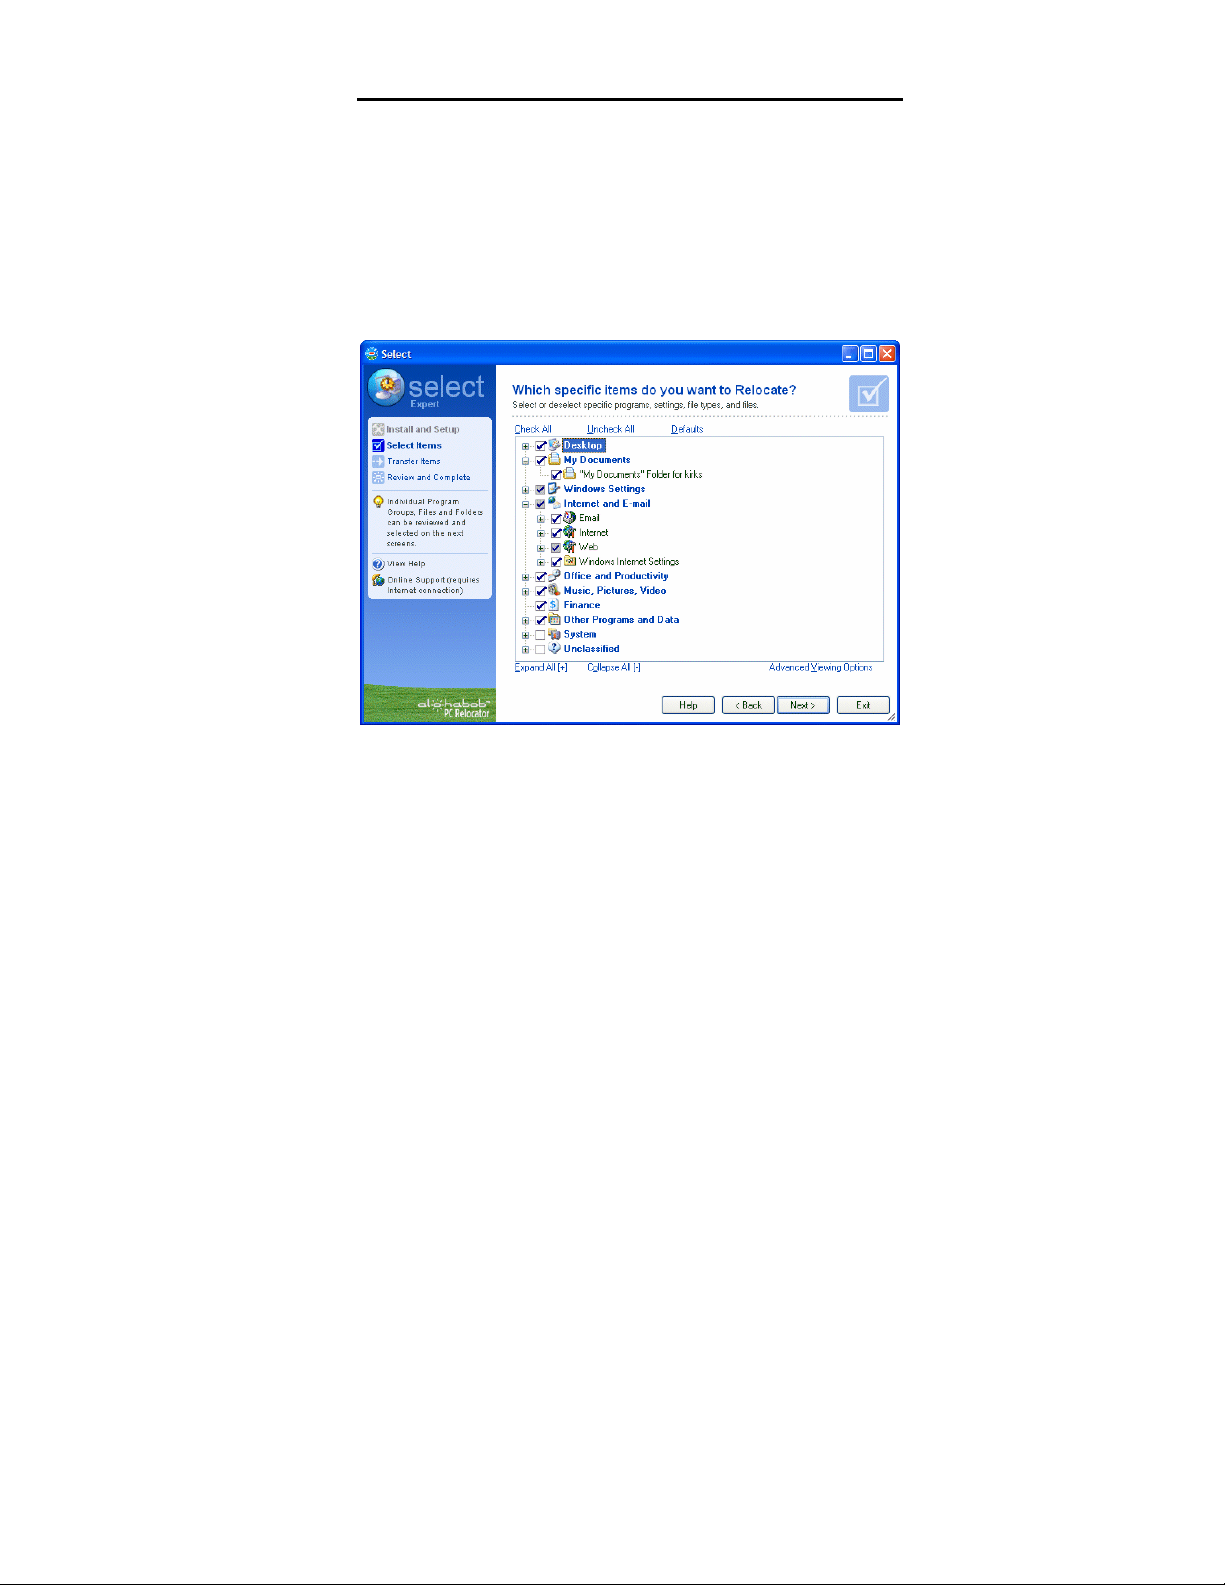
3) The Which specific items do you want to
Relocate? screen gives you the opportunity to
selectively include or exclude files from common
categories such as your Desktop and the My
Documents folder for your individual user name.
Place check marks in the boxes you wish to select
for transfer, then click Next.
NOTE: PC Relocator Ultra Control has grouped the possible
selection items into categories related to the function of the
item. These categories are the same as those found on the
Standard Selectivity screen Which categories do you want
to Relocate? For example, Office Productivity, Music,
Pictures, Video, and Finance are all top-level categories
that indicate the types of files you will find in the associated
folders.
This makes it easy for you to transfer large numbers of items
related to programs you use frequently, and also lets you
efficiently exclude from the relocation groups of files that you
do not want.
Page 52

54 PC Relocator Ultra Control User Guide
Next, let’s review what programs we can re-install on the
New PC. This list looks very similar to the list generated
during the Standard Selectivity relocation, but there are
some changes. Instead of just taking everything like we did
in the last tutorial, let’s de-select some programs. You can
de-select a program to re-install by removing the check mark
from the box directly to the left of the application name, then
click Next.
NOTE: Direct your attention to the item marked in black at
the bottom of the screen. This program will not be reinstalled because it already exists on the New PC. How can
you tell? Look under the Remarks column to the right. Any
information on how or why an application will not transfer (or
may transfer, but with conditions, such as in the case of
programs rated Medium or Low) appears here.
Page 53

PC Relocator Ultra Control User Guide 55
4) The next feature (redirection) is advanced control
for expert users only.
On the redirection screen, you can choose to
redirect and re-install an application anywhere on
the New PC that you want. You can change it’s
folder location, the name of the folder, and if you
have multiple drives on your New PC (not shown in
this example), even the drive the program gets
installed on. For this tutorial, we skipped redirection
– PC Relocator Ultra Control will install the program
in the same directory as it was found on the Old PC.
Before you click Next, click the Redirect label in the
top left of the screen.
Page 54

56 PC Relocator Ultra Control User Guide
5) NOTE: You will see the following screen if you click
the Redirect button. This window asks you to tell PC
Relocator Ultra Control where you want to redirect
the program during the re-installation process.
For this example, do not select to redirect any
applications. Click Cancel to return to the
redirection screen, then click Next.
NOTE: To select a redirection path, single click on the label
in the right hand text box.
Page 55

PC Relocator Ultra Control User Guide 57
6) Now it’s time to review our complete list of files to
relocate. The Review Files to Relocate screen
gives you additional flexibility to pick and choose
files that might have been excluded earlier as PC
Relocator Ultra Control analyzed your Old and New
PC’s.
To select additional files or folders, simply expand
items in the tree by clicking the PLUS (+) sign, then
place a check in items you wish to move or remove
the check to de-select items.
Before you click Next, let’s take a look at how you
can apply filters to our list of reviewed items to
narrow down or expand the choices. Click the blue
Advanced Viewing Options label near the center of
the screen.
Page 56

58 PC Relocator Ultra Control User Guide
7) The Advanced Viewing Options screen allows you
to filter in or out either hidden files or folders, or files
and folders that are either checked or unchecked.
You can filter out everything except specific items
you wish to view. If you want to see what .WAV or
.MP3 files PC Relocator has catalogued, select
Multimedia – audio from the drop list and click OK.
The filter will be applied, and you will only see these
file types when you expand the folder list back on
the Review Files to Relocate screen.
For now, leave the default selections and click
Cancel. When you return to the Review Files to
Relocate screen, click Next to continue.
NOTE: Advanced users can use the Registered Program
and Extension (File Type) drop lists to perform additional
filtering. The Registered Program list shows all programs
registered with the Windows operating system (these show
up in the Control Panel under Add / Remove programs).
The Extension drop list shows files by their Windows
extension. For example, a Microsoft Word document shows
up as .DOC, a Microsoft Excel spreadsheet as .XLS, etc.
Page 57
PC Relocator Ultra Control User Guide 59
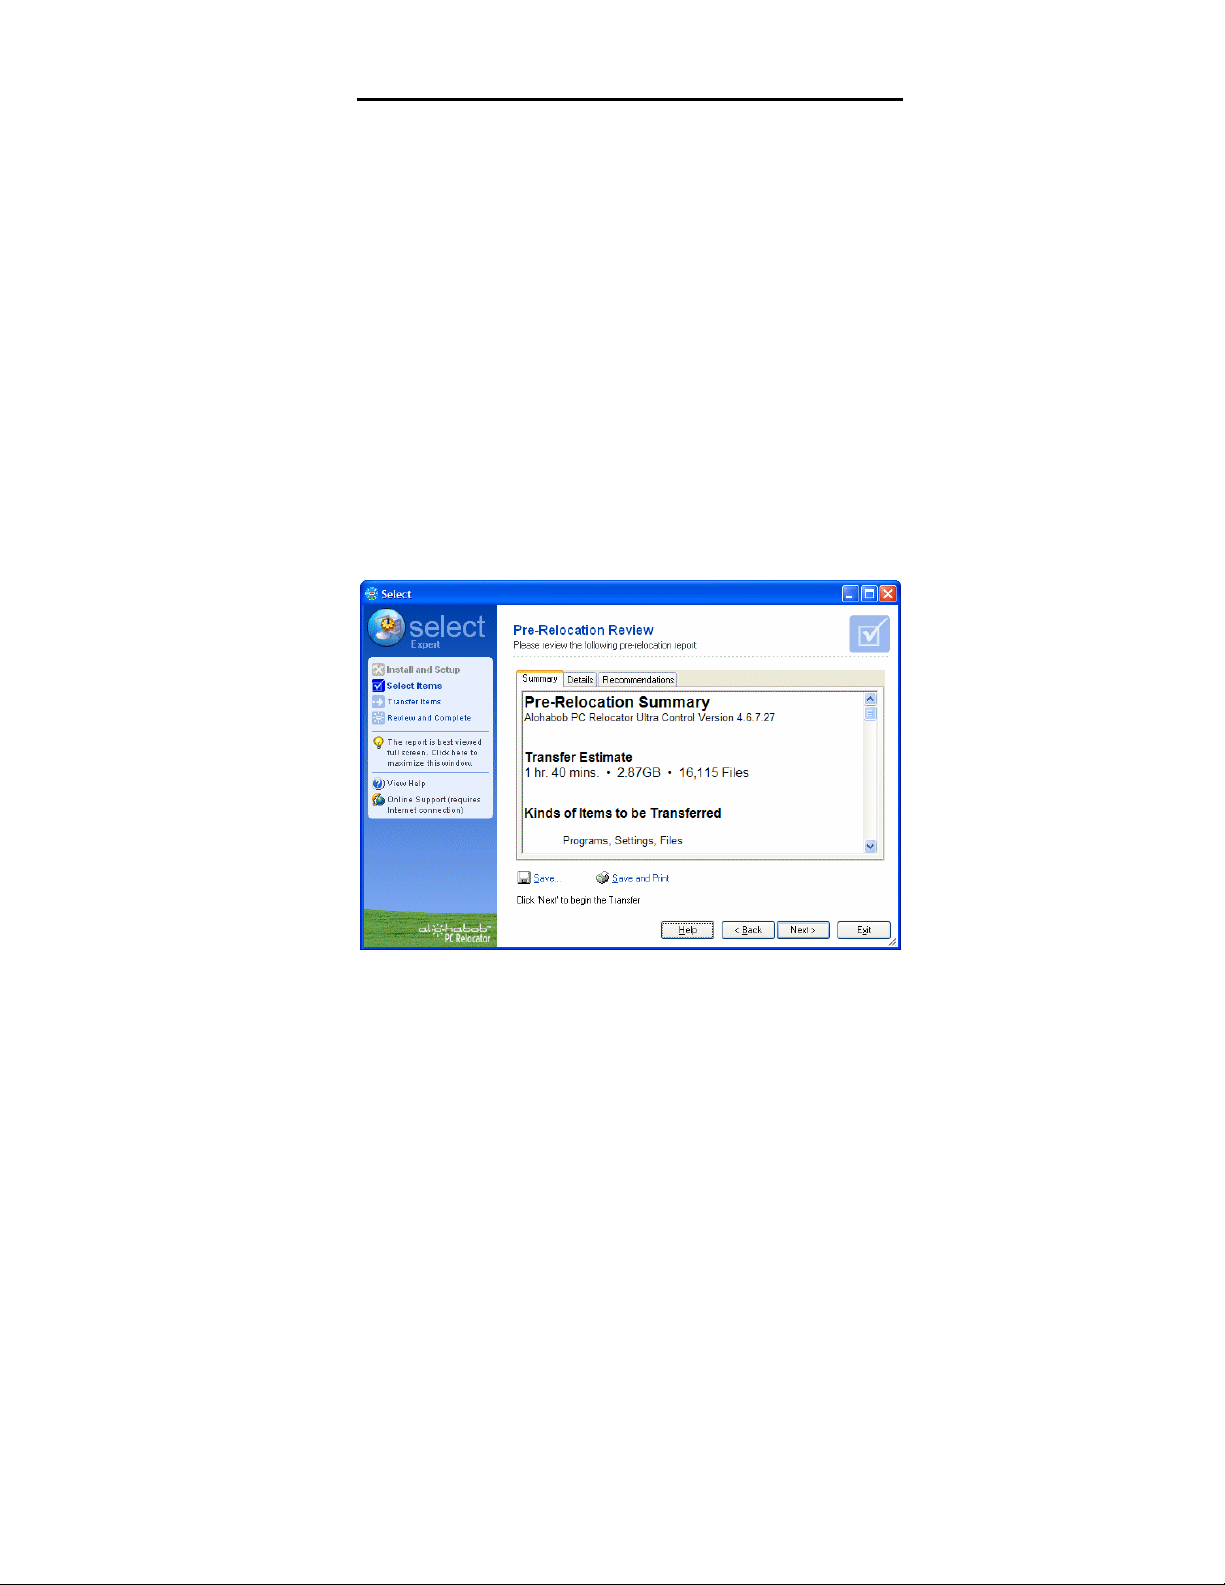
8) After making all your selections, it’s time to perform
a final review of your choices. The Pre-Relocation
Review screen allows you to review your choices
and save or print the pre-relocation report.
By default, the Summary report appears first. This
report shows you how much disk space your
relocation will take up on your New PC, the transfer
time estimate, and a short list of the items to be
moved. If you want more information, click the
Details tab to see a comprehensive list of the items
you choose to relocate, what directories they will
relocate to, and the names of all the programs, files,
and settings that will migrate to your New PC.
When you are ready to relocate, click Next to
continue, or Exit if you wish to relocate later.
Page 58

60 PC Relocator Ultra Control User Guide
9) Congratulations! If you are reading this step, you
have successfully finished your relocation project.
After your New PC reboots, check your PreRelocation Review report against the files, settings,
and applications you wanted to migrate. We are
certain you will be pleased with the results!
NOTE: You can run PC Relocator Ultra Control again to
either UNDO the migration if necessary, or to relocate any
programs you might have forgotten to move the first time
around. More information on the UNDO procedure is
available at http://www.alohabob.com/support
.
Page 59

PC Relocator Ultra Control User Guide 61
After the Relocation
Contacting Technical Support
When the relocation is complete, a Congratulations
screen appears on the Old PC, and the New PC reboots
automatically after a few seconds.
When the New PC has rebooted, you should open your
programs, look for your data, etc. to make sure that
everything is operating as expected. Depending on what
you find, you may want to:
• Troubleshoot problems
• Contact Technical Support
• View the relocation report
• Undo the relocation
• Clean up after the relocation
Troubleshooting information can be found in a number of
places:
Online Help. Clicking the "Help" button on any PC
Relocator Ultra Control screen will open a help topic that
is pertinent to the current PC Relocator Ultra Control
screen. You can also search through the Contents for a
particular topic. This information is more extensive than
the information in the Troubleshooting guide.
Website. Our support page
(http://www.alohabob.com/support
extensive and up-to-date troubleshooting section than
either the Troubleshooting guide or online Help. Please
visit the site for the latest information on PC Relocator
news, issues, and compatible programs.
) has a more
Viewing the Relocation Report
Page 60

62 PC Relocator Ultra Control User Guide
To view a report detailing what files were transferred
during the relocation, what files were left behind (and
why), how long the relocation took, etc. just start PC
Relocator Ultra Control on the New PC after the
relocation is finished, click on "Report", and follow onscreen instructions.
Cleaning Up
During the process of the relocation, PC Relocator Ultra
Control creates a number of by-products, including log
files that keep track of what was transferred and backup
folders that contain copies of any files that were changed
or replaced. At some point you may wish to delete these
files and folders to free up more space on your New
PC's hard drive.
To clean up the relocation by-products, just start PC
Relocator Ultra Control on the New PC and then click on
the "Clean-up" button at the first available screen.
Use this feature with caution! If you perform the cleanup operation on your PC, you will no longer be able to
Undo your relocation or create relocation reports! Also,
the ability of Technical Support to troubleshoot problems
will be impaired. Information contained in relocation
reports is extremely important to Alohabob Support
personnel in determining the circumstances of your
relocation. If you are experiencing relocation issues,
please DO NOT perform a clean-up without speaking to
Alohabob Technical Support first.
.
Page 61

PC Relocator Ultra Control User Guide 63
Undoing Your Relocation
In the unlikely event you wish to “undo” your relocation,
we strongly recommend that you exhaust your
troubleshooting options before un-doing the relocation.
To undo your relocation and return your PC to its original
state, start PC Relocator Ultra Control on the New PC
and click "Undo" at the first screen.
On Windows 2000 Professional and Windows XP, the
Undo process will begin when you press the Undo
button.
NOTE: On Windows 95, 98, and Me, the Undo must be
run from DOS and cannot be performed while Windows
is running. Therefore when you click on Undo, you will
be given detailed instructions for performing the undo
from DOS in the online Help file.
Page 62

64 PC Relocator Ultra Control User Guide
Support Policy
FREE ONLINE TECHNICAL SUPPORT
Our support website offers extensive online knowledge
and self-help tools that provide easy to understand
answers to most common issues.
Visit us online at:
http://www.alohabob.com/support
TELEPHONE SUPPORT
If you wish to contact a support engineer for incidentbased support, call us at 954-845-9941, Monday through
Friday, 8:00 A.M. to 8:00 P.M., and on weekends from
10:00 A.M. to 6:00 P.M., Eastern Standard Time. You
may also request an appointment via e-mail at:
premiumsupport@alohabob.com
FEES
There is a standard fee of $19.95 for every support
incident. A non-refundable $15.00 service fee will be
incurred at time of call. The remaining $4.95 is
refundable only if your issue is not resolved.
90 Day Free Support (Registered Users Only)
Register at http://www.eisenworld.com/register to take
advantage of your 90 days of free telephone technical
support (from the date of your first call) at no charge to all
registered users of Eisenworld Software. After 90 days
normal support fees are incurred.
Page 63

PC Relocator Ultra Control User Guide 65
Frequently Asked Questions
How do I use PC Relocator with a single
monitor?
It is easiest to perform a PC-to-PC relocation with two
monitors. Since this is the most common setup, the
instructions below assume that you have a monitor on
each PC and that you can conveniently go back and
forth between the PCs.
However, if you have just one monitor to share between
the two PCs, you may find it inconvenient to switch the
monitor back and forth after each step. If you wish, you
can minimize switching the monitor by rearranging the
steps as follows:
If you have the box version of PC Relocator Ultra Control
and if only one PC has a CD-ROM or DVD drive,
connect the monitor to the PC with the CD-ROM/DVD
drive and use the PC Relocator Ultra Control installation
CD to create installation diskettes for the other PC (see
the Setup section for instructions).
If you purchased the downloadable version of PC
Relocator Ultra Control, connect the monitor to the PC
where you downloaded PC Relocator Ultra Control and
create installation diskettes for the other PC (see the
Setup section, below, for installation instructions).
Connect the monitor to the Old PC and follow the Setup
and Select instructions. When the Old PC's screen
displays Waiting for New PC to connect, you are finished
on the Old PC.
Connect the monitor to the New PC and follow all
instructions, starting with the Setup topic.
Page 64

66 PC Relocator Ultra Control User Guide
What is an officially installed application?
Not every program comes with an installation package,
ready to unpack and install on your hard drive.
Programmers often create small programs on their own
for distribution to friends or for personal use, etc. If you
happen to have any of these “home grown” applications,
or have copied one to your local hard drive from another
location, PC Relocator Ultra Control may not relocate
this file from the Old PC to the New PC by default. The
reason for this is because PC Relocator searches
through the Add / Remove programs list on your Old
PC to determine what applications we can and cannot
relocate. If we find a program on this list, we can
relocate the program and its associated files. If we do
not find the program on the Add / Remove programs list,
you will need to manually select the program file yourself
(they usually have a file extension of .EXE). To move a
single program manually, you will need to use Expert
Selectivity mode or put the program file into your My
Documents folder.
How can I use PC Relocator for disaster
recovery?
A Digital Moving File (DMV) is a way to save your data
so that it can be kept on any storage device including
intermediate storage devices such as Zip disks, Jazz
disks and others. If the DMV file is larger than the
storage capacity of the media, PC Relocator Ultra
Control will span the file across multiple media (i.e. Zip
disks). DMV files can be used for standard migrations as
well as disaster recovery.
NOTE: Due to the selectivity feature of PC Relocator
Ultra Control, a DMV file MAY NOT contain every file
desired or needed. Therefore it is HIGHLY
Page 65

PC Relocator Ultra Control User Guide 67
RECOMMENDED that you make sure that all the files
that are needed are included in the DMV file! This can
be done when you select files, and you can later review
your selections using the same screen.
From the Choose where to Store Data screen:
1) Click Browse.
2) On the Old PC:
a) Select the desired intermediate storage
location and assign a name to the file.
b) Click Save.
c) Select Validation Option:
Choose Minimal, Fast, or Thorough.
depending on the level of reliability desired.
d) Type in the desired size of the DMV file.
Maximum file size is 4000 MB.
From the Specify Where the Old PC’s data was
Stored screen:
1) Click Browse.
2) On the New PC:
a) Select the desired intermediate storage
location and select the name of an existing
intermediate storage file.
b) Click Open.
c) Click Next.
What do the program ratings mean?
After the PCs are scanned for installed applications,
each application is assigned a rating based on the ease
and/or desirability of migrating the application. Ratings
follow a stoplight pattern of green-yellow-red (green =
high rating). An additional rating of black is for
Page 66

68 PC Relocator Ultra Control User Guide
applications that you cannot choose to move.
Applications may receive a low rating for a few reasons:
The application may be installed in a non-standard way.
Most programs follow standard installation procedures,
and PC Relocator Ultra Control uses this fact to analyze
the applications it finds. However, if some expected
installation information is missing, other less precise
analysis methods are used. This type of application
receives a yellow or red rating, depending on how much
expected installation information was missing.
By default, these applications will not be migrated, but
you can override the default decision. The application
may very well migrate successfully.
The application may be incompatible with the New PC
operating system. This happens most often when
migrating a system utility (e.g., firewalls or disk recovery
tools) from a Windows 95, 98, or Me Old PC to a
Windows 2000 Professional or XP New PC. This type of
application generally receives a red or black rating.
By default, this kind of application will not be migrated.
You can choose to override the default decision, but the
application will most likely not work on the New PC.
You may have chosen not to relocate the partition where
the application is located (Expert Mode option only). If a
partition has been de-selected, nothing on the partition
can be migrated. Therefore, applications on de-selected
partitions receive a black rating. If you wish to migrate
the application, you must click the Back button until the
"Select Drives/Partitions" screen appears, then check
the desired drive/partition. Otherwise, you cannot
override the decision not to migrate the application.
The application may be part of the operating system.
Some examples include WordPad, Notepad, Windows
Messenger. This kind of application receives a black
rating. Because this kind of program is closely tied to the
Page 67

PC Relocator Ultra Control User Guide 69
Old PC operating system, it will not be migrated to the
New PC. You cannot override this decision.
What do all the icons on the screen mean?
Under the name of each application listed, there is at
least one icon. The icons serve multiple purposes:
1) They represent the shortcuts relating to the
application. For example, on the Start Menu there may
be several shortcuts relating to the application -- one for
the application itself, one for the user manual, one for
the Help file, etc. The icon for each of these shortcuts is
displayed under the name of the application.
2) They give you visual clues as to the identity of the
application. If you do not recognize the name of the
application as displayed in the list, the icons may be
familiar to you and therefore may help you determine
which application it is.
Sometimes PC Relocator Ultra Control finds conflicting
information as to the name of the application. When
there are several possible names to choose from, PC
Relocator Ultra Control may pick a name that you do not
recognize.
How can I transfer a program PC Relocator
didn’t find?
PC Relocator Ultra Control picks applications based on
what it finds using several discovery methods. The most
common way to know if PC Relocator Ultra Control will
be able to relocate a program is in the Add / Remove
Programs applet found in your Control Panel. If an
application exists there, chances are PC Relocator Ultra
Control will be able to move or export the application to
Page 68

70 PC Relocator Ultra Control User Guide
either another PC or a DMV (digital moving) file.
If you use a program that PC Relocator Ultra Control did
not find, you may still be able to relocate the program.
To relocate a program that does not appear on the
Review Applications to Reinstall list, you will need to
manually select the files related to that application on the
Files and Folders selection screen (later in the relocation
process).
If there is a program that you know exists but PC
Relocator Ultra Control will not let you transfer for any
given reason, simply place that program or file into your
My Documents folder. By default, the My Documents
folder is relocated from the Old PC to New PC.
Can I still transfer data related to a program?
Yes. Use Expert mode to select the files and folders you
want to transfer, and proceed with the relocation.
Which programs are compatible with Windows
XP?
Microsoft has created several tools you can use to check
the compatibility of the software on your Old PC.
Visit the following Microsoft website and search the
Windows Catalog to find which hardware and software
is compatible with or designed for Windows XP. The
web address is:
http://www.microsoft.com/windowsxp/pro/howtobuy/upgr
ading/compat.asp
If you have a high-speed connection, you can download
the following tool called, **Windows XP Upgrade
Advisor** at:
Page 69

PC Relocator Ultra Control User Guide 71
http://www.microsoft.com/WINDOWSXP/pro/howtobuy/u
pgrading/advisor.asp
How are user profiles relocated?
User Profiles are a feature of Windows that allows each
person that logs onto a PC to make individualized
customizations, such as changing the background
wallpaper or the e-mail notification sound.
The default plan for user profile relocation is a current
user to current user relocation, which merges the Old
PC's currently logged in user with the New PC's
currently logged in user. This is what works best in most
relocations. No new user profiles will be created on the
New PC, and only the current Old PC user profile will be
transferred.
NOTE: It is not possible with the retail version of PC
Relocator Ultra Control to migrate all user profiles at the
same time. You can transfer the currently logged in user,
but not all user profiles at once. If you want to relocate
all user profiles, you will need to run PC Relocator Ultra
Control more than once, logging on both the Old PC and
the New PC as the user you wish to transfer.
If you need to perform a relocation where all users are
transferred at the same time, contact Alohabob Sales for
information on our PC Relocator Professional product
for small to medium sized businesses.
What is a setting or preference?
A setting is loosely defined as a customization that you
have made, or could make, on your PC. Examples of
common settings include the picture you use as
background wallpaper, the sound your PC makes when
Page 70

72 PC Relocator Ultra Control User Guide
you receive a new e-mail message, and the shape of
your mouse pointer.
The most common settings are selected during a
relocation.
Settings supported by PC Relocator Ultra Control are
grouped into three categories:
• Desktop settings
• Internet settings
• Windows settings
Desktop Settings
The Windows desktop -- not to be confused with a
desktop computer -- refers to the main screen you see
after your computer has started. Its main components
are:
1) Background wallpaper. The picture that occupies
most of the screen.
2) Files and shortcuts. These can be files, or
shortcuts to files, folders, or programs.
3) Taskbar. Usually located along the bottom of the
screen; areas of the taskbar include:
a) Start button.
b) Quick Launch. This is usually right next to
the Start button; it gives you quick access to
program shortcuts that you place here.
c) System Tray. Also called the “systray.” It is
usually on the right side of the taskbar, and
it contains the clock as well as icons for
“startup” programs (programs that run
automatically when Windows starts).
All of the above are customizable to some extent and
are therefore considered settings. However, because
the system tray icons are most closely related to
Page 71

PC Relocator Ultra Control User Guide 73
programs installed on the PC, they are considered part
of the application. Therefore, they are not included in the
group of Desktop Settings. Instead, a given system tray
icon is relocated, or not, depending on whether the
related application is being relocated.
Internet settings
As the name implies, Internet Settings include settings
for internet-related activities and programs, including:
1) Connecting to the Internet (Dial-up Networking).
2) Email files and account settings.
3) Bookmarks and favorites. This does not include AOL
favorites, which are relocated, or not, depending on
whether the AOL program is being relocated.
4) Internet Options. This is the same "Internet Options"
available via the Control Panel.
5) Cookies. Some websites leave "cookies" on your
computer that make access to that website easier in
the future.
6) History. Internet Explorer keeps track of the Internet
sites you've visited.
Windows settings
In general, this category includes settings that you can
change via the Control Panel. However, not all Control
Panel settings are supported by the current version of
PC Relocator Ultra Control. In addition, certain Control
Panel settings – for example, "Internet Options" – are
included in other groups of settings.
Other Applications
In general, this category includes common Microsoft
Office settings.
What should I do about security programs?
Page 72

74 PC Relocator Ultra Control User Guide
Security programs, including anti-virus software, privacy
tools that partition your disk, firewall software, etc., can
cause problems for PC Relocator. Here are a few tips to
get you past these issues.
• If you have a program called PGPDisk, be sure
to shut down PGPDisk on the Old PC before
starting PC Relocator Ultra Control, so that the
PGPDisk file can be transferred.
• If you run Norton or McAfee anti-virus software,
please be certain to shut down either the
process or the service before starting PC
Relocator.
• Other programs, like ZoneAlarm, Armor2Net,
etc., should also be shut down before starting
PC Relocator. These programs tend to block
Internet and/or intranet traffic, and could give
problems when attempting to connect your two
PC’s.
What should I do about Windows version
conflicts?
In some cases, the version of Microsoft Windows on the
New PC is older than the version on the Old PC. If this
happens, program relocation using PC Relocator Ultra
Control will not be available (though file transfers will still
be permitted).
The main problem here is that you are attempting to
relocate from a higher version of Windows to a lower
version (for example, Windows 98 to Windows 95). Or,
you may be attempting to relocate from a later release of
the same version of Windows to an earlier release (for
example, Windows 95c to Windows 95a).
Page 73

PC Relocator Ultra Control User Guide 75
When relocating to the same operating system version,
you must ensure that the New PC has a more recent
release. For example, Windows 95 release "a" (95a) will
relocate to release "c" (95c), but not vice versa. Make
the appropriate adjustments and try your relocation
again.
To fix this problem, you must ensure that the version and
release of Windows on the New PC are the same as or
higher than the version and release of Windows on the
Old PC. Your most feasible option may be to upgrade
Windows on the New PC.
To locate your version of Windows, right-click on My
Computer and select Properties. The version is
displayed on the General tab. For information about
upgrading, see the Microsoft Windows update site at
http://windowsupdate.microsoft.com
.
What should I do about Internet Explorer
conflicts?
If the version of Internet Explorer (IE) on the New PC is
older than the version on Old PC, PC Relocator Ultra
Control will not permit a transfer of programs (but you
will still be able to transfer files).
When it comes to versions, the same restriction that
applies to Windows as a whole applies to IE as well –
namely, the version on the New PC must the same as or
higher than the version on the Old PC. This is important,
even if you do not use Internet Explorer as your default
web browser. A full relocation is not possible if this
requirement is not met.
To locate your version of Internet Explorer, go to Help |
About Internet Explorer from the Internet Explorer
Window. The information screen will display the version
Page 74

76 PC Relocator Ultra Control User Guide
number. One of the options for resolving the IE version
conflict appears below.
If you have the CD version of PC Relocator Ultra
Control, the files necessary to upgrade the New PC to a
recent version of IE are included. With Windows
Explorer, open the folder containing the IE upgrade.
Double-click on the IE6SETUP.EXE icon to begin the
installation of Internet Explorer version 6.0.2800 (or
greater). To save time, choose Install Minimal.
Can I relocate my data if my locale settings
differ?
For various reasons, some folks have different locale
and/or regional settings on their Old and New PC’s.
If your Regional Settings are not identical on both PCs,
you will not be able to relocate applications, and will be
allowed to perform only a partial relocation consisting of
your My Documents folder and your Internet Explorer
Favorites folder). Note that this is a rare occurrence
and is easily fixed.
To change the Regional Settings without exiting PC
Relocator Ultra Control, activate the Start menu on each
PC. Use the Ctrl-Esc key combination or the Windows
key (next to the Ctrl key). Choose Settings | Control
Panel | Regional Settings and click the Regional
Settings tab. Adjust the language setting on one PC to
match the other. Click OK and close the Control Panel to
return to PC Relocator Ultra Control. On the New PC,
Click Back and then Next to begin the scanning process
again.
Page 75

PC Relocator Ultra Control User Guide 77
What should I do if the transfer stops?
Sometimes, PC Relocator Ultra Control stops scanning,
or it loses connection during the scan phase or the file
transfer phase. An error message may be displayed.
The causes of these problems are essentially the same
as the causes of initial connection problems: incorrect
hardware configurations, faulty physical connections, or
software running in the background. For more details,
please refer to the Connectivity troubleshooting sections
for parallel cable and TCP/IP network in the online Help
file or on the Alohabob Support website. If this does not
help, contact Alohabob Technical Support for
troubleshooting assistance.
If you receive a “Critical Error. PC Relocator cannot
continue due to path errors,” message do not panic.
You will be given 2 choices, Ok and Cancel. If you
choose Ok, it will skip this program. If you choose
cancel, PC Relcoator will exit to the desktop. This will
allow you to make changes to the registry. Usually,
these programs/registry entries are specific to the
Operating System and will not be transferred to the New
PC. Normally, you can just skip these by selecting Ok.
For more information, please go to the following link:
http://www.alohabob.com/support/patherrors
What if I don’t have enough disk space?
If you see the message Not Enough Disk Space
displayed on your New PC, there may be two reasons
for this error message.
If you are sure there is enough space available on the
New PC, the problem is likely due to the presence of
multiple drives and/or partitions on both PCs. In
Page 76

78 PC Relocator Ultra Control User Guide
calculating the available space, PC Relocator Ultra
Control performs a drive-by-drive comparison. That is, it
compares the size of the New PC’s C: drive with the Old
PC’s C: drive, and the New PC’s D: drive with the Old
PC’s D: drive, etc. If any New PC drive/partition is
smaller than the corresponding Old PC drive/partition,
you will get the disk space error.
You may be able to delete unnecessary files and/or
move files temporarily to create the space PC Relocator
requires. If you are having trouble, please call Technical
Support for assistance.
If the space on your New PC is less than the disk space
on the Old PC you cannot perform a full relocation. If
you are marginally close to the size limitations, you can
remove some files or applications from your Old PC in
order to do a full relocation. PC Relocator Ultra Control
gives you the option of performing a partial relocation in
which, only certain items are transferred to the New PC.
Here are some suggestions for overcoming disk space
issues.
First, uninstall any programs that are no longer useful.
This is performed from the Add/Remove Programs icon
in the Control Panel. Only programs that were designed
for Windows can be removed by using the Add/Remove
Programs Properties dialog box. For all other programs,
check that program documentation to determine which
files should be removed.
Delete any document or data files that are no longer
important to you.
NOTE: We recommend making a backup before
deleting any files!
If your Windows versions support it, run the Disk
Cleanup wizard. Go to Start | Programs | Accessories |
Page 77

PC Relocator Ultra Control User Guide 79
System Tools to start this program (the path may be
slightly different for different versions of Windows).
What happens if I cancel my relocation?
If PC Relocator Ultra Control stops for any reason during
the file transfer – for example, the user presses the
"Cancel" button, or PC Relocator Ultra Control
encounters a problem – PC Relocator Ultra Control must
ensure that none of the changes made to the New PC
will cause conflicts after the program stops. Therefore,
PC Relocator Ultra Control may need to undo some of
the changes it has made.
PC Relocator Ultra Control will undo ONLY those
changes necessary to ensure the stability of the system.
Most of the files that were transferred from the Old PC
will remain on the New PC. This will reduce the time
needed to complete the relocation the next time PC
Relocator Ultra Control is run.
If you do not wish to keep ANY of the changes PC
Relocator Ultra Control has made to your New PC, you
have the option to completely undo all the changes that
PC Relocator Ultra Control has made. More information
on completely undoing the relocation is available in the
Undoing the Relocation section.
What post-relocation problems could occur?
Normally, everything goes fine after a relocation has
been completed. The team that designed PC Relocator
Ultra Control took extra care to make sure you have the
best customer experience possible with our software.
However, things can and do go wrong, and if they do we
want to assure you that help isn’t far away!
Page 78

80 PC Relocator Ultra Control User Guide
Before you call us, though, there are a few things you
might want to keep an eye on after relocation.
For example, if Windows displays errors when starting
up or shutting down, Windows does not start at all, or
when Windows starts, a number of other programs and
processes start at the same time. If there are
compatibility problems with one or more of these other
programs or processes, then you may have difficulty
starting or shutting down Windows.
To solve these types of problems, let’s examine a few
easy steps you can do yourself to troubleshoot issues. If
these steps do not eliminate the problems, or if you need
help at any time in the troubleshooting process, call
Technical Support to assist in resolving the problem. It
is important that you DO NOT call the computer
manufacturer’s technical support. The folks at Alohabob
Technical Support are experienced in resolving these
types of problems.
Detailed troubleshooting instructions are below, but the
basic idea is this:
1) Start Windows with a minimum of extra programs
and processes running. The problem should go
away.
2) Start Windows a few more times, each time enabling
a few more extra programs and processes.
3) When the problem reappears, the cause will be one
of the extra programs or processes you just enabled.
4) Repeat the process as necessary, disabling
programs and processes that you determine to be
causing problems.
To troubleshoot problems starting or shutting down
Windows:
1) If your PC will not boot into Windows, try booting into
Safe Mode. The procedure to start in Safe Mode
Page 79

PC Relocator Ultra Control User Guide 81
may vary from PC-to-PC. For instructions, see the
topic "Starting Windows in Safe Mode" at the end of
this Troubleshooting Guide.
2) Once Windows is running on the New PC (in Normal
Mode or Safe Mode), uninstall the kinds of programs
listed below. To uninstall, go to Start | Settings |
Control Panel | Add/Remove Programs.
a) Uninstall any manufacturer-specific
programs clearly intended for use with the
Old PC. For example, utilities from an IBM
Old PC are not appropriate on a new
Hewlett Packard New PC.
b) Next, uninstall any relocated software that is
clearly hardware-related. For example,
software for the Old PC's mouse or touch
pad. If you are unsure if a program was
relocated from the Old PC or if it was
previously installed on the New PC, call
Technical Support before uninstalling.
c) Uninstall any anti-virus programs originating
on the Old PC.
3) Restart the New PC. If the problem persists,
continue to the next step. Otherwise, you are done.
The remaining steps help you narrow in on the cause of
the problem through a process of elimination.
4) Restart the New PC, in Safe Mode if necessary.
Once Windows is running, go to Start | Run. Type
MSCONFIG in the space provided and click OK.
Under "Startup Selection" on the "General" page,
choose "Selective Startup." There are a number of
check boxes. One or more may be grayed out and
unavailable; if so, ignore it. The remaining boxes
should be checked with a white background. If
any of these five checkboxes is gray or unchecked,
Page 80

82 PC Relocator Ultra Control User Guide
you should determine why so that you can return all
settings to their original values when you are done
troubleshooting.
When you are ready to proceed, uncheck all available
items under Selective Startup. Click OK or Close, then
Yes to restart the PC.
The screen colors, screen resolution, and icon sizes will
be noticeably different when the PC restarts. This is
normal and will continue for several more
troubleshooting steps. If the problem is gone, continue
to the next step. If the problem is not fixed, call Alohabob
Technical support.
5) Start MSCONFIG again and check the first available
box under Selective Startup. Click OK and Yes to
Restart.
6) If the problem returns, it is caused by the item you
just checked. Skip ahead to Step 8.
7) If the problem does not return, it is caused by one
of the items that are still unchecked. Go back to
Step 5, checking the next available unchecked item
under Selective Startup.
8) Once a single item under Selective Startup is
determined to be the cause, click on the tab
associated with that item (e.g., if the "Load startup
group items" is the cause, click on the "Startup" tab).
There will be a new list of items to analyze by the
same process of elimination.
9) Repeat the process outlined in steps 5-7, modified
so that, if there are many items in the list, you check
or uncheck 8-10 at a time rather than just one or
two.
Page 81

PC Relocator Ultra Control User Guide 83
10) You are done when you've unchecked all the items
that cause errors or are otherwise undesirable.
For more information on using MSCONFIG, the Windows
utility that helps you modify startup programs and processes,
visit our help page on the website. The address is:
http://www.alohabob.com/support/msconfig
Page 82

84 PC Relocator Ultra Control User Guide
Why are there three extra directories on my
New PC?
PC Relocator Ultra Control creates three working
directories on the New PC. These contain all the original
New PC files that were replaced during the relocation by
files from Old PC, plus certain files from the Old PC that
were merged with files on the New PC.
You should leave these directories on the PC as long as
feasible (we suggest about a month). The files in them
are used if you need to use the Undo feature of PC
Relocator Ultra Control. Along with a log created on the
C:\ root of your New PC, these three files are required
for the UNDO operation to function properly.
Once you are comfortable that everything works, as it
should after the relocation, you can clean these and
other by-products of the relocation by running PC
Relocator Ultra Control again on the New PC and
choosing Cleanup from the screen that appears.
How can I resolve connectivity issues?
The symptoms listed below can occur immediately after
choosing a connection method (Standard or High-speed
Parallel Transfer Cable, USB, Existing Local Area
Network, or Crossover cable) and clicking Next.
Although the error messages you see on the screen are
different, the possible causes and solutions of both
problems are the same.
Connection problems can occur later in the relocation
process as well. These other connection problems have
the same possible causes and solutions as the
symptoms listed below.
Page 83

PC Relocator Ultra Control User Guide 85
PC Relocator Ultra Control reports errors “New PC
cannot find Old PC” or “Application error code –200
or –201.”
There are a few possible causes for these errors.
Troubleshooting steps are different for different
connection methods, and some are described below. If
you are still having difficulties, visit the Alohabob Support
site at http://www.alohabob.com/support
or call
Alohabob Technical Support.
Verify that PC Relocator Ultra Control on the Old PC is
“Waiting for the New PC to connect.” The New PC will
not be able to find the Old PC if the Old PC is not at the
“Waiting for New PC to connect” stage.
Connectivity issues with parallel cables
Parallel cables (either high-speed or standard parallel)
are a popular relocation method. In most cases,
connectivity is easier using parallel cables than with any
other connection method. Here are some ideas for
troubleshooting connectivity issues with parallel
connections.
1) Verify that PC Relocator Ultra Control on the Old
PC is “Waiting for the New PC to connect.”
The New PC will not be able to find the Old PC if
the Old PC is not at the “Waiting for New PC to
connect” stage.
2) Check the cable.
If you downloaded the software and wish to use a
parallel cable, make sure you purchase either a high-
speed parallel data transfer cable directly from
Alohabob (http://www.alohabob.com
), or a standard
parallel cable (also called a "Direct Cable Connection" or
"PC-to-PC Parallel File Transfer cable"). The Belkin part
Page 84

86 PC Relocator Ultra Control User Guide
number for this cable is F3D508-10. We have also
successfully used Laplink and pcAnywhere parallel file
transfer cables. Standard printer cables will not work.
If you are using the correct parallel cable, the cable may
not be securely connected to the PCs. Check the end
connections for tightness. If the problem persists, try
running the cable around the front of the computer. That
is, run the cable from the connection in the back of the
first PC, around the front and across the second PC, to
the back connection of the second PC.
NOTE: No software drivers are required to use either
high-speed or standard parallel data cables.
3) Start both PCs in Safe Mode.
Certain programs, especially printer/scanner or anti-virus
software, may be running in the background and
interfering with PC Relocator Ultra Control's
communication across the connection cable. Even if you
manually closed all programs as instructed in the
Preparation and Connectivity Steps section, some
programs may not turn off completely. Safe Mode is the
most thorough way to turn off all background programs.
NOTE: If one of the PCs has a processor speed of 1
GHz or higher, first start only the slower PC in Safe
Mode, leaving the faster 1 GHz PC in normal mode.
Then run PC Relocator Ultra Control again. If the
problem persists, start the 1 GHz PC in Safe Mode and
try again.
4) Check the hardware configuration.
When the error occurs, both New PC and Old PC
screens will have a "View" button in the "Connectivity
Info" section. Click on this button and look for an entry
for "I/O address" under "LPT (Printer Ports)". If the I/O
address on each PC is a 3-digit number, such as 378
Page 85

PC Relocator Ultra Control User Guide 87
(not necessarily the same on both PCs), the hardware
configuration is fine.
If either PC does not display a 3-digit I/O address, the
PC's parallel ports are set to a mode incompatible with
PC Relocator Ultra Control software. You need to
reconfigure the port settings on that PC in the BIOS
setup.
Starting the BIOS setup program varies from computer
to computer, but the following general instructions apply
to many PCs. To start the BIOS setup program you
must restart the PC. The very first screen you see will
often tell you which key you must press to start the BIOS
setup program. Common keys are F1, F2, F10, Esc, and
Delete. (If you have difficulty, check with the
documentation supplied by the manufacturer of your
PC). The instructions for operating the BIOS setup
program are located at the bottom of the screen.
NOTE: In the BIOS for each PC, you need to set the
parallel port to Enabled and set the mode to ECP.
These settings may be located in the Advanced, I/O
Devices, or Peripherals section.
For more information on ECP Mode,
http://www.alohabob.com/support/ecpmode
Page 86

88 PC Relocator Ultra Control User Guide
Connectivity issues related to USB cables
Try these tips to resolve issues regarding your USB
cable connection between the Old and New PC:
1) Verify that PC Relocator Ultra Control on the
Old PC is “Waiting for New PC to connect.”
The New PC will not be able to find the Old PC if the Old
PC is not at the “Waiting for New PC to connect” stage.
2) Check the cable.
If you purchased the PC Relocator Ultra Control boxed
version, the correct cable and drivers are supplied for
you. Ensure you have followed the installation
procedures exactly in order to obtain connectivity
between the two PC’s. Also, make sure that no other
USB cables (or drivers) are installed on your system.
Uninstall them first, then install the Alohabob USB cable
and driver.
Download the latest version of PC Relocator Ultra
Control, and check the website for more information.
If you are NOT using the Alohabob USB Bridge
Cable
There are several different manufacturers of bridge
cables, and not all of these cables behave the same,
depending on the drivers they install, operating systems,
etc. Visit the web site for more information on
recommended and tested USB cables that work with PC
Relocator Ultra Control.
You may experience issues related to drivers installed
during the installation process carried out by your USB
cable manufacturer. PC Relocator Ultra Control may
appear NOT to connect with the Old PC but in fact you
can still perform the relocation as normal.
Page 87

PC Relocator Ultra Control User Guide 89
This situation occurs with some USB bridge cables, and
occurs after you have run the installation program for the
cable on both the Old PC and New PC’s.
Connectivity issues using a Local Area Network
1) Verify network configuration.
The TCP/IP settings for one or both of the PCs
may be incorrect. Check the TCP/IP settings for
the network card on each computer by right
clicking on Network Neighborhood and
choosing Properties.
For more information, please go to our support site.
In the list of installed network components, verify that
there is an entry similar to TCP/IP -> <your network
card>.
Example:
TCP/IP -> HP EN1207D-TX PCI 10/100 Fast Ethernet
If there is no TCP/IP -> entry, go to Windows Help and
search the Index for "protocols, TCP/IP". Follow the
instructions for adding the TCP/IP protocol to your
network card. Once TCP/IP is bound to your card,
double-click on the "TCP/IP -> <your network card>"
entry on the Network Properties page and click on the
"IP Address" tab. Specify the IP address to be
192.168.0.1 for the Old PC and 192.168.0.2 for the New
PC. Set the Subnet Mask to 255.255.255.0 for both PCs.
NOTE: If there are pre-existing values for these settings,
write them down so that you can reset the original values
after the relocation.
Verify the changes took effect by restarting the
computers. Go to Start | Programs | MS-DOS Prompt.
At the C:\ prompt type: PING x.x.x.x. where x.x.x.x is the
IP address of the other PC. For example, from the New
Page 88

90 PC Relocator Ultra Control User Guide
PC type PING 192.168.0.1. If TCP/IP is working, you will
see several lines on the screen beginning with "Reply
from 192.168.0.1...". If TCP/IP is not working, you will
see several "Request timed out" lines.
2) Check your anti-virus software.
The anti-virus software (AV) on either PC may
be at fault. Temporarily disable AV on both
PCs to eliminate this possibility. Generally, this
can be done by right-clicking on the AV icon on
the desktop taskbar and selecting "Disable" from
the menu. Refer to your AV documentation for
specific instructions.
3) Disable firewalls and proxy clients.
A firewall program, proxy client, or other
network-related software or hardware may be
running, blocking PC Relocator Ultra Control's
communication across the network. Disable any
firewalls and proxy clients you have on the Old
PC and New PCs. If possible, isolate the Old
PC and New PCs to eliminate potential
interference from similar programs running on
the rest of the network. Be sure to restore the
original configuration after the relocation is
complete.
NOTE: Windows XP Home and Pro versions have a
built-in firewall that may need to be disabled before you
can perform a relocation with PC Relocator Ultra
Control. Click Start and then Help in Windows for more
information.
How can I perform an UNDO of the relocation?
Immediately after relocation, you can run Undo to bring
your New PC back to the way it was before you began
the relocation process. In order to provide a fail-safe
recovery, Undo runs in MS-DOS mode on some
operating systems and in Windows mode (via PC
Page 89

PC Relocator Ultra Control User Guide 91
Relocator Ultra Control) on other operating systems.
See the instructions below for details!
Windows Millennium users should perform the
following steps. Unlike Windows 95 and 98, Windows
ME does not contain an MS-DOS mode. To run Undo
under Windows ME, you must reboot your PC using a
Windows ME startup disk. You may create a startup
disk by using any PC that runs Windows ME. PC
Relocator Ultra Control also prompts you to create a
startup disk on the New PC as part of starting the
relocation process.
1) Place DOS boot diskette into the floppy drive of the
New PC. Boot the PC.
2) At the DOS prompt, type C:\ABU\ABUNDO and then
press the Enter key.
3) When the undo process is finished (a few minutes
later), remove the boot diskette and reboot the PC.
Windows 95 or 98/SE users:
If Windows is currently running:
1) Go to the Start Menu and select Shutdown.
2) Select Restart in MS-DOS mode and press OK.
3) Savvy users may press F8 at system boot and
choose Command prompt only.
4) You may also start your PC in MS-DOS mode by
booting your PC using the Windows startup diskette.
5) At the DOS prompt, type C:\ABU\ABUNDO and
then press the Enter key.
Page 90

92 PC Relocator Ultra Control User Guide
6) When the undo process is finished (a few minutes
later), remove the boot diskette and reboot the PC.
Windows NT, 2000, and XP users:
If Windows is currently running:
1) Start PC Relocator Ultra Control on the New PC.
2) Click the Undo button on the first screen that
appears.
3) The “undo” process will begin immediately, then your
PC will reboot.
How can I find out more about error codes?
We have a more complete list of error codes in the
online Help file. Check the Help file first, and if you
cannot find the code you are looking for, check the
Alohabob website for a complete list.
What are required and forbidden files?
Required and forbidden files
A required file is any file that must be transferred in
order for the relocation to complete successfully. There
are a few files that PC Relocator Ultra Control creates
and requires internally, but most required files are
related to selections you've made. For example, files
that are related to applications you selected are required
because the applications will not run correctly on the
New PC without these files.
A forbidden file is a file that PC Relocator Ultra Control
will not allow to be transferred. A file may be forbidden
for a number of reasons: for example, it may be an
Page 91

PC Relocator Ultra Control User Guide 93
operating system file, or it may be known to be
incompatible with the New PC's operating system. PC
Relocator Ultra Control will forbid any file it determines
could cause problems on the New PC.
If you try to check or uncheck a folder that contains
required or forbidden files, you may receive a message
to the effect, "if you want to select or de-select files in
the folder, you will need to open the folder and select/deselect individual files and sub-folders."
The reason for this is that, if you check/uncheck a folder,
the selection/de-selection would normally apply also to
every item in that folder. However, the "selection state"
(i.e., selected or de-selected) of required and forbidden
files cannot be changed. If changing the "selection
state" of a folder would conflict with a required or
forbidden item, PC Relocator Ultra Control prevents the
action.
If you receive this message, you will need to go into the
folder and select or de-select individual items.
Page 92

94 PC Relocator Ultra Control User Guide
Appendix
PC Relocator does not provide additional software
licenses.
IMPORTANT: Regarding 3rd party software licenses, in
using PC Relocator you will be duplicating copies of 3rd
party software. In keeping with the proper use of
software, review the 3rd party product’s license
agreement to ensure that you do not have unlicensed
copies of software. If you do have more copies than
permitted you must either purchase an additional copy or
delete the extra copy from the computer containing the
extra copy.
It is illegal to use PC Relocator to make improper
duplicates of an installed program.
PC Relocator Ultra Control does not support program
relocations to the Windows NT operating system.
However, PC Relocator will perform a partial transfer of
certain items. For more information, please contact
Alohabob Technical Support.
Page 93

PC Relocator Ultra Control User Guide 95
Glossary
Throughout the migration you may encounter the
following terms:
DMV file – Created by PC Relocator Ultra Control during
Intermediate Storage transfers, a DMV file is a single
"digital moving" file that contains all of your selected
applications, files, and settings exported from your Old
PC. Think of the DMV file as a self-contained "archive"
image file that stores your selection of applications, files,
and settings until needed at a future time.
Download – Copy data from the Internet to a PC. Not to
be confused with “Relocate” (“copy data from one PC to
another PC”).
Install – Copy data from a CD-ROM, floppy diskette, or
Internet download file to a PC, in order to create and
activate a single application. Not to be confused with
Download (copy data from Internet to PC) or Relocate
(copy data from PC-to-PC).
Intermediate storage – Any temporary storage device
that you can use to hold data from the Old PC before
putting the data on the New PC. Common examples:
ZIP drive, CD-R/RW, tape drive, internal (or external)
hard drive, and network drive.
Migrate – See Relocate.
New PC – The computer that will receive (import) the
desired data.
Old PC – The computer that will send (export) the
desired data.
PC-to-PC – A way of connecting two PCs directly to
each other in such a way that data can be transferred
Page 94

96 PC Relocator Ultra Control User Guide
from one PC to the other. "PC-to-PC" can refer to the act
of transferring the data (e.g., a relocation), or it can refer
to the hardware that enables the data transfer (e.g.,
parallel transfer cable).
Relocate – Copy selected data from one computer to
another. This can happen in a single step (PC => PC), or
it can happen in two steps (PC => Intermediate Storage
=> PC). This term is used interchangeably with "migrate"
and “transfer.”
Synchronize – To make the version of PC Relocator
Ultra Control running on the Old PC as current as the
version running on the New PC or vice versa.
Transfer – See “Relocate.”
Update – To make an old version of a software program
the latest version of that same program.
Upgrade – To replace a software program with a version
that provides more features.
 Loading...