

Page 1
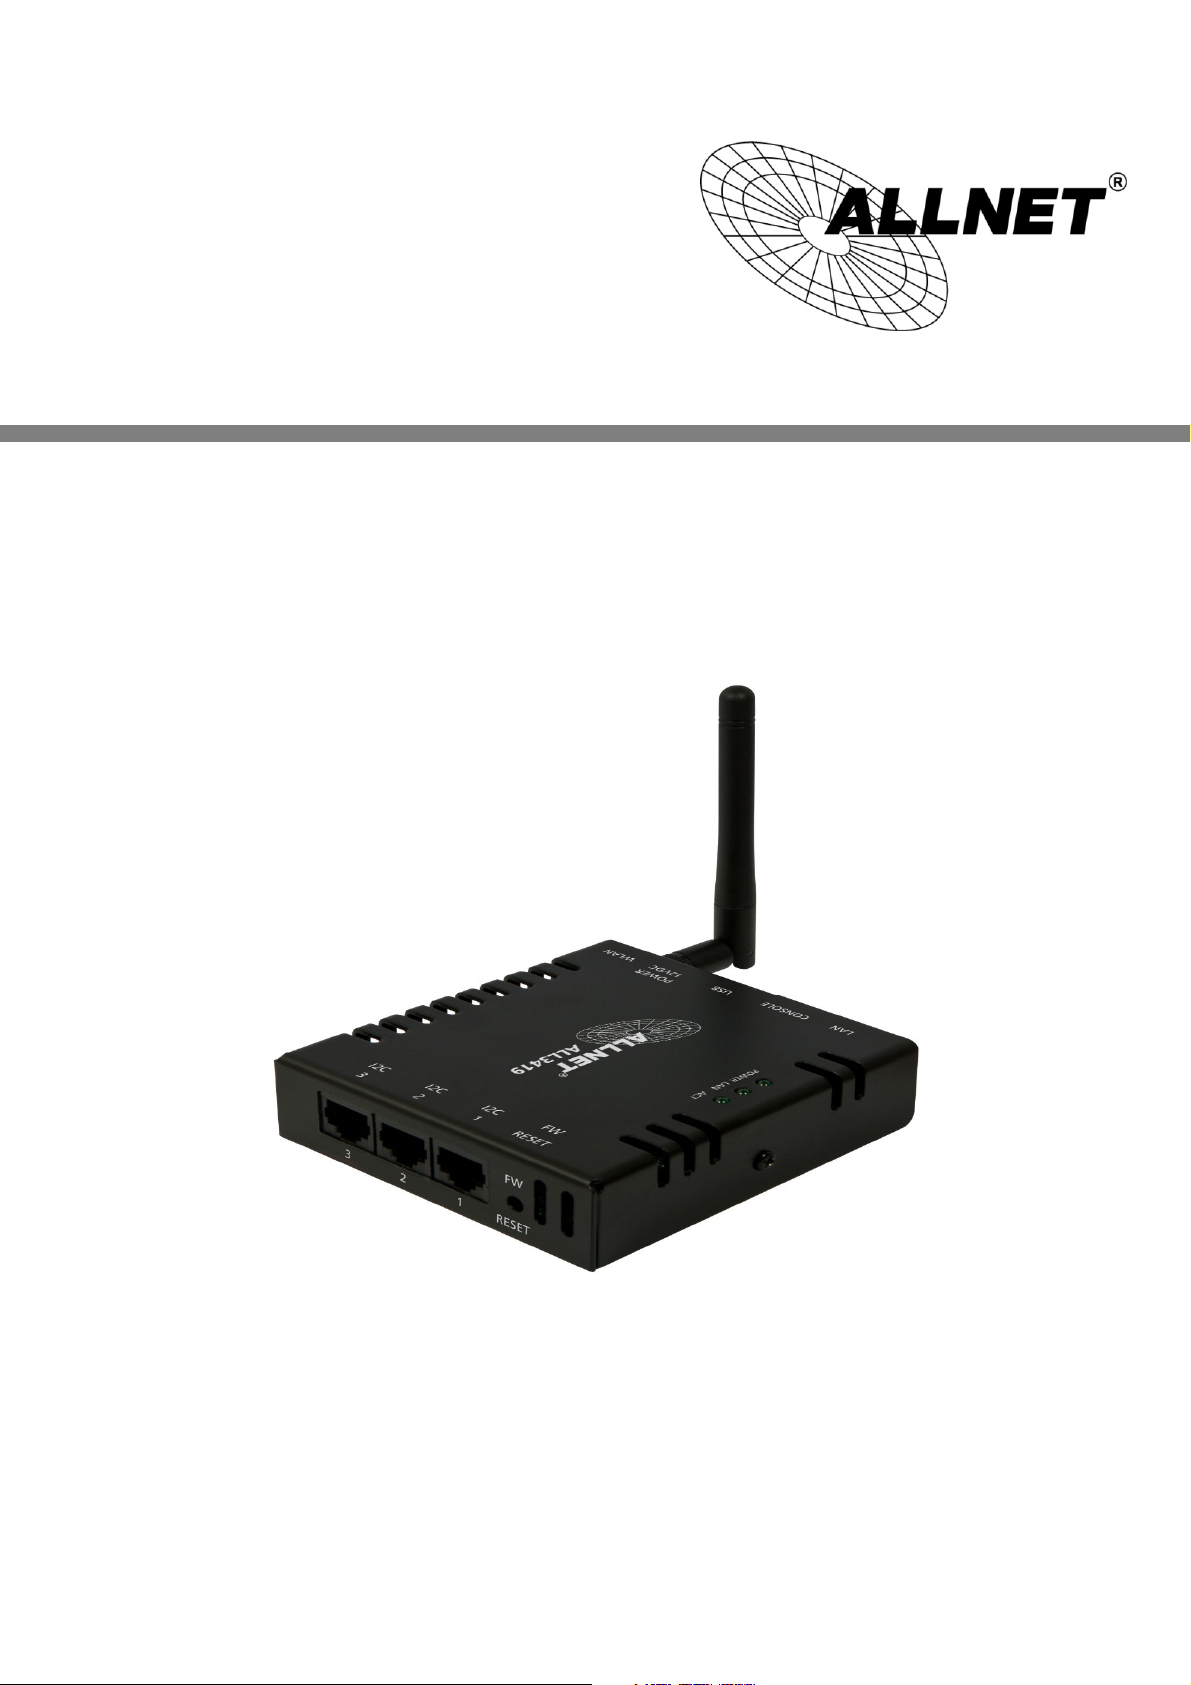
ALL3419
IP thermometer
Quick install guide
© ALLNET GmbH Computersysteme 2016 - All rights reserved.
Subject to errors and modifications.
Page 2
1. Scope of delivery:
Please check packaging and content for damages:
Does something indicate transport damage to the packaging?
Does the case show any traces of usage?
You must never put a damaged device into operation!
In case of doubt, contact our technical support.
Packaging content
ALLNET® ALL3419
1x ALL3006 sensor
1x 12V power adapter
1x network cable
Quick install guide
Safety instructions
Please pay attention to the safety notes:
• Never open the device.
• Never perform an installation during a storm.
• Make sure pipes are laid surefooted.
• Do not expose the device in use to direct sunlight.
• Do never use the device near any heat sources.
• Do never place the device on heat sensitive surfaces.
• Protect the device from moisture, dust, fluids and vapours.
• Do never use the device in humidors or explosion-hazard environments.
• Use dry and smooth antistatic cloth instead of solvent cleaning products for
cleaning.
• Authorized, trained staff may only do repair.
• In case of unintended use or inappropriate operation ALLNET® is released
from all liabilities.
Positioning and mounting location
Generally:
ALL3419 IP thermometer may only be used in dry indoor areas. Ensure adequate
ventilation. After the installation should not result any tension onto the cables
(network and connection cables). Tensioned cables can detach.
© ALLNET GmbH Computersysteme 2016 - All rights reserved.
Subject to errors and modifications.
2
Page 3
2. Standard values:
IP address 192.168.0.100
Reset to factory settings
If your ALL3419 is due to incorrect user settings or forgotten password not
accessible anymore, you can reset the device to factory settings by performing
the following instructions (all settings and values will be lost):
- Disconnect the device from power.
- Press RESET button with a prick out of non-conductive material and keep
button pressed
- (The button needs to be kept pressed!)
- Connect ALL3419 to power and wait about 45 seconds.
- Release RESET button.
Reset process is completed. All settings are reset to delivery status.
3. Adapt ALL3419 to your network
a. Connect your ALL3419 via the attached LAN cable to the network. Make
sure you hear the connectors snap.
b. ALL3419 communicates with connected components via the TCP/IP
protocol. The PC/MAC has to be located in the same network segment as
the ALL3419, so the ALL3419 can be recognized by the PC/MAC.
The ALL3419 has following IP address by default: 192.168.0.100 - no user
name, no password.
c. Now set the PC/MAC temporary to a free IP address between 192.168.0.1
and 192.168.0.254 (192.168.0.100 is already occupied by the ALL3419).
In perfect case you can set a second IP address for this sector with
192.168.0.xxx for your PC network interface.
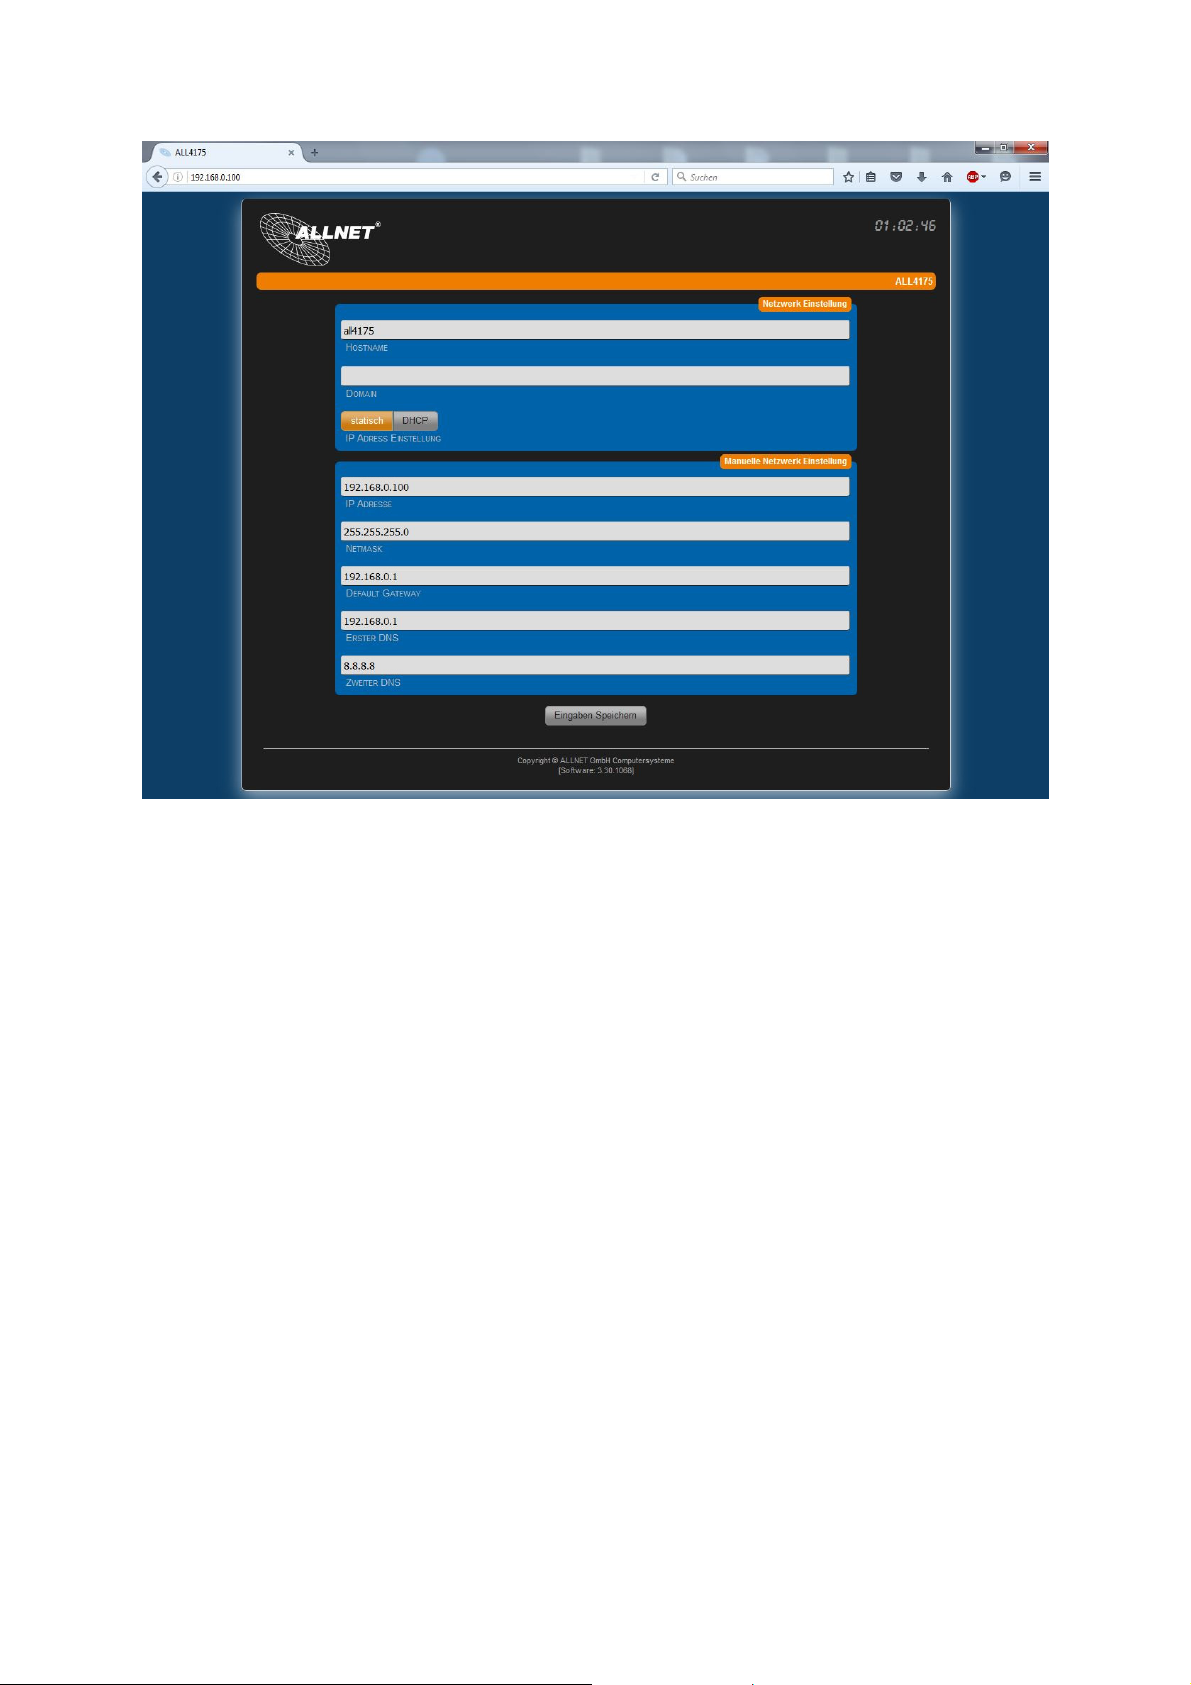
d. By typing the address 192.168.0.100 into your web browser, the first page
for language settings turns up:
© ALLNET GmbH Computersysteme 2016 - All rights reserved.
Subject to errors and modifications.
3
Page 4
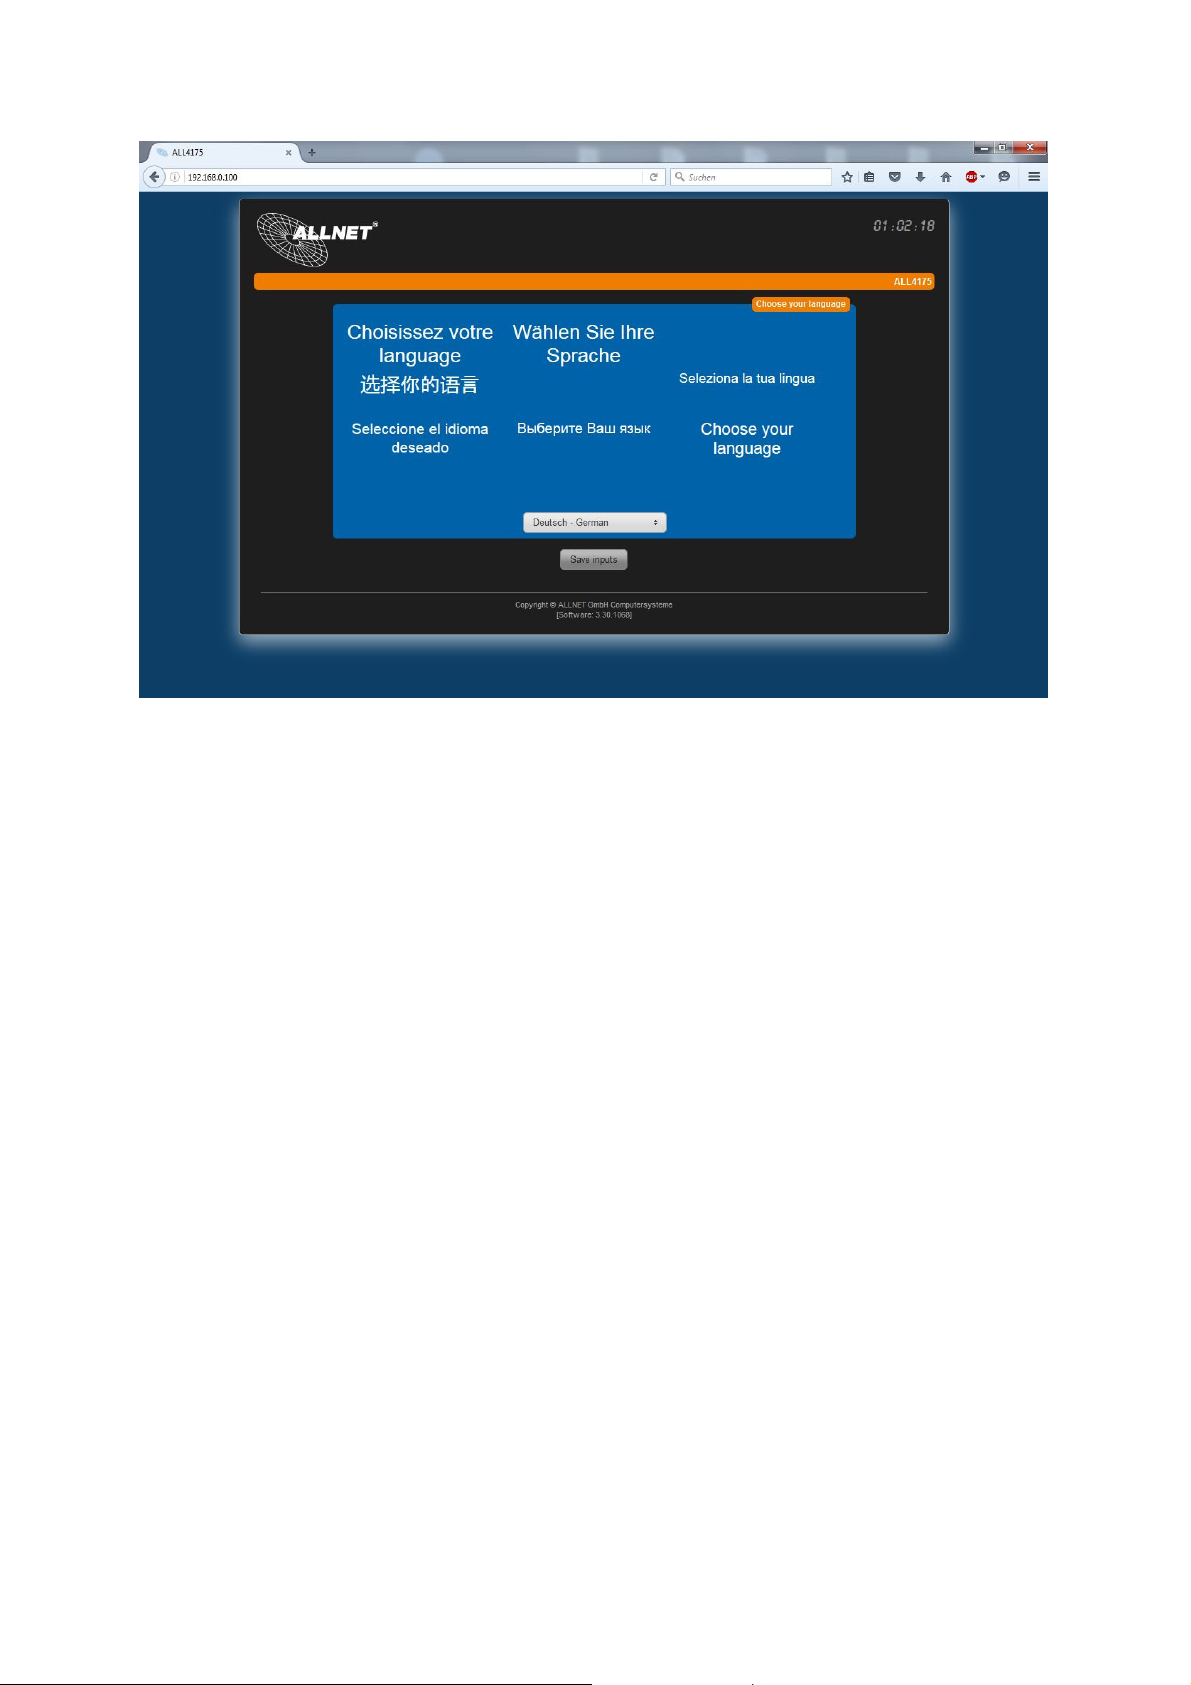
e. Choose the right language from the dropdown menu and save your
settings. The next configurations item appears automatically.
f. Now you can assign an IP address from your network segment to the
ALL3419.
Statically: Here IP settings can be defined manually.
DHCP: ALL3419 chooses an IP from your router automatically.
Confirm the settings with "save entries".
© ALLNET GmbH Computersysteme 2016 - All rights reserved.
Subject to errors and modifications.
4
Page 5
g. The device adopts the settings. This process will take 10 seconds. When
done, the page reloads with your defined IP address.
h. Now, a page with time settings turns up, where you can define an own
timeserver, use a listed server or set up the time manually.
© ALLNET GmbH Computersysteme 2016 - All rights reserved.
Subject to errors and modifications.
5
Page 6
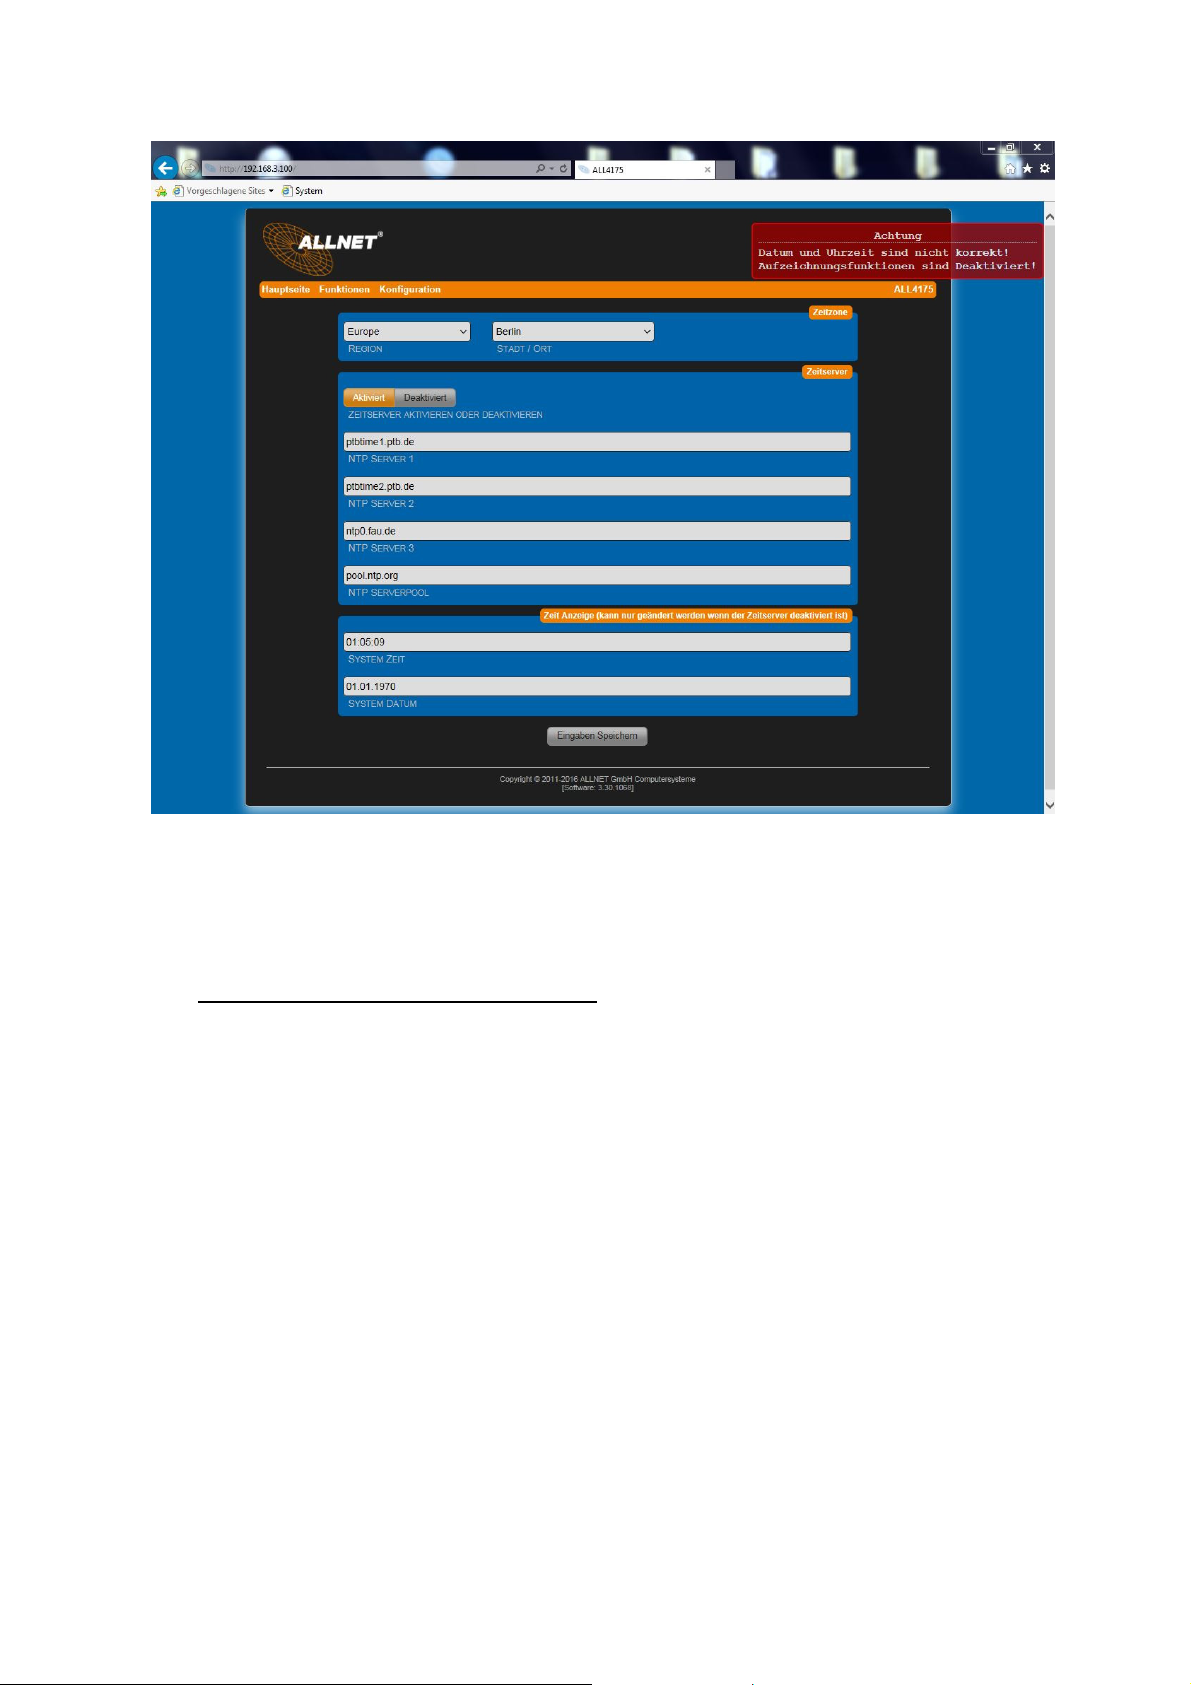
i. Secure your settings with "save entries".
4. Checking for updates
When the IP configuration is done, an update to the latest software version is
recommended. The update can be found in "configuration" -> "update
settings". By clicking on "Checking for updates" you'll receive one of the
following notifications:
a. No later versions found
or
b. Install update
© ALLNET GmbH Computersysteme 2016 - All rights reserved.
Subject to errors and modifications.
6
Page 7

Perform the update check several times until you receive the notification from
the picture above.
5. Create user
You should configure an Admin account, so that only you have access onto
ALL3419's setups.
Choose "configuration" -> "web server and user"
Here you can create an Admin user and a normal user. The Admin user has full
access to the web interface, the normal user may only see and operate the main
page.
© ALLNET GmbH Computersysteme 2016 - All rights reserved.
Subject to errors and modifications.
7
Page 8

6. Access-Point configuration
The ALL3419 can also be configured as an own access point.
In "configuration" -> "Wi-Fi settings" the access point mode can be set up.
© ALLNET GmbH Computersysteme 2016 - All rights reserved.
Subject to errors and modifications.
8
Page 9

SSID: Register any desired name for the network here. This name will be shown
after scanning for networks.
Channel: Choose the transmitting channel here.
Wi-Fi auth. mode: Choose encryption mode here. WPA2PSK-AES is
recommended.
Cryptographic key: Enter an arbitrary password here. The key is inquired by
connecting to the ALL3419. Choose a secure password with at least 8 characters.
Secure your settings with "save entries".
The entries are confirmed. This process takes 120 seconds.
7. Wireless-Client configuration
The ALL3419 may also be connected to an existing Wi-Fi network.
In "configuration" -> "Wi-Fi settings" you can set up the Wi-Fi connection.
© ALLNET GmbH Computersysteme 2016 - All rights reserved.
Subject to errors and modifications.
9
Page 10

Choose "Wireless Client" to connect the device to an existing network. Click
"search for access points" to find your Wi-Fi network.
All surrounding networks will be displays. Select your network and confirm by
clicking "choose".
"SSID" and "Wi-Fi auth. mode" will be filled automatically. You only need to
type in the Wi-Fi key and confirm the settings with "save entries". The device
takes all the settings within a duration of 120 seconds.
The ALL3419 can be reached at the registered IP address.
IMPORTANT: After 120 seconds, disconnect the LAN cable to avoid
network conflicts.
NOTICE: The Wi-Fi you wish to connect shall not have any space
character in its SSID. Otherwise a connection will not be established.
© ALLNET GmbH Computersysteme 2016 - All rights reserved.
Subject to errors and modifications.
10
Page 11

Hereby ALLNET GmbH Computersysteme declares, that the appliance ALL3419
conforms to fundamental requirements and other relevant terms and conditions of the
standard 2004/108/EC. The declaration of conformity can be found here:
http://www.allnet.de/en/allnet-brand/support/downloads-search/
ALLNET GmbH Computersysteme
Maistrasse 2
82110 Germering
Tel. +49 (0)89 894 222 - 22
Fax +49 (0)89 894 222 - 33
Email: info(at)allnet.de
GPL Declaration for ALLNET products
This Program is free software; you can redistribute it and/or modify it under the terms of the GNU General Public License
DISCLAIMER_OF_WARRANTY
as published by the Free Software Foundation; version 2 of the License.
This Program is distributed in the hope that it will be useful, but WITHOUT ANY WARRANTY; without even the implied
warranty of MERCHANTABILITY or FITNESS FOR A PARTICULAR PURPOSE. See the GNU General Public License for more
details.
You should have received a copy of the GNU General Public License along with this Program; if not, write to the Free
Software Foundation, Inc., 59 Temple Place, Suite 330, Boston, MA 02111-1307 USA.
The full text of the GNU General Public License version 2 is included with the software distribution in the file
LICENSE.GPLv2
NO WARRANTY
BECAUSE THE PROGRAM IS LICENSED FREE OF CHARGE, THERE IS NO WARRANTY FOR THE PROGRAM, TO THE EXTENT
PERMITTED BY APPLICABLE LAW. EXCEPT WHEN OTHERWISE STATED IN WRITING THE COPYRIGHT HOLDERS AND/OR
OTHER PARTIES PROVIDE THE PROGRAM "AS IS" WITHOUT WARRANTY OF ANY KIND, EITHER EXPRESSED OR IMPLIED,
INCLUDING, BUT NOT LIMITED TO, THE IMPLIED WARRANTIES OF MERCHANTABILITY AND FITNESS FOR A PARTICULAR
PURPOSE. THE ENTIRE RISK AS TO THE QUALITY AND PERFORMANCE OF THE PROGRAM IS WITH YOU. SHOULD THE
PROGRAM PROVE DEFECTIVE, YOU ASSUME THE COST OF ALL NECESSARY SERVICING, REPAIR OR CORRECTION. IN NO
EVENT UNLESS REQUIRED BY APPLICABLE LAW OR AGREED TO IN WRITING WILL ANY COPYRIGHT HOLDER, OR ANY
OTHER PARTY WHO MAY MODIFY AND/OR REDISTRIBUTE THE PROGRAM AS PERMITTED ABOVE, BE LIABLE TO YOU FOR
DAMAGES, INCLUDING ANY GENERAL, SPECIAL, INCIDENTAL OR CONSEQUENTIAL DAMAGES ARISING OUT OF THE USE
OR INABILITY TO USE THE PROGRAM (INCLUDING BUT NOT LIMITED TO LOSS OF DATA OR DATA BEING RENDERED
INACCURATE OR LOSSES SUSTAINED BY YOU OR THIRD PARTIES OR A FAILURE OF THE PROGRAM TO OPERATE WITH
ANY OTHER PROGRAMS), EVEN IF SUCH HOLDER OR OTHER PARTY HAS BEEN ADVISED OF THE POSSIBILITY OF SUCH
DAMAGES.
Written Offer for Source Code
For binaries that you receive from ALLNET GmbH Computersysteme on physical media or within the download of the
offered firmware that are licensed under any version of the GNU General Public License (GPL) or the GNU LGPL, you can
receive a complete machine-readable copy of the source code by sending a written request to:
ALLNET GmbH Computersysteme
Maistrasse 2
82110 Germering
Your request should include: (i) the name of the covered binary, (ii) the version number of the ALLNET product
containing the covered binary, (iii) your name, (iv) your company name (if applicable) and (v) your return mailing and
email address (if available). We may charge you a nominal fee to cover the cost of the media and distribution. Your
request must be sent within three (3) years of the date you received the GPL or LGPL covered code. For your convenience,
some or all of the source code may also be found at:
http://www.allnet.de/gpl.html
LICENSE.GPLv2
GNU GENERAL PUBLIC LICENSE
Version 2, June 1991
© ALLNET GmbH Computersysteme 2016 - All rights reserved.
Subject to errors and modifications.
11
Page 12

Copyright (C) 1989, 1991 Free Software Foundation, Inc. 51 Franklin Street, Fifth Floor, Boston, MA 02110-1301, USA
Everyone is permitted to copy and distribute verbatim copies of this license document, but changing it is not allowed.
The licenses for most software are designed to take away your freedom to share and change it. By contrast, the GNU
General Public License is intended to guarantee your freedom to share and change free software--to make sure the
software is free for all its users. This General Public License applies to most of the Free Software Foundation's software
and to any other program whose authors commit to using it. (Some other Free Software Foundation software is covered
by the GNU Library General Public License instead.) You can apply it to your programs, too.
When we speak of free software, we are referring to freedom, not price. Our General Public Licenses are designed to
make sure that you have the freedom to distribute copies of free software (and charge for this service if you wish), that
you receive source code or can get it if you want it, that you can change the software or use pieces of it in new free
programs; and that you know you can do these things.
To protect your rights, we need to make restrictions that forbid anyone to deny you these rights or to ask you to
surrender the rights. These restrictions translate to certain responsibilities for you if you distribute copies of the software,
or if you modify it.
For example, if you distribute copies of such a program, whether gratis or for a fee, you must give the recipients all the
rights that you have. You must make sure that they, too, receive or can get the source code. And you must show them
these terms so they know their rights.
We protect your rights with two steps: (1) copyright the software, and (2) offer you this license which gives you legal
permission to copy, distribute and/or modify the software.
Also, for each author's protection and ours, we want to make certain that everyone understands that there is no
warranty for this free software. If the software is modified by someone else and passed on, we want its recipients to
know that what they have is not the original, so that any problems introduced by others will not reflect on the original
authors' reputations.
Finally, any free program is threatened constantly by software patents. We wish to avoid the danger that redistributors
of a free program will individually obtain patent licenses, in effect making the program proprietary. To prevent this, we
have made it clear that any patent must be licensed for everyone's free use or not licensed at all.
The precise terms and conditions for copying, distribution and modification follow.
GNU GENERAL PUBLIC LICENSE
TERMS AND CONDITIONS FOR COPYING, DISTRIBUTION AND MODIFICATION
0. This License applies to any program or other work which contains a notice placed by the copyright holder
saying it may be distributed under the terms of this General Public License. The "Program", below, refers to
any such program or work, and a "work based on the Program" means either the Program or any derivative
work under copyright law: that is to say, a work containing the Program or a portion of it, either verbatim or
with modifications and/or translated into another language. (Hereinafter, translation is included without
limitation in the term "modification".) Each licensee is addressed as "you".
Activities other than copying, distribution and modification are not covered by this License; they are outside its
scope. The act of running the Program is not restricted, and the output from the Program is covered only if its
contents constitute a work based on the Program (independent of having been made by running the Program).
Whether that is true depends on what the Program does.
1. You may copy and distribute verbatim copies of the Program's source code as you receive it, in any medium,
provided that you conspicuously and appropriately publish on each copy an appropriate copyright notice and
disclaimer of warranty; keep intact all the notices that refer to this License and to the absence of any warranty;
and give any other recipients of the Program a copy of this License along with the Program.
You may charge a fee for the physical act of transferring a copy, and you may at your option offer warranty
protection in exchange for a fee.
2. You may modify your copy or copies of the Program or any portion of it, thus forming a work based on the
Program, and copy and distribute such modifications or work under the terms of Section 1 above, provided that
you also meet all of these conditions:
a) You must cause the modified files to carry prominent notices stating that you changed the files and the
date of any change.
b) You must cause any work that you distribute or publish, that in whole or in part contains or is derived
from the Program or any part thereof, to be licensed as a whole at no charge to all third parties under the
terms of this License.
c) If the modified program normally reads commands interactively when run, you must cause it, when started
running for such interactive use in the most ordinary way, to print or display an announcement including
an appropriate copyright notice and a notice that there is no warranty (or else, saying that you provide a
warranty) and that users may redistribute the program under these conditions, and telling the user how to
view a copy of this License. (Exception: if the Program itself is interactive but does not normally print such
an announcement, your work based on the Program is not required to print an announcement.)
These requirements apply to the modified work as a whole. If identifiable sections of that work are not
derived from the Program, and can be reasonably considered independent and separate works in
themselves, then this License, and its terms, do not apply to those sections when you distribute them as
separate works. But when you distribute the same sections as part of a whole which is a work based on
the Program, the distribution of the whole must be on the terms of this License, whose permissions for
other licensees extend to the entire whole, and thus to each and every part regardless of who wrote it.
Thus, it is not the intent of this section to claim rights or contest your rights to work written entirely by
you; rather, the intent is to exercise the right to control the distribution of derivative or collective works
based on the Program.
Preamble
© ALLNET GmbH Computersysteme 2016 - All rights reserved.
Subject to errors and modifications.
12
Page 13

In addition, mere aggregation of another work not based on the Program with the Program (or with a
work based on the Program) on a volume of a storage or distribution medium does not bring the other
3. You may copy and distribute the Program (or a work based on it, under Section 2) in object code or executable
4. You may not copy, modify, sublicense, or distribute the Program except as expressly provided under this
5. You are not required to accept this License, since you have not signed it. However, nothing else grants you
6. Each time you redistribute the Program (or any work based on the Program), the recipient automatically
7. If, as a consequence of a court judgment or allegation of patent infringement or for any other reason (not
8. If the distribution and/or use of the Program is restricted in certain countries either by patents or by
9. The Free Software Foundation may publish revised and/or new versions of the General Public License from time
10. If you wish to incorporate parts of the Program into other free programs whose distribution conditions are
work under the scope of this License.
form under the terms of Sections 1 and 2 above provided that you also do one of the following:
a) Accompany it with the complete corresponding machine-readable source code, which must be distributed
under the terms of Sections and 2 above on a medium customarily used for software interchange; or,
b) Accompany it with a written offer, valid for at least three years, to give any third party, for a charge no
more than your cost of physically performing source distribution, a complete machine-readable copy of
the corresponding source code, to be distributed under the terms of Sections 1 and 2 above on a medium
customarily used for software interchange; or,
c) Accompany it with the information you received as to the offer to distribute corresponding source code.
(This alternative is allowed only for noncommercial distribution and only if you received the program in
object code or executable form with such an offer, in accord with Subsection b above.)
The source code for a work means the preferred form of the work for making modifications to it. For an
executable work, complete source code means all the source code for all modules it contains, plus any
associated interface definition files, plus the scripts used to control compilation and installation of the
executable. However, as a special exception, the source code distributed need not include anything that is
normally distributed (in either source or binary form) with the major components (compiler, kernel, and so on)
of the operating system on which the executable runs, unless that component itself accompanies the
executable.
If distribution of executable or object code is made by offering access to copy from a designated place, then
offering equivalent access to copy the source code from the same place counts as distribution of the source
code, even though third parties are not compelled to copy the source along with the object code.
License. Any attempt otherwise to copy, modify, sublicense or distribute the Program is void, and will
automatically terminate your rights under this License. However, parties who have received copies, or rights,
from you under this License will not have their licenses terminated so long as such parties remain in full
compliance.
permission to modify or distribute the Program or its derivative works. These actions are prohibited by law if
you do not accept this License. Therefore, by modifying or distributing the Program (or any work based on the
Program), you indicate your acceptance of this License to do so, and all its terms and conditions for copying,
distributing or modifying the Program or works based on it.
receives a license from the original licensor to copy, distribute or modify the Program subject to these terms
and conditions. You may not impose any further restrictions on the recipients' exercise of the rights granted
herein. You are not responsible for enforcing compliance by third parties to this License.
limited to patent issues), conditions are imposed on you (whether by court order, agreement or otherwise) that
contradict the conditions of this License, they do not excuse you from the conditions of this License. If you
cannot distribute so as to satisfy simultaneously your obligations under this License and any other pertinent
obligations, then as a consequence you may not distribute the Program at all. For example, if a patent license
would not permit royalty-free redistribution of the Program by all those who receive copies directly or
indirectly through you, then the only way you could satisfy both it and this License would be to refrain entirely
from distribution of the Program.
If any portion of this section is held invalid or unenforceable under any particular circumstance, the balance of
the section is intended to apply and the section as a whole is intended to apply in other circumstances.
It is not the purpose of this section to induce you to infringe any patents or other property right claims or to
contest validity of any such claims; this section has the sole purpose of protecting the integrity of the free
software distribution system, which is implemented by public license practices. Many people have made
generous contributions to the wide range of software distributed through that system in reliance on consistent
application of that system; it is up to the author/donor to decide if he or she is willing to distribute software
through any other system and a licensee cannot impose that choice.
This section is intended to make thoroughly clear what is believed to be a consequence of the rest of this
License.
copyrighted interfaces, the original copyright holder who places the Program under this License may add an
explicit geographical distribution limitation excluding those countries, so that distribution is permitted only in
or among countries not thus excluded. In such case, this License incorporates the limitation as if written in the
body of this License.
to time. Such new versions will be similar in spirit to the present version, but may differ in detail to address
new problems or concerns.
Each version is given a distinguishing version number. If the Program specifies a version number of this License
which applies to it and "any later version", you have the option of following the terms and conditions either of
that version or of any later version published by the Free Software Foundation. If the Program does not specify
a version number of this License, you may choose any version ever published by the Free Software Foundation.
different, write to the author to ask for permission. For software which is copyrighted by the Free Software
Foundation, write to the Free Software Foundation; we sometimes make exceptions for this. Our decision will
be guided by the two goals of preserving the free status of all derivatives of our free software and of
promoting the sharing and reuse of software generally.
© ALLNET GmbH Computersysteme 2016 - All rights reserved.
Subject to errors and modifications.
13
Page 14

11. BECAUSE THE PROGRAM IS LICENSED FREE OF CHARGE, THERE IS NO WARRANTY FOR THE PROGRAM, TO THE
EXTENT PERMITTED BY APPLICABLE LAW. EXCEPT WHEN OTHERWISE STATED IN WRITING THE COPYRIGHT
HOLDERS AND/OR OTHER PARTIES PROVIDE THE PROGRAM "AS IS" WITHOUT WARRANTY OF ANY KIND,
EITHER EXPRESSED OR IMPLIED, INCLUDING, BUT NOT LIMITED TO, THE IMPLIED WARRANTIES OF
MERCHANTABILITY AND FITNESS FOR A PARTICULAR PURPOSE. THE ENTIRE RISK AS TO THE QUALITY AND
PERFORMANCE OF THE PROGRAM IS WITH YOU. SHOULD THE PROGRAM PROVE DEFECTIVE, YOU ASSUME
THE COST OF ALL NECESSARY SERVICING, REPAIR OR CORRECTION.
12. IN NO EVENT UNLESS REQUIRED BY APPLICABLE LAW OR AGREED TO IN WRITING WILL ANY COPYRIGHT
HOLDER, OR ANY OTHER PARTY WHO MAY MODIFY AND/OR REDISTRIBUTE THE PROGRAM AS PERMITTED
ABOVE, BE LIABLE TO YOU FOR DAMAGES, INCLUDING ANY GENERAL, SPECIAL, INCIDENTAL OR
CONSEQUENTIAL DAMAGES ARISING OUT OF THE USE OR INABILITY TO USE THE PROGRAM (INCLUDING BUT
NOT LIMITED TO LOSS OF DATA OR DATA BEING RENDERED INACCURATE OR LOSSES SUSTAINED BY YOU OR
THIRD PARTIES OR A FAILURE OF THE PROGRAM TO OPERATE WITH ANY OTHER PROGRAMS), EVEN IF SUCH
HOLDER OR OTHER PARTY HAS BEEN ADVISED OF THE POSSIBILITY OF SUCH DAMAGES.
END OF TERMS AND CONDITIONS
How to Apply These Terms to Your New Programs
If you develop a new program, and you want it to be of the greatest possible use to the public, the best way to
achieve this is to make it free software which everyone can redistribute and change under these terms.
To do so, attach the following notices to the program. It is safest to attach them to the start of each source file
to most effectively convey the exclusion of warranty; and each file should have at least the "copyright" line and
a pointer to where the full notice is found.
<one line to give the program's name and a brief idea of what it does.> Copyright (C) <year> <name of
author>
This program is free software; you can redistribute it and/or modify it under the terms of the GNU General
Public License as published by the Free Software Foundation; either version 2 of the License, or (at your option)
any later version.
This program is distributed in the hope that it will be useful, but WITHOUT ANY WARRANTY; without even the
implied warranty of MERCHANTABILITY or FITNESS FOR A PARTICULAR PURPOSE. See the GNU General Public
License for more details.
You should have received a copy of the GNU General Public License along with this program; if not, write to
the Free Software Foundation, Inc., 51 Franklin Street, Fifth Floor, Boston, MA 02110-1301, USA
Also add information on how to contact you by electronic and paper mail. If the program is interactive, make
it output a short notice like this when it starts in an interactive mode:
Gnomovision version 69, Copyright (C) year name of author
Gnomovision comes with ABSOLUTELY NO WARRANTY; for details type `show w'.
This is free software, and you are welcome to redistribute it under certain conditions; type `show c' for details.
The hypothetical commands `show w' and `show c' should show the appropriate parts of the General Public
License. Of course, the commands you use may be called something other than `show w' and `show c'; they
could even be mouse-clicks or menu items--whatever suits your program.
You should also get your employer (if you work as a programmer) or your school, if any, to sign a "copyright
disclaimer" for the program, if necessary. Here is a sample; alter the names:
Yoyodyne, Inc., hereby disclaims all copyright interest in the program
`Gnomovision' (which makes passes at compilers) written by James Hacker.
<signature of Ty Coon>, 1 April 1989
Ty Coon, President of Vice
This General Public License does not permit incorporating your program into proprietary programs. If your
program is a subroutine library, you may consider it more useful to permit linking proprietary applications with
the library. If this is what you want to do, use the GNU Lesser General Public License instead of this License.
GNU LESSER GENERAL PUBLIC LICENSE
Copyright (C) 1991, 1999 Free Software Foundation, Inc. 51 Franklin Street, Fifth Floor, Boston, MA 02110-1301
USA Everyone is permitted to copy and distribute verbatim copies of this license document, but changing it is
not allowed. [This is the first released version of the Lesser GPL. It also counts as the successor of the GNU
Library Public License, version 2, hence the version number 2.1.]
The licenses for most software are designed to take away your freedom to share and change it. By contrast,
the GNU General Public Licenses are intended to guarantee your freedom to share and change free software-to make sure the software is free for all its users.
This license, the Lesser General Public License, applies to some specially designated software packages--typically
libraries--of the Free Software Foundation and other authors who decide to use it. You can use it too, but we
NO WARRANTY
LICENSE.LGPLv2.1
Version 2.1, February 1999
Preamble
© ALLNET GmbH Computersysteme 2016 - All rights reserved.
Subject to errors and modifications.
14
Page 15

suggest you first think carefully about whether this license or the ordinary General Public License is the better
strategy to use in any particular case, based on the explanations below.
When we speak of free software, we are referring to freedom of use, not price. Our General Public Licenses are
designed to make sure that you have the freedom to distribute copies of free software (and charge for this
service if you wish); that you receive source code or can get it if you want it; that you can change the software
and use pieces of it in new free programs; and that you are informed that you can do these things.
To protect your rights, we need to make restrictions that forbid distributors to deny you these rights or to ask
you to surrender these rights. These restrictions translate to certain responsibilities for you if you distribute
copies of the library or if you modify it.
For example, if you distribute copies of the library, whether gratis or for a fee, you must give the recipients all
the rights that we gave you. You must make sure that they, too, receive or can get the source code. If you link
other code with the library, you must provide complete object files to the recipients, so that they can relink
them with the library after making changes to the library and recompiling it. And you must show them these
terms so they know their rights.
We protect your rights with a two-step method: (1) we copyright the library, and (2) we offer you this license,
which gives you legal permission to copy, distribute and/or modify the library.
To protect each distributor, we want to make it very clear that there is no warranty for the free library. Also, if
the library is modified by someone else and passed on, the recipients should know that what they have is not
the original version, so that the original author's reputation will not be affected by problems that might be
introduced by others.
Finally, software patents pose a constant threat to the existence of any free program. We wish to make sure
that a company cannot effectively restrict the users of a free program by obtaining a restrictive license from a
patent holder. Therefore, we insist that any patent license obtained for a version of the library must be
consistent with the full freedom of use specified in this license.
Most GNU software, including some libraries, is covered by the ordinary GNU General Public License. This
license, the GNU Lesser General Public License, applies to certain designated libraries, and is quite different
from the ordinary General Public License. We use this license for certain libraries in order to permit linking
those libraries into non-free programs.
When a program is linked with a library, whether statically or using a shared library, the combination of the
two is legally speaking a combined work, a derivative of the original library. The ordinary General Public
License therefore permits such linking only if the entire combination fits its criteria of freedom. The Lesser
General Public License permits more lax criteria for linking other code with the library.
We call this license the "Lesser" General Public License because it does Less to protect the user's freedom than
the ordinary General Public License. It also provides other free software developers Less of an advantage over
competing non-free programs. These disadvantages are the reason we use the ordinary General Public License
for many libraries. However, the Lesser license provides advantages in certain special circumstances.
For example, on rare occasions, there may be a special need to encourage the widest possible use of a certain
library, so that it becomes a de-facto standard. To achieve this, non-free programs must be allowed to use the
library. A more frequent case is that a free library does the same job as widely used non-free libraries. In this
case, there is little to gain by limiting the free library to free software only, so we use the Lesser General Public
License.
In other cases, permission to use a particular library in non-free programs enables a greater number of people
to use a large body of free software. For example, permission to use the GNU C Library in non-free programs
enables many more people to use the whole GNU operating system, as well as its variant, the GNU/Linux
operating system.
Although the Lesser General Public License is Less protective of the users' freedom, it does ensure that the user
of a program that is linked with the Library has the freedom and the wherewithal to run that program using a
modified version of the Library.
The precise terms and conditions for copying, distribution and modification follow. Pay close attention to the
difference between a "work based on the library" and a "work that uses the library". The former contains
code derived from the library, whereas the latter must be combined with the library in order to run.
TERMS AND CONDITIONS FOR COPYING, DISTRIBUTION AND MODIFICATION
0. This License Agreement applies to any software library or other program which contains a notice placed by the
copyright holder or other authorized party saying it may be distributed under the terms of this Lesser General
Public License (also called "this License"). Each licensee is addressed as "you".
A "library" means a collection of software functions and/or data prepared so as to be conveniently linked with
application programs (which use some of those functions and data) to form executables.
The "Library", below, refers to any such software library or work which has been distributed under these terms.
A "work based on the Library" means either the Library or any derivative work under copyright law: that is to
say, a work containing the Library or a portion of it, either verbatim or with modifications and/or translated
straightforwardly into another language. (Hereinafter, translation is included without limitation in the term
"modification".)
"Source code" for a work means the preferred form of the work for making modifications to it. For a library,
complete source code means all the source code for all modules it contains, plus any associated interface
definition files, plus the scripts used to control compilation and installation of the library.
Activities other than copying, distribution and modification are not covered by this License; they are outside its
scope. The act of running a program using the Library is not restricted, and output from such a program is
covered only if its contents constitute a work based on the Library (independent of the use of the Library in a
tool for writing it). Whether that is true depends on what the Library does and what the program that uses the
Library does.
1. You may copy and distribute verbatim copies of the Library's complete source code as you receive it, in any
medium, provided that you conspicuously and appropriately publish on each copy an appropriate copyright
© ALLNET GmbH Computersysteme 2016 - All rights reserved.
GNU LESSER GENERAL PUBLIC LICENSE
Subject to errors and modifications.
15
Page 16

notice and disclaimer of warranty; keep intact all the notices that refer to this License and to the absence of
any warranty; and distribute a copy of this License along with the Library.
You may charge a fee for the physical act of transferring a copy, and you may at your option offer warranty
protection in exchange for a fee.
2. You may modify your copy or copies of the Library or any portion of it, thus forming a work based on the
Library, and copy and distribute such modifications or work under the terms of Section 1 above, provided that
you also meet all of these conditions:
a) The modified work must itself be a software library.
b) You must cause the files modified to carry prominent notices stating that you changed the files and the
date of any change.
c) You must cause the whole of the work to be licensed at no charge to all third parties under the terms of
this License.
d) If a facility in the modified Library refers to a function or a table of data to be supplied by an application
program that uses the facility, other than as an argument passed when the facility is invoked, then you
must make a good faith effort to ensure that, in the event an application does not supply such function or
table, the facility still operates, and performs whatever part of its purpose remains meaningful.
(For example, a function in a library to compute square roots has a purpose that is entirely well-defined
independent of the application. Therefore, Subsection 2d requires that any application-supplied function
or table used by this function must be optional: if the application does not supply it, the square root
function must still compute square roots.)
These requirements apply to the modified work as a whole. If identifiable sections of that work are not derived
from the Library, and can be reasonably considered independent and separate works in themselves, then this
License, and its terms, do not apply to those sections when you distribute them as separate works. But when
you distribute the same sections as part of a whole which is a work based on the Library, the distribution of the
whole must be on the terms of this License, whose permissions for other licensees extend to the entire whole,
and thus to each and every part regardless of who wrote it.
Thus, it is not the intent of this section to claim rights or contest your rights to work written entirely by you;
rather, the intent is to exercise the right to control the distribution of derivative or collective works based on
the Library.
In addition, mere aggregation of another work not based on the Library with the Library (or with a work based
on the Library) on a volume of a storage or distribution medium does not bring the other work under the scope
of this License.
3. You may opt to apply the terms of the ordinary GNU General Public License instead of this License to a given
copy of the Library. To do this, you must alter all the notices that refer to this License, so that they refer to the
ordinary GNU General Public License, version 2, instead of to this License. (If a newer version than version 2 of
the ordinary GNU General Public License has appeared, then you can specify that version instead if you wish.)
Do not make any other change in these notices.
Once this change is made in a given copy, it is irreversible for that copy, so the ordinary GNU General Public
License applies to all subsequent copies and derivative works made from that copy.
This option is useful when you wish to copy part of the code of the Library into a program that is not a library.
4. You may copy and distribute the Library (or a portion or derivative of it, under Section 2) in object code or
executable form under the terms of Sections 1 and 2 above provided that you accompany it with the complete
corresponding machine-readable source code, which must be distributed under the terms of Sections 1 and 2
above on a medium customarily used for software interchange.
If distribution of object code is made by offering access to copy from a designated place, then offering
equivalent access to copy the source code from the same place satisfies the requirement to distribute the source
code, even though third parties are not compelled to copy the source along with the object code.
5. A program that contains no derivative of any portion of the Library, but is designed to work with the Library by
being compiled or linked with it, is called a "work that uses the Library". Such a work, in isolation, is not a
derivative work of the Library, and therefore falls outside the scope of this License.
However, linking a "work that uses the Library" with the Library creates an executable that is a derivative of
the Library (because it contains portions of the Library), rather than a "work that uses the library". The
executable is therefore covered by this License. Section 6 states terms for distribution of such executables.
When a "work that uses the Library" uses material from a header file that is part of the Library, the object code
for the work may be a derivative work of the Library even though the source code is not. Whether this is true is
especially significant if the work can be linked without the Library, or if the work is itself a library. The
threshold for this to be true is not precisely defined by law.
If such an object file uses only numerical parameters, data structure layouts and accessors, and small macros and
small inline functions (ten lines or less in length), then the use of the object file is unrestricted, regardless of
whether it is legally a derivative work. (Executables containing this object code plus portions of the Library will
still fall under Section 6.)
Otherwise, if the work is a derivative of the Library, you may distribute the object code for the work under the
terms of Section 6. Any executables containing that work also fall under Section 6, whether or not they are
linked directly with the Library itself.
6. As an exception to the Sections above, you may also combine or link a "work that uses the Library" with the
Library to produce a work containing portions of the Library, and distribute that work under terms of your
choice, provided that the terms permit modification of the work for the customer's own use and reverse
engineering for debugging such modifications.
You must give prominent notice with each copy of the work that the Library is used in it and that the Library
and its use are covered by this License. You must supply a copy of this License. If the work during execution
displays copyright notices, you must include the copyright notice for the Library among them, as well as a
reference directing the user to the copy of this License. Also, you must do one of these things:
a) Accompany the work with the complete corresponding machine-readable source code for the Library
including whatever changes were used in the work (which must be distributed under Sections 1 and 2
© ALLNET GmbH Computersysteme 2016 - All rights reserved.
Subject to errors and modifications.
16
Page 17

above); and, if the work is an executable linked with the Library, with the complete machine-readable
"work that uses the Library", as object code and/or source code, so that the user can modify the Library
and then relink to produce a modified executable containing the modified Library. (It is understood that
the user who changes the contents of definitions files in the Library will not necessarily be able to
recompile the application to use the modified definitions.)
b) Use a suitable shared library mechanism for linking with the Library. A suitable mechanism is one that (1)
uses at run time a copy of the library already present on the user's computer system, rather than copying
library functions into the executable, and (2) will operate properly with a modified version of the library, if
the user installs one, as long as the modified version is interface-compatible with the version that the work
was made with.
c) Accompany the work with a written offer, valid for at least three years, to give the same user the materials
specified in Subsection 6a, above, for a charge no more than the cost of performing this distribution.
d) If distribution of the work is made by offering access to copy from a designated place, offer equivalent
access to copy the above specified materials from the same place.
e) Verify that the user has already received a copy of these materials or that you have already sent this user a
copy.
For an executable, the required form of the "work that uses the Library" must include any data and utility
programs needed for reproducing the executable from it. However, as a special exception, the materials to be
distributed need not include anything that is normally distributed (in either source or binary form) with the
major components (compiler, kernel, and so on) of the operating system on which the executable runs, unless
that component itself accompanies the executable.
It may happen that this requirement contradicts the license restrictions of other proprietary libraries that do
not normally accompany the operating system. Such a contradiction means you cannot use both them and the
Library together in an executable that you distribute.
7. You may place library facilities that are a work based on the Library side-by-side in a single library together
with other library facilities not covered by this License, and distribute such a combined library, provided that
the separate distribution of the work based on the Library and of the other library facilities is otherwise
permitted, and provided that you do these two things:
a) Accompany the combined library with a copy of the same work based on the Library, uncombined with
any other library facilities. This must be distributed under the terms of the Sections above.
b) Give prominent notice with the combined library of the fact that part of it is a work based on the Library,
8. You may not copy, modify, sublicense, link with, or distribute the Library except as expressly provided under
9. You are not required to accept this License, since you have not signed it. However, nothing else grants you
10. Each time you redistribute the Library (or any work based on the Library), the recipient automatically receives a
11. If, as a consequence of a court judgment or allegation of patent infringement or for any other reason (not
12. If the distribution and/or use of the Library is restricted in certain countries either by patents or by copyrighted
13. The Free Software Foundation may publish revised and/or new versions of the Lesser General Public License
and explaining where to find the accompanying uncombined form of the same work.
this License. Any attempt otherwise to copy, modify, sublicense, link with, or distribute the Library is void, and
will automatically terminate your rights under this License. However, parties who have received copies, or
rights, from you under this License will not have their licenses terminated so long as such parties remain in full
compliance.
permission to modify or distribute the Library or its derivative works. These actions are prohibited by law if you
do not accept this License. Therefore, by modifying or distributing the Library (or any work based on the
Library), you indicate your acceptance of this License to do so, and all its terms and conditions for copying,
distributing or modifying the Library or works based on it.
license from the original licensor to copy, distribute, link with or modify the Library subject to these terms and
conditions. You may not impose any further restrictions on the recipients' exercise of the rights granted herein.
You are not responsible for enforcing compliance by third parties with this License.
limited to patent issues), conditions are imposed on you (whether by court order, agreement or otherwise) that
contradict the conditions of this License, they do not excuse you from the conditions of this License. If you
cannot distribute so as to satisfy simultaneously your obligations under this License and any other pertinent
obligations, then as a consequence you may not distribute the Library at all. For example, if a patent license
would not permit royalty-free redistribution of the Library by all those who receive copies directly or indirectly
through you, then the only way you could satisfy both it and this License would be to refrain entirely from
distribution of the Library.
If any portion of this section is held invalid or unenforceable under any particular circumstance, the balance of
the section is intended to apply, and the section as a whole is intended to apply in other circumstances.
It is not the purpose of this section to induce you to infringe any patents or other property right claims or to
contest validity of any such claims; this section has the sole purpose of protecting the integrity of the free
software distribution system which is implemented by public license practices. Many people have made
generous contributions to the wide range of software distributed through that system in reliance on consistent
application of that system; it is up to the author/donor to decide if he or she is willing to distribute software
through any other system and a licensee cannot impose that choice.
This section is intended to make thoroughly clear what is believed to be a consequence of the rest of this
License.
interfaces, the original copyright holder who places the Library under this License may add an explicit
geographical distribution limitation excluding those countries, so that distribution is permitted only in or
among countries not thus excluded. In such case, this License incorporates the limitation as if written in the
body of this License.
from time to time. Such new versions will be similar in spirit to the present version, but may differ in detail to
address new problems or concerns.
Each version is given a distinguishing version number. If the Library specifies a version number of this License
which applies to it and "any later version", you have the option of following the terms and conditions either of
© ALLNET GmbH Computersysteme 2016 - All rights reserved.
Subject to errors and modifications.
17
Page 18

that version or of any later version published by the Free Software Foundation. If the Library does not specify a
license version number, you may choose any version ever published by the Free Software Foundation.
14. If you wish to incorporate parts of the Library into other free programs whose distribution conditions are
incompatible with these, write to the author to ask for permission. For software which is copyrighted by the
Free Software Foundation, write to the Free Software Foundation; we sometimes make exceptions for this. Our
decision will be guided by the two goals of preserving the free status of all derivatives of our free software and
of promoting the sharing and reuse of software generally.
15. BECAUSE THE LIBRARY IS LICENSED FREE OF CHARGE, THERE IS NO WARRANTY FOR THE LIBRARY, TO THE
EXTENT PERMITTED BY APPLICABLE LAW. EXCEPT WHEN OTHERWISE STATED IN WRITING THE COPYRIGHT
HOLDERS AND/OR OTHER PARTIES PROVIDE THE LIBRARY "AS IS" WITHOUT WARRANTY OF ANY KIND, EITHER
EXPRESSED OR IMPLIED, INCLUDING, BUT NOT LIMITED TO, THE IMPLIED WARRANTIES OF MERCHANTABILITY
AND FITNESS FOR A PARTICULAR PURPOSE. THE ENTIRE RISK AS TO THE QUALITY AND PERFORMANCE OF THE
LIBRARY IS WITH YOU. SHOULD THE LIBRARY PROVE DEFECTIVE, YOU ASSUME THE COST OF ALL NECESSARY
SERVICING, REPAIR OR CORRECTION.
16. IN NO EVENT UNLESS REQUIRED BY APPLICABLE LAW OR AGREED TO IN WRITING WILL ANY COPYRIGHT
HOLDER, OR ANY OTHER PARTY WHO MAY MODIFY AND/OR REDISTRIBUTE THE LIBRARY AS PERMITTED
ABOVE, BE LIABLE TO YOU FOR DAMAGES, INCLUDING ANY GENERAL, SPECIAL, INCIDENTAL OR
CONSEQUENTIAL DAMAGES ARISING OUT OF THE USE OR INABILITY TO USE THE LIBRARY (INCLUDING BUT
NOT LIMITED TO LOSS OF DATA OR DATA BEING RENDERED INACCURATE OR LOSSES SUSTAINED BY YOU OR
THIRD PARTIES OR A FAILURE OF THE LIBRARY TO OPERATE WITH ANY OTHER SOFTWARE), EVEN IF SUCH
HOLDER OR OTHER PARTY HAS BEEN ADVISED OF THE POSSIBILITY OF SUCH DAMAGES.
How to Apply These Terms to Your New Libraries
If you develop a new library, and you want it to be of the greatest possible use to the public, we recommend
making it free software that everyone can redistribute and change. You can do so by permitting redistribution
under these terms (or, alternatively, under the terms of the ordinary General Public License).
To apply these terms, attach the following notices to the library. It is safest to attach them to the start of each
source file to most effectively convey the exclusion of warranty; and each file should have at least the
"copyright" line and a pointer to where the full notice is found.
<one line to give the library's name and a brief idea of what it does.> Copyright (C) <year> <name of author>
This library is free software; you can redistribute it and/or modify it under the terms of the GNU Lesser General
Public License as published by the Free Software Foundation; either version 2.1 of the License, or (at your
option) any later version.
This library is distributed in the hope that it will be useful, but WITHOUT ANY WARRANTY; without even the
implied warranty of MERCHANTABILITY or FITNESS FOR A PARTICULAR PURPOSE. See the GNU Lesser General
Public License for more details.
You should have received a copy of the GNU Lesser General Public License along with this library; if not, write
to the Free Software Foundation, Inc., 51 Franklin Street, Fifth Floor, Boston, MA 02110-1301 USA
Also add information on how to contact you by electronic and paper mail.
You should also get your employer (if you work as a programmer) or your school, if any, to sign a "copyright
disclaimer" for the library, if necessary. Here is a sample; alter the names:
Yoyodyne, Inc., hereby disclaims all copyright interest in the library `Frob' (a library for tweaking knobs) written
by James Random Hacker.
<signature of Ty Coon>, 1 April 1990 Ty Coon, President of Vice
That's all there is to it!
NO WARRANTY
END OF TERMS AND CONDITIONS
© ALLNET GmbH Computersysteme 2016 - All rights reserved.
Subject to errors and modifications.
18
 Loading...