

Page 1

AlliedView™-EMS 4.0
INSTALLATION GUIDE
AlliedView™-EMS 4.0 INSTALLATION GUIDE Page 1 of 29
Page 2

TABLE OF CONTENTS
INTRODUCTION.............................................................................................................................................. 3
1
2 SYSTEM REQUIREMENTS................................................................................................................................3
2.1 WINDOWS................................................................................................................................................................. 3
2.2 SOLARIS ......................................................................................................................................................................3
2.3 HP-UX....................................................................................................................................................................... 3
3 BEFORE YOU BEGIN........................................................................................................................................4
4 INSTALLING ALLIEDVIEW-EMS 4.0.............................................................................................................. 4
4.1 WINDOWS............................................................................................................................................................. 4
4.2 HP-UX.....................................................................................................................................................................14
4.3 SOLARIS .................................................................................................................................................................14
5 CONFIGURATION (WINDOWS)...............................................................................................................14
6 INTEGRATING ALLIEDVIEW-EMS 4.0 WITH SNMPC ...........................................................................15
7 INTEGRATING ALLIEDVIEW-EMS 4.0 WITH OPENVIEW....................................................................16
8 INTEGRATING ALLIEDVIEW-EMS 4.0 WITH NETVIEW.......................................................................18
9 INTEGRATING ALLIEDVIEW-EMS 4.0 WITH WHATSUP.....................................................................19
10 UNINSTALLING ALLIEDVIEW-EMS OR AT-VIEW PLUS.......................................................................20
10.1 WINDOWS...............................................................................................................................................................20
10.2 UNIX ....................................................................................................................................................................... 22
11 LICENSE REGISTRATION.............................................................................................................................. 23
12 INSTALLATION/UNINSTALLATION NOTES..........................................................................................24
12.1 INSTALLATION .........................................................................................................................................................24
12.2 UNINSTALLATION ...................................................................................................................................................25
13 ERROR/ALERT MESSAGES.............................................................................................................................26
AlliedView™-EMS 4.0 INSTALLATION GUIDE Page 2 of 29
Page 3

1 INTRODUCTION
This Installation Guide describes the installation, configuration, and registration procedures for
AlliedView-EMS 4.0 on Windows and UNIX. It also describes the system requirements for the
application. AlliedView-EMS comprises the Device Manager application for managing Allied Telesis
devices, the MIB browser AMIGO, the MIB Compiler, VLAN Manager and QoS Manager.
2 SYSTEM REQUIREMENTS
The following software and hardware components are required to run AlliedView-EMS 4.0. Make
sure that your system meets these requirements before installing AlliedView-EMS 4.0.
2.1 Windows
Hardware Pentium based PC, 64MB RAM (128MB+ recommended)
CPU Pentium 166MHz or greater (400MHz+ recommended)
Operating System 32-bit Windows: Windows 2000 (SP3 or later), Windows XP
(SP1 or later), Windows 2003
Video 1024 x 768 pixels, 64K or more colors
Supported NMS HP OpenView Network Node Manager v6.20 and v7.0; SNMPc
5.1.6c, 6.0, 7.0 and 7.1; Tivoli NetView 7.1.3; Ipswitch
WhatsUp Professional 2006
Hard Disk Space 120MB or greater (240MB or greater HDD space is temporarily
required during installation)
2.2 Solaris
Hardware SPARC station 20 or UltraSparc series (UltraSparc
recommended), 128MB RAM (256MB recommended)
Operating System Sun OS 5.8/Solaris 8 (32-bit version)
Video 64K or more colors
Supported NMS HP OpenView Network Node Manager v6.20 and v7.0
Hard Disk Space 145MB or greater (at least 15MB of SWAP area is required
during start-up; 275MB HDD space is temporarily required
during installation)
2.3 HP-UX
Hardware HP 9000 Workstations, HP Visualize Workstations, 128 MB
RAM (256 recommended)
Operating System HP-UX 11 (32-bit version)
Video 64K or more colors
Supported NMS HP OpenView Network Node Manager v6.20 and v7.0
Hard Disk Space 220MB or greater (at least 15MB of SWAP area is required
during start-up; 435MB HDD space is temporarily required
during installation)
AlliedView™-EMS 4.0 INSTALLATION GUIDE Page 3 of 29
Page 4

3 BEFORE YOU BEGIN
Make sure that you satisfy the following requirements before installing AlliedView-EMS 4.0.
• You must have administrative rights on the machine where you will install AlliedView-EMS
4.0. To make sure that you have administrative rights, log on as administrator before
installing AlliedView-EMS 4.0.
• If your machine is defined as an Active Directory Domain Controller and if you plan to
integrate AlliedView-EMS with a network management application, you should use only one
administrator account to install both the network management application and AlliedViewEMS.
• If you plan to integrate AlliedView-EMS 4.0 with Castle Rock SNMPc or HP OpenView, you
have to install SNMPc or OpenView first before installing AlliedView-EMS 4.0. Before
installing AlliedView-EMS 4.0, stop SNMPc or OpenView if it is running.
• If you plan to integrate AlliedView-EMS 4.0 with Ipswitch WhatsUp, you have to install
WhatsUp first before installing AlliedView-EMS 4.0. Before installing AlliedView-EMS 4.0,
close the WhatsUp application, stop the WhatsUp Engine service and start the WhatsUp
SQL services.
• If you plan to integrate AlliedView-EMS 4.0 with Tivoli NetView, you have to install NetView
first before installing AlliedView-EMS 4.0. Before installing AlliedView-EMS 4.0, ensure that
NetView is running.
• Please refer to Section 12 Installation/Uninstallation Notes
issues.
for any known installation-related
4 INSTALLING ALLIEDVIEW-EMS 4.0
4.1 WINDOWS
To install AlliedView-EMS 4.0 for Windows, perform the following procedure.
1. Close all Windows applications before installing AlliedView-EMS 4.0 so that the
application can detect any existing network management system (NMS) installation in
the shortest possible time.
2. Insert the AlliedView-EMS 4.0 Installation CD in the CD drive. The AlliedView-EMS 4.0
installation setup program will automatically execute and the AlliedView-EMS 4.0 splash
screen is displayed for a few seconds.
If you downloaded the AlliedView-EMS installer from the Allied Telesis FTP site, point
to the folder where the installer program was copied to and double click EMS400.exe.
3. The Welcome window appears after the splash screen has been displayed.
AlliedView™-EMS 4.0 INSTALLATION GUIDE Page 4 of 29
Page 5
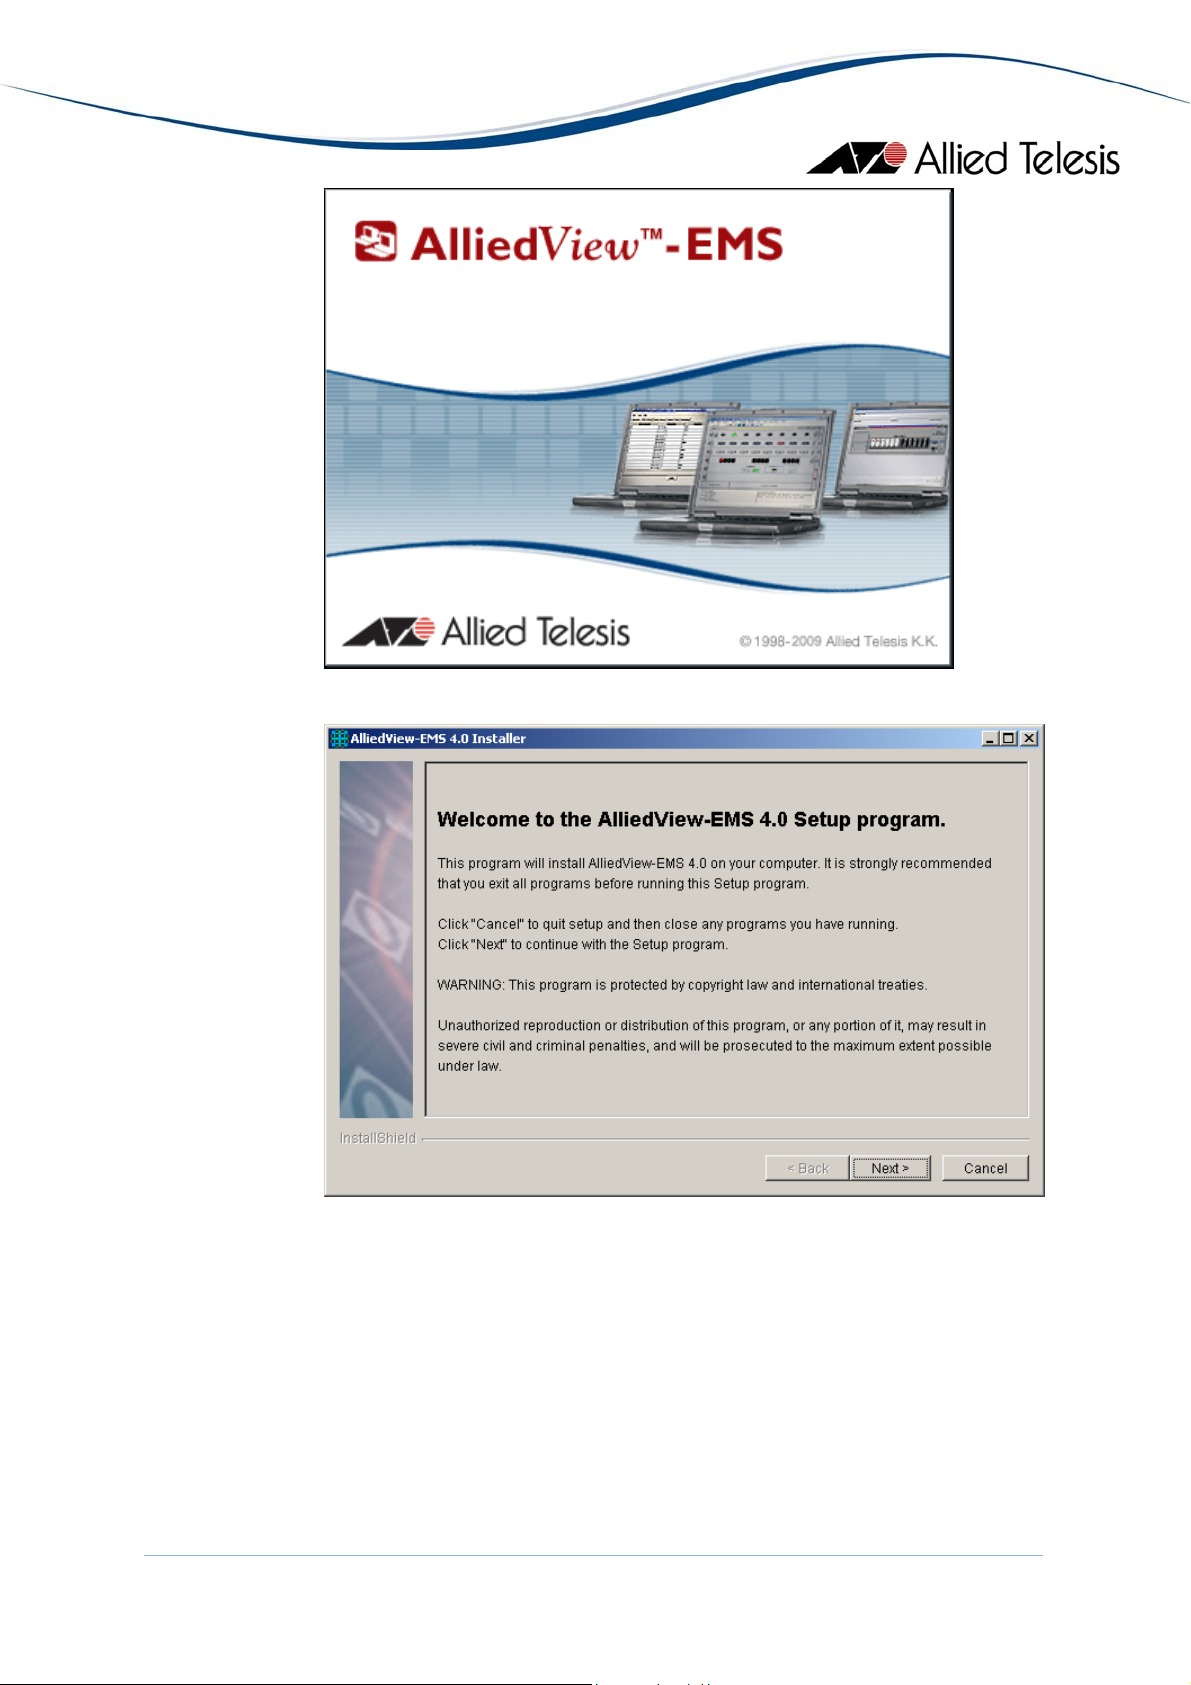
Click Next to continue.
AlliedView-EMS supports Windows 2000, Windows XP and Windows 2003. The next
window will be displayed if the installer has detected that your Windows platform is not
supported.
AlliedView™-EMS 4.0 INSTALLATION GUIDE Page 5 of 29
Page 6
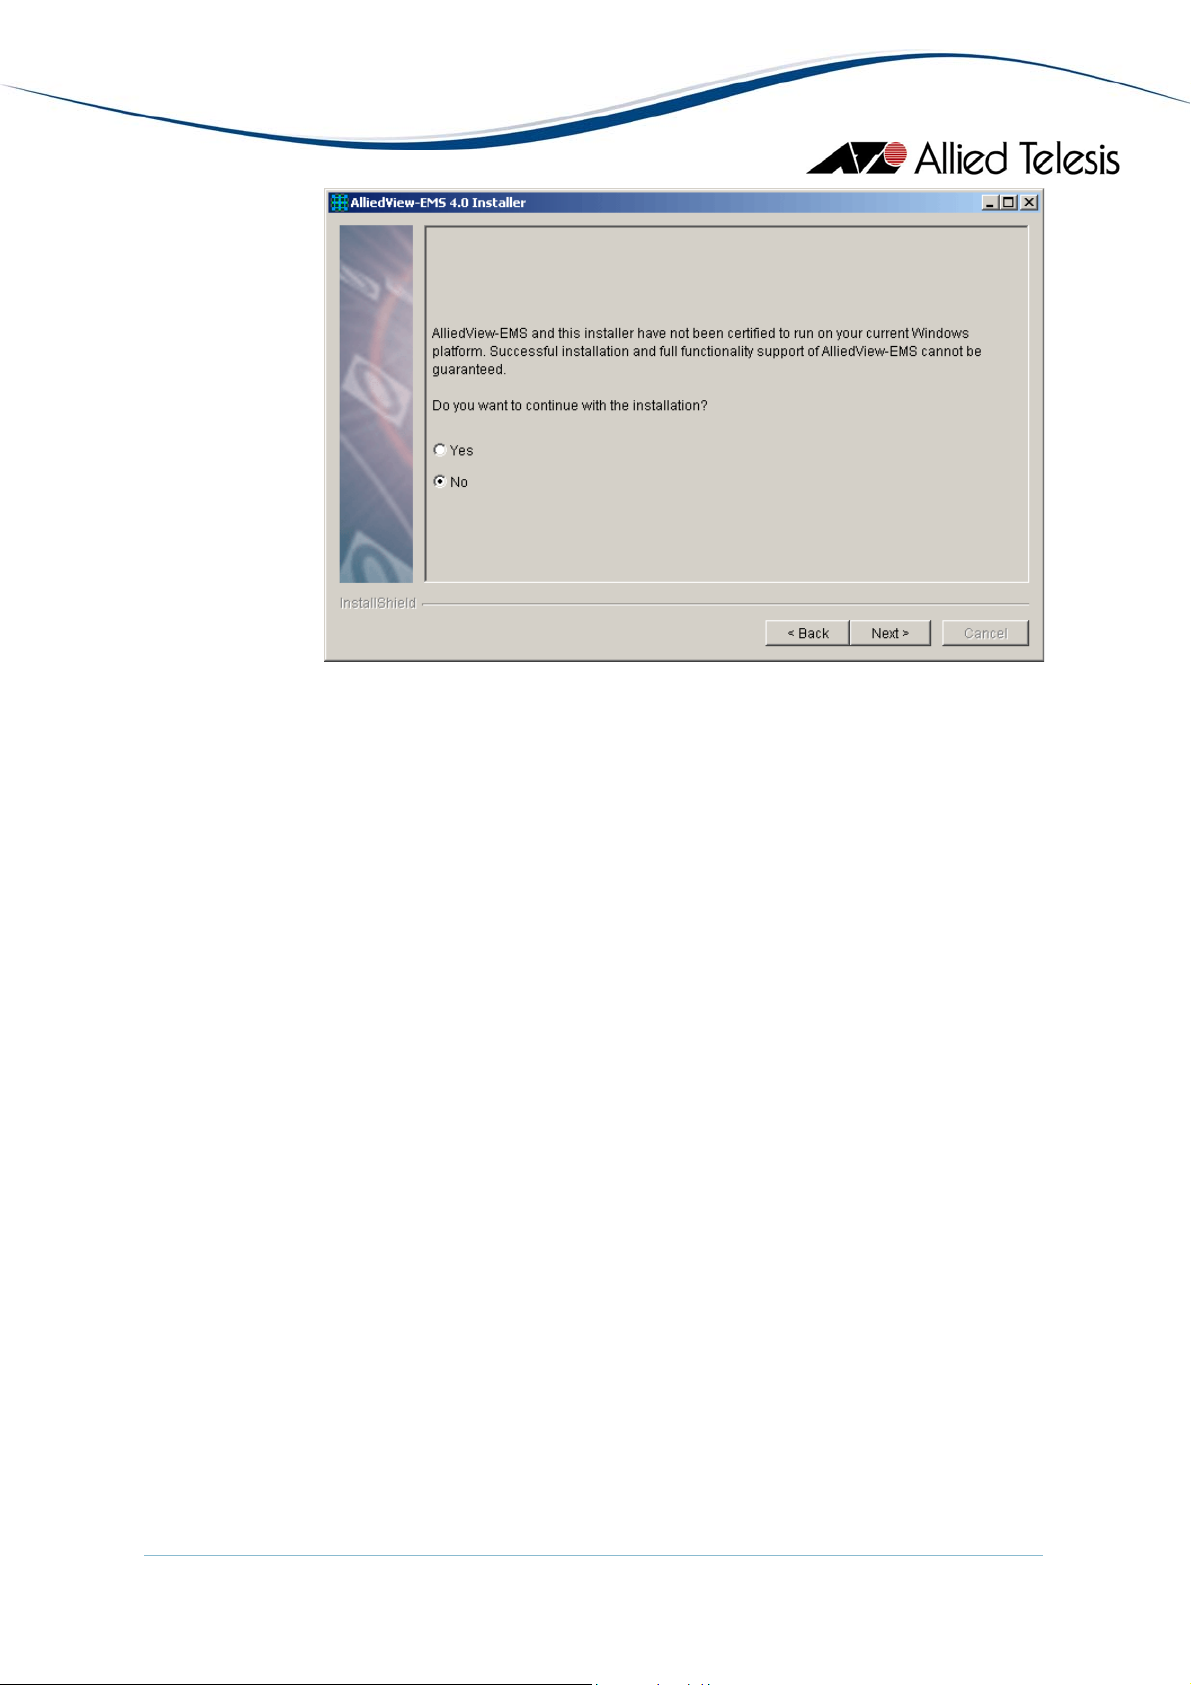
If you do not wish to continue with the installation, select No and click Next to
terminate the installation setup program.
If you wish to continue with the installation, select Yes and click Next. However,
successful installation and full functionality support of AlliedView-EMS will not be
guaranteed since the Windows platform is not supported.
If you plan to integrate AlliedView-EMS 4.0 with an NMS, the NMS should be in the
correct state:
• For SNMPc and OpenView, services should not be running.
• For WhatsUp, the WhatsUp Engine service should not be running but the
WhatsUp SQL services should be running.
• For NetView, services should be running.
The next window is displayed if the installer has detected that your NMS is not in its
correct state.
AlliedView™-EMS 4.0 INSTALLATION GUIDE Page 6 of 29
Page 7
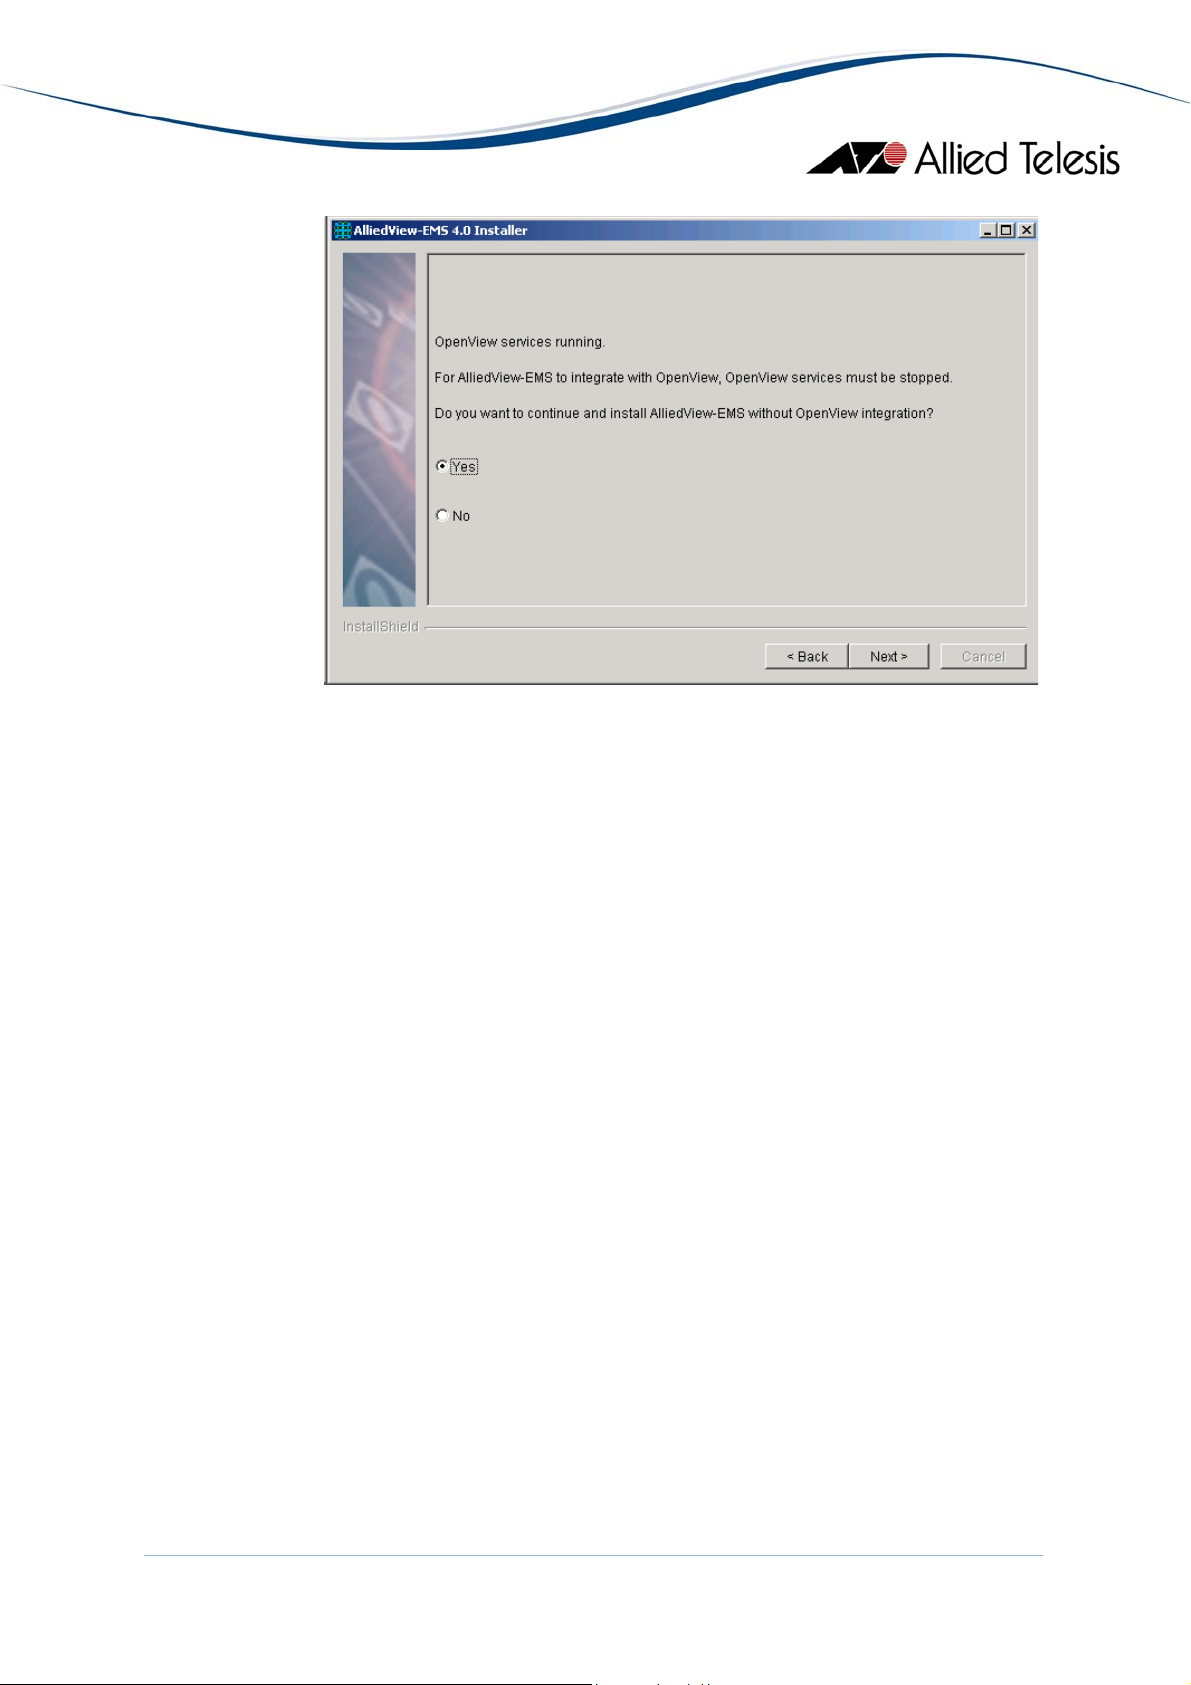
If you plan to integrate AlliedView-EMS 4.0 with SNMPc, OpenView or WhatsUp, select
No and click Next to continue. Selecting No will terminate the installation setup
program. You will then need to stop SNMPc or OpenView services and start the
installer again. For WhatsUp, you will need to stop the WhatsUp Engine service, start
the WhatsUp SQL services and then start the installer again.
If you do not plan to integrate AlliedView-EMS 4.0 with SNMPc, OpenView or
WhatsUp, select Yes and click Next to continue. The installer will then proceed to the
next window.
Note that the opposite applies for NetView. The window will be displayed if NetView
services are not running.
4. Specify whether you want to install both the AlliedView-EMS 4.0 application and its
documentation. You also have the option to install either the application or the
documentation only.
AlliedView™-EMS 4.0 INSTALLATION GUIDE Page 7 of 29
Page 8
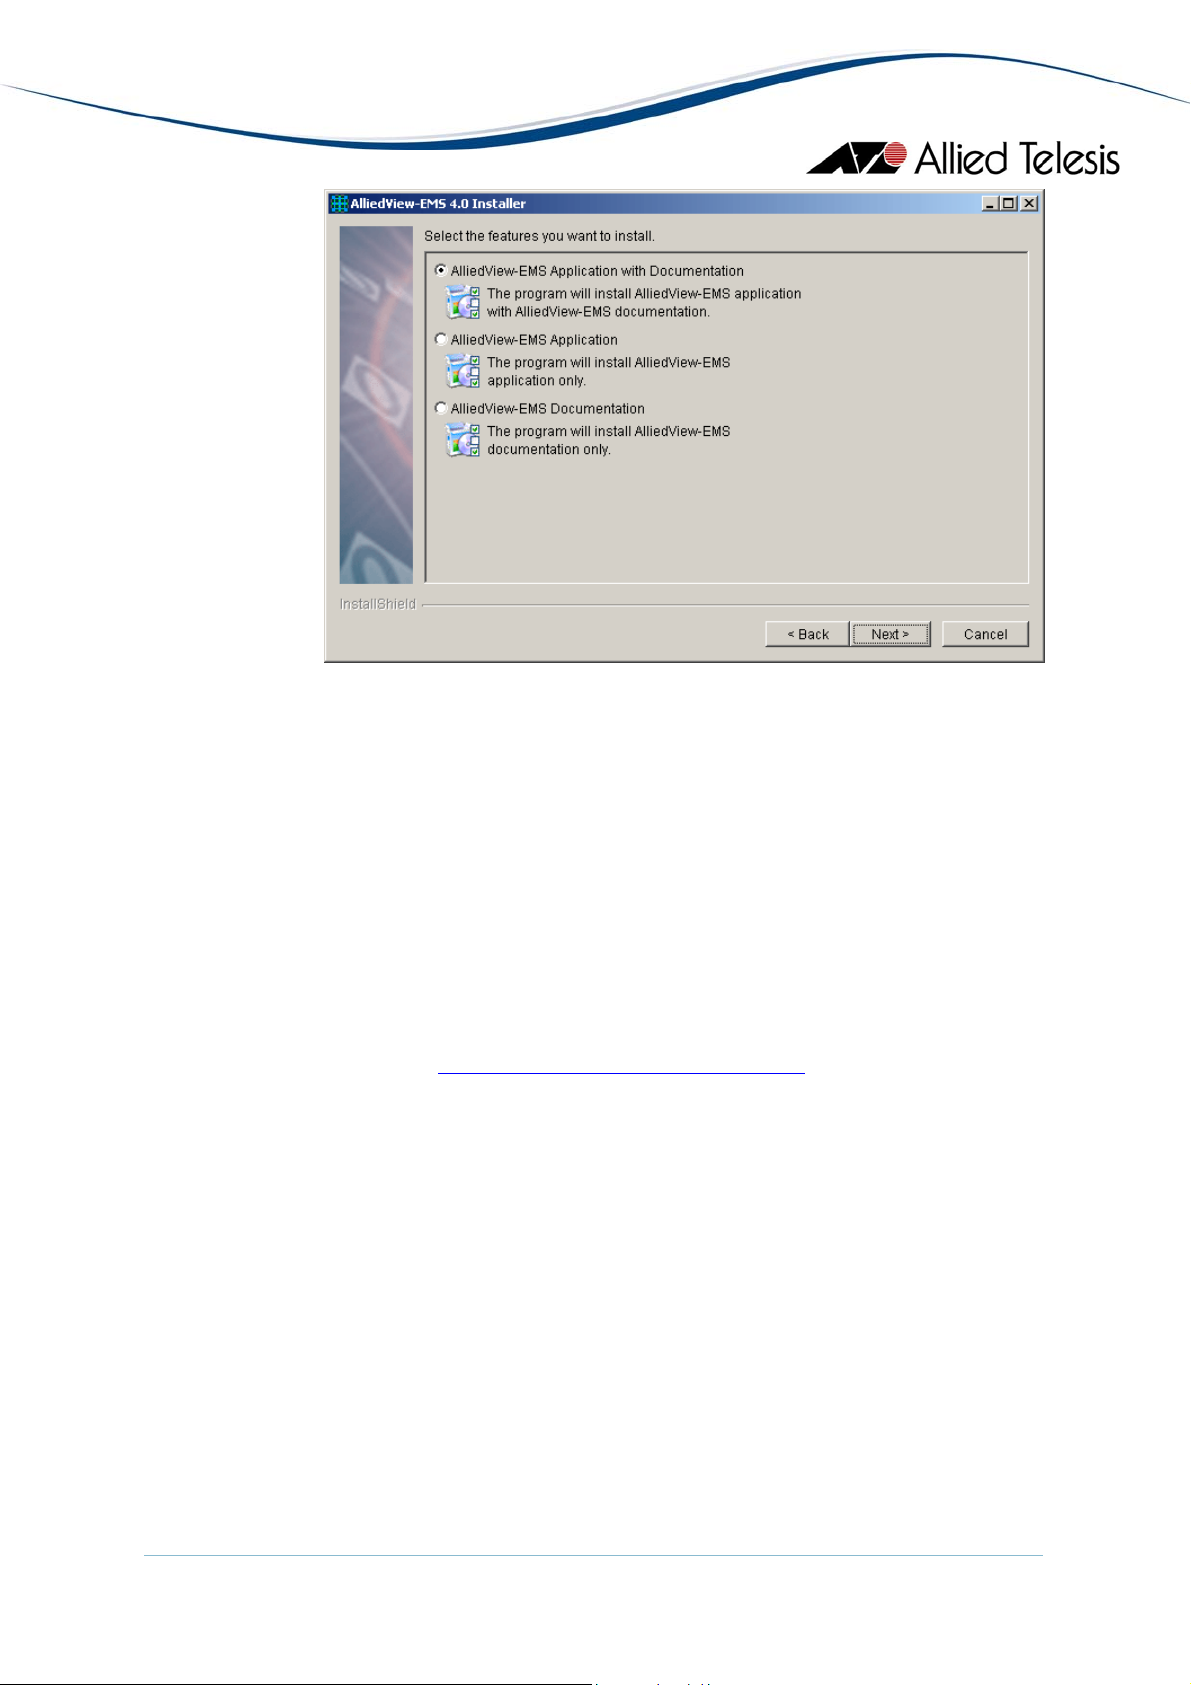
Click Next to continue.
If you choose to install the AlliedView-EMS 4.0 application only, the documentation for
the application will not be available after the installation. You will have to run the
installer again and choose the option “AlliedView-EMS Documentation” to install the
documentation.
If you choose to install the AlliedView-EMS 4.0 documentation only, you will have to
specify a folder where the documents will be installed, unless AlliedView-EMS 4.0
application is already installed. You will not have the option to integrate AlliedView-EMS
4.0 with an NMS since you will not be installing the application.
If there is a previous installation of AT-View Plus or AlliedView-EMS on your machine, a
message box will open advising you to uninstall the application first before running the
AlliedView-EMS 4.0 installer again. To uninstall AT-View Plus or AlliedView-EMS, refer
to Section 10 Uninstalling AlliedView-EMS or AT-View Plus
.
5. Specify the mode or type of installation, if you want to install AlliedView-EMS 4.0 and
integrate it with an NMS or just install the AlliedView-EMS 4.0 application and/or
documentation. The selection below will depend on which network management
system is installed on your computer.
This window will not be displayed if you have chosen to install the AlliedView-EMS 4.0
documentation only, if you do not have an NMS installed on your computer or if the
NMS you wish to integrate is not in the correct state (refer to page 6).
Note - It is not advisable to have more than one network management application
installed on the same machine as conflicts may arise between or among the network
management applications installed. Such conflicts may cause the integration between
AlliedView-EMS and the selected network management application to fail.
Select “NONE” if you want to install AlliedView-EMS 4.0 as a standalone application.
AlliedView™-EMS 4.0 INSTALLATION GUIDE Page 8 of 29
Page 9
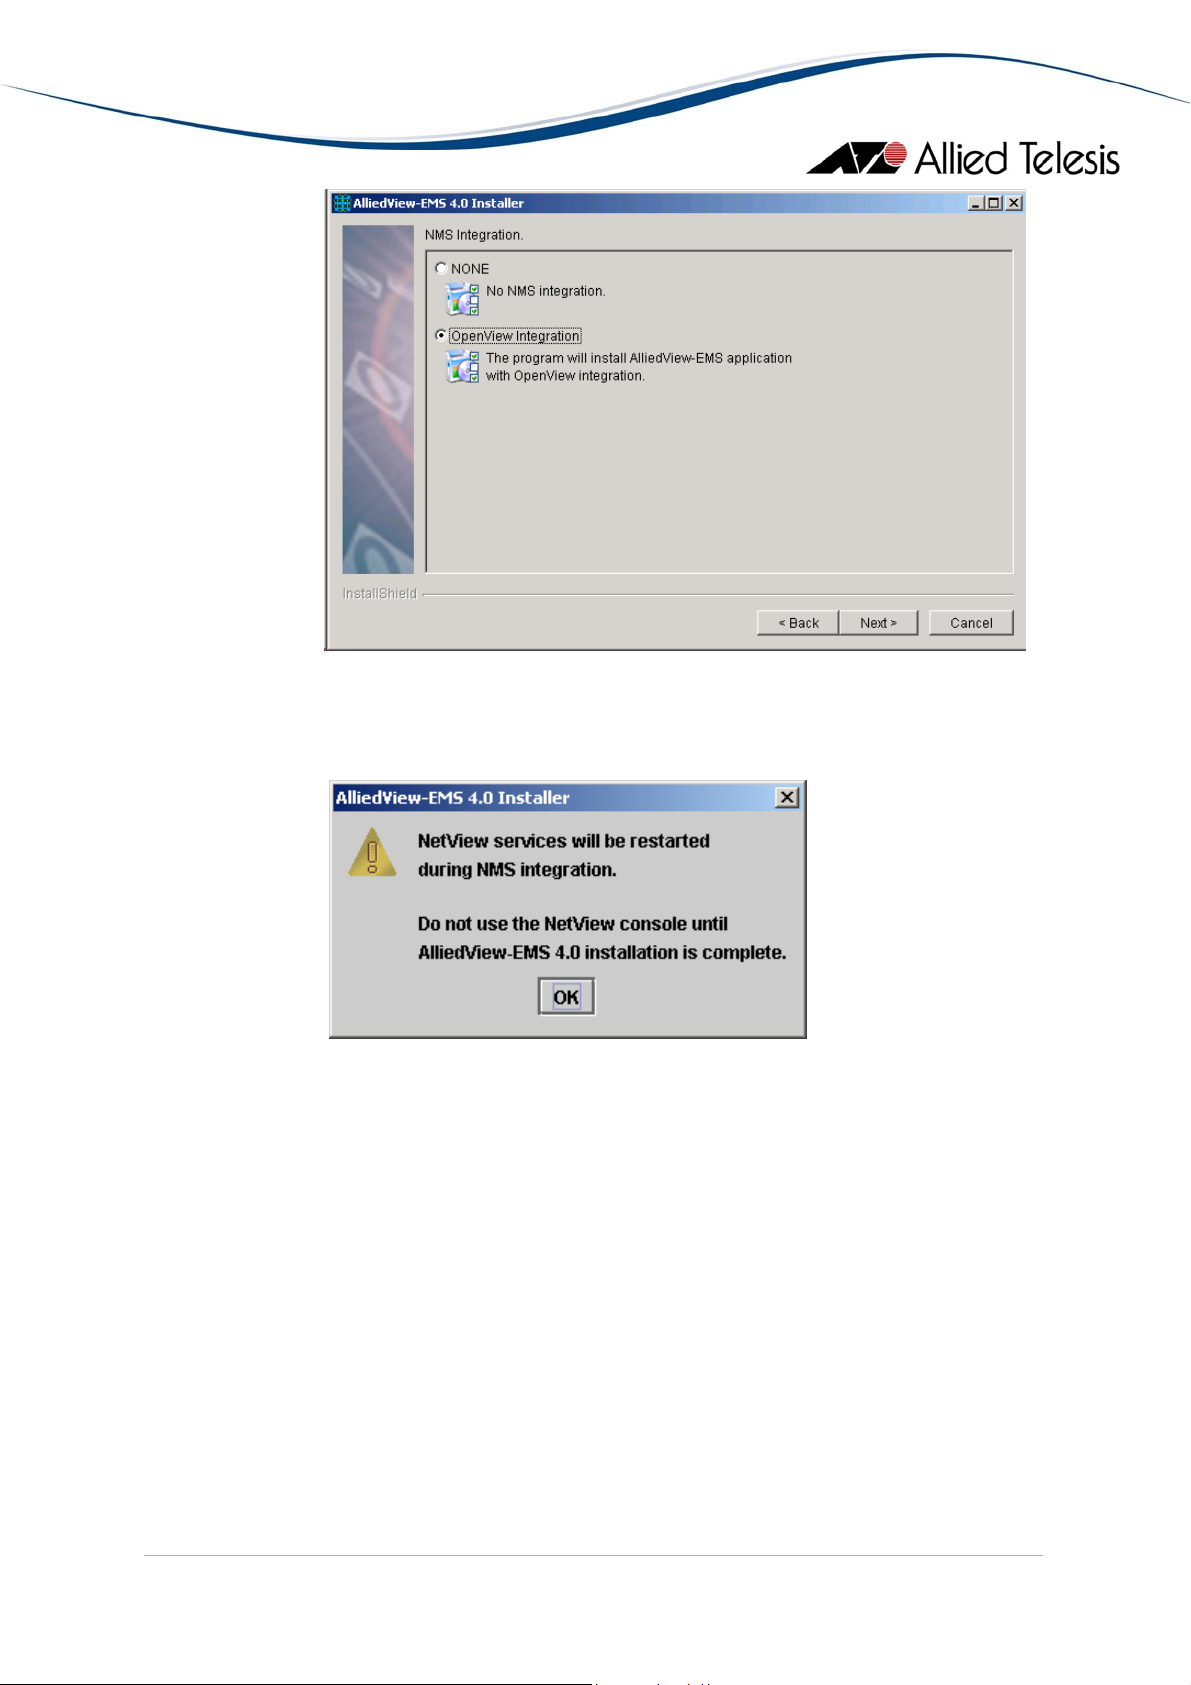
Click Next to continue.
If NetView integration is selected, the following message is displayed:
Click OK to continue.
6. Read the license agreement. To continue with the installation, accept the terms of the
license agreement then click Next.
AlliedView™-EMS 4.0 INSTALLATION GUIDE Page 9 of 29
Page 10

If you choose not to accept the license agreement, the Next button will remain disabled
and you cannot proceed with the installation.
7. A message box is displayed informing you that you are installing a 45-day trial version of
AlliedView-EMS 4.0.
Click OK to continue.
8. You can install AlliedView-EMS 4.0 in the default directory or you can specify the
directory where you want to install AlliedView-EMS 4.0.
AlliedView™-EMS 4.0 INSTALLATION GUIDE Page 10 of 29
Page 11

Click Next to continue.
9. Specify the folder where AlliedView-EMS 4.0 program icons will be stored. The default
folder is AlliedView-EMS.
Click Next to continue.
10. Verify that the installation information you have specified is correct.
AlliedView™-EMS 4.0 INSTALLATION GUIDE Page 11 of 29
Page 12

Click Next to continue.
11. The progress of the installation is displayed.
At this point, the AlliedView-EMS 4.0 installer initializes the WEB and Telnet external
command fields used by the AlliedView-EMS Device Manager application for the current
user. Current user refers to the login name that you used when you logged into the
system. Initializing the external command fields by the installer allows you to access
AlliedView-EMS Help, the WEB browser application within AlliedView-EMS Device
Manager or establish a Telnet management session with a device without the need to
set the values for these external commands first.
In setting the WEB browser external command field on the Windows platform, the
installer checks if Microsoft Internet Explorer or Netscape Navigator is installed. If
AlliedView™-EMS 4.0 INSTALLATION GUIDE Page 12 of 29
Page 13

neither of the two browser programs exists, the external command field is left blank.
On the UNIX platform, the installer checks if Mozilla is installed.
In setting the Telnet external command field on UNIX, the installer uses the standard
Telnet application that comes with the operating system. For Windows 2000, Windows
XP, and Windows 2003, the HyperTerminal application is used.
12. Click Next to continue.
13. The release notes will be displayed. Click Finish to close the installation wizard.
AlliedView™-EMS 4.0 INSTALLATION GUIDE Page 13 of 29
Page 14

4.2 HP-UX
To install AlliedView-EMS 4.0 on HP-UX, perform the following procedure.
1. Make sure that you have root privilege.
2. Copy the EMS400H.bin file to a temporary directory.
3. Move to the directory where the installation file is.
4. Make sure that the installation file is executable. Use the chmod command to correct
the permissions mode of the file.
5. Enter the following on the command line:
6. Press Enter to start the AlliedView-EMS 4.0 installer. The AlliedView-EMS 4.0 splash
4.3 SOLARIS
To install AlliedView-EMS 4.0 on Solaris, perform the following procedure.
1. Make sure that you have root privilege.
2. Copy the EMS400S.bin file to a temporary directory.
3. Move to the directory where the installation file is.
4. Make sure that the installation file is executable. Use chmod command to correct the
5. Enter the following on the command line:
chmod u+x EMS400H.bin
./EMS400H.bin
screen is displayed for a few seconds then the installation wizard will appear. Use the
same procedure as the Windows procedure to install AlliedView-EMS 4.0 on your
UNIX machine.
permission mode of the file.
chmod u+x EMS400S.bin
./EMS400S.bin
6. Press Enter to start the AlliedView-EMS 4.0 installer. The AlliedView-EMS 4.0 splash
screen is displayed for a few seconds then the installation wizard will appear. Use the
same procedure as the Windows procedure to install AlliedView-EMS 4.0 on your
UNIX machine.
5 CONFIGURATION (WINDOWS)
To run AlliedView-EMS 4.0 from the command line on Windows, configure the environment variable
PATH to point to the directory containing the AlliedView-EMS 4.0 executable. For example, if
AlliedView-EMS 4.0 is installed in C:\Program Files\Allied Telesis\AlliedView-EMS\bin, set the PATH
variable as follows:
set PATH=%PATH%;C:\Program Files\Allied Telesis\AlliedView-EMS\bin
This statement can be written in the C:\AUTOEXEC.BAT file, which is automatically executed at
system boot.
AlliedView™-EMS 4.0 INSTALLATION GUIDE Page 14 of 29
Page 15

6 INTEGRATING ALLIEDVIEW-EMS 4.0 WITH SNMPC
The AlliedView-EMS 4.0 installer automatically detects if SNMPc is installed and will perform the
necessary integration so that AlliedView-EMS 4.0 can be started from within SNMPc. If AlliedViewEMS 4.0 is installed before SNMPc, integration will not take place. Reinstallation of AlliedView-EMS
4.0 will be required.
Note - For Device Manager to run properly on the console component of SNMPc, AlliedView-EMS
should be installed with SNMPc integration on both the Server and Console PCs.
When SNMPc is running, double clicking on a device that is not supported by AlliedView-EMS
launches SNMPc’s BitView program. Double clicking on a device supported by AlliedView-EMS
launches the Device Manager application and loads the information for the selected device.
If you are using SNMPc version 5.1.6c and you launched SNMPc for the first time after integration
with AlliedView-EMS 4.0 is done, a message box appears informing you that the newly detected MIB
files will be compiled. Click Done after compilation process is completed. For SNMPc version 6.0,
7.0, and 7.1, compilation of MIB files is done automatically.
AlliedView™-EMS 4.0 INSTALLATION GUIDE Page 15 of 29
Page 16

If a device icon is displayed as a computer in SNMPc, double clicking it may not launch Device
Manager. In this case, poll the device to change its icon to an ATI product icon then double click the
icon again.
Note - SNMPc v7.0.16 and later versions do not allow spaces in device object names. As a result, ATI
devices whose system name contains spaces will not be discovered correctly. Labels for such devices
will show the device’s system name instead of its IP address. Furthermore, launching Device Manager
to connect to these devices will result in the error message: “Request/Poke failed. Error 0x10”.
Device Manager will then hang at this point.
To prevent this from happening, the name-value pair “UseSysName=No” can be added to the Polling
Agent section of the snmpc.ini file. This will force SNMPc to use the IP address of devices as labels.
Note - When SNMPc discovers two or more devices with the same system name, a device icon will
be displayed for each. However, all these device icons will have the same label and will be pointing to
the same specific device – the first one that was discovered.
To prevent this from happening, the name-value pair “NoDupNames=Yes” can be added to the
SNMPcConfig section of the snmpc.ini file. This will configure SNMPc to append a unique number to
the non-unique labels in order to make them unique.
Note - SNMPc, by default, has the ability to recognize the AT-8224XL device as an Allied Telesis
device. This means that, upon discovery of this device, SNMPc automatically displays an ATI device
icon for it. However, integrating AlliedView-EMS with SNMPc alters the reference to the AT8224XL. As a result, after uninstalling AlliedView-EMS, SNMPc no longer recognizes the AT-8224XL
as an Allied Telesis device.
Note - AlliedView-EMS temporarily removes the ati6875.mib file from the SNMPc MIB database
during integration with SNMPc. This MIB file will be returned upon uninstalling AlliedView-EMS.
7 INTEGRATING ALLIEDVIEW-EMS 4.0 WITH OPENVIEW
The AlliedView-EMS 4.0 installer automatically detects if HP OpenView is installed and will perform
the necessary integration so that AlliedView-EMS 4.0 can be started from within OpenView. After
integration, the “AlliedView-EMS” submenu is added to the “Tools” menu. “AlliedView-EMS”
contains the options “Device Manager” and “AMIGO”.
AlliedView™-EMS 4.0 INSTALLATION GUIDE Page 16 of 29
Page 17

To start AlliedView-EMS for an Allied Telesis device, follow the steps below:
1. Select an Allied Telesis device on the network map.
2. Select Tools or right click on the device icon then choose AlliedView-EMS>Device
Manager or AMIGO.
3. Device Manager or AMIGO will be launched.
AlliedView™-EMS 4.0 INSTALLATION GUIDE Page 17 of 29
Page 18

8 INTEGRATING ALLIEDVIEW-EMS 4.0 WITH NETVIEW
The AlliedView-EMS 4.0 installer automatically detects if NetView is installed and will perform the
necessary integration so that AlliedView-EMS 4.0 can be started from within NetView. After
integration, the “AlliedView-EMS” submenu is added to the “Tools” menu. “AlliedView-EMS”
contains the options “Device Manager” and “AMIGO”.
After installing AlliedView-EMS 4.0, NetView does not immediately update its maps to show Allied
Telesis icons. You can use the “Demand Poll” selection from the “Test” menu to force NetView to
refresh its maps or wait for NetView to complete its scheduled “Polling for Node Configuration”.
You can also change the default period of the “Polling for Node Configuration” in order for the
discover node configuration to take effect immediately.
To start AlliedView-EMS for an Allied Telesis device, follow the steps below:
1. Select an Allied Telesis device on the network map.
2. Select Tools>AlliedView-EMS>Device Manager or AMIGO.
3. Device Manager or AMIGO will be launched.
AlliedView™-EMS 4.0 INSTALLATION GUIDE Page 18 of 29
Page 19

9 INTEGRATING ALLIEDVIEW-EMS 4.0 WITH WHATSUP
The AlliedView-EMS 4.0 installer automatically detects if WhatsUp is installed and will perform the
necessary integration so that AlliedView-EMS 4.0 can be started from within WhatsUp. After
integration, the options “AlliedView-EMS Device Manager” and “AlliedView-EMS AMIGO” are added
to the device context menu.
To start AlliedView-EMS for an Allied Telesis device, follow the steps below:
1. Select an Allied Telesis device on the network map.
2. Right click on the device icon then choose AlliedView-EMS Device Manager or
AlliedView-EMS AMIGO.
3. Device Manager or AMIGO will be launched.
Note - There are two Allied Telesis device icons used in WhatsUp – the “WA7500” device icon used
for the AT-WA750x devices and the “ATI” device icon used for all other Allied Telesis devices.
AlliedView™-EMS 4.0 INSTALLATION GUIDE Page 19 of 29
Page 20

10 UNINSTALLING ALLIEDVIEW-EMS OR AT-VIEW PLUS
Before uninstalling AlliedView-EMS or AT-View Plus, make sure that you have administrative rights. If
the machine where you installed AlliedView-EMS is defined as an Active Directory Domain
Controller, make sure that you use the same administrator account that installed AlliedView-EMS to
uninstall it. Using a different administrator account to uninstall AlliedView-EMS will not uninstall the
application completely.
If you are uninstalling AlliedView-EMS or AT-View Plus with NMS integration, check the status of the
NMS. For SNMPc or OpenView, make sure that the services are not running. For NetView, make
sure that its services are running. For WhatsUp, make sure that the application is closed, the
WhatsUp Engine service is not running and the WhatsUp SQL services are running.
10.1 Windows
Use the Control Panel’s “Add/Remove Programs” utility to uninstall AlliedView-EMS or ATView Plus and its components. NMS integration files will also be removed during the
uninstallation process. To uninstall AlliedView-EMS or AT-View Plus for Windows, perform
the following procedure:
1. Select AlliedView-EMS or AT-View Plus then click the “Change/Remove” button. The
AlliedView-EMS or AT-View Plus splash screen will be displayed for a few seconds.
2. In the AlliedView-EMS or AT-View Plus Uninstaller window, click Next to continue.
AlliedView™-EMS 4.0 INSTALLATION GUIDE Page 20 of 29
Page 21

3. A new window is displayed stating that AlliedView-EMS or AT-View Plus and its components
will be uninstalled from its installation folder.
Click Next to uninstall AlliedView-EMS or AT-View Plus.
4. This window is displayed only if the uninstallation program has detected that SNMPc or
OpenView services are running or if NetView services are not running or if the WhatsUp
Engine service is running and the WhatsUp SQL services are not running. Click OK to
terminate the uninstallation. Stop the SNMPc or OpenView services or start the NetView
services or stop the WhatsUp Engine service and start the WhatsUp SQL services and run
the uninstallation program again.
AlliedView™-EMS 4.0 INSTALLATION GUIDE Page 21 of 29
Page 22

5. Click Finish. You have successfully uninstalled AlliedView-EMS or AT-View Plus from your
computer.
10.2 UNIX
To uninstall AlliedView-EMS or AT-View Plus from UNIX, run the application
“uninstaller.bin” found in the _uninstx folder of the AlliedView-EMS or AT-View Plus
installation directory, where x is the latest number.
The Uninstall Wizard will appear. To uninstall AlliedView-EMS or AT-View Plus, perform
steps 2 to 5 of the uninstallation procedure for Windows.
AlliedView™-EMS 4.0 INSTALLATION GUIDE Page 22 of 29
Page 23

11 LICENSE REGISTRATION
This installation automatically provides you with a 45-day trial period. You will need to enter a license
key if you wish to continue to use AlliedView-EMS 4.0 after the trial period expires.
For existing AT-View Plus and AlliedView-EMS users, your license key will not work on this release.
Please contact your Allied Telesis sales representative to upgrade your license.
To register the License Key:
1. Start AlliedView-EMS 4.0.
2. Select Help>License Registration. The License Registration dialog box opens.
3. Click the Register License key button. The Register License dialog box opens.
Enter the License Key and the Company Name indicated on the system-generated email
provided to you by an Allied Telesis sales representative.
4. Click the OK button. The registered License Key and License Type will be displayed.
To modify the License Key:
1. Start AlliedView-EMS 4.0.
AlliedView™-EMS 4.0 INSTALLATION GUIDE Page 23 of 29
Page 24

2. Select Help>License Registration. The License Registration dialog box opens.
5. Click the Modify License key button. The Modify License dialog box opens.
Edit License Key and/or Company Name.
6. Click the OK button. The registered License Key and License Type will be displayed.
12 INSTALLATION/UNINSTALLATION NOTES
12.1 Installation
If OpenView is installed, a command window (black screen) is displayed for a few
seconds after clicking the “Next” button in the Welcome dialog. This is because
the installation setup program checks if OpenView services are running.
When installing AlliedView-EMS 4.0 with NetView integration, you may receive the
warning message “The NetView Console lost connection to the NetView Server.
Exiting the Console.”. This is an expected message and does not affect the
installation process.
AlliedView™-EMS 4.0 INSTALLATION GUIDE Page 24 of 29
Page 25

When installing AlliedView-EMS 4.0 with NetView integration, the installation setup
program will invoke NetView’s “loadmib” application to load the MIB files used by
Allied Telesis devices. Loading the MIB files may take some time to complete.
When installing AlliedView-EMS 4.0 with NetView integration, the following
warning message may be displayed:
“C:\usr\ov\symbols\ati_device_sym.bak exists on this system and is newer
than the file being installed. Do you want to replace this file?”
This happens when an AlliedView-EMS 4.0 was previously uninstalled and installed
again. Click Yes to proceed with the installation setup.
In UNIX, it is recommended that the AlliedView-EMS 4.0 installation setup program
be run on a console. Double clicking the setup program from the File Manager
window will not close the Run window automatically after the installation has been
completed.
Before installing AlliedView-EMS in UNIX, add the location of Mozilla to the PATH
environment variable (e.g. PATH=$PATH:/opt/mozilla). This will allow the
AlliedView-EMS installer to determine where Mozilla is installed. Note that you
must run the AlliedView-EMS installer and applications (Device Manager, VLAN
Manager and QoS Manager) on the same virtual terminal used to add the location
of Mozilla to PATH. The PATH variable does not span virtual terminals so using a
different virtual terminal will cause the Online Help and WEB Browser functions to
fail.
12.2 Uninstallation
InstallShield message “java.lang.NoClassDefFoundError: run Exception in thread
“main”” may be displayed when user with no administrative rights attempts to
uninstall AlliedView-EMS. To uninstall AlliedView-EMS successfully, be sure that
you have administrative rights.
In Windows XP and Windows 2003, if Accessories, Games, Administrative Tools,
or any Windows system folder was selected as the program folder during
installation, an error message is displayed just before uninstallation is completed.
The error message informs the user that the uninstallation program cannot remove
the desktop icon. This however does not affect the uninstallation process. The
designated AlliedView-EMS program folder is still deleted and uninstallation is
processed completely.
In UNIX, after uninstalling AlliedView-EMS, the user should manually delete the
folder where AlliedView-EMS 4.0 was installed. When AlliedView-EMS is uninstalled,
the directories are not totally removed because some files are used to invoke the
un-installation program.
In UNIX, if the folder where AlliedView-EMS 4.0 was previously installed was not
deleted, a directory named _uninstx (where x represents the number of times
AlliedView-EMS was installed) is created. Use the latest _uninstx folder to uninstall
the application.
AlliedView™-EMS 4.0 INSTALLATION GUIDE Page 25 of 29
Page 26

The following notes apply when uninstalling AlliedView-EMS 4.0 with NetView
integration:
o The process to unload MIB files for Allied Telesis devices may take some
time to complete.
o When the NetView applications “\usr\ov\bin\ovw_fields” and
“\usr\ov\bin\ovw_ config” are run after AlliedView-EMS 4.0 is uninstalled,
some information related to AlliedView-EMS are retained in the NetView
database. NetView will continue to recognize Allied Telesis devices but
the Allied Telesis icons will not be shown.
o The following messages may appear when NetView is started after
uninstalling AlliedView-EMS 4.0:
“\usr\ov\bin\disptec.exe:Unable to get map info: The map is not open.
Exiting…”
“java.exe has generated errors and will be closed by Windows. You will
need to restart the program. An error log is being created.”
To correct this error, please do the following:
1. Move the file \usr\ov\symbols\ati_device_sym.bak to \usr\ov\symbols\c.
2. Rename ati_device_sym.bak to ati_device_sym.
3. Start the NetView console. The map should now be displayed.
4. Exit from NetView.
13 ERROR/ALERT MESSAGES
You may encounter the following alert messages while installing AlliedView-EMS 4.0.
Error/Alert Message Description/Solution
You must have administrator rights to install
the AlliedView-EMS 4.0 package.
AlliedView-EMS 4.0 Installer will now
terminate.
AlliedView-EMS and this installer have not
been certified to run on your current
Windows platform. Successful installation
and full functionality support of AlliedViewEMS cannot be guaranteed.
Do you want to continue with the
installation?
AlliedView-EMS [application |
documentation | application and
documentation] [is | are] already installed on
this system.
Please uninstall AlliedView-EMS [application
| documentation| application and
documentation] prior to installing
AlliedView-EMS 4.0.
AlliedView-EMS 4.0 Installer will now
terminate.
You must log on as administrator to the machine
where you will install AlliedView-EMS 4.0.
AlliedView-EMS does not support your Windows
platform. You can proceed with the installation but
successful installation and full functionality of
AlliedView-EMS are not guaranteed.
There is an existing copy of AlliedView-EMS on the
machine where you are performing the installation.
Exit the installation program and uninstall
AlliedView-EMS before running the AlliedView-EMS
4.0 installer again.
AlliedView™-EMS 4.0 INSTALLATION GUIDE Page 26 of 29
Page 27

Error/Alert Message Description/Solution
AT-View Plus m.n is already installed on this
system.
There is an older version of AlliedView-EMS i.e., ATView Plus (where m.n is the version) on the machine
where you are performing the installation.
Please uninstall AT-View Plus m.n prior to
installing AlliedView-EMS 4.0.
Exit the AlliedView-EMS 4.0 installer and uninstall
AT-View Plus m.n. Then run the AlliedView-EMS 4.0
AlliedView-EMS 4.0 Installer will now
installer again.
terminate.
SNMPc [or OpenView] services running.
For AlliedView-EMS to integrate with
SNMPc [or OpenView], SNMPc [or
OpenView] services must be stopped.
NetView services not running.
For AlliedView-EMS to integrate with
NetView, NetView services must be started.
WhatsUp services running and/or WhatsUp
SQL service not running.
For AlliedView-EMS to integrate with
WhatsUp, WhatsUp services must be
stopped and WhatsUp SQL service must be
running.
Do you want to continue and install
AlliedView-EMS without WhatsUp
integration?
SNMPc [or OpenView] services running.
To uninstall AlliedView-EMS 4.0, please stop
SNMPc [or OpenView] services.
SNMPc [or OpenView] is running. It is
recommended that you exit the installation program,
stop SNMPc [or OpenView], then run the
AlliedView-EMS 4.0 installer again if you want to
integrate AlliedView-EMS 4.0 with SNMPc [or
OpenView].
It is recommended that you exit the installation
program, start NetView, then run the AlliedViewEMS 4.0 installer again if you want to integrate
AlliedView-EMS 4.0 with NetView.
It is recommended that you exit the installation
program, stop the WhatsUp Engine service and start
the WhatsUp SQL services, and then run the
AlliedView-EMS 4.0 installer again if you want to
integrate AlliedView-EMS 4.0 with WhatsUp.
To uninstall AlliedView-EMS 4.0, SNMPc [or
OpenView] services must not be running. Exit from
the uninstallation program and stop SNMPc [or
OpenView] services.
AlliedView-EMS 4.0 Uninstaller will now
terminate.
NetView services not running.
To uninstall AlliedView-EMS 4.0, NetView services
must be running. Exit from the uninstallation
To uninstall AlliedView-EMS 4.0, please start
program and start NetView services.
NetView services.
AlliedView-EMS 4.0 Uninstaller will now
terminate.
NetView services will be restarted during
NMS integration. Do not use the NetView
console until AlliedView-EMS 4.0 installation
is complete.
This is a warning message informing you not to use
the NetView console during installation. If you do,
you will receive the message “The NetView Console
lost connection to the NetView Server. Exiting the
Console.”. This is an expected message and does
not affect the installation process.
WhatsUp services running and/or WhatsUp
SQL service not running.
To uninstall AlliedView-EMS 4.0, the WhatsUp
Engine service must not be running and/or the
WhatsUp SQL services must be running. Exit from
To uninstall AlliedView-EMS 4.0, please stop
WhatsUp services and start WhatsUp SQL
AlliedView™-EMS 4.0 INSTALLATION GUIDE Page 27 of 29
the uninstallation program and stop the WhatsUp
Engine service and/or start the WhatsUp SQL
Page 28

Error/Alert Message Description/Solution
service.
services.
AlliedView-EMS 4.0 Uninstaller will now
terminate.
A directory name cannot contain any of the
following characters:
In Windows, do not use the following characters
;+!@#$%^&()={}[]’,*?”<>|` for the directory name .
;+!@#$%^&()={}[]’,*?”<>|`
In UNIX, the colon “:” character is included in the
list of invalid characters.
Invalid format for the directory name. To specify a drive in the directory name, the drive
must be delimited by a colon followed by a
backslash. For example, c:\MyInstall.
A program folder name cannot contain any
of the following characters
;+!@#$%^&()={}[]',*?"<>|\:./`~
In Windows, do not use the following characters
;+!@#$%^&()={}[]',*?"<>|\:./`~ for the program
folder name .
AlliedView™-EMS 4.0 INSTALLATION GUIDE Page 28 of 29
Page 29

© 1998-2009 Allied Telesis K. K.
All rights reserved. No part of this publication may be reproduced without prior written permission from
Allied Telesis, K. K.
Microsoft is a registered trademark of Microsoft Corporation. Netscape Navigator is a registered trademark
of Netscape Communications Corporation. All other product names, company names, logos or other
designations mentioned herein are trademarks or registered trademarks of their respective owners.
Allied Telesis K. K. reserves the right to make changes in specifications and other information contained in this
document without prior written notice. The information provided herein is subject to change without
notice. In no event shall Allied Telesis K. K. be liable for any incidental, special, indirect, or consequential
damages whatsoever, including but not limited to lost profits, arising out of or related to this manual or the
information contained herein, even if Allied Telesis K. K. has been advised of, known, or should have known,
the possibility of such damages.
613-000205 Rev K
USA Headquarters | 19800 North Creek Parkway | Suite 200 | Bothell | WA 98011 | USA | T: +1 800 424 4284 | F: +1 425 481 3895
European Headquarters | Via Motta 24 | 6830 Chiasso | Switzerland | T: +41 91 69769.00 | F: +41 91 69769.11
Asia-Pacific Headquarters | 11 Tai Seng Link | Singapore | 534182 | T: +65 6383 3832 | F: +65 6383 3830
www.alliedtelesis.com
 Loading...