

Allegri 090074040FR001 User Manual
Fixture Assembly
Assembly & Installation Instructions for:
090074 9-LT. CHANDELIER SHORECREST
If you have any questions or problems assembling your fixture please call us for assistance.
Customer Service: (702) 361-4345 or (800) 525-2655
customer.service@kalco.com
WARNING - TO REDUCE THE RISK OF FIRE OR INJURY PLEASE TAKE PRECAUTION AND FOLLOW
THE STEPS BELOW.
1. If you are unfamiliar with electrical wiring, call a qualified electrician to install this unit. More than one person may
be necessary to install fixture, make sure you have enough qualified help.
2. Turn off the power to the fixture's circuit at the service panel. Use a voltage detector to verify that the power is off.
3. DO NOT install bulb which exceeds the maximum wattage specified on the socket label.
SI VOUS AVEZ DES QUESTIONS OU DES PROBLÈMES ASSEMBLAGE DE VOTRE DISPOSITIF S'IL VOUS
PLAÎT APPEL POUR L'ASSISTANCE.
Customer Service: (702) 361-4345 or (800) 525-2655
customer.service@kalco.com
AVERTISSEMENT - POUR RÉDUIRE LES RISQUES D'INCENDIE OU DE BLESSURES S'IL VOUS PLAÎT
PRENDRE DES PRÉCAUTIONS ET SUIVEZ LES ÉTAPES CI-DESSOUS.
1. Si vous n'êtes pas familier avec le câblage électrique, appelez un électricien qualifié pour installer cet appareil.
Plus d'une personne peut être nécessaire d'installer appareil, assurez vous que vous disposez de l'aide assez
qualifié.
2. Coupez l'alimentation au circuit de l'appareil sur le tableau de service. Utiliser un détecteur de tension pour vérifier
que l'alimentation est coupée.
3. NE PAS installer l'ampoule qui excède la puissance maximale indiquée sur l'étiquette du socket.
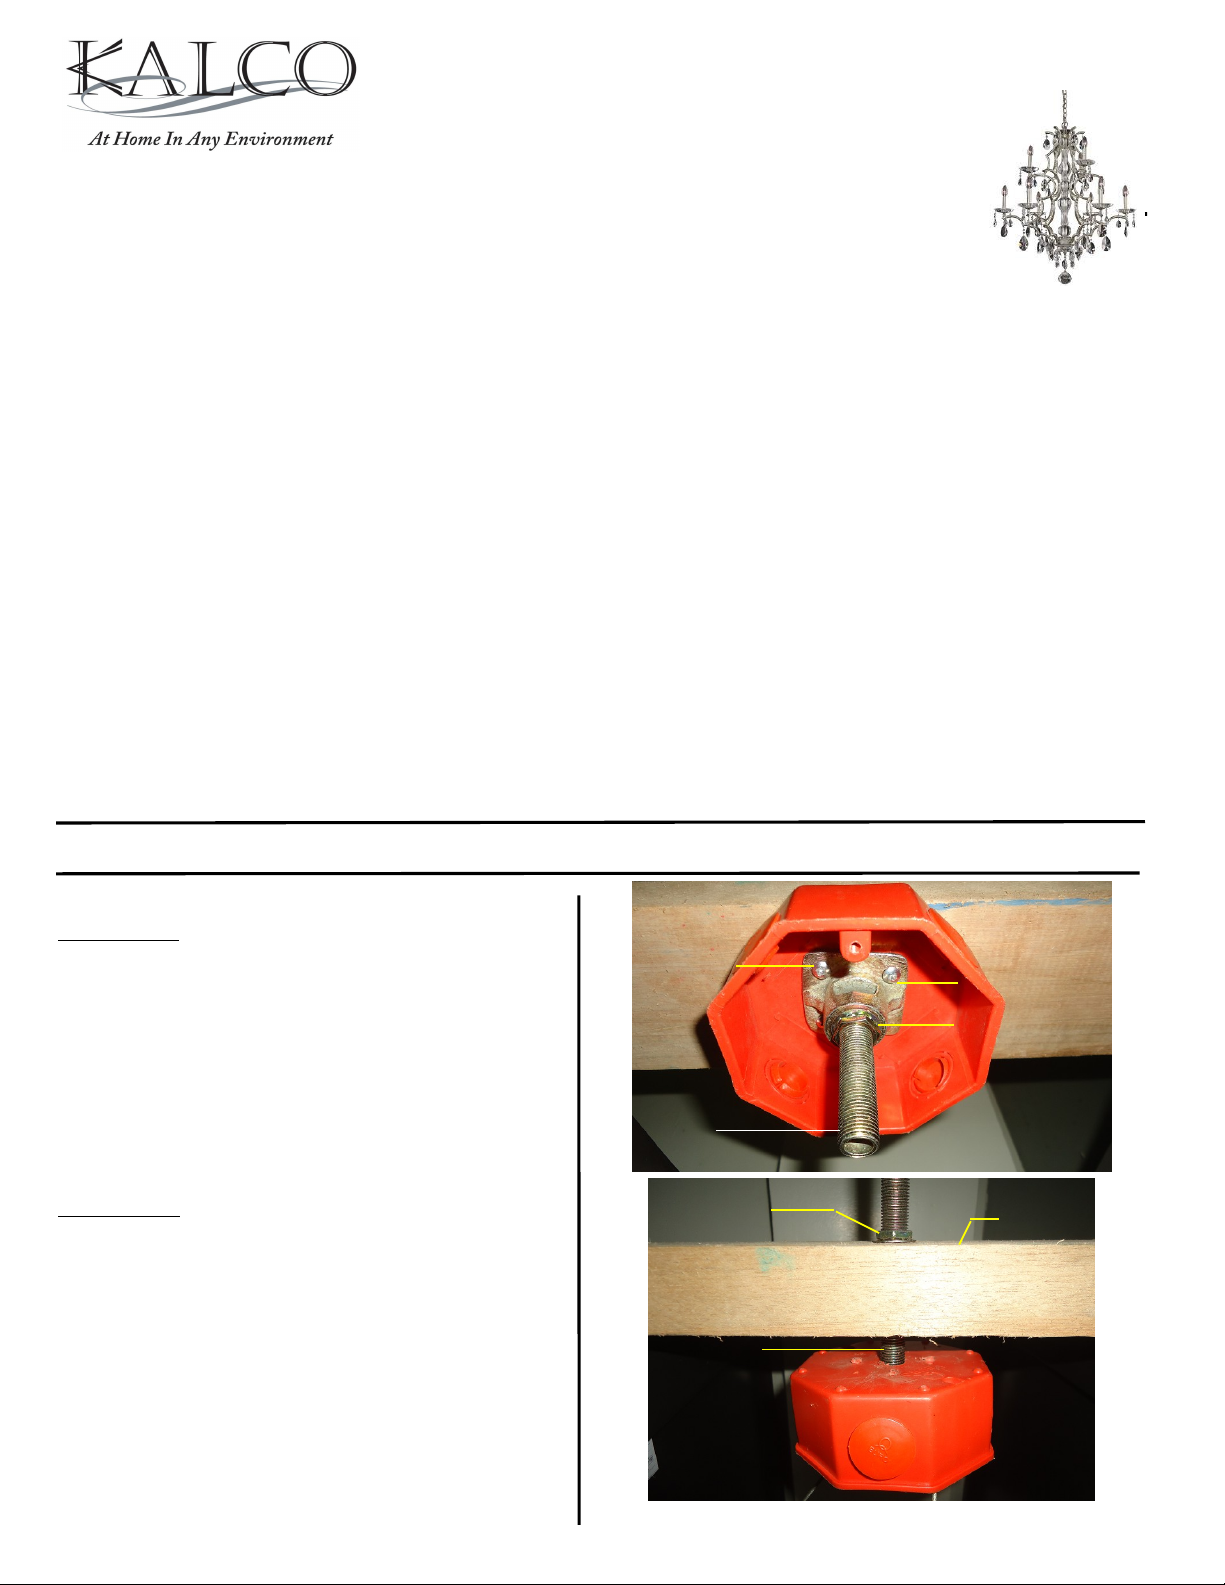
BRACE
NIPPLE
HEX NUT &
LOCK-WASHER
BRACE
METHOD “B”
PLATE HICKEY
#8 X 1-1/2”
HEX NUT &
LOCK-WASHER
METHOD “A”
1/4” IP X 4”
NIPPLE
METHOD A: (Brace is directly on top of the outlet
box and not accessible)
Using a 1/8” drill bit, pre-drill (4) holes into the
wood brace through the (4) hole pattern in the
outlet box. (Outlet box is shown as a cutaway for
Clarity). Secure the hickey to the brace with (4)
#8 x 1-1/2” screws. The wire way opening should
mount as shown, between the outlet box and 2
mounting flanges.
METHOD B: (Brace is above and not in contact
with the outlet box and is accessible)
Remove center knockout from outlet box. In line
with the center knockout, drill a 9/16” hole in the
brace. (Brace should be fastened to the ceiling
joist after pipe is installed). Assemble hickey to
one end of a ¼ pipe nipple. The pipe should be
flush with inside of the hickey wire way. Insert
pipe through back of outlet box and through the
brace above. Secure pipe with a ¼ pipe nut.
Customer Service: (702) 361-4345, (800) 525-2655,
customer.service@kalco.com
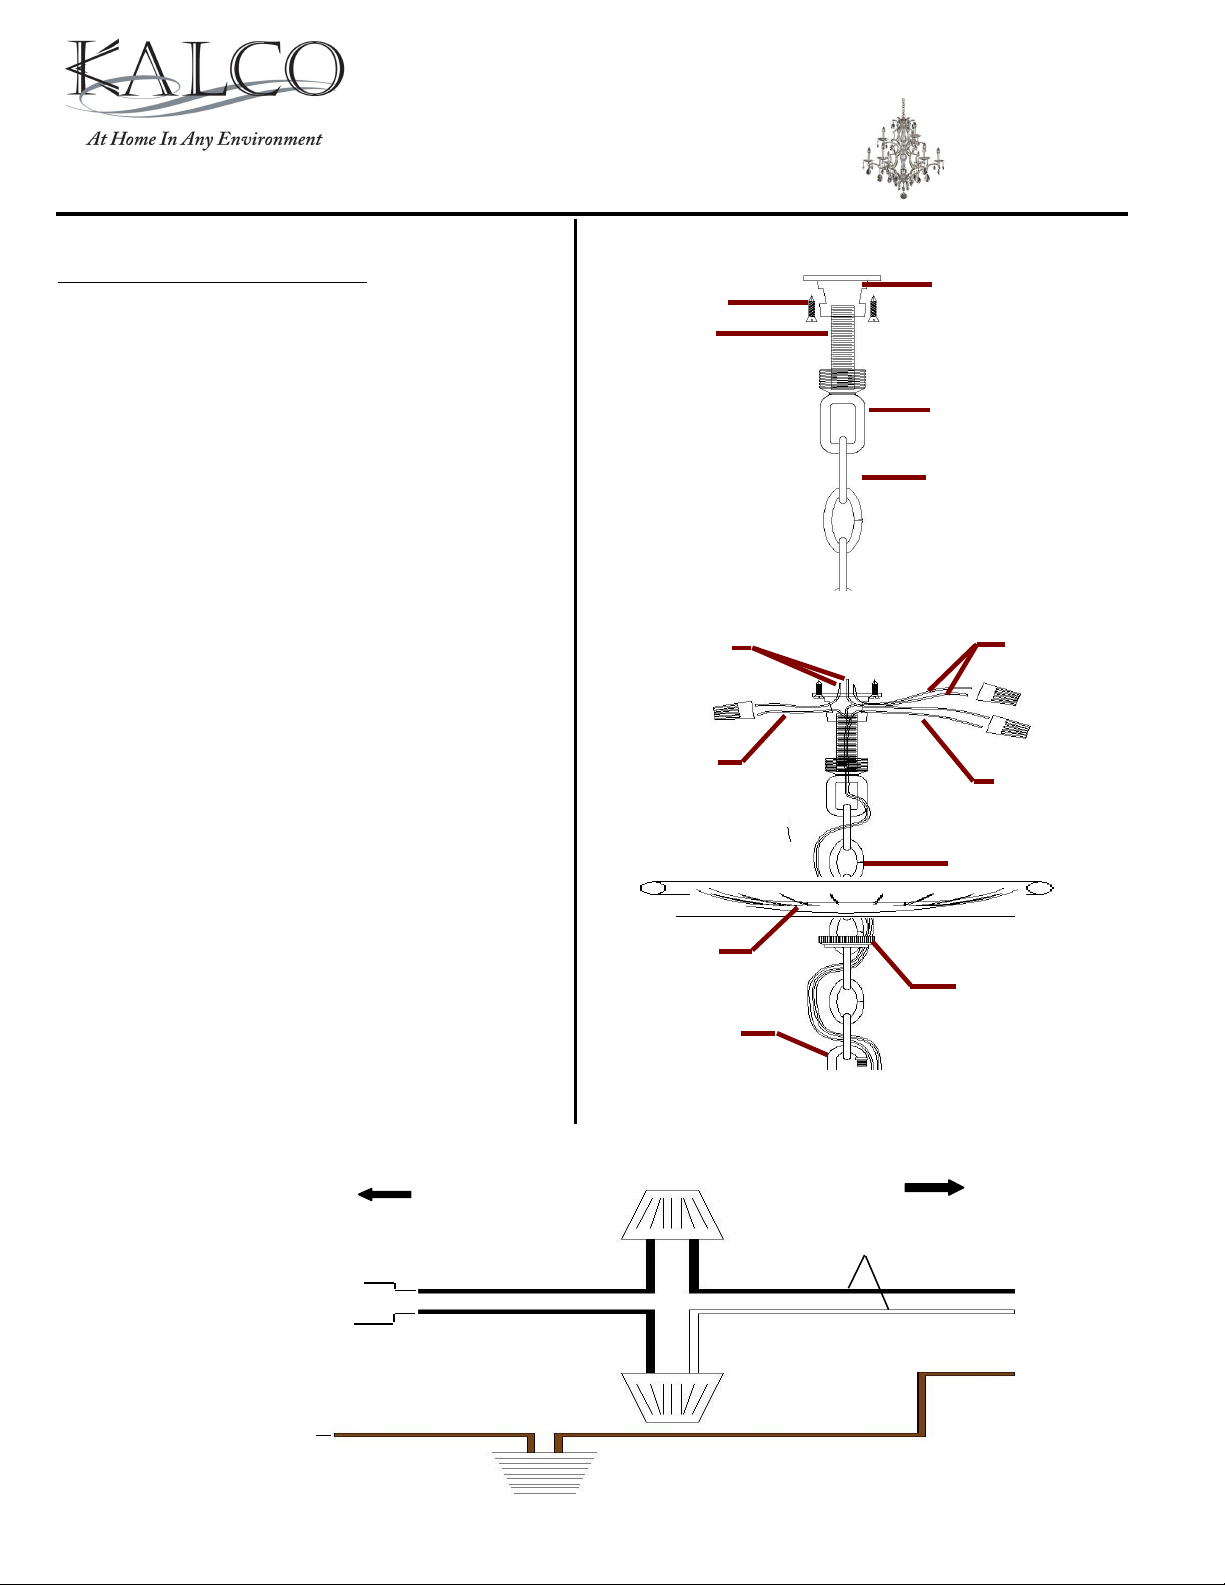
HOUSE WIRES
LINE:RIBBED
LINE:SMOOTH
GROUND WIRES
SOCKET (INCANDESCENT)
Black & White supply wires
GROUND
WIRES
BLACK & WHITE
SUPPLY WIRES
LINE:SMOOTH
LINE:RIBBED
CHAIN
COLLAR LOOP RING
CANOPY
OPENABLE LINK
CAST HICKEY
SCREWS
NIPPLE
CHAIN LINK
COLLAR LOOP
Assembly & Installation Instructions for:
090074 9-LT. CHANDELIER SHORECREST
After following Method A or B:
Step 1.
Assemble nipple and collar loop to
cast hickey.
Step 2.
Determine fixture height. Make
adjustment to chain if needed.
Step 3.
Lace the wires through the chain (every
other link)
Step 4.
Pass the collar loop ring and canopy,
over the chain in that order, Raise the
fixture to the outlet box and hook the
open link of the chain to fixture. Close
link. Use pliers and a cloth to protect
finish.
Step 5.
Pull ends of wire through center hole
of collar loop and out the openings
of the cast hickey.
Step 6. Refer to wiring diagram.
Connect the black supply wire to the
black fixture wire with wire connector,
connect the white supply wire to the
white fixture wire with wire connector.
Step 7.
Carefully tuck in all wires and raise the
canopy to the outlet box. Secure canopy
with collar loop ring.
 Loading...