

esAs
mbly & Installati
ton Ins
ructions f
035020-010-FR001 2-Light Wall lamp
Customer Service :(702)361-4345,(800)525-2655,customer.service@kalco.com
WARMING - TO REDUCE THE RISK OF FIRE OR INJURY:
1.lf you are unfamiliar with electricalwiring, call a qualified electrician to install this unit .More than
one person may be necessary to install fixture ,make sure you have enough qualified help.
2.Turn off the power to the fixture's circuit at the service panel. Use a coltage detector to verify that
the power is off.
3.DO NOT install bulb which exxeeds the maximum wattge specified on the socket label.
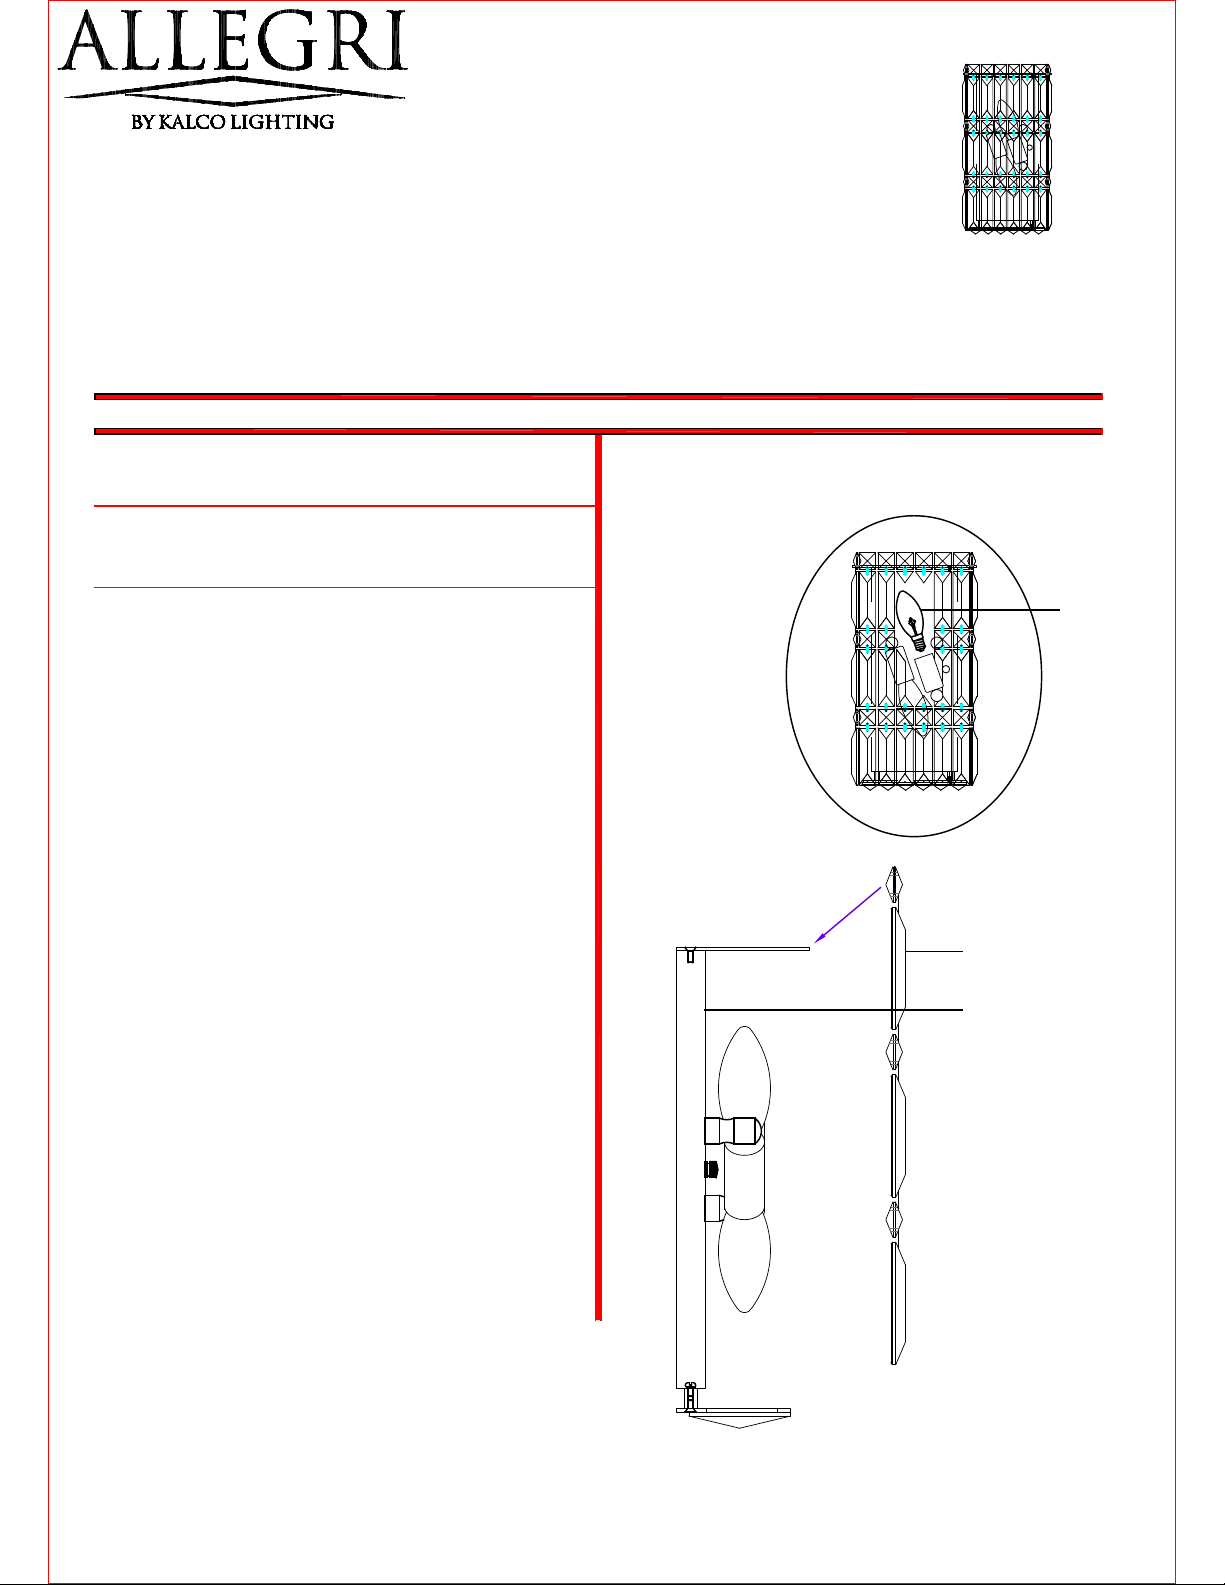
Fixture Assembly
Step 1. Place mount mounting and wiring steps before
crystal installation step
Step 4. Lnstall candelabra bulbs bulb,do not use
bulbs that exceeds 40W
r:o
Crystal strand
Main body
40W BULBS
esAs
mbly & Installati
035020-010-FR001 2-Light Wall lamp
Customer Service :(702)361-4345,(800)525-2655,customer.service@kalco.com
Fixtur
e Assembly
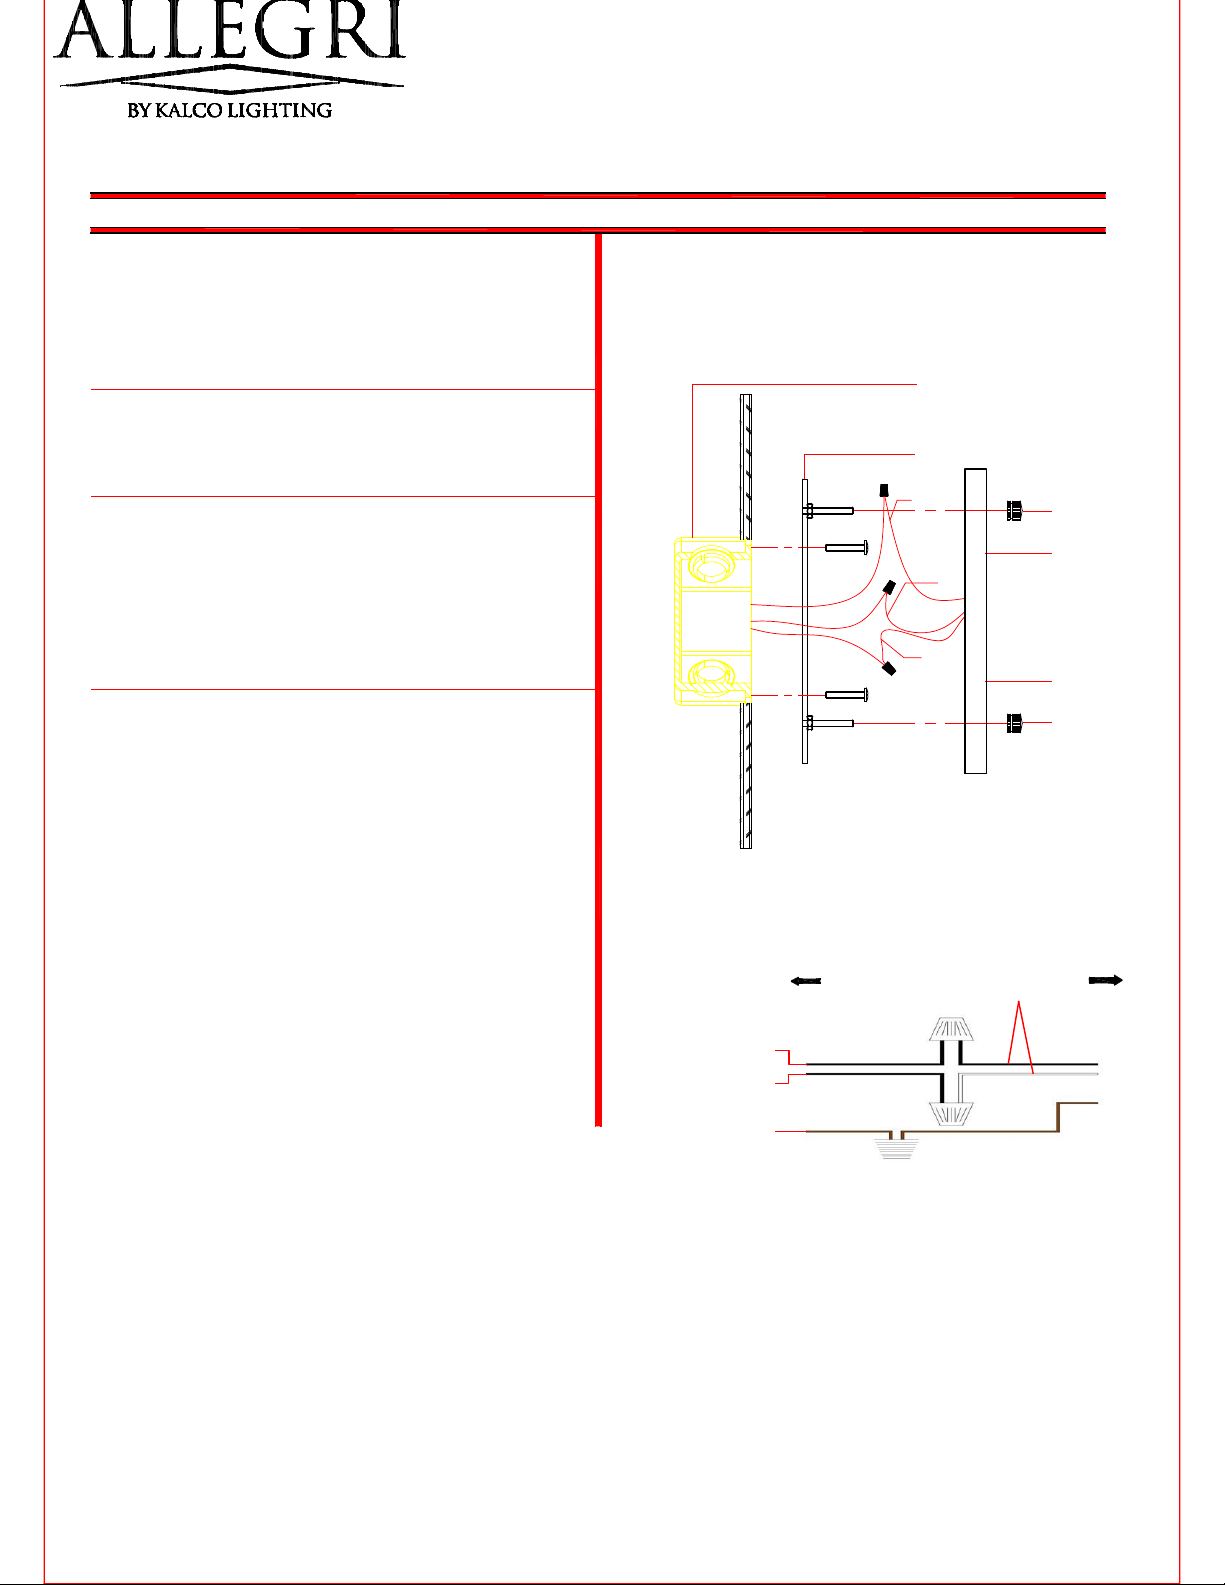
Step 5. Fasten 2 (state specification of screw )
into mounting plate so that they extend
away from wall when mounting plate is
installed
Step 6. Attach the mounting plate to outlet box
with sorews
ELECTRICAL BOX
MOUNTING BLOCK
ton Ins
ructions f
r:o
Step 7. Refer to wiring diagram.
Splice the ribbed side of fixture cord
to the white supply wire from outlet box
with wire connector. Splice the smooth
side of the fixture cord to black supply
wire from outlet box with wire connector
Step 8. Carefully tuck in all wires Attach the
backplate with the mounting screw on
the crossbar.Secure fixture with shell
hnobs.
SOC
Fixture black and white wires
KET
L
N
G
ANDE
NC (I
T) SCEN
Black & white supply wires
DECORATIVE NUTS
LAMP BODY
LAMP BODY
DECORATIVE NUTS
RESSE WIHOU
Change to black and white
UND
GRO
ERWI
S
 Loading...