

Allegri 029122024FR001 User Manual
esAs
mbly & Installati
ton Ins
ructions f
029122-024-FR001
Customer Service :(702)361-4345,(800)525-2655,customer.service@kalco.com
WARNING - TO REDUCE THE RISK OF FIRE OR INJURY:
1.lf you are unfamiliar with electrical wiring, call a qualified electrician to install this unit .More than
one person may be necessary to install fixture ,make sure you have enough qualified help.
2.Turn off the power to the fixture's circuit at the service panel. Use a voltage detector to verify that
the power is off.
3.DO NOT install bulb which exceeds the maximum wattage specified on the socket label.
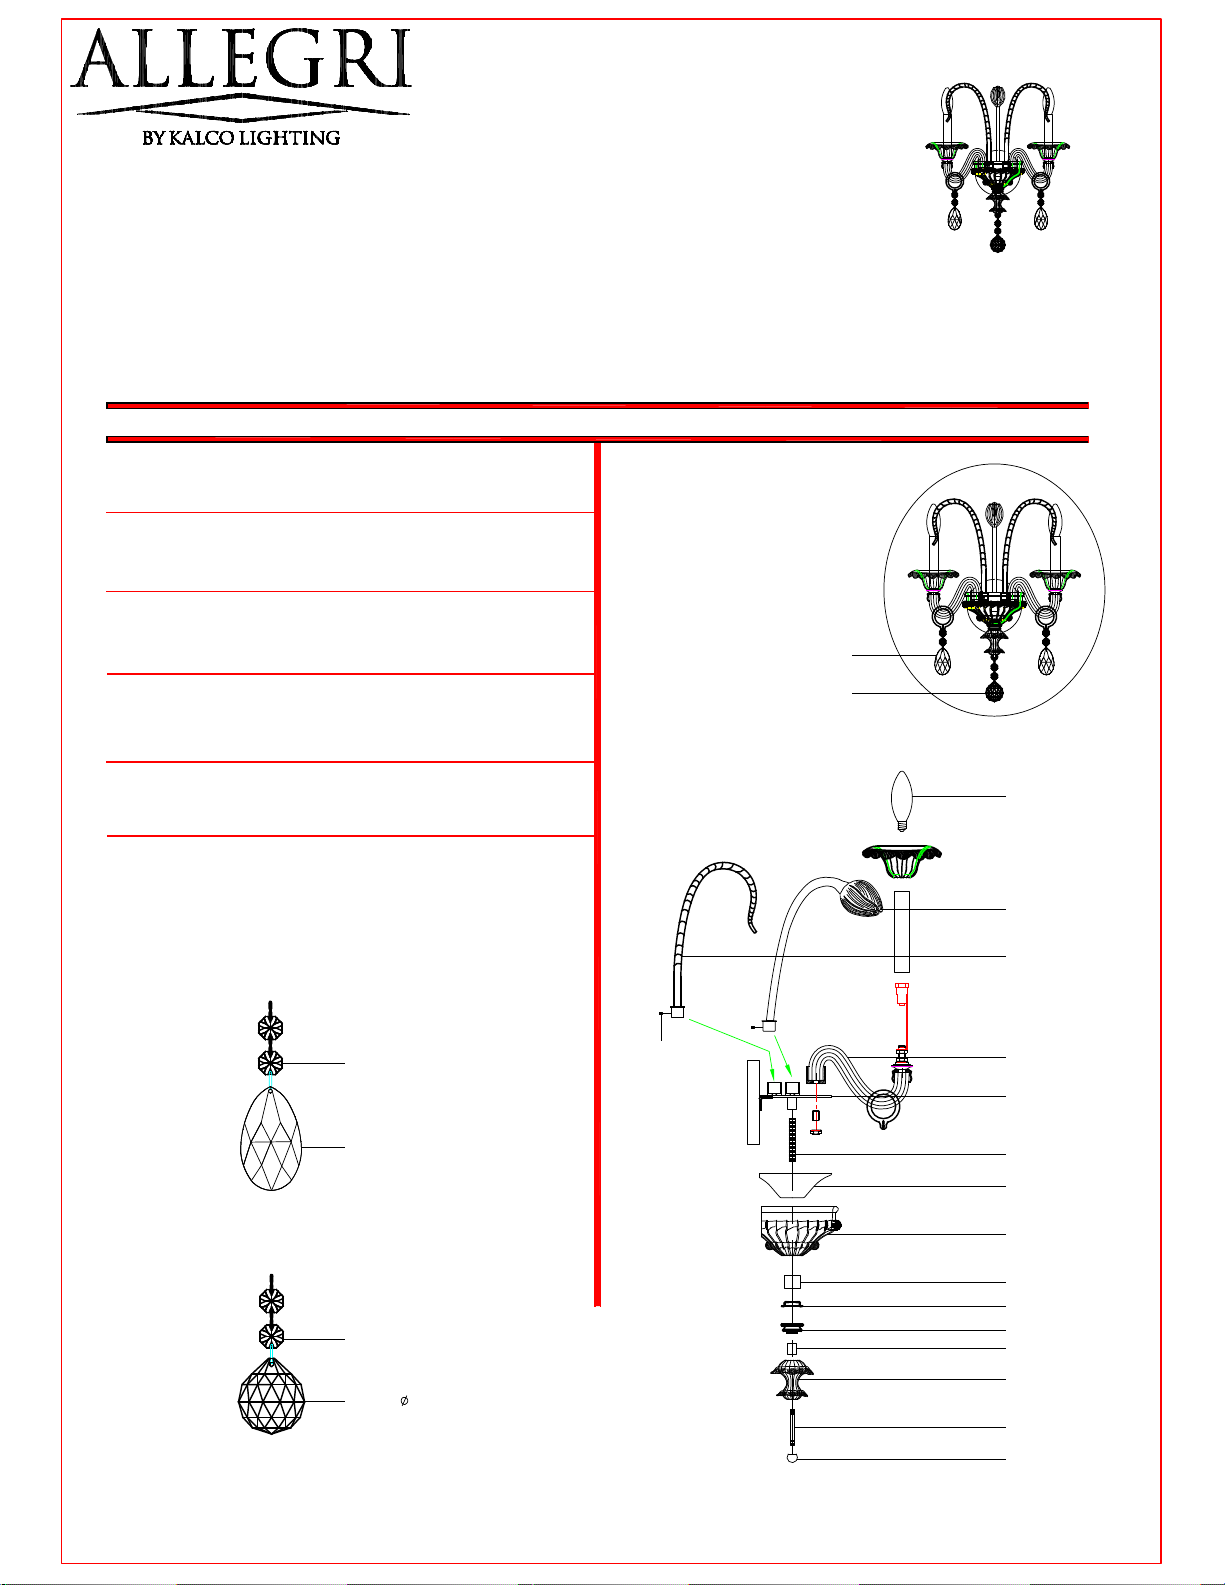
e AssemblyFixtur
Step 1. Fix part #1,#2 to part #4 by using part #15.
Step 2. Fix part #3 to part #4 by using nut,at time connect
all inner wires.
r:o
Step 3.
Step 4.
Step 5.
Put part #5 through part #6,#7,#8,#9,#10
then screw to part #4,#11.
Put part #13 through part #12 then screw to
part #11,#14.
Install candelabra bulbs bulb,do not use
bulbs that exceeds 60W
K9.1080/14mm/2Pcs
K9.872/63*37mm/1Pc
A(2Pcs)
15-Safety screw
A
B
60W Bulbs
1-Glass flower
2-Glass leafage
3-Glass arm
4-Main body
5-Nipple A
6-Rolling plate A
7-Glass tray
B(1Pc)
K9.1080/14mm/2Pcs
K9.701/
40mm/1Pc
8-Cannula
9-Rolling plate B
10-Metal adorn
11-Connector
12-Glass mast
13-Nipple B
14-Metal ball
P1
esAs
mbly & Installati
029122-024-FR001
Customer Service :(702)361-4345,(800)525-2655,customer.service@kalco.com
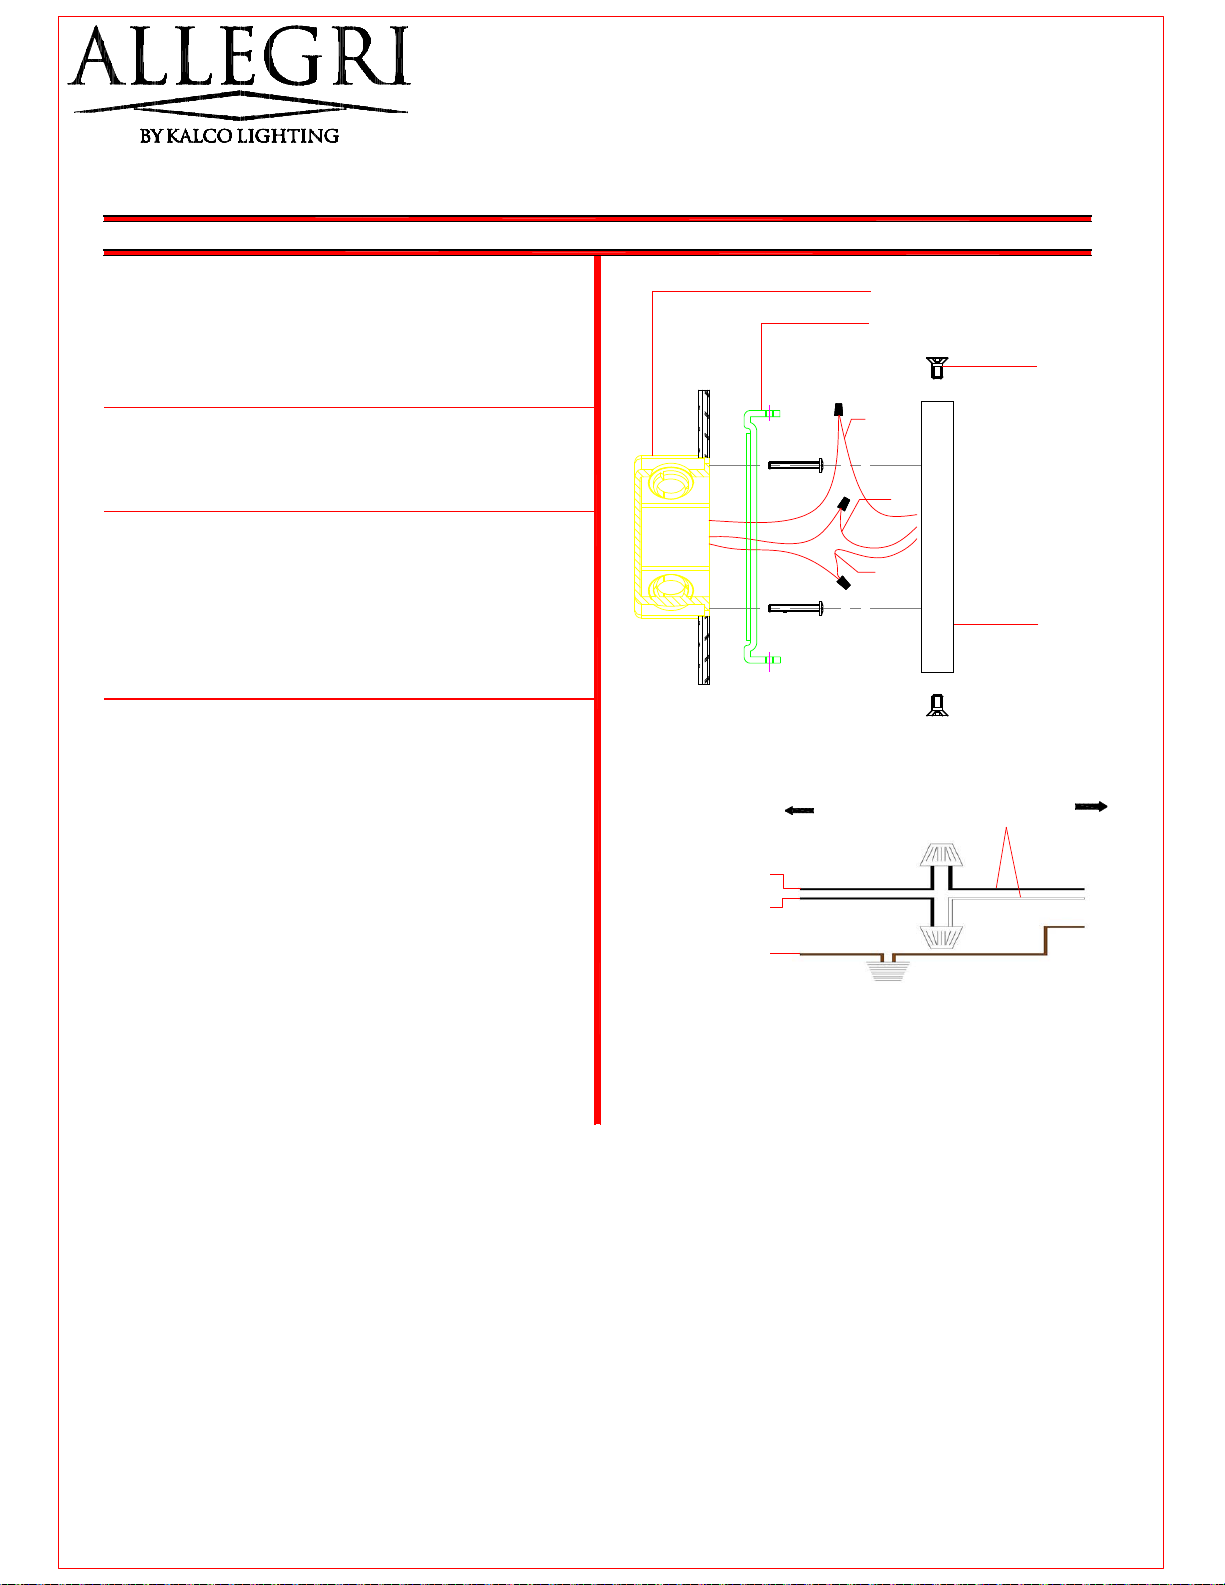
Fixtur
e Assembly
ton Ins
ructions f
r:o
Step 6. Fasten 2 (state specification of screw )
into mounting plate so that they extend
away from wall when mounting plate is
installed
Step 7. Attach the mounting plate to outlet box
with screws
Step 8. Refer to wiring diagram.
Splice the ribbed side of fixture cord
to the white supply wire from outlet box
with wire connector. Splice the smooth
side of the fixture cord to black supply
wire from outlet box with wire connector
Step 9. Carefully tuck in all wires Attach the
back plate with the mounting screw on
the crossbar.Secure fixture with shell
knobs.
SOC
KET
ELECTRICAL BOX
MOUNTING BLOCK
FLAT SCREW
L
N
G
LAMP BODY
ANDE
NC (I
T) SCEN
Black & white supply wires
RESSE WIHOU
Fixture black and white wires
Change to black and white
UND
GRO
ERWI
S
P2
 Loading...