

Page 1
Pixxa
Quick Start Guide
1
Install Setup Enjoy
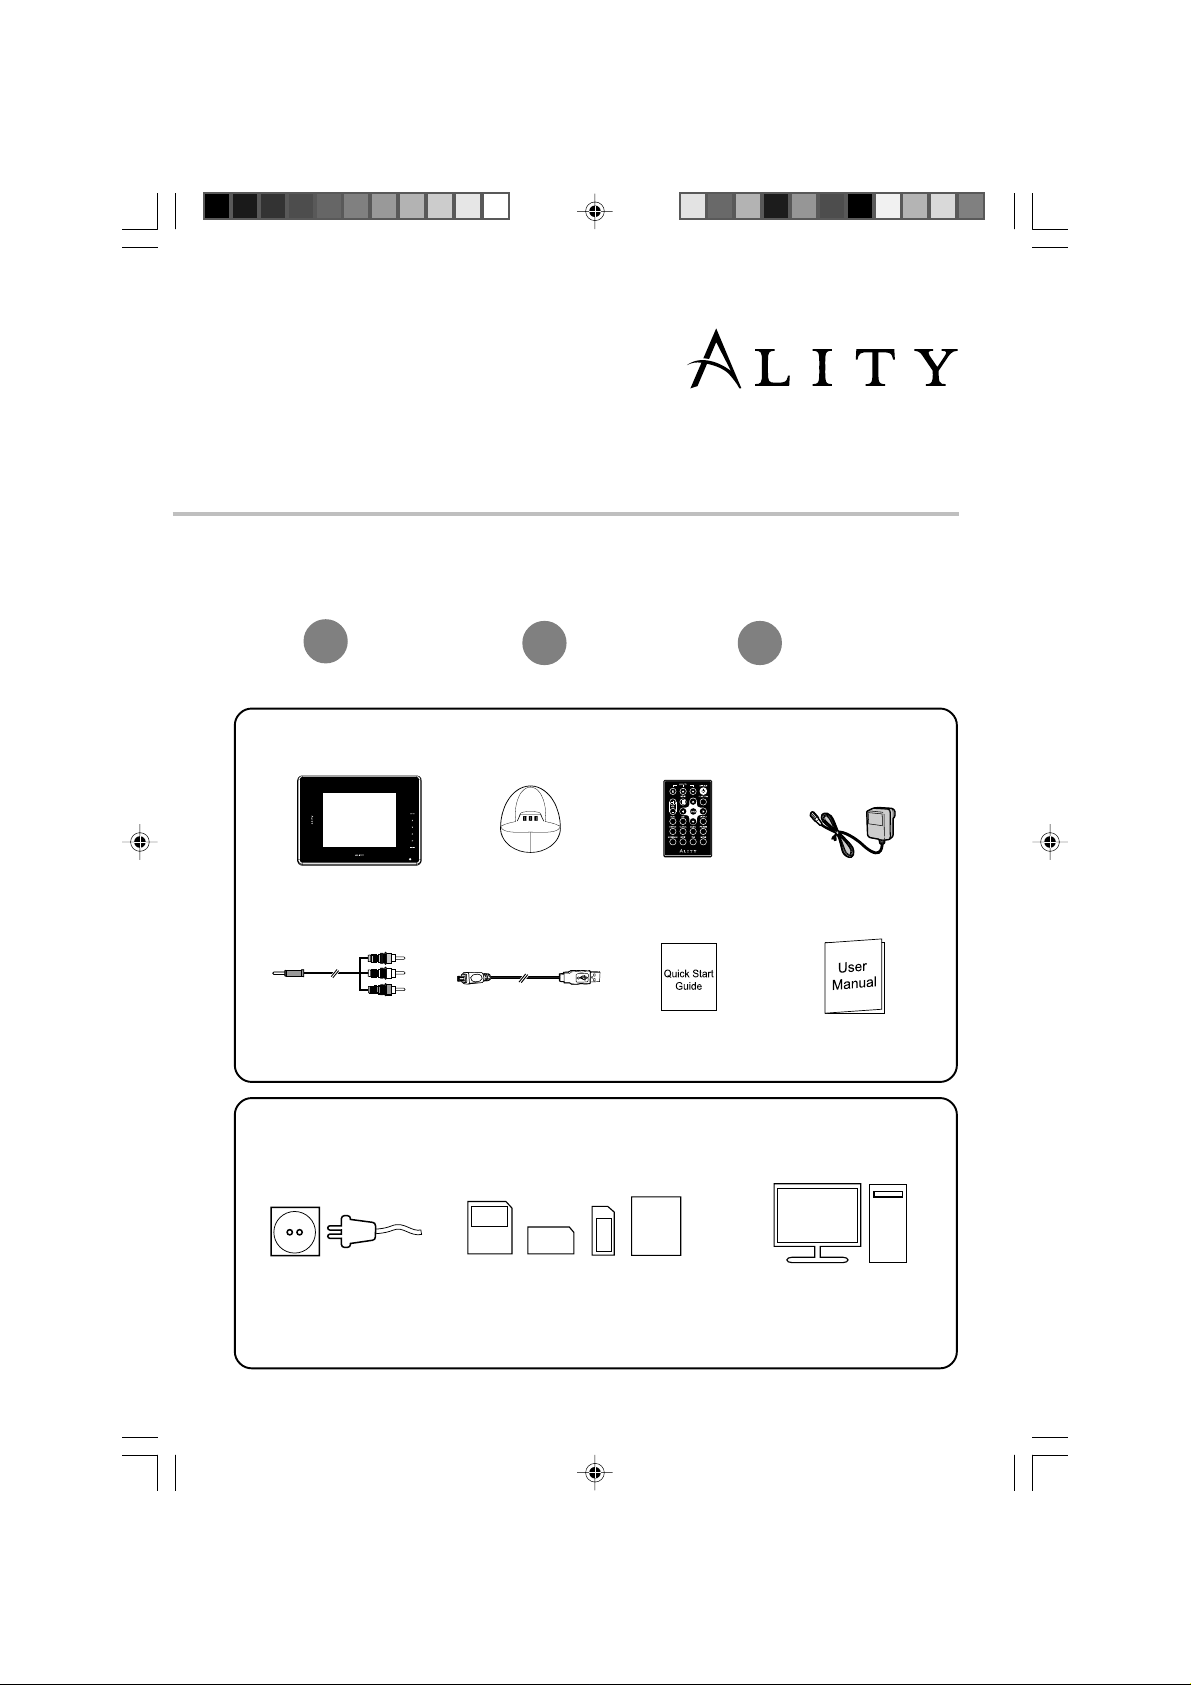
What’s in the box:
Pixxa digital photo frame
AV cable
Y ou also need:
23
Cradle
USB cable* Quick start guide User manual
Remote control
Power adaptor
Power outlet
* Only for version with internal memory.
Memory card (CF , SD, MMC or
MS) with photos, videos or music
or
Computer with photos,
videos or music
1
Page 2
1
Install
or
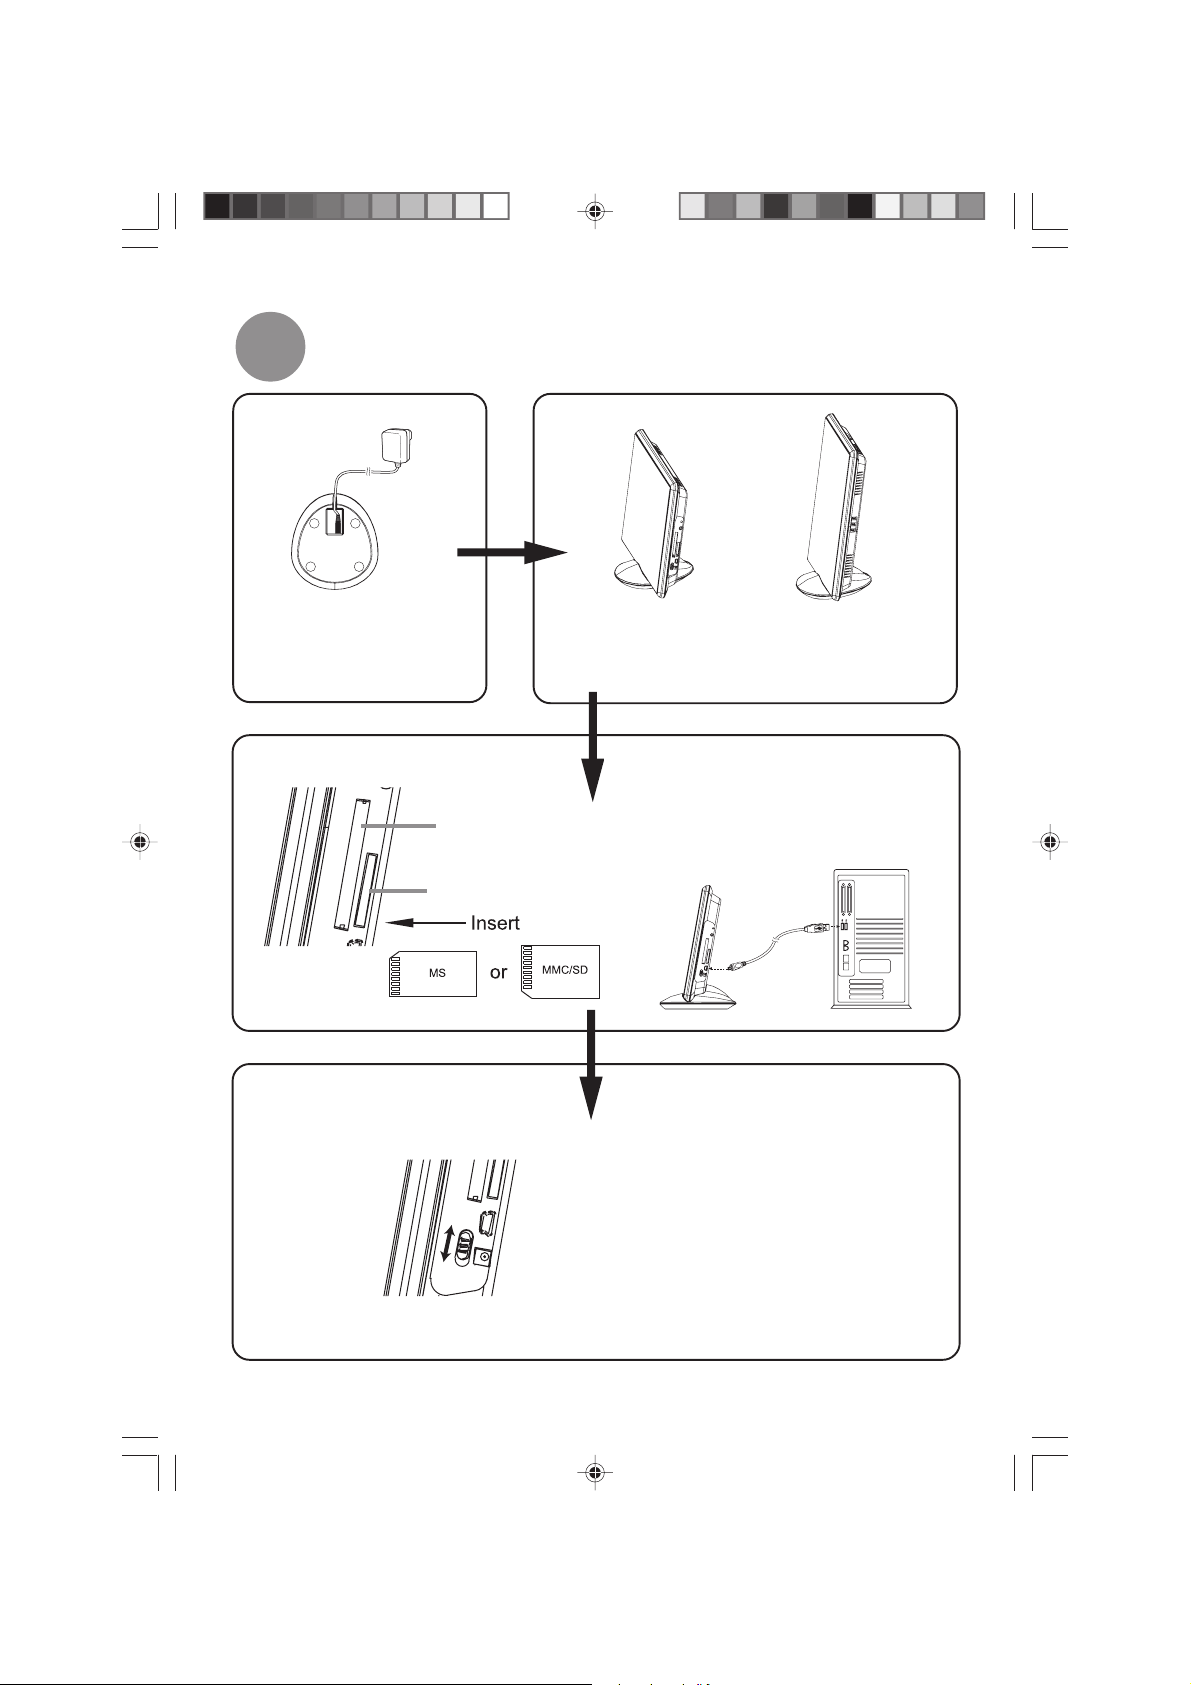
Connect the power
adaptor to the cradle
and a power outlet.
Insert memory card to card slot.
CF
MS / MMC /SD
Install
the digital photo frame to the cradle.
You may either put it in landscape or
portrait position.
Connect the USB cable* (ensure
to switch off the unit first) to the
computer and transfer files to the
digi
tal photo frame.
or
* Only for version with internal memory.
Turn on the unit.
Page 3
2
Setup
Clock and Alarm
Use the navigation keys ( ) and ENTER on the remote
control to perform the followings:
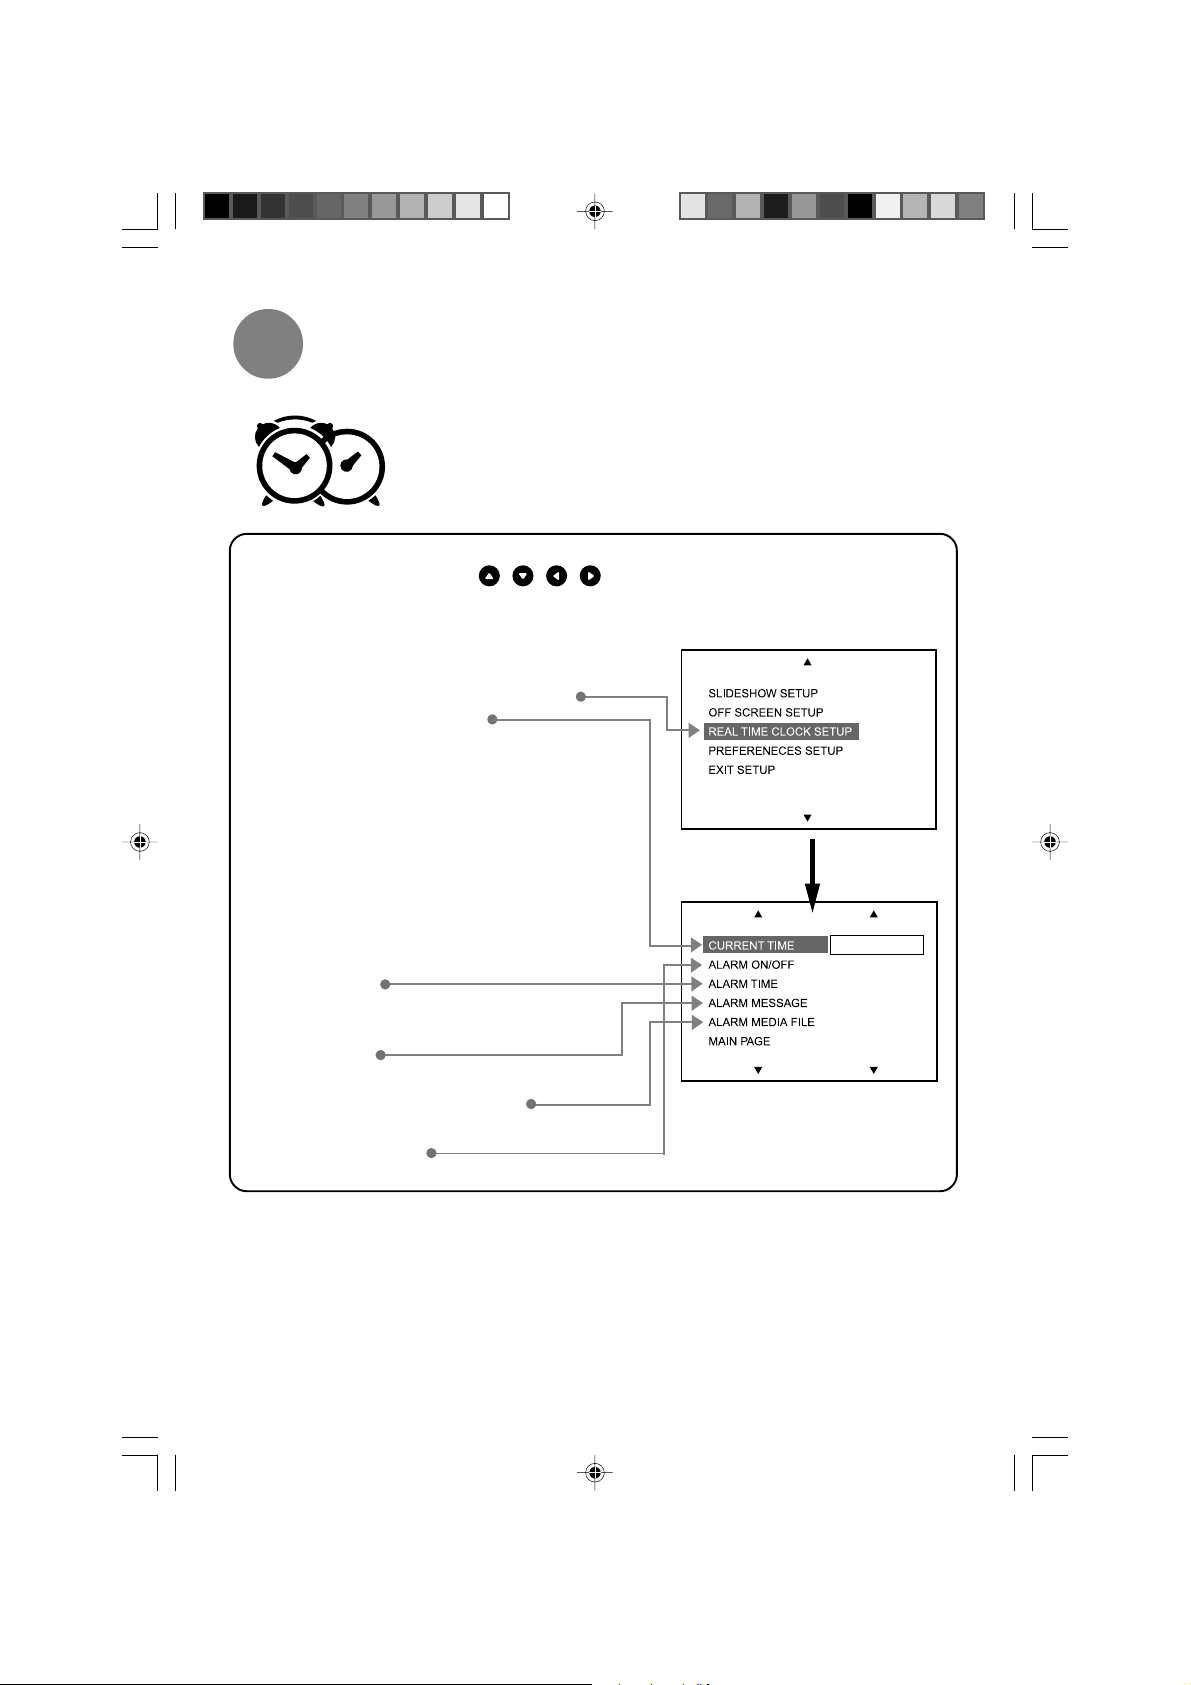
Set the clock as below:
1. Press SETUP key on the remote control.
2. Select “Real Time Clock setup”.
3. Select “Current time”.
4. Set date and time in the setting menu.
5. Select “OK” and then press ENTER.
To display the clock, press CLOCK on the
remote control.
Set the alarm as below:
1. Press SETUP key on the remote control.
2. Select “Real Time Clock setup”.
3. Select “Alarm Time” to set the alarm date
and time.
4. Select “Alarm Message” to create
reminder message when the alarm
activates.
5. Select “Alarm Media File” to select a file
for playback as the alarm.
6. Select “Alarm On/Off” to turn on or off the
alarm function.
3
Page 4
3
Enjoy
Auto Tilting
This photo frame is equipped with Auto Tilting function, your photos will be
displayed according to their orientation (portrait or landscape).
Start a photo slideshow
1. Press PICTURE on the remote control to enter picture mode.
2. Select a photo from the photo thumbnails with keys on
the remote control and then press ENTER to st art the slideshow .
Scheduler
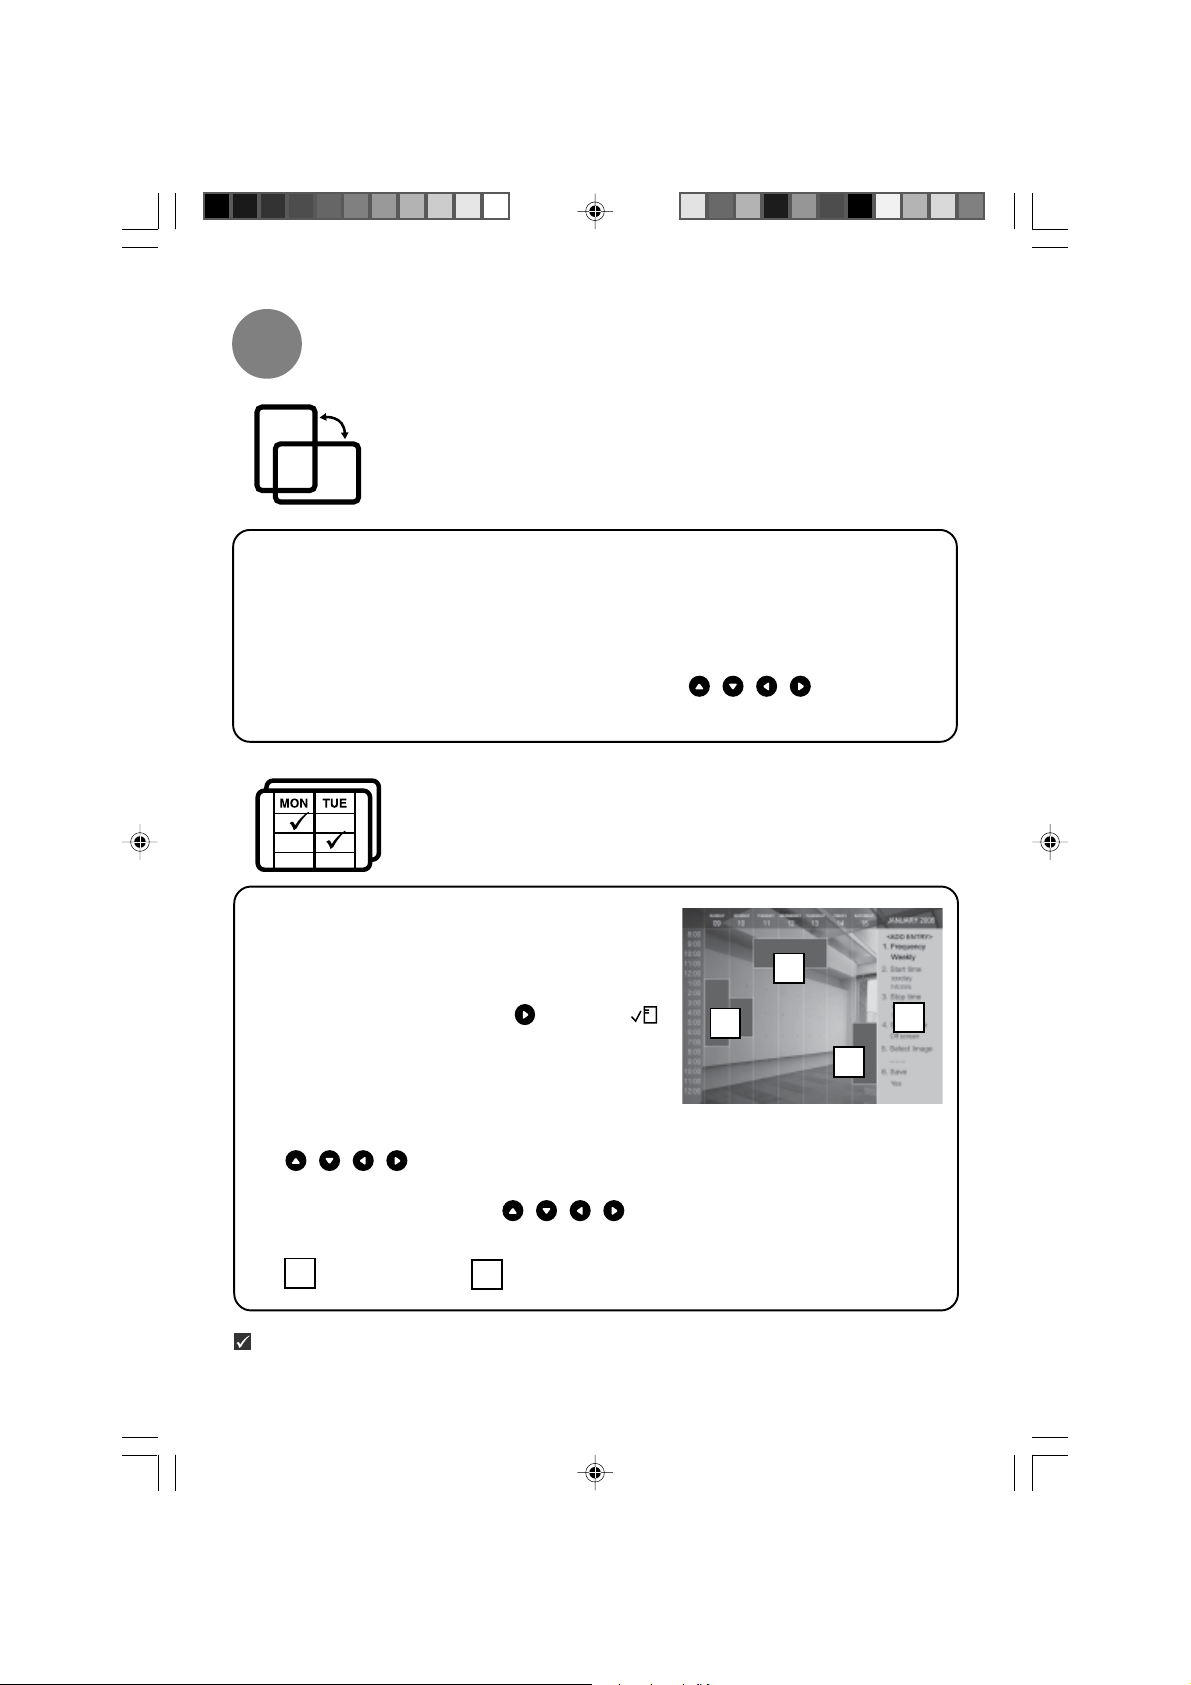
Y ou can also preset time and date for playback
of a selected file.
1. Press SCHEDULE on the remote control.
2. Press FUNCTION to show a row of icons at
the screen bottom, press to select “ ”
and then press ENTER to show the Add
Entry menu on the right of the screen.
3. There are 6 steps to create a schedule
(select frequency , set st art time, set end
time, select media type, select playback file and saving). Use
keys and ENTER to go through these steps.
• When selecting start and end time of a new schedule, a highlight box will
be created as you press keys. The highlighted time slots
on the calendar refer to your created schedules.
B
B
B
A
Add Entry menu
A
This quick start guide only introduces some of the great features of the Pixxa digital photo
frame, for further details of the operations please refer to the user manual.
Created schedules
B
 Loading...