

Page 1

Guide to installation and operation
Copyright 2007 by Algolith Inc.
C3012-8001-200
Page 2

Flea
Table of Contents
Warning ........................................3
Electromagnetic Compatibility .................. 3
Introduction ..................................4
Compression Artifacts .............................. 4
Table of Contents
Flea ........................................................ 4
Getting Started .............................5
Accessories .........................................5
Connecting your Flea ...........................5
Typical Set-up .......................................... 5
Power Connections .................................. 6
Video Connections ................................... 7
USB Port ................................................. 8
Stand ..................................................9
Operating Flea............................10
Front panel keys ................................10
Menu .................................................10
Input Selection ....................................... 11
Status ................................................... 11
Split Image ............................................ 12
Processing ............................................ 13
Test Pattern ........................................... 14
Block Artifact Reducer ............................ 15
2D Spatial Filter ..................................... 16
3D Temporal Filter.................................. 17
Detail Enhancement ................................ 18
Dynamic Range Stretcher ....................... 19
Language .............................................. 20
Adjusting 2D Spatial Filtering .................. 22
Adjusting 3D Temporal Filtering ............... 23
Blocking Artifacts ...............................24
Detail Enhancement ............................25
Dynamic Range Stretching ..................25
Recommended settings ......................25
Specifi cations* ...........................26
Limited Warranty .........................27
Troubleshooting ..........................28
How to contact us .......................30
Technical Tutorial .........................21
2D Spatial and 3D Temporal Filtering ...21
2D Spatial Filtering ................................. 21
3D Temporal Filtering ............................. 21
2
Page 3
Flea
Warning
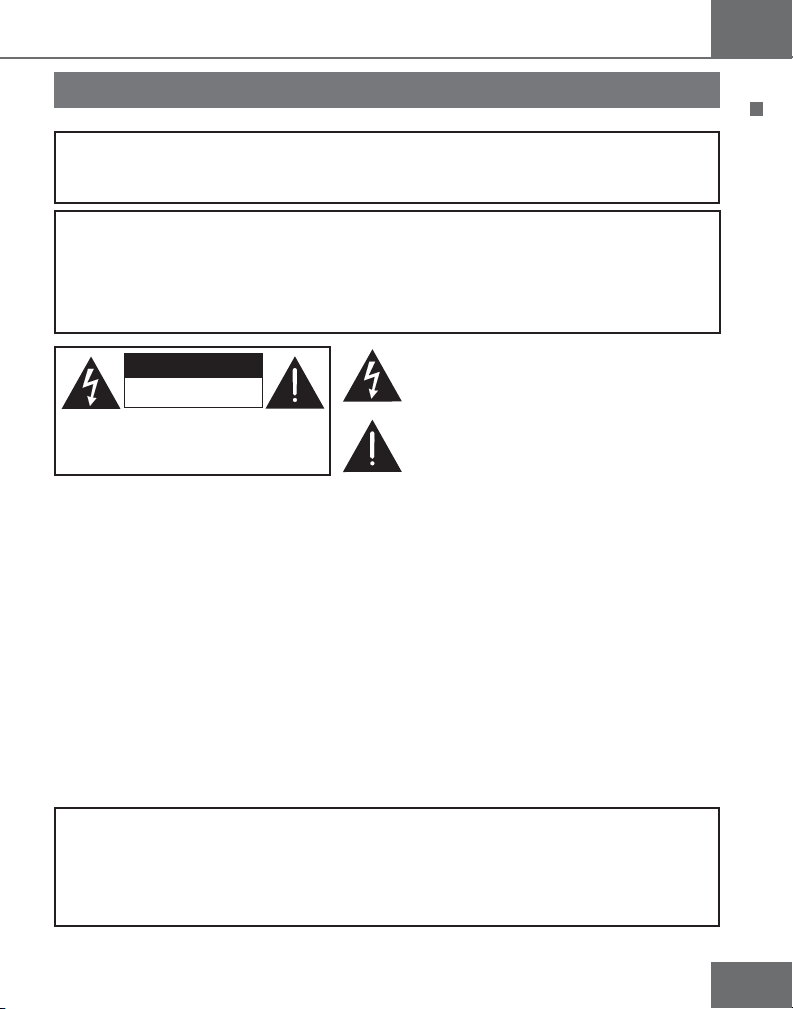
WARNING:
To prevent fire, shock hazard or product damage, do not expose the unit to rain or moisture, dripping or splashing of any liquids.
CAUTION:
- Ensure this unit is well ventilated. To prevent hazard due to overheating, ensure
that curtains and any other type of materials do not obstruct the ventilation vents.
- Do not place on another apparatus that might be heating.
- Do not install near any heat sources such as radiators, stoves, or other apparatus
(such as amplifiers) that produces heat.
Warning
CAUTION
RISK OF ELECTRIC SHOCK
DO NOT OPEN
CAUTION: TO REDUCE THE RISK OF ELECTRIC
SHOCK, DO NOT REMOVE COVER.
NO USER-SERVICEABLE PARTS INSIDE
REFER SERVICING TO QUALIFIED
SERVICE PERSONNEL.
This symbol is intended to alert the user to the presence of uninsulated “dangerous voltage” within the
product’s enclosure that may be of sufficient magnitude
to constitute a risk of electric shock to persons.
This symbol is intended to alert the user to the presence of important operating and maintenance (servicing) instructions in the litterature accompanying the
appliance.
Electromagnetic Compatibility
This equipment has been tested and found to comply with the limits for a class B digital device,
pursuant to part 15 of the FCC Rules. These limits are designed to provide reasonable protection
against harmful interference in a residential installation. This equipment generates, uses and can
radiate radio frequency energy and, if not installed and used in accordance with the instructions, may
cause harmful interference to radio communications. However, there is no garantee that interference
will not occur in a particular installation. If this equipment does cause harmful interference to radio
or television reception, which can be determined by turning the equipment off and on, the user is
encouraged to try to correct the interference by one or more of the following measures:
- Increase the separation between the equipment and receiver.
- Connect the equipment into an outlet on a circuit different from that to which the receiver is
connected.
- Consult the dealer or an experienced radio/TV technician for help.
This product incorporates copyright protection technology that is protected by
U.S. patents and other intellectual property rights. Use of this copyright protected
technology must be authorized by Macrovision and is intended for home and other
limited viewing uses only unless otherwise authorized by Macrovision. Reverse
engineering or disassembly is prohibited.
3
Page 4
Flea
Introduction
Compression Artifacts
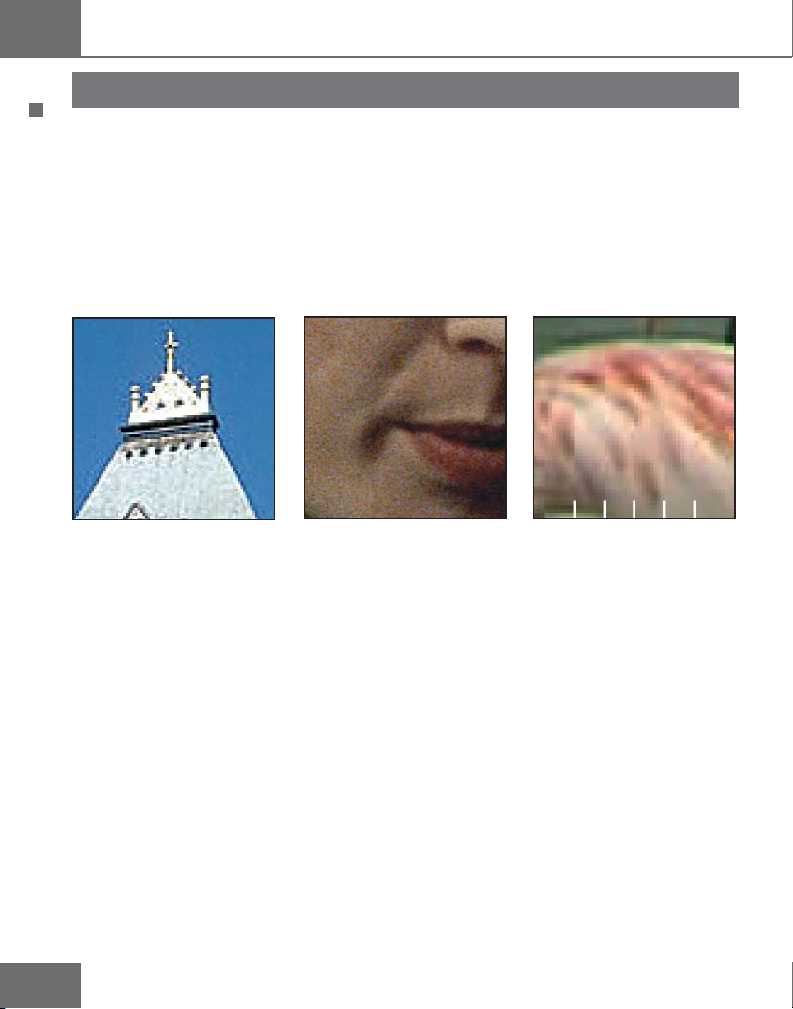
Digital video compression has introduced a new set of picture artifacts known in the
industry as «mosquito noise» and «blocking artifacts». These new degradations coexist
Introduction
with analog video noise and become quite objectionable when seen on today’s large
screen displays (see images below).
Algolith’s Flea has been engineered to reduce the appearance of noise and compression
artifacts, allowing for a much better viewing experience.
Mosquito Noise Analog Type Noise Blocking Effect
Flea
Flea is a three-dimensional digital noise reduction processor, designed to clean up
signals from DVD Players/Recorders, Satellite Receivers, Cable Decoders, PVRs and
other digital devices using MPEG-2 compression.
Flea performs four distinct image noise reduction techniques.
1- Mosquito noise is removed, using Algolith’s proprietary region-based algorithm.
2- Block Artifact Reduction (BAR) blends and diminishes the inherent 8 x 8 pixel block
structures of MPEG2 images.
3- Algolith’s advanced motion adaptive temporal filtering eliminates “bad reception
and low light” noise.
4- Flea provides image enhancement using non-linear filters for exceptionally sharp
and noise free pictures.
4
Page 5

Flea
Getting Started
Accessories
Your Flea comes with the following:
• 1 Power Supply DC 12V • 1 Stand
• 1 Operation Manual • 1 Demo DVD
Connecting your Flea
Typical Set-up
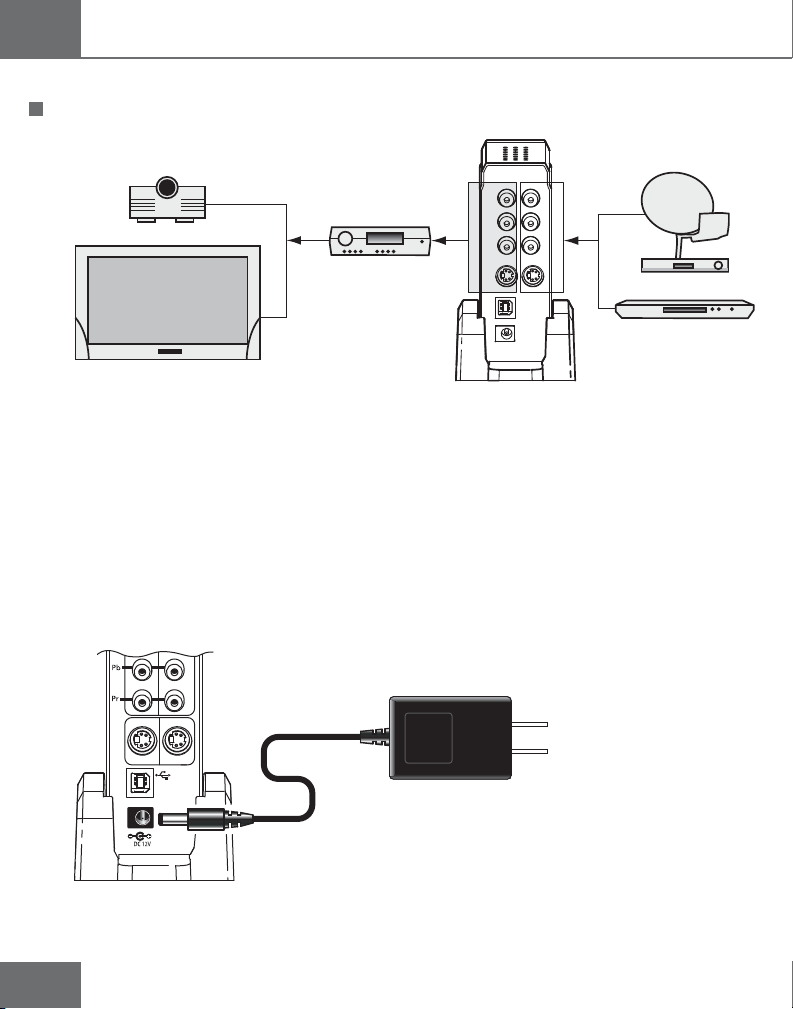
Flea should be installed between your video sources and your display device. See figure
below for a typical set-up.
Flea
Getting Started
Display devices
• Flea does not have audio processing capability. When two video sources are
connected, switching from one source to the other will require external audio switching.
The video processing delay introduced by Flea is negligible, and does not require any
audio delay compensation.
Video
output
Audio connections
Video
input
SD/HD Component/S-Video
Satellite TV, Digital Cable,
DVD player, PVR...
5
Page 6
Flea
• People owning a Dragonfly Video Scaler should always install the Flea between the
Video Sources and before the Video Scaler.
Flea
Getting Started
Video scaler
Video sources
Display devices
• To enhance your Home Theatre listening experience, the Flea is fanless and achieves
cooling through natural convection and dissipation of heat. Therefore, when installing the
Flea, do not obstuct any of its air vents, nor place it over heat dissipating devices such
as amplifiers. Placing the Flea near heat sources can damage it or cause it to overheat
and not operate properly.
Power Connections
The Flea comes with an external power supply and an AC power cord.
S VIDEO
IN OUT
Note: Only use the power supply provided with the Flea
6
To AC wall outlet
Page 7
Flea
Video Connections
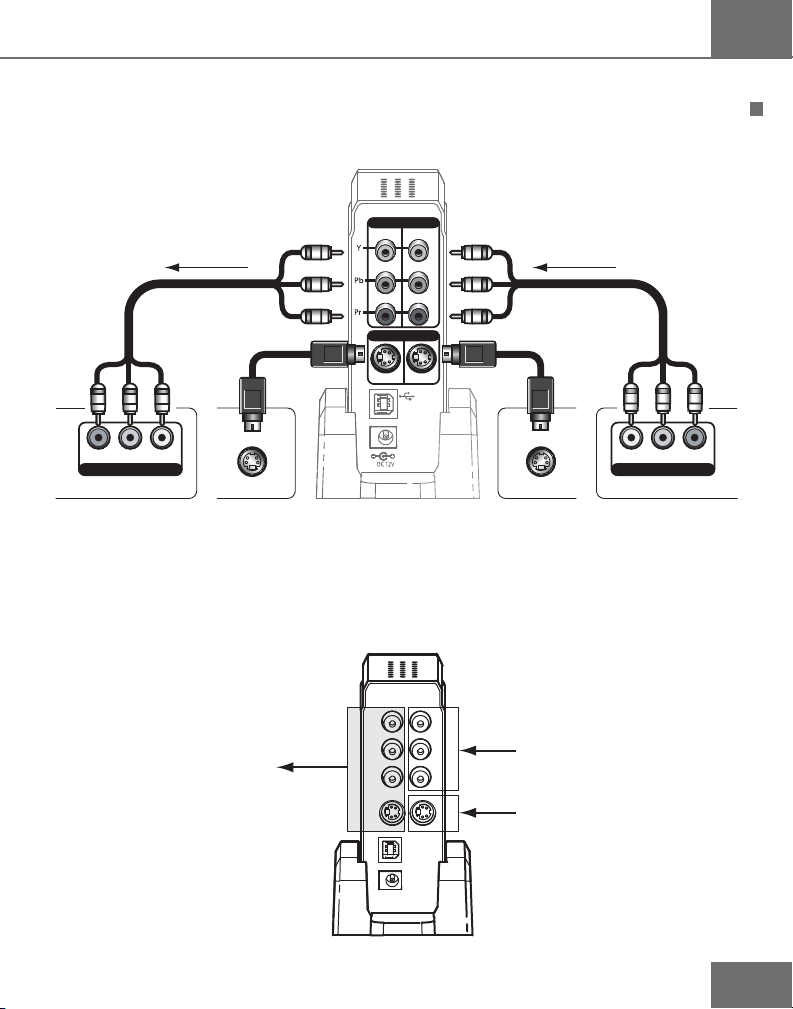
The Flea accepts SD or HD analog video signals. 1 set of component input terminals and
1 S-Video input terminal are provided (cables are not supplied).
6)$%/
36)$%/
/54
)./54
GREEN
BLUE
RED
).
GREEN
BLUE
RED
component cable component cable
GREEN
BLUE
RED
s-video cable s-video cable
GREEN
BLUE
RED
Getting Started
YPbPr
6)$%/).
36)$%/ 36)$%/
YPbPr
6)$%//54
Display Device(s) Satellite/Cable/DVD/PVR
or other source
• A signal received at the Flea component input in 480i or 576i, will go out from both
the component and S-Video outputs. A signal received at the S-Video input in 480i or
576i will go out from both the component and S-Video outputs.
Both outputs are available
component video 480i, 576i
s-video 480i, 576i
7
Page 8

Flea
• A signal received at the Flea component input in 480p, 720p and 1080i, will only go
out from the component output, in the same format.
component video
(480p, 720p, 1080i)
Getting Started
component video
(480p, 720p, 1080i)
no signal at output
USB Port
The USB port can be used to update the Flea to the latest available firmware using
your PC’s USB port and a USB cable. Visit Algolith’s website (www.algolith.com) for
availability of the latest firmware updates and download instructions.
36)$%/
)./54
to computer USB port
8
Page 9
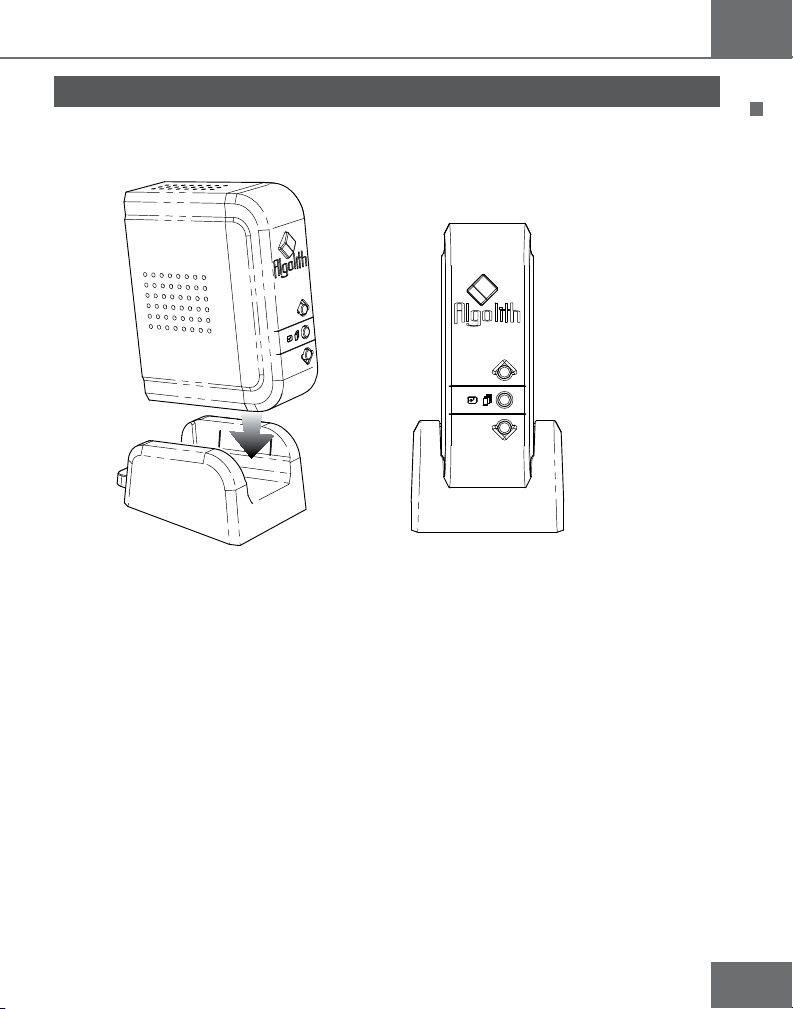
Stand
The Flea comes with a stand.
Flea
Getting Started
9
Page 10
Flea
Operating Flea
Front panel keys
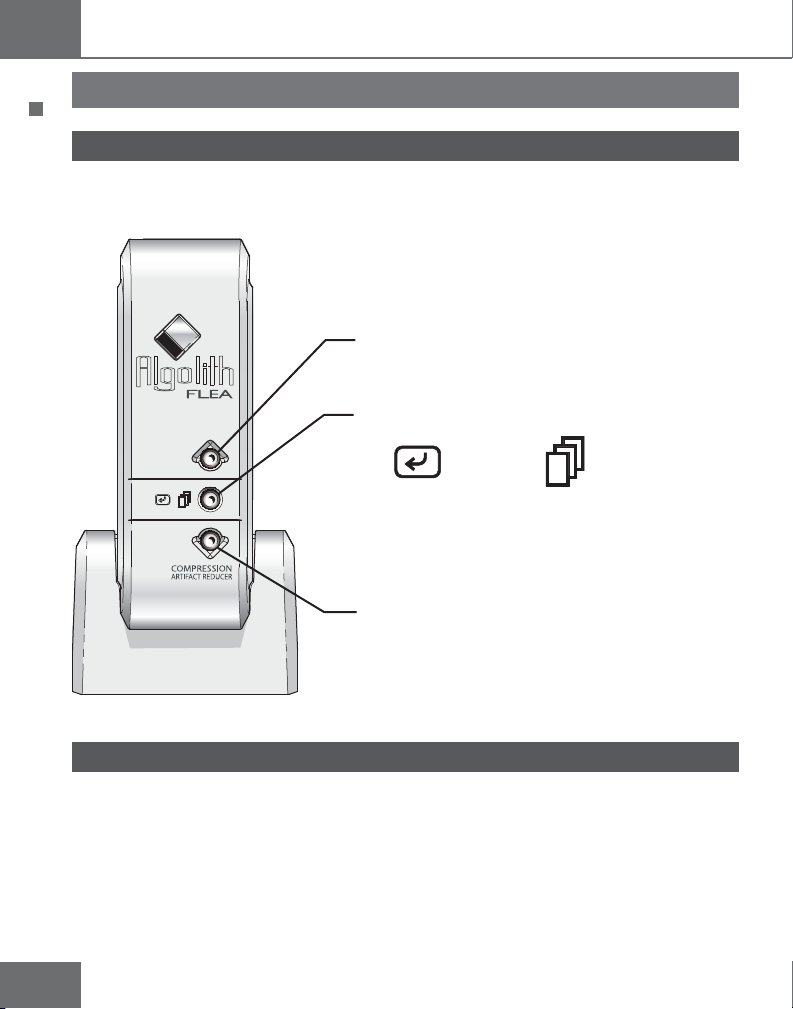
The front panel keys used in conjunction with the On Screen Display (OSD) allows you to
change parameters on the Flea.
Operating Flea
Up Key - move up through the
menus or increase a parameter
value
Enter/toggle value
Press and hold down 3 seconds
to power off the Flea
Press again to automatically power
on the Flea
Down Key - move down through the
menus or decrease a parameter
value
Menu
Menu
Use the menu to select the noise reduction mode, adjust various settings and view other
useful information about your Flea settings.
(See the Technical Tutorial at the end of this guide for technical information and tips on
how to set your Flea).
10
Page 11
Flea
Input Selection
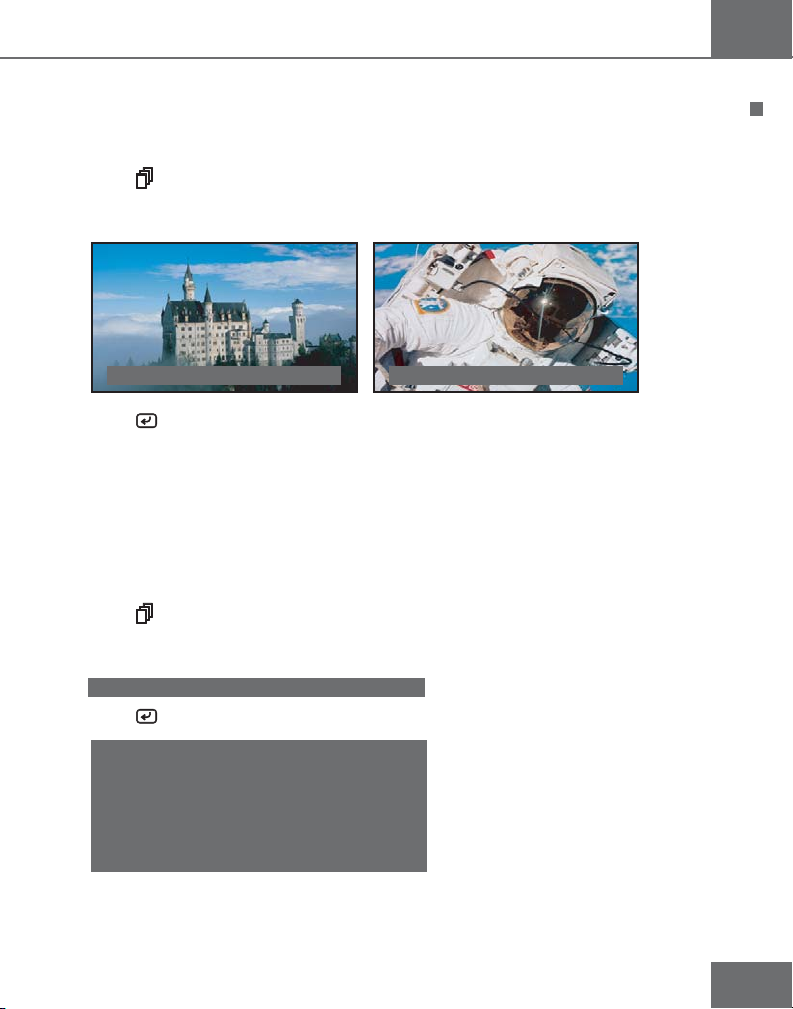
Use the Input Selection function to select between the component input and the S-Video
input.
Operating Flea
1- Press
2- Press the Up or Down keys to move through the menu and access the Input
Selection command.
3- Press to change the selected input. You will get a checker board pattern if no
video signal is present at the selected input.
4- The menu will disappear by itself after a few seconds.
to access the menu.
Input Selection Component Input Selection S-Video
Status
Use the status parameter to display the firmware version of the Flea and other
complementary information.
1- Press
2- Press the Up or Down keys to move through the menu and access the Status
command.
3- Press to set Status to on.
4- The menu will disappear by itself after a few seconds.
to access the menu.
Status off
STATUS
Input Selection
Input Video Format
Color Space
Revision Number
Serial Number
720p60
1
YBR422
2.01
3014-000100
11
Page 12
Flea
Split Image
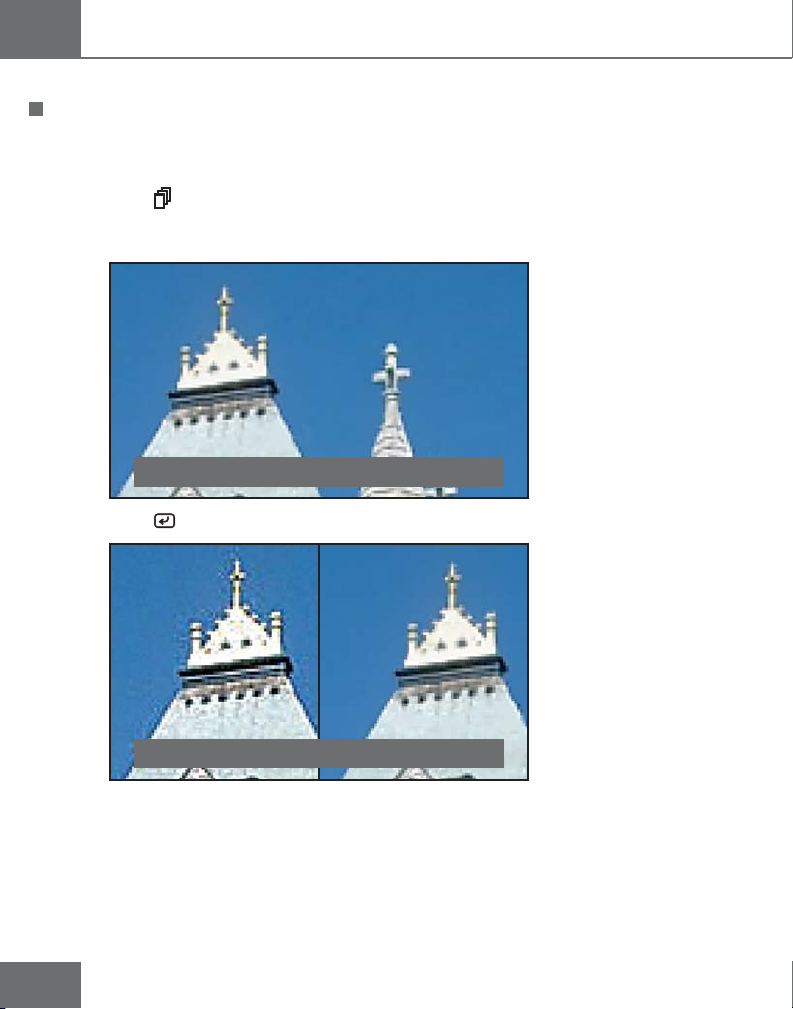
Use the Split Image function to view the input image before and after processing. The
two images appear side by side on your screen. This function is useful to perform
processing evaluation and adjustments. Left side of screen is unprocessed.
1- Press
2- Press the Up or Down keys to move through the menu and access the Split
Operating Flea
Image command.
to access the menu.
Split Image off
3- Press to turn Split Image on and off.
Split Image on
4- The menu will disappear by itself after a few seconds.
12
Page 13
Flea
Processing
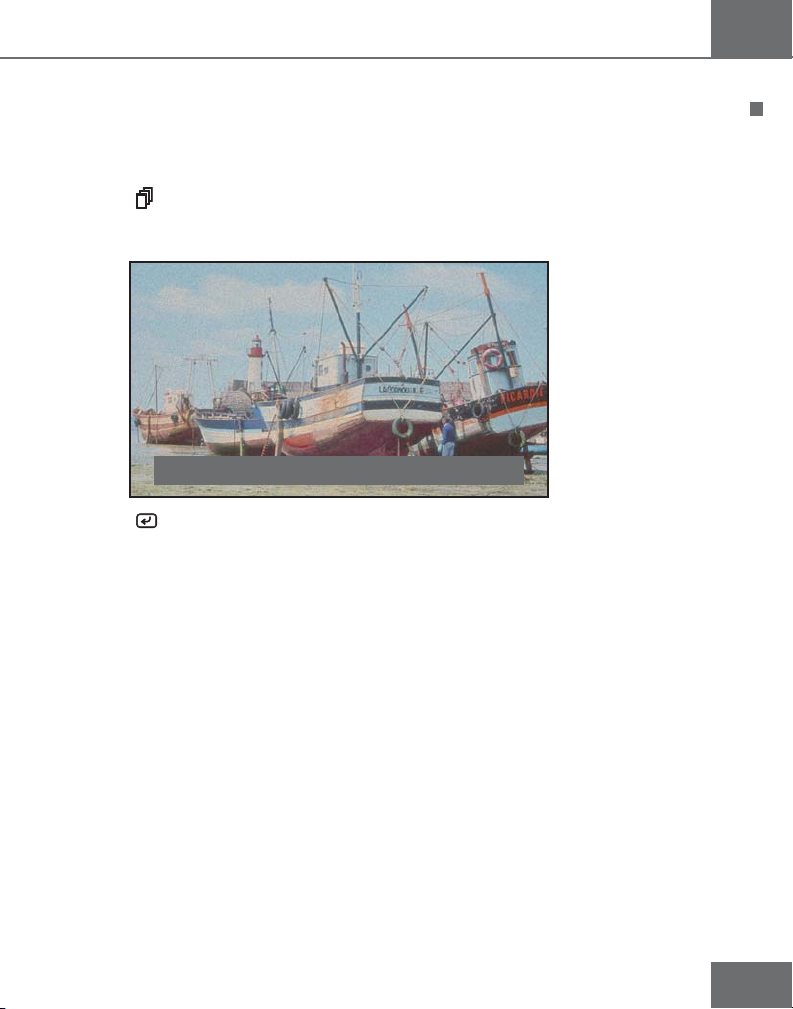
Use the processing function to enable or disable noise reduction, block artifact reduction,
dynamice range stretching and detail enhancement (the «processing» of the video image).
When Processing is off, your image is displayed as received from the source.
Operating Flea
1- Press
2- Press the Up or Down keys to move through the menu and access the
Processing command.
to access the menu.
Processing on
3- Press to turn Processing on and off.
4- The menu will disappear by itself after a few seconds.
13
Page 14
Flea
Test Pattern
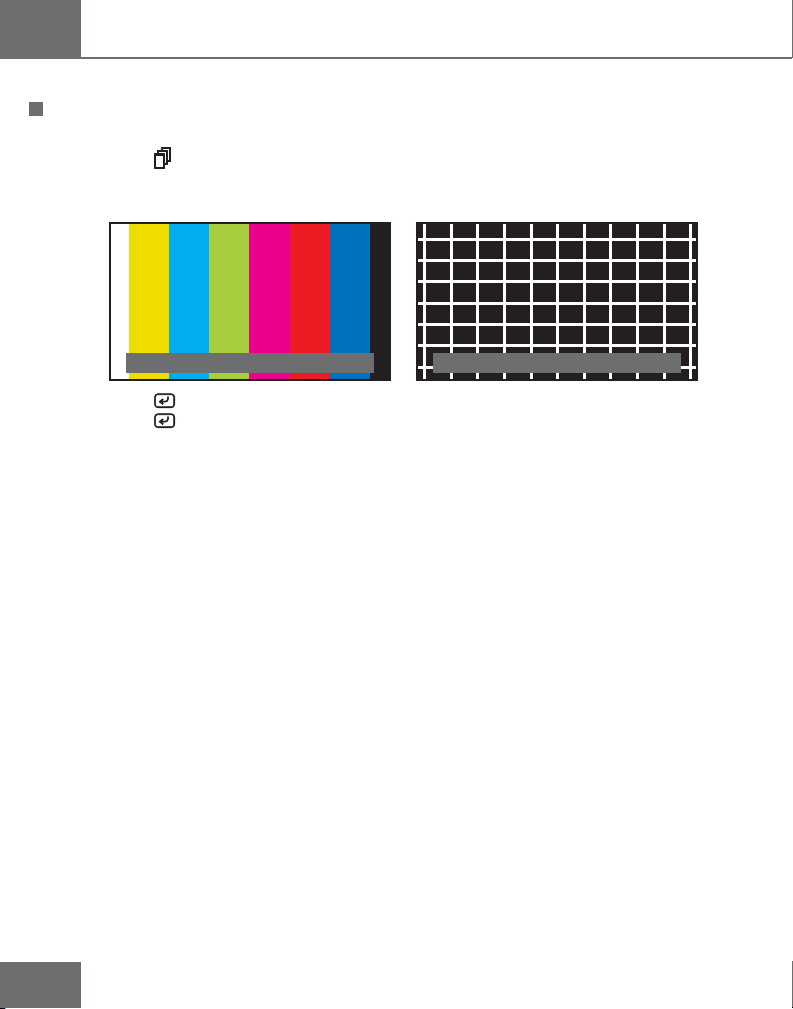
A color bar test pattern has been included in your Flea to ease display adujstments.
1- Press
to access the menu.
2- Press the Up or Down keys to move through the menu and access the Test
Pattern command.
Operating Flea
Test Pattern on Test Pattern on
3- Press to turn the Test Pattern on.
4- Press
again to turn the Test Pattern off. (This command will not disappear by
itself to allow you all the time necessary to perform the color adjustments).
Note: The test pattern will show color bars in 480i and 576i, and will show a hatched pattern when activated in
component 480p, 720p and 1080i.
14
Page 15
Flea
Block Artifact Reducer
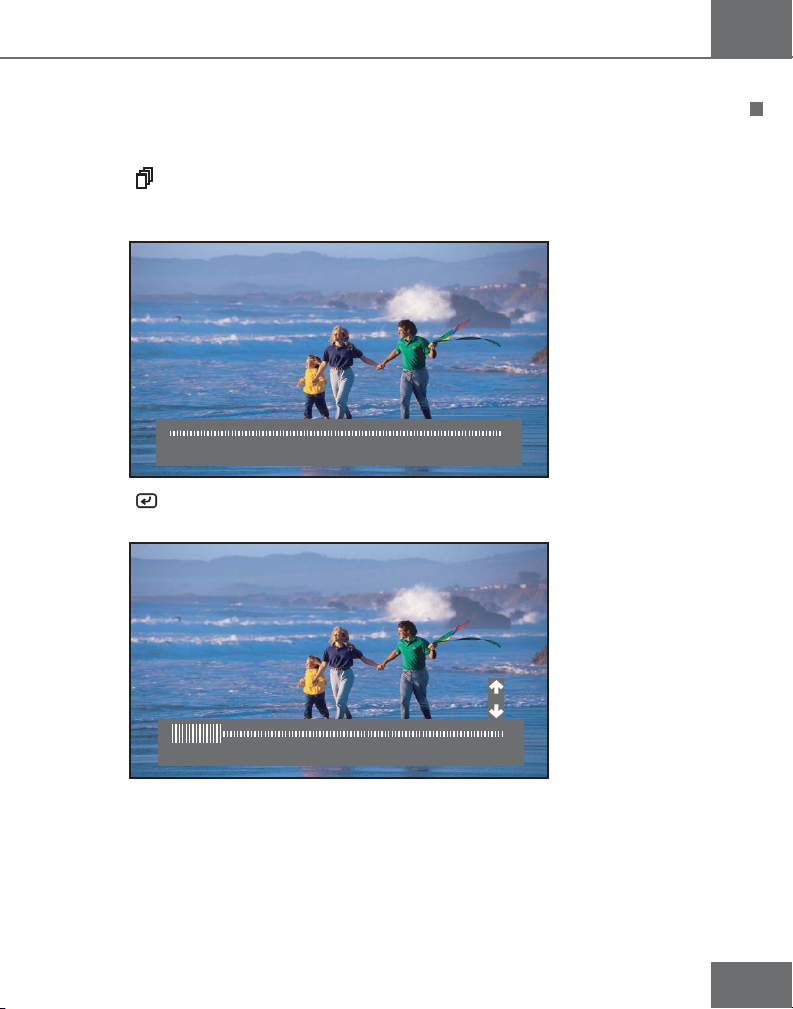
The Block Artifact Reducer function sets the level of block artifact reduction in the
image.
Operating Flea
1- Press
2- Press the Up or Down keys to move through the menu and access the Block
Artifact Reducer command.
to access the menu.
Block Artifact Reducer off
3- Press to enter the Block Artifact Reducer edit mode. Notice that 2 arrows
will appear over the menu.
Block Artifact Reducer 2
4- Press the Up or Down keys to adjust the level of filtering from 0 (off) to 4.
5- The menu will disappear by itself after a few seconds.
Note: The Block Artifact Reducer function is N/A (not available) when Processing function is set to off.
15
Page 16
Flea
2D Spatial Filter
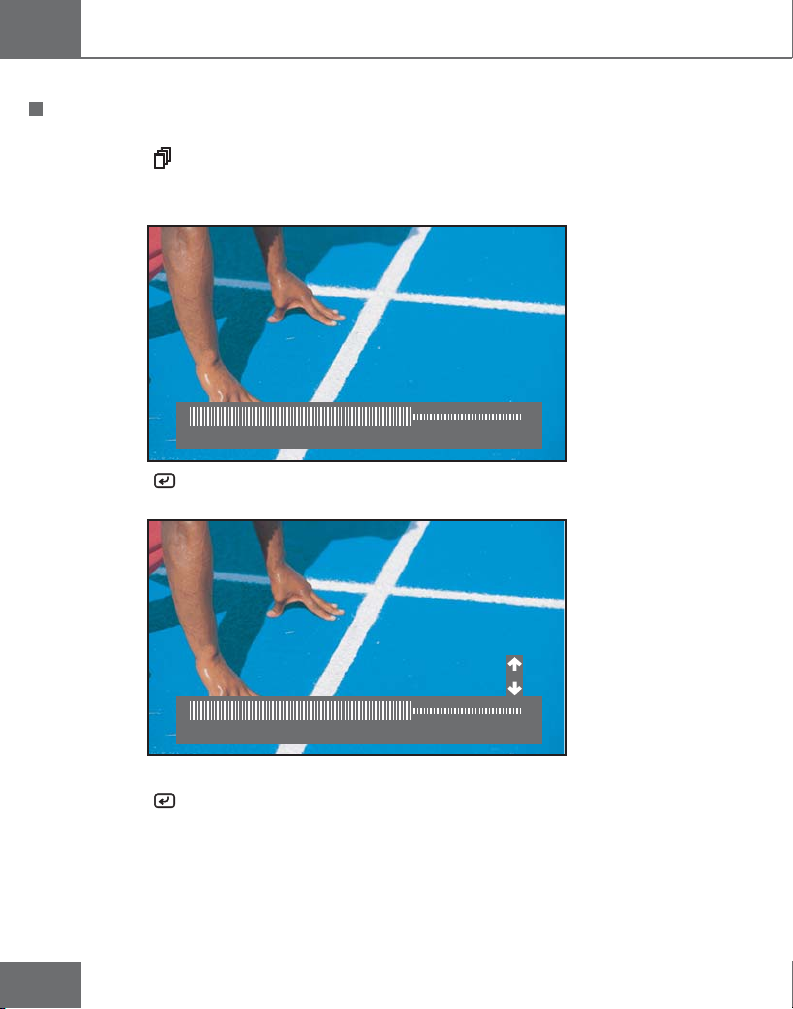
The 2D Spatial Filter function sets the level of 2D, or spatial noise filtering
1- Press
2- Press the Up or Down keys to move through the menu and access the 2D Spatial
Filter command.
Operating Flea
to access the menu.
2D Spatial Filter 10
3- Press
appear over the menu.
to enter the 2D Spatial Filter edit mode. Notice that 2 arrows will
2D Spatial Filter 10
4- Press the Up or Down keys to adjust the level of filtering from 0 (off) to 15 (max).
5- Press
Note: The 2D Spatial Filter function is N/A (not available) when Processing function is set to off.
16
to save the spatial filtering level, or wait for menu to disappear.
Page 17
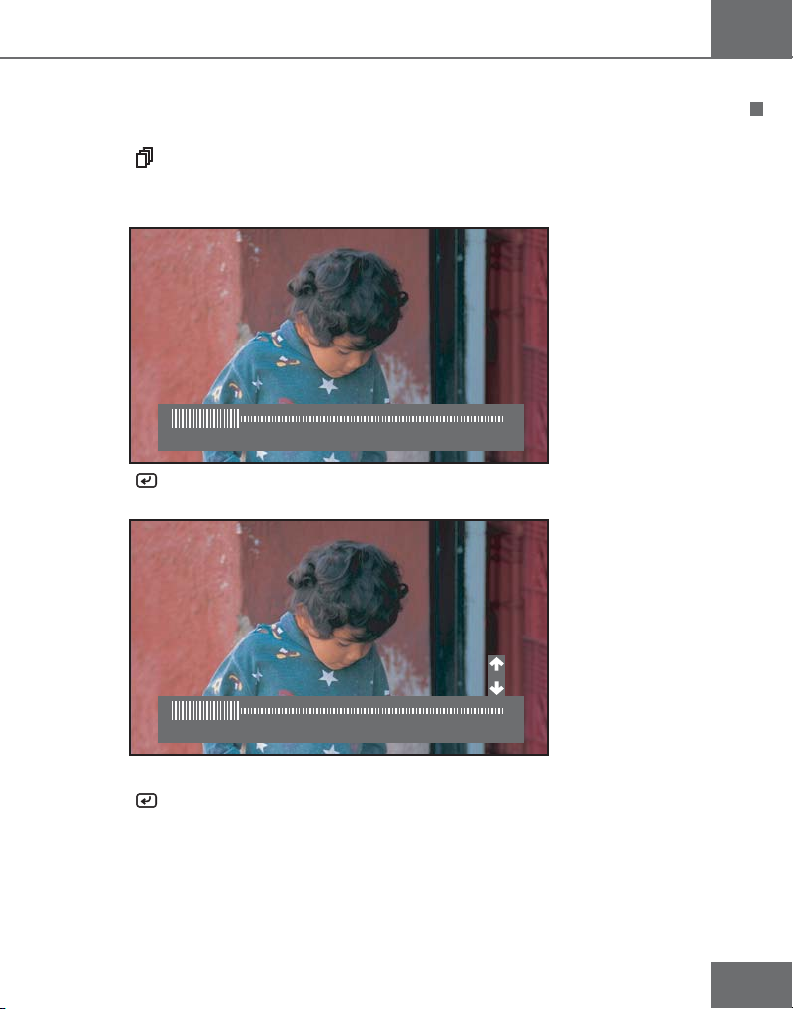
3D Temporal Filter
The 3D Temporal Filter sets the level of 3D, or temporal noise filtering.
Flea
Operating Flea
1- Press
2- Press the Up or Down keys to move through the menu and access the 3D
Temporal Filter command.
to access the menu.
3D Temporal Filter 3
3- Press to enter the 3D Temporal Filter edit mode. Notice that 2 arrows will
appear over the menu.
3D Temporal Filter 3
4- Press the Up or Down keys to adjust the level of filtering from 0 (off) to 15 (max).
5- Press
Note: The 3D Temporal Filter function is N/A (not available) when Processing function is set to off.
to save the Temporal filtering level, or wait for menu to disappear.
17
Page 18
Flea
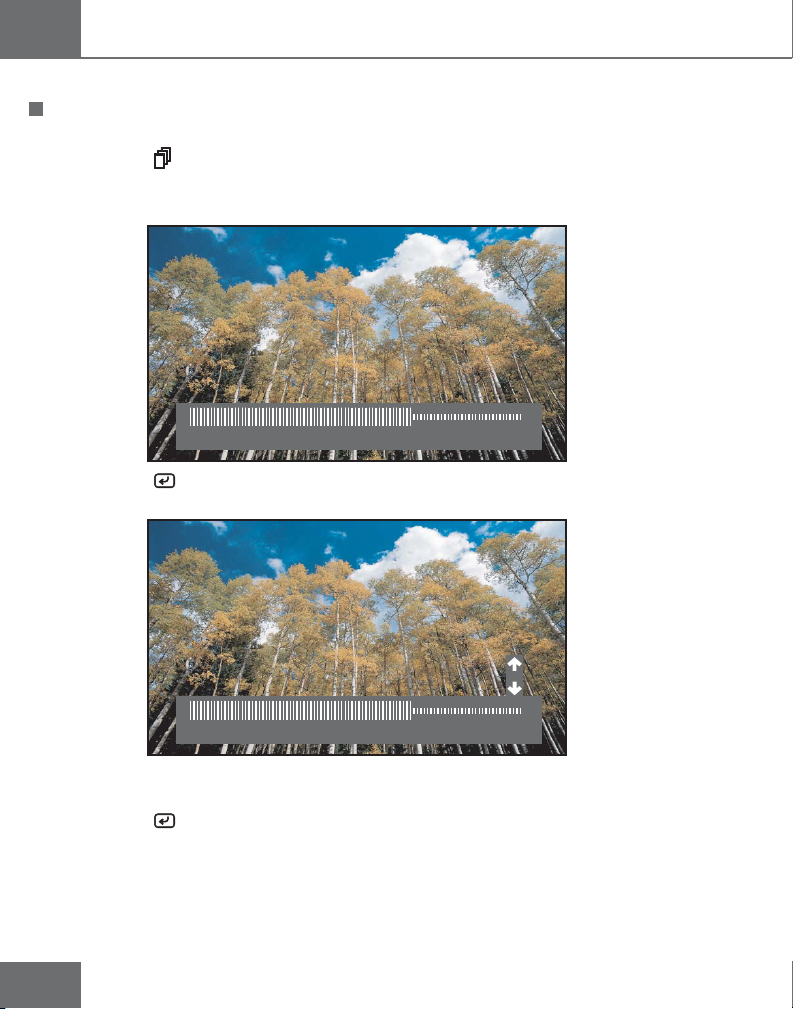
Detail Enhancement
The Detail Enhancement function sets the level of detail enhancement in the image.
1- Press
2- Press the Up or Down keys to move through the menu and access the Detail
Enhancement command.
Operating Flea
to access the menu.
Detail Enhancement 10
3- Press
appear over the menu.
to enter the Detail Enhancement edit mode. Notice that 2 arrows will
Detail Enhancement 10
4- Press the Up or Down keys to adjust the level of detail enhancement from 0 (off) to
15 (max).
5- Press
Note: The Detail Enhancement function is N/A (not available) when Processing function is set to off.
18
to save the detail enhancement level, or wait for menu to disappear.
Page 19
Flea
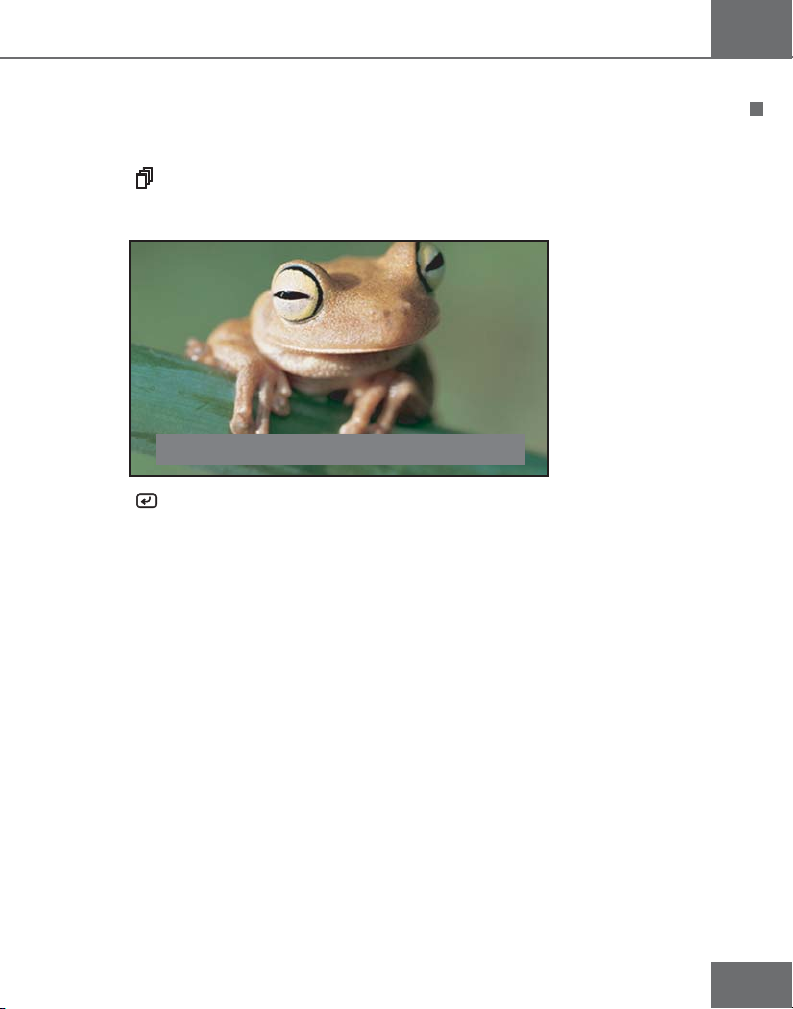
Dynamic Range Stretcher
The Dynamic Range Stretcher function turns the normalization of the image on and
off.
Operating Flea
1- Press
2- Press the Up or Down keys to move through the menu and access the Dynamic
Range Stretcher command.
to access the menu.
Dynamic Range Stretcher on
3- Press
4- The menu will disappear by itself after a few seconds.
Note: The Dynamic Range Stretcher function is N/A (not available) when Processing function is set to off.
to turn Dynamic Range Strectcher on and off.
19
Page 20
Flea
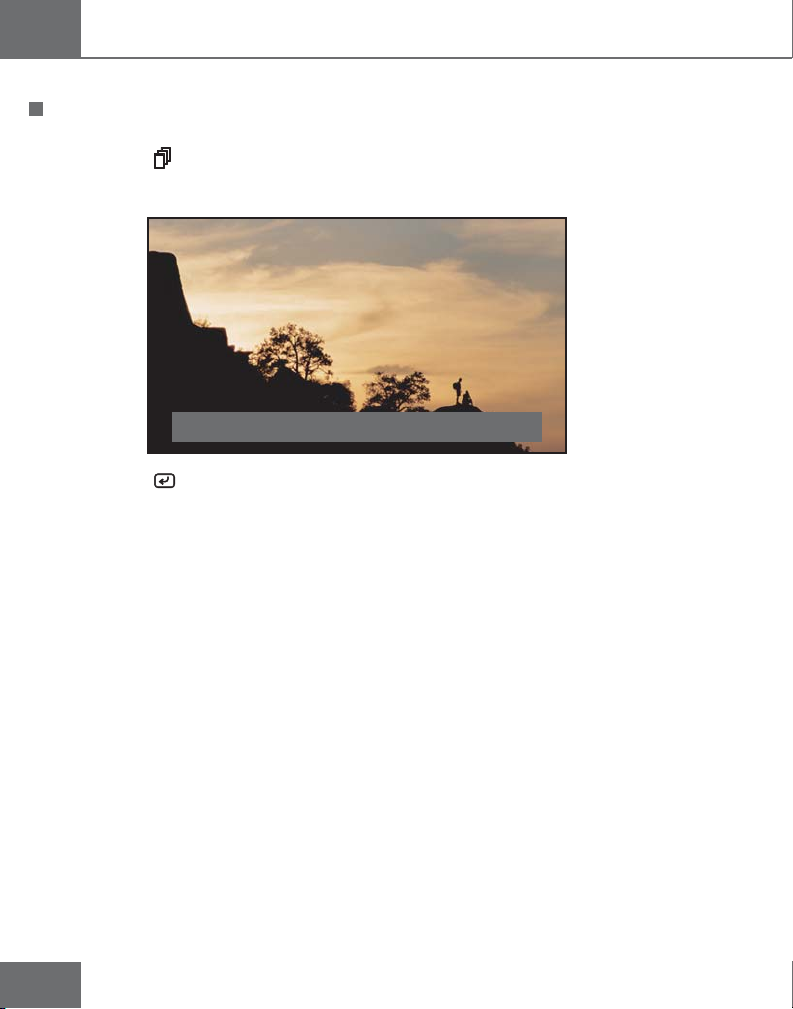
Language
The menu can be displayed in two languages.
1- Press
2- Press the Up or Down keys to move through the menu and access the Language
command.
Operating Flea
to access the menu.
Language English
3- Press to select between English and Français.
4- The menu will disappear by itself after a few seconds.
20
Page 21

Flea
Technical Tutorial
The following section contains useful information about noise reduction and how your
Flea will improve your viewing experience
2D Spatial and 3D Temporal Filtering
Your Flea reduces mosquito noise by looking at and comparing the content of the spatial
(2D) and temporal (3D) domains. You can set the filtering level for each.
2D Spatial Filtering
With 2D spatial filtering, images are treated as static and mosquito noise is reduced on a
picture by picture basis. To experiment and view the effect of various settings and set 2D
level filtering, you can put your video on «pause». You will see the effect on the paused
image when you increase or decrease the filtering level.
3D Temporal Filtering
Temporal filtering (3D) looks at images one after the other, over time. The Flea searches
for moving pixels in the images, then correlates this information with 2D spatial filtering.
You cannot see the effect of 3D filtering when you apply it while your video is paused.
Its effect is only visible on moving pictures.
Technical Tutorial
21
Page 22
Flea
Adjusting 2D Spatial Filtering
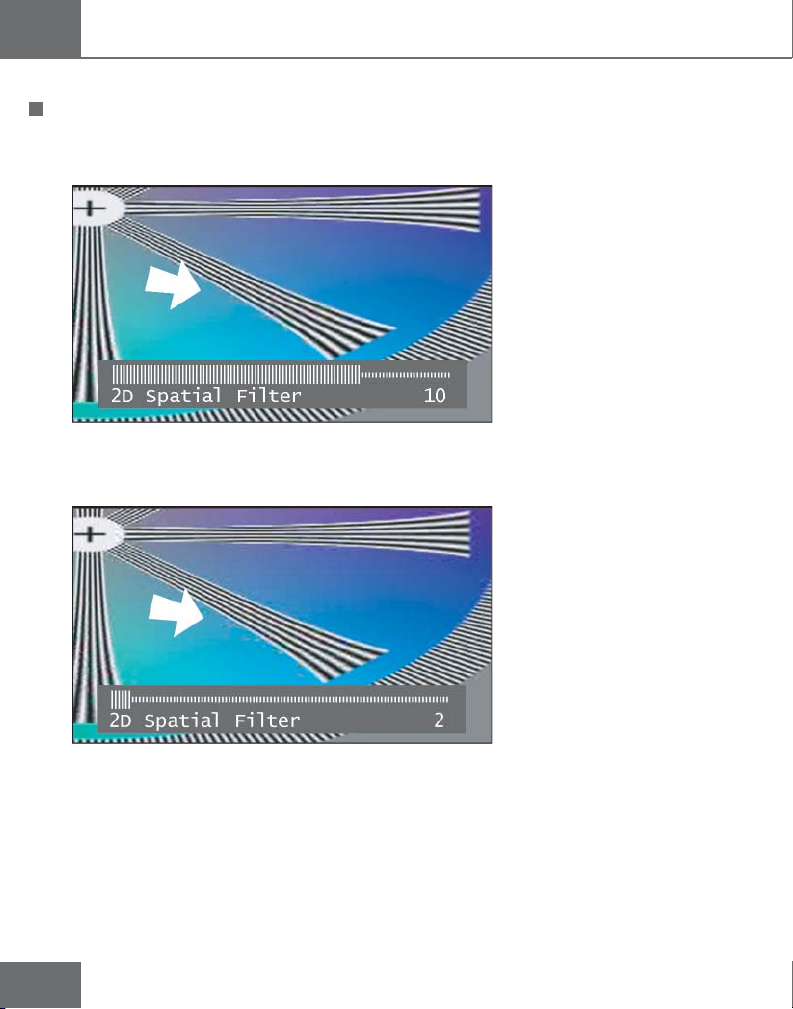
Generally, 2D Spatial Filtering should be set to high values to remove mosquito noise.
A good setting is higher than 8. However, reducing mosquito noise using the 2D Spatial
Filter shouldn’t be so high as to blur image detail.
Technical Tutorial
2D spatial filtering with proper settings.
Too low a value of 2D filtering is likely to leave some mosquito noise in your image.
Low filtering (residual noise).
(Continued on next page).
22
Page 23
Flea
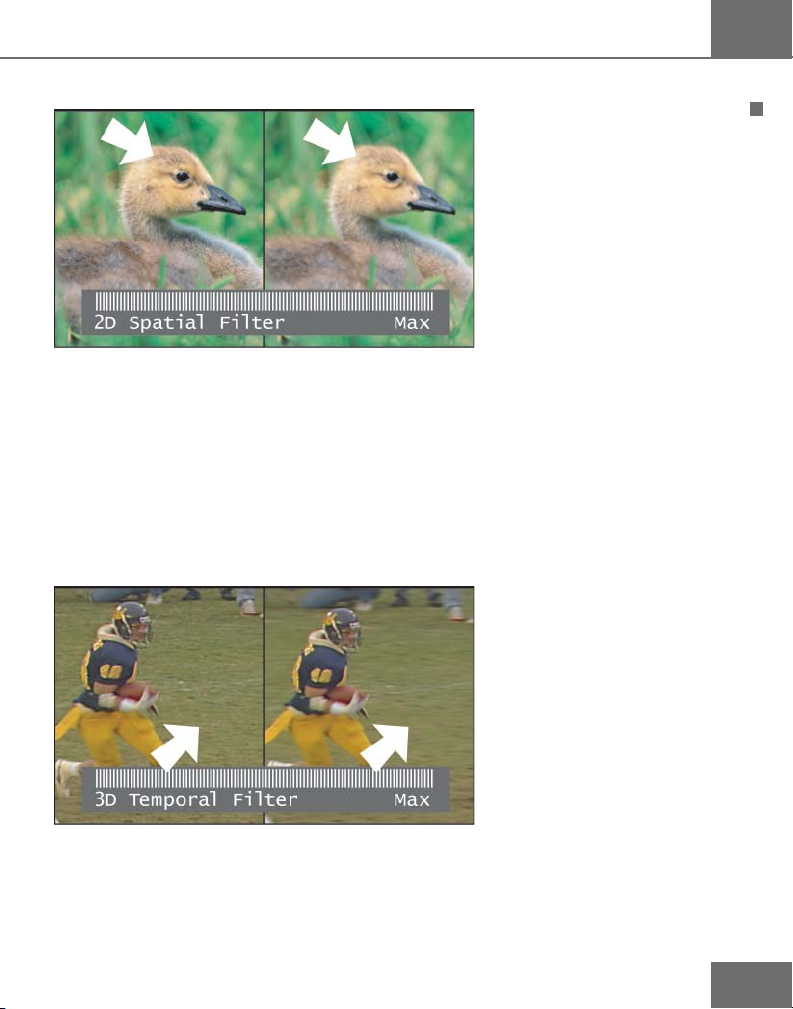
Too high a level of filtering can blur finer details in the image.
2D filter set too high, seen a with split image. (left image unprocessed). The finer
details are lost.
Adjusting 3D Temporal Filtering
Generally, 3D filtering requires little adjustment and should be set to a value of about
3. If you experiment with the setting, note that a low value will work with medium and
fast moving images, while a high value will work with slow moving images. If the value
is set high on moving images, the resulting images will have «image blur» and visible
«image retention».
Technical Tutoria
3D filter set too high, seen with a split image. (left image unprocessed). Image blur
can occur.
23
Page 24
Flea
Blocking Artifacts
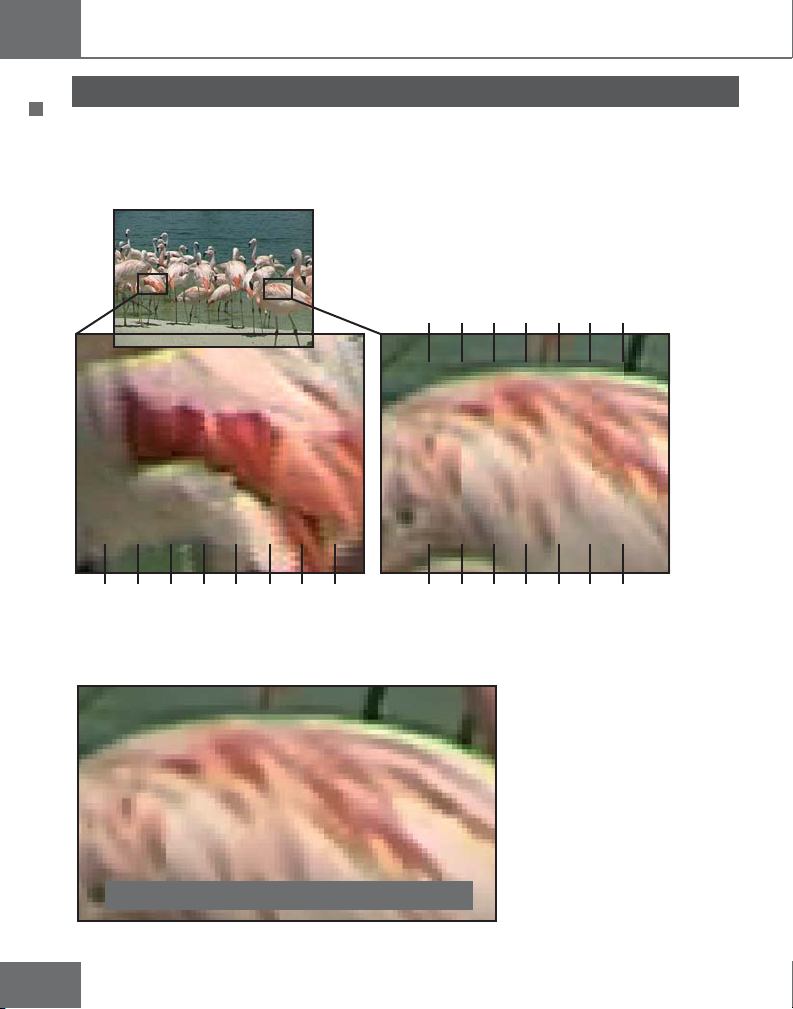
Blocking artifacts or «Macro-Blocking» occur whenever images are digitally compressed.
These artifacts are most visible in fast moving images like sports scenes and action
scenes, and in images that are high in detail and textures. Parts of your image appear
to be divided into little squares.
Technical Tutorial
Typical Blocking Artifacts.
Block artifact reduction will help blend in and reduce macro-blocks. To reduce blocking
artifacts, set the Block Artifact Reducer level between 1 and 4.
Block Artifact Reducer on
3D Temporal Filter Max
24
Page 25
Flea
Detail Enhancement
Flea’s detail enhancement is achieved after MPEG noise reduction, so you can increase
detail substantially without reintroducing artifacts. Once both 2D and 3D filters are set
properly, the Flea will yield impressive images that are sharp and noise free.
Dynamic Range Stretching
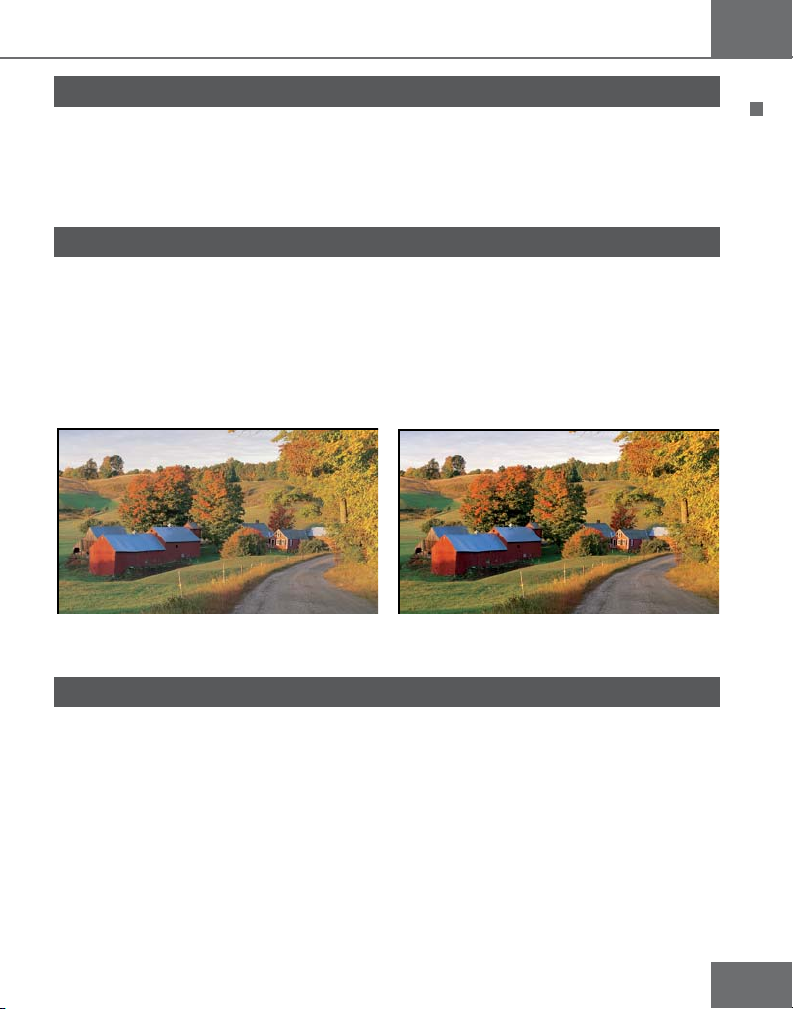
Flea’s Dynamic Range Stretching function enhances the contrast of an image by
ensuring that each image occupies the full dynamic range available. Otherwise said,
images are analyzed on a pixel per pixel basis, and luminosity is recalibrated, so that
details are more contrasted and more realistic to human vision.
The result is a picture with more depth, greater realism for the human eye, and finer
edges in contrasting areas.
Technical Tutoria
Image without DRS Image processed with DRS
Recommended settings
Video feeds of different image quality (a DVD movie, a satellite program...) require
different filtering strengths and settings. As a starting point, Algolith recommends the
following:
SD signal HD Signal
Block Artifact Reducer 1 1
2D Spatial Filter 10 6
3D Temporal Filter 3 2
Detail Enhancer 10 7
Dynamic Range Stretcher off off
25
Page 26

Flea
Specifi cations*
Video Inputs:
• 1 Component (Y/Pb/Pr) interlaced/
progressive SD/HD
• 480i60
• 480p60
Specifications
• 576i50
• 576p50
• 720p60
• 1080i60
• 1 S-Video interlaced SD
• 480i60
• 576i50
• Automatic interlaced/progressive
SD/HD input detection
Video Outputs :
• Component (Y/Pb/Pr) interlaced/
progressive SD/HD
• 480i60
• 480p60
• 576i50
• 576p50
• 720p60
• 1080i60
(output follows input)
• 1 S-Video interlaced SD
• 480i60
• 576i50
• 14-bit processing
• Proprietary 3D-MNR MPEG Noise
Reduction
• Proprietary 2D Auto detection
Block Artifact Reduction (BAR)
• Proprietary Detail Enhancer
• Proprietary Dynamic Range Stretcher
• USB control and upgradability
Front Panel Features:
• Power on blue LED indicator
• 2 Up & Down Buttons
• 1 Menu / Enter Button
Back Panel:
• 1 Analog Component Input
• 1 Analog Component Output
• 1 Analog S-Video Input
• 1 Analog S-Video Output
• USB connector
• External DC power supply
User Selectable Controls:
• Input Selection
• Split Image (on/off)
• Processing (on/off)
• Test Pattern (on/off)
• Block Artifact Reduction Level
• 2D Noise Reduction Level
• 3D Noise Reduction Level
• Detail Enhancement Level
• Dynamic Range Stretching Level
Power:
• External AC Adaptor
• Input: 90-240 VAC 1A
• Output: 12VDC 4.5A
• Fanless chassis
Mechanical:
• Width: 2.75 in.
• Depth: 5 in.
• Height: 5.5 in.
• Weight: 1 lbs
• Footstand
OSD:
• OSD (On Screen Display) with
status feedback
26
* Specifi cations are subject to change without notice.
Weight and dimensions are approximate.
Page 27

Flea
Limited Warranty
Limited Warranty Coverage
Algolith Inc. warrants that the equipment it manufactures shall be free from defects in material and workmanship for a period of one (1) year from the date of purchase. If equipment
fails due to such defects, Algolith Inc. will, at its option, repair or provide a replacement for
the defective part or product.
Equipment that fails after the warranty period or has been operated or installed in a manner
other than that specified by Algolith, or has been subjected to abuse or modification, will be
repaired for time and material charges at the Buyer’s expense.
All out-of-warranty repairs are warranted for a period of ninety (90) days from the date of
shipment from the factory.
A purchase receipt or other proof of the original purchase date is required for warranty
service.
Algolith Inc. makes no other warranties, expressed or implied, of merchantability, fitness for a
particular purpose or otherwise. Algolith’s liability for any cause, including breach of contract,
breach of warranty, or negligence, with respect to products sold by it, is limited to repair or
replacement by Algolith, at its sole discretion.
In no event shall Algolith Inc. be liable for any incidental or consequential damages, including
loss of profits.
Limited Warranty
27
Page 28
Flea
Troubleshooting
Please read the following troubleshooting section carefully before calling Algolith’s
support lines.
Television screen is blank:
Troubleshooting
1- Is the Flea on?
Source signals go through the Flea. When the Flea is off (power supply not connected), no
picture can reach the display device.
2- Is a valid input selected?
Selecting a vacant input (ex. no signal present at component input) will leave the screen
blank. Use the On Screen Display (OSD) to select a valid input (see Input on page 7 and
11).
3- Do you have the right connection?
A S-Video cable between the Flea and the display device will not carry the signal from a
component cable between the source and the Flea. (See Video Connections on page 7-8).
OSD menus appear small on screen:
1- It is normal for On Screen Display menus to appear in different sizes.
A 480i/p source signal will produce a large On Screen Display whereas a 1080i source will
produce a small On Screen Display.
Sound does not correspond to image:
1- The Flea does not have audio processing.
When 2 video sources are connected to Flea, switching from one to the other will
necessitate external audio switching.
Moving portions of the image create a blurry trail:
1- 3D Filtering is set too high.
When 3D Temporal Filter is set too high, it can create a blurry trail and cause a loss in
image details. Reduce 3D filtering strength. (See 3D Temporal Filter on page 17).
28
Page 29
Flea
Screen shows a color bar image:
1- The Test Pattern command is on.
The Test Pattern command needs to be set to off. (See page 14).
Stuck with a bad image:
1- Is Processing on?
Even though the Flea is on, processing of the image could have been set to off and
the source image is displayed with all of its moquito noise and blocking artifacts. Set
Processing command to on. (See Processing on page 13).
N/A - can’t modify parameters:
1- Processing is off.
When the Processing function is set to off, you cannot control or modify MNR, 2D Spatial
Filter, 3D Temporal Filter and Detail Enhancement. These parameters are «Not
Available» (N/A). To modify them, set the Processing function to on (see page 13).
Troubleshooting
29
Page 30

Flea
How to contact us
Algolith Inc.
400 Isabey
Montréal, Québec, Canada
H4T 1V3
Contact us
t. 514.335.9867
f. 514.333.9873
Via Internet
Support Home Theater: [email protected]
Sales Home Theater: [email protected]
General Information: [email protected]
Visit us at:
www.algolith.com
30
Page 31

Flea
31
Page 32
32
 Loading...