


Instruction Manual
Alfa Laval GJ 8
Covering:
Standard Machines
First published: 2015-08
ESE032025-EN1 2015-08
Original manual


Table of Contents
The information herein is correct at the time of issue but may be subject to change without prior notice
1. EC Declaration of Conformity ...... ..... ..... ...... ..... ...... ..... ...... ..... ...... ..... ..... ...................................... …… 1
2. Safety .. ..... ...... ..... ...... ..... ...... ...... ..... ..... ...... ..... ...... ..... ...... ..... ...... ..... ..... ...................................... …… 2
2.1. Important information . ..... ...... ...... ..... ..... ...... ..... ...... ..... ...... ..... ...... ..... ..... ...................................... …… 2
2.2. Warning signs ... ...... ..... ...... ...... ..... ..... ...... ..................................... ..... ..... ................................ …. 2
2.3. Safety precautions .... ..... ...... ...... ..... ..... ...... ..... ...... ..... ...... ..... ...... ..... ..... ...................................... …… 3
3. Introduction ..... ..... ...... ...... ..... ..... ...... ..... ...... ..... ...... ..... ...... ..... ..... ...................................... …… 4
3.1. Description . ...... ..... ...... ..... ..... ...... ..... ...... ..... ...... ..... ...... ..... ..... ...................................... …… 4
3.2. Intended Use . ...... ..... ...... ..... ..... ...... ..... ...... ..... ...... ..... ...... ..... ..... ...................................... …… 4
3.3. Patents and trademarks . ...... ..... ...... ..... ..... ...... ..... ...... ..... ...... ..... ...... ..... ..... ...................................... …… 4
3.4. Marking . ...... ..... ...... ..... ..... ...... ..... ...... ..... ...... ..... ...... ..... ..... ...................................... …… 4
4. Installation . ...... ..... ...... ..... ...... ...... ..... ..... ...... ..... ...... ..... ...... ..... ...... ..... ..... ...................................... …… 5
4.1. Unpacking/delivery ... ..... ...... .......... ..... ...... ..... ...... ..... ...... ..... ...... ..... ..... ...................................... …… 5
4.2. Installation .. ..... ...... .......... ...... ..... ...... ..... ...... ..... ...... ..... ..... ...................................... …… 6
4.3. Recycling Information ..... ...... ..... ..... ...... ..... ........... ...... ........... ..... ..... ...................................... …… …...…. 8
5. Operation . . ...... ..... ...... ..... ..... ...... ..... ........... ...... ..... ..... ...................................... …………..... 9
5.1. Operation/Control ..... ..... ...... ...... ..... ..... ............ ..... ...... ..... ...... ..... ..... ...................................... …………….. 9
5.2. Trouble Shooting ..... ............ ..... ...... ..... ...... ..... ..... ….. ….. …. ...................................... …………….. 10
5.3. Cleaning Solution Leakage ..... ..... ..... ............ ..... ...... ..... ...... ..... ..... ...................................... …………….. 12
5.4. Poor Cleaning Performance .... ..... ..... ............ ..... ...... ..... ...... ..... ..... ...................................... …………….. 13
5.5. Recommended Cleaning . . ...... ..... ..... ............ ..... ...... ..... ...... ..... ..... ...................................... …………….. 14
6. Maintenance . ...... ..... ...... ..... ............ ..... ...... ..... ...... ..... ..... ...................................... …………….. 15
6.1. General Maintenance.... ..... ...... ..... ..... ..... ............ ..... ...... ..... ...... ..... ..... ...................................... …………….. 15
6.2. General dismantling set up ..... ..... ..... ............ ..... ...... ..... ...... ..... ..... ...................................... …………….. 16
6.3. General dismantling . . ..... ...... ..... ............ ..... ...... ..... ...... ..... ..... ...................................... …………….. 17
6.4. Inspection and Service of Components . ...... .......... ...... ..... ..... ...................................... …………….. 18
6.5. Reassembly ..... ...... ..... ..... ............ ..... ...... ..... ...... ..... ..... ...................................... …………….. 21
7. Technical Data .. ..... ...... ..... ..... ............ ..... ...... ..... ...... ..... ..... ...................................... …………….. 23
7.1. Technical Data .. ...... ..... ..... ............ ..... ...... ..... ...... ..... ..... ...................................... …………….. 23
7.2. Performance Data .... ..... ...... ..... ..... ............ ..... ...... ..... ...... ..... ..... ...................................... …………….. 24
7.3. Dimensions . .......... ..... ............ ..... ...... ..... ...... ..... ..... ...................................... …………….. 25
7.4. Trax Simulation Tool .. ..... ...... ..... ............ ..... ...... ..... ...... ..... ..... ...................................... …………….. 26
8. Parts List and Service Kits ... ...... ..... ..... ............ ..... ...... ..... ...... ..... ..... ...................................... …………….. 27
8.1. GJ8 View ..... ..... ...... ..... ............ ..... ...... ..... ...... ..... ..... ...................................... …………….. 27
8.2. Assembly Drawings - 1 & 2 ..... ..... ..... ............ ..... ...... ..... ...... ..... ..... ...................................... …………….. 28
8.3. Assembly Drawings - 3, 4, 5, 6, 7 & 8 . ..... ..... ............ .......... ...... ..... ..... ...................................... …………….. 29
8.4. Assembly Drawings - 9, 10, 11, 12, 13, 14, 15, 16 & 17............. ...... ..... ..... ...................................... …………….. 31
8.5. Assembly Drawings – 18, 19, 20, 21, 22, 23, 24 & 25..... ..... ...... ..... ..... ...................................... …………….. 33
8.6. Assembly Drawings – 26, 27, 28 & 29 ..... ............................. ...................................... …………….. 35
8.7. Assembly Drawings – 30, 31, 32, 33 & 34... ............ ..... ...... ..... ...... ..... ..... ...................................... …………….. 37
8.8. Parts List .... ..... ...... ..... ...... ..... ..... ............ ..... ...... ..... ...... ..... ..... ...................................... …………….. 40
8.9. Minor Service Kit ...... ..... ...... ..... ..... ..... ............ ..... ...... ..... ...... ..... ..... ...................................... …………….. 43
8.10. Major Service Kit ...... ..... ...... ................. ..... ...... ..... ...... ..... ..... ...................................... …………….. 45
9. Appendix A ………............................................................................................................................................. …… 47

Alfa Laval Tank Equipment Inc.
Company name
604 Jeffers Circle – Exton, PA – 19341, United States
Address
+1 610 408 9940
Phone no.
Tank Cleaning Machine
Alfa Laval GJ 8
Denomination
Type
Executive VP Operations
Andrew Delaney
Title Name
Signature
2015-05-18
Exton, United States
Date Place
EC Declaration of Conformity
The designated company
hereby declare that
From serial numbers from E-0001 to E-XXXX
is in conformity with the following regulations and directives with amendments:
- The Machinery Directive 2006/42/EC
DS/EN ISO 12100:2011
- The Pressure Directive 97/23/EC
According to its own volume and the rated pressure range the product is regarded an Article 3, paragraph 3 Equipment
The person authorised to compile the technical file is the signer of this document.
1
2. Safety
Unsafe practices and other important information are emphasized in this manual. Warnings are emphasized by means of
special signs.
Always read the manual before using the tank cleaning machine!
2.1 Important information
WARNING
Indicates that special procedures must be followed to avoid serious personal injury.
CAUTION
Indicates that special procedures must be followed to avoid damage to the tank cleaning machine.
NOTE
Indicates important information to simplify or clarify procedures.
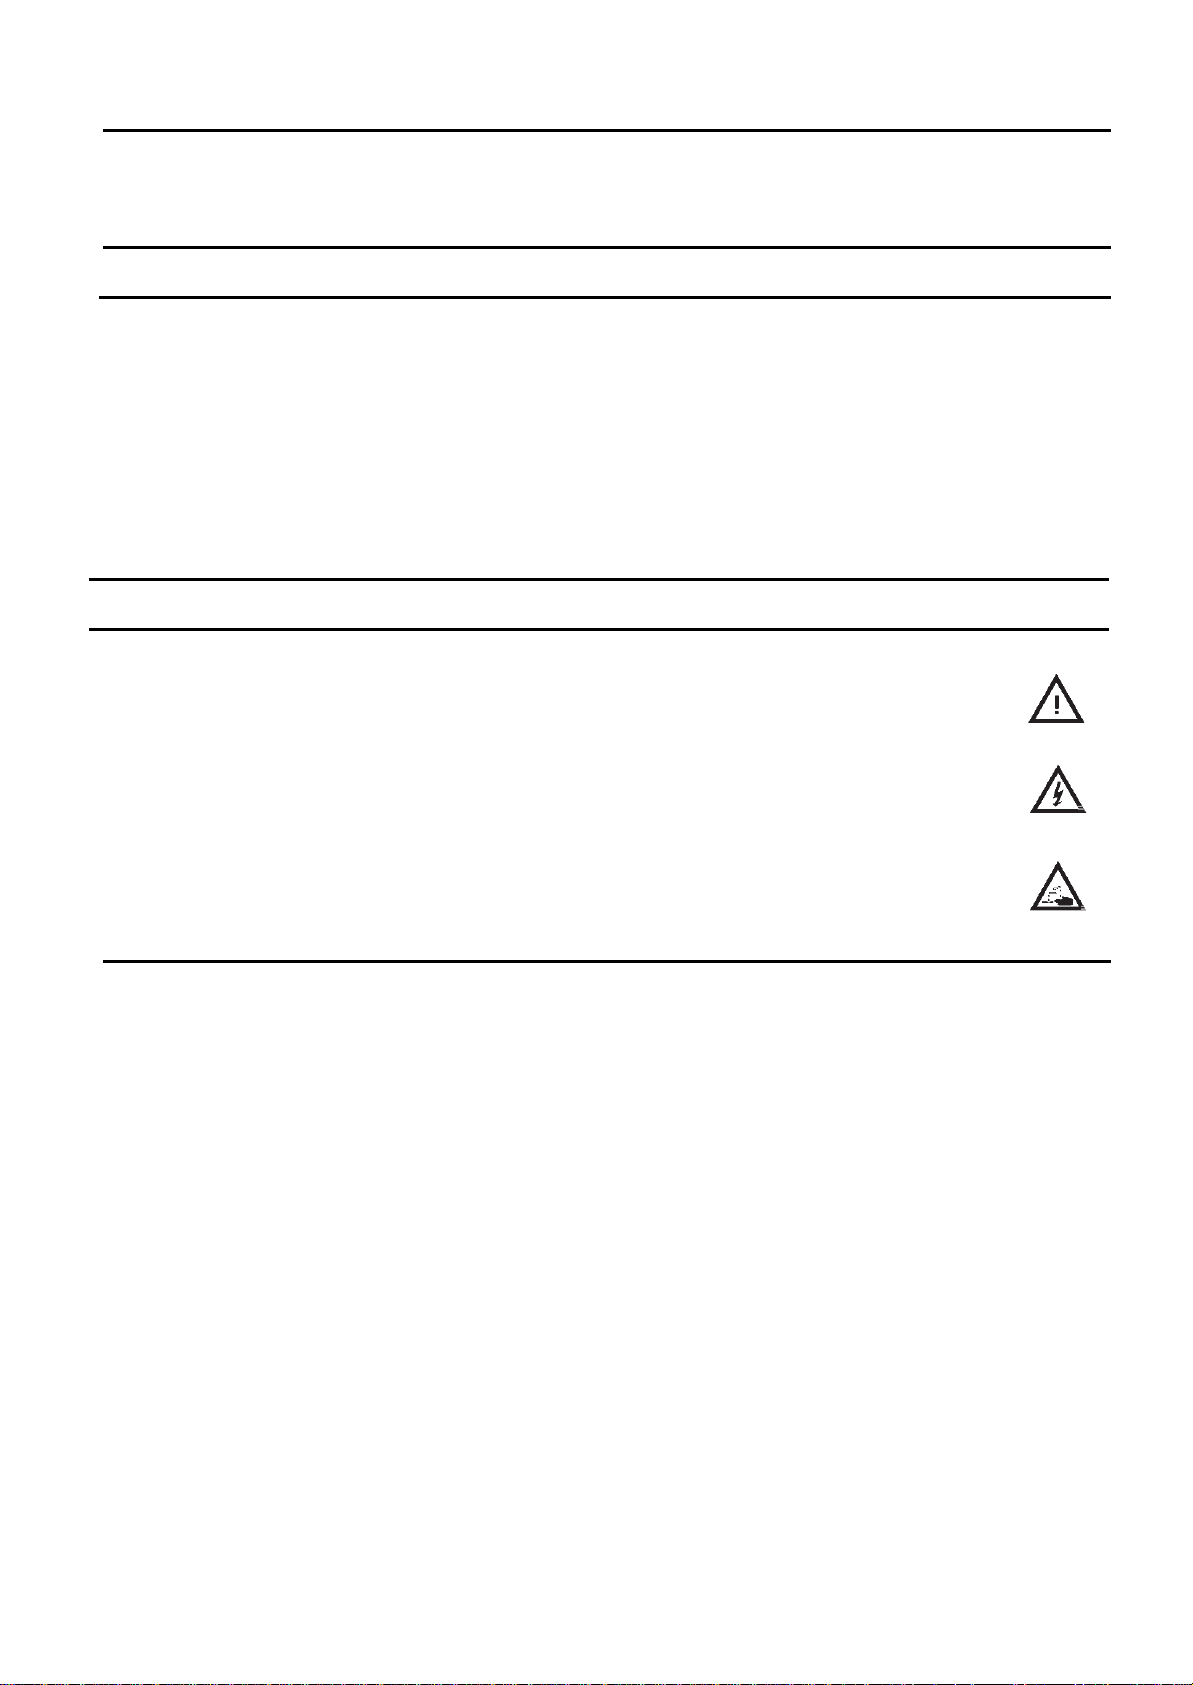
2.2 Warning signs
General warning:
Dangerous electrical voltage:
Caustic agents:
2

2. Safety
All warnings in the manual are summarized on this page.
Pay special attention to the instructions below so that severe personal injury and/or damage to the tank cleaning machine
are avoided.
2.3 Safety precautions
Installation:
Always read the technical data thoroughly. (See chapter 7 Technical Data)
Any tank-cleaning machine can develop a static electricity charge while in operation.
If the tank being cleaned contains a combustible liquid or vapor having a risk of ignition or explosion, it is imperative to
have the Alfa Laval Gamajet properly grounded using the provided location on the unit.
Operation:
Always read the technical data thoroughly. (See chapter 7 Technical Data)
Necessary precautions must be taken if leakage occurs as this can lead to hazardous situations.
Always handle lye and acid with great care.
When an Alfa Laval Gamajet is operating, there should be covers over every tank opening.
These covers should be sealed well enough to withstand the full force of the jet striking the cover plate.
If the cleaning solution were hot, corrosive, or toxic, a leak would present a serious hazard to any personnel
in the immediate vicinity or to any exposed electrical equipment.
Warning: Any tank-cleaning machine can develop a static electricity charge while in operation. If the tank being
cleaned contains a combustible liquid or vapor having a risk of ignition or explosion, it is imperative to have the
Alfa Laval Gamajet properly grounded using the provided location on the unit.
Maintenance:
Always read the technical data thoroughly. (See chapter 7 Technical Data).
Never service the tank cleaning machine when it is hot.
Always use Alfa Laval genuine spare parts.
Transportation of the tank cleaning machine:
Always drain the tank cleaning machine head and accessories of any liquid
Always use original packaging or similar during transportation.
3

3. Introduction
3.1 Description
The Alfa Laval GJ 8 is a fluid-driven (turbine-driven) 360° rotary nozzle machine designed for cleaning the interior surfaces of
a variety of medium to large tanks and vessels. It is powered entirely by the cleaning solution; it requires no electricity,
compressed air or lubricant for operation. The Alfa Laval GJ 8 is designed primarily for portable service; however, the unit
may also be permanently installed in a vessel. If the Alfa Laval GJ 8 is permanently mounted inside a tank, we strongly
recommend inspecting the unit every few hundred hours of operation. (See Chapter 6 - Preventative Maintenance for more
information.)
WARNING: Under no conditions, whatsoever, should the Alfa Laval GJ 8 ever be immersed in anything, unless you
have prior approval from Alfa Laval Tank Equipment, Inc. Failure to comply with this restriction will void the
warranty!
In order to handle the broadest possible range of applications, the stainless steel Alfa Laval GJ 8 is available with dual or triple
nozzles, and an extensive selection of nozzle sizes, stators (non-rotating turbine), and O-ring materials. The nozzles are
available in six interchangeable sizes - 1/4", 9/32", 5/16", 3/8" and 7/16" /(6.3 mm, 7.1mm, 8mm, 9.5mm and 11.1 mm). The
Alfa Laval Gamajet wash cycle time can be adjusted for special applications by changing the stator, and nozzle size.
Interchangeable stators and nozzle sizes are available for either low or high pressures and/or flow rates. A complete
description of the technical specifications and materials of construction of the Alfa Laval GJ 8 is contained in section 8 Parts list
and Service kits.
3.2 Intended Use
It is to be verified by the end-user:
- that the tank cleaning machine is in conformity with respect to tank, vessel or container size in which it will be used.
- that the construction materials (both metallic and non-metallic) are compatible with product, flushing media, cleaning media,
temperatures and pressure under the intended use.
3.3 Patents and trademarks
This Instruction Manual is published by Alfa Laval Tank Equipment without any warranty. Improvements and changes to this
Instruction Manual may at any time be made by Alfa Laval Tank Equipment without prior notice. Such changes will, however,
be incorporated in new editions of this Instruction Manual.
© Alfa Laval Tank Equipment. All rights reserved.
The Alfa Laval logotype is a trademark or a registered trademark of Alfa Laval Corporate AB. "Gamajet" is a trademark or
registered trademark of Alfa Laval Tank Equipment. The Alfa Laval GJ 8 product has patent in the US (US 6.123.271 & US
6.561.199). Other products or company names mentioned herein may be the trademarks of their respective owners. Any rights
not expressly granted herein are reserved.
3.4 Marking
Alfa Laval tank cleaning machines are all marked to allow recognition of machine type, machine name, Serial number and
manufacturing address. The marking is placed on the body of the tank cleaning machine.
Alfa Laval Tank Equipment – Exton, PA
Patent #: 6,123,271 & 6,561,199
4

4. Installation
Read the instructions carefully and pay special attention to the warnings! Always check the tank cleaning machine before
operation.
4.1
Step 1
CAUTION
Alfa Laval cannot be held responsible for incorrect unpacking.
Step 2
Remove any packing material
Step 3
Inspect the tank cleaning machine for visible transport damage. Inspection!
U
npacking/
delivery
Check the delivery for:
1. Complete Cleaning Machine
2. Delivery note
5

4. Installation
Read the instructions carefully and pay special attention to the warnings! Always check the tank cleaning machine before
operation.
4.2 Installation
Step 1
Always read the technical data thoroughly.
(See chapter 7 Technical Data)
Step 2
Assembly
Every Alfa Laval Gamajet is operationally tested before shipment and is ready to run after unpacking. No assembly is
required prior to use. The Alfa Laval Gamajet has been configured to meet the operating conditions (at the Alfa Laval Tank
Equipment Inc., not at the pump) given to us, e.g. pressure, flow, temperature, cycle time, etc.
Note: Any change to the originally supplied operating conditions will affect the performance of the Alfa Laval Gamajet
accordingly.
Step 3
Inlet Connections
The Alfa Laval GJ 8 is supplied with a combination 1-½” NPT female/2" quick disconnect male inlet connection or 1-½” BSP /2"
quick disconnect male inlet connection. It is recommended that when using the NPT/BSP connection the mating male thread be
wrapped with PTFE pipe joint tape prior to mounting. This will minimize any chance of leakage and will make subsequent
removal much easier.
Step 4
Mounting
Before mounting the Alfa Laval GJ 8, make sure the supply line has been adequately flushed. It should be mounted on a rigid
1-½” pipe using an adjustable or pipe wrench. In most applications, the Alfa Laval GJ 8 will be mounted in the upright position
(inlet connection pointing up); however, the Alfa Laval Gamajet will function at any orientation. We do not recommend attaching
the machine to a hose while in the inverted or horizontal orientation. This form of mounting is not rigid and, thus, will not
maintain the Alfa Laval Gamajet’s position should the unit become unbalanced due to clogging of the nozzles. In addition, we
do not recommend using a Triple Nozzle or directional version machine with a flexible supply line. The dynamic imbalance of
the Triple Nozzle will affect the Alfa Laval Gamajet’s performance accordingly.
Warning: When attaching the Alfa Laval GJ 8 onto the supply pipe, ALWAYS use the wrench on the Collar at the
top/inlet of the unit. Never use a wrench on Stem or Tee Housing to tighten the unit onto the pipe. Doing so risks
internally damaging the machine.
6

4. Installation
Read the instructions carefully and pay special attention to the warnings! Always check the tank cleaning machine before
operation.
Step 5
Location inside Tank
Generally, a single Alfa Laval Gamajet should be positioned in the approximate center of the vessel in order to equalize the
cleaning radius in all directions. Some vessels may have specific cleaning problems such as coils or heavy deposits such as
the liquid level line (bathtub ring). In these situations the Alfa Laval Gamajet should be located closer to the difficult area for the
best cleaning results.
Tanks with internal mechanisms or structures such as an agitator shaft, impellers or baffles will require careful positioning to
minimize the “shadow effect” on areas which do not receive direct jet impact. Sometimes, more than one machine, or, more
than one placement of a single machine, may be necessary to completely avoid shadow problems.
Step 6
Entry Openings
When using the Alfa Laval GJ 8, the vessels being cleaned must provide entry openings large enough to avoid interference
during insertion and removal. The minimum opening size required for Alfa Laval GJ 8 is 228.6 mm / 9.0 inches in diameter.
Step 7
Vessel Drainage
If it is necessary to clean the floor of a vessel, remember that standing liquid will diminish the effectiveness of the jet by
covering any soils underneath. Wherever possible, the tank floor should be pitched toward the drain and the drainage opening
should be large enough to eliminate or reduce any liquid buildup or puddling. If gravity alone is insufficient, a scavenger or
stripper pump should be connected to the drain to suck out the excess wash fluid. In extreme cases, it may be necessary to
use smaller nozzles on the Alfa Laval Gamajet, or even to operate it intermittently to allow time for draining.
Step 8
Filters and Strainers
All tank cleaning systems should be equipped with a filter or strainer that will trap solids 15 mm/1/16" (175 micron, 80 mesh) or
larger, as these will not pass through the Alfa Laval Gamajet. These large particles will not harm the machine, but they can
become caught in one of the internal passages of the machine and cause it to stop turning or reduce its cleaning effectiveness
due to a loss of flow. It will then be necessary to disassemble the Alfa Laval Gamajet and remove the blockage.
In recirculating (closed-loop) cleaning or any other application where the cleaning solution may carry abrasive solids in
suspension, adequate filtration is a must. These particles can be extremely destructive to the Alfa Laval Gamajet, pumps,
valves, and other system components. Filters, properly installed and maintained, will more than pay for themselves with lower
overall operating costs in these applications. Furthermore, to ensure that clogged filters or strainers are cleaned, we
recommend using automatic self-cleaning models.
7

4. Installation
Read the instructions carefully and pay special attention to the warnings! Always check the tank cleaning machine before
operation.
Step 9
Capacity Of Supply Pump
The Alfa Laval GJ 8 can be used with either a centrifugal or positive displacement (constant volume), PD, style pump. In
most cases, if the machine is to be used with a centrifugal pump, it should be configured so that the pump will operate close
to its best efficiency point. The end user must, therefore, take all of the plumbing, elevation, and 8 pressure/flow rate
requirements into account.
If a PD style pump (i.e. piston pump, plunger pump, or mechanical diaphragm pump, etc.) will supply the wash fluid to the
Alfa Laval GJ 8 a different set of rules apply. PD pumps are fixed volume pumps whose flow rate is dependent upon the
speed of the pump; the pumps also have a pressure rating which is the maximum operating pressure. Note: Do not
confuse the maximum operating pressure of a PD pump with the actual operating pressure. The actual operating
pressure is dictated by the fixed flow rate of the pump, the Alfa Laval GJ 8 and the plumbing system. If a PD pump is
used, the Alfa Laval GJ 8 should be sized to, first, match the flow capability of the pump and, second, not exceed the pump's
maximum operating pressure (taking the pressure rating of the plumbing system into account, also).
WARNING: For high-pressure applications (over 250 psig/17 bar), the pressure of the system must "ramp up" to its
operating pressure. If the system experiences a pressure spike or pressure increases at a rate of more than 250
psig per second, the machine may be damaged and parts will wear out prematurely. Damage resulting from this
phenomenon is not covered by the warranty.
4.3 Recycling Information
• Unpacking
- Packing material consists of wood, plastics, cardboard boxes and in some cases metal straps.
- Wood and cardboard boxes can be reused, recycled or used for energy recovery.
- Plastics should be recycled or burnt at a licensed waste incineration plant.
- Metal straps should be sent for material recycling.
• Maintenance
- All metal parts should be sent for material recycling.
• Scrapping
- At end of use, the equipment must be recycled according to relevant, local regulations. Beside the equipment itself, any
hazardous residues from the process liquid must be considered and dealt with in a proper manner. When in doubt, or in the
absence of local regulations, please contact your local Alfa Laval sales company.
8

5. Operation
Read the instruction carefully and pay special attention to the warnings!
5.1 Operation/Control
Step 1
Always read the technical data thoroughly. See chapter 7 Technical Data
CAUTION
Alfa Laval cannot be held responsible for incorrect operation/control.
Step 2
Never touch the tank cleaning machine or the pipelines when pumping hot liquids.
Step 3
Initial Startup
Every Alfa Laval GJ 8 that ships is accompanied by a Birth Certificate. This document indicates how the Alfa Laval GJ 8
performed in our testing tank before it shipped based on the operating conditions supplied to Alfa Laval Tank Equipment Inc.
To ensure the longest possible life of the Alfa Laval GJ 8, please verify the operating conditions and, most importantly, the
machine’s cycle time. The cycle time can be measured by, first, picking a fixed point inside of a vessel as a reference and,
second, timing how long it takes the same nozzle to pass back over that point in the vessel. (This, naturally, will not be the
exact same spot because the spray pattern is indexing.) The measured time in seconds directly corresponds to the machines
full cycle time in minutes. In other words, a single 10-second rotation translates to a 10 minute full cycle time.
9

5. Operation
Yes
No
Does Rotor (pos.
10) turn freely by
- Damaged planetary gearhead (pos. 13) - Section 6.4 Inspection and Service of
- Loose Stem Cap Washer (pos. 42) - Section 6.4 Inspection and Service of
No
Yes
Do Nozzle (pos.
5) and Tee
Housing (pos.
4) both index
when Rotor
(pos. 10) is
Yes
No
Does only Tee
- Worn Tee/ Nozzle housing bevel gear (pos. 17, 18) - Section 6.4 Inspection and
- Cracked/Loose input pinion (pos. 39) - Section 6.4 Inspection and Service of
Components
Pay attention to possible faults
Read the instructions carefully
5.2 Trouble Shooting
hand?
turned?
Housing
(pos. 4) index?
- Cracked Input Pinion (pos. 39) - Section 6.4 Inspection and Service of Components
Components
Components
- Bent stem Collar (pos. 2) - Section 6.4 Inspection and Service of Components
- Cracked/Loose Input Pinions (pos. 39) - Section 6.4 Inspection and Service of
Components
- Worn gear bushing (pos. 32) - Section 6.4 Inspection and Service of
Components
- Worn Tee/ Nozzle housing bearing and cup (pos. 29, 31) - Section 6.4
Inspection and Service of Components
- Loose nozzle housing cup (pos. 30) - Section 6.4 Inspection and Service of
Components
Service of Components
- Using Clutch Drive Machine, if nozzle housing does not operate during normal
operation- Section 6.4 Inspection and Service of Components
Components
- Very loose gear set screw (pos. 40) - Section 6.4 Inspection and Service of
10

5. Operation
Pay attention to possible faults
Read the instructions carefully
Step 1
INSUFFICIENT FLOW
The Alfa Laval Gamajet was configured to meet certain operating conditions supplied to us, such as flow rate (m3/Hr/ GPM),
pressure (Bar/ PSI), temperature, chemical content of the wash fluid, cycle time, etc. If the Nozzle size is too small and/or the
opening at the bottom of the Stator is too large, the Tee Housing will not turn.
Look for restrictions in the fluid supply such as a clogged filter, kinked hose, or deposits in the piping.
Step 2
TIGHT CLEARANCES
A newly overhauled Alfa Laval GJ 8 may fail to operate when first returned to service. If the machine seems otherwise fine, try
running it with at least one Nozzle Tip removed. The reduction in pressure and additional flow will invariably be enough to
overcome the extra resistance of new Bearings and Seals. A few minutes of operation should loosen the clearances enough for
the machine to run normally with the Nozzles remounted.
Step 3
DEBRIS INSIDE
Loosen the Collar Set Screw (45) and remove the Collar (8), then lift out the Stator (9). Look for and remove any debris caught
in the passageways of Stator and Rotor (10). Remove any material wound around the Rotor Shaft (21). In addition check for
any debris caught in the outlet holes of the Stem (3), the vent holes of the (26), the nose of the Tee Housing (4), the Nozzle
Housing (5), and the Nozzles (7).
11

5. Operation
Pay attention to possible faults
Read the instructions carefully
5.3 Cleaning Solution Leakage
- Worn Bearings & Seals
Water exiting from the CIP holes in the Tee Housing will cause a slight spray to exit around the Tee and Nozzle Housing.
However, excessive leakage from the Tee Housing or Nozzle Housing usually indicates worn Housing Bearings (29), and Seals
(31). Inspect them for wear (sealing lips are worn to a smooth surface) or damaged lips or loss of spring tension (indicated by
excessive dry deposits of dirty or abrasive cleaning solution on the spring), and replace as required.
- Worn Bearing Cups
Inspect the Bearing Cups (30) for excessive wear (grooved or scored), particularly near the inside flange where they contact the
(31) Seals. Replace any that show distinct grooves.
- Worn Static Seal Contact Surfaces
Inspect the Bearing and Seal contact surfaces of the Stem (3) and the nose of the Tee Housing (4). If these are worn or
grooved, new Bearings and Seals will be ineffective. Replace the damaged parts as required.
- Leak On Either Side of Bearing Housing
Verify that the Stem Cap SHCS (41) are tight. If tight, inspect the Stem Collar (2), Rotor Shaft Upper Bearing Housing (26), and
Stem (3) for nicks or burrs. File, if necessary.
- Worn Stem Collar O-Rings
Severe leakage between the Inlet Collar (1) and Stem Collar (2) may indicate worn or damaged Stem Collar O-rings (56) and
(57). Remove the Stem Collar as described in Section 2, and inspect the O-rings for signs of damage or wear.
12

5. Operation
Pay attention to possible faults
Read the instructions carefully
5.4 Poor Cleaning Performance
- Inadequate Flow and Pressure
Check the pressure at the Alfa Laval Gamajet inlet under actual operating conditions. The supply piping and hoses must be
large enough to handle the flow rate required for the nozzle size being used to ensure adequate pressure.
Insufficient pressure may also result from line losses when the machine is far from the pump, so the line size must be increased
accordingly for long runs. Although the Alfa Laval Gamajet will rotate at low flow rates, effective cleaning may require
considerably more flow. Proper mechanical operation (the unit turns) is NOT the same thing as effective cleaning (the soils
have been removed)!
- Chemical Concentration and Temperature
Verify that the cleaning solution is the correct compound and in the concentration needed for the deposit being cleaned. If
heating is necessary, also check that the solution is at the proper temperature.
- Plugged Nozzles
Unscrew the Nozzles (7) and inspect for any debris.
- Slow or no Rotation of the Housings
This will result in partial or erratic washing coverage. Refer to previous sections for more information.
- Alfa Laval Gamajet Configuration
Determine if the deposit being cleaned requires greater jet impact or longer jet dwell time (slower rotation) for more thorough
scrubbing. Confirm that the Alfa Laval Gamajet nozzle size, turbine, and gearing are correct for the specific application. Contact
Alfa Laval Tank Equipment for assistance, if needed.
- Inadequate Drainage
Ensure that the vessel drains the effluent or used wash fluid as fast as it’s being sprayed in through the Alfa Laval Gamajet.
The floor of the vessel should be sloped or pitched toward the drain and the drainage opening should be large enough to
gravity-drain the effluent from the vessel. If you still have puddling (build-up of the wash fluid so it covers the floor and shields
the residues underneath), use some form of pump to suck out the effluent.
13

5. Operation
The Tank Cleaning machine is designed for cleaning in place (CIP). CIP = Cleaning In Place. Study the instructions carefully
and pay special attention to the warnings! NaOH = Caustic Soda, HNO3 = Nitric acid.
5.5 Recommended Cleaning
Step 1
Always handle lye and acid with great care.
always use rubber gloves! Always use protective goggles!
Step 2
Never touch the pump or the pipelines when sterilizing.
Step 3
Always rinse well with clean water after using a cleaning agent.
NOTE
Cleaning agents must be stored/disposed of in accordance with
current regulations/directives.
Caustic danger!
Danger of burns!
Always rinse!
Clean Water Cleaning agent
14

6. Maintenance
Maintain the Tank Cleaning Machine with care. Read the instructions carefully and pay special attention to the warnings!
Always keep Minor spare parts kit in stock.
6.1 General Maintenance
Step 1
Always read the technical data thoroughly. (see chapter 7 technical Data)
Step 2
Recommended spare parts:
Order service kits from the service kits list
(See 8.9 Minor Service Kit & 8.10 Major Service Kit)
Ordering spare parts:
Contact your local Alfa Laval Sales Company.
15

6. Maintenance
Maintain the Tank Cleaning Machine with care. Read the instructions carefully and pay special attention to the warnings!
Always keep Minor spare parts kit in stock.
6.2 General dismantling set up
Step 1
NOTE
A rigorously implemented preventative maintenance program will significantly reduce repair costs over the life of the Alfa Laval
Gamajet. The foundation of such a program is regularly scheduled inspections to discover and replace worn or damaged parts
before they can cause the failure of other, more costly, components. The inspection intervals required will depend on the
severity of the application, but a complete internal inspection at 100 hours of operation is recommended initially.
Step 2
STORAGE
The Alfa Laval Gamajet should be washed out with clean water after each use to remove any foreign material or soft
substances left in the machine that may harden during storage and cause the Alfa Laval Gamajet to seize or lock up. A clean
water rinse through the Alfa Laval Gamajet will also wash out any residues of chemical cleaners or recirculated wash water that
could adversely affect the seals and O-rings during prolonged contact in storage. The best position to store the Alfa Laval
Gamajet is to stand it up with the inlet connection facing down.
Step 3
EXTERNAL INSPECTION INTERVALS
Before every shift, the Stator (9) and the Nozzles (7) should be inspected for debris. Examine the Stator by loosening the Collar
Set Screw (45) and removing the main section of the machine from the Collar (8). Note: One does not have to remove the Inlet
Collar (8) from the supply pipe when performing this check; simply, loosen the set screw (45) and unthread the body from the
(8). Look into each Nozzle for signs of debris or build-up. Also, the vent holes on either side of the (26) should be checked for
blockage. Use a fine wire or compressed air to clear them, if necessary.
Step 4
INTERNAL INSPECTION INTERVALS
An interval of 100 hours is recommended initially. If all of the components are found to be in acceptable condition after the first
100 hours, the Alfa Laval Gamajet may then be inspected and routine preventive maintenance should be performed every 300
to 500 hours of operation, depending on the severity of use.
Step 5
TIPS
All the Bearings, Bushings, Seals and O-rings are wear parts. Ideally, they should all be replaced, as a group, every 300 to 500
hours of operation, depending on the severity of use. If just one Bearing or Seal is worn or damaged, replace both it and its
mate, not just the worn or damaged part.
16

6. Maintenance
Read the instructions carefully. The items refer to the parts list and service kits section.
6.3 General dismantling
Step 1
Inlet Collar
Loosen the Collar Set Screw (45) with the 1/8" Hex Key.
Unthread the Collar (8) and remove the Stator (9).
Tip: If (8) does not unthread easily, remove (45) and spray a generous amount of liquid lubricant into the threaded hole. Turn
(8) back and forth to slowly unthread. Forcing the (8) off of the unit without the use of a lubricant may gall the threads on the (8)
and/or (2).
Step 2
Base Assembly
Remove the Socket Head Cap Screws (SHCS) (43) with a 1/4” Hex Key, the Lockwashers (44), and Base (14) from the Tee
Housing (4).
Remove the Nut (52) with an 11/32” socket and Lockwasher (51) from the Output Shaft (12).
Using slotted screwdriver, remove the Idlers Shafts (15), Idler Gear Assemblies (16), and the Output Pinion (11).
Step 3
Stem Collar
Unscrew the SHCS (42) with 5/32” Hex Key, and remove them along with the Lockwashers (41).
Pull the Stem Collar (2) from the Rotor Shaft Upper Bearing Housing (26).
Step 4
Gear Train Assembly
Remove the Gear Train Assembly from the body by tapping on the Ouput Shaft (12) at the Base end of the machine with the
handle of a screw driver.
Step 5
Nozzle Housing
Remove the Nameplate Screws (46) and Lockwashers (47) with a 5/16" socket.
Pull the Nozzle Housing (5) off the nose of the Tee Housing (4).
Remove the inner Housing Seal (31) and Bearing (29). Tip: Use a screwdriver on both sides of the flange of (29) to aid in
removal.
Step 6
Tee Housing
Using a 1/8” slotted screwdriver, remove the Ring Gear Retaining Ring (20), and Pullout the Ring Gear (19).
Unscrew the SHCS (41) using a 5/32" Hex Key, and remove the Lockwashers (42) and Idler Shaft Base (28).
Tip: if the (28) is difficult to remove, screw the SHCS (43) (removed in Step 2.2.2) back into (28) and use them for leverage. Or,
using two slotted screwdrivers, pry between the Tee Housing (4) and Stem (3).
Pull the (4) from the (3).
Remove the lower Tee Housing (31).
Pry/Pull the lower Tee Housing Bearing (29) and Tee Housing Bevel Gear (17) from (3).
17

6. Maintenance
Read the instructions carefully. The items refer to the parts list and service kits section.
6.4 Inspection and Service of Components
Drawing 1
Stator
Inspect all the openings through the Stator (9) to be sure that they are clear and free of debris.
Drawing 4, 5
Base Assembly
Inspect the Output Pinion (11) and Idler Gears (16) for worn, damaged, or sharp/pointed teeth.
Check for signs of scoring and wear on the Idler Shafts (15).
Examine the Idler Gear Bushings (32) on the Idler Gears and the Idler Shaft Bushing (33) on the Base for signs of wear. The
inside diameter of the (32) should not exceed 6.6 mm/ 0.260". This can be measured with a plug gauge or a letter size G drill
bit. The inside diameter of the (33) should not exceed 6.5 mm/ 0.255”. If Bushings need to be replaced remove them with a
small slotted screwdriver or razor blade, then tap replacements into place. Make sure the underside of the bearing’s flan ge is
flush with the metal.
Drawing 8
Stem Collar
Inspect the Small and Large Stem Collar O-rings, (56) and (57), for deterioration (hardening or deformation) or damage and
replace if necessary.
Drawing 20-32
Planetary Gear Train Assembly
General Disassembly and Inspection
Turn to (drawing 20): Unscrew the Nut (52) with an 11/32” socket and remove it with the Lockwasher (51) from the Rotor Shaft
(21). Remove the Rotor (10) from (21). Use a slotted screwdriver for assistance. Check that the Carbide Bushing pressed into
(10) protrudes slightly.
Turn to (drawing 22):Remove the Rotor Shaft Upper Bearing Housing (26) by pulling and twisting it. Take out the Rotor Shaft
Static Seal (22) from the inside of (26). Inspect the interior of (22) for loss of spring tension (indicated by excessive dry deposits
of dirty or abrasive cleaning solution on the spring), replace as required. Check the drain holes on either side of (26) for
blockage.
Turn to (drawing 23): Also, check that the Carbide Bushing (34) pressed into the top of (26) protrudes slightly.
Remove the Gearbox Static Seal (24) from the top of the Gearbox (1), use a 1/8" slotted screwdriver if necessary. Inspect the
interior of (24) for loss of spring tension (indicated by excessive dry deposits of dirty or abrasive cleaning solution on the
spring), replace as required.
Turn to (drawing 24): Pull and twist the Output Shaft Bearing Housing (27) from (1).
Turn to (drawing 26): Remove the Output Shaft (12) from the Gearhead by first, unscrewing the Output Shaft Jam Set Screw
(63) and then the Output Shaft Set Screw (62) using a 3/32" Hex Key. Inspect the Output Shaft (12) for signs of scoring and
wear.
Go back to (drawing 24): Remove the other (24) from the opposite end of (1), use a 1/8" slotted screwdriver if necessary.
Inspect the interior of (24) for loss of spring tension (indicated by excessive dry deposits of dirty or abrasive cleaning solution on
the spring), replace as required.
18

6. Maintenance
Read the instructions carefully. The items refer to the parts list and service kits section.
Drawing 27- 30
Gearhead & Rotor Shaft Assembly
Turn to (drawing 27): Unscrew the Gearhead Short Screws (48) from the Gearhead (13) using a 3/16" slotted screwdriver.
Remove (13) from the Gearbox (1) by pushing on its output shaft. It is not uncommon to find a slight amount of condensation
on (13).
Inspect the (13) by rotating the Rotor Shaft (21) by hand. If the (21) does not turn smoothly in both directions or feels stuck,
return the entire unit to Alfa Laval Tank Equipments, Inc. for service.
Otherwise, using a #1 Phillips screwdriver, loosen, but do not remove the Gearbox Long Screws (49). Do not disturb position of
the Gearhead Flange (53) at this time.
While holding (53) and (13) together, remove the Rotor Shaft Lower Bearing Housing (25) and (21) from (13).
WARNING: Proceed in a cautious manner when performing any work to the Planetary Gearhead due to the complexity
and size of the internal parts.
If the grease inside the (13) is completely or partially filled with liquid (cleaning fluid, water, etc.) or if the inside of the Gearhead
is dry, the grease inside the (13) may have dissolved. If this is the case, please refer to the steps below for adding grease to
the (13). If the (13) rotates freely and is adequately greased, no further inspection is required.
Turn to (drawing 30): In order to grease the gears of the (13) adequately, the Planetary Ring Gear must be removed. To do
this, hold the top tier of Planetary Gears in place with downward pressure and then pull away the Planetary Ring Gear. The
internal components (three individual tiers of planetary gears) of the (13) must remain together as a single unit. Any debris can
then be loosened and removed using an aerosol degreaser and air to dry. Once dry, the Planetary Gears can be lightly handpacked with grease. Alfa Laval Tank Equipment recommends using a Chevron FM NLGI 2 grease for food grade applications
and a Fuch’s ST-80 grease for aggressive chemical environments. Please consult your lubricant specialist for compatibility.
The Planetary Ring Gear can then be reinstalled by aligning the Planetary Gears with the Planetary Ring Gear on tier at a time.
Turn to (drawing 31): Inspect the Input Pinion (39) for hairline cracks on the end face or for worn, damaged, or sharp/pointed
teeth. The assembly of (39), the Rotor Shaft Carbide Thrust Washer (36) and (21) should be tight (circular scoring on the top
of the Rotor (10) and underside of Stator (9) is an indication of (39) slippage). Press (39) back onto (21) if it has slipped, or
replace if cracked.
Check for signs of scoring and wear on (21).
Check the (36) for cracks or chips, and, replace if necessary.
Turn to (drawing 29): Also, check the (60) (inside the (25)) for wear by placing the (21) back through it. There will be drag if the
(60) is still good. If it needs to be replaced, pry out the old (60), and replace it with a new one. Be sure that the seal is as
square as possible to the (25) when installing it. Apply even pressure with the use a flat-faced pin.
Inspect the Rotor Shaft Lower Bearing Housing O-ring (55) and Rotor Shaft O-ring (50) for deterioration (hardening or
deformation) or damage, replace if necessary.
Drawing 25
Output Shaft Bearing Housing
Using a 1/8" slotted screwdriver, remove the Output Shaft Seal Retaining Ring (38).
Using the same screwdriver, carefully pry the Output Shaft Upper Seal (23) out of the Output Shaft Bearing Housing (27).
Check the (23) for wear by placing back onto the Output Shaft (12) and twisting. There will be a little drag if (23) is still good.
Drawing 12- 15
Nozzle Housing
Turn to (drawing 15): Unscrew the Nozzles (7) with an open-end wrench and inspect for debris inside the (7) and Stream
Straightener (54). The inside diameter of (7) must be smooth, round, and free of damage (especially any nicks) for maximum
jet impact. Replace worn or oversized nozzles if the original flow rate is required.
Inspect the Nozzle O-rings (55) for deterioration (hardening or deformation) or damage, replace if necessary.
Turn to (drawing 13): Inspect Nozzle Housing Bevel Gear (18) for wear such as sharp/pointed or broken teeth. Also, check that
(18) does not spin relative to the Nozzle Housing (5). If the teeth are damaged or (18) can be rotated, loosen both of the Bevel
Gear Set Screws (40), and remove (18) from (5). When reinstalling the (18), ensure that the (40) are aligned with the dimples
on the (5) by removing one of the (40) and visually aligning the threaded hole in the gear with the dimple. Also, the Drive Pin
(59) should line up with the slot in the back of the (18).
19

6. Maintenance
Read the instructions carefully. The items refer to the parts list and service kits section.
Turn to (drawing 12): Inspect the Housing Bearings and Seals (29) and (31), replace any that are broken, cracked, or deeply
scored. Clean any deposits from the exterior of both pieces and check (29) fit in the Nozzle Housing Bearing Cups (30). While
they should turn freely, to avoid shortening the life of the Bevel Gears the (29) should be replaced if the thickness of the flange
is less than 0.115". The outside of the seal section of (31) should still have a bead, replace if glazed across the majority of the
seal face. Inspect the interior of (31) for loss of spring tension (indicated by excessive dry deposits of dirty or abrasive cleaning
solution on the spring), replace as required.
Turn to (drawing 14): Clean any deposits from (30) and examine for excessive wear. Light scoring is acceptable, but the Cups
should be replaced if they are grooved in the seal contact area. A good maintenance program will require replacing many
seals, therefore, it may be worthwhile to make or obtain press tools for pressing (30) out of (5). The press tools are available
from Alfa Laval Tank Equipment Inc. Before installing new (30), clean the housing bores and remove any burrs resulting from
(30) removal. Press them in so that their flanges are flush against (5).
Drawing 6, 14, 18
Tee Housing
Turn to (drawing 18): Inspect the Tee Housing (4) for damage to the keyway that engages the Ring Gear (19). If the Ring Gear
was difficult to remove, check to see if (4) is out-of-round (as the result of an external blow, such as dropping) where the Gear
seats.
Check the water outlets on the nose and the CIP holes of (4); they should be free of debris.
Inspect the Tee Housing Bevel Gear (17) for worn, damaged or sharp/pointed teeth.
Turn to (drawing 6): Inspect (19) for worn, damaged or sharp/pointed teeth, and for damage to the key that engages the slot in
(4).
Inspect the Tee Housing Bearings and Seals (29) and (31), replace any that are broken, cracked, or deeply scored. Clean any
deposits from the exterior of both pieces and check the fit of (29) in the Tee Housing Bearing Cups (30). While they should turn
freely, to avoid shortening the life of the Bevel Gears (29) should be replaced if the thickness of the flange is less than 0.115".
The outside of the seal section of (31) should still have a bead, replace if glazed across the majority of the seal face. Inspect
the interior of (31) for loss of spring tension (indicated by excessive dry deposits of dirty or abrasive cleaning solution on the
spring), replace as required.
Turn to (drawing 14): Clean any deposits from (30) and examine for excessive wear. Light scoring is acceptable, but the Cups
should be replaced if they are grooved in the seal contact area. A good maintenance program will require replacing many (30),
therefore, it may be worthwhile to make or obtain press tools for pressing (30) out of (4). The press tools are available from Alfa
Laval Tank Equipment Inc. Before installing new (30), clean the housing bores and remove any burrs resulting from (30)
removal. Lubricate the outside of the new (30) and press them in so that their flanges are flush against (4).
Drawing 33
Stem
Inspect the water outlets of the Stem (3); they should be free of debris.
Check the Clutch O-ring, (61), for deterioration (hardening or deformation) or damage and replace if necessary.
If the machine is pin drive, the Drive Pin, (59), should be securely in the (3).
20

6. Maintenance
Read the instructions carefully. The items refer to the parts list and service kits section.
6.5 Reassembly
General Notes
All parts must be cleaned thoroughly before reassembling. Any deposits remaining on the parts can cause difficult disassembly
the next time the Alfa Laval Gamajet needs servicing.
Apply a dab of a Teflon-based anti-seize compound, except when otherwise noted, to all threads when reassembling; this will
prevent galling of threads and ease any future disassembly.
Whenever lubrication of O-rings is required for assembly, lithium-based soap grease (Calypsol SF 3-097) is acceptable, for
Viton, Zalak, and Kalrez O-rings. Silicon based grease MUST be used for EP O-rings. In either case food grade grease
may be used.
Refer to previous illustrations or the exploded views in section 8 for clarification during reassembly.
Drawing 18, 19
Stem
Turn to (drawing 18): Place (17) back onto the Stem (3). If the machine is pin drive, the slot in the (17) should line up with the
Drive Pin (59) in the (3). Slide the first Tee Housing Bearing (29), flange down, onto (3).
Turn to (drawing 19): Align the Bearing Locating Pin (58) with the hole in underside of (29). Ensure that the flange of (29) is
flush with (17). Slide the first Tee Housing Seal (31), spring up, onto (3). Ensure that this tight against (29).
Drawing 16, 17, 18, 19
Tee Assembly
Turn to (drawing 18): Push the Tee Housing (4) over the Stem (3) until it is fully seated.
Place the second Tee Housing Seal (31), spring side down, over (3).
Tip: First, Place the second Tee Housing Bearing (29) into (28), aligning its hole with the Bearing Locating Pin (58). Now, invert
the (4)/ (3) assembly and place it over (29)/ (28) assembly. This technique ensures correct alignment of (29) and (58). Turn to
(drawing 17): Apply pressure to (28) to drive it, (29), and (31) into (4).
Align the through holes of (28) with the threaded holes in the top of the (3). Screw the four SHCS (41) with their Lockwashers
(42) into place using a 5/32" Hex Key, tightening them in a star pattern.
Turn to (drawing 19): Insert the Ring Gear (19) into (4), being sure to align the key and keyway of the two components.
Reinstall the Ring Gear Retaining Ring (20).
Drawing 10, 11, 12, 13
Nozzle Housing
Turn to (drawing 12): Place the first Housing Bearing (29) onto the nose of the Tee Housing (4). Ensure that the Bearing
Locating Pin (58) and hole in back of (29) are aligned.
Place the first Housing Seal (31), spring side out, onto the nose of the (4).
Turn to (drawing 13): Using an open-end wrench, screw the Nozzles (7) into the Nozzle Housing (5).
Push (5) assembly onto the nose of (4). Ensure that the Bevel Gears mesh properly.
Place the second Housing Seal (31), spring side in, over the nose of (4).
Turn to (drawing 13): Place the second (29) into the Name Plate (6), aligning (58) with the hole in back of (29).
Turn to (drawing 10): Push the two parts ((29) and (6)) over the nose of (4), driving (31) into (5). Align the through hole of (6)
with the threaded holes of (4).
With their Lockwashers (47), thread the Name Plate Screws (46) into the nose of (4). Tighten with a 5/16" socket.
21

6. Maintenance
Read the instructions carefully. The items refer to the parts list and service kits section.
Drawing 20- 31
Gear Train
Turn to (drawing 30): Place the Rotor Shaft (21) assembly partially into the Rotor Shaft Lower Bearing Housing (25). Insert
them into the Planetary Gearhead (13), ensuring that the Input Pinion (39) has properly meshed with the gears inside of (13).
Turn to (drawing 28): Align the threaded holes of (25) with the four Long Screws (49). Tighten in a star pattern with a #1 Phillips
Screwdriver.
Slide the Rotor Shaft O-ring (50) over (21) until it touches (25).
Put the Rotor Shaft Static Seal (22), spring side out, onto (25).
Turn to (drawing 27): Insert the (13) assembly back into the Gearbox (1), aligning the threaded holes in Gearhead Flange (53)
with the through holes in (1).
Using a 3/16" slotted screwdriver, thread the Short Screws (48) into (53). Tighten in a star pattern.
Turn to (drawing 25): Insert the Output Shaft Upper Seal (23), spring side out, into the Output Shaft Bearing Housing (27).
Install the Output Shaft Seal Retaining Ring (38).
Turn to (drawing 26): Reattach the Output Shaft (12) to (13) by aligning the dimple on the flat of (13) with the setscrew hole.
Install the (62) first (do not use anti-seize) using a 3/32" Hex Key and then the (63).
Turn to (drawing 24): Place both of the Gearbox Static Seals (24), spring side out, into either end of the (1). Push the (27)
assembly over (12) and into (1).
Turn to (drawing 22, 23): Push the Rotor Shaft Upper Bearing Housing (26) over (21) and into (1). Be sure to align the Drive
Pin (59), which is pressed into the (26), with the keyway in the (1).
Turn to (drawing 20): Put the Rotor (10), carbide bearing down, onto (21). Place the Lockwasher (51) and Nut (52) onto (21).
Hold (10) stationary while tightening (52) with an 11/32" socket.
Turn to (drawing 9): Insert this assembly into the Stem (3), aligning the through holes of (26) with the threaded holes in (3).
Drawing 7, 8
Stem Collar
Place the Stem Collar (2) on Rotor Shaft Upper Bearing Housing (26), making sure the screw holes are aligned.
Using a 5/32” Hex Key, screw the SHCS (42) with their Lockwashers (41) through (2) and (26) and into the Stem (3). Tighten in
a star pattern.
Drawing 2, 3, 4
Base assembly
Turn to (drawing 3): Place the Output Pinion (11), round opening down, onto the Output Shaft (12).
Thread the Idler Shafts (15) into their respective holes in the Idler Shaft Base (28).
Install the Idler Gears (16), Idler Gear Bushing (32) down, onto (15).
Tip: Twisting the Tee Housing (4) slightly will help (15) drop into place.
Tighten the Nut (52) and the Lockwasher (51) onto (12) with an 11/32" socket.
Turn to (drawing 2): Put the Base (14) back into (4).
Using a 1/4” Hex Key, screw the SHCS (43) and Lockwashers (44) into (28).
Drawing 1
Stator and inlet collar
Using one of the Hex Keys, rotate the Rotor (10). It should spin fairly easily and its veins must not strike the walls of the Stem
Collar (2). Continue turning the Rotor. The Nozzle and Tee Housing will slowly rotate if everything has been assembled
correctly. Insert the Stator (9) into (2). Lubricate the Small and Large Collar O-rings, (56) and (57).
Apply a generous amount of an anti-seize compound (ensuring that it is compatible with the O-ring material used in the 8) to
the threads of the Inlet Collar (8). Screw on the (8) (hand-tight only), and tighten the Collar Set Screw (45) with a 1/8" Hex Key.
22

7. Technical Data
It is important to observe the technical data during installation, operation and maintenance. Inform personnel about the
technical data.
7.1 Technical Data
The Alfa Laval GJ 8 Tank Cleaning Machine is a highly efficient machine at a range of pressures and flows. The instruction
manual is part of the delivery. Read the instructions carefully.
TECHNICAL DATA
Lubricant . . . . . . . . . . . . . . . . . . . Food grade
Max. throw length . . . . . . . . . . . . . 14 - 26 m (45-85 ft.)
Pressure
Working pressure . . . . . . . . . . . . . . 3 - 28+ bar (40 - 400+ PSI)
Recommended pressure . . . . . . . . . 4 - 20 bar (50 - 300 PSI)
Cleaning Pattern
The above drawings show the cleaning pattern achieved on a cylindrical horizontal vessel. The difference between the first
cycle and the full pattern represents the number of additional cycles available to increase the density of the cleaning.
Certificate
2.1 material certificate
PHYSICAL DATA
Materials
1.4404 (316L), PPS, PTFE, FKM (EPDM and FFKM available).
Temperature
Max. working temperature . . . . . . . . 95°C (203°F)
Max. ambient temperature . . . . . . . . 140°C (284°F)
Weight . . . . . . . . . . . . . . . . . . . . . 6.5 kg (14.5 lbs.)
Connections
Standard thread . . . . . . . . . . . . . . . 1½” Rp (BSP) or NPT, female
Available option . . . . . . . . . . . . . . . 2” Rp (BSP) or NPT, female
Options
Electronic rotation sensor to verify 3D coverage.
Caution
Do not use for gas evacuation or air dispersion.
23

7. Technical Data
Inlet Pressure
- - - Wetting, --- Impact cleaning
Inlet Pressure
Cleaning Time
Flow Rate
It is important to observe the technical data during installation, operation and maintenance. Inform personnel about the
technical data.
7.2 Performance Data
Flow Rate Impact Throw Length
24

7. Technical Data
A B C D E F G H I
mm
281
202
215
51
118
216
248
121
165
in
11.06
7.95
8.46
2.01
4.64
8.50
9.76
4.76
6.50
A B C D E F G
mm
281
217
126
51
211
350
248
in
11.05
8.54
5
2.02
8.30
13.78
9.76
It is important to observe the technical data during installation, operation and maintenance. Inform personnel about the
technical data.
7.3 Dimensions
Dimensions Dimensions 180˚ directional version
Dimensions
Dimensions 180˚ directional version
25

7. Technical Data
D12.2m (480”), H19.6m (770”),
2xØ7.94mm (2xØ5/16”) Time = 3.1 min.
D12.2m (480”), H19.6m (770”), 2xØ7.94mm
(2xØ5/16”) Time = 3.1 min.
It is important to observe the technical data during installation, operation and maintenance. Inform personnel about the
technical data.
7.4 Trax Simulation Tool
Standard Design
The choice of nozzle diameters can optimize jet impact length and flow rate at the desired pressure. As standard
documentation, the Alfa Laval GJ 8 can be supplied with a “Declaration of Conformity” for material specifications.
TRAX simulation tool
TRAX is an unique software that simulates how the Alfa Laval GJ 8 performs in a specific tank or vessel. The simulation gives
information on wetting intensity, pattern mesh width and cleaning jet velocity. This information is used to determine the best
location of the tank cleaning device and the correct combination of flow, time, and pressure to implement.
A TRAX demo containing different cleaning simulations covering a variety of applications can be used as a reference and
documentation for tank cleaning applications. The TRAX demo is free and available upon request.
Wetting Intensity
26

8. Parts List and Service Kits
GJ0900
The drawing shows Alfa Laval GJ 8 Tank Cleaning Machine
8.1 GJ8 View
27

8. Parts List and Service Kits
B
A
GJ0902
A
Drawing 1 - Completed Assembly
A: Drawing 2
B: Never hold or turn on tee housing cap during removal of (8)
Drawing 2 – Base Assembly
A : Drawing12
The drawing shows Alfa Laval GJ 8 Tank Cleaning Machine
8.2 Assembly Drawings - 1 & 2
28

8. Parts List and Service Kits
A
Drawing 5 – Idler Gear
A: Press fit
The drawing shows Alfa Laval GJ 8 Tank Cleaning Machine
8.3 Assembly Drawings – 3, 4, 5, 6, 7 & 8
Drawing 3 – Output Pinion Assembly Drawing 4 – Idler Shaft Assembly
29

8. Parts List and Service Kits
A
Drawing 7 – Stem Collar Screws & washer
Drawing 6 – Ring Gear
A: Align the flats and press flush
Drawing 8 – Stem Collar Assembly
The drawing shows Alfa Laval GJ 8 Tank Cleaning Machine
30

8. Parts List and Service Kits
Drawing 9 – Gear train Assembly
A : Drawing 20
Drawing 12 – Nozzle Housing Assembly
A : Drawing 16
A
Drawing 11 – Nose Plate
A : Press fit
Drawing 10 – Nozzle Housing Assembly
A
A
*For Directional Machine, refer to Appendix A
The drawing shows Alfa Laval GJ 8 Tank Cleaning Machine
8.4 Assembly Drawings – 9, 10, 11, 12, 13, 14, 15, 16 & 17
31

8. Parts List and Service Kits
Drawing 13 – Tee Housing Bevel Gear
A : Press fit
Drawing 14 – Nozzle Housing
Drawing 15 – Nozzle
A : Press flush with the bottom edge
A
Drawing 17 – Idler Shaft Base
Drawing 16 – Housing Assembly
*For Directional Machine, refer to Appendix A
The drawing shows Alfa Laval GJ 8 Tank Cleaning Machine
32

8. Parts List and Service Kits
Drawing 18 – The Housing Assembly
A : Drawing 33
Drawing 20 – Geartrain
A : Drawing 22
Drawing 19 – Tee Housing Bevel Gear
A : Press fit
Drawing 21 – Rotor
*For Directional Machine, refer to Appendix A
The drawing shows Alfa Laval GJ 8 Tank Cleaning Machine
8.5 Assembly Drawings – 18, 19, 20, 21, 22, 23, 24 & 25
33

8. Parts List and Service Kits
Drawing 22 – Geartrain Housing
A : Drawing 26
Drawing 23 – Input Shaft Bearing Housing
A : Press fit
Drawing 25 – Output Shaft Bearing Housing
A : Press fit
Drawing 24 – Geartrain Assembly
A
A
The drawing shows Alfa Laval GJ 8 Tank Cleaning Machine
34

8. Parts List and Service Kits
Drawing 26 – Geartrain Assembly
A : Drawing 28
Drawing 27 – Planetary Gearbox Assembly
The drawing shows Alfa Laval GJ 8 Tank Cleaning Machine
8.6 Assembly Drawings – 26, 27, 28 & 29
35

8. Parts List and Service Kits
Drawing 28 – Install Geartrain & Cap
A : Drawing 32
Drawing 29 – Input Geartrain Housing Assembly
The drawing shows Alfa Laval GJ 8 Tank Cleaning Machine
36

8. Parts List and Service Kits
Drawing 31 – Input Shaft assembly
Drawing 30 –Geartrain Assembly
A : Drawing 29
B : Drawing 32
The drawing shows Alfa Laval GJ 8 Tank Cleaning Machine
8.7 Assembly Drawings – 30, 31, 32, 33 & 34
37

8. Parts List and Service Kits
Pos.
Description
Qty.
1
18 TEETH PLANET GEAR BOTTOM BASE
1
2
10 TEETH PLANET GEAR
6
3
17 TEETH PLANET GEAR BASE
1
4
17 TEETH PLANET GEAR BASE
1
5
17 TEETH PLANET GEAR
3 6 PLANET GEAR WASHER
9
7
PLANETARY GEARHEAD WASHER
1
Drawing 32 –Gearhead Assembly
The drawing shows Alfa Laval GJ 8 Tank Cleaning Machine
38

8. Parts List and Service Kits
Drawing 33 –Stem Assembly
Drawing 34 –Tee Housing Assembly
*For Directional Machine, refer to Appendix A
The drawing shows Alfa Laval GJ 8 Tank Cleaning Machine
39

8. Parts List and Service Kits
Pos.
AL No.
Gamajet No.
Description
No.
1
9614602801
E-801
GEARBOX
1 2 9614602901
E-802
STEM COLLAR
1
3
9614603002
E-803-HV
STEM 1 4
9614603101
E-804-HV
TEE HOUSING
1
5.1
9614603201
E-805-ASD-HV
DUAL NOZZLE HOUSING ASSEM. (805-HV-DN, 2 x 832-HV)
1
5.2
9614603301
E-805-AST-HV
TRIPLE NOZZLE HOUSING ASSEM. (805-HV-TN, 2 x 832-HV)
1 6 9614604001
E-806-HV
NAMEPLATE
1
7.1
9614604201
E807ASEHV1/4
NOZZLE ASSEMBLY, EPDM ® , 1/4 BORE SIZE
2 OR
3
7.2
9614604202
E807ASEHV3/8
NOZZLE ASSEMBLY, EPDM ® , 3/8 BORE SIZE
2 OR
3
7.3
9614604203
E807ASEHV5/16
NOZZLE ASSEMBLY, EPDM ® , 5/16 BORE SIZE
2 OR
3
7.4
9614604204
E807ASEHV7/16
NOZZLE ASSEMBLY, EPDM ® , 7/16 BORE SIZE
2 OR
3
7.5
9614604205
E807ASEHV9/32
NOZZLE ASSEMBLY, EPDM ® , 9/32 BORE SIZE
2 OR
3
7.6
9614604206
E807ASVHV1/4
NOZZLE ASSEMBLY, VITON ® , 1/4 BORE SIZE
2 OR
3
7.7
9614604207
E807ASVHV3/8
NOZZLE ASSEMBLY, VITON ® , 3/8 BORE SIZE
2 OR
3
7.8
9614604208
E807ASVHV5/16
NOZZLE ASSEMBLY, VITON ® , 5/16 BORE SIZE
2 OR
3
7.9
9614604209
E807ASVHV7/16
NOZZLE ASSEMBLY, VITON ® , 7/16 BORE SIZE
2 OR
3
7.10
9614604210
E807ASVHV9/32
NOZZLE ASSEMBLY, VITON ® , 9/32 BORE SIZE
2 OR
3
7.11
9614604212
E807ASKHV1/4
NOZZLE ASSEMBLY, KALREZ ® , 1/4 BORE SIZE
2 OR
3
7.12
9614604213
E807ASKHV3/8
NOZZLE ASSEMBLY, KALREZ ® , 3/8 BORE SIZE
2 OR
3
7.13
9614604214
E807ASKHV5/16
NOZZLE ASSEMBLY, KALREZ ® , 5/16 BORE SIZE
2 OR
3
7.14
9614604215
E807ASKHV7/16
NOZZLE ASSEMBLY, KALREZ ® , 7/16 BORE SIZE
2 OR
3
7.15
9614604216
E807ASKHV9/32
NOZZLE ASSEMBLY, KALREZ ® , 9/32 BORE SIZE
2 OR
3
8
9614604901
E-808
COLLAR
1
9.1
9614605001
E-809-LM
STATOR – LM
1
9.2
9614605002
E-809-LRG
STATOR – LRG
1
9.3
9614605003
E-809-LV
STATOR – LV
1
9.4
9614605004
E-809-SMALL
STATOR - SMALL
1
10
9614605101
E-810
ROTOR
1
11
9614605301
E-811
OUTPUT PINION
1
12
9614605401
E-812
OUTPUT SHAFT
1
13
9614605601
E-813
GEARHEAD w/ SS FLANGE ASSEM. (8-513-236,E-858,2x8-513-B)
1
8.8 Parts
List
40

8. Parts List and Service Kits
14
9614605801
E-814
BASE 1 15
9614606101
E-815
IDLER SHAFT
2
16
9614606201
E-816
IDLER GEAR
2
17
9614606401
E-817
TEE HOUSING BEVEL GEAR
1
18
9614606801
E-818-HV
NOZZLE HOUSING BEVEL GEAR
1
19
9614607101
E-820
RING GEAR
1
20
9614607201
E-821
RING GEAR RETAINING RING
1
21
9614607401
E-822-A
ROTOR SHAFT ASSEMBLY (822, 8-512, 841)
1
22
9614607501
E-823
ROTOR SHAFT STATIC SEAL
1
23
9614607601
E-824
OUTPUT SHAFT UPPER SEAL
1
24
9614607701
E-826
GEARBOX STATIC SEAL
2
25
9614607801
E-827
ROTOR SHAFT LOWER BEARING HOUSING
1
26
9614608001
E-828
ROTOR SHAFT UPPER BEARING HOUSING
1
27
9614608201
E-829
OUTPUT SHAFT BEARING HOUSING
1
28
9614608401
E-830-HV
IDLER SHAFT BASE
1
29
9614608601
E-831
TEE/NOZZLE HOUSING BEARING
4
30
9614608701
E-832
TEE/NOZZLE HOUSING CUP
4
31
9614608801
E-835
TEE/NOZZLE HOUSING SEAL
4
32
9614608901
E-837
IDLER GEAR BUSHING
2
33
9614609001
E-838
IDLER SHAFT BUSHING
2
34
9614609101
E-839
CARBIDE BUSHING
3
35
9614609201
E-840
OUTPUT SHAFT UPPER CARBIDE BUSHING
1
36
9614609301
E-841
ROTOR SHAFT CARBIDE THRUST WASHER
1
37
9614609401
E-842
OUTPUT SHAFT LOWER CARBIDE BEARING
1
38
9614609501
E-843
OUTPUT SHAFT UPPER SEAL SNAP RING
1
39
9614674601
8-512
INPUT PINION
1
40
9614609601
E-845
BEVEL GEAR SET SCREW
2
41
9614609701
E-846
STEM-IDLER SHAFT BASE / STEM CAP SCREWS
8
42
9614609801
E-847
STEM-IDLER SHAFT BASE / STEM CAP WASHER
8
43
9614609901
E-848
BASE SCREW
2
44
9614610001
E-849
BASE LOCKWASHER
2
45
9614610101
E-850
COLLAR SET SCREW
1
46
9614610201
E-851
NAMEPLATE SCREW
2
47
9614610301
E-852
NAMEPLATE LOCKWASHER
2
48
9614610401
E-853
GEARHEAD SHORT SCREW
4
49
9614610501
E-854
GEARHEAD LONG SCREW
4
41

8. Parts List and Service Kits
50.1
9614677901
8-541-V
ROTOR SHAFT O-RING, VITON®
1
50.2
9614677902
8-541-EP
ROTOR SHAFT O-RING, EP
1
50.3
9614677903
8-541-K
ROTOR SHAFT O-RING, KALREZ®
1
51
9614678201
8-544
ROTOR / OUTPUT PINION LOCKWASHER
2
52
9614678301
8-545
ROTOR / OUTPUT PINION NUT
2
53
E-858
PLANETARY GEARHEAD STAINLESS FLANGE
1
54
9614610701
E-860-HV
STREAM STRAIGHTENER
2 OR
3
55.1
9614677701
8-539-V
NOZZLE O-RING AND ROTOR SHAFT LOWER BEARING HOUSING ORING, VITON®
3 OR
4
55.2
9614677702
8-539-E
NOZZLE O-RING AND ROTOR SHAFT LOWER BEARING HOUSING ORING, EP
3 OR
4
55.3
9614677703
8-539-K
NOZZLE O-RING AND ROTOR SHAFT LOWER BEARING HOUSING ORING, KALREZ®
3 OR
4
56.1
9614610801
E-862-V
COLLAR STEM SMALL O-RING, VITON®
1
56.2
9614610802
E-862-E
COLLAR STEM SMALL O-RING, EP
1
56.3
9614610803
E-862-K
COLLAR STEM SMALL O-RING, KALREZ®
1
57.1
9614610901
E-863-V
COLLAR STEM LARGE O-RING, VTION®
1
57.2
9614610902
E-863-E
COLLAR STEM LARGE O-RING, EP
1
57.3
9614610903
E-863-K
COLLAR STEM LARGE O-RING, KALREZ®
1
58
9614611001
E-864
BEARING LOCATING PIN
4
59
9614611101
E-866
DRIVE PIN (TWO IF CLUTCH DRIVE)
2 OR
3
60
9614611201
E-867
ROTOR SHAFT SEAL
1
61
9614611401
E-870
CLUTCH O-RING
1
62
9614611501
E-871
OUTPUT SHAFT SET SCREW
1
63
9614611601
E-872
OUTPUT SHAFT JAM SET SCREW
1
64
9614603003
E-803-HV-D
DIRECTIONAL STEM
1
65
9614603103
E-804-D
DIRECTIONAL TEE HOUSING
1
66
9614603601
E-805-DIR-2N
DIRECTIONAL NOZZLE HOUSING
1
67
9614606701
E-818-D
DIRECTIONALNOZZLE HOUSING BEVEL GEAR
1
68
9614608403
E-830-D
DIRECTIONAL IDLER SHIFT BASE
1
69
9614607001
E-819-D
DIRECTIONAL GEAR RETAINING RING
1
42

8. Parts List and Service Kits
Article no: 9614612001 EHV8EPDMKIT ALFA LAVAL GJ 8 KIT - EPDM
Pos. no.
Part No.
Gamajet Part No.
Description
No.
22
9614607501
E823
GJ VIII RS STATIC SEAL
1
pcs.
23
9614607601
E824
GJ VIII OS UPPER SEAL
1
pcs.
24
9614607701
E826
GJ VIII GEARBOX STATIC SEAL
2
pcs.
29
9614608601
E831
GJ VIII TEE HOUSING BEARING
4
pcs.
31
9614608801
E835
GJ VIII TEE HOUSING SEAL
4
pcs.
32
9614608901
E837
GJ VIII IDLER GEAR BUSHING
2
pcs.
33
9614609001
E838
GJ VIII IDLER SHAFT BUSHING
2
pcs.
56
9614610802
E862E
GJ VIII COLLAR STEM SM O-RING
1
pcs.
57
9614610902
E863E
GJ VIII COLLAR STEM LG O-RING
1
pcs.
55
9614677702
8539EP
GJ V GB NS/VIII RSLBH O-RING
4
pcs.
60
9614611201
E867
GJ VIII GEARHEAD SEAL
1
pcs.
61
9614611402
E870E
GJ VIII HV-8 CLUTCH O-RING
1
pcs.
39
9614674601
8512
GJ V/VIII INPUT PINION
1
pcs.
Article no: 9614612301 EHV8KALREZKIT ALFA LAVAL GJ 8 KIT - KALREZ
Pos. no.
Part No.
Gamajet Part No.
Description
No.
22
9614607501
E823
GJ VIII RS STATIC SEAL
1
pcs.
23
9614607601
E824
GJ VIII OS UPPER SEAL
1
pcs.
24
9614607701
E826
GJ VIII GEARBOX STATIC SEAL
2
pcs.
29
9614608601
E831
GJ VIII TEE HOUSING BEARING
4
pcs.
31
9614608801
E835
GJ VIII TEE HOUSING SEAL
4
pcs.
32
9614608901
E837
GJ VIII IDLER GEAR BUSHING
2
pcs.
33
9614609001
E838
GJ VIII IDLER SHAFT BUSHING
2
pcs.
56
9614610803
E862K
GJ VIII COLLAR STEM SM O-RING
1
pcs.
57
9614610903
E863K
GJ VIII COLLAR STEM LG O-RING
1
pcs.
55
9614677703
8539K
GJ V GB NS/VIII RSLBH O-RING
4
pcs.
60
9614611201
E867
GJ VIII GEARHEAD SEAL
1
pcs.
61
9614611403
E870K
GJ VIII HV-8 CLUTCH O-RING
1
pcs.
39
9614674601
8512
GJ V/VIII INPUT PINION
1
pcs.
Article no: 9614612701 EHV8VITONKIT ALFA LAVAL GJ 8 KIT - VITON
Pos. no.
Part No.
Gamajet Part No.
Description
No.
22
9614607501
E823
GJ VIII RS STATIC SEAL
1
pcs.
23
9614607601
E824
GJ VIII OS UPPER SEAL
1
pcs.
24
9614607701
E826
GJ VIII GEARBOX STATIC SEAL
2
pcs.
29
9614608601
E831
GJ VIII TEE HOUSING BEARING
4
pcs.
31
9614608801
E835
GJ VIII TEE HOUSING SEAL
4
pcs.
32
9614608901
E837
GJ VIII IDLER GEAR BUSHING
2
pcs.
33
9614609001
E838
GJ VIII IDLER SHAFT BUSHING
2
pcs.
56
9614610801
E862
GJ VIII COLLAR STEM SM O-RING
1
pcs.
57
9614610901
E863
GJ VIII COLLAR STEM LG O-RING
1
pcs.
55
9614677701
8539
GJ V GB NS/VIII RSLBH O-RING
4
pcs.
60
9614611201
E867
GJ VIII GEARHEAD SEAL
1
pcs.
61
9614611401
E870
GJ VIII HV-8 CLUTCH O-RING
1
pcs.
39
9614674601
8512
GJ V/VIII INPUT PINION
1
pcs.
8.9 Minor Service Kit
43

8. Parts List and Service Kits
Article no: 9614612501 EHV8TEFLONKIT ALFA LAVAL GJ 8 KIT - TEFLON
Pos. no.
Part No.
Gamajet Part No.
Description
No.
22
9614607501
E823
GJ VIII RS STATIC SEAL
1
pcs.
23
9614607601
E824
GJ VIII OS UPPER SEAL
1
pcs.
24
9614607701
E826
GJ VIII GEARBOX STATIC SEAL
2
pcs.
29
9614608601
E831
GJ VIII TEE HOUSING BEARING
4
pcs.
31
9614608801
E835
GJ VIII TEE HOUSING SEAL
4
pcs.
32
9614608901
E837
GJ VIII IDLER GEAR BUSHING
2
pcs.
33
9614609001
E838
GJ VIII IDLER SHAFT BUSHING
2
pcs.
56
9614610804
E862T
GJ VIII COLLAR STEM SM O-RING
1
pcs.
57
9614610904
E863T
GJ VIII COLLAR STEM LG O-RING
1
pcs.
55
9614661501
391130
639-T HOUSING O-RING PTFE
4
pcs.
60
9614611201
E867
GJ VIII GEARHEAD SEAL
1
pcs.
61
9614611404
E870T
GJ VIII HV-8 CLUTCH O-RING
1
pcs.
39
9614674601
8512
GJ V/VIII INPUT PINION
1
pcs.
44

8. Parts List and Service Kits
Article no: 9614612801 EHV8MAJVITONKIT ALFA LAVAL GJ 8 MAJOR – KIT -VITON
Pos. no.
Part No.
Gamajet Part No.
Description
No.
22
9614607501
E823
GJ VIII RS STATIC SEAL
1
pcs.
23
9614607601
E824
GJ VIII OS UPPER SEAL
1
pcs.
24
9614607701
E826
GJ VIII GEARBOX STATIC SEAL
2
pcs.
29
9614608601
E831
GJ VIII TEE HOUSING BEARING
4
pcs.
31
9614608801
E835
GJ VIII TEE HOUSING SEAL
4
pcs.
32
9614608901
E837
GJ VIII IDLER GEAR BUSHING
2
pcs.
33
9614609001
E838
GJ VIII IDLER SHAFT BUSHING
2
pcs.
56
9614610801
E862
GJ VIII COLLAR STEM SM O-RING
1
pcs.
57
9614610901
E863
GJ VIII COLLAR STEM LG O-RING
1
pcs.
55
9614677701
8539
GJ V GB NS/VIII RSLBH O-RING
4
pcs.
60
9614611201
E867
GJ VIII GEARHEAD SEAL
1
pcs.
61
9614611401
E870
GJ VIII HV-8 CLUTCH O-RING
1
pcs.
39
9614674601
8512
GJ V/VIII INPUT PINION
1
pcs.
11
9614605301
E811
GJ VIII OUTPUT PINION
1
pcs.
12
9614605401
E812
GJ VIII OUTPUT SHAFT
1
pcs.
13
9614605601
E813
GJ VIII PLANETARY GEARHEAD
1
pcs.
15
9614606101
E815
GJ VIII IDLER SHAFT
2
pcs.
16
9614606201
E816
GJ VIII IDLER GEAR
2
pcs.
21
9614607401
E822A
GJ VIII ROTOR SHAFT ASSEMBLY
1
pcs.
30
9614608701
E832
GJ VIII TH BEARING CUP
4
pcs.
62
9614611501
E871
GJ VIII OUTPUT SHAFT SCREW
1
pcs.
63
9614611601
E872
GJ VIII OUTPUT SHAFT LOCK SCR
1
pcs.
Article no: 9614612101 EHV8MAJEPDMKIT ALFA LAVAL GJ 8 MAJOR KIT - EPDM
Pos. no.
Part No.
Gamajet Part No.
Description
No.
22
9614607501
E823
GJ VIII RS STATIC SEAL
1
pcs.
23
9614607601
E824
GJ VIII OS UPPER SEAL
1
pcs.
24
9614607701
E826
GJ VIII GEARBOX STATIC SEAL
2
pcs.
29
9614608601
E831
GJ VIII TEE HOUSING BEARING
4
pcs.
31
9614608801
E835
GJ VIII TEE HOUSING SEAL
4
pcs.
32
9614608901
E837
GJ VIII IDLER GEAR BUSHING
2
pcs.
33
9614609001
E838
GJ VIII IDLER SHAFT BUSHING
2
pcs.
56
9614610802
E862E
GJ VIII COLLAR STEM SM O-RING
1
pcs.
57
9614610902
E863E
GJ VIII COLLAR STEM LG O-RING
1
pcs.
55
9614677702
8539EP
GJ V GB NS/VIII RSLBH O-RING
4
pcs.
60
9614611201
E867
GJ VIII GEARHEAD SEAL
1
pcs.
61
9614611402
E870E
GJ VIII HV-8 CLUTCH O-RING
1
pcs.
39
9614674601
8512
GJ V/VIII INPUT PINION
1
pcs.
11
9614605301
E811
GJ VIII OUTPUT PINION
1
pcs.
12
9614605401
E812
GJ VIII OUTPUT SHAFT
1
pcs.
13
9614605601
E813
GJ VIII PLANETARY GEARHEAD
1
pcs.
15
9614606101
E815
GJ VIII IDLER SHAFT
2
pcs.
16
9614606201
E816
GJ VIII IDLER GEAR
2
pcs.
21
9614607401
E822A
GJ VIII ROTOR SHAFT ASSEMBLY
1
pcs.
30
9614608701
E832
GJ VIII TH BEARING CUP
4
pcs.
61
9614611501
E871
GJ VIII OUTPUT SHAFT SCREW
1
pcs.
62
9614611601
E872
GJ VIII OUTPUT SHAFT LOCK SCR
1
pcs.
8.10 Major Service Kit
45

8. Parts List and Service Kits
Article no: 9614612401 EHV8MAJKALREZ ALFA LAVAL GJ 8 MAJOR KIT - KALREZ
Pos. no.
Part No.
Gamajet Part No.
Description
No.
22
9614607501
E823
GJ VIII RS STATIC SEAL
1
pcs.
23
9614607601
E824
GJ VIII OS UPPER SEAL
1
pcs.
24
9614607701
E826
GJ VIII GEARBOX STATIC SEAL
2
pcs.
29
9614608601
E831
GJ VIII TEE HOUSING BEARING
4
pcs.
31
9614608801
E835
GJ VIII TEE HOUSING SEAL
4
pcs.
32
9614608901
E837
GJ VIII IDLER GEAR BUSHING
2
pcs.
33
9614609001
E838
GJ VIII IDLER SHAFT BUSHING
2
pcs.
56
9614610803
E862K
GJ VIII COLLAR STEM SM O-RING
1
pcs.
57
9614610903
E863K
GJ VIII COLLAR STEM LG O-RING
1
pcs.
55
9614677703
8539K
GJ V GB NS/VIII RSLBH O-RING
4
pcs.
60
9614611201
E867
GJ VIII GEARHEAD SEAL
1
pcs.
61
9614611403
E870K
GJ VIII HV-8 CLUTCH O-RING
1
pcs.
39
9614674601
8512
GJ V/VIII INPUT PINION
1
pcs.
11
9614605301
E811
GJ VIII OUTPUT PINION
1
pcs.
12
9614605401
E812
GJ VIII OUTPUT SHAFT
1
pcs.
13
9614605601
E813
GJ VIII PLANETARY GEARHEAD
1
pcs.
15
9614606101
E815
GJ VIII IDLER SHAFT
2
pcs.
16
9614606201
E816
GJ VIII IDLER GEAR
2
pcs.
21
9614607401
E822A
GJ VIII ROTOR SHAFT ASSEMBLY
1
pcs.
30
9614608701
E832
GJ VIII TH BEARING CUP
4
pcs.
62
9614611501
E871
GJ VIII OUTPUT SHAFT SCREW
1
pcs.
63
9614611601
E872
GJ VIII OUTPUT SHAFT LOCK SCR
1
pcs.
Article no: 9614612601 EHV8MAJTEFLON ALFA LAVAL GJ 8 MAJOR KIT - TEFLON
Pos. no.
Part No.
Gamajet Part No.
Description
No. 22
9614607501
E823
GJ VIII RS STATIC SEAL
1
pcs.
23
9614607601
E824
GJ VIII OS UPPER SEAL
1
pcs.
24
9614607701
E826
GJ VIII GEARBOX STATIC SEAL
2
pcs.
29
9614608601
E831
GJ VIII TEE HOUSING BEARING
4
pcs.
31
9614608801
E835
GJ VIII TEE HOUSING SEAL
4
pcs.
32
9614608901
E837
GJ VIII IDLER GEAR BUSHING
2
pcs.
33
9614609001
E838
GJ VIII IDLER SHAFT BUSHING
2
pcs.
56
9614610804
E862T
GJ VIII COLLAR STEM SM O-RING
1
pcs.
57
9614610904
E863T
GJ VIII COLLAR STEM LG O-RING
1
pcs.
55
9614661501
391130
639-T HOUSING O-RING PTFE
4
pcs.
60
9614611201
E867
GJ VIII GEARHEAD SEAL
1
pcs.
61
9614611404
E870T
GJ VIII HV-8 CLUTCH O-RING
1
pcs.
39
9614674601
8512
GJ V/VIII INPUT PINION
1
pcs.
11
9614605301
E811
GJ VIII OUTPUT PINION
1
pcs.
12
9614605401
E812
GJ VIII OUTPUT SHAFT
1
pcs.
13
9614605601
E813
GJ VIII PLANETARY GEARHEAD
1
pcs.
15
9614606101
E815
GJ VIII IDLER SHAFT
2
pcs.
16
9614606201
E816
GJ VIII IDLER GEAR
2
pcs.
21
9614607401
E822A
GJ VIII ROTOR SHAFT ASSEMBLY
1
pcs.
30
9614608701
E832
GJ VIII TH BEARING CUP
4
pcs.
62
9614611501
E871
GJ VIII OUTPUT SHAFT SCREW
1
pcs.
63
9614611601
E872
GJ VIII OUTPUT SHAFT LOCK SCR
1
pcs.
46

9. Appendix A
Drawing A1: Directional Nozzle Housing Removal
Drawing A2: Directional Nozzle Housing Removal
The drawing shows Alfa Laval GJ 8 Directional Tank Cleaning Machine
9. Appendix A
47

9. Appendix A
Drawing A3: Directional Nozzle Housing Removal
The drawing shows Alfa Laval GJ 8 Directional Tank Cleaning Machine
48

9. Appendix A
Drawing A4: Directional Tee Housing Removal
Drawing A5: Directional Tee Housing Dis-Assembly
The drawing shows Alfa Laval GJ 8 Directional Tank Cleaning Machine
49

9. Appendix A
Drawing A6: Directional Stem Assembly
Drawing A7: Directional Tee Housing Assembly
The drawing shows Alfa Laval GJ 8 Directional Tank Cleaning Machine
50

How to contact Alfa Laval
Contact details for all countries are
continually updated on our website.
Please visit www.alfalaval.com to access the information directly.
© Alfa Laval Corporate AB
This document and its contents is owned by Alfa Laval Corporate AB and protected by laws governing intellectual property and thereto related rights. It is the responsibility of the user of this
document to comply with all applicable intellectual property laws. Without limiting any rights related to this document, no part of this document may be copied, reproduced or transmitted in any
form or by any means (el
will enforce its rights related to this document to the fullest extent of the law, including the seeking of criminal pr
ectronic,
mechanical,
photocopying,
recording, or otherwise), or for any purpose, without the expressed permission of Alfa Laval Corporate AB. Alfa Laval Corporate A
osecution.
51
B
 Loading...