


USER MANUAL
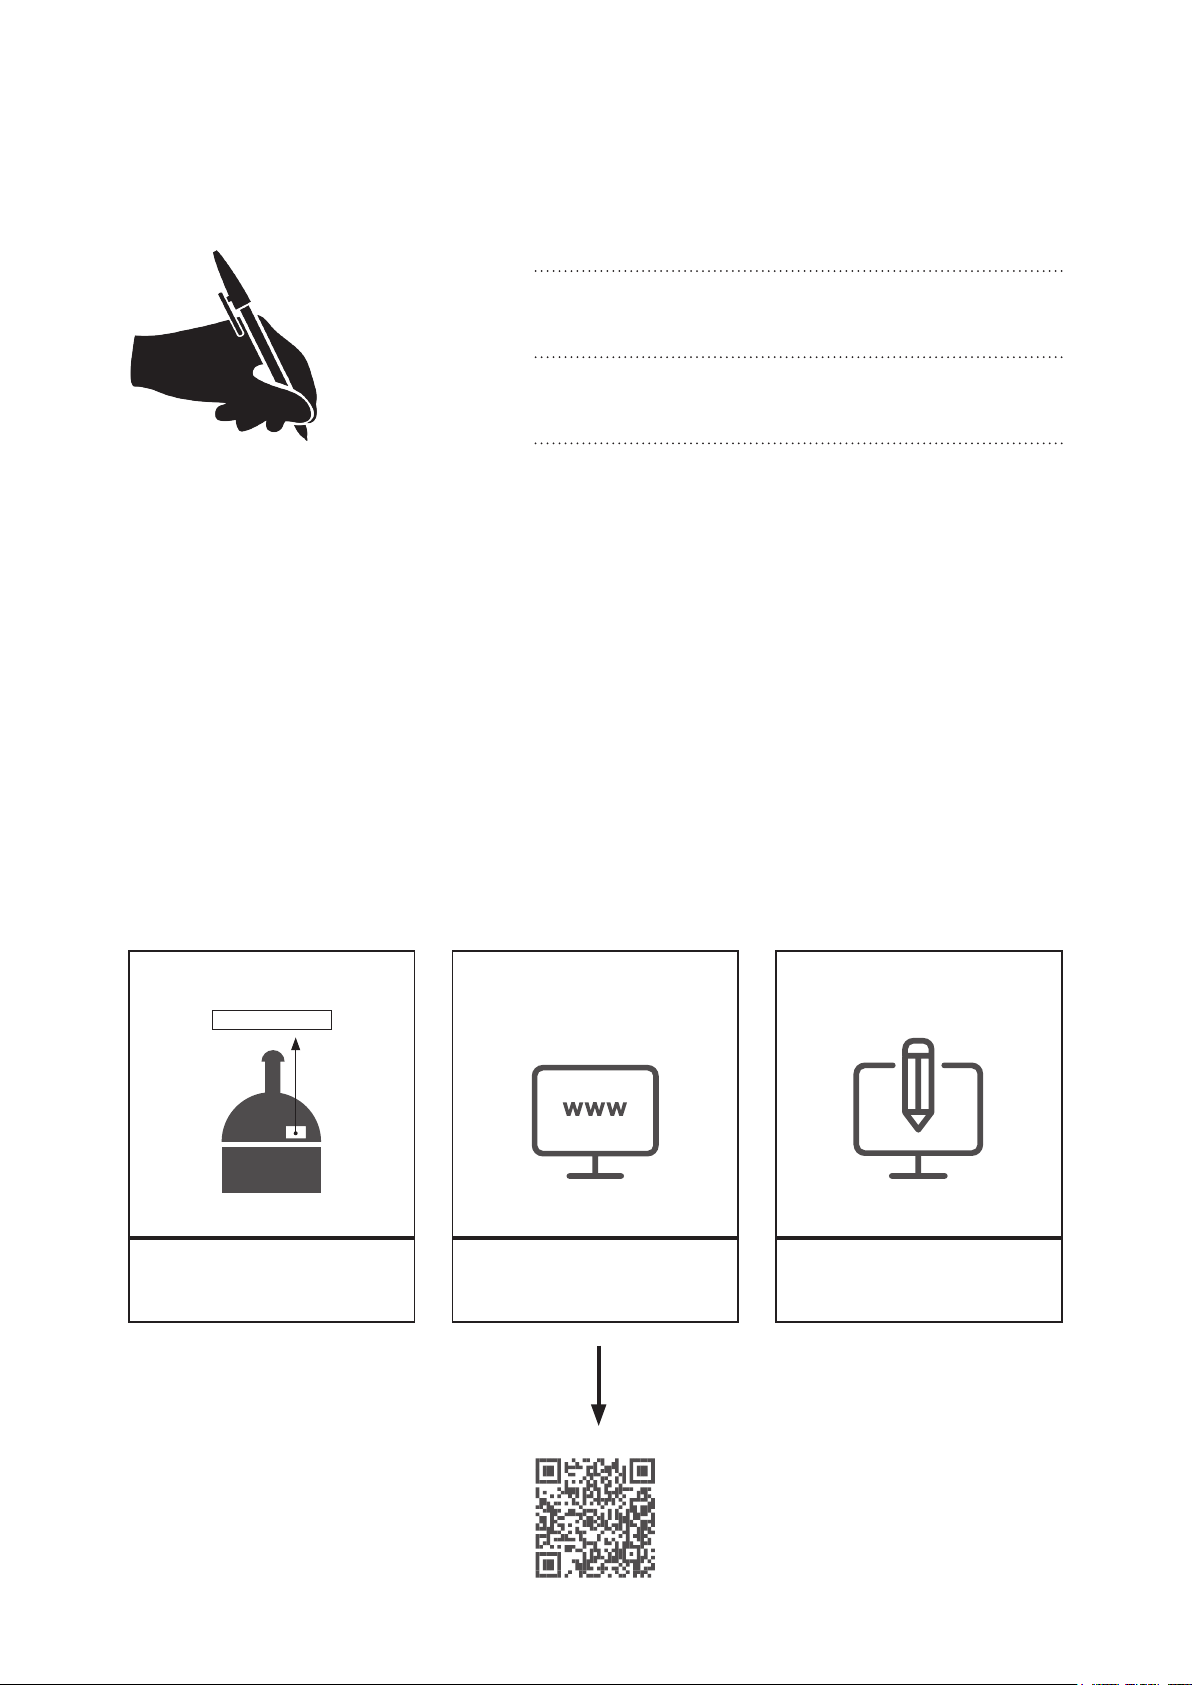
Write in this section the data of your product.
Oven Model:
Serial number:
Purchase date:
NB: The identication label is located on the back of the product.
Visit www.alfaforni.com and register your oven today.
1 2 3
12345678901234
Identies the serial number,
the identication label is located
on the back of the product.
Visit our web site and click on
“register your product” or type
“alfa1977.it/product-registration/”
Enter your information
and register

02 WARNINGS
• GENERAL
• SAFETY
06 WARRANTY
07 INSTALLATION
08 GAS CONNECTION
12 GAS CONVERSION
14 OVEN USE
• LIGHTING
• TURNING OFF
• DIFFERENT TYPES OF WOOD
16 COOKING
• COOKING PIZZA
• OTHER COOKING
• PYROMETER
• OVEN DOOR
18 MAINTENANCE AND CARE
• MAINTENANCE
• CLEANING
• STORING THE OVEN
20 TROUBLESHOOTING
• WOOD VERSION
• GAS VERSION

GENERAL WARNINGS
RETAIN THIS MANUAL FOR FUTURE REFERENCE
Additional copies of this manual at www.alfaforni.com
WARNING: improper installation, adjustment, alteration, service
or maintenance can cause property damage, injury or death. read
the installation, operating and maintenance instructions thoroughly
before installing or servicing this equipment.
PLEASE READ THE FOLLOWING INFORMATION FOR PROPER
INSTALLATION AND OPTIMUM PERFORMANCE OF THE OVEN.
- The identication plate, with technical data, lot number and brand
name is visibly applied to the device. The label must not be removed.
- Before putting the unit into operation, it is mandatory to remove all
protective laser lms present.
- Never use steel sponges or sharp scrapers, its will damage the
surfaces. Use ordinary non-abrasive products, use, if necessary,
wood or plastic tools. Rinse thoroughly and dry with a soft cloth or
microber cloth.
- Do not use dishes or containers made of plastic material. The high
temperatures inside the oven could melt the plastic, damaging the
appliance.
- Use tools and utensils that are resistant to high temperatures.
- Position the oven on a at surface.
- Due to the temperature, the colour of the surfaces may vary in time.
- Do not paint or apply objects to the oven.
- Remove the protective lm before switching on, to facilitate the
separation, use warm air (for example, a hairdryer)
- The installation of the product must guarantee easy access for
cleaning.
- Where available, use the special stop-wheel supplied to lock the oven
once positioned.
- Never put inammable objects in the oven: they could be accidentally
2

ignited and cause a re.
- Do not allow children to approach the unit during operation or make
them subject of play.
- Do not place sharp metal objects (cutlery or utensils) into the slots of
the unit.
- Alfa stainless steel ready-to-use ovens, despite including insulating
material between the two layers of steel, can become hot on the
outside.
- Alfa stainless steel ready-to-use ovens, despite including insulating
material between the two layers of steel, can become hot on the
outside.
- Do not store ammable materials on the rst shelf below the mouth of
the oven.
- Operate the oven door by gripping the handles.
- Do not close the door when the oven is lit with a ame at maximum.
- Do not touch the surfaces of the chimney ue during use.
- Do not use ammable liquids near the oven.
- Keep any electrical wiring and fuel lines away from hot surfaces.
- Do not use the oven if it is not working properly or you suspect a
fault.
- Do not move the oven during use or when it is hot.
- Do not lean on or rest objects on the oven, this may compromise its
stability.
- Never extinguish the ame with water.
- Do not turn the oven off by throwing water inside.
- Do not use ammable liquids near the oven.
- In the case of uncontrolled are-ups, move the food away from the
ames until they extinguish.
- In the event that a grease re occurs, turn off the gas and leave the
counter closed until the re is extinguished.
- When using the oven wear heat resistant oven gloves.
- The parts that are sealed by the manufacturer should not be modied
by the user.
- Do not leave the appliance unattended during cooking that can free
fats or oils. Fats and oils may cause re.
- Do not block the openings and slots provided for ventilation and heat
dissipation.
- Do not use charcoal, briquettes or lava rock or fuel other than that
expressly indicated.
- During use, in ovens with an integrated base, always remember to
lock the wheels using the special tool “Lock Wheels”.
3
SAFETY WARNINGS
READ ALL INSTRUCTIONS BEFORE INSTALLING AND USING THIS APPLIANCE
Please read this entire manual before you install the oven. Failure to follow
instructions may result in property damage, bodily injury or even death.
Contact your local building or re ofcials about restrictions
and installation inspection in your area.
A MAJOR CAUSE OF OVEN RELATED FIRES IS A FAILURE TO
MAINTAIN REQUIRED CLEARANCES TO COMBUSTIBLE MATERIAL.
IT IS OF UTMOST IMPORTANCE THAT THIS OVEN BE INSTALLED
ONLY IN ACCORDANCE WITH THESE INSTRUCTIONS.
FOR YOUR SAFETY: Do not store or use gasoline or other ammable
vapors or liquids in the vicinity of this or any other appliance. Also,
always keep the area under and around this appliance free and clear of
any and all combustible materials.
IN THE EVENT OF A POWER FAILURE,
NO ATTEMPT SHOULD BE MADE TO OPERATE THE OVEN.
The product must be installed by qualied technicians.
WARNING:Improper installation, adjustment,
alteration, service or maintenance can cause
property damage, injury or death.
4
SAFETY WARNINGS
ONLY FOR GAS VERSION
GAS LEAKS MAY RESULT IN FIRE OR EXPLOSION AND
CAUSE SERIOUS PERSONAL INJURY OR DEATH,
OR PROPERTY DAMAGE.
IF YOU SMELL GAS:
1. Turn the gas off.
2. Put out any free ames.
3. Open the counter to the oven.
4. Consulting a specialized technician
WARNING: The door and the smoke valve may help achieve
the right temperature but in no case should they be used at
the same time or when the temperature is higher than 400°C.
Incorrect use can cause the oven to overheat.
ATTENTION! The gas oven may be converted from natural gas to LPG
or vice versa using the Alfa Forni conversion kit; the conversion must be
carried out by qualied persons using exclusively Alfa materials; under
other conditions, the guarantee will no longer be valid.
WARNING: If the oven is installed in a room, make sure there
is adequate ventilation to prevent high concentrations of gas.
WARNING: If the gas oven is not used
close the gas supply valve.
WARNING: Do not store unused gas cylinders near it.
5

WARRANTY
Alfa ovens fully comply with the Italian and European proposed regulations.
The oven is guaranteed for 2 (two) years; good maintenance and proper use
can make sure that the oven lasts much longer.
Warranty covers only parts and components. Shipping and assembly costs
are charged to the customer.
PLEASE RETAIN YOUR SALES RECEIPT OR INVOICE
WRITE HERE UNDER THE SERIAL NUMBER ON THE PRODUCT
IDENTIFICATION TAG
_______________________________________________________________
The warranty does not apply in the following options:
- If the oven is not properly used and installed as described in this manual.
- If the oven has been tampered with either voluntarily or involuntarily in any way.
- In the event the equipment is improperly or inadequately maintained. Burner
problems resulting from debris or ash in the burner well will not be covered by
the warranty.
- If the oven, for any cause, has been altered and is no longer in the condition
detected at delivery of the product.
- If other fuels other than those used have been used. Do not use liquid coal for
barbecues, chemicals products, or other fuel.
- If the damage is the result of the use of chemicals inside or outside the oven.
- Normal wear of the burner, thermometer, ignition, electrodes, ignition cable, gas
hose and refractory stones.
- The door is not covered by the guarantee.
- Damage caused by exceeding the temperature limit of 450°C / 842°F.
- If components not produced or recommended by Alfa Pro are used.
- Damage to parts not functional and decorative that do not affect the normal use
of the oven, including scratches and colors differences.
- In the event the equipment is used outdoor.
- In the event the oven is built-in.
- In the event that the rating plate has been removed, altered or obliterated.
- Bricks are not covered by warranty. Our ovens are supplied with a replacement
brick; further spare parts can be available on request.
We recommend the exclusive use of spare parts recommended by Alfa Oven.
6

POSITIONING THE OVEN
THE OUTER WALLS OF OVEN MAY REACH
HIGH TEMPERATURES GREATER THAN 50°C / 120°F.
ANY FLAMMABLE MATERIAL SHOULD BE KEPT
AT LEAST 1 METRE AWAY FROM THE OVEN.
CAUTION! When being used,
place the oven at a safe distance
from ammable materials
or substances that may be
damaged by heat.
WARNING: Do not light
the oven near trees,
brushwood or dry leaves.
WARNING!
Do not recess the oven!
NO Do not built-in the oven
CAUTION! Put the oven in a
place sheltered from wind or
strong draughts.
WARNING! Place the oven on
a at, stable surface to prevent
it from moving during use and
putting the safety of people or
things at risk.
ATTENTION: Position the oven at a minimum distance of
20 cm from the walls and from any other equipment.
TOP VERSION OVENS SHOULD BE PLACED ON TABLES OR OTHER
FIREPROOF SURFACES WITH ADEQUATE LOAD-BEARING CAPACITY. IF
NEED BE, ADJUST THE LEGS TO LEVEL THE SUPPORTING SURFACE.
7

CONNECTION
ONLY FOR LPG VERSION
CONNECT THE LPG CYLINDER
(only for LPG oven)
Connect the exible hose to the back of the oven.
PRESSURE REGULATOR:
- gas ow:
10 kg/h - 22 lbs/h
- outlet pressure:
butane G30: 28 - 30 mbar
propane G31: 30 - 37 mbar
FLEXIBLE HOSE:
Diameter 1/2’’
Length 1,5 meters
CYLINDER:
almost 30 kg / 66 lbs
Pressure regulator, exible hose and cylinder are not supplied with the oven.
WARNINGS: Follow the following advises for a correct use of the gas cylinder.
- Use a suitable pressure regulator and hose according to the regulations in force.
- LPG is heavier than air. Any losses of LPG may collect in a lover part of the
environment.
- The LPG cylinder must always be installed, transported and stored in a vertical
position. Handle with care and do not drop the LPG cylinders.
- Make sure the gas tank is placed in a ventilated place that it is away from other
objects.
- Never store a spare gas cylinder near the gas oven.
- Do not leave or transport the LPG cylinders in places where temperatures can reach
50°C / 120°F (too hot to handle. For example: Do not leave the cylinder in the car on
hot days).
- Treat “empty” LPG cylinders with the same attention as full ones. Even if there is no
more liquid in the cylinder there may always be gas
- Pressure left in the cylinder. Always close the cylinder valve before disconnecting it.
- It is recommended that all gas connections are checked before using the oven.
- Make sure that the valve on the LPG cylinder or the regulator is closed. Replacement
of the cylinder must be performed away from sources of heat and ignition.
- It is advisable to replace the gas pipe every 2-3 years.
- Only use LPG cylinders.
- Do not twist the hose.
- Before each use check that the hose does not have any marks, cracks, abrasions or
cuts. If the hose is damaged in some way, do not use the oven.
8

CONNECTION FOR USE IN NORTH AMERICA ONLY
ONLY FOR LPG VERSION
ADVICE REGARDING THE USE OF AN LPG GAS CYLINDER
• LPG is heavier than air. Any losses of LPG may collect in a lower part of the
environment.
• The LPG cylinder must always be installed, transported and stored in a vertical
position. Handle with care and do not drop the LPG cylinders.
• Never store a spare gas cylinder near the gas oven.
• Make sure the gas tank is placed in a ventilated place that it is away from other objects.
• Do not leave or transport the LPG cylinders in places where temperatures can reach
50°C (too hot to handle. For example: Do not leave the cylinder in the car on hot days).
• Treat “empty” LPG cylinders with the same attention as full ones. Even if there is no
more liquid in the cylinder there may always be gas.
• Pressure left in the cylinder. Always close the cylinder valve before disconnecting it.
• Ensure that the regulator is mounted with the vent hole facing down, so as not to
collect water. Make sure that the hole is not obstructed by dirt, grease, insects, etc.
• It is recommended that all gas connections are checked before using the oven.
• Make sure that the valve on the LPG cylinder or the regulator is closed. Replacement of
the cylinder must be performed away from sources of heat and ignition.
Connection of the LPG cylinder.
This activity must be performed by a qualied technician.
A) Connect the hose provided with the unit to the oven
B) Connect the pressure regulator (stabilizer) provided with the unit to the hose.
• This regulator works at an input pressure of 1/2 PSI, and the input connection is
type 1/2” (F) NPT.
• Pressure regulator - 1/2 psi - 97 9(L)(F), Inlet Size: 1/2, Outlet Size:1/2 from
Cavagna Group S.P.A.
C) Connect a pressure regulator NOT PROVIDED with the unit to the sabilizer (B) to keep
a pressure of 1/2 PSI. D) Connect a cylinder to the piping.
D) Connect a cylinder to the piping.
- It is advisable to replace the gas pipe every 2-3 years.
- Do not twist the hose.
9

CONNECTION
ONLY FOR NATURAL GAS VERSION
NATURAL GAS SUPPLY
- Connect the exible hose to the back of the
oven.
- The natural gas supply must be delivered
through a galvanized pipe Ø 1/2’’ or
equivalent copper pipe, located at the
burner inlet hole.
- Install the gas shut-off valve in a suitable
position up-line.
ATTENTION! Follow our advice to correctly use your oven.
- We recommend checking gas connection before using the oven.
- Make sure the gas tap is turned off when the oven is not being used and
during maintenance or cleaning operations.
- Replace the gas hose every 2-3 years. Do not kink the gas hose.
- Before using the oven, check out the hose searching for cracks, cuts or any
wearing sign. If the hose is damaged, do not use the oven.
10

CONNECTION FOR USE IN NORTH AMERICA ONLY
ONLY FOR NATURAL GAS VERSION
CONNECTION TO THE NATURAL GAS PIPING
This activity must be performed by a qualied technician.
A) Connect the hose provided with the unit to the oven.
B) Connect the pressure regulator (stabilizer) provided with the unit to the hose.
This regulator works at an input pressure of 1/2 PSI, and the input connection is
type 1/2” (F) NPT.
Pressure regulator - 1/2 psi - 97 9(L)(F), Inlet Size: 1/2, Outlet Size:1/2 from
Cavagna Group S.P.A.
C) Connect to the natural gas piping.
11

ONLY USE THE COMPONENTS AND PARTS SUPPLIED
WARNING: The following conversion must be performed by
authorized professionals when the oven is completely cold.
CONVERSION
LPG - METHANE
WITH THE CONVERSION KIT
Improper installation, adjustment, alteration can
cause property damage or injury.
1 GAS KIT DISASSEMBLY
Remove the gas kit
according to the
instructions in the
appropriate section of the
manual.
2 REPLACEMENT OF THE
MAIN NOZZLE
Unscrew the xing screw
(a) and remove the plate
covering the nozzle (b).
Unfasten the main nozzle
(e) to the holder screw (d)
by using an 11 mm spanner.
Replace the nozzle with
the spare part supplied in
the kit and screw it back
to the holder (d) without e
tightening it.
During these operations,
lock the nozzle holder to
keep it from rotating.
a
d
e
b
12

3.1 REPLACEMENT OF
THE PILOT NOZZLE.
Unscrew the xing screw
(h) of the pilot light tube
and remove it
3.2
Remove the tube (i) from
the seat.
h
3.3
Remove the pilot nozzle (l)
from the cone-like support
(o) and replace it with the
spare component supplied
in the kit. Reassemble
everything following the
same steps in reverse
order.
i
o
Following the conversion, apply the new label
on the product and check that the size of the nozzle
corresponds to that shown on the label.
13

OVEN USE
ONLY FOR WOOD VERSION
WARNING: Follow the instructions before turning on the oven.
- Do not use ammable liquids or other fuels to light the oven.
- Make sure that there are no ammable materials near the oven and that the
minimum safety distance is respected.
LIGHTING
1. Make a small pile of wood in the centre of the oven
with small pieces of dry wood.
2. When the wood is well-lit, add two larger logs and
move the re to one side.
3. After a few minutes of continuous burning, never
excessive, the temperature of 250°C/482°F will be
reached, burning to a dark soot. This is the moment
the oven is ready to be used.
TURNING OFF
- To turn the oven off, close the oven door and wait for ash to form.
- When the oven has been completely turned off for 30 minutes you can
remove the ashes.
DIFFERENT TYPES OF WOOD
- Use small sized wood pieces that are very dry, above all for lighting.
- Each wood type provides a fragrance to food in a different way, for example
wood from fruit trees is used to give food a more appetising aroma similarly,
maple, walnut and chestnut go well for other foods like meat.
- Treated wood, resin or scrap wood are strictly excluded.
- Wet or damp wood can pop due to the increased volume of water. This will
produce a lot of smoke and less heat.
FOR YOUR SAFETY:
- Do not exceed the temperature limit of 450°C / 840°F
- Do not leave the oven unattended when the re is going.
- To keep constant temp, throw in small quantities of rewood at regular
intervals; do not keep adding more logs to avoid a dangerous rise
in temperature or ames spilling out of the oven that might damage
people or things.
14

OVEN USE
ONLY FOR GAS VERSION
WARNING: Follow the instructions before turning on the oven.
- Check all gas connections for gas leak before starting your oven.
- Do not lean over the oven when lighting. Keep your face and body at least
50 cm / 19,6 inches far from the oven door,
- When lighting the oven, the oven door must be open.
- The burner control knob must be in the off position before turning on the
LGP cylinder valve.
- Do not move the oven while it is in use.
1. To ignite the pilot light, press and rotate the knob together
with the piezo ignition button that discharges a spark to
ignite the pilot light. To extinguish the ame on the main
burner and leave only the pilot light on, turn the knob to
the star. If the ame does not light, release the knob back
to “zero position”, wait for about 3 minutes and repeat the
lighting procedure.
2. Press and rotate the knob anti-clockwise and turn it on
high ame;
3. Press and rotate the knob and position it on low ame;
4. To turn the main burner and the pilot light off completely,
turn the knob to the dot.
In the rst few times it may be necessary to keep pressed
the knob to the ON position for a few minutes in order to
drain the gas inside the piping.
FOR YOUR SAFETY:
- Never run at maximum for more than 40 minutes.
- Do not close the door when the oven is lit with the ame at the
maximum position.
- Do not exceed the temperature limit of 450°C / 840°F.
- Never disconnect the gas pipe or other ttings when using the oven.
15

350 °C
COOKING
- Always preheat the oven before cooking; heat for 15 minutes, or until the
thermometer reaches 350-400°C / 660-750°F; once the temperature has
been reached, wait a few minutes for it to stabilise to ensure that the oven
oor warms up properly.
- Calculate longer cooking time for cold or ventilated days or high
altitudes. Calculate a shorter cooking time if the external temperature is
particularly high.
- Cooking times vary according to weather conditions or the amount,
dimensions and shape of the food to be cooked.
°C
300 °C
250 °C
220 °C
0
15’ 45’
75’ 90’ min
ADVICE FOR COOKING PIZZA
- Wait for around 15 minutes after lighting the oven with a high quantity of wood
to reach the optimum temperature for cooking an excellent Neapolitan pizza
(with an increased level of moisture):
- Air temperature of 400°C/750°F,
- Refractory oor temperature of 350°C/660°F.
- Once the optimum temperature is reached,
- FOR THE WOOD-FIRED OVEN: just add some logs every 3-5 minutes to
maintain constant temperature and churn out pizzas back to back,
- FOR THE GAS-FIRED OVEN: adjust the ame and churn out pizzas back to
back.
- Check that there is no build-up of grease, and, if present, remove to prevent the
grease from catching re.
- During cooking do not lean over the open oven and do not place hands or ngers
on the front edge of the oven.
16
- During cooking the oven will have high temperatures, therefore, it should never
be moved or left unattended.

PYROMETER
- The pyrometer detects the temperature at a point inside the oven. The value
detected by the pyrometer is therefore indicative. With experience it will be easy
to better assess when the oven is ready for various types of cooking. You will
acquire, therefore, complete control of the oven and you will become very adept at
choosing the cooking temperature.
OVEN DOOR
- The door is very effective at adjusting heat intensity: by closing and opening it the
temperature may be better managed.
- ONLY WOOD VERSION: If the re is too high and comes out from the oven mouth,
use the door to adjust the ame.
17

MAINTENANCE AND CARE
MAINTENANCE
- For proper maintenance of the oven, make sure before you turn it on
that the chimney ue is free from any objects and that ash from previous
cooking has been removed.
- The oven can be used all year round; in the winter, heat the oven with a
smaller re to avoid thermal shock due to the humidity.
- Prevent corrosion by coating the oven metal parts with Vaseline.
- It is recommended regular maintenance by a qualied technician.
- Thermometer - clean with warm water and soap with a soft plastic
scouring pad.
- Stainless steel surfaces - wash with a soft cloth and a solution of soap and
water. Make sure to rub following the grain of the stainless steel. Never use
detergents containing acid, white spirit or xylene. Rinse well after cleaning
the oven.
CLEANING
- Clean the oven oor (when the oven is cold) with a brush and gently wipe
the oven oor with a damp cloth.
- Use a damp cloth to clean the external sheet.
- Apply a light coat of vaseline to make the metal shine.
- Remove and clean the chimney ue once a year; animals may nest there
and/or ash may block the passage of smoke.
- If traces of rust begin to appear, clean with a polishing brush and apply a
thin coat of vaseline.
- Do not use chemical products to clean the oven.
- Do not clean the product when it is in use.
- If the oven is exposed in a sea side, in order to prevent corrosion and
fouling, it is recommended to frequently clean the oven with fresh water.
STORING THE OVEN
- During periods of inactivity is advised to clean carrefully the oven, grease
the metal parts and cover it with the cover Alfa available on request.
- On the rst use, inspect for potential signs of malfunction.
18

ONLY FOR WOOD VERSION
CLEANING
- When the re has gone out and the oven is not hot enough, collect the
ashes left over from previous cooking with a metallic brush and a pan.
ONLY FOR GAS VERSION
MAINTENANCE
- The gas burner should be cleaned periodically by carefully sucking up any
cooking residues.
- When cleaning valves and burners, be careful not to damage the burner.
- Remove any residues from the burners with a brush.
- Do not enlarge burner holes (openings).
GAS KIT DISASSEMBLY
- The gas burner should be cleaned periodically by carefully sucking up any
cooking residues.
- When cleaning valves and burners, be careful not to damage the burner.
- Before cleaning is necessary to remove the burner from the oven by
following the procedure in the assembly instructions.
STORING THE OVEN
- If the gas oven is not used close the supply valve of the gas cylinder.
- If the gas oven is placed in a closed space, disconnect the gas supply. The
gas cylinder must be left outside in a well-ventilated area.
- In the event that the cylinder is not removed from gas oven, place the
entire device and the cylinder in a well-ventilated outdoor area.
- The gas cylinders must be stored outdoors in a well-ventilated area and
out of the reach of children. Cylinders not in use must not be stored in a
building, garage or other enclosed space.
19

TROUBLESHOOTING
ONLY FOR WOOD VERSION
Contact us directly for expert advice on the web site www.alfaforni.com
ALFA REFRATTARI S.R.L.
via Osteria della Fontana 63,
03012 Anagni (FR), ITALY
THE OVEN
PRODUCES SMOKE
THE OVEN DOES
NOT HEAT
THE OVEN COOLS
DOWN QUICKLY
TEL +39 0775.7821
FAX +39 0775.782218
- Check that the wood is not too moist and the embers are not
unburned.
- Make sure that you have started a re with vivid ames, gradual
but steady, in order to avoid incomplete combustion.
- If the oven is installed indoors, check the chimney ue and any
air inlets in the room.
- It is recommended to close the oven door.
- Check that the re is on one side of the oven and not near the
mouth.
- Fire with vivid ames for 20 minutes.
- Do not amass the wood over the embers.
- Gradually add the wood to the re.
- Check that no moisture or water has inltrated the oven.
- It may be lit for the rst time or after a long idle period.
- Avoid sudden short res that do not warm the bottom of the
oven..
E-MAIL info@alfaforni.com
WEB SITE alfaforni.com
THE FLAMES COME
OUT OF THE MOUTH
OR CHIMNEY CAP
THE OVEN DOESN’T
COOK AS YOU
WOULD LIKE
hairline cracks of the oor as they are an intrinsic
20
- Avoid excessive res and immediately dampen the ames that
reach out of the oven by resting the door over
- the mouth of the oven, leaving a gap of 2 or 3 cm.
- Ensure the oven is at the right temperature.
- Ensure the oven maintains the desired temperature for the
duration of the cooking time; use the counter to
- Adjust the heat intensity as well as the ame adjuster: open and
close it to raise or lower the temperature as necessary.
Alfa Forni is not responsible for veins, cracks,
characteristic of the material.

TROUBLESHOOTING
ONLY FOR GAS VERSION
Contact us directly for expert advice on the web site www.alfaforni.com
ALFA REFRATTARI S.R.L.
via Osteria della Fontana 63,
03012 Anagni (FR), ITALY
THE OVEN COOLS
DOWN TOO EARLY
IF THE OVEN
DOESN’T COOK AS
YOU WOULD LIKE
TEL +39 0775.7821
FAX +39 0775.782218
- Make sure that neither moisture nor water have gathered inside
the oven.
- Firing the oven for the rst time or after a long period of
idleness.
- Do not build a powerful but short-lived re that won’t heat the
oven thoroughly.
- Verify that the burner is working and close the door.
- Ensure the oven is at the right temperature.
- Fire with high vivid ames for 10 minutes.
- Ensure the oven maintains the desired temperature for the
duration of the cooking time; use the counter
- To adjust the heat intensity as well as the ame adjuster: open
and close the counter to raise or lower the temperature as
necessary.
E-MAIL info@alfaforni.com
WEB SITE alfaforni.com
Alfa Forni is not responsible for veins, cracks,
hairline cracks of the oor as they are an intrinsic
characteristic of the material.
21

V.20190417
ALFA REFRATTARI S.R.L.
via Osteria della Fontana 63, 03012 Anagni (FR), Italy
web site: www.alfaforni.com
web site: www.alfaovens.com
e-mail: info@alfaforni.com
tel: +39 0775.7821 - fax: +39 0775.782218
 Loading...