

Page 1
Page 2
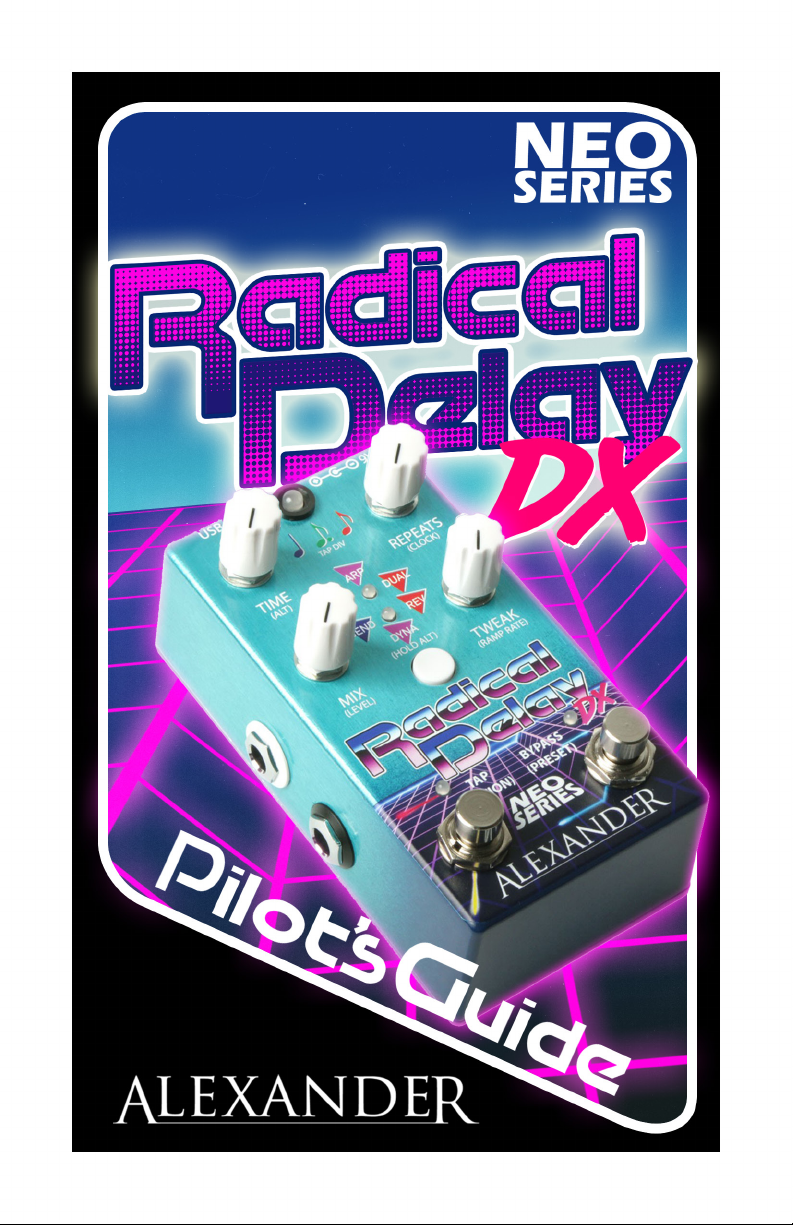
Pilot’s GuidePilot’s Guide
Copyright ©2019 AlexAnder pedAls llC
GREAT TONES. DOING GOOD.
2018 Garner Station Rd, Raleigh NC 27603 (919) 977-6665 alexanderpedals.com
Page 3
thiS Pedal needS no introduction
Well, maybe it does.
We released the rst Radical Delay way back in 2015 as an homage to the tones and aesthetic
of the 1980s. We were shooting for video games, neon nights, and maybe a hint of ALF.
It’s now 2019, and according to conventional wisdom we should be dealing with replicants in
the streets and competing in futuristic running-based game shows.
Since that stu hasn’t quite happened yet, we thought it might be time to update the Radical
Delay to our Neo Series platform and give it a bit of a makeover at the same time.
Inside you’ll nd the same great delay and special eects that made the earlier Radical Delay
pedals so fun, plus a few new twists. Outside, we’ve added some teal and chrome, and intensied the laser grid for your enjoyment.
We hope you love this pedal as much as we do. There’s a lot to discover inside, so let’s get
going!
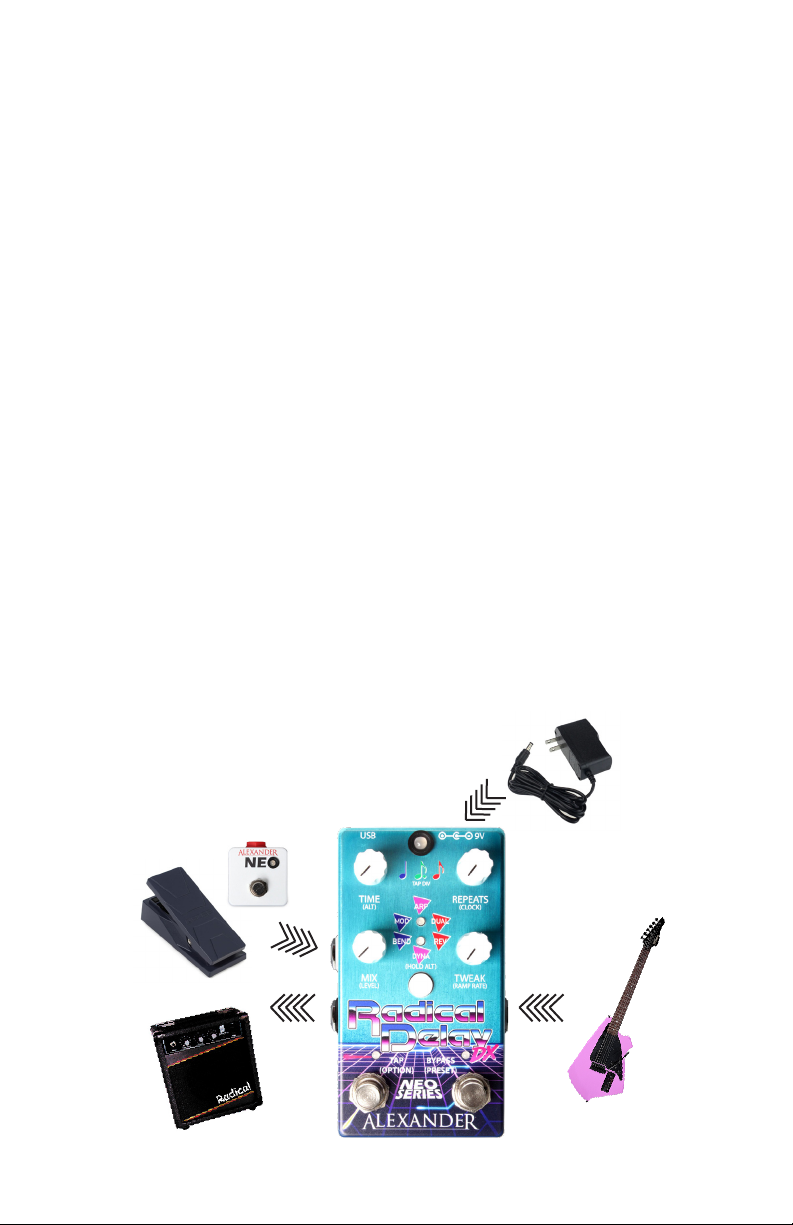
GettinG Started
If you’ve used a guitar pedal before, please feel free to skip this part of the manual.
Connect a 9V power supply, center negative, 100mA minimum to the 9V input
on the top of the pedal.
Connect your instrument to the jack on the right side of the pedal.
Connect your amp to the lower jack on the left side of the pedal.
Connect your expression pedal, Neo Footswitch, or
MIDI Controller to the MultiJack on the upper left
side of the pedal (OPTIONAL.)
Have fun!
Page 4

BaSic oPeration
While the Radical Delay DX does have a lot of powerful and fun features, it’s really just a guitar
pedal. Plug it in and turn the knobs to discover cool sounds, that’s pretty much all you need to
know to get started.
We’ll cover some of the basic (and not so basic) functions of the pedal throughout this section.
Advanced functionality like the pedal conguration and the various MIDI settings are at the
back of the manual.
Finally, if the Pilot’s Guide doesn’t answer your questions, visit our website:
alexanderpedals.com
Hit up the Support page for rmware updates, FAQ’s, and a contact link.
effect ModeS
The Radical Delay DX has six Eect Modes, selected by tapping the small Select button in the
center of the pedal.
Tap the Select button to move to the next Eect Mode.
The two small LEDs light to show the current mode.
MOD: Modulated digital delay. The TWEAK knob controls modulation amount, and the
ALT knob controls modulation speed. The modulation can get pretty crazy, so be warned.
BEND: Delay with pitch shift. TWEAK selects the shift interval, ALT routes the shift either
after the delay or in the feedback loop. Pitch shifts are quantized to musical intervals: -12,
-7, -2, -1, detune, +1, +2, +3, +4, +5, +6, +7, +12 semitones.
DUAL: Dual tap delay line. Time knob and tap tempo control the rst delay output.
TWEAK sets the delay time and ALT controls the feedback of the second delay tap.
REV: YALED ESREVER. TWEAK warps the main delay from forward to reverse, with “tape
stop” and glitch sounds in the middle. ALT fades between a second forward delay and the
reverse eect.
ARP: Arpeggiated delay. TWEAK sets the arpeggiator speed, ALT selects one of eight
patterns.
DYNA: Dynamic Delay. The delay time responds to your pick attack, allowing subtle
bends or wild bird noises and video game pew pews. TWEAK controls the amount of
bend and bend direction, ALT controls the attack sensitivity.
Please note that tapping the Select button doesn’t change any of the pedal’s knob settings,
only the eect mode. If you’d like to have the knob settings change as well as the Eect Mode,
then you’ll need to save your settings as a Preset.
MultiJack
The upper left 1/4” jack on the Radical Delay DX is our astounding MultiJack. You can congure
it to connect an expression pedal, our Neo Footswitch, or a MIDI controller.
It’s set up to work with an expression pedal from the factory, but check out the Conguring
Your Pedal section for details on how to use it with other peripherals.
Page 5

knoB functionS
Each of the knobs on the Radical Delay DX has more than one function.
Turn the knob to adjust the main control, labeled in large text under the knob.
Hold the Select button and turn the knob to adjust the Alternate function, labeled in
(parentheses) under the knob.
TIME: Adjusts the delay time. Available delay ranges from 0-1280ms in most modes at full
audio quality, and over 5000ms at computer barf quality.
(ALT ): Controls a dierent parameter in each delay mode.
REPEATS: Controls the delay feedback or repeats. The Radical Delay DX will self-oscillate or
feed back forever if you want. Be careful with short delay times, the repeats get loud quickly!
(CLOCK):Here’s the magic. This knob is tied directly to the clock oscillator for the delay
engine. Turn it up for full bandwidth and highest processing speed, turn it down for longer
delay times and lo- fun. There’s a point where the internal clock circuit has a hard time
working, and you’ll hear this as white noise in the output signal. We put it there because it
sounds cool, but if you’d prefer less noise just crank this knob up a little. The clock knob will
also totally bork the Tap Tempo timing, so if you need accuracy keep this knob full up.
MIX:Controls the blend between the dry and delay signal. Equal mix is at approximately 3
o’clock, higher mix levels function as a “kill dry” with only wet signal.
(LEVEL): Controls the overall output level of the pedal, from -20dB to +10dB. Unity gain is
near 1 o’clock.
TWEAK:Adjusts a dierent parameter in each delay mode. See below for full details.
(RAMP RATE): Sets the speed at which the ramp generator morphs between settings.
ByPaSS and oPtion footSwitcheS
Both of the Radical Delay DX footswitches serve multiple functions, as you might expect.
BYPASS / (PRESET): Tap this footswitch to bypass or engage the eect.
HOLD this footswitch to advance to the next preset.
TAP / (OPTION): Tap this footswitch two or more times to set the tempo of the main delay
eect. Please note that the tap tempo will be less accurate at lower Clock settings. If you
need tight timing, crank that Clock full up!
HOLD this footswitch to activate the Option function.
If Option is congured for Tap Division, holding this footswitch will select the next tap
division.
If Option is congured for Ramp, holding this footswitch will trigger the ramp generator and
begin morphing to the other ramp setting.
BONUS: If Option is congured for Ramp, you may select the Tap Division by rst holding
Select and then holding this footswitch.
Page 6

PreSetS
You know what we hate? Having to bend over at a gig to tweak pedals between songs. We
also hate when we lose settings on a pedal because it got bumped on the way to a show!
So we did something about it. Every Neo Series pedal features a complete preset system that
saves and recalls every parameter on the pedal with a single button press.
• To load a preset, just hold down the Bypass / Preset footswitch. You’ll see the main LED
blink 1, 2, 3 or 4 times to show the current preset, and you’ll hear the pedal move to the
new settings.
• To save a preset, just tweak the knobs the way you want, then hold down Select and
Bypass / Preset. The pedal will save in the current preset slot, so be sure to advance to
your desired location before saving.
You can also use the Neo Footswitch to load presets. Tap to move to the next preset, or hold
to move to the previous one.
If you’re using a MIDI controller, you can access up to 16 presets! The LED will still blink when
a preset loads but it will show RED for presets 1-4, GREEN for 5-8, BLUE for 9-12, and WHITE for
13-16.
exPreSSion and raMPinG
The whole point of music is expression, right? So why not try an expression pedal with your
Radical Delay DX? Or if you don’t have room for it, you could use the Option footswitch or a
Neo Footswitch to do some straight up Terminator 2 style “morphing” action!
The morphing eect controls all of the knobs on the pedal, including the Alternate knobs.
The only things it can’t control are the Tap Division, Eect Mode, and the Ramp Rate knob.
Everything else is up for grabs, so go nuts!
Expression and Ramp functions work the same way - the only real dierence is that
Ramp moves automatically at a speed set by the Ramp Rate control, and Expression
moves wherever you set the pedal.
• To set the expression parameters, rst set the expression pedal to the heel position. If
you’re using a Neo Footswitch or the Option footswitch, you can skip to the next step.
• Move the Neo Pedal knobs to your desired settings.
• Advance the expression pedal to the toe setting. If you’re using a Neo Footswitch or the
Option footswitch, tap or hold it to move to the other ramp position.
• Move the Neo Pedal knobs again to your desired values.
• Sweep the expression pedal back and forth to hear the cool new sounds!
You should notice the main LED on the Neo Pedal change colours to reect the expression
pedal position.
Once you are satised with the pedal settings, you can save everything to a preset for instant
recall later.
If you prefer to use MIDI commands to control your pedal, both Expression and Ramp are
accessible using MIDI continuous controller (CC) messages. Please consult the MIDI Control
section for more details.
Page 7

confiGurinG your Pedal
Your Radical Delay DX has a few parameters that you can congure to make it work exactly
the way you like.
To access the conguration mode, just hold down the Select button while powering on the
pedal. Release the button when you see the main LED turn violet.
When you’re done making your changes, hold Select to save and exit.
TAP
MultiJack: Tap the Select button to assign the MultiJack function. The upper small LED will
light to indicate the function.
BLUE = Expression Pedal, VIOLET = Neo Footswitch, RED = MIDI.
Neo Footswitch Assign: If you have set the MultiJack to use the Neo Footswitch, this knob
sets the function of the connected footswitch.
Counter-clockwise = Ramp, Mid = Preset, Clockwise = Tap Tempo.
AutoTrails: This knob controls the duration of the trails, ranging from zero seconds (no trails)
to ten seconds (very long trails.)
Counter-clockwise = no trails, Clockwise = very long trails.
Option Footswitch Assign: Sets the function of the Option footswitch HOLD.
Counter-clockwise = Tap Division, Clockwise = Ramp
LED Brightness: Sets the brightness of the main, tap, and bypass LEDs.
Counter-clockwise = dim, Clockwise = bright.
HOLD THE SELECT BUTTON TO SAVE AND EXIT.
Page 8

Midi control
Connect a compatible MIDI controller to the Neo pedal to access its full feature set!
The Neo pedal can accept MIDI over USB from a computer or mobile device, or from a MIDI
controller using a 1/4” cable. The Neo pedals are compatible with interface converters made
by Disaster Area Designs and Empress.
To use USB MIDI, connect the USB mini-B port to your computer or mobile device. iOS devices
will require the use of a Camera Connection Kit available from Apple to connect. Most
Android devices will require a USB OTG or USB Host Adapter.
The following commands are accepted by the Neo pedal:
MIDI Program Change: Load Presets 0-15
0-3 are the Red bank, also accessible by holding the Bypass / Preset footswitch
4-7 are the Green bank
8-11 are the Blue bank
12-15 are the White bank
MIDI Continuous Controller 93: Tap Tempo
MIDI Continuous Controller 97: Ramp
Send any value to trigger the ramp
MIDI Continuous Controller 100: Expression Pedal
Value 0 = Heel down, Value 127 = toe down
MIDI Continuous Controller 102: Bypass
Value 0-63 = Bypass, Value 64-127 = Engage
MIDI Continuous Controller 50-57: Pedal Knobs
Value 0 = CCW, Value 127 = CW
CC 50 = Tweak CC 54 = Ramp Rate
CC 51 = Time CC 55 = ALT
CC 52 = Repeats CC 56 = Clock
CC 53 = Mix CC 57 = Level
MIDI Continuous Controller 59: Mode Select
0: MOD 3: REV
1: BEND 4: ARP
2: DUAL 5: DYNA
MIDI Beat Clock
The Radical Delay DX will sync to MIDI beat clock. Please be aware that the timing
of the pedal will not be accurate if the clock rate knob is decreased from maximum. It’s really
awful, just trust us.
MIDI Channel Assignment:
• First, set up the MultiJack to accept MIDI communication as described on the previous
page.
• Next, power the pedal o and back on, then enter Conguration mode again.
• Send a MIDI program change on your desired MIDI channel to set the Neo pedal’s MIDI
channel.
• Hold the Select button to save the MIDI channel assignment.
 Loading...