

technical data
installed sensor option
DSL—LUTRON ECOSYSTEM® SENSOR
Requires Integration into Larger Lutron EcoSystem® Package
Requires Lutron EcoSystem® EC5 Series Digital Ballasts
40%-70% Potential Energy Savings when Installed as Part of a Complete EcoSystem® Installation
Shown installed in Curv Radial Lens at left.
For specic in-product placement in other Alera Lighting products, see individual product specication
and/or technical data sheets. For special placement requests, contact Alera Lighting.
OPEN LOOP OPERATION
sensor manufacturer data
Lutron Commissioning
The installed lutron sensor integrates into the larger EcoSystem® application via proprietary Lutron components.
For commissioning details, please contact Lutron, or if applicable, your Alera Lighting representative.
sensor manufacturer data continued
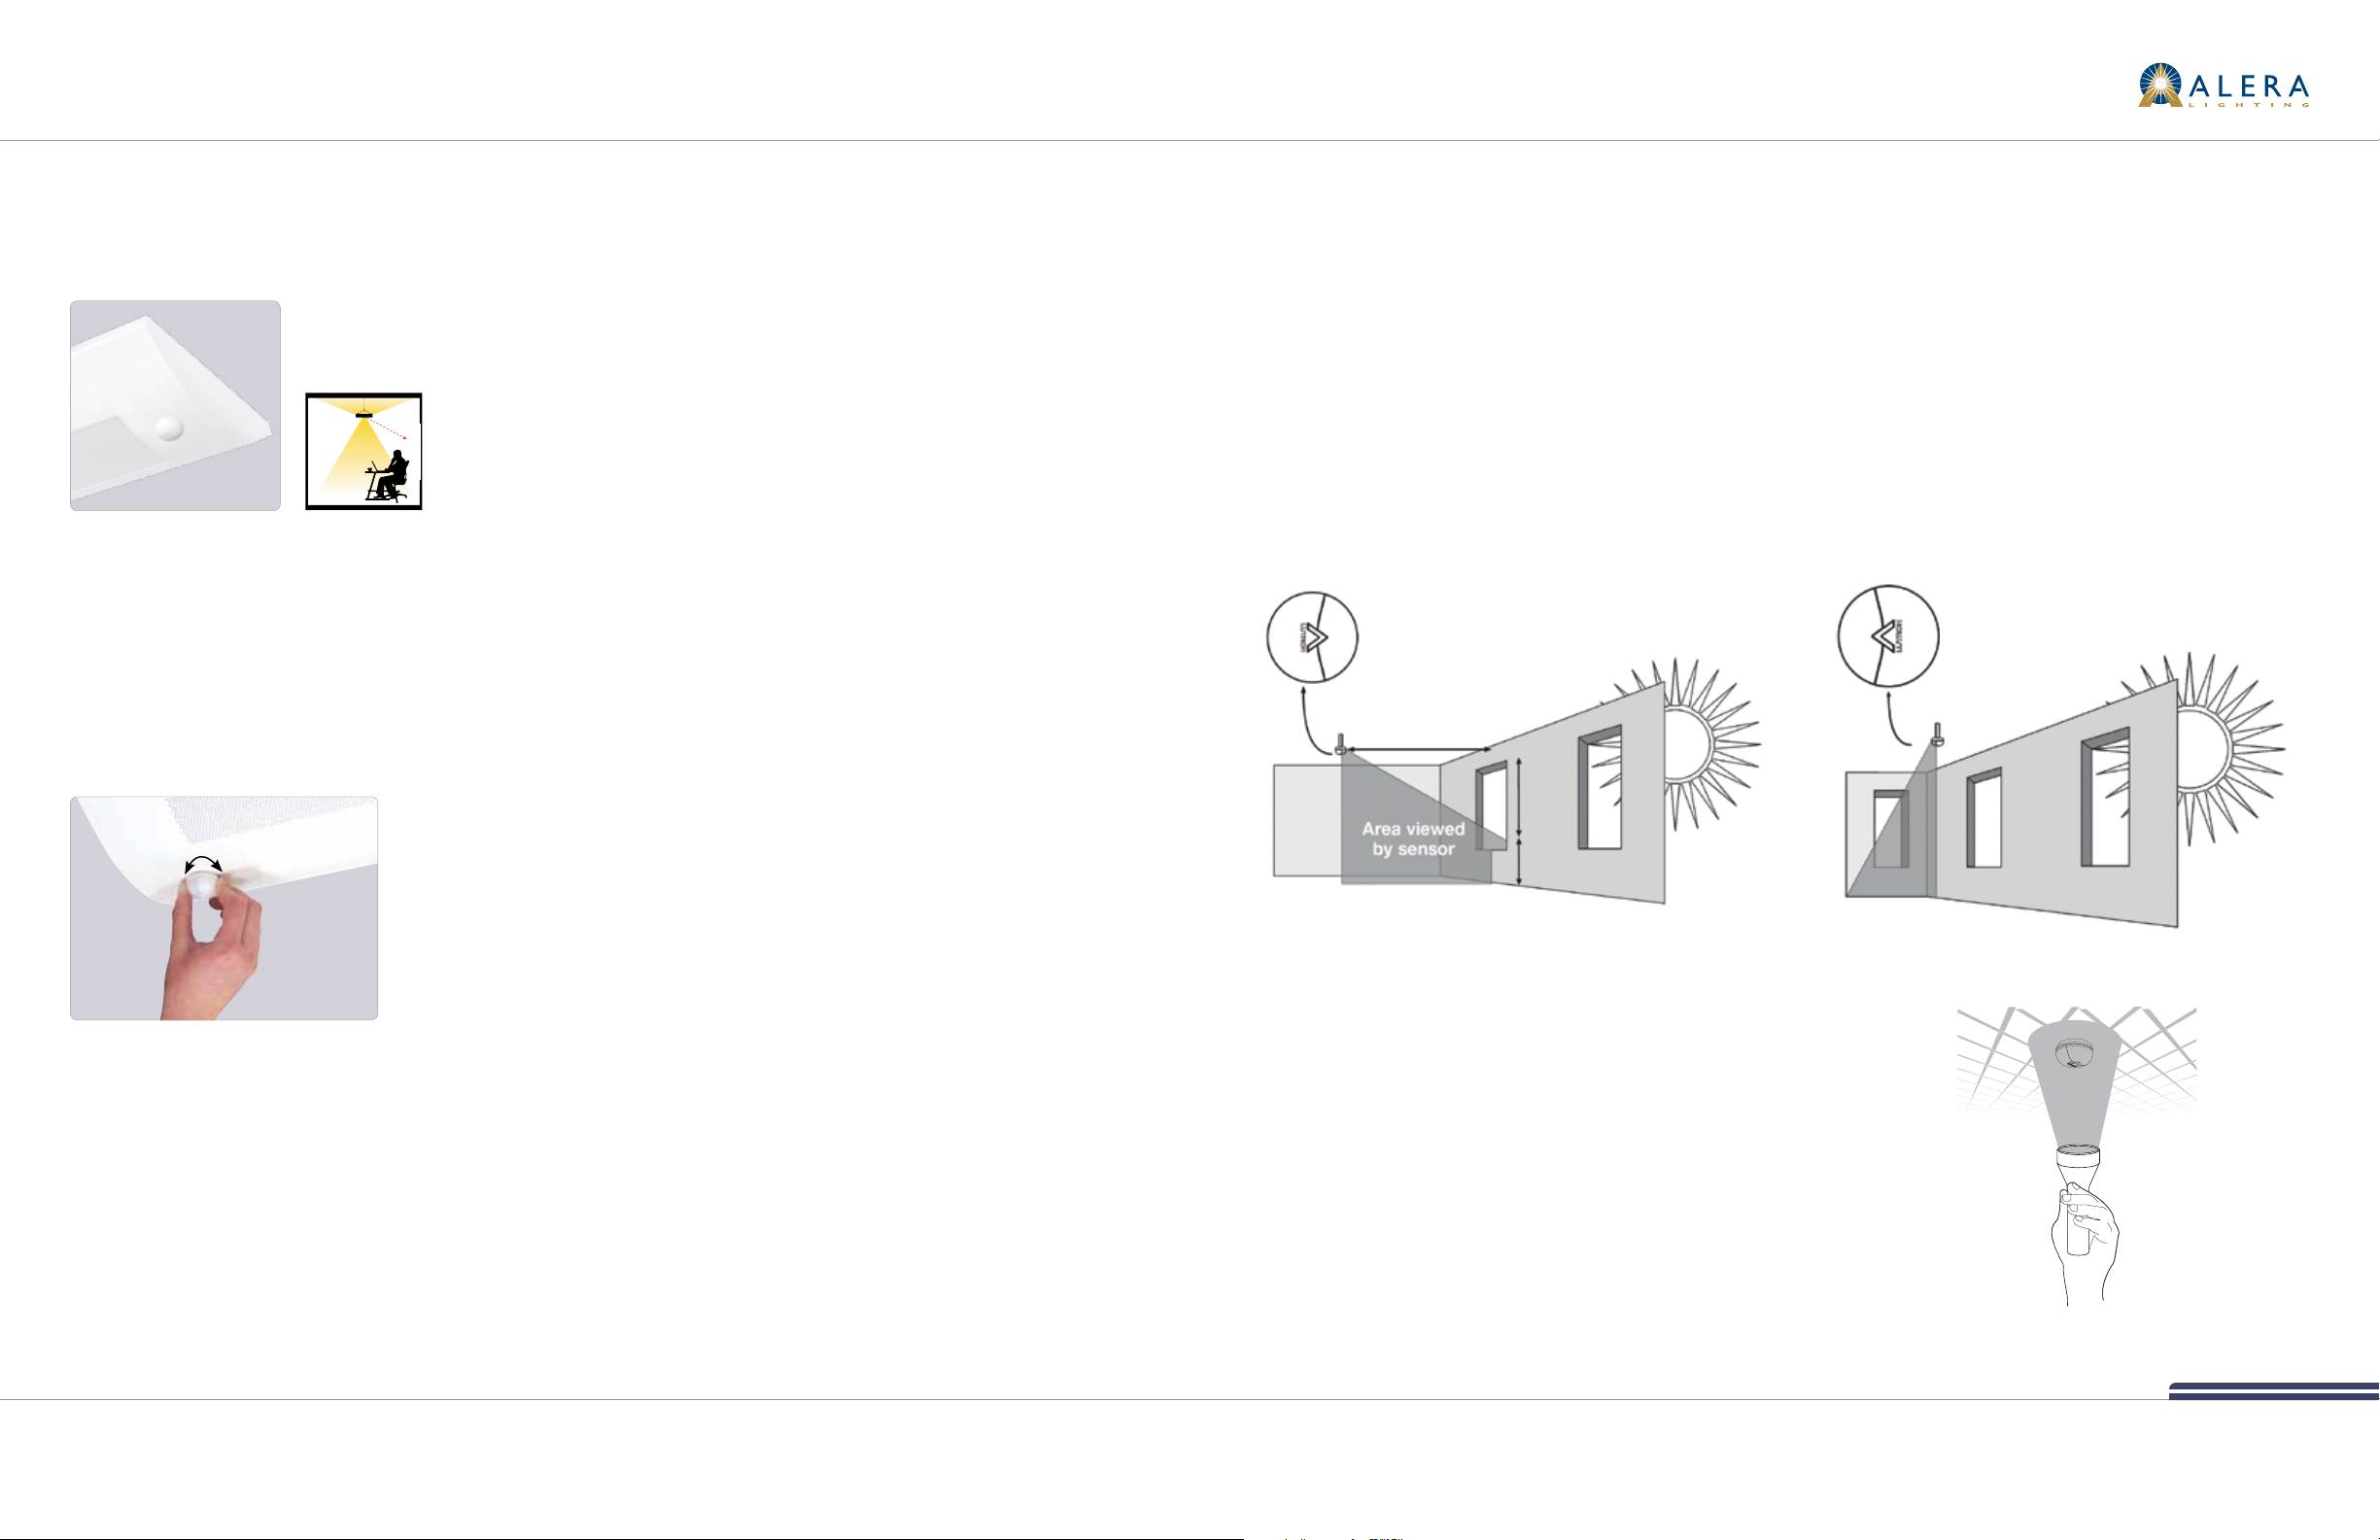
Determining the Daylight Sensor Mounting Location
Determine the proper location of the Daylight Sensor using the adjacent diagrams.
• The arrow on the daylight sensor points toward the area viewed by the sensor.
• Place the daylight sensor so its viewing area is centered on the nearest window at a distance
from the window of between one to two times the eective window height, H.
• The eective window height, H, starts at the window sill or 3 feet (91 cm) up from the oor,
whichever is higher, and ends at the top of the window.
• Ensure that the view of the daylight sensor is not obstructed.
• Do not position the daylight sensor in the well of a skylight or above indirect lighting xtures.
• For narrow areas where the daylight sensor cannot be placed 1-2 H from windows, place
sensor near window facing into the space.
TYPICAL INSTALLATION NARROW AREA INSTALLATION
Arrow points toward the area viewed
by the sensor (toward windows)
Bottom of sensor
1-2 H
Arrow points toward the area viewed
by the sensor (away from window)
Optical Characteristics
Sensor
Lutron Additional Componentry
Please note that the Lutron system can include wall switches and occupancy sensors which may need to be wired into the
EcoSystem® ballast. While these additional ancillary components are not available installed on the xture itself, the in-xture
wiring requirements can typically be accommodated.
Alera Lighting will, therefore, ask for project details to determine if additional wiring is required within the Alera product.
Directional light sensing requires lens be aimed at window(s). (see adjacent page)
Controls Characteristics
• Sensor is equipped with IR receiver
• EcoSystem® Programmer can be used to commission
— See Lutron.com for additional data
Alera Lighting Note To adjust sensor direction, twist sensor as indicated by arrow seen at left.
H
3 ft (91 cm)
H = Eective Window Height
Testing the Daylight Sensor
• Ensure power to the lighting circuit in ON.
• Ensure the lighting control system is commissioned properly.
WARNING: Electrical shock hazard. Can cause serious injury or death. The lighting
circuit should be energized only when all wiring is complete and all persons are clear of
xtures/devices. Turn power ON only after checking that it is safe to do so.
• Shine a ashlight directly onto the daylight sensor.
• Keep the light ON for at least 30-40 seconds. This should cause the lights connected or
programmed to the sensor to dim. If the lights do not dim, they may already be at a dimmed
level due to daylight. If so, you may test the sensor by covering it for 30-40 seconds. This
should cause the lights to get brighter.
All technical data is per published data from Lutron unless noted. Subject to change without notice.
For additional technical data and/or the most current information available, visit Lutron.com.
2
All technical data is per published data from Lutron unless noted. Subject to change without notice.
For additional technical data and/or the most current information available, visit Lutron.com.
1110
 Loading...