

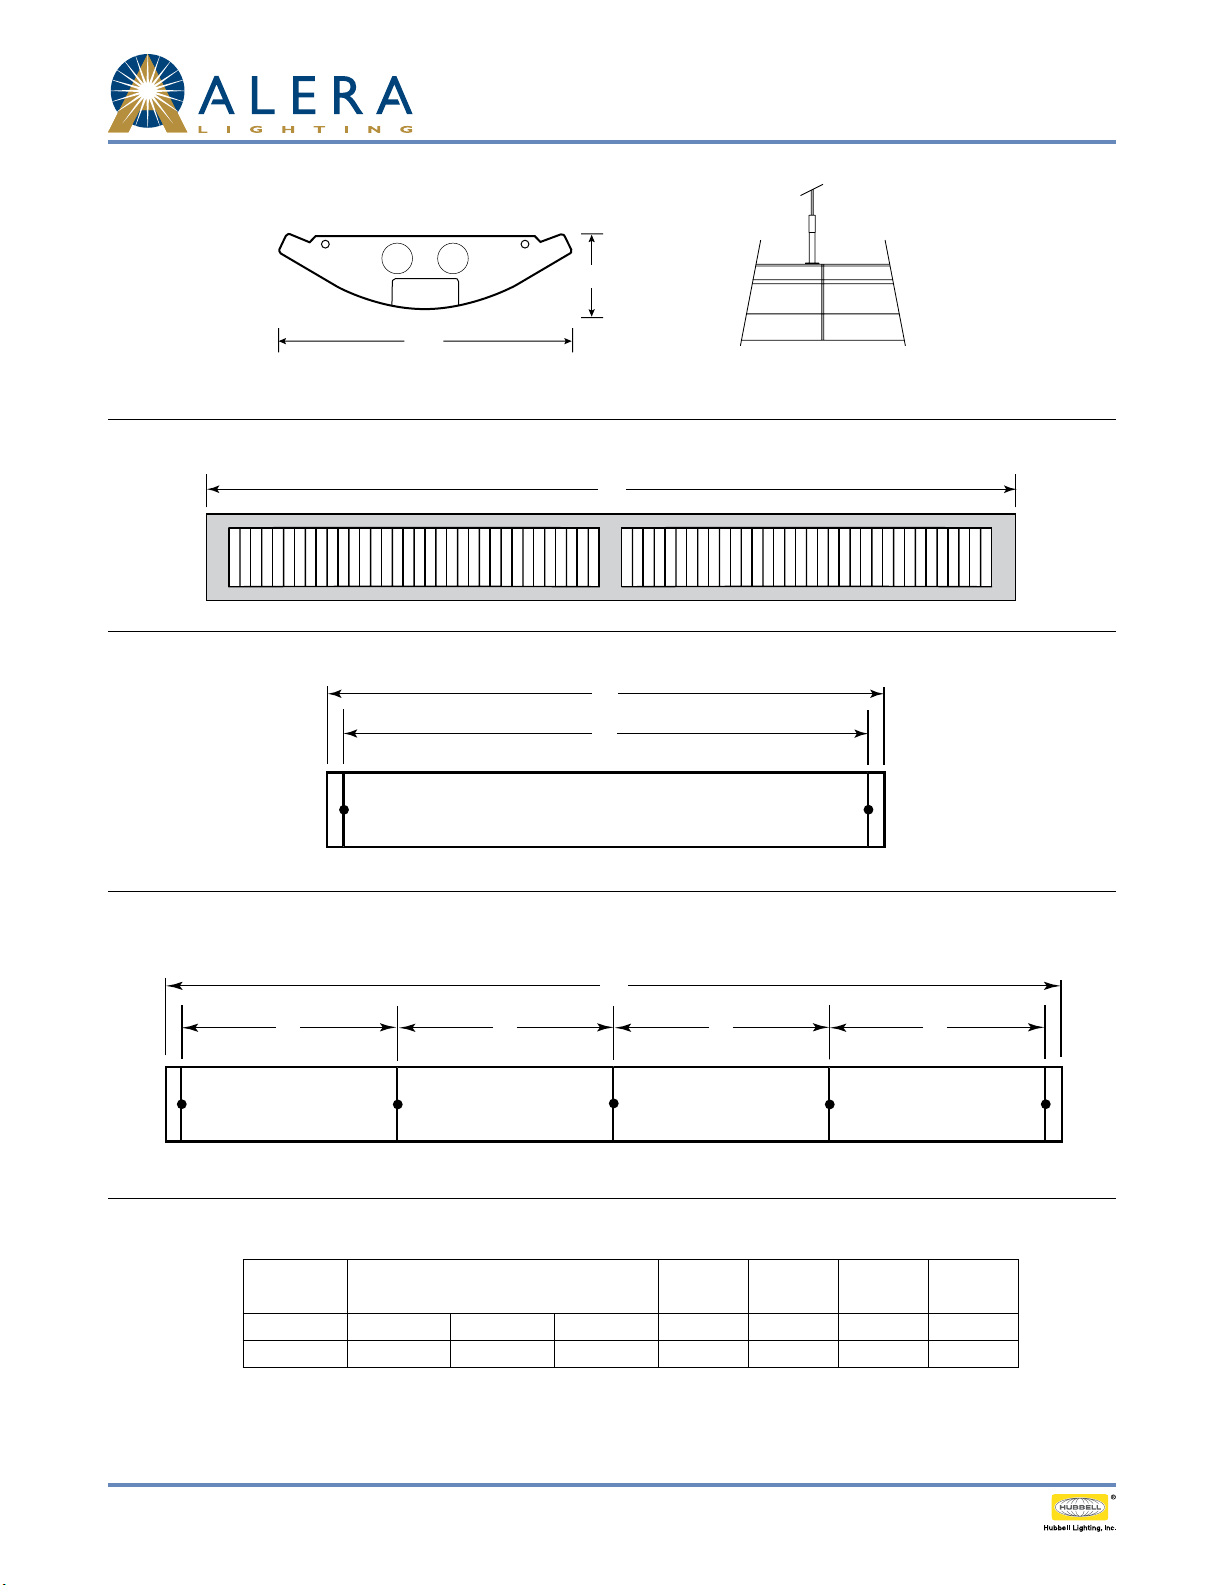
sections
BottoM View
single Mounting
Curv radial baffle
Technical Installation Data
2½"
9½"
Connection SectionCross Section
8'
Row Mounting
data chaRt
D
A
4', 8'
C
A B B B
4', 8'
Nominal
Length
4' 13.3 lbs. 15.6 lbs. 17.9 l b s . 47 ¼" 48" 192 ⅝" 48 ⅝"
8' 25.3 lbs. 27. 6 lbs . 29.9 lbs. 95 ¼" 96" 384 ⅝" 96 ⅝"
Note: Suspension data is computed using the standard aircraft cable assembly. The use of rigid stems will yield dierent data. Please consult
factory for stem data.
Page 1/2 Rev. 08/29/12 curves / CVRB TID
© 2012 Ale ra Lighting, a division of Hubbell Lighting, Inc. Because of continuin g product improvement programs , Alera Lighting reserves the ri ght to change specifications
© 2012 Ale ra Lighting, a division of Hubbell Lighting, Inc. Because of continuin g product improvement programs , Alera Lighting reserves the ri ght to change specifications
without notice. 701 Millennium B lvd. Greenville, SC 2 9607 / Tel 864.678.1000 / Website www.aleralighting.com
without notice. 701 Millennium B lvd. Greenville, SC 2 9607 / Tel 864.678.1000 / Website www.aleralighting.com
1-lamp 2-lamp 3-lamp
Approx. Weight
A B C D
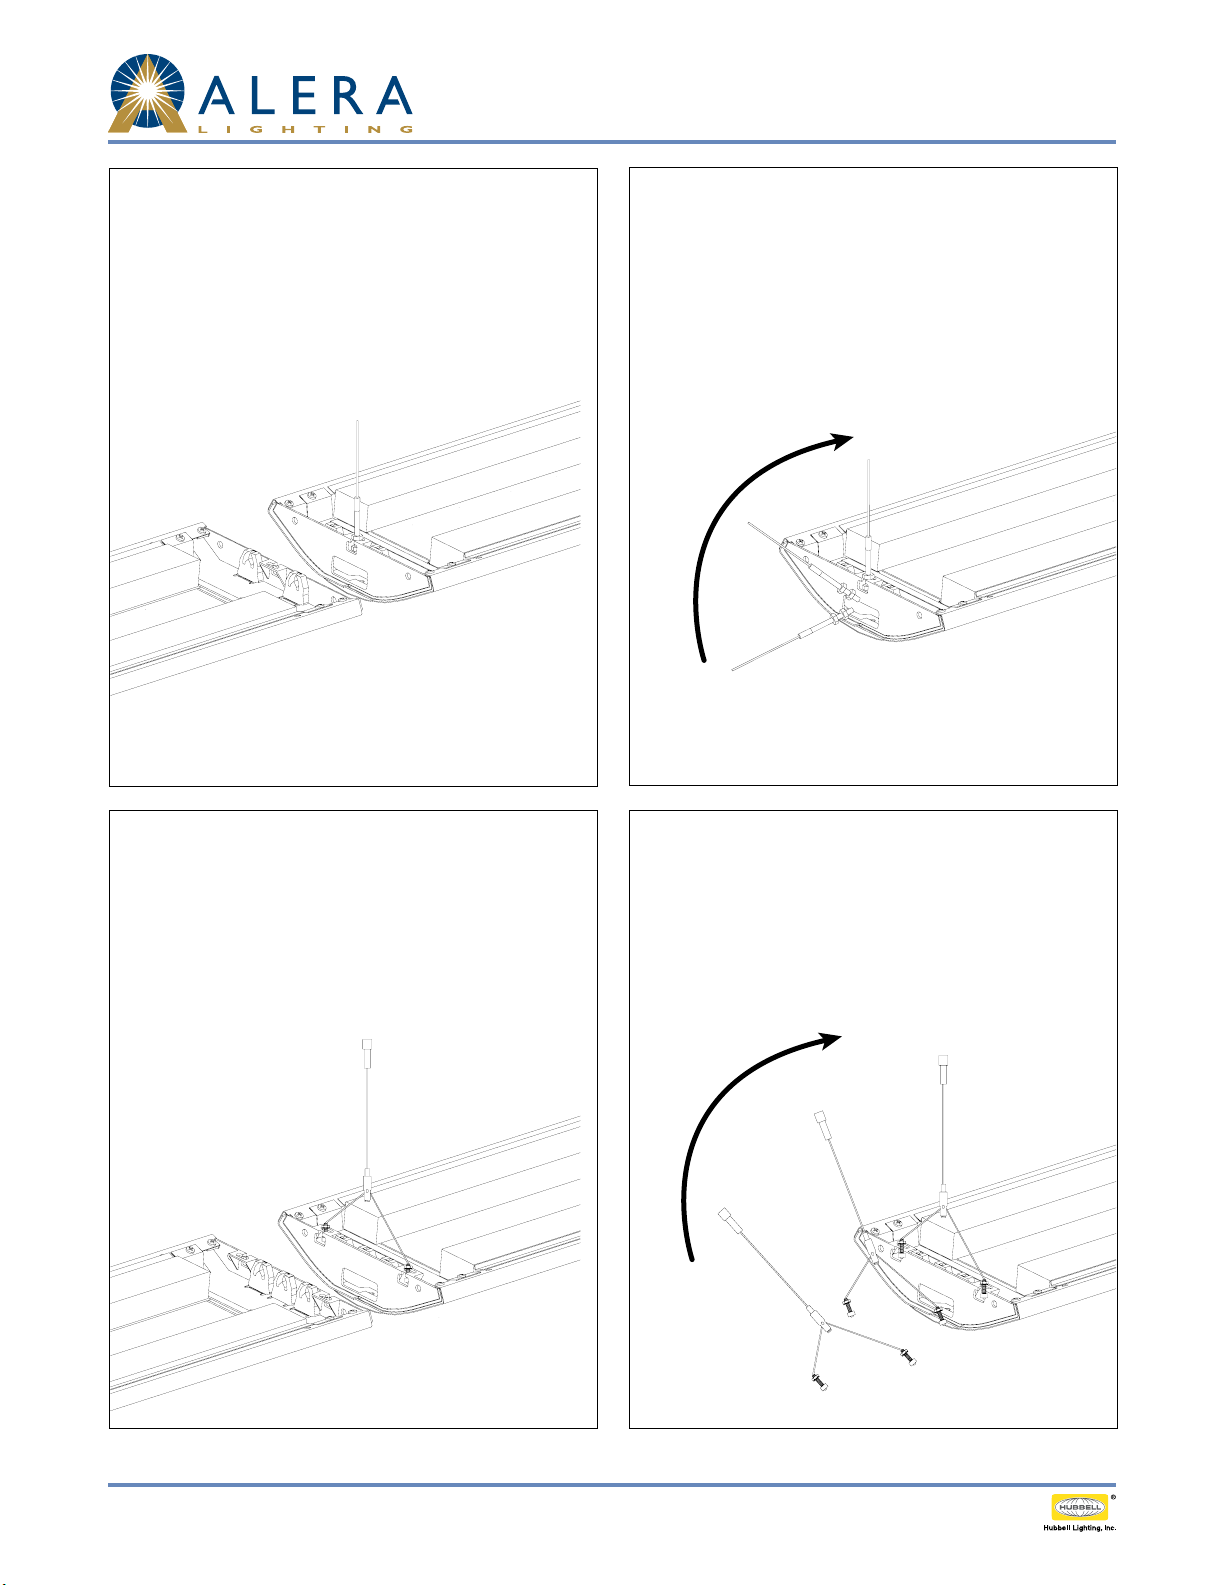
Curv radial baffle
Technical Installation Data
Connection Instructions (2 Lamp):
1. Install rst xture of row with two hangers.
2. Slide inner die cast plates together.
3. Secure xture joints with two bolts and nuts and
attach hanger at opposite end.
4. Repeat steps 2 and 3 until row is complete.
5. At each end of the row, attach and align end cap with
two screws.
Suspension Instructions (2 Lamp):
1. Set bottom nut to desired xture height.
2. Adjust upper nut for a minimum of 3/8" between upper
and lower nuts.
3. Slide cable hanger into hanger slot.
4. Secure and tighten upper nut.
Connection Instructions (1 or 3 Lamp):
1. Install rst xture of row with two hangers.
2. Slide inner die cast plates together.
3. Secure xture joints with two bolts and nuts and
attach hanger at opposite end.
4. Repeat steps 2 and 3 until row is complete.
5. At each end of the row, attach and align end cap with
two screws.
Suspension Instructions (1 or 3 Lamp):
1. Set bottom nut to desired xture height.
2. Adjust upper nut for a minimum of 3/8" between upper
and lower nuts.
3. Slide cable hanger into hanger slot.
4. Secure and tighten upper nut.
Page 2/2 Rev. 08/29/12 curves / CVRB TID
18-7.1
© 2012 Ale ra Lighting, a division of Hubbell Lighting, Inc. Because of continuin g product improvement programs , Alera Lighting reserves the ri ght to change specifications
© 2012 Ale ra Lighting, a division of Hubbell Lighting, Inc. Because of continuin g product improvement programs , Alera Lighting reserves the ri ght to change specifications
without notice. 701 Millennium B lvd. Greenville, SC 2 9607 / Tel 864.678.1000 / Website www.aleralighting.com
without notice. 701 Millennium B lvd. Greenville, SC 2 9607 / Tel 864.678.1000 / Website www.aleralighting.com
 Loading...