

Aleco Steel-Lite User Manual

Installation Instructions for Doors
with 3/4” and 1 1/2” VCam Hardware
Required Tools
Header is Level
Center Punch
Drill (1/4” or 3/8” electric)
Drill bits: 5/16”, 9/64”
Extension Cord
Hammer
Level (3’ minimum)
Level Bar
Need Nose Pliers
Pen or Pencil
Plumb Bob
Ratchet with 3” or 5” extension
Ratchet sockets: 9/16”, 1/4”
Screwdriver, Slotted
Security Driver (for SteelLite
only bit supplied by Aleco)
Tape Measure
Tap 3/8” 16 NC
Wood Spacer Block
(scrap 2” x 4”)
Jamb is
Plumb
Tape Template
in Place
Drill Top Cam
Mounting Holes
Center Plumb
Line on Jamb
Drill Bottom
Bearing Holes
Step 1 Doorway Preparation
1.1 Inspect. If carton or doors are damaged
from shipping (bent shaft, etc.), contact
factory.
1.2 Check jamb and header for plumb, level
and square (measure diagonals).
1.3 Match size of door opening to size on
packing slip.
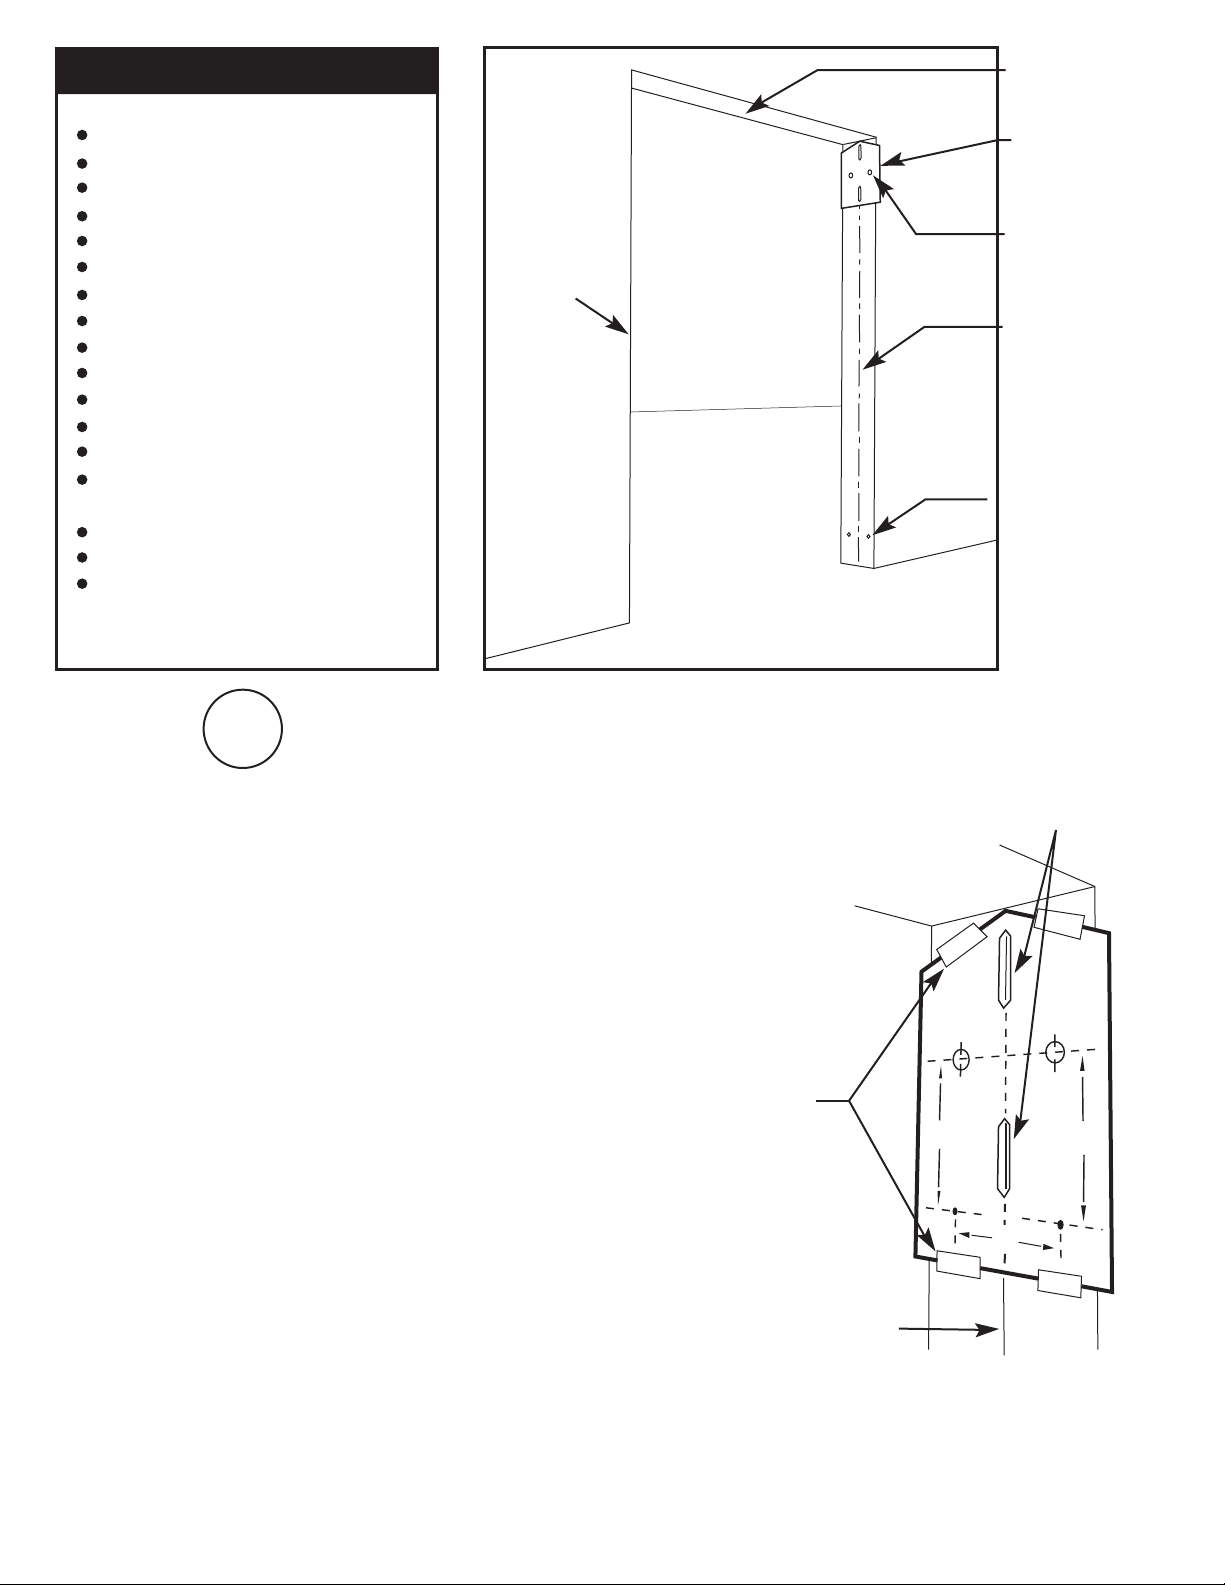
1.4 Mark center plumb line on jamb.
1.5 Tape the template supplied with these
instructions to jamb. Template center line
must line up with your plumb line (see
detail). Adjust template height if header is
not level.
1.6 Mark top cam hole centers on jamb with
center punch. Do the same for bottom
bearing. See instructions on template. If
jamb guards are included, use jamb guard
as template to mark holes.
Template
Placement
Details
Tape template
to jamb
Center plumb line
Holes in template
should line up with
center plumb line
1.7 Drill holes with 5/16” bit and tap with
3/816NC tap.
 Loading...