

Aleco Clear-Flex II Truck Mounting System User Manual
MaxBullet Truck Mount System
Installation Instructions
PARTS INCLUDED: TOOLS NEEDED:
INSTALLATION
(1) 8 ft. MaxBullet Mounting Bar
(2) L-brackets
(4) 1/4” x 1 1/2” Self-Tapping Screws
(4) 1/4” x 3/4” Bolts
(4) Locknuts
Scratch-Guard Material & Hi-Viz Safety Rings*
* Number of strips and safety rings dependent upon strip size and overlap
Pen or Pencil
Drill with 1/4” Bit
Adjustable Wrenches
Saw (as needed)
Ladder
Tape Measure
Utility Knife
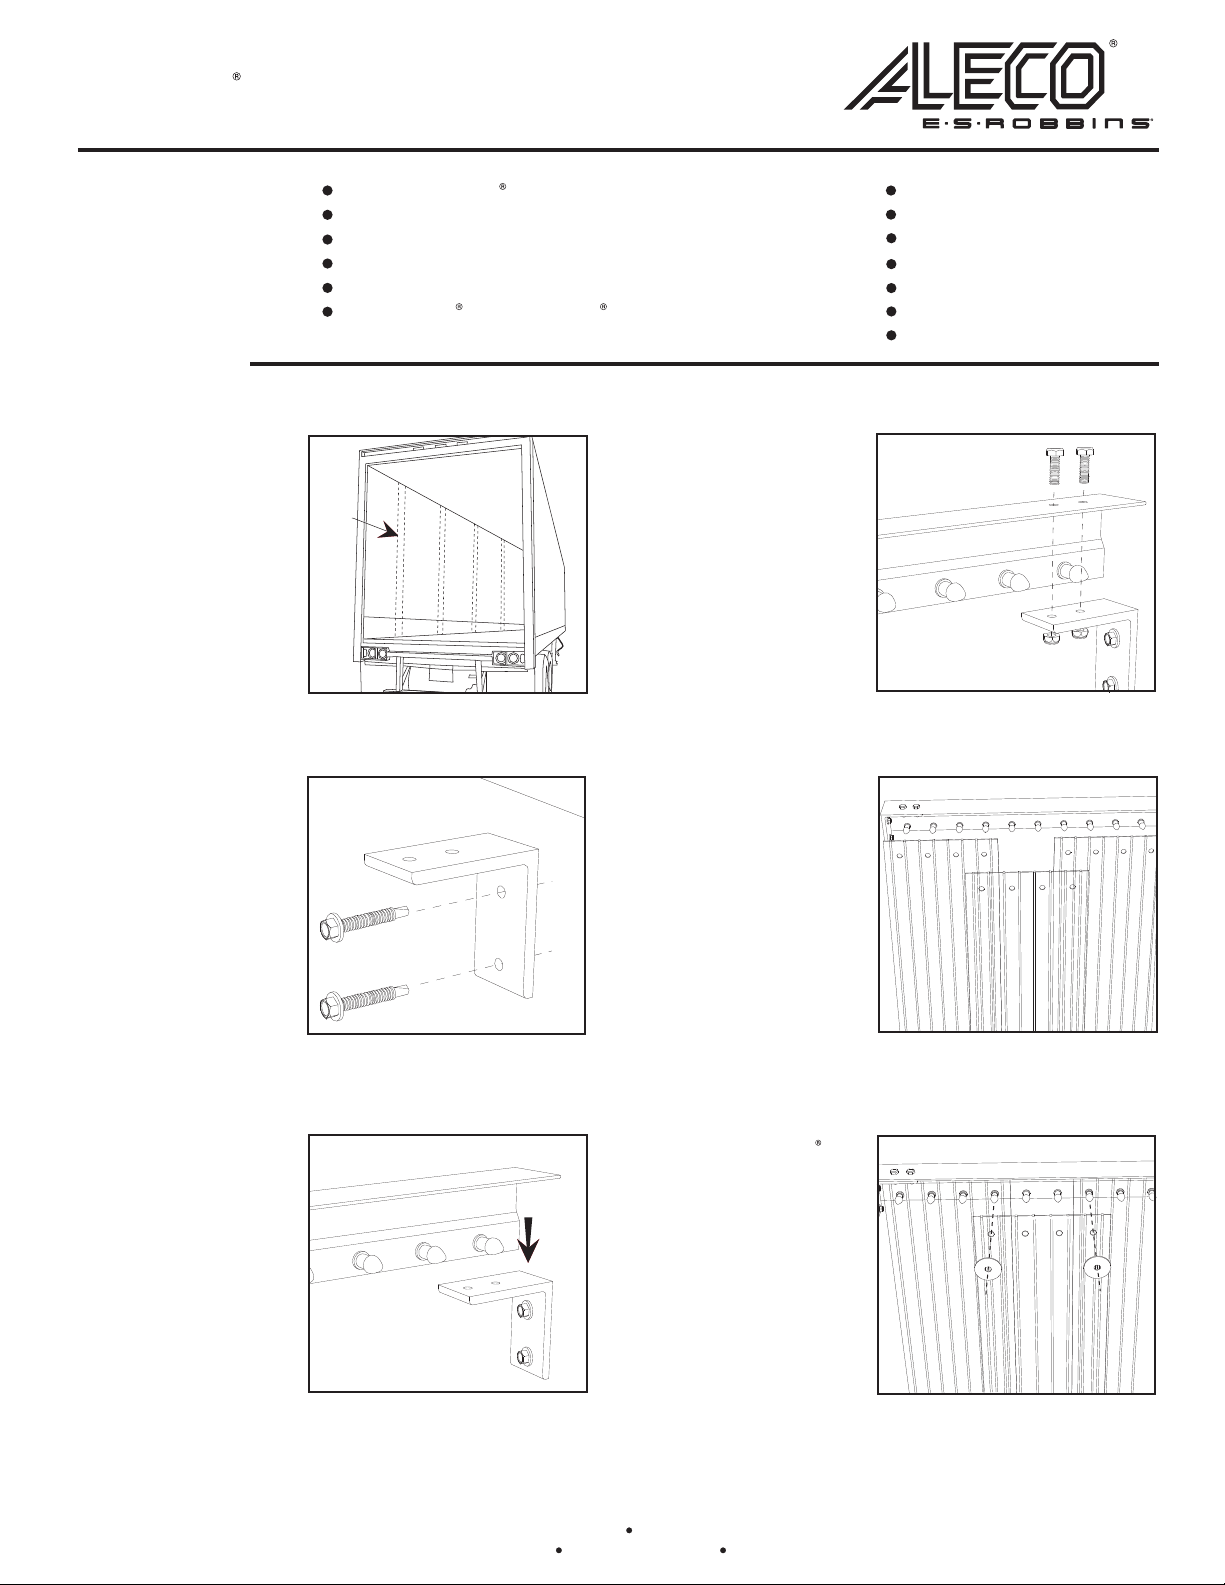
Step 1 For trailers with
roll-up doors, locate the stud
closest to the door opening
in the rear of the trailer.
NOTE: For trailers with swingdoors, mount bar as close to
top of trailer as possible.
Be sure to leave room for
mounting bar and bolts,
approximately 1” from top.
Step 2 Using the self-
tapping screws provided,
install L-bracket on stud as
close to roller track as possible
without impeding movement of door on track.
Repeat for other side.
NOTE: Remember to leave
room for mounting bar.
STUD
Figure A
Step 5 Mount bar
to L-brackets using the
provided bolts and locknuts.
Figure D
Step 6 Install PVC strips
using preferred amount of
overlap. Refer to diagram on
referse side of this page for
details on strip placement.
Step 3 Measure width
of trailer and, if necessary,
cut mounting bar to length
using saw.
Step 4 Place mounting
bar on L-brackets and using
L-bracket as a template, mark
holes and drill with a
drill bit.
1/4”
Figure B
Figure E
Step 7 Place Hi-Viz
safety rings on bullets
where strips overlap
(see Figure F).
Step 8 The strips should
be trimmed to leave
clearance from the floor
surface. Use a common utility
knife to score and then tear
the strips by hand.
Figure C
FOR ANY QUESTIONS OR COMMENTS, PLEASE CONTACT AN ALECO REPRESENTATIVE
2720 E. Avalon Ave. Muscle Shoals AL, 35661 Phone (256) 248-2402 or toll free 1-800-633-3120
Fax: 1-800-750-9616 email: info@aleco.com web: www.aleco.com
1/4” of
Figure F
P/N 477504
0506
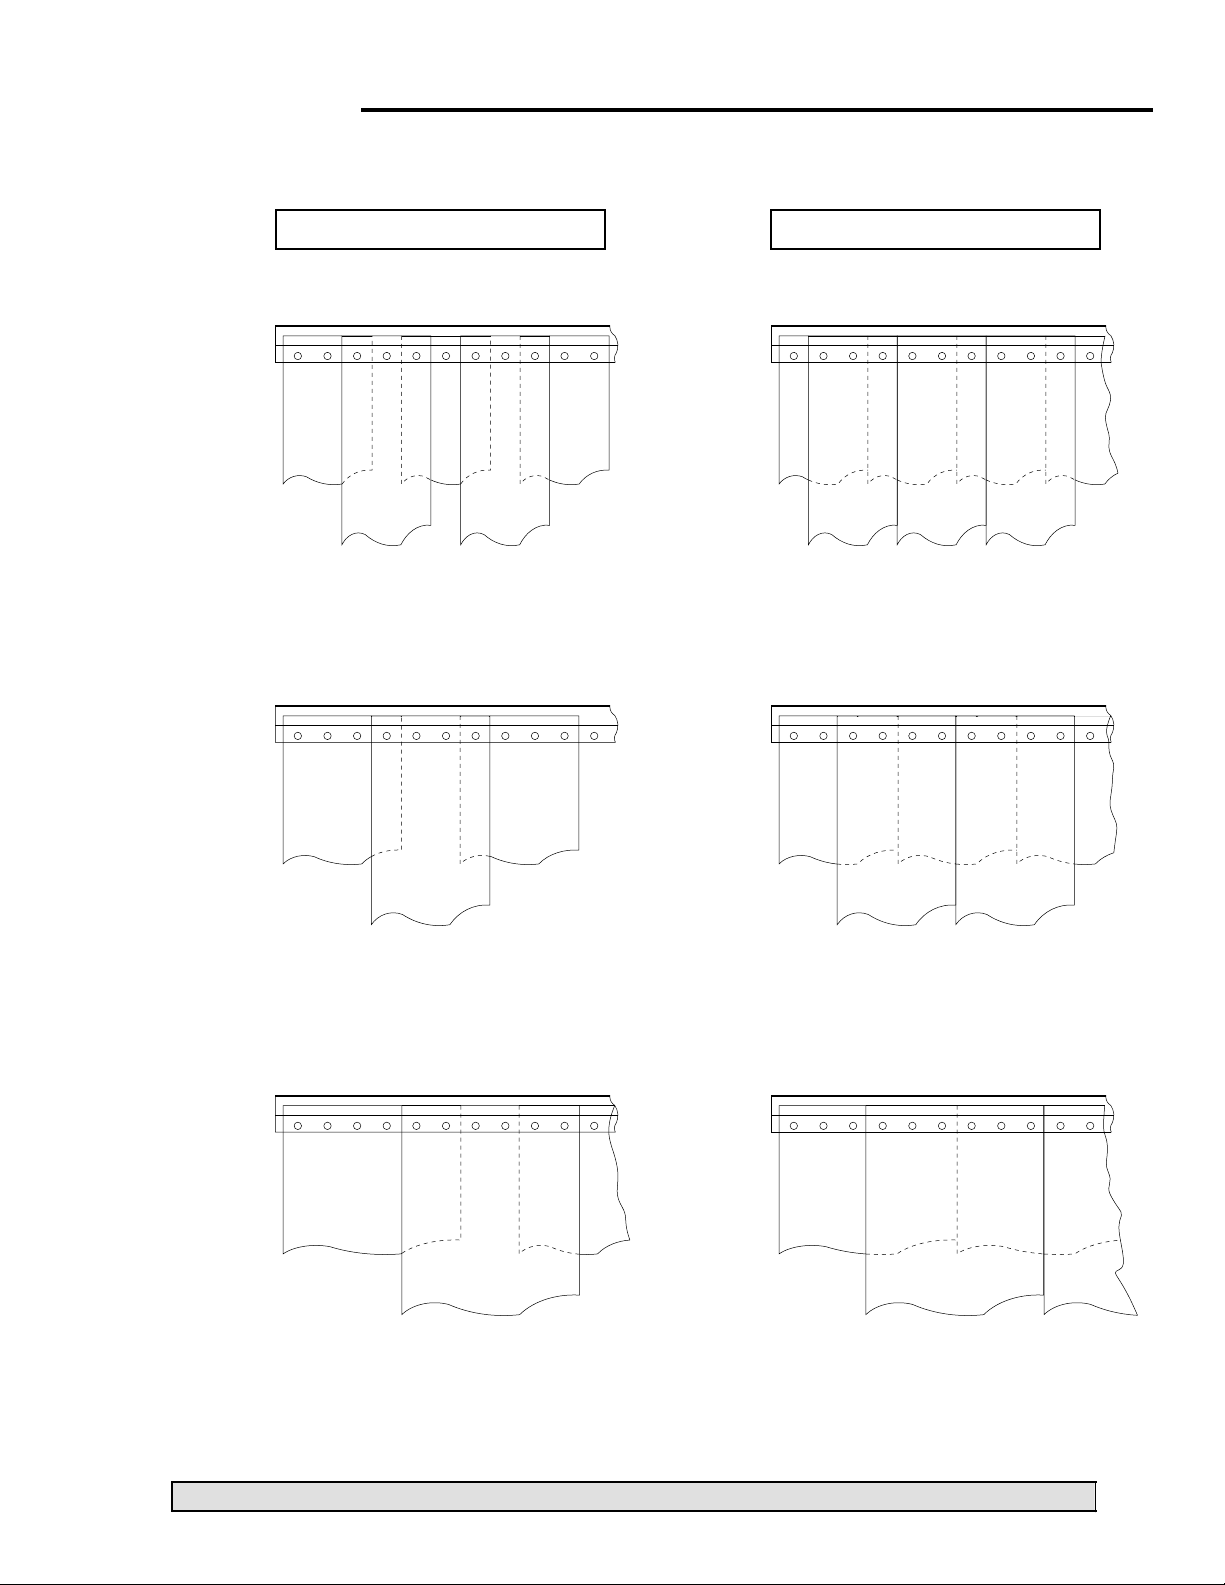
STRIP PLACEMENT GUIDE
6“ WIDE
MATERIAL
8“ WIDE
MATERIAL
PARTIAL OVERLAP
PARTIAL OVERLAP 66%
FULL OVERLAP
FULL OVERLAP 100%
12“ WIDE
MATERIAL
PARTIAL OVERLAP 50%
PARTIAL OVERLAP 66% (4”)
PARTIAL OVERLAP 33% (2”)
Specially formulated Vinyl Strip Cleaner available exclusively through your local Aleco distributor.
FULL OVERLAP 100%
FULL OVERLAP 100%
 Loading...