

Aleco AirFlex Insect Barriers User Manual
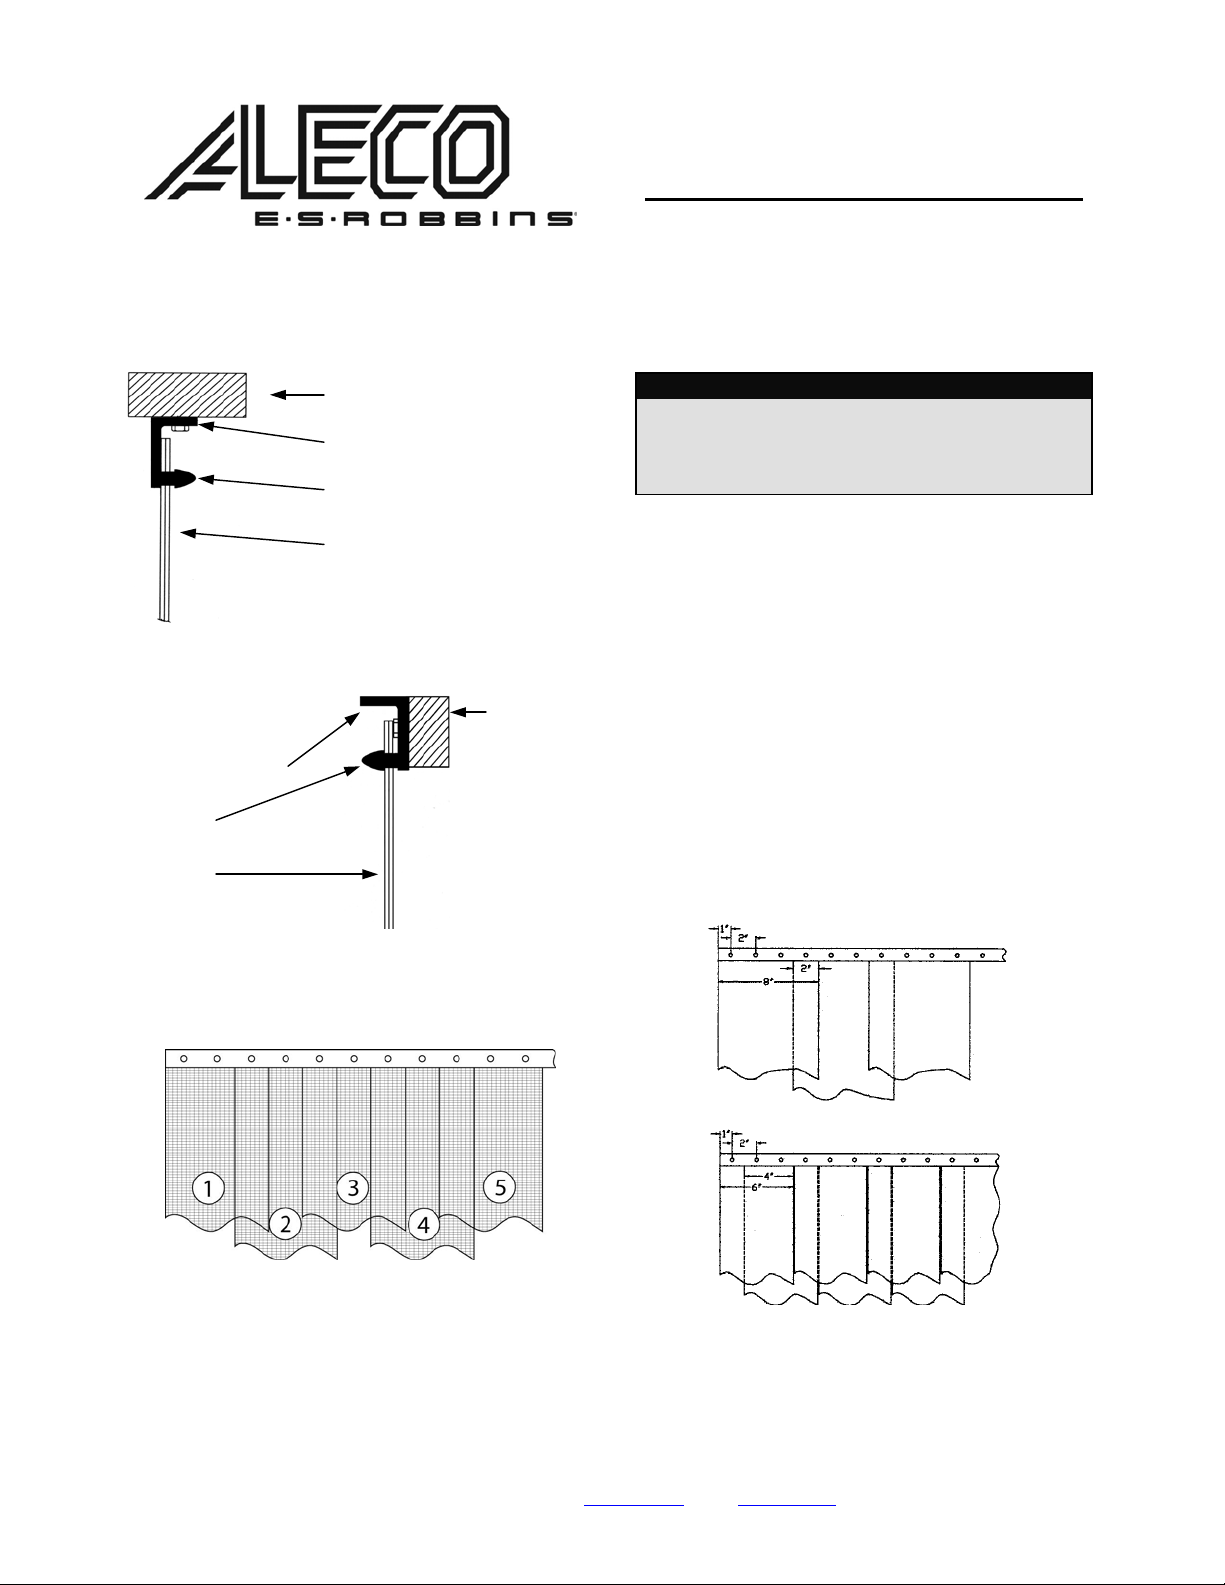
Under Header (Lintel) Position
Wall (Header) Position
HTP Hardware
Bracket
Bullet
Strips
Diagram 1
Wall
HTP Hardware
Bracket
Bullet
Strips
Diagram 2
Wall
Air-Flex® Insect Barrier
Installation Instructions
Using the MaxBullet® HTP System
TOOLS NEEDED
• Pen or Pencil to Mark Drill Holes
• Drill
• Step Stool or Ladder
• Utility Knife to Cut Strips
IMPORTANT
Some door models feature alternating clear PVC strips.
Prior to installation, unroll all door strips and place them on
a clean, flat surface in a warm atmosphere for a minimum of
twenty-four (24) hours. This will allow the strips to return to
their original form.
1. Mount the MaxBullet® hardware bracket in either
the under header or wall position shown in
Diagrams 1 and 2 using the appropriate fasteners
supplied.
2. Press the door strips onto the “bullets” of the
hardware bracket making certain that the
concave sides are facing each other. Attach strip
numbers 1 and 3 (see Diagram 3) leaving desired
spacing between strips as indicated below
(Diagram 4).
3. Attach strip number 2 over strip numbers 1 and 3
(Diagram 3).
4. Attach all of the remaining door strips in the same
manner as in Steps 2 and 3.
Diagram 4
Diagram 3
Front View Strip Spacing
FOR ANY QUESTIONS OR COMMENTS, PLEASE CONTACT AN ALECO REPRESENTATIVE
2720 E. Avalon Ave. Muscle Shoals, AL 35661 ● Phone (256) 248-2402 or toll free 1-800-633-3120
Fax: 1-800-750-9616 ● email: info@aleco.com
● web: www.aleco.com
P/N 477254
(Rev 0511)
 Loading...