


User GUide


Welcome to the NAO Community!
This guide will help you to get started with your NAO.
EN
1

TABLE OF
CONTENTS
2

04 / WHAT’S IN THE BOX
06 / WHAT YOU NEED TO USE YOUR NAO
08 / NAO OVERVIEW
12 / BEST PRACTICES
18 / OPENING THE BOX
20 / TURNING YOUR NAO ON AND OFF
22 / CONNECTING TO YOUR NAO
24 / INSTALLING THE SOFTWARE
28 / PLUGGING AND UNPLUGGING NAO’S USB KEY
30 / TROUBLESHOOTING
34 / FINDING OUT MORE ABOUT US
EN
3

WHAT’S IN THE
BOX
4

1 NAO
1 SOFTWARE DVD
1 BATTERY
1 STANDARD CHARGER (1.4A)
10 SCREWS
4 ADAPTOR (EU, US, UK, AUS)
1 SPARE USB KEY
1 USER GUIDE
OPTIONAL
HIGH-POWER CHARGER (2A)
SPARE BATTERY
EN
5

WHAT YOU
NEED TO USE
YOUR NAO
6

1 ETHERNET CABLE
1 ROUTER WITH WIFI CONNECTION
1 COMPUTER WITH WINDOWS, MAC, OR LINUX
You can also find information on:
http://academics.aldebaran-robotics.com,
a username and password for this site has been provided in the DVD case.
EN
7

NAO
OVERVIEW
8

TACTILE SENSORS
SPEAKERS (X2) AND
EARLEDS
INFRARED EMITTER/
RECEIVER AND EYELEDS
HEAD JOINT
EN
FRONT & REAR
MICROPHONES
CAMERAS (X2)
LATERAL
MICROPHONES (X2)
SHOULDER JOINT
CHEST BUTTON
HIP JOINT
PREHENSILE
HANDS
(except NAO
H21
ANKLE JOINT
BUMPERS (X2)
SONARS (X2)
ELBOW JOINT
BATTERY
WRIST JOINT
TACTILE SENSORS
)
(except NAO
H21
)
KNEE JOINT
NAO
SENSOR PRESSURE
(except NAO
H25/H21
H21
)
9

TACTILE SENSORS
SPEAKERS (X2) AND
EARLEDS
INFRARED EMITTER/
RECEIVER AND EYELEDS
HEAD JOINT
CHEST BUTTON
WRIST JOINT
PREHENSILE
HANDS
NAO
FRONT & REAR
MICROPHONES
CAMERAS (X2)
LATERAL
MICROPHONES (X2)
SHOULDER JOINT
SONARS (X2)
ELBOW JOINT
BATTERY
T14
10

TACTILE SENSORS
SPEAKERS (X2) AND
EARLEDS
INFRARED EMITTER/
RECEIVER AND EYELEDS
HEAD JOINT
CHEST BUTTON
EN
FRONT & REAR
MICROPHONES
CAMERAS (X2)
LATERAL
MICROPHONES (X2)
SONARS (X2)
BATTERY
NAO
T2
11

BEST
PRACTICES
12

H21/H25
NAO
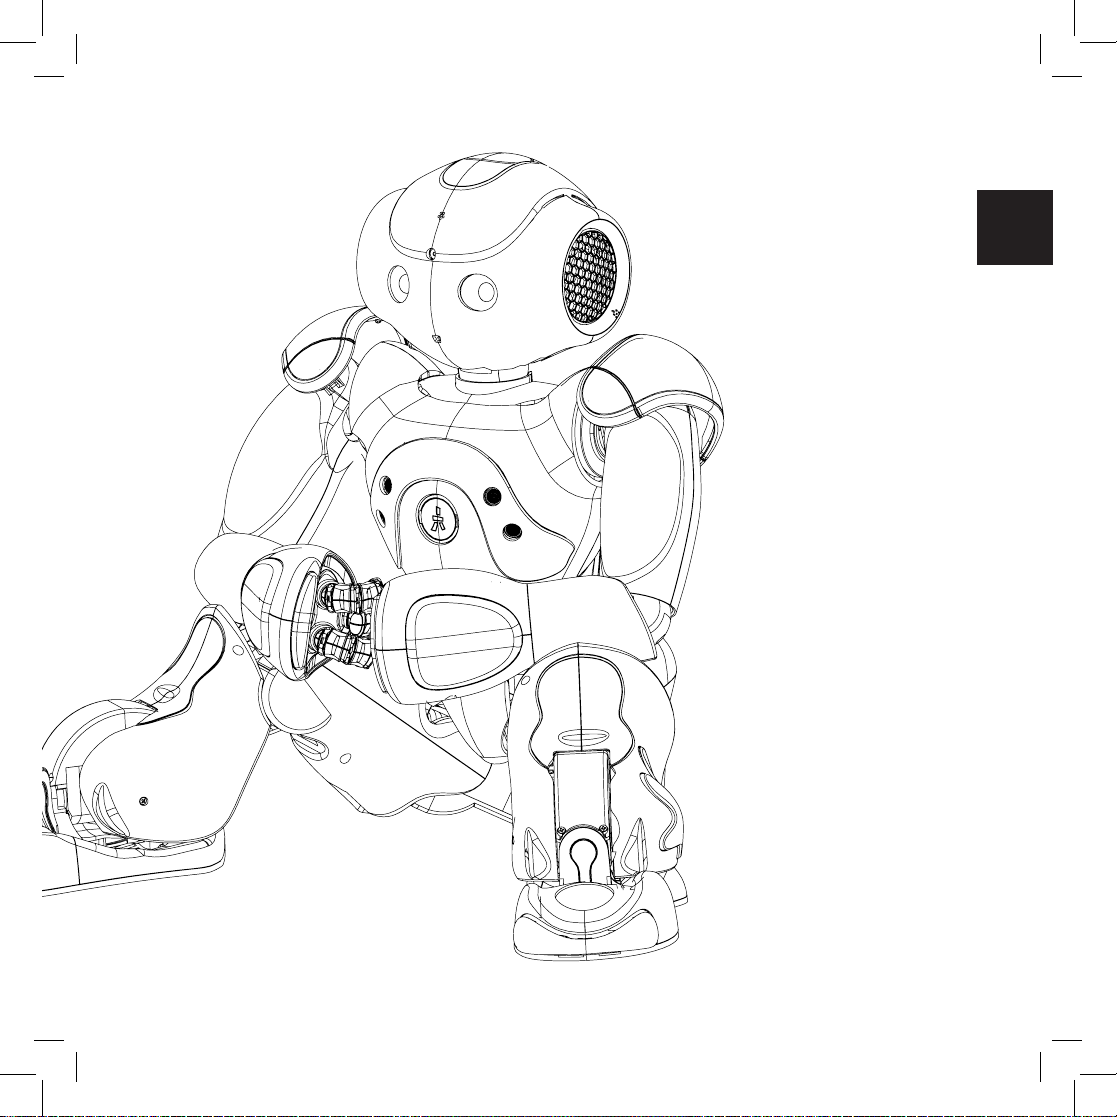
● NAO needs to be in
a stable position when
he’s not in use or while
charging, like in this
picture.
EN
13

T2/T14
NAO
● Fix NAO’s base onto a horizontal surface
with 4 screws.
ETHERNET CABLE
● When plugged into Ethernet, NAO
should not walk, lie down or perform
behaviors which could move his head too
far (particularly tilting his head back), as
the plug could damage his head. The Wifi
connection is the recommended connection.
CHARGING NAO
● Plug the adaptor into
NAO’s back while he’s in a stable
position and leave him to charge for at
least 2 hours. He should not walk or lie
down while charging.
CLEANING
● Use a damp cloth to clean NAO.
HANDS
● Avoid playing with NAO’s fingers and
rotating his hands when turned off.
14

SAFE AREA
You should prevent NAO from falling.
Yet if he falls, he should not hurt any object
or fall from a high surface, such as a table.
A safe working area is shown in the
figures opposite.
The way you position NAO is also important
to prevent NAO from falling or hurting
himself. Place him in a stable position
when pressing his Chest button, or when
plugging a cable. Before starting a move,
make sure he can perform it from his
current position.
When turned off, the best position is to
have NAO lying down on his back, with no
cable plugged.
We recommend
that NAO adopts
these positions
while working.
60cm/25in.
30cm/12in.
NAO
NAO
H21/H25
EN
T2/T14
15

UNDERSTANDING NAO’S
MESSAGES
NAO communicates with you when he is
getting too hot or when his battery level is
too low so that you can take care of him.
This is normal.
● When NAO says:
“Energy” : The battery is very low.
The robot is about to turn off and may fall.
“Heat” : The motor of a joint is getting too
hot. The joint will become less stiff as a
protection and NAO may fall as a result.
“Warning: my head is getting too hot.
You should stop playing with me as I will
probably start my emergency shutdown
procedure” with its eyes blinking.
The CPU in the head is getting too hot. You
should turn NAO off as its behavior could
be unexpected and if the temperature
keeps increasing, it will turn off automatically.
“Emergency shutdown: the temperature
of my head is too high” with its eyes
blinking. The CPU in the head is getting
too hot, NAO is about to turn off automatically and may fall.
● Color of the chest button and level
of battery:
- GREEN: a short green flash means that
the battery is fully charged.
- ORANGE: a short orange flash means
that the battery charge is less than 60%
- RED: slow red blinking light means that
the battery charge is less than 20%
Better charge your NAO.
NOTE: When you press the chest button, it
also turns green.
● Boot-up
While NAO boots up, the LEDs around
its ears light up to show how close it is to
finishing. If it remains stuck on one light
for more than five minutes, you should
remove and reflash the USB key in NAO’s
head with the latest version of NAOqi.
16

TEMPERATURE
OF THE MOTORS/HEAD
STIFFNESS
EN
When NAO says “Heat” it means that one
of his joint motors is too hot. NAO enters
a self-protection mode and starts to limit
stiffness. Consequently moves which
require the motor’s full power might be
disturbed. For instance: if your NAO is
sitting down and you ask him to stand up
he might have trouble achieving this task
and fall.
When you write behaviors we recommend
that you:
- Make NAO move and do not let him stay
in the same position for too long when the
stifness on.
- Plan breaks during which NAO can sit
down and remove stiffness to rest for a
while.
A sample box sequence in Choregraphe:
“sit down” , “remove stiffness” , “wait 10
minutes” , “turn stiffness back on”,
“stand up” (to resume a standing
behavior).
What is “stiffness”?
To be able to move, NAO’s motorized joints
need to be stiff. The “stiffness” of the motors
is made possible thanks to power supply.
Stifness and motor temperature
When the motors are stiff, their temperature
increases.
When you turn on your robot, the motors do
not become stiff. They become stiff when the
stiffness is turned on during a behavior.
For example, in Choregraphe, the Walk box
turns on the stiffness.
Quickly releasing the stiffness
To remove stiffness on all joints, press twice
on the Chest button. (NAO may fall so make
sure you support him!)
17

OPENING
THE BOX
18
01. Remove NAO from
his box and place him in
a stable position.
02. Charge NAO: plug
the battery into his back
before use.
EN
19

TURNING YOUR
NAO ON AND OFF
20

To turn NAO on,
press and hold his chest
button for 2 seconds: he
will boot up then say his
name and his battery level.
To turn NAO off,
press and hold his chest
button for 5 seconds.
Nao may fall so make sure
he’s in a safe position.
To force NAO to perform
an emergency shut down
(not recommended in normal use) press and hold
his chest button for
8 seconds.
EN
21

CONNECTING TO
NAO
22

ETHERNET CONNECTION
01. Turn on your NAO.
02. Remove the hatch
behind his head to access to
the Ethernet socket.
03. Connect NAO to your
router via an Ethernet cable.
04. Get his IP address: press
his Chest button.He says his
IP address (e.g. “192.168.1.4”).
05. Open an Internet browser
(such as Internet Explorer,
Firefox, etc).
06. Type the IP address which
NAO has just spoken into the
address bar and press Enter.
07. NAO’s webpage opens.
Type in the login and
password: “nao” for both.
WIFI CONNECTION
01. To set Wifi connection on
the webpage, connect the
robot via Ethernet.
02. On the webpage of the
robot, go to Network.
03. In the list of available
networks, click the one you
want to use.
04. Its configuration page
opens. Click Connect. NAO
will connect automatically
when finding this network.
ROUTER
NETWORK PARAMETERS
The router should act as a
DHCP server.
Wireless connection
parameters:
WEP, WPA or WPA2 Personal
(channels 1 to 11; channels 12
and 13 are not supported).
Note : we recommend you
to use the Wifi connection
when working with NAO.
EN
08. Explore the page
(change the name, password,
volume…).
23

INSTALLING THE
SOFTWARE
24

T
EN
CHOREGRAPHE
Our user-friendly software Choregraphe
enables you to program easily for NAO.
With Choregraphe and its flow diagram,
you can explore event-based, sequential
or parallel programming using a preprogrammed set of behavior boxes. Its
timeline lets users program with a time
scheduled logic.
It accepts Urbi and Python language, so it
can directly call C++ modules developed
separately. Choregraphe comes with
many detailed examples to simplify the
learning process.
NAOsim
Our simulator NAOsim, developed by our
partner Cogmation Robotics, enables you
to test their algorithms in a virtual world
governed by real physics.
The environment can be modified
manually at will by inserting and editing
objects of various shapes into the
simulated environment.
(only for NAO
H25/H21
)
TELEPATHE
Telepathe is a desktop application that
gives you a feedback of what NAO is
seeing and feeling. With the Camera
module, you will receive data from
the camera you have chosen. With the
Memory module, you will have access
to data from the robot’s sensors in an
ergonomic way.
Telepathe also gives you the possibility
to test vision algorithms on recorded
excerpts.
NAOqi
Our ergonomic and well documented SDK
enables you to embed modules you have
created onto your robot and to use them
to create elaborate behaviors for NAO.
The SDK for NAO comes with the appropriate compilation and debugging tools.
25

INSTALLATION
FOR WINDOWS
INSTALLATION
FOR LINUX
Software
01. Insert the DVD into your computer.
02. On the DVD, go to SOFTWARE
open the installation folder.
03. Double-click the AldebaranChoregraphe-
x.x.x-win32-vc90.exe file to start the installation
of the software suite.
Note: “vc90” stands for Visual Studio 2008.
Developers using Visual Studio 2005 should
instead open the AldebaranChoregraphe-x.x.x-
win32-vc80.exe file.
04. Follow the wizard to install the software
Suite (Choregraphe, NAOqi, Telepathe, etc.)
05. Repeat the operation for NAOsim.
>
WINDOWS to
SDK
Python and C++ developers should also
decompress the SDK archive:
- aldebaran-cpp-sdk-x.x.x -win32-vc80.zip,
- aldebaran-cpp-sdk-x.x.x -win32-vc90.zip.
.NET developers should run the installation
wizard for the .NET SDK
(NaoqiDotNet-x.x.x-win32-vc90.msi).
Software
01. Insert the DVD in your computer.
02. On the DVD, go to SOFTWARE
open the installation folder.
03. Unzip the aldebaran-sdk-x.x.x-linux-i386.tar.gz
archive.
04. You will be able to launch Choregraphe,
NAOqi, and Telepathe by using the scripts at
the root of the archive
./choregraphe ./naoqi ./telepathe
05. You may experience problems with graphical acceleration if you do not have appropriate drivers. In this case, use:
./choregraphe --no-ogre
>
LINUX to
SDK
C++ and Python developers should also
decompress the SDK archive
(aldebaran-cpp-sdk-x.x.x-linux-i386.tar.gz file).
26

INSTALLATION
FOR MAC
Software
01. Insert the DVD in your computer.
02. On the DVD, go to SOFTWARE
the installation folder.
03. Open the Aldebaran-SDK-x.x.x-macosx-i386.
dmg file.
04. Drag and drop the Choregraphe and
Telepathe applications into the Applications
directory.
05. Repeat the operation for NAOsim.
>
MAC to open
SDK
C++ and Python developers should also
decompress the SDK archive
(aldebaran-cpp-sdk-x.x.x-macosx-i386.tar.gz).
EN
27

PLUGGING AND
UNPLUGGING
NAO’S USB KEY
28

This procedure is necessary
to flash the USB key or to
change the USB key.
01. Make sure NAO is off and
in a stable position.
02. Remove the hatch
behind NAO’s head to access
the USB key.
03. Remove the USB key
from the head.
04. Plug the new USB key
into the head with the gold
connectors facing upwards.
05. Replace the hatch in the
correct position.
Note: make sure the version
of the OS installed on the
USB disk and the version
of NAOqi running on your
computer are the same.
EN
29

TROUBLESHOOTING
30

GENERAL
My robot does not start, or
starts but does not finish
booting.
01. Make sure the USB key in
its head is inserted correctly,
and that the head is correctly
clicked on.
CONNECTION
NAO says that he can’t
connect to the network.
01. Connect the robot via
Ethernet (make sure the
Ethernet cable is correctly
plugged into NAO and to the
router).
When I start NAO, he does
not say its IP address.
What should I do?
This is normal. NAO only
says his name and the
charge level of the battery
when starting. Press his
Chest button again, and
NAO says his IP address.
EN
02. Flash the USB key inside
NAO’s head with the latest
version of NAOqi.
03. Remove the battery
and charge it for at least
2 hours, then replace the
battery.
04. Press the Chest button
again to turn it on.
If it still does not start,
contact support.
I can’t turn my robot off.
To turn NAO off, you should
place NAO in a stable position
and hold down his Chest
button for 5 seconds. If he
does not turn off, press and
hold his Chest button for 8
seconds to force shutdown.
02. Make sure your network
is configured in DHCP as
described earlier in this
guide.
03. Turn NAO off.
04. Turn NAO on.
05. Go to the webpage of
the robot and connect to
one of the available Wifi
connections.
NAO should now be
connected to the network.
If he still says «I can’t
connect to the network»,
contact support.
HARDWARE
NAO moves uncontrollably.
01. Reflash the USB key
(in Choregraphe, with
your NAO connected, go to
CONNECTION > ADVANCED >
FLASH YOUR USB KEY).
02. Replace the USB key
with the Spare USB Key and
upgrade it.
03. Reinstall NAOqi on your
computer.
04. Upgrade NAOqi on your
computer and NAO (having
the same software version
is required).
05. Restart your robot.
31

CHOREGRAPHE
When I play a behavior,
some boxes turn red.
What’s the problem?
It occurs when you play a
behavior made of boxes
which cannot be simulated on a virtual robot
(called «local NaoQi»); for
example, the Say box, as
speech is not simulated.
01. Connect Choregraphe
to NAO.
02. Play the behavior on the
physical robot itself.
REMOVING NAO’S
HEAD
You will need to do this if
your robot does not turn
on, if you want to change
the head, or if asked to do
so by Support.
01. With NAO turned off
and unplugged, firmly grip
his head on either side of
his face.
02. Push up on the two
buttons located on the
underside of NAO’s head as
shown, making sure they
are fully pressed in.
03. The head should lift
off.
04. To replace NAO’s
head, simply align the
connector on his neck with
the body and push down.
You should make sure that
the head fully ‘clicks’ in;
both buttons should snap
back into place.
If your problem is still not solved, please contact:
support@aldebaran-robotics.com
32

EN
33

FINDING OUT
MORE ABOUT US
34

The NAO Community should be your first port of call for support and information:
http://academics.aldebaran-robotics.com
Your login and password are inside the DVD package.
Read the documentation.
It can be found on the DVD, on the forum and with the software.
Contact support:
support@aldebaran-robotics.com
For information about ALDEBARAN Robotics, visit our website at
www.aldebaran-robotics.com
EN
35

NOTES
36

37

©2010 ALDEBARAN Robotics
www.aldebaran-robotics.com
ALDEBARAN Robotics, the ALDEBARAN Robotics logo, and NAO are trademarks of ALDEBARAN Robotics. Other trademarks, trade names
and logos used in this document refer either to the entities claiming the marks and names, or to their products. ALDEBARAN Robotics
disclaims proprietary interest in the marks and names of others. Choregraphe
Robotics. The design of NAO
®
is the property of ALDEBARAN Robotics. All the photos featured in this document are noncontractual and
are the property of ALDEBARAN Robotics.
Designed by Edouard Duvernay for ALDEBARAN Robotics. Printed in France.
®
& NAO® are registered trademarks of ALDEBARAN
 Loading...