

Page 1
SUN SHADE
CORDLESS WITH CRANK INSTALLATION INSTRUCTIONS
Dear customer:
The product you have purchased has been engineered and manufactured to the highest standards of quality and performance.
Please read the instruction sheet carefully before installing your new shade.
C
A
E
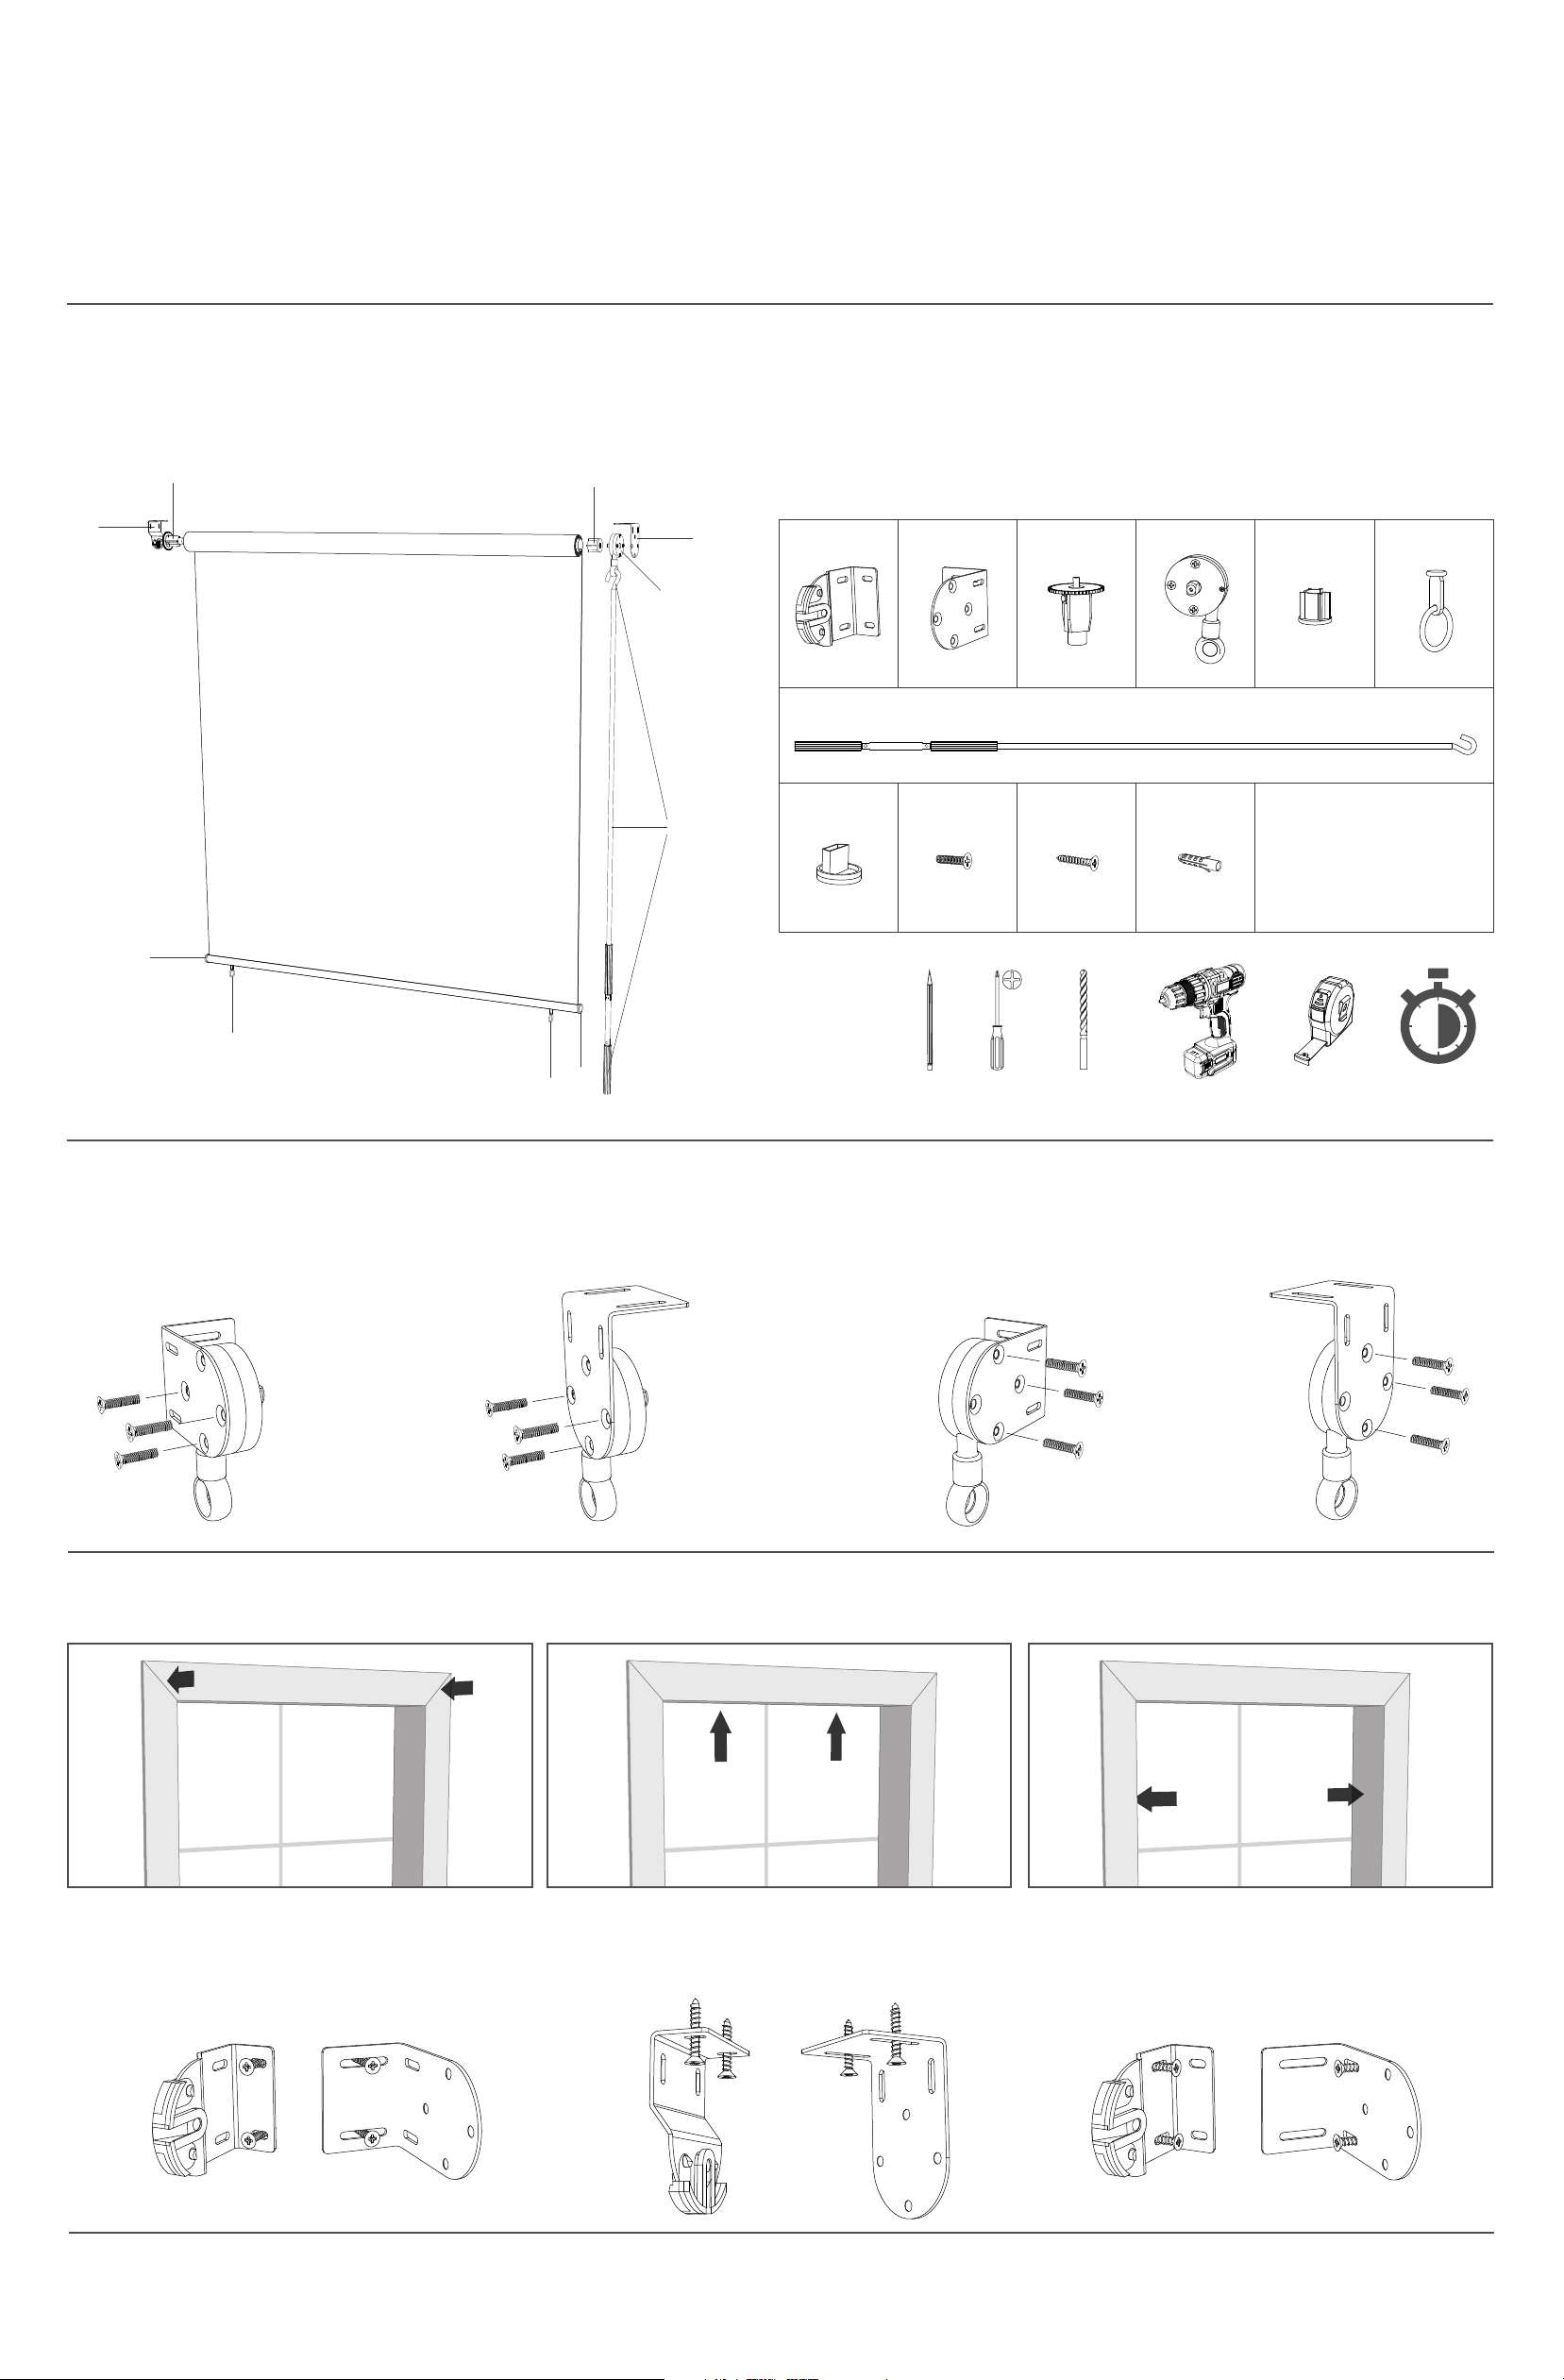
Hardware Contents:
B
A
B C D E F
D
(1) Pin Wheel Bracket (1) Crank Bracket (1) Pin Wheel (1) Crank Device (1) Crank Rail Connector (2) Wind Tie Downs
G
(1) Crank Handle
H I J K
G
(2) Bottom Rail Caps
Machine Screws
(3) 4 x 18mm
Wood Screws
(4) 3.5 x 25mm
Wall Plugs
(4) 6mm Diameter
NOTE:
Crank Devise can be installed on the
Right or Left Side of the Sun Shade
Crank Handle on the Left: (Flip Crank Devise
and Bracket to the Left side of the shade)
H
F
H
F
Tools Needed:
Step 1
Connecting the Crank Device (D) to the Crank Bracket (B) with Machine Screws (I).
(If desired handle position is on the left please see image below)
Outside Mounting
(Left Side Mounting) (Right Side Mounting)
Top / Inside Mounting
Outside Mounting
1/16 in.
Top / Inside Mounting
30
min
Step 2
Measure Bracket Placement to desired mounting location, mark holes on each bracket with a pencil.
a). Outside
Mounting to the face or outside the window frame.
b). Top
Mounting overhead to a surface such as the top inside of
the window frame or the ceiling.
c). Inside
Mounting to the inside or between the sides of
the window.
Page 2
SUN SHADE
CORDLESS WITH CRANK INSTALLATION INSTRUCTIONS
Step 3
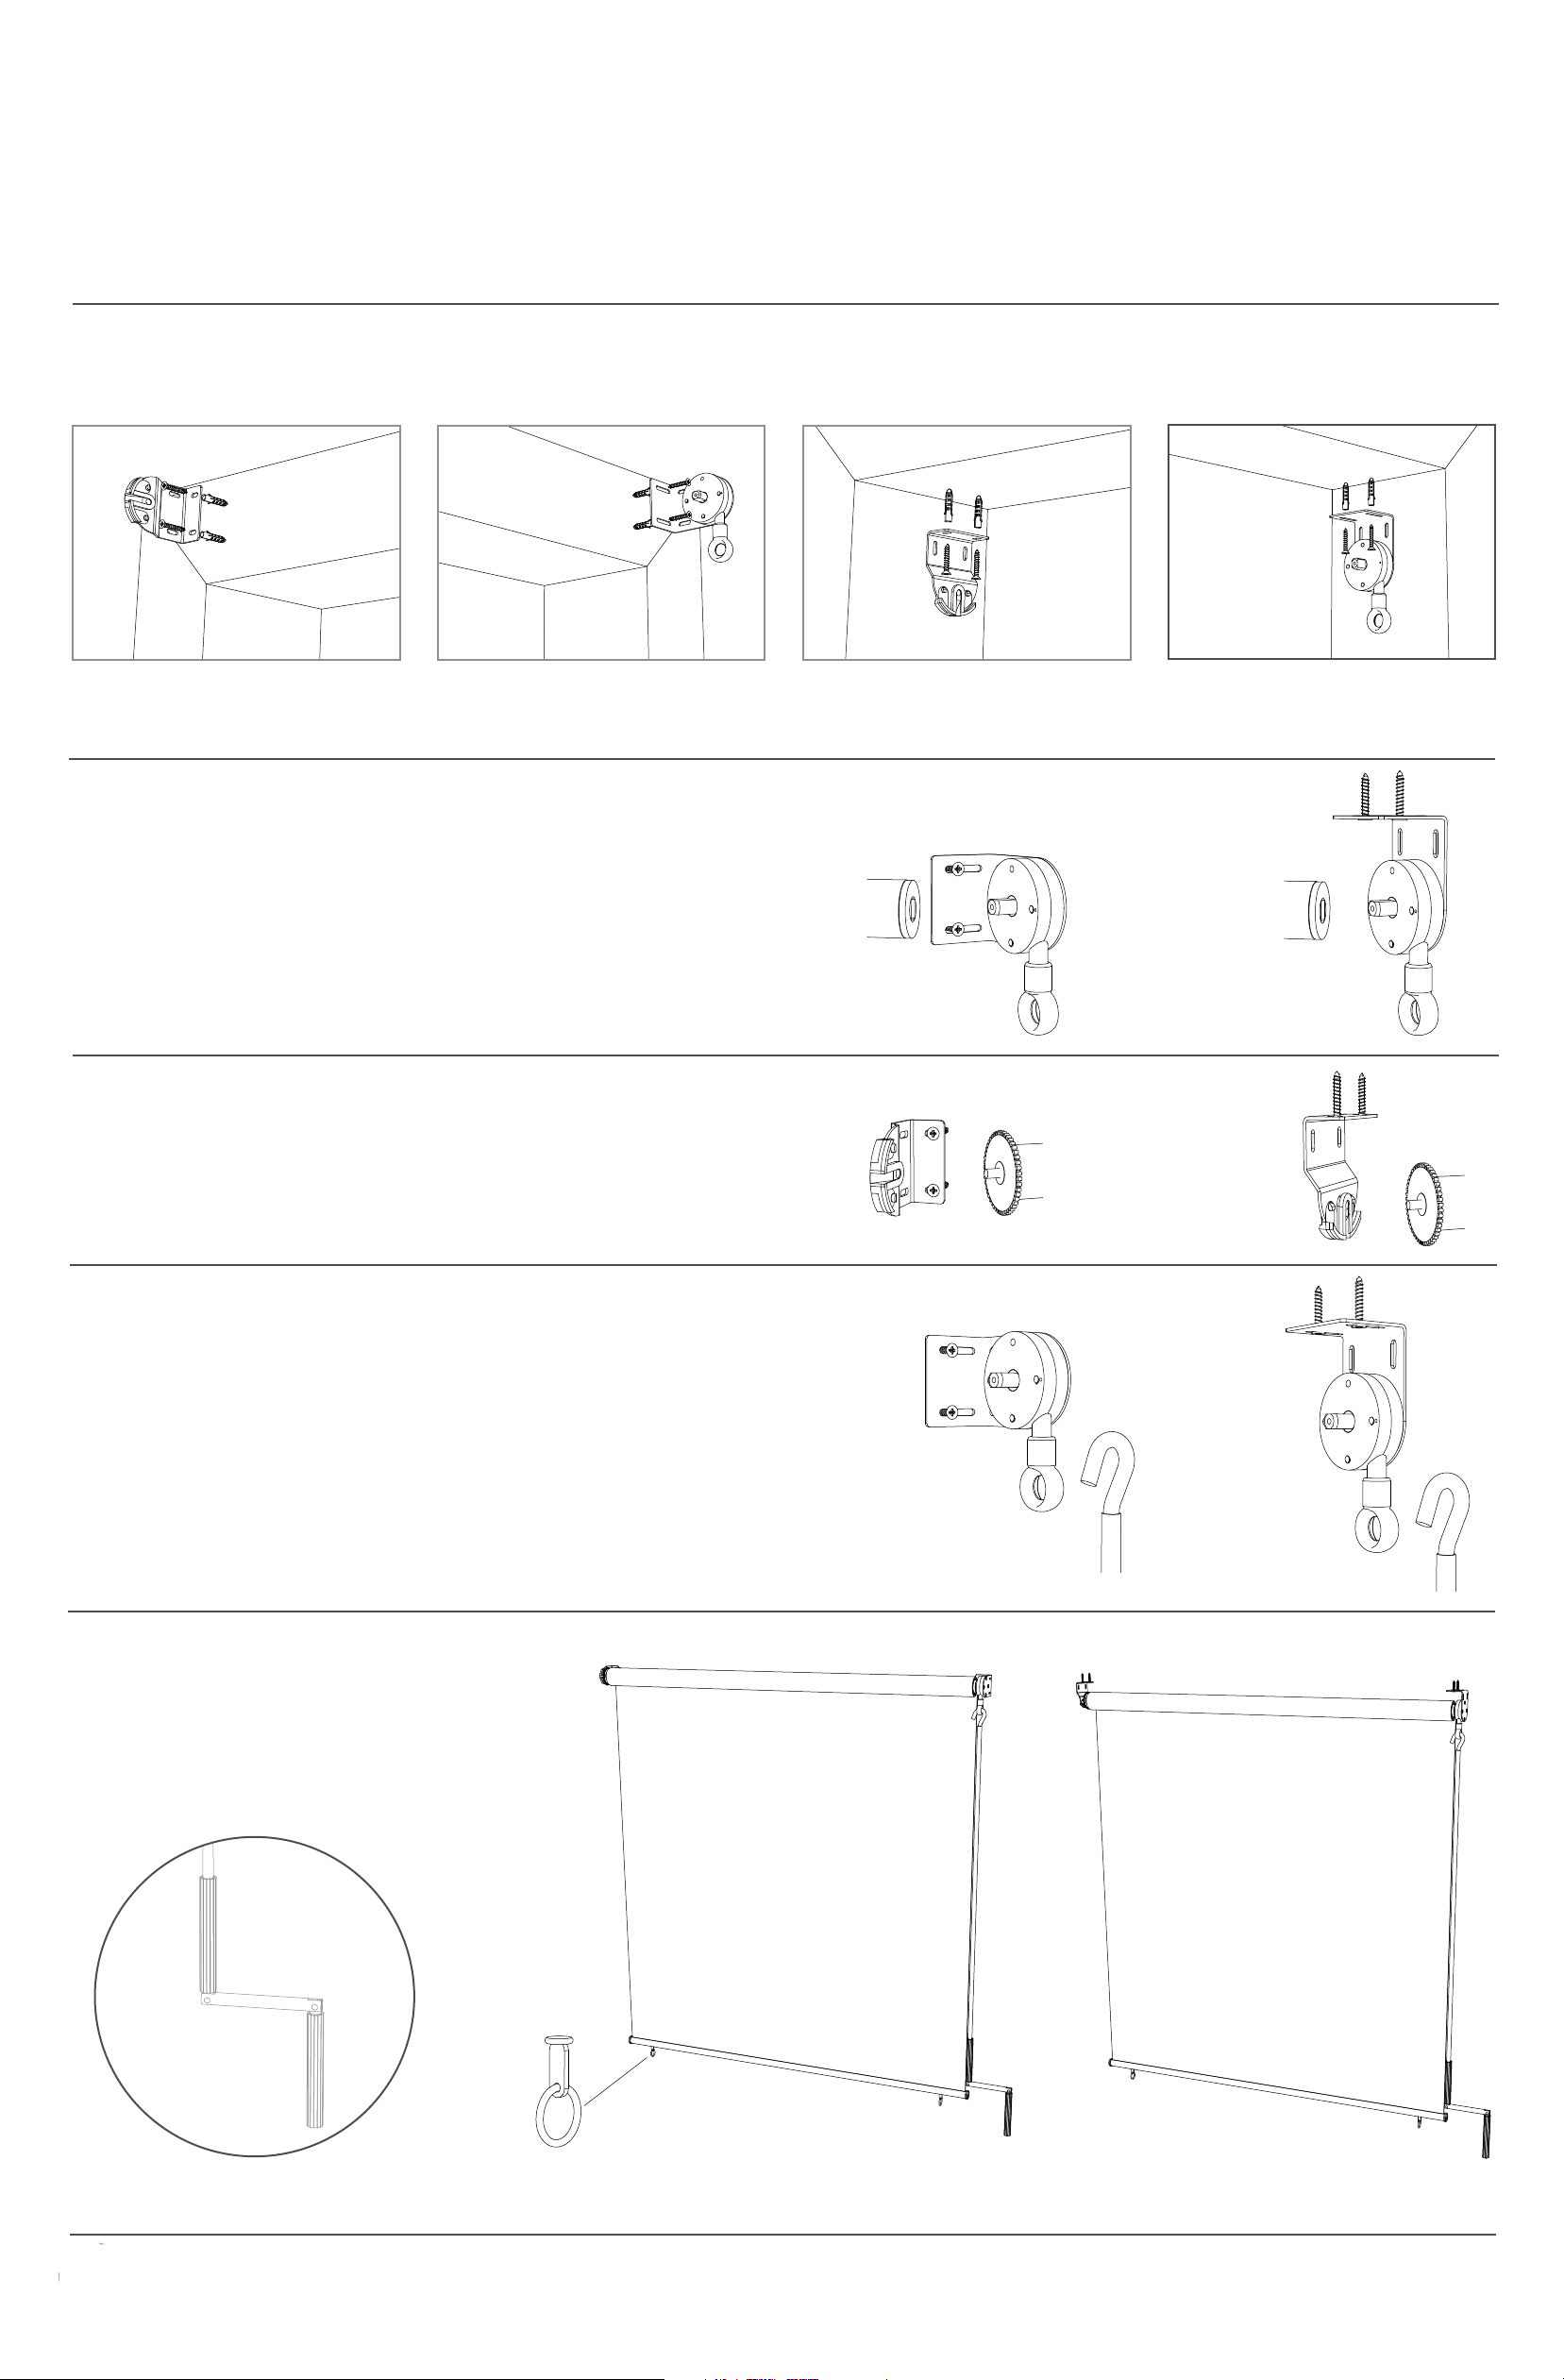
Installing Brackets. (Use Wall Plugs (K) only if you are installing into drywall)
Outside Mounting Pin Wheel Bracket (A). Outside Mounting Crank Bracket (B). Top Mounting Pin Wheel Bracket (B).
Top Mounting Pin Wheel Bracket (A).
(Flip screws 90° to mount inside).
(Flip screws 90° to mount inside).
Step 4
Securing Sun Shade to the Crank Bracket (B).
Insert headrail, Crank Rail Connector (E) side, into the Crank Device (D).
Outside Mounting
Top / Inside Mounting
Step 5
Securing Sun Shade to the Pin Wheel Bracket (A).
Insert headrail, Pin Wheel (C) side, into the Pin Wheel Bracket (A).
Outside Mounting
Top / Inside Mounting
Step 6
Attaching the Crank Handle (G) to the Crank Device (D).
Angle the Crank Handle (G) Head through the Crank Device (D) Hole.
Step 7
Fold Up the Crank Handle (G).
This allows easier range of motion raising and lowering the Sun Shade.
Secure Wind Tie Down (F) for extra support in inclement weather.
Outside Mounting
Top / Inside Mounting
Wind Tie Down
Outside Mounting
Top / Inside Mounting
 Loading...