

Alcor HDT-4400 Service Manual
HDT 4400
set-top-box
USER MANUAL
USER MANUAL
Important Safety Instructions
HDT- 4400
High Denition Digital Receiver
1) Read these instrucons.
2) Keep these instrucons.
3) Heed all warnings.
4) Follow all instrucons.
5) Do not use this apparatus near water.
6) Clean only with dry cloth.
7) Do not install near any heat sources such as radiators ,heat registers. stoves, or other apparatus (including
amplifiers) that produce heat.
8) Operate this product only from the type of power source indicated on the label. If you are not sure of the
type of power connected to your home. Consult your local power company, Disconnect the unit from the
mains before any maintenance or installaon procedure.
9) Protect the mains cord from damage and stress.
10) Only use aachments/accessories specified by the manufacturer.
11) Unplug this apparatus during lightning storms or when unused for long periods of time.
12) Refer all servicing to qualified service personnel, Servicing is required when the apparatus has been damaged
in any way, including damage to the mains cord or plug, if the unit has been exposed to liquid or moisture,
has been dropped or is not operang correctly.
13) Do not impede the air flow into the unit by blocking the ventilaon slots.
14) Aenon should be drawn to the environmental aspects of baery disposal.
15) Use the apparatus in moderate climate.
WARNING: To reduce the risk of fire or electric shock, do not expose this apparatus to rain or moisture.
WARNING: The baeries shall not be exposed to excessive heat such as direct sun light, fire, etc.
Warning:
※ The apparatus shall not be exposed to dripping or splashing and that no objects filled with liquids, such as
vases, shall be placed on the apparatus.
※ The MAINS plug or an appliance coupler is used as the disconnect device, the disconnect device shall remain
readily operable.
※ The batteries shall not be exposed to excessive heat such as sunshine, fire or the like.
This symbol indicates that dangerous voltages constituting a risk of electric
shock are present within this unit.
This symbol indicates that there are important operating and maintenance
instructions in the literature accompanying this unit.
This symbol indicates that this product incorporates double insulation
Between hazardous mains voltage and user accessible parts.
When servicing use only identical replacement parts.
Package Contents
Before installation, please check the contents of the package.
The package should contain the following items:
1. DVB-T2 TV receiver x1pc
2. Remote control x1pc
3. AAA Battery for the remote control x1pair
4. User manual x1pc

Table of Contents
Front and rear Panel………………………………………………………………………………………………………….……………………………….1
Remote Control……..…………………………………………………………………………………………….…………………………………………….2
System Connection.....………………………………………………………………………………………………………………….…………………….4
First time Installation……………………………………………………………………..……………………………………………………….………….5
Basic Operation………………………………………………………………………………………………………………………………………….……….5
Program Settings…….………………………………………………………………………………………………………………………………….……….5
Program Edit………………………………………………………………………………………………………………………………………….6
EPG(Electronic Program Guide)……….…………………………………………………………………………………………………….7
Sorting……….………………………………………………………………………………………………………………………………………….8
LCD(Logical Channel Number)……………………………………………………………………………………………………….……….8
Pictures Setting……….…………………………………………………………………………………………………………………………….…………….8
Resolution….…………………………………………………………………………………………………………………….…………………….8
TV format…..………………………………………………………………………………………………………………………….……………….8
Channel search………….………………………………………………………………………………………………………………………….……………..9
Auto search..………………………………………………………………………………………………………………………..…………….9
Manual search……………………………………………………………………………………………………………………………..………….9
Country……..………………………………………………………………………….………………………………………………………………10
Antenna power..……………………………………………………………………………………………………………………………………10
Time setting……………………………………………………………………………………………………………………………………………………….10
Time offset..……………………………………………………………………………….…………………………………………………………10
Country region..………………………………………………………………………………….…………………………………………………10
Time zone..…………………………….……………………………………………………………………………………………………..………10
Option……………………………………………………………………………………………………………………………………………………………..….10
OSD language…..……………………………………………………………………………………………………………………..….…………11
Subtitle language..……………………………………………………………………………….………………………………………..………11
Audio language..………………………………………………………………………………….…………………………………………..……11
System setting………….……………………………………………………………………………………………………………………………………..….11
Set password…...………………………………………………………………………………….……………………………………………..…11
Restore factory default .………………………………………………………………………………………………………………..………12
Information……...………………………………………………………………………………….……………………………………….………12
USB…………………………..……………………………………………………………………………………………………………………………….……….12
Multimedia……...……………………………………………………………………………………………………………….……….…………12
Photo configuration……...…………………………………………………………………………………………………..……….…………13
Movie configuration..………………………………………………………………………….…………………………………………………13
PVR configuration…...………………………………………………………………………….…………………………………………………13
Trouble shooting……..………………………………………………………………………………………………………………………………………….15
Technical specifications……………………………………………………………………………………………………………………………………….16
Notice about recycling.……………………………………………………………………………………………………………………………………….17
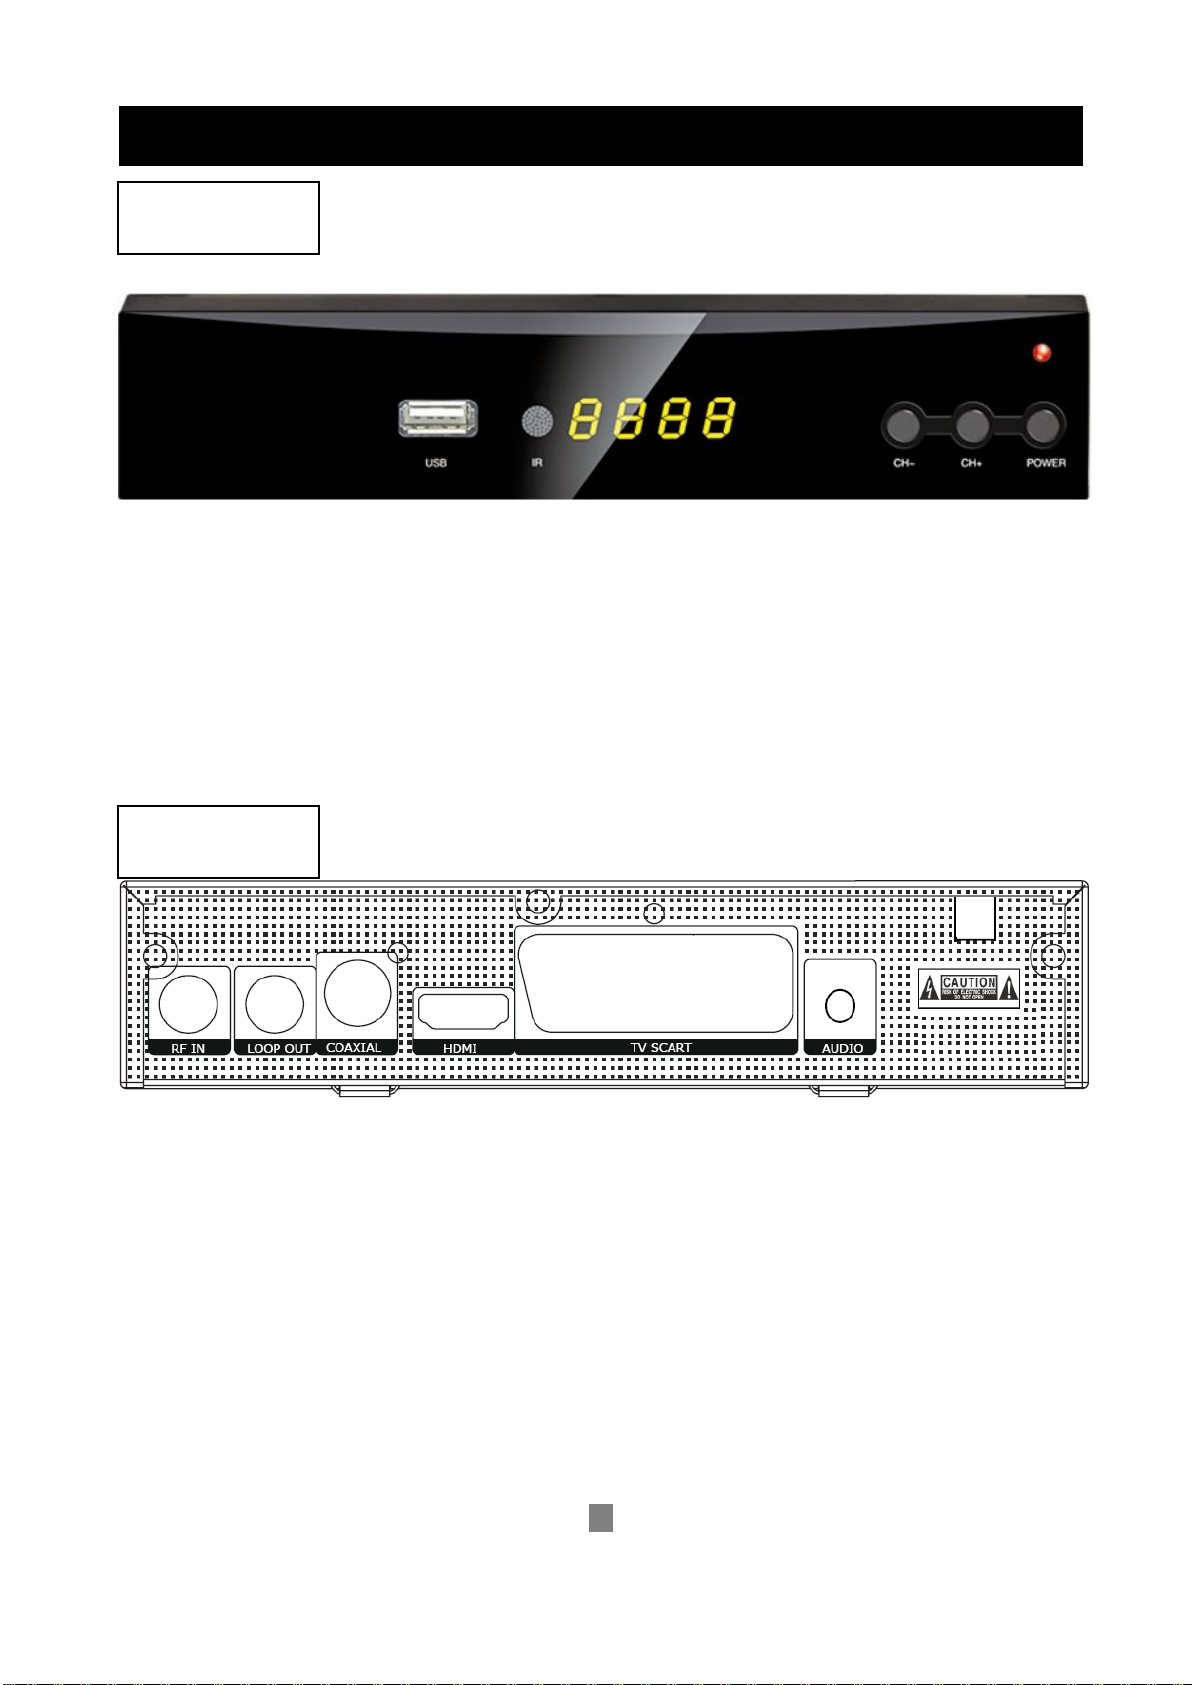
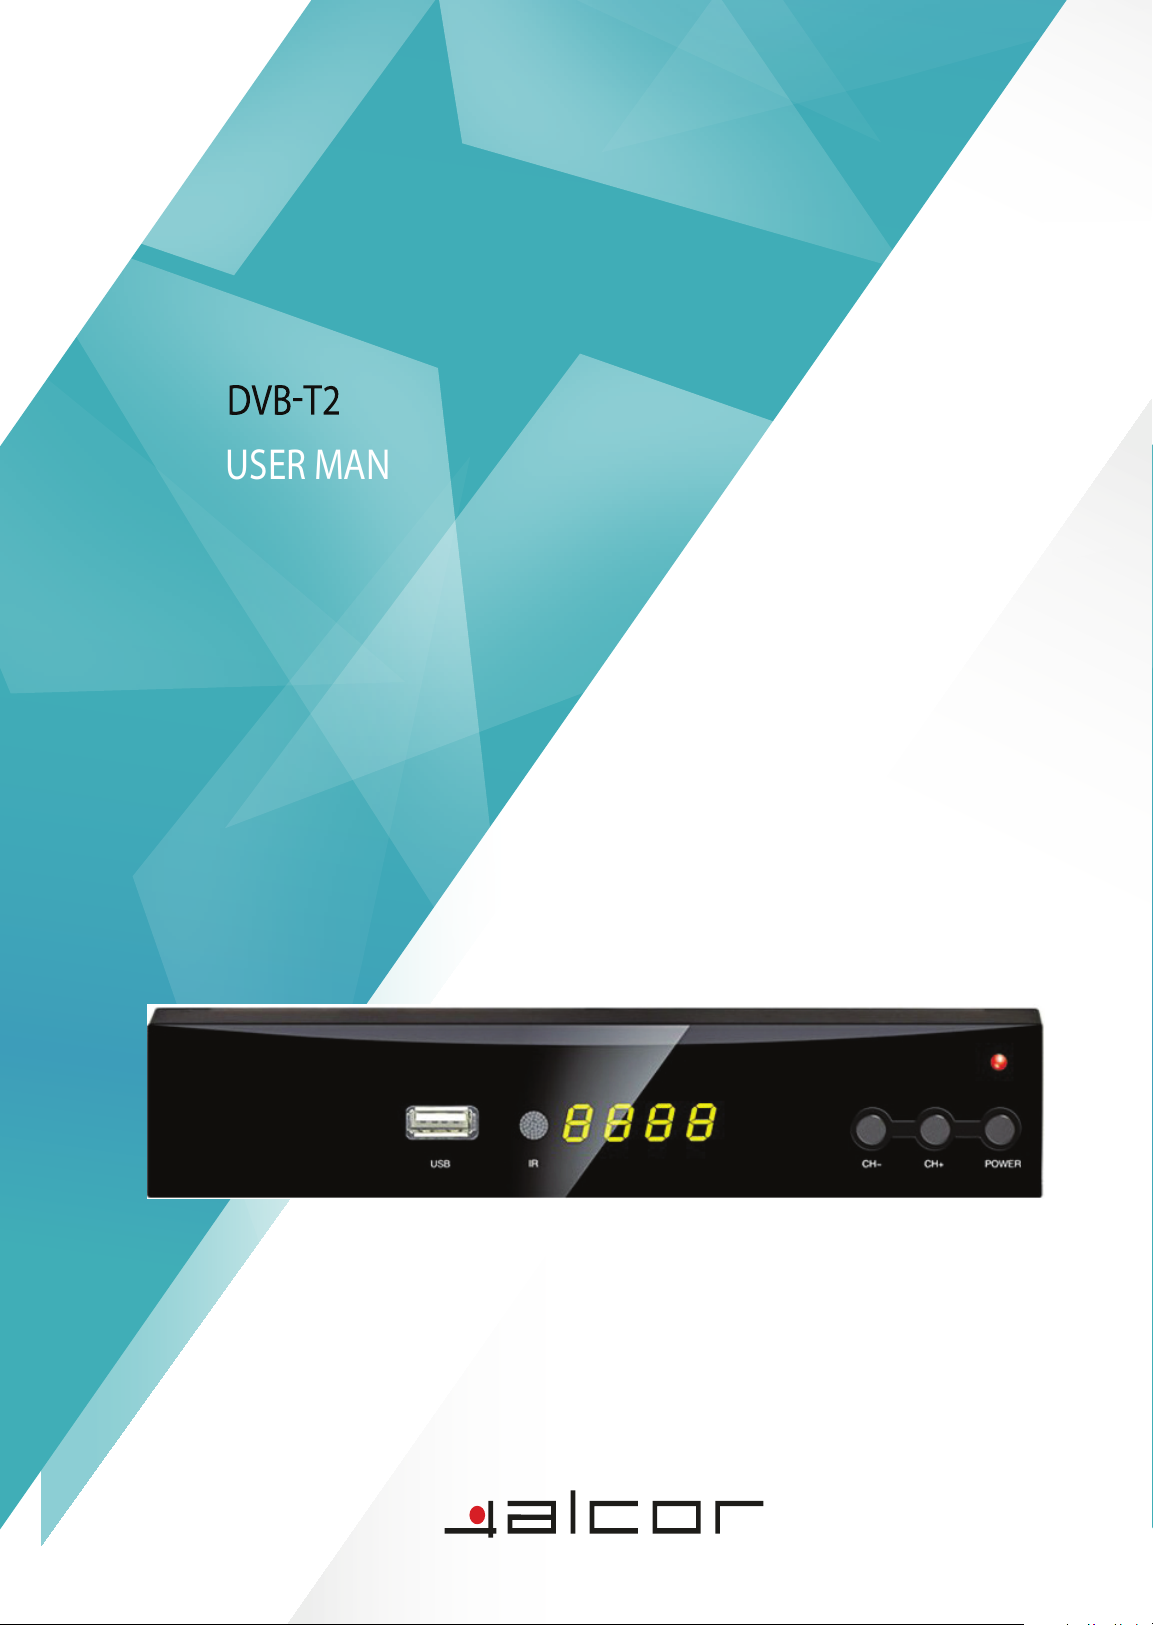
1.Front Panel
2.Rear Panel
Front and Rear Panel
1. POWER BUTTON: Push to turn on/off the main power supply.
2. POWER INDICATOR: When green, unit working; when red, it is in standby.
3. REMOTE CONTROL SENSOR: Used to receive the signal from the remote control.
4. LED DISPLAY SCREEN: Used to display channel number or information
5. USB: For software upgrade and media playback.
6. CHANNEL UP: Used to change channels without using the remote control.
7. CHANNEL DOWN: Used to change channels without using the remote control.
1. RF IN: This socket connects to your external Aerial.
2. LOOP OUT THROUGH: This socket will feed the RF signal to either your TV or another video system.
3. Coaxial: This socket outputs digital audio signal.
4. HDMI: High definition audio and video output used to connect to a HDMI device.
5. TV Scart output
6. AUDIO for sound
7. Bulit-in Power supplier
-1-
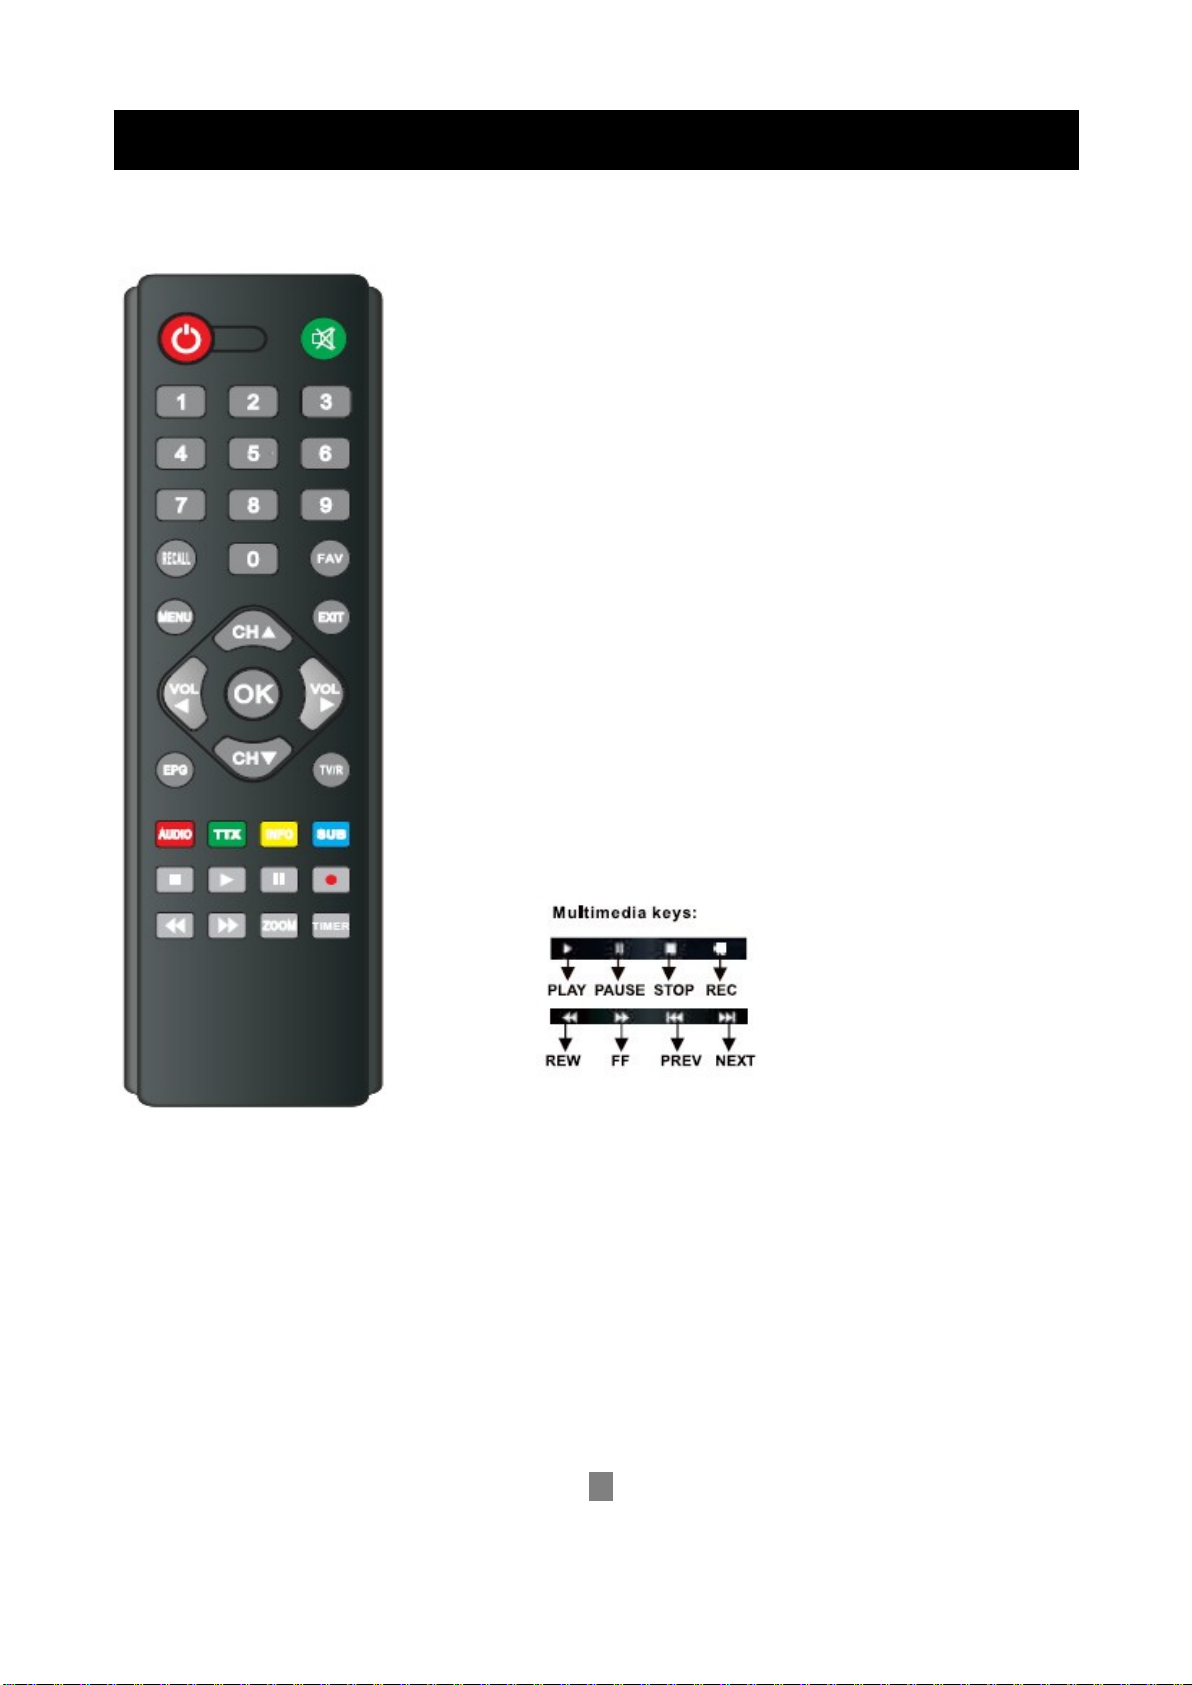
POWER: Switch the receiver in and out of standby mode.
<0>-<9>: Numeric keys
CH-/CH+: Program changing keys.
MENU: Display main menu on TV screen, and press again to disappear menu
OK: To confirm current setting, or display channel list in no-menu mode.
VOL-/VOL+:To increase/decrease volume; Press to move the cursor
EPG: Shows the electronic program guide.
FAV: Displays your favorite channels list; press FAV again to access to the other
favorite lists.
RECALL: Go back to the previous viewed channel.
Red/Green/Yellow/Blue: Use to navigate between pages in teletext mode and
special functions in Menu or EPG
TTX: Switch on teletext, if current channel has this option, and use EXIT key to
quit teletext.
SUB: Display subtitle options(availability depends on the channel)
EXIT: Use this key to quit current menu
INFO: Display information about the current channel.
TV/RADIO: Switch between digital radio and DVB-T modes.
MUTE: To switch on/off volume.
Remote Control
-2-
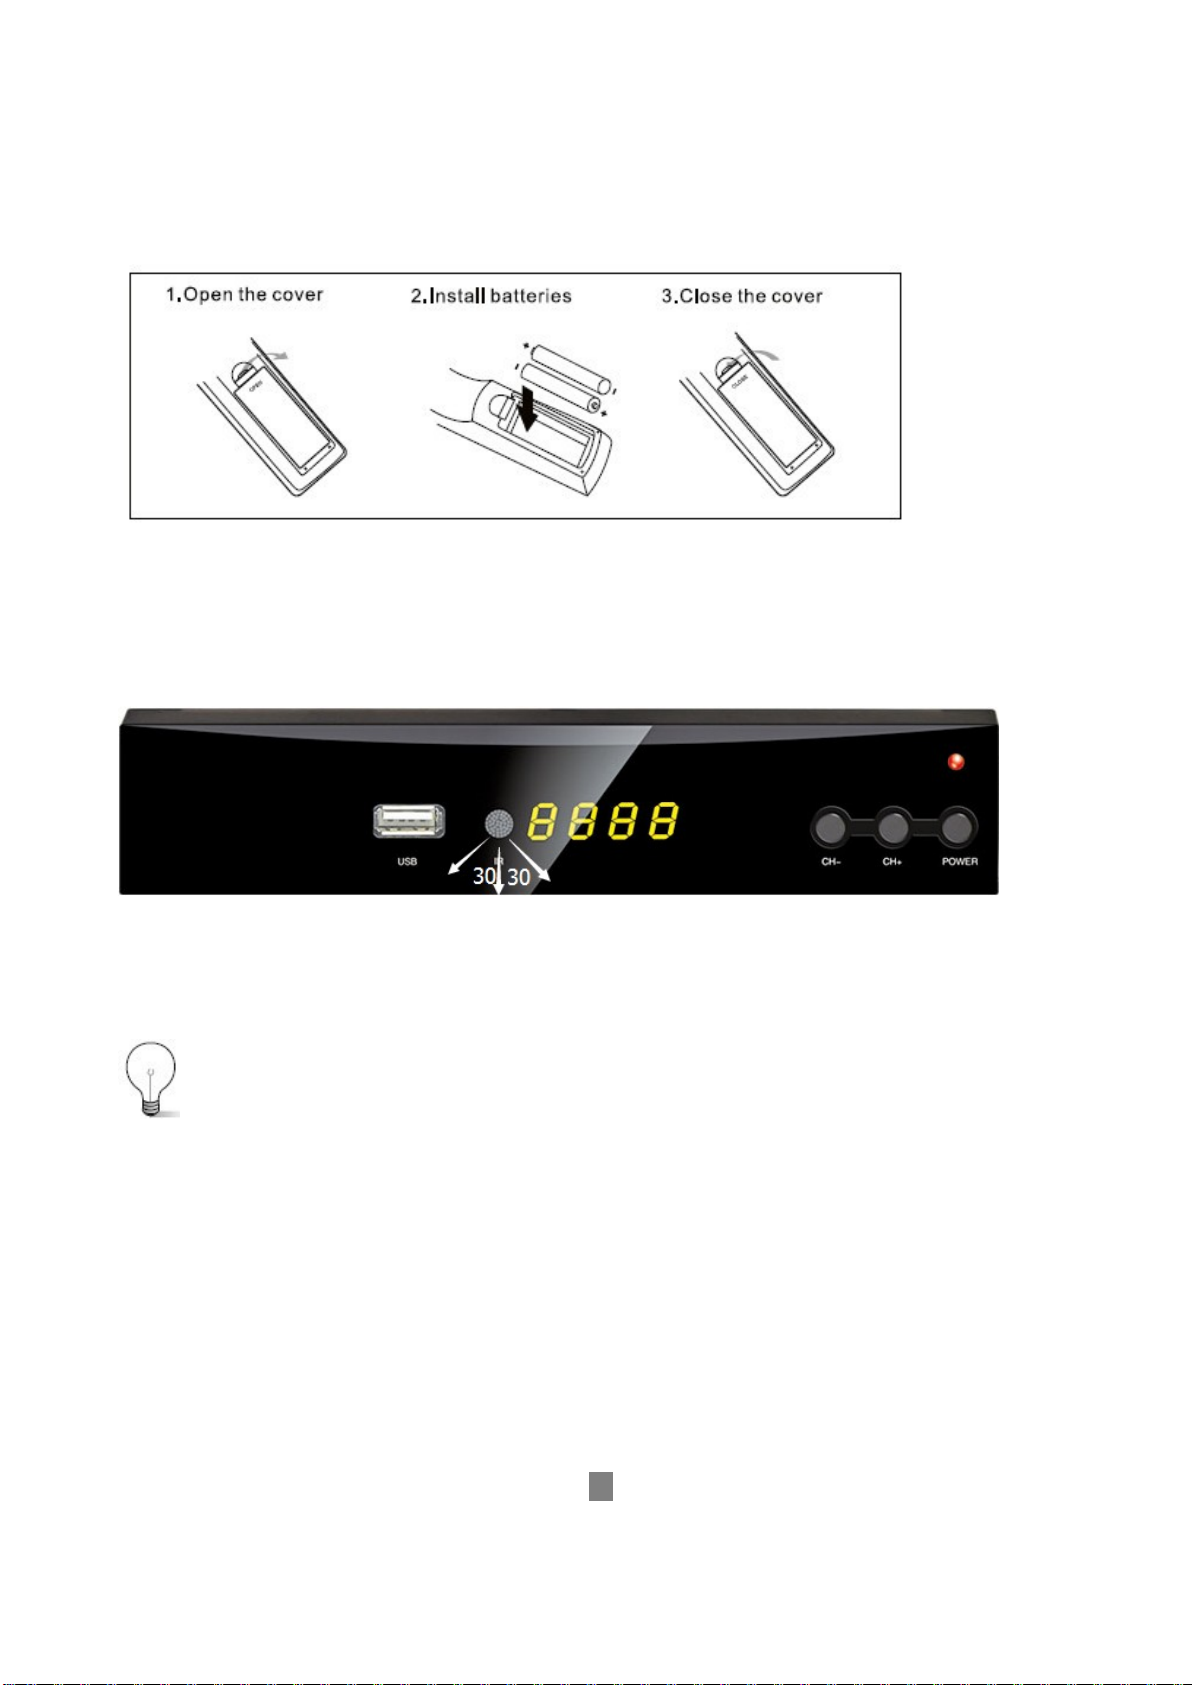
Installing the Batteries
Remove the battery cover from the rear of the Remote control and place 2xAAA size batteries inside the
compartment.
Please make sure the battery polarities match the polarity markings inside the compartment.
Using the Remote Control
To use the remote control, point it towards the front of the digital set top box.
The remote control has a range of up to 7 meters from the set top box at an angle of up to 60 degrees.
The Remote Control will not operate if its path is blocked.
Sunlight or very bright light will decrease the sensitivity of the Remote Control.
-3-
 Loading...