

Alcatel OT-565 User Manual [zh]
Doc No :TCT-AAA-BB-CC00 Version : 00 Page : 1/24
GISUS Administration Console User Guide
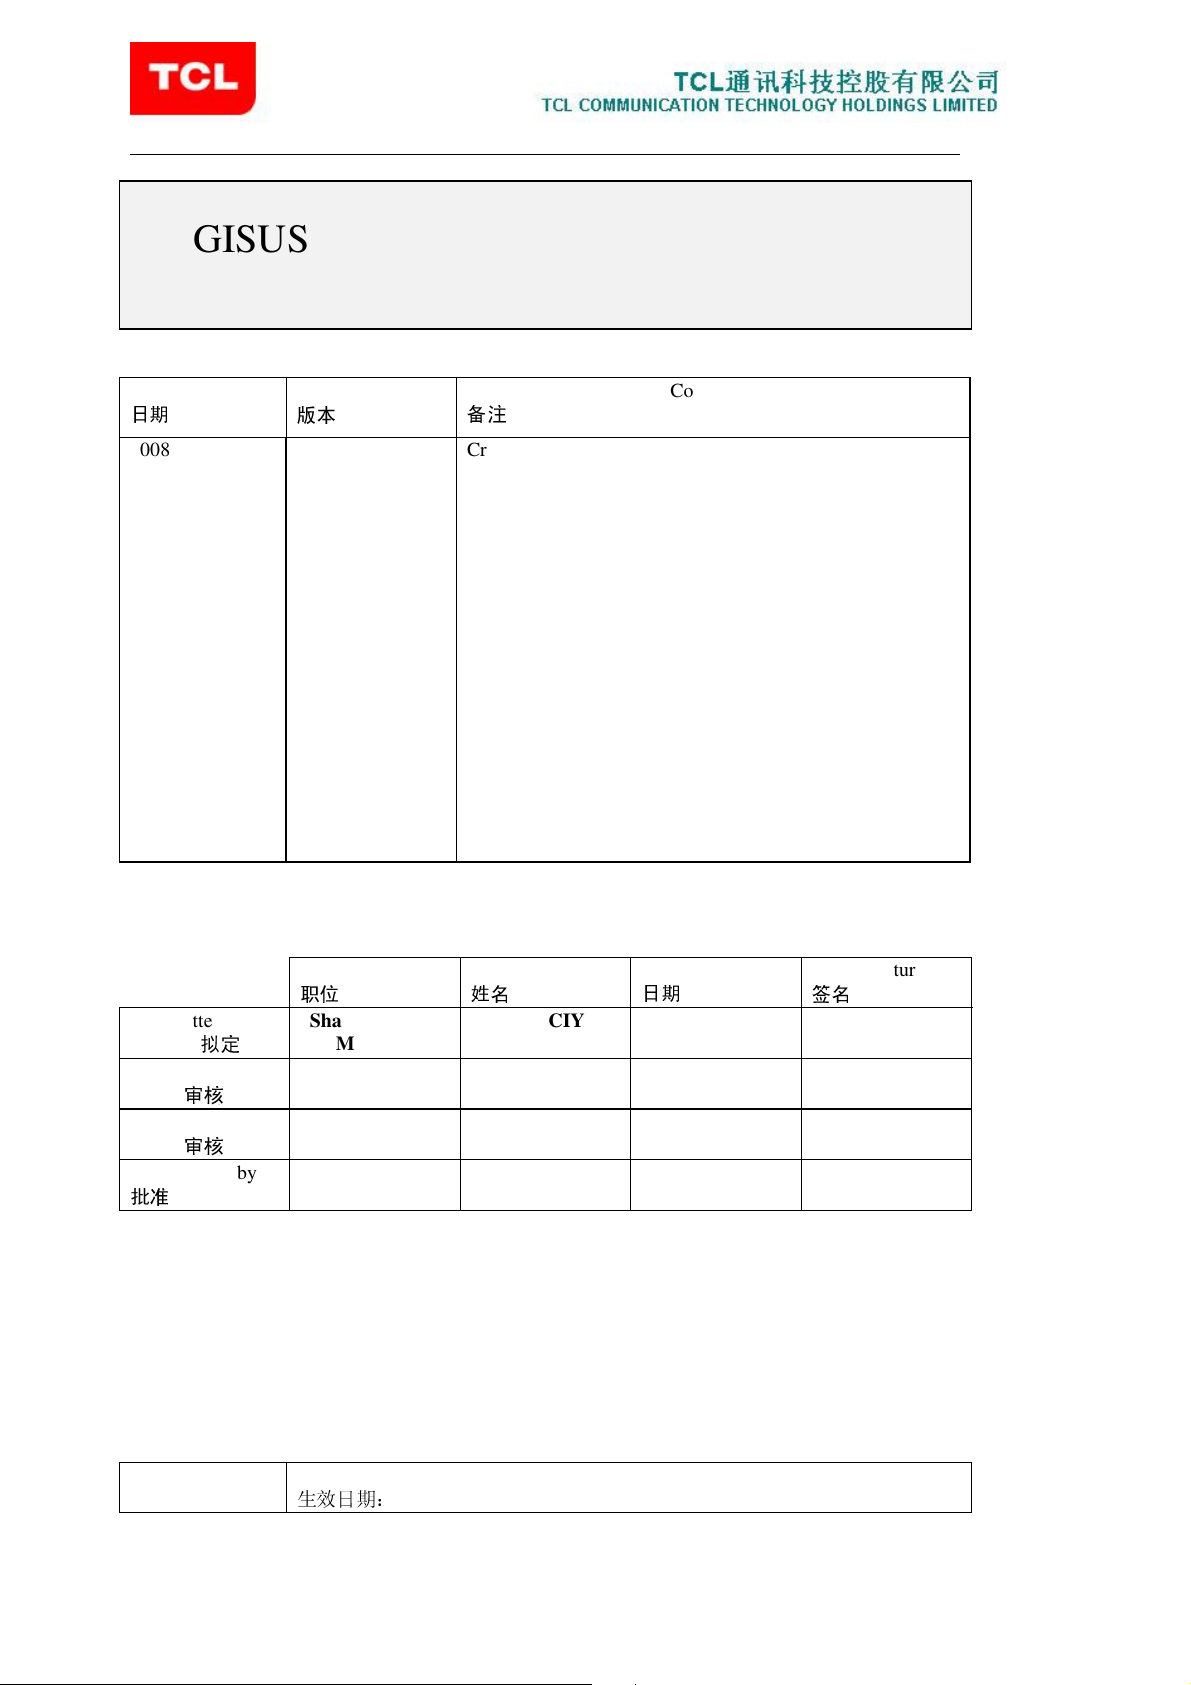
Date
2008/12/08 1.0 Creation of Document
2009/12/09 2.0 Updated for the definitive deployment.
Version
Comments
Function
Written by
Verified by
Shanghai IS/IT
Manager
Verified by
Approved by
Name
SEMERCIYAN
Raffi
Date
2009/12/09
Signature
TCL
Communication
Effective Date:

:TCT-AAA-BB-CC00
!"
: 00
#$
: 2/24
Content Summary
CONTENT SUMMARY.............................................................................................................................2
FIGURE SUMMARY ................................................................................................................................3
1 INTRODUCTION ...................................................................................................................................4
1.1 OVERVIEW ................................................................................................................................4
1.2 FOCUS.......................................................................................................................................4
1.3 TERMS AND DEFINITIONS ......................................................................................................4
1.4 REFERENCES...........................................................................................................................5
2 PRE-REQUISITES ................................................................................................................................5
3 LOGGING INTO THE GISUS ADMIN CONSOLE ................................................................................5
4 MANAGING FILE SET..........................................................................................................................6
4.1 CONCEPT DEFINITION AND OVERVIEW ...............................................................................6
4.2 CONFIGURING FILEZILLA.......................................................................................................7
4.3 UPLOADING A FILE SET..........................................................................................................8
4.4 FILE SET LIST PAGE..............................................................................................................11
4.5 IMPORTING A FILE SET.........................................................................................................11
4.6 SEEING DETAILS ABOUT A FILE SET .................................................................................14
4.7 DELETING A FILE SET...........................................................................................................14
4.8 PURGING FILESET.................................................................................................................14
5 MANAGING PRODUCT FAMILY........................................................................................................15
5.1 PRODUCT FAMILY LIST PAGE .............................................................................................15
5.2 CREATING A NEW PRODUCT FAMILY.................................................................................16
5.3 MODIFYING A PRODUCT FAMILY ........................................................................................17
5.4 DELETING A PRODUCT FAMILY ..........................................................................................17
6 MANAGING PRODUCT TYPE ...........................................................................................................17
6.1 PRODUCT TYPE LIST PAGE .................................................................................................17
6.2 CREATING A NEW PRODUCT TYPE ....................................................................................18
6.3 MODIFYING A PRODUCT TYPE ............................................................................................18
6.4 DELETING A PRODUCT TYPE ..............................................................................................19
7 MANAGING PRODUCT......................................................................................................................19
7.1 PRODUCT LIST PAGE............................................................................................................19
7.2 CREATING A NEW PRODUCT...............................................................................................19
7.3 SUPPORTED REGULAR EXPRESSION FOR COMMERCIAL REFERENCE ......................20
7.4 MODIFYING OR UPGRADING A PRODUCT .........................................................................22
7.5 DELETING A PRODUCT.........................................................................................................22
8 STATISTICS MANAGEMENT.............................................................................................................22
9 USER MANAGEMENT........................................................................................................................22
10 LOG MANAGEMENT........................................................................................................................23
11 FREQUENTLY ASKED QUESTIONS ..............................................................................................24
Version : 2.0

:TCT-AAA-BB-CC00
!"
: 00
Figure Summary
Fig.1: Home page of the GISUS Administration Console......................................................................................6
Fig.2: FileZilla screenshot showing how to start the Site Manager........................................................................7
Fig.3: FileZilla screenshot showing an example of a new site creation..................................................................7
Fig.4: FileZilla screenshot showing the main Windows of the application. ...........................................................8
Fig.5: Creating new directory – Step 1...................................................................................................................9
Fig.6: Creating new directory – Step 2: Giving it a name. .....................................................................................9
Fig.7: Uploading file to the server........................................................................................................................10
Fig.8: FileZilla screenshot showing a detail of the download queue....................................................................10
Fig.9: FileZilla screenshot showing the local and remote folder contents after successful file upload. ...............11
Fig.10: FileSet List page of the GISUS Administration Console .........................................................................11
Fig.11: File Set Details Page (step 1 of import) of the GISUS Administration Console......................................12
Fig.12: File Set Details Page (step 2 of import) of the GISUS Administration Console showing warnings. .......12
Fig.13: FileSet List after import of an existing FileSet. .......................................................................................13
Fig.14: Product Family List page of the GISUS Administration Console............................................................14
Fig.15: End of a page after a FileSet Purge operation..........................................................................................15
Fig.16: Product Family List page of the GISUS Administration Console............................................................16
Fig.17: Product Family Details page of the GISUS Administration Console.......................................................16
Fig.18: Product Type List page of the GISUS Administration Console...............................................................17
Fig.19: Product Type Details page of the GISUS Administration Console..........................................................18
Fig.20: Product List page of the GISUS Administration Console ........................................................................19
Fig.21: Product Details page (step 1) of the GISUS Administration Console......................................................20
Fig.22: Product Details page (step 2) of the GISUS Administration Console......................................................20
Fig.23: Log page of the GISUS Administration Console .....................................................................................23
#$
: 3/24
Version : 2.0
:TCT-AAA-BB-CC00
1 Introduction
1.1 Overview
The Global Internet Software Upgrade System (GISUS) is a system composed of
several servers and applications that allows any end user to upgrade his mobile phone
software from his home with his personal computer.
In order to share the mobile phone software, someone needs to upload them into the
system. This is done by using a backend application called ‘GISUS Administration
Console System’ which is a web application accessible from any Internet connection.
The current guide describes how to use the functions available in the GISUS
Administration Console System.
1.2 Focus
!"
: 00
#$
: 4/24
Publishing mobile phone software to public is a serious job that needs to be supported
by a rigorous process. This document won’t focus on this process that should be
defined into another separated document.
This document will only focus on the functionalities made available by the GISUS
Admin Console and details how to use them independently from any process.
1.3 Terms and definitions
Commercial Reference Unique identifier of a Product. For examples: C825X-2AALFR1
File Set A set of files related to the same version and commercial reference of a
mobile phone. All these files are necessary to upgrade the software of a
given mobile phone. FileSet may contain files with different names.
GISUS Global Internet Software Upgrade Service
IT Information Technology
JRDC Joined Research & Development Communication
Product Family Highest level of a mobile phone type. For example ‘K7’.
Product Type Subtype of a mobile phone type. For examples ‘K7S’ (or ‘OT-C820’),
‘K7T’ (or ‘OT-C825’) and ‘Elle N3’ (or ‘ELLE3’) are all three different
product types of the same product family ‘K7’.
‘K7S’ is called the R&D Product Type name.
‘OT-C820’ is called the commercial Product Type name.
Product A product is one instance of a product type. It can be uniquely identified
with the commercial reference. Each Product belongs to one Product Type
and only one.
Version : 2.0
:TCT-AAA-BB-CC00
For example: The product ‘C825X-2AALFR1’ belongs to the ‘OT-C825’
(or ‘K7T’) product type.
RegExp Regular Expression. For example ‘*’ or ‘[A-DJKTZ]’
1.4 References
!"
: 00
#$
: 5/24
[1]
amsu.support@tcl.com
[2]
Filezilla (
functionalities. It can be freely downloaded at
http://filezilla-project.org/
project.org/download.php
[3]
. System administrator email.
.
) is a open source tool providing smart FTP
http://filezilla-
2 Pre-Requisites
Before going further, you must:
Have your SFTP account for the SUMaster server.
Have your GISUS Admin Console account on the SUMaster server.
Have all the File Sets to import under hand.
IMPORTANT NOTE: All the files belonging to the same software version or
commercial reference set MUST have the same base name. Gisus Admin console pay
attention to that as the import function makes this hypothesis.
If any of the first 2 items is missing, then contact the GISUS Administrator to get an
account.
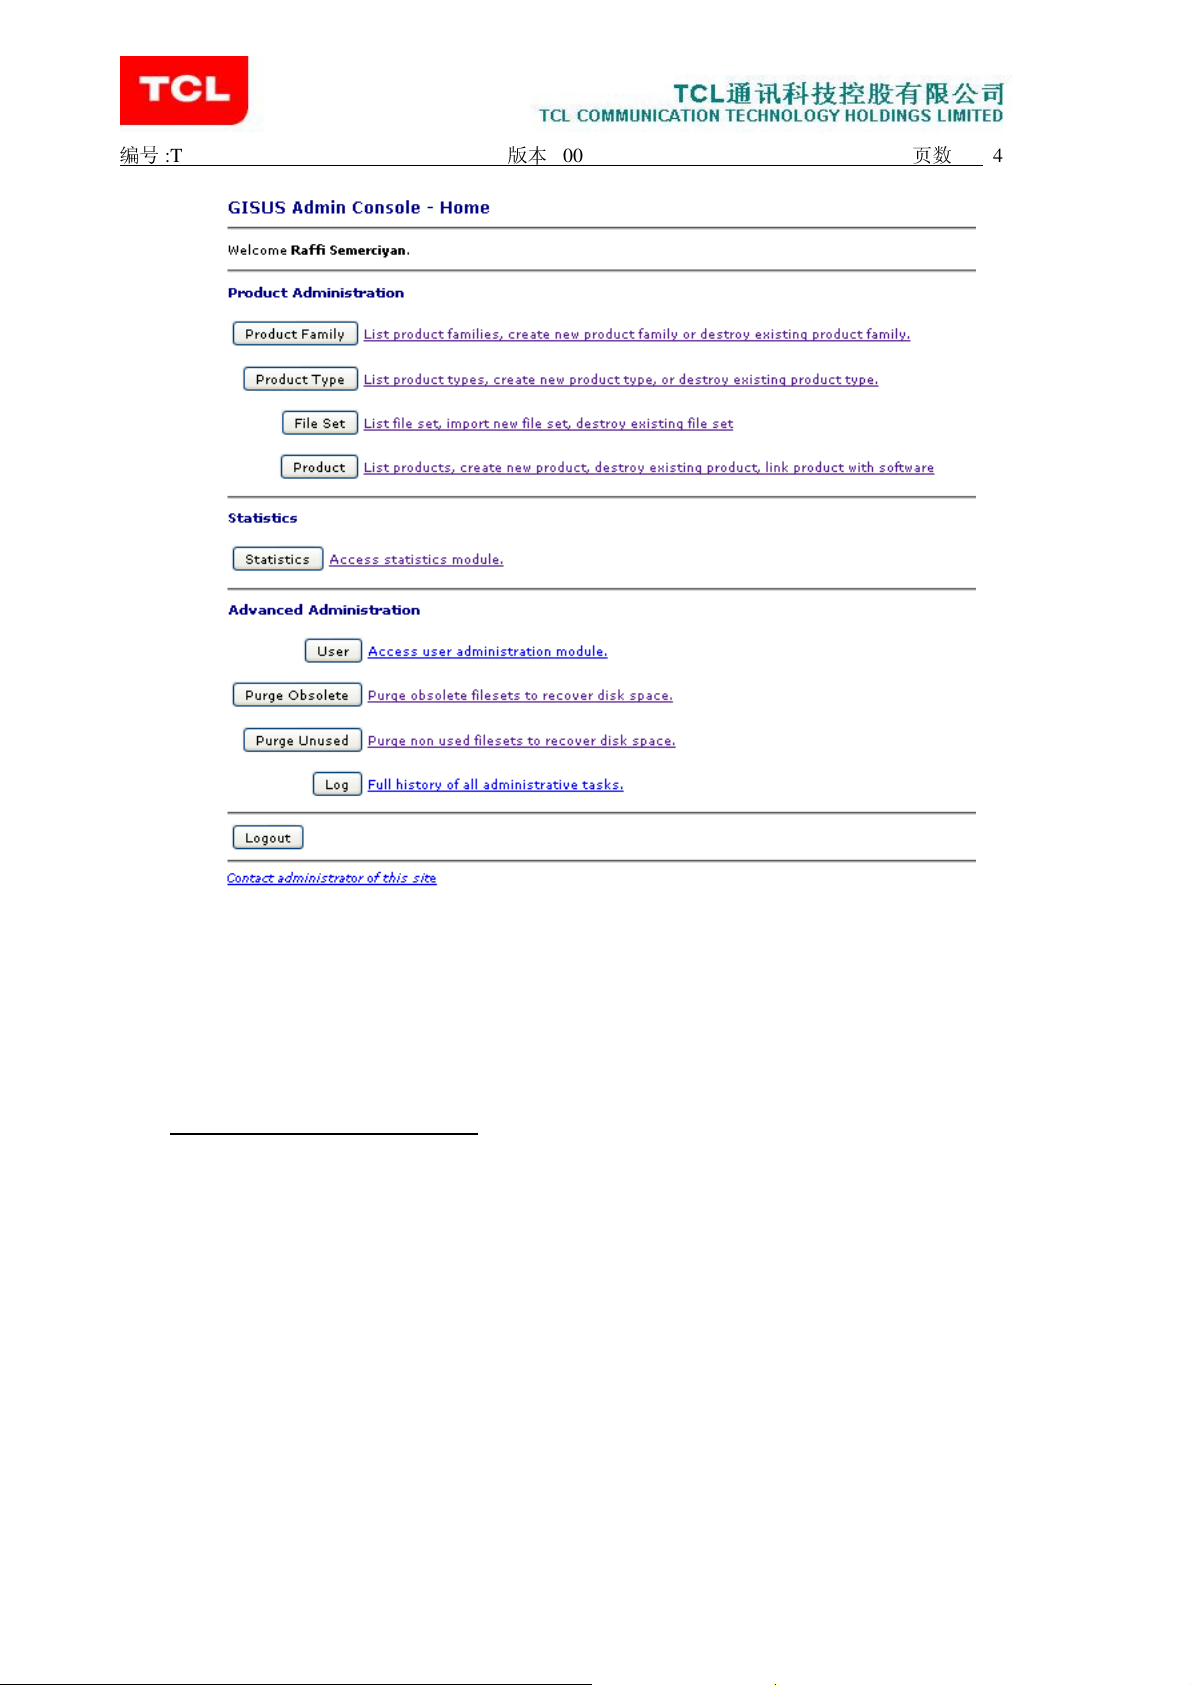
3 Logging into the GISUS Admin Console
To login to the Gisus Admin Console, just open the following link into your preferred
browser:
http://gisusadmin.tcl-ta.com/
Then click on ‘Login’ link. You are required to enter your GisusAdmin login and
password.
Once done, you should reach the home page of the application as shown in the
screenshot below:
Version : 2.0
:TCT-AAA-BB-CC00
!"
: 00
#$
: 6/24
Fig.1: Home page of the GISUS Administration Console
This Home page is the starting points of all the functions of the system.
4 Managing File Set
4.1 Concept definition and overview
The software of a given mobile phone will be composed of a set of binary files or more
simply put: a File Set. A File Set is uniquely identified by a name. All the files
belonging to the same File Set will be stored into the same directory.
For example: All files that can be found into the directory C825X-2AALFR1 are files
of the same File Set since all are located in this same directory. So we will call this File
Set the ‘C825X-2AALFR1’ File Set.
Since the main target of GISUS is to share File Set with any end users, it is normal that
at some point of time, we need to import File Set into the system. The particularity of
GISUS is that the upload of these File Sets is not directly managed by the application
itself. Instead, we will use a more efficient protocol to do that: SFTP, the secured
version of FTP.
Version : 2.0
:TCT-AAA-BB-CC00
!"
: 00
#$
: 7/24
So GISUS Admin Console expects the operator to put these File Sets at a specific
location on the server (/data/www/htdocs/gisusadmin/import) with SFTP in order to
import them into the system later with the Web interface.
4.2 Configuring FileZilla
NOTE: The only supported tool is FileZilla [2]. We won’t provide support for any
other tool. However, as long as the other tool provide SFTP functionality and let you
choose the port number, there shouldn’t be any problem.
This step is recommended if this is the very first time you connect to the system.
However, it is not mandatory. It just provides you comfort for eventual future usage.
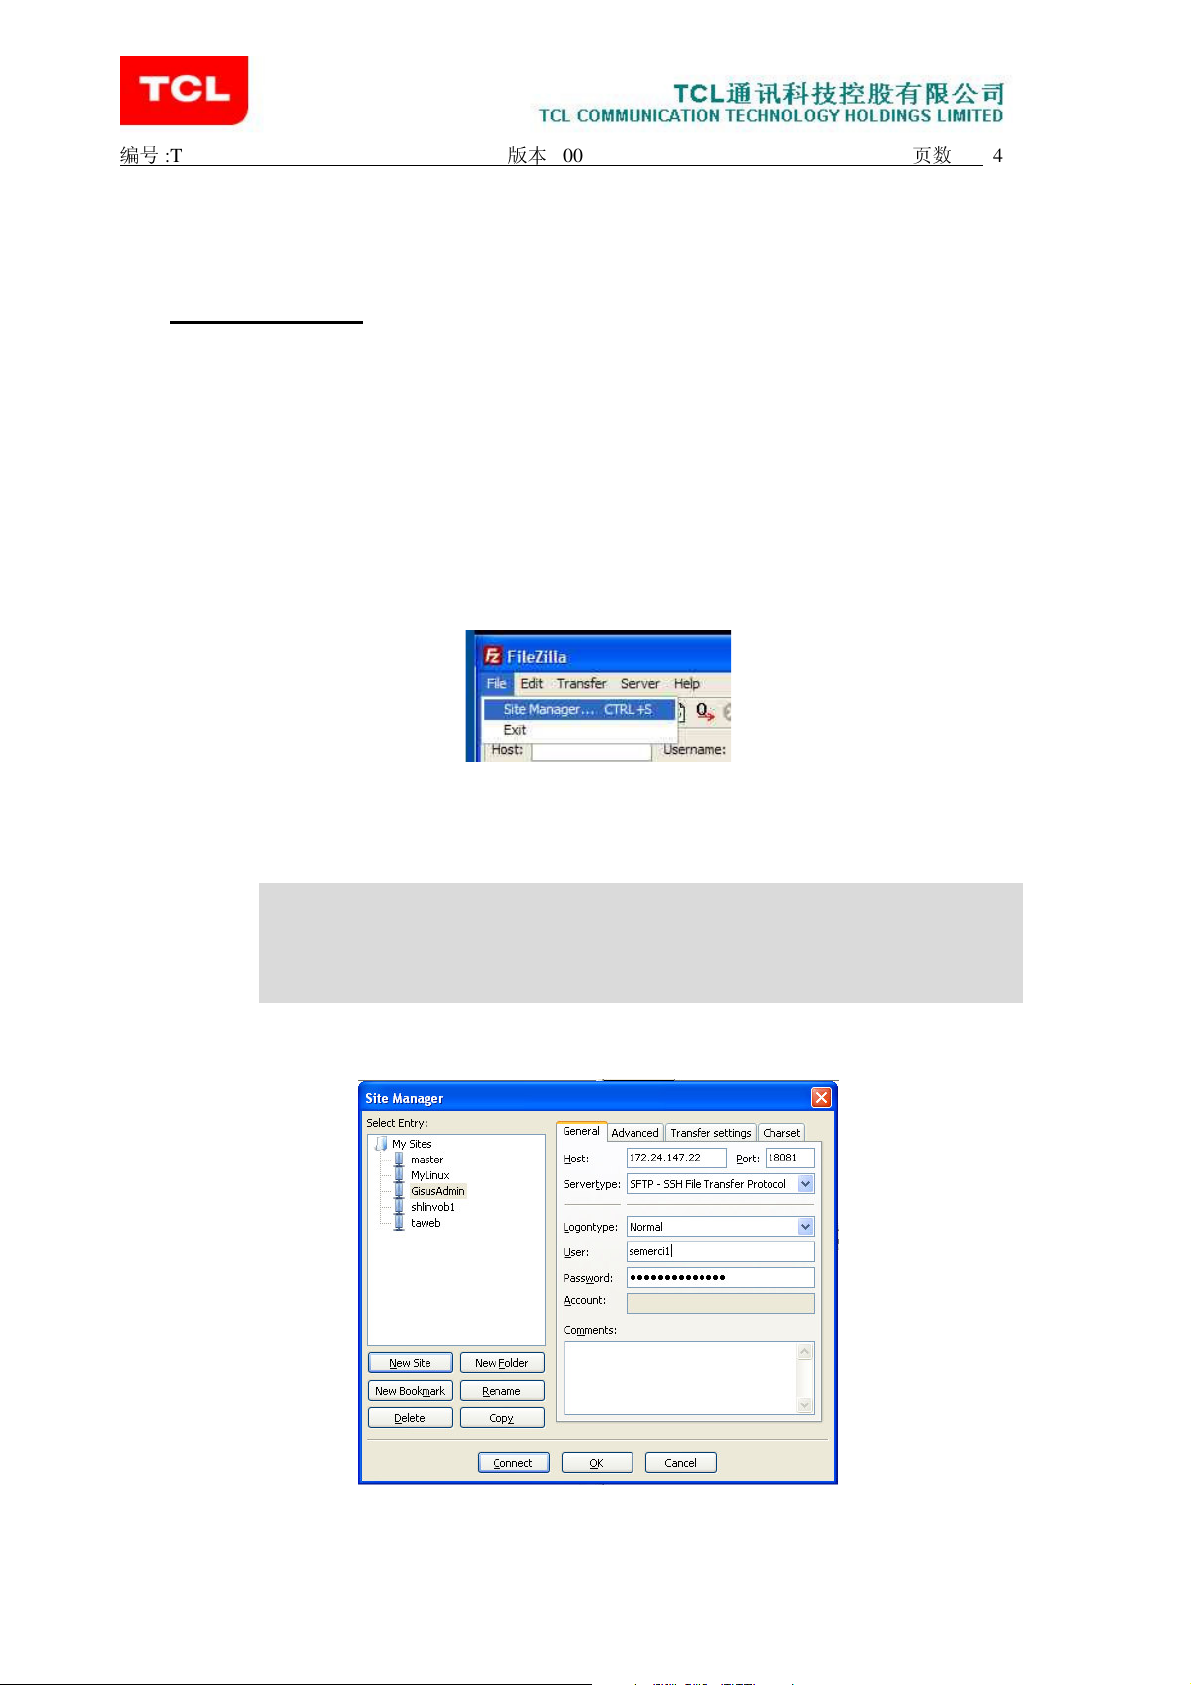
Once FileZilla application started, choose File->Site Manager from the menu as show
in the figure below or click on the corresponding icon below the ‘File’ menu.
Fig.2: FileZilla screenshot showing how to start the Site Manager.
Then, in the site manager, create a new site (for example ‘GisusAdmin’) and fill in the
required information with the following ones:
Host: 172.24.147.22
Port: 18081
Server Type: SFTP – SSH File Transfer Protocol
LogonType: Normal
User: <input your GISUS FTP username>
Password: <input your GISUS FTP password>
You should have something like the below pictures:
Fig.3: FileZilla screenshot showing an example of a new site creation.
Version : 2.0
:TCT-AAA-BB-CC00
!"
: 00
#$
: 8/24
Click on the ‘Ok’ button to confirm the new site creation and configuration.
4.3 Uploading a File Set
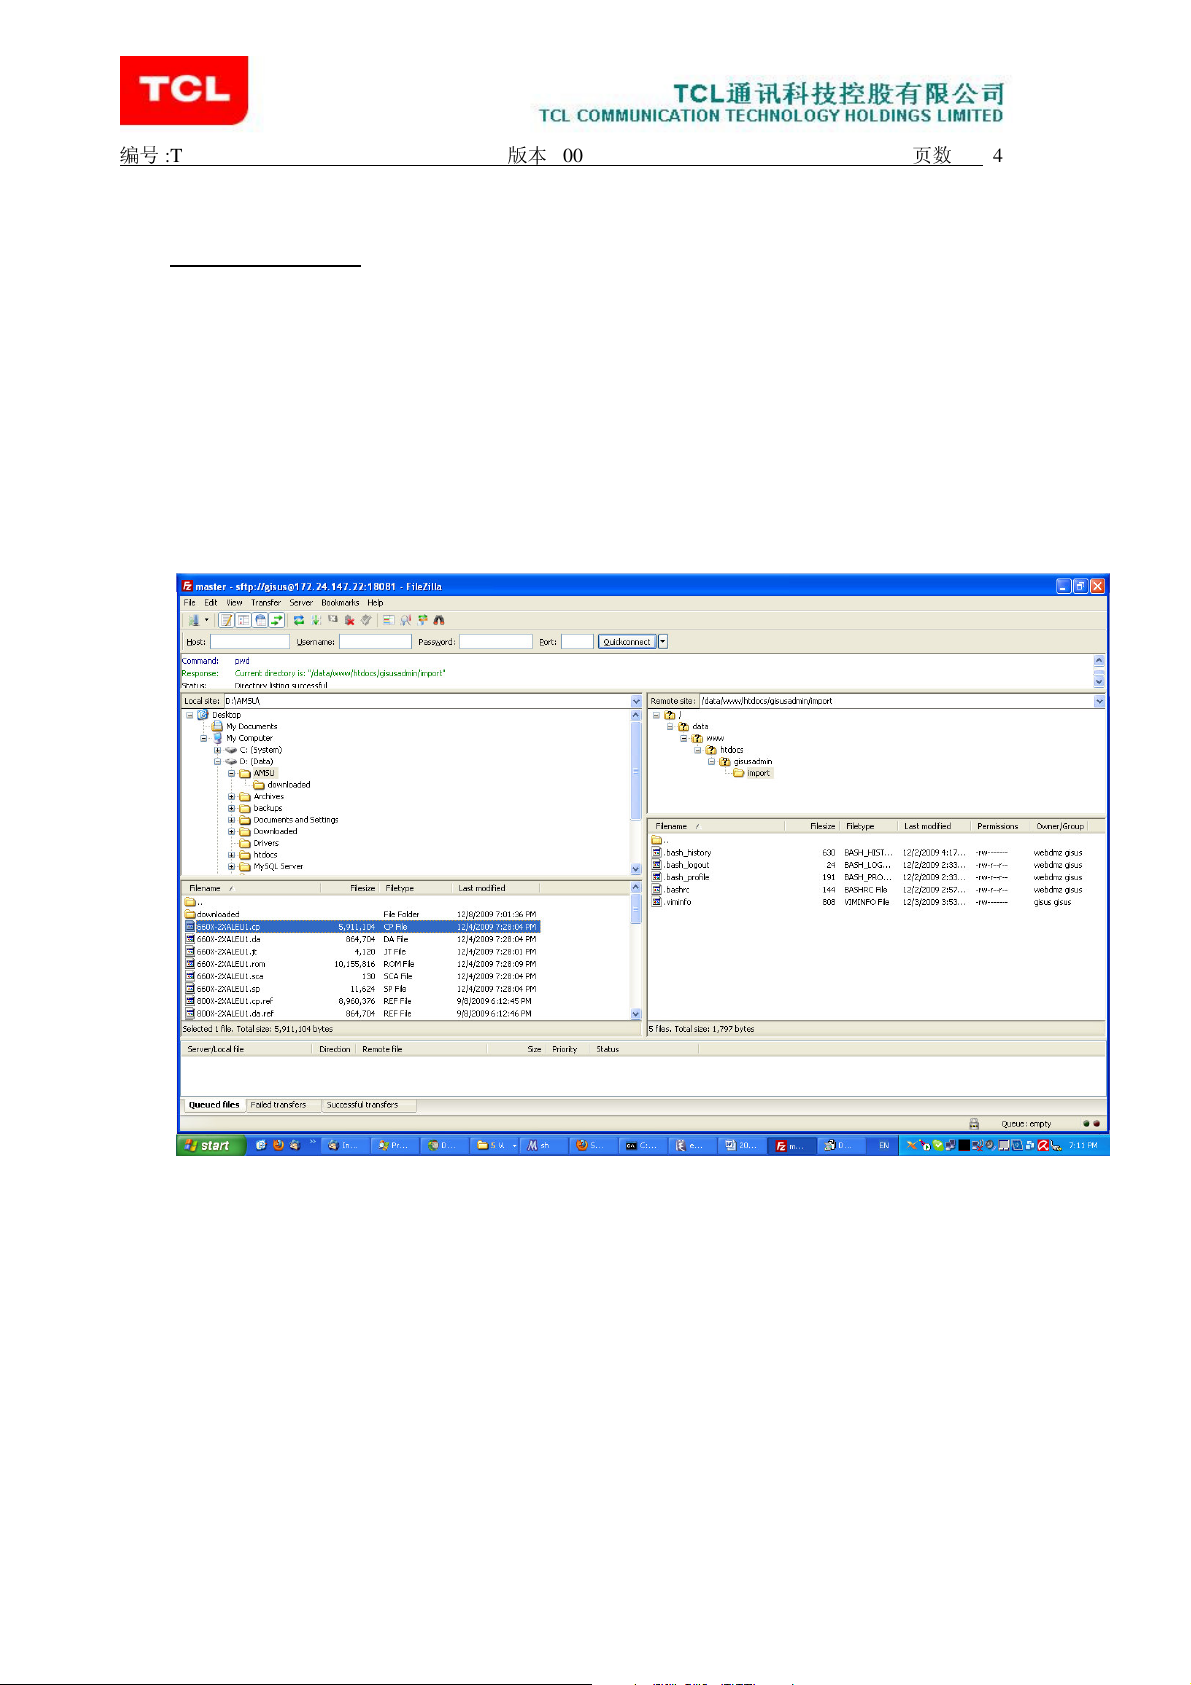
In the FileZilla application, open the Site Manager windows and select the
‘GisusAdmin’ site (it may have another name).
Connect to GisusAdmin server by clicking on ‘Connect’ button.
Once connected, you should directly be in ‘/data/www/htdocs/gisusadmin/import ‘. If
not, then you can directly enter by hand or copy/paste the path
‘(/data/www/htdocs/gisusadmin/import’ in the ‘Remote Path’ field (on the right side of
the FileZilla application).
Fig.4: FileZilla screenshot showing the main Windows of the application.
On the remote site, right click on the ‘import’ directory and select the ‘Create directory’
action as shown on the figure 5.
Version : 2.0
 Loading...