

Page 1
SpeedTouch™608/609
Business ADSL Routers
Orientation Guide
Release R4.2.9
Page 2

Page 3

SpeedTouch™
608/609
Orientation Guide
R4.2.9
Page 4

Copyright
Copyright ©1999-2005 THOMSON. All rights reserved.
Passing on, and copying of this document, use and communication of its contents is not permitted without written authorization
from THOMSON. The content of this document is furnished for informational use only, may be subject to change without notice,
and should not be construed as a commitment by THOMSON. THOMSON assumes no responsibility or liability for any errors or
inaccuracies that may appear in this document.
Thomson Telecom Belgium
Prins Boudewijnlaan, 47
B-2650 Edegem
Belgium
www.speedtouch.com
Trademarks
The following trademarks are used in this document:
SpeedTouch™ is a trademark of THOMSON.
Microsoft®, MS-DOS®, Windows® and Windows NT® are either registered trademarks or trademarks of Microsoft Corpora-
tion in the United States and/or other countries.
UNIX® is a registered trademark of UNIX System Laboratories, Incorporated.
Apple® and Mac OS® are registered trademarks of Apple Computer, Incorporated, registered in the United States and other
countries.
Adobe, the Adobe logo, Acrobat and Acrobat Reader are trademarks or registered trademarks of Adobe Systems, Incorpo-
rated, registered in the United States and/or other countries.
Netscape® and Netscape Navigator® are registered trademarks of Netscape Communications Corporation.
Ethernet™ is a trademark of Xerox Corporation.
UPnP™ is a certification mark of the UPnP™ Implementers Corporation.
Wi-Fi® and the Wi-Fi logo are registered trademarks of the Wi-Fi Alliance. "Wi-Fi CERTIFIED", "Wi-Fi ZONE", "Wi-Fi Alli-
ance", their respective logos and "Wi-Fi Protected Access" are trademarks of the Wi-Fi Alliance.
Other products may be trademarks or registered trademarks of their respective manufacturers.
Document Information
Status: v2.0 (January 2005)
Reference: E-DOC-CTC-20041207-0004
Short Title: Orientation Guide ST608/609 R4.2.9
Page 5

Contents
Contents
1 SpeedTouch™ Installation ........................................... 7
1.1 Getting Acquainted with the SpeedTouch™................................... 8
1.2 Setting up the SpeedTouch™........................................................ 10
1.3 SpeedTouch™ Local Networking Setup ........................................ 11
1.4 SpeedTouch™ Configuration Setup .............................................. 13
1.4.1 Microsoft Windows SpeedTouch™ Configuration Setup ..................................... 14
1.4.2 Operating System Independent SpeedTouch™ Configuration Setup...................... 20
2 SpeedTouch™ Internet Connectivity ........................ 23
2.1 Internet Connections via SpeedTouch™’s Embedded PPP Dial-in
Client............................................................................................ 24
2.1.1 Using the MS Windows XP Internet Gateway Device Control Agent.................... 25
2.1.2 Using the SpeedTouch™ Web Pages................................................................ 27
2.2 Connect to the Internet via a Host PPPoE Dial-in Client ............. 29
2.2.1 Using an MS Windows XP BroadBand Connection ............................................ 30
2.2.2 Using the Mac OS X PPPoE Dial-in Client......................................................... 34
3 Dr SpeedTouch™ ........................................................ 37
4 SpeedTouch™ Web Interface .................................... 41
E-DOC-CTC-20041207-0004 v2.0
4.1 Quick Tasks Links ........................................................................ 46
4.2 IP Router Tasks Links................................................................... 50
4.3 Connection Tasks Links ............................................................... 55
3
Page 6

Contents
4.4 LAN Services Tasks Links ............................................................ 59
4.5 System Config Tasks Links .......................................................... 63
4.6 Advanced Tasks Links.................................................................. 66
5 SpeedTouch™ NAPT Manager .................................. 69
6 SpeedTouch™ IPSec VPN .......................................... 75
7 SpeedTouch™ Advanced Concepts .......................... 81
7.1 Native Command Line Interface Access ...................................... 82
7.2 Dynamic DNS ............................................................................... 84
7.3 Simple Network Management Protocol ....................................... 89
7.4 Packet Firewalling ....................................................................... 90
8 Support ........................................................................93
8.1 SpeedTouch™ Default Configuration ............................................ 94
8.2 UPnP™ on Windows XP Systems .................................................. 95
8.3 Troubleshooting ........................................................................... 97
4
E-DOC-CTC-20041207-0004 v2.0
Page 7

About this Orientation Guide
About this Orientation Guide
Used Symbols
A note provides additional information about a topic.
A tip provides an alternative method or shortcut to perform an action.
A caution warns you about potential problems or specific precautions that need to be taken.
!
Ter min olo gy
Generally, the SpeedTouch™608, SpeedTouch™608i, SpeedTouch™609 and SpeedTouch™609i will be referred to as
SpeedTouch™ throughout this Orientation Guide unless specifically indicated.
Documentation and software updates
THOMSON continuously develops new solutions, but is also committed to improve its existing products.
For more information on THOMSON's latest technological innovations, documents and software releases, visit us
at:
www.speedtouch.com
E-DOC-CTC-20041207-0004 v2.0
5
Page 8

About this Orientation Guide
6
E-DOC-CTC-20041207-0004 v2.0
Page 9

SpeedTouch™ Installation
1 SpeedTouch™ Installation
Introduction Thank you for purchasing the SpeedTouch™608/609 Business DSL router!
Specially designed for Small/Medium Enterprises (SMEs) and Small Office/Home
Office (SOHO), the SpeedTouch™608/609 Business Digital Subscriber Line (DSL)
router offers plenty of capabilities.
With easy installation mechanisms, embedded firewalling, embedded IPSec based IP
Virtual Private Networking (VPN) functionality the SpeedTouch™ is a highly secure
Internet Gateway. In addition the SpeedTouch™ features embedded dynamic DNS
client functionality that allows to point fixed DNS host names to the Service
Provider-assigned dynamic IP address(es) on one or more of the SpeedTouch™’s
interfaces.
As such, beyond the small business market, the SpeedTouch™608/609 Business DSL
Router is the ideal solution for connecting regional and branch offices back to
corporate headquarters.
Chapter 1
Contents This Orientation Guide will assist you in getting acquainted with the SpeedTouch™
Business DSL router and its broad range of service capabilities.
Safety instructions Prior to connecting the SpeedTouch™, read the SpeedTouch™ Safety Instructions and
Regulatory Notices, and the Quick Installation Guide.
UPnP™ The SpeedTouch™ is a UPnP™ certified product. This feature enables your computer
to discover and control UPnP™ devices on the network.
If you are running Microsoft Windows XP, it is strongly recommended to add the
UPnP™ software component to your system.
For more information see MS Windows XP Help and “8.2 UPnP™ on Windows XP
Systems” on page 95.
E-DOC-CTC-20041207-0004 v2.0
7
Page 10
Chapter 1
SpeedTouch™ Installation
1.1 Getting Acquainted with the SpeedTouch™
Introducing the
SpeedTouch™
Prior to proceeding, please make sure to read the SpeedTouch™ Quick Installation
Guide. It provides important package content and safety information.
Check whether all items are present in your package.
In the event of damaged or missing items, please contact your local product dealer
for further information.
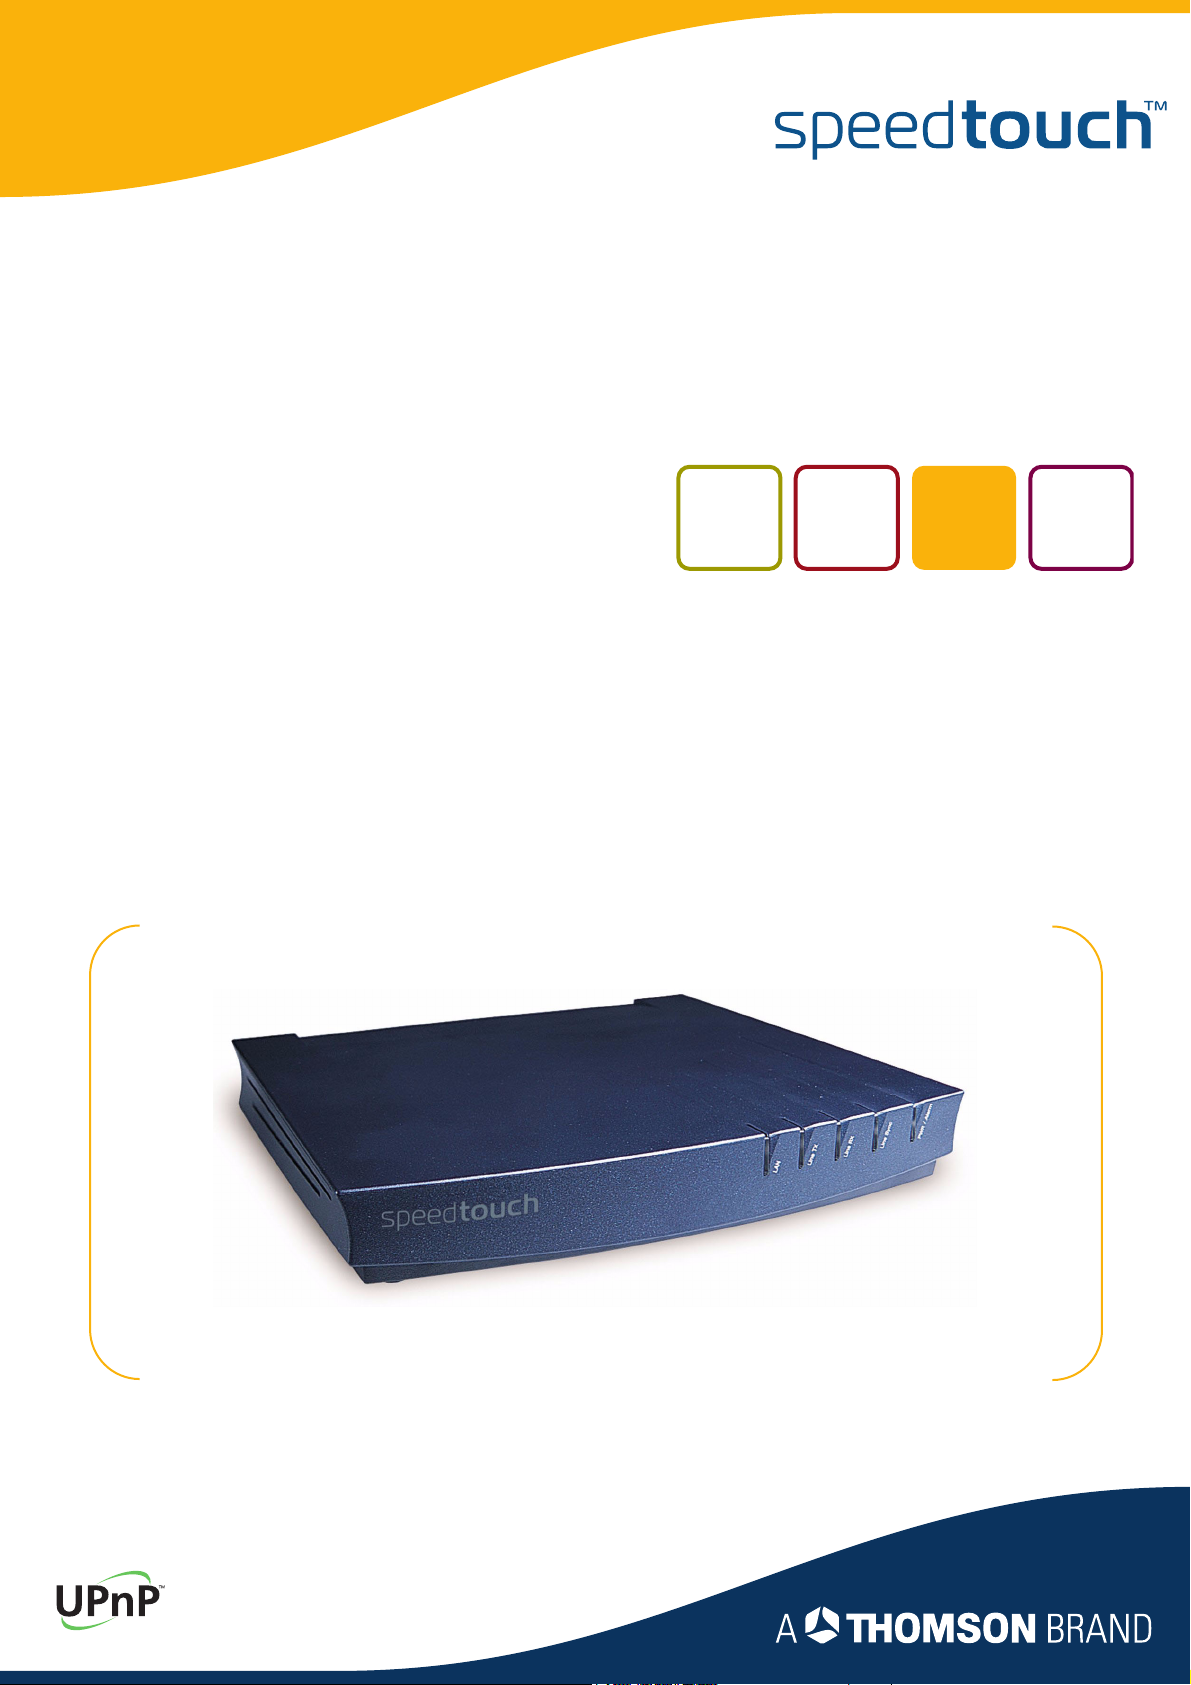
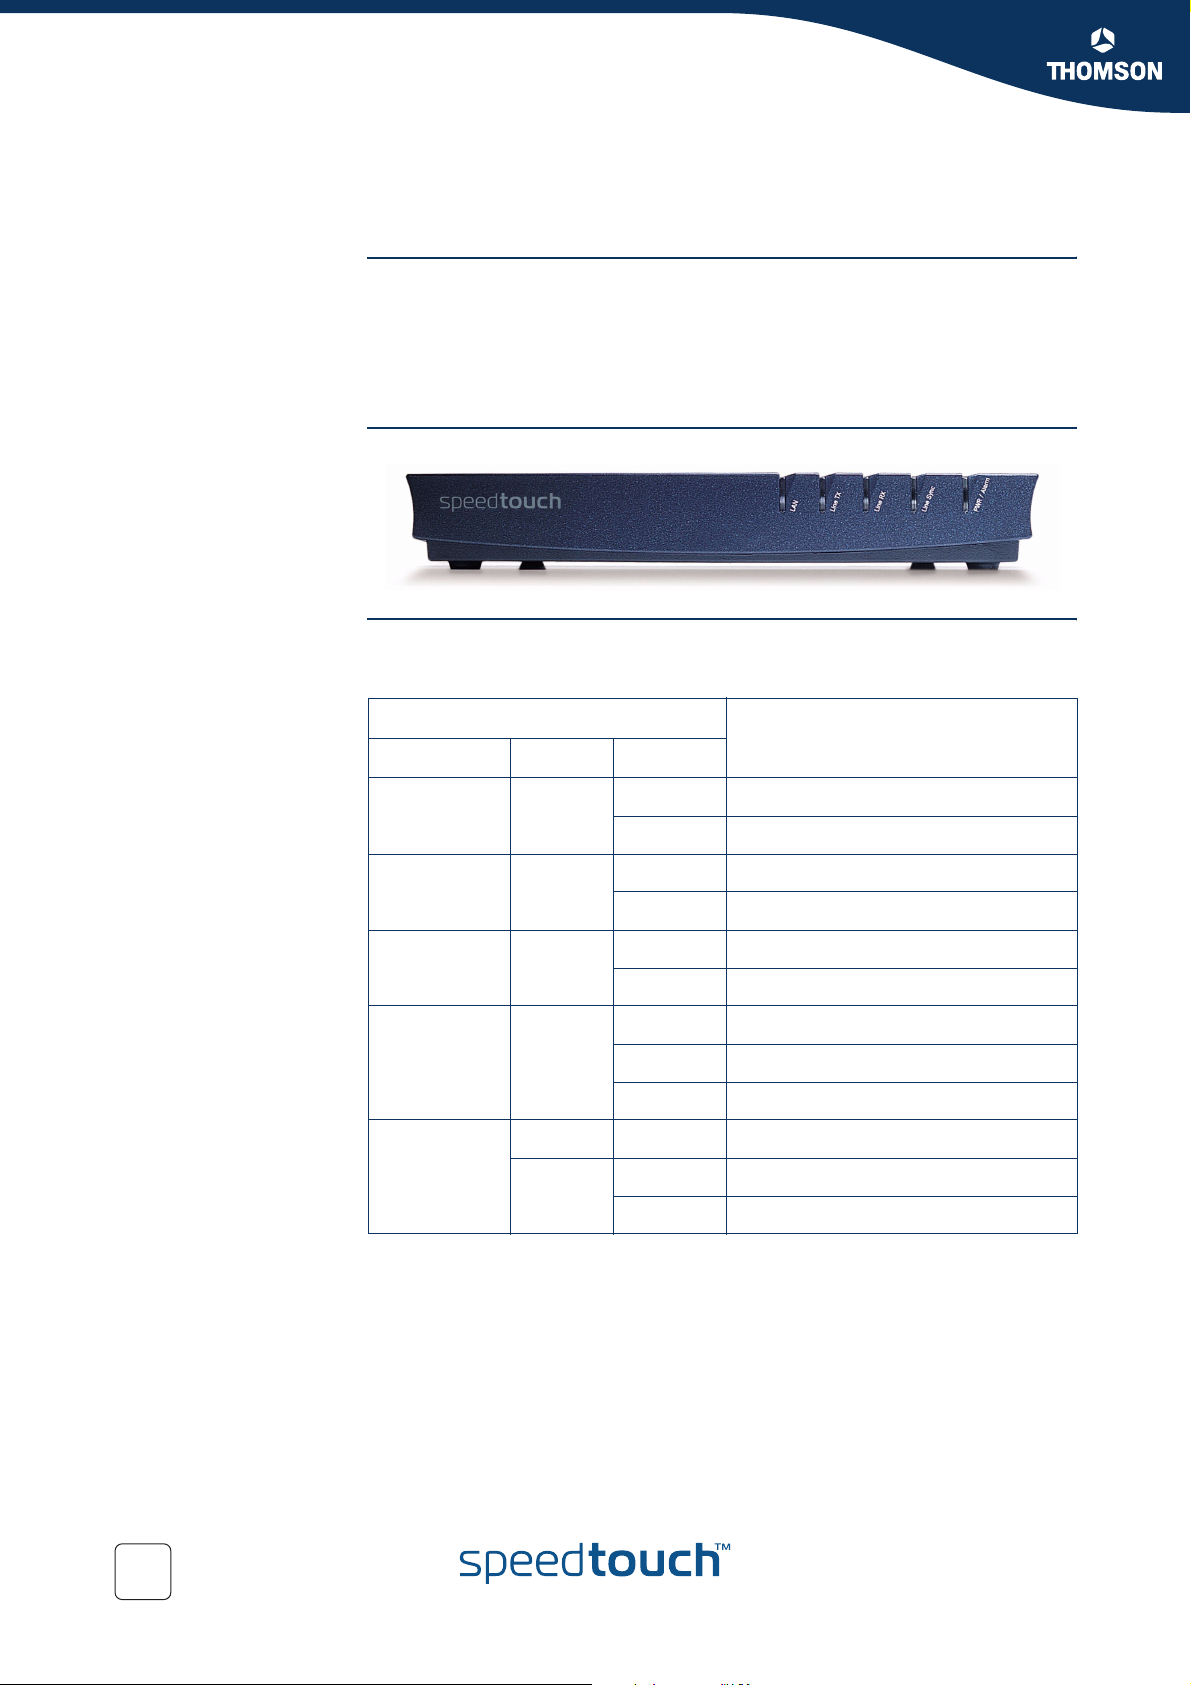
Front panel layout The SpeedTouch™ is presented in a desktop housing:
Front panel LEDs The SpeedTouch™ is equipped with five LEDs on its front panel, indicating the state
of the device during normal operation:
Indicator Description
Name Color State
LAN Green Flashing Ethernet LAN activity
Off No Ethernet LAN activity
Line TX Green Flashing ATM cell transmission on DSL line
Off No transmission activity
Line RX Green Flashing ATM cell reception on DSL line
Off No reception activity
Line Sync Green Off No DSL line
Flashing Initialization of DSL line
On DSL line synchronized
PWR/Alarm Green On Power on, normal operation
Red Flashing Power on, DIP switch 4 up
On Power on, startup pending
8
E-DOC-CTC-20041207-0004 v2.0
Page 11

Back panel layout
Ethernet port(s) LEDs
Chapter 1
SpeedTouch™ Installation
BA C D E F
A Power switch D DIP switches
B Power inlet E Serial Console port
C Four port Ethernet switch F DSL line port (RJ11 3/4-pinning)
BA
Indicator Description
Name LED Status
A
(Optional)
B Integrity
10/100Base-T Off 10Base-T Ethernet connection.
On 100Base-T Ethernet connection.
Off No connection on this port.
(Activity)
On Ethernet link up.
Flashing Data is flowing from/to this port.
E-DOC-CTC-20041207-0004 v2.0
9
Page 12

Chapter 1
SpeedTouch™ Installation
SpeedTouch™ variants The SpeedTouch™608 is offered in two ADSL variants:
ADSL service The appropriate ADSL service must be available at your local premises:
1.2 Setting up the SpeedTouch™
The SpeedTouch™608:
The ADSL/POTS variant connecting to an analog Plain Old Telephone Service
(POTS) line.
The SpeedTouch™608i:
The ADSL/ISDN variant connecting to a digital Integrated Services Digital
Network (ISDN) line.
You can easily identify your variant by checking the identification label located on the
bottom of your SpeedTouch™.
Use only the SpeedTouch™ variant which is appropriate for the DSL service
delivered to your local premises. Check with your Service Provider whether your
SpeedTouch™ variant is adapted to DSL service requirements.
ADSL service must be enabled on your phone line
If both telephone and ADSL service are simultaneously available from the same
copper pair, you will need a central splitter or distributed filters for decoupling
ADSL and telephone signals
Always contact your Service Provider for splitter/filter installation!
Public telephone lines carry voltages that can cause electric shock. Only install
splitter/filters yourself if these are qualified for that purpose.
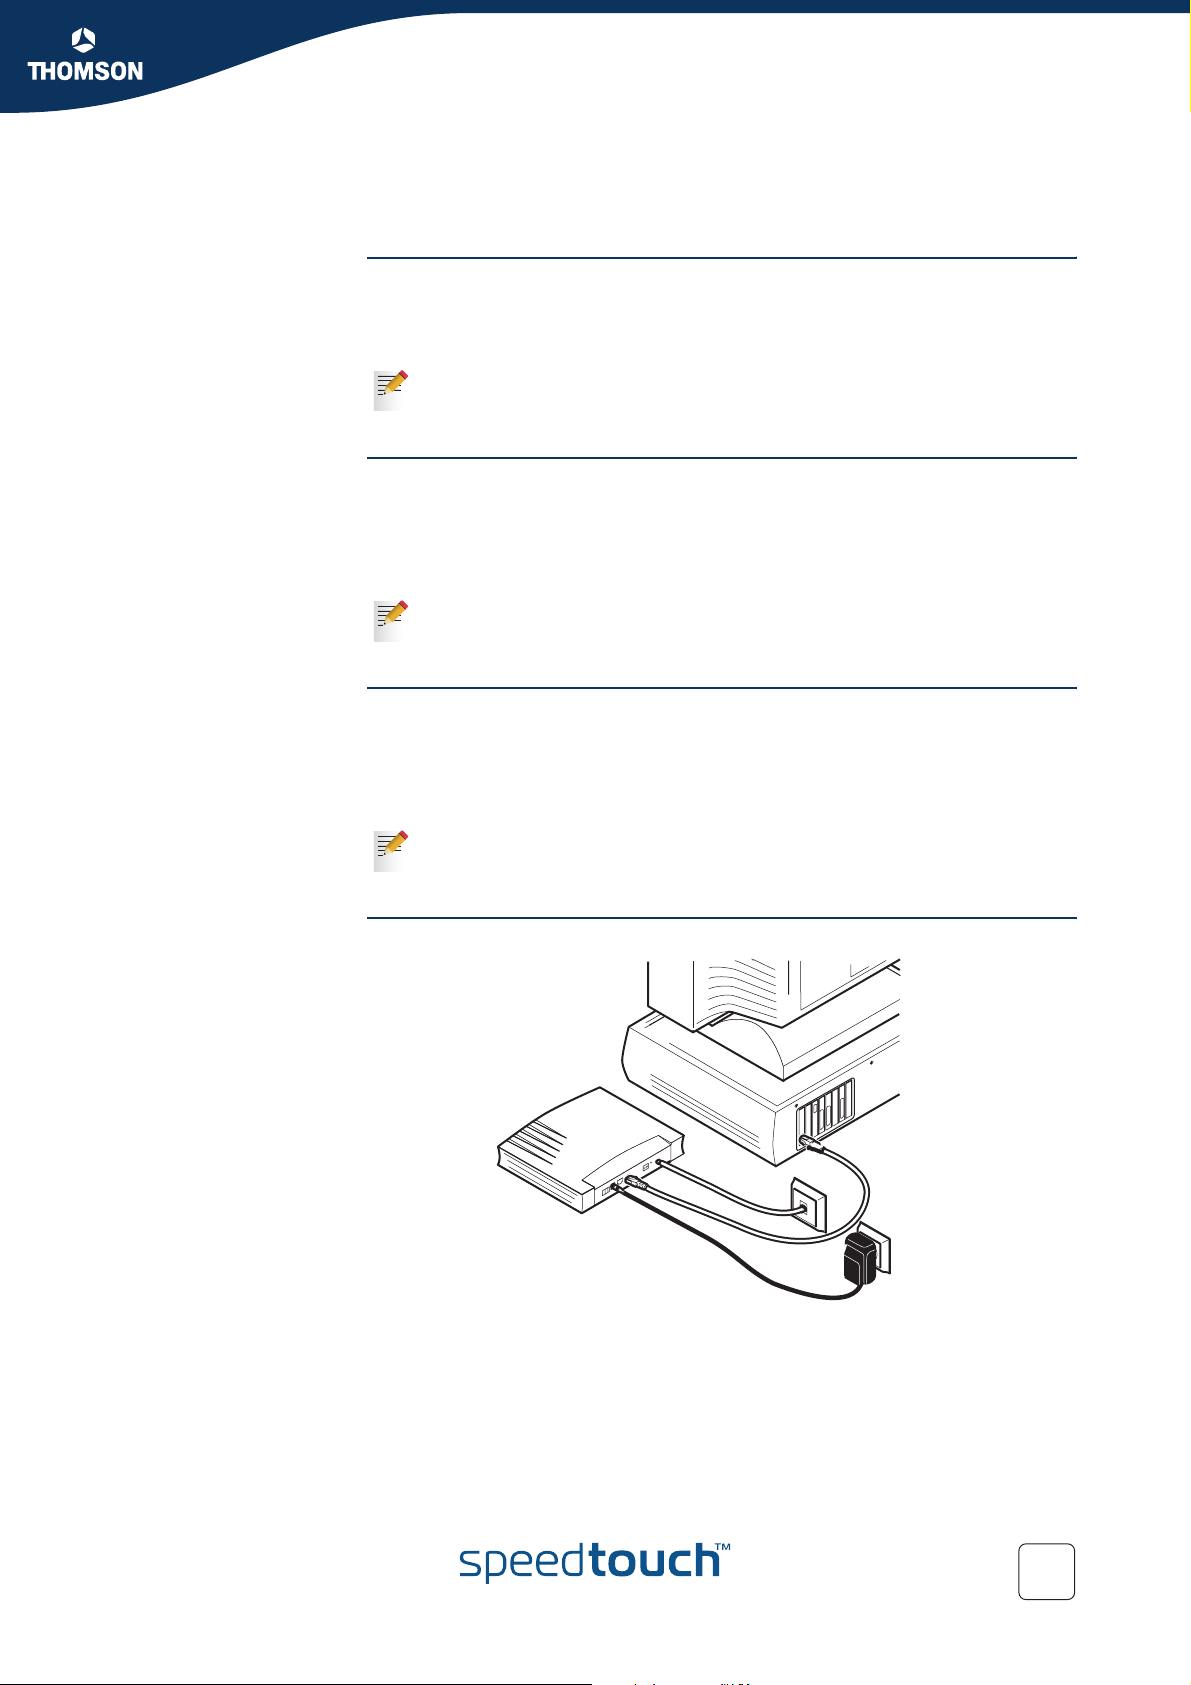
Connect the DSL line The DSL port on the SpeedTouch™ is marked “Line”.
Use the DSL cable provided to wire the SpeedTouch™ DSL port to your telephone
wall outlet or distributed filter.
Connect the power
supply
Turn on th e
SpeedTouch™
Connecting your
computer(s)
Always check first whether the power supply adapter provided is suitable for the
local power specifications. Contact your Service Provider in case of any doubt.
The power inlet on the SpeedTouch™ is marked “DC”.
Plug the adapter's coaxial jack into the SpeedTouch™'s power inlet and plug the
power supply into a power socket outlet.
Once all previous steps are completed, you can turn the SpeedTouch™ on (I) with the
power switch located on the SpeedTouch™608 rear panel.
The SpeedTouch™ is ready for service as soon as the start-up procedures are
completed, the Power On Self Test (POST) is passed and the Power LED on the front
panel is constantly lit green.
For troubleshooting startup failures, see “7.5 Troubleshooting” on page 103.
The SpeedTouch™ offers you various possibilities to connect your computer(s) to the
device. Proceed with “1.3 SpeedTouch™ Local Networking Setup” on page 11 to set
up your local network.
10
E-DOC-CTC-20041207-0004 v2.0
Page 13
Chapter 1
SpeedTouch™ Installation
1.3 SpeedTouch™ Local Networking Setup
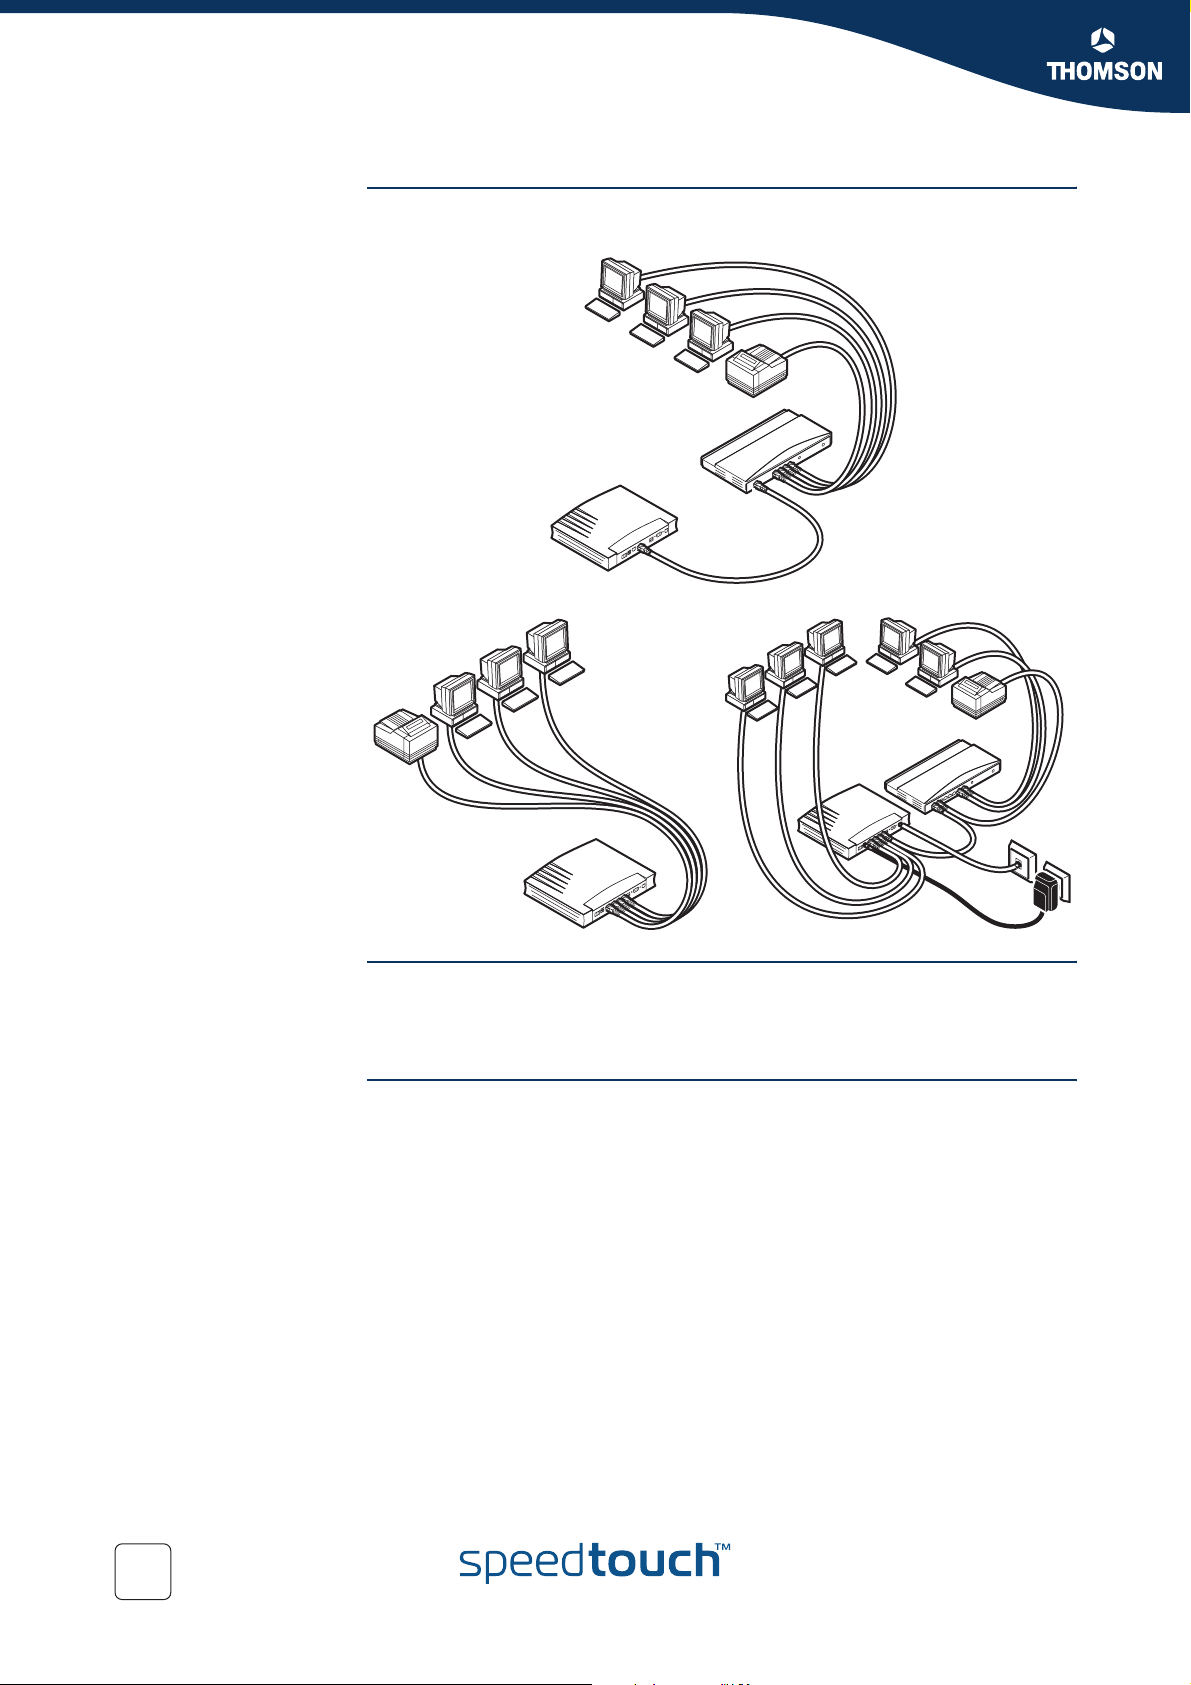
Wired Ethernet The SpeedTouch™ managed four-port 10/100Base-T Half-/Full-duplex auto-sensing
MDI/MDI-X Ethernet switch allows you to create a local Ethernet network of up to
four devices, without needing extra networking devices or to expand an existing 10
or 100Base-T Ethernet network.
If an external hub or switch is used for wired Ethernet networking, please
follow the installation instructions supplied with the hub for connections
and Ethernet cabling.
Local network The SpeedTouch™ Ethernet ports on the back panel allow you to connect the
SpeedTouch™ to an existing 10 or 100Base-T Ethernet network or one (or more)
computer(s) with installed Ethernet card.
Using the SpeedTouch™ Ethernet switch, you can create a local Ethernet network of
up to four devices, without needing extra networking devices.
In the SpeedTouch™ package, a full-wired straight-through RJ45/RJ45
Ethernet cable is included to connect a single computer to your
SpeedTouch™.
Standard wiring
procedure
Use the Ethernet cable provided to wire your computer's Ethernet port to one of the
SpeedTouch™'s Ethernet ports.
If you intend to extend an existing local network, you can use the Ethernet cable
included to wire any Ethernet port of an external Ethernet hub or switch to one of the
SpeedTouch™’s Ethernet ports.
If an external hub or switch is used for Ethernet networking, please follow
the installation instructions supplied with the hub or switch for connections
and Ethernet cabling.
Single PC wiring Once all connections are made, the result should look similar as below:
E-DOC-CTC-20041207-0004 v2.0
11
Page 14
Chapter 1
SpeedTouch™ Installation
LAN wiring Using the SpeedTouch™ switch and/or an external hub, you can connect multiple
computers to your SpeedTouch™:
Ethernet link check The SpeedTouch™ LED indicators allow you to check your Ethernet.
See “1.1 Getting Acquainted with the SpeedTouch™” on page 8 for more
information.
Internet connection
setup
To continue with preparing the SpeedTouch™ for internet connectivity, see
“1.4 SpeedTouch™ Configuration Setup” on page 13.
12
E-DOC-CTC-20041207-0004 v2.0
Page 15

SpeedTouch™ Installation
1.4 SpeedTouch™ Configuration Setup
Internet connectivity Some configuration may be required to prepare the SpeedTouch™ for Internet
connectivity.
Before setting up the SpeedTouch™ for Internet connectivity, make sure that the
SpeedTouch™ is prepared as described in “1.2 Setting up the SpeedTouch™” on
page 10.
The configuration of your SpeedTouch™ can be done
semi-automatically via the SpeedTouch™ Setup wizard
- or -
manually via the SpeedTouch™ web pages.
This section describes how to configure the SpeedTouch™ via the Setup wizard.
For advanced configurations via the SpeedTouch™ web pages, see “4 SpeedTouch™
Web Interface” on page 41.
Chapter 1
What you need from
your ISP
SpeedTouch™
configuration options
You might need a user account with an Internet Service Provider (ISP) for Internet
access. For this user account, your ISP will provide you with:
A user name (logon ID).
A password.
Other information might be required, depending on the ISP’s specific requirements.
The method for configuring the SpeedTouch™ via the Setup configuration files
depends on the Operating System (OS) of your computer system.
If your computer system runs:
A Microsoft Windows Operating System:
The SpeedTouch™ Setup wizard, included on the SpeedTouch™ Setup CD, will
automatically guide you through the configuration of both the SpeedTouch™
and your PC for setting up the appropriate configuration.
Proceed with “1.4.1 Microsoft Windows SpeedTouch™ Configuration Setup” on
page 14.
In addition it is recommended to install Dr SpeedTouch™.
See“3 Dr SpeedTouch™” on page 37 for more information.
Another Operating System (e.g. Mac OS, UNIX, Linux, etc.):
The SpeedTouch™ Embedded Easy Setup wizard, accessible from the
SpeedTouch™ web pages, will automatically guide you through the
configuration of the SpeedTouch™.
Proceed with “1.4.2 Operating System Independent SpeedTouch™
Configuration Setup” on page 20.
E-DOC-CTC-20041207-0004 v2.0
13
Page 16

Chapter 1
SpeedTouch™ Installation
1.4.1 Microsoft Windows SpeedTouch™ Configuration Setup
Supported Operating
Systems
The SpeedTouch™
Setup Wizard
One of the following MS Windows OSs must be installed on your PC(s):
MS Windows 98SE
MS Windows ME
MS Windows NT4.0 SP6
MS Windows 2000
MS Windows XP
You may need the MS Windows installation CD-ROM during installation.
The SpeedTouch™ Setup wizard procedure consists of three parts:
Detection of the SpeedTouch™
Configuration of the SpeedTouch™ (and PC)
Additional configuration (if needed)
14
E-DOC-CTC-20041207-0004 v2.0
Page 17
Chapter 1
SpeedTouch™ Installation
Detection of the
SpeedTouch™
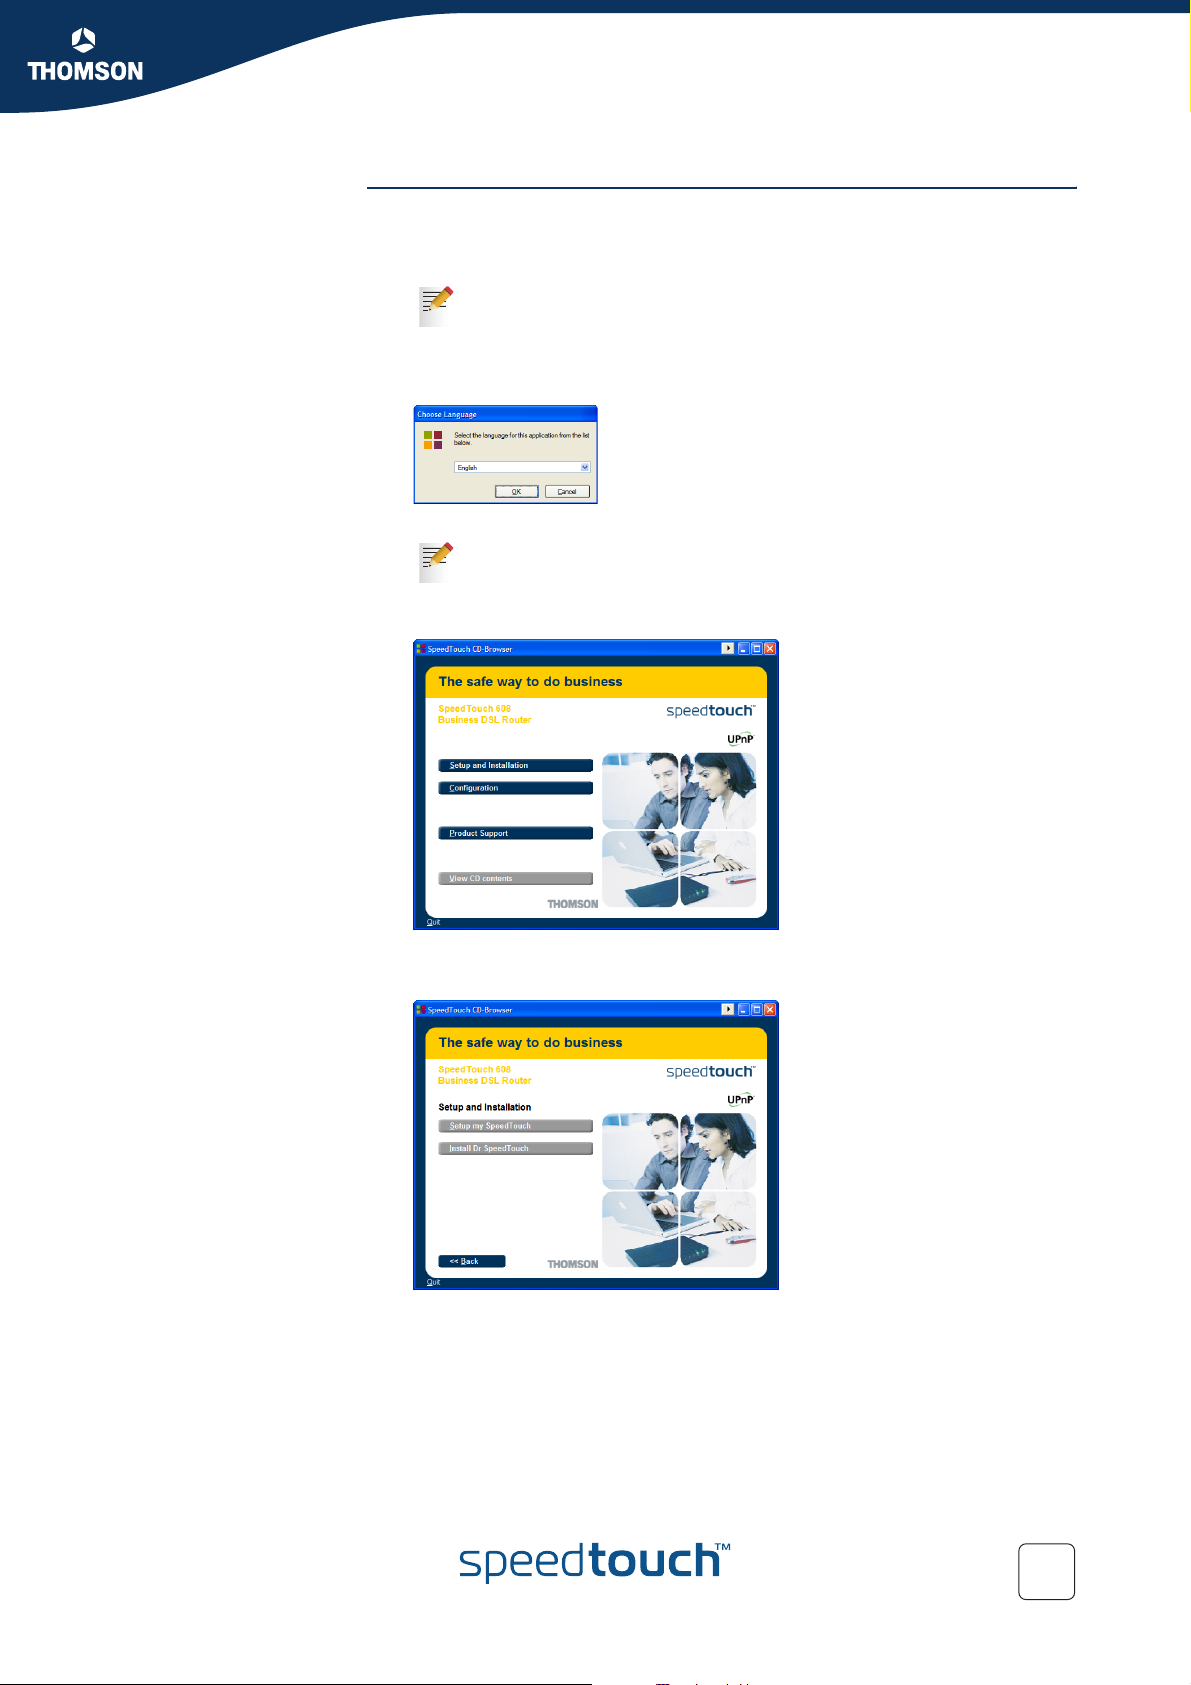
Proceed as follows:
1 Insert the SpeedTouch™ Setup CD-ROM in your PC's CD-ROM drive. The
SpeedTouch™ CD Browser will start automatically.
If the SpeedTouch™ CD Browser window does not appear
automatically, open a Run window via Start > Run from the Start
menu and enter the following path: D:\Menu.exe, where D stands for
the drive letter of your CD-ROM drive.
2 The Choose Language window prompts you to select a language:
Select the language of your choice and click OK.
The selected language will also be used as default language in the
SpeedTouch™ web pages. See “ Language” on page 67 for more
information on how to change the web page language.
3 The SpeedTouch™ CD Browser menu appears:
Click Setup and Installation.
4 The Setup and Installation window appears:
Click Setup my SpeedTouch™ to start the SpeedTouch™ Setup Wizard.
E-DOC-CTC-20041207-0004 v2.0
15
Page 18
Chapter 1
SpeedTouch™ Installation
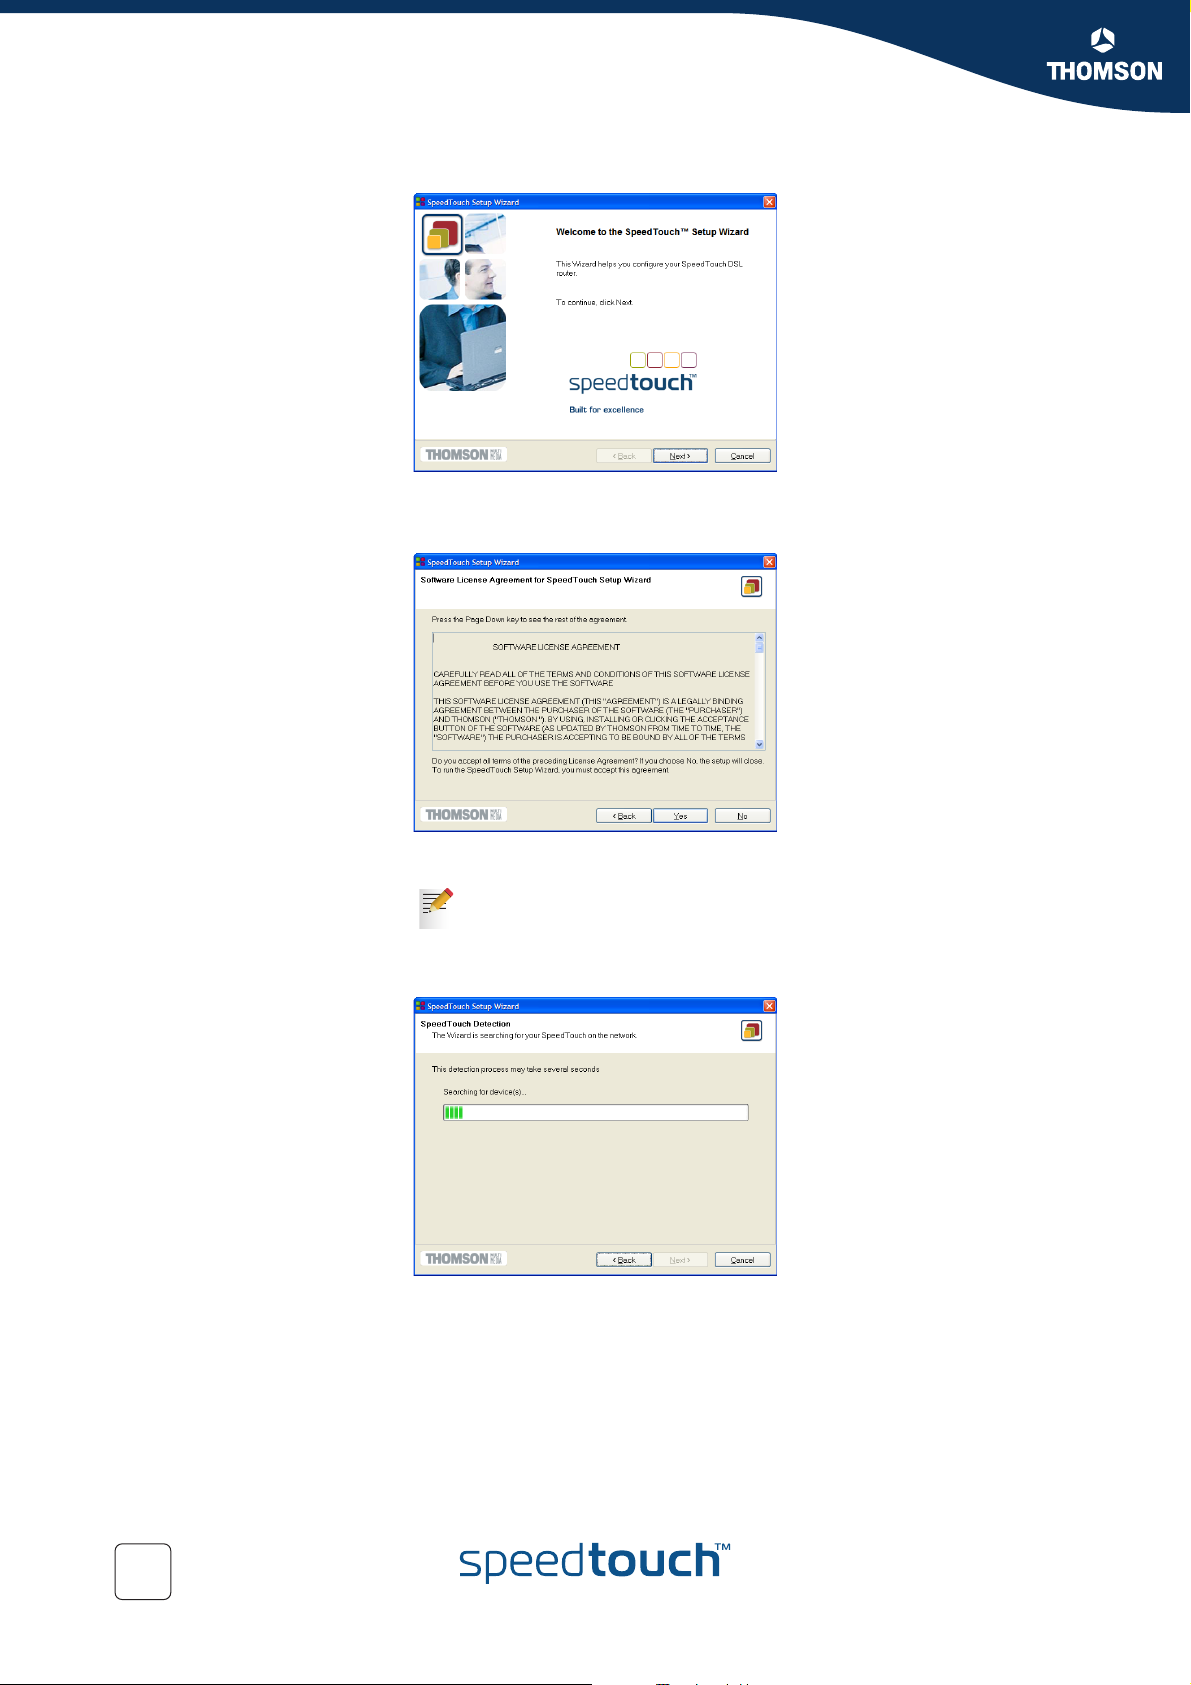
5 The Welcome to the SpeedTouch™ Setup Wizard window appears:
Click Next.
6 The Software License Agreement window appears:
You must accept before continuing. Click Yes to accept.
If you have accepted this License Agreement in a previous
configuration setup, this window will not be shown anymore.
7 The SpeedTouch™ Setup Wizard will search for the SpeedTouch™ on the
network. The following window shows the detection progress:
16
E-DOC-CTC-20041207-0004 v2.0
Page 19
Chapter 1
SpeedTouch™ Installation
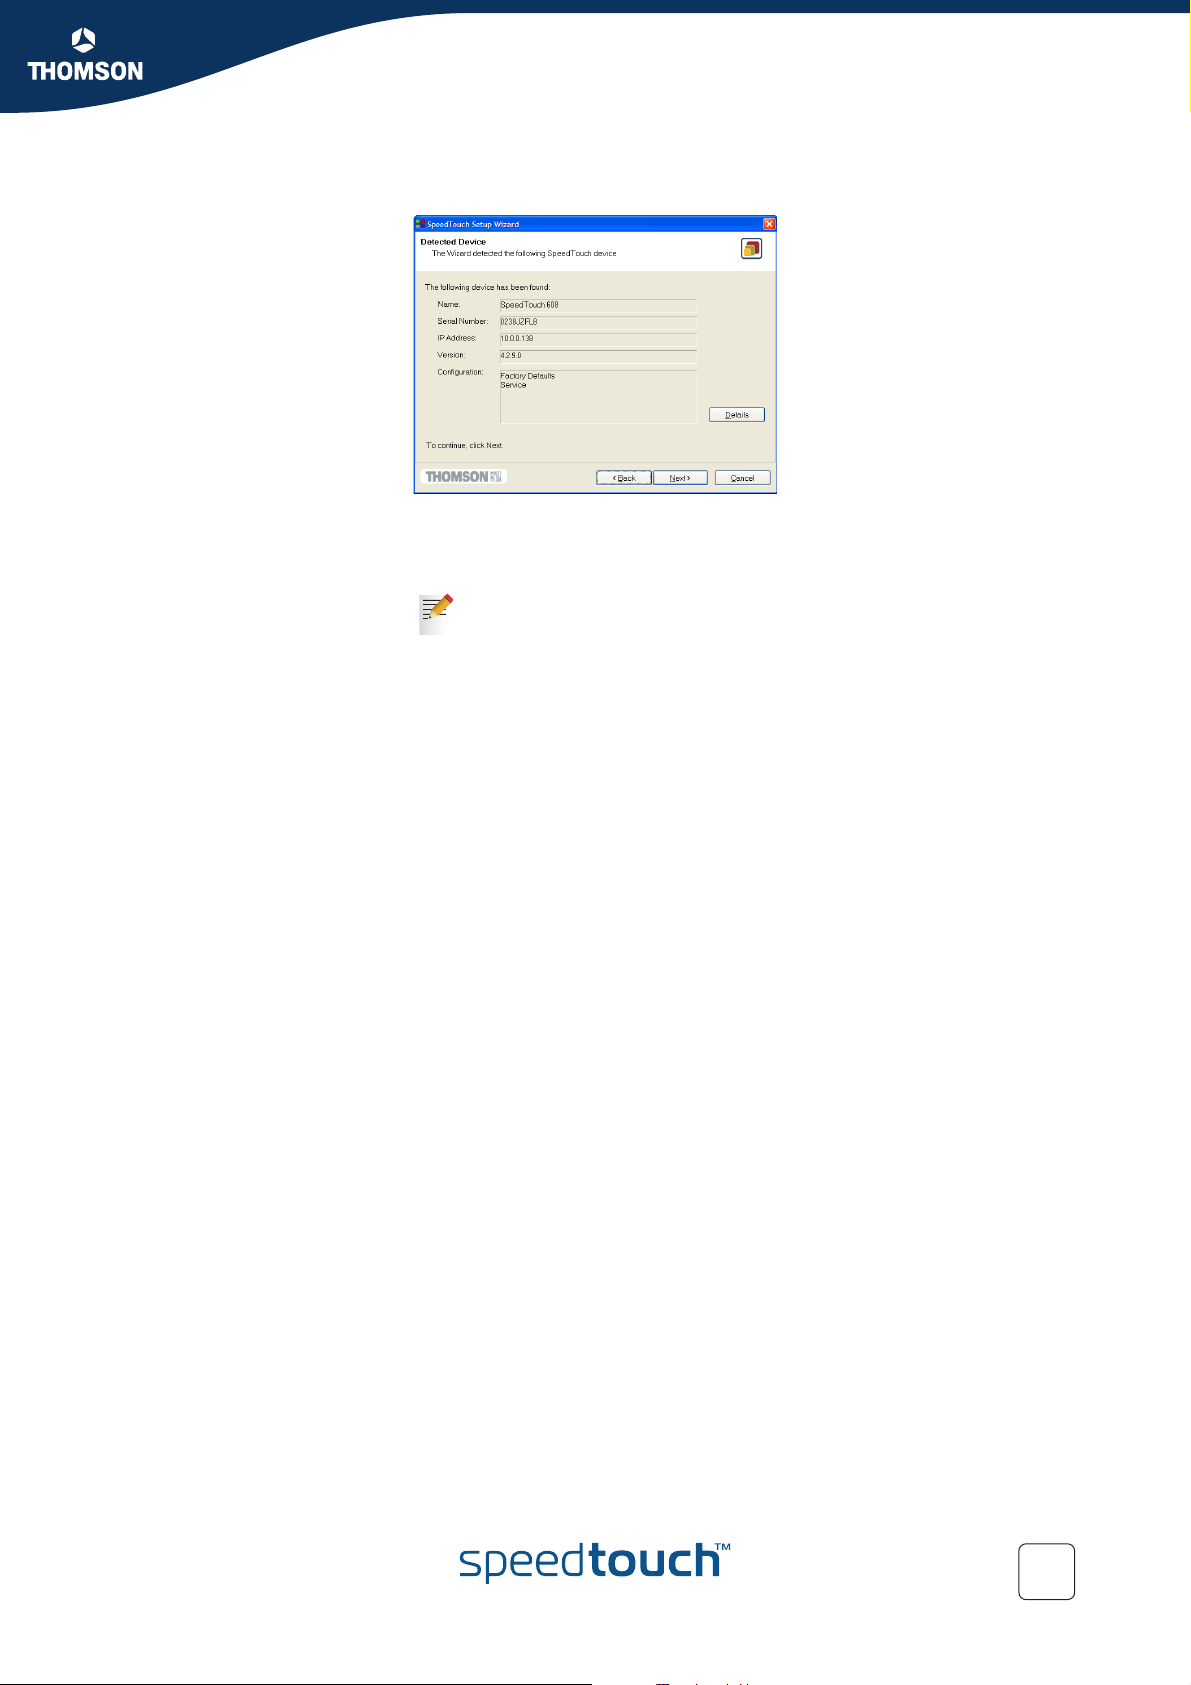
8 The setup wizard should find your SpeedTouch™ device on the local network.
This is indicated by following window:
If more than one device is found, a list of available devices will be provided. If
this is the case, select your SpeedTouch™ device (SpeedTouch™608) and click
Next.
If the Setup wizard does not find any SpeedTouch™ on the network an
error window appears. In this case check that:
The SpeedTouch™ is turned on and fully initialized.
Your PC has a valid IP address (i.e. any IP address but 0.0.0.0).
No dedicated firewall device or router is placed between your PC
and the SpeedTouch™.
No personal firewall software is running on your PC.
To repeat the search for your SpeedTouch™, click Back and proceed
with step 77 of this procedure.
9 Click Next to start the configuration procedure described below.
E-DOC-CTC-20041207-0004 v2.0
17
Page 20
Chapter 1
SpeedTouch™ Installation
Configuration of the
SpeedTouch™ (and PC)
Proceed as follows:
1 As soon as the SpeedTouch™ Setup wizard has detected your SpeedTouch™
device, you can proceed with the configuration procedure.
If the SpeedTouch™ has been configured before:
It may be protected by a system password. You must provide this
password before you can view the device details or continue with
the configuration.
You will be asked to choose between reconfiguring your
SpeedTouch™ or changing your Local Area Network configuration.
Select the Reconfigure the SpeedTouch™ option and click Next.
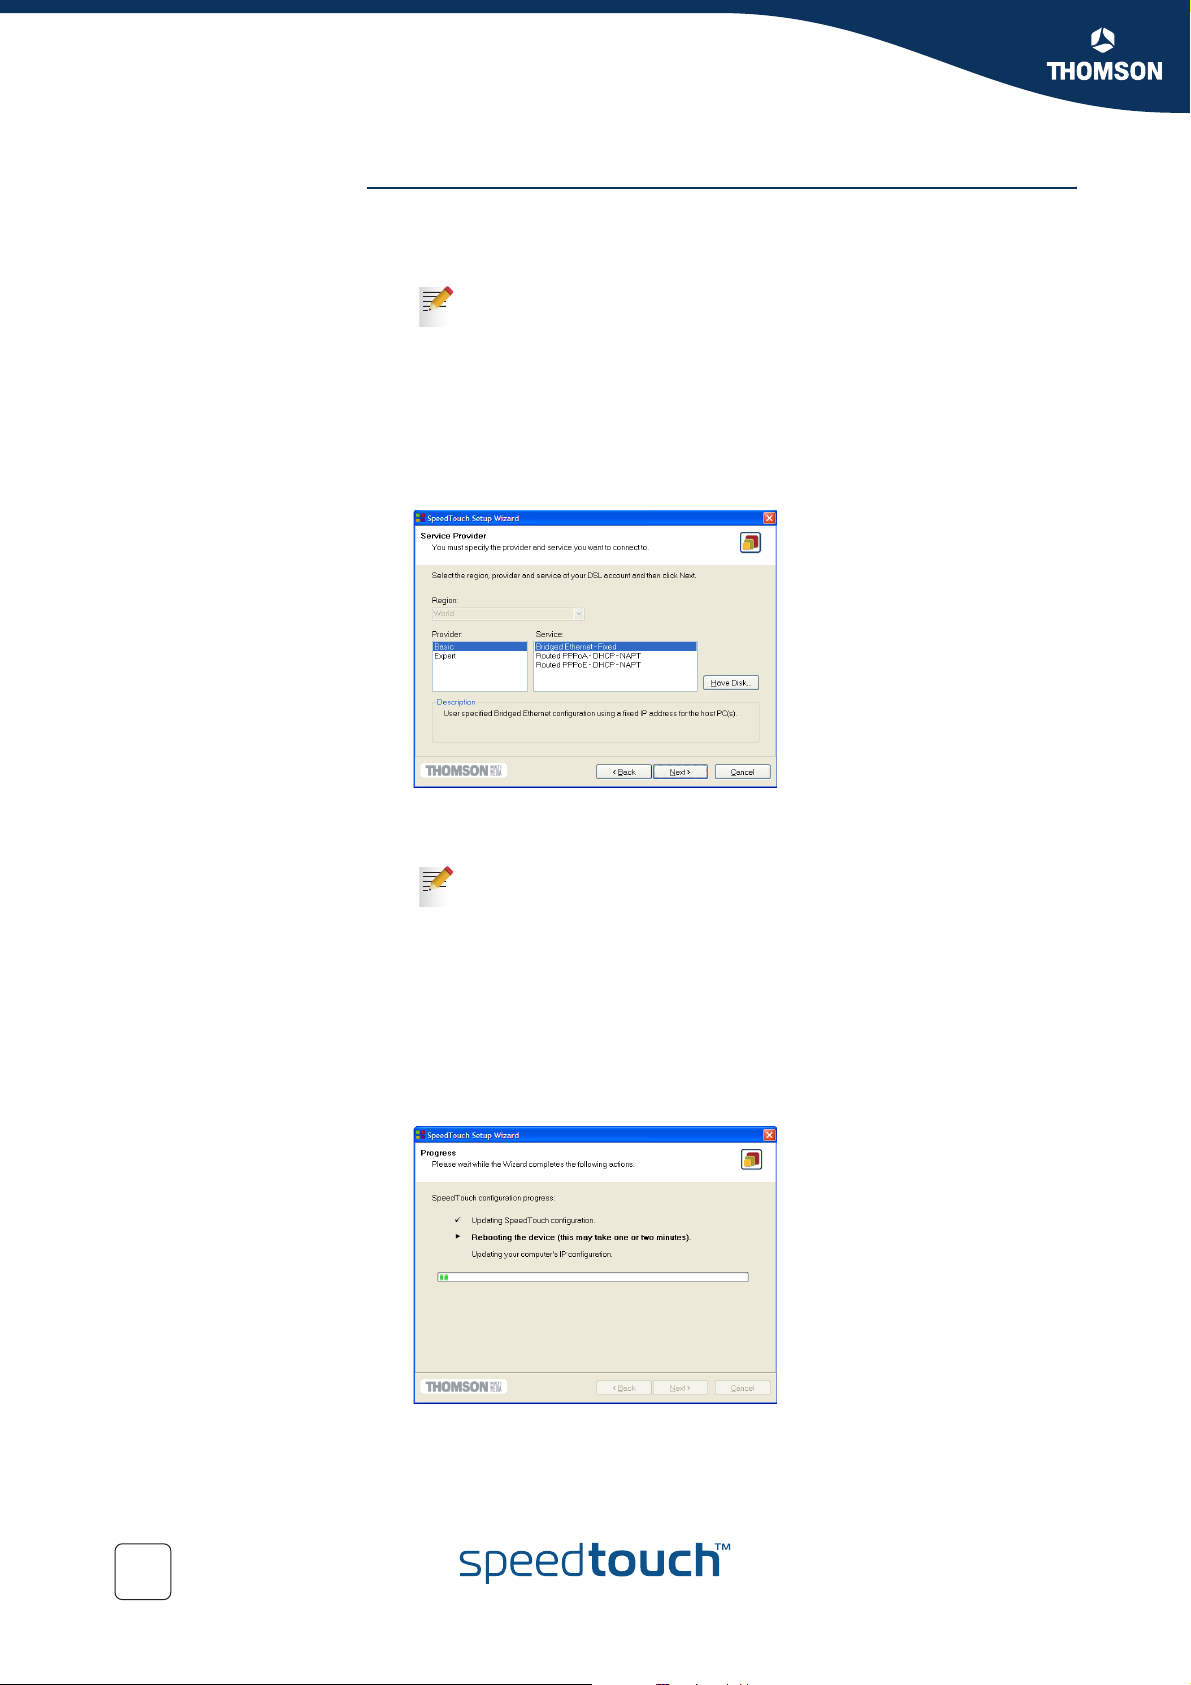
2 The following window invites you to select the appropriate service for your
Internet connectivity:
Select region, Provider and Service as specified by your Service Provider and
click Next to continue.
If the Service Provider has included a separate disk with a dedicated
service profile, click Have Disk to navigate to the location of the
appropriate Service template file.
3 Subsequent screens will guide you through the configuration setup of both the
SpeedTouch™ and your PC. Follow the instructions and enter the required
information whenever needed. The requested information will depend on the
selected Service profile and should be provided by your Service Provider.
Click Next whenever requested.
4 The SpeedTouch™ Setup wizard will update the SpeedTouch™ configuration and
your PC’s configuration according the Service profile. You can monitor the
configuration progress in following window:
18
E-DOC-CTC-20041207-0004 v2.0
Page 21
SpeedTouch™ Installation
5 As soon as the SpeedTouch™ Setup wizard completed the update of the
SpeedTouch™ configuration and reconfigured your PC, following window will
appear:
Click Finish to close the wizard.
In some cases, the SpeedTouch™ Setup wizard may ask you to restart
your computer.
Chapter 1
Additional configuration Some additional configuration may be needed:
MS Windows IP configuration
Most Service profiles will enable the SpeedTouch™ DHCP server. Since by
default a PC’s Ethernet interface is configured for obtaining its IP configuration
dynamically (DHCP client), in most cases, no additional configuration is
required.
To make sure that all PCs are configured as expected (DHCP or fixed IP
addresses):
1 Run the SpeedTouch™ Setup Wizard on every PC connected to the local
network.
2 Select Change the LAN configuration.
3 Follow the instructions.
For fixed IP configurations, or other advanced settings, please follow
the instructions provided by your Service Provider or network
administrator.
It is recommended to install Dr SpeedTouch™ to allow monitoring and
troubleshooting of your SpeedTouch™. Proceed with “3 Dr SpeedTouch™” on
page 37.
E-DOC-CTC-20041207-0004 v2.0
19
Page 22

Chapter 1
SpeedTouch™ Installation
Supported Systems As the SpeedTouch™ is OS-independent, this configuration setup can be used by any
Prerequisites Make sure that:
1.4.2 Operating System Independent SpeedTouch™ Configuration Setup
computer system
The SpeedTouch™ device is correctly set up and turned on as described in
“1.2 Setting up the SpeedTouch™” on page 10.
The SpeedTouch™ device is in its default configuration state.
See “7.3 SpeedTouch™ Default Configuration” on page 100 for resetting your
device.
The computer’s Operating System supports TCP/IP and it’s Ethernet interface is
configured for obtaining its IP configuration dynamically.
In case of problems with DHCP you can also configure the computer’s
Ethernet or USB interface with a static Net10 private IP address, e.g.
10.0.0.1, 10.0.0.2, but make sure NOT to use the 10.0.0.138 IP address
as this is the default IP address of the SpeedTouch™.
Your web browser is able to run Javascripts.
SpeedTouch™
Easy Setup
SpeedTouch™ Easy Setup consists of two parts:
Configuration of the SpeedTouch™
Additional configuration (if needed)
20
E-DOC-CTC-20041207-0004 v2.0
Page 23
Chapter 1
SpeedTouch™ Installation
Configuration of the
SpeedTouch™
Proceed as follows:
1 Open a web browser and browse to the SpeedTouch™ web pages at
http://10.0.0.138
information.
If you can not access the SpeedTouch™ web pages, it is probably not in
its default state. It is recommended to reset the device. See
“7.3 SpeedTouch™ Default Configuration” on page 100 for more
information.
. See “4 SpeedTouch™ Web Interface” on page 41 for more
2 The embedded Easy Setup wizard will appear automatically:
Click Next.
If Easy Setup doesn’t start automatically go to
Advanced > Easy Setup.
3 The following window invites you to select the appropriate Service for you
Internet connectivity:
E-DOC-CTC-20041207-0004 v2.0
In the Service list, select the Service as specified by your Service Provider and
click Next to continue.
If only one Service is available, this window will not be shown.
You can add services to the Services list by uploading templates. See
“ Templates” on page 67 for more information on uploading templates.
4 Subsequent screens will guide you through the configuration setup of the
SpeedTouch™. Follow the instructions and enter the required information
whenever needed. The requested information will depend on the selected
Service and should be provided by your Service Provider.
Click Next whenever requested.
21
Page 24

Chapter 1
SpeedTouch™ Installation
5 Easy Setup will update the SpeedTouch™ configuration according to the Service
profile. You can follow the configuration progress in following window:
6 As soon as Easy Setup completed the update of the SpeedTouch™
configuration, following window will appear:
Click Finish to close the wizard.
Due to the reconfiguration the SpeedTouch™’s IP configuration may
have been changed. If this is the case, the last window of Easy Setup
will not be shown. If so, refer to the Service Provider’s instructions for
more information.
Additional configuration Some additional configuration may be needed:
Computer IP configuration
Most Service profiles will enable the SpeedTouch™ DHCP server. Therefore,
make sure that the computer’s Ethernet interface is configured for obtaining its
IP configuration dynamically (DHCP client).
For fixed IP configurations, or other advanced settings, please follow the
instructions provided by your Service Provider or network administrator.
22
E-DOC-CTC-20041207-0004 v2.0
Page 25

Chapter 2
SpeedTouch™ Internet Connectivity
2 SpeedTouch™ Internet Connectivity
Introduction This chapter provides information on how to configure your SpeedTouch™ according
to your preferences and how to access the Internet.
Access methods As soon as the SpeedTouch™ and your computers have been configured as outlined
in “1.4 SpeedTouch™ Configuration Setup” on page 13, you are able to connect to
the WAN or Internet.
Depending on the configuration of the SpeedTouch™ you may have:
Direct access
As soon as the initial configuration has been done, continuous and immediate
access is available via the DSL line.
Dial-in access
Access must be explicitly established, e.g. by “dialing” into a Broadband
Remote Access Server (BRAS).
The applied connection protocol model depends on the service profile you selected to
configure the SpeedTouch™ and should correspond with the Service Provider’s
requirements.
Direct access As mentioned, as soon as the initial configuration has been done, immediate and
uninterrupted WAN access is provided.
In case of direct access, the remote organization might ask for a user name
and password on an Internet welcome page.
More information on these “stateless” connection protocols can be found in the
application note “SpeedTouch™ Connection and Packet Services”, available at
www.speedtouch.com.
Dial-in access Depending on the SpeedTouch™ configuration, dial-in access is provided via:
The SpeedTouch™’s Routed PPPoA or Routed PPPoE packet services with
embedded PPP client.
See “2.1 Internet Connections via SpeedTouch™’s Embedded PPP Dial-in
Client” on page 24 for more information.
A broadband dial-in application on your computer.
See “2.2 Connect to the Internet via a Host PPPoE Dial-in Client” on page 29
for more information.
More information on the popular PPP connection protocols can be found in the
application note “SpeedTouch™ Connection and Packet Services”, available at
www.speedtouch.com
.
E-DOC-CTC-20041207-0004 v2.0
23
Page 26

Chapter 2
SpeedTouch™ Internet Connectivity
2.1 Internet Connections via SpeedTouch™’s
Introduction The SpeedTouch™ supports both most popular connection methods: PPP over ATM
Embedded PPP Dial-in Client
(PPPoA) and PPP over Ethernet (PPPoE).
The connection method depends on the service profile you selected to configure the
SpeedTouch™ and should correspond with the service Provider’s requirements.
the embedded Routed PPPoA dial-in client, the SpeedTouch™ needs to be
configured for the Routed PPPoA Service.
the embedded Routed PPPoE dial-in client, the SpeedTouch™ needs to be
configured for the Routed PPPoE Service.
Both Services are available via the SpeedTouch™ Setup Wizard or via the embedded
Easy Setup.
Using SpeedTouch™
embedded PPP dial-in
client
SpeedTouch™’s embedded PPP dial-in client allows you to establish an Internet
connection for all (or a selection of) computers residing on your local network, using
only one computer of the network to control the client.
If this computer runs:
MS Windows XP
you can use MS Windows XP’s Internet Gateway Device Control Client.
See “2.1.1 Using the MS Windows XP Internet Gateway Device Control Agent”
on page 25 to proceed.
another Operating System
you can use the SpeedTouch™ web pages.
See “2.1.2 Using the SpeedTouch™ Web Pages” on page 27 to proceed.
24
E-DOC-CTC-20041207-0004 v2.0
Page 27

SpeedTouch™ Internet Connectivity
2.1.1 Using the MS Windows XP Internet Gateway Device Control Agent
Introduction MS Windows XP users can easily establish PPP sessions, without the need of first
browsing to the SpeedTouch™ web pages, due to MS Windows XP’s Internet
Gateway Device Discovery and Control Client that allows you to control the
SpeedTouch™ directly from you PC.
Preconditions Following conditions must be met:
UPnP™ (subcomponent of Windows XP’s Networking Services) must be added
to your Windows XP system (see “7.4 UPnP™ on Windows XP Systems” on
page 101).
Internet Gateway Device Discovery and Control Client (subcomponent of
Windows XP’s Networking Services) must be enabled on your Windows XP
system (see “7.4 UPnP™ on Windows XP Systems” on page 101).
Make sure UPnP™ is enabled on the SpeedTouch™ (see “Configure UPnP™:” on
page 76).
Chapter 2
Starting an Internet
session
Proceed as follows:
1 Click (Settings >) Control Panel on the Start menu.
2 The Control Panel window appears. Go to (Network and Internet Connections
>) Network Connections.
3 The Network Connections window appears:
Next to your Network connection(s), you can find an Internet Gateway icon,
representing the SpeedTouch™ Internet Gateway Device Internet connection
ability.
4 Double-click the Internet Connection icon.
As a result SpeedTouch™’s embedded PPP dial-in client establishes the Internet
connection. The Internet Gateway icon displays connected and your PC is online.
You can open a web browser and surf the Internet.
E-DOC-CTC-20041207-0004 v2.0
25
Page 28

Chapter 2
SpeedTouch™ Internet Connectivity
The connected Internet
Gateway
Terminating an Internet
session
As long as the SpeedTouch™’s embedded PPP dial-in client is connected, you are able
to overview the connection status and some counters by double-clicking the Internet
Connection icon in your PC’s Network Connections window:
More detailed monitoring is provided via:
The SpeedTouch™ System Information page
See “ System Information” on page 59.
The SpeedTouch™ Diagnostics page
See “ Diagnostics” on page 72.
Proceed as follows:
1 Click (Settings >) Control Panel on the Start menu.
2 The Control Panel window appears.
Go to (Network and Internet Connections >) Network Connections.
3 The Network Connections window appears.
4 Right-click the Internet Connection icon and select Disconnect to close the
session.
You can also double-click the icon. As a result the Internet Connection
Status window appears from which a Disconnect button is available to
close the session.
As a result SpeedTouch™’s embedded PPP dial-in client will close the Internet
connection. The Internet Gateway icon displays disconnected and your computers
are offline.
26
E-DOC-CTC-20041207-0004 v2.0
Page 29
Chapter 2
SpeedTouch™ Internet Connectivity
2.1.2 Using the SpeedTouch™ Web Pages
Introduction As the SpeedTouch™ web pages are controllable from any Operating System with an
installed web browser, the method to establish PPP sessions described below can be
used by any computer system.
Starting an Internet
session
Proceed as follows:
1 Open a web browser on your computer and browse to the SpeedTouch™ web
pages (see “5 SpeedTouch™ Web Interface” on page 55 for more information):
By default the SpeedTouch™ shows you the System Information page.
2 In the Basic menu, click Connections to open the Connections page that
allows you to establish dial in-in connections.
3 Click next to the connection entry you want to establish a connection with.
As a result the entry will be highlighted.
4 Enter your user name and password in the appropriate fields. If you want the
SpeedTouch™ to remember your credentials, select Save this password.
5 Click Connect.
As a result SpeedTouch™’s embedded PPP dial-in client establishes the Internet
connection.
During session-establishment the State column will display Try in g. As soon as the
PPP session is started successfully the field displays up and your computers are
online.
You can open another web browser or continue with this one and surf the Internet.
During the Internet
session
E-DOC-CTC-20041207-0004 v2.0
You are able to overview and monitor your Internet connectivity as long as the
session is running via:
The SpeedTouch™ System Information page
See “ System Information” on page 59.
The SpeedTouch™ Diagnostics page
See “ Diagnostics” on page 72.
27
Page 30

Chapter 2
SpeedTouch™ Internet Connectivity
Terminating an Internet
session
To close an active Routed PPP connection:
1 Make sure you have access to the SpeedTouch™ web pages.
2 On the Connections page, click next to the connection entry you want to
close the connection for.
3 Click Disconnect.
As a result SpeedTouch™’s embedded PPP dial-in client will close the Internet
connection. The entry's session state will change to Down and your PC is offline.
28
E-DOC-CTC-20041207-0004 v2.0
Page 31

Chapter 2
SpeedTouch™ Internet Connectivity
2.2 Connect to the Internet via a Host PPPoE Dialin Client
Introduction This section explains how you can connect to the Internet using a Broadband PPPoE
dial-in application. The PPP over Ethernet connection scenario provides PPP-like dialin behaviour over the virtual Ethernet segment.
To be able to use a broadband dial-in application on your computer for connecting to
the Internet, the SpeedTouch™ needs to be configured for Bridged Ethernet or Routed
PPPoE (with PPPoE relay) via the SpeedTouch™ Setup wizard or the embedded Easy
Setup.
BroadBand dial-in
clients
To connect to the Internet you can use:
An MS Windows XP broadband dial-in client.
See “2.2.1 Using an MS Windows XP BroadBand Connection” on page 30 for
more information.
A Mac OS X broadband dial-in client.
See “2.2.2 Using the Mac OS X PPPoE Dial-in Client” on page 34 for more
information.
- or -
A broadband PPPoE dial-in client provided by your Service Provider to connect
to the Internet
Upon availability of OS-specific PPPoE dial-in client applications, the
latter method is Operating System independent.
For PPPoE session connectivity from a Mac OS 8.6/9.x, a MS Windows
95/98(SE)/ME/2000 or a Linux system, a host PPPoE dial-in application
is mandatory.
E-DOC-CTC-20041207-0004 v2.0
29
Page 32

Chapter 2
SpeedTouch™ Internet Connectivity
2.2.1 Using an MS Windows XP BroadBand Connection
Configuring a
broadband connection
Proceed as follows:
1 On the Start menu, click (Settings >) Control Panel.
2 The Control Panel window appears. Go to (Network and Internet Connections
>) Network Connections.
3 In the Network Tasks menu, click Create a new connection.
The New Connection Wizard appears:
Click Next to continue.
4 In the next window, select Connect to the Internet:
30
Click Next to continue.
5 In the next window, select Set up my connection manually:
Click Next to continue.
E-DOC-CTC-20041207-0004 v2.0
Page 33

SpeedTouch™ Internet Connectivity
6 In the next window, select Connect using a broadband connection that
requires a user name and password:
Click Next to continue.
7 In the next window, give a name to the connection you are creating, e.g.
MyISP:
Chapter 2
8 In the next window, select whether the connection is available to any user or
only to yourself:
If you want to share this connection with other users you must select
!
Anyone’s use.
9 In the next window, fill in the Internet account information. This information
should be provided by your service provider:
E-DOC-CTC-20041207-0004 v2.0
31
Page 34

Chapter 2
SpeedTouch™ Internet Connectivity
10 At the end of the configuration the following window appears:
Click Finish to complete the configuration.
The Connect MyISP window (see below) appears.
Starting a broadband
Internet session
Proceed as follows:
1 On the Start menu, point Connect To and click the name of the connection
you’ve created e.g. MyISP.
If you are using the Classic Start menu click Start > Settings >
Network (and Dial-up) connections > MyISP.
2 The Connect MyISP window appears:
3 If needed, enter user name and password for your user account at the Service
Provider.
4 Click Connect.
5 As soon as the connection is established, the Connection message box and
Dialup window are minimized into a DUN icon in the system tray:
Terminating a
broadband Internet
32
session
You can open your web browser and surf the Internet.
Proceed as follows:
1 On the Start menu, point Connect To and click the name of the connection
you’ve created e.g. MyISP.
If you are using the Classic Start menu go to Start > Settings >
Network (and Dial-up) connections > MyISP.
E-DOC-CTC-20041207-0004 v2.0
Page 35

SpeedTouch™ Internet Connectivity
2 The MyISP Status window appears:
3 Click Disconnect.
The connection is released. As a result no Internet connectivity exists anymore.
Chapter 2
E-DOC-CTC-20041207-0004 v2.0
33
Page 36

Chapter 2
SpeedTouch™ Internet Connectivity
2.2.2 Using the Mac OS X PPPoE Dial-in Client
Configuring a
broadband connection
Proceed as follows:
1 On the Apple menu, click System Preferences.
2 The System Preferences window appears. Click the Network icon.
3 The Network window appears. Make sure Built-in Ethernet is selected in the
Show list and click the PPPoE tab:
4 Enter the Account Name and Password provided by your Service Provider.
Select Save password in case you want the computer to remember the
password for this account name.
Optionally you can enter a name for this connection in the Service
Provider field. All other fields may stay empty
5 Click Apply Now.
Starting a broadband
Internet session
Proceed as follows:
1 Click the Internet Connect dockling.
If the Internet Connect dockling is not available, go to the Applications
folder on the system startup disk and double-click Internet Connect.
2 The following window appears:
Make sure Built-in Ethernet is selected in the Configuration list.
3 If needed, enter user name and password for your user account at the Service
Provider.
4 Click Connect.
As soon as the connection is established you can open your web browser and surf
the Internet.
34
E-DOC-CTC-20041207-0004 v2.0
Page 37

Chapter 2
SpeedTouch™ Internet Connectivity
Terminating a
broadband Internet
session
Proceed as follows:
1 Click the Internet Connect dockling.
If the Internet Connect dockling is not available, go to the Applications
folder on the system startup disk and double-click Internet Connect.
2 The following window appears:
Make sure Built-in Ethernet is selected in the Configuration list
3 Click Disconnect.
The connection is released. As a result no Internet connectivity exists anymore.
E-DOC-CTC-20041207-0004 v2.0
35
Page 38

Chapter 2
SpeedTouch™ Internet Connectivity
36
E-DOC-CTC-20041207-0004 v2.0
Page 39

Chapter 3
Dr SpeedTouch™
3 Dr SpeedTouch™
Introduction The Dr SpeedTouch™ application allows you to monitor, diagnose and troubleshoot
your SpeedTouch™ device.
With Dr SpeedTouch™you can:
Monitor the status and performance of the SpeedTouch™ device.
Run a Diagnostics program to locate a connectivity problem.
Run a Troubleshooter to help you solve a connectivity problem.
Supported Operating
Systems
Installation Proceed as follows:
MS Windows 98
MS Windows 98SE
MS Windows ME
MS Windows NT4.0 SP6
MS Windows 2000
MS Windows XP
Note Dr SpeedTouch™ requires Internet Explorer 5.0 or higher.
1 Insert the SpeedTouch™ Setup CD-ROM in your PC's CD-ROM drive. The
SpeedTouch™ CD Browser will start automatically. Choose your language and
browse to Initial Setup > Install Dr SpeedTouch™.
If the SpeedTouch™ CD Browser window does not appear
automatically, open a Run window via Start > Run from the Start menu
and enter the following path: D:\Menu.exe, where D stands for the
drive letter of your CD-ROM drive.
2 The Dr SpeedTouch™ Setup wizard appears:
Using
Dr SpeedTouch™
E-DOC-CTC-20041207-0004 v2.0
Click Next to continue.
3 Subsequent screens will guide you through the installation. Follow the provided
instructions and click Next whenever requested.
4 After installation, Dr SpeedTouch™ is started automatically.
By default Dr SpeedTouch™ is started automatically at boot of your system and runs
in the background, i.e. minimized in the status area.
37
Page 40

Chapter 3
Dr SpeedTouch™
Proceed as follows:
1 Double-click in the notification area.
2 Dr SpeedTouch™ searches your network for SpeedTouch™ devices. If more than
one device is found, a list of available devices will be provided. If this is the
case, select your SpeedTouch™ device (SpeedTouch™608) and click OK.
3 Dr SpeedTouch™ appears:
Dr SpeedTouch™
features
Dr SpeedTouch™ consists of two sections:
Select the General tab to:
View SpeedTouch™ device information and status:
View activity between your computer, the SpeedTouch™ and the Internet:
Click Diagnostics to open the Diagnostics wizard:
38
To test and troubleshoot the connectivity of your computer and the
SpeedTouch™ device to your ISP and the Internet, click Start Tests.
E-DOC-CTC-20041207-0004 v2.0
Page 41

Chapter 3
Dr SpeedTouch™
Select the Performance tab to monitor the downstream and upstream
performance of your DSL connection:
For more information on Dr SpeedTouch™ please click Help in the application or press
F1 for context sensitive help.
E-DOC-CTC-20041207-0004 v2.0
39
Page 42

Chapter 3
Dr SpeedTouch™
40
E-DOC-CTC-20041207-0004 v2.0
Page 43

SpeedTouch™ Web Interface
4 SpeedTouch™ Web Interface
Introduction The SpeedTouch™ comes with integrated configuration web pages.
These pages allow you to configure your SpeedTouch™ simply by using a web
browser from any local computer attached to the SpeedTouch™.
In most cases the SpeedTouch™ is correctly configured for your Internet connectivity
via the appropriate configuration profile/file and no further configuration on the web
interface is needed.
Only for using the advanced SpeedTouch™ features, access to the web pages is
required.
This chapter aims to give a brief overview of the SpeedTouch™ web pages and their
respective functionality.
For more profound information, see the relevant application notes.
Preconditions Before you can access the SpeedTouch™ web pages, you must make sure that:
The SpeedTouch™ and your computer share the same IP subnet (10.0.0.0/24).
By default the SpeedTouch™ has a local IP address 10.0.0.138
access the web pages, your computer needs to be configured for an IP address
in the same subnet, e.g. 10.0.0.1.
Your web browser is not using a proxy server and the SpeedTouch™ IP address
is not submitted to a proxy server
To configure your computer with an IP address, please consult the Operating
System’s Help. For more information on how to disable your web browser's
proxying, please consult the web browser's Help.
. To be able to
Chapter 4
Browsing to the
SpeedTouch™ web
pages
To access the SpeedTouch™ web pages:
1 Start the web browser on your computer.
2 Browse to the SpeedTouch™ web pages at its IP address at 10.0.0.138.
10.0.0.138 is the SpeedTouch™ default IP address in the very most
cases. If not, please contact your Service Provider for more
information.
3 If a system password has been set, an authentication window will be displayed.
You must enter the user name and system password before access will be
granted.
E-DOC-CTC-20041207-0004 v2.0
41
Page 44

Chapter 4
SpeedTouch™ Web Interface
Access to the
SpeedTouch™ web
interface via UPnP™
The SpeedTouch™
home page
If your computer is UPnP™ enabled you can access the pages as follows:
1 Click (Settings >) Control Panel on the Start menu to open the Control Panel.
2 Go to Network and Internet Connections > My Network Places.
If you use the Control Panel in Classic View, click Network
Connections in the Control Panel and Network Places under Other
Places.
3 The following window appears:
Double-click the SpeedTouch™ icon.
4 If a system password has been set, an authentication window will be displayed.
Enter user name and system password in the appropriate fields.
5 Click OK.
As a result the System Information page appears:
42
E-DOC-CTC-20041207-0004 v2.0
Page 45

Chapter 4
SpeedTouch™ Web Interface
Topics menu and links On the left of each of the SpeedTouch™ web pages, a topics menu is provided. This
menu navigates you via links through all configurational aspects of the
SpeedTouch™.
For your convenience the links are sorted in six expandable topics menus:
Quick
IP Router
Connections
LAN Services
System Config
Advanced
Each of these offers you a set of specific links, leading you to a configuration aspect
of the SpeedTouch™.
Quick The following table lists all Quick Tasks Links:
Click ... To ...
Easy Setup Configure SpeedTouch™.
System Information View the current configuration profile.
View current ADSL line status.
Connections Establish dial-in PPPoA and/or PPPoE connections.
Diagnostics View the SpeedTouch™ diagnostics.
Syslog View/configure System Log services.
IP Router The following table lists all IP Router Tasks Links:
Click ... To ...
IP Addresses View/configure the SpeedTouch™ IP interfaces.
IP Routing View/configure the SpeedTouch™ IP router.
NAPT View/configure static NAPT services.
View/configure multi-NAT entries.
Define a Default local server for inbound connectivity.
Configure UPnP™.
IPSEC Policy View/configure IPSec based VPN services.
E-DOC-CTC-20041207-0004 v2.0
IPSEC Certificates View/configure the certificate configuration.
43
Page 46

Chapter 4
SpeedTouch™ Web Interface
Connections The following table lists all Connection Tasks Links:
Click ... To ...
Phonebook View/configure connection service entries.
Routed Ethernet Configure Routed Ethernet.
Routed PPPoE Configure Routed PPPoE.
Routed PPPoA Configure Routed PPPoA.
Routed IPoA Configure Routed IPoA.
Classical IP Configure Routed Classical IPoA.
Bridged Ethernet Configure Bridged Ethernet (for Bridged PPPoE).
Relayed PPPoA View current Relayed PPPoA connections.
LAN Services The following table lists all LAN Services Tasks Links:
Click ... To ...
DHCP View/configure DHCP services.
DNS View/configure DNS services.
System Config The following table lists all System Config Tasks Links:
Click ... To ...
System Password Set a system password.
Upgrade Manage software and configuration.
Add-On Manage activation keys for extended software modules.
SNTP View/configure SNTP services.
Syslog View/configure System Log services.
Advanced The following table lists all Advanced Tasks Links:
44
Click ... To ...
CLI Open the web based Command Line Interface.
Templates View/upload templates.
Language Configure the SpeedTouch™ web page language.
E-DOC-CTC-20041207-0004 v2.0
Page 47

SpeedTouch™ Web Interface
Save all The Save All link on the menu allows you to save the SpeedTouch™ settings.
It is advised to back-up your saved configuration on a regular basis. This can be done
via the Upgrade link in the Advanced menu.
Help The Help link in the topics menu header allows you to browse the SpeedTouch™
online Help.
For more information on a specific topic you can click the context-related Help links located at the Topic's web pages.
Chapter 4
E-DOC-CTC-20041207-0004 v2.0
45
Page 48

Chapter 4
SpeedTouch™ Web Interface
Easy Setup Click this link to start the SpeedTouch™ Easy Setup wizard.
System Information The System Information page is the SpeedTouch™ home page. It consists of four
4.1 Quick Tasks Links
See “1.4.2 Operating System Independent SpeedTouch™ Configuration Setup” on
page 20 for more information.
sections:
Select Diagnostics to view the results of the System Self Test, LAN
connectivity and DSL synchronization test:
Select Service Info to view the current physical status of the ADSL line:
The DSL Statistics allow you to view:
Line Status: this shows whether the DSL link is synchronized (Enabled) or
not (Initializing).
Bandwidth Up/Down: the maximum available bandwidth of the DSL link in
both up- and downstream direction.
Uptime: The duration of the current Enabled Line Status.
kBytes Tx/Rx: the amount of kilobytes (kBytes) sent (Tx) and received
(Rx) since the establishment of the DSL link.
46
E-DOC-CTC-20041207-0004 v2.0
Page 49

SpeedTouch™ Web Interface
Select Configuration to view the Service profile currently activated on the
SpeedTouch™:
Select System to view some important system information of the
SpeedTouch™:
Chapter 4
The System table lists:
The SpeedTouch™ product name.
Depending on whether the IPSec VPN software module extension
has been enabled or not, your SpeedTouch™ may identify itself as
SpeedTouch™608 (not activated) or SpeedTouch™609 (activated).
The unique Medium Access Control (MAC) address of your SpeedTouch™.
This MAC address can be used to identify your SpeedTouch™.
The SpeedTouch™ Software Release.
The SpeedTouch™ Board Name.
The SpeedTouch™ Serial Number.
The SpeedTouch™ Product Code.
Most of the information above is also listed on the identification label
on the bottom of your SpeedTouch™.
Connections The Connections page allows you to establish dial-in connections, if applicable:
E-DOC-CTC-20041207-0004 v2.0
47
Page 50

Chapter 4
SpeedTouch™ Web Interface
Diagnostics The Diagnostics page consists of three expandable sections:
See “2.1.2 Using the SpeedTouch™ Web Pages” on page 27 for more information on
how to use the Connections table.
For more information on the configuration and use of PPP connections, see
the application notes “The SpeedTouch™ Routed PPPoA Packet Service” and
“The SpeedTouch™ Routed PPPoE Packet Service”.
Expand the System section to view some important system information:
Expand the Wan section. To view the current DSL state and connection
information, expand the DSL and connections sections:
48
Click to perform an IP connectivity test.
E-DOC-CTC-20041207-0004 v2.0
Page 51

Chapter 4
SpeedTouch™ Web Interface
Expand the Lan section to view the LAN configuration:
Syslog The Syslog page allows you to view recent syslog messages that were generated by
the SpeedTouch™.
Select Messages to view the list of syslog messages generated until now:
E-DOC-CTC-20041207-0004 v2.0
By default this page refreshes every 30 seconds. To change the refresh rate or
change the (lowest) facility and/or priority of the syslog messages to be
displayed you must disable the automatic refresh via Stop AutoRefresh.
Select Configuration to assign one or more computers to send all or a subset of
syslog messages to. This allows basic remote monitoring of the
SpeedTouch™608:
For more information on Syslog, see the application notes “SpeedTouch™
Operation and Maintenance” and “SpeedTouch™ Remote Management”.
49
Page 52

Chapter 4
SpeedTouch™ Web Interface
IP Addresses The IP Addresses page allows you to view or add/delete specific IP address entries
4.2 IP Router Tasks Links
for the SpeedTouch™ interfaces:
When adding an IP address, all essential IP routes will be automatically be added to
the SpeedTouch™ IP routing table.
To assign a new IP address to the SpeedTouch™’s Ethernet interface (for
example for the purpose of multi-homing), select eth0 as interface.
IP Routing The IP Routing page allows you to view or add/delete static IP routes for the
SpeedTouch™ IP router:
Routing can be useful in the case of subnetting your local network.
50
E-DOC-CTC-20041207-0004 v2.0
Page 53

Chapter 4
SpeedTouch™ Web Interface
NAPT The Network Address and Port Translation (NAPT) page allows you to view and/or
change the SpeedTouch™ IP router’s NAPT configuration (including UPnP™
behaviour).
Select NAPT Entries to view or add/delete specific static NAPT entries:
To add a static NAPT entry:
1 Click New.
2 Specify the outside address and inside address for the entry as well as the
protocol and port on which the entry applies.
If the NAPT entry is applied to a connection’s dynamically
assigned local peer IP address, you should specify 0.0.0.0 as the
outside address.
3 Click Apply to add the entry to the table.
You can also add static NAPT entries semi-automatically using the
SpeedTouch™ NAPT Manager. For more information on NAPT Manager,
see “5 SpeedTouch™ NAPT Manager” on page 69.
Select Multi-NAT Entries to view or add/delete Multi-NAT entries:
E-DOC-CTC-20041207-0004 v2.0
To add a Multi-NAT entry:
1 Click New.
2 Specify the inside address and put the desired range between brackets
e.g. 10.0.0.[1-10]. Specify the outside address and interface.
3 Click Apply.
Multi-NAT is also commonly known as Basic NAT (IETF).
51
Page 54

Chapter 4
SpeedTouch™ Web Interface
Select De-Militarized Zone (commonly referred to as DMZ or Direct Mapping
Zone) to view or change the local default server terminating all inbound NAT
connections:
By specifying a default server IP address (e.g. 10.0.0.3 as depicted above), all
incoming connections that don’t match a specifically configured static NAPT
entry will be forwarded to the device with this IP address. This setting should
be adequate for most server applications and eliminates the need for specific
static NAPT entries.
Select UPnP to configure the SpeedTouch™’s UPnP™ behaviour:
Three standard, preconfigured UPnP™ settings are available:
Full:
The SpeedTouch™ is UPnP™ enabled, all local hosts are able to detect the
SpeedTouch™. Any local host is able to create port mappings for any local
device.
Secure (default):
The SpeedTouch™ is UPnP™ enabled, all local hosts are able to detect the
SpeedTouch™. A local host is allowed to make port mappings for its own,
i.e. a local host is not allowed to create port mappings for other local
devices.
Off:
The SpeedTouch™ is UPnP™ disabled, none of the local hosts is able to
detect the SpeedTouch™. Via UPnP™ no port mappings can be created.
For more information, see the application notes “The SpeedTouch™ and
Network Address Translation” and “The SpeedTouch™ and Universal
Plug and Play”.
52
E-DOC-CTC-20041207-0004 v2.0
Page 55

SpeedTouch™ Web Interface
IPSEC Policy The IPSEC Policy page allows you to control the embedded IPSec VPN client and
server.
By default the SpeedTouch™ supports the configuration of maximum one
!
VPN peer and two IP VPN connections.
You can increase the maximum number of simultaneous VPN peers and IP
VPN connections to 4 VPN peers and 4 IP VPN connections via the VPN4
software activation key. By doing so the SpeedTouch™608 is renamed into
SpeedTouch™609. See “ Add-On” on page 64 for more information.
Select Peers to view and/or change the IP VPN configuration setup for the VPN
connection:
Chapter 4
This window allows you to configure the local and remote VPN peer identities,
select the key distribution mechanism, and specify in case of a preshared
secret, the secret string.
Select Connections to start and stop VPN sessions and to view and/or change
the VPN connection configuration:
For more information, see “6 SpeedTouch™ IPSec VPN” on page 75 and the
application notes “The SpeedTouch™ IPSec Quick Start Guide” and “The
SpeedTouch™ IPSec Configuration Guide”.
E-DOC-CTC-20041207-0004 v2.0
53
Page 56

Chapter 4
SpeedTouch™ Web Interface
IPSEC Certificates The IPSEC Certificates page allows you to control the certification mechanisms used
for authentication when starting (or rekeying) the VPN session (in cases where
certificates are used for authentication):
The certificate configuration window contains four tabs, to view/configure:
Secure Storage.
Request-Import.
Certificate Revocation List (CRL).
Certificate Enrollment Protocol (CEP).
Following dynamic key distributions are supported:
Public key infrastructure (PKI) (RFC2459, ITU-T Q.817) with X.509 digital
certificates.
On-line PKI enrollment: CEP interoperable with Entrust, Verisign, Netscape and
Baltimore CAs.
Off-line PKI enrollment: PKCS#10 “Certification Request Syntax Standard” and
PKCS#7 “Cryptographic Message Syntax Standard”, compatible with Entrust,
Verisign, Netscape, RSA Security (RSAS) and Xcert.
In case the authentication is based on a shared secret, no certificate configuration
needs to be done.
For more information on the configuration and use of IPSec certificates, see
the application note “The SpeedTouch™ IPSec PKI Configuration Guide”.
54
E-DOC-CTC-20041207-0004 v2.0
Page 57

Chapter 4
SpeedTouch™ Web Interface
4.3 Connection Tasks Links
Phonebook The Phonebook page allows you to view or add/delete ATM Virtual Channels (VCs),
that are used for end-to-end connectivity over the DSL line via the Ethernet
interface(s):
For more information, see the application note “SpeedTouch™ Connection
and Packet Services”.
Routed Ethernet The Routed Ethernet Configuration page allows you to view/configure the
SpeedTouch™ Routed Ethernet connections entries.
Routed Ethernet is often referred to as MAC Encapsulated Routing or MER.
For more information, see the application note “The SpeedTouch™ Routed
Ethernet Packet Service”.
E-DOC-CTC-20041207-0004 v2.0
55
Page 58

Chapter 4
SpeedTouch™ Web Interface
Routed PPPoE The Routed PPPoE page allows you to view/configure the SpeedTouch™ Routed
Point-to-Point Protocol over Ethernet (PPPoE) connection entries.
Per selected Routed PPPoE entry you can:
View/configure basic PPPoE entry parameters:
The destination of an Routed PPPoE should always be a Routed Ethernet
interface or eth0 (PPPoE on the LAN).
View/configure the Routing parameters for the PPP session:
View/configure advanced PPP session parameters:
56
E-DOC-CTC-20041207-0004 v2.0
Page 59

SpeedTouch™ Web Interface
During a PPP session on the selected Routed PPPoA entry view some session
statistics:
For more information, see the application notes “The SpeedTouch™ Routed
PPPoE Packet service” and “The SpeedTouch™ PPPoE Relay Packet Service”.
Routed PPPoA The Routed PPPoA page allows you to view/configure the SpeedTouch™ Routed
Point-to-Point Protocol over ATM (PPPoA) connection entries.
Per selected Routed PPPoA entry you can:
View/configure basic PPPoA entry parameters:
View/configure the Routing parameters for the PPP session.
View/configure advanced PPP session parameters
During a PPP session on the selected Routed PPPoE entry view some session
statistics.
For more information, see Routed PPPoE and the application note “The
SpeedTouch™ Routed PPPoA Packet Service”.
Chapter 4
Routed IPoA The Routed IPoA page allows you to view/configure the SpeedTouch™ Routed IP over
ATM connection entries.
E-DOC-CTC-20041207-0004 v2.0
57
Page 60

Chapter 4
SpeedTouch™ Web Interface
Classical IP The Classical IP page allows you to view/configure the SpeedTouch™ Classical IP
(CIP) over ATM connection entries.
Select CIP Interfaces to view/configure the SpeedTouch™ IP interface
connection entries:
Select CIP Connections to view/configure the SpeedTouch™ CIP connection
entries:
Bridged Ethernet The Bridged Ethernet page allows you to view/configure the SpeedTouch™ Bridged
Ethernet connection entries:
Bridged Ethernet is commonly known as IEEE802.1D Transparent Bridging or
RFC1483/Bridged.
The Bridged Ethernet packet service is also used for the Bridged PPP over
Ethernet (PPPoE) packet service.
For more information, see the application notes “The SpeedTouch™ Bridged
Ethernet Packet Service” and “The SpeedTouch™ Bridged PPPoE Packet
Service”.
Relayed PPPoA The Relayed PPPoA page allows you to view currently active PPP sessions the
SpeedTouch™ relays from LAN to WAN:
58
Relayed PPPoA is often referred to as PPPoA-to-PPTP Relaying or PPPoA/
Point-to-Point Tunnelling Protocol (PPPoA/PPTP).
E-DOC-CTC-20041207-0004 v2.0
Page 61

SpeedTouch™ Web Interface
4.4 LAN Services Tasks Links
DHCP The DHCP page allows you to view/change the SpeedTouch™ Dynamic Host
Configuration Protocol (DHCP) server, DHCP client and DHCP relay engine.
Select DHCP Server to access the DHCP server pages.
This page has three tabs:
Select Server Config to enable/disable the SpeedTouch™ (Auto)DHCP
server:
Chapter 4
Depending on the DHCP server status, following Status may be shown:
Scanning for other DHCP server:
When the DHCP server and its Auto DHCP feature are enabled,
during local network probing on the SpeedTouch™ Ethernet interface
eth0.
DHCP server stopped:
When the DHCP server and its Auto DHCP feature are enabled, and a
concurrent DHCP server was found during probing, thus causing its
own DHCP server to be stopped and a DHCP client on the
SpeedTouch™ Ethernet interface eth0 be created and activated.
DHCP server started:
When the DHCP server and its Auto DHCP feature are enabled, and
no concurrent DHCP server was found during network probing, thus
starting its own DHCP server on the SpeedTouch™ Ethernet interface
eth0.
DHCP server running:
When the SpeedTouch™ DHCP server is enabled by default (without
DHCP client).
DHCP client:
When SpeedTouch™ server is disabled by default, and a DHCP client
is running on the SpeedTouch™ Ethernet interface eth0.
No DHCP:
When the SpeedTouch™ server is disabled by default and the
SpeedTouch™ Ethernet interface eth0 IP address is statically
assigned.
E-DOC-CTC-20041207-0004 v2.0
59
Page 62

Chapter 4
SpeedTouch™ Web Interface
If required, under Properties you are able to select:
DHCP server
Enables the SpeedTouch™ DHCP server. If it was not running, it will
be started immediately.
Auto DHCP (default)
The SpeedTouch™ will not start as DHCP server immediately, but
will first probe the network for a possible concurrent DHCP server
for some period of time (set by Client timeout in seconds).
As soon as another DHCP server is found, the SpeedTouch™ will
behave as DHCP client, i.e. a DHCP client will be created on its
Ethernet interface and the SpeedTouch™ DHCP server will not be
started.
If no concurrent DHCP server is found, the SpeedTouch™ DHCP
server is started.
No DHCP
Disable SpeedTouch™ DHCP configuration.
If the SpeedTouch™ DHCP server was running, it will be stopped
immediately.
Existing SpeedTouch™ DHCP client entries are deleted.
Always click Apply after changing the DHCP server configuration.
Select Server Leases to view the current leases provided by the
SpeedTouch™ DHCP server:
If needed, you can manually add static DHCP leases for specific hosts. To
make dynamically assigned leases static, select the entry and click Lock.
Select Address Pools to configure the SpeedTouch™ DHCP server lease
pool properties:
60
The SpeedTouch™ DHCP server (if enabled) will use the address pools
listed in this table to provide IP addresses to requesting DHCP clients. If
needed, you can add/delete DHCP address pools manually.
One DHCP pool (LAN_Private) is defined by default
E-DOC-CTC-20041207-0004 v2.0
Page 63

SpeedTouch™ Web Interface
Select DHCP Relay to view the DHCP Relay pages.
This page has two tabs:
Select Relay Config to view the current SpeedTouch™ DHCP relay status:
Via this table you can also manually add static SpeedTouch™ DHCP relay
entries for specific interfaces, if applicable.
Select Relay Interfaces to view the SpeedTouch™ DHCP relay interfaces:
Chapter 4
Select DHCP client to view the current SpeedTouch™ DHCP client status:
Via this table you can also manually add static SpeedTouch™ DHCP client
entries for specific interfaces, if applicable.
DNS The DNS page allows you to view/change SpeedTouch™’s local Dynamic Name
System (DNS) server.
Select DNS Hostname Table to view the current SpeedTouch™ DNS server
hostname leases:
E-DOC-CTC-20041207-0004 v2.0
Via this table you can also add static DNS hostname entries.
This may be useful for devices which do not support DNS, e.g. a printer. By
adding a name for your network printer, identified by its IP address, you will be
able to contact this printer by name rather than by IP address.
61
Page 64

Chapter 4
SpeedTouch™ Web Interface
Select DNS Server Configuration to view and/or supply the SpeedTouch™ DNS
domain name and to enable/disable the SpeedTouch™ DNS server:
The use of DNS subdomains is supported, e.g. dsl.office.lan.
Next to the SpeedTouch™ DNS server, it also features an embedded dynamic DNS
client service. The dynamic DNS client - configurable via the SpeedTouch™ CLI only allows you to enable a dynamic DNS client service per interface.
Via the dynamic DNS client service you are able to assign a fixed Fully Qualified
Domain Name (FQDN) to the Service Provider-assigned dynamic IP address(es)
provided to the applicable interface. Via online updates of the current IP address to a
central dynamic DNS server on the Internet, your SpeedTouch™ device (and your
local network behind it) can be made accessible from the Internet by means of the
dynamic DNS domain name, without the need of knowing the current Service
Provider-assigned IP address.
To use the dynamic DNS client functionality you must subscribe to a third
party dynamic DNS service provider.
For more information on the use of the dynamic DNS client functionality, see
“7.2 Dynamic DNS” on page 84.
62
E-DOC-CTC-20041207-0004 v2.0
Page 65

SpeedTouch™ Web Interface
4.5 System Config Tasks Links
System Password The System Setup page allows you to configure a System password to restrict
access to the SpeedTouch™:
It is highly advised to configure a System password. To protect the SpeedTouch™
you should change the System password on a regular basis. However, never use an
obvious password as your name, birth date, etc.
Enter the User id and System password of your choice and re-enter your password in
the appropriate field. Click Apply to apply the System password and Save all to save
your changes to persistent memory.
As long as no System password is supplied, a warning is displayed on the
SpeedTouch™ web pages.
For more information regarding the SpeedTouch™ security features, default
settings, and configuration update, see the application note “SpeedTouch™
Operation and Maintenance”.
Chapter 4
Upgrade The Upgrade page allows you to.
Upgrade the SpeedTouch™ system software:
For more information on how to upgrade the SpeedTouch™ System
Software, see the application note “SpeedTouch™ Operation and
Maintenance”.
E-DOC-CTC-20041207-0004 v2.0
63
Page 66

Chapter 4
SpeedTouch™ Web Interface
Back up the current SpeedTouch™ configuration, restore the SpeedTouch™
default configuration, or upload a backup configuration file:
To backup the current configuration click Backup and follow the
instructions.
To restore the SpeedTouch™ defaults, click Restore default and follow the
instructions to confirm the reset.
To upload and apply a SpeedTouch™ backup configuration file, click
Browse to locate the backup file on your local disk and click Upload to
upload and temporary apply the backup configuration.
Once uploaded, you must confirm that you want the SpeedTouch™ to
effectively apply the uploaded configuration. Click Accept to save the
new configuration. Once confirmed, the previous configuration is
irrevocably lost.
For more information, see the application note “SpeedTouch™
Operation and Maintenance”.
Add-On The Add-On page allows you to activate additional software modules in addition to
the SpeedTouch™’s standard functionality.
The Software Module Status Display allows you to overview the available software
module feature extensions and their current status:
To install a Software Activation Key and activate the software module you will need
to apply for a software activation key user name and password for the particular
SpeedTouch™ software module at your network administrator, Internet Service
Provider (ISP), or the reseller or distributor of your SpeedTouch™.
To activate the software module:
1 Click the link of the software module you intend to activate.
2 Follow the instructions for generating the software activation key.
3 If required, paste the obtained software key in the Software Activation Code
Input Display box.
The key is unique for each SpeedTouch™ device, and can not be copied
from/to other SpeedTouch™ devices.
4 Click Add to process the software activation key.
5 Restart your SpeedTouch™.
After restart the activated software module can be used.
By activating the IPSec VPN software module extension, the
SpeedTouch™608 is renamed into SpeedTouch™609.
64
E-DOC-CTC-20041207-0004 v2.0
Page 67

SpeedTouch™ Web Interface
SNTP The SNTP page allows you to view/configure the SpeedTouch™ internal Simple
Network Time Protocol (SNTP) clock client.
Select SNTP to enable the SNTP clock client and to add/configure NTP servers
(available on the Internet) to which the SpeedTouch™ is able to synchronize its
internal clock:
Chapter 4
Select Manual to disable the SNTP clock client and to set the time manually, in
case external synchronization is not used:
For more information, see the application note “SpeedTouch™ Operation and
Maintenance”.
Syslog Click this link to display the Syslog page.
For more information, see the Syslog topic in “4.1 Quick Tasks Links”.
E-DOC-CTC-20041207-0004 v2.0
65
Page 68

Chapter 4
SpeedTouch™ Web Interface
4.6 Advanced Tasks Links
CLI Click this link to display the SpeedTouch™ Command Line Interface (CLI) page:
The CLI is meant for in-depth configuration of the SpeedTouch™, giving full control
on all configurational aspects of the device.
The web based CLI provides the same functionality as the native Command Line
Interface, available through a Telnet session to the SpeedTouch™, or via the serial
Console interface.
All CLI groups and commands are placed in a menu. You can open a group by
clicking the mark next to a group name, or clicking the group name.
Clicking on a command name will execute it. Commands without parameters are
indicated with and are executed immediately. Commands which require
additional parameters are indicated with . After you configured all parameters,
simply click Apply to execute the command.
For more information, see “7.1 Native Command Line Interface Access” on page 82.
To access the web based CLI pages:
You need at least Microsoft's Internet Explorer 4.0, or at least
Netscape's Communicator 4.06, or equivalent, both supporting
Javascript.
You need to install JRE (Java Runtime Environment) from SUN if your
computer runs Microsoft Windows XP.
For more information, see the application note “SpeedTouch™ Operation and
Maintenance”.
66
E-DOC-CTC-20041207-0004 v2.0
Page 69

SpeedTouch™ Web Interface
Temp l ates The Templates page allows you to overview, and/or add/delete service profile
templates used by the embedded Easy Setup wizard.
You can:
View the templates available for the embedded Easy Setup wizard:
Upload new template files, e.g. from the SpeedTouch™ Setup CD-ROM (usually
template files have the extension .tpl):
Chapter 4
By uploading templates you can extend the number of services listed in the
Easy Setup wizard.
For more information, see the application note “SpeedTouch™ Operation and
Maintenance”.
Language Click this link to view the Language page.
This page allows you to select the SpeedTouch™ web page language:
For more information, see the application note “SpeedTouch™ Operation and
Maintenance”.
E-DOC-CTC-20041207-0004 v2.0
67
Page 70

Chapter 4
SpeedTouch™ Web Interface
68
E-DOC-CTC-20041207-0004 v2.0
Page 71

Chapter 5
SpeedTouch™ NAPT Manager
5 SpeedTouch™ NAPT Manager
Introduction The SpeedTouch™ Network Address Port Translation (NAPT) Manager is designed to
simplify the configuration of the SpeedTouch™ NAPT engine. Rather than defining the
required NAPT entries for a certain application and adding them via the SpeedTouch™
web pages, the NAPT Manager offers you a selection of most popular host
applications for which the configuration of NAPT entries can be done automatically.
Supported Operating
Systems
Using SpeedTouch™
NAPT Manager
Detection of the
SpeedTouch™
The NAPT Manager is supported for following Microsoft Windows Operating
Systems:
MS Windows 98SE
MS Windows ME
MS Windows NT4.0 SP6
MS Windows 2000
MS Windows XP
The SpeedTouch™ NAPT Manager procedure consists of two major parts:
Detection of the SpeedTouch™
Configuration of the SpeedTouch™
Proceed as follows:
1 Insert the SpeedTouch™ Setup CD in your computer’s CD-ROM drive. The
SpeedTouch™ CD Browser will start automatically.
If the SpeedTouch™ CD Browser window does not appear
automatically, click Run on the Start menu and enter the following
path: D:\Menu.exe where D stands for the drive letter of your CD-ROM
drive.
2 The Choose Language window prompts you to select a language:
E-DOC-CTC-20041207-0004 v2.0
Select your language and click OK.
69
Page 72

Chapter 5
SpeedTouch™ NAPT Manager
3 The SpeedTouch™ CD Browser menu appears:
Click Configuration.
4 The following window appears:
70
Click Configure NAPT Settings.
5 The NAPT Manager window appears:
Click Next.
E-DOC-CTC-20041207-0004 v2.0
Page 73

SpeedTouch™ NAPT Manager
6 The Software License Agreement appears:
You must accept before continuing. Click Yes to accept.
If you accepted this Software License Agreement in a previous session
of NAPT Manager, this window will not be shown anymore.
7 NAPT Manager will search for the SpeedTouch™ on the network.
The following window shows the detection progress:
Chapter 5
E-DOC-CTC-20041207-0004 v2.0
8 The NAPT manager should find your SpeedTouch™ device on the local network.
This is indicated by the following window:
If more than one device is found, a list of available devices will be provided. If
this is the case, select your SpeedTouch™ device (SpeedTouch™608) and click
Next.
If the SpeedTouch™ Setup Wizard does not find any SpeedTouch™ on
the network an error window appears. In this case see page 33 for
more information.
To repeat the search for the SpeedTouch™, click Back and proceed with step 7
of this procedure.
71
Page 74

Chapter 5
SpeedTouch™ NAPT Manager
Configuration of the
SpeedTouch™
Proceed as follows:
1 As soon as the NAPT Manager has detected your SpeedTouch™ device you can
proceed with the configuration procedure.
The SpeedTouch™ may be protected by a system password. You must
!
provide user name and system password to continue with the
configuration.
2 The following page lists the application hosts currently configured on the
SpeedTouch™:
Click Add to enter a new application host.
3 The Add Port Mapping window appears.
If you want to:
Enter a port mapping for a specific application:
Click the Basic tab. Select an application in the Application list and enter
the Host IP Address in the appropriate fields.
72
By default, the IP address of the PC from which you are running the NAPT
Manager will be taken as host IP address. To add a NAPT entry for
another PC, you must change the proposed IP address.
E-DOC-CTC-20041207-0004 v2.0
Page 75

SpeedTouch™ NAPT Manager
Manually add a static NAPT entry:
Click the Advanced tab. Select a protocol in the Protocol list and enter
Port and Host IP address in the appropriate fields.
By default, the IP address of the PC from which you are running the NAPT
Manager will be taken as host IP address. To add a NAPT entry for
another PC, you must change the proposed IP address.
Specify a default server IP address:
Click the Default inbound host tab. Enter the new IP address in the Host
IP address field.
Chapter 5
Click Set to add your entry to the list.
4 If all required entries are added click Next to save the new entries.
5 The NAPT Manager will update the SpeedTouch™ NAPT configuration. You can
follow the progress in following window:
E-DOC-CTC-20041207-0004 v2.0
73
Page 76

Chapter 5
SpeedTouch™ NAPT Manager
6 As soon as the NAPT Manager completed the update of the SpeedTouch™
NAPT configuration, following window will appear:
Click Finish to close the NAPT Manager.
The NAPT manager allows you to delete or modify configured NAPT
mappings via the same procedure.
74
E-DOC-CTC-20041207-0004 v2.0
Page 77

SpeedTouch™ IPSec VPN
6SpeedTouch™ IPSec VPN
Introduction The SpeedTouch™ comes with integrated IPSec VPN client/server capabilities,
configurable via the SpeedTouch™ Command Line Interface and the SpeedTouch™
web pages (see “ IPSEC Policy” on page 53 for more information).
The integrated IPSec VPN functionality supports the configuration of
!
maximum one VPN peer and two IP VPN connections.
You can increase the maximum number of simultaneous VPN peers and IP
VPN connections to 4 VPN peers and 4 IP VPN connections via the VPN4
software activation key. By doing so the SpeedTouch™608 is renamed into
SpeedTouch™609. See “ Add-On” on page 64 for more information.
Example In this chapter the IPSec VPN functionality is demonstrated, by providing a simple
example of how to setup a secure tunnel between the SpeedTouch™ and a remote
site.
For this example, the remote side is represented by another SpeedTouch™ device
with integrated IPSec VPN client/server capabilities.
In real-life the secure tunnel will be setup via the SpeedTouch™ DSL interface (e.g.
via a PPP session with a PPP server). In fact, a secure tunnel can be negotiated on
any interface on the SpeedTouch™ capable of having an IP address.
Chapter 6
IP network setup The figure below shows the setup
SpeedTouch™[1] SpeedTouch™[2]
10.0.0.138/
PC1
10.0.0.1/24
40.0.0.1
Local IP network
10.0.0.0/24
Assume following IP network configuration:
PC1 and SpeedTouch™[1] are in the 10.0.0.0/24 network:
IP address PC1: 10.0.0.1/24
LAN IP address SpeedTouch™608[1]: 10.0.0.138/24
PC2 and SpeedTouch™[2] are in the 20.0.0.0/24 network:
IP address PC2: 20.0.0.1/24
LAN IP address SpeedTouch™[2]: 20.0.0.138/24
The two SpeedTouch™ devices are in the “public” 40.0.0.0/24 network:
“public” IP address SpeedTouch™[1]: 40.0.0.1
“public” IP address SpeedTouch™[2]: 40.0.0.2
Ethernet
40.0.0.2
“public” IP network
40.0.0.0/24
20.0.0.138/24
Local IP network
20.0.0.0/24
PC2
20.0.0.1/24
E-DOC-CTC-20041207-0004 v2.0
75
Page 78

Chapter 6
SpeedTouch™ IPSec VPN
IP configuration check To check whether the IP configuration has been set up correctly, it should be
Phase 1 tunnel To setup a secure tunnel between the two SpeedTouch™ devices on each side a
possible to ping SpeedTouch™[2] from SpeedTouch™[1] and vice versa by using the
:ip ping command via the SpeedTouch™ Command Line Interface (CLI). For example
to ping SpeedTouch™[2] from SpeedTouch™[1], execute following command:
=>:ip ping addr=40.0.0.2
9 bytes from 40.0.0.2 icmp_seq=0 intf=eth0
=>
So far PC1 can NOT ping PC2, as no IP network relationship exists between
the two local IP networks 10.0.0.0/24 and 20.0.0.0/24.
Phase 1 tunnel (IKE configuration) must be defined. In the SpeedTouch™, a Phase 1
tunnel is referred to as ‘peer’.
To create a peer you must:
Provide a name for the peer (the name has only local significance)
Define:
The IP address of the remote IPSec peer
The peer’s authentication type
The security descriptor for the peer
For simplicity, in this example the pre-shared key (PSK) method, with pre-shared
secret: ‘1234’, is used. As a security descriptor the popular IKE_AES descriptor is
selected.
Phase 2 tunnel The Phase 2 tunnel (ESP/AH configuration) is referred to as ‘connection’ in the
SpeedTouch™. The setup of the actual secure tunnel will be triggered by ‘starting’
the IPSec connection on both SpeedTouch™ devices
To create a connection you must:
Provide a name for the connection (as for peers, only with local significance)
Define:
Which Phase 1 settings to use (actually this implies selecting the peer
previously created)
Which packets are allowed to enter the secure tunnel. This is done by
specifying the range of IP addresses triggering the IPSec policy.
The security descriptor for the connection
Obviously for this example the local IP network configurations will be the local and
remote ranges of IP addresses that are triggering the IPSec policy. As a security
descriptor, the popular ESP_AES_PFS descriptor is selected.
76
E-DOC-CTC-20041207-0004 v2.0
Page 79

Chapter 6
SpeedTouch™ IPSec VPN
SpeedTouch™[1]
Phase 1 tunnel
configuration
To create the SpeedTouch™[1] peer:
1 Browse to the SpeedTouch™[1] web pages from PC1 and open the IPSec Policy
page via IP Router > IPSec Policy.
2 Select the Peers tab.
3 Specify following IPSec peer settings:
Peer Name: remote_peer_40_2
IP address (of the remote IPSec peer): the “public” IP address of
SpeedTouch™[2], i.e. 40.0.0.2
Auth(entication) Typ e: select preshared
Descriptor: select IKE_AES
Secret (to be entered twice for confirmation): 1234
SpeedTouch™[1]
Phase 2 tunnel
configuration
4 Click Add to create the peer ‘remote_peer_40_2’.
To create the SpeedTouch™[1] connection:
1 Proceeding from the IPSec peer creation procedure described above, click the
Connections tab.
2 Specify following IPSec connection settings:
Connection name: ipsec_connection_1
Peer name: select remote_peer_40_2
Local Range: 10.0.0.0/24
Remote Range: 20.0.0.0/24
Descriptor: select ESP_AES_PFS
3 Click Add to create the IPSec connection ‘ipsec_connection_1’.
To save your configuration, click Save All.
E-DOC-CTC-20041207-0004 v2.0
77
Page 80

Chapter 6
SpeedTouch™ IPSec VPN
SpeedTouch™[2]
Phase 1 tunnel
configuration
To create the SpeedTouch™[2] peer:
1 Browse to the SpeedTouch™[2] web pages from PC2 and open the IPSec Policy
page via IP Router > IPSec Policy.
2 Click the Peers tab.
3 Specify following IPSec peer settings:
Peer Name: remote_peer_40_1
IP address (of the remote IPSec peer): the “public” IP address of
SpeedTouch™[2], i.e. 40.0.0.1
Auth(entication) Typ e: select preshared
Descriptor: select IKE_AES
Secret (to be entered twice for confirmation): 1234
SpeedTouch™[2]
Phase 2 tunnel
configuration
4 Click Add to create the peer ‘remote_peer_40_1’.
To create the SpeedTouch™[2] connection:
1 Proceeding from the IPSec peer creation procedure described above, click the
Connections tab.
2 Specify following IPSec connection settings:
Connection name: ipsec_connection_2
Peer name: select remote_peer_40_1
Local Range: 20.0.0.0/24
Remote Range: 10.0.0.0/24
Descriptor: select ESP_AES_PFS
3 Click Add to create the IPSec connection ‘ipsec_connection_2’.
To save your configuration, click Save All.
78
E-DOC-CTC-20041207-0004 v2.0
Page 81

Chapter 6
SpeedTouch™ IPSec VPN
Establishing the secure
tunnel
With both IPSec Phase 1 and Phase 2 tunnels defined, it is now possible to actually
establish the secure tunnel by starting the IPSec connection on both
SpeedTouch™608 devices.
Proceed as follows to start the IPSec connection on both SpeedTouch™ devices:
Open the IPSec Policy web page
Select the Connection tab
Click Start for the selected IPSec connection, e.g. for SpeedTouch™[1]:
As soon as the IPSec connection is started on both SpeedTouch™ devices, the secure
tunnel is set up. This can be verified via the SpeedTouch™ Command Line Interface
(CLI), e.g. on the SpeedTouch™[1]:
=>ipsec salist
Phase I (IKE) SA's :
SA index : 0
Peer : 40.0.0.2 (from 40.0.0.1)
Cookies : Initiator A1512E8C550642ED, Responder 50D270BD6507C471
Cipher : AES[128] SHA1 dhgroup 2
Expires : 3577s
Phase II (ESP/AH) SA's :
SA index : 0
Local ID : 10.0.0.*
Remote ID : 20.0.0.* (40.0.0.2)
Expires : 86377s
Connection : ipsec_connection_1
SAs in suite : 1
SPI - 5bcd1572/e27c511f : ESP-AES[128]-HMAC-SHA1
=>
As can be seen, the descriptor values entered during IPSec peer and IPSec
connection configuration match the ones of the actual secure tunnel.
By setting up the secure tunnel, IP connectivity between both local IP networks
(10.0.0.0/24 and 20.0.0.0/24) is possible. This can be verified easily by pinging PC2
(20.0.0.1) from PC1 (10.0.0.1) and vice versa.
Additional information For more information on the features, abilities and functionalities of the
SpeedTouch™ IPSec VPN functionality, see following application notes:
SpeedTouch™ IPSec Quick Start Guide
SpeedTouch™ IPSec Configuration Guide
For IPSec Certificates, see following application note:
SpeedTouch™ IPSec PKI Configuration Guide.
E-DOC-CTC-20041207-0004 v2.0
79
Page 82

Chapter 6
SpeedTouch™ IPSec VPN
80
E-DOC-CTC-20041207-0004 v2.0
Page 83

SpeedTouch™ Advanced Concepts
7 SpeedTouch™ Advanced Concepts
Introduction This chapter introduces some advanced features supported by the SpeedTouch™.
Overview The following concepts will be briefly described:
Topi c Pag e
7.1 Native Command Line Interface Access 82
7.2 Dynamic DNS 84
7.3 Simple Network Management Protocol 89
7.4 Packet Firewalling 90
Chapter 7
E-DOC-CTC-20041207-0004 v2.0
81
Page 84

Chapter 7
SpeedTouch™ Advanced Concepts
7.1 Native Command Line Interface Access
Accessing the
Command Line
Interface
The SpeedTouch™ provides two methods for accessing its Command Line Interface:
Via a TCP/IP Telnet session
Via the serial “Console” interface.
For both access methods, authentication is required in case
!
the SpeedTouch™ is protected by a system password.
Basic CLI Once authentication has been passed (if required), the following banner appears:
For your convenience, the CLI commands are structured in CLI command groups,
e.g. “dhcp”. To find out which CLI command groups and/or commands are available,
you can execute 'help' from each command group level prompt.
For a syntax description of a CLI command, simply enter 'help' followed by the CLI
command and press Enter.
You can enter a level by executing its name. From each level you can execute '..' to
go one level up.
Executing a command is done by entering the name of the command and
subsequently providing the parameters, whenever asked for. In case the parameter
provides preset values, you can go through these via the arrow keys.
Do not forget to save your changes by executing 'saveall' (from any CLI
prompt).
82
E-DOC-CTC-20041207-0004 v2.0
Page 85

Chapter 7
SpeedTouch™ Advanced Concepts
Semi-graphical CLI To use the semi-graphical Command Line Interface, execute 'menu' from the prompt:
The semi-graphical CLI offers you an attractive and easy-to-use configuration
environment for the CLI.
You can browse through the CLI command groups via the arrow keys. Pressing Enter
executes your selection. From each level you can execute '..' to go one level up.
Use the Tab key to change from the CLI command menu to the control menu and
vice versa.
To setup a CLI command, simply press Enter on its name. You can configure and
overview its various parameters at one time. In case the parameter provides preset
values, you can go through these via the arrow keys. If you are satisfied, use the Tab
key to go to the 'OK' field and press Enter.
Do not forget to save your changes by executing 'saveall' (from any CLI
prompt).
CLI Reference Guide For a complete description of the SpeedTouch™ Command Line Interface, see the
“SpeedTouch™ CLI Reference Guide”.
E-DOC-CTC-20041207-0004 v2.0
83
Page 86

Chapter 7
SpeedTouch™ Advanced Concepts
7.2 Dynamic DNS
Introduction Dynamic DNS is a mechanism, offered by several dynamic DNS service providers
(available through the Internet) that allows the mapping of a worldwide resolvable
static DNS host name to a dynamically (and temporarily) assigned public IP address
used for Internet connectivity.
This allows you to offer basic Internet services to the world wide web, through a
DNS host name, without the need for obtaining a static and worldwide unique public
IP address.
In most cases dynamic DNS service providers offer various host applications, which
run in background on a local computer and send IP address updates to a dynamic
DNS service server whenever the dynamically assigned public IP address has been
changed.
For your convenience the SpeedTouch™ offers you the embedded dynamic DNS
client, making the use of third party host applications running on a local computer
superfluous.
Applying for the
dynamic DNS service
Dynamic DNS client
configuration
Preparing the
SpeedTouch™ dynamic
DNS client
Before you are able to use the SpeedTouch™ dynamic DNS client functionality, you
must first apply for a dynamic DNS account (and DNS host name) at one of the
available dynamic DNS service providers available on the Internet.
The SpeedTouch™ supports by default the following dynamic DNS service providers:
DynDNS (www.dyndns.org/services/dyndns/)
StatDNS (www.dyndns.org/services/statdns/)
No-IP (www.no-ip.com)
DtDNS (www.dtdns.com)
GnuDIP
You can also configure other custom dynamic DNS services fully manually in
addition to the ones listed above.
The SpeedTouch™ dynamic DNS client service can only be configured via the CLI.
Below a short description will be provided on how to prepare your SpeedTouch™ for
dynamic DNS, using an imaginary account at the DynDNS dynamic DNS service
provider.
For more in-depth information on the CLI, see “7.1 Native Command Line
Interface Access” on page 82 and the “SpeedTouch™ CLI Reference Guide”.
The procedure for enabling a dynamic DNS client consists of four steps:
1 Adding a dynamic DNS host name
2 Adding a dynamic DNS client
3 Modifying the dynamic DNS client
4 Refining the dynamic DNS service settings (optional)
5 Enabling the dynamic DNS service.
In a preliminary step, it is assumed that the SpeedTouch™ is already correctly
configured for your Internet subscription and connected to the Internet, and
that you have obtained a valid dynamic DNS account (and DNS host name)
at a dynamic DNS service provider (in this example DynDNS).
84
E-DOC-CTC-20041207-0004 v2.0
Page 87

Chapter 7
SpeedTouch™ Advanced Concepts
The SpeedTouch™ CLI
dyndns commands
The SpeedTouch™ allows configuration of its dynamic DNS client functionality via
the :dyndns CLI command group:
=>dyndns
[dyndns]=>help
Following commands are available :
add : Add a Dynamic DNS client.
modify : Modify a Dynamic DNS client.
delete : Delete a Dynamic DNS client.
flush : Delete all Dynamic DNS clients.
list : List all Dynamic DNS clients.
Following command groups are available :
host service
[dyndns]=>
In this command group all commands are available for adding/deleting and
configuring a dynamic DNS client.
It contains also two sub command groups:
:dyndns host
[dyndns]=>host
[dyndns host]=>help
Following commands are available :
add : Add a fully qualified host name
delete : Delete a host name
flush : Delete all host names
list : List all host names
[dyndns host]=>
This allows to specify one or more host name(s) corresponding to a dynamic
DNS client.
:dyndns service
[dyndns]=>service
[dyndns service]=>help
Following commands are available :
modify : Modify specific DynDNS service settings
list : List all DynDNS services
[dyndns service]=>
This allows you to view/configure the preconfigured dynamic DNS service
providers, or to create custom dynamic DNS service providers.
For a full description of the syntax of these commands, see the
“SpeedTouch™ CLI Reference Guide”.
E-DOC-CTC-20041207-0004 v2.0
85
Page 88

Chapter 7
SpeedTouch™ Advanced Concepts
Example dynamic DNS
subscription
Adding a dynamic DNS
host name
For this example, following fictive dynamic DNS subscription is assumed at DynDNS
(www.dyndns.org
):
value
user name
password
Dynamic DNS host
Allow wildcards
JohnDoe@MyISP.com
john
johndoe.dyndns.org
yes
Depending on your dynamic DNS subscription some other, more advanced
options may be required or available, e.g. multiple host names, the Mail
Exchanger (MX) host name, update interval, etc.
In a first step you must specify for which hostname(s) you want to enable the dynamic DNS service for. According to the Example dynamic DNS subscription information, following configuration must be done:
=>dyndns host add group=MyDynDNSHost name=johndoe.dyndns.org
To allow multiple host names to be assigned to the same dynamic DNS service, host
names always reside in a group. You are free to choose a group name, it is only used
for referring to the group during CLI configuration.
Adding a dynamic DNS
client
Modifying the dynamic
DNS client
Add a dynamic DNS client entry:
=>dyndns add name=MyDynDNS
Now the dynamic DNS client must be configured according your dynamic DNS
subscription. According the Example dynamic DNS subscription information,
following configuration must be done:
=>dyndns modify
name = MyDynDNS
[intf] = PPPoE_1
[user] = JohnDoe@MyISP.com
[password] = **** First time typing the password
Please retype password for verification.
[password] = **** Second time typing the password for
verification
[group] = MyDynDNSHost
[mx] = Left empty
[backmx] = disabled
[wildcard] = enabled
[offline] = disabled
[service] =dyndns
[status] = disabled
:dyndns modify name=MyDynDNS intf=DIALUP_PPPOE user=JohnDoe@MyISP.com
password=_DEV_2AF11E9E944667D4 group=MyDynDNSHost
=>
86
The [intf] parameter requires you to select the SpeedTouch™ interface used
for your Internet connectivity.
E-DOC-CTC-20041207-0004 v2.0
Page 89

Chapter 7
SpeedTouch™ Advanced Concepts
Refining the dynamic
DNS service settings
If needed or required by the dynamic DNS service provider, you can change some
details of the dynamic DNS service.
The Example dynamic DNS subscription at DynDNS requires no changes in the
service settings, as the preconfigured settings should be adequate.
Below an overview of the default service settings per preconfigured dynamic DNS
service provider (and the custom dynamic DNS service):
[dyndns service]=>list
dyndns :
server = members.dyndns.org
port = 80
request = /nic/update
update interval = 2097120s
retry interval = 30s
max retry = 3
statdns :
server = members.dyndns.org
port = 80
request = /nic/update
update interval = 0s
retry interval = 30s
max retry = 3
custom :
server = members.dyndns.org
port = 80
request = /nic/update
update interval = 0s
retry interval = 30s
max retry = 3
No-IP :
server = dynupdate.no-ip.com
port = 80
request = /ducupdate.php
update interval = 86400s
retry interval = 30s
max retry = 3
DtDNS :
server = dtdns.com
port = 80
request = /api/autodns.cfm
update interval = 86400s
retry interval = 30s
max retry = 3
gnudip :
server =
port = 80
request =
update interval = 0s
retry interval = 0s
max retry = 0
=>
E-DOC-CTC-20041207-0004 v2.0
87
Page 90

Chapter 7
SpeedTouch™ Advanced Concepts
Enabling the dynamic
DNS service
Check dynamic DNS
client resolvation
In a final step you must enable the dynamic DNS client:
=>dyndns modify name=MyDynDNS status=enabled
You can easily check whether the dynamic DNS client is successfully updating the
SpeedTouch™ public IP address towards the dynamic DNS service provider’s
hostserver:
=>dyndns list
MyDynDNS : PPPoE_1 [CONNECTED]
options = dyndns wildcard
user = JohnDoe@MyISP.com password = ********
addr = 141.11.1.1
group = MyDynDNSHost
=>
88
E-DOC-CTC-20041207-0004 v2.0
Page 91

SpeedTouch™ Advanced Concepts
7.3 Simple Network Management Protocol
Introduction The Simple Network Management Protocol (SNMP) is a standard way to retrieve
counters, status variables and other diagnostic information of the SpeedTouch™.
Chapter 7
SpeedTouch™ Firewall
configuration
The SpeedTouch™ Firewall is by default configured to only count the SNMP packets
(and to drop them in the end). To allow SNMP traffic to migrate to a remote SNMP
manager, you will have to allow it explicitly by adding the appropriate firewall rules.
For more information, see the application note “SpeedTouch™ Remote
Management”
SpeedTouch™ MIBs Based on a client /server concept, the SNMP server (the SNMP manager) gets or sets
the values of objects defined in a Management Information Base (MIB) kept by the
SNMP client (the SNMP agent). In addition the SNMP agent is also able to
autonomously initiate an action by sending a trap to the SNMP manager.
The SpeedTouch™ supports the following SNMP MIBs:
RFC2863 IF-MIB
RFC1213 MIB-II
For more information, see the application note “SpeedTouch™ Remote
Management”.
E-DOC-CTC-20041207-0004 v2.0
89
Page 92

Chapter 7
SpeedTouch™ Advanced Concepts
7.4 Packet Firewalling
Introduction A firewall is a security gateway that controls access between a private LAN domain,
often referred to as Intranet (even for one computer), and the public Internet.
It secures the entry points to the network in such way that access is only allowed to
authorized traffic. Therefore, to effectively control the flow of data, firewall
protection should be placed at each point where the network connects to the WAN.
One point at least, and most probably the most important connection point to the
WAN is the SpeedTouch™.
SpeedTouch™ packet
firewall
How the packet firewall
works
The SpeedTouch™ packet firewall is a set of related programs that protects the
resources of your local network from users from other networks.
Basically, a firewall examines each network packet to determine whether to forward
it towards its destination, or not. Firewalls work in most cases closely together with
a forwarding or proxy server that makes network requests on behalf of your local
network users.
For the SpeedTouch™ firewall, the SpeedTouch™ DSL router acts as a network
gateway as well as a proxy server to contact the outside world via the DSL line.
The SpeedTouch™ is in fact a packet firewall: inside and outside nodes are visible to
each other in the IP layer, but the firewall filters out, i.e. blocks, the passage of
certain packets, based on the packet header information.
The packets are intercepted at certain Packet Interception Points (PIP) called hooks in
the SpeedTouch™ IP router. At these points, they are matched against a chain, which
comprises a hierarchical set of rules (at least one). These rules determine the type of
control implemented on the packets.
Incoming and outgoing traffic is validated by comparing certain values in the packets
with configured firewall parameters. The parameters in a rule can be divided
according to the protocol to which they belong: a first group validates traffic on the
interface level, a second group on IP level, and a third group on protocol level.
See the CLI command ":firewall rule help create" for a full parameter
description
SpeedTouch™ hooks
and PIP flows
90
The following hooks can be determined in the SpeedTouch™:
Input:
The point of all incoming traffic, i.e. at this point it can be determined whether
a packet is allowed to reach the SpeedTouch™ IP router or local IP host.
Sink:
The point of all traffic destined for the SpeedTouch™ IP router, i.e. at this point
it can be determined whether a packet is allowed to address the local IP host.
Forward:
The point of all traffic to be forwarded through the SpeedTouch™, i.e. at this
point it can be determined whether a packet is allowed to be handled (i.e.
routed) by the local IP host.
Source:
The point of all traffic sourced by the SpeedTouch™ IP router, i.e. at this point it
can be determined whether a packet is allowed to leave the local IP host.
Output:
The point of all outgoing traffic, i.e. at this point it can be determined whether a
packet is allowed to leave the SpeedTouch™ IP router or local IP host.
E-DOC-CTC-20041207-0004 v2.0
Page 93

SpeedTouch™ Advanced Concepts
Through the hooks defined above, following traffic can run:
Input-to-Sink:
The flow of packets destined exclusively for the SpeedTouch™.
Source-to-Output:
The flow of packets sourced exclusively by the SpeedTouch™ itself.
Input-through-Forward-to-Output:
The flow of packets sourced by the WAN, forwarded by the SpeedTouch™
towards the local network, or vice versa.
Chapter 7
SpeedTouch™ Packet
Firewall and Packet
Treatments
At every hook a separate access list (chain), containing an ordered list of rules will
operated on each processed packet, resulting in a specific treatment of this packet.
See the CLI command ":firewall rule help create" for a full parameter
description
Firewall criteria A rule is able to operate on (a combination of) the following criteria:
Interface related
Source interface
Source interface group
Source bridge port
Destination interface
Destination interface group
IP related
Source IP address (range)
Destination IP address (range)
Type of service, precedence and DSCP specification in the IP packet
Protocol in the IP packet
TCP related
Source port number (range)
Destination port number (range)
Synchronization, urgent, and acknowledge flags
UDP related
Source port number (range)
Destination port number (range)
ICMP related
ICMP type
ICMP code number (range)
E-DOC-CTC-20041207-0004 v2.0
91
Page 94

Chapter 7
SpeedTouch™ Advanced Concepts
Firewall treatments Once a packet is intercepted in a hook, and a (first) rule is found to be applicable (i.e.
matches against at least one of the criteria defined in this rule), the SpeedTouch™
firewall is able to:
Accept the packet:
I.e. submit it to the next processing stage without further action.
Deny the packet:
I.e. no submission is done and a message is sent to the sender that the packet
could not be delivered.
Drop the packet:
I.e. no submission is done; the packet is silently discarded
Count the packet for statistical use (no further action is done on the packet; it
is passed to the next firewall rule for validation).
Link the packet to another chain of hooks, i.e. for parsing another defined chain, if
the specific rule applies.
SpeedTouch™ Packet
Firewall Configuration
The SpeedTouch™ packet firewall is by default configured to:
Drop all traffic migrating from WAN to WAN
Drop all traffic from the SpeedTouch™ to the WAN, except DNS and ICMP
replies
Allow all traffic from SpeedTouch™ to LAN, and vice versa
Allow all traffic from LAN to WAN, and vice versa
Allow all traffic from a remote LAN to local LAN, and vice versa
Allow the SpeedTouch™ to be pinged from the WAN (i.e. to allow ICMP
requests from WAN to SpeedTouch™, and to allow ICMP replies from
SpeedTouch™ to WAN)
You can create other, or additional chains with rules, specific for your needs via the
CLI.
92
E-DOC-CTC-20041207-0004 v2.0
Page 95

8 Support
In this chapter This chapter contains the following topics:
Topi c Pag e
SpeedTouch™ Default Configuration 94
UPnP™ on Windows XP Systems 95
Troubleshooting 97
Chapter 8
Support
E-DOC-CTC-20041207-0004 v2.0
93
Page 96

Chapter 8
Support
8.1 SpeedTouch™ Default Configuration
Reset to default
configuration
Proceed as follows:
1 Put DIP switch number 4 in the upper position:
Config Console
You will notice that the PWR/Alarm LED flashes red.
2 Power cycle the SpeedTouch™ and wait to allow it to restart.
The SpeedTouch™ will come online with manufacturing defaults.
3 Reset the DIP switch in its original position. If not, the PWR/Alarm LED will
flash red as a warning.
Leaving the DIP switch in the UP position, will cause unintended reset
!
to manufacturing defaults!
4 A reset to factory default settings also deletes the configuration profile
settings. Therefore, a reconfiguration via the SpeedTouch™ Setup wizard or via
uploading the appropriate configuration file might be needed. See
“1.4 SpeedTouch™ Configuration Setup” on page 13 for more information.
For more information on the operation and management of the SpeedTouch™, see the
application note “SpeedTouch™ Operation and Management”.
94
E-DOC-CTC-20041207-0004 v2.0
Page 97

8.2 UPnP™ on Windows XP Systems
Adding UPnP™ If you are running Microsoft Windows XP, it is recommended to add the UPnP™
component to your system.
Proceed as follows:
1 On the Start menu, click Control Panel.
2 The Control Panel window appears. Click Add or Remove Programs.
3 The Add or Remove Programs window appears. Click Add/Remove Windows
Components.
4 The Windows Components Wizard appears:
Chapter 8
Support
Select Networking Services in the Components list and click Details.
5 The Networking Services window appears:
Select Universal Plug and Play and click OK.
6 Click Next to start the installation and follow the instructions in the Windows
Components Wizard.
7 At the end of the procedure the wizard prompts you that the installation was
succesfull. Click Finish to quit.
For more information on UPnP™ and SpeedTouch™ UPnP™ features go to the UPnP™
pages at www.speedtouch.com
.
E-DOC-CTC-20041207-0004 v2.0
95
Page 98

Chapter 8
Support
Adding Internet
Gateway Device
Discovery and Control
Your MS Windows XP system is able to discover and control Internet Gateway
Devices (IGD), like your SpeedTouch™ on the local network. Therefore it is
recommended to add the IGD Discovery and Control client to your system.
Proceed as follows:
1 On the Start menu, click Control Panel.
2 The Control Panel window appears. Click Add or Remove Programs.
3 The Add or Remove Programs window appears. Click Add/Remove Windows
Components.
4 The Windows Components Wizard appears:
Select Networking Services in the Components list and click Details.
5 The Networking Services window appears:
96
Select Internet Gateway Device Discovery and Control Client and click OK.
6 Click Next to start the installation and follow the instructions in the Windows
Components Wizard.
7 At the end of the procedure the wizard prompts you that the installation was
succesfull. Click Finish to quit.
E-DOC-CTC-20041207-0004 v2.0
Page 99

8.3 Troubleshooting
Configuration problems In case your SpeedTouch™ is unreachable due to misconfiguration, you might
consider a hardware reset to factory defaults as described in “8.1 SpeedTouch™
Default Configuration” on page 94.
However, note that resetting the SpeedTouch™ to its factory settings will revoke all
the changes you made to the configuration.
Dr SpeedTouch™ Dr SpeedTouch™ enables you to test your computer and SpeedTouch™ connectivity
via its Diagnostics wizard. The SpeedTouch™ Troubleshooter will report what is
wrong with your connection.
For more information on Dr SpeedTouch™, see “3 Dr SpeedTouch™” on page 37.
Troubleshooting table Following table may help you determine the nature of the problem, and provides
some plausible solutions:
Chapter 8
Support
Problem Solution
SpeedTouch™ does not work.
(none off the LEDs lights up)
No Ethernet connectivity.
LAN LED does not light up.
Ethernet port(s) link integrity LED does
not light up.
Poor SpeedTouch™ performance. Make sure the SpeedTouch™ is installed
No UPnP™. Make sure UPnP™ is installed on your PC
Make sure the SpeedTouch™ is plugged
into an electrical outlet.
Make sure the power switch on the
SpeedTouch™ is turned on.
Make sure the cable(s) are securely
connected to the Ethernet port(s).
Make sure you are using the correct
cable type for your Ethernet equipment.
as instructed in this User's Guide and/or
as instructed by the SP.
Check whether a central splitter or
dedicated filters are installed properly.
if you are running Microsoft Windows
XP.
Your computer doesn’t support UPnP™ if
you run an operating system other than
Microsoft Windows XP.
E-DOC-CTC-20041207-0004 v2.0
No Line synchronization achieved.
Line Sync LED is off or keeps flashing
Make sure that UPnP™ is not turned off
in the SpeedTouch™ web pages.
Make sure ADSL service is enabled on
the telephone line your SpeedTouch™ is
connected to.
Make sure the correct SpeedTouch™
variant is used for your ADSL service.
97
Page 100

Chapter 8
Support
98
E-DOC-CTC-20041207-0004 v2.0
 Loading...