

Bluetooth 4.0 Cycling Computer
Cyclaid 10
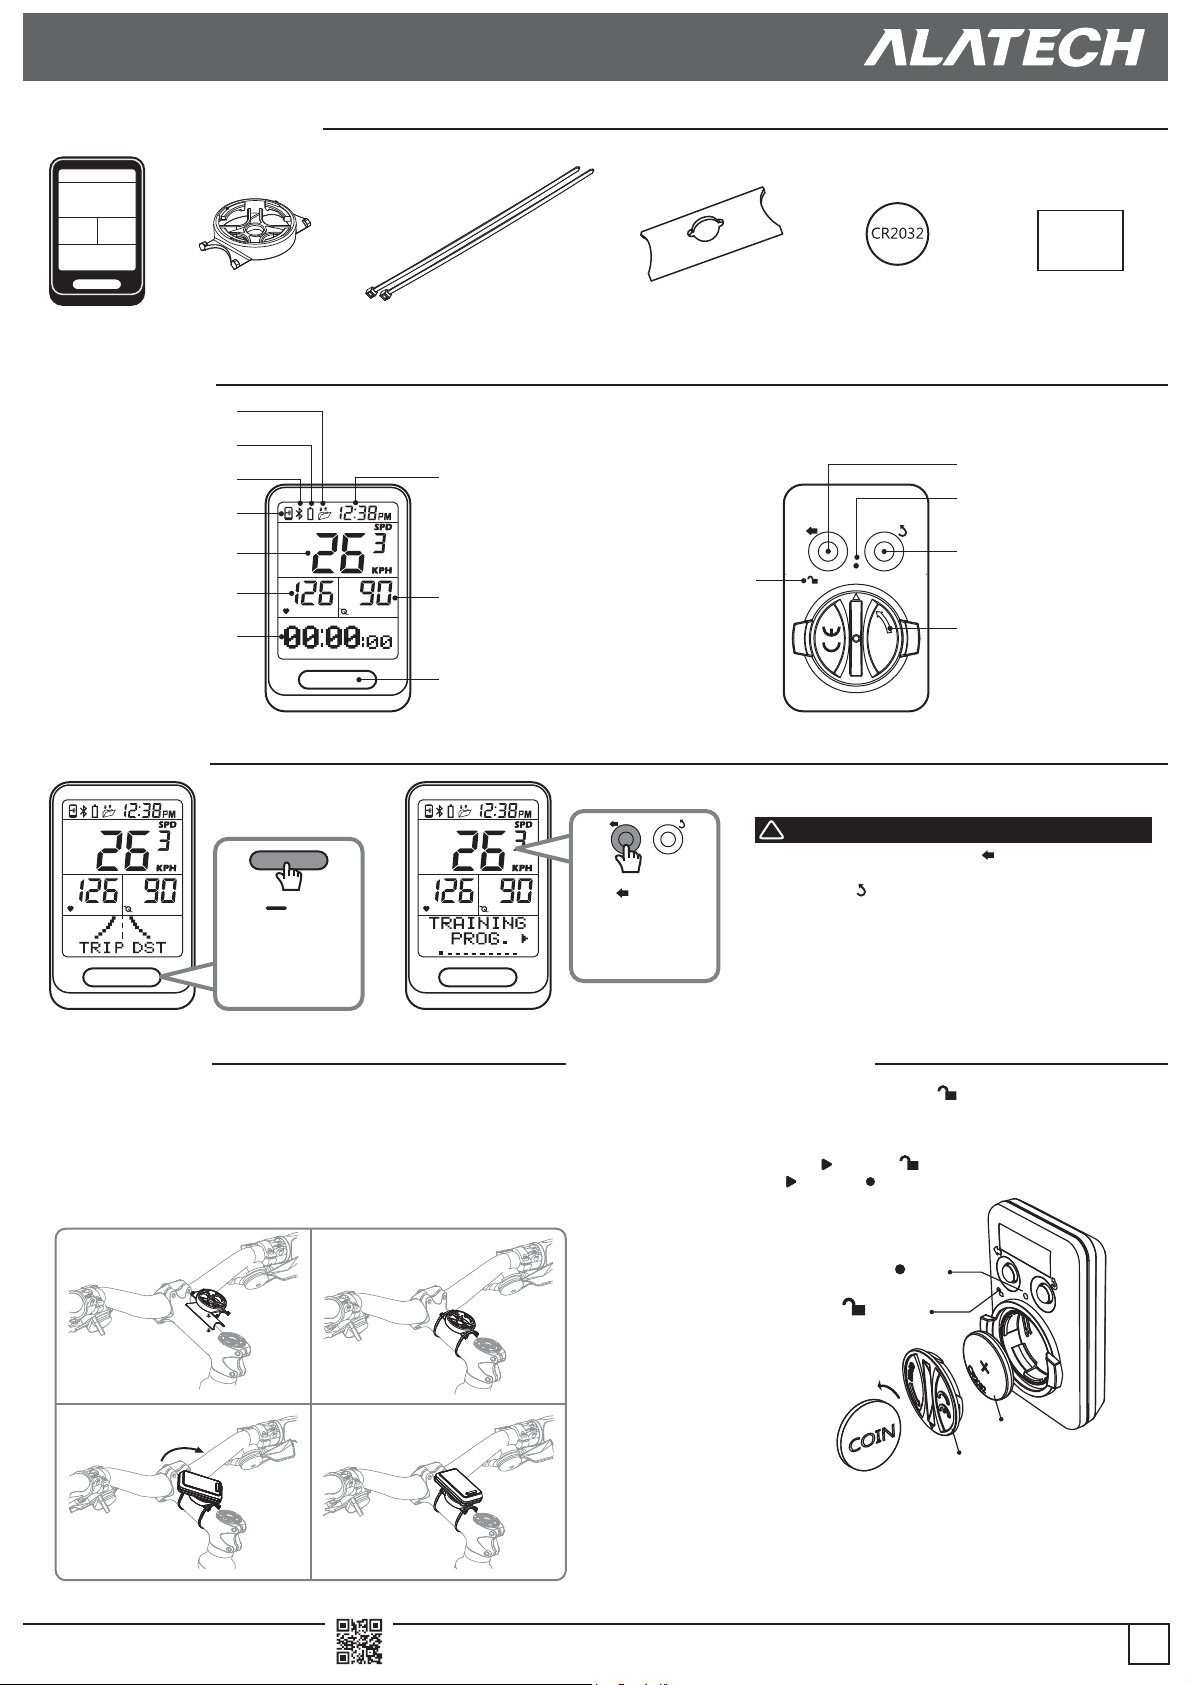
What's in the Box?
Quick Start Guide
Quick Start
Guide
Cyclaid 10 ×1 Holder ×1
Introducing
Upload file
Battery low indicator
Connection to sensor
Connection to mobile phone
Speed display
Heartbeat display
Information display
Use modes
Press to switch
to bicycling mode
and start timing in
standby mode.
Front
Cable tie ×4 CR2032 button battery ×1 Quick Start Guide ×1
Current time
Pedaling frequency
display
Enter key
Press to switch to
individual setup
window in standby
mode.
Fixing pad ×1
Battery cover
unlock position
Right/Down arrorw key
Battery cover lock position
Exit/Back/Stop bicycling key
N
E
P
O
Reverse
! Attention
• For the first time using, press to turn on Cycling
Computer and select your appropriate language.
then press to exit to standby mode (no screen).
• If you have already setup the Language Settings
once, you can change it by going to SYSTEM SET >
LANGUAGE.
Battery cover
1 Place the fixing pad under the fixer and attach both to the bike frame.
2 Tie the fixer with cable ties.
3 Place the Cycling Computer in the fixer 45 degree to the frame as
shown in the diagram.
4 Turn the Cycling Computer clockwise until it clicks into the 12-oclock
position.
STEP 1 STEP 2
STEP 3 STEP 4
•
Please download the latest Quick User Guide and
complete user manual at web site: www.alatech.com
Replace BatteryInstallation
1 Use a coin to twist it counter-clockwise to .
2 Remove the cover and insert (replace) the battery (type: CR2032) into
the sensor with positive (+) side facing up.
3 Place the battery cover ( points to ). Use a coin to twist the cover
clockwise to close ( points to ).
lock
unlock
battery
cover
•
Please recycle your waste batteries.
• Product information in this document is for reference only.
2PF2972100800XX
03/2015. Rev. 1.2
EN
 Loading...