

Page 1

Alacritech Accelerator Users Guide
Version 9.2 March 2008
Page 2

Preface
Disclaimer
The information in this document is subject to change without notice. Alacritech reserves the right to change any portion of these products for reasons such as improving
performance or enhancing functionality. Alacritech assumes no liability arising out of
the application or use of these products for anything other than its intended purpose.
Copyright
This document is copyrighted material. No part of this document may be copied by any
means without the written permission of Alacritech, Inc.
This document describes Accelerators from Alacritech, Inc. This document is the official reference source for all revisions/releases of these products until rescinded by an
update.
Copyright © 2000-2007 Alacritech, Inc. All rights reserved. Alacritech, the Alacritech
logo, SLIC Technology and the SLIC Technology logo are registered trademarks of
Alacritech, Inc. in the United States. All other marks belong to their respective owners.
Patents
One or more U.S. and international patents apply to Alacritech products, including
without limitation: U.S. Patent Nos. 6,226,680, 6,247,060, 6,334,153, 6,389,479,
6,393,487, 6,427,171, 6,427,173, 6,434,620, 6,470,415, 6,591,302, 6,658,480,
6,687,758, 6,697,868, 6,751,665, 6,757,746, 6,807,581, 6,938,092 6,941,386,
6,965,941, 6,996,070, 7,042,898, 7,076,568, 7,089,326, 7,093,099, 7,124,205,
7,133,940, 7,167,926, 7,167,927, 7,174,393, 7,185,266, 7,191,241, 7,191,318.
Portions of the technology in Alacritech‘s acceleration products are used under license
from Broadcom Corporation [and may be covered by one or more Broadcom U.S. Patents.] Alacritech does not have a license under the Broadcom Licensed Patents to
implement certain claimed functionality with hardware and software not provided by
Alacritech. No license is granted under Broadcom‘s patents expressly, by implication,
by exhaustion or otherwise, to use or sell the acceleration technology in combination
with any non-licensed hardware or software that is specifically designed to practice the
Broadcom Licensed Patents.
Part Number: 900156 Rev 5 03/08
Alacritech Accelerator Users Guide i
Page 3

Organization of This Guide
This guide is the primary reference and operation guide for Alacritech Accelerators and
contains the following sections:
Chapter 1 – Introduction provides a general introduction to Alacritech Accelerators
and the SLIC Technology on which they are based.
Chapter 2 – Software Installation includes the procedures required to install the
software component and configure the operating system for correct operation.
Chapter 3 – Device Management provides the procedures for configuring, monitoring
and maintaining Accelerator performance and procedures for special circumstances.
Chapter 4 – Troubleshooting and Support provides a list of possible problems and
their solutions.
Appendix A – Network Software License Agreement and Warranty provides the
text of the License Agreement to use the software component and the Limited Media
Warranty for the software media.
Alacritech Accelerator Users Guide ii
Page 4

Table of Contents
1 Introduction 1-1
1.1 About this Guide 1-1
1.2 Description 1-2
1.3 Operating System Compatibility 1-3
2 Software Installation 2-1
2.1 Software Installation Overview 2-1
2.2 Software First Installation 2-2
2.3 Hardware First Installation 2-8
2.4 Uninstalling the Accelerator 2-11
3 Device Management 3-1
3.1 Starting Device Management 3-1
3.2 Running Adapter Diagnostics 3-3
3.3 Updating Flash Code 3-5
3.4 Disabling Windows Firewall to Enable TCP Offload 3-6
3.5 Managing Drivers 3-8
3.6 Configuring Advanced Properties 3-10
3.7 Configuring Teaming and Failover 3-14
3.8 Configuring VLAN Tagging 3-20
4 Troubleshooting and Support 4-1
4.1 Alacritech Automated Customer Support 4-1
4.2 README Files on CD-ROM 4-1
4.3 Troubleshooting Overview 4-1
4.4 Installation Problems 4-2
4.5 Event Log Errors 4-2
4.6 Connectivity Problems 4-3
Appendix A Network Software License Agreement and Warranty A-1
Alacritech Accelerator Users Guide iii
Page 5

1-1
1 Introduction
1.1 About this Guide
This guide describes how to install Release 9 software and operate Alacritech Accelerators on a Windows Server 2003-based system or a Windows XP Professional x64
Edition-based system that uses the Microsoft Windows Server 2003 Scalable Networking Pack. Note that certain Alacritech Accelerators are compatible with specific versions of Microsoft Windows Server 2003.
1000 Series (1000x1, SES1001) Accelerators are not supported with this software release, but will continue to be supported under earlier software releases with a major
number of 7. 100 Series (100x4, 100x2 and 100x1) Accelerators are not supported
with this software release, but will continue to be supported under earlier releases with
a major number of 6.
1.1.1 Naming Conventions
The general term Accelerator for this release applies to all of the following products:
TCP/IP Offload Engine (TOE) NICs (TNICs):
SEN2001XT Single-Port Accelerator
SEN2001XF Single-Port Accelerator (1000Base-SX)
SEN2002XT Dual-Port Accelerator
SEN2002XF Dual-Port Accelerator (1000Base-SX)
SEN2102ET Dual-Port Accelerator
SEN2102EF Dual-Port Accelerator (1000Base-SX)
SEN2104ET Quad-Port Accelerator
SEN2104EF Quad-Port Accelerator (1000Base-SX)
SEN1811XT Single-Port Accelerator
SEN1812XT Dual-Port Accelerator
SEN1822ET Dual-Port Accelerator
SES2001XT Single-Port iSCSI Accelerator
SES2001XF Single-Port iSCSI Accelerator (1000Base-SX)
SES2002XT Dual-Port iSCSI Accelerator
SES2002XF Dual-Port iSCSI Accelerator (1000Base-SX)
SES2104ET Quad-Port iSCSI Accelerator
SES2104EF Quad-Port iSCSI Accelerator (1000Base-SX)
Alacritech Accelerator Users Guide
Page 6

1-2
SES2102ET Dual-Port iSCSI Accelerator
SES2102EF Dual-Port iSCSI Accelerator (1000Base-SX)
SES1811XT Single-Port iSCSI Accelerator
SES1812XT Dual-Port iSCSI Accelerator
SES1822ET Dual-Port iSCSI Accelerator
Product names ending with a T specify unshielded twisted pair (UTP) copper connections, and product names ending with an F indicate fiber-based connections. XT and
XF products are PCI-X based, and ET and EF products are PCI Express (PCIe)
based.
1.2 Description
Alacritech Accelerators are single-port or multi-port network interface cards (NICs) that
employ Alacritech‘s SLIC Technology architecture, which uses an innovative applica-
tion-specific integrated circuit (ASIC) for protocol processing. Accelerators operate with
Windows Server 2003 or Windows XP Professional x64 Edition operating systems using the Microsoft Scalable Networking Pack.
The SLIC Technology architecture increases server performance and efficiency in two
specific ways:
TCP/IP Protocol processing is offloaded onto the Accelerator, freeing the CPU
for application processing and maximizing throughput
A unique ASIC utilizes an Internet Protocol Processor (IPP), optimized for
TCP/IP protocol processing, which delivers faster performance than general
purpose CPUs
SLIC Technology eliminates the burden of TCP/IP protocol processing on the host
CPU. By offloading protocol processing, SLIC Technology frees the CPU for application processing, boosting both network and server performance.
Alacritech Accelerator Users Guide
Page 7

1-3
1.3 Operating System Compatibility
The SEN1811XT, SEN1812XT, SEN1822ET, SES1811XT, SES1812XT and
SES1822ET are compatible with the Microsoft Windows XP Professional 64bit, Microsoft Windows 2003 32 bit Standard, and Microsoft Windows 2003 32 bit standard R2
operating systems.
The SEN2001XT, SEN2002XT, SEN2001XF, SEN2002XF, SEN2102ET, SEN2104ET,
SEN2102EF, SEN2104EF, SES2001XT, SES2002XT, SES2001XF, SES2002XF,
SES2102ET, SES2104ET, SES2102EF, and SES2104EF are compatible with the Microsoft Windows XP Professional 64bit, Microsoft Windows 2003 32 bit Standard, Microsoft Windows 2003 32 bit standard R2, Microsoft Windows Server 2003 32 bit Datacenter, Microsoft Windows Server 2003 32 bit Datacenter R2, Microsoft Windows
Server 2003 Standard x64, Microsoft Windows Server 2003 Datacenter x64, Microsoft
Windows Server 2003 Datacenter x64 R2 operating systems.
1.3.1 Additional Information
For the latest information on supported hardware and operating systems, see Alacritech's website at:
http://www.alacritech.com/Support/Downloads/Drivers/Default.aspx#CHOOSE
Alacritech Accelerator Users Guide
Page 8
2-1
2 Software Installation
2.1 Software Installation Overview
This chapter covers the installation of the software required for an Accelerator under
Windows Server 2003 or Windows XP Professional x64 Edition. There are different
procedures for different types of installations. It is important to follow the correct procedure. The following types of situations are covered:
Installing the drivers into a system with the Windows operating system
Updating the drivers for an existing Accelerator installation
Uninstalling the Accelerator
Note: TCP Chimney offload will not work with the following features:
Windows Firewall (Windows XP enabled by Default)
Internet Protocol security (IPsec)
Internet Protocol Network Address Translation (IPNAT)
Third-party firewalls
NDIS 5.1 intermediate drivers
If any one of these features is turned on, TCP Chimney offload will not
work regardless of the registry settings. See Chapter 3 for instructions on
disabling these features.
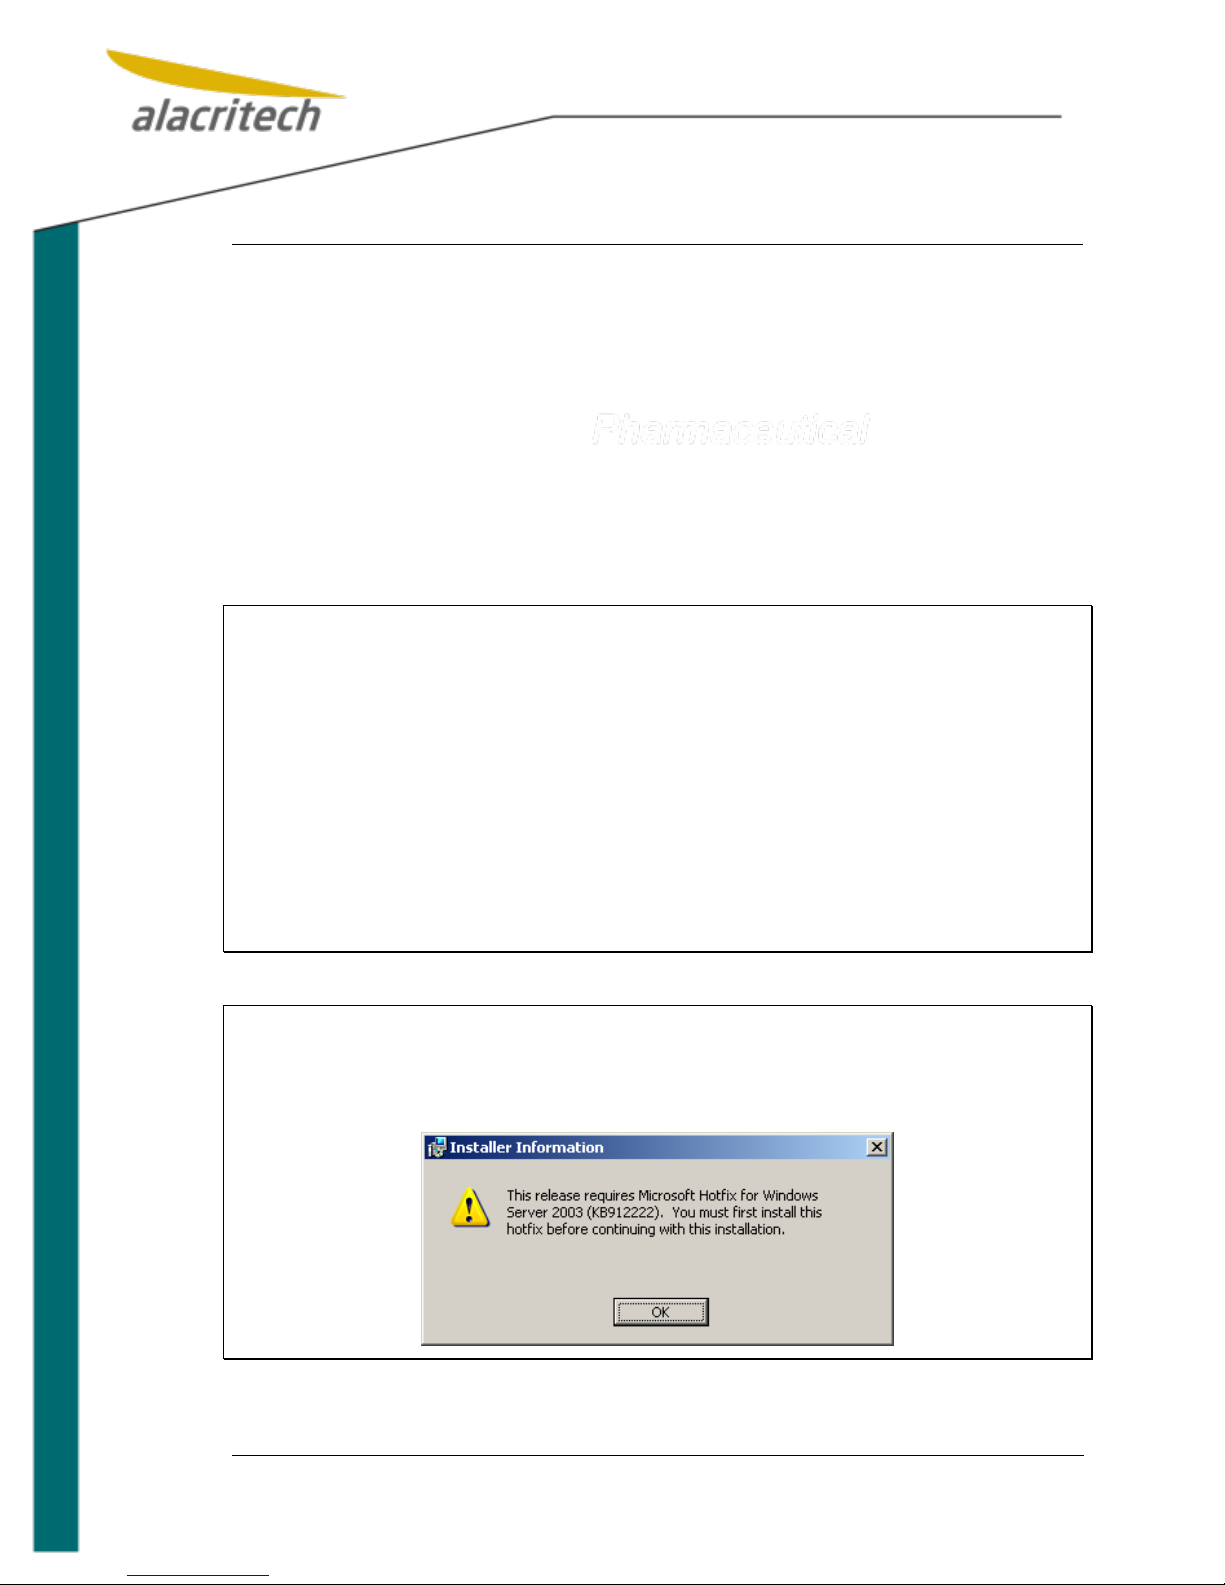
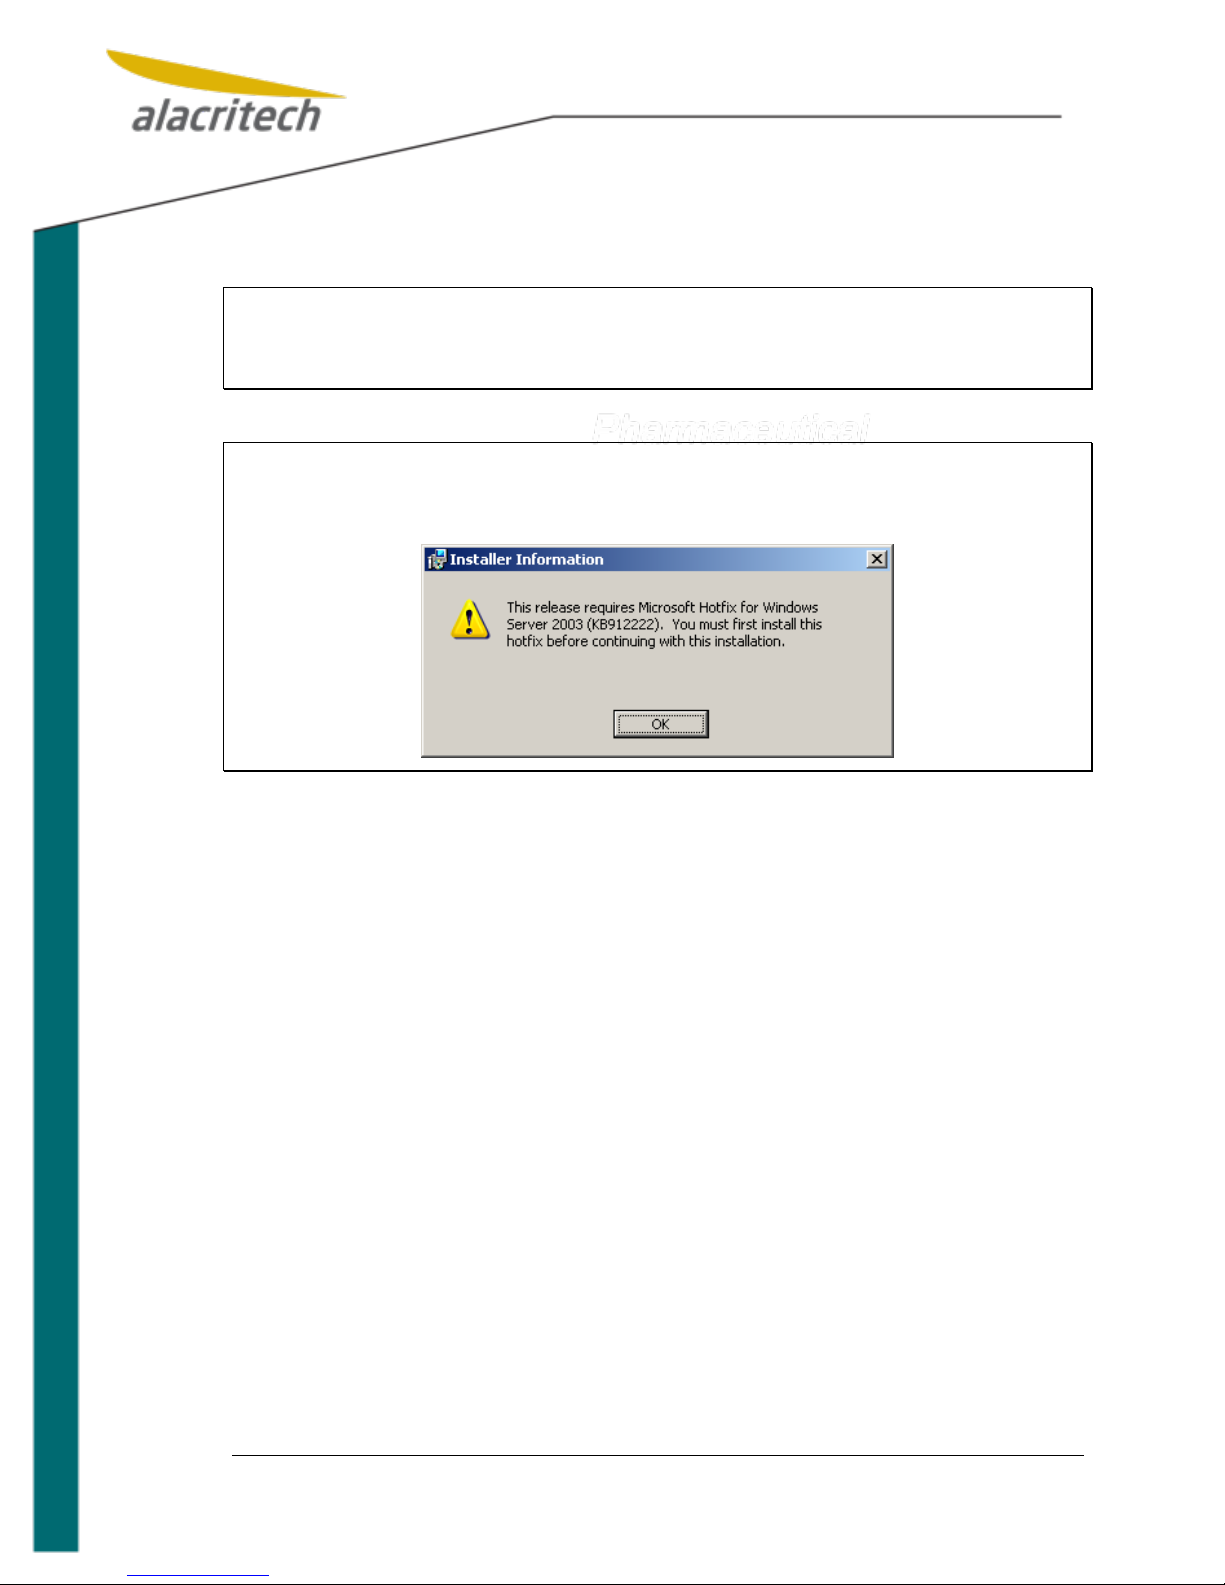
Note: The Microsoft Scalable Networking Pack must be installed prior to instal-
ling Alacritech software. If Scalable Networking Pack is not installed, you
will get the following popup and be unable to complete the installation.
Scalable Networking Pack is included as Part of WS2003 SP2.
Alacritech Accelerator Users Guide
Page 9
2-2
2.2 Software First Installation
This section covers the procedures for installing the software required for the Accelerators prior to installing Alacritech hardware. Follow the appropriate procedure for your
type of installation.
2.2.1 Installation of the Accelerator
1. Insert your Alacritech Driver Installation CD into the system. Select the ap-
propriate installation. If the installation is launched from the install.htm page on
the CD, and default security settings are set on the browser, there may be several pop-ups asking if you want to run this package. Once you select run, the
setup wizard will launch.
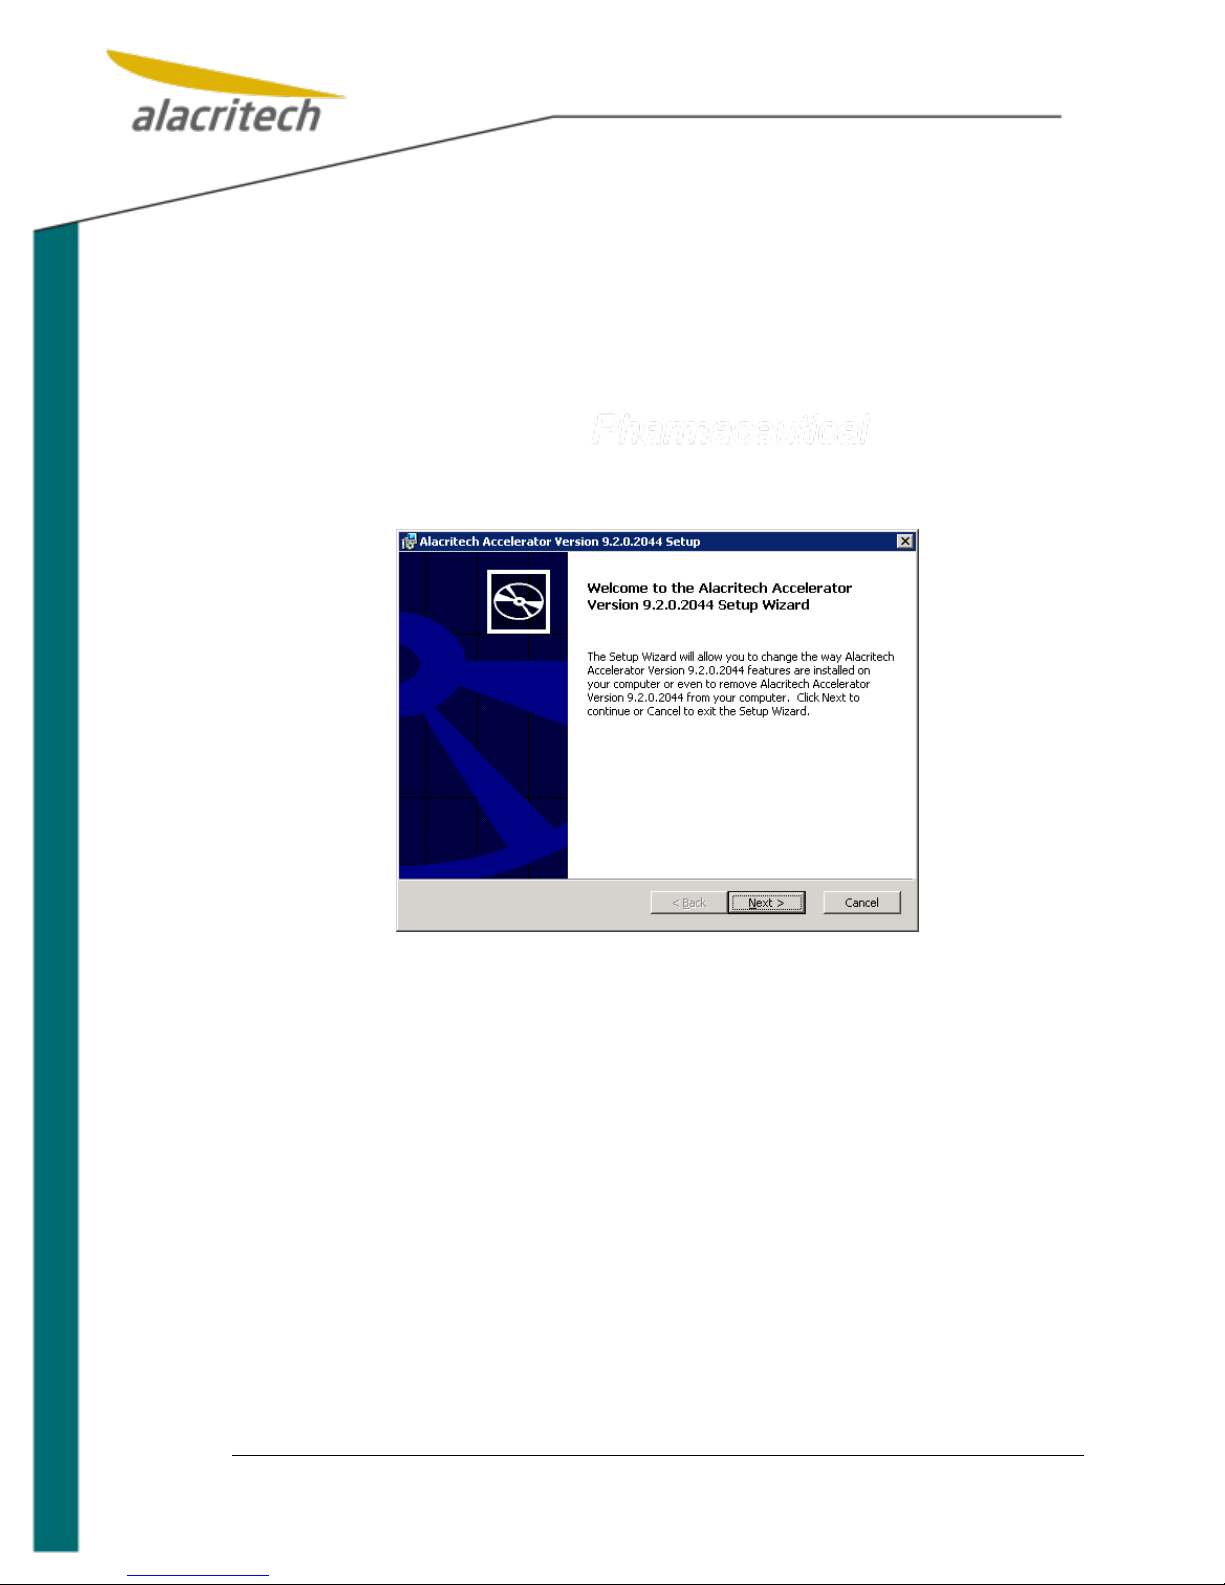
2. From the Alacritech Accelerator Setup click Next to begin the software instal-
lation.
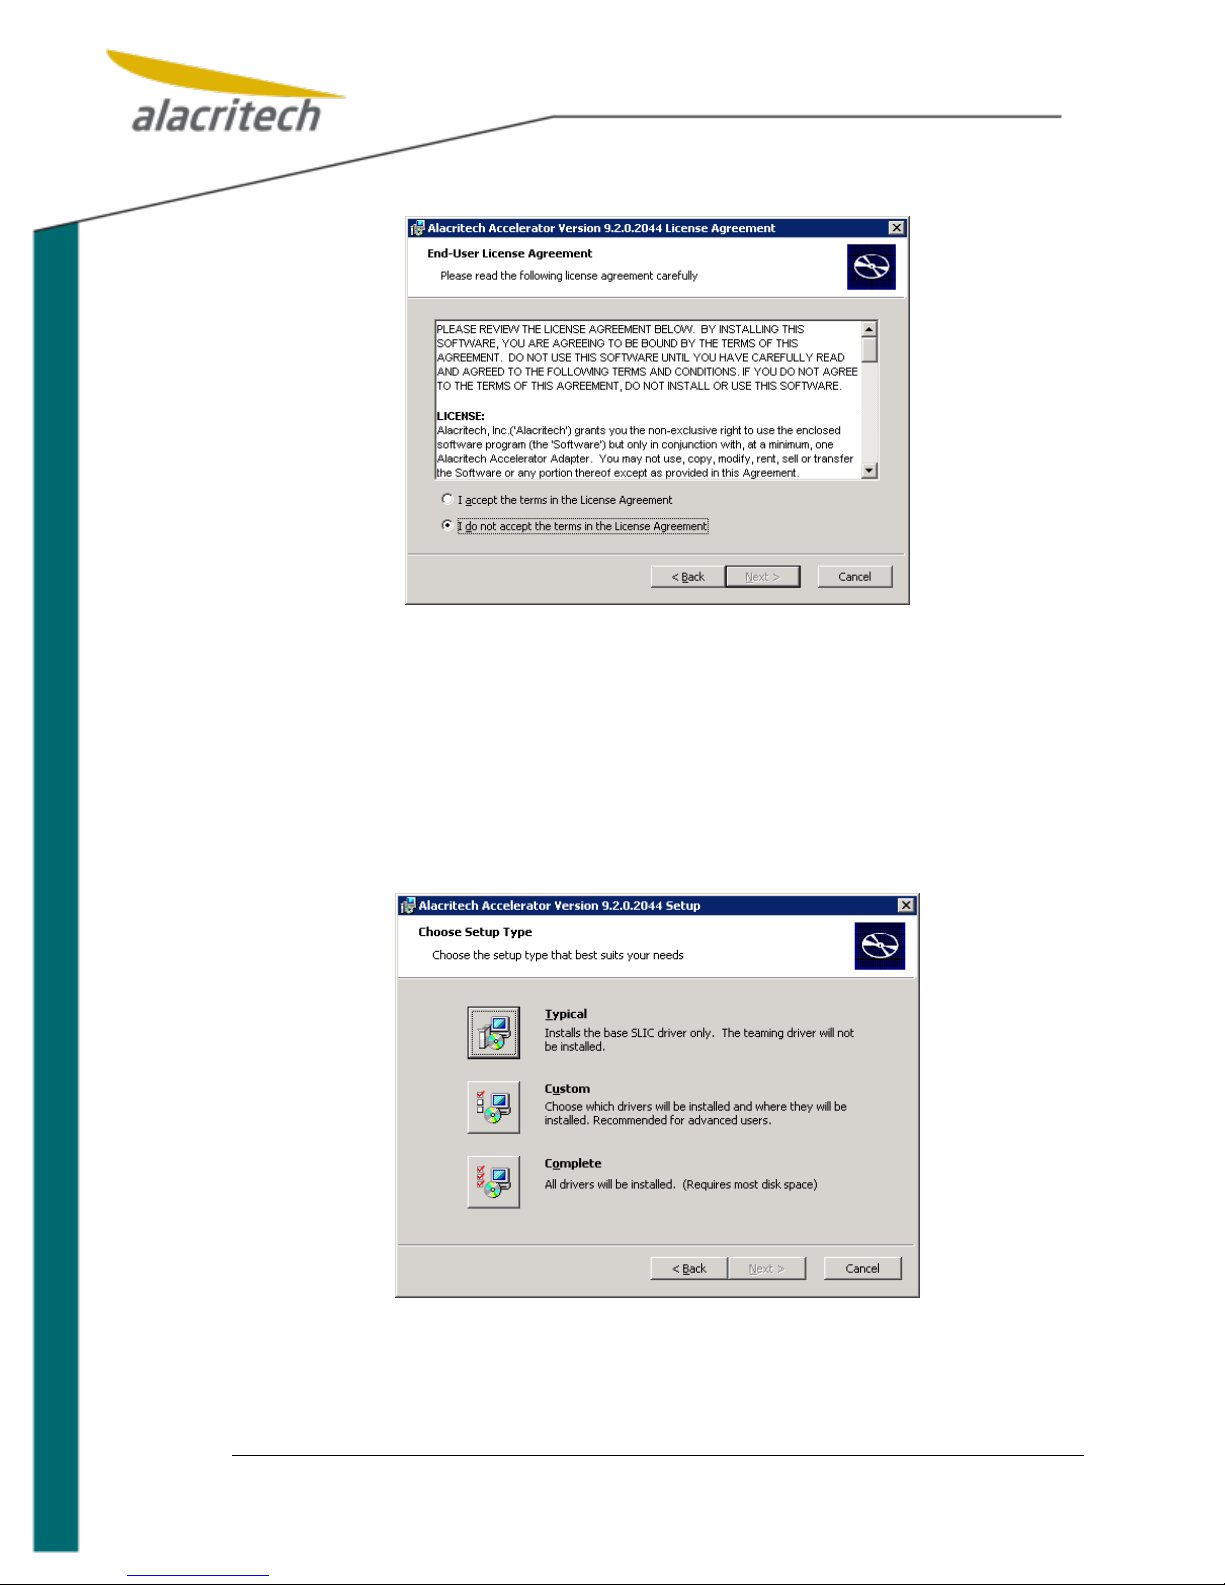
3. In the Alacritech Accelerator Setup – Software License Agreement window
read the terms of the End User License Agreement. Select I accept the terms
of the License Agreement, and click the Next button if you accept the license
agreement.
Alacritech Accelerator Users Guide
Page 10
2-3
If you do not accept the terms of the License Agreement then leave I do not
accept the terms in the License Agreement selected and click Cancel to exit
the installation.
4. If you accept the agreement the Choose Setup Type window will appear.
From this window you can select the installation appropriate for your environment. Most users will choose Typical, which will install the base drivers in their
default locations. The Custom setting is for advanced users who wish to manually select which drivers will be installed. Complete will install the entire driv-
er package. This is the selection that should be made if you want to do network
teaming.
Once you have made your selection, click Next to continue.
Alacritech Accelerator Users Guide
Page 11
2-4
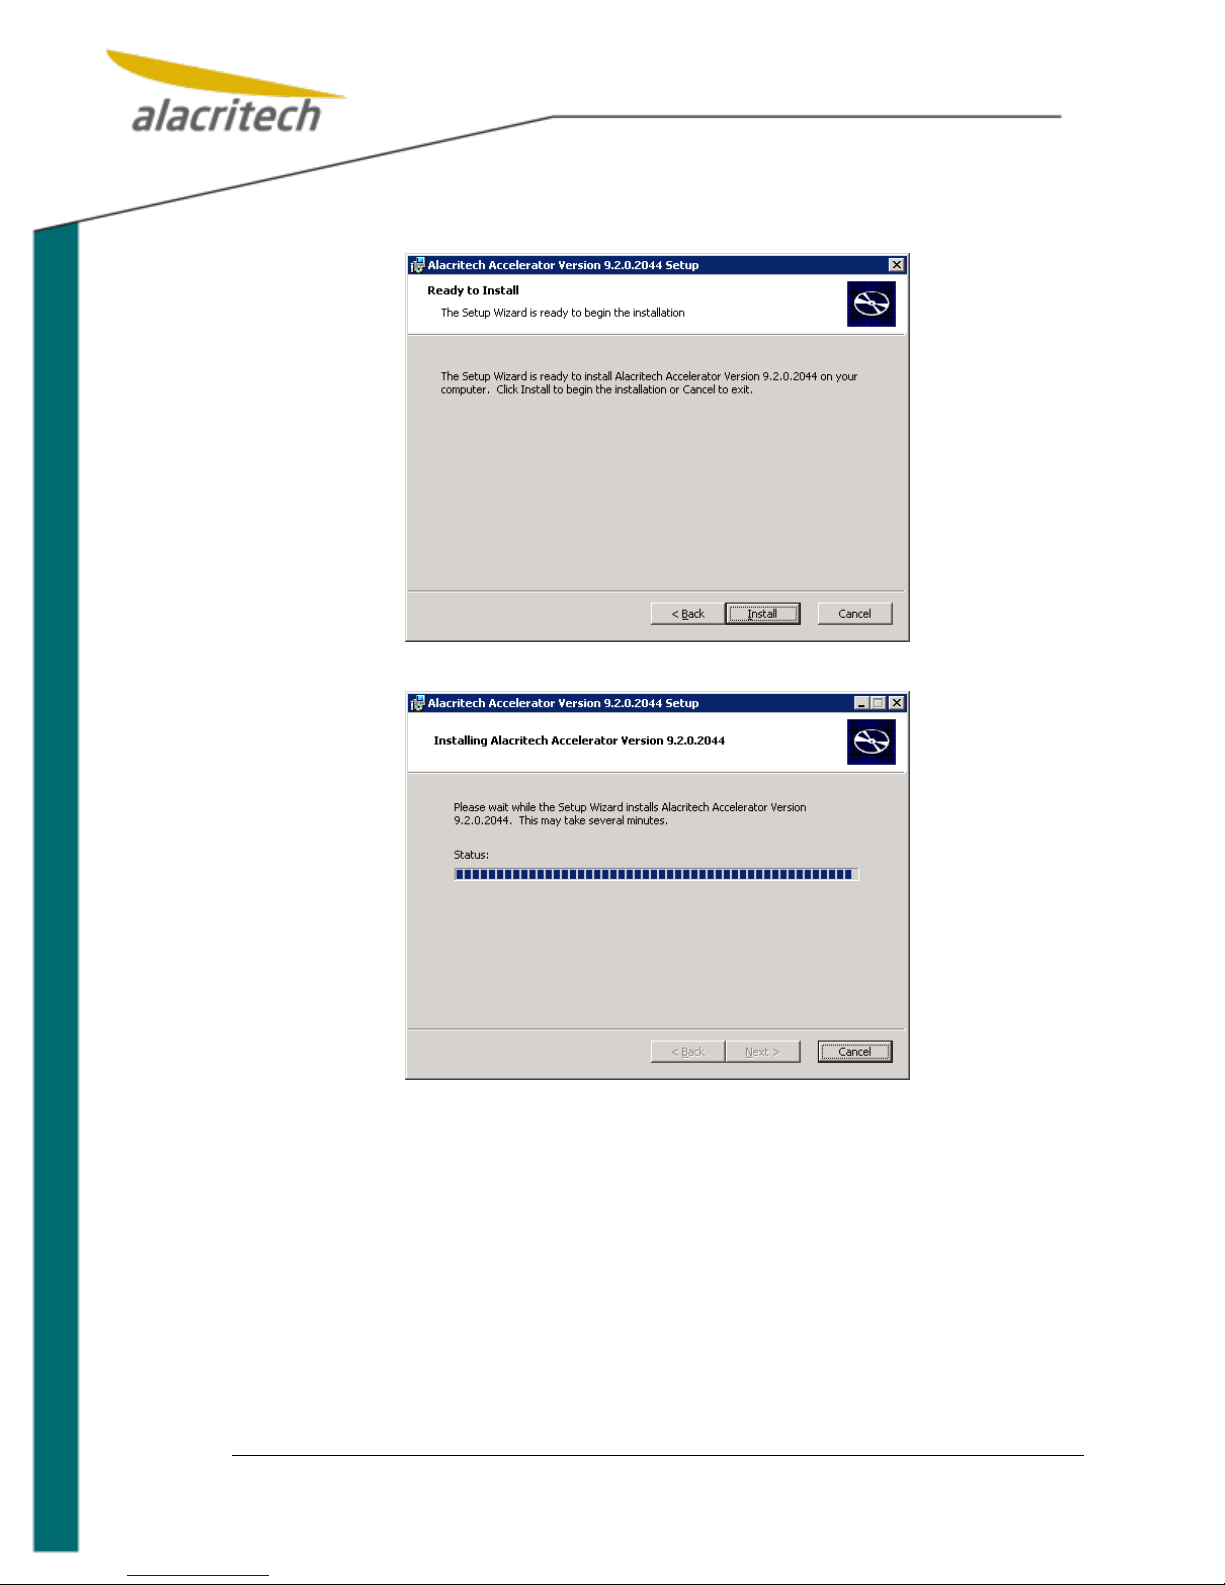
5. The ready to install window will appear.
Click the Install button to install the software.
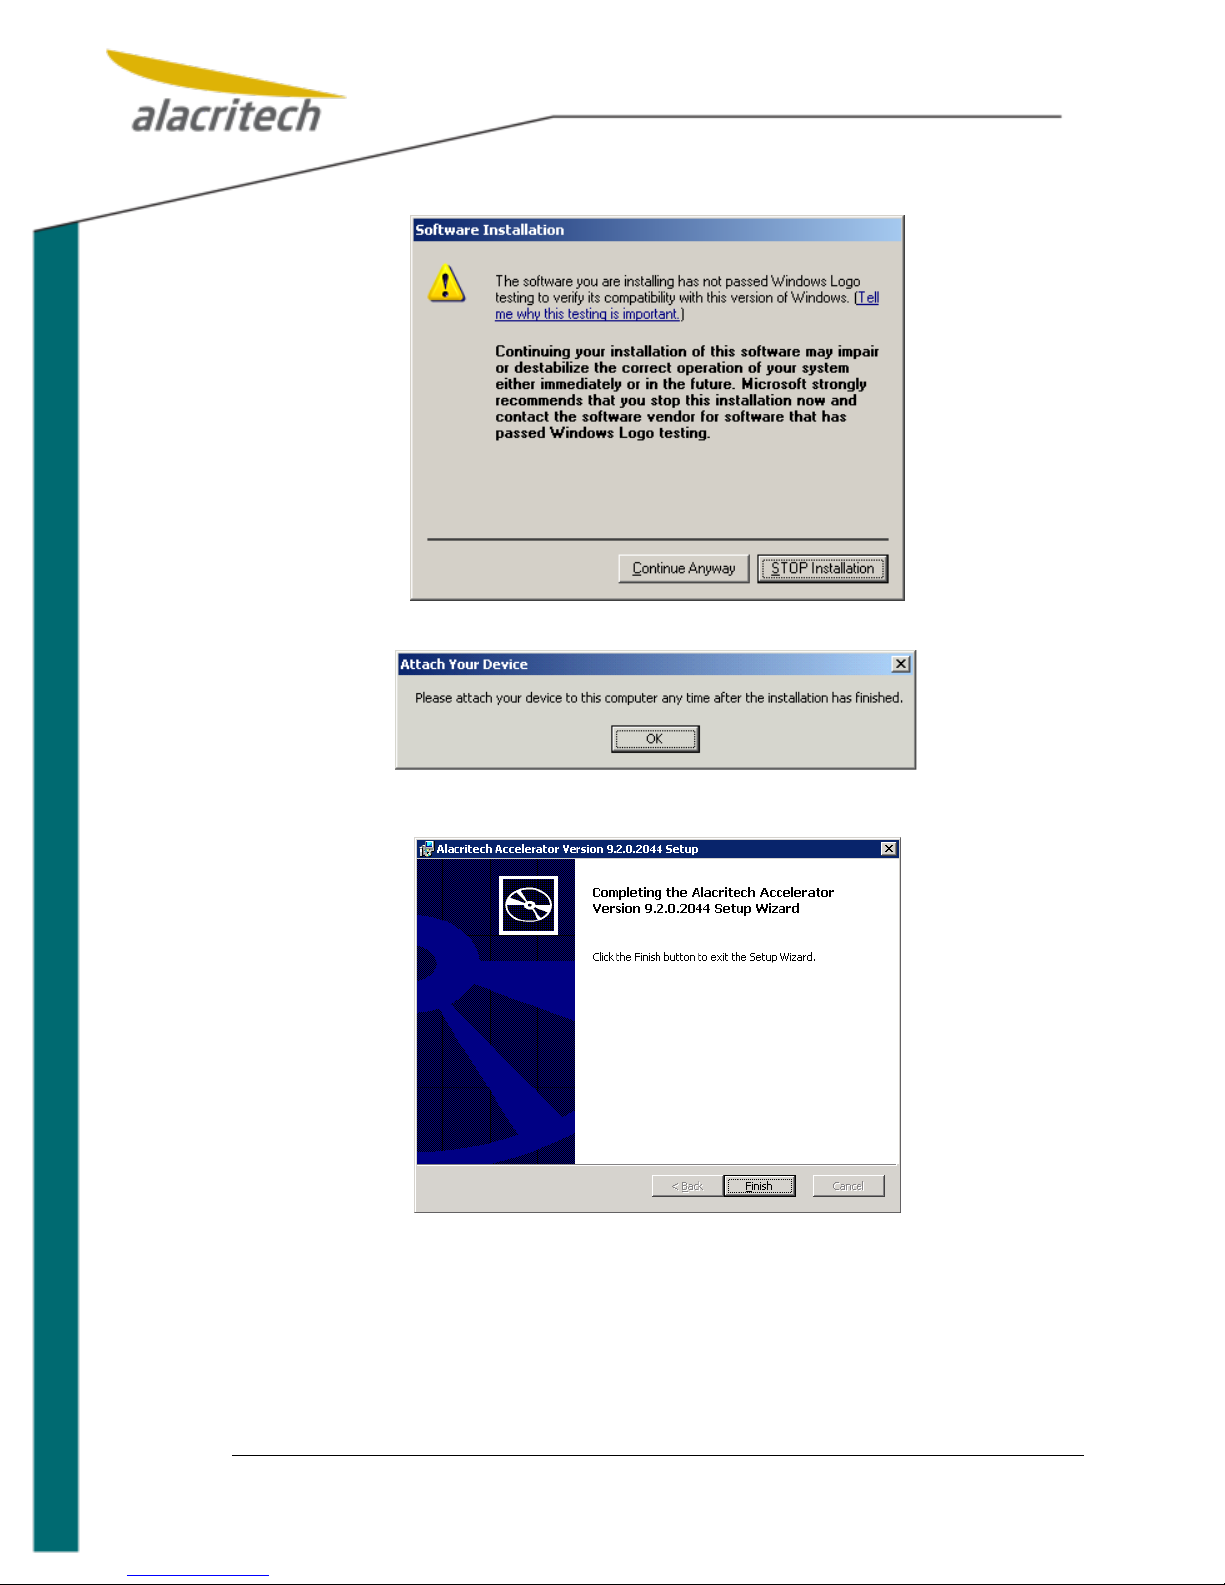
6. A dialog box titled Software Installation may appear. This should only occur
when using drivers that are not certified through the Microsoft Designed for
Windows Logo process. Most official drivers released by Alacritech have appropriate digital signatures, while others, including beta drivers, do not. A missing digital signature does not prevent the Alacritech drivers from working properly on your system.
Click the button titled Continue Anyway to install the driver without a digital signature. This dialog box will appear each time the driver is installed for an adapter port. Be sure to click the Continue Anyway button each time:
Alacritech Accelerator Users Guide
Page 12
2-5
7. The Attach Your Device dialog box will appear. Hit OK.
8. Click Finish to exit the Setup Wizard.
9. The software setup is now complete. Follow the steps in the Alacritech Hardware Installation Manual to install your Accelerator.
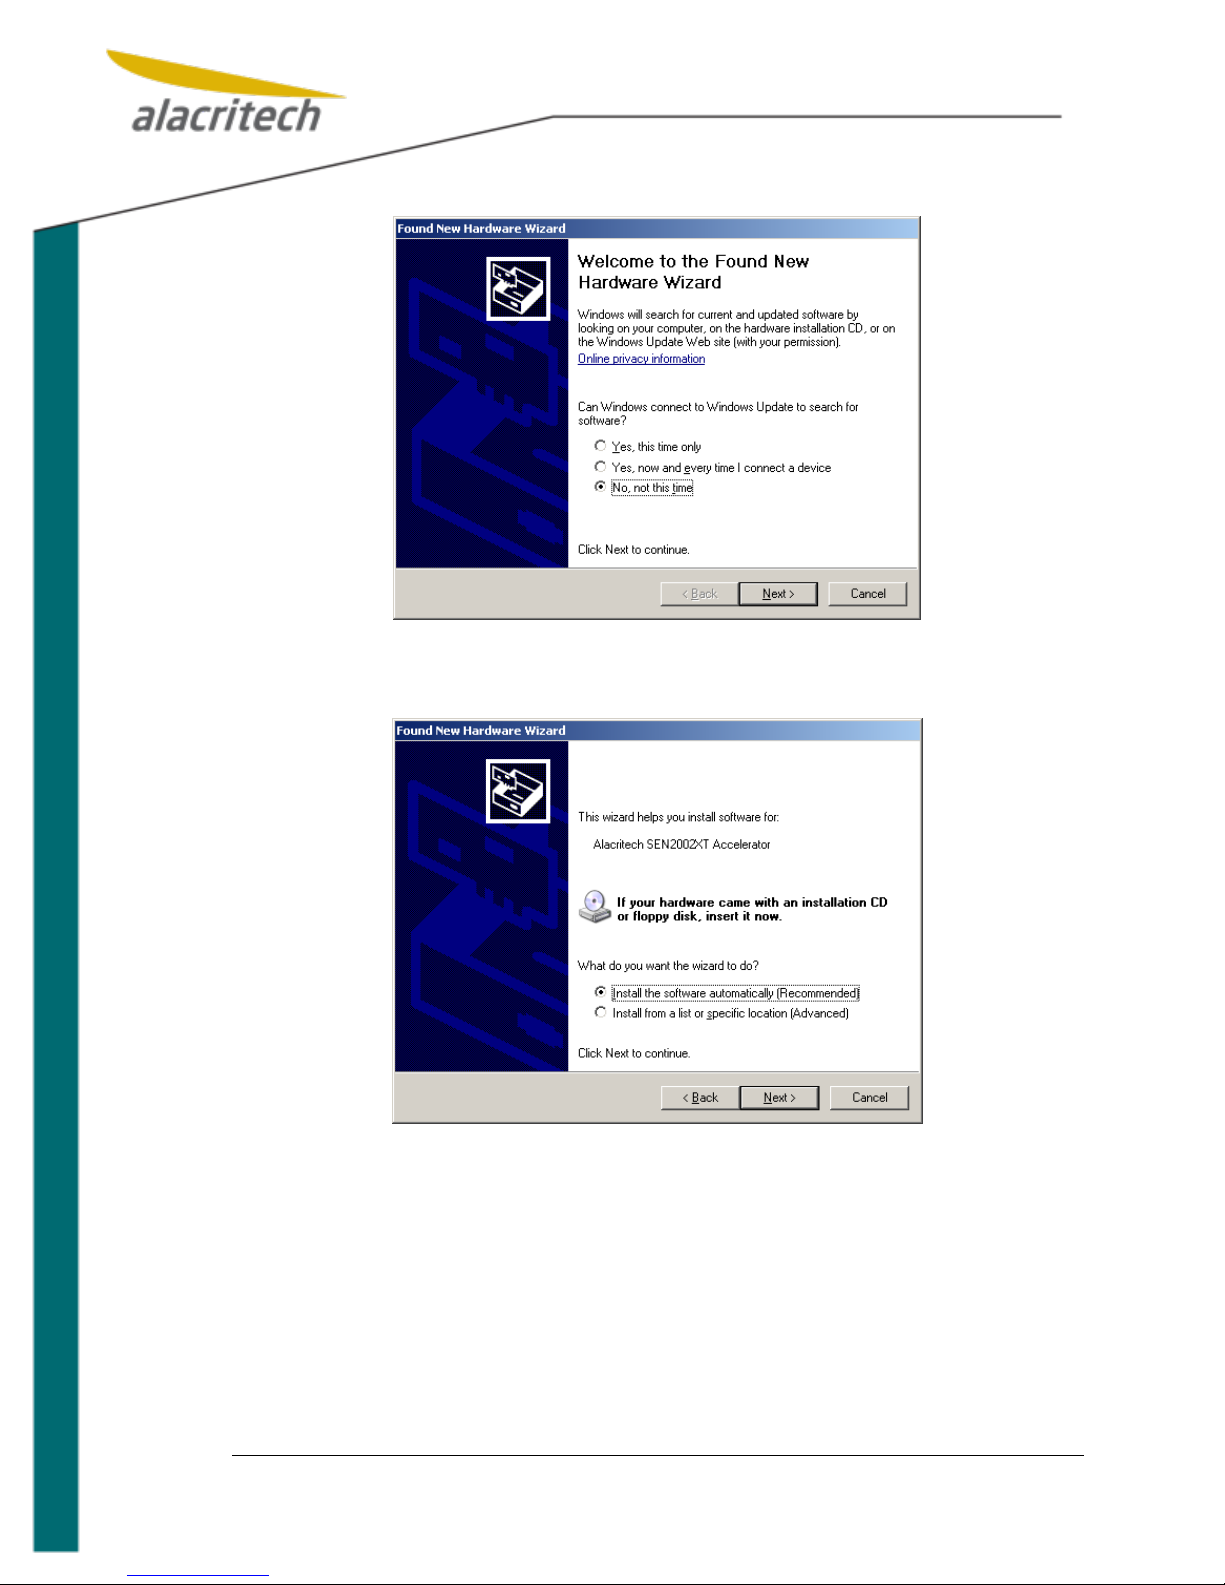
10. Once the hardware has been installed, start the system. On start up the Microsoft Found New Hardware Wizard will be launched. When the Found New
Hardware Wizard is launched, decide whether you want to connect to Windows
Update or install drivers that shipped with the product. Select an option and
Click Next to continue.
Alacritech Accelerator Users Guide
Page 13
2-6
11. Selecting No, not this time will prompt the Found New Hardware Wizard to lo-
cate the drivers. Since the drivers were installed in a previous step select In-
stall the software automatically.
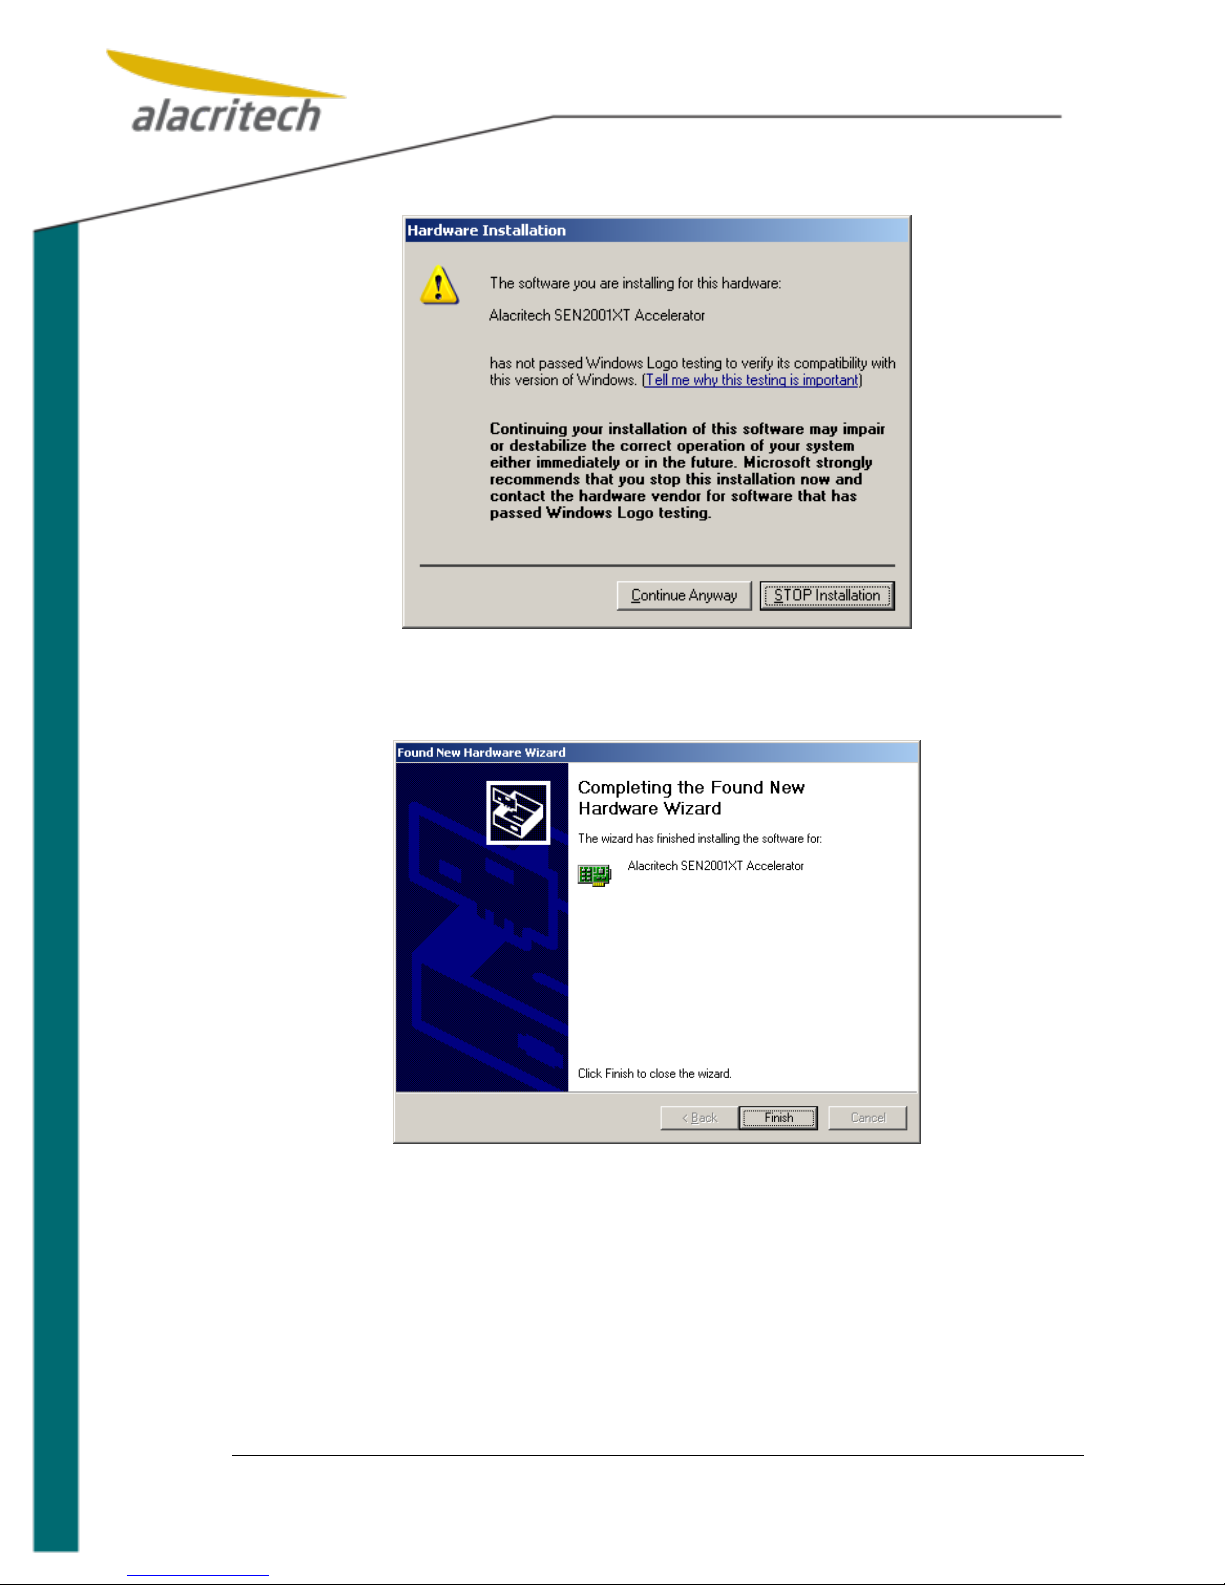
12. A dialog box titled Hardware Installation may appear. This should only occur
when using drivers that are not certified through the Microsoft Designed for
Windows Logo process. Most official drivers released by Alacritech have appropriate digital signatures, while others, including beta drivers, do not. A missing digital signature does not prevent the Alacritech drivers from working properly on your system.
Click the button titled Continue Anyway to install the driver without a digital
signature. This dialog box will appear each time the driver is installed for an
adapter port. Be sure to click the Continue Anyway button each time.
Alacritech Accelerator Users Guide
Page 14
2-7
13. You may have to repeat steps 11-13 when installing multiport cards or multiple
cards.
14. When installation completes click the Finish button.
15. Your Alacritech Accelerator is now installed.
Alacritech Accelerator Users Guide
Page 15
2-8
2.3 Hardware First Installation
Note: Link Aggregation (Teaming) will not be available if you install via the
Found New Hardware Wizard. If you require teaming functionality, you
should install via the install.htm file at the root of the driver distribution.
Note: The Microsoft Scalable Networking Pack must be installed prior to instal-
ling Alacritech software. If Scalable Networking Pack is not installed, you
will get the following popup and be unable to complete the installation.
1. Install the Alacritech Accelerator using the procedure in the Alacritech Hardware Installation Guide.
2. Once the hardware has been installed, start the system. On start up the Microsoft Found New Hardware Wizard will be launched. When the Found New
Hardware Wizard is launched, decide whether you want to connect to Windows
Update or install drivers that shipped with the product. Select an option and
Click Next to continue Insert your Alacritech Driver Installation CD into the
system. Select the appropriate installation. If the installation is launched from
the HTML page on the CD, and default security settings are set on the browser,
there may be several pop-ups asking if you want to run this package. Once you
select run, the setup wizard will launch.
Alacritech Accelerator Users Guide
Page 16

2-9
3. Selecting No, not this time will prompt the Found New Hardware Wizard to locate the drivers. Select Install from a list or specific location. Drivers are lo-
cated in one of the following directories on the CD:
a. \snp\x86 (32-bit drivers)
b. \snp\x64 (64-bit drivers)
4. A dialog box titled Hardware Installation may appear. This should only occur
when using drivers that are not certified through the Microsoft Designed for
Windows Logo process. Most official drivers released by Alacritech have appropriate digital signatures, while others, including beta drivers, do not. A missing digital signature does not prevent the Alacritech drivers from working properly on your system.
5. Click the button titled Continue Anyway to install the driver without a digital
signature. This dialog box will appear each time the driver is installed for an
adapter port. Be sure to click the Continue Anyway button each time.
Alacritech Accelerator Users Guide
Page 17

2-10
6. When installation completes click the Finish button.
7. Your Alacritech Accelerator is now installed.
Alacritech Accelerator Users Guide
Page 18

2-11
2.4 Uninstalling the Accelerator
2.4.1 Removal of an Accelerator
1. The Windows operating system will disable the driver software automatically. If
you subsequently install a card after removal, the Found New Hardware wizard
will install the driver. With Release 9 and later, it is not necessary to uninstall
the Alacritech Accelerator with the Hardware Manager prior to moving/removing the card.
2. Shut down the computer, and unplug the power cable. Failure to do so may
endanger you, and may damage the adapter or computer.
Note: Alacritech Accelerators use components that are sensitive to ESD. Prop-
er ESD handling and storage should be followed.
3. Remove the computer cover, and remove the Alacritech Accelerator.
Alacritech Accelerator Users Guide
Page 19

3-1
3 Device Management
3.1 Starting Device Management
Alacritech Accelerators are managed using the Windows Device Manager. To start
Device Manager, use the following procedure:
1. From the Start menu, open the Network Connections submenu located under
the Settings menu and select a connection to manage.
Alacritech Accelerator Users Guide
Page 20

3-2
2. Highlight Client for Microsoft Networks and click the Configure button. This
will open the Properties box which will allow you to manage the device.
Alacritech Accelerator Users Guide
Page 21

3-3
3.2 Running Adapter Diagnostics
Diagnostics can be run on any Accelerator using the following procedure:
1. Start Device Manager, right-click on the network adapter, and select Proper-
ties.
2. Select the Diagnostics tab.
Note: Running Diagnostics will disrupt the port of the Accelerator under test.
3. Click the Run Tests button.
4. A warning will appear. Click the Yes button to run the tests.
Alacritech Accelerator Users Guide
Page 22

3-4
5. The adapter will then run through self-test of the IPP and the selected Accelerator. A properly functioning board will display Passed for all results.
6. Additional adapter information is available by clicking the Adapter Details button.
7. Click the Close button to exit Adapter Details.
8. Click the OK button to exit the application.
Alacritech Accelerator Users Guide
Page 23

3-5
3.3 Updating Flash Code
The mechanism for flashing code on flash-capable Accelerators is provided through
device manager. The PXE/UNDI drivers for Alacritech Accelerators allow PXE and
iSCSI software boot solutions to work. Note that these drivers do not include a BIOSlevel iSCSI boot driver, and that a third-party iSCSI boot software package is needed
for complete iSCSI boot support.
The latest PXE drivers are available from Alacritech‘s web site in the Support section.
To install the latest flash code on an Accelerator, follow these steps:
1. Click the Flash Update tab in the device manager.
2. Set the Port Selection, Link Speed, and Boot Selection options, then click the
Update Flash Image button.
3. Specify the flash image directory by either entering the appropriate path to the
flash files in the Flash Image Directory text box or by browsing to the appro-
priate path by clicking the Browse button. By default, the Alacritech PXE/UNDI
binary image files are located in the Flashimage folder of the driver distribution
media.
4. Once the path is specified, click the Update Flash button to complete the flash
process. NOTE: The Accelerator will not be operational during the flash update
process and will disrupt all ports of the Accelerator being flashed in the server.
5. After flashing the latest PXE drivers, click the OK button to exit the application.
Alacritech Accelerator Users Guide
Page 24

3-6
3.4 Disabling Windows Firewall to Enable TCP Offload
In Windows XP Professional it is necessary to disable Windows Firewall/Internet Connection Sharing to activate the TCP Offload feature on the Accelerators in your system.
Note: By default with Windows XP Professional, the Windows Firewall feature is
turned on. Therefore, TCP Chimney will not function in such a scenario.
The Windows Firewall must be explicitly turned off before TCP Chimney
can function.
Note: By default, the IP NAT and IPsec Policy Agent features are turned on
when certain components such as bridging and routing services are
enabled. Therefore, TCP Chimney will not function in such a scenario.
When the bridging and routing services are disabled, IPNAT is not turned
off. Therefore, TCP Chimney is not re-enabled.
The IP NAT and IPsec Policy Agent features must be explicitly turned off
before TCP Chimney can function.
To disable this feature, use the following procedure:
1. Start Computer Management - from the Start menu, right click My Computer
and select Manage.
2. Under Services and Applications, click on Services. On the right side, scroll
down and double click on Windows Firewall/Internet Connection Sharing
(ICS), select Disabled.
Alacritech Accelerator Users Guide
Page 25

3-7
3. Under Startup type, select Disabled.
4. Click OK.
Alacritech Accelerator Users Guide
Page 26

3-8
3.5 Managing Drivers
Drivers for Alacritech Accelerators can be managed through the device manager.
1. From the Start menu, open the Network Connections folder located under the
Settings menu.
2. Select the interface whose properties you are interested in.
3. Select the ―Properties‖ button.
4. Select the Driver tab.
Alacritech Accelerator Users Guide
Page 27

3-9
5. Click Driver Details to obtain additional driver information. Click OK when you
are finished.
6. The Update Driver, Roll Back Driver and Uninstall buttons may be used for
their respective operations. Alacritech expects to provide updates for Scalable
Networking Pack drivers through Windows Update.
Alacritech Accelerator Users Guide
Page 28

3-10
3.6 Configuring Advanced Properties
Alacritech Accelerators support the advanced features TCP Checksum Offload and
TCP Offload.
Perform the following steps to access the advanced configuration properties for an
Alacritech Accelerator:
1. From the Start menu, open the Network Connections folder located under the
Settings menu.
2. Click the LAN connection of the interface you wish to modify.
Alacritech Accelerator Users Guide
Page 29

3-11
3. Click the Configure button. The Accelerator Properties dialog box will appear.
Alacritech Accelerator Users Guide
Page 30

3-12
4. Select the Advanced tab to access the properties that are available for the selected Accelerator.
The following settings are available under the Advanced tab:
IP Checksum Offload (IPv4) – The IP Checksum Offload option will allow the Accele-
rator to offload the IP checksum for IP data transmitted and received when the Accelerator has the TCP Offload disabled or the Microsoft stack has chosen not to offload a
TCP connection to the Alacritech Accelerator. An example of this would be the used of
IPSec which cannot be offloaded to the Alacritech Accelerator. Because Alacritech‘s
SLIC Technology offloads the checksum automatically, this option is unused except
when TCP traffic is not offloaded.
The default value for IP Checksum Offload is Enabled.
Jumbo Packets – Allows the Accelerator to be configured to use jumbo frames. The
default setting is for standard Ethernet frames. Alacritech Accelerators support 9014
byte jumbo frames as well.
Link Speed & Duplex – This option allows for the direct setting of the data transmis-
sion rate. The default for this setting is Auto Detect. The available options for this setting are shown in the following table.
Alacritech Accelerator Users Guide
Page 31

3-13 Media
Setting
Description
Copper
10Mbps Full
Duplex
Sets data rate to a maximum of 10 megabits per
second bi-directionally
10Mbps Half
Duplex
Sets data rate to a maximum of 10 megabits per
second unidirectionally
100Mbps Full
Duplex
Sets data rate to a maximum of 100 megabits per
second bi-directionally
100Mbps Half
Duplex
Sets data transmission rate to a maximum of 100 megabits per second unidirectionally
1000 Mbps
Full Duplex
Sets data transmission rate to a maximum of 1000
megabits per second bi-directionally
Auto Detect
The controller will detect the optimum data transmission rate for a given connection
Fiber
1000 Mbps
Full Duplex
Sets data transmission rate to a maximum of 1000
megabits per second bi-directionally
Auto Detect
The controller will detect the optimum data transmission rate for a given connection. It will negotiate 1000
Mbps Full Duplex
Receive Side Scaling – Receive Side Scaling allows network interrupts from the Ala-
critech Accelerator to be spread over all CPU cores in a multi-core server.
TCP Checksum Offload (IPv4) – The TCP Checksum Offload option will allow the
Accelerator to offload the TCP checksum for TCP data transmitted and received when
the Accelerator has the TCP Offload disabled or the Microsoft stack has chosen not to
offload a TCP connection to the Alacritech Accelerator. Because Alacritech‘s SLIC
Technology offloads the checksum automatically, this option is unused except when
TCP traffic is not offloaded.
The default value for TCP Checksum Offload is Enabled.
Alacritech Accelerator Users Guide
Page 32

3-14
TCP Large Send Offload (LSO v1 IPv4) – TCP Large Send Offload is a ―stateless‖
offload technology supported by the Alacritech Accelerator. It provides some of the
benefit of full TCP offload but still results in multiple CPU interrupts for large payloads.
Because Alacritech‘s SLIC Technology offloads all TCP Processing, this option is un-
used except when TCP traffic is not offloaded.
The default value for TCP Large Send Offload is Enabled.
3.7 Configuring Teaming and Failover
Alacritech SNP Drivers support network teaming and failover. Two different types of
failover are supported:
Cisco Fast EtherChannel/802.3AD
Hot-Stand-by Fail-over
Given the flexible nature of Alacritech‘s teaming implementation, it is possible that it
may work with other proprietary solutions as well. For more information on our current
teaming support, visit our Customer Support website at
http://www.alacritech.com/Support/Overview.aspx
It is important to note that EtherChannel and 802.3AD require that the team be configured on the host and on the switch that the host connects to.
Note: Alacritech’s Teaming implementation does not support the optional Port
Aggregation Protocol (PAgP) feature that is part of the EtherChannel Protocol. Nor is the LACP portion of the 802.3ad protocol Supported.
PAgP/LACP facilitates the automatic creation of link aggregation groups
by exchanging packets between channel-capable ports. All EtherChannel
or Link Aggregation groups that connect to Alacritech Accelerator teams
must be manually configured. The specific details of manual vs. auto configuration are vendor specific. Consult your switch documentation.
3.7.1 Recommended Order of Implementation
Alacritech strongly recommends that teams be created using the following sequence.
Using an alternative sequence of steps may result in unpredictable behavior.
1. Establish TCP/IP communication over a single Ethernet link. If this is a new installation of an Alacritech Accelerator it is important that network connectivity
be established before configuring a team. All other ports that will later be used
on the team should be disabled and not have cables connected to them.
2. If using EtherChannel/802.3AD, set up the switch according to the vendor‘s in-
structions. Once the team is set up on the switch you will have full network
connectivity as long as there is only one physical connection to the host.
3. Set up the team on the host using the steps below.
4. Connect the remaining Ethernet cables to the appropriate switch and host
ports. Verify the link on all connections. You should now have a fully functional
team.
Alacritech Accelerator Users Guide
Page 33

3-15
3.7.2 Configuring a team
1. From the Start menu, open the Network Connections folder located under the
Settings menu.
2. Click the LAN connection of the interface you wish to configure in a team.
3. Click the Configure button. The Accelerator Properties dialog box will appear.
Select Teaming.
4. To configure a team select the interfaces you wish to team and click the New
Team button.
Alacritech Accelerator Users Guide
Page 34

3-16
5. Once the team is created you must specify which type of teaming or failover
that the team will utilize.
6. The default is Cisco Fast EtherChannel/802.3AD. Select OK.
7. If Cisco Fast EtherChannel/802.3AD is selected then you must have switch that
supports one of these protocols. If you do, click the Yes button. Otherwise click
the No button and choose Hot Stand-by Fail-over.
Alacritech Accelerator Users Guide
Page 35

3-17
8. The team will now be shown in the properties window.
Alacritech Accelerator Users Guide
Page 36

3-18
3.7.3 EtherChannel Guidelines and Restrictions
If you disable a port in a team, it is treated as a link failure and its traffic is
transferred to one or more of the remaining ports in the team.
Configure all ports in a team to operate at the same speed and duplex mode
(full or half duplex).
Ensure that all ports in a team have the same configuration on both ends of the
link.
3.7.4 Removing Teaming
1. From the start menu, open the network connections menu under the settings
tab. Right click on a member of the team you wish to reconfigure and select
properties.
2. Highlight Client for Microsoft Networks and click Configure.
Alacritech Accelerator Users Guide
Page 37

3-19
3. Select the Teaming tab.
4. Select the team you want to dissolve.
5. Click the Dissolve Team button.
Alacritech Accelerator Users Guide
Page 38

3-20
3.8 Configuring VLAN Tagging
Alacritech SNP Drivers support VLAN Tagging allowing the user to create Virtual Local
Area Networks when used with switches conforming to the IEEE 802.1Q VLAN Tagging Specification.
3.8.1 Recommended Order of Implementation
Alacritech strongly recommends that VLANs be created using the following sequence.
Using an alternative sequence of steps may result in unpredictable behavior.
1. Configure the switch on which the VLAN is to be created. Different switch vendors have different configuration interfaces which are outside the scope of this
document, but the basic procedure is as follows. (For the purposes of this example two VLANs are created—one for the Engineering department (100) and
one for the Finance department (200) )
a. Create the Engineering VLAN within the switch and assign it a tag of 100.
b. Add the Engineering tag (100) to the switch port connecting to the Alacri-
tech Accelerator (usually on a server). Add the Engineering tag (100) to
each switch port connected to an Engineering computer.
c. Repeat Step a. for the Finance VLAN (tag of 200).
d. Add the Finance tag to the same switch port connecting to the Alacritech
Accelerator. Add the Finance tag (200) to each switch port connecting to a
Finance computer.
2. Follow the ‗Configuring a VLAN‘ procedure to configure the Alacritech Accele-
rator.
Alacritech Accelerator Users Guide
Page 39

3-21
3.8.2 Configuring a VLAN
1. From the Start menu, open the Network Connections folder located under the
Settings menu. For this example a SEN2104ET (4-port adapter) is used.
2. Click the LAN connection of the interface to be converted to a VLAN (Port A in
this example).
Alacritech Accelerator Users Guide
Page 40

3-22
3. Click the Configure button. The Accelerator Properties dialog box will appear.
Select VLAN Setup.
4. Click the Add VLAN button and in the Add VLAN dialog enter the VLAN ID
(tag) as well as the VLAN Name.
Alacritech Accelerator Users Guide
Page 41

3-23
2 New
Devices
5. Click OK and then add the 2nd VLAN again using the Add VLAN button. After
the 2nd VLAN is created the VLAN list will show both VLANs.
6. Now click OK to create the two requested VLANs. These appear as unique devices in the Network Connection Property Frame.
Alacritech Accelerator Users Guide
Page 42

3-24
7. Configure each of these new devices as a normal network connection. Each
requires its own unique IP address on a separate subnet. Notice that Port A of
the adapter shows ―Network cable unplugged.‖ This connection is no longer
available and is now replaced by the two VLAN network adapters (Local Area
Connection 7 and 8).
8. The two VLANs are now configured and should be isolated at the network level. A quick isolation test is to ping an Engineering system from a Finance system. The ping should fail. A ping of a Finance system from another Finance
system should succeed.
Alacritech Accelerator Users Guide
Page 43

4-1
4 Troubleshooting and Support
4.1 Alacritech Automated Customer Support
You can reach Alacritech‘s automated support service 24 hours a day, every day. The
service contains the most up-to-date information about Alacritech products. You can
access the most current drivers, installation instructions, troubleshooting information,
and general product information.
Support: http://www.alacritech.com/Support/Overview.aspx
Corporate: http://www.alacritech.com/
4.2 README Files on CD-ROM
For more information about known issues, open bugs or other integration problems
with Microsoft Windows drivers, see the readme.html documentation and RelNotes.txt
release notes. To view the files, go to the Alacritech Driver Installation CD and open
it with any web browser or text editor.
4.3 Troubleshooting Overview
This chapter describes specific problems with installation or use that may arise and
their solutions. It covers the following issues:
Installation Problems
Event Log Errors
Connectivity Problems
Performance Problems
Miscellaneous Issues About SLIC Technology
Alacritech Accelerator Users Guide
Page 44

4-2
Problem
Solution
TCP Offload does
not work
TCP Chimney offload will not work with the following features:
Windows Firewall (Windows XP enabled by Default)
Internet Protocol security (IPsec)
Internet Protocol Network Address Translation (IPNAT)
Third-party firewalls
NDIS 5.1 intermediate drivers
If any one of these features is turned on, TCP Chimney offload
will not work regardless of the registry settings. See Chapter 3
for instructions on disabling these features.
Problem
Solution
Event Log reports
"SLIC<x> Has determined that the
adapter is not functioning properly"
Run Diagnostics from NCPA. See the procedure in Chapter
3.
Contact Alacritech technical support for assistance. This is
probably the result of a malfunctioning adapter.
4.4 Installation Problems
This section covers errors and problems surrounding installation only. For other problems, please see the other sections in this chapter.
4.5 Event Log Errors
This section covers entries written to the Event Log. You can view the Event Log from
the Event Viewer located in the Administrative Tools folder on the Start Menu, located
under Programs.
Alacritech Accelerator Users Guide
Page 45

4-3
Problem
Solution
There is no connectivity at all with other
computers on the
network.
Pinging does not
work.
Make sure that the cables are attached securely at both
RJ-45 connections (adapter and switch) and that the
network cable is otherwise functional.
Make sure that the network cables are plugged into the
correct port of the adapter. The driver will list the slot and
port for the interface.
Check the LED indicators on the adapter. Each port has
LEDs for link/link speed and activity. These lights help
indicate if there is a problem with the adapter, switch or
cable. Refer to the "LED Function Indicators" chart below.
LED
Indication
Meaning
ACT/LNK
Green On
The port is connected to a valid link partner.
Green Flashing
The Accelerator is sending or receiving network
data.
Off
The Accelerator is not connected to a valid link
partner.
10/100/1000
Off
A 10 Mbps link has been established (if the
ACT/LNK LED is on or flashing).
Green
A 100 Mbps link has been established.
Yellow
A 1000 Mbps link has been established.
4.6 Connectivity Problems
This section covers problems with network connectivity.
4.6.1 Alacritech SEN2002XT, SEN2001XT, SES2002XT and SES2001XT Accelerator LED Function Indicators
Alacritech Accelerator Users Guide
Page 46

4-4
LED
Indication
Meaning
LNK
Green On
The Accelerator and the switch are receiving
power; the fiber optic cable connection between them is good, and a 1000 Mbps link
has been established.
Off
Either the Accelerator or the switch (or both)
is not receiving power, or the fiber optic cable
connection between them is faulty
ACT
Yellow Flashing
The Accelerator is sending or receiving network data.
Off
The Accelerator is not sending or receiving
network data.
4.6.2 Alacritech SEN2002XF, SEN2001XF, SES2002XF and SES2001XF Accelerator LED Function Indicators
Alacritech Accelerator Users Guide
Page 47

A-1
Appendix A Network Software License Agreement and
Warranty
PLEASE REVIEW THE LICENSE AGREEMENT BELOW. BY OPENING THIS SOFTWARE
OR PACKAGE OR OTHERWISE DOWNLOADING OR COPYING THIS SOFTWARE, YOU
ARE AGREEING TO BE BOUND BY THE TERMS OF THIS AGREEMENT. DO NOT USE
THIS SOFTWARE UNTIL YOU HAVE CAREFULLY READ AND AGREED TO THE FOLLOWING TERMS AND CONDITIONS. IF YOU DO NOT AGREE TO THE TERMS OF THIS
AGREEMENT, DO NOT INSTALL OR USE THIS SOFTWARE.
LICENSE: Alacritech, Inc. ("Alacritech") grants you the non-exclusive right to use the enclosed
software program (the "Software") but only in conjunction with, at a minimum, one Alacritech
Accelerator. You may not use, copy, modify, rent, sell or transfer the Software or any portion
thereof except as provided in this Agreement.
You may:
1. Install and use the Software on one or more personal computers and/or local area network
("LAN") servers;
2. Copy the Software only for the purposes of installing and using the Software on personal
computers and/or LAN servers as described above, and for backup or archival purposes.
RESTRICTIONS:
You will not:
1. Sublicense the Software,
2. Reverse-engineer, de-compile, or disassemble the Software,
3. Copy the Software, in whole or in part, except as provided in this Agreement.
TRANSFER: You may transfer the Software to another party if the receiving party agrees to the
terms of this Agreement and you retain no copies of the Software and accompanying documentation. Transfer of the Software terminates your right to use the Software.
OWNERSHIP AND COPYRIGHT OF SOFTWARE: Title to the Software and all copies thereof
remain with Alacritech or its suppliers. The Software is copyrighted and is protected by the
United States and other countries, and international treaty provisions. You will not remove the
copyright notice from the Software. You agree to prevent any unauthorized copying of the
Software. Alacritech may make changes to the Software, or to items referenced therein, at any
time without notice, but is not obligated to support, upgrade, or update the Software. Except as
otherwise provided, Alacritech grants no express or implied right under Alacritech patents, copyrights, trademarks, or other intellectual property rights.
Alacritech Accelerator Users Guide
Page 48

A-2
FREEBSD SOFTWARE: Some portions of the Software are:
Copyright © 1994-2003 FreeBSD, Inc. All rights reserved.
Redistribution and use in source and binary forms, with or without modification, are permitted
provided that the following conditions are met:
1. Redistributions of source code must retain the above copyright notice, this list of conditions
and the following disclaimer.
2. Redistributions in binary form must reproduce the above copyright notice, this list of condi-
tions and the following disclaimer in the documentation and/or other materials provided with the
distribution.
THIS SOFTWARE IS PROVIDED BY THE FREEBSD PROJECT "AS IS" AND ANY EXPRESS
OR IMPLIED WARRANTIES, INCLUDING, BUT NOT LIMITED TO, THE IMPLIED WARRANTIES OF MERCHANTABILITY AND FITNESS FOR A PARTICULAR PURPOSE ARE DISCLAIMED. IN NO EVENT SHALL THE REGENTS OR CONTRIBUTORS BE LIABLE FOR
ANY DIRECT, INDIRECT, INCIDENTAL, SPECIAL, EXEMPLARY, OR CONSEQUENTIAL
DAMAGES (INCLUDING, BUT NOT LIMITED TO, PROCUREMENT OF SUBSTITUTE
GOODS OR SERVICES; LOSS OF USE, DATA, OR PROFITS; OR BUSINESS INTERRUPTION) HOWEVER CAUSED AND ON ANY THEORY OF LIABILITY, WHETHER IN CONTRACT, STRICT LIABILITY, OR TORT (INCLUDING NEGLIGENCE OR OTHERWISE) ARISING IN ANY WAY OUT OF THE USE OF THIS SOFTWARE, EVEN IF ADVISED OF THE
POSSIBILITY OF SUCH DAMAGE.
The views and conclusions contained in the software and documentation are those of the authors and should not be interpreted as representing official policies, either expressed or implied,
of the FreeBSD Project or FreeBSD, Inc.
LIMITED MEDIA WARRANTY: Alacritech warrants that the media on which the Software is furnished will be free from defects in material and workmanship for a period of one (1) year from
the date of purchase. Upon return of such defective media, Alacritech‘s entire liability and your
exclusive remedy shall be the replacement of the Software.
Exclusions of other warranties: THE SOFTWARE IS PROVIDED "AS IS" WITHOUT WARRANTIES OF ANY KIND, EITHER EXPRESS OR IMPLIED, INCLUDING WARRANTIES OF
NON-INFRINGEMENT OF INTELLECTUAL PROPERTY, MERCHANTABILITY, OR FITNESS
FOR ANY PARTICULAR PURPOSE. Alacritech does not warrant or assume responsibility for
the accuracy or completeness of any information, text, graphics, links, or other items contained
within the Software.
LIMITATION OF LIABILITY: IN NO EVENT SHALL ALACRITECH HAVE ANY LIABILITY FOR
ANY INDIRECT OR SPECULATIVE DAMAGES WHATSOEVER (INCLUDING, WITHOUT LIMITING THE FOREGOING, CONSEQUENTIAL, INCIDENTAL, AND SPECIAL DAMAGES)
INCLUDING, BUT NOT LIMITED TO, INFRINGEMENT OF INTELLECTUAL PROPERTY, REPROCUREMENT COSTS, LOSS OF USE, BUSINESS INTERRUPTIONS, AND LOSS OF
PROFITS, IRRESPECTIVE OF WHETHER ALACRITECH HAS ADVANCE NOTICE OF THE
POSSIBILITY OF ANY SUCH DAMAGES. SOME JURISDICTIONS PROHIBIT EXCLUSION
OR LIMITATION OF LIABILITY FOR IMPLIED WARRANTIES OR CONSEQUENTIAL OR INCIDENTAL DAMAGES, SO THE ABOVE LIMITATION MAY NOT APPLY TO YOU. YOU MAY
ALSO HAVE OTHER LEGAL RIGHTS THAT VARY FROM JURISDICTION TO JURISDICTION.
Alacritech Accelerator Users Guide
Page 49

A-3
AUDIT: Alacritech reserves the right to have audits conducted to verify your compliance with
this Agreement.
TERMINATION OF THIS LICENSE: Alacritech may terminate this license at any time if you are
in breach of any of its terms and conditions. Upon termination, you will immediately destroy the
Software and documentation or return all copies of the Software and documentation to Alacritech.
U.S. GOVERNMENT RESTRICTED RIGHTS: The Software and documentation were developed at private expense and are provided with "RESTRICTED RIGHTS." Use, duplication, or
disclosure by the Government is subject to restrictions as set forth in FAR 52.227-14 and DFAR
252.227-7013 et seq. or its successor. Use of the software by the Government constitutes ac-
knowledgment of Alacritech‘s proprietary rights therein. Contractor or Manufacturer is Alacritech, Inc., 234 E. Gish Road, San Jose, CA 95112, USA.
EXPORT LAWS: You agree that the distribution and export/re-export of the Software is in compliance with the laws, regulations, orders or other restrictions of the U.S. Export Administration
Regulations. Some products may contain encryption technology. U.S. Department of Commerce Encryption Regulations are applicable on all products imported to and exported from the
United States and Puerto Rico. Additionally, imports and exports may be regulated by government agencies in other countries. Intra-country restrictions may be applicable regarding application use. You agree that the distribution and import, export, and re-export of the Software is
in compliance with all applicable laws, regulations, orders or other restrictions on encryption
technology.
GOVERNING LAW: Claims arising under this Agreement shall be governed by the laws of California, excluding its principles of conflict of laws and the United Nations Convention on Contracts for the Sale of Goods. Alacritech is not obligated under any other agreements unless
they are in writing and signed by an authorized representative of Alacritech.
SEVERABILITY: The terms and conditions stated in this Agreement are declared to be severable. If any paragraph, provisions, or clause in this Agreement shall be found or be held to be
invalid or unenforceable in any jurisdiction in which this Agreement is being performed, the remainder of this Agreement shall be valid and enforceable and the parties shall use good faith to
negotiate a substitute, valid, and enforceable provision which most nearly effects the parties‘
intent in entering into this Agreement.
Alacritech Accelerator Users Guide
 Loading...