

Akura TOMSTB01 Instruction Manual
1

Safety
Congratulations on purchasing this Digital Terrestrial Free to View Receiver.
Please note that the availability of digital signals depends on the transmitter(s) available
in your reception area.
In order to enjoy this product for a long time it is important that you observe the following
points when installing and operating the receiver:
• This receiver should be plugged into a 230V to 240V AC, 50/60Hz power supply only.
• This receiver is intended for the reception of TV picture and sound signals.
• Avoid long-term display of static images e.g. menus or audio only channels. Use the
Radio feature (blank screen – see Advanced Setup).
• The receiver is intended for use in dry rooms. Do not expose the receiver to any moisture.
If there is a need to use the receiver in open air, make sure that it is protected against
moisture (rain, humidity, splashes etc.).
• Do not place any object filled with water such as a vase on the receiver.
• Place the receiver on a hard and flat surface and do not place any object over it.
• If the receiver is placed in an enclosed unit, make sure that there is at least 10cm of
space around the receiver and the sides of the unit.
• Do not place the receiver close to a heat source or in direct sunlight as this will prevent
the necessary cooling for the unit.
• During a thunderstorm it is advised to disconnect the unit from the mains and from the
aerial to prevent damage from lightning.
• Never open the receiver as this will invalidate your guarantee.
• Dispose of used batteries at appropriate collection points and not in the normal waste
– this prevents hazardous chemicals from the batteries being released into the
environment.
• If the receiver is not being used for a long period of time, such as whilst on holiday. This
saves energy.
• Do not connect or modify cables with the receiver plugged in.
• No naked flame sources such as lighted candles should be placed on the apparatus.
• The mains plug is used as the disconnect device and it shall remain readily operable.
To completely disconnect the power input, the mains plug of the apparatus should be
disconnected from the mains (when the mains plug is disconnected the power indicator
light will not light up).
Note
Dust will collect on the receiver and can be removed by using a dry clean cloth. Do not
spray any substances such as cleaning liquids on the unit.
2

Contents
Parts Checklist 3
About Your Receiver 4
Getting Started and Connections 5
Remote Control 7
Basic Operations
First Time Tuning 8
Programme Information 9
Lists and Interactive Services 10
Advanced Operations
Tuning the Receiver 12
Languages and TV Setup 15
Page
Parental Control 16
Timer Programming and Recording 18
Upgrading Your Receiver 19
Technical Information Display 20
Troubleshooting Guide 21
Specifications 22
3
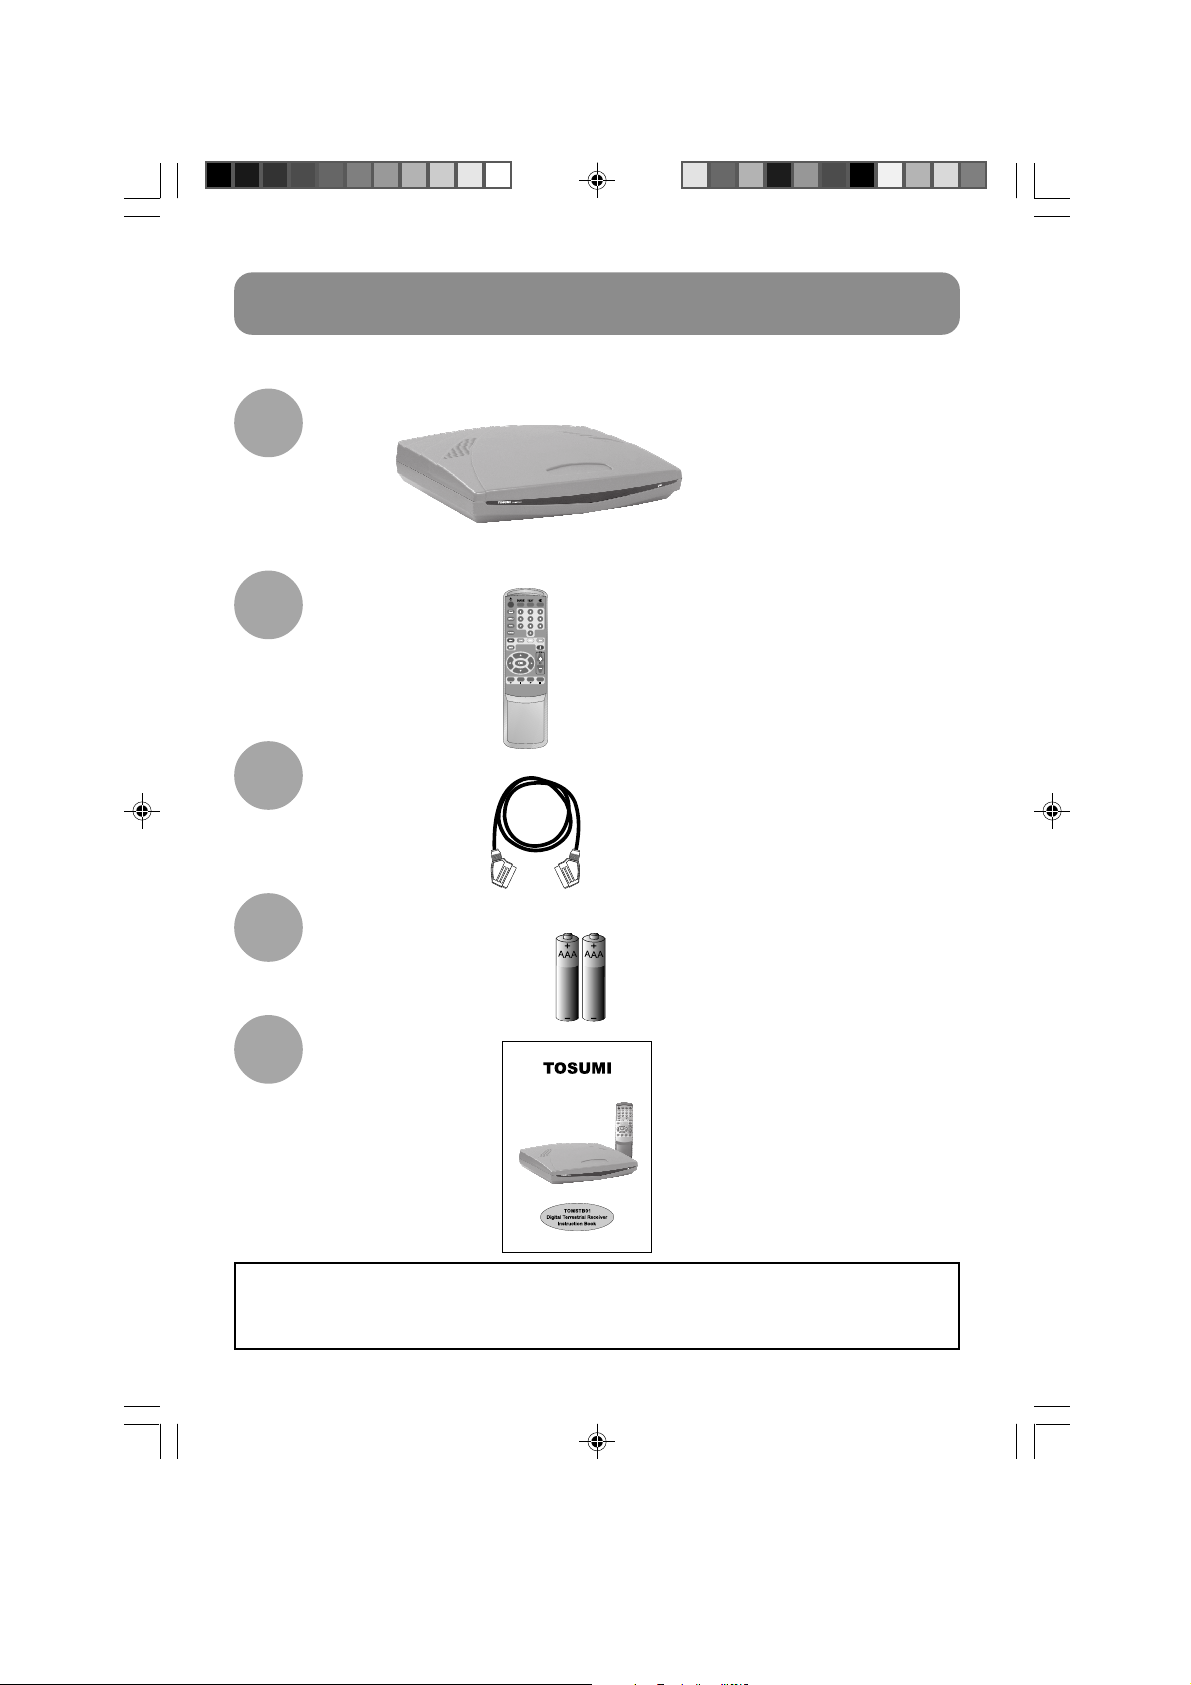
Parts Checklist
Unpack your receiver and make sure that you have all of the items listed below.
Digital Terrestrial Free-to-View Receiver
1
2
3
4
5
Remote Control
Scart Cable
Two AAA batteries
Instruction Book
Note
If any item from the checklist is missing please notify your sales agent where you
purchased this receiver.
4
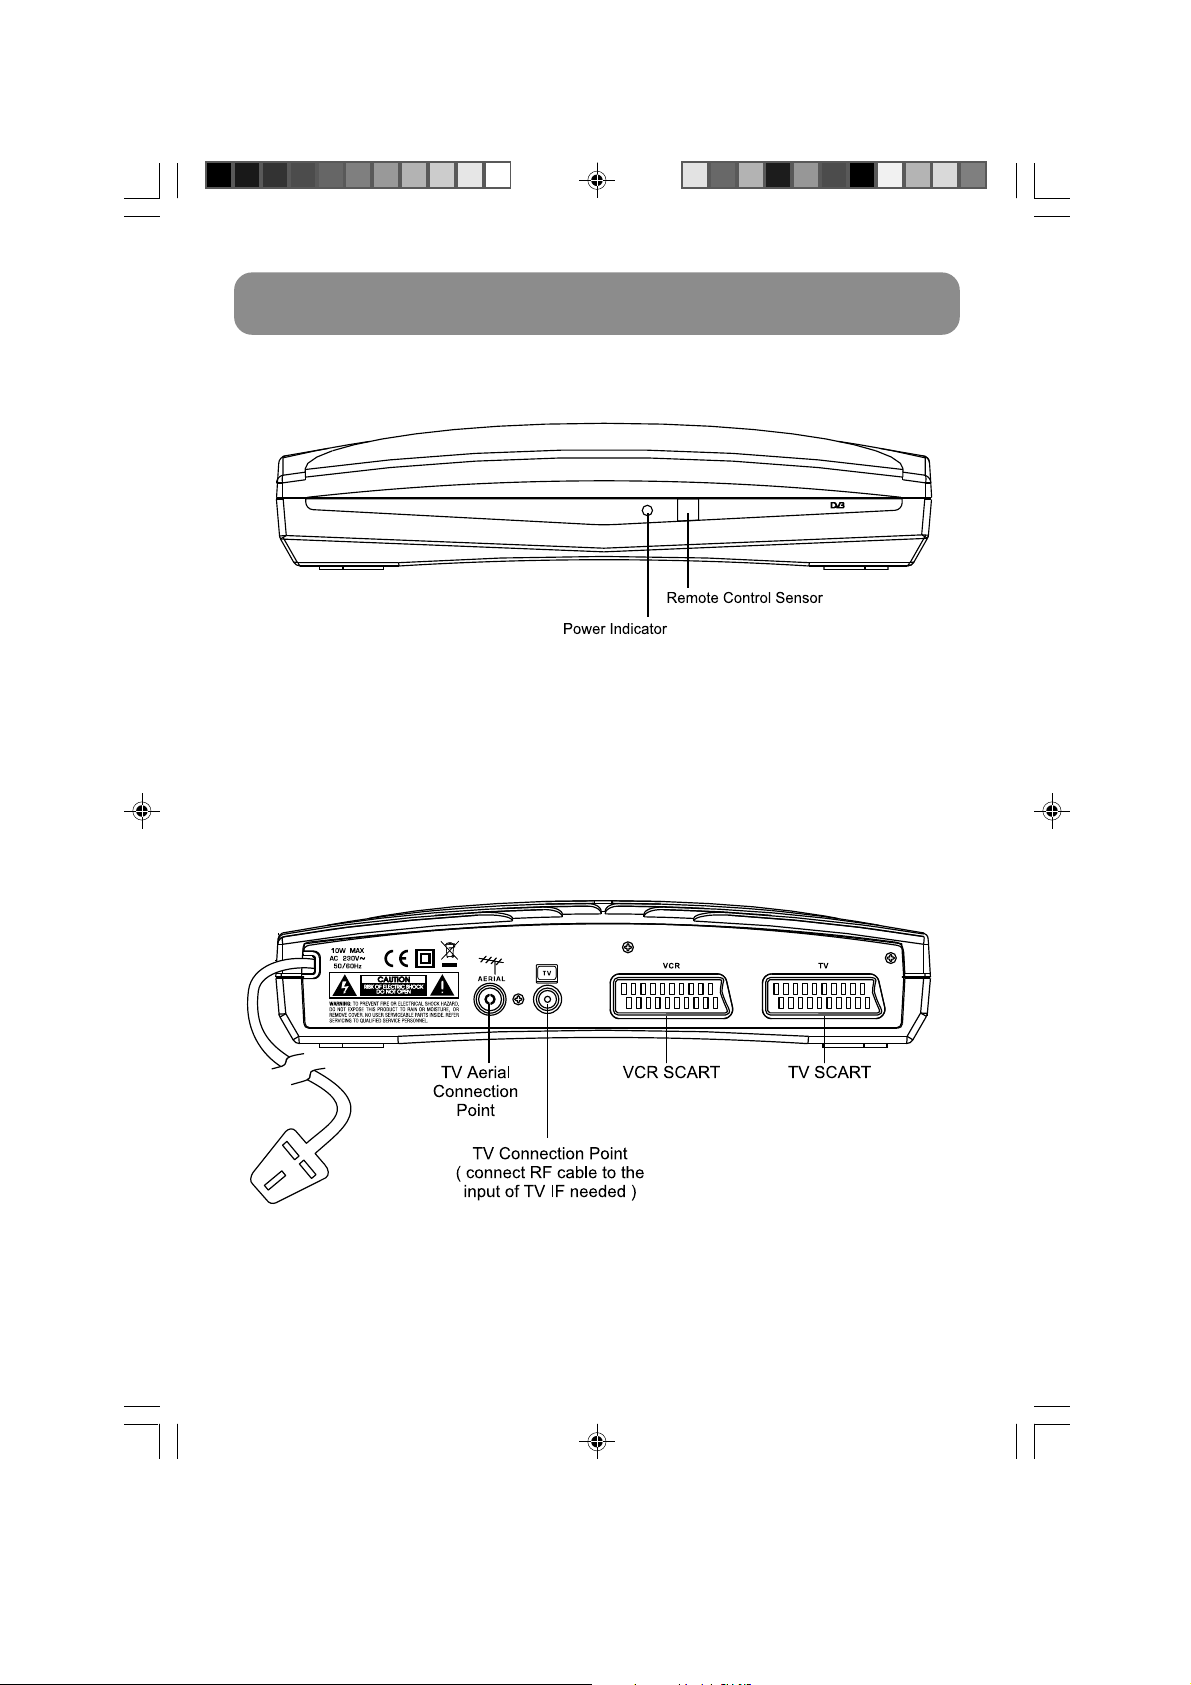
About Your Receiver
Front
Rear
5
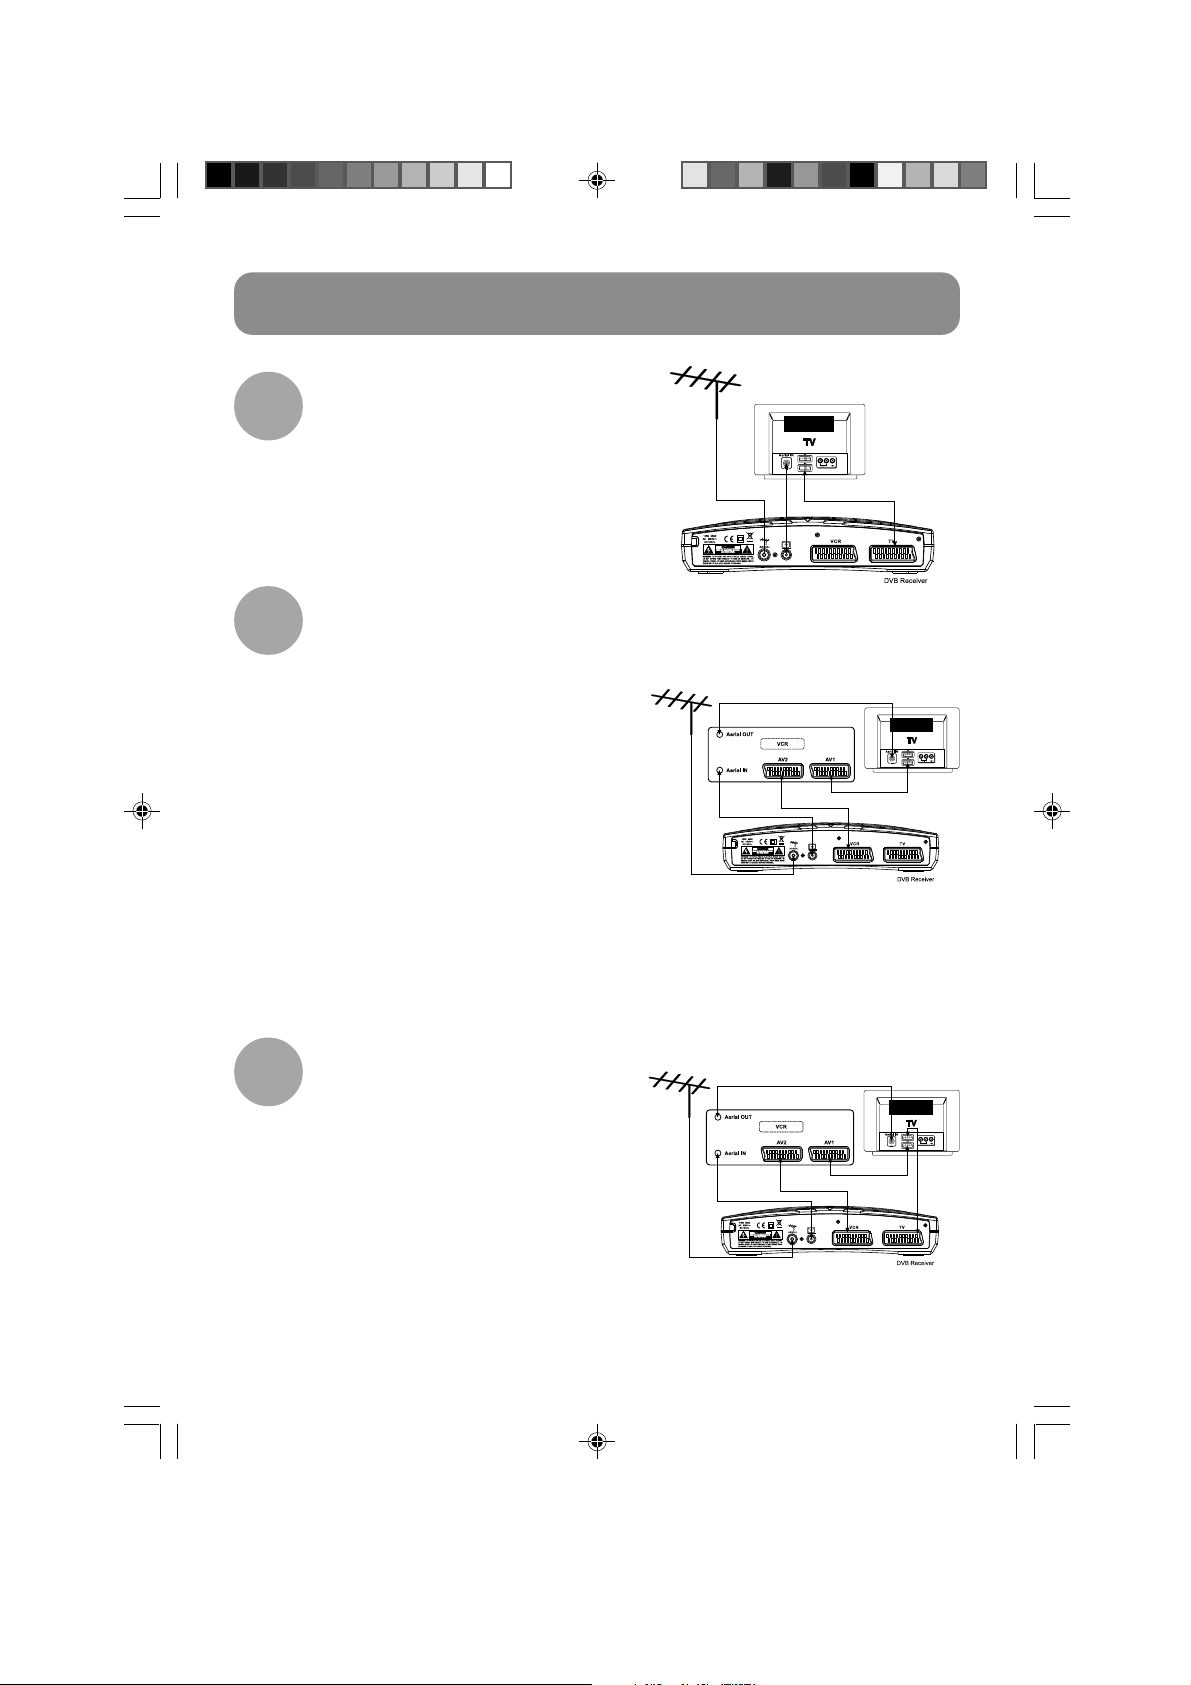
Getting Started and Connections
Operation of Receiver and Tv only.
In this connection mode, your DTR box
1
is connected directly to your TV Scart
socket. When you turn on the DTR box
it should automatically switch your Tv
to A1. With older Tv’s you may have to
select AV manually.
Operation of Receiver, VCR and Tv
( Tv single Scart socket ).
2
In this connection mode, you may only
view the DTR box via the VCR.
To view the DTR box select AV on your Tv
to monitor the VCR and set your VCR
input to AV. To record a programme, just
set the Timer or Immediate record. With
this connection you may only view, non
digital received signals on your Tv whilst
recording a digital programme. To playback
a recorded programme, press play and
the VCR should be automatically viewed
on the TV. (Note. :- variations in technology
may mean manual selection of AV may
be necessary). You may not record a Non
digital programme, whilst watching a
Digital programme.
Operation of Receiver, VCR and Tv
(Tv Dual Scart socket).
3
In this connection mode, you may
watch a Digital programme on AV1,
whilst recording a Non Digital
programme on the VCR. (Note. :- variations
in technology may mean manual selection
of AV may be necessary). If you need
to connect other boxes such as a DVD
player, connect the DTR box as Fig 2
and your DVD player to AV1 on the Tv.
6
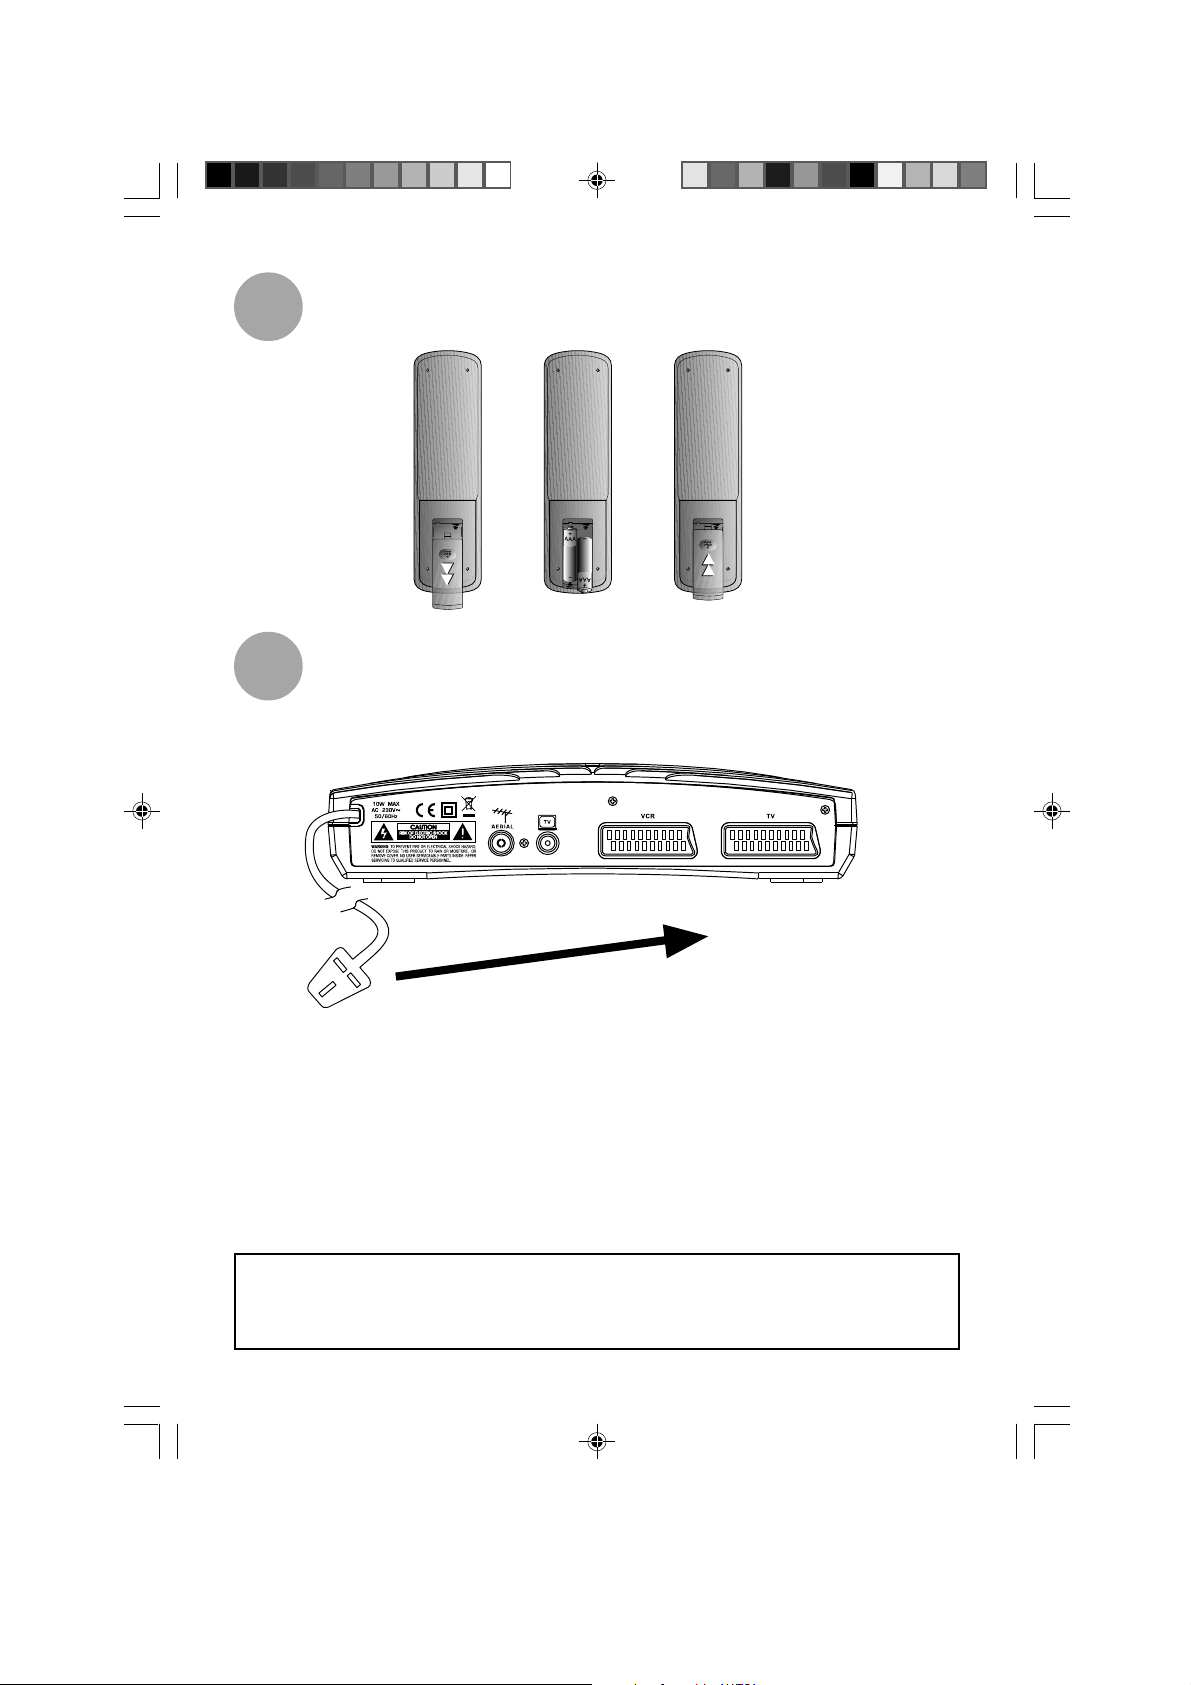
4
Place batteries into remote control as shown.
5
Plug your receiver into the mains supply.
To mains supply
Note
Always disconnect the receiver from the mains supply before you connect it to any other
equipment.
7
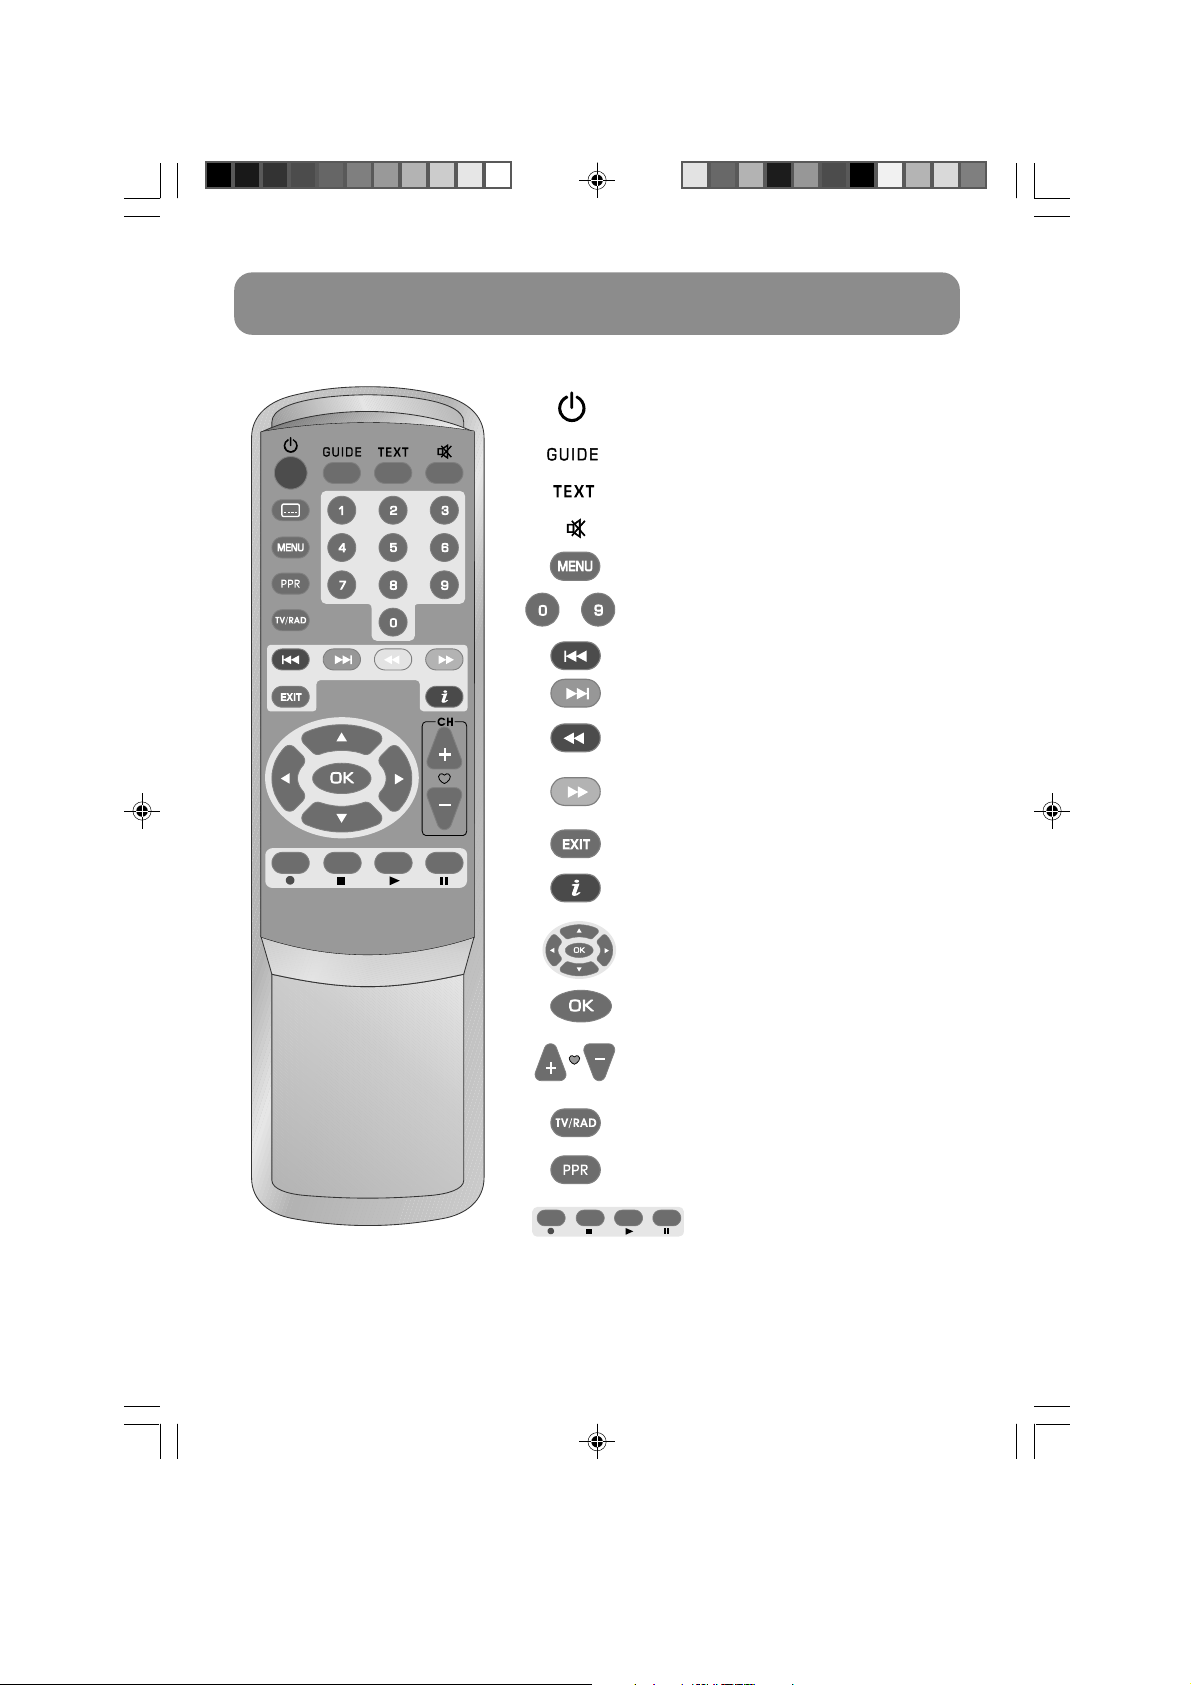
Remote Control
Remote Buttons
Button Function
Standby – switches the receiver in/out
of standby mode
[Guide] – Displays TV Guide
[Text] – Enters Teletext mode
Mute – turns volume on/off
[Menu] – goes to main menu
Number Keys – used where numbers can
be entered
[Red] – for Teletext and interactive services
[Green] – for Teletext and interactive services
[Yellow] – for Teletext and interactive
services
[Blue] – for Teletext and interactive
services
[Exit] – exits the menu mode
[i] – calls upon the information banner
Navigation buttons – used to select
various functions.
[OK] – confirms selections made
Channel – navigates through channel
and favourites
Switches between TV and Radio.
The follow keys are only for PPR use.
They do not function on a set top box.
8
 Loading...