

Page 1
Customer Help Line: 01422 263313
Opening Hours: Mon-Fri 8am-8pm, Sat 9am-4pm, Sun 11am-4pm
Or visit our website at www.ekey.co.uk
APTCDC367AR
3CD/Radio/Cassette Micro System
Page 2
WARNING
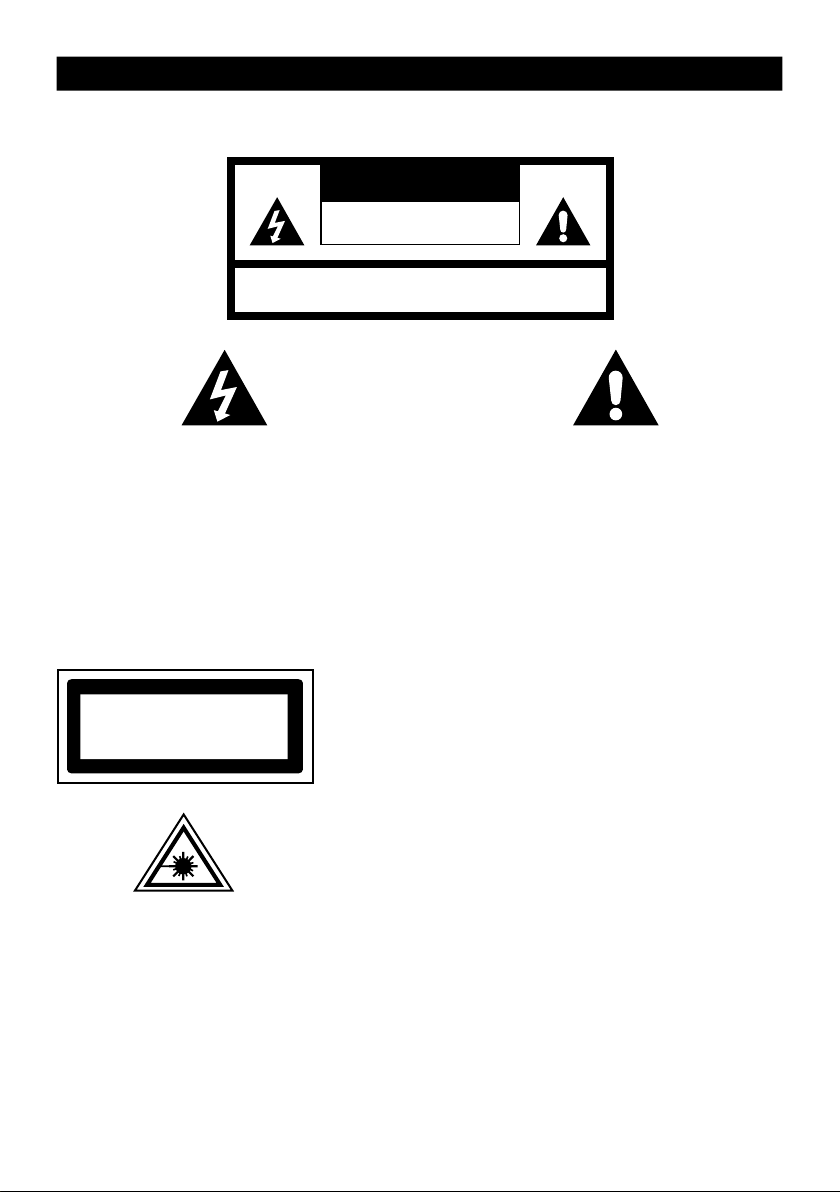
TO PREVENT FIRE OR SHOCK HAZARD DO NOT EXPOSE THIS APPLIANCE TO RAIN OR MOISTURE.
CAUTION
RISK OF ELECTRIC SHOCK
DO NOT OPEN
WARNING : SHOCK HAZARD-DO NOT OPEN
LIGHTNING FLASH WITH ARROWHEAD SYMBOL -
within an equilateral triangle, is intended to alert the
us e r t o th e pr e sen c e o f un i nsu l ate d da n ger o us
voltage within the products enclosure that may be of
sufficient m agn itu de to constitu de a r isk of electri c
shock to persons.
The following label has been affixed to the unit, listing the proper procedure for working with the laser beam:
CLASS 1 LASER PRODUCT LABEL -
CLA SS 1 LA SE R PRO DU CT
KLA SS 1 LA SE R APP AR AT
LUO KE N 1 L AI SERLA IT E
KLA SS E 1 L AS ER PR OD UKT
This label is attached to the place as illustrated to inform that the
apparatus contains a laser component.
WARNING LABEL INFORMING OF RADIATION -
This label is placed inside the unit. As shown in the illustration. To
warn against further measures on the unit. The equipment contains
a laser radiating laser rays according to the limit of laser product of
class 1.
EXCLAMATION POINT -
is used to indicate that a specific component shall be
replaced o nl y by t he c omponent spec if ie d in t ha t
documentation for safety reason.
within an equilateral triangle,
E-1
Page 3

SAFETY INSTRUCTIONS
1. READ INSTRUCTIONS - All the safety and operating instructions should be read before the appliance is operated.
2. RETAIN INSTRUCTIONS - The safety and operating instruction should be retained for future reference.
3. HEED WARNINGS - All warnings on the appliance and in the operating instructions should be adhered to.
4. FOLLOW INSTRUCTIONS - All operating instructions should be followed.
5. WATER AND MOISTURE - The appliance should not be used near water, for example, near a bathtub, washbowl,
kitchen sink, laundrytub, swimming pool or in a wet basement.
6. VENTILATION - The appliance should be situated so that its location or position does not interfere with its proper
ventilation. Do not place on bed, sofa, rug or similar surface that may block the ventilation openings, in a built-in
installation, such as a bookcase or cabinet that may impede the flow of air through the ventilation openings.
7. HEAT - The appliance should be situated away from heat sources such as radiators, stoves, or other appliances
(including amplifiers) that produce heat.
8. POWER SOURCE - The ap pl ia nce sho ul d be co nn ec ted to po wer sup pl y only of t he type d es cribed in the
operating instructions or as marked on the appliance.
9. GROUNDING - Precautions should be taken to ensure that the grounding means of an appliance is not defeated.
10. POWER CORD PROTECTION - Power supply cords should be routed so that they are not likely to be walked
on or pinched by items placed upon or against them.
11. POWER LINES - An outdoor antenna should be located away from power lines.
12. OBJECT and LIQUID ENTRY - Care should be taken so that objects do not fall and liquids are not spilled into
the enclosure through openings.
13. ESD WARNING - The display does not function properly or no reaction to operation of any the control may due
14. DAMAGE REQUIRING SERVICE - The appliance should be serviced by qualified service personnel when:
a. The power-supply cord or plug has been damaged.
b. Objects have fallen into, or liquid has been spilled into the appliance enclosure.
c. The appliance has been exposed to rain.
d. The appliance has been dropped, or the enclosure damaged.
e. The appliance does not appear to operate normally.
15. SERVICING - The user should not attempt to service the appliance beyond that described in the user operating
instructions. All other servicing should be referred to qualified service personnel.
Notes:
a. Dirty or scratched CD may cause a skipping problem. Clean or replace the CD.
b. If an error display or malfunction occurs, disconncet the AC cord and remove all the batteries. Then turn the power
back on.
to the electrostatic discharge. Switch off and unplug the set. Reconnect after a few seconds.
BEFORE OPERATION
Notes: CONCERNING COMPACT DISCS.
Since dirty, damaged or warped discs may damage the appliance, care should be taken of the followings items:
a. Usable compact discs. Use only compact disc with the mark shown below.
b. CD compact disc only with digital audio signals.
E-2
Page 4
LOCATION OF CONTROL
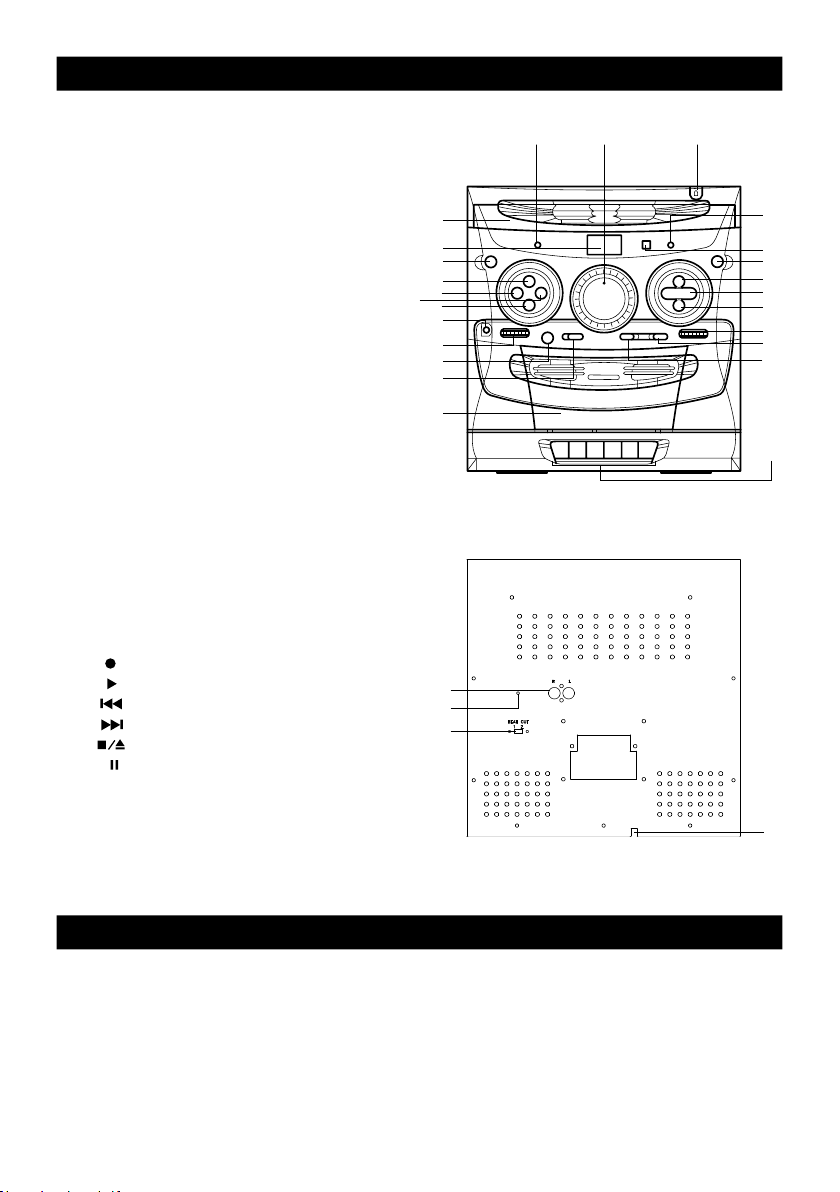
1.) CD TRAY OPEN / CLOSE
2.) 3 CD CHANGE TRAY
3.) POWER INDICATOR
4.) LCD DISPLAY
5.) REMOTE SENSOR
6.) FM STEREO INDICATOR
7.) POWER
8.) DISC CHANGE
9.) RANDOM
10.) SKIP -
11.) SKIP +
12.) PROGRAM
13.) DIAL POINTER
14.) STOP
15.) PLAY / PAUSE
16.) REPEAT
17.) HEAD PHONE JACK
18.) VOLUME CONTROL
19.) BASS BOOSE
20.) FUNCTION SELECTOR
21.) BAND SELECTOR
22.) FM MODE SELECTOR
23.) TUNING CONTROL
24.) CASSETTE DOOR
25.) CASSETTE CONTROL BUTTONS
RD
RECO
PLAY (PLAYBAC
K)
REW (REWIND)
F.FWD (FAST FORWARD)
STOP/EJECT
PAUSE
26.) FM ANTENNA LEAD
27.) SPEAKER JACK
28.) BEAT CUT
29.) AC POWER CORD
1133
2
4
7
9
10
11
12
17
18
19
20
24
27
26
28
SPEAKER
6
5
8
14
15
16
23
22
21
25
29
POWER SOURCE
AC POWER
You can power your appliance by plugging the AC power cord at the back of the appliance into a wall
AC power outlet. Check that the rated voltage of your appliance matches your local voltage.
E-3
Page 5
REMOTE CONTROL
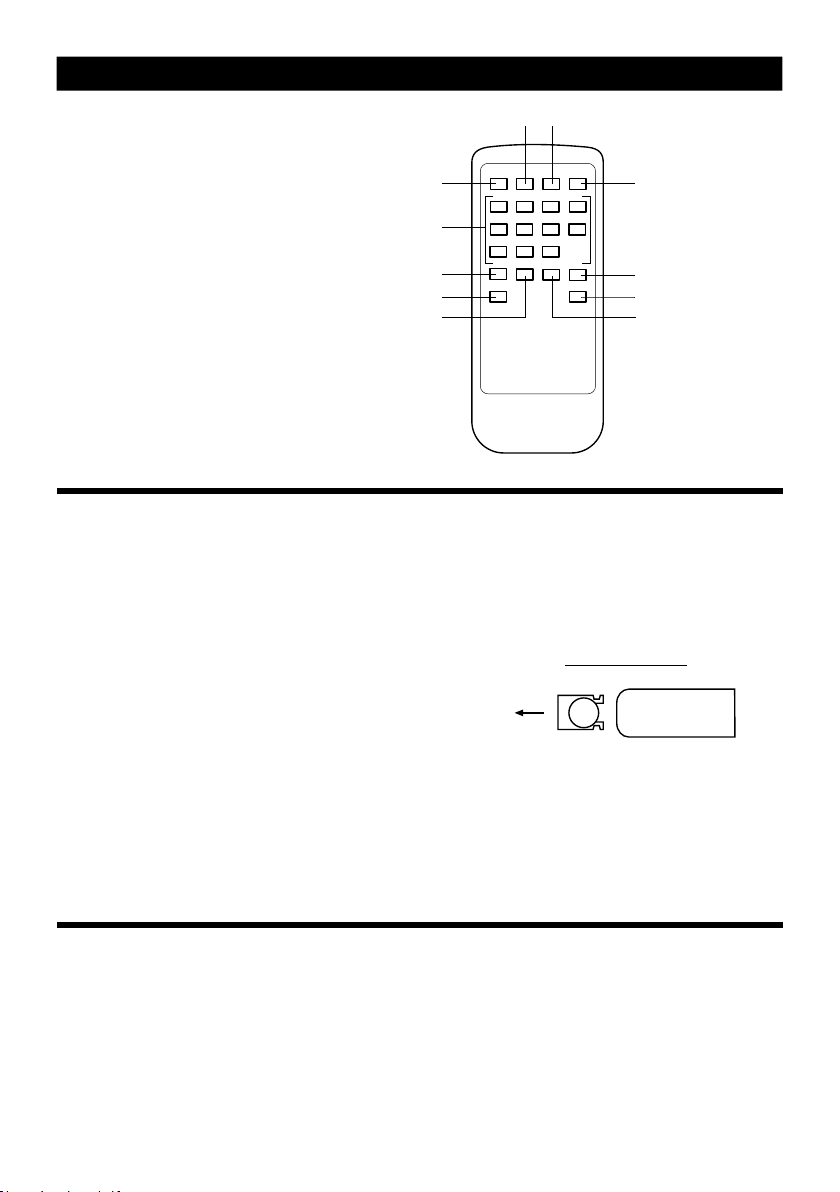
1. STOP
2. PROGRAM
3. MUTE
4. CD DOOR OPEN / CLOSE
5. TRACK NUMBER KEY
6. RANDOM
7. DISC CHANGE
8. REPEAT
9. PLAY / PAUSE
10. BACK
11. NEXT
1
5
8
10
6 7
2 3
4
9
11
BATTERY INSTALLATION
Insert a “Cell” size batteries into the battery compartment. Be sure that the batteries are inserted
correctly to avoid da mage to t he remote control. Always remove the batteries when the remote
control wi ll not be used for a long peri od of time, as this wil l cause leakage to the batter
subsequently damage to your set.
INSTALLING BATTERIES
ies and
+
Slide out cover and install single “Cell” battery
with polarities as shown
Notes:
- If the distance required between the remote control and the appliance decreases, the batteries
are exhausted. In this case replace the batteries with new one.
- Power button on main unit must be ‘On’ in order for Remote Control to operat
e.
SENSOR WINDOW OF THE RECEIVER
- Even if the remote control is operated within the effective range, its operation may be impossible if
there are any obstacies between the appliance and the remote control.
- If the remote control is operated near other appliances which generate infrared rays, or if other
remote control devices using infrared rays are used near the appliance, it may operate incorrectly.
E-4
Page 6

RADIO OPERATION
GENERAL OPERATION
1. Set the “FUNCTION” selector to “RADIO” mode.
2. Select desired band by using the “BAND” selector.
3. Adjust radio frequency to your desired station by using the “TUNING” control.
4. Adjust the “VOLUME” control to the desired level.
FM / FM-STEREO RECEPTION
- Set the “BAND” selector to FM mode for MONO reception.
- Set the “BAND” selector to FM ST. mode for FM STEREO reception. The Stereo indicator light up
to show FM ST. mode.
FOR BETTER RECEPTI
FM - This appliance has a FM antenna located at the rear cabinet. This wire is completely unraveled
and extended for better reception.
AM - This appliance is equipped with a built - in directional ferrite AM antenna. Rotate the appliance
to get better reception.
ON
E-5
Page 7
TAPE OPERATION
GENERAL OPERA
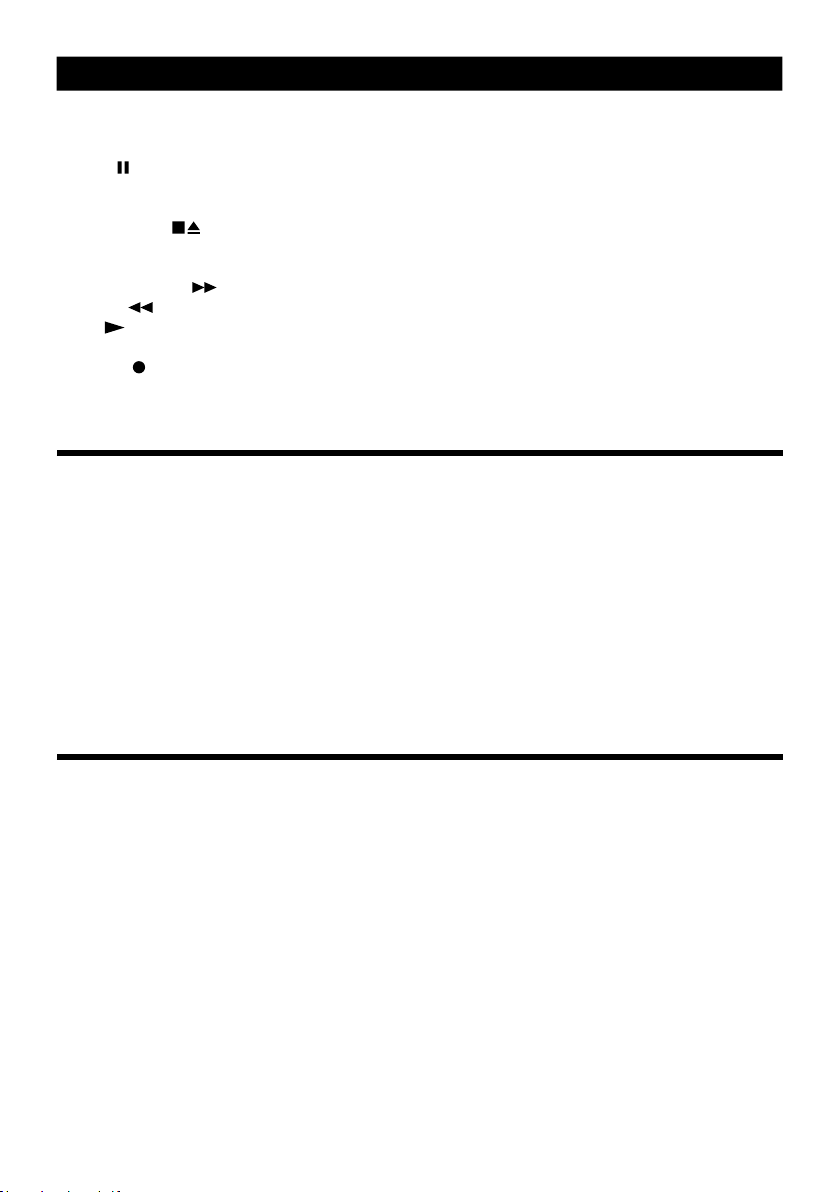
PAUSE Press to stop playing tape operation temporarily.
Press again to resume tape operation.
STOP / EJECT Press to stop tape operations.
Press again to open the cassette door after the tape spools stop turning.
FAST FORWARD & Press to start rapid tape winding either forward or reverse direction.
REWIND
PLAY Press to start playing tape.
RECORD Press it together with “PLAY” button to start recording.
TION
PLAYBACK
1. Press the “STANDBY” button to turn on unit.
2. Press the “FUNCTION” button to select “TAPE”.
3. Press the “STOP / EJECT” button to open the cassette door and insert your tape.
4. Close the cassette d
5. Press the “PLAY” button to start playing tape.
6. Adjust the “VOLUME” control to the desired level.
7. Press the “PAUSE” button when you want to stop playing tape operation temporarily.
8. Press the “STOP / EJECT” button when finis
oor.
hed.
RECORDING
1. Press the “STOP / EJECT” button to open the cassette door and insert a blank tape.
2. Select the source you want to rec
To record from radio - Press the “FUNCTION” button to select “TUNER” and adjust the desired
station.
To record from CD - Place a disc on the CD compartment. Press the “FUNCTION” button to
select “READING” and select the desired track.
3. Press the “RECORD” button together with the “PLAY” button to start recording.
4. Press the “STOP / EJECT” button when finished.
ord.
E-6
Page 8
CD OPERATION
GENERAL OPERA
PLAY / PAUSE Press to start playing CD disc.
Press again to stop playing CD operation temporarily.
Press again to resume playback.
SKIP + & Press to go to the next track or back to the previous track.
SKIP - Press and hold while playing until you find the point of the sound.
STOP Press to stop all CD operation.
TION
PLAYBACK
1. Press the “CD” button to select CD mode.
2. Press the “OPEN / CLOSE” button to open the disc loader compartment and place a CD
disc with the label up in the CD compartment.
3. During disc loader compartment were open, exposing only the right and left disc holders. The
third disc holder will remain in unit. To expose the third disc holder, press one of the “DISC
SKIP” button.
4. Press the “OPEN / CLOSE” button to close the disc loader compartment.
5. Focus search is performed if disc is inside. Press the “PLAY / PAUSE” button to start playing disc.
6. Adjust the “VOLUME” control to the desired level.
7. Press the “PLAY / PAUSE” button again when you want to stop playback temporarily.
8. Press the “STOP” button when finished.
E-7
Page 9
CD OPERATION
PRO
GRAM
Up to 60 tracks can be programmed for disc play in any order.
Be sure to press the “STOP” button before use.
1. Press the “PROGRAM” button, the display will show “000 P-01”, “PROGRAM” and disc no. flashing.
2. Select desired track by using the “SKIP +” or “SKIP -” button.
3. Press the “PROGRAM” button again to confirm desired track into the program memory.
4. Repeat step 2 to 4 to enter additional tracks into the program memory.
5. When all the desired tracks have programmed. Press the “PLAY / PAUSE” button to play the disc
in the order you have programmed.
6. Press the “STOP” button to terminate programmed playback.
REPEAT
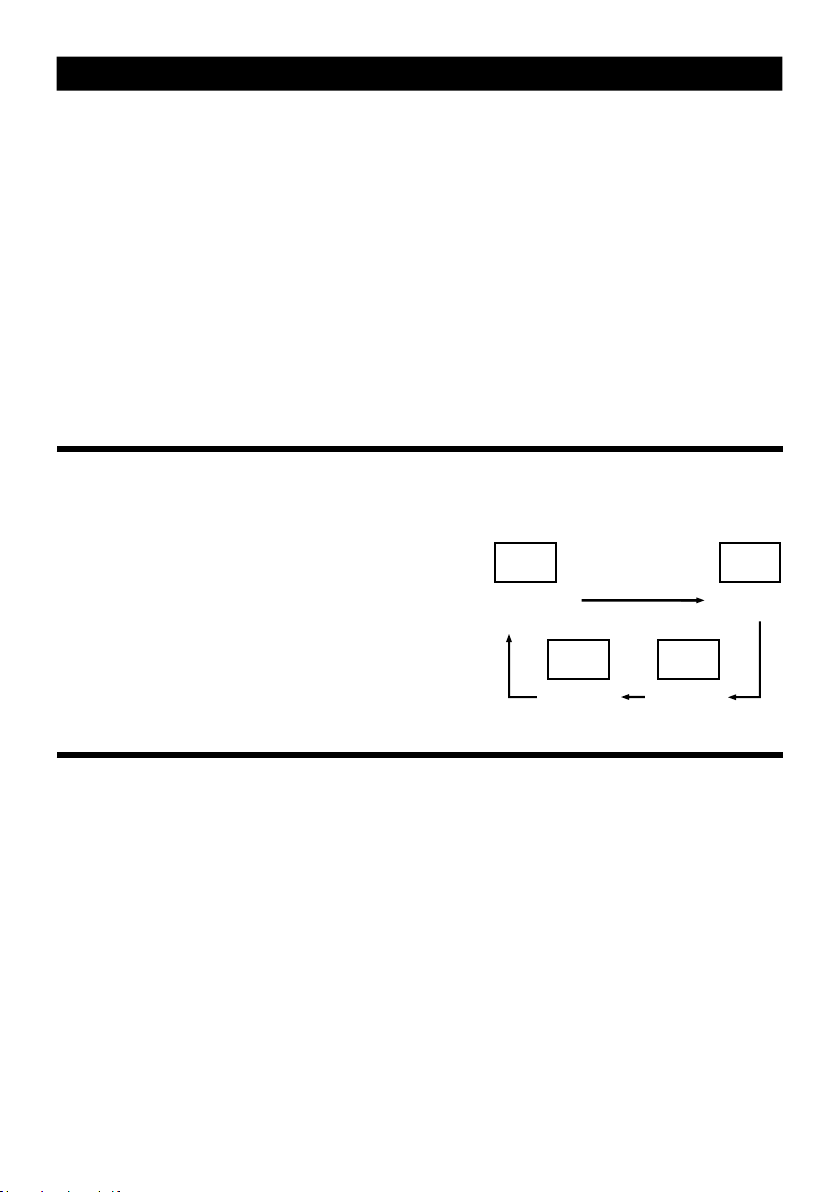
Press the “REPEAT” button before or during playing CD disc,
each press switches the repeat function as follows:
1 - REPEAT ALL DISCS IN COMPARTMENT
2 - REPEAT 1 DISC
3 - REPE
AT 1
4 - NORMAL PLAYBACK
REPEAT
ALL DISCS
REPEAT ALL
DISCS
COMPART
IN
MENT
NORMAL
PLAY
BACK
REPEAT 1
REPEAT 1
REPEAT
1 DISC
REPEAT
ISC
1 D
RANDOM
1. Press the “RANDOM” button on remote control before playing disc.
2. Press the “PLAY / PAUSE” button and the unit will select and pl
ay a track randomly.
3. Press the “RANDOM” button again to terminate random mode.
E-8
Page 10

OTHER FEATURES
EXTRA BA
1. Press the “BASS” button to enjoy extra bass sound effect.
2. Display will show “BASS - ON”.
3. Press the “BASS” button again to switch off extra bass sound effec
SS
t.
E-9
 Loading...