

Page 1
APL2YR2068U
Quick Start Guide
GETTING STARTED
1. Please read the safety section (page 2) in the main instructions before proceeding
further. This section contains vital information to ensure safe positioning and use of
the TV
2. Unpack the TV and place on a flat level surface suitable to support the weight of the TV (4.51
kg approx.).
3. Remove the plastic protective film on the front of the screen.
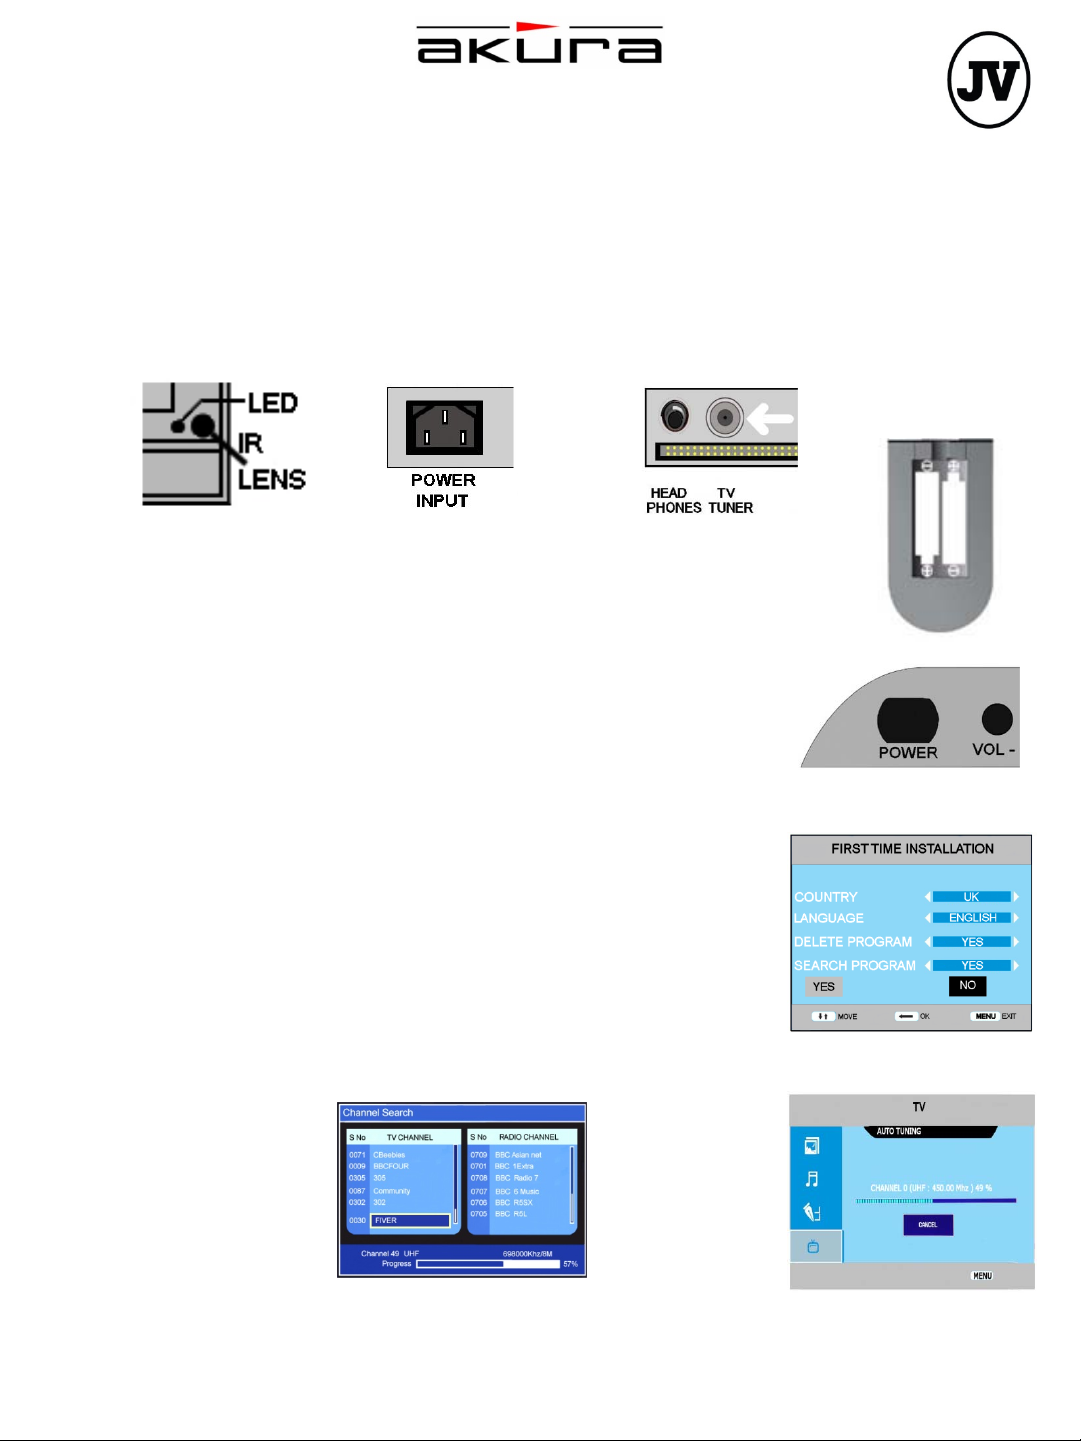
4. Connect the aerial into the TV Tuner connector at the left side of the TV (Fig 3).
Fig 1
5. Connect the mains power lead to the Power Input socket at the
rear of the TV, (Fig 2) Plug in and switch on at the mains. The
LED indicator on the TV will illuminate and show red (Fig 1).
6. Open the battery compartment cover (Fig 4) on the reverse of the
remote control. Insert 2 x AAA 1.5V alkaline batteries in
accordance with the diagram in the battery compartment. Take
care to observe the correct polarity (+/-). Refit the battery
compartment cover
7. Press the POWER button (Fig 5) to turn the TV set on. The LED
indicator will turn green and after a few seconds, the screen will
activate and the first time installation menu (Fig. 6) will appear.
8. Use the cursor ▼/▲ buttons on the remote control to move up
and down the display to highlight desired options.
9. The default language is “English” if you want another language
select that language using the ►/◄ buttons and press Ok.
10. Select YES to start tuning and press Ok. Fig 7 and 8 will be
displayed. The TV will now search the entire UHF range for both
Digital and Analog TV stations. When search is complete the TV
will display the first channel (BBC1) in DVBt mode. The Analog
stations may not be in the correct order, see page18 in the Main
Instruction book for more information
Fig.2 Fig.3
Fig.6
Fig.4
Fig.5
Fig.8
Fig.7
Page 2
WATCHING TV (basic operation)
11. To select a channel either enter the number of the channel using the
number buttons on the remote control or scroll through the channels
using the channel CH+/- buttons.
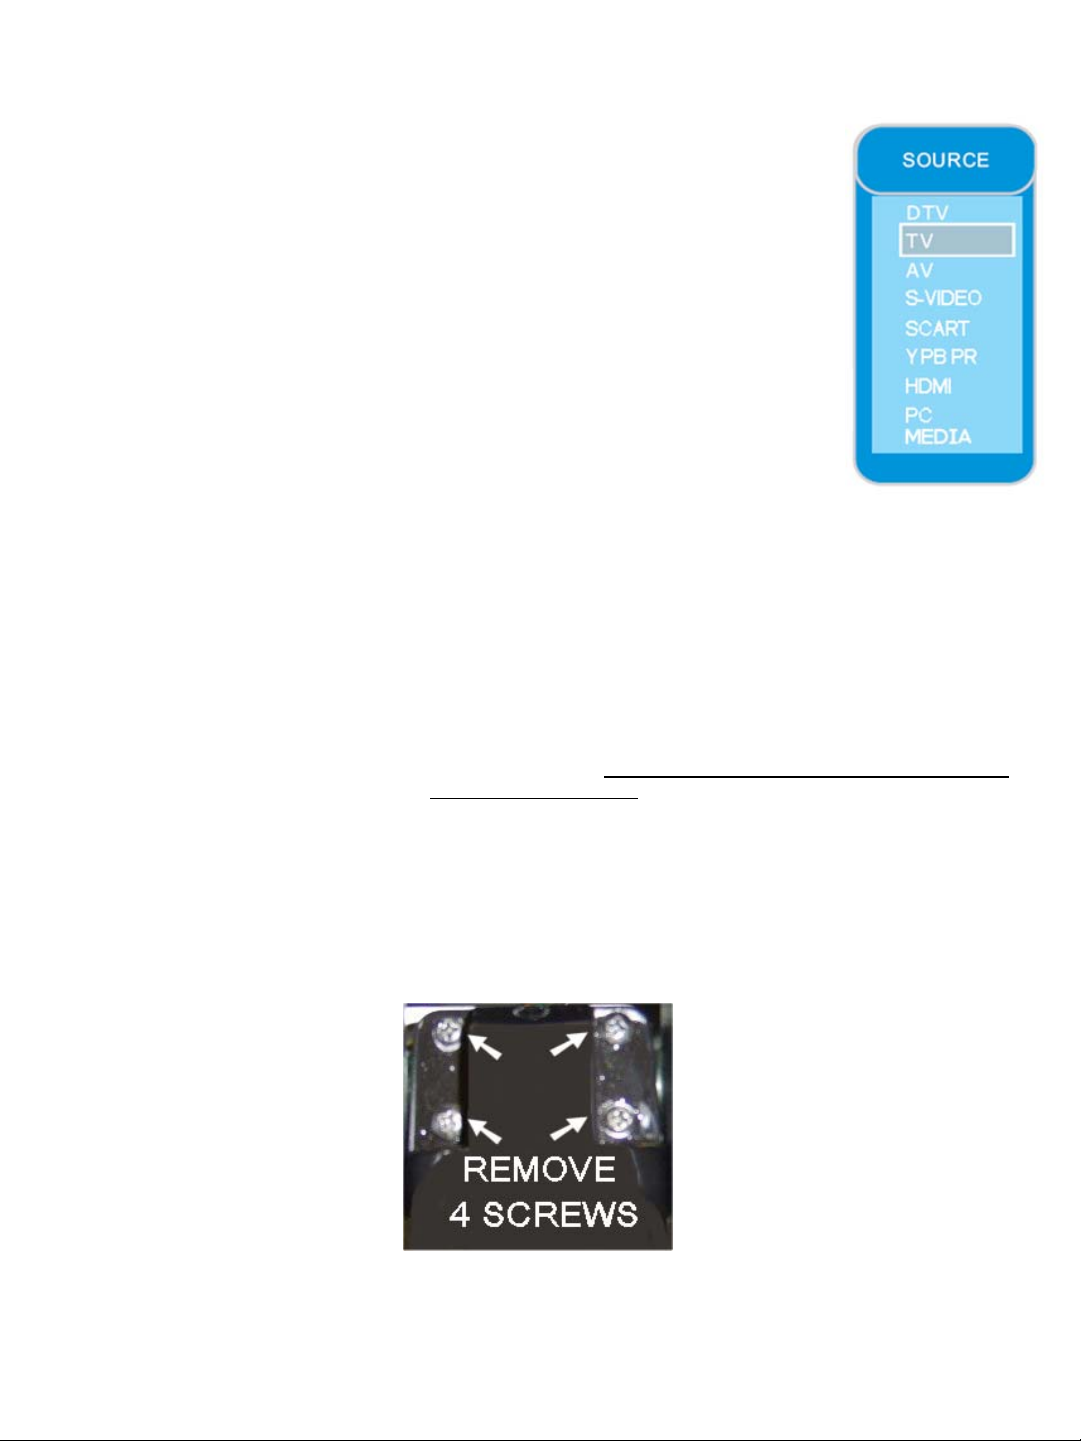
12. To view analogue TV channels press the SOURCE/INPUT button to
display the source menu. Using the cursor ▲ / ▼ buttons highlight TV
on the menu and press OK to select. To view digital TV channels select
DTV on this same menu.
13. To check the list of channels stored, press the “OK” button to display
the channel list and use the cursor ▲ / ▼ buttons to move up and down
the display. To select a channel, highlight the channel on the list and
press “OK” to confirm.
14. Adjust the volume to the desired level using the volume or cursor ◄ /
►buttons. The sound can be silenced by pressing the MUTE button on
the remote control and a mute symbol will appear on the screen. Press
the MUTE button a second time to restore the sound.
15. To switch off the TV for short periods, press the POWER button. The
TV will go into standby mode and the LED indicator will change to red.
If not using the TV for extended periods turn off at the mains switch to
conserve electricity, all settings will be retained.
Wall Mounting
Fig.10
To mount the TV on a wall you need to purchase a VESA Standard (100mm) bracket.
Remove the screws as shown below (Fig 11).
Mount the wall bracket as described by the manufacturer.
Mount the TV to the wall bracket using 4 x M4 x 10mm set screws. (Do NOT use longer screws as the internal parts of
the TV may be damaged).
Akura accepts no responsibility for damage, caused to or by, incorrect mounting of the wall bracket.
There are many variations of Wall Mounting Brackets. The “ARM” variety allow a greater movement of the TV into the
viewing angle required.
The “Fixed Tilt” variety allow up and down Tilt.
The Fixed “Non Tilt” variety are fixed very close to the wall. To ensure suitable clearance of the Mains Plug, 4 x spacers
are provided. Attach these to the TV cabinet back and tighten before fitting the Wall Bracket plate.
Fig.11
For advanced operation of this TV please consult the Instruction Manual.
Should you have difficulty in operating this unit, please consult the Trouble Shooting Guide in the Instruction Manual.
If you suspect a fault, please contact the Customer Help Line.
 Loading...