

Page 1
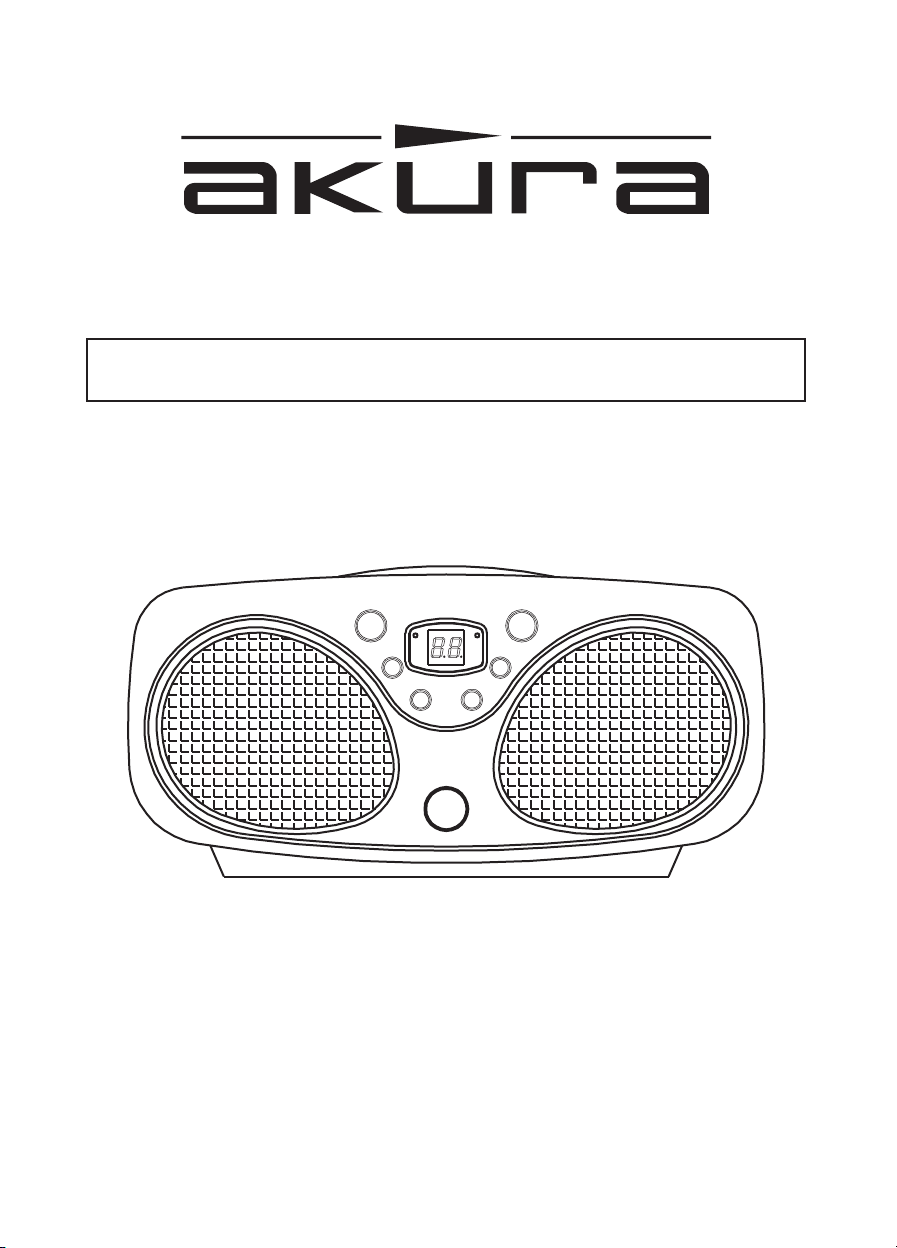
INSTRUCTION MANUAL
APCD-913
Customer Help Line 01422 203676
Page 2
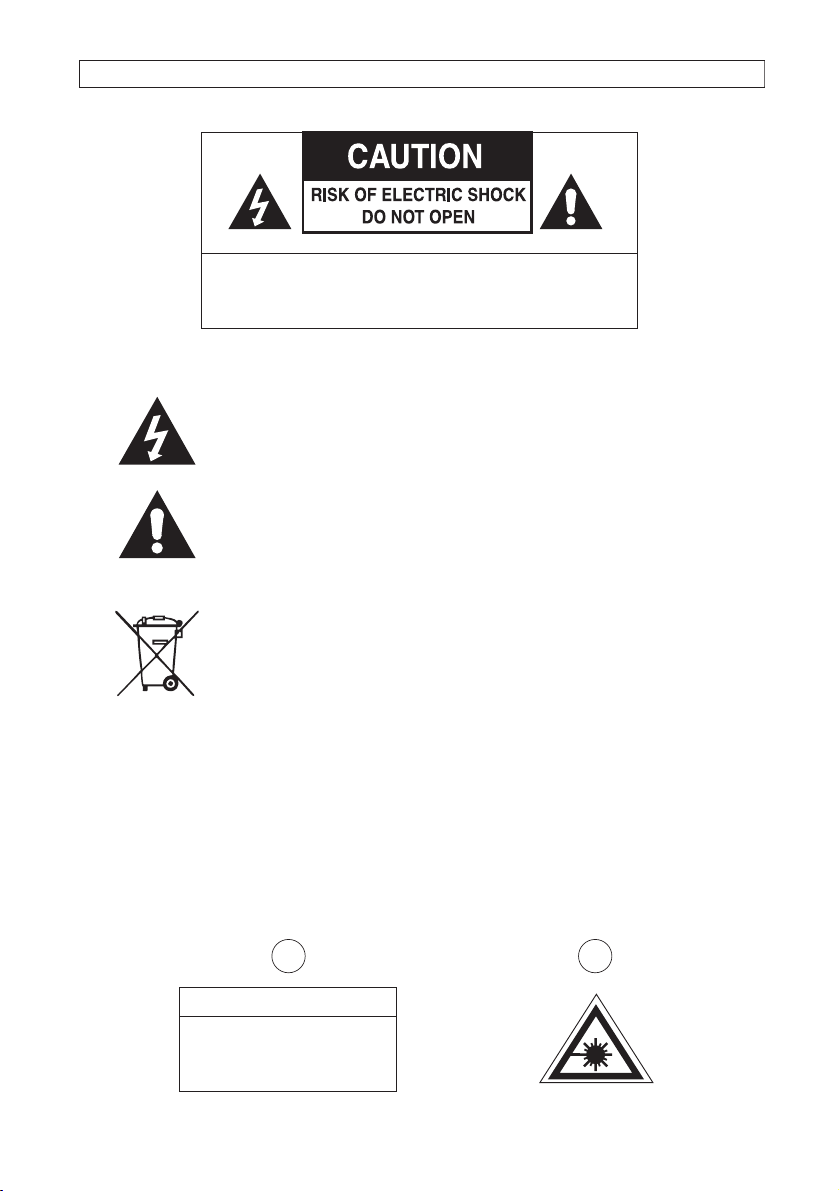
WARNING : TO PREVENT FIRE OR SHOCK HAZARD DO NOT EXPOSE THIS APPLIANCE TO RAIN OR MOISTURE
WARNING : SHOCK HAZARD-DO NOT OPEN
This marking is located on the rear of the unit
The lighting flash with arrowhead symbol, within an equilateral triangle, is
intended to alert the user to the presence of uninsulated dangerous voltage
within the products enclosure that may be of sufficient magnitude to
constitute a risk of electric shock to persons.
The exclamation point within an equilateral triangle, is intended to alert
the user to the presence of important operating and maintenance (servicing)
instructions in the literature accompanying the appliance.
The crossed out “Wheelie bin” is intended to show that this appliance
must
not be placed with ordinary household waste.
Whe
n this appliance has reached the end of its useful life. It must be
disposed
disposal
of in accordance with local by-laws. Consult your local waste
authority. (WEEE Directive)
The following lab le has been affixed to the unit, listing the proper procedure
for working with the laser beam.
1. T
HIS LABEL IS ATTACHED TO THE PLACE AS ILLUSTRATED TO INFORM THAT
CONTAINS A LASER COMPONENT.
WARNING LABEL INFORMING OF RADIATION IS PLACED INSIDE THE
2. THE
ILLUSTRATION. TO WARN AGAINST FURTHER MEASURES ON THE UNIT. THE EQUIPMENT CONTAI
A LASER RADIATING LASER RAYS EXCEEDING THE LIMIT OF LASER PRODUCT OF CLASS 1.
THE APPARATUS
UNI
T. AS SHOWN IN THE
1 2
CLASS 1 LASER PRODUCT
DANGER : INVISIBLE LASER
RADI
ATION WHEN OPEN AND
INT
ERLOCKS DEFEATED, AVOID
EXPOSURE TO BEAM
Page 1
NS
Page 3

SAFETY INSTRUCTIONS
READ INSTRUCTIONS-All the safety and
1.
operati
ng instructions should be read before
the appliance is operated.
2.
RETAIN INSTRUCTIONS-The safety and
operating
instruction should be retained for future
rence.
refe
3. HEED WARNINGS-All warnings on the appliance
and in the operating instructions should be adhered to.
FOLLOW INSTRUCTIONS-All operating
4.
instructions should be followed.
WATER AND MOISTURE-The appliance should
5.
not be used near water, for example, near a bathtub,
washbowl,
or in a wet basement.
6. VENTILATION-The appliance should be situated
so that its location or position does not interfere with
its proper ventilation. For example, the appliance
should not be situated on a bed, sofa, rug or similar
surf
placed
ca
may
openin
7. HEAT-The appliance should be situated away from
heat sources such as radiators, stoves, or other
appliances
8.
connected
described in the operating instructions or as marked on
the appliance.
9.
cords
walk
them.
10.
appliance
the appliance is to be left un-used for a long period of
ti
Any batteries should also be removed.
11. OBJECT and LIQUID ENTRY-Care should be
ta
spil
12.
appliance
personn
A.
damag
kitchen sink, laundrytub, swimming pool
ace that may block the ventilation openings,
in a built-in installation, such as a bookcase or
binet that
impede the flow of air through the ventilation
gs.
(including amplifiers) that produce heat.
POWER SOURCE-The appliance should be
to a power supply only of the type
POWER CORD PROTECTION-Power supply
should be routed so that they are not likely to be
ed on or pinched by items placed upon or against
. NON-USE PERIODS-The power cord of the
should be unplugged from the outlet when
me.
ken so that objects do not fall and liquids are not
led into the enclosure through openings.
DAMAGE REQUIRING SERVICE-The
should be serviced by qualified service
el when :
The power-supply cord or plug has been
ed.
B. Objects have fallen into, or liquid has been spilled
to the appliance enclosure.
in
C. The appliance has been exposed to rain.
D. The appliance has been dropped, or the
enclosure
damaged.
E. The
appliance does not appear to operate
normally
or exhibits a marked change in
performan
13. SERVICING-The user should not attempt to
service
operating
referred to qualified service personnel.
NO
1) It is preferred to retain a CD inside the unit even
wh
on
2)
prob
3)
disconnect the AC cord and remove all the
batteries. Then turn the power back on.
BEFORE
NOTES-CONCERNING
Since dirty, damaged or warped discs may damage the
un
1. a. Usable compact discs
Use compact discs only with the mark shown on the
disc.
b.
signa
ce.
the appliance beyond that described in the user
instructions. All other servicing should be
TES:
en it is not in use .This prevents dust accumulation
optical lens.
Dirty or scratched CD may cause a skipping
lem. Clean or replace the CD.
If an error display or malfunction occurs,
OPERATION
COMPACT DISCS.
it, care should be taken of the followings items:
CD compact discs only with digital audio
ls.
Page 2
Page 4
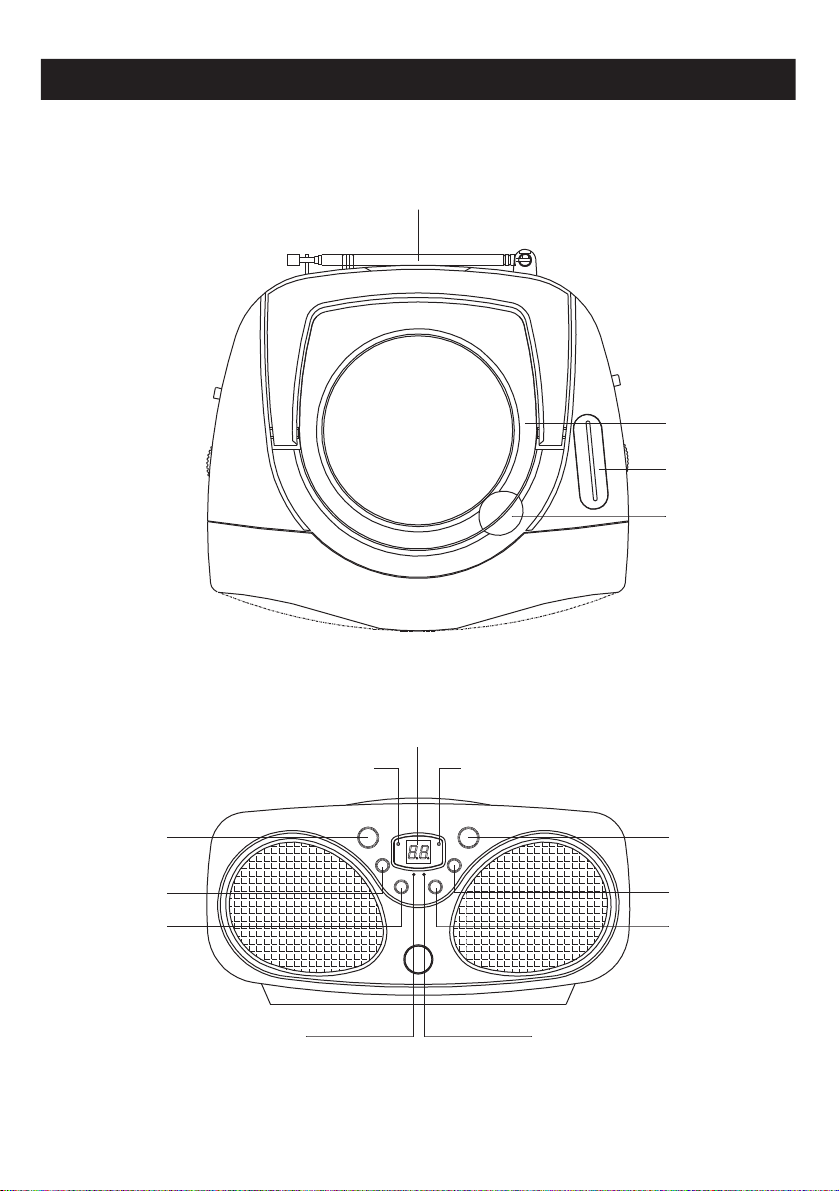
LOCATION OF CONTROLS
FM Antenna
CD Door
Dial Pointer
Open / Close
Stop Button
Repeat Button
Skip Down Button
Power Indicator
LED Display
FM Stereo Indicator
Play / Pause Button
Program Button
Skip Up Button
Play / Pause IndicatorRepeat 1 / ALL Indicator
Page 3
Page 5
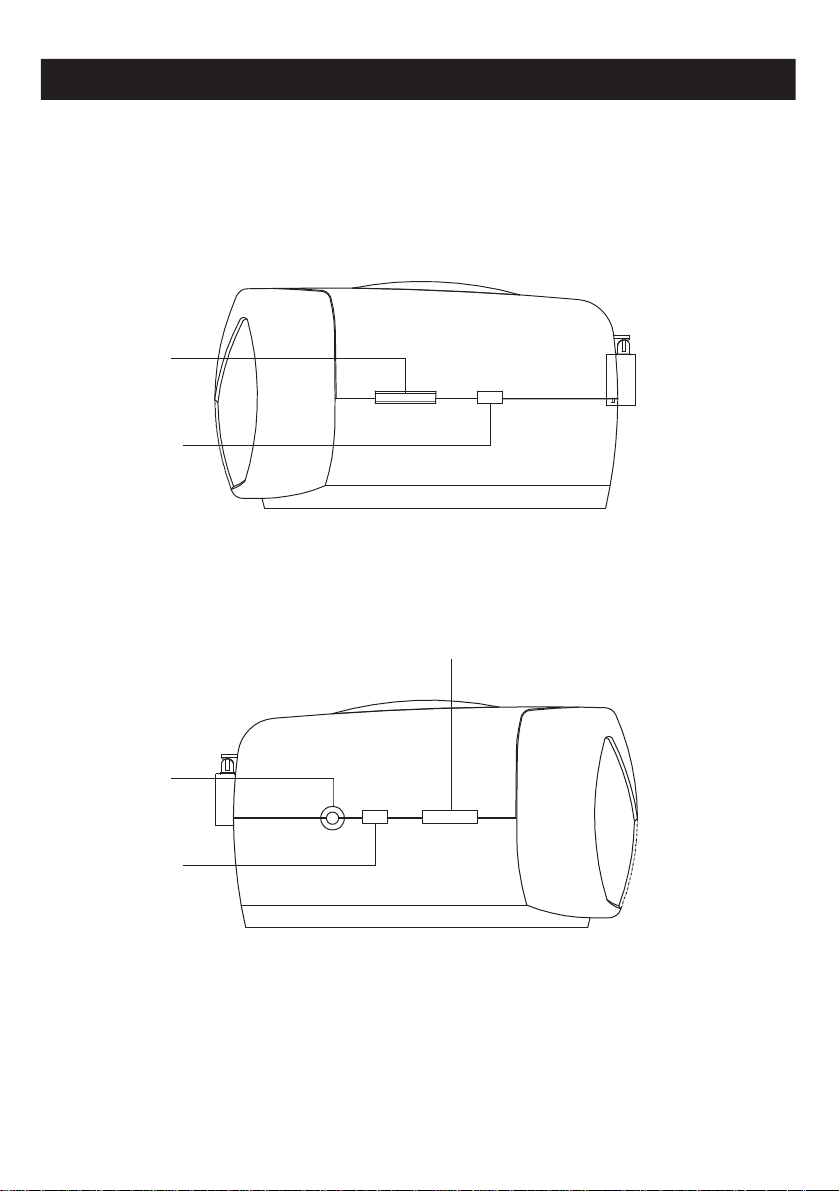
Tuning Knob
Band Selector
LOCATION OF CONTROLS
( Right side )
( Left side )
Volume Control
Head Phone Jack
Function Selector
Page 4
Page 6
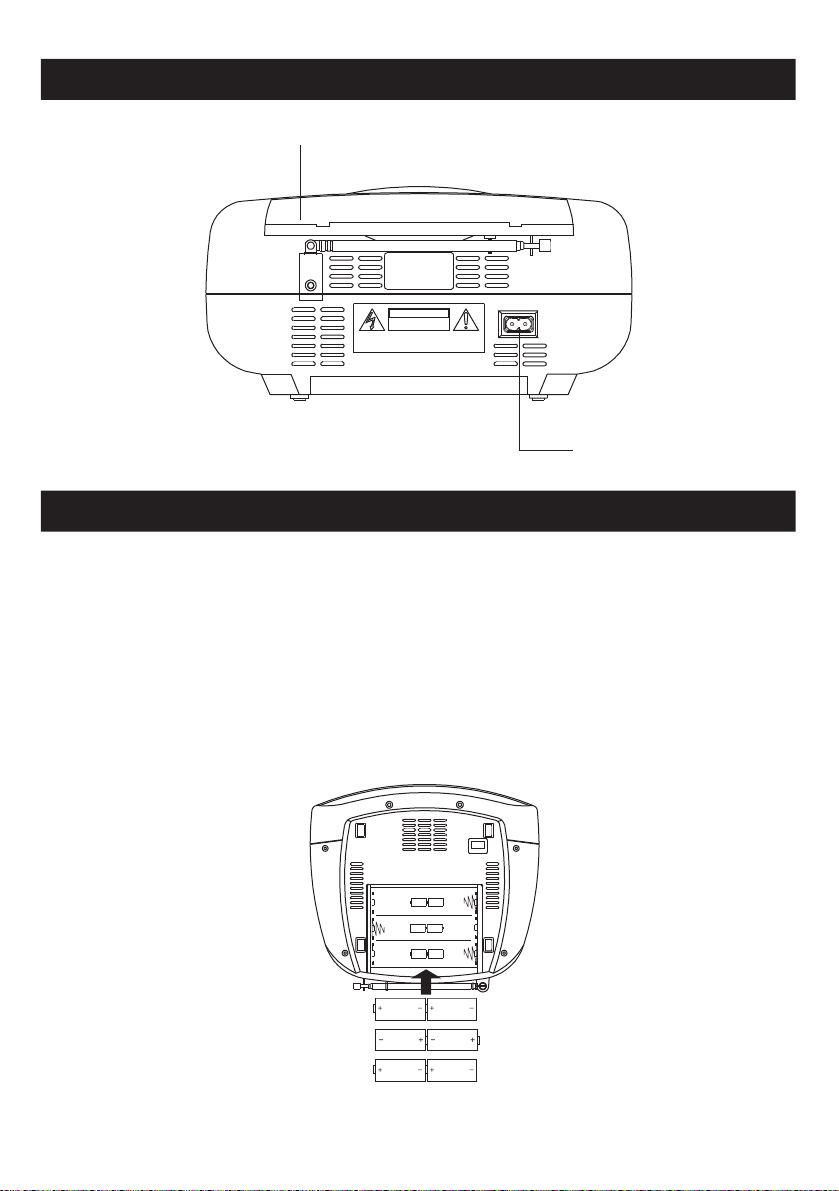
LOCATION OF CONTROLS
Handle
CAUTION
RISK OF ELECTRIC SHOCK
DO NOT OPEN
WARNING:SHOCK HAZARD.DO NOT OPEN
AVIS:RISQUE DE CHOC ELECTRIQUE.NE PAS OUVRIR
AC Jack
POWER SOURCES
AC POWER
You can power your portable system by plugging the detachable AC power cord into the AC inlet on the
back of the unit and into a wall AC power outlet. Check that the rated voltage of your unit matches your
local voltage. Make sure that the AC power cord is fully inserted into the unit.
BATTERY POWER
Insert 6“C” size batteries in the Battery Compartment. Be sure that the batteries are inserted correctly to
avoid damage to the unit. Always remove the batteries when the unit is not be used for a long period of
time, Batteries may leak and cause damage to your set.
110V 220V
Insert 6”C” size batteries
into battery compartment
Page 5
Page 7
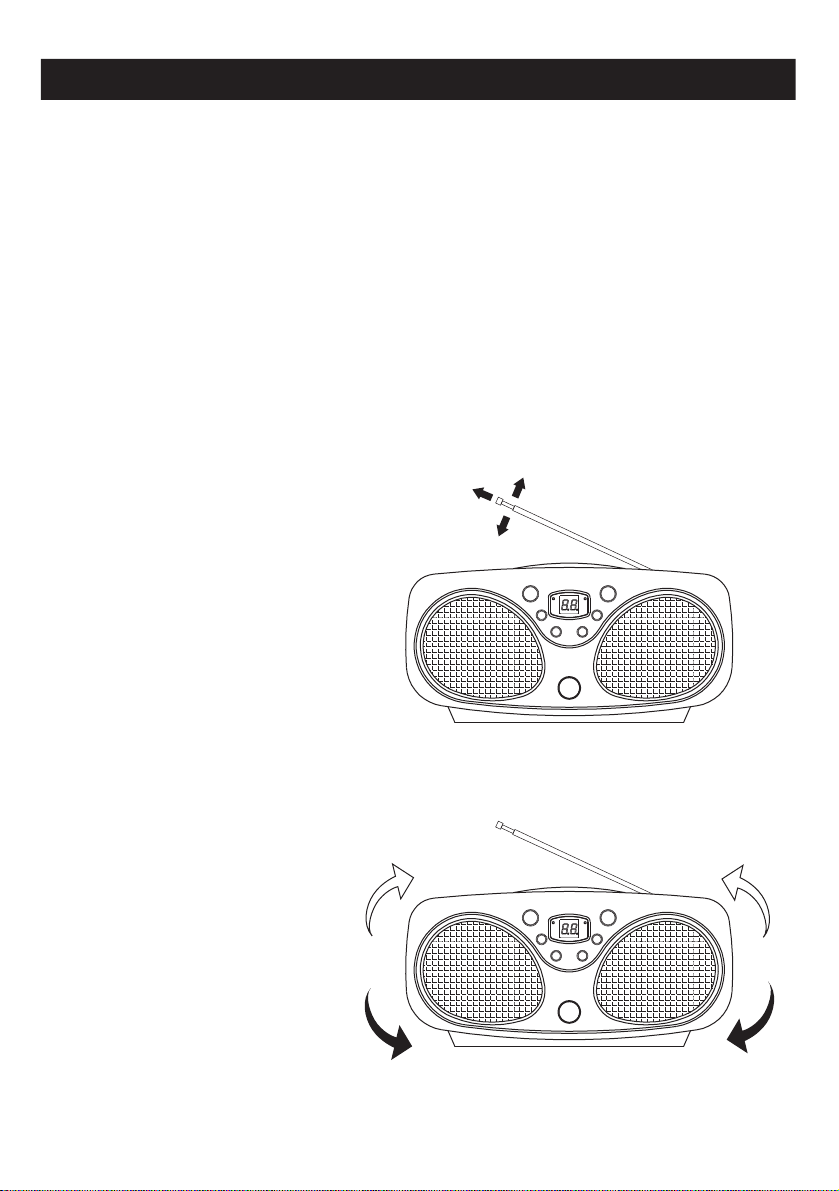
LISTENING TO RADIO
OPERATION
1. SET THE FUNCTION SELECTOR TO "RADIO" POSITION.
SELECT THE DESIRED RADIO FREQUENCY BAND WITH BAND SELECTOR.
2.
3. TURN THE TUNING CONTROL TO SET THE DIAL POINTER AGAINST THE STATION
FREQUENCY AS DESIRED.
4.
ADJUST VOLUME CONTROL FOR THE DESIRED VOLUME LEVEL.
FM & FM-STEREO RECEPTION
• SET THE BAND SELECTOR AT "FM" POSITION. PROGRAMS ARE RECEIVED IN MONO
MODE. IN
THE PROGRAM IN MONO.
• SET THE BAND SELECTOR AT "FM ST" POSITION FOR RECEIVING STEREO
PROGRAMS. THE STEREO INDICATOR LIGHTS UP TO SHOW FM STEREO PROGRAM.
FOR BETTER RECEPTION
A. Extend the rod antenna for better reception.
PARTICULAR WHEN STEREO SIGNALS ARE WEAK, IT IS PREFERABLE TO RECEIVE
B. Repositionning the unit to get better AM reception.
Page 6
Page 8
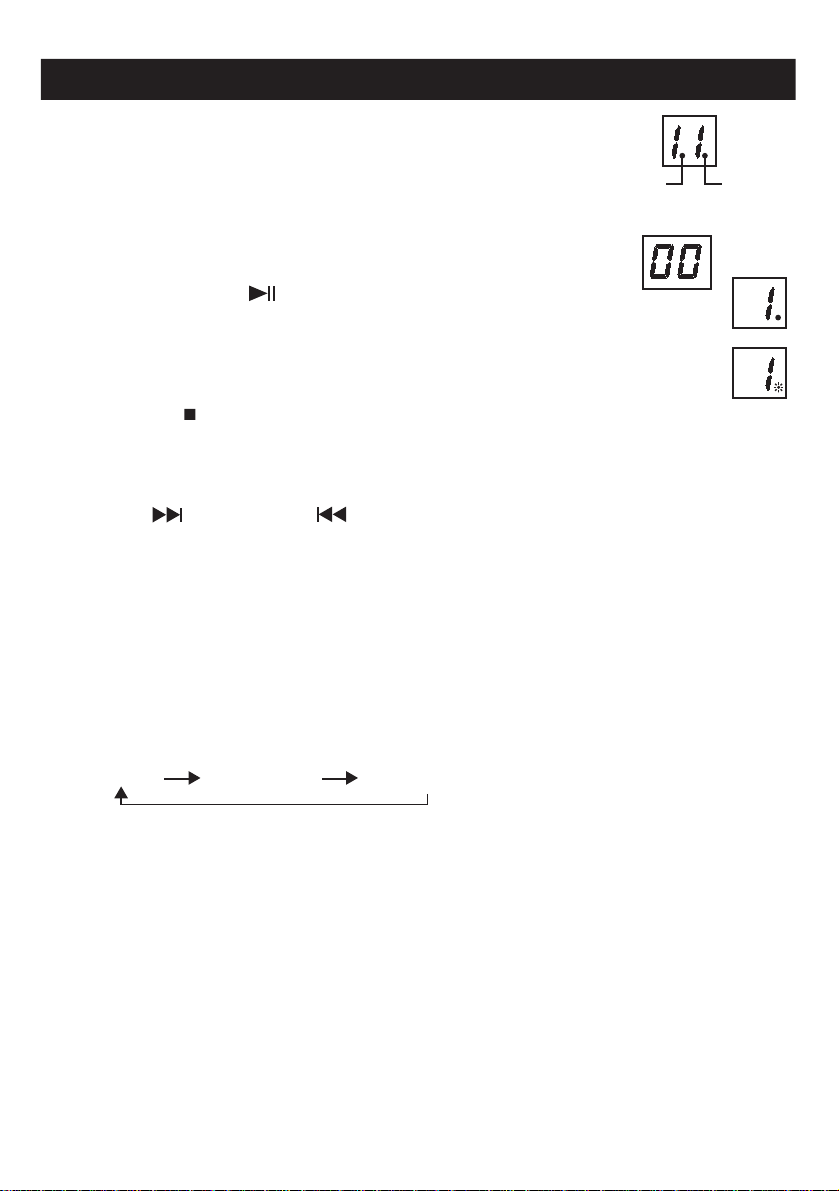
CD OPERATION
PLAYING COMPACT DISC
•
GETTING STARTED
1. SET THE FUNCTION SELECTOR TO "CD" POSITION. OPEN THE
CD COM
INTO THE COM
2. FOCUS SEARCH IS PERFORMED IF THERE IS A DISC IS INSIDE.
THE TOTAL NUMBER OF TRACKS IS READ.
•
PLAY/PAUSE MODE
1. IF THE PLAY/PAUSE BUTTON IS PRESSED DURING STOP MODE, THE FIRST
TRACK WILL BE PL
2. IF THE PLAY/PAUSE BUTTON IS PRESSED DURING PLAY MODE, THE CD WILL
GO TO PAUSE MODE AND THE PLAY/PAUSE LED WILL BE FLASHING.
•
STOP MODE
1. IF STOP BUTTON IS PRESSED DURING PLAY OR P
AND DISPLAY TOTAL NUMBER OF TRACK. ALL INDICATOR LED ARE TURNED OFF.
•
SKIP MODE
PARTMENT BY LIFTING UP THE CD DOOR. PUT A CD
PARTMENT AND CLOSE THE CD DOOR.
AYED AND THE PLAY/PAUSE LED WILL BE TURNED ON.
AUSE MODE. THE CD WILL GO TO STOP MODE
(SKIP UP / SKIP DOWN )
1. DURING PLAY OR PAUSE MODE. IF THE SKIP UP BUTTON IS PRESSED IT WILL GO TO THE NEXT
TRACK AND DISPL
2. DURING PLAY OR PAUSE MODE, IF THE BACK BUTTON IS PRESSED IT WILL GO BACK TO THE
BEGINNING OF THE TRACK, THE SAME TRACK NO. IS DISPL
THE PLAY OR PAUSE MODE.
3. AFTER STEP 2, PRESS THE BACK BUTTON AGAIN AND IT WILL GO TO THE PREVIOUS TRACK
AND CONTINUE THE PL AY OR PAUSE MODE.
AY THE TRACK NO. AND THEN CONTINUE THE PLAY OR PAUSE MODE.
AYED AND THE CD CONTINUES
Repeat 1/
Repeat all
Indication
Play /
Pause
Indication
• REPEAT MODE
PRESS THE REPEAT BUTTON BEFORE OR DURING PLAY, A SINGLE TRACK OR ALL THE TRACKS
CANBE REPE
EACH PRESS OF THE REPEAT MODE SWITCH PERFORMS THE FUNCTION BELO
(1) REPEAT 1 (2) REPEAT ALL (3) REPEAT OFF
ATED.
W
Page 7
Page 9
CD PROGRAMMING
UP TO 20 TRACKS CAN BE PROGRAMMED FOR PLAY IN ANY ORDER.
TO PROGRAM
1) SET IN CD MODE.
2) PRESS THE PROGRAM BUTTON, THE DISPLAY WILL SHOW 01 AND FLASH, AND THEN IT
CHANGES TO 00.
3) SELECT A DESIRED TRACK BY USING THE SKIP BUTTONS.
4) PRESS THE PROGRAM BUTTON TO ENTER THE TRACK INTO MEMORY.
5) THE LED DISPL
6) REPE
AT 3~5, UP TO 20 TRACKS. AFTER STORING 20 TRACKS, THE DISPL AY SHOWS 01 AND
FLASHES AGAIN.
AY CHANGES TO 02, AND THEN CHANGES TO 00 AGAIN.
TO COMPLETE PROGRAMMING AND START PLAY
PRESS PLAY BUTTON, THE PROGRAM WILL PLAY AUTOMATICALLY.
TO CLEAR PROGRAMMING
1)
PRESS PROGRAM BUTTON ONCE, THE DISPLAY WILL SHOW 01, AND THEN IT CHANGES TO
00 IN A
2) PRESS AND HOLD THE STOP BUTTON AGAIN TO CLEAR PROGRAM.
FEW SECONDS.
Fault Guide.
Should you experience any problems please see guide below before calling the help line
Symptom Fault Action
Dead. No Operations
No Radio operations but Led
lit
No Radio stations on MW Poor signal area Rotate the case of the radio as
No Radio stations on FM Poor signal area Extend and rotate the rod
Not playing CD’s
No power to player. Check the power plug is in
Function switch in incorrect
position.
Function switch set to CD Switch to Radio. Turn up the
Dirty or damaged disc Carefully clean the disc and
and connected to a
firmly
power
supply.
If
batteries are fitted, ensure
are new and fitted the
they
corre
ct way round.
Switch to CD or Radio
volume.
the
internal aerial is
directional.
aerial
aerial.
place
up.
The extending rod
is not in use on AM
in the player label side
Dirty
laser lens Carefully clean the lens with a
If you are still having difficulty please call the Technical help line. Ring 01422 203676 (Normal
rates apply).
Opening hours Mon-Fir 8 am - 8 pm. Sat 9 am - 4 pm. Sun 11am - 4 pm. “Bank holidays as
Sun”
tton bud”.
“co
Page 8
Page 10
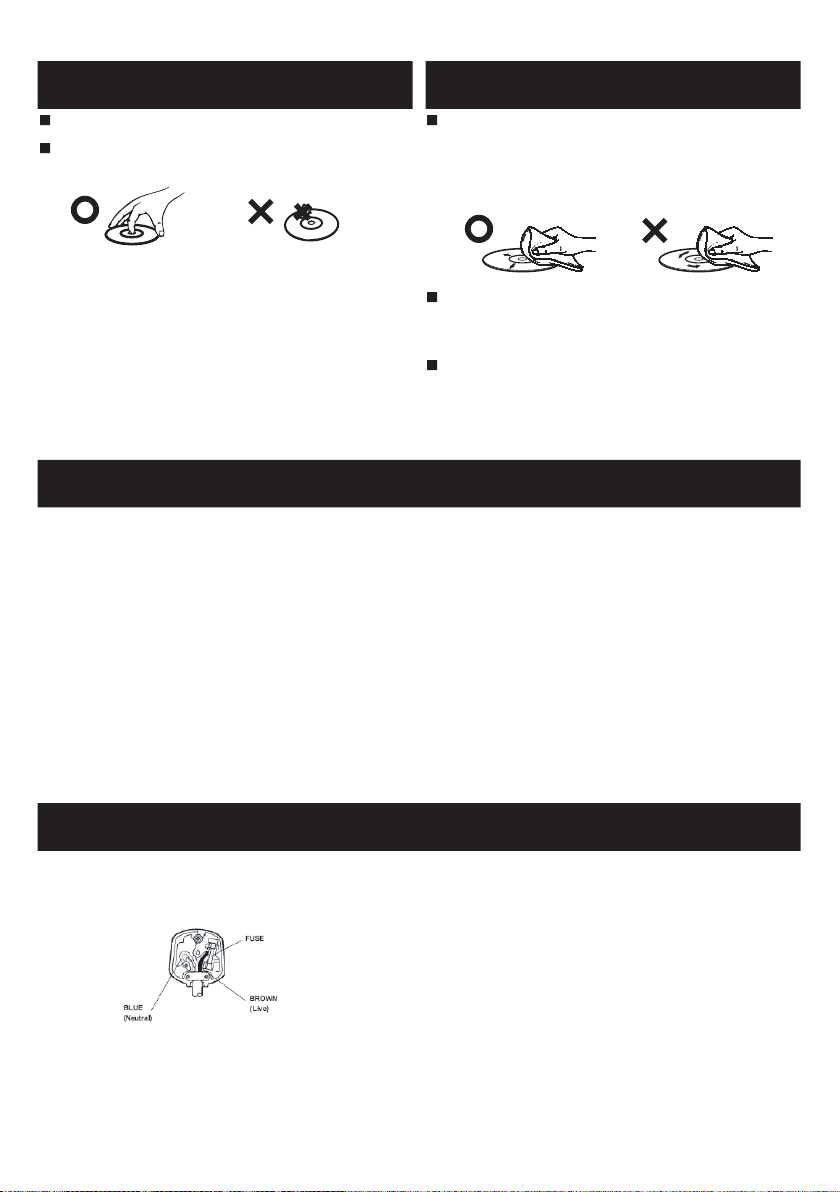
ON HANDLING DISCS ON CLEANING DISCS
Do not touch the playback side of the disc.
Do not attach paper or tape to disc.
Fingerprints and dust on the disc casue picture
and sound deterioration. Wipe the disc from the
centre outwards with a soft cloth. Always keep
the disc clean.
If you can not wipe off the dust with a soft cloth,
wipe the disc lightly with a slightly moistened soft
cloth and finish with a dry cloth.
Do not use any type of solvent such as thinner,
benzine, commercially available cleaners or antistatic spray for vinyl Lps. It may damage the disc.
Specifications
Power Supply : 230V ~ 50Hz
Power Consumption : 9 Watt
Output Power(RMS) : 2 x 1W
Terminal impedence : Speaker 4ohms
Unit Dimensions : 236(L) x 215(W) x 115.5(H)mm
Net Weight : 1.4kg
Gross Weight : 1.8kg
Tuning Frequency : AM: 540-1600 KHz
FM: 88-108 MHz
DC Operation : 12V (6 X UM-2)
IMPORTANT
If the mains plug requires replacement, please follow the following instructions.
DO NOT CONNECT THE CENTRE PIN (EARTH).
Connect the Blue wire to the (N) terminal ( this may be
coloured blue).
Connect the Brown wire to the (L) terminal adjacent to
the fuse ( this may be coloured brown).
This appliance must have a 3A fuse fitted.
Page 9
 Loading...