

Page 1
EK4e User Manual
3
2016 © Ak u a Mob il e
Contents
1. Appearance and keypad oper ations..................................................... 03
2. Using memor y card as U disk .............................................................. 04
3. WLAN ................................................................................................. 05
4. BT wireless ......................................................................................... 07
5. Mail ..................................................................................................... 08
6. Dialing ................................................................................................. 09
7. Messaging........................................................................................... 11
8. Contacts .............................................................................................. 12
9. Internet Explorer .................................................................................. 13
10. Sound recorder ................................................................................... 14
11. Clock ................................................................................................... 15
12. Calculator ............................................................................................ 16
13. Camera ............................................................................................... 16
14. Gallery ................................................................................................ 18
15. Music .................................................................................................. 19
16. Calendar ............................................................................................. 20
17. FM Radio ............................................................................................ 21
18. Settings ............................................................................................... 22
19. Personalization .................................................................................... 23
20. Notices for the use of phone ................................................................ 25
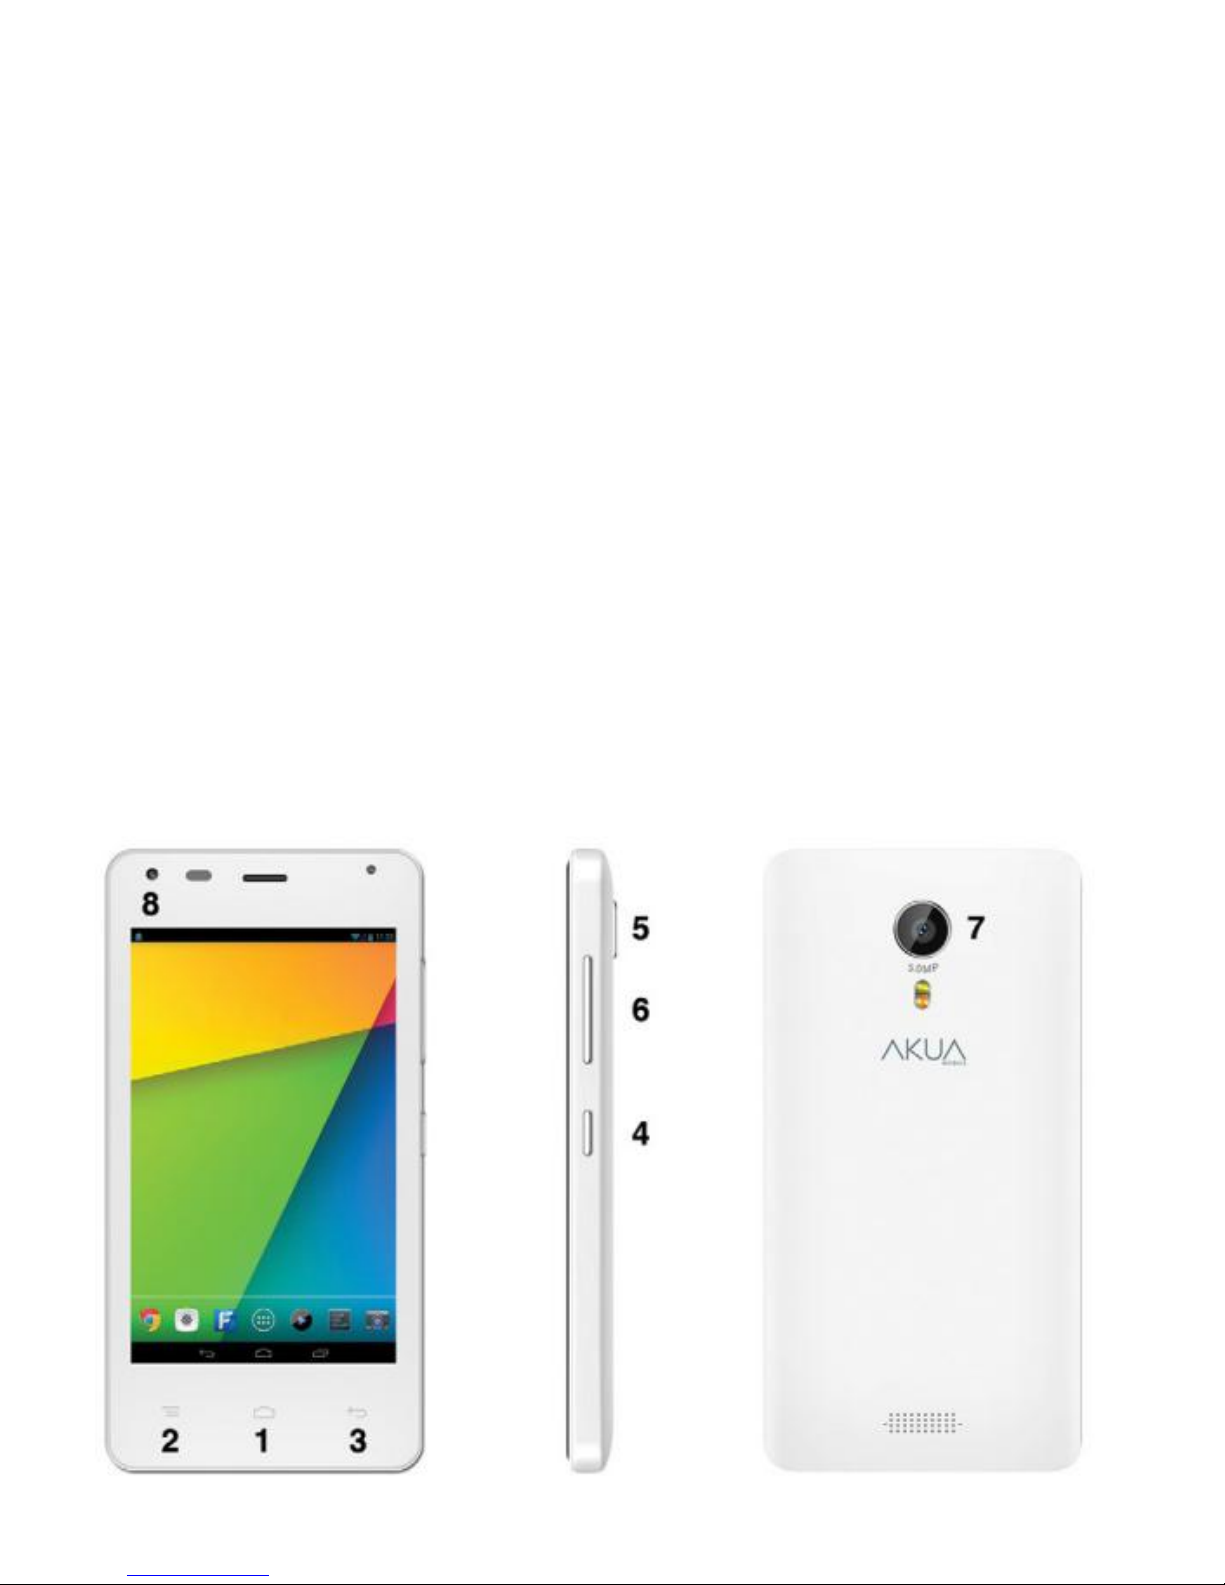
1 . Appearance and Keypad Operations
Page 2
EK4e User Manual
4
2016 © Ak u a Mob il e
Keys Functions
(1) Home
-
Press this button to return home from any appli c ation or
interface.
-
Press it to open rec ently opened application window.
(2) Menu
Press it to start t he m enu, which allows you to perform actions
in the current interface or options’ m enu.
(3) Back
Press it to return to the previous interface, or to close dialog
box, options’ menu, notific ation panel or the keypad.
(4) Power
Press it to open t he phone’s menu, then you could choose to
lock the screen, turn off the phone.
(5) Up
-
Press it to increase the volume
-
Press it to turn t he phone to vibration mode from the silent
mode.
(6) Down
-
Press it to decr ease the volume
(7) Back Camera
Entering the camera interface
(8) Front Camera
Entering the camera interface, switched to the front camera
can photo yourself.
(9) TP
Double touch screen unlock, default off
2. Using Memory Card as U Disk
If you want to send music , pictures or other files to the phone’s memory card fr om the
comput er, y ou shoul d set m em or y card as u di sk fi r st.
Set memory card as u di sk
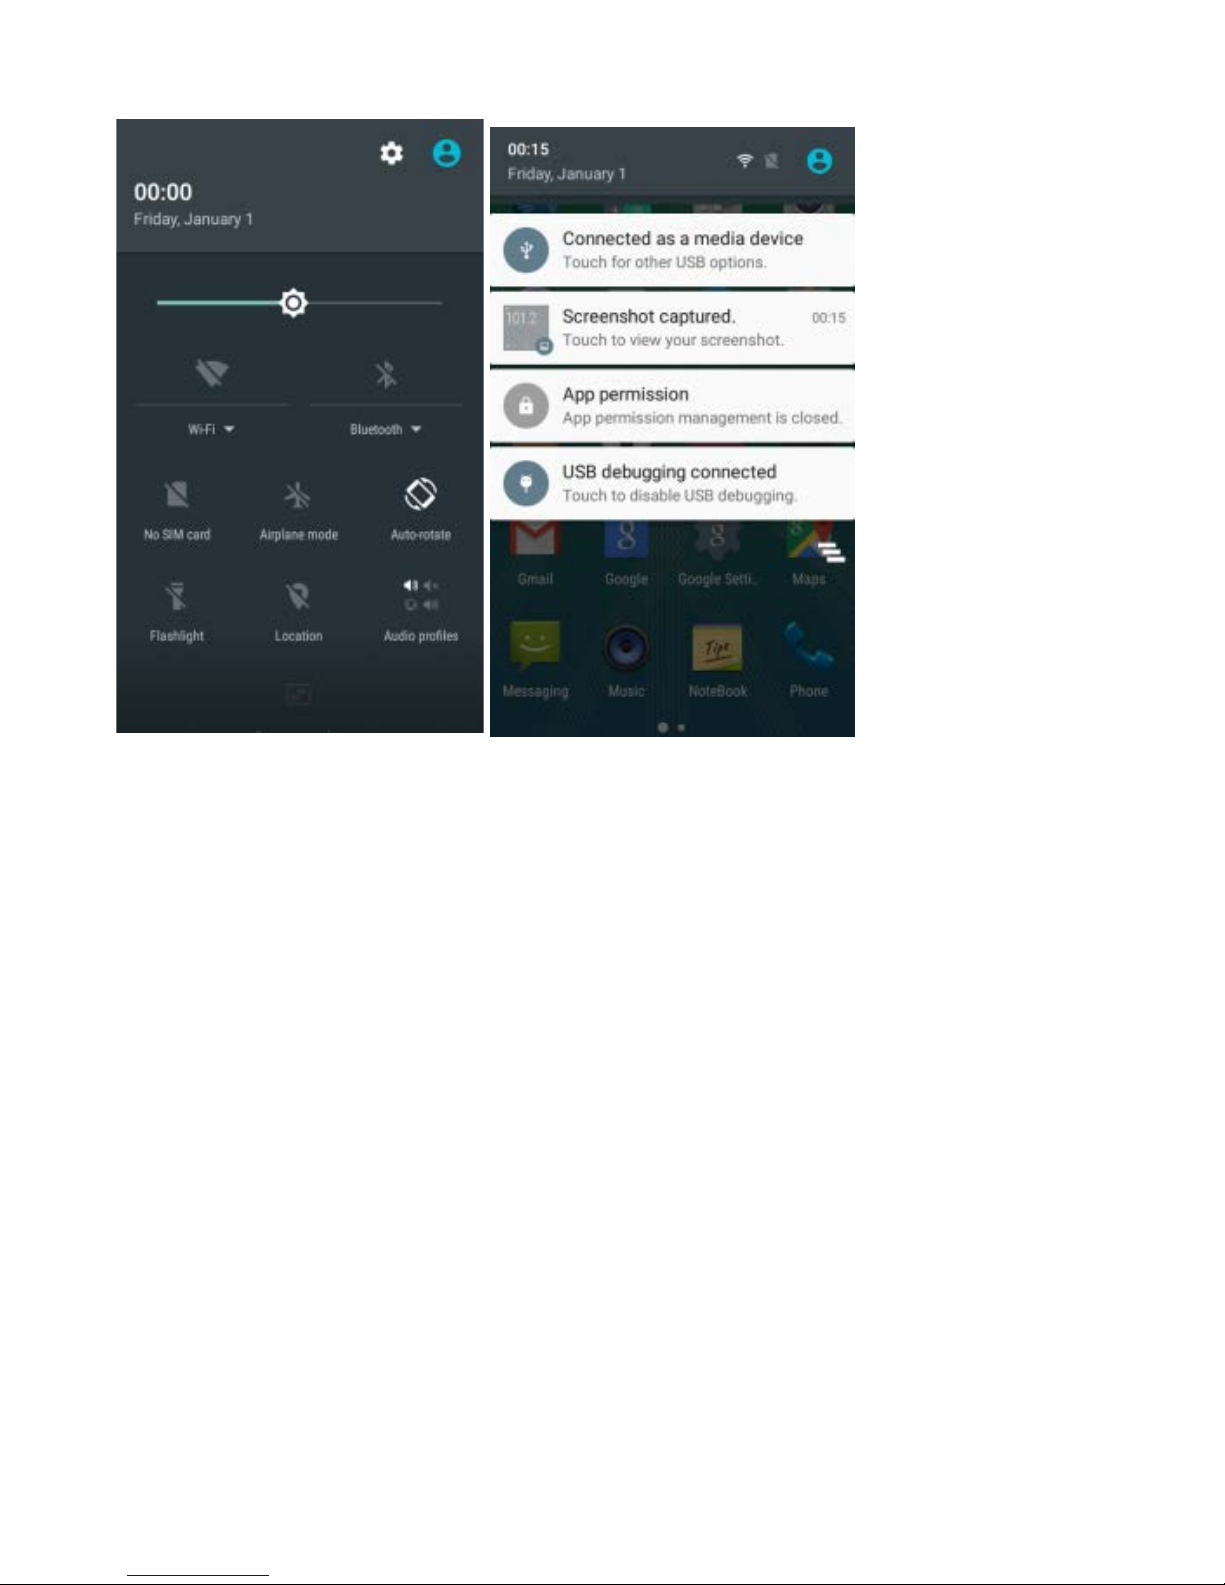
Connect the phone t o the computer with USB cable. The notification ic on will appear
in the stat us box.
Use USB mobil e transmission line will connect ed to the computer
In the notification panel, touch US B is connected, then touch “Open the USB Stor age
Device”
4) After the c onnec tion can be directly in the PC check im ages capt ur ed on c am era
Notice: dif ferent PC operating sy stem to how t o operate to normal use the U disk.
WIN7 Can directly use
XP update windows media player to 11
Install wpdmtp.inf driv er
Vista Unconf irmed
Page 3
EK4e User Manual
5
2016 © Ak u a Mob il e
Notice: O n the PC operation assistant tool such as mobile phone, Must be open the
USB debugging.
Page 4
EK4e User Manual
6
2016 © Ak u a Mob il e
3. WLAN
Wi-Fi provides as far as 300feet (100M) range of wireless network acces s. If you use
cell phone to connect W i-Fi, you should connect to the wirel ess access point or “hot
spots”.
Notices: The availability and coverage of Wi-Fi signal depend on the number ,
infrastr uc ture and other objects penetrated by the signal.
Open Wi-Fi and to connect to the wirel ess network
Press home>menu, then touch settings>Wi-Fi and internet
Select the Wi-Fi box, to open Wi-Fi. Phone will automati c ally scan for available wir eless
networks.
Touch Wi-Fi settings. Then a li st of Wi -Fi net work will show the founded network name
and security settings. (Open net work or WEP/WPA/WPA2 with password).If you enable
the notific ation in Wi-Fi settings, the status box will show this icon ) when open
avail able wir eless network founded.
Touch one of the Wi-Fi choices to connec t the network. When you c hoose open
network, phone will connect to it autom atically. If you choose WE P /W P A/WPA 2 with
password, you shoul d type the password fir st, then touch to connect it.
Page 5

EK4e User Manual
7
2016 © Ak u a Mob il e
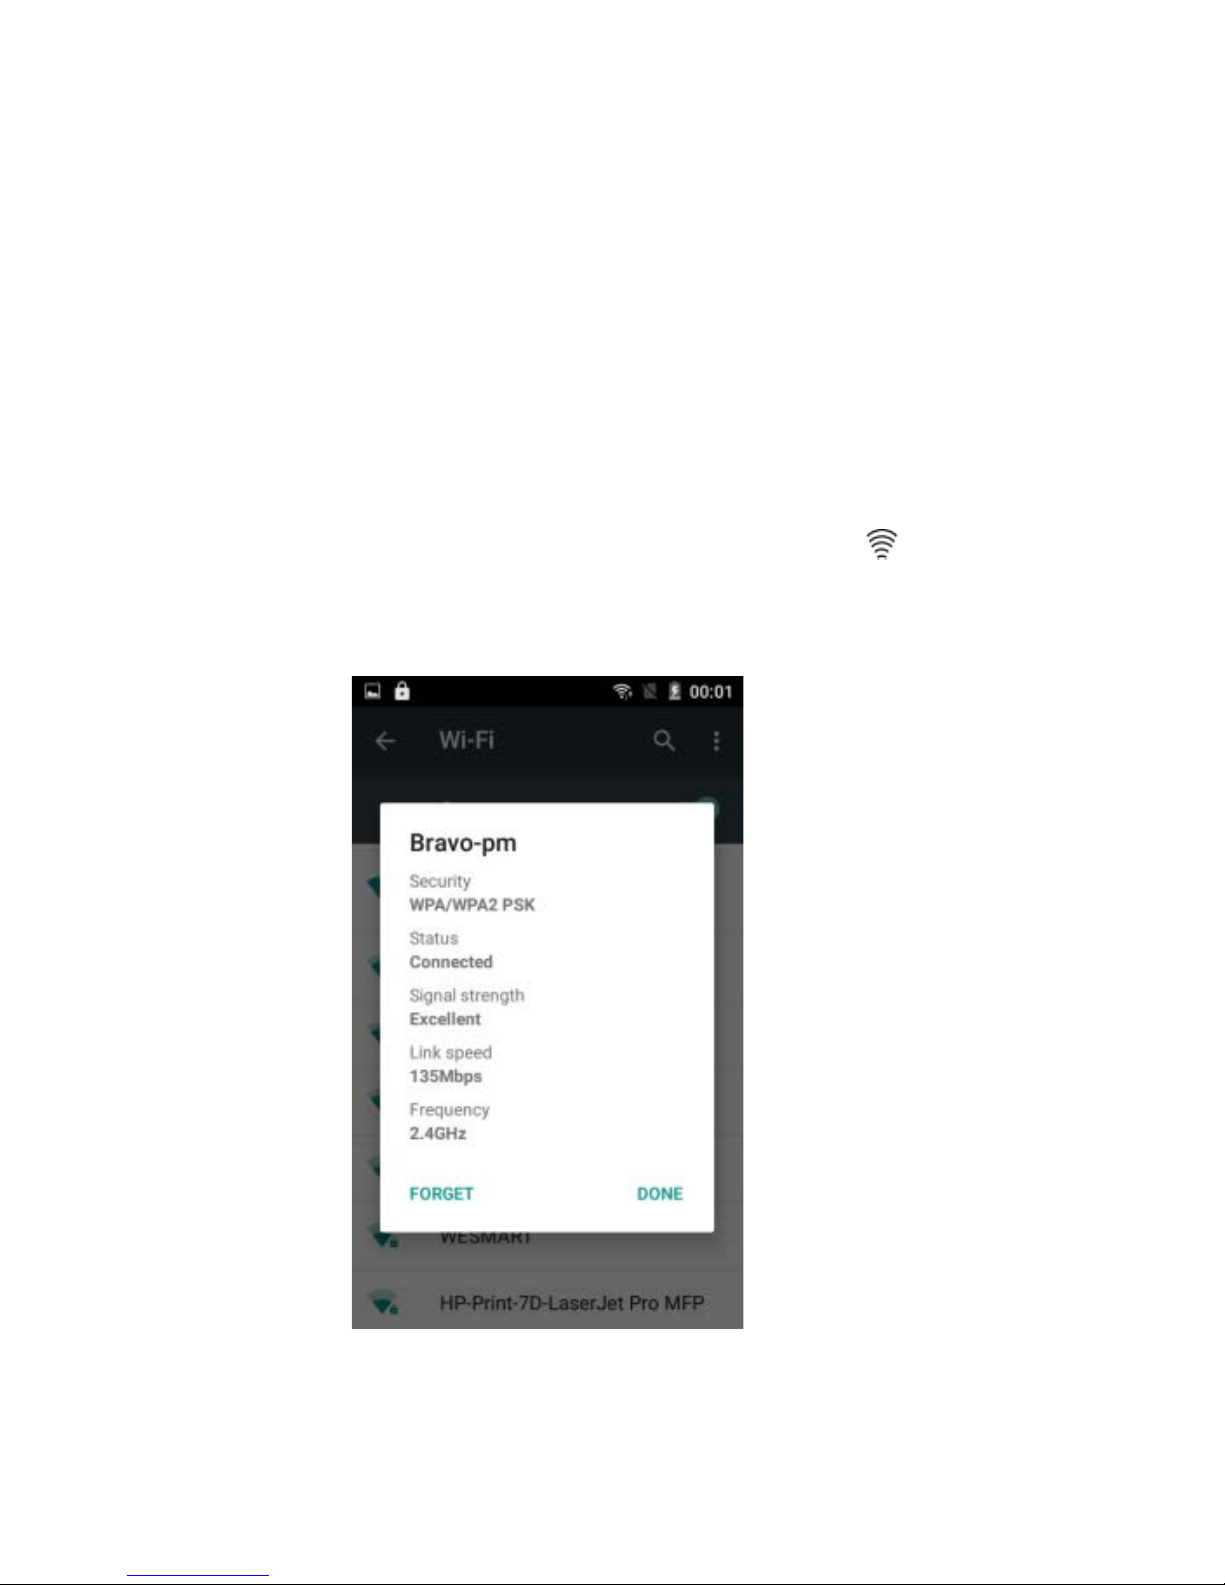
Notices: When t he phone is c onnec ted to the wireless netw or k, the status box will show
this Wi-Fi icon, and the approx im ate signal str engthen (the number of lit bars) .If touch
the connected network, will display the name of Wi—Fi network, status, speed, signal,
strength, security, inform ation and IP address.
If you want to delete the wireless settings, please touch “not r eserve” as in the right
pictur e. If y ou want t o connect to this network, you should r e-enter these settings
Notices: Unles s y ou c hoos e not t o reserv e the network with passwor d, ot herw is e, there
is no need to re-enter the cor r es ponding pas s word when next time connect ing to the
previously encrypted wireless network. Wi-Fi will search autom atically, t hat is, phone
needn’t to perf or m additional steps to connect Wi-Fi networks.
Connect to ot her Wi-Fi networks
In the interface of wireless and network, t ouc h Wi-Fi settings. The founded Wi-Fi
networks will show on the Wi-Fi network list.
Touch other Wi-Fi networks, and then you can connect to this network.
Notices: in addition, you can surf the int er net via GPRS. We default that the GPRS
in SIM1 is opened after s tarted, users can select manually , the specific location
is “sett ings> wireless and int er net> data connection”, t ouch “SIM1/SIM2/no dat a
connection”, w hen the dot turns green, it’s already opened.
Page 6
EK4e User Manual
8
2016 © Ak u a Mob il e
4. BT wireless
Turn on BT wirel ess or set the phone can be detected
Press home>menu, t he touch settings.
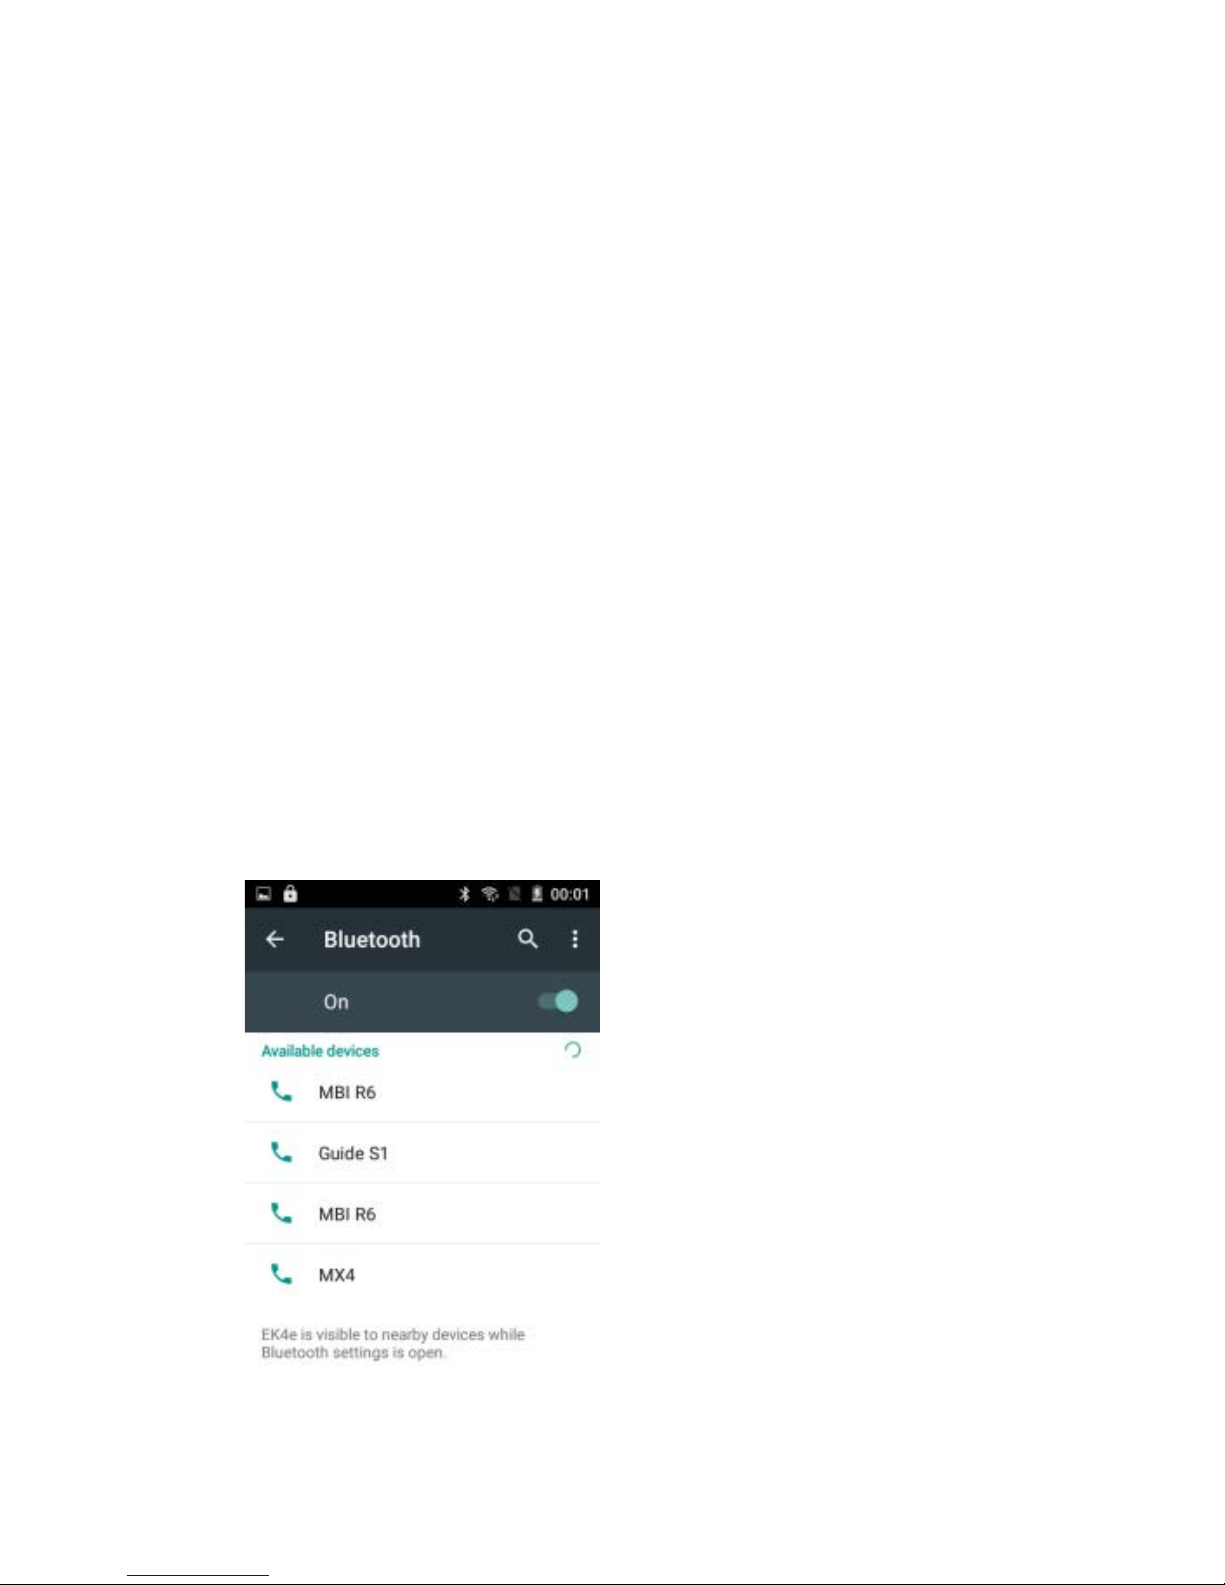
Touch wirel ess and int er net, then choose BT wireless box to open the BT wireless
function. After started, t he status box will show the BT wireless i c on. Touch “scan for
devices “then it starts to scan for all dev ic es within range.
Touch BT wirel ess setti ngs, all the devices founded will displ ay in the list under the
icon.
(select the box “can be detected”, set it to be detected, the other BT wireless devices
will be able to find the phone.)
Important: the maximum detecting time of the phone is 2 minutes.
Pairing and connec tion of BT wireless headset
1)
Press home>menu, then touch settings.
2)
Touch wirel ess and internet >BT wireless sett ings, then selec t BT wirel ess box, then
your phone will scan for the BT wireless devices within range, and show the founded
devices in the list under the icon.
Tips: If the list can’t find your equipment, touch scanning equipment t o re-scan it.
Make sure that t he dev ic es wanted are under t he detected mode.
3)
Touch headset in the equipment list to finish the connection.
Notices: gener ally B T wireless devices need pas sw or d to be paired, often us e “0000”as
the default pas sw or d.
4)The pairing and connec ting status will show under the headset in the BT wireless
devices list. When the headset connected to your phone, the stat us box will show this
icon means connect ed. Then you can use the headset to make or receive callings.Cut
the connection to the BT wireless
Page 7

EK4e User Manual
9
2016 © Ak u a Mob il e
Press home>menu>settings> wir eless and internet>BT wireless settings.
In the list of BT wirel ess equipment, touch or tap and hold the connected hand-free
headset.
Press and select “c anc el the pairing”.
BT wireless proximity sensor
After pairi ng the two device, you can test out the signal is strong or weak by the BT
wireless proximity sensor devic e
5.Mail
5.1 Gmail
Create an elec tronic mail account
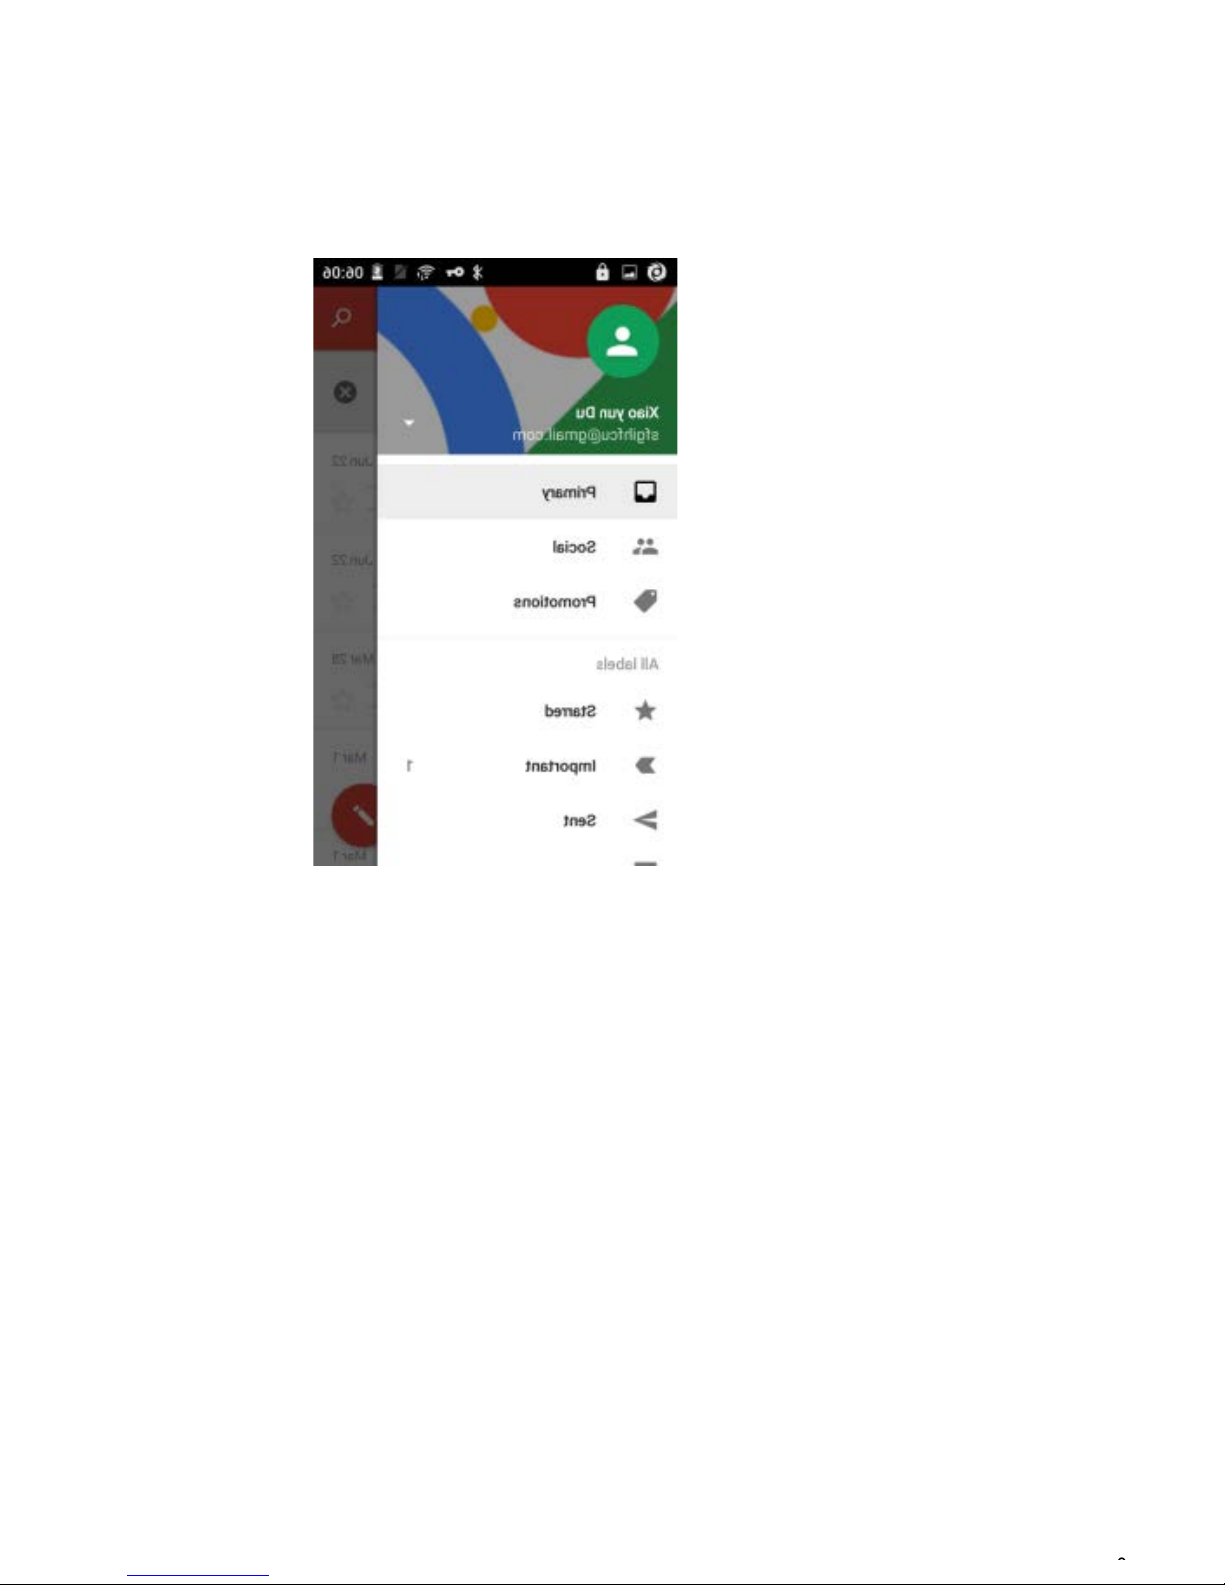
Select mail>settings. Y ou can activate or edit existi ng e-mail ac c ounts as well as
create a new e-mail acc ount.
Select mail, Google account setti ng interface appears. Then t ouc h ‘nex t step’>create
account> enter name, last name and e-mail account .
Google serv ers determine whether the name can be used, if so, new interface appears
prompti ng enter password, then judge the password’ securi ty, users who doesn’t meet
the requir em ents need to re-enter the password.
Successful ly register a new Gmail acc ount, a m essenger c r eated automatic ally for
testing.
Loading m ail ac c ount
a.
Open Gmail ski p introduc tion screen>l oading interf ac e appears>select load
b.
Enter name, password then load
E-mail account init ialization, pr om pting “login successf ul” All Google accounts will be
synchronized.
Creating and sendi ng,mails
When creating m ails, select mail> c r eating mails. Enter the address (recipient)/
theme and contents. Press MENU you could ‘append’/‘Add Cc/B c c ’, selec t send or
discarded.
Receive mails
There is tone for new mails, in the status box will show Gm ail button, Press
Menu>‘ref r esh’, r efresh and update the number of the unread mails in a proper way.
Delete mails
When loading a mail ac c ount, if you want to delete it, you need to restore factory
settings. W hen loading a second one, you could press the menu button to delete it.
Notices: m any functions depend on Gmail Account , for example: Elect r onic M ar k et/
Google Talk/ S y nc Contac t and Calendar.
5.2 Email
Load Email.
a.
Open network connection,
b.
In setti ng the acc ount interface, input the correct email address and pass word
and click next m obile phone automatically complete the sending and receiving
server Settings. Pop-up mail fi nd frequenc y , and user Settings interface, complete
Settings, click next.
For account creat ion name, the editor of the law that em ail user name, and click next.
Page 8
EK4e User Manual
1
2016 © Ak u a Mob il e
Complete set, synchronous mail box .
Create and send Email
When creating m ails, select mails>cr eate mails. Enter the address(recipient) /theme
and contents. Pr ess MENU you could ‘append’/‘Add Cc/Bcc’, select send or discarded
or save as draft.
Check the Email files
Click on the bottom folder options, li st all folder options
6. Dialling
When the icon of i nternet server appears in the screen, you coul d dial or receive
calli ngs. The signal bar on the top right corner show the str ength of network signal (the
maximum with 4 si gnal bar s) .
Start dialing
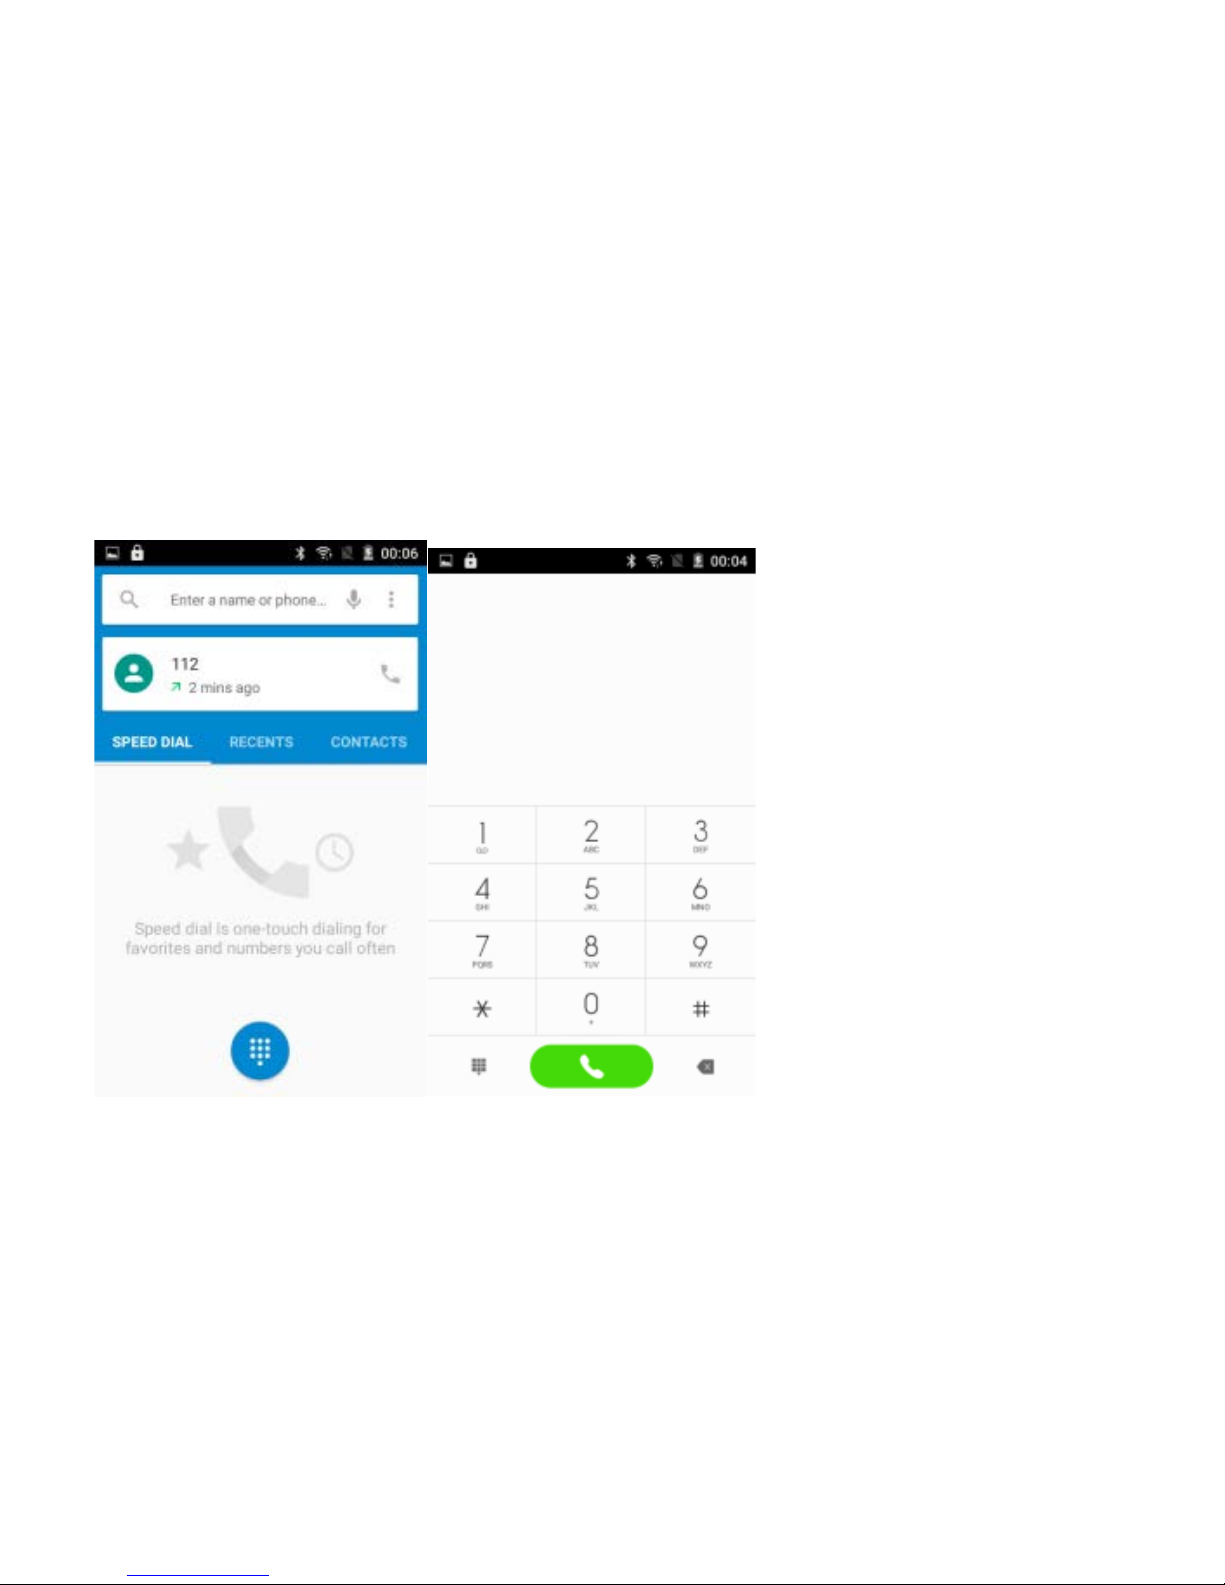
Open application’s main menu> dial. You could choose SIM to do the diali ng.
Dialing
At the dialing Keyboard, enter the phone number, and then clic k the dialing key, after
that, you should choose one SI M c ar d or internet call. If needed to call the extension,
you could clic k the “dial pad” in the bottom of the screen to open the interf ac e or press
menu key to select “ delay 2 seconds”, and then enter the num ber of t he extensi on.
Telephone calls in the call log
Every telephone number called and rec eiv ed in S IM will reserv ed in phone’s menu of
call log. On t he top lef t of ev ery call r ec or d will sho w SIM
All numbers i n the call log c an be dialed by clicking the button ” dial” on the right si de
of the screen.
Page 9
EK4e User Manual
10
2016 © Ak u a Mob il e
When number li st appear ing, click it to catch details: press it for long you could dial via
SIM, meanwhil e y ou c an edit, delete, save the number or do other oper ations.
Receive callings
When calling c om es (t op left will sho w from which SIM card) press “Answer” and slide
towards right until the middle button, then you can receiv e calli ngs.
Proximity sensor
Accordi ng to t he distanc e between phone and human body, it will adjust automatically
the switch of t he bac klight.
During the c all, close the phone to the ear, the backl ight will turn off automatically,
which could sav e batt er ies and prevent inadvertently touching.
Refuse to answer the phone
When standby, calling comes, press “refuse” button and slide towards left side until the
middl e butt on, t hen y ou c ould r efuse the calling.
When using, calling comes, click on the “ r efuse” button to refuse the calli ng.
Two-way call/multiparty call (conference c all)
Notices: this function needs t hat SIM c ar d open m ultiparty call features.
Already exi st a c all in the phone
Click “A dd call s”, dial another call (or rec eiv e another call, phone default open ” c all
waiting”(settings–dialing setti ngs–other dialing settings) , aft er both connected, could
view the status of calling.
3)
select “com bine c all”– you can combine two call s i nto one way.
4)
after multiparty call connect ed, you could separate t he cal ls or hang up one of them
via “the small ar r ow of conference call”.
Telephone rec or ding
Page 10

EK4e User Manual
10
2016 © Ak u a Mob il e
During the c all, more>start record, you could record the dialog of the call.
1)
settings>set other functi ons of the call in the diali ng settings, for example: Call
Transfer– after all the settings finished and turned on, you coul d transfer the call to
a certai n number.
2)
In settings>dialing settings>other dialing settings, open “call waiting”. After turned
on, you can receiv e anot her call when already ex ist one, T he answering and rej ect-
ing functions are just like the ordinary phone.
Call settings
Voice Call
1)
Voice Mail: The voice mailbox in setting in the input voicemail number.
2)
IP prefix number: Setting the differ ent of SIM cards IP prefix numbers
3)
Call forwardi ng: Can set respectiv ely a SIM card, t he line is busy, and no one has to
receive, not be c onnec t f our c onnec ting way
4)
Call barring: can set respectiv ely to the SIM c ar d call restrictions
5)
Additional Settings: a. My phone number b. Call waiting
Internet call
Account
Use Internet calling
Other Setti ngs
Fixed Dialing Numbers
Minute Remi nder: Turn on minute reminder at 50s of every minute. Qui ck Response:
Can edit the text m essages rej ec ted by the informati on when content.
Page 11

EK4e User Manual
10
2016 © Ak u a Mob il e
7. Messaging
Important: the message title of t his phone i s the phone number, will be reserved in s
similar for of dialog, instead of t he usual folder structure. M essages with
bluebackground ar e those received, and messages wit h white background are t hose
sent. Send SMS to certain phone number
Press home>messaging, touch “ new messages”.
In the interface of “edit”:
Click “r eci pient” box to start input met hod, you c an also click “enter” box to star t input
method, in t hat way you can ent er c har ac ters.
Click the button of send from SIM to start sending.
Send MMS to certai n phone num ber
When creating m essage, i t was defaulted as SMS, it will be t ur ned to MMS when
following operations were done. You can send MMS via c licking “send” after editing.
In the interface of “edit”, Click the but ton of “+key”:
Click “append” , you can spend the following at tachments, then it will be turned to MMS
automatically.
Send messages to mult iple numbers
Enter multi ple numbers in the box of enteri ng, each number is divi ded by the c omma
in Engli sh.
Click on the right si de of t he head with the receiver plus icon, can c hoose cont ac t
group in the addr ess book
Notices: For now this phone can m as s m es s ages to almost 20 numbers, the correct
number depends on the charact ers, you can only enter 312 characters in the box of
“recipient”.
When a message is sent or sent agai n, a little yellow letter will appear . The number 1 or
2 on the letter ref er s to SIM.
When message sending failed, a red tri angle with exclamation will appear .
when editing information other functions of Menu button
Page 12

EK4e User Manual
10
2016 © Ak u a Mob il e
8. Contacts
Open the menu of appli c ations>contacts
1)
Default displ ay phone c ontacts and SIM card contacts, sort contacts by fi r st letter
of alphabet.
2)
Click Sear c h Icons, Y ou c an enter the contact search interface.
a.
To enter the Numbers or letters and the list of names of the agreem ent, which will
be shown in the search results.
b.
If it were not so search to m atch of t he c ontact, interface will appear ‘not find any
contact.
3)
Click “A dd Contact” Icons, Can create New Contacts
Select save c ontacts to phone or a a SIM card, into contact editing interf ac e.
You can edit cont ac t head, nam e, t elephone number, group, save to and more, and
then clic k “fi nish”.
4)
In contact interface, click on the Menu button
Menu>Delete contacts
Can “All” Icons checked, click the delete button, delete all the contact person,
including cell phone and SIM card of contact.
Can separate check one or more contacts, cli c k the delete, delete the selected all
contacts.
Menu>To displ ay of t he c ontact
You can choose all c ontact, one a SIM card of contact, the mobil e phone c ontacts
Choose fr om t he definition, but al so on a SIM card and cell phone choice whether or
not to show that all the lone contacts.
Page 13

EK4e User Manual
10
2016 © Ak u a Mob il e
Menu>Import/export
In the mobile phone can local, SIM card and SD card three parties achieve contact
inform ation of the copy each other.
First choose the “copy source” and then select t he nex t step, sel ec ting copy cont act
to, can com plete the contact’s copy.
Menu>Share visible contacts
All cont acts can be impor ted into the SD card, or through BT wireless, email, text
message or MMS share
Open the appli c ation interface> Contact, change to the group.
Click “Add group” Icons can create new group, Just to be saved in a cell phone group
2)
In “the group nam e” col um n input group name, in “type in the contact’s name”
column input contact key word, can be in all of contact search, and added to the
group. Finally cli c k “finish”.
3)
In a group, clic k on the M enu butt on, Menu functions
a. Menu>Update
You can modify the group name, delete or add group of contacts
b. Menu>Delete
You can delet e the group, and will not delete t he contact itself.
c. Menu>Send messaging by group.
Automatic new information, and the gr oup added to contact the address bar
recipients
d. Menu>S end Email by group
If contact gr oup hav e the sam e em ail addr ess, the automati c new mail, and E-mail
address in the addres s bar add t o the receiver
Page 14
EK4e User Manual
10
2016 © Ak u a Mob il e
9. Internet Explorer
Internet ex plor er
In the interface of internet explorer, touch
address filed and enter the URL.
Use keypad to enter URL. The appropr iate web
sites will appear on the screen. You can touch
it directly go to t he page or continue to enter
URL.
Homepage
Select “homepage” , you could load in the set
homepage. If y ou do not set it , you will use the
vendor’s pre-set sites.
Functions of menu
Menu>Backward
After br owsing thr ough multiple pages, will return
to the previous page the c ur r ent page.
Menu>Forward
After br owsing thr ough multiple pages, will move
to a web page after the c ur r ent page.
Menu>Windows
You can view all open windows to the current.
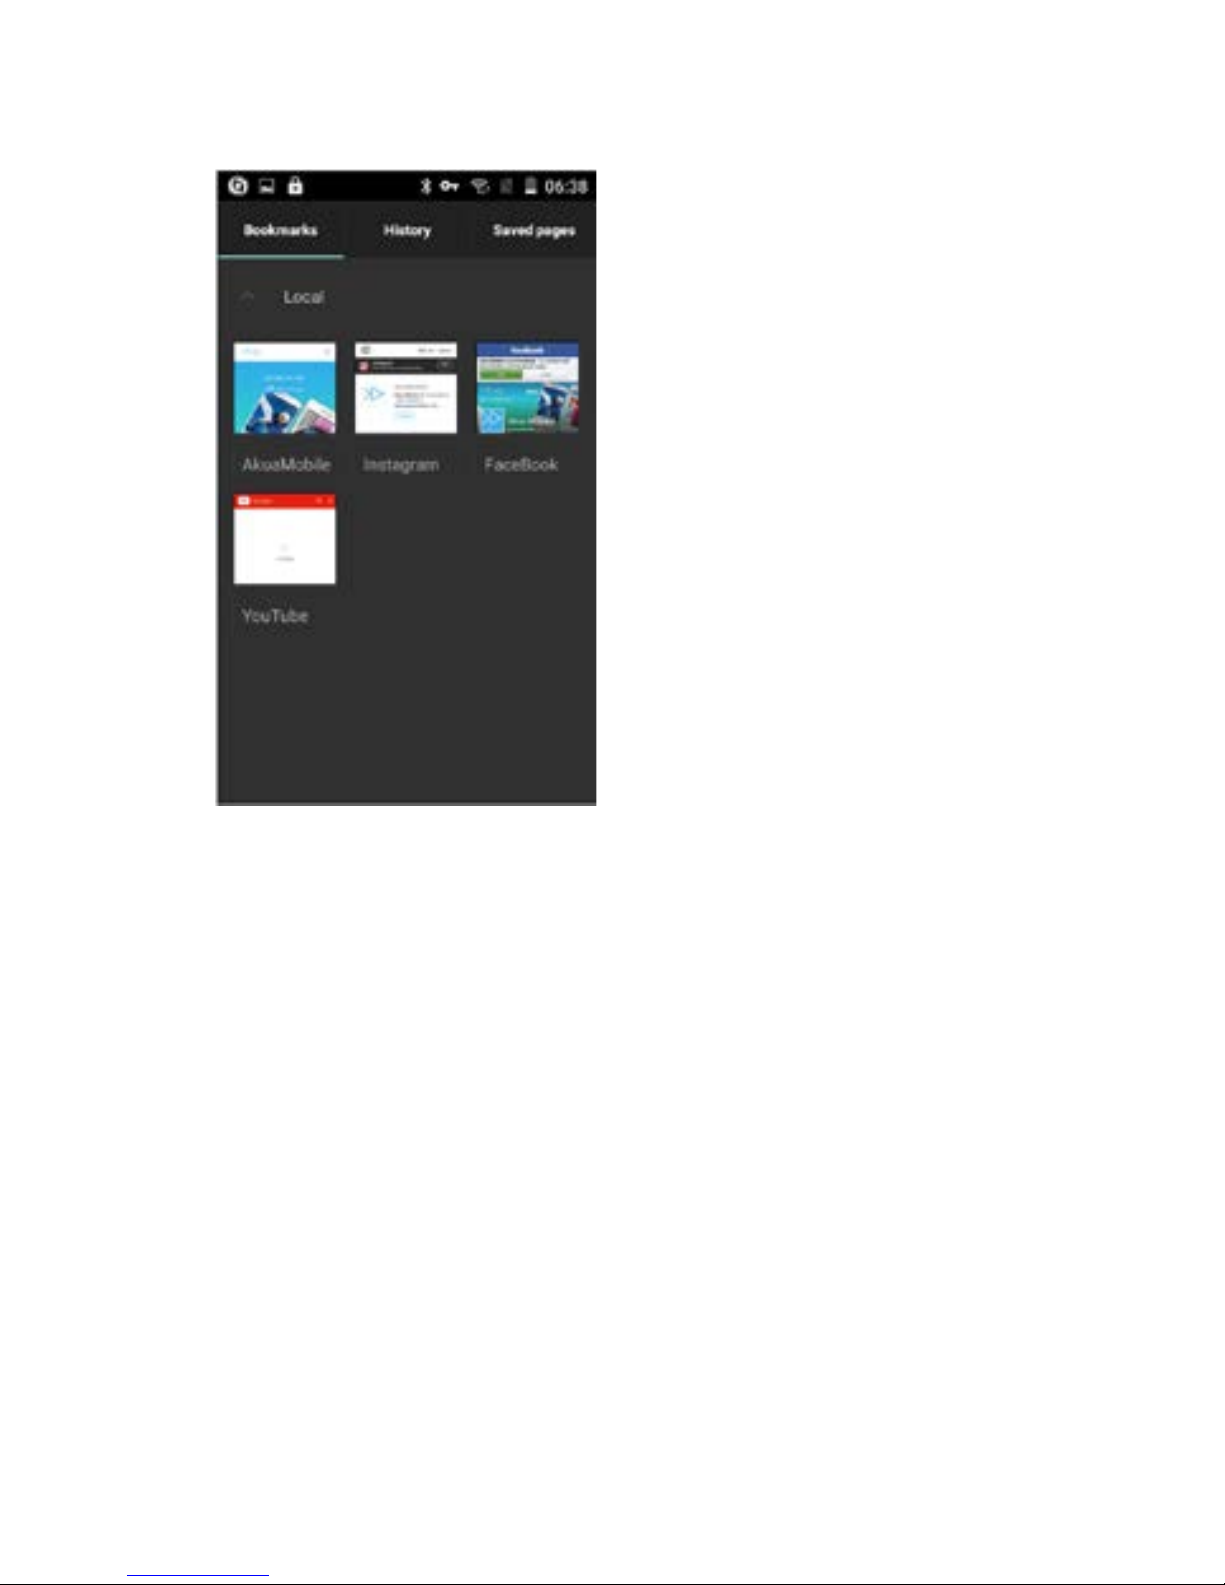
Menu>Bookmarks
Page 15

EK4e User Manual
10
2016 © Ak u a Mob il e
Click the “Bookmarks” to make the current URL as a bookm ar k saved.
Click the bookmar k under the bookmarks list, will open t he URL.
Menu>More
Add bookmar k s, save the current URL as bookmark.
Find on page, search what y ou need in current page.
Select tex t, in the t ext, click and drag to select a piece of t ext.
Page info, display page address and other information of t he c ur r ent browsing.
Share page, select the BT wireless or SMS to share the curr ent page.
Downloads, show all the content downloaded.
History, S how your browsing hi stor y , and view the most visited pages of inform ation.
Setting, c ontains a variety of browser settings.
10. Sound Record er
Recorder can recor d v oice, and send it quickl y via BT
wireless or MMS as well as mak e it as ring tone.
Notices: r ec or der c an only save t he audio files as AMR
format.
1)
Click the recorder application .
2)
Keep the phone’s microphone near the v oic e source .
3)
Click rec or der to rec or d v oic es, and cli c k to stop or
Recording list.
All recordings save in my recording folder in the
default music program.
Page 16
EK4e User Manual
10
2016 © Ak u a Mob il e
11.Clock
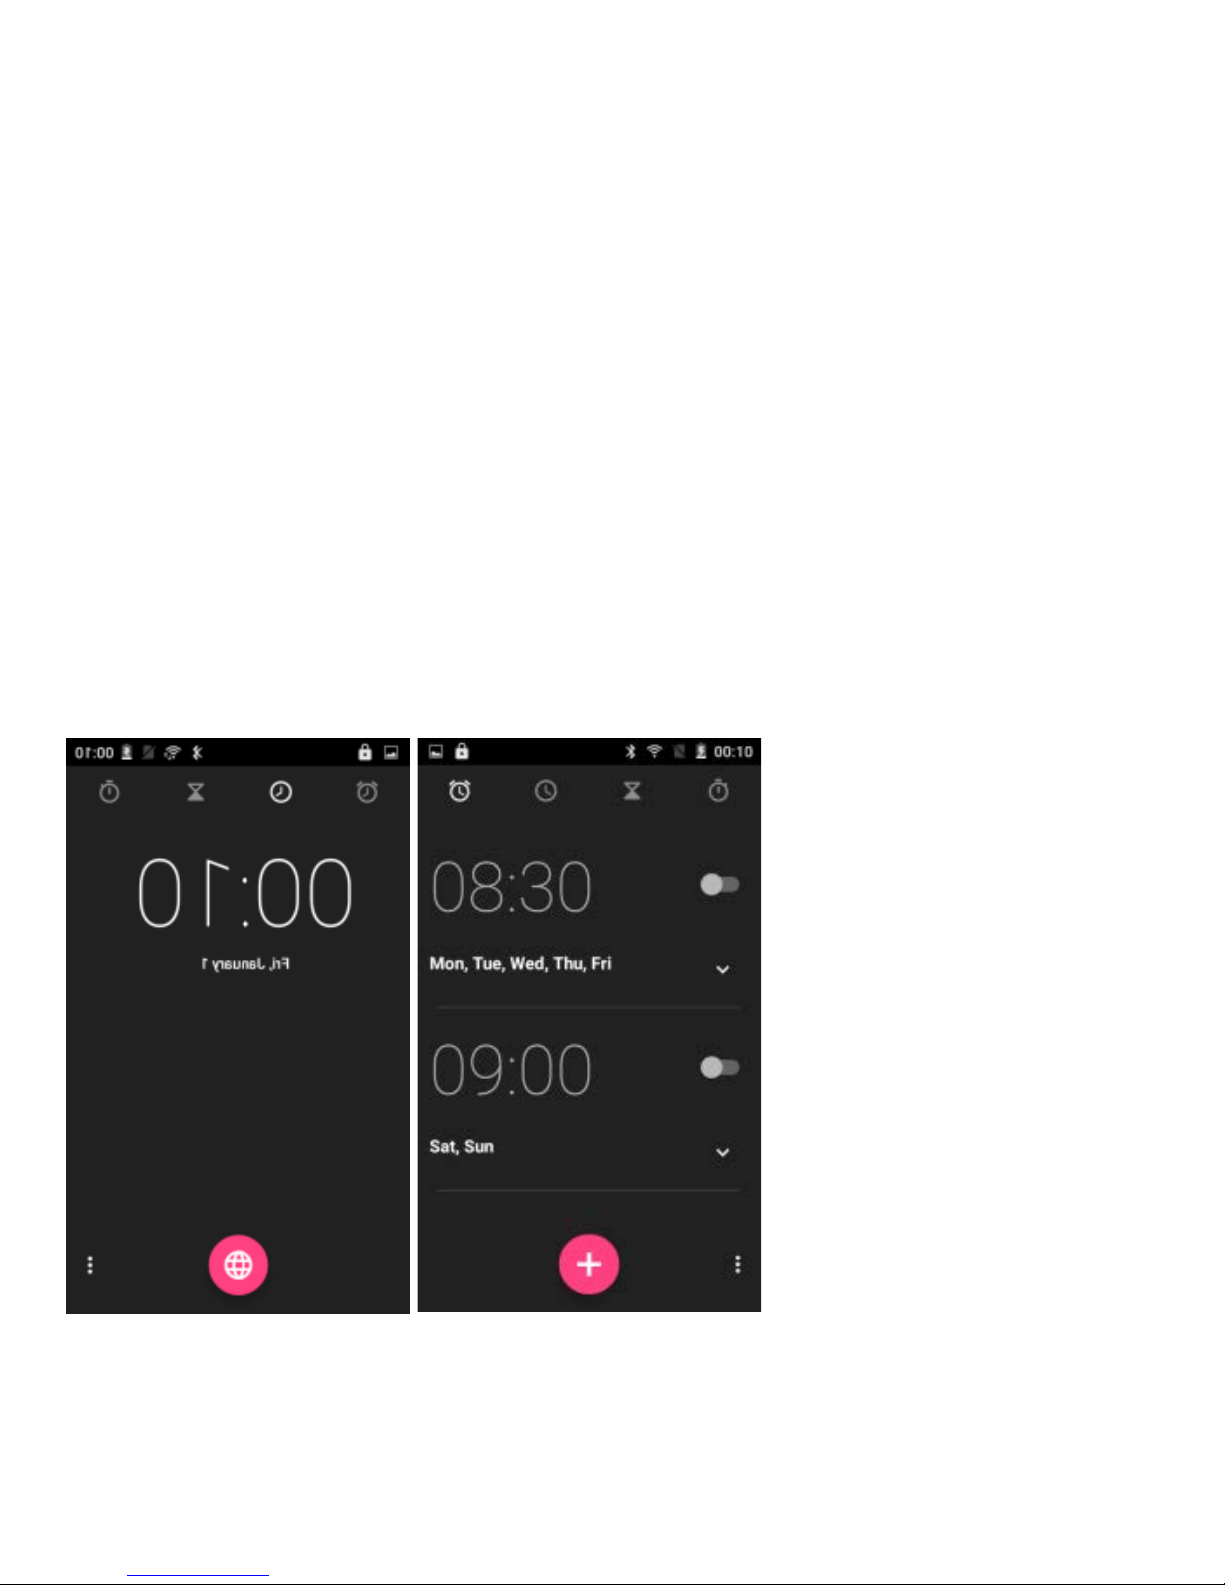
Open the menu of appli c ation, click clock
Click screen exc ept the alarm at any position, screens,
black, tim e with white shows, this tim e the standby time
to screen will not ex tinguish screen. Cli c k agai n on the
screen, and restore normal clock int erface.
Click screen set alarm butt on and
enter the al arm clock set interf ace
Alarm
After functions set, phone will
arrives i n the sett ing time to alert
you by ringing or vi br ating to
achieve its function. Press Menu
to add alarm, y ou can al so add
it from the adding interface. You
could set the alarm according
to your needs. In the interface
of alarm will show three closed
alarms(two alar m cl oc k s are
Monday to Fri day 8:30, 9:00) .
You can edit the c ur r ent alarm ,
you could edit time/ringing tones/
vibration/repeat form and tabs.
Page 17
EK4e User Manual
10
2016 © Ak u a Mob il e
12. Calculator
Calculator
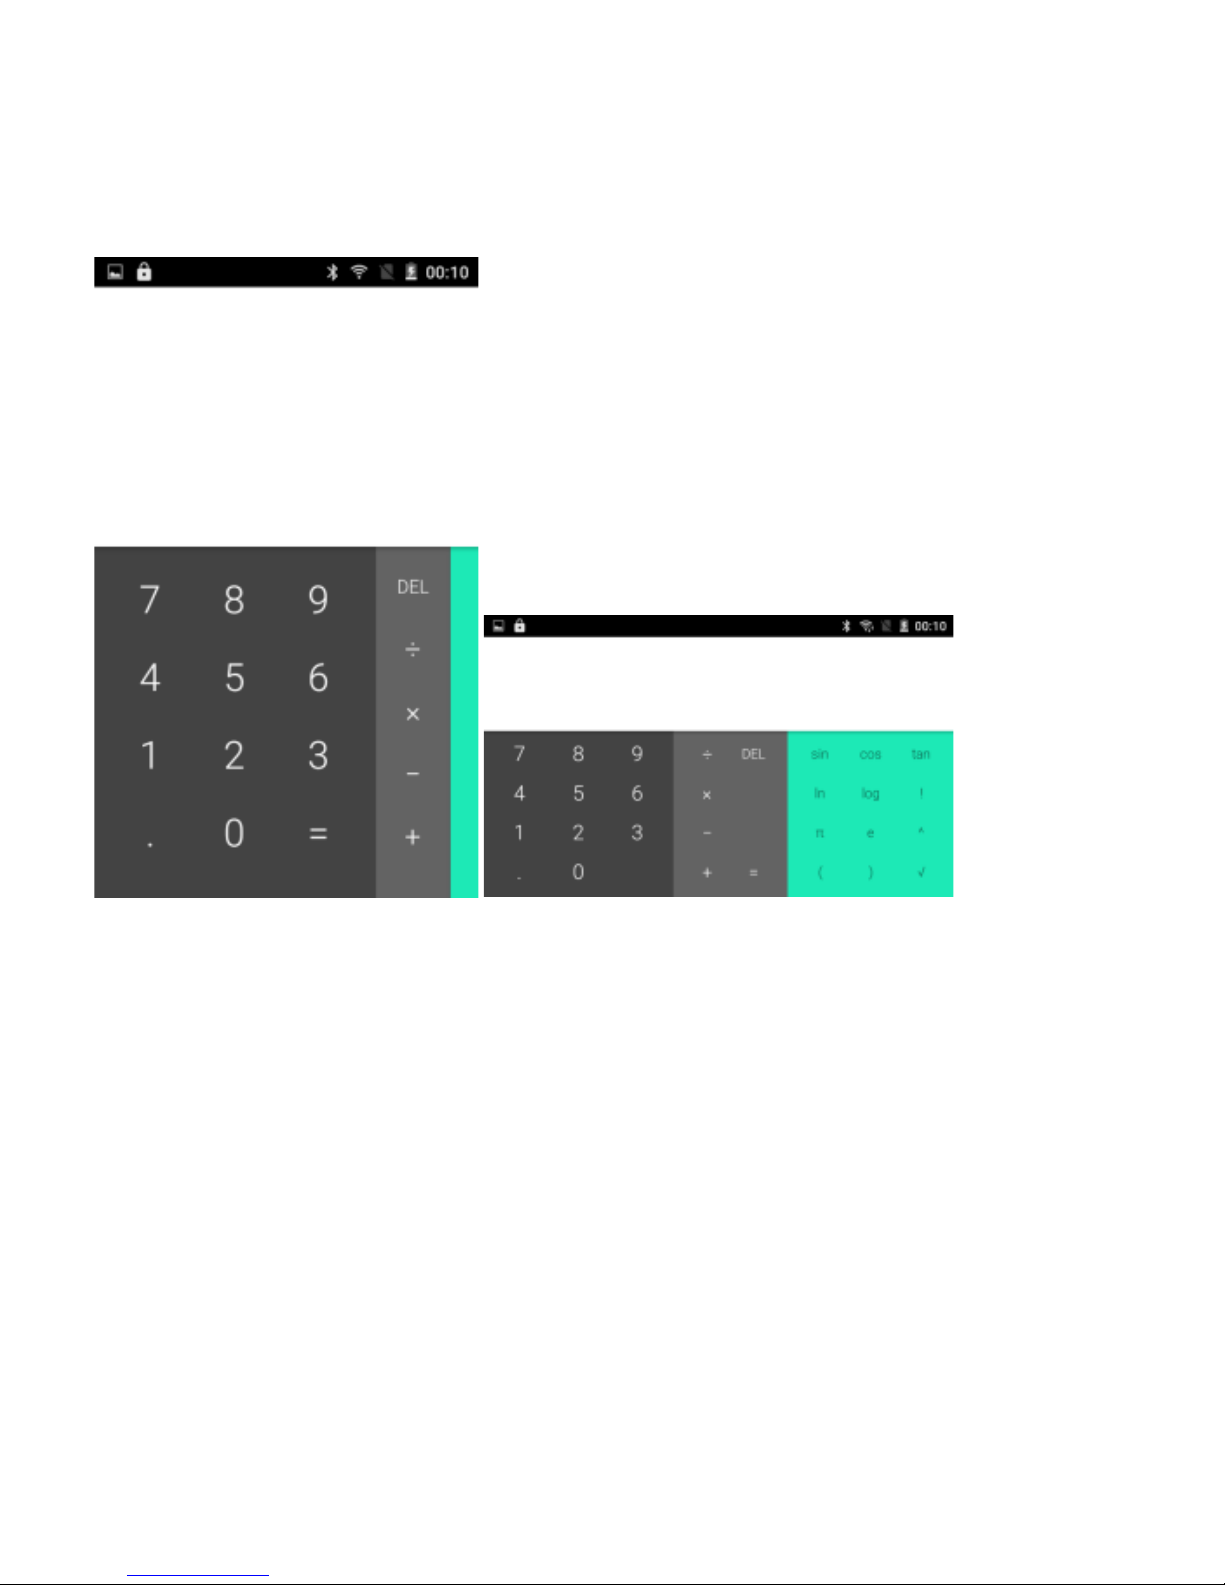
This function can turn your phone into calc ulator, it can do some simple calculations.
Touch the number k ey s to make it appear in the blank box.
In the interfac e of calculator, press menu butt on, then the senior panel appears.
Mobil e phone screen rotat ion direction in the calculat or i nterface can switc h out
the senior panel
13. Camera
13.1
camera
Prior preparation
Install mem or y card before using the camera or v ideo camera. All your phot os or
videos taken by the phone are stored in memory card.
Open camera
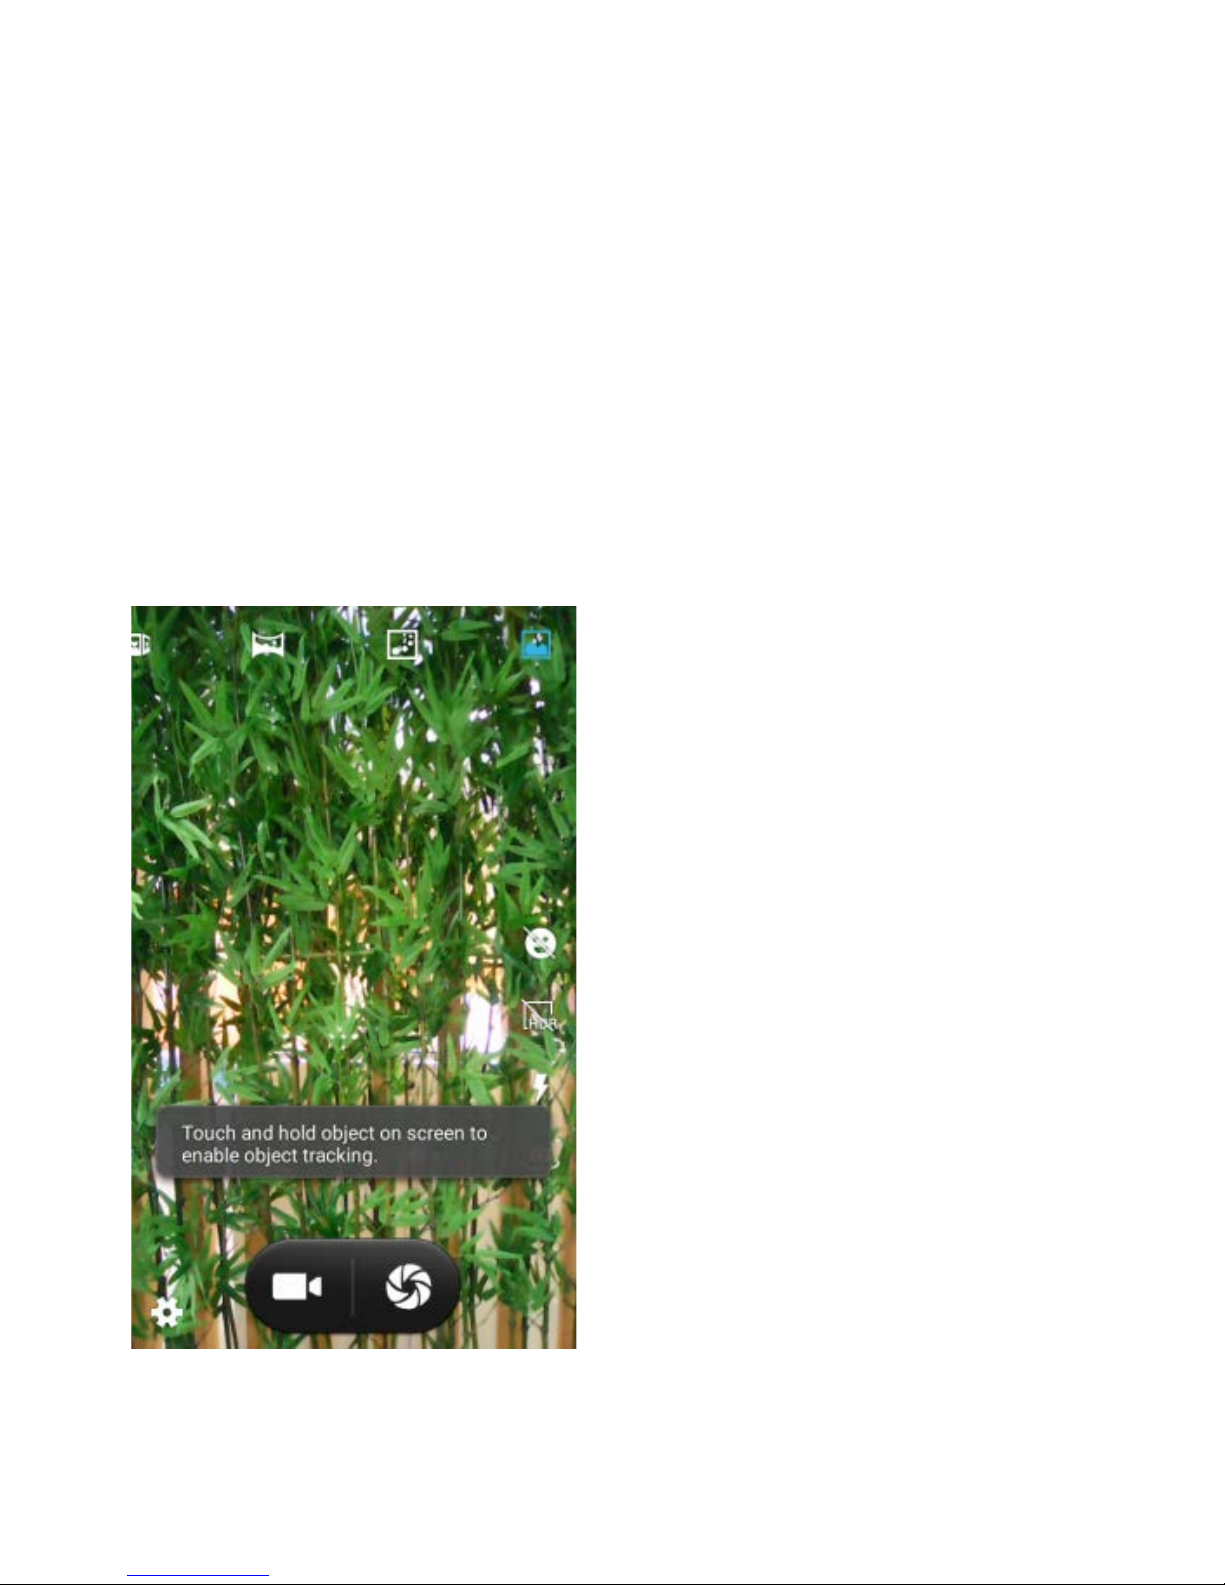
Press home, touc h m enu, selec t camera. Take pictures
1)
Touch the “shutter” button on the screen.
2)
After taking, photos will save to t he camera’s gal ley folder with the name of taking
time.
3)
You can view the phot os by t ouc hing the preview box button.
4)
Camera settings
You can touch t he butt on of “setting Menu” in the int erface of c am er a to do the
settings
Under camer a vi ewfinder mode, press Menu, you can switch t o v ideo or photos’
gallery.
On the bot left of c am era viewfi nder m ode, display the previ ew of t he pr ev ious
pictur e. T ouc h pr ev iew box , t he photo display on full screen and you can enl ar ge
it to view details.
Shared Setti ngs of Cam er a and Vi deo c am er a
Page 18
EK4e User Manual
10
2016 © Ak u a Mob il e
1)
Flash mod e : Au to /On/off.
2)
White bal anc e:
Auto/Incandescent/Daylight/
Fluorescent/Cloudy/Twilight/Sh
ade/Warm fluorescent.
3)
Color effect:
None/Mono/Sepia/Negative/Aqua/
Blackboard/Whiteboard.
4)
Scene mode,
Auto/Night/Sunset/Party/Portrait/
Landscape/Night
portrait/Theatre/Beach/Snow/
Steady
Photo/Fireworks/Sport/Candle
light.
5)
other settings: store location,
exposure, image properties, antiflicker
Camera Setti ngs
Capture m ode: norm al/HDR/Face beauty/
Panorama
self timer: off, 2 seconds, 10 seconds
continuous shot: 40 shots, 99 shots
pictur e si z e: QVGA, VGA, 1M pixels, 1.3M pixels,
Page 19

EK4e User Manual
10
2016 © Ak u a Mob il e
2M pixels, 3M pix els, 5M pix els
13.2 Video camera
Prior pr epar ation
Install memory card befor e using the camera or vi deo
camera. All y our photos or videos taken by the phone
are stored in mem or y card.
Take video
1)
Aim your obj ect with the
screen.
2)
Touch the “shutter” button
on the screen.
3)
After taking, photos will
save to the camera’s
galley folder with the
name of taking time.
4)
You can view the videos
by touching the preview
box button.
5)
Video camer a settings
You can touch t he butt on
of “set” i n the int erface of
camera to do the settings
Under camera viewfinder
mode, press Menu, you can
switch to v ideo or photos’
gallery.
On the top right of cam er a
viewfinder m ode, display the previ ew of the previous video. Touc h pr ev iew box, the
video will displ ay on full screen and you can touch the play button to view it.
Shared Setti ngs of Cam er a and Vi deo c am er a
1)
Flash mod e : Au to /On/off.
2)
White bal anc e: Auto/Incandescent/Daylight/Fluorescent/Cloudy/Twilight/Shade/
Warm fluorescent.
3)
Color effect: None/Mono/Sepia/Negative/Aqua/Blackboard/Whiteboard.
4)
Scene mode, Auto/Night/Sunset/ P ar ty/Portr ait/ Landscape/Night portrait/Theatre/
Beach/Snow/St eady P hoto/Fireworks/Sport/Candle light.
Page 20

EK4e User Manual
10
2016 © Ak u a Mob il e
Videos setti ngs
1)
Microphone: off, on
2)
audio mode: meeting, normal
3)
time lapse i nterval: off, 1s, 1.5s, 2s, 2. 5s, 3s, 5s, 10s
4)
video quality: low, medium, high, fine
Page 21

EK4e User Manual
10
2016 © Ak u a Mob il e
14. Gallery
Open images
Press home, touc h label of applicati ons, then touch photos’ galley.
In the interface of camera, Press menu to open it , t hen touch to operate.
Files Int erface
In the library the interface, upper right a slide show the play button, click on the way to
the slide ci r c ulation play all image files.
Click on the images, ent er the picture to see int erf ac e.
Choose a long press image files, pop-up correspondi ng operation.
Use images
After taking pictures, you can view them and share t hem with your friends.
Use E-mail to send pictures: c hoose Gmail or E-mail, pictures wil l be automatically
added to an E-mail. Write your information, click send.
b. Use Messaging to send pic tures: Select the information, pi ctur es wil l be additional to
the MMS. Write y our i nform ation, click send.
C. Use BT wireless: BT wireless list, select alr eady pairing of BT wirel ess equipment,
through
BT wireless send a pict ur e.
3)
check pictures
In the photo v iew interface, on the screen or so slip, can forward or backward view
photos Edit pic ture.
Edit light: Fill Light Highlights Shadows Auto-Fix.
Edit im age eff ects: Cr oss-proce s s Posterize Lom o Documentary and so on.
Color Effec ts: Warmth Saturati on B &W Sepia Negative Tint Duo-tone Doodle.
Crop: Crop Red Eye Str aighten Rotate Fli p Sharpen.
4)
Crop pictures:
a.
If you want to adjust the size of the clip, please hold t he edge of the cutting t ools.
The arrow appears cl ip, from the trim your finger s i nsi de or outsi de the center to drag,
can adjust its size.
b.
If you want to adjust the big hours in the clip that keep proportion, please hold down
any of the four cor ner s of the one.
c.
If you move to the clip of t he pic ture area of the other, please hol d c utting is inter nal,
then mov e to drag the fi nger s to the position.
View images
1)
In the pict ur e interface, touch photo album to view images.
2)
Touch the thumbnail to view pictures on full screen.
You can choose to displ ay small or large thumbnails. Hold down the screen t owar ds
the left si de to view the next photo or towards right t o v iew the prev ious one.
In the photo album or li st, press and hold down the picture toward s l eft to view the next
Page 22
EK4e User Manual
10
2016 © Ak u a Mob il e
pictur e, or towards right to view the prev ious one.
15. Music
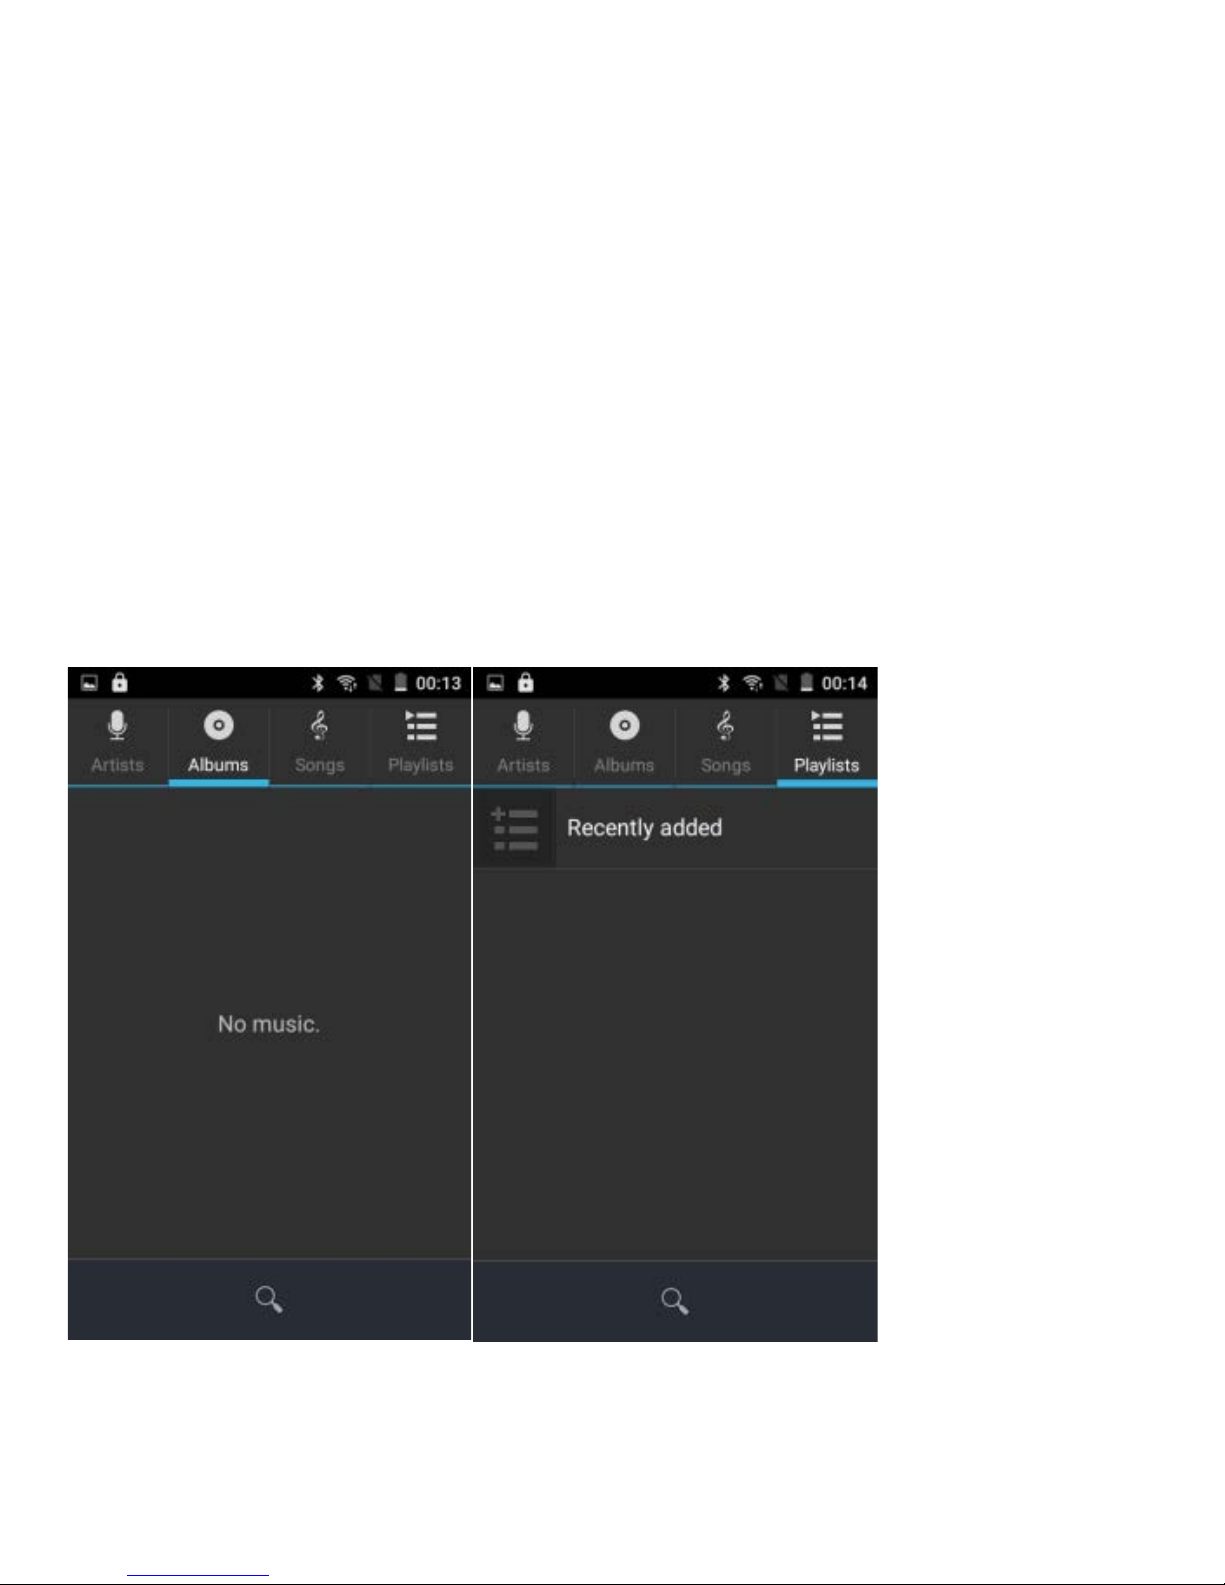
The phone can play digital audio files i n memory card. The following f ormats are
available : AMR/M4A/MIDI/MP3/WAV/OGG.
Open Music
Press home, touc h the label of applications, and touch music. Then the interface of
Music Medi a appears.
Music Medi a
Your music fil es are classified according to the following four categories: Arti sts,
albums, songs and play lists. Touch one of these cat egor ies; you can view the list
inside.
Continue t he oper ations, until your wanted music appears. Such as, if y ou c hoose
Arti sts a li st of artists sorted by the numbers in E nglish wil l appear . Choose any on to
open the list, then all the albums and songs will appear. S elec t one album, then the
songs in it will be play ed.
Tips: You can play all of the songs in the interface of music media, in random sequence
. Press Menu, and then t ouc h the Party Shuffle. Then will s tart playing the f ir st s ong
randomly select ed. To close the Party S huff le, press Menu, then touc h to t ur n off the
Party Shuff le.
16. Calendar
Enter the c alendar application
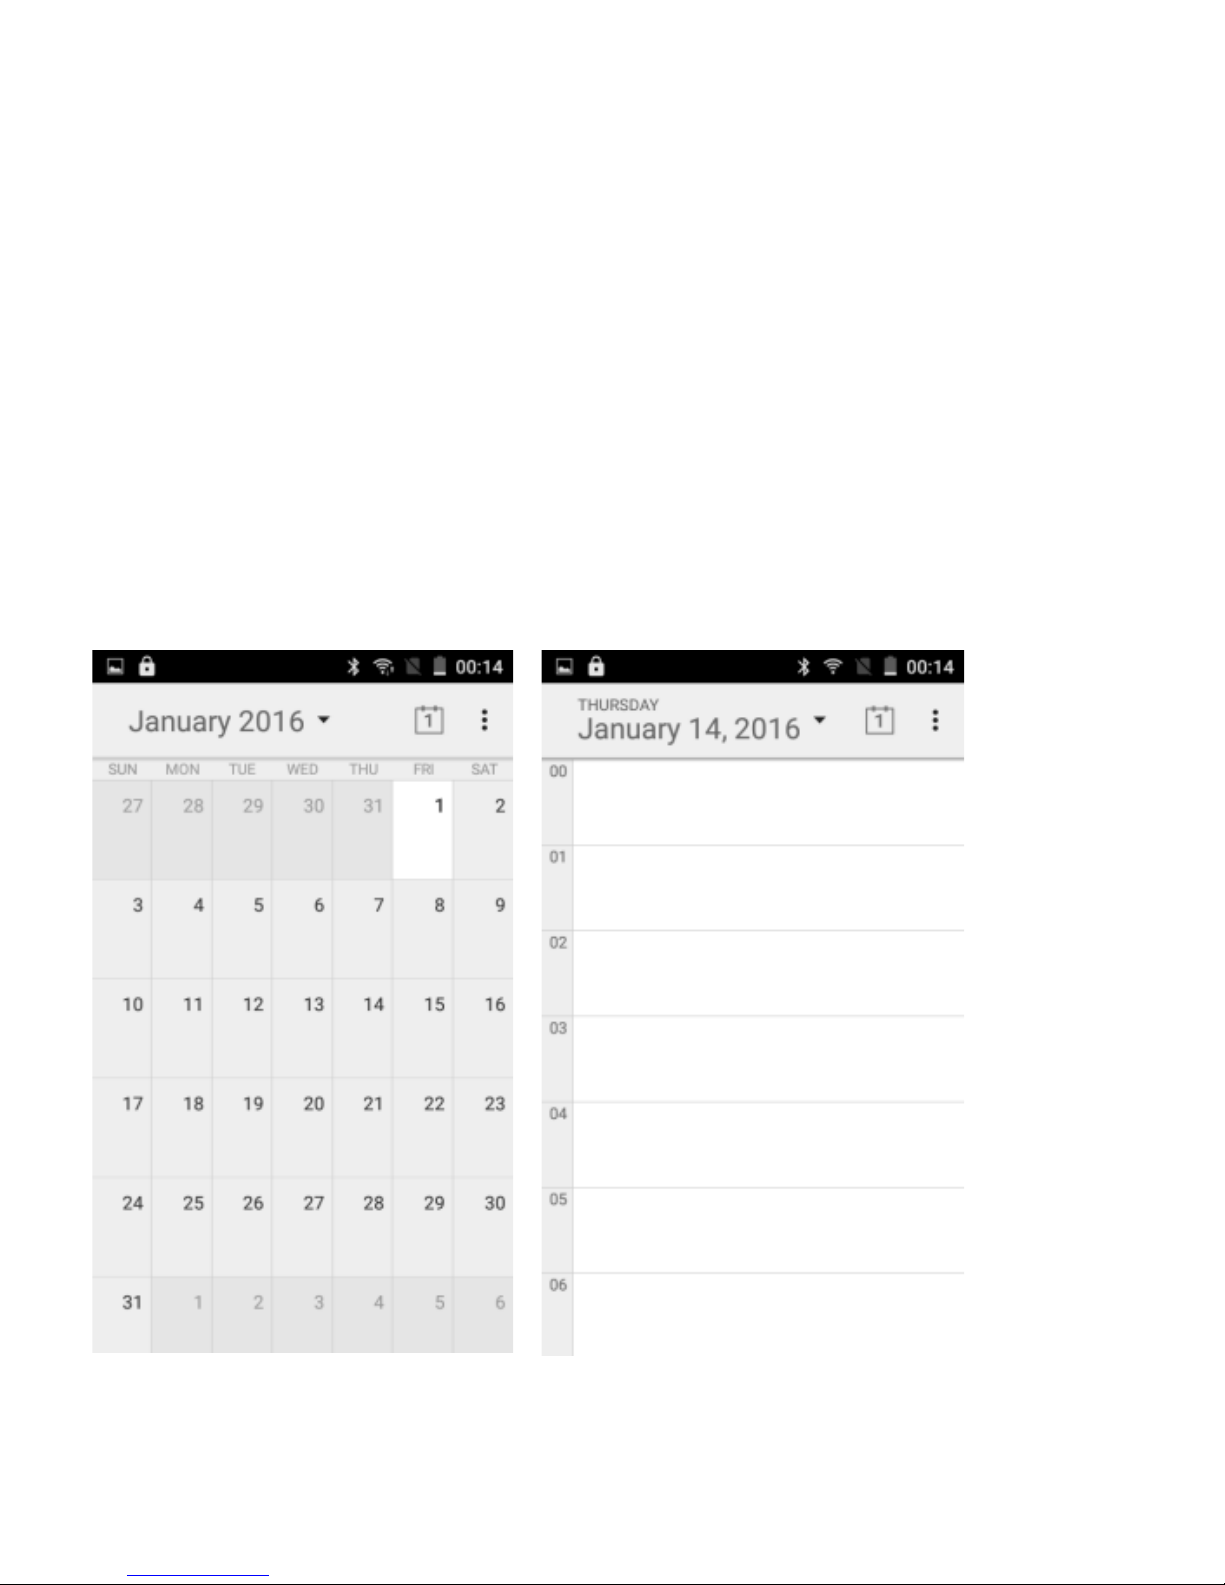
Load Goggles account s, enter the appli c ation, in the interface of month or week will
use gray to highlight the day. Display default the date on the curr ent month.
In the interface, press menu, 4 display m odes will appear :
Page 23
EK4e User Manual
10
2016 © Ak u a Mob il e
1)
Schedule I nterface shows a certain schedul e( c lick on the initial time and
view for ward, cli c k the fi nal time to view backwards )
2)
Day Interface displays a day’s schedule (l ast c licked date), Sl ide around to turn
page according day.
3)
Week Interf ac e displ ay s a week’s schedule (last clic k ed date),Slide around to turn
page according week.
4)
Today Int erface displays a day’s schedule, In the interface of m onth or week use
gray to highli ght the day.
5)
Month interface displays a month’s schedule (last cli c ked date) S lide around to turn
page according month.
New activities
Press menu, more < touch new activities.
Enter the nam e of activity in the activiti es’
box.
Notices: S uc h as special oc c as ions s uc h as birthday or a day wit h ev ents, set the
all-day option to Yes . If the activity is at a certain time period, select the start time and
end time.
3)
Enter the ev ent location, description, guests, repeat , remind time.
4)
Click fi nish to r eturn to calendar.
Page 24

EK4e User Manual
10
2016 © Ak u a Mob il e
17. FM Radio
FM Radio
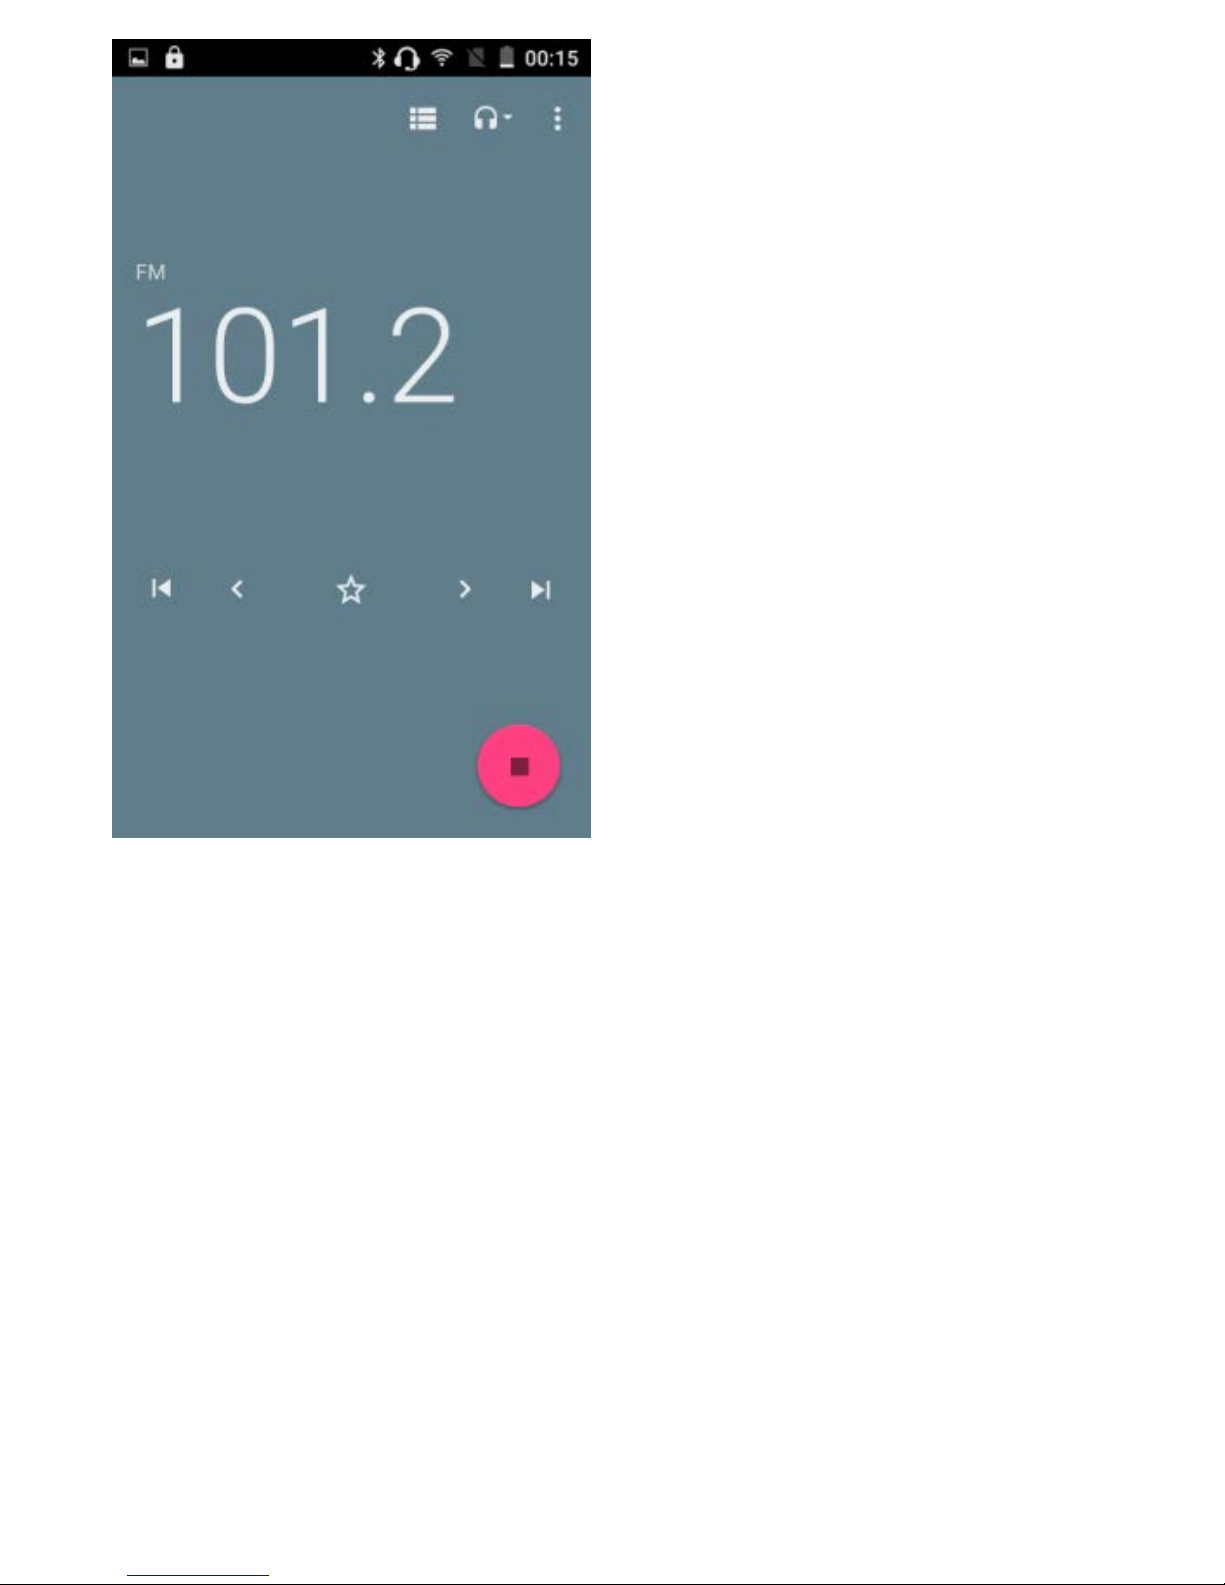
Through this program, you may listen to FM radio on the device, F M radio use the
wired headset as an antenna to r ec eive signal s, before opening thi s program , you
can install the original equipment-headphones, when listeni ng, you can switch it
manuall y to speakers or t he m ode with wired headphones.
Open FM radio
Touch “FM radio” to open the application of FM radio.
Click on the “search”, aut omatic scanning search FM
channel, and channel in list interface, list all
channels
Click “FM recording”, listening to the radio to the
current can be r ec or ded. The tape recording to
default file name can be arbitrary well-preserved
input fil enam e. Save to FM recording the default file.
Click “exi t” cl osed FM r adio, cannot listen to in the
background.
Must be insert cable headphones as antenna, but
click on the horn button, can put the FM radi o.
Click on the fr equenc y of t he r ear of the fivepointed star ic on, channel was added to the
collection channel list.
Listen to FM radio bac k gr ound
Click to ret ur n to key, the radio program moved to
the background, r ight now you can still continue to
listen to t he show, and can al so carr y out any
other program
Page 25
EK4e User Manual
10
2016 © Ak u a Mob il e
.
18. Settings
Your service pr ov ider may default some dev ic e
settings, so you may not be able to change these settings.
1 Wireless and Networks
1)wifi
修改为 WIFI and WIFI setti ngs: Touch WIFI to open. Open WIFI,it c an search for
avail able networks automatic ally, networks without pas s word can be used directly ,
others need to enter the password fir st.
修改为 Notice: Open WIFI then the flight mode, WIFI will close automatically: Open
flight mode then c onnec t WIFI, it can be used normally.
2)BT wireless
BT wireless switc h and setting up the touch BT wirel ess open, wil l automatically be
search nearby BT wireless open the equipm ent.
Page 26

EK4e User Manual
10
2016 © Ak u a Mob il e
3)SIM card)
Set up SIM card lock Enter(4-8numbers) PIN to set the loc k of SIM.
SIM card PIN (Per sonal Ident ification Number) is to prevent unauthori z ed use of SIM
cards. PIN code pr ov ided with SIM. The servic e provider gives the initial value.
Change a blocked PIN c ode, you need to open the “SIM Lock “, then go to Change
Password screen, the phone will autom atically prompt enter t he old P IN code and
asked to enter a new PIN code t wic e, fi nally the phone will prom pt that change
the code successf ully. If you enter the PIN with error for three tim es, SIM card
PIN
codes will be aut om atically locked, PUK codes i s usually suppl ied with SIM card. If
no, you should go to the service provider f or the codes.
If you enter 10 times wrong PUK code, the SIM card will be permanently locked.
4)Data usage
Data usage: set up mobile data traffic limit, fl ow m or e than limit will be close mobile
data services.
5) more...
Airplane mode: Touch to open or close.
Default SMS app
Tethering & portable hotspot
VPN
2 device
1)Personalize
Wallpaper:You can choose the album, wallpapers or video wallpaper set as the default
wallpaper Acc essibility
2)Display
a. Brightness level ,A djust the brightness:
b. Adaptive brightness :optimize brightness level for available light.
c. Sleep
d. Font si z e:choose font size: small , norm al, large or extra large
Sleep: A djust the delay before the screen automaticall y l oc k s
2)sound and notification : gener al, silent,meeting,outdoor
3)storage
Can view the SD card and c ell phone memory usage. Can mount S D card or Erase SD card.
Can choose the default memory.
4)battery
Boot time that use and each module to use power in general
5)apps
6)users
7)magic thumb
Page 27

EK4e User Manual
10
2016 © Ak u a Mob il e
3 personal
1)Location
High accurac y : Use GPS,Wifi and mobile networks to det er m ine location. T ouc h it t o open
or close
Battery saving: Use wifi and mobile networks to det ermine location. Touch it to open or
close
Device only: Use GPS to determine your location. Touch it to open or close
2)Security
Set up screen loc k s: Use none,s wipe, pattern, PIN or password to lock the screen.
a.
Touch “none” t o stop this application.
b.
touch swipe,enter the swipe mode to unlock the screen.
c.
Touch patter n and set pattern to unlock the screen.
d.
Touch PIN Enter PIN num ber s to unloc k the screen.
e.
Touch password Set password to unlock the screen.
,3)Account
Add account
4)language &input
1)
Selecti ng Language: Include all the languages on the phone.
2)
Spell check er
3)
Personal Dic tionary: Add words to custom dic tionary or delet e.
4)
Keyboard &input method .you can select A ndr oid k ey board or google pinyin input
method
5)
Speech , including voice input and text-to- speech output
6)
Mouse /trackpad :pointer speed
7)
8)
Notice : Vibrating when butt ons are pres sed, P layi ng sound when buttons are pressed,
Capitalizing automati c ally , Speec h Input (by microphone on t he k ey boar d) , Inputting
words (speech can be altered by slidi ng finger on space key),Displaying tips (activate
predictive function when you input words); Auto-Text (Automatically input certain words
when press space key or specified keys)
5)back up &reset
a back up my data
backup app data ,wifi pass words and other S ettings backup to G oogle’s servers
b personal data
Resetting to Factory Settings, Cl ear all data stored on the phone.
4 system
1)Date and Tim e
a Automation: Use date and time provided by Network.
b Setting Date: Touch “+” and”-” to set date.
c Selecting Time Zone: Select Time Zone acc or ding to where you are.
Page 28

EK4e User Manual
10
2016 © Ak u a Mob il e
For China please select “GMT+08:00, China Standar d Time”.
d Setting Time: Touch “+” and”-” to set time.
e Use 24 Hour Time Format: ON/OFF
f Select Date F ormat: There are six kinds of form ats you can choose
from: Regional (1/1/2016) is default setting
1/1/2016, 1/1/2016, 2016/ 1/1,
Fri, Jan1, 2016; Fri, Jan1, 2016; Jan1, Fri,2016
2)Scheduled power on or of f
3)Accessibility
a Servic e
b system
Large text
Power button ends cal l: According t o the “power” button to end the call to open,
call,pr ess the “power” will end the call and not shut down the screen
High contr ac t t ext
Power botton ends call
Auto-rotate screen Speak passwords
Accessibility shortcut
Touch & hold del ay
c display
4)Gestures and movement
5)Printing
6)About phone
Page 29

EK4e User Manual
10
2016 © Ak u a Mob il e
19. Noti ces for the use o f phone
Your phone is a product of superior design and craftsmanship and shoul d be treated
with care. The f ollowing suggestions can help you c om ply with the t erms of repair kits,
to extend t he life of mobile phone.
Place the mobile phone and their part s and components out of r eac h of sm all c hildren.
Keep the phone dry, r ain, humidity and all types of liquids which contai n mi ner als wil l
corrode electronic circuits.
Don’t touch t he phone with wet hands when charging, it will cause elec tric shock or
damage the phone.
Avoid place t he dev ic e in high temper ature environment. Temperatures wil l short en the
life of el ectr onic devices, damage batt er ies, and warp or melt certain plastics.
Avoid place the device in too low temperature environment. When t he temper ature
rises, the phone wil l produce water vapor that may damage electronic circuit.
Avoid place the phone in dusty, dirty places, otherwise part s may be damaged.
To avoid the phone in a lit cigarette, near open flame or any heat source.
Do not open the device, non-professional approac h will do dam age to t he phone.
Do not throw it fr om hei ght, k noc k or shake the phone, rough handling can dam age
internal ci r c uit boards.
Do not paint the phone, because the paint will bloc k headphones, m icrophones or
other removable parts, and lead it not work.
Use clean, sof t, dr y clot h to clean the camera, light sensor lenses. P r ohibit t he use of
harmf ul chemicals and cleaning agents, c leaning fluids to clean the phone
If mobile phone, battery, charger, or m obile phone ac c es sories are defective, send to
Page 30

EK4e User Manual
10
2016 © Ak u a Mob il e
the nearest qualified servi c e center for inspection.If necessary, S ervice Centre staff will
assist you and will ar r ange for phone repair s.
About AKUA Warranty Policy
Warranty Inf ormation:
This cell phone i s covered during 12 months by a limited warranty and 6 months for the
accessories inc luding the battery .
Please visi t AK UA MOBI LE websit e at www.akuamobile.com to know more details
about thi s limit ed warrant y .
Page 31

EK4e User Manual
10
2016 © Ak u a Mob il e
FCC Statement
1. This device complies with Part 15 of the FCC Rules. Operation is subject
to the follow ing two c o ndi ti o ns :
(1) This device may not cause harmful interference.
(2) This device must accept any interference received, including
interference that may cause undesired operation.
2. Changes or modifications not expressly approved by the party
responsible for compliance could void the user's authority to operate the
equipment.
NOTE:
This equipment has been tested and found to comply with the limits for a
Class B digital device, pursuant to Part 15 of the FCC Rules. These limits
are designed to provide reasonable protection against harmful interference
in a residential installation.
This equipment generates uses and can radiate ra di o fr equency en er gy
and, if not installed and used in accordance with the instructions, may
cause harmful interference to radio communications. However, there is no
guarantee that interference will not occur in a particular installation. If this
equipme
nt does cause harmful interference to radio or television reception,
which can be determined by turning the equipment off and on, the user is
encouraged to try to correct the interference by one or more of the
following measures:
Reorient or relocate the rec ei vi n g antenna .
Increase the separation between the equipment and receiver.
Connect the equipment into an outlet on a circuit different from that to
which the receiver is connected.
Consult the dealer or an experienced radio/TV technician for help.
SAR Information State ment
Your wireless phone is a radio transmitter and receiver. It is designed and
manufactured not to exceed the emission limits for exposure to
radiofrequency (RF) energy set by the Federal Communications
Commission of the U.S. Government. These limits are part of
comprehensi v e guidelin es an d es ta bl i s h perm i tted level s o f RF ener gy for
the gen er al popula ti on . Th e guideli n es ar e based on sta nd ar ds th at wer e
developed by independent scientific organizations through periodic and
thorough eval uation of scientific studies. The standards include a
Page 32

EK4e User Manual
10
2016 © Ak u a Mob il e
substantial safety margin designed to assure the safety of all persons,
regar dl ess o f age and healt h. The expos ur e s ta ndard for wir el ess mobile
phones employs a unit of measurement known as the Specific Absorption
Rate, or SAR. The SAR limit set by the FCC is 1.6 W/kg. * Tests for SAR
are conducted with the phone transmitting at its highest certified power
level in all tested frequency bands. Although the SAR is determined at the
highest cer tified power level, the actual SAR level of the phone while
operating can be well below the maximum value. This is because the
phone is designed to operate at multiple power levels so as to use only the
power required to reach the network. In general, the closer you are to a
wireless base station antenna, the lower the power output. Before a phone
model is available for sale to the public, it must be tested and certified to
the FCC that it does not exceed the limit established by the government
adopted requirement for safe exposure. The tests are performed in
positions and locations (e.g., at the ear and worn on the body) as required
by the FCC for each model. The highest SAR value for this model phone
when tested for use at the ear is 0.987W/Kg and when worn on the body,
as described in this user guide, is
1.192W/Kg(Body-worn measurements
differ am o ng phone m od el s, de pe ndi n g upon avai l abl e acc es sor ies and
FCC requirements). The maximum scaled SAR in hotspot mode is
1.192W/Kg. While ther e m ay be differences between the SAR levels of
various phones an d at v ar ious posi ti o ns, th ey all m eet the gover nm ent
requirement for safe exposure. The FCC has granted an Equipment
Authorization for this model phone with all reported SAR levels evaluated
as in compl
iance with the FCC RFexposure guidelines. SAR information on
Page 33

EK4e User Manual
10
2016 © Ak u a Mob il e
this model ph one is on fil e with the FCC and can be found un der t h e
Display Grant section of http://www.fcc.gov/ oet/fccid after searching on
FCC ID: 2AGE2-EK4E Additional information on Specific Absorption Rates
(SAR) can be found on the Cellular Telecommunications Industry Association (CTIA) we b-site at http://www.wow-com.com. * In the United States
and Canada, the SAR limit for mobile phones used by the public is 1.6
watts/kg (W/kg) averaged over one gram of tissue. The standard
incorp or ates a sub-stantial margin of safety to give additional protection for
the public and to account for any variations in measurements.
Body-worn Operation
This device was tested for typical body-worn operations. To comply with
RF exposure requirements, a minimum separation distance of 10mm must
be maint ai n ed betwe en th e us er ’ s body and the handset, incl udi n g the
antenna. Third-party belt-cl i ps, hol s t er s , an d sim i l ar accessories used by
this device should not contain any metallic components. Body-worn
accessories that do not meet these requirements may not comply with RF
exposure requirements and should be avoided. Use only the supplied or an
approv e d ant enna
Page 34

EK4e User Manual
10
2016 © Ak u a Mob il e
 Loading...