

Page 1
KAWA
ELECTRONIC
RESEARCIT
& DEYELOPMENT
CENTRE
Reference
Revision
Date
Page
In
House
Customer
BOM
Description
Prepared
No
No.
Model
Model
By:
No.
No.
&e
Service
: SM:0
: 2006
:P1of67
: PDP501D
: PDP5073TM
:
:
Service
PDPSOIDMIA1LS
May
25
PDPSOIDMIA1LS
Manual
for
-A01
PDP5073TM
Manual
-
001
LG
X3
Checked
Approved
Received
DOC
Rev
NO.
0
By:
By:
By:
Electronic
Mechanical
Engineering
MK
Department
Initial
Release
Engineer
Engineer
Manager
The
Latest
Revision
Detaits
DATE
2006-Mav-25
Page 2

SERVICE MANUAL
Model:
PDP5073TM
Safety Precaution.........................................................................1~2
Technical Specifications..............................................................3~9
Circuit Diagram..........................................................................10~30
Basic Operations & Circuit Description.....................................31~36
Main IC Information.......................................................................37
Panel Information....................................................................38~55
Spare Part List.........................................................................56~59
Exploded View............................................................................60
If you forget your V-Chip Password...............................................61
Software Upgrade...................................................................62~65
This manual is the latest at the time of printing, and does not
include the modification which may be made after the printing,
by the constant improvement of product.
Page 3
Safety Precaution
1/65
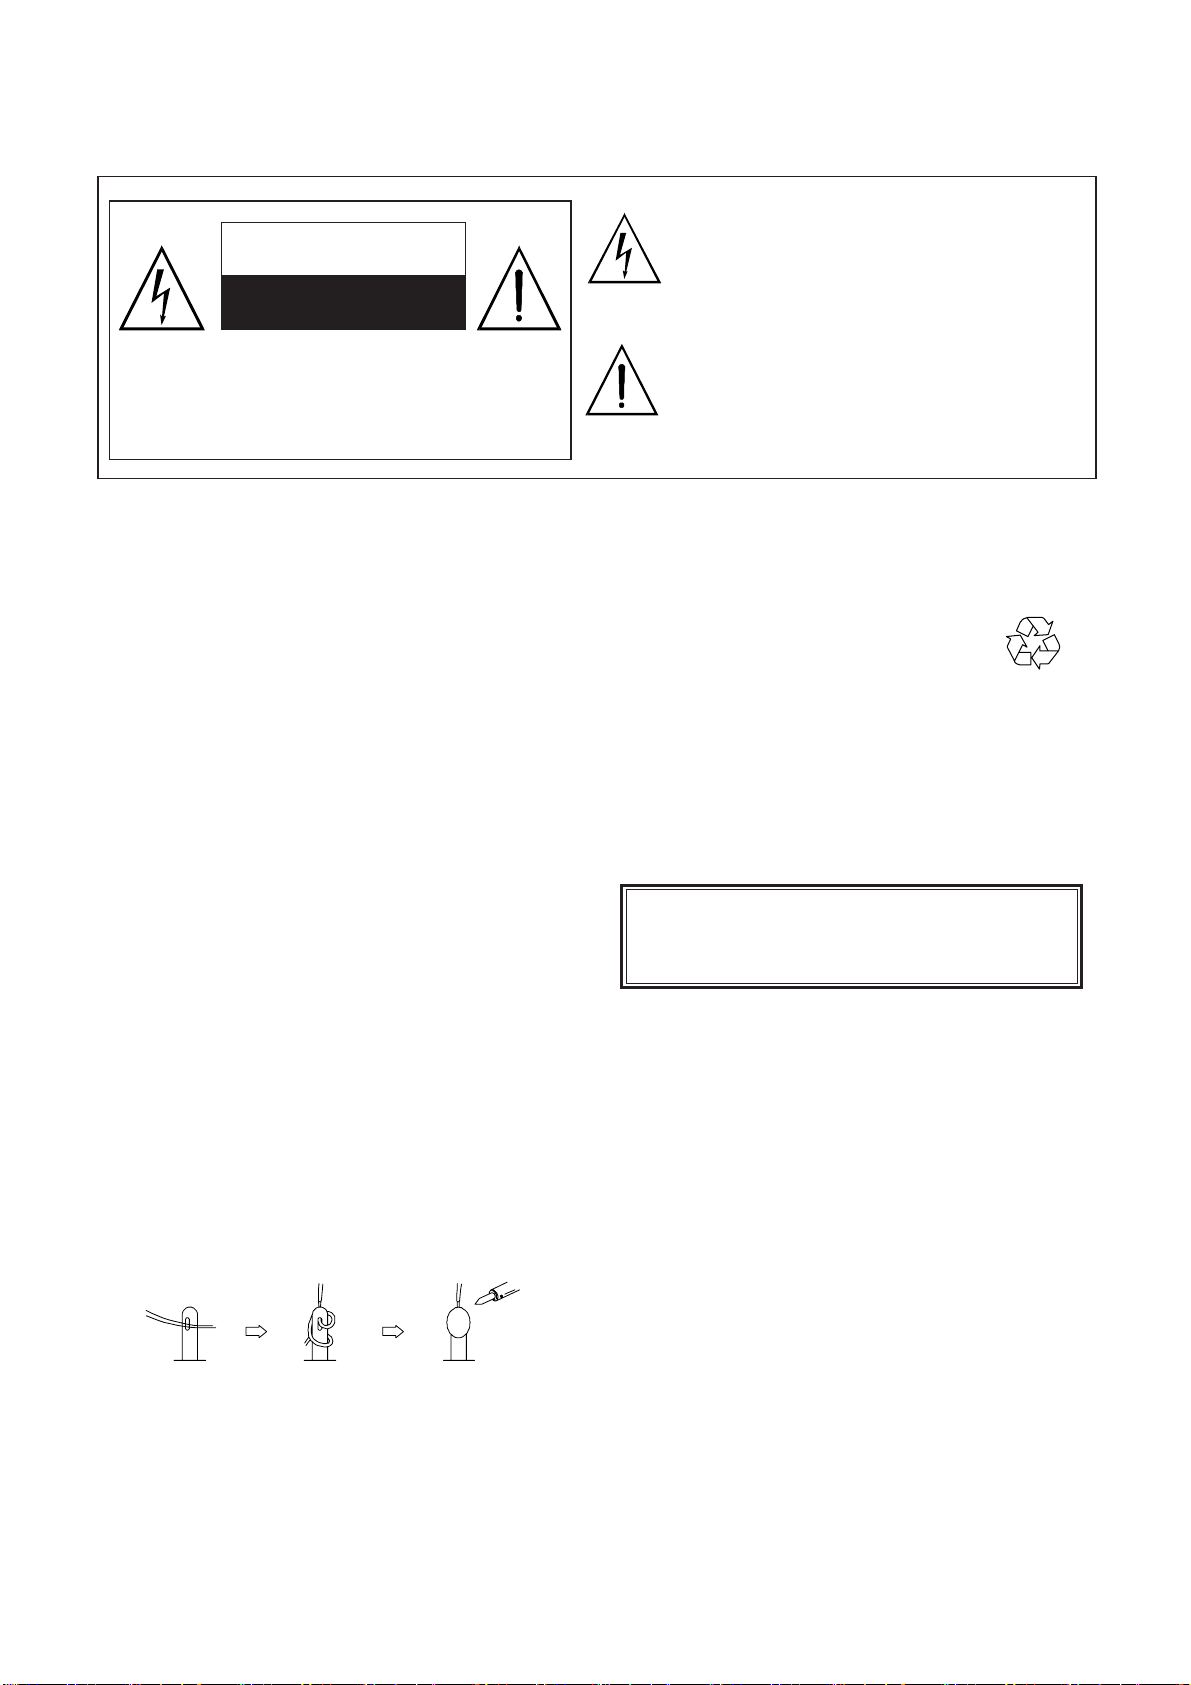
CAUTION
RISK OF ELECTRIC SHOCK
DO NOT OPEN
The lightning flash with arrowhead symbol,
within an equilateral triangle, is intended to
alert the user to the presence of uninsulated
“dangerous voltage” within the product’s enclo
sure that may be of sufficient magnitude to
constitute a risk of electric shock to persons.
CAUTION: TO REDUCE THE RISK OF
ELECTRIC SHOCK, DO NOT REMOVE COVER
(OR BACK). NO USER-SERVICEABLE PARTS
INSIDE. REFER SERVICING TO QUALIFIED
SERVICE PERSONNEL ONLY.
PRECAUTIONS DURING
SERVICING
1. In addition to safety, other parts and
assemblies are specified for conformance with
such regulations as those applying to spurious
radiation. These must also be replaced only
with specified replacements.
Examples: RF converters, tuner units, antenna
selection switches, RF cables, noise-blocking
capacitors, noise-blocking filters, etc.
2. Use specified internal Wiring. Note especially:
1) Wires covered with PVC tubing
2) Double insulated wires
3) High voltage leads
3. Use specified insulating materials for hazardous
live parts. Note especially:
1) Insulating Tape
2) PVC tubing
3) Spacers (insulating barriers)
4) Insulating sheets for transistors
5) Plastic screws for fixing micro switches
4. When replacing AC primary side components
(transformers, power cords, noise blocking
capacitors, etc.), wrap ends of wires securely
about the terminals before soldering.
5. Make sure that wires do not contact heat
generating parts (heat sinks, oxide metal film
resistors, fusible resistors, etc.)
6. Check if replaced wires do not contact sharply
edged or pointed parts.
7. Make sure that foreign objects (screws, solder
droplets, etc.) do not remain inside the set.
The exclamation point within an equilateral
triangle is intended to alert the user to the
presence of important operating and
maintenance (servicing) instructions in the
literature accompanying the appliance.
MAKE YOUR CONTRIBUTION
TO PROTECT THE
ENVIRONMENT
Used batteries with the ISO symbol
for recycling as well as small accumulators
(rechargeable batteries), mini-batteries (cells) and
starter batteries should not be thrown into the
garbage can.
Please leave them at an appropriate depot.
WARNING:
Before servicing this TV receiver, read the
SAFETY INSTRUCTION and PRODUCT
SAFETY NOTICE.
SAFETY INSTRUCTION
The service should not be attempted by anyone
unfamiliar with the necessary instructions on this
apparatus. The following are the necessary
instructions to be observed before servicing.
1. An isolation transformer should be connected in
the power line between the receiver and the
AC line when a service is performed on the
primary of the converter transformer of the set.
2. Comply with all caution and safety related
provided on the back of the cabinet, inside the
cabinet, on the chassis or picture tube.
3. To avoid a shock hazard, always discharge the
picture tube's anode to the chassis ground
before removing the anode cap.
4. Completely discharge the high potential voltage
of the picture tube before handling. The picture
tube is a vacuum and if broken, the glass will
explode.
Page 4

5. When replacing a MAIN PCB in the cabinet,
2/65
always be certain that all protective are
installed properly such as control knobs,
adjustment covers or shields, barriers, isolation
resistor networks etc.
6. When servicing is required, observe the original
lead dressing. Extra precaution should be given
to assure correct lead dressing in the high
voltage area.
7. Keep wires away from high voltage or high
tempera ture components.
8. Before returning the set to the customer,
always perform an AC leakage current check
on the exposed metallic parts of the cabinet,
such as antennas, terminals, screwheads,metal
overlay, control shafts, etc., to be sure the set
is safe to operate without danger of electrical
shock. Plug the AC line cord directly to the
AC outlet (do not use a line isolation
transformer during this check). Use an AC
voltmeter having 5K ohms volt sensitivity or
more in the following manner.
Connect a 1.5K ohm 10 watt resistor paralleled
by a 0.15µF AC type capacitor, between a
good earth ground (water pipe, conductor etc.,)
and the exposed metallic parts, one at a time.
Measure the AC voltage across the combination
of the 1.5K ohm resistor and 0.15 uF
capacitor. Reverse the AC plug at the AC
outlet and repeat the AC voltage measurements
for each exposed metallic part.
The measured voltage must not exceed 0.3V
RMS.
This corresponds to 0.5mA AC. Any value
exceeding this limit constitutes a potential
shock hazard and must be corrected
immediately.
The resistance measurement should be done
between accessible exposed metal parts and
power cord plug prongs with the power switch
"ON". The resistance should be more than
6M ohms.
AC VOLTMETER
PRODUCT SAFETY NOTICE
Many electrical and mechanical parts in this
apparatus have special safety-related
characteristics.
These characteristics are offer passed
unnoticed by visual spection and the protection
afforded by them cannot necessarily be obtained
by using replacement components rates for a
higher voltage, wattage, etc.
The replacement parts which have these
special safety characteristics are identified by
marks on the schematic diagram and on the parts
list.
Before replacing any of these components,
read the parts list in this manual carefully. The
use of substitute replacement parts which do not
have the same safety characteristics as specified
in the parts list may create shock, fire, or other
hazards.
9. Must be sure that the ground wire of the AC
inlet is connected with the ground of the
apparatus properly.
Good earth ground
such as the water
pipe, conductor,
etc.
AC Leakage Current Check
Place this probe
on each exposed
metallic part
Page 5
Technical Specifications PDP5073TM
3/65
1. Standard Test Conditions
All tests shall be performed under the following conditions, unless otherwise specified.
1.1 Ambient light : 150ux (When measuring IB, the ambient luminance
≦0.1Cd/m2)
1.2 Viewing distance : 50cm in front of PDP
1.3 Warm up time : 30 minutes
1.4 PDP Panel facing : no restricted
1.5 Measuring Equipment : Minolta CA 100 photometer
1.6 Magnetic field : no restricted
1.7 Control settings : Brightness, Contrast, Tint, Color set at Center(50)
1.8 Power input : 120Vac, 60Hz
1.9 Ambient temperature : 20°C ± 5°C (68°F ± 9°F)
1.10 Display mode : Resolution 1366 (H) x 768 (V) Pixels
1.11 Other conditions :
1.11.1 With image sticking protection of PDP module, the luminance will descend
by time on a same still screen and rapidly go down in 5 minutes. When
measuring the color tracking and luminance of a same still screen, be sure
to accomplish the measurement in one minute to ensure its accuracy.
1.11.2 Due to the structure of PDP, the extra-high-bright same screen should not
hold over 5 minutes for fear of branding on the panel.
Page 6
Technical Specifications PDP5073TM
4/65
ELECTRICAL CHARACTERISTICS
2. Power Input
2.1 Voltage : 120VAC
2.2 Input Current : 4.0A
2.3 Maximum Inrush Current : <30 A (FOR AC 120V ONLY)
Test condition : Measured when switched off for at least 20 mins
2.4 Frequency : 60Hz(±3Hz)
2.5 Power Consumption : 480W Typical
Test condition : full white display with maximum brightness and
contrast
2.6 Power Factor : Meets IEC1000-3-2
2.7 Withstanding voltage : 1.5kVac or 2.2kVdc for 1 sec
3. Display
3.1 Screen Size : 50” Plasma display
3.2 Aspect Ratio : 16:9
3.3 Pixel Resolution : 1366 x 768
3.4 Peak Brightness : 1000 cd/m² (Panel module without filter)
3.5 Contrast Ratio (Dark room) : 10000:1 (Panel module without filter)
3.6 Viewing Angle : Over 160°
3.7 OSD language : English, Spaish, French
4. Signal
4.1 AV & Graphic input
4.1.1 Composite signal : AV
4.1.2 Y,C Signal : S-Video
4.1.3 Component signal : YPbPr HDTV compatible
4.1.4 Graphic Input : D-Sub 15 pin detachable cable
4.1.5 HDMI : HDMI
4.1.6 PnP compatibility : DDC 1.0
4.1.7 I/P frequency : f
recommended)
: 31.5kHz to 60kHz/fV: 56.25Hz to 75Hz (640x480
H
Page 7
Technical Specifications PDP5073TM
5/65
4.2 Audio input
Audio Input(L/Rx5) : 1 for DVI / D-Sub
2 for YPbPr
1 for S-Video
1 for AV
4.3 Audio output
Audio Output (L/Rx1) : Monitor out(L/R)
SPDIF : Coaxial x 1 (only for HDMI)
5. Environment
5.1 Operating environment
5.1.1 Temperature : 5º to 33°C
5.1.2 Relative humidity: 20% to 85%(non-condensing)
5.2 Storage and Transport
5.2.1 Temperature : -20°C to 60°C (-4º to 140°F)
5.2.2 Relative humidity: 5% to 95%
6. Panel Characteristics
6.1 Type : LG X3
6.2 Size : 50”, 1190mm(W)x700mm(H)x58mm(D)±1mm
6.3 Aspect ratio : 16:9
6.4 Viewing angle : Over 160°
6.5 Resolution : 1366 x 768
6.6 Weight : Approx 21.4kg +/- 0.5kg (1EA)
6.7 Color : 1073.7 million colors by combination of 10 bits R,G,B
digital
6.8 Contrast : Max 10000:1 (In dark room 1% White Window pattern
at center)
6.9 Peak brightness : Typical 1000cd/㎡ (1% White Window pattern at center)
6.10 Color Coordinate Uniformity : Contrast; Brightness and Color control
at normal setting
Test Pattern : Full white pattern
Average of point A,B,C,D and E +/- 0.01
Page 8

Technical Specifications PDP5073TM
6/65
6.11 Color temperature : Contrast and Brightness at Normal;
Color temperature set at Middle
x=0.285±0.02
y=0.293±0.02
6.12 Cell Defect Specifications
Subject to Panel supplier specification as appends.
7. Front Panel Control Button
7.1 SEL. Up / Down Button : Select the up or down item in OSD menu.
VOL. Left / Right Button : Press the key to increase the volume left or right.
When selecting the adjusting item on OSD menu
increase or decrease the data-bar.
MENU Button : Press the key to display or exit the menu.
SOURCE Button : Press the key to select the input signals source.
7.2 STANDBY Button : Switch on main power, or switch off to enter power
Saving modes.
7.3 Main Power Switch : Turn on or off the unit.
8. OSD Function
Full on screen display
9. Agency Approvals
Safety UL60950
Emissions FCC class B
10. Reliability
10.1 MTBF: 20,000 hours (Use moving picture signal at 25°C ambient)
11. Accessories: User Manual x 1, Remote Control x 1, Stand x 1, Power Cord x 1, Battery x2.
Page 9
Technical Specifications PDP5073TM
7/65
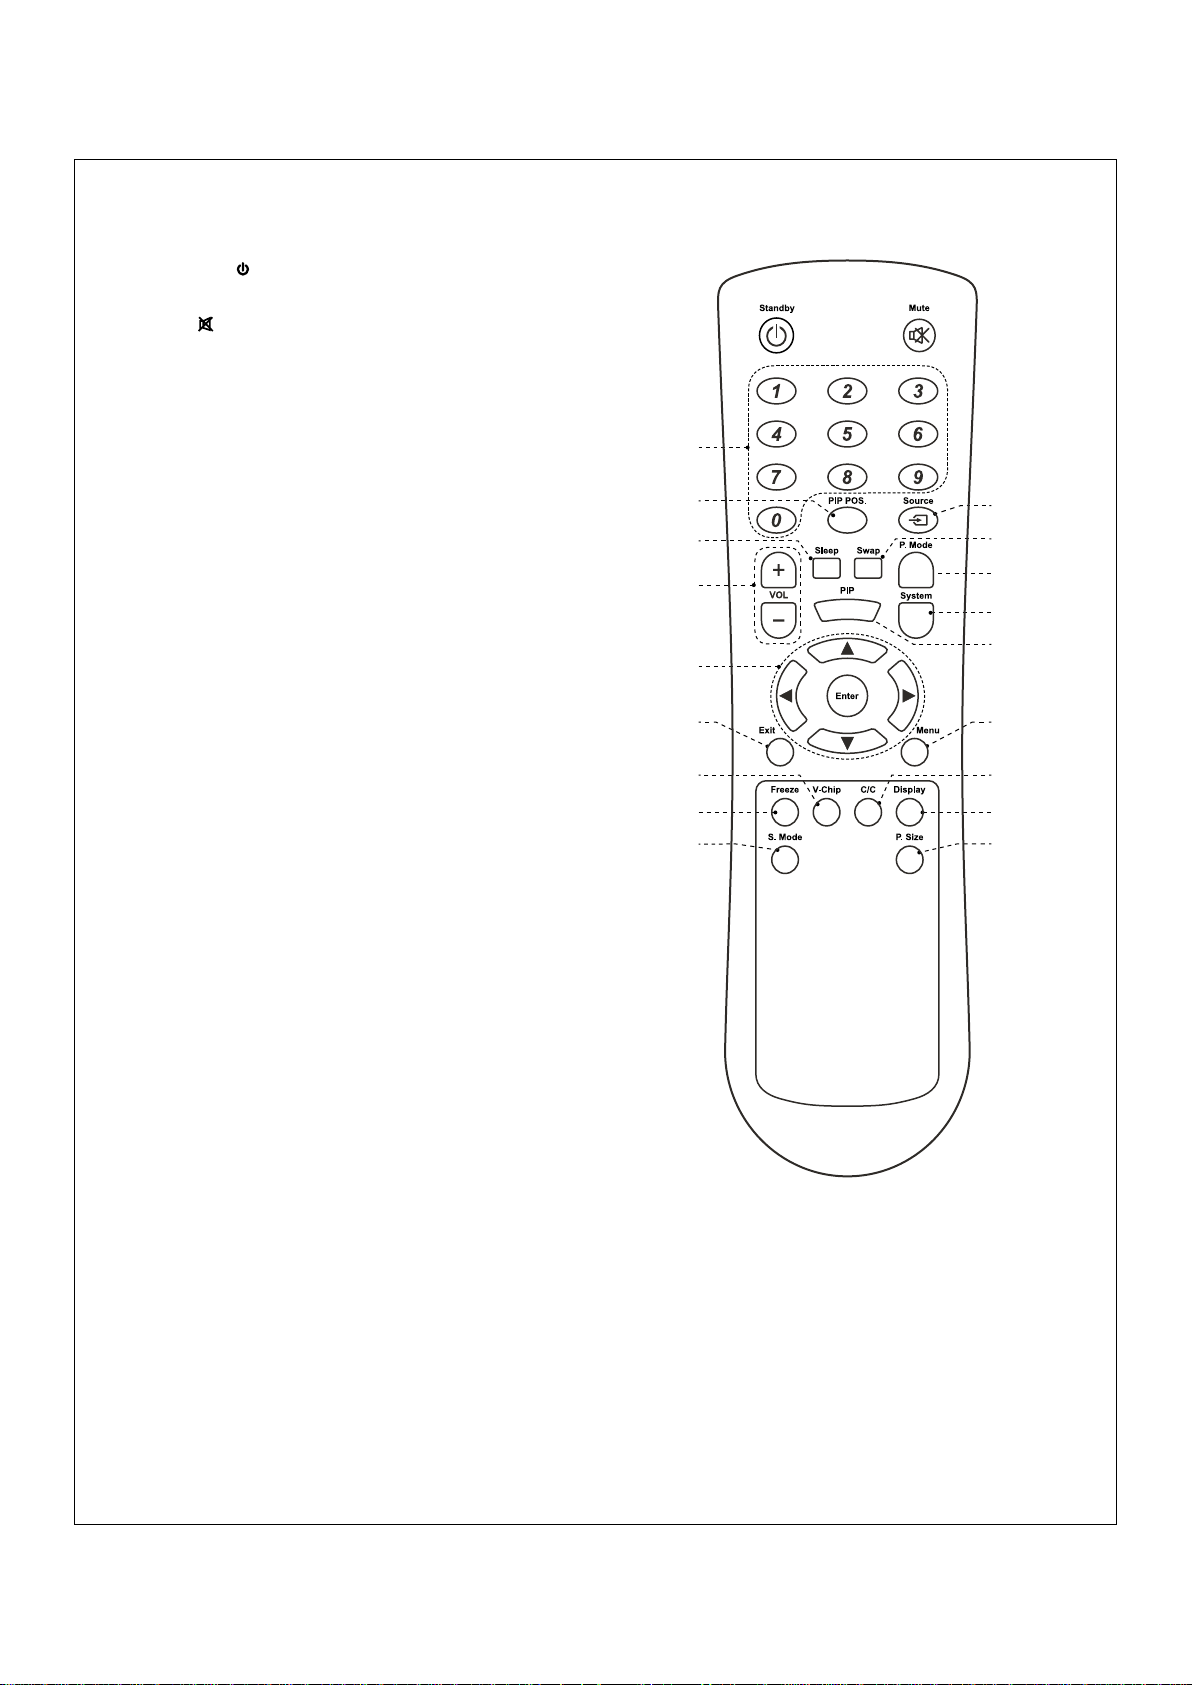
12. Remote Control
Standby( ): Press this button to turn off to
standby and turn on from standby.
Mute( ): Press this button to quiet the sound
system. Press again to reactivate the
sound system.
Number buttons: Use these buttons to enter
the password.
PIP POS. : Press the button to select different
Image Position in PIP Mode.
Source: Press this button and use ▲ / ▼
button to select the signal sources. AV, S-Video,
YPbPr 1, YPbPr 2, VGA or HDMI.
Sleep: Press this button to
time, such as “15 Min, 30 Min, 60 Min, 90 Min,
120 Min or off”.
Swap: Press this button to switch the Main
window or Sub window pictures in PIP and
Split Screen
VOL +/- : Press these buttons to
decrease the volume
P. Mode : Press the button to select different
picture effect, such as “Normal, Vivid, Hi-Bright,
User or Cinema”.
System: Press this button to select the color
system, such as “AUTO or NTSC 3.58”.
PIP: Press this button to enter PIP function.
Enter : Press to enter or confirm.
◄ / ► : They are used as ◄ / ► buttons in
the OSD Menu screen.
/ ▼ : They are used as ▲ / ▼ buttons in
▲
the OSD Menu screen.
Exit: Press this button to exit the OSD Menu.
Menu: Press this button to pop up the OSD
Menu and press it again to exit the OSD Menu.
V-Chip: Press this button to enter the V-Chip
Function. (Only for AV or S-Video)
Freeze: Press this button to hold on the screen. Press again to normal.
C/C: Press this button to enter the Closed Caption Function. (Only for AV or S-Video)
Display: Press the button to display the source information.
S. Mode: Press the button to select different sound effect, such as “Normal, News,
Cinema, Concert or User”.
P. Size: Press this button, the picture will change according
(inactive for VGA)
.
.
select
the sleep
increase or
to
Full, 4:3 or Panoramic.
Page 10
Technical Specifications PDP5073TM
8/65
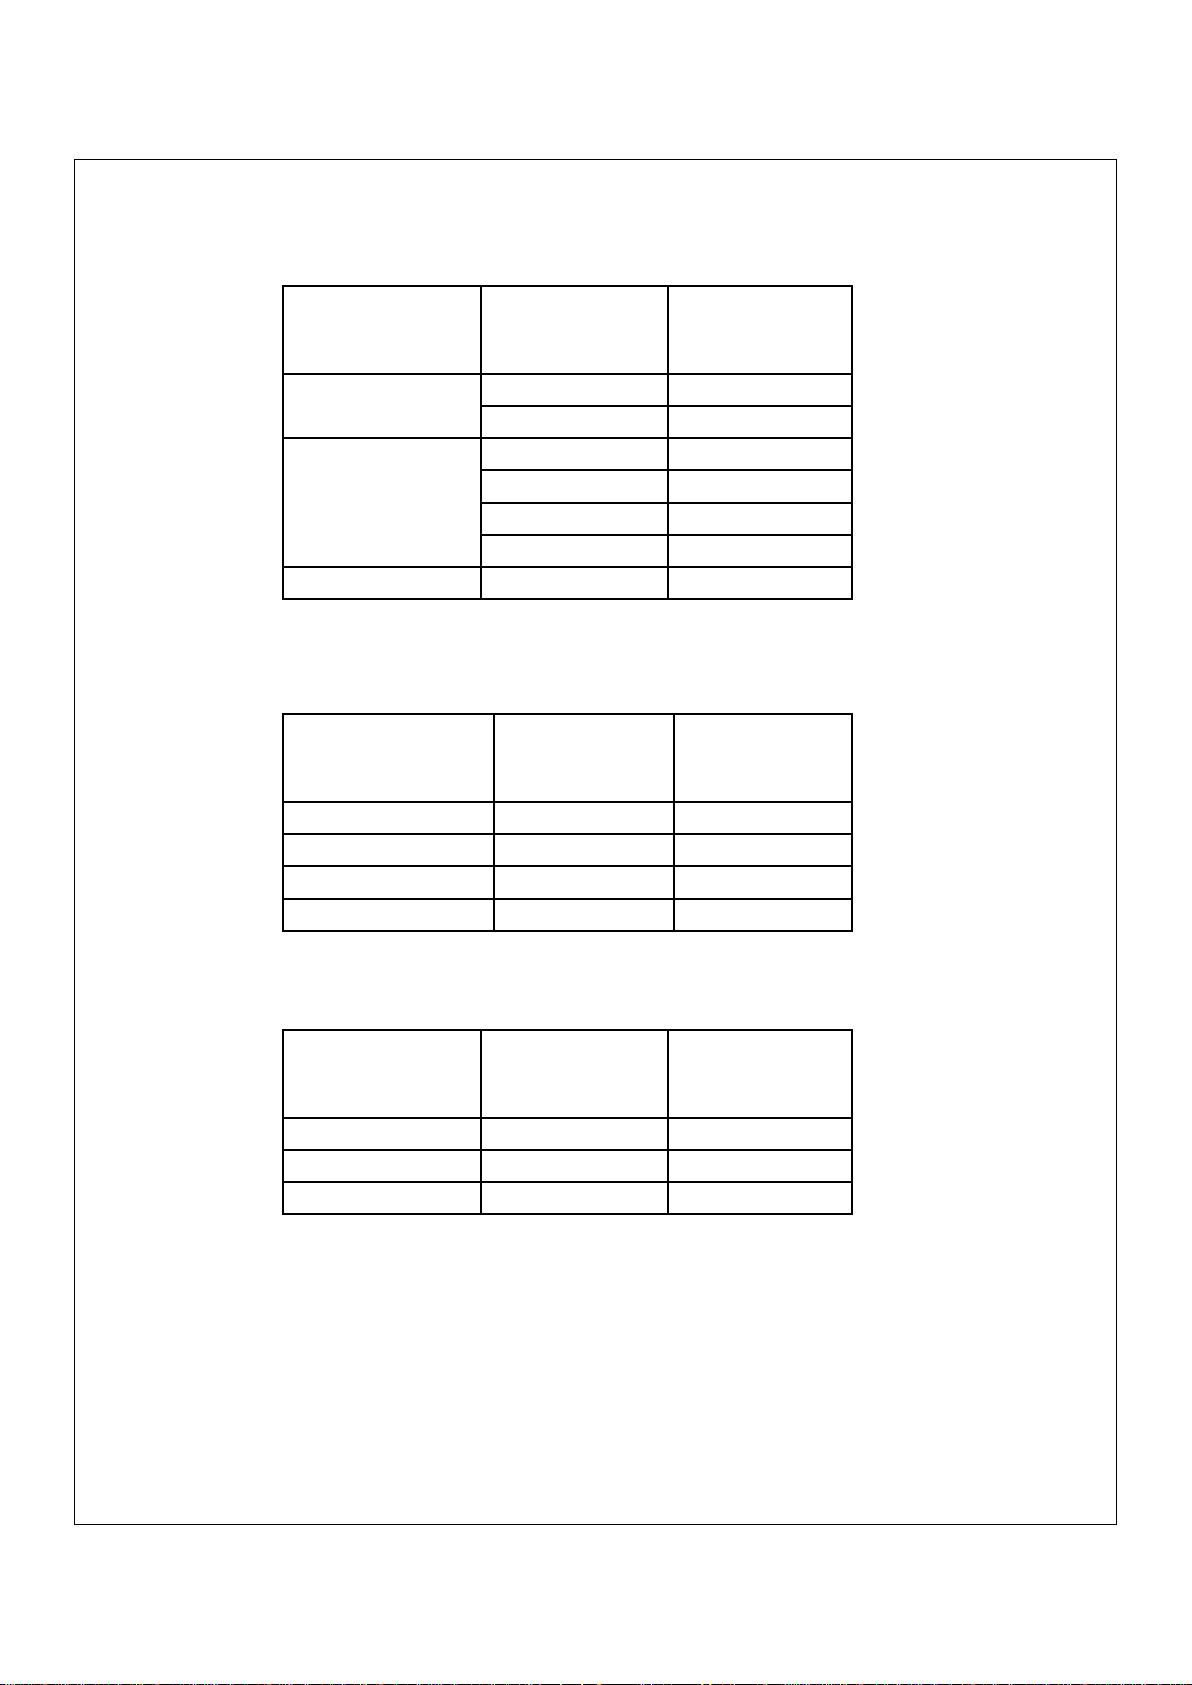
13. Support the Signal Mode
VGA Mode
A.
B. YPbPr Mode
Horizontal
Resolution
640 x 480
800 x 600
1024 x 768 48.40 60.00
Resolution
480i 15.734 59.94
480p(720x480) 31.468 59.94
720p(1280x720) 45.00 60.00
1080i(1920x1080) 33.75 60.00
Frequency
(KHz)
31.50 60.00
37.86 72.81
35.16 56.25
37.90 60.32
46.90 75.00
48.08 72.19
Horizontal
Frequency
(KHz)
Vertical
Frequency
(Hz)
Vertical
Frequency
(Hz)
C. HDMI Mode
Horizontal
Resolution
480p 31.468 59.94
720p 45.00 60.00
1080i 33.75 60.00
- When the signal received by the Display exceeds the allowed range, a warning message
shall appear on the screen.
- You can confirm the input signal format from the on-screen.
Frequency
(KHz)
Vertical
Frequency
(Hz)
Page 11
Technical Specifications PDP5073TM
9/65
PHYSICAL CHARACTERISTICS
14. Power Cord
Length : 1.8m nominal
Type : optional
15. Cabinet
15.1 Color : “Black” colour as defined by colour plaque reference number
15.2 Weight
Net weight : 54.5 kg(with stand, speaker and handles)
Gross weight : 61.0 kg
15.3 Dimensions(w/o stand)
Width : 1227.8 mm
Height : 871 mm
Depth : 286 mm
Page 12
A
10/65
4 4
UART0
(Communication with MT5351)
Video[0...23]
data audio signal
From MT5351
J24
TMDS0~3
5V
HDMIPLUG_PWR
HDMI_I2C
EEPROM
24C02
(U51)
HDMI
Connector
P1
3 3
control signal
MT8293
HDMI Receiver
(U25)
UPA672T
(U34)
Level Shift
B
74LVC244A
U30-U33
(BUFFER)
Video/audio signal
control signal
I2C(MT8202I2C)
MT8253
I2C
3.3V
HDCP_I2C
EEPROM
24C04
(U50)
3.3v
2.5v
MT8202
U12
1.8v
C
TO PDPLVDS Data
PDP
Connector
PDP
Control Signal
D
E
3.3V
MT8202 Download
VGA
MAX3232
(U54)
Level shift
VGA Signal Input
VGA_I2C
EEPROM
5V
24C02
(U53)
2 2
CVBS3(CVBS0 is from tuner)
UART
(TXD/RXD)
Data[0..31]
Address[0..11]
Flash
16Mb
(U17)
DDR
128Mb
(U18)
DDR
128Mb
(U19)
3.3V
1.25V
LP2996
(U20)
2.5V
YPbPr×2
S_VIDEO
S_Video Audio
AV1 Audio
1 1
A
HEF4052
(U52)
B
AV Audio inAV2 Audio
YPbPr1 Audio in
YPbPr2 Audio in
VGA Audio in
Din
WM8776
(U41)
NJM4558
OPA
(U60)
CLK
Dout
I2C(MT8202I2C)
EEPROM
24C16
(U2)
Audio Bypass
NJM4558
OPA
(U46)
Video Bypass
AUDIO Bypass
5V
R2S15103
(U57)
TO
Speaker
KAWA Confidential
KAWA Confidential
KAWA Confidential
MT8202 Block
MT8202 Block
MT8202 Block
E
Rev
Rev
Rev
Drawn:
<Designer>
Drawn:
<Designer>
Drawn:
<Designer>
<Checker>
<Checker>
<Checker>
Checked:
Checked:
Checked:
of
of
of
22Friday, March 17, 2006
22Friday, March 17, 2006
22Friday, March 17, 2006
ZhongShan KAWA Electronic Inc.
ZhongShan KAWA Electronic Inc.
ZhongShan KAWA Electronic Inc.
Title
Title
Title
Document Number
Document Number
Document Number
Size
Size
Size
AKAI_MT8202_MT5351_V1.0
AKAI_MT8202_MT5351_V1.0
AKAI_MT8202_MT5351_V1.0
D
D
D
Date: Sheet
Date: Sheet
C
D
Date: Sheet
1
1
1
Page 13

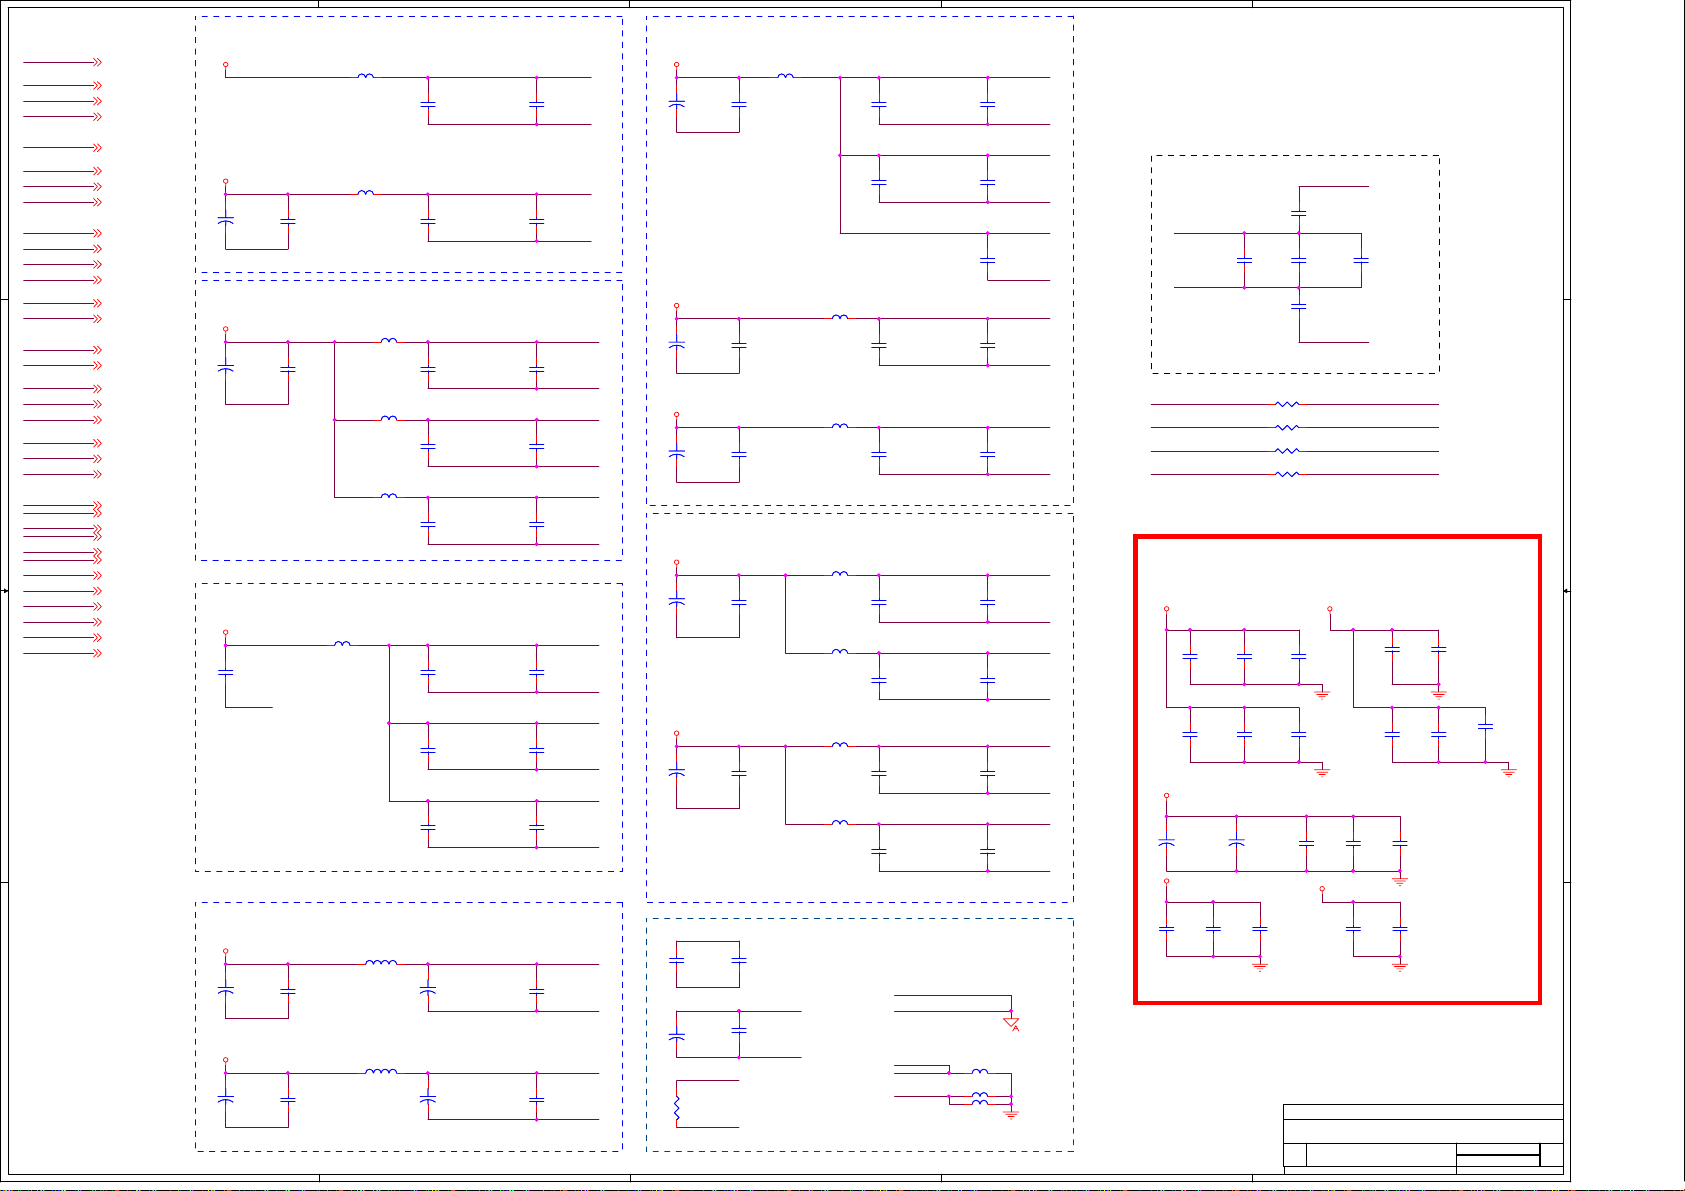
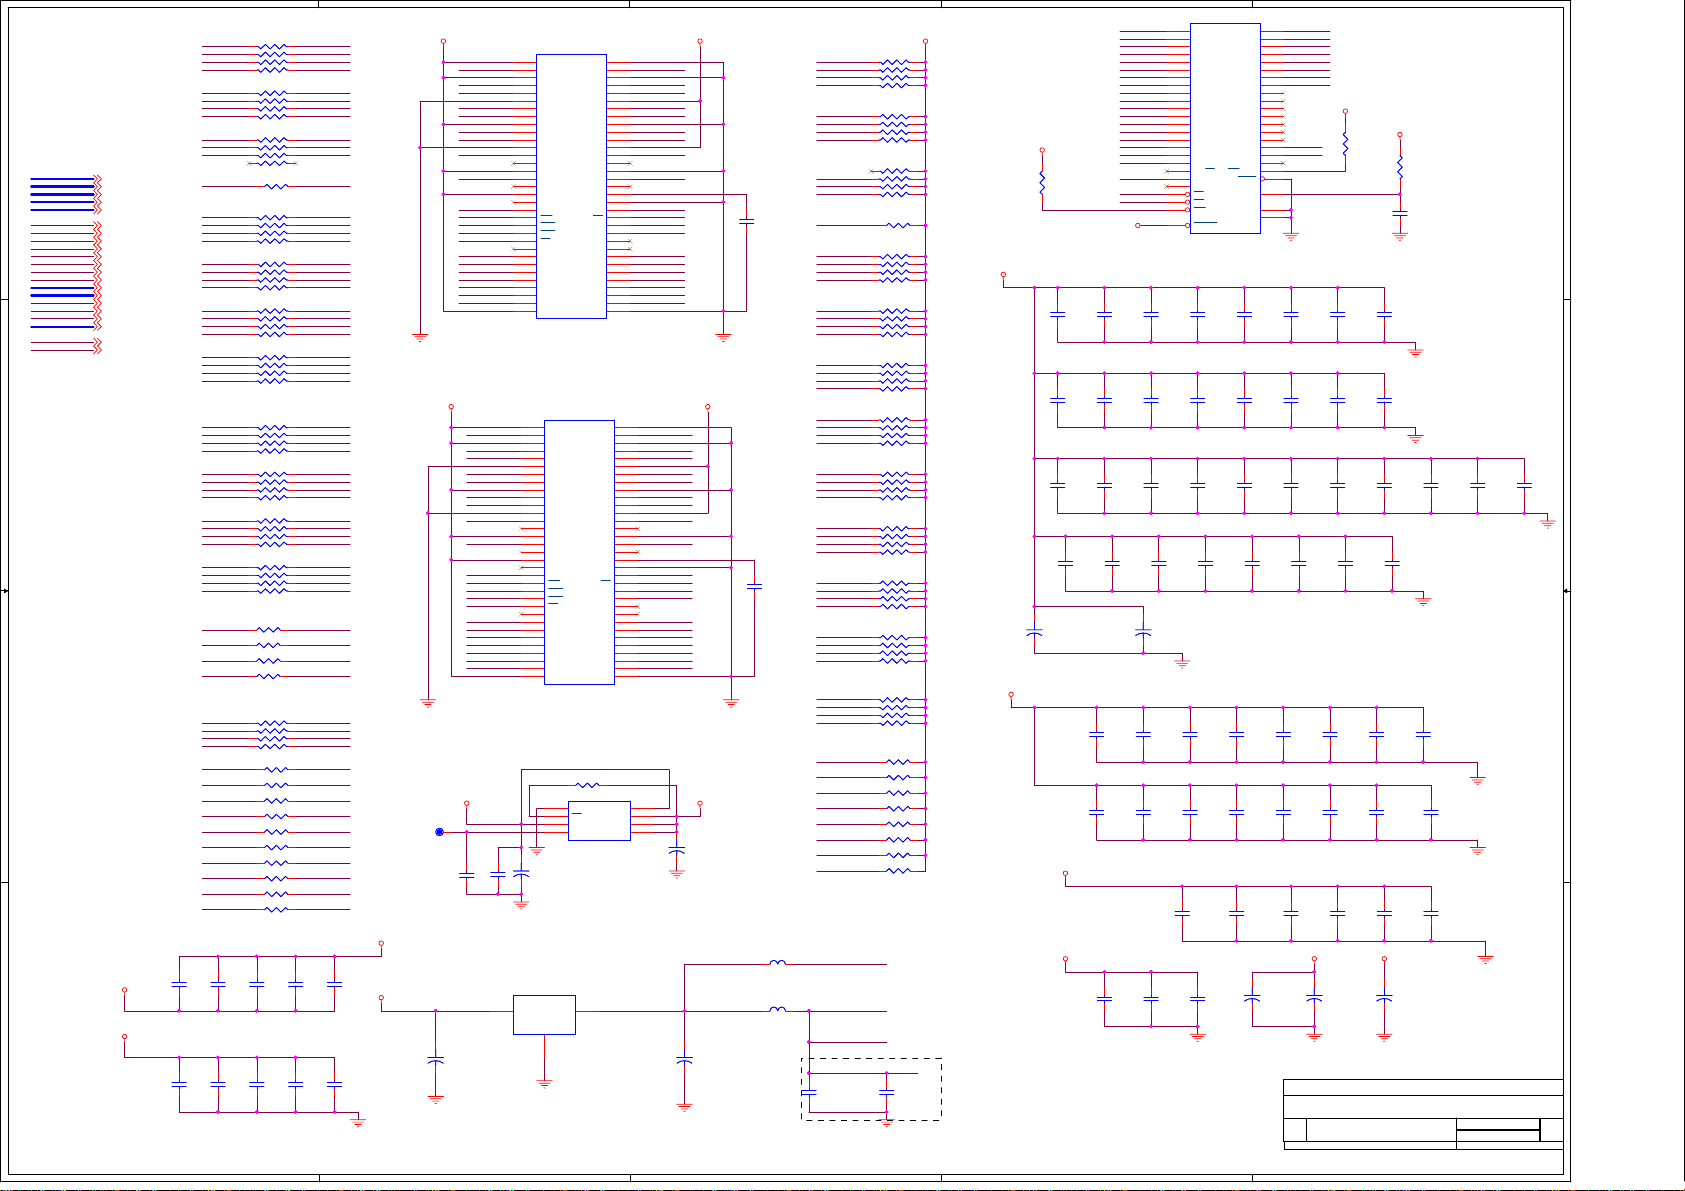
Circuit Diagram
11/65
- Main (Video) board
- Keypad board
- Remote control receiver board
- External L/R Speakers board
- Remote control board
Page 14
5
12/65
MT8202E (PBGA388) LCDTV BOARD 4 LAYERS FOR AKAI
D D
1. INDEX / POWER / RESET / EEPROM
2. LDO
3. MT8202E PBGA388
4. MT8202 DECOUPLING
5. DDR MEMORY & FLASH
6. MT5351 INTERFACE
7. HDMI MT8293
8. DAUGHTER BOARD IN
9. WM8776 & VIDEO BYPASS
4
Rev DateP#History
AKAI_MT8202_27US_LVDS_V0.0
AKAI_MT8202_27US_HDMI_LVDS_V0.0
3
New
ADD HDMI / VIDEO /AUDIO CONNECTOR INPUT IN
2005/11/22
2
9VV 9V
9VV
VCC +5V/+6V
9V
+
+
CE12
CE12
100uF/10v
GPIO14
GPIO19
SB33B
R776
R776
10k
10k
100uF/10v
C22UF25V/D5H11
C22UF25V/D5H11
HI = > POWER ON
LO = > POWER OFF
R7770/NC R7770/NC
1
R7780 R7780
CB20
CB20
0.1uF
0.1uF
Q44
Q44
2N3904
2N3904
SOT23/SMD/NC
SOT23/SMD/NC
3 2
FB42 FB/NCFB42 FB/NC
FB43 FB/NCFB43 FB/NC
U62
U62
8
D1
7
D1
6
D2
5
D2
IRF7316
IRF7316
SOIC8/SMD
SOIC8/SMD
5VSB
S1
G1
S2
G2
1
2
3
4
R775
R775
22k
22k
C681
C681
1uF/NC
1uF/NC
1
LVDSVDD
SCL
SDA
URST#
8202UP3_1
GPIO2
GPIO4
GPIO14
GPIO19
9V
12V
RELAY_ON
9V
VS_ON
9VV
C4
1uFC41uF
LVDSGND 2,3,4
SCL 9,14
SDA 9,14
URST# 3
8202UP3_1 3
GPIO2 3,12
GPIO4 3
GPIO14 3,13
GPIO19 3,13
9V 7,9,14
12V 12,13
RELAY_ON 12
VS_ON 12
Q45
Q45
2N3904
2N3904
1
R57 1KR57 1K
3 2
5VSB
R77922K R77922K
GPIO2
10. AUDIO / VIDEO IN CIRCUIT
12V
12V
D26
D26
9VV
1N4001/SMD
1N4001/SMD
VCC
+
+
R37NCR37
NC
8202UP3_1 HIGH :POWER OFF
8202UP3_1 LOW :POWER ON
CB6
CB6
0.1uF/NC
0.1uF/NC
CE6
CE6
100uF/16v.NC
100uF/16v.NC
SB33B
R635
R635
10k/NC
10k/NC
R340
R340
8202UP3_1
4.7k
4.7k
J6
CE145
CE145
470uF/16v
470uF/16v
1
2
3
4
5
6
7
8
9
10
11
+
+
J6
11x1
11x1
DIP11/P2.54
DIP11/P2.54
+5V/+6V
LVDSVDD
+
+
CB3
CB3
0.1uF
0.1uF
0.1uF
0.1uF
CB207
CB207
D23
D23
1N4001/SMD
1N4001/SMD
FB39 FB/NCFB39 FB/NC
=
=
FB40 FB/NCFB40 FB/NC
U61 KA278RA05/NC TO-220F-4LU61 KA278RA05/NC TO-220F-4L
IN1OUT
CB4
CB4
R52NCR52
0.1uF/NC
0.1uF/NC
NC
C153
C153
5VSB
R236
R236
0/NC
0/NC
C154
C154
+12V
9VV
9VV
VCC
CE144
CE144
220uF/16v
220uF/16v
FB2 FB/NCFB2 FB/NC
FB3 FB/NCFB3 FB/NC
D24
D24
1N4001/SMD
1N4001/SMD
GND
VDIS
4
R22 NCR22 NC
5VSB
R339
R339
10k
10k
SOT23/SMD
SOT23/SMD
3 2
ADD1
+12V
+
+
CB15
CB15
0.1uF
0.1uF
D25
D25
2
3
Q21
Q21
1
2N3904
2N3904
+5V/+6V
12V +12V
CE2
CE2
100uF/16v
100uF/16v
C C
11 . VGA & PC AUDIO IN
12. LVDS OUT
SB33A
13. BACK LIGHT / KEYPAD
14. TUNER IN
5VSB
15. AV IN
16. AUDIO IN
17.AUDIO Amplifier
POWER DOWN RESET# CIRCUIT
CE110
R337 10R337 10
R225
R225
10/NC
10/NC
CE110
47uF/16v
47uF/16v
+
+
1N4148D21N4148
D2
CB188
CB188
0.1uF
0.1uF
2N3904
2N3904
3 2
+12V
URST#
0
R3380R338
Q20
Q20
1
R744
R744
470
470
1N4001/SMD
1N4001/SMD
DIODE SMD/NC
DIODE SMD/NC
+5V/+6V VCC
+
+
CE3
CE3
100uF/16v/NC
100uF/16v/NC
SB33B
POWER ON RESET# CIRCUIT
CB5
CB5
0.1uF
0.1uF
3
U1
U1
LM809
LM809
VCC
SOT-23/SMD/NC
SOT-23/SMD/NC
GND1RESET
2
U2
U2
1
NC
2
NC
3
NC
GND4SDA
EEPROM 24C16
EEPROM 24C16
SOP8/SMD
SOP8/SMD
SYSTEM EEPROM
R11
R11
100k/NC
100k/NC
VCC
WP
SCL
R324
R324
10K
10K
R9
1k/NCR91k/NC
URST#
Q19
Q19
3 2
2N3904
2N3904
SOT23/SMD
SOT23/SMD
R10
R10
1
4.7K
4.7K
1N4148/SMD
1N4148/SMD
5VSB
5VSB
R637
R637
R638
R638
R6390R639
10K
10K
10K
10K
0
8
7
6
5
C175
C175
20pF
20pF
R674 100R674 100
R675 100R675 100
C176
C176
20pF
20pF
SYSROMWP
SCL
SDA
R13
R13
20K
20K
Q4
Q4
2N3904
2N3904
R676 10K/NCR676 10K/NC
SOT23/SMD
SOT23/SMD
3 2
CB2
CB2
0.1uF/NC
HOLE/GNDH2HOLE/GND
H2
1
1
HOLE/GNDH4HOLE/GND
1
1
2
2
3
3
4
4
5
5
2
2
3
3
4
4
5
5
9
9
8
8
7
7
6
6
B B
H4
9
9
8
8
7
7
6
6
A A
HOLE/GNDH1HOLE/GND
H1
9
9
8
8
7
7
6
6
9
9
8
8
7
7
6
6
2
2
3
3
4
4
5
5
1
1
HOLE/GNDH3HOLE/GND
H3
2
2
3
3
4
4
5
5
1
1
0.1uF/NC
D1
D1
R14 10KR14 10K
1
R15
R15
10K/NC
10K/NC
SB33B
+
+
CE4
CE4
10uF/25v
10uF/25v
R8
47kR847k
SB33B
H : WP DISABLE
L : WP ENABLE
R645
R645
10K
10K
GPIO4
1000pF/NC
1000pF/NC
VS_ON
7
SYS_PWRSYS_PWRSYS_PWRSYS_PWRSYS_PWRSYS_PWRSYS_PWRSYS_PWRSYS_PWRSYS_PWRSYS_PWRSYS_PWRSYS_PWRSYS_PWRSYS_PWRSYS_PWRSYS_PWRSYS_PWRSYS_PWRSYS_PWRSYS_PWRSYS_PWRSYS_PWRSYS_PWR
6
5
4
3
2
RELAY_ON
1
1000pF/NC
1000pF/NC
J23
J23
DIP7/W/H/P2.54
DIP7/W/H/P2.54
J7
J7
1
2
3
4
5
6
7
R. ANGLE
R. ANGLE
8
9
10
DIP10/W/H/P2.54
DIP10/W/H/P2.54
9VV
CB1
CE1
CE1
220uF/16v
220uF/16v
CB1
+
+
0.1uF
0.1uF
FROM POWER BOARD
KAWA Confidential
KAWA Confidential
KAWA Confidential
ZhongShan KAWA Electronic Inc.
ZhongShan KAWA Electronic Inc.
ZhongShan KAWA Electronic Inc.
Title
Title
Title
INDEX / POWER / RESET / EEPROM
INDEX / POWER / RESET / EEPROM
INDEX / POWER / RESET / EEPROM
Document Number
Document Number
Document Number
Size
Size
Size
AKAI_MT8202_27US_LVDS_V0.0
AKAI_MT8202_27US_LVDS_V0.0
AKAI_MT8202_27US_LVDS_V0.0
C
C
C
Date: Sheet
Date: Sheet
5
4
3
2
Date: Sheet
Rev
Rev
<Designer>
<Designer>
<Designer>
<Checker>
<Checker>
<Checker>
117Monday, April 03, 2006
117Monday, April 03, 2006
117Monday, April 03, 2006
Rev
1
1
1
of
of
of
Drawn:
Drawn:
Drawn:
Checked:
Checked:
Checked:
1
Page 15
5
13/65
4
3
2
1
ASB33A
+
+
CE7
CE7
100uF/16v
100uF/16v
SB33B
CB8
CB8
0.1uF
0.1uF
ASB33A
+
+
CE8
CE8
100uF/16v
100uF/16v
CE10
CE10
100uF/16v
100uF/16v
LVDS_GND
CB10
CB10
0.1uF
0.1uF
SB18ASB33A
LVDS_GND
VFE_GND
VFE_GND1
LVDS_GND 3,4,12
VFE_GND 3,4,8,11
VFE_GND1 3,4,8,11
U4
U4
AZ1117/adj
AZ1117/adj
3
+
+
CB9
CB9
0.1uF
0.1uF
2
OUT
IN
ADJ/GND
1
SOT223/SMD
SOT223/SMD
R773
R773
110 1%
110 1%
R774
R774
62 1%
62 1%
+
+
CE79
CE79
100uF/16v
100uF/16v
L5 FBL5 FB
L8 FBL8 FB
ASB18A
LVDS_GND
ASB18A
+
+
CE11
CE11
100uF/16v
100uF/16v
+
+
SB18ASB18SB33A
CE9
CE9
100uF/16v
100uF/16v
L4 FBL4 FB
Power ON alive source
AZ1117-3.3V
AZ1117-3.3V
U3
CB7
CB7
0.1uF
0.1uF
U3
3
IN
1
D D
5VSB
OUT
ADJ/GND
SOT223/SMD
SOT223/SMD
SB33
2
+
+
CE78
CE78
100uF/16v
100uF/16v
L6 FBL6 FB
L7 FBL7 FB
1.25x(1+62/110)=1.95V
OUT
ADJ/GND
ADCV33A
CB202
CB202
0.1uF
0.1uF
+
+
AZ1117-1.8V
AZ1117-1.8V
SOT223/SMD
SOT223/SMD
2
+
CE14
+
CE14
100uF/16v
100uF/16v
DV33A
CB17
CB17
0.1uF
0.1uF
VFE_GND1
+
+
CE82
CE82
100uF/16v
100uF/16v
SB18
L47 FBL47 FB
L43 FB/1206L43 FB/1206
L49 FB/NCL49 FB/NC
ADCV18A
VFE_GND
+
+
+
+
CE17
CE17
220uF/16v
220uF/16v
ADCV18A
CE13
CE13
100uF/16v
100uF/16v
DV18A
CB189
CB189
0.1uF
0.1uF
DV18A
CB18
CB18
0.1uF
0.1uF
L46 FBL46 FB
C C
AZ1117-3.3V
CB206
CB206
0.1uF
0.1uF
AZ1117-3.3V
3
IN
U7
U7
OUT
ADJ/GND
1
SOT223/SMD
SOT223/SMD
2
+
CE81
+
CE81
100uF/16v
100uF/16v
VCC
+
+
CE103
CE103
470uF/16v
470uF/16v
SB33
change 2/16
L10 FBL10 FB
L48 FBL48 FB
3
IN
CE15
CE15
220uF/16v
220uF/16v
U8
U8
1
AV33A
CE18
CE18
220uF/16v
220uF/16v
4
AV33A
+
+
CB21
CB21
0.1uF
0.1uF
AV33A
+
+
CE108
CE108
220uF/16v
220uF/16v
LVDS_GND
U37
U37
3
IN
ADJ/GND
1
SOT223/SMD
SOT223/SMD
3
L42FBL42
B B
AZ1117-3.3V
AZ1117-3.3V
SOT223/SMD
SOT223/SMD
U11
CB23
CB23
0.1uF
0.1uF
U11
3
2
OUT
IN
ADJ/GND
1
+
+
CE21
CE21
220uF/16v
220uF/16v
VCC
+
+
CE104
CE104
470uF/16v
470uF/16v
A A
5
DV33B
CB24
CB24
0.1uF
0.1uF
FB
AZ1117/adj
AZ1117/adj
OUT
LVDS_GND
L50 FBL50 FB
DACVDD
+
CE109
+
CE109
220uF/16v
220uF/16v
LVDS_GND
DACVDD
R325
R325
300 1%
300 1%
R326
R326
180 1%
180 1%
+
+
L51 FBL51 FB
CE80
CE80
100uF/16v
100uF/16v
2
1.25x(1+180/300)=1.99V
AV18A
+
+
LVDS_GND
CE20
CE20
220uF/16v
220uF/16v
CB187
CB187
0.1uF
0.1uF
2
AV18A
CB22
CB22
0.1uF
0.1uF
KAWA Confidential
KAWA Confidential
KAWA Confidential
ZhongShan KAWA Electronic Inc.
ZhongShan KAWA Electronic Inc.
ZhongShan KAWA Electronic Inc.
Title
Title
Title
LDO
LDO
LDO
Document Number
Document Number
Document Number
Size
Size
Size
AKAI_MT8202_27US_LVDS_V0.0
AKAI_MT8202_27US_LVDS_V0.0
AKAI_MT8202_27US_LVDS_V0.0
C
C
C
Date: Sheet of
Date: Sheet
Date: Sheet
Drawn:
<Designer>
Drawn:
<Designer>
Drawn:
<Designer>
Checked:
Checked:
Checked:
<Checker>
<Checker>
<Checker>
217Thursday, March 30, 2006
217Thursday, March 30, 2006
217Thursday, March 30, 2006
of
of
1
Rev
Rev
Rev
1
1
1
Page 16
5
14/65
AUDIO_GND
TESTP3
C23
D23
TP3
TN3
HIGHA1F3DVSS18
HIGHA2
F2
F_A9
F_A20
AL
ADACVSS
IOA20
F_A21
TP3TP3
TP2TP2
TP4TP4
MPX1
MPX2
ACENT
AADCVSS
AADCVDD
TESTP2
AR
TESTN2
ADACVDD
C24
B24
ADACVDD
ACENT/AOSDAT2
IOA18
G3
M12
F_A18
F_A8
AVDD_VAD0
C26
C25
E24
B25
D24
B26
F23
AF
SIF
TP2
TN2
AADCVSS
AADCVDD
IOA6H2IOA5H3DVDD33AH4IOA4
HIGHA0G2IOA7
H1
G1
IOA7
IOA3
IOA6
IOA5
IOA4
SB33A
TP50TP50
AVICM
A26
A24
A25
AVICM
AL/AOSDAT0
AR/AOSDAT1
IOA19
IOA21
IOWR#
J2
F1
G4
IOWR#
F_A19
GND
R34 820kR34 820k
Y1
SB33B
TP80TP80
TP12TP12
TP13TP13
TP45TP45
TP46TP46
TP47TP47
TP31TP31
TP8TP8
TP9TP9
TP10TP10
TP48TP48
TP49TP49
DV18A
DV33A
VFE_GND
DV18A
DV33A
5
XTALO
C2
27pFC227pF
PLLVDD1
LVDS_GND
PLLVDD2
LVDS_GND
PLLVDD3
XTALVDD
XTALO
XTALI
LVDS_GND
LVDS_GND
ADC_IN4
ADC_IN3
ADC_IN2
ADC_IN1
ADC_IN0
ADCVDD
PWM2VREF
SVM
B
LVDS_GND
G
DACVDDA
LVDS_GND
DACVDDB
R
LVDS_GND
DACFS
DACVREF
DACVDDC
TESTP4
TESTN4
VPLLVDD1
LVDS_GND
VPLLVDD2
LVDDA
AP7
AN7
CLK2+
CLK2LVDS_GND
AP6
AN6
AP5
AN5
LVDDB
AP4
AN4
AP3
AN3
LVDS_GND
CLK1+
CLK1AP2
AN2
LVDDC
AP1
AN1
AP0
AN0
LVDS_GND
SB18A
GPIO19
SB33A
8202UP3_5
8202UP3_1
8202UP3_0
VSYNC
HSYNC
DE
VCLK
F_A17
IOA0
F_D7
GND
F_D6
F_D5
F_D4
GND
F_D3
F_D2
F_D1
F_D0
F_OE#
IOCE#
IOA1
SB18A
F_A16
F_A15
F_A14
F_A13
ICE
GND
U12
U12
R351 1kR351 1k
C22
B22
C21
A23
B21
A22
A20
A21
A19
D21
D20
C20
B20
C19
B19
D18
C18
B18
A18
D19
A17
C16
C17
D16
B17
D17
A16
B16
C15
A15
B15
D15
D14
A13
D13
C12
D12
C11
D11
C14
C10
D10
C13
A12
B12
B14
A11
B11
A10
B10
B13
A14
L12
L11
AA3
C9
D9
C8
D8
A9
B9
A8
B8
K4
D7
D5
C7
B7
A7
B6
A6
C6
D6
C3
C2
C4
B1
B2
A2
B3
A3
B4
A4
B5
A5
C1
K3
D2
D1
E4
E3
A1
C5
J3
J4
N2
PLLVDD1
PLLVSS2
PLLVDD2
PLLVSS3
PLLVDD3
XTALVDD
XTALO
XTALI
XTALVSS
ADCVSS
ADIN4/GPIO
ADIN3/GPIO
ADIN2/GPIO
ADIN1/GPIO
ADIN0/GPIO
ADCVDD
PWM2VREF
SVM
B
DACVSSA
G
DACVDDA
DACVSSB
DACVDDB
R
DACVSSC
FS
VREF
DACVDDC
TP4
TN4
VPLLVDD1
VPLLVSS
VPLLVDD2
LVDDA
A7P
A7N
CK2P
CK2N
LVSSA
A6P
A6N
A5P
A5N
LVDDB
A4P
A4N
A3P
A3N
LVSSB
CK1P
CK1N
A2P
A2N
LVDDC
A1P
A1N
A0P
A0N
LVSSC
DVDD18A
GPIO
DVDD33A
UP3_5
UP3_1
UP3_0
VSYNCO
HSYNCO
GPIO
GPIO
A17
IOA0
AD7
DVSS18
AD6
AD5
AD4
DVSS33
AD3
AD2
AD1
AD0
IOOE#
IOCS#
IOA1
DVDD18A
A16
HIGHA7
HIGHA6
HIGHA5
NC BALL
NC BALL
NC BALL
NC BALL
NC BALL
NC BALL
HIGHA4
E2
F_A12
LVDS_GND
B23
E1
F_A11
TESTN3
D22
PLLVSS1
HIGHA3
F4
F_A10
XTALI
D D
AUDIO_GND
AADCVSS
LVDS_GND
VFE_GND
VFE_GND1
AVDD_VAD1
AVDD_VFE1
PLLVDD1
PLLVDD2
PLLVDD3
XTALVDD
VPLLVDD1
DACVDDA
DACVDDB
DACVDDC
AVDD_VFE0
AVDD_VAD0
AADCVDD
ADACVDD
ADCVDD
VPLLVDD2
C C
LVDDA
LVDDB
LVDDC
TESTP2
TESTP3
TESTN3
TESTP4
TESTN4
AVICM
PWM2VREF
DACFS
REFP
REFN
B B
DE
DE
SVM
CVBS3
AOSDATA0
AOSDATA3
27MHzY127MHz
C1
22pFC122pF
LVDS_GND
AUDIO_GND 4,10
AADCVSS 4,10
LVDS_GND 2,4,12
VFE_GND 2,4,8,11
VFE_GND1 2,4,8,11
AVDD_VAD1 4
AVDD_VFE1 4
PLLVDD1 4
PLLVDD2 4
PLLVDD3 4
XTALVDD 4
VPLLVDD1 4
DACVDDA 4
DACVDDB 4
DACVDDC 4
AVDD_VFE0 4
AVDD_VAD0 4
AADCVDD 4
ADACVDD 4
ADCVDD 4
VPLLVDD2 4
LVDDA 4
LVDDB 4
LVDDC 4
TESTP2 9
TESTP3 4
TESTN3 4
TESTP4 4
TESTN4 4
AVICM 4
PWM2VREF 4
DACFS 4
REFP 4
REFN 4
R673 10K/NCR673 10K/NC
R364 10K/NCR364 10K/NC
R341 10KR341 10K
R342 10KR342 10K
R434 10KR434 10K
R441 10KR441 10K
SB33B
R39
R39
R40
R40
10k
10k
10k
10k
RXD1
TXD1
A A
SB33A
SB33B
SB18A
SB33A
SB33B
SB18A
TP5TP5TP23TP23
REFP
CVBS0
CVBS2
CVBS3
REFN
CVBS1
VFE_GND1
G24
F24
D25
D26
E26
E25
G23
REFP
REFN
CVBS1
CVBS0
CVBS2
AVSS_VAD0
AVDD_VAD0
WR#
RD#
IOA3D3INT0L1PRST#L2UP3_4L3IR
IOALE
IOA2
J1
K1
K2
D4
ALE
IOA2
INT0#
URD#
URST#
UWR#
8202UP3_4
TP51TP51
TP52TP52
4
SY0
VFE_GND1
AVDD_VFE0
H23
J23
CVBS3
AVSS_VFE0
AVDD_VFE0
ICE
L4
M2
ICE
IR
DV18A
R745NCR745
NC
4
TP7TP7
TP6TP6
PB1-
PR0+
Y1-
SOY1
PR1-
SY1
SC1
PR1+
SC0
PB1+
AVDD_VAD1
L26
G26
F26
J26
G25
F25
K26
J25
K25
L23
SY1
SY0
SC1
SC0
PB1P
PB1N
PR1P
PR1N
AVDD_VAD1
MT8202
MT8202
SOCKET
SOCKET
DVDD18U4RXDM3TXDM4AOMCLK
AOBCKN1LINN4DVSS18
AOSDATA0/GPIOP1AOSDATA1/GPIOP2AOSDATA2/GPIOP3AOSDATA3/GPIOP4DVSS33
AOLRCK
N3
M1
M11
RXD
TXD
AOLRCK
AOBCLK
AOSDATA0
ADIN
GND
AOMCLK
AOSDATA1
Y0+
PR0-
PB0-
Y0-
PB0+
Y1+
L25
Y1N
AOSDATA2
SOY0
VFE_GND
TESTN1
TESTP1
RED+
RED-
AVDD_VFE1
P26
M26
P24
L24
Y1P
SOY1
PR0N
N12
AOSDATA3
GND
M25
GPIO0
R24
P25
N26
P23
N25
PB0N
PR0P
GPIO0/AOSDATA4R1GPIO3R4GPIO1/AOSDATA5R2FCICLK/GPIOT1GPIO4T4GPIO5/TXDU1GPIO6/RXDU2DVDD18U3GPIO7V1GPIO9V3GPIO8V2GPIO10V4GPIO13W3GPIO14W4GPIO15Y1GPIO16
GPIO1
GPIO2
Y0P
Y0N
PB0P
GPIO2R3FCICMD/GPIO
FCLK
FCMD
GPIO3
R26
R25
R23
M24
RN
TP1
TN1
SOY0
AVSS_VAD1
AVDD_VFE1
FCIDAT/GPIO
T2
T3
TXD1
GPIO4
GPIO7
FDAT
RXD1
DV18A
GREEN-
T26
RP
GN
GPIO8
GREEN+
T25
GP
GPIO9
R35310K R35310K
SB33B
VFE_GND
BLUE-
BLUE+
VGASOG
U25
N24
T24
U26
BP
BN
SOG
GPIO11W1GPIO17
GPIO12
W2
GPIO12
GPIO10
GPIO11
GPIO13
R22010K R22010K
TP43TP43
VGAHSYNC#
VGAVSYNC#
SCART_FB
V26
V25
U24
VSYNC
HSYNC
AVSS_VFE1
FAST_BLANK
Y2
GPIO15
GPIO14
GPIO16
R22110K R22110K
R8710K R8710K
R8610K R8610K
SDA0
SCL0
V23
U23
SCL0
Y3
Y4
GPIO17
GPIO18
R8810K R8810K
SB33B
SB33B
CCIR_V7
V24
SDA0
CCIR_V7/GPIO
SDA
GPIO18
AA1
IOSDA
R8910K R8910K
3
R32310K R32310K
2
1
SB33B
GND
GND
CCIR_V3
CCIR_V1
SDA1
HDMISD3
CCIR_V0
Y26
CCIR_V1/GPIO
DQ3
AC1
A_DQ4
CCIR_V0/GPIO
DQ4
CCIR_VCLK
W23
CCIR_VCLK/GPIO
DQ5
AC2
A_DQ5
T16
DVSS33
DQ6
AC3
A_DQ6
SCL1
AB24
N11
GND
AB23
SCL1
DVSS25
AC4
A_DQ7
AA24
SDA1
HDMISD3/GPIO
DQ7
DQS0
AD1
A_DQS0
HDMISD1
HDMISD2
AA26
AA23
HDMISD2/GPIO
DQM0
AD5
AD2
DV25A
A_DQM0
CCIR_V6
CCIR_V2
CCIR_V5
CCIR_V4
Y25
Y24
Y23
W26
W25
W24
R16
DVSS18
CCIR_V2/GPIO
CCIR_V3/GPIO
CCIR_V4/GPIO
CCIR_V5/GPIO
CCIR_V6/GPIO
SCL
DQ2
DQ1
DQ0
DVDD33
DVDD25
AA2
AB3
AB2
AB1
AA4
AB4
AC5
IOSCL
DV25A
A_DQ3
A_DQ0
A_DQ2
DV33A
A_DQ1
3
HDMISD0
AA25
HDMISD0/GPIO
HDMISD1/GPIO
DVDD25
DQS1
AE1
A_DQS1
HDMILRCK
AC24
HDMILRCK/GPIO
DQ8
AF1
A_DQ8
DV18A
DV33A
HDMIBCLK
HDMIMCLK
VI23
VI19
VI22
VI20
VI21
AE26
AD25
AD26
AC25
AC26
AB25
AC20
AC23
AB26
VI20
VI21
VI22
VI23
DVDD33
DVDD18
HDMIBCLK/GPIO
HDMIMCLK/GPIO
DQ12
DVSS18
DQ11
DQ10
RVREF
DVSS18
DQ9
DVSS25
P12
P11
AF3
AF2
R12
AE3
AE2
AD3
GND
A_DQ10
A_DQ11
GND
VREF
GND
A_DQ9
A_DQ12
VI18
VI19
GND
VI17
AF26
AE25
VI18
DGND/BALL
L13
L14
GND
VI17
DGND/BALL
L15
GND
AADCVSS
E23
AADCVSS
DGND/BALL
DGND/BALL
L16
GND
VFE_GND1
VFE_GND1
VFE_GND
VFE_GND1
VFE_GND1
M23
H24
H25
H26
K23
VFE_GND
VFE_GND1
VFE_GND1
VFE_GND1
VFE_GND1
VCLK_DVI
HSYNC_DVI
VSYNC_DVI
CEN_DVI/GPIO
DE_SOG/GPIO
OUT_27MHZ/GPIO
GPIO/PWM1
GPIO/PWM0
DVDD25OPT
DVDD25OPT
DVDD25OPT
DVDD25_CLK
DGND/BALL
DGND/BALL
DGND/BALL
DGND/BALL
DGND/BALL
DGND/BALL
DGND/BALL
DGND/BALL
DGND/BALL
DGND/BALL
DGND/BALL
DGND/BALL
M15
M13
M14
GND
GND
GND
VFE_GND
N23
VFE_GND
NC BALL
NC BALL
NC BALL
VI16
VI15
VI14
VI13
VI12
VI11
DVSS18
VI10
DVSS33I
DVDD18
DE_DVI
DVDD33I
DQ31
DQ30
DQ29
DQ28
DQ27
DVSS25
DQ26
DQ25
DQ24
DQS3
DQM1
DVSS18
DQS2
DQ23
DQ22
DVSS25
DQ21
DQ20
DVDD18
DQ19
DQ18
DQ17
DQ16
RA4
RA5
DVSS25
RA6
RA7
RA8
DVSS18
RA9
RA11
CKE
RCLK
RCLKB
DVSS25
RA3
RA2
RA1
RA0
RA10
DVDD25
BA1
DVDD18
BA0
RCS#
RAS#
DVSS25
CAS#
RWE#
DQ15
DQ14
DQ13
DVDD25
R36
R36
R35
R35
10k
10k
10k
10k
RXD
TXD
GND
GND
GND
GND
GND
RS-232
IOSDA
R47 0R47 0
IOSCL
R48 0R48 0
8202UP3_5
R49 0/NCR49 0/NC
8202UP3_4
R50 0/NCR50 0/NC
8202UP3_4 FOR S/W SCL
8202UP3_5 FOR S/W SDA
CVBS0
CVBS1
CVBS2
SY0
SC0
SY1
SC1
RED+
REDGREEN+
GREENBLUE+
BLUEVGASOG
VGAHSYNC#
VGAVSYNC#
Y0+
Y0PB0+
PB0PR0+
PR0SOY0
Y1+
Y1PB1+
PB1PR1+
PR1SOY1
J24
K24
T23
VI16
AF25
VI15
AD24
VI14
AE24
VI13
AF24
VI12
AD23
VI11
AE23
T15
AF23
R15
AD22
VI9
AE22
VI8
AF22
VI7
AC21
VI6
AD21
VI5
AE21
VI4
AE19
AF21
VI3
AD20
VI2
AC22
AE20
VI1
AF20
VI0
AC19
AD19
AF19
AF18
AE18
AD18
AC18
AD17
AC17
AE17
AF17
AC16
AC15
AD16
AE16
T14
AF16
AE15
AD14
AF15
AD15
AE14
R14
AF14
AF13
AE13
T13
AD13
AC13
AC9
AF12
AC14
AE12
AD12
AC12
AF11
AE11
R13
AD11
AC11
AF10
T12
AE10
AD10
AC10
AC7
AE9
AF9
T11
AD9
AF8
AE8
AD8
AF7
AD6
AE7
AC8
AD7
AF6
AE6
R11
AF5
AE5
AF4
AE4
AD4
AC6
P16
P15
P14
P13
N16
N15
N14
N13
M16
BGA388/SMD
BGA388/SMD
MT8202
MT8202
2
GND
VI10
GND
VI9
VI8
VI7
VI6
VI5
VI4
HDMIODCK
VI3
VI2
DV18A
VI1
VI0
HDMIDE
HDMIHSYNC
HDMIVSYNC
HDMICEN
DE_SOG
27MHZ
PWM1
PWM0
DV33A
A_DQ31
A_DQ30
A_DQ29
SDV25A
A_DQ28
A_DQ27
A_DQ26
A_DQ25
A_DQ24
A_DQS3
SDV25A
A_DQM1
A_DQS2
A_DQ23
A_DQ22
A_DQ21
A_DQ20
DV18A
A_DQ19
SDV25A
A_DQ18
A_DQ17
A_DQ16
A_RA4
A_RA5
A_RA6
A_RA7
A_RA8
A_RA9
A_RA11
A_CKE
DV25A
A_CLK
A_CLK#
GND
A_RA3
A_RA2
A_RA1
A_RA0
A_RA10
DV25A
A_BA1
DV18A
A_BA0
A_CS#
A_RAS#
GND
A_CAS#
A_WE#
A_DQ15
A_DQ14
A_DQ13
DV25A
GND
GND
GND
GND
GND
GND
GND
GND
GND
J4
J4
1
2
3
4
4x1 W/HOUSING
4x1 W/HOUSING
DIP4/W/H/P2.0
DIP4/W/H/P2.0
SB33B
R101
R101
R103
R103
4.7K
4.7K
4.7K
4.7K
SDA_8202
SCL_8202
CVBS0 10
CVBS1 10
CVBS2 10
SY0 10
SC0 10
SY1 10
SC1 10
RED+ 11
RED- 11
GREEN+ 11
GREEN- 11
BLUE+ 11
BLUE- 11
VGASOG 11
VGAHSYNC# 11
VGAVSYNC# 11
Y0+ 10
Y0- 10
PB0+ 10
PB0- 10
PR0+ 10
PR0- 10
SOY0 10
Y1+ 10
Y1- 10
PB1+ 10
PB1- 10
PR1+ 10
PR1- 10
SOY1 10
ZhongShan KAWA Electronic Inc.
ZhongShan KAWA Electronic Inc.
ZhongShan KAWA Electronic Inc.
Title
Title
Title
MT8202E PBGA388
MT8202E PBGA388
MT8202E PBGA388
Document Number
Document Number
Document Number
Size
Size
Size
AKAI_MT8202_27US_LVDS_V0.0
AKAI_MT8202_27US_LVDS_V0.0
AKAI_MT8202_27US_LVDS_V0.0
C
C
C
Date: Sheet
Date: Sheet
Date: Sheet
AP[0..7]
AN[0..6]
CLK1+
CLK1-
VI[0..23]
HDMIMCLK
HDMIBCLK
HDMILRCK
HDMISD0
HDMISD1
HDMISD2
HDMISD3
HDMIODCK
HDMIDE
HDMIHSYNC
HDMIVSYNC
HDMICEN
DE_SOG
27MHZ
A_DQS[0..3]
A_RA[0..11]
A_BA[0..1]
A_DQM[0..1]
A_DQ[0..31]
A_CLK
A_CLK#
A_CKE
A_CS#
A_RAS#
A_CAS#
A_WE#
VREF
DV25A
SDV25A
IR
F_A21
IOCE#
F_OE#
IOWR#
F_A[8..20]
F_D[0..7]
IOA[0..7]
URST#
INT0#
SDA_8202
SCL_8202
SCL1
SDA1
ADC_IN0
8202UP3_0
8202UP3_1
PWM0
PWM1
GPIO0
GPIO1
GPIO2
GPIO3
GPIO4
GPIO7
GPIO8
GPIO9
GPIO10
GPIO11
GPIO12
GPIO13
GPIO14
GPIO15
GPIO16
GPIO17
GPIO18
GPIO19
VCLK
CCIR_VCLK
CCIR_V7
CCIR_V6
CCIR_V5
CCIR_V4
CCIR_V[0..3]
SCL0
SDA0
ADC_IN4
TXD1
RXD1
TXD
RXD
AOMCLK
AOBCLK
AOLRCK
ADIN
AOSDATA1
AOSDATA2
AL
AR
MPX1
MPX2
FCLK
FCMD
FDAT
SCL_8202
SDA_8202
1
AP[0..7] 12
AN[0..6] 12
CLK1+ 12
CLK1- 12
A_DQS[0..3] 5
A_RA[0..11] 5
A_BA[0..1] 5
A_DQM[0..1] 5
A_DQ[0..31] 5
A_CLK 5
A_CLK# 5
A_CKE 5
A_CS# 5
A_RAS# 5
A_CAS# 5
A_WE# 5
VREF 5
TXD1 7
RXD1 7
TXD 7,11
RXD 7,11
AOMCLK 9,16
AOBCLK 9,16
AOLRCK 9,16
AOSDATA1 9
KAWA Confidential
KAWA Confidential
KAWA Confidential
Drawn:
Drawn:
Drawn:
Checked:
Checked:
Checked:
VI[0..23] 6,7
HDMIMCLK 6,7
HDMIBCLK 6,7
HDMILRCK 6,7
HDMISD0 6,7
HDMISD1 6
HDMISD2 6
HDMISD3 6
HDMIODCK 6,7
HDMIDE 6,7
HDMIHSYNC 6,7
HDMIVSYNC 6,7
HDMICEN 6
DE_SOG 6
27MHZ 6
DV25A 5
SDV25A 5
IR 13,15
F_A21 13
IOCE# 5
F_OE# 5
IOWR# 5
F_A[8..20] 5
F_D[0..7] 5
IOA[0..7] 5
URST# 1
INT0# 6
SDA_8202 6,9,12
SCL_8202 6,9,12
SCL1 7
SDA1 7
ADC_IN0 8
8202UP3_0 13
8202UP3_1 1
PWM0 13
PWM1 13
GPIO0 12
GPIO1 15
GPIO2 1,12
GPIO3 7
GPIO4 1
GPIO7 9
GPIO8 17
GPIO9 17
GPIO10 13
GPIO11 8
GPIO12 13
GPIO13 13
GPIO14 1,13
GPIO15 8
GPIO16 8
GPIO17 8
GPIO18 8
GPIO19 1,13
VCLK 13
CCIR_VCLK 12
CCIR_V7 8
CCIR_V6 7
CCIR_V5 8
CCIR_V4 12
CCIR_V[0..3] 6,8,13
SCL0 7
SDA0 7
ADC_IN4 14
ADIN 9
AOSDATA2 16
AL 9
AR 9
MPX1 10
MPX2 10
FCLK 12
FCMD 12
FDAT 12
SCL_8202 6,9,12
SDA_8202 6,9,12
<Designer>
<Designer>
<Designer>
<Checker>
<Checker>
<Checker>
317Thursday, March 30, 2006
317Thursday, March 30, 2006
317Thursday, March 30, 2006
of
of
of
Rev
Rev
Rev
1
1
1
Page 17
5
15/65
STANDBY ANALOG POWER
XTALVDD
ADCVDD
AVICM
PWM2VREF
DACFS
D D
LVDDA
LVDDB
LVDDC
AVDD_VFE0
AVDD_VAD0
AADCVDD
ADACVDD
VPLLVDD1
VPLLVDD2
AVDD_VAD1
AVDD_VFE1
PLLVDD1
PLLVDD2
PLLVDD3
DACVDDA
C C
DACVDDB
DACVDDC
TESTP3
TESTN3
TESTP4
TESTN4
REFP
REFN
AADCVSS
AUDIO_GND
LVDS_GND
VFE_GND
AADCVSS
VFE_GND1
B B
XTALVDD 3
ADCVDD 3
AVICM 3
PWM2VREF 3
DACFS 3
LVDDA 3
LVDDB 3
LVDDC 3
AVDD_VFE0 3
AVDD_VAD0 3
AADCVDD 3
ADACVDD 3
VPLLVDD1 3
VPLLVDD2 3
AVDD_VAD1 3
AVDD_VFE1 3
PLLVDD1 3
PLLVDD2 3
PLLVDD3 3
DACVDDA 3
DACVDDB 3
DACVDDC 3
TESTP3 3
TESTN3 3
TESTP4 3
TESTN4 3
REFP 3
REFN 3
AADCVSS 3,10
AUDIO_GND 3,10
LVDS_GND 2,3,12
VFE_GND 2,3,8,11
AADCVSS 3,10
VFE_GND1 2,3,8,11
ASB18A
ASB33A
+
+
CE26
CE26
10uF/10V
10uF/10V
LVDS_GND
L12 FBL12 FB
L13 FBL13 FB
C10
C10
1uF
1uF
NORMAL VIDEO DAC POWER
DACVDD
+
+
CE28
CE28
10uF/10V
10uF/10V
LVDS_GND
FB5 FB
FB5 FB
BEAD/SMD/0603
BEAD/SMD/0603
C14
C14
1uF
1uF
FB6 FB
FB6 FB
BEAD/SMD/0603
BEAD/SMD/0603
FB8 FB
FB8 FB
BEAD/SMD/0603
BEAD/SMD/0603
NORMAL VIDEO DAC POWER
AV33A
C20
C20
1uF
1uF
LVDS_GND
FB10 FB
FB10 FB
BEAD/SMD/0603
BEAD/SMD/0603
NORMAL AUDIO ADC / DAC POWER
ADCV33A
+
+
CE33
CE33
10uF/10V
10uF/10V
A A
AADCVSS
ADCV33A
+
CE35
+
CE35
10uF/10V
10uF/10V
AUDIO_GND
5
C27
C27
1uF
1uF
C28
C28
1uF
1uF
L14 150uH
L14 150uH
L/IND/DIP/P10.0
L/IND/DIP/P10.0
L15 150uH
L/IND/DIP/P10.0
L/IND/DIP/P10.0
+
+
+
+
C5
4.7uFC54.7uF
C11
C11
4.7uF
4.7uF
C15
C15
4.7uF
4.7uF
C16
C16
4.7uF
4.7uF
C18
C18
4.7uF
4.7uF
C21
C21
4.7uF
4.7uF
C23
C23
4.7uF
4.7uF
C25
C25
4.7uF
4.7uF
CE34
CE34
470uF/16V
470uF/16V
CE36
CE36
470uF/16V
470uF/16V
4
3
2
1
NORMAL ANALOG POWER
XTALVDD
CB26
CB26
0.1uF
0.1uF
LVDS_GND
ADCVDD
CB29
CB29
0.1uF
0.1uF
LVDS_GND
DACVDDA
CB33
CB33
0.1uF
0.1uF
LVDS_GND
DACVDDB
CB34
CB34
0.1uF
0.1uF
LVDS_GND
DACVDDC
CB37
CB37
0.1uF
0.1uF
LVDS_GND
LVDDA
CB40
CB40
0.1uF
0.1uF
LVDS_GND
LVDDB
CB42
CB42
0.1uF
0.1uF
LVDS_GND
LVDDC
CB45
CB45
0.1uF
0.1uF
LVDS_GND
AADCVDD
CB47
CB47
0.1uF
0.1uF
AADCVSS
ADACVDD
CB48
CB48
0.1uF
0.1uF
AUDIO_GND
4
ASB18A
FB1 FBFB1 FB
+
+
CE24
CE24
10uF/10V
10uF/10V
LVDS_GND
AV18A
+
+
CE27
CE27
10uF/10V
10uF/10V
LVDS_GND
AV33A
+
+
CE29
CE29
10uF/10V
10uF/10V
LVDS_GND
C6
1uFC61uF
CB31
CB31
1uF
1uF
CB35
CB35
1uF
1uF
FB4 FBFB4 FB
FB7 FBFB7 FB
NORMAL VIDEO ADC POWER
ADCV33A
+
+
CE30
CE30
10uF/10V
10uF/10V
VFE_GND1
ADCV18A
+
+
CE32
CE32
10uF/10V
10uF/10V
VFE_GND
AVICM
CB25
CB25
0.1uF
0.1uF
AUDIO_GND
+
+
CE25
CE25
47uF/16V
47uF/16V
DACFS
R42
R42
820
820
LVDS_GND
CB38
CB38
1uF
1uF
CB43
CB43
1uF
1uF
C3
C3
10uF/10v
10uF/10v
C0805/SMD
C0805/SMD
PWM2VREF
C8
C8
0.1uF
0.1uF
C0603/SMD
C0603/SMD
LVDS_GND
FB9 FBFB9 FB
FB11 FBFB11 FB
FB13 FBFB13 FB
FB15 FBFB15 FB
3
C7
4.7uFC74.7uF
C9
4.7uFC94.7uF
C13
C13
4.7uF
4.7uF
C17
C17
4.7uF
4.7uF
C19
C19
4.7uF
4.7uF
C22
C22
4.7uF
4.7uF
C24
C24
4.7uF
4.7uF
C26
C26
4.7uF
4.7uF
AADCVSS
AUDIO_GND
VFE_GND
VFE_GND1
LVDS_GND
L9 FBL9 FBL15 150uH
L2 FBL2 FB
L3 FBL3 FB
PLLVDD1
CB27
CB27
0.1uF
0.1uF
LVDS_GND
PLLVDD2
CB28
CB28
0.1uF
0.1uF
LVDS_GND
PLLVDD3
CB30
CB30
0.1uF
0.1uF
LVDS_GND
VPLLVDD1
CB32
CB32
0.1uF
0.1uF
LVDS_GND
VPLLVDD2
CB36
CB36
0.1uF
0.1uF
LVDS_GND
AVDD_VFE0
CB39
CB39
0.1uF
0.1uF
VFE_GND1
AVDD_VAD0
CB41
CB41
0.1uF
0.1uF
VFE_GND1
AVDD_VFE1
CB44
CB44
0.1uF
0.1uF
VFE_GND
AVDD_VAD1
CB46
CB46
0.1uF
0.1uF
VFE_GND
VFE_GND1
C51
C51
10uF/10v
10uF/10v
C0805/SMD
REFP
REFN
TESTP3
TESTN3
TESTN4
C0805/SMD
C49
C49
10uF/10v
10uF/10v
C0805/SMD
C0805/SMD
R43 49.9 1%R43 49.9 1%
R44 49.9 1%R44 49.9 1%
R45 49.9 1%R45 49.9 1%
R46 49.9 1%R46 49.9 1%
C173
C173
0.1uF
0.1uF
C50
C50
10uF/10v
10uF/10v
C0805/SMD
C0805/SMD
VFE_GND1
C174
C174
0.01uF
0.01uF
PLLVDD1
PLLVDD1
VPLLVDD1TESTP4
VPLLVDD1
MT8202 DIGITAL POWER & DECOUPLING
DV18A
CB52
CB52
CB53
CB53
0.1uF
0.1uF
0.1uF
0.1uF
C32
C32
C33
C33
3300pF
3300pF
3300pF
3300pF
5VSB
+
+
DV33A
2
CE37
CE37
220uF/16v
220uF/16v
CB59
CB59
0.1uF
0.1uF
CB60
CB60
0.1uF
0.1uF
+
+
CE38
CE38
220uF/16v
220uF/16v
SB33A
CB49
CB49
CB50
CB50
0.1uF
0.1uF
0.1uF
CB55
CB55
0.1uF
0.1uF
0.1uF
C29
C29
0.01uF
0.01uF
C30
C30
3300pF
3300pF
CB54
CB54
0.1uF
0.1uF
C34
C34
3300pF
3300pF
PUT ON NEARLY BGA
CB57
CB57
CB58
SB18A
0.1uF
0.1uF
C31
C31
3300pF
3300pF
CB58
0.1uF
0.1uF
CB51
CB51
0.1uF
0.1uF
KAWA Confidential
KAWA Confidential
KAWA Confidential
Drawn:
Drawn:
Drawn:
Checked:
Checked:
Checked:
1
<Designer>
<Designer>
<Designer>
<Checker>
<Checker>
<Checker>
417Thursday, March 30, 2006
417Thursday, March 30, 2006
417Thursday, March 30, 2006
of
of
of
CB56
CB56
0.1uF
0.1uF
SB18A
CB61
CB61
0.1uF
0.1uF
ZhongShan KAWA Electronic Inc.
ZhongShan KAWA Electronic Inc.
ZhongShan KAWA Electronic Inc.
Title
Title
Title
MT8202 DECOUPLING
MT8202 DECOUPLING
MT8202 DECOUPLING
Document Number
Document Number
Document Number
Size
Size
Size
AKAI_MT8202_27US_LVDS_V0.0
AKAI_MT8202_27US_LVDS_V0.0
AKAI_MT8202_27US_LVDS_V0.0
C
C
C
Date: Sheet
Date: Sheet
Date: Sheet
Rev
Rev
Rev
1
1
1
Page 18
5
16/65
RN2
RN2
A_RA3
7 8
A_RA2
5 6
A_RA1
3 4
A_RA0
1 2
RN4
RN4
A_RA6
7 8
A_RA7
5 6
A_RA4
3 4
A_RA5
1 2
RN6
RN6
A_RA8
7 8
A_RA9
5 6
A_RA11
D D
A_DQS[0..3]
A_DQS[0..3] 3
A_RA[0..11]
A_RA[0..11] 3
A_BA[0..1]
A_BA[0..1] 3
A_DQM[0..1]
A_DQM[0..1] 3
A_DQ[0..31]
IOA[0..7]
F_D[0..7]
F_A[8..20]
A_DQ[0..31] 3
A_CLK 3
A_CLK# 3
A_CKE 3
A_CS# 3
A_RAS# 3
A_CAS# 3
A_WE# 3
VREF 3
IOA[0..7] 3
F_D[0..7] 3
IOCE# 3
F_OE# 3
IOWR# 3
F_A[8..20] 3
DV25A 3
SDV25A 3
VREF
VREF
VREF
VREF
CB120
CB120
0.1uF
0.1uF
VREF DECOUPLING
CB125
CB125
0.1uF
0.1uF
5
A_CLK
A_CLK#
A_CKE
A_CS#
A_RAS#
A_CAS#
A_WE#
VREF
IOCE#
F_OE#
IOWR#
DV25A
SDV25A
C C
B B
A A
3 4
1 2
A_RA10
R64 22R64 22
RN8
RN8
A_DQ0
7 8
A_DQ1
5 6
A_DQ2
3 4
A_DQ3
1 2
RN10
RN10
A_DQ4
7 8
A_DQ5
5 6
A_DQ6
3 4
A_DQ7
1 2
RN11
RN11
A_DQ8
7 8
A_DQ9
5 6
A_DQ10
3 4
A_DQ11
1 2
RN13
RN13
A_DQ12
7 8
A_DQ13
5 6
A_DQ14
3 4
A_DQ15
1 2
RN16
RN16
A_DQ16
7 8
A_DQ17
5 6
A_DQ18
3 4
A_DQ19
1 2
RN17
RN17
A_DQ20
7 8
A_DQ21
5 6
A_DQ22
3 4
A_DQ23
1 2
RN19
RN19
A_DQ24
7 8
A_DQ25
5 6
A_DQ26
3 4
A_DQ27
1 2
RN21
RN21
A_DQ28
7 8
A_DQ29
5 6
A_DQ30
3 4
A_DQ31
1 2
A_DQS0
R66 47R66 47
A_DQS1 D_DQS1
R67 47R67 47
A_DQS2
R68 47R68 47
A_DQS3
R69 47R69 47
A_CAS#
7 8
A_WE#
5 6
A_CS# D_CS#
3 4
A_RAS#
1 2
A_BA1
R71 22R71 22
A_BA0
R73 22R73 22
A_DQM0
R76 22R76 22
A_DQM1
R78 22R78 22
A_CKE
R80 22R80 22
A_CLK
R82 22R82 22
A_CLK# D_CLK#
R84 22R84 22
D_CLK
R327 100/NCR327 100/NC
D_CLK
R328 100/NCR328 100/NC
D_CLK
R329 100/NCR329 100/NC
CB121
CB121
0.1uF
0.1uF
CB126
CB126
0.1uF
0.1uF
RN25
RN25
22x4
22x4
22x4
22x4
22x4
22x4
47x4
47x4
47x4
47x4
47x4
47x4
47x4
47x4
47x4
47x4
47x4
47x4
47x4
47x4
47x4
47x4
22x4
22x4
CB122
CB122
0.1uF
0.1uF
CB127
CB127
0.1uF
0.1uF
SDV25
CB123
CB123
0.1uF
0.1uF
CB128
CB128
0.1uF
0.1uF
D_RA3
D_RA2
D_RA1
D_RA0
D_RA6
D_RA7
D_RA4
D_RA5
D_RA8
D_RA9
D_RA11
D_RA10
D_DQ0
D_DQ1
D_DQ2
D_DQ3
D_DQ4
D_DQ5
D_DQ6
D_DQ7
D_DQ8
D_DQ9
D_DQ10
D_DQ11
D_DQ12
D_DQ13
D_DQ14
D_DQ15
D_DQ16
D_DQ17
D_DQ18
D_DQ19
D_DQ20
D_DQ21
D_DQ22
D_DQ23
D_DQ24
D_DQ25
D_DQ26
D_DQ27
D_DQ28
D_DQ29
D_DQ30
D_DQ31
D_DQS0
D_DQS2
D_DQS3
D_CAS#
D_WE#
D_RAS#
D_BA1
D_BA0
D_DQM0
D_DQM1
D_CKE
D_CLK
D_CLK#
D_CLK#
D_CLK#
CB124
CB124
0.1uF
0.1uF
CB129
CB129
0.1uF
0.1uF
DV25B
VCC
4
DV25B DV25B
D_DQ0
D_DQ1
D_DQ2
D_DQ3
D_DQ4
D_DQ5
D_DQ6
D_DQ7
D_DQS0
D_DQM0
D_WE#
D_CAS#
D_RAS#
D_CS#
D_BA0
D_BA1
D_RA10
D_RA0
D_RA1
D_RA2 D_RA5
D_RA3
DV25B
D1V25
TP40TP40
CB110
CB110
CB111
CB111
0.1uF
0.1uF
0.1uF
0.1uF
+
CE44
+
CE44
220uF/16v
220uF/16v
4
U18
U18
1
VDD
2
DQ0
3
VDDQ
4
DQ1
5
DQ2
6
VSSQ
7
DQ3
8
DQ4
9
VDDQ
10
DQ5
11
DQ6
12
VSSQ
13
DQ7
14
NC
15
VDDQ
16
LDQS
17
NC
18
VDD
19
DNU
20
LDM
21
WE
22
CAS
23
RAS
24
CS
25
NC
26
BA0
27
BA1
28
A10/AP
29
A0
30
A1
31
8M x 16
8M x 16
A2
32
A3
33
VDD
HY5DU281622ET-5 8Mx16 TSOP(II)-66/SMD
HY5DU281622ET-5 8Mx16 TSOP(II)-66/SMD
U19
U19
1
D_DQ16
D_DQ17
D_DQ18 D_DQ29
D_DQ19
D_DQ20
D_DQ21
D_DQ22
D_DQ23
D_DQS2
D_DQM1
D_WE#
D_CAS#
D_RAS#
D_CS#
D_BA0
D_BA1
D_RA10
D_RA0
D_RA1
D_RA2
D_RA3
VDD
2
DQ0
3
VDDQ
4
DQ1
5
DQ2
6
VSSQ
7
DQ3
8
DQ4
9
VDDQ
10
DQ5
11
DQ6
12
VSSQ
13
DQ7
14
NC
15
VDDQ
16
LDQS
17
NC
18
VDD
19
DNU
20
LDM
21
WE
22
CAS
23
RAS
24
CS
25
NC
26
BA0
27
BA1
28
A10/AP
29
A0
30
A1
31
A2
32
A3
33
VDD
HY5DU281622ET-5 8Mx16 TSOP(II)-66/SMD
HY5DU281622ET-5 8Mx16 TSOP(II)-66/SMD
D1V25
VREF
+
+
LT1084-2.5 TO-252-3
LT1084-2.5 TO-252-3
U21
3
IN
CE42
CE42
220uF/16v
220uF/16v
TO-252-3/SMDU21
TO-252-3/SMD
IC LP2996 DDR Termination SOP8
IC LP2996 DDR Termination SOP8
ADJ/GND
1
DQ15
VSSQ
DQ14
DQ13
VDDQ
DQ12
DQ11
VSSQ
DQ10
VDDQ
VSSQ
UDQS
VREF
UDM
DDR
DDR
8M x 16
8M x 16
DDR
DDR
R74 4.7kR74 4.7k
U20
U20
1
GND
2
SD
3
VSENSE
VREF4VDDQ
2
OUT
VSS
DQ9
DQ8
VSS
CKE
A12
A11
VSS
VSSQ
VDDQ
VSSQ
VDDQ
VSSQ
UDQS
VREF
NC
NC
CK
CK
NC
A9
A8
A7
A6
A5
A4
DQ15
DQ14
DQ13
DQ12
DQ11
DQ10
UDM
66
D_DQ15
65
64
D_DQ14
63
D_DQ13
62
61
D_DQ12
60
D_DQ11
59
58
D_DQ10
57
D_DQ9
56
55
D_DQ8
54
53
52
D_DQS1
51
50
49
48
D_DQM0
47
D_CLK#
46
D_CLK
45
D_CKE
44
43
42
D_RA11
41
D_RA9
40
D_RA8
39
D_RA7
38
D_RA6
37
36
D_RA4
35
34
66
VSS
D_DQ31
65
64
D_DQ30
63
62
61
D_DQ28
60
D_DQ27
59
58
D_DQ26
57
D_DQ25
56
DQ9
55
D_DQ24
54
DQ8
53
NC
52
D_DQS3
51
50
NC
49
48
VSS
D_DQM1
47
D_CLK#
46
CK
D_CLK
45
CK
D_CKE
44
CKE
43
NC
42
A12
D_RA11
41
A11
D_RA9
40
A9
D_RA8
39
A8
D_RA7
38
A7
D_RA6
37
A6
D_RA5
36
A5
D_RA4
35
A4
34
VSS
8
VTT
7
PVIN
6
AVIN
5
VREF
VREF
+
+
DV25B
DV25B
CE41
CE41
47uF/16v
47uF/16v
+
CE46
+
CE46
220uF/16v
220uF/16v
3
CB64
CB64
0.1uF
0.1uF
CB93
CB93
0.1uF
0.1uF
L16 FBL16 FB
L17 FBL17 FB
3
D_RA3
D_RA2
D_RA1
D_RA0
D_RA5
D_RA4
D_RA7
D_RA6
D_RA8
D_RA9
D_RA11
D_BA1
D_DQ0
D_DQ1
D_DQ2
D_DQ3
D_DQ4
D_DQ5
D_DQ6
D_DQ7
D_DQ8
D_DQ9
D_DQ10
D_DQ11
RN15
RN15
D_DQ12
D_DQ13
D_DQ14
D_DQ15
RN18
RN18
D_DQ16
D_DQ17
D_DQ18
D_DQ19
RN20
RN20
D_DQ20
D_DQ21
D_DQ22
D_DQ23
RN22
RN22
D_DQ27
D_DQ26
D_DQ25
D_DQ24
RN23
RN23
D_DQ31
D_DQ30
D_DQ29
D_DQ28
D_CS#
D_RAS#
D_BA0
D_RA10
D_DQS2
D_DQS3
D_CAS#
D_WE#
D_DQM1
D_DQS1
D_DQS0
D_DQM0
SDV25A
DV25B
DV25A
CLOSE TO 8202 PIN
DV25A
C56
C56
10uF/10v
10uF/10v
C0805/SMD
C0805/SMD
RN3
RN3
7 8
5 6
3 4
1 2
75x4
75x4
RN5
RN5
75x4
75x4
RN7
RN7
75x4
75x4
R65 75R65 75
RN9
RN9
7 8
5 6
3 4
1 2
75x4
75x4
RN12
RN12
7 8
5 6
3 4
1 2
75x4
75x4
RN14
RN14
7 8
5 6
3 4
1 2
75x4
75x4
7 8
5 6
3 4
1 2
75x4
75x4
75x4
75x4
75x4
75x4
1 2
3 4
5 6
7 8
75x4
75x4
1 2
3 4
5 6
7 8
75x4
75x4
RN24
RN24
7 8
5 6
3 4
1 2
75x4
75x4
R70 75R70 75
R72 75R72 75
R75 75R75 75
R77 75R77 75
R79 75R79 75
R81 75R81 75
R83 75R83 75
R85 75R85 75
CB130
CB130
0.1uF
0.1uF
D1V25
78
56
34
12
12
34
56
78
12
34
56
78
12
34
56
78
D1V25
SB33B
2
R63
R63
10k
10k
IOWR#
SB33B
U17
U17
IOA1
25
A0
IOA2
24
A1
IOA3
23
A2
IOA4
22
A3
IOA5
21
A4
IOA6
20
A5
IOA7 F_D6
19
A6
F_A8
18
A7
F_A9
8
A8
F_A10
7
A9
F_A11
6
A10
F_A12
5
A11
F_A13
4
A12
F_A14
3
A13
F_A15
2
A14
F_A16
1
A15
F_A17
48
A16
F_A18
17
A17
15
RY/BY
F_A20
9
A19
10
A20
IOCE#
26
CE
F_OE#
28
OE
11
WE
12
RESET
TSOP 48 PIN
D1V25
CB68
CB94
CB94
0.1uF
0.1uF
CB102
CB102
0.1uF
0.1uF
CB112
CB112
0.1uF
0.1uF
CB67
CB67
0.1uF
0.1uF
CB75
CB75
0.1uF
0.1uF
CB83
CB83
0.1uF
0.1uF
C41
C41
3300pF
3300pF
+
+
CB68
0.1uF
0.1uF
CB76
CB76
0.1uF
0.1uF
CB84
CB84
0.1uF
0.1uF
CE40
CE40
220uF/16v
220uF/16v
CB95
CB95
0.1uF
0.1uF
CB103
CB103
0.1uF
0.1uF
CB113
CB113
0.1uF
0.1uF
C42
C42
3300pF
3300pF
DV25A
C54
C54
3300pF
3300pF
CB66
CB66
0.1uF
0.1uF
D1V25
CB74
CB74
0.1uF
0.1uF
D1V25
CB82
CB82
0.1uF
0.1uF
D1V25
C40
C40
3300pF
3300pF
D1V25
+
CE39
+
CE39
270uF/16v OS-CON/NC
270uF/16v OS-CON/NC
C220UF16V/D6H11
C220UF16V/D6H11
DV25B
DV25B
DV25A
SDV25A DV25B
2
29
D0
31
D1
33
D2
35
D3
38
D4
40
D5
42
D6
44
D7
30
D8
32
D9
34
D10
36
D11
39
D12
41
D13
43
D14
45
D15
16
A18
13
NC
14
WP/ACC
47
BYTE
37
VCC
27
GND1
46
GND2
29LV160
29LV160
CB69
CB69
CB70
CB70
0.1uF
0.1uF
0.1uF
0.1uF
CB78
CB78
CB77
CB77
0.1uF
0.1uF
0.1uF
0.1uF
CB85
CB85
CB86
CB86
0.1uF
0.1uF
0.1uF
0.1uF
C43
C43
C44
C44
3300pF
3300pF
3300pF
3300pF
CB96
CB96
CB97
CB97
0.1uF
0.1uF
0.1uF
0.1uF
CB104
CB104
CB105
CB105
0.1uF
0.1uF
0.1uF
0.1uF
PUT ON NEARLY BGA
C55
C55
3300pF
3300pF
DV25B
+
+
CE47
CE47
CB114
CB114
0.1uF
0.1uF
220uF/16v
220uF/16v
ZhongShan KAWA Electronic Inc.
ZhongShan KAWA Electronic Inc.
ZhongShan KAWA Electronic Inc.
Title
Title
Title
Size
Size
Size
Date: Sheet
Date: Sheet
Date: Sheet
1
F_D0
F_D1
F_D2
F_D3
F_D4
F_D5
F_D7
SB33B
SB33B
R61
IOA0
F_A19
C
C
C
R61
R620R62
10k
10k
0
FLASHVCC
CB72
CB72
CB73
CB99
CB99
0.1uF
0.1uF
CB107
CB107
0.1uF
0.1uF
CB117
CB117
0.1uF
0.1uF
0.1uF
0.1uF
CB80
CB80
0.1uF
0.1uF
CB88
CB88
0.1uF
0.1uF
C46
C46
3300pF
3300pF
DV25A
+
+
CB73
0.1uF
0.1uF
CB81
CB81
0.1uF
0.1uF
CB89
CB89
0.1uF
0.1uF
CB100
CB100
0.1uF
0.1uF
CB108
CB108
0.1uF
0.1uF
CB118
CB118
0.1uF
0.1uF
CE45
CE45
220uF/16v
220uF/16v
C47
C47
3300pF
3300pF
1
CB71
CB71
0.1uF
0.1uF
CB79
CB79
0.1uF
0.1uF
CB87
CB87
0.1uF
0.1uF
C45
C45
3300pF
3300pF
CB98
CB98
0.1uF
0.1uF
CB106
CB106
0.1uF
0.1uF
CB116
CB116
0.1uF
0.1uF
+
+
CE48
CE48
220uF/16v
220uF/16v
DDR MEMORY & FLASH
DDR MEMORY & FLASH
DDR MEMORY & FLASH
Document Number
Document Number
Document Number
AKAI_MT8202_27US_LVDS_V0.0
AKAI_MT8202_27US_LVDS_V0.0
AKAI_MT8202_27US_LVDS_V0.0
CB65
CB65
0.1uF
0.1uF
CB90
CB90
CB91
CB91
0.1uF
0.1uF
0.1uF
0.1uF
CB101
CB101
0.1uF
0.1uF
CB109
CB109
0.1uF
0.1uF
CB119
CB119
0.1uF
0.1uF
KAWA Confidential
KAWA Confidential
KAWA Confidential
Drawn:
<Designer>
Drawn:
<Designer>
Drawn:
<Designer>
Checked:
Checked:
Checked:
<Checker>
<Checker>
<Checker>
517Thursday, March 30, 2006
517Thursday, March 30, 2006
517Thursday, March 30, 2006
CB92
CB92
0.1uF
0.1uF
Rev
Rev
Rev
1
1
1
of
of
of
Page 19
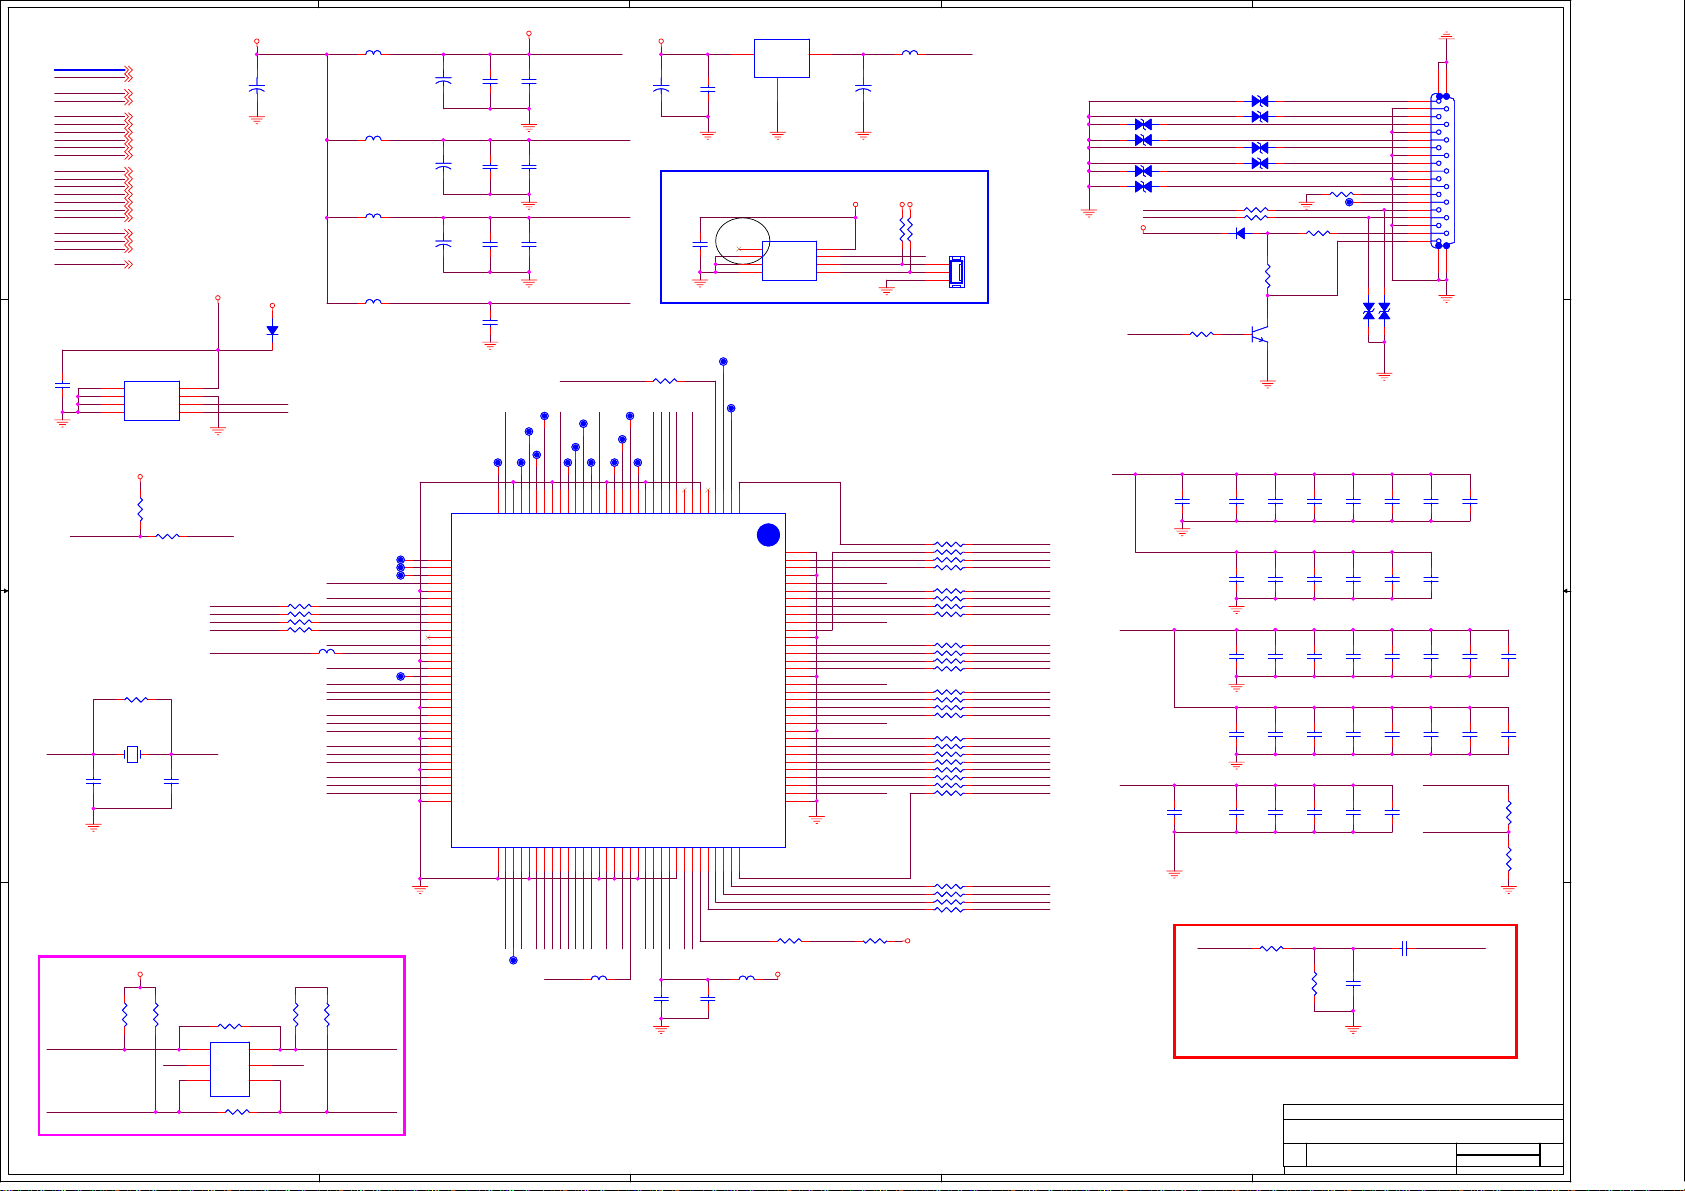
5
17/65
DV33B DV33B
VI[0..23]
HDMICEN
HDMIODCK
HDMIDE
HDMIHSYNC
HDMIVSYNC
DE_SOG
INT0#
CCIR_V1
D D
C C
B B
A A
CCIR_V3
SCL_8202
SDA_8202
27MHZ
HDMIMCLK
HDMIBCLK
HDMILRCK
HDMISD0
HDMISD1
HDMISD2
HDMISD3
CVBS_OUT
C632
C632
0.1uF
0.1uF
XTLI XTLO
DDC_SCL
DDC_SDA
HDMIRST#
CRYS/49US/P4.88
CRYS/49US/P4.88
18pF/NC
18pF/NC
R703
R703
47k
47k
VI[0..23] 3,7
HDMICEN 3
HDMIODCK 3,7
HDMIDE 3,7
HDMIHSYNC 3,7
HDMIVSYNC 3,7
DE_SOG 3
INT0# 3
CCIR_V1 3
CCIR_V3 3
SCL_8202 3,9,12
SDA_8202 3,9,12
27MHZ 3
HDMIMCLK 3,7
HDMIBCLK 3,7
HDMILRCK 3,7
HDMISD0 3,7
HDMISD1 3
HDMISD2 3
HDMISD3 3
CVBS_OUT 9,15
U51
U51
1
NC
VCC
2
NC
3
NC
GND4SDA
EEPROM 24C04/CODE
EEPROM 24C04/CODE
DV33B
R693
R693
4.7k
4.7k
R710
R710
1M/NC
1M/NC
Y2
Y2
27MHz/NC
27MHz/NC
C634
C634
HDMI_PLUGPWR
WP
SCL
R6950R695
0
R704
R704
47k
47k
AVCC
5
HDMI_PLUGPWR
8
7
6
5
DE_SOG
SDA_8202
SCL_8202
9993_SDA
9993_SCL
VCC18
C635
C635
18pF/NC
18pF/NC
R708 0/NCR708 0/NC
U34
U34
D23S2
5
G2
6
D1
UPA672T
UPA672T
R711 0/NCR711 0/NC
DDC_SCL
DDC_SDA
G1
S1
+
CE610
+
CE610
100uF/16v
100uF/16v
VCC
D68
D68
1N4148/NC
1N4148/NC
R698 0R698 0
R699 0R699 0
R700 0R700 0
R701 0R701 0
L83 FBL83 FB CB227
AVCC
R705
R705
47k/NC
47k/NC
4
AVCC
2
1
R706
R706
47k/NC
47k/NC
VCC18
CI2CA
PLUGPWR
PVCC
AVCC
CLOCKCLOCK+
AVCC
DATA0DATA0+
AVCC
DATA1DATA1+
AVCC
DATA2DATA2+
9993_SCL
9993_SDA
L78FBL78
FB
L80FBL80
FB
L81FBL81
FB
L82FBL82
FB
TP74TP74
TP75TP75
TP76TP76
TP77TP77
33
34
35
36
37
38
39
40
41
42
43
44
45
46
47
48
49
50
51
52
53
54
55
56
57
58
59
60
61
62
63
64
CE609
CE609
+
+
10uF/16v
10uF/16v
CE613
CE613
+
+
10uF/16v
10uF/16v
CE614
CE614
+
+
10uF/16v
10uF/16v
GPIO2
GPIO1
GPIO0
CVCC18
CGND18
CI2CA
CSDA
CSCL
DSDA
DSCL
CEC
PWR5V
CVCC18
PGND
PVCC
EXT_RES
AVCC
RXCRXC+
AGND
AVCC
RX0RX0+
AGND
AVCC
RX1RX1+
AGND
AVCC
RX2RX2+
AGND
4
AVCC
AVCC
CB210
CB210
C611
C611
1000pF
1000pF
0.1uF
0.1uF
IOVCC
CB212
CB212
C612
C612
1000pF
1000pF
0.1uF
0.1uF
PVCC
CB213
CB213
C613
C613
1000pF
1000pF
0.1uF
0.1uF
REGVCC
27MHZ
TP61TP61 TP60TP60
TP63TP63
TP64TP64
TP66TP66
VCC18
TP67TP67
TP70TP70
IOVCC33
69
IOGND33
70
HDMISD3
SPDIF
25
CGND18
SD371SD2
72
HDMISD2
VCC18
TP71TP71
24
22
21
GPIO9
GPIO823GPIO726GPIO627GPIO528GPIO429GPIO3
CVCC18
SD173SPDIF
WS75SCK
SD074IOVCC3377CGND1880CVCC1881AUDPVCC1882AUDPGND83XTALOUT84XTALIN
76
HDMISD1
HDMISD0
IOVCC
HDMIBCLK
HDMILRCK
L85FBL85
FB
TP69TP69
30
IOVCC33
IOGND33
MT8293
MT8293
CVCC1866CGND18
MUTE
68
67
IOVCC
TP68TP68
4
CB217
CB217
0.1uF
0.1uF
32
65
TP79TP79
IOVCC
31
VCC18
IOVCC
19
IOVCC33
IOGND33
78
HDMIMCLK
TP65TP65
TP72TP72
18
IOGND33
MCLK
79
TP62TP62
16
GPIO13
VCC18
TP73TP73
GPIO1415GPIO1217GPIO1120GPIO10
+
CE611
+
CE611
47uF/16v
47uF/16v
CB218
CB218
0.1uF
0.1uF
R95 0R95 0
VCC18
HDCP_SDA
HDCP_SCL
10
11
13
12
14
KSCL
KSDA
GPIO15
CVCC18
CGND18
XTALVCC86REGVCC
87
85
XTLO
XTLI
REGVCC
CB234
CB234
0.1uF
0.1uF
3
U48
U48
AZ1117-1.8
AZ1117-1.8
IN
ADJ/GND
1
U50
U50
NC
NC
NC
GND4SDA
HSYNC
DE
QE0
QE1
QE2
QE3
ODCK
QE4
QE5
QE6
QE7
QE8
QE9
QE10
QE11
QE12
QE13
QE14
QE15
QE16
QE17
QE18
R707 0R707 0
DV33B
2
OUT
SOT223/SMD
SOT223/SMD
VCC
WP
SCL
U25
U25
MT8293
MT8293
G1
128
127
126
125
124
123
122
121
120
119
118
117
116
115
114
113
112
111
110
109
108
107
106
105
104
103
102
101
100
99
98
97
LQFP128/SMD/8293
LQFP128/SMD/8293
3
CB211
CB211
0.1uF
0.1uF
1
2
3
EEPROM 24C04/CODE
EEPROM 24C04/CODE
TP59TP59
IOVCC
KWP
HDMICEN
OSC_IN
1
3
9
4
5
8
6
2
7
NC
NC
CEN
KWP
VSYNC
OSC_IN
SOG_IN
IOVCC33
IOGND33
ePad/GND
CGND18
CVCC18
IOVCC33
IOGND33
CGND18
CVCC18
IOVCC33
IOGND33
IOVCC33
IOGND33
INT91RESET#89TEST88SCDT
QE2392QE2293QE2194QE2095QE19
90
96
HDMIRST#
CCIR_V3
L84FBL84
C633
C633
FB
0.01uF
0.01uF
L79 FBL79 FB
+
CE612
+
CE612
47uF/16v
47uF/16v
DV33B
10K
10K
R746
R746
8
KWP
7
HDCP_SCL
6
HDCP_SDA
5
VCC18
IOVCC
VCC18
IOVCC
IOVCC
R709 47kR709 47k
INT0#
VCC18
DV33B DV33B
R747
R747
10K
10K
J13
J13
1
2
3
DIP3/W/H/P2.0
DIP3/W/H/P2.0
RN26 33x4RN26 33x4
RN27 33x4RN27 33x4
RN28 33x4RN28 33x4
RN29 33x4RN29 33x4
RN30 33x4RN30 33x4 C630
RN31 33x4RN31 33x4
SB33B
RN32
RN32
HDMIVSYNC
78
HDMIODCK
56
HDMIHSYNC
34
HDMIDE
12
VI0
78
VI1
56
VI2
34
VI3
12
VI4
78
VI5
56
VI6
34
VI7
12
VI8
78
VI9
56
VI10
34
VI11
12
VI12
78
VI13
56
VI14
34
VI15
12
VI16
78
VI17
56
VI18
34
VI19
12
33x4
33x4
VI20
78
VI21
56
VI22
34
VI23
12
2
D9 DIODE EGA-0603D9 DIODE EGA-0603
D10 DIODE EGA-0603D10 DIODE EGA-0603
D13 DIODE EGA-0603D13 DIODE EGA-0603
D14 DIODE EGA-0603D14 DIODE EGA-0603
HDMI_PLUGPWR
CCIR_V1
IOVCC
AVCC
12
12
12
12
DDC_SCL
DDC_SDA
HDMI_PLUGPWR
R691
R691
VCC18
CB219
CB219
0.1uF
0.1uF
CB214
CB214
0.1uF
0.1uF
D7 DIODE EGA-0603D7 DIODE EGA-0603
D8 DIODE EGA-0603D8 DIODE EGA-0603
D11 DIODE EGA-0603D11 DIODE EGA-0603
D12 DIODE EGA-0603D12 DIODE EGA-0603
R687 0R687 0
R688 0R688 0
D17 1N4148D17 1N4148
1
4.7K
4.7K
C617
C617
1000PF
1000PF
CB224
CB224
0.1uF
0.1uF
CB226
CB226
0.1uF
0.1uF
CB230
CB230
0.1uF
0.1uF
C614
C614
1000PF
1000PF
R782
R782
100
100
12
12
12
12
R6901KR690
1K
Q36
Q36
2N3904
2N3904
SOT23/SMD
SOT23/SMD
3 2
CB220
CB220
0.1uF
0.1uF
C622
C622
1000PF
1000PF
C624
C624
1000PF
1000PF
C628
C628
1000PF
1000PF
CB215
CB215
0.1uF
0.1uF
R686 R/NCR686 R/NC
TP58TP58
R689 0R689 0
HDMICAB
DIODE EGA-0603
DIODE EGA-0603
C618
C618
1000PF
1000PF
CB225
CB225
0.1uF
0.1uF
CB227
0.1uF
0.1uF
CB231
CB231
0.1uF
0.1uF
C615
C615
1000PF
1000PF
R783
R783
100
100
DATA2+
DATA2DATA1+
DATA1DATA0+
DATA0CLOCK+
CLOCK-
PLUGPWR
D15
D15
CB221
CB221
0.1uF
0.1uF
C623
C623
1000PF
1000PF
C625
C625
1000PF
1000PF
C629
C629
1000PF
1000PF
CB216
CB216
0.1uF
0.1uF
C683
C683
33pF
33pF
12
12
1
1
2
3
4
5
6
7
8
9
10
11
12
13
14
15
16
17
18
19
D16
D16
DIODE EGA-0603
DIODE EGA-0603
C619
C619
1000PF
1000PF
C621
C621
1000PF
1000PF
CB228
CB228
0.1uF
0.1uF
CB232
CB232
0.1uF
0.1uF
C616
C616
1000PF
1000PF
C682
C682
0.1uF
0.1uF
2221
20 23
CB222
CB222
0.1uF
0.1uF
CB223
CB223
1000PF
1000PF
0.1uF
0.1uF
C626
C626
1000PF
1000PF
C630
CVBS_OUTSPDIF
P1
P1
HDMI TYPE-A
HDMI TYPE-A
HDMI
HDMI
IOVCC
CI2CA
C620
C620
1000PF
1000PF
CB229
CB229
0.1uF
0.1uF
CB233
CB233
0.1uF
0.1uF
C627
C627
1000PF
1000PF
C631
C631
1000PF
1000PF
R692
R692
4.7K
4.7K
R696
R696
4.7K/NC
4.7K/NC
ADD HDMI COAXOUT
WHEN USE HDMI COAXOUT,C127 CHANGE 0 RES
KAWA Confidential
KAWA Confidential
KAWA Confidential
ZhongShan KAWA Electronic Inc.
ZhongShan KAWA Electronic Inc.
ZhongShan KAWA Electronic Inc.
Title
Title
Title
HDMI INPUT MT8293
HDMI INPUT MT8293
HDMI INPUT MT8293
Document Number
Document Number
Document Number
Size
Size
Size
AKAI_MT8202_27US_LVDS_V0.0
AKAI_MT8202_27US_LVDS_V0.0
AKAI_MT8202_27US_LVDS_V0.0
C
C
C
Date: Sheet
Date: Sheet
3
2
Date: Sheet
Rev
Rev
<Designer>
<Designer>
<Designer>
<Checker>
<Checker>
<Checker>
617Thursday, March 30, 2006
617Thursday, March 30, 2006
617Thursday, March 30, 2006
Rev
1
1
1
of
of
of
Drawn:
Drawn:
Drawn:
Checked:
Checked:
Checked:
1
Page 20
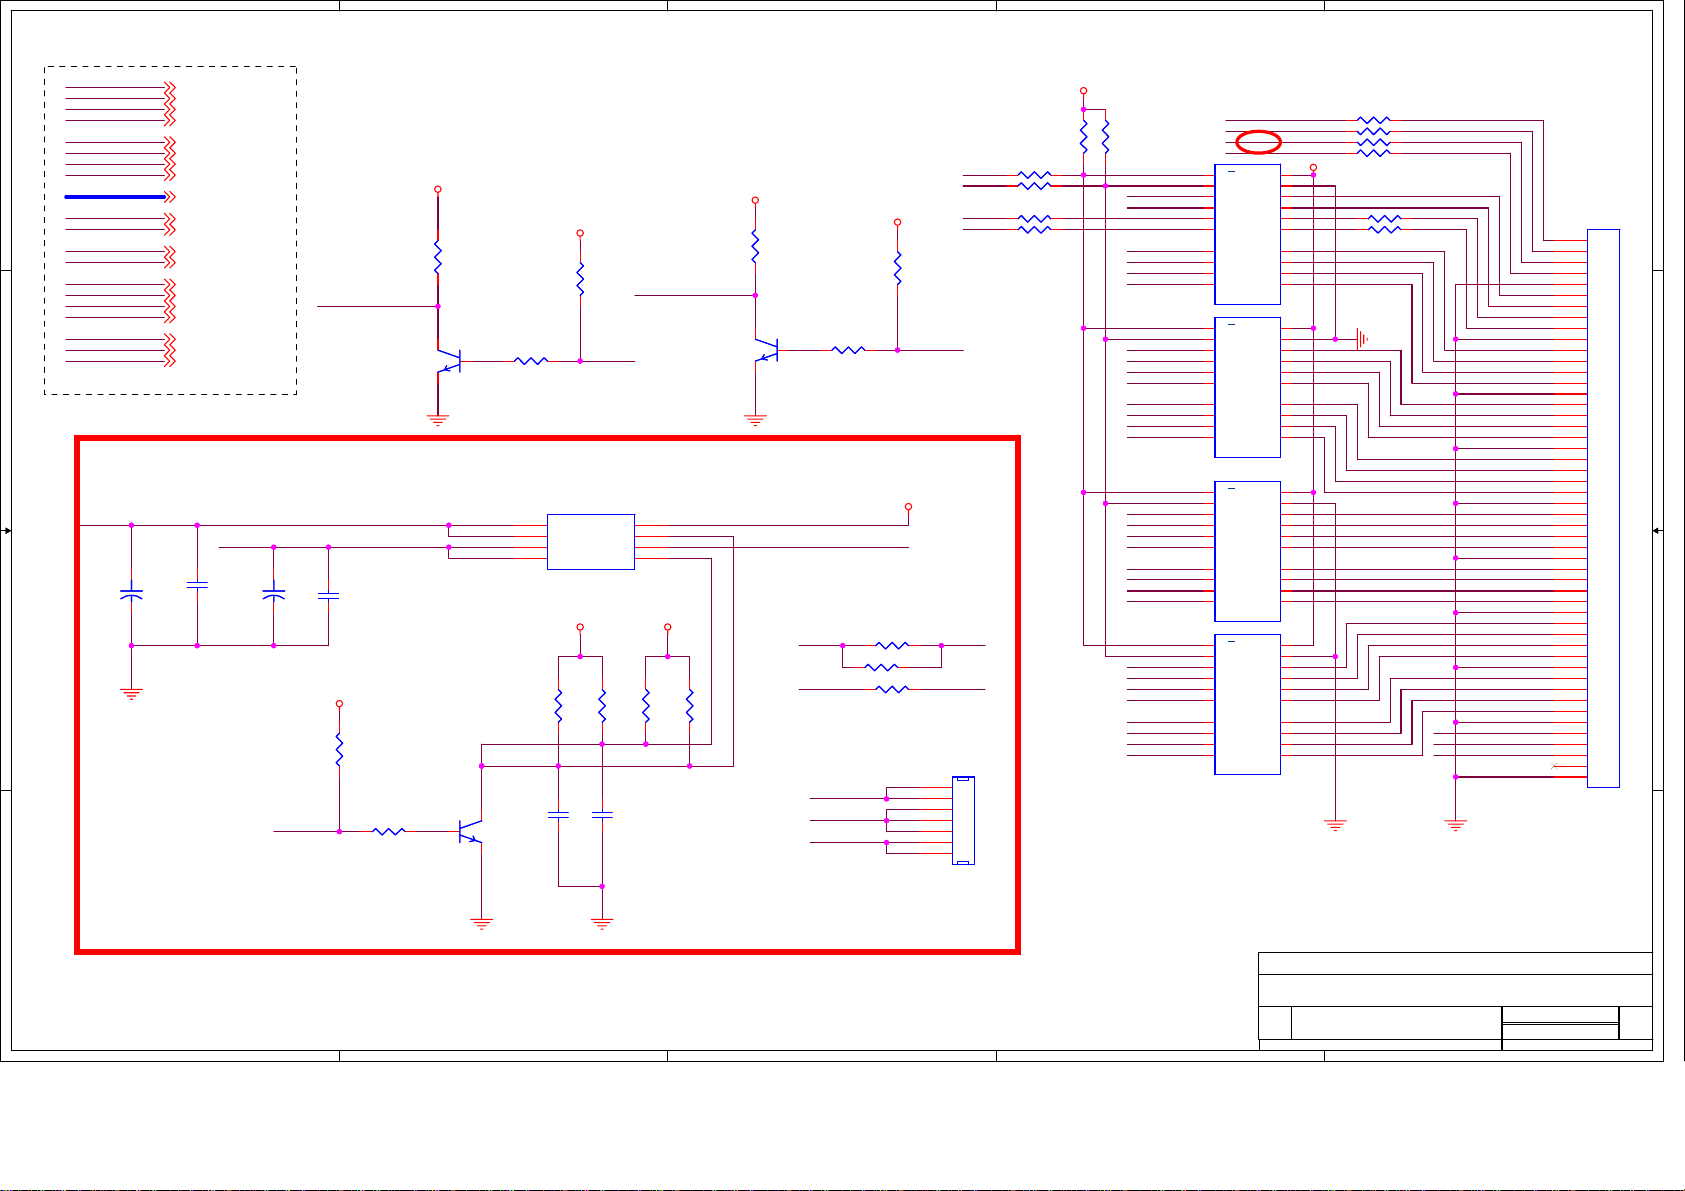
5
18/65
HDMIMCLK
HDMIBCLK
HDMILRCK
HDMISD0
D D
C C
B B
HDMIDE
HDMIODCK
HDMIHSYNC
HDMIVSYNC
VI[0..23]
TXD
RXD
TXD1
RXD1
SCL1
SDA1
GPIO3
CCIR_V6
SCL0
SDA0
9V
V5V
CE142
CE142
+
+
220uF/16v/NC
220uF/16v/NC
TXD 3,11
RXD 3,11
TXD1 3
RXD1 3
HDMIMCLK 3,6
HDMIBCLK 3,6
HDMILRCK 3,6
HDMISD0 3,6
HDMIDE 3,6
HDMIODCK 3,6
HDMIHSYNC 3,6
HDMIVSYNC 3,6
VI[0..23] 3,6
SCL1 3
SDA1 3
GPIO3 3
CCIR_V6 3
SCL0 3
SDA0 3
9V 1,9,14
V9V
CB204
CB204
0.1uF/NC
0.1uF/NC
CE143
CE143
+
+
220uF/16v/NC
220uF/16v/NC
SB33B
R358
R358
10k
10k
SCL1
Q22
Q22
2N3904
2N3904
SOT23/SMD
SOT23/SMD
CB205
CB205
0.1uF/NC
0.1uF/NC
LO = > DTV BOARD POWER OFF
HI = > DTV BOARD POWER ON
3 2
SB33B
R642
R642
10k
10k
R643
GPIO3
A A
5
R643
0/NC
0/NC
1
1
Q31
Q31
2N3904
2N3904
SOT23/SMD/NC
SOT23/SMD/NC
3 2
4
4
R362
R362
1K/NC
1K/NC
R360
R360
8
7
6
5
C601
C601
1uF/NC
1uF/NC
SB33B
10k/NC
10k/NC
U45
U45
D1
D1
D2
D2
IRF7316
IRF7316
SOp8/SMD
SOp8/SMD
9V
R640
R640
22k/NC
22k/NC
C602
C602
1uF/NC
1uF/NC
READY#
R641
R641
22k/NC
22k/NC
3
SB33B
R1
10KR110K
SCL0
R3 0R3 0
SDA0
R4 0R4 0
LRCK LRCK
R222 0/NCR222 0/NC
SDA1
SB33B
R359
R359
10k
10k
2N3904
2N3904
SOT23/SMD
SOT23/SMD
Q23
Q23
SB33B
R361
R361
10k/NC
10k/NC
R363
R363
1
1K/NC
3 2
1K/NC
REQUEST#
DTV POWER CONTROL
VCC
1
S1
2
G1
3
S2
4
G2
VCC
VCC V5V
R713
R713
22k/NC
22k/NC
R712
R712
22k/NC
22k/NC
9V V9V
Trace width of 12V>30mil
Trace width of 5V >40mil
R786 0/NCR786 0/NC
R787 0/NCR787 0/NC
R788 0/NCR788 0/NC
V9V
GND
V5V
3
9V
J1
J1
1
2
3
4
5
6
7
7x1
7x1
DIP7/P2.0/NC
DIP7/P2.0/NC
R2
10KR210K
HDMIMCLK
HDMIBCLK
HDMILRCK
HDMISD0DATA0
VI0
VI1
VI2
VI3
VI4
VI5
VI6
VI7
VI8
VI9
VI10
VI11
VI12
VI13
VI14
VI15
VI16
VI17
VI18
VI19
VI20
VI21
VI22
VI23
HDMIHSYNC
HDMIVSYNC
HDMIDE
HDMIODCK
2
change 2/16
19
18
17
16
15
14
13
12
11
19
18
17
16
15
14
13
12
11
19
18
17
16
15
14
13
12
11
19
18
17
16
15
14
13
12
11
2
TXD:MT5351 Transmit
RXD:MT5351 Receiver
TXD1:MT5351& MT8205 Communication
RXD1:MT5351& MT8205 Communication
TXD
RXD
TXD1
RXD1
VCC
OE
1
GND
DIR
B7
A7
A6
B6
A5
B5
A4
B4
A3
B3
A2
B2
A1
B1
A0
B0
U30 74LVC245AU30 74LVC245A
VCC
OE
1
GND
DIR
B7
A7
A6
B6
A5
B5
A4
B4
A3
B3
A2
B2
A1
B1
A0
B0
U31 74LVC245AU31 74LVC245A
VCC
OE
1
GND
DIR
B7
A7
A6
B6
A5
B5
A4
B4
A3
B3
A2
B2
A1
B1
A0
B0
U32 74LVC245AU32 74LVC245A
VCC
OE
1
GND
DIR
B7
A7
A6
B6
A5
B5
A4
B4
A3
B3
A2
B2
A1
B1
A0
B0
U33 74LVC245AU33 74LVC245A
ZhongShan KAWA Electronic Inc.
ZhongShan KAWA Electronic Inc.
ZhongShan KAWA Electronic Inc.
Title
Title
Title
Size
Size
Size
Date: Sheet
Date: Sheet
Date: Sheet
R354 0/NCR354 0/NC
R355 0/NCR355 0/NC
R356 0R356 0
R357 0R357 0
DV33B
20
10
2
3
R229 0R229 0
4
R228 0R228 0R230 0/NCR230 0/NC
5
6
7
8
9
20
10
2
3
4
5
6
7
8
9
20
10
2
3
4
5
6
7
8
9
20
10
2
3
4
5
6
7
8
9
MT5351 INTERFACE
MT5351 INTERFACE
MT5351 INTERFACE
Document Number
Document Number
Document Number
AKAI_MT8202_27US_LVDS_V0.0
AKAI_MT8202_27US_LVDS_V0.0
AKAI_MT8202_27US_LVDS_V0.0
B
B
B
1
DATA0
CCIR_V6
READY#
REQUEST#
FOR MT5351 INTERFACE
KAWA Confidential
KAWA Confidential
KAWA Confidential
Drawn:
Drawn:
Drawn:
<Designer>
<Designer>
<Designer>
Checked:
Checked:
Checked:
<Checker>
<Checker>
<Checker>
717Monday, April 03, 2006
717Monday, April 03, 2006
1
717Monday, April 03, 2006
J24
J24
1
2
3
4
5
6
7
8
9
10
11
12
13
14
15
16
17
18
19
20
21
22
23
24
25
26
27
28
29
30
31
32
33
34
35
36
37
38
39
40
41
42
43
44
45
46
47
48
49
50
CON50
CON50
Rev
Rev
Rev
1
1
1
of
of
of
Page 21
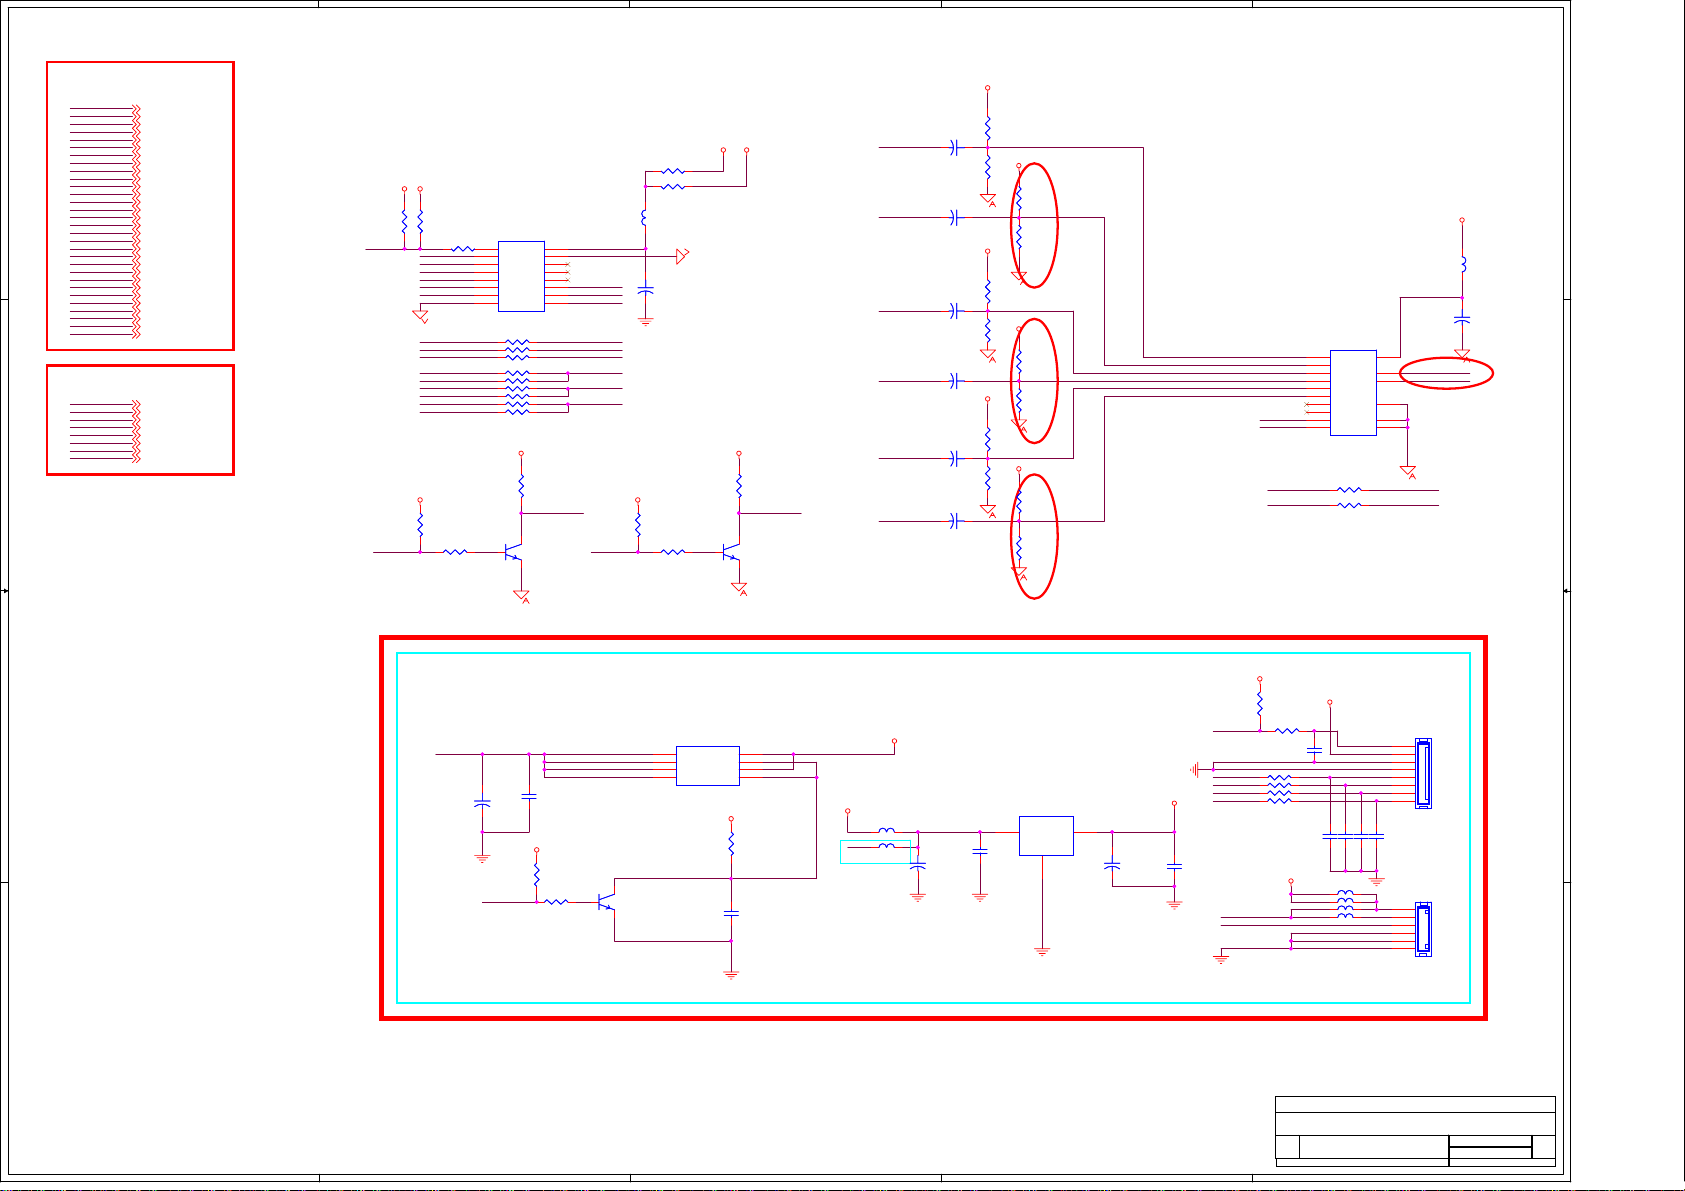
5
19/65
4
3
2
1
CE115
CE115
+
+
22uF/25v
22uF/25v
CE116
CE116
+
+
22uF/25v
22uF/25v
CE117
CE117
+
+
22uF/25v
22uF/25v
CE118
CE118
+
+
22uF/25v
22uF/25v
CE155
CE155
+
+
22uF/25v
22uF/25v
CE156
CE156
+
+
22uF/25v
22uF/25v
SWV9
SWV9
SWV9
R372
R372
100k
100k
100k
100k
R373
R373
R377
R377
100k
100k
100k
100k
R378
R378
R380
R380
100k
100k
100k
100k
R381
R381
SWV9
SWV9
SWV9
R374
R374
100K
100K
R375
R375
100K
100K
R714
R714
100K
100K
R715
R715
100K
100K
R716
R716
100K
100K
R717
R717
100K
100K
SW1S1
SW1S2
AV1_R
AV1_L
U52
U52
12
0X
VCC
1
0Y
14
5
1Y
15
2X
2
2Y
11
3X
4
3Y
10
A
9
B
VSS
HEF4052
HEF4052
SOP16/SMD
SOP16/SMD
R382 0/NCR382 0/NC
R383 0/NCR383 0/NC
SWV9
L55FBL55
FB
+
CE608
+
CE608
22uF/25v
22uF/25v
16
Y31X
X
INH
VEE
AV_L
AV_R
13
6
7
8
AV_R
AV_L
INPUT
ADC_IN0
CCIR_V0
CCIR_V5
CCIR_V7
GPIO11
GPIO15
D D
C C
GPIO16
GPIO17
GPIO18
VFE_GND
AADCVSS
AV1_R
AV1_L
AV2_R
AV2_L
SY_R
SY_L
Y2_INB
Y2_GNDB
CB2_INB
CB2_GNDB
CR2_INB
CR2_GNDB
Y3_INB
Y3_GNDB
CB3_INB
CB3_GNDB
CR3_INB
CR3_GNDB
9V
OUTPUT
AV_R
AV_L
YQ
CBQ
CRQ
YQ_GND
CBQ_GND
CRQ_GND
ADC_IN0 3
CCIR_V0 3
CCIR_V5 3
CCIR_V7 3
GPIO11 3
GPIO15 3
GPIO16 3
GPIO17 3
GPIO18 3
VFE_GND 2,3,4,11
AADCVSS 3,4,10
AV1_R 15
AV1_L 15
AV2_R 15
AV2_L 15
SY_R 15
SY_L 15
Y2_INB 15
Y2_GNDB 10,15
CB2_INB 15
CB2_GNDB 10,15
CR2_INB 15
CR2_GNDB 10,15
Y3_INB 15
Y3_GNDB 15
CB3_INB 15
CB3_GNDB 15
CR3_INB 15
CR3_GNDB 15
9V 1,7,9,14
AV_R 9
AV_L 9
YQ 10
CBQ 10
CRQ 10
YQ_GND 10
CBQ_GND 10
CRQ_GND 10
VCC
SB33B
R368
R368
R204
R204
10K
10K
10k/NC
10k/NC
CCIR_V7
R431 0/NCR431 0/NC
CB2_INB
CB3_INB
CBQ
Y2_INB
Y3_INB
YQ
CR2_INB CRQ
Y2_GNDB
Y3_GNDB
CB2_GNDB
CB3_GNDB
CR2_GNDB
CR3_GNDB
SB33B SB33B
R721
R721
10K
10K
CCIR_V5
R724 10KR724 10K
U39
U39
1
S
VCC
2
I0A
E#
3
I1A
I0D
4
YA
I1D
5
I0B
YD
6
I1B
I0C
7
YB
I1C
8
GND
YC
QS3VH257
QS3VH257
TSSOP16/SMD
TSSOP16/SMD
R369 0/NCR369 0/NC
R370 0/NCR370 0/NC
R371 0/NCR371 0/NC
R438 0/NCR438 0/NC
R446 0/NCR446 0/NC
R439 0/NCR439 0/NC
R447 0/NCR447 0/NC
R440 0/NCR440 0/NC
R448 0/NCR448 0/NC
R718
R718
47K
47K
Q37
Q37
2N3904
2N3904
1
SOT23/SMD
SOT23/SMD
3 2
16
15
14
13
12
11
10
9
SW1S2
CR2_INB
CR3_INB
CRQ
CBQCB2_INB
YQY2_INB
YQ_GND
CBQ_GND
CRQ_GND
CCIR_V0
L52FBL52
FB
R723
R723
10K
10K
R20 0/NCR20 0/NC
R21 0R21 0
+
+
22uF/25v
22uF/25v
R726 10KR726 10K
CE607
CE607
VCC DV33B
SWV9SWV9
1
3 2
R720
R720
47K
47K
SW1S1
Q38
Q38
2N3904
2N3904
SOT23/SMD
SOT23/SMD
AV1_R
AV1_L
AV2_R
AV2_L
SY_R
SY_L
GPIO FOR USB CONTORL
SB33B
5VSB
R613
R613
10K/NC
10K/NC
R627 0/NCR627 0/NC
CB209
CB209
0.1uF/NC
0.1uF/NC
ADC_IN0
GPIO15
GPIO16
GPIO17
GPIO18
C155
C155
1000pF/NC
1000pF/NC
5V
+3.3V
CB11
CB11
0.1uF/NC
0.1uF/NC
R442 0/NCR442 0/NC
R443 0/NCR443 0/NC
R444 0/NCR444 0/NC
R445 0/NCR445 0/NC
C156
C156
1000pF/NC
1000pF/NC
VCC
L73 FB/NCL73 FB/NC
L74 FB/NCL74 FB/NC
L75 FB/NCL75 FB/NC
L76 FB/NCL76 FB/NC
VCC
5V
VCC
L71 FB/NCL71 FB/NC
L72 FB/NCL72 FB/NC
+
CE153
+
CE153
470uF/16v /NC
470uF/16v /NC
CB208
CB208
0.1uF/NC
0.1uF/NC
AZ1117-3.3V
AZ1117-3.3V
SOT223/SMD/NC
SOT223/SMD/NC
U47
U47
3
IN
ADJ/GND
1
+3.3V
2
OUT
+
CE154
+
CE154
220uF/16v/NC
220uF/16v/NC
B B
5V
CE141
CE141
+
+
CB203
CB203
0.1uF/NC
0.1uF/NC
220uF/16v/NC
220uF/16v/NC
GPIO11
LO = > DVD BOARD POWER OFF
HI = > DVD BOARD POWER ON
SB33B
R450
R450
10k
10k
1
R4510/NC R4510/NC
3 2
Q28
Q28
2N3904
2N3904
SOT23/SMD/NC
SOT23/SMD/NC
U44
U44
8
7
6
5
IRF7316
IRF7316
SOp8/SMD
SOp8/SMD
D1
D1
D2
D2
2
G1
3
S2
4
G2
VCC
R449
R449
22k/NC
22k/NC
C195
C195
1uF/NC
1uF/NC
1
S1
1
2
3
4
5
6
7
8
DIP8/W/H/P2.0
DIP8/W/H/P2.0
C157
C157
1000pF/NC
1000pF/NC
1
2
3
4
5
6
DIP6/W/H/P2.54
DIP6/W/H/P2.54
J32
J32
J31
J31
C158
C158
1000pF/NC
1000pF/NC
DVD POWER CONTROL
A A
KAWA Confidential
KAWA Confidential
KAWA Confidential
ZhongShan KAWA Electronic Inc.
ZhongShan KAWA Electronic Inc.
ZhongShan KAWA Electronic Inc.
Title
Title
Title
DAUGHTER BOARD IN
DAUGHTER BOARD IN
DAUGHTER BOARD IN
Document Number
Document Number
Document Number
Size
Size
Size
AKAI_MT8202_27US_LVDS_V0.0
AKAI_MT8202_27US_LVDS_V0.0
AKAI_MT8202_27US_LVDS_V0.0
C
C
C
Date: Sheet
Date: Sheet
5
4
3
2
Date: Sheet
Rev
Rev
<Designer>
<Designer>
<Designer>
<Checker>
<Checker>
<Checker>
817Monday, April 03, 2006
817Monday, April 03, 2006
817Monday, April 03, 2006
Rev
1
1
1
of
of
of
Drawn:
Drawn:
Drawn:
Checked:
Checked:
Checked:
1
Page 22

5
20/65
CE119
AV_R
AV_L
YPBPR3_R
DV33B
SB33B
DV33B
YPBPR3_L
YPBPR2_R
YPBPR2_L
YPBPR1_R
YPBPR1_L
VGAR_IN
VGAL_IN
AOBCLK
AOSDATA1AOSDATA1AOSDATA1AOSDATA1
AOLRCKAOLRCK
L114 FB/NCL114 FB/NC
L65 FBL65 FB
CE134
CE134
47uF/16v
47uF/16v
INPUT
D D
GPIO7
SCL
SDA
SDA_8202
SCL_8202
AOSDATA1
AOMCLK
AOBCLK
AOLRCK
ADIN
AV_R
AV_L
YPBPR1_L
YPBPR1_R
YPBPR2_R
YPBPR2_L
YPBPR3_R
YPBPR3_L
VGAR_IN
VGAL_IN
TESTP2
AR
AL
MU
A_MUTE
9V
OUTPUT
AUSPR
AUSPL
AVR_OUT
AVL_OUT
C C
CVBS_OUT
GPIO7 3
SCL 1,14
SDA 1,14
SDA_8202 3,6,12
SCL_8202 3,6,12
AOSDATA1 3
AOMCLK 3,16
AOBCLK 3,16
AOLRCK 3,16
ADIN 3
AV_R 8
AV_L 8
YPBPR1_L 15
YPBPR1_R 15
YPBPR2_R 15
YPBPR2_L 15
YPBPR3_R 15
YPBPR3_L 15
VGAR_IN 11
VGAL_IN 11
TESTP2 3
AR 3
AL 3
MU 16
A_MUTE 17
9V 1,7,14
AUSPR 16
AUSPL 16
AVR_OUT 15
AVL_OUT 15
CVBS_OUT 6,15
CE119
10uF/25v
10uF/25v
+
+
CE120
CE120
10uF/25v
10uF/25v
+
+
+
+
CE121 10uF/25v
CE121 10uF/25v
+
+
CE122 10uF/25v
CE122 10uF/25v
+
+
CE123 10uF/25v
CE123 10uF/25v
+
+
CE124 10uF/25v
CE124 10uF/25v
+
+
CE125 10uF/25v
CE125 10uF/25v
+
+
CE126 10uF/25v
CE126 10uF/25v
+
+
CE128 10uF/25v
CE128 10uF/25v
+
+
CE129 10uF/25v
CE129 10uF/25v
R226 33R226 33
CB115
CB115
R23233R232
100pF/NC
100pF/NC
33
CB132
CB132
33pF/NC
33pF/NC
R23333R233
33
CB133
CB133
33pF/NC
33pF/NC
+
+
DVDD
CB198
CB198
0.1uF
0.1uF
R411 10kR411 10k
R412 10kR412 10k
AOMCLK
AOMCLK
ADIN
DVDD
R398 10kR398 10k
R399 10kR399 10k
R400 10kR400 10k
R402 10kR402 10k
R404 10kR404 10k
R407 10kR407 10k
R408 10kR408 10k
R409 10kR409 10k
R22733R227
33
R234 33R234 33
AOLRCK
4
AOBCLK
CB131
CB131
33pF/NC
33pF/NC
1
2
3
4
5
6
7
8
9
10
11
12
CB134
CB134
33pF/NC
33pF/NC
R4131kR413
1k
U41
U41
AIN2L
AIN1R
AIN1L
DACBCLK
DACMCLK
DIN
DACLRC
ZFLAGR
ZFLAGL
ADCBCLK
ADCMCLK
DOUT
R405 5.1KR405 5.1K
R406 5.1KR406 5.1K
39
42
44
46
48
41
43
45
47
AIN5L
AIN4L
AIN3L
AIN5R
AIN4R
AIN3R
AIN2R
ADCLRC13DGND14DVDD15MODE16CE17DI18CL19HPOUTL20HPGND21HPVDD22HPOUTR23NC
AOLRCK
DVDD
SDA14
AINVGL40AINOPL
HPVDD
SCL14
VCC
37
AGND
AINVGR38AINOPR
AVDD
ADCREFP
ADCREFGND
VMIDADC
AUXL
AUXR
DACREFP
DACREFN
VMIDDAC
VOUTR
VOUTL
WM8776
WM8776
24
CB193
CB193
0.1uF
0.1uF
CODHPOUTR
CODHPOUTL
NC
L64FBL64
FB
CB62
CB62
0.1uF
0.1uF
36
35
34
33
32
31
30
29
28
27
26
25
C186 10uF/10vC186 10uF/10v
C187 10uF/10vC187 10uF/10v
C181
C181
+
+
10uF/25v
10uF/25v
HPVDD
HPVDD
HPVDD_
COD_VOUTR
COD_VOUTL
3
HPVDD
CB63
CB63
0.1uF
0.1uF
HPVDD
VMIDDAC
+
+
R41033R410
33
+
+
CE132
CE132
10uF/25v
10uF/25v
TP53TP53
TP54TP54
CE127
CE127
10uF/25v
10uF/25v
CB197
CB197
0.1uF
0.1uF
CB194
CB194
0.1uF
0.1uF
+
+
CE19
CE19
10uF/25v
10uF/25v
SCL_8202
SDA_8202
R401 100R401 100
R403 100R403 100
VMIDADCVMIDADC
+
+
ADCREFPADCREFPADCREFPADCREFPADCREFPADCREFPADCREFPADCREFP
CE16
CE16
10uF/25v
10uF/25v
+
+
CE131
CE131
10uF/25v
10uF/25v
SCL14
SDA14
C183
C183
100pF
100pF
CB196
CB196
0.1uF
0.1uF
C184
C184
100pF
100pF
2
QF1
SB33B
SB33B
CE133
CE133
+
+
10uF/25V
10uF/25V
CE135
CE135
+
+
10uF/25v
10uF/25v
QF1
32
MOSFET N 2N7002
MOSFET N 2N7002
SOT23/SMD
SOT23/SMD
1
QF2
QF2
32
1
+
+
CE130
CE130
10uF/25v
10uF/25v
SCL
COD_VOUTR AUSPR
CB195
CB195
0.1uF
0.1uF
COD_VOUTL
MOSFET N 2N7002
MOSFET N 2N7002
SOT23/SMD
SOT23/SMD
R414
R414
10k
10k
R415
R415
10k
10k
1
SCL_8202
SDA_8202SDA
AUSPL
R426 0R426 0
9VVCC
VCC
OP1VREF
R246
R252
R252
47K
47K
R246
10K/NC
10K/NC
R666
R666
22k
CE5
CE5
+
+
C12
C12
1uF
1uF
10uF/25v
10uF/25v
22k
L70 22L70 22
CE77
CE77
220uF/16v
220uF/16v
OPA1V9
+
+
R223 47KR223 47K
9V
B B
R662NCR662
NC
+
+
CE152
CE152
100uF/16V
100uF/16V
R6630R663
0
D3 1N4148D3 1N4148
1 2
D4
1N4148D41N4148
1 2
R668 470R668 470
CE151
CE151
R235
R235
470uF/16V
470uF/16V
4K7/NC
4K7/NC
+
+
32
Q34
Q34
1
2N3906
12
2N3906
D6
1N4148D61N4148
D5 1N4148D5 1N4148
1 2
STBY
Q1
1
2N3904/NCQ12N3904/NC
3 2
A_MUTE
MU
AVCVBSO
CE139
CE139
+
+
2.2uF/50v
2.2uF/50v
VCC
VCC
R427
R427
24K
24K
Q27
Q27
1
2SD2653K
2SD2653K
3 2
R429
R429
R430
R430
47K
47K
75 1%
75 1%
AVCVBSOTESTP2
CB201
CB201
0.1uF
0.1uF
CE140 470uF/16V
CE140 470uF/16V
+
+
R428 0/NCR428 0/NC
+
CE138
+
CE138
10uF/16v
10uF/16v
R748 68R748 68
R7491KR749
1K
R59 0R59 0
CVBS_OUT
BYPASS VIDEO OUTPUT
-
-
+
+
8 4
-
-
+
+
8 4
U46A
U46A
1
NJM4558 OPA
NJM4558 OPA
OPA1V9
U46B
U46B
7
NJM4558 OPA
NJM4558 OPA
OPA1V9
R51 0/NCR51 0/NC
10uF/10V
10uF/10V
CE148
CE148
+
+
R41 0/NCR41 0/NC
10uF/10V
10uF/10V
CE150
CE150
+
+
R650
R650
100
100
R655
R655
100
100
AVR_OUT1
AVL_OUT1
2
R750
R750
100
100
100
100
R752
R752
AVR_OUT
AVL_OUT
KAWA Confidential
KAWA Confidential
KAWA Confidential
ZhongShan KAWA Electronic Inc.
ZhongShan KAWA Electronic Inc.
ZhongShan KAWA Electronic Inc.
Title
Title
Title
M8776 & VIDEO BYPASS
M8776 & VIDEO BYPASS
M8776 & VIDEO BYPASS
Document Number
Document Number
Document Number
Size
Size
Size
AKAI_MT8202_27US_LVDS_V0.0
AKAI_MT8202_27US_LVDS_V0.0
AKAI_MT8202_27US_LVDS_V0.0
C
C
C
Date: Sheet
Date: Sheet
Date: Sheet
Drawn:
<Designer>
Drawn:
<Designer>
Drawn:
<Designer>
Checked:
Checked:
Checked:
<Checker>
<Checker>
<Checker>
917Thursday, April 06, 2006
917Thursday, April 06, 2006
917Thursday, April 06, 2006
of
of
of
1
Rev
Rev
Rev
1
1
1
AUDIO BYPASS MUTE
SB33B
R631
R631
1.5K
1.5K
GPIO7
L : ENABLE
H : MUTE
A A
5
R632
R632
470
470
MU
R6772KR677
2K
1
C134
C134
1uF
1uF
R7512KR751
2K
R644
R644
470
470
C152
C152
1uF
1uF
Q29
Q29
2N3904
2N3904
SOT23/SMD
SOT23/SMD
3 2
1
AVR_OUT1
Q30
Q30
2N3904
2N3904
SOT23/SMD
SOT23/SMD
3 2
AVL_OUT1
4
BYPASS AUDIO OUTPUT
CE147
R647 0R647 0
AR
R652 0R652 0
AL
CE147
10uF/16v
10uF/16v
C100UF16V/D6H11
C100UF16V/D6H11
CE149
CE149
10uF/16v
10uF/16v
C100UF16V/D6H11
C100UF16V/D6H11
R648 10KR648 10K
+
+
R653 10KR653 10K
+
+
R646 39KR646 39K
R649 5.1KR649 5.1K
C604
C604
820pF
820pF
R651 39KR651 39K
R654 5.1KR654 5.1K
C606
C606
820pF
820pF
3
OP1VREF
OP1VREF
OP1VREF
OP1VREF
C603
C603
150pF
150pF
C605
C605
150pF
150pF
2
3
6
5
Page 23

5
21/65
CVBS0
CVBS1
CVBS2
SY0
SC0
SY1
SC1
Y0+
Y0PB0+
D D
PB0PR0+
PR0SOY0
Y1+
Y1PB1+
PB1PR1+
PR1SOY1
MPX1
MPX2
CVBS0 3
CVBS1 3
CVBS2 3
SY0 3
SC0 3
SY1 3
SC1 3
Y0+ 3
Y0- 3
PB0+ 3
PB0- 3
PR0+ 3
PR0- 3
SOY0 3
Y1+ 3
Y1- 3
PB1+ 3
PB1- 3
PR1+ 3
PR1- 3
SOY1 3
MPX1 3
MPX2 3
TO MT8202
TV_GND
CVBS_0
SIF
AF
CVBS_1
CVBS1_GND
CVBS_2
CVBS2_GND
SY_1
SY_1_GND
SC_1
SC_1_GND
SY_0
C C
SY_0_GND
SC_0
SC_0_GND
SOY1
SOY0
Y1_INB
Y1_GNDB
CR1_INB
CR1_GNDB
CB1_INB
CB1_GNDB
CBQ
CRQ
YQ
YQ_GND
CBQ_GND
CRQ_GND
TV_GND 14
CVBS_0 14
SIF 14
AF 14
CVBS_1 15
CVBS1_GND 15
CVBS_2 15
CVBS2_GND 15
SY_1 15
SY_1_GND 15
SC_1 15
SC_1_GND 15
SY_0 15
SY_0_GND 15
SC_0 15
SC_0_GND 15
SOY1 3
SOY0 3
Y1_INB 15
Y1_GNDB 8,15
CR1_INB 15
CR1_GNDB 8,15
CB1_INB 15
CB1_GNDB 8,15
CBQ 8
CRQ 8
YQ 8
YQ_GND 8
CBQ_GND 8
CRQ_GND 8
FROM AV BOARD
4
THIS PAGE NEARLY IC
CVBS_0 CVBS0
CVBS_1
CVBS_2
SY_0
SC_0
SY_1
R197 0R197 0
R200 0R200 0
R424 0R424 0
R198 0R198 0
R201 0R201 0
R205 0R205 0
C110 47nFC110 47nF
C113
C113
330pF
330pF
TV_GND
C117 47nFC117 47nF
C120
C120
330pF
330pF
CVBS1_GND
C188 47nFC188 47nF
C189
C189
330pF
330pF
CVBS2_GND
C111 47nFC111 47nF
C114
C114
330pF
330pF
SY_0_GND
C118 47nFC118 47nF
C121
C121
330pF
330pF
SC_0_GND
C125 47nFC125 47nF
C128
C128
330pF
330pF
SY_1_GND
CVBS1
CVBS2
SY0
SC0
SY1
3
YQ
YQ_GND
CBQ PB0+
CBQ_GND
CRQ
CRQ_GND
Y1_INB
Y1_GNDB
CB1_INB
CB1_GNDB
R211 68R211 68
C138
C138
15pF
15pF
R213 100R213 100
R214 68R214 68
C142
C142
15pF
15pF
R217 100R217 100
R55 0R55 0
R199 68R199 68
C116
C116
15pF
15pF
R202 100R202 100
R203 68R203 68
C123
C123
15pF
15pF
R206 100R206 100
R207 68R207 68
C130
C130
15pF
15pF
R210 100R210 100
R56 0R56 0
2
C112 4.7nFC112 4.7nF
C115 100nFC115 100nF
C119 100nFC119 100nF
C122 100nFC122 100nF
C126 100nFC126 100nF
C129 100nFC129 100nF
C133 100nFC133 100nF
C136 4.7nFC136 4.7nF
C137 100nFC137 100nF
C140 100nFC140 100nF
C141 100nFC141 100nF
C145 100nFC145 100nF
SOY0
Y0+
Y0-
PB0-
PR0+
PR0-
SOY1
Y1+
Y1-
PB1+
PB1-
1
SC_1
AADCVSS
B B
AADCVSS 3,4
R209 0R209 0
C132 47nFC132 47nF
C135
C135
330pF
330pF
SC_1_GND
SC1
CR1_INB
CR1_GNDB
R218 68R218 68
C147
C147
15pF
15pF
R219 100R219 100
C146 100nFC146 100nF
C148 100nFC148 100nF
PR1+
PR1-
FROM Tuner
SIF MPX1
AF MPX2
A A
5
4
R212 8.2KR212 8.2K
R215 39KR215 39K
AADCVSS
R216 39KR216 39K
C143
C143
15pF
15pF
AADCVSS
C139 10nFC139 10nF
C48
C48
1.8pF
1.8pF
+
+
CE70 47uF/16V
CE70 47uF/16V
C144
C144
15pF
15pF
KAWA Confidential
KAWA Confidential
KAWA Confidential
ZhongShan KAWA Electronic Inc.
ZhongShan KAWA Electronic Inc.
ZhongShan KAWA Electronic Inc.
Title
Title
Title
AUDIO / VIDEO IN CIRCUIT
AUDIO / VIDEO IN CIRCUIT
AUDIO / VIDEO IN CIRCUIT
Document Number
Document Number
Document Number
Size
Size
Size
AKAI_MT8202_27US_LVDS_V0.0
AKAI_MT8202_27US_LVDS_V0.0
AKAI_MT8202_27US_LVDS_V0.0
C
C
C
Date: Sheet
Date: Sheet
Date: Sheet
3
2
Rev
Rev
<Designer>
<Designer>
<Designer>
<Checker>
<Checker>
<Checker>
10 17Thursday, March 30, 2006
10 17Thursday, March 30, 2006
10 17Thursday, March 30, 2006
Rev
1
1
1
of
of
of
Drawn:
Drawn:
Drawn:
Checked:
Checked:
Checked:
1
Page 24

5
22/65
4
3
2
1
R132 68R132 68
C88
C88
5pF
5pF
R134 100R134 100
R136 0R136 0
R138 68R138 68
C92
C92
5pF
5pF
R140 100R140 100
R146 68R146 68
C97
C97
5pF
5pF
R148 100R148 100
L29 2.2uHL29 2.2uHR416 100R416 100
L30 2.2uHL30 2.2uH
RCA1X2 AV2-8.4-13P
RCA1X2 AV2-8.4-13P
P2
P2
NEARLY 8202
C87 10nFC87 10nF
C89 10nFC89 10nF
C90 4.7nFC90 4.7nF
C91 10nFC91 10nF
C93 10nFC93 10nF
C94 10nFC94 10nF
C98 10nFC98 10nF
VGAHSYNC#
C100
C100
5pF
5pF
VGAVSYNC#
C102
C102
0.1uF
0.1uF
R
R
VGAR_IN
1
L
L
VGAL_IN
2
3
change
RED+
RED-
VGASOG
GREEN+
GREEN-
BLUE+
BLUE-
RED+
REDGREEN+
GREENBLUE+
BLUEVGASOG
VGAHSYNC#
VGAVSYNC#
TXD
RXD
VGAR_IN
D D
VGAL_IN
VFE_GND
VFE_GND
C C
5VSB
B B
5VSB
RED+ 3
RED- 3
GREEN+ 3
GREEN- 3
BLUE+ 3
BLUE- 3
VGASOG 3
VGAHSYNC# 3
VGAVSYNC# 3
TXD 3,7
RXD 3,7
VGAR_IN 9
VGAL_IN 9
VFE_GND 2,3,4,8
1
3
2
TXD
1
3
2
D110
D110
DIODE SMD BAV99
DIODE SMD BAV99
D73
D73
DIODE SMD BAV99
DIODE SMD BAV99
RXD
CB235
CB235
0.1uF
0.1uF
RXD
RSRXD
R5 0/NCR5 0/NC
R6 0R6 0
VGASDA_IN
HSYNC#
VSYNC#
VGASCL_IN
11
12
13
14
15
VGA_PLUGPWR
U53
U53
1
NC
2
NC
3
NC
GND4SDA
EEPROM 24C02
EEPROM 24C02
R737 0R737 0
R738 0R738 0
C638 0.1uFC638 0.1uF
C639 0.1uFC639 0.1uF
C640 0.1uFC640 0.1uF
C642 0.1uFC642 0.1uF
VGA IN
1617
VCC
WP
SCL
C636
C636
20pF
20pF
13
8
11
10
1
3
4
5
2
6
P9
P9
D-SUB15 FEMALE
D-SUB15 FEMALE
DSUB15/DIP/F
DSUB15/DIP/F
6
1
7
2
8
3
9
4
10
5
VGA_PLUGPWR
8
7
6
5
U54
U54
R1IN
R2IN
T1IN
T2IN
C+
C1C2+
C2V+
V-
MAX3232
MAX3232
RED_GND
RED
GRN_GND
GREEN
BLU_GND
BLUE
R16 0R16 0
R12 0/NCR12 0/NC
VGASCL
VGASDA
C637
C637
20pF
20pF
R1OUT
R2OUT
T1OUT
T2OUT
VCC
GND
VCC
D63
D63
1N4148/NC
D21
D21
1N4148
1N4148
NC
R730NCR730
change 2/16
TXD
RXD
SB33B
R7430R743
0
C641
C641
0.1uF
0.1uF
VGA_PLUGPWR
R733
R733
10K/NC
10K/NC
H : WP ENABLE
L : WP DISABLE
R736
R736
10K
10K
RSTXD
TXD
RSTXD
RSRXD
12
9
14
7
16
15
1N4148/NC
NEARLY VGA CON
RED
RED_GND
GREEN
GRN_GND
BLUE
BLU_GND
VGASDA_IN
DIODE SMD BAV99
DIODE SMD BAV99
VGASCL_IN
2
D69
D69
DIODE SMD BAV99
DIODE SMD BAV99
3
DIODE SMD BAV99
DIODE SMD BAV99
D71
D71
3
DIODE SMD BAV99
DIODE SMD BAV99
D72
D72
3
VGA_PLUGPWR
VGA_PLUGPWR
VGA_PLUGPWR
3
DIODE SMD BAV99
DIODE SMD BAV99
D77
D77
VGA_PLUGPWR
3
C172
C172
220pF
220pF
VCC
R436 0R436 0
VCC
R437 0R437 0
VCC
R739
R739
10K
10K
R741
R741
10K
10K
1
2
1
2
1
2
D75
D75
1
R417 100R417 100
2
1
R267 1.5KR267 1.5K
VGAR_IN VGAL_IN
C168NCC168
NC
R435 0R435 0
VGASDA
VGASCL
R159
R159
47K
47K
C167NCC167
NC
HSYNC#
VSYNC#
R266 1.5KR266 1.5K
RED
R72975R729
75
RED_GND
FB160FB16
0
GREEN
R73275R732
75
GRN_GND
FB170FB17
0
BLUE
R73575R735
75
BLU_GND
FB180FB18
0
2
1
R333 510R333 510
2
1
DIODE SMD BAV99
DIODE SMD BAV99
C171
C171
220pF
220pF
R332 510R332 510
DIODE SMD BAV99
DIODE SMD BAV99
VCC
D74
D74
3
VCC
D76
D76
3
R158
R158
47K
47K
R1502KR150
2K
R1542KR154
2K
VGA/DVI AUDIO INPUT
A A
KAWA Confidential
KAWA Confidential
KAWA Confidential
Rev
Rev
<Designer>
<Designer>
<Designer>
<Checker>
<Checker>
<Checker>
11 17Thursday, March 30, 2006
11 17Thursday, March 30, 2006
11 17Thursday, March 30, 2006
Rev
1
1
1
of
of
of
Drawn:
Drawn:
Drawn:
Checked:
Checked:
Checked:
1
ZhongShan KAWA Electronic Inc.
ZhongShan KAWA Electronic Inc.
ZhongShan KAWA Electronic Inc.
Title
Title
Title
VGA IN & PC AUDIO IN
VGA IN & PC AUDIO IN
VGA IN & PC AUDIO IN
Document Number
Document Number
Document Number
Size
Size
Size
AKAI_MT8202_27US_LVDS_V0.0
AKAI_MT8202_27US_LVDS_V0.0
AKAI_MT8202_27US_LVDS_V0.0
C
C
C
Date: Sheet
Date: Sheet
Date: Sheet
5
4
3
2
Page 25

GPIO0
23/65
GPIO2
CLK1+
CLK1AP[0..7]
AN[0..6]
LVDS_GND
LVDSVDD
CCIR_VCLK
CCIR_V4
FCLK
FCMD
FDAT
SCL_8202
D D
C C
SDA_8202
RELAY_ON
VS_ON
12V
5
GPIO0 3
GPIO2 1,3
CLK1+ 3
CLK1- 3
AP[0..7]
AN[0..6]
LVDS_GND 2,3,4
LVDSGND 2,3,4
CCIR_VCLK 3
CCIR_V4 3
FCLK 3
FCMD 3
FDAT 3
SCL_8202 3,6,9
SDA_8202 3,6,9
RELAY_ON 1
VS_ON 1
12V 1,13
3
3
VCC12V
+
+
CE107
CE95
CE95
220uF/16v/NC
220uF/16v/NC
+
+
CE107
220uF/16v/NC
220uF/16v/NC
L68 FB/NCL68 FB/NC
L56 FB/NCL56 FB/NC
L57 FB/NCL57 FB/NC
L69 FB/NCL69 FB/NC
4
5VSB
3
2
1
SB33B
LVDS OUT(Include PDP and 32' LCD LVDS interface)
J10
J10
1
2
3
4
5
6
7
8
9
10
11
12
13
14
15
16
17
18
19
20
21
22
23
24
25
26
27
28
29
30
FI-SE30P-HF
FI-SE30P-HF
LVDS/30P/P1.25/S
LVDS/30P/P1.25/S
LVDS_GND
R17
R17
10K/NC
10K/NC
+
CE94
+
CE94
330uF/25v
330uF/25v
C330UF25V/D8H14
C330UF25V/D8H14
R18
R18
10K/NC
10K/NC
R19
R19
10K/NC
10K/NC
R23
R23
10K
10K
U35
U35
8
7
6
5
IRF7316
IRF7316
SOIC8/SMD
SOIC8/SMD
R25
R25
10K
10K
S1
S2
SB33B
10k
10k
R32
R32
1
2
3
4
CPUGO /PDPGO :INPUT TO PDP
IRQ /READY :PDP INPUT TO MT8202
AN6
R26 0/NCR26 0/NC
ADD1
R27 0/NCR27 0/NC
AP6
R28 0/NCR28 0/NC
ADD2
R29 0/NCR29 0/NC
AP7
R30 0/NCR30 0/NC
R31 0/NCR31 0/NC
SEL_AP7_IRQ
FDAT
5VSB
R93
R93
4.7k/NC
4.7k/NC
R33
R33
4.7k
4.7k
12V
LVDSVDD
Q39
Q39
1
SOT23/SMD
SOT23/SMD
2N3904
2N3904
CPUGO
PDPGO
3 2
SB33B
F1
4A/16V/NCF14A/16V/NC
R94
R94
4.7k
4.7k
DISPEN_PDWN_READY
SCL_P
SDA_P
+
+
CE96
CE96
220uF/16v/NC
220uF/16v/NC
CB181
CB181
0.1uF/NC
0.1uF/NC
R90 0R90 0
R91 100R91 100
R92 100R92 100
AN0
AP0
AN1
AP1
AN2
AP2
CLK1CLK1+
AN3
AP3
AN4
AP4
AN5
AP5
R24
R24
10K
10K
GPIO0
D1
G1
D1
D2
G2
D2
VCC
R54
R294
R294
R425
R425
22k/NC
22k/NC
22k/NC
22k/NC
22K/NC
R287
R287
R224
R224
SB33B
R257
R257
1k/NC
1k/NC
Q12
Q12
2N3904/NC
2N3904/NC
SB33B
R2601kR260
1k
Q13
Q13
2N3904
2N3904
22K/NC
5VSB
3 2
5VSB
3 2
LO = > LVDS POWER OFF
HI = > LVDS POWER ON
SB33B
R656
R656
10K
10K
R296
GPIO2
B B
SB33B
R107
R107
R106
R106
4.7k
4.7k
4.7k
4.7k
SCL_8202
R100
R100
0/NC
0/NC
R7 0R7 0
SDA_8202
SB33B
5VSB
R98
10K/NC
10K/NC
10K/NC
A A
CCIR_VCLK
CCIR_V4
10K/NC
10K
10K
10K
10K
R108 0R108 0
R109 0R109 0
R112
R112
R110
R110
R99
R99
R98
R105 0R105 0
R102
R102
0/NC
0/NC
SCL_P
SDA_P
R296
1k/NC
1k/NC
RELAY_ON
VS_ON
1
Q16
Q16
2N3904
2N3904
SOT23/SMD/NC
SOT23/SMD/NC
3 2
R60
R60
0/NC
0/NC
R1040 R1040
4.7k/NC
4.7k/NC
ADD1
4.7k/NC
4.7k/NC
ADD2
FHP USE
5
4
3
R54
R53
R53
22K/NC
22K/NC
Gate2
Gate1
LVDS_GND
R250
R250
1
1k/NC
1k/NC
USE WHEN LG V6
R248 1kR248 1k
1
USE WHEN LG V6
FCLK
FCMD
10k/NC
10k/NC
R288
R288
R289
R289
10k/NC
10k/NC
2
LVDS_GND
KAWA Confidential
KAWA Confidential
KAWA Confidential
ZhongShan KAWA Electronic Inc.
ZhongShan KAWA Electronic Inc.
ZhongShan KAWA Electronic Inc.
Title
Title
Title
LVDS OUT
LVDS OUT
LVDS OUT
Document Number
Document Number
Document Number
Size
Size
Size
AKAI_MT8202_27US_LVDS_V0.0
AKAI_MT8202_27US_LVDS_V0.0
AKAI_MT8202_27US_LVDS_V0.0
C
C
C
Date: Sheet
Date: Sheet
Date: Sheet
1
Drawn:
Drawn:
Drawn:
Checked:
Checked:
Checked:
<Designer>
<Designer>
<Designer>
<Checker>
<Checker>
<Checker>
12 17Thursday, March 30, 2006
12 17Thursday, March 30, 2006
12 17Thursday, March 30, 2006
Rev
Rev
Rev
1
1
1
of
of
of
Page 26

5
24/65
IR
GPIO10
GPIO12
GPIO13
GPIO14
PWM0
D D
PWM1
8202UP3_0
GPIO14
GPIO19
VCLK
F_A21
CCIR_V2
12V
IR 3,15
GPIO10 3
GPIO12 3
GPIO13 3
GPIO14 1,3
PWM0 3
PWM1 3
8202UP3_0 3
GPIO14 1,3
GPIO19 1,3
VCLK 3
F_A21 3
CCIR_V2 3
12V 1,12
4
SB33B
R657
R657
10K
10K
R0603/SMD
R0603/SMD
R658 4.7KR658 4.7K
3
SB33B
2
1
KEYPAD
5VSB
Q32
Q32
1
2N3904
2N3904
SOT23/SMD
SOT23/SMD
3 2
R384
R384
10K
10K
SB33B
R385
R385
10K
10K
R386
R386
10K
10K
R387
R387
5VSB
10K
10K
VCC
R388
R388
10K
10K
IR
R389
R389
10K
10K
GPIO12
GPIO13
GPIO14F_A21
GPIO19
VCLK
R753 OR753 O
FB
FB41FBFB41
TV/AV
MENU
VOLVOL+GPIO10
CHCH+
IRR
LED_RED
LED_GRE
8202UP3_0
POW
L58 FBL58 FB
L59 FBL59 FB
L60 FBL60 FB
L61 FBL61 FB
L62 FB/NCL62 FB/NC
L63 FBL63 FB
R659 510R659 510
R660 510R660 510
R394 10KR394 10K
R395 0R395 0
CCIR_V2 CH-
C36 1000pFC36 1000pF
C38 1000pFC38 1000pF
C39 1000pFC39 1000pF
C106 1000pFC106 1000pF
C101 1000pFC101 1000pF
C99 1000pFC99 1000pF
C53 1000pFC53 1000pF
C124 1000pFC124 1000pF
C52 1000pFC52 1000pF
C35 1000pFC35 1000pF
C37 1000pFC37 1000pF
TV/AV
MENU
VOLVOL+
CHCH+
IRR
LED_RED
LED_GRE
8202UP3_0
POW
1
2
3
4
5
6
7
8
9
10
11
12
13
J21
J21
13x1
13x1
DIP13/P2.0
DIP13/P2.0
ADC KEY & GPIO KEY KEYPAD
C C
12V
12V
VCC
SB33B
R305
R305
10k/NC
R304
R304
10K
10K
R308
B B
A A
5
PWM0
PWM1
SB33B
R111
R111
10K
10K
4
R308
4.7k/NC
4.7k/NC
R316
R316
4.7k/NC
4.7k/NC
10k/NC
Q17
Q17
1
2N3904/NC
2N3904/NC
3 2
VCC
R315
R315
10k/NC
10k/NC
Q18
Q18
1
2N3904/NC
2N3904/NC
3 2
R754
R754
10k/NC
10k/NC
D805.6V/NC D805.6V/NC
R755
R755
10k/NC
10k/NC
R306100k/NC R306100k/NC
BACK LIGHT CIRCUIT
3
CB185
CB185
1uF/NC
1uF/NC
Dimming
BL_ON/OFF
2
J15
J15
1
2
3
CON3/NC
CON3/NC
KAWA Confidential
KAWA Confidential
KAWA Confidential
ZhongShan KAWA Electronic Inc.
ZhongShan KAWA Electronic Inc.
ZhongShan KAWA Electronic Inc.
Title
Title
Title
BACK LIGHT / KEYPAD
BACK LIGHT / KEYPAD
BACK LIGHT / KEYPAD
Document Number
Document Number
Document Number
Size
Size
Size
AKAI_MT8202_27US_LVDS_V0.0
AKAI_MT8202_27US_LVDS_V0.0
AKAI_MT8202_27US_LVDS_V0.0
B
B
B
Date: Sheet
Date: Sheet
Date: Sheet
Rev
Rev
Rev
of
of
of
1
Drawn:
Drawn:
Drawn:
Checked:
Checked:
Checked:
<Designer>
<Designer>
<Designer>
<Checker>
<Checker>
<Checker>
13 17Thursday, March 30, 2006
13 17Thursday, March 30, 2006
13 17Thursday, March 30, 2006
1
1
1
Page 27

5
25/65
4
3
2
1
SCL
SDA
CVBS_0
TV_GND
AF
SIF
ADC_IN4
9V
D D
C C
B B
A A
SCL 1,9
SDA 1,9
CVBS_0 10
TV_GND 10
AF 10
SIF 10
ADC_IN4 3
9V 1,7,9
TUNER SIF1NTSC 4.5MHz BPF
SIF1_IN
+
AF1_IN AF
ADC_IN4
9V
+
+
CE629
CE629
47uF/16V
47uF/16V
5
+
CE626 33uF/16V
CE626 33uF/16V
VCC
R178
R178
R/NC
R/NC
R180 0/NCR180 0/NC
R179
R179
R/NC
R/NC
FB2147FB21
47
FB22 FBFB22 FB
+
+
+
CE634+CE634
SWV9
CE630
CE630
220uF/16V
220uF/16V
AFC
C646
C646
10nF
10nF
C191
C191
20pF
20pF
1000pF/27pF
1000pF/27pF
C647
R418 0R418 0
C649
C649
820pF
820pF
560pF 1.2uH 560pF 1.2uH
9V
+
+
CE635
CE635
220uF/10V
220uF/10V
SWV9
CB242
CB242
0.1uF
0.1uF
SIF_9V
CB243
CB243
0.1uF
0.1uF
4
C647
L87
L87
1.5uH
1.5uH
3
IN
CB247
CB247
0.1uF
0.1uF
加散热片,尺寸与
TU_AV TU_CVBS
FB19
BEAD/SMD/1210
BEAD/SMD/1210
U59
U59
OUT
ADJ/GND
1
TO220/DIP
TO220/DIP
7805
7805
atsc Board
L93 2.2uH
L93 2.2uH
L/IND/SMD/0805
L/IND/SMD/0805
C656
C656
330pF
330pF
C650
C650
820pF
820pF
ADD
2
相同
3.3uH/22uHFB19
3.3uH/22uH
TU_VCC
+
+
TU_VCC
TU_VCC
TU_VCC
SIF_9V
+
+
CE617
CE617
10uF/25v
10uF/25v
C10UF25V/D4H5
C10UF25V/D4H5
C648 10nFC648 10nF
L88
L88
1.5uH
1.5uH
2.2uH
L89 470uH
L89 470uH
L/IND/SMD/SLF7032
CE618
CE618
220uF/10V
220uF/10V
C657
C657
330pF
330pF
Title
Title
Title
Size Document Number Rev
Size Document Number Rev
Size Document Number Rev
Date: Sheet
Date: Sheet
Date: Sheet
L/IND/SMD/SLF7032
FB12 BEAD/SMD/1206 NCFB12 BEAD/SMD/1206 NC
L91 470uH
L91 470uH
L/IND/SMD/SLF7032
L/IND/SMD/SLF7032
FB14 BEAD/SMD/1206 NCFB14 BEAD/SMD/1206 NC
R317 18R317 18
<Title>
<Title>
<Title>
<Doc> <RevCode>
Custom
<Doc> <RevCode>
Custom
<Doc> <RevCode>
Custom
3
R422
R422
1.8K
1.8K
R419
R419
220
220
1
3 2
VS_TUNER
VS_IF
R58 0R58 0
R31856R318
56
TV_GND
FB200FB20
0
R4231KR423
1K
Q40
Q40
2N3904
2N3904
SOT23/SMD
SOT23/SMD
R42010R420
10
R421
R421
71.5
71.5
C645 10nFC645 10nF
C651NCC651
NC
+
+
CE620
CE620
470uF/16V
470uF/16V
+
+
CE625
CE625
470uF/16V
470uF/16V
CVBS_0
11Monday, April 03, 2006
11Monday, April 03, 2006
11Monday, April 03, 2006
of
of
of
FQ1216 : PAL
FQ1236 : NTSC
TU1
TU1
FQ1236-MK3
FQ1236-MK3
SIF
GND121GND222VS_TUNER3SCL4AS6SDA
NC1BT
VS_TUNER
SCL
R231 100R231 100
SDA
R208 100R208 100
C675
C675
20pF
20pF
AFC
SIF1_IN
CB236
CB236
0.1uF
0.1uF
CB239
CB239
0.1uF
0.1uF
2
AF1_IN
ZhongShan KAWA Electronic Inc.
ZhongShan KAWA Electronic Inc.
ZhongShan KAWA Electronic Inc.
Title
Title
Title
TUNER IN
TUNER IN
TUNER IN
Document Number
Document Number
Document Number
Size
Size
Size
AKAI_MT8202_27US_LVDS_V0.0
AKAI_MT8202_27US_LVDS_V0.0
AKAI_MT8202_27US_LVDS_V0.0
Custom
Custom
Custom
Date: Sheet
Date: Sheet
Date: Sheet
2
5
20pF
20pF
C676
C676
TU_VCC
TU_AV
TV_GND
SIF1_IN
AF1_IN
SCL
SDA
AFC
SIF
AF
CVBS_0
TV_GND
SCL
SDA
AFC7NC
8
DIP11/W/H/P2.0
DIP11/W/H/P2.0
ADDRESS
TUNER
2nd SIF OUT11NC9NC10CVBS12GND323GND4
J9
J9
1
2
3
4
5
6
7
8
9
10
11
J16
J16
1
2
3
4
5
6
7
8
8x1
8x1
DIP8/P2.0
DIP8/P2.0
KAWA Confidential
KAWA Confidential
KAWA Confidential
Drawn:
Drawn:
Drawn:
Checked:
Checked:
Checked:
1
C0
13
AF /MPX14VS_IF
TU_AV
<Designer>
<Designer>
<Designer>
<Checker>
<Checker>
<Checker>
14 17Monday, April 03, 2006
14 17Monday, April 03, 2006
14 17Monday, April 03, 2006
24
VS_IF
IF
84
of
of
of
Rev
Rev
Rev
1
1
1
Page 28

5
26/65
DIODE SMD BAV99
AV /YC VIDEO IN
AV1_IN
6
CVBS1_GND
7
34
CY
J37
J37
9x1
9x1
DIP9/P2.0
DIP9/P2.0
P14
P14
K2
6
WR
WR
5
4
3
R W
R W
2
1
K1
RCA2X2 AV4-8.4-13P
RCA2X2 AV4-8.4-13P
J14
J14
1
2
2x1 W/HOUSING
2x1 W/HOUSING
DIP2/W/H/P2.54
DIP2/W/H/P2.54
CY
GG
GG
5
1
2
3
4
5
6
7
8
9
SPOUTR
AVL_OUT
CVBS_OUT
AVR_OUT
C127 0.1uFC127 0.1uF
CVBS_OUT
12
P4
P4
S-VIDEO + RCA
S-VIDEO + RCA
DASW-02
DASW-02
AV2_IN
CVBS2_GND
AV2_L
AV2_R
SY1_IN
SY_1_GND
SC1_IN
SC_1_GND
D D
SC_0_GND
C C
AV VIDEO/AUDIO OUT.
SY0_INSC0_IN
SY_0_GND
C109
C109
100pF
100pF
AV1_IN
SY_0_GND
SY1_IN
SY_1_GND
2
1
DIODE SMD BAV99
2
D81
D81
VCC
1
VCC
DIODE SMD BAV99
DIODE SMD BAV99
2
1
2
1
3
D85
D85
3
3
C131NCC131
NC
CVBS1_GND
CVBS_OUT AVL_OUT AVR_OUT
D96
D96
SOT23/SMD
SOT23/SMD
3
L96 1.8uHL96 1.8uH
C57
C57
47pF
47pF
L100 1.8uHL100 1.8uH
VCC
C61
C61
47pF
47pF
L98 1.8uHL98 1.8uH
D89D89
VCC
C59
C59
47pF
47pF
C177NCC177
NC
4
R113 18R113 18
C58
C58
47pF
47pF
R117 0R117 0
C62
C62
47pF
47pF
R115 0R115 0
C60
C60
47pF
47pF
YPBPR AUDIO IN.
P12
P12
WR
WR
R W
R W
RCA2X2 AV4-8.4-13P
RCA2X2 AV4-8.4-13P
CVBS_1
R11456R114
56
FB230FB23
0
SY_0SY0_IN SC_0SC0_IN
R11875R118
75
FB270FB27
0
SY_1
R11675R116
75
FB250FB25
0
K2
YPBPR2_L
6
YPBPR1_L
5
GNDA
4
YPBPR2_R
3
YPBPR1_R
2
GNDA
1
K1
AV2_IN
CVBS2_GND
SC_0_GND
SC_1_GND
2
1
1
1
D82D82
VCC
3
2
D86D86
VCC
3
D90
D90
DIODE SMD BAV99
DIODE SMD BAV99
2
VCC
3
R259
R259
C164NCC164
NC
R262
R262
1.5K
1.5K
C166NCC166
NC
1.5K
1.5K
3
L97 1.8uHL97 1.8uH
C69
C69
47pF
47pF
L101 1.8uHL101 1.8uH
C73
C73
47pF
47pF
L99 1.8uHL99 1.8uH
C71
C71
47pF
47pF
YPBPR1_RYPBPR1_R
C105
C105
220pF
220pF
YPBPR1_LYPBPR1_L
C107
C107
220pF
220pF
2
AV /YC AUDIO IN
P5
P5
FB240FB24
0
FB280FB28
0
FB260FB26
0
YPBPR2_RYPBPR2_R
C83
C83
220pF
220pF
YPBPR2_L
C84
C84
220pF
220pF
K2
6
WR
WR
5
4
3
R W
R W
2
1
K1
RCA2X2 AV4-8.4-13P
RCA2X2 AV4-8.4-13P
C160NCC160
NC
C162NCC162
NC
R142
R142
47K
47K
R143
R143
47K
47K
R243
R243
1.5K
1.5K
R245
R245
1.5K
1.5K
C103
C103
220pF
220pF
SY_L
AV1_L
SY_R
AV1_R
C104
C104
220pF
220pF
SY_RSY_R
SY_L
R163
R163
100K
100K
R145
R145
100K
100K
C159NCC159
NC
C161NCC161
NC
C163NCC163
NC
C165NCC165
NC
R263
R263
R261
R261
1.5K
1.5K
1.5K
1.5K
CVBS_2
R12656R126
56
R13075R130
75
SC_1SC1_IN
R12875R128
75
R125 18R125 18
C70
C70
47pF
47pF
R129 0R129 0 C82
C74
C74
47pF
47pF
R127 0R127 0
C72
C72
47pF
47pF
R166
R166
47K
47K
R169
R169
47K
47K
R240
R240
1.5K
1.5K
C81
C81
220pF
220pF
R244
R244
1.5K
1.5K
C82
220pF
220pF
C85NCC85
NC
C86NCC86
NC
YPBPR3_R
C95NCC95
NC
YPBPR3_L
C96NCC96
NC
AV2_R
AV2_LAV2_L
AV1_RAV1_R
AV1_LAV1_L
R264NCR264
NC
R265NCR265
NC
R164
R164
100K
100K
R141
R141
100K
100K
R256NCR256
NC
R144NCR144
NC
R258NCR258
NC
R165NCR165
NC
R152NCR152
NC
R153NCR153
NC
GPIO1
GPIO1
IR
SY_1
SY_1_GND
SC_1
SC_1_GND
SY_0
SY_0_GND
SC_0
SC_0_GND
CVBS_1
CVBS1_GND
CVBS_2
CVBS2_GND
SPOUTR
AVR_OUT
AVL_OUT
CVBS_OUT
AV1_R
AV1_L
AV2_R
AV2_L
SY_R
SY_L
YPBPR1_L
YPBPR1_R
YPBPR2_R
YPBPR2_L
YPBPR3_R
YPBPR3_L
Y1_INB
Y1_GNDB
CB1_INB
CB1_GNDB
CR1_INB
CR1_GNDB
Y2_INB
Y2_GNDB
CB2_INB
CB2_GNDB
CR2_INB
CR2_GNDB
Y3_INB
Y3_GNDB
CB3_INB
CB3_GNDB
CR3_INB
CR3_GNDB
SB33B
R171
R171
10k
10k
R173
R173
4.7K
4.7K
1
IR
GPIO1 3
IR 3,13
SY_1 10
SY_1_GND 10
SC_1 10
SC_1_GND 10
SY_0 10
SY_0_GND 10
SC_0 10
SC_0_GND 10
CVBS_1 10
CVBS1_GND 10
CVBS_2 10
CVBS2_GND 10
SPOUTR 16
AVR_OUT 9
AVL_OUT 9
CVBS_OUT 6,9
AV1_R 8
AV1_L 8
AV2_R 8
AV2_L 8
SY_R 8
SY_L 8
YPBPR1_L 9
YPBPR1_R 9
YPBPR2_R 9
YPBPR2_L 9
YPBPR3_R 9
YPBPR3_L 9
Y1_INB 10
Y1_GNDB 8,10
CB1_INB 10
CB1_GNDB 8,10
CR1_INB 10
CR1_GNDB 8,10
Y2_INB 8
Y2_GNDB 8,10
CB2_INB 8
CB2_GNDB 8,10
CR2_INB 8
CR2_GNDB 8,10
Y3_INB 8
Y3_GNDB 8
CB3_INB 8
CB3_GNDB 8
CR3_INB 8
CR3_GNDB 8
GNDAGNDV
VCC
R172
R172
10k
10k
SOT23/SMD
SOT23/SMD
2N3904
2N3904
1
Q42
Q42
2 3
DVD_IR
Y1_IN
YPBPR VIDEO IN.
P13
B B
P13
RCA2X3 AV6-8.4-13P
RCA2X3 AV6-8.4-13P
GEN/Y
BLU/PB
RED/PR
Y_GND
1
Y1_IN
2
Y2_IN
3
PB_GND
4
PB1_IN
5
PB2_IN
6
PR_GND
7
PR1_IN
8
PR2_IN
9
Y_GND
PB1_IN
YPBPR1 / 2 INPUT.
J40
J40
PR3_IN
1
PR3_GND
2
Y3_IN
3
Y3_GND
4
PB3_IN
5
PB3_GND
6
DVD_IR
7
R. ANGLE
R. ANGLE
YPBPR3_L
8
GNDA
9
YPBPR3_R
10
YPBPR 3 INPUT.
A A
5
PB_GND
PR1_IN
PR_GND
2
DIODE SMD BAV99
DIODE SMD BAV99
D102
D102
VCC VCC
1
3
DIODE SMD BAV99
DIODE SMD BAV99
2
D105
D105
VCC
1
3
DIODE SMD BAV99
DIODE SMD BAV99
2
D22
D22
VCC
1
3
L102 0L102 0
C63
C63
47pF/NC
47pF/NC
L105 0L105 0
C65
C65
47pF/NC
47pF/NC
L108 0L108 0
C67
C67
47pF/NC
47pF/NC
R119 0R119 0
C64
C64
47pF/NC
47pF/NC
R121 0R121 0
C66
C66
47pF/NC
47pF/NC
R123 0R123 0
C68
C68
47pF/NC
47pF/NC
4
Y1_INB
R12075R120
75
Y1_GNDB
FB290FB29
0
CB1_INB
R12275R122
75
FB320FB32
0
CR1_INB
R12475R124
75
CR1_GNDB
FB350FB35
0
Y2_IN
Y_GND
PB2_IN
PB_GND
PR2_IN
PR_GND
2
1
1
1
3
L103 0L103 0
C75
C75
47pF/NC
47pF/NC
L106 0L106 0
C77
C77
47pF/NC
47pF/NC
L109 0L109 0
C79
C79
47pF/NC
47pF/NC
DIODE SMD BAV99
DIODE SMD BAV99
D103
D103
3
2
DIODE SMD BAV99
DIODE SMD BAV99
D106
D106
VCC
3
2
DIODE SMD BAV99
DIODE SMD BAV99
D108
D108
VCC VCC
3
R160 0R160 0
C76
C76
47pF/NC
47pF/NC
R161 0R161 0 L107 0L107 0
C78
C78
47pF/NC
47pF/NC
R162 0R162 0
C80
C80
47pF/NC
47pF/NC
Y2_INB Y3_INB
R13375R133
75
Y2_GNDB
FB300FB30
0
CB2_INB CB3_INB
R13575R135
75
CB2_GNDBCB1_GNDB
FB330FB33
0
CR2_INB
R13775R137
75
FB360FB36
0
Y3_IN
Y3_GND
PB3_IN
PB3_GND
PR3_IN
PR3_GND
2
DIODE SMD BAV99
DIODE SMD BAV99
2
D104
D104
VCC
1
3
DIODE SMD BAV99
DIODE SMD BAV99
2
D107
D107
VCC
1
3
2
DIODE SMD BAV99
DIODE SMD BAV99
D109
D109
1
3
KAWA Confidential
KAWA Confidential
KAWA Confidential
L104 0L104 0
C108
C108
47pF/NC
47pF/NC
C149
C149
47pF/NC
47pF/NC
L110 0L110 0
C151
C151
47pF/NC
47pF/NC
R131 0R131 0
C169
C169
47pF/NC
47pF/NC
R168 0R168 0
C150
C150
47pF/NC
47pF/NC
R167 0R167 0
C170
C170
47pF/NC
47pF/NC
ZhongShan KAWA Electronic Inc.
ZhongShan KAWA Electronic Inc.
ZhongShan KAWA Electronic Inc.
Title
Title
Title
AV IN
AV IN
AV IN
Document Number
Document Number
Document Number
Size
Size
Size
AKAI_MT8202_27US_LVDS_V0.0
AKAI_MT8202_27US_LVDS_V0.0
AKAI_MT8202_27US_LVDS_V0.0
C
C
C
Date: Sheet
Date: Sheet
Date: Sheet
R14775R147
75
Y3_GNDB
FB310FB31
0
R14975R149
75
CB3_GNDB
FB340FB34
0
CR3_INB
R15175R151
75
CR3_GNDBCR2_GNDB
FB370FB37
0
1
Drawn:
Drawn:
Drawn:
Checked:
Checked:
Checked:
<Designer>
<Designer>
<Designer>
<Checker>
<Checker>
<Checker>
15 17Thursday, March 30, 2006
15 17Thursday, March 30, 2006
15 17Thursday, March 30, 2006
Rev
Rev
Rev
1
1
1
of
of
of
Page 29

5
27/65
AOSDATA2
AOMCLK
AOBCLK
AOLRCK
MU
SPOUTR
AUSPR
AUSPL
OPOUTR
OPOUTL
A_MUTE
D D
AOSDATA2 3
AOMCLK 3,9
AOBCLK 3,9
AOLRCK 3,9
MU 9
SPOUTR 15
AUSPR 9
AUSPL 9
OPOUTR 17
OPOUTL 17
A_MUTE 9,17
AOSDATA2
AOBCLK
AOLRCK
AOMCLK
R194 33R194 33
R195 33R195 33
R96 33R96 33
R97 33R97 33
4
U55
U55
1
SDATA
2
DEM#/SCLK
3
LRCK
MCLK4AOUTR
CS4334 2-CH AUDIO DAC
CS4334 2-CH AUDIO DAC
SOP8/SMD
SOP8/SMD
AOUTL
AGND
3
2
1
GPIO DECRIPTION
UP3_4 : SW SCL
UP3_5 : SW SDA
ERO0/UP3_0 :KEYPAD POWER
VCC
AUSPLL
8
DACVA
7
VA
6
AUSP
5
+
+
CE97
CE97
10uF/25V
10uF/25V
FB38 FBFB38 FB
CE169
CE169
+
+
10uF/25V
10uF/25V
DACVA
C659
C659
1uF
1uF
CB244
CB244
0.1uF
0.1uF
ERO1/UP3_1 : MAIN POWER SWITCH
VCLK : KEPAD CH+
GPIO19 : KEPAD CHDE/GPIO : DVD IR
CCIR_CLK : PDP USE
CCIR_V4 : PDP USE
R175 20KR175 20K
C660
C660
220pF
OP1VREF
OP1VREF
OPVREF
OPVREF
220pF
U56A
U56A
-
-
2
+
+
3
8 4
OPA1V9
R181 0/NCR181 0/NC
C677
C677
220pF
220pF
U60A
U60A
-
-
2
+
+
3
NJM4558 OPA
NJM4558 OPA
8 4
OPA1V9OP1VREF
R182 0/NCR182 0/NC
C679
C679
220pF
220pF
U60B
U60B
-
-
6
+
+
5
NJM4558 OPA
NJM4558 OPA
8 4
OPA1V9OP1VREF
1
1
7
CE171 10uF/10V
CE171 10uF/10V
+
+
NJM4558 OPA
NJM4558 OPA
22uF/10v
22uF/10v
CE75
CE75
+
+
22uF/10v
22uF/10v
CE638
CE638
+
+
R177 100R177 100
MU
R765 100R765 100
R770 100R770 100
R196 10KR196 10K
R756 100R756 100
Q41
Q41
2SD2653K
2SD2653K
1
3 2
R241
R241
100
100
R772
R772
100
100
SPOUTR
OPOUTR
OPOUTL
CE170
CE170
AUSP
C C
AUSPR
B B
AUSPL
+
+
10uF/10V
10uF/10V
CE636
CE636
+
+
22uF/10v
22uF/10v
CE637
CE637
+
+
22uF/10v
22uF/10v
R174 10KR174 10K
R763 10KR763 10K
R768 10KR768 10K
R176 5.1KR176 5.1K
C661
C661
2200pF
2200pF
R762 20KR762 20K
R764 5.1KR764 5.1K
C678
C678
2200pF
2200pF
R767 20KR767 20K
R769 5.1KR769 5.1K
C680
C680
2200pF
2200pF
GPIO0 : PDP USE
GPIO1 : NO USE
GPIO2 : LVDS POWER SW
GPIO3 : DTV POWER CONTROL
GPIO4 : EEPROM WRITE PROTECT
GPIO5/TXD : 2nd UART FOR MT5351
GPIO6/RXD : 2nd UART FOR MT5351
GPIO7 : AUDIO BYPASS MUTE CONTROL
GPIO8 : SPEAKER SWITCH
GPIO9 : AUDIO MUTE
GPIO10 : Indicates active video at HDMI port
GPIO11 : DVD POWER CONTROL
GPIO12 : AV SWITCH
GPIO13 : HDMI Hot Plug Detect
GPIO14 : NO USE
GPIO[15..18] : FOR DVD CONTROL
GPIO/PWM0 : DIMMING
GPIO/PWM1 : BACKLIGHT ON/OFF
OUT_27Mhz/GPIO : HDMI CRYSTAL
SDA1 : TO MT5351 I/F REQUEST
SCL1 : TO MT5351 I/F READY
F_A21 : KEYPAD(LED RED)
ADCIN0 : KEYPAD
ADCIN3:PDP 5VD DETECT
ADCIN4:FOR TUNER AFC
CCIR_V[0-3] : KEYPAD
CCIR_V5 : AUDIO SWITCH
OP1VREF
CCIR_V6 : RESET DTV
CCIR_V7 : YPBPR VIDEO SWITCH
-
-
U56B
+
+
8 4
U56B
7
NJM4558 OPA
NJM4558 OPA
OPA1V9
5
+
+
CE98
CE98
10uF/25v
10uF/25v
CB246
CB246
0.1uF
0.1uF
ZhongShan KAWA Electronic Inc.
ZhongShan KAWA Electronic Inc.
ZhongShan KAWA Electronic Inc.
Title
Title
Title
SUB WOOFER
SUB WOOFER
SUB WOOFER
Document Number
Document Number
Document Number
Size
Size
KAWA Confidential
KAWA Confidential
KAWA Confidential
4
3
2
Size
AKAI_MT8202_27US_LVDS_V0.0
AKAI_MT8202_27US_LVDS_V0.0
AKAI_MT8202_27US_LVDS_V0.0
B
B
B
Date: Sheet
Date: Sheet
Date: Sheet
Rev
Rev
Rev
1
1
1
of
of
of
1
Drawn:
Drawn:
Drawn:
Checked:
Checked:
Checked:
<Designer>
<Designer>
<Designer>
<Checker>
<Checker>
<Checker>
16 17Thursday, March 30, 2006
16 17Thursday, March 30, 2006
16 17Thursday, March 30, 2006
A A
OP1VREF
6
5
OP1VREF
Page 30

GPIO8
28/65
GPIO9
AUSPR
AUSPL
A_MUTE
OPOUTR
OPOUTL
OPOUTL
L21
L21
ACM3225-102-2P
D D
C C
B B
OPOUTR
change 2/16
INTR
R239
R239
0/NC
0/NC
ROUT
ACM3225-102-2P
VD
GPIO8
5
GPIO8 3
GPIO9 3
AUSPR 9,16
AUSPL 9,16
A_MUTE 9
OPOUTR 16
OPOUTL 16
4
312
4
312
L20
L20
ACM3225-102-2P
ACM3225-102-2P
L2.5X3.5
L2.5X3.5
SB33B
R189
R189
47K
47K
R781 0R781 0
R780 0R780 0
R757 0/NCR757 0/NC
R758 0/NCR758 0/NC
ROUT EXTR
EXTR EXTL
8
6
4
D64
D64
1N4148
1N4148
R170
R170
10K
10K
R139 3.3KR139 3.3K
CB245
CB245
0.1uF
0.1uF
U58
U58
8
11
6
13134
1116
G6A-234
G6A-234
R188
R188
47K
47K
9
VCC
R297
R297
1.5K/NC
1.5K/NC
VCC
CB13
CB13
0.1uF
0.1uF
AMP-GND
EXTLLOUT
LOUT
INTL
R156
R156
0/NC
0/NC
9
11
16
2N3904
2N3904
1
Q15
Q15
3 2
R1550R155
0
R238
R238
0/NC
0/NC
SMD 4.7V
SMD 4.7V
D18
D18
C22UF25V/D5H11
C22UF25V/D5H11
R237
R237
3.3K
3.3K
R187
R187
47K
47K
1000uF/35v
1000uF/35v
CE162
CE162
10uF/35v
10uF/35v
AMP-GND
+
+
CE163
CE163
4
+
+
C667
C667
1uF
1uF
CE1612.2uF/25v+CE1612.2uF/25v
CE1682.2uF/25v+CE1682.2uF/25v
+
+
C665
C665
0.1uF
0.1uF
CB14
CB14
0.1uF
0.1uF
R183 10KR183 10K
R184 10KR184 10K
C673
C673
0.1uF
0.1uF
C674
C674
0.1uF
0.1uF
CE167
CE167
+
+
10uF/35v
10uF/35v
VD
CB16
CB16
0.1uF
0.1uF
+
+
CE160
CE160
10uF/35v
10uF/35v
R185
R185
33K
33K
CB19
CB19
0.1uF
0.1uF
VD
VD
R1861KR186
1K
+
+
CE157
CE157
2200uF/35v
2200uF/35v
5
11
3
2
14
18
C668
C668
0.047uF
0.047uF
6
7
8
9
10
CE159
CE159
3.3uF/50v
3.3uF/50v
C2.2UF50V/D4H5
C2.2UF50V/D4H5
L115
L115
#C3B-A0619
#C3B-A0619
4
L04A
L04A
+
+
312
IN1
IN2
STBY
VD1
VD2
DVDD
CBIAS
ROSC
GND
AVDD
PROT
3
U57 R2S15103U57 R2S15103
PWM1
OUT1
HB1
PWM2
OUT2
HB2
MUTEL
VS1
VS2
R1570R157
0
CE22
CE22
2200uF/35v
2200uF/35v
+
+
SR260/NC
SR260/NC
R242
R242
1K/NC 2W
1K/NC 2W
D65
D65
L1170L117
0
4
1
19
12
15
17
13
20
16
R193 150KR193 150K
C663
C663
0.1uF
0.1uF
R192 150KR192 150K
C670
C670
0.1uF
0.1uF
R190
R190
47K
47K
CB12
D19
D19
CB12
0.1uF
0.1uF
1N4148/NC
1N4148/NC
VCC
J39
J39
1
2
3
R.A.
R.A.
4
4x1 W/HOUSING R.A.
4x1 W/HOUSING R.A.
DIP4/WH/P2.54/R
DIP4/WH/P2.54/R
C662 3pFC662 3pF
L111
L111
D61
D61
BEAD/15UH/DIP
BEAD/15UH/DIP
D300
D300
DIODE SMD ZENER 33V
DIODE SMD ZENER 33V
C669 3pFC669 3pF
L112BEAD/15UH/DIPL112BEAD/15UH/DIP
D62
D62
D300
D300
DIODE SMD ZENER 33V
DIODE SMD ZENER 33V
R38 1KR38 1K
R191
R191
150K
150K
2
MUTE_RES
MUTE_RES
2200uF/35v
2200uF/35v
CE166
CE166
+
+
1uF
1uF
C664
C664
2200uF/35v
2200uF/35v
CE165
CE165
+
+
1uF
1uF
C671
C671
5VSB
R760
R760
4.7k
4.7k
Q43
Q43
2N3904
2N3904
L18
L18
LOUT
1
342
#C3H-A0028
#C3H-A0028
L-A
L-A
L19
L19
ROUT
1
432
#C3H-A0028
#C3H-A0028
L-A
L-A
DEL R759 R262 Q11 16/2
1
3 2
INTL
INTR
EXTR
EXTLAMP-GND
MUTE
R759 4.7KR759 4.7K
R761 1kR761 1k
1
DIP3/P2.54
DIP3/P2.54
2x1 W/HOUSING
2x1 W/HOUSING
DIP2/W/H/P2.54
DIP2/W/H/P2.54
A_MUTE
GPIO9
J8
J8
1
2
3
3x1
3x1
J11
J11
1
2
J12
J12
1
2
3
4
5
5x1 W/HOUSING
5x1 W/HOUSING
DIP5/W/H/P2.54
DIP5/W/H/P2.54
A A
ZhongShan KAWA Electronic Inc.
ZhongShan KAWA Electronic Inc.
GPIO8: SPEAKER SWITCH(INTERNAL OR EXTERNAL
5
4
3
2
ZhongShan KAWA Electronic Inc.
Title
Title
Title
AUDIO Amplifier
AUDIO Amplifier
AUDIO Amplifier
Document Number
Document Number
Document Number
Size
Size
Size
AKAI_MT8202_27US_LVDS_V0.0
AKAI_MT8202_27US_LVDS_V0.0
AKAI_MT8202_27US_LVDS_V0.0
B
B
B
Date: Sheet
Date: Sheet
Date: Sheet
KAWA Confidential
KAWA Confidential
KAWA Confidential
Drawn:
Drawn:
Drawn:
Checked:
Checked:
Checked:
1
<Designer>
<Designer>
<Designer>
<Checker>
<Checker>
<Checker>
17 17Monday, April 03, 2006
17 17Monday, April 03, 2006
17 17Monday, April 03, 2006
Rev
Rev
Rev
1
1
1
of
of
of
Page 31

29/65
Keypad
Remote control receiver
External L/R Speakers
Page 32

30/65
Remote control
Page 33

Basic operation of Plasma Display
31/65
1. After turning on power switch, PSU board sends 5Vst-by Volt to Main IC MT8202 waiting
for ON signals from Key Switch or Remote Receiver.
2. When the ON signal from Key Switch or Remote Receiver is detected, MT8202 will send
RLY ON and VS ON signals to PSU B/D. Then PSU B/D sends 5Vsc, 9Vsc, 24V to
PCBs working. This time CONTROL Board will send signals to Panel by Z/Y SUS
Board, OSD on the panel and display available signal. If the audio signals input, them
will be amplified by Audio AMP and transmitted to Speakers.
3. If some abnormal signals are detected (for example: over volts, over current, over
temperature and under volts), the system will be shut down by Power off.
Page 34

Parts position
32/65
Y-DRIVE TOP
Y-SUS B/D
Y-DRIVE
BOTTOM
X-LEFT B/D
Cooling Fan
PSU B/D Cooling Fan
Z-SUS B/D
AC Inlet
Power Switch
VSC (Main)CONTROL B/DLocal Key Speaker
Terminal
X-RIGHT B/D
Page 35

Parts position
33/65
To the Infrared
Terminal
Remote Control Receiver
(in Speaker Box)
Speaker Wire
Speaker BoxSpeaker Box
Page 36

Basic Operations & Circuit Description
34/65
MODULE
There are 1 pcs panel and 8 pcs PCBs including 2 pcs Y/Z Sustainer board, 2 pcs
Y Drive board, 2 pcs X (left and right) Extension board, 1 pcs Control (Signal Input)
board and 1 pcs PSU board in the Module.
SET
There are 4 pcs PCBs including 1 pcs Local key board, 1 pcs Remote Control
Receiver board, 1 pcs L/R Speakers and 1 pcs VSC (Main) board, 2 pcs Cooling
Fan in the SET.
Page 37

PCB function
35/65
1. PSU B/D:
(1). Input voltage: AC 120V, 60Hz.
(2). To provide power for PCBs.
2. VSC (Main) board: To converter S signals, AV signals, Y Pb/Cb Pr/Cr signals, HDMI
signals and D-SUB signals to digital ones and to transmit to Control board.
3. Control board: Creates signal processing and order of many FET on/off of each DRIVE
B/D with R, G, B each 10 bit input.
4. Y-Sustainer board: Generates SUSTAIN, RESET Waveform, VSC (SCAN) voltage and
supplies it Y DRIVE B/D.
5. Y-Drive board:
(1). This is a path to supply SUSTAIN, RESET waveform which made from Y SUSTAIN
B/D to Panel through SCAN DRIVER IC.
(2). Supply a waveform that select Horizontal electrode (Y SUSTAIN electrode)
sequentially.
6. Z-Sustainer board: Make SUSTAIN PULSE and ERASE PULSE that generates SUSTAIN
discharge in panel by receiving LOGIC signal from CONTROL B/D.
7. X (left and right) extension board: Receiving LOGIC signal from CONTROL B/D and
make ADDRESS PULSE (generates Address discharge) by ON/OFF operation, and
supplies this waveform to COF (data).
Page 38

PCB failure analysis
36/65
1. CONTROL:
a. Abnormal noise on screen.
b. No picture.
2. VSC (MAIN) :
a. Lacking color, Bad color scale.
b. No voice.
c. No picture.
d. Abnormal noise on screen.
3. PSU: No picture, no power output.
4. Z - Sustainer:
a. No picture.
b. Color not enough.
c. Flash on screen.
5. Y - Sustainer: Darker picture with signals.
6. Y/Z - Sustainer: The component working temperature is about 55
If the temperature rises abnormal, this may be a error point.
o
C.
Page 39

Main IC Information
37/65
- M13S128168A (ESMT)
2M x 16 Bit x 4 Banks Double Data Rate SDRAM
- MT8202
MT8202G is a highly integrated Single-Chip for LCD TV supporting video input and output
format up to HDTV. It includes 3D comb filter TV decoder to retrieve the best image from
popular composite signals.
- MT8293
HDMI PanelLink Cinema Receiver
- R2S15102NP
Digital Power Amplifier R2S15102NP
- WM8776
24-bit, 192kHz Stereo CODEC with 5 Channel Input Multiplexer
Page 40

Product Specification of PDP Module
38/65
0. Warnings and Cautions
9 WARNING indicates hazards that may lead to death or injury if ignored.
9 CAUTION indicates hazards that may lead to injury or damage to property if ignored.
WARNING
1) This product uses a high voltage (450 V max.). Do not touch the circuitry of this product with your hands when
power is supplied to the product or immediately after turning off the power. Be sure to confir m that the voltage
is dropped to a sufficiently low level.
2) Do not supply a voltage higher than that specified to this product. This may damage the product and may cause a
fire.
3) Do not use this product in locations where the humidity is extremely high, where it may be splashed with water,
or where flammable materials surround it. Do not install or use the product in a location that does no satisfy the
specified environmental conditions. This may damage the product and may cause a fire.
4) If a foreign substance (such as water, metal, or liquid) gets inside the product, immediately turn off the power.
Continuing to use the products it may cause fire or electric shock.
5) If the product emits smoke, an abnormal smell, or makes an abnormal sound, immediately turn off the power. If
noting is displayed or if the display goes out during use, immediately turn off the power. Continuing to use the
product as it is may cause fire or electric shock.
6) Do not disconnect or connect the connector while power to the product is on. It takes some time for the voltage
to drop to a sufficiently low level after the power has been turned off. Confirm that the voltage has dropped to a
safe level before disconnecting or connecting the connector. Otherwise, this may cause fire, electric shock, or
malfunction.
7) Do not pull out or insert the power cable from/to an outlet with wet hands. It may cause electric shock.
8) Do not damage or modify the power cable. It may cause fire or electric shock.
9) If the power cable is damaged, or if the connector is loose, do not use the product; otherwise, this can lead to fire
or electric shock.
10) If the power connector or the connector of the power cable becomes dirty or dusty, wipe it with a dry cloth.
Otherwise, this can lead to fire.
Page 41

Product Specification of PDP Module
39/65
CAUTION
General
1) Do not place this product in a location that is subject to heavy vibration, or on an unstable surface such as an
inclined surface. The product may fall off or fall o ver, causing injuries.
2) When moving the product, be sure to turn off the power and disconnect all the cables. While moving the
product, watch your step. The product may be dropped or fall, leading to injuries of electric shock.
3) Do not place this product in a location that is subject to heavy vibration, or on an unstable surface such as an
inclined surface. The product may fall off or fall o ver, causing injuries.
4) Before disconnecting cable from the product, be sure to turn off the power. Be sure to hold the connector when
disconnecting cables. Pulling a cable with excessive force may cause the core of the cable to be exposed or
break the cable, and this can lead to fire or electric shock.
5) This product should be moved by two or more persons. If one person attempts to carry this product alone, he/she
may be injured.
6) This product contains glass. The glass may break, causing injuries, if shock, vibration, heat, or distortion is
applied to the product.
7) The temperature of the glass surface of the display may rise to 80°C or more depending on the conditions of use.
If you touch the glass inadvertently, you may be burned.
8) Do not poke or strike the glass surface of the display with a hard object. The glass may break or be scratched. If
the glass breaks, you may be injured.
9) If you glass surface of the display breaks or is scratched, do not touch the broken pieces or the scratches with
bare hands. You may be injured.
10) Do not place an object on the glass surface of the display. The glass may break or be scratched.
Design
1) This product may be damaged if it is subject to excessive stresses (such as excessive voltage, current, or
temperature). The absolute maximum ratings specify the limits of these stresses, and system design must ensure
that none of the absolute maximum ratings are exceeded.
2) The recommended operating conditions are conditions in which the normal operation of this product is
guaranteed. All the rated values of the electrical specifications are guaranteed within these conditions. Always
use the product within the range of the recommended operating conditions. Otherwise, the reliability of the
product may be degraded. Use of the product with a combination of parameters, conditions, or logic not
specified in the specifications of this product is not guaranteed. If intending to use the product in such a way, be
sure to consult LGE in advance.
3) This product emits near infrared rays (800 to 1000nm) that may cause the remote controllers of other electric
products to malfunction. To avoid this, use an infrared absorption filter and thoroughly evaluate the system and
environment.
Page 42

Product Specification of PDP Module
40/65
Design (continued)
4) This product uses high-voltage switching and a high –speed clock. A system using this product should be
designed so that it does not affect the other systems, and should be thoroughly evaluated.
5) The materials which contain sulfur are forbidden to use, because they may damage PDP module
6) This product has a glass display surface. Design your system so that excessive shock and load are not applied to
the glass. Exercise care that the vent at the corner of the glass panel is not damaged. If the glass panel or vent is
damaged, the product is inoperable.
7) There are some exposed components on the rear panel of this product. Touching these components may cause an
electric shock.
8) This product uses a high voltage. Design your system so that any residual voltage in this product is dissipated
quickly when power is turned off, observing the specifications.
9) This product uses heat-emitting components. Take the heat emitted by these components into consideration
when designing your system. If the product is used outside the specified temperature range, it may malfunction.
10) This product uses a high voltage and, because of its compact design, components are densely mounted on the
circuit board. If dust collects on these components, it can cause short-circuiting between the pins of the
components and moisture can cause the insulation between the components to break down, causing the product
to malfunction.
11) Regulations and standards on safety and electromagnetic interference differ depending on the country. Design
your system in compliance with the regulations and standards of the country for which your system is intended.
12) To obtain approval under certain safety standards (such as UL and EN), a filter that p asses a shock test must be
fitted over the glass surface of the finished product. In addition, it must be confirmed that the lev el of UV
emissions is within the range specified by such standards.
.
13) If this product is used as a display board to display a static image, “image sticking” occurs. This means that the
luminance of areas of the display that remain lit for a long time drops compared with the luminance of areas that
are lit for a shorter time, causing uneven luminance across the disp lay. The degree to which this occurs is in
proportion to the luminance at which the display is used. To prevent this phenomenon, therefore, avoid static
images as much as possible and design your system so that it is used at a low luminance, by reducing signal level
difference between bright area and less bright area through signal processing.
14) Within the warranty period, general faults that occur due to defects in components such as ICs will be rectified
by LGE without charge. However, IMAGE STICKING is not included in the warranty. Repairs due to the other
faults may be charged for depending on responsibility for the faults.
15) In case of AC PDP driving mechanism, Because the brightness of output is not always proportional to input
signals. Therefore the non-linearity of gray can occasionally be observed in certain gray levels as well as
Contour and Error Diffusion Noise can be appeared when a dark picture is on the screen especially. These are
phenomena that can be observed on the PDP driving mechanism. With simple adjustment to picture brightness
control, these can be reduced considerably.
16) Because of the need to control the power consumption on the PDP driving mechanism, the APL(Average Picture
Level) mode was equipped. Thus, as the picture on the screen changes, there can be slightly switched in
brightness. This also is a phenomenon that can be observed on the PDP driving mechanism.
17) Th is product is designed to LGE’s “Standard” quality grade. If you wish to use the product for applications
outside the scope of the “Standard” quality grade, be sure to consult LGE in advance to assess the technological
feasibility before starting to design your system.
Page 43

Product Specification of PDP Module
41/65
USE
1) Because this product uses a high voltage, connecting or disconnecting the connectors while power is supplied to
the product may cause malfunctioning. Never connect or disconnect the connectors while the power is on.
Immediately after power has been turned off, a residual voltage remains in the product. Be sure to confirm that
the voltage has dropped to a sufficiently low level.
2) Watching the display for a long time can tire the eyes. Take a break at appropriate intervals.
3) PDP ’s brightness and contrast ratio is lower than that of the CRT. The picture is dimmer with surrounding light
and better for viewing in dark condition.
4) Do not cover or wrap the product with a cloth or other covering while power is supplied to the product.
5) Before turning on power to the product, check the wiring of the product and confirm that the supply voltage is
within the rated voltage range. If the wiring is wrong or if a voltage outside the rated range is applied, the
product may malfunction or be damaged.
6) Do not store this product in a location where temperature and humidity are high. This may cause the product to
malfunction. Because this product uses a discharge phenomenon, it may take time to light (operation may be
delayed) when the product is used after it has been stored for a long time. In this case, it is recommended to light
all cells for about 2hours (aging).
7) If the glass surface of the display becomes dirty, wipe it with a soft cloth moistened with a neutral detergent. Do
not use acidic or alkaline liquids, or organic solvents.
8) Do not tilt or turn upside down while the module package is carried, the product may be damaged.
9) This product is made from various materials such as glass, metal, and plastic. When discarding it, be sure to
contact a professional waste disposal operator.
Repair and Maintenance
Because this product combines the display panel and driver circuits in a single module, it cannot be repaired or
maintained at user’s office or plant. Arrangements for maintenance an d repair will be determined later
Others
1) If your system requires the user to observe any particular precautions, in addition to the above warnings and
cautions, include such caution and warning statements in the manual for your system.
2) If you have any questions concerning design, such as on housing, storage, or operating environment, consult
LGE in advance.
Page 44

Product Specification of PDP Module
42/65
1. GENERAL DESCRIPTION
DESCRIPTION
The PDP50X3#### is a 50-inch 16:9 color plasma display module with resolution of 1366(H) × 768(V) pixels.
This is the display device which offers vivid colors with adopting AC plasma technology by LG Electronics Inc.
FEATURES
High peak brightness (1000cd/m2 Typical) and high contrast ratio (10,000:1 Max) enables user to create
high performance PDP SETs.
APPLICATIONS
9 Public information display
9 Video conference systems
9 Education and training systems
Page 45

Product Specification of PDP Module
43/65
ELECTRICAL INTERFACE OF PLASMA DISPLAY
The PDP50X3#### requires 8bits or 10bits of digital video signals for each RGB color.
In addition to the video signals, six different DC voltages are required to operate the display.
GENERAL SPECFICATIONS
9 Model Name
9 Number of Pixels
9 Pixel Pitch
9 Cell Pitch
9 Display Area
9 Outline Dimension
9 Pixel Type
9 Number of Gradations
9 Weight
: PDP50X3#### (50X3 Model)
: 1366(H) × 768(V) (1pixel=3 RGB cells)
: 810㎛ (H) × 810㎛ (V)
: 270㎛ (H) × 810㎛ (V) (Green Cell basis)
: 1106.5(H) × 622.1(V) ± 0.5mm
: 1190(H) × 700(V) × 58(D) ± 1mm
: RGB Closed(Well) type
: (R)1,024 × (G)1,024 × (B)1,024 colors
: 21.4±0.5 Kg (Net 1EA)
130±5 Kg (5EA/1BOX)
9 Aspect Ratio
9 Peak Brightness
9 Contrast Ratio
: 16:9
: Typical 1000cd/㎡ (1/100 White Window pattern at center)
: Average 90:1 (In a bright room with 100Lux at center)
: Max 10,000:1 (In a dark room 1/100 White Window pattern at center)
9 Power Consumption
9 Expected Life-time
: Max. 400 W (Full-White)
: more than 60,000 Hours of continuous operation
☞ Life-time is defined as the time when the brightness level becomes half of its initial value.
9 Display Dot Diagram
Pixel Pitch(width)
1st pixel
row
2nd pixel
row
3rd pixel
row
767th pixel
row
768th pixel
row
pitch(height)
0.81㎜
BGR BGR
BGR BGR
BGR BGR
BGR BGR
BGR BGR
2nd
pixel
column
Cell pitch
R:0.26㎜
G:0.27㎜
B:0.28㎜
1365th
pixel
column
cell
BGR BGR
BGR BGR
BGR BGR
BGR BGR
BGR BGR
1366th
pixel
column
pixel
1st
pixel
column
0.81㎜
Page 46

BLOCK DIAGRAM
44/65
)
u
t
p
i
n
S
D
V
(
L
RA1+/ RA1-
RB1+/ RB1RC1+/ RC1-
RD1+/ RD1-
RCLK1+/ RCLK1-
RE2+/ RE2-
DIPEN
I2C Interface
Ext APL Interface
APL Data
Product Specification of PDP Module
Controller
Memory
Controller
Input
Interface
Controller
Driver
Timing
Controller
Display data, Driver timing
Address Driver
Common sustain driver
Color PDP
1366 X 768 pixels
Scan Driver
Address Driver
☞ Applied Voltage level is specified at th e time when Full-White pattern is displayed on the panel.
(External Power)
Vs (188V~198V)
Va (59V~61V)
Vcc (5V)
Page 47

Product Specification of PDP Module
45/65
LVDS Signal and LVDS Receiver
¾ Definitions and Functions of LVDS Signal
Symbol Definition and Function Related Output Signal
RA+ Channel-A Pos. Receiver Input
RA- Channel-A Neg. Receiver Input
RB+ Channel-B Pos. Receiver Input
RB- Channel-B Neg. Receiver Input
RC+ Channel-C Pos. Receiver Input
RC- Channel-C Neg. Receiver Input
RD+ Channel-D Pos. Receiver Input
RD- Channel-D Neg. Receiver Input
RE + Channel-E Pos. Receiver Input
RE - Channel-E Neg. Receiver Input
RCLK+ Clock Pos. Receiver Input
RCLK- Clock Neg. Receiver Input
R4, R5, R6, R7, R8, R9, G4
G5, G6, G7, G8, G9, B4, B5
B6, B7, B8, B9, Hsync, Vsync, BLANK
R2, R3, G2, G3, B2, B3
R0, R1, G0, G1, B0, B1
PIX_CLK
¾ Video Input Connector (P3)
Pin No. Symbol Pin No. Symbol Pin No. Symbol
1 GND 11 RD12 RA1- 12 RD1+
3 RA1+ 13 GND
4 RB1- 14 GND
5RB1+
6 GND 16 Nc
7RC18RC1+18 Nc
9 RCLK1- 19 GND
10 RCLK1+
1 2 3 4 5 6 7 8 9 10 11 12 13 14 15 1617 1819 20 21 22 2324 25 26 27 28 2930 31
15 Nc
17 Nc
20 Nc
21 nc
22
23
24
25
26
27
28
29
30
31
nc
nc
RE1RE1+
GND
DISPEN
2
C SDATA
I
I2CSCLK
Nc
GND
3.3V level
LG Cable, GT121-31P-TD pin number ( Top view )
☞ substitute : JAE, FI-TWEP31-VF
Page 48

Product Specification of PDP Module
46/65
LVDS Signal and LVDS Receiver (continued)
¾ Output Signals of LVDS Receiver
Symbol Definition and Function
R9 ~ R0
G9 ~ G0
B9 ~ B0
PIX_CLK
Vsync
Hsync
10-bit Red Pixel video signal ( R9 : MSB, R0 : LSB )
10-bit Green Pixel video signal ( G9 : MSB, G0 : LSB )
10-bit Blue Pixel video signal ( B9 : MSB, B0 : LSB )
Clock Signal which synchronous to vi deo s i gnal
vertical synchronous signal
horizontal synchronous signal
BLANK ‘HIGH’ level : data is valid ‘LOW’ level : data is invalid
DISPEN
‘HIGH’ level : Display Enable ‘LOW’ level : Non Display
☞ Each of the RGB signals can be changed with the Gamma Mode.
¾ Pin assignment of LVDS Receiver Output Signal
Pin No Symbol Pin No Symbol
1
2
3
5
6
7
26
27
29
30
32
33
34
35
37
B9
NC
Hsync
Vsync
BLANK
R2
PIX_CLK
R4
R5
R6
R7
R8
R3
R9
G4
38
39
41
42
43
45
46
47
49
50
51
53
54
55
G5
G6
G2
G3
G7
G8
G9
B4
B2
B3
B5
B6
B7
B8
IC64 : First LVDS Reciever IC78 : Second LVDS Reciever
☞ LVDS Receiver : THC63LVDF84B(THine) or SN75LVDS82(TI)
Pin No Symbol Pin No Symbol
1
2
3
5
6
7
26
27
29
30
32
33
34
35
37
NC
NC
NC
NC
NC
R0
NC
NC
NC
NC
NC
NC
R1
NC
NC
38
39
41
42
43
45
46
47
49
50
51
53
54
55
NC
NC
G0
G1
NC
NC
NC
NC
B0
B1
NC
NC
NC
NC
¾ Signal Input sequence of LVDS Receiver
RxCLK IN
(Differential)
RE
RD
RC
RB
RA
Previous cycle Next cycle
NC B1 B0 G1 G0 R1 R0R1-1 R0-1
R3-1 R2-1
B7-1 B6-1
G6-1 G5-1
R5-1 R4-1
NC B3 B2 G3 G2 R3 R2
DE VS HS B9 B8 B7 B6
B5 B4 G9 G8 G7 G6 G5
G4 R9 R8 R7 R6 R5 R4
< 10-bit Data Map to LVDS outputs >
※ DE : BLANK, VS : Vsync, HS : Hsync
Page 49

Product Specification of PDP Module
47/65
5. IMAGE STICKING CHARACTERISTICS
Image Sticking
The fluorescent substance used in the plasma module loses its brightness with the lapse of lighting time. This
deterioration in brightness appears to be a difference in brightness in relation to the surroundings, and comes to
be recognized as image sticking.
In other words, the image sticking is defined as follows: when the same pattern (of the fixed display) is
displayed for a long time, a difference in brightness is caused around the lighting area and non-lighting area due
to deterioration in the fluorescent substance.
When the present pattern is changed over to another one, the boundary comes to be seen between the lighting
area and non-lighting area due to difference in brightness in the pattern shown shortly before changeover. If this
conditions is accumulated, the boundary or image sticking comes to be seen with the naked eyes.
Secular change in brightness
The life of brightness, defined as the reduction to half the initial level, is more than 25 thousand hours on average.
Conditions: All white (100% white) input at an ambient temperature of 25°C.
However, this lifetime is not a guarantee value for life and brightness. It should be recognized simply as the data
for reference.
Warranty
Image sticking and faults in brightness and picture elements are excluded from the warranty objects.
Cause of deterioration in brightness
A major possible cause of deterioration in brightness is damage in the fluorescent substance due to impact caused
by ions generated at the time of plasma discharges.
Practical value for Image sticking
The relationship between integrated lighting time and brightness in this plasma module is described in the
attached material. In particular, the deterioration in brightness tends to be accelerated up to 100 hours in the initial
period. In the initial period, the fixed display of patterns particularly tends to cause image sticking. The practical
value for image sticking is difficult in concrete numerals. As described below, you are advised to take proper
measures to make the occurrence of image sticking as slow as possible.
Page 50

Product Specification of PDP Module
48/65
Proposed measures taken to relieve image sticking
So long as there is the reduction of brightness in the fluorescent substance, it is impossible to avoid the
occurrence of image sticking. Therefore, to relieve image sticking, we offer you a method of entering an image
input that may ensure reluctance to the generation of the difference in brightness reduction among the displayed
dots.
The images from TV broadcasting involve a high rate of motion picture displays. Therefore, there is less chance
of being a cause of difference in brightness reduction among the cells. Even when the fixed patterns are
displayed, they generally last for a few minutes. Since the same pattern is less liable to be displayed, there is
almost no influence toward image sticking.
If the fixed patterns tend to be displayed for a long time, however, there occurs a substantial imbalance between
the lighting and non-lighting areas, thus causing a difference in brightness as a result. In this document, we offer
you some proposals of installation, paying attentions to the two points: the reduction of difference in brightness
achieved by integrated lighting time leveling and the method of edge smearing to make image sticking hard to be
discerned.
The result from these proposals can, however, greatly depend on the contents of images and the operating
environment. Therefore, we consider that it is essential to take the suitable measures in consideration of the
customer’s operating environment.
Example of Proposal 1: The display position is moved while the fixed display pattern is changed over, or it is
scrolled during the display.
Example of Proposal 2: If possible, a pattern of complementary color is incorporated (for integrated time
leveling).
Example of Proposal 3: The fixed pattern and the motion picture display are reciprocally exchanged, in order to
minimize display period of the fixed pattern.
Example of Proposal 4: During operation, the brightness of screen is suppressed as low as possible. For the
display patterns, characters are indicated not on the black ground (non-picture area) but on the colored ground
(mixture of R, G, B recommended).
Page 51

Product Specification of PDP Module
49/65
6. OUTLINE DRAWING
Front View
Page 52

Rear View
50/65
Product Specification of PDP Module
Page 53

Product Specification of PDP Module
51/65
7. CONNECTORS and CONNECTIONS
Power Input Connector
¾ Connector P25 Pin Assignment ( Y SUS Board )
Pin No. Symbol
1
2
3
4
GND
GND
+5V
+5V
¾Connector P26 Pin Assignment ( Y SUS Board )
Pin No. Symbol
1
2
3
4
Vs
Vs
Vs
NC
Pin No. Symbol
6
7
8
9
GND
GND
GND
Va
GP390-4P-TS Pin num bers
( Top View )
④③②①
Connector : GP390-4P-TS
Housing : GP390-4S-CS
Maker : LG Cable
GP390-10P-TS Pin numbers
( Top View )
⑩⑨⑧⑦⑥⑤④③②①
Connector : GP390-10P-TS
Housing : GP390 -10S-CS
Maker : LG Cable
5 GND
10
Va
Page 54

Product Specification of 50X3 Unicorn PSU
52/65
4. Output Specification
4.1 Output Voltage & Load Condition
Output
Name
5V
Output
Typical
(V)
5.0 - ±5 1.0 100mVp-p
Variable
Voltage
Range(V)
Voltage
Tolerance
(%)
Output Current(A)
Min. Max.
0.03
Stand_by
0.5
0
0
0.005
2.0
1.75
2.4
100mVp-p
100mVp-p
200mVp-p
500mVp-p
300mVp-p
300mVp-p
500mVp-p
Vsc Board
(Signal Interface)
1
*
PDP Module
5Vsc
9Vsc
12Vsc
12Vfan
Vaudio
(selectable)
5Vctrl
Va
Vs
5.0 - ±54.5
9- ±5
12 - ±501.0
12 - ±5 0 0.6 200mVp-p
24 - ±12
30 - ±12 0 1.4 500mVp-p
5.0 - ±52.05.0
60 55~61 ±1
195 180~200 ±10.12.2
*1. PDP Module Maximum Power are below 500W at all pattern of full white gray scale.
*2Ripple
& Noise
(Vp-p)
*2. Ripple & Noise measurement method
Power Supply Unit
Electrolytic Capacitor 47㎌ + 0.1㎌
Load
700mm
"Measurement point"
Page 55

Product Specification of 50X3 Unicorn PSU
53/65
4.2 Output protection
Output
Name
5V stand_by 5.0 Short Protection
5Vctrl 5.0
5Vsc 5.0
9Vsc 9
12Vsc 12
12Vfan 12
Vaudio
Va 60 2.80 ∼ 4.60 64 ~ 77
Vs 195 2.42 ∼ 4.25 205 ~ 230
Output
Typical(V)
24 3.0 or more 26 ~ 35
30 38 ~ 50
*1Over Current
Protection(A)
13.0 ~ 26.0
2.2 or more 11~15
1.76 or more 13~17
2.5 or more
Protection(V)
Over Voltage
5.3~7.0
Short circuit
protection
No hardware
failure
*1 The O.C.P point is measured by resistor load when other output load is a maximum.
( The Output voltage must keep normally at moment peak current of PDP.)
The O.C.P point is load current when the output voltage decrease to 0 ( shut down )
No hardware failure and No fire
5. Environment condition
5.1 Ambient temperature and humidity
(Under Condition PDP Module + PSU)
Storage temperature -20℃ ~ 60℃
Operation temperature 0℃ ~ 40℃
Storage humidity 10% ~ 85%
Operation humidity 20% ~ 80%
5.2 MTBF(Mean Time Between Failures)
: 50,000hours or more
Page 56

Product Specification of 50X3 Unicorn PSU
54/65
8. Input/Output pin assignment & specification
CN804
1
2
3
4
5
6
7
8
9
CN803
1
2
3
4
5
6
7
8
9
10
11
12
CN809
1
2
CN802
1
2
3
4
4 3 2 1
#1 : 9Vsc
#2 : 9Vsc
#3 : GND
#4 : 5Vsc
#5 : 5Vsc
#6 : 5Vsc
#7 : GND
#8 : GND
#9 : GND
#1 ~ #3 : 5Vsc
#4 ~ #6 : GND
#7, #8 : 12Vsc
#9, #10 : GND
#11 : 12Vfan
#12 : 12Vfan.GND
#1 : 9Vsc
#2 : GND
#1, #2
: 30V or 24V
#3, #4
: GND
CN805
#1 ~#2
: GND
#3 ~ #4
: 5Vctrl
Selection Wire
=>
30V/24V
CN806
10 9 8 7 6 5 4 3 2 1
#1 : Vs
#2 : Vs
#3 : Vs
#4 : NC
#5 : GND
#6 : GND
#7 : GND
#8 : GND
#9 : Va
#10 : Va
Location No. Specification Vendor
CN01
3-176976-2(Red)
CN801 171825-7 AMP
CN802 171825-4 AMP
CN803 1-171825-2 AMP
CN804 171825-9 AMP
CN805 GP390-04P-TS LG Cable
CN806 GP390-10P-TS LG Cable
CN809 171825-2 AMP
AMP
CN801
1
2
3
4
5
6
7
CN01(Red)
#1 : ACD
#2 : RLY ON
#3 : 5Vst_by
#4 : GND
#5 : Vs ON
#6 : 5VD
#7 : NC
1 2
Live
Neutral
* PSU operation method S/W
1 2
Normal : On/Off with Vsc B/D
Auto : Automatic On/Off
without Vsc B/D
Page 57

9. Adjustment detail
55/65
Product Specification of 50X3 Unicorn PSU
CN804
1
2
3
4
5
6
7
8
9
CN803
1
2
3
4
5
6
7
8
9
10
11
12
CN809
1
2
CN802
1
2
3
4
CN801
1
2
3
4
5
6
7
Selection Wire
Selection S/W
Normal
(Mode1)
4 3 2 1
CN805
30V/24V
Auto
(Mode2)
10 9 8 7 6 5 4 3 2 1
CN806
Va ADJ.
VR301
* PSU driving method S/W
Vs ADJ
VR201
* Vs Voltage Variabe Resistor
- Turn right, increase Voltage
Turn left, decrease Voltage
•Shipment Condition : 198V
* Va Voltage Variable Resistor
- Turn right, increase Voltage
Turn left, decrease Voltage
•Shipment Condition : 60V
•You can select output Audio Voltage(24V or 30V)
•Shipment Condition : 24V
1 2
Auto(Mode2) : Driving without
interface B/D
Normal(Mode1) : Driving with interface B/D
Shipment Condition : Normal
* Connect with Noise Filter Cable
1 2
Live
Neutral
CN01(Red)
※ The color of CN01 is red.
※ Caution : If Va, Vs Voltage is adjusted Max. PSU is able to shut down by OVP
Page 58

Spare Part List
56/65
PDP5073TM
Item
1>
2>
3>
4>
5>
6>
7>
8>
9>
10>
11>
12>
13>
14>
15>
16>
17>
18>
19>
20>
21>
Part Number
PDP501DMIA1LS-
A01
510-501D01-SMU01K
518-501D01-01K
580-P501DHS-MU01L
E7501-056001
771E501D01-01
205-50SD01-01RV
206-50SD01-01RV
244-34B811-01
248-46D201-01
269-42SD01-01L
277-46SD01-01S
300-42SD05-01C
310-041104-01V
310-111404-07V
310-635005-02T
326-001010-20
329-002510-50
329-006010-50
329-008410-50
329-010010-50
329-064510-50
AKAI PDP50"(PDP5073TM) MT8202/LGX3 (1366X768) 120V/60HZ USA MONITOR BLACK
Part Description
CARTON BOX AKAI ENG PDP5073TM (S-MT8202) LGX3 PANEL USA K
BOTTOM BOX 1356(L)X346(W)
IB E FOR AKAI PDP5073TM LGX3 S-MT8202 USA
REMOTE CONTROL K001 "AKAI" 34KEYS MT8202 PDP MONITOR USA BLACK
MAIN PCB ASSY S-MT8202 (LG50X3) (MONITOR) USA
SPEAKER FRONT CABINET 501D(W/WINDOW) RV SILVER
SPEAKER BACK CABINET BLACK
GIFT BOX HANDLE 34B8
HANDLE FOR PLASMA BLACK
REMOTE RECEIVE LENS
FUNCTION KNOB 42SD S BLK
POLYFOAM SHEET 421D
POLYBAG 4"X11"X0.04 AV
POLYBAG 11"X14"X0.04 FV
POLYBAG 63"X50"X0.5 THKX0.04MM W/WARNING& RELYCLE MARK&HOLE
CUSHION 10X10X2.0MM W/ADHESIVE
SPONGE 25X10X5.0MM W/ADHESIVE
SPONGE 60X10X5.0MM W/ADHESIVE
SPONGE 84X10X5.0MM W/ADHESIVE
SPONGE 100X10X5.0MM W/ADHESIVE
SPONGE 645X10X5.0MM W/ADHESIVE
Usage /
unit
Unit Key/Spare
1.000000 Piece
1.000000 Piece
1.000000 Piece
1.000000 SET
1.000000 SET
1.000000 Piece
1.000000 Piece
2.000000 Piece
4.000000 Piece
1.000000 Piece
1.000000 Piece
2.000000 Piece
1.000000 Piece
1.000000 Piece
1.000000 Piece
1.000000 Piece
2.000000 Piece
1.000000 Piece
4.000000 Piece
2.000000 Piece
2.000000 Piece
K
K
K
K
K
S
S
S
S
S
S
S
S
S
S
S
S
S
S
S
S
Page 59

Spare Part List
57/65
PDP5073TM
22>
23>
24>
25>
26>
27>
28>
29>
30>
31>
32>
33>
34>
35>
36>
37>
38>
39>
40>
41>
42>
43>
44>
45>
46>
329-115010-50
329-P46T01-01
329-SP0101-01
370-42D102-01
384-42AG01-02AH
388-421D02-01H
388-421D03-01H
388-42D103-01H
388-42SB04-01H
388-42SD01-01
400-501D03-SMK01
402-50AA03-01S
422-42SD05-01
422-42SD06-01
422-42SD11-01
429-50AD0C-01S
436-50AA0B-01S
481-42AA03-01S
483-50AA01-01
486-50AD01-01
512-501D01-01
512-501D02-01
521-030091-01
522-421D01-01
530-095045-10
PVC SHEET FOR TERMINAL PDP5073TM(S-MT8202G) USA H
FRONT CABINET (AL) LGX3 PANEL 501D (S-MT8202) W/O WINDOW AKAI BLACK
TERMINAL SHEET FOR MTK 8202 MINITOR (5073TM) W S-PCB HOLE
SPONGE 1150X10X5.0MM W/ADHESIVE
SPK ABSORB SPONGE 450X100X20MM
ABSORB SPONGE 100X100X20MM
PAD CORD SPONG FOR SPK
INFRARED PLATE 421D H
SPEAKER PLATE 421D H
CAUTION PLATE ENG 42D1 H
POWER PLATE SANSUI 42SB H
PC SHEET FOR KEY PCB
BACK COVER 501D BLACK
SPEAKER BRACKET LEFT
SPEAKER BRACKET RIGHT
SPEAKER BRACKET
POWER JACK BKT
SHIELD BOX MTK8202 42AA
SHIELD BOX COVER 50AA
NAME PLATE AKAI SIL/BLACK 50AD
SHEET 1380X1315X3.0MM
SHEET 1380X945X3.0MM
FELT PAPER 30X9X1.0MM W/ADHESIVE
MASKING PAPER
FIBBER WASHER 9.5X4.5X1.0 W/ADHESIVE
2.000000 Piece
4.000000 Piece
3.000000 Piece
1.000000 Piece
1.000000 Piece
1.000000 Piece
1.000000 Piece
1.000000 Piece
1.000000 Piece
1.000000 Piece
1.000000 Piece
1.000000 Piece
1.000000 Piece
1.000000 Piece
2.000000 Piece
1.000000 Piece
1.000000 Piece
1.000000 Piece
1.000000 Piece
1.000000 Piece
.640000 Piece
.040000 Piece
1.000000 Piece
1.000000 Piece
8.000000 Piece
S
S
S
S
S
S
S
S
S
S
S
S
S
S
S
S
S
S
S
S
S
S
S
S
S
Page 60

Spare Part List
58/65
PDP5073TM
47>
48>
49>
50>
51>
52>
53>
54>
55>
56>
57>
58>
59>
60>
61>
62>
63>
64>
65>
66>
67>
68>
69>
70>
530-150032-10
553-002009-40A
553-002509-40A
553-010509-10A
553-013509-10A
553-015009-40A
553-017009-40A
553-018509-40A
553-020009-40A
553-039509-25A
553-056007-10A
553-067009-40A
553-114009-40A
554-090030-01
563-119-
568-P46T02-02
579-42D103-02
579-42D105-01
579-50AD02-01
590-501D01-01
593-421D01-09APA AKAI INSERTION CARD ENG FOR PDP4235M&PDP4225M &PDP5073TM (S-MT8202) USA P(QIAN
734-BM1401-01
900-500201-01A
E3301-028005
SHIELD GASKET 20X9X4.0MM W/CONDUCTIVE ADHESIVE KI JD-60
EMI SHIELD GASKET 25X9X4.0MM W/CONDUCTIVE ADHESIVE
SHIELD GASKET 105X9X1.0MM W/CONDUCTIVE ADHESIVE
EMI SHIELD GASKET 150X9X4.0MM W/CONDUCTIVE ADHESIVE
EMI SHIELD GASKET 170X9X4.0MM W/CONDUCTIVE ADHESIVE
EMI SHIELD GASKET 185X9X4.0MM W/CONDUCTIVE ADHESIVE
SHIELD GASKET 200X9X4.0MM W/CONDUCTIVE ADHESIVE KI JD-60
SHIELD GASKET 395X9X2.5MM W/CONDUCTIVE ADHESIVE
SHIELD GASKET 560X7X1.0MM W/CONDUCTIVE ADHESIVE
EMI SHIELD GASKET 670X9X4.0MM W/CONDUCTIVE ADHESIVE
EMI SHIELD GASKET 1140X9X4.0MM W/CONDUCTIVE ADHESIVE
SHIELD CLOTH 90X30MM W/CONDUCTIVE ADHESIVE
SECC STAND BASE 501D(COST DOWN) W/O PACKING SILVER
DISPLAY FILTER 50" SSC FOR LG/SDI 1155X671X3.1 (S3-COATING TYPE)
FIBER WASHER 15X3.2X1.0MM
SHIELD GASKET 135X9X1.0MM
SERIAL NO. LABEL
WARNING LB ENG 42SF NIL
ON/OFF LB ENG 42D1 NIL
PROTECTIVE EARTH LABEL FOR ESA 42TD1
SERIAL NO/BAR CODE LABEL 50HA (USA)
WARRANTY CARD AKAI ENG PDP5073TM USA
SE)
TERMINAL PUSH WP4-15B
1.000000 Piece
2.000000 Piece
4.000000 Piece
1.000000 Piece
2.000000 Piece
8.000000 Piece
2.000000 Piece
4.000000 Piece
2.000000 Piece
1.000000 Piece
1.000000 Piece
2.000000 Piece
2.000000 Piece
1.000000 Piece
1.000000 Piece
1.000000 Piece
1.000000 Piece
1.000000 Piece
1.000000 Piece
1.000000 Piece
1.000000 Piece
1.000000 SET
1.000000 Piece
1.000000 Piece
S
S
S
S
S
S
S
S
S
S
S
S
S
S
S
S
S
S
S
S
S
S
S
S
Page 61

Spare Part List
59/65
PDP5073TM
71>
72>
73>
74>
75>
76>
77>
78>
79>
80>
81>
82>
83>
84>
E3404-157004
E3421-924026
E3421-924028
E3421-926105
E3421-927001
E3461-000099
E3461-000100
E3471-004003
E4101-027001
E4801-125001
E4802-015001
E6205-50LD01
E7301-010002
775-501D01-01
WIRE ASSY KEY 13P/8P+6P P2.0 L=650/240 FOR 50LGX3 MT8202 W/EMI
AC CORD UL 1.88M (YY-3/ST3 YUNBIAO)
WIRE ASSY 2P L=300 R/B FOR SPK (L/R)
WIRE ASSY 2P L=110 R/B FOR SPK
WIRE ASSY 4P/5P 2.0MM L=300MM S-VIDEO (FOR FHP)
WIRE ASSY AMP/AMP-2Y/530 (FROM SWITCH POW)
CABLE SPK CONVERT 2P L=600 W/B SPK-L
CABLE SPK CONVERT 2P L=600 R/B SPK -R
SWITCH POW MR-22-N2BB-F2 ROCKET
SPEAKER 16 OHM 10W D3" YD78-2
TWEETER 6 OHM 10W D2" YDG52-2
DISPLAY PDP 50" LG-X3 (XGA) (127CM)
BATTERY AAA R03P1.5V <2>
ELECT NON COMMON ASSY MT8202 LG50X3
1.000000 Piece
2.000000 Piece
2.000000 Piece
1.000000 Piece
1.000000 Piece
1.000000 Piece
1.000000 Piece
1.000000 Piece
1.000000 Piece
4.000000 Piece
2.000000 Piece
1.000000 Piece
2.000000 Piece
1.000000 SET
S
S
S
S
S
S
S
S
S
S
S
S
S
S
Page 62

60/65
Page 63

If you forget your V-Chip Password
61/65
- Omnipotence V-Chip Password: 8202.
Using the “Change Password” item
When enter the “V-Chip” menu, select “Change Password”.
Press ▲ or ▼ button to highlight the “Change Password” item.
Press Enter button to confirm and pop up a menu.
Use 0~9 buttons input the omnipotence password(8202), then Press Enter button to enter and
pop up a menu.
Press Enter button to confirm
-Suggest: Change to your familiar Password again.
Use 0~9 buttons input your new password.
Press
Use 0~9 buttons input your new password again.
▼ button to move to confirm blank.
Page 64

Software Upgrade
62/65
Process of update MT8202
Preparing :
1. Connect RS232-VGA download line, One connector is connecte d to VGA connect port of
Plasma TV ,while another side is connected to PC COM port.
2. Store the MtkTool into the PC .
Downloading :
3.Turn on AC power switch of the Plasma TV and then press the button “standby” of the remote
control . The image could be found on the screen of the Plasma TV while the color of the
power indicator is green . (the mode of the Plasma TV will be standby mode if after turn on
the main power switch only . )
Execute MTKtool and select the chipset as MT8202. (the software of MTKtool will be sent to
4.
your side)
5. Select current COM port. (please try to check the COM port of your PC).
Page 65

6.Choose the bit rate as 115200.
63/65
7.Select the update binary by pressing browse button. For exemple,the binary file name is
PDP5073TM_V09.bin. (this update firmware will be sent to your side)
8. Press Upgrade button and start update process.
Page 66

64/65
9.The update process is successful as the progress bar is 100%. After the update process is ok,
Page 67

turn off power and wait indicator light is off. Turn on power and TV can work.
65/65
Checking
It is needed to check the version of the firmware for MT8202 which has been
download into the Plasma TV .
Press Menu button of the remote control,following input “8202”of the remote
control and OSD menu for Factory Setting is appeared on the screen .
Use the remote control and select the mode of Firmware Version and then enter the
mode of Firmware Version . It is easy to be found the version of the current firmware
for MT8202 is as the following : “Factory ID : PDP5073TM_VXX ”
PC
PDP
RS232-VGA download line
RXD
TXD
GND
D-Sub 9(RS232)
2
3
5
D-Sub 15A(VGA)
11
4
5
RXD
TXD
GND
 Loading...