

Page 1

CO MPA Q D ISC ST ERE O S YST EM
SI ST EMA E ST ERE O CO N R EP RO DUG OR D E D IS CO S C OM PA QOS
CH AI NE ST ER EO AV EC LE ŒU R DE DI SQ UES C OM PAŒ
XR-M25
OPERATING INSTRUaiONS
For assistance and information,
calí toll free 1-800-BUY-AIWA.
MANUAL DE INSTRUCCIONES
MODE D'EMPLOI
En (English)
E (Español)
E (Français)
88-CL4-901-01
980326BWW-X6
(United States and Puerto Rico)
COMPACT
DIGITAL AUDIO
Page 2
ENGLISH
WAmmm
TO REDUCE THE RISK OF FIRE OR ELECTRIC
SHOCK, DO NOT EXPOSE THÉ APPLIANCE TO
RAIN OR MOISTURE.
CAUTION
RISK OF ELECTRIC SHOCK
DO NOT OPEN
“CAUTIONTO REDUCE THE RISK OF
ELECTRIC SHOCK,
DO NOT REMOVE COVER (OR BACK).
NO USER-SERVICEABLE PARTS INSIDE.
REFER SERVICING TO QUALIFIED
SERVICE PERSONNEL.”
EieplanaUoA el OmpMc^ Spnbols:
Tlwlghtilc^læhwlth^mjsrttsadssrôtxrf.virfthh
» ecpjllateral te'-mterafed to alert toe
œerto 9» jiresence ©{ unteuFatod "dattgeroas
, vol!^”vsHthto toe p[o#jet'seMÉ38ur® that rnay
be of mjïictèit ffi^fcude to oonsBtùte a rte* of
lectio shotÿc to pe©c»&
The exdamation pdrrt witoto an etp'fateral
Wangle to Wended to ^ert tte user to the
presence of importar«t operating and
maintenance (servicing) «nstructions in the
ilt««ure œcQtnp»yinp toe:afi^iaBce.
PRECAUTION
Read the Operating Instructions carefully and completely before
operating the unit. Be sure to keep the Operating Instructions for
future reference. All warnings and cautions in the Operating In
structions and on the unit should be strictly followed, as well as
the safety suggestions below.
Installation
1 Water and moisture — Do not use this unit near water, such
as near a bathtub, washbowl, swimming pool, or the like.
2 Heat — Do not use this unit near sources of heat, including
heating vents, stoves, or other appliances that generate heat.
It also should not be placed in temperatures less than 5°C
(41 °F) or greater than 35°C (95°F).
3 Mounting surface — Place the unit on a flat, even surface.
4 Ventilation — The unit should be situated with adequate
space around it so that proper heat ventilation is assured.
Allow 10 cm (4 in.) clearance from the rear and the top of the
unit, and 5 cm (2 in.) from the each side.
- Do not place the unit on a bed, rug, or similar surface that
may block the ventilation openings.
- Do not install the unit in a bookcase, cabinet, or airtight rack
where ventilation may be impeded.
5 Objects and liquid entry — Take care that objects or liquids
do not get inside the unit through the ventilation openings.
6 Carts and stands — When
placed or mounted on a stand or
cart, the unit should be moved
with care.
Quick stops, excessive force, and
uneven surfaces may cause the
unit or cart to overturn or fall.
7 Condensation — Moisture may form on the CD pickup lens
when:
- The unit is moved from a cold spot to a warm spot
- The heating system has just been turned on
- The unit is used in a very humid room
- The unit is cooled by an air conditioner
When this unit has condensation inside, it may not function
normally. Should this occur, leave the unit for a few hours, then
try to operate again.
8 Wall or ceiling mounting — The unit should not be mounted
on a wall or ceiling, unless specified in the Operating Instruc
tions.
I
ENGLISH
Electric Power
1 Power sources — Connect this unit only to power sources
specified in the Operating Instructions, and as marked on the
unit.
2 Polarization —Asa safety feature, some units are equipped
with polarized AC power plugs which can only be inserted
one way into a power outlet. If it is difficult or impossible to
insert the AC power plug into an outlet, turn the plug over and
try again. If it still does not easily insert into the outlet, please
call a qualified service technician to service or replace the
outlot. To avoid defeating the safety feature of the polarized
plug, do not force it into a power outlet.
3 AC power cord
- When disconnecting the AC power cord, puli out by the AC
power plug. Do not pull the cord itself.
- Never handle the AC power plug with wet hands, as this
could result in fire or shock.
- Power cord should be routed to avoid being severely bent,
pinched, or walked upon. Pay particular attention to the cord
from the unit to the power socket.
- Avoid overloading AC power plugs and extension cords
beyond their capacity, as this could result in fire or shock.
Page 3
4 Extension cord — To help prevent electric shock, do not use a
polarized AC power plug with an extension cord, receptacle, or
other outlet unless the polarized plug can be completely inserted
to prevent exposure of the blades of the plug.
5 When not in use — Unplug the AC power plug from the power
socket if the unit will not be used for several months or more.
When the cord is plugged in, a small amount of current continues
to flow to the unit,even when the power is turned off.
Outdoor Antenna
1 Power lines — When connecting an outdoor antenna, make
sure it is located away from power lines.
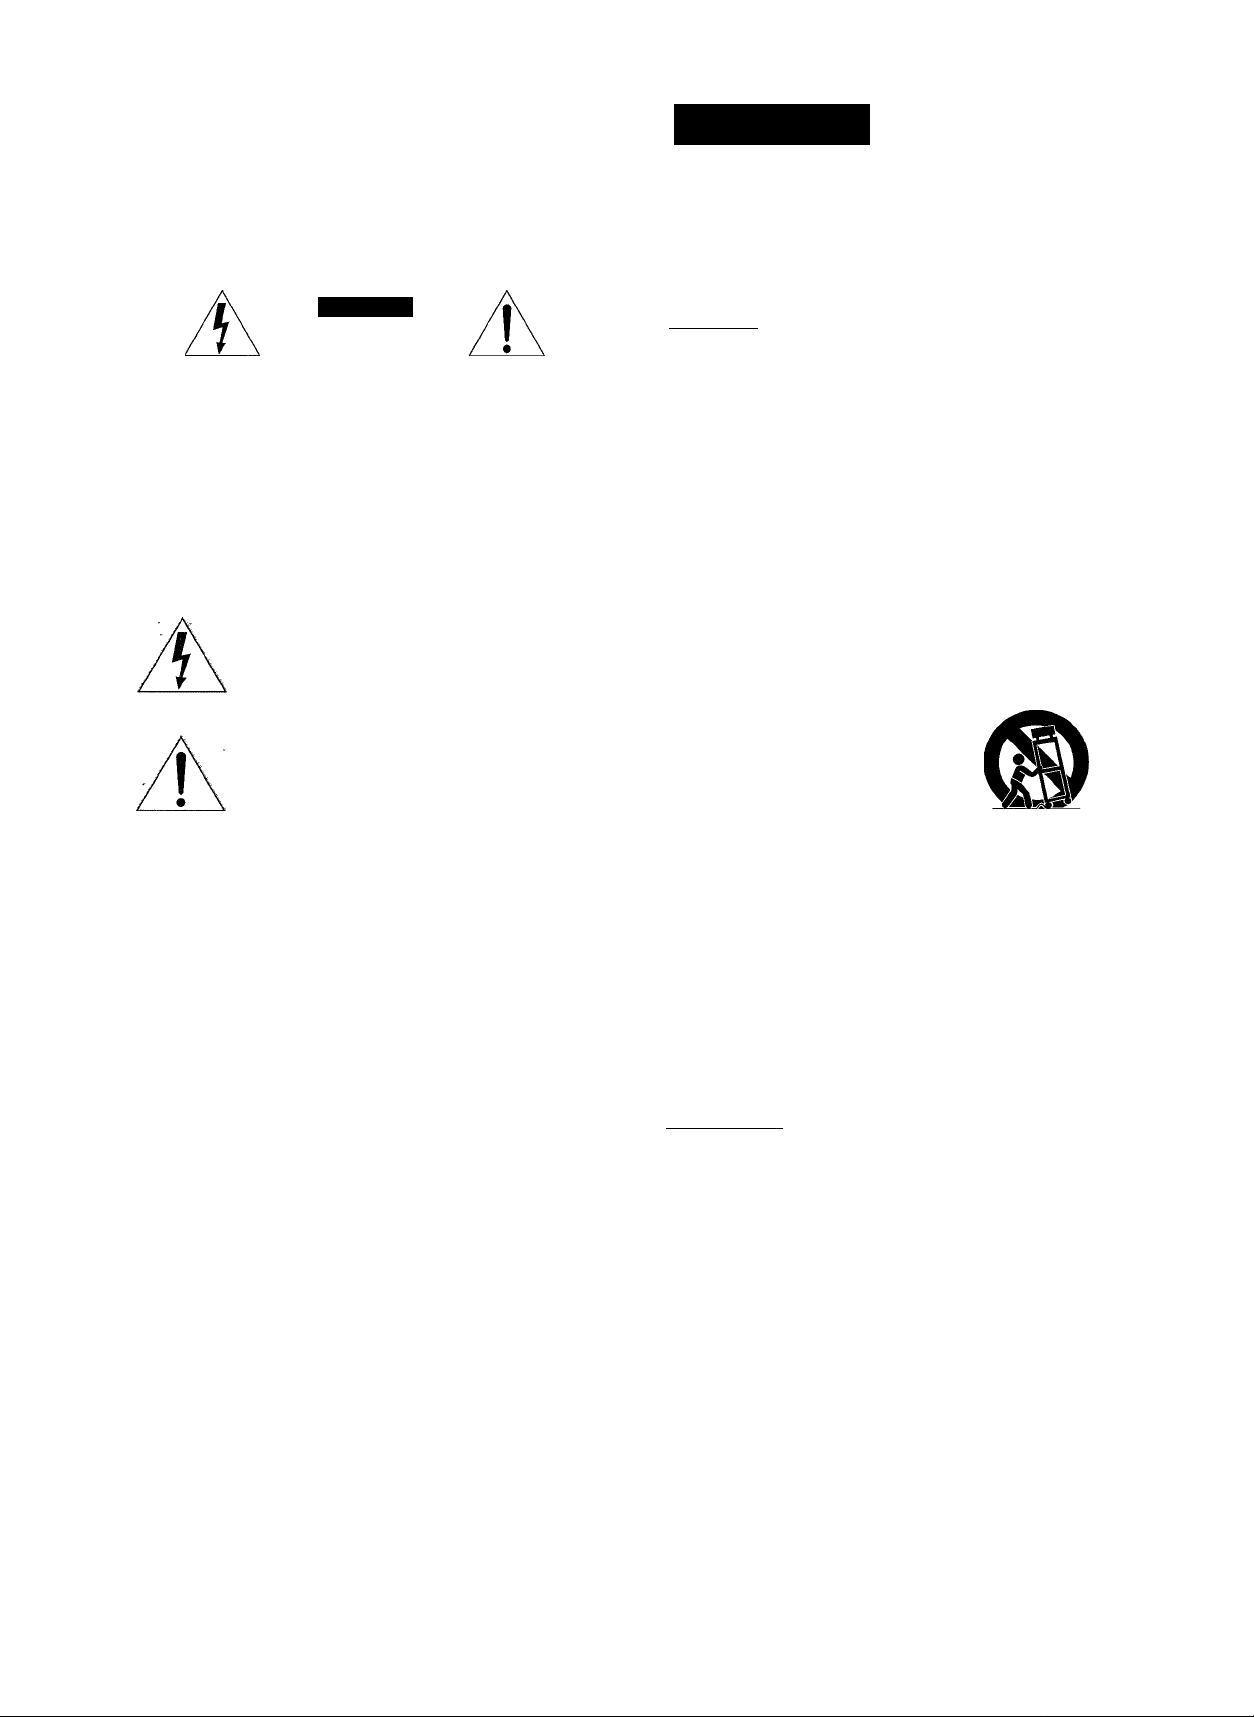
Outdoor antenna grounding — Be sure the antenna system
is properly grounded to provide protection against unexpected
voltage surges or static electricity build-up. Article 810 of the
National Electrical Code, ANSI/NFPA70, provides information
on proper grounding of the mast, supporting structure, and
the lead-in wire to the antenna discharge unit, as well as the
size of the grounding unit, connection to grounding terminals,
and requirements for grounding terminals.
Antenna Grounding According to the Nationai Eiectricai Code
TABLE OF CONTENT
PRECAUTIONS
PREPARATIONS
CONNECTIONS
REMOTE CONTROL.......................................................... 5
BEFORE OPERATION
SOUND
____________________________________
AUDIO ADJUSTMENTS ...................................................
GRAPHIC EQUALIZER...
RADIO RECEPTION
MANUAL TUNING
PRESETTING STATIONS.................................................. 8
CD PLAYING________________________________
BASIC OPERATIONS........................................................ 9
PROGRAMMED PLAY.................................................... 10
.................................................................
____________________________
.................................................................
......................................................
..................................................
__________________________
.............................................................
1
3
5
6
6
7
Maintenance
Clean the unit only as recommended in the Operating Instruc
tions.
Damage Requiring Service
Have the units serviced by a qualified service technician if:
- The AC power cord or plug has been damaged
- Foreign objects or liquid have gotten inside the unit
- The unit has been exposed to rain or water
- The unit does not seem to operate normally
- The unit exhibits a marked change in performance
- The unit has been dropped, or the cabinet has been damaged
DO NOTATTEMPTTO SERVICE THE UNIT YOURSELF.
TAPE PLAYBACK
BASIC OPERATIONS
___________________________
.....................................................
11
RECORDING________________________________
BASIC RECORDING
Al EDIT RECORDING......................................................13
PROGRAMMED EDIT RECORDING...............................14
KARAOKE
MICROPHONE MIXING.................................................... 15
_________________________________
.......................................................
12
CLOCK AND TIMER__________________________
SETTING THE CLOCK
SETTING THE SLEEP TIMER.........................................16
SETTING THE TIMER......................................................17
.................................................
16
OTHER CONNECTIONS_______________________
CONNECTING OPTIONAL EQUIPMENT
LISTENING TO EXTERNAL SOURCES
GENERAL
CARE AND MAINTENANCE
TROUBLESHOOTING GUIDE.........................................19
SPECIFICATIONS............................................................20
__________________________________
...........................................
.......................
.........................
18
18
19
Owner’s record
For your convenience, record the model number and serial
number (you will find them on the rear of your set) in the space
provided below. Please refer to them when you contact your Aiwa
dealer in case of difficulty.
Model No.
XR-M25 U
Serial No. (Lot No.)
PARTS INDEX.................................................................21
ENGLISH 2
Page 4
PREPARATIONS
CONNECTIONS
Check your system and accessories
/
---
V
z
1
----
0
nm°r
1
1
□
Before connecting the AC cord
The rated voltage of your unit shown on the rear panei is 120 V
AC. Check that the rated voltage matches your local voltage.
IMPORTANT
• Connect the speakers, antennas, and all optional equipment
first. Then connect the AC cord.
• There are no differences between the front speakers. Both
speakers can be connected as L (Left) or R (Right)
i§)
---
.,
XR-M25 Compact disc
stereo cassette receiver
Remote control
AM antenna
Operating Instructions, etc.
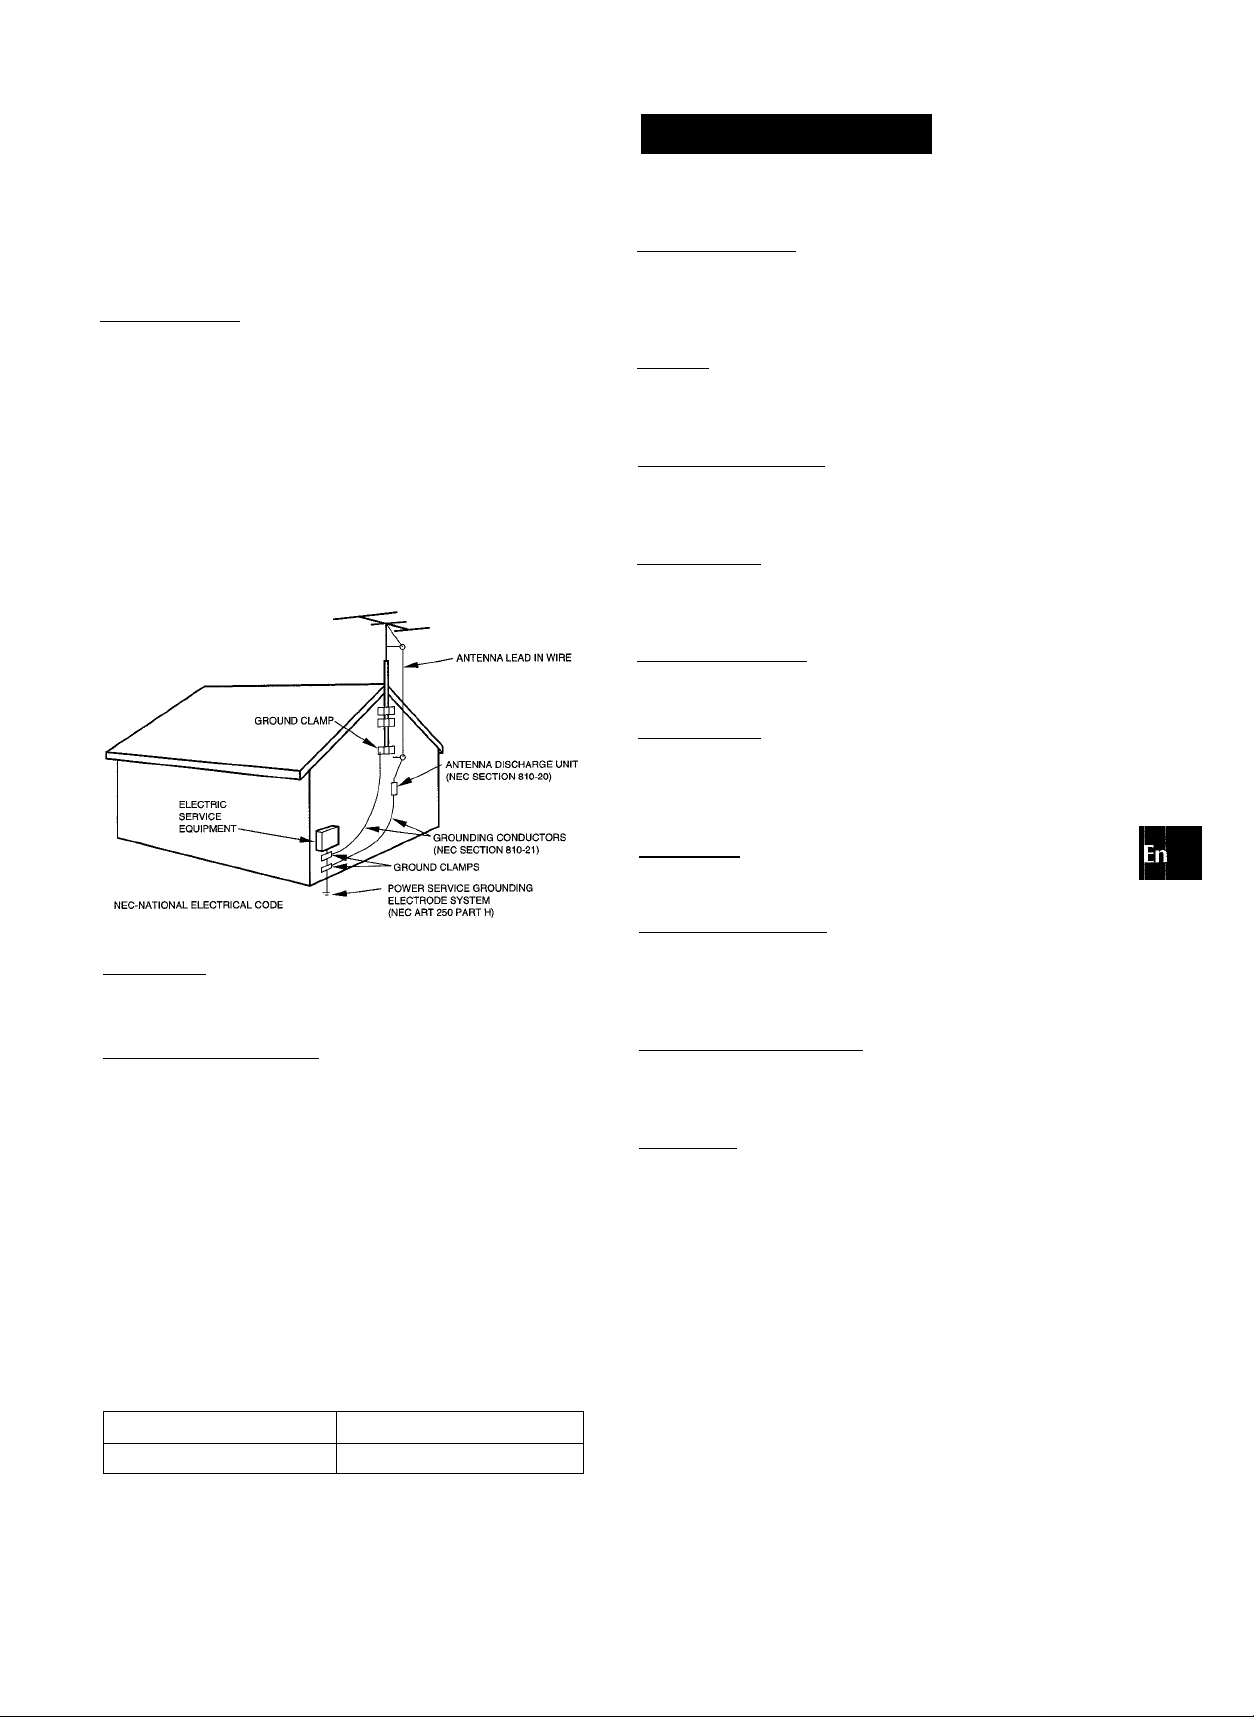
1 Connect the speaker cord to the main unit.
Speakers (L, R)
C>
The speaker cord with the white stripe should be connected
to O terminal and the black cord to © terminal.
FM antenna
FM antenna
3 ENGLISH
Page 5
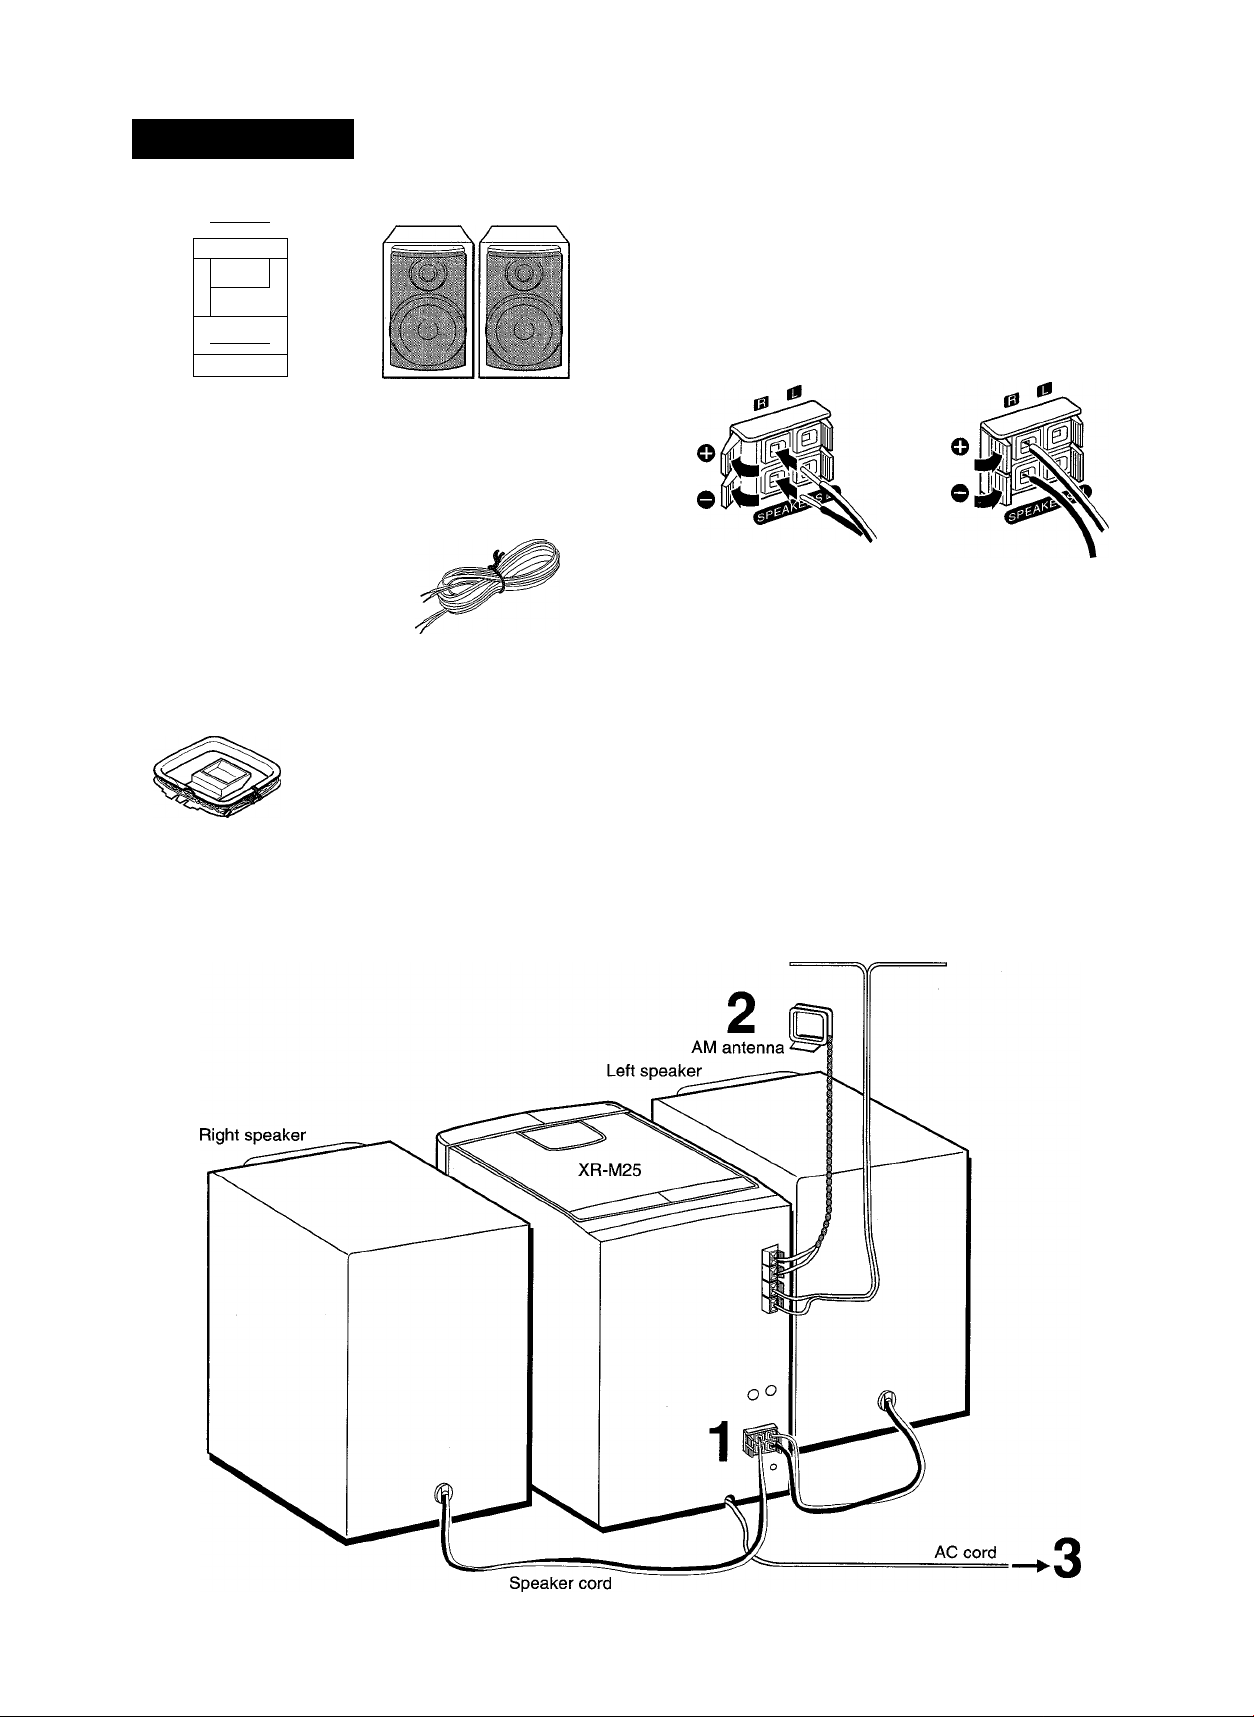
2 Connect the supplied antennas.
Connect the FM antenna to FM 75 Q terminals and the AM
antenna to AM LOOP terminals.
3 Connect the AC cord to an AC outlet.
To stand the AM loop antenna on a surface
Fix the claw to the slot.
CONNECTING AN OUTDOOR ANTENNA
For better FM reception, use of an outdoor antenna is
recommended.
Connect the outdoor antenna to FM 75 Cl terminals.
To connect other optional equipment page 18
m
t*
i
S
m
b:
a.
FM feeder antenna:
Extend this antenna horizontally in a T-shape and fix its ends to
the wall.
AM loop antenna:
Position for the best reception.
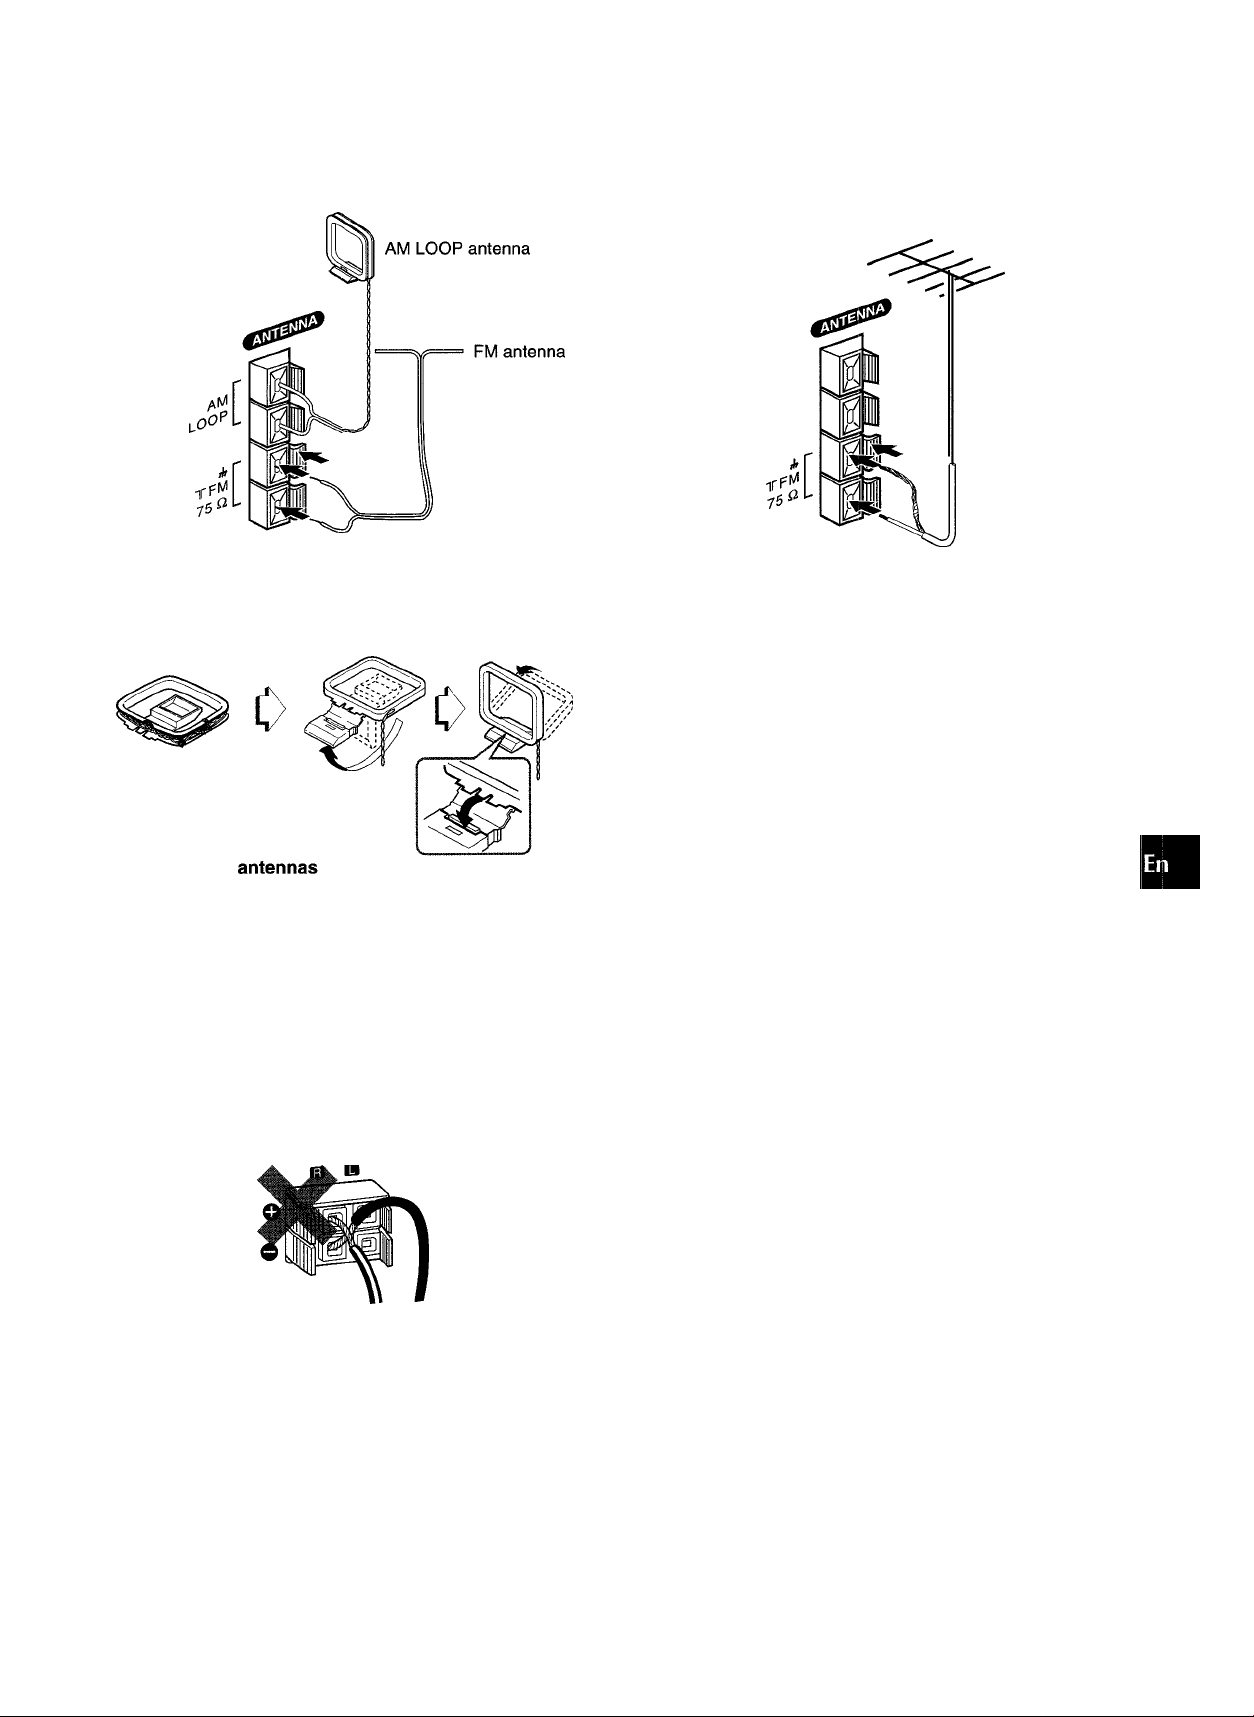
• Do not connect any speakers to the unit other than the supplied
ones.
• Be sure to connect the speaker cords correctly. Improper
connections can cause short circuits in SPEAKERS terminals.
• Do not leave objects generating magnetism, such as credit
cards, near the speakers, as these objects may be damaged.
’ Do not bring the FM antenna near metal objects or curtain rails.
’ Do not bring the AM antenna near other optional equipment,
the stereo system itself, the AC cord or speaker cords, since
noise will be picked up.
■ Do not unwind the AM antenna wire.
ENGLISH
4
Page 6
REMOTE CONTRO
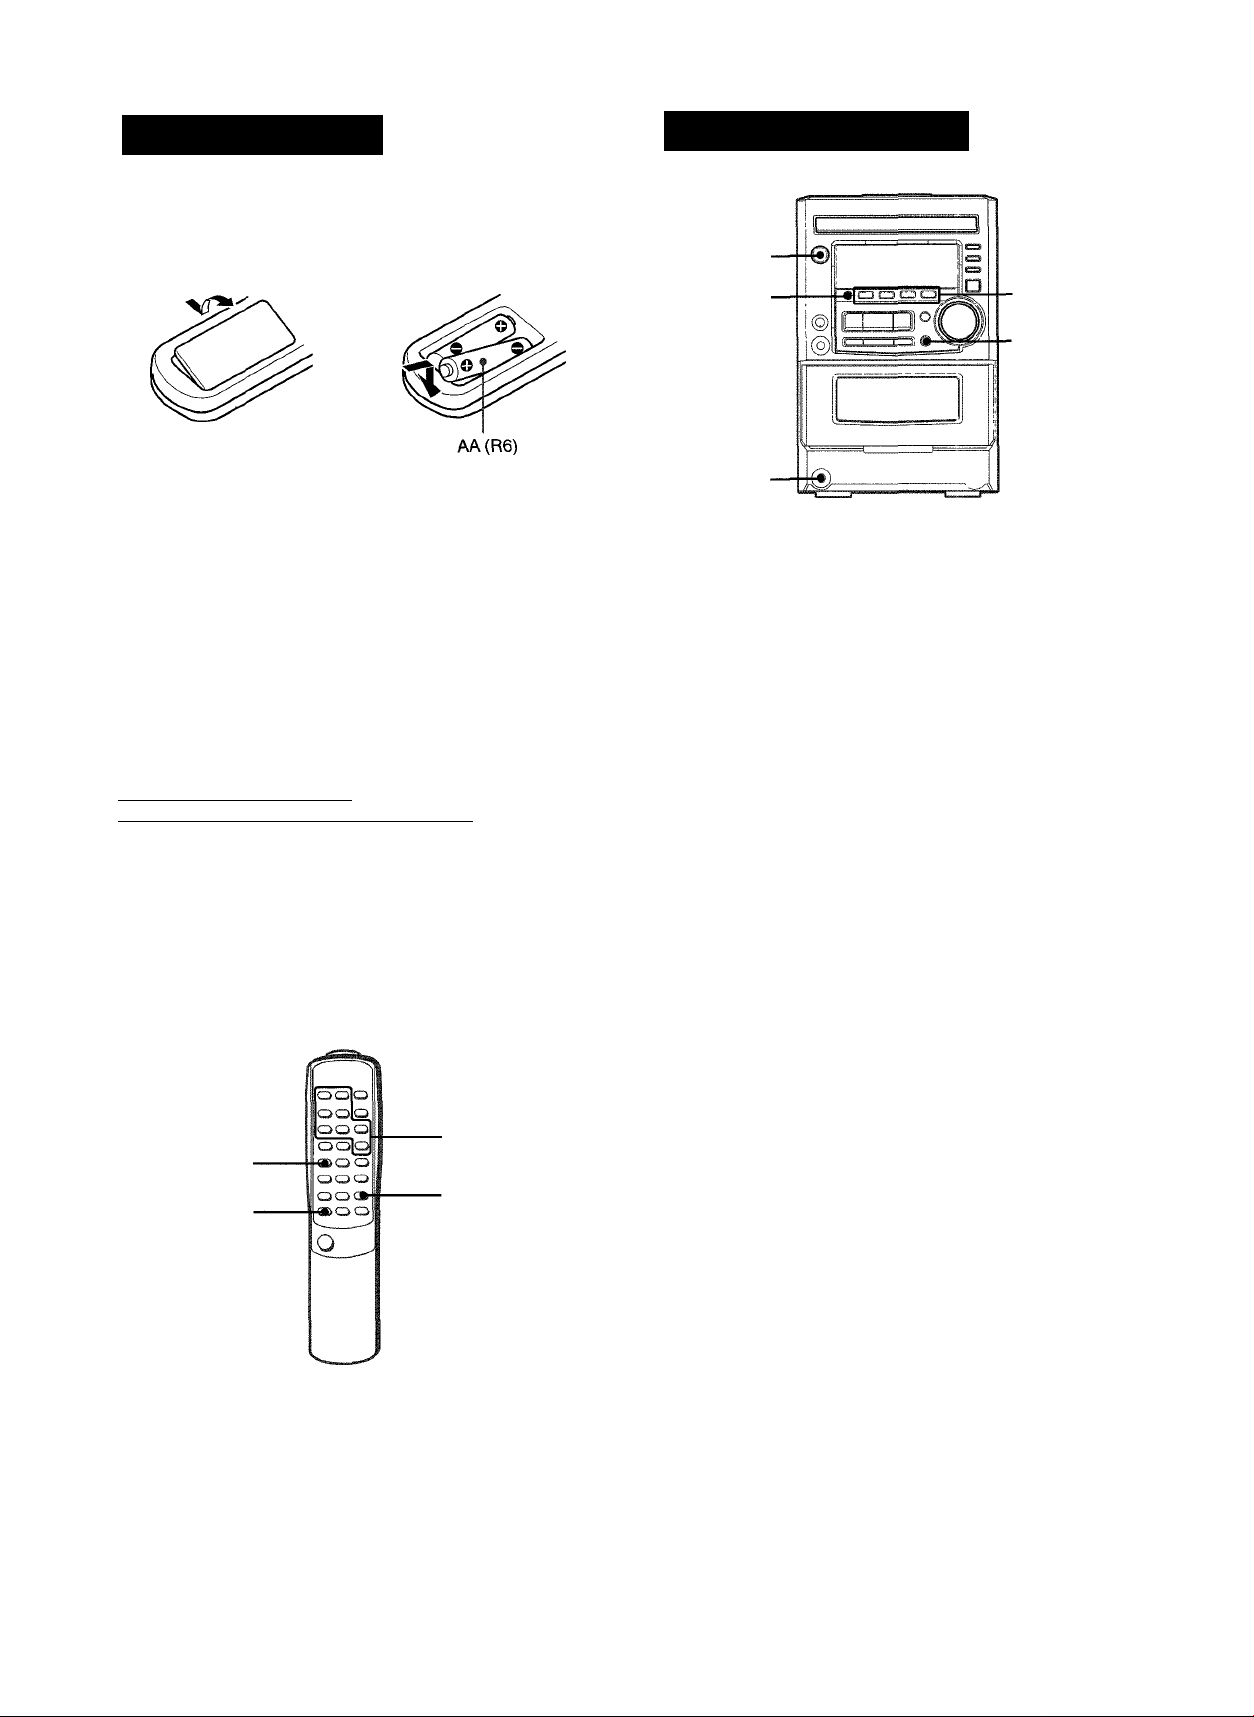
Inserting batteries
Detach the battery cover on the rear of the remote oontrol and
insert two size AA (R6) batteries.
0
BEFORE OPERATION
POWER
Remote
sensor
I
Function
' buttons
■DEMO
When to replace the batteries
The maximum operational distance between the remote control
and the sensor on the main unit should be approximately 5 meters
(16 feet). When this distance decreases, replace the batteries
with new ones.
Using the remote control
The instructions in this manual refer mainly to the buttons on the
main unit. Buttons on the remote control with the same names
as those on the main unit can be used as well.
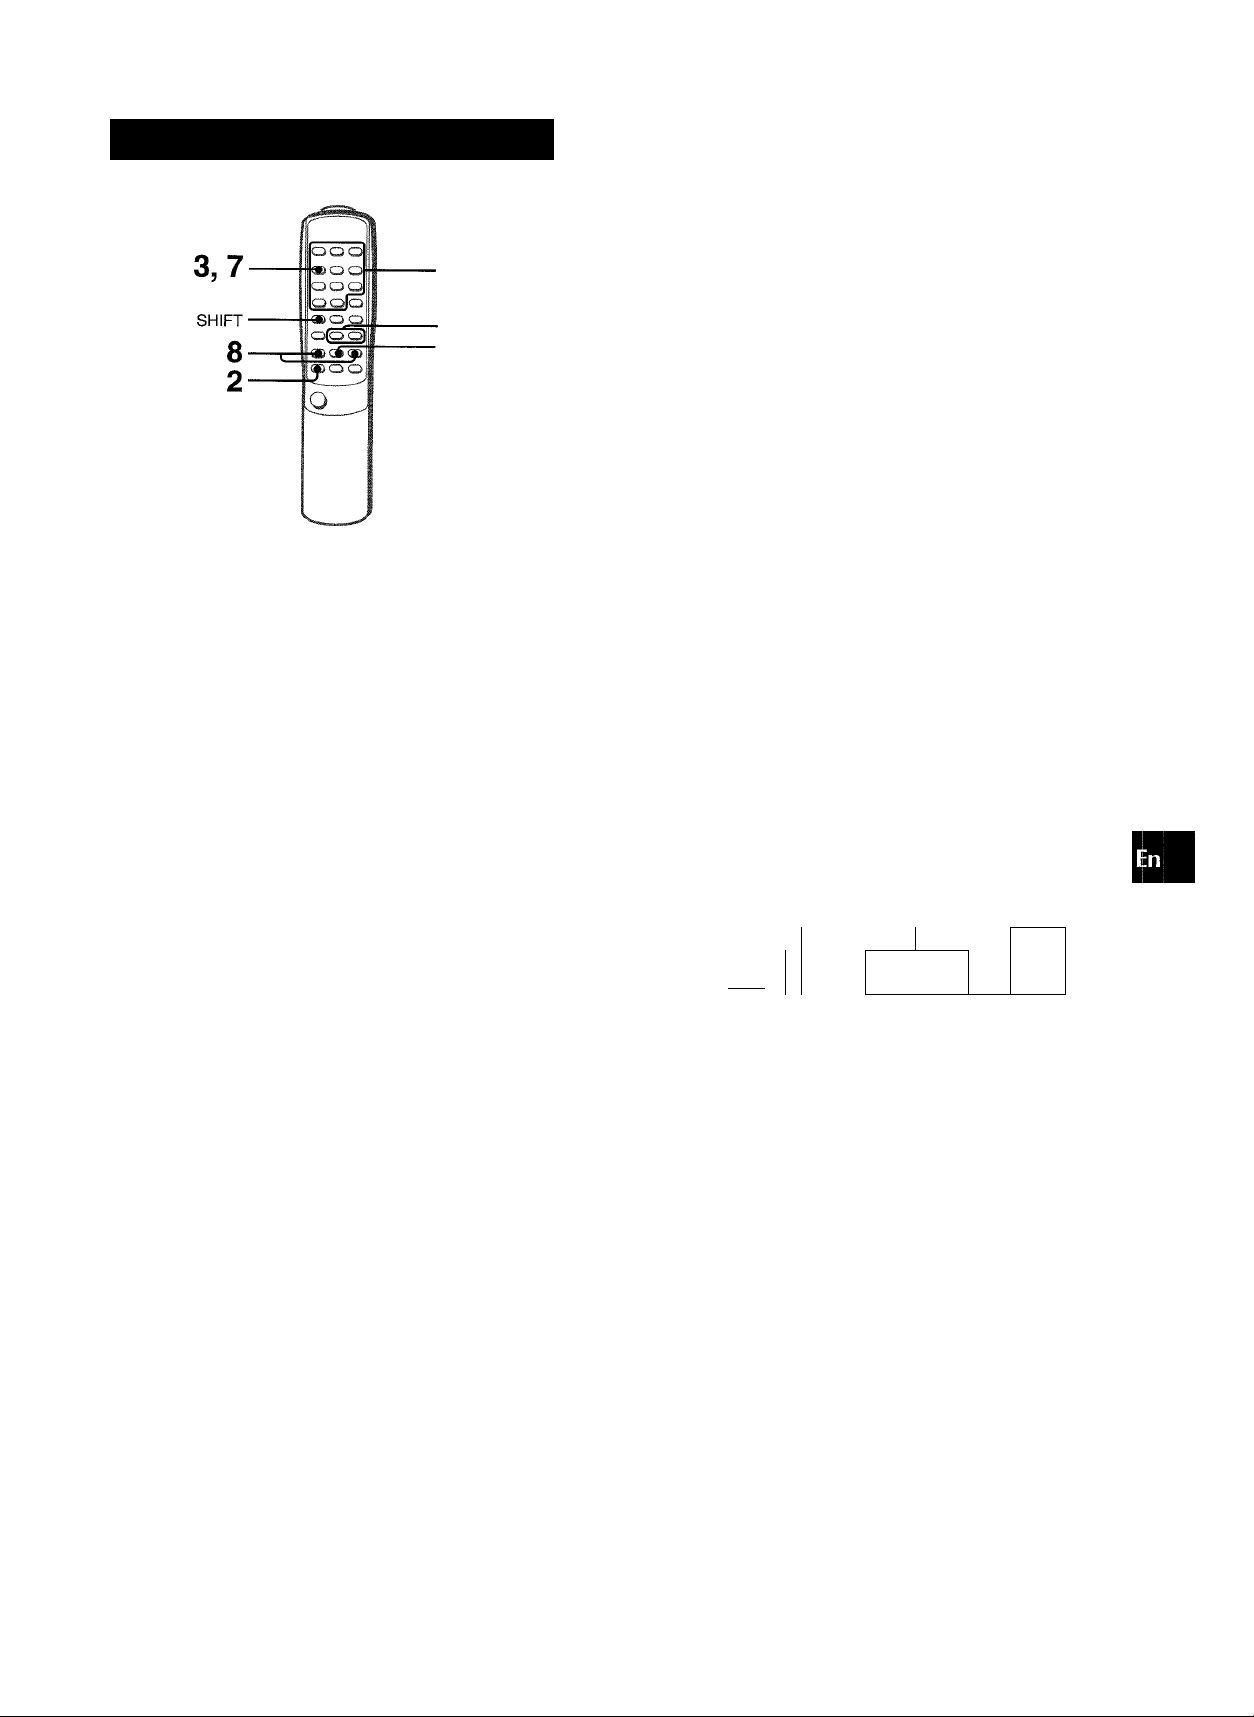
To use SHIFT on the remote control
Buttons © have two different functions. One of these functions
is indicated on the button, and the other on the plate above the
button.
To use the function on the button, simply press the button.
To use the function on the plate above the button, press the button
while pressing SHIFT.
To use FUNCTION on the remote control
The FUNCTION substitutes for the function buttons (TAPE,
TUNER, AUX/VIDEO, CD) on the main unit.
Each time FUNCTION is pressed while power is on, the next
function is selected cyclically.
► PRESET on the remote control
The function is the same as that of on the main unit.
PHONES
To turn the unit on
Press one of the function buttons (TAPE, TUNER, AUX/VIDEO,
CD). Playback of the inserted disc or tape begins, or the
previously tuned station is received (Direct Play Function).
POWER is also available.
To turn the power off
Press POWER.
DEMO (Demonstration) mode
When the AC cord is connected, the display window
demonstrates the functions of the unit. When the power is turned
on, the DEMO display is overridden by the operation display.
When the power is turned off, the DEMO mode is restored.
To cancel DEMO mode
Press DEMO. The clock display appears. (To set the current
time, see “SETTING THE CLOCK” on page 16.) To re-activate
the DEMO mode, press
Using the headphones
Connect the headphones to PHONES jack with a stereo mini
plug (03.5 mm, Vs inch).
No sound is output from the speakers while the headphones are
plugged in.
DEMO again.
SHIFT
FUNCTION
’ If the remote control is not going to be used for an extended
period of time, remove the batteries to prevent possible
electrolyte leakage.
' The remote control may not operate correctly when:
- The line of sight between the remote control and the remote
sensor beside TAPE is exposed to intense light, such as direct
sunlight
' Other remote controls are used nearby (those of a television,
etc.)
PRESET
5 ENGLISH
©
Page 7
SOUND
AUDIO ADJUSTMENT
VOLUME
T-BASS
T-BASS
VOLUME
GRAPHIC EQUALI
w
z
0
1
a
u
B
a.
3
s
VOLUME
Turn VOLUME on the main unit, or press VOLUME on the
remote controi.
The volume level is displayed as a number from 0 to MAX (31).
The volume level is automatically set to 20 when the power is
turned off with the volume level set to 21 or more.
SUPER T-BASS SYSTEM
The T-BASS system enhances the realism of low-frequency
sound.
Press T-BASS.
Each time it is pressed, the level changes. Select one of the
three levels, or the off position to suit your preference.
■■■III -
j
____
/;
n
Low frequency sound may be distorted when the T-BASS system
is used for a disc or tape in which low frequency sound is originally
emphasized. In this case, cancel the T-BASS system.
■■ml III-
T.?
P
(cancel)
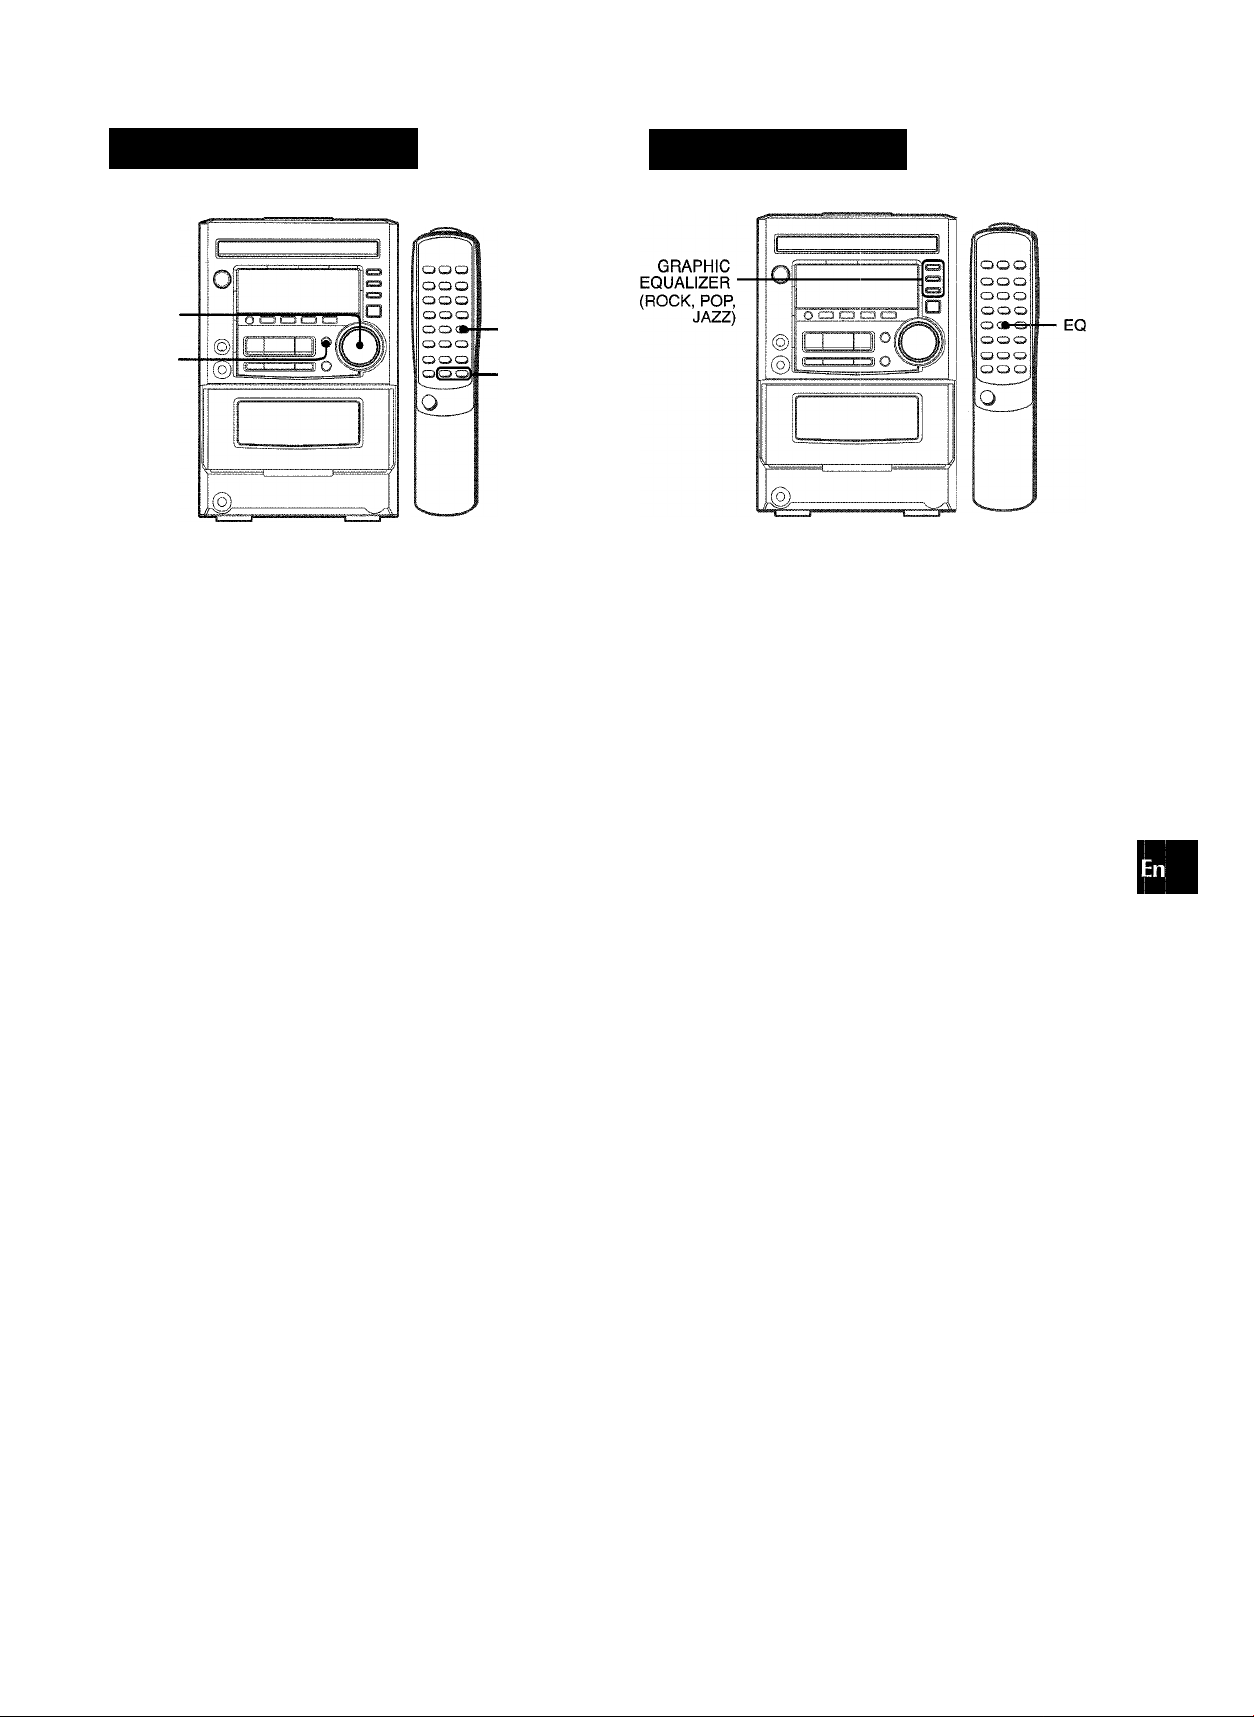
This unit provides the following three different equalization
curves.
ROCK: Powerful sound emphasizing treble and bass
POP: More presence in the vocals and midrange
JAZZ: Accented lower frequencies for jazz-type music
Press one of GRAPHIC EQUALIZER
The selected equalization mode is displayed.
iJ C Lv
To cancel the selected mode
Press the selected button again. “GEQ oFF” is displayed.
To select with the remote control
Press EQ repeatedly. The GEQ mode is displayed cyclically as
follows.
GEQ RQCK ■
GEQ OFF
(cancel)
GEQ PQP GEQ JAZZ >
ENGLISH 6
Page 8

RADIO RECEPTION
MANUAL TUNING
When an FM stereo broadcast contains noise
Press BAND/MODE TUNER while pressing SHiFT on the remote
control so that “MONO” appears on the display.
Noise is reduced, although reception is monaural.
To restore stereo reception, press these buttons so that “MONO”
disappears.
SHIFT
BAND/
MODE
TUNER
1 Press TUNER/BAND repeatedly to select the
desired band.
FM AM
r
When TUNER/BAND is pressed while the power is off, the
previously tuned station will be played (Direct Play Function).
To select a band with the remote control
Press BAND/MODE TUNER repeatedly.
1
Press ◄◄ DOWN or ►► UP to select a station.
Each time the button is pressed, the frequency changes.
When a station is received, “TUNE” is displayed for 2 seconds.
During FM stereo reception, “(li®il)” is displayed.
/1
i /■
To change the AM tuning intervai
The default setting of the AM tuning interval is 10 kHz/step. If
you use this unit in an area where the frequency allocation system
is 9 kHz/step, change the tuning interval.
Press POWER while pressing DIR/PRESET during power
on.
To reset the interval, repeat this procedure.
When the AM tuning interval is changed, all preset stations are
cleared. The preset stations have to be set again.
i§Ìi»lÌBSSiMìi
iHHi
IMÒMÒI 1.
MONO
To search for a station quickly (Auto Search)
Keep ◄◄ DOWN or ►► UP pressed until the frequency starts
to change rapidly. After tuning in to a station, the search stops.
To stop the Auto Search manually, press ◄◄ DOWN or ►► UP.
• The Auto Search may not stop at stations with very weak
signals.
7 ENGLISH
Page 9
PRESETTING STATIONS
0-9,
+10
BAND/
MODE
TUNER
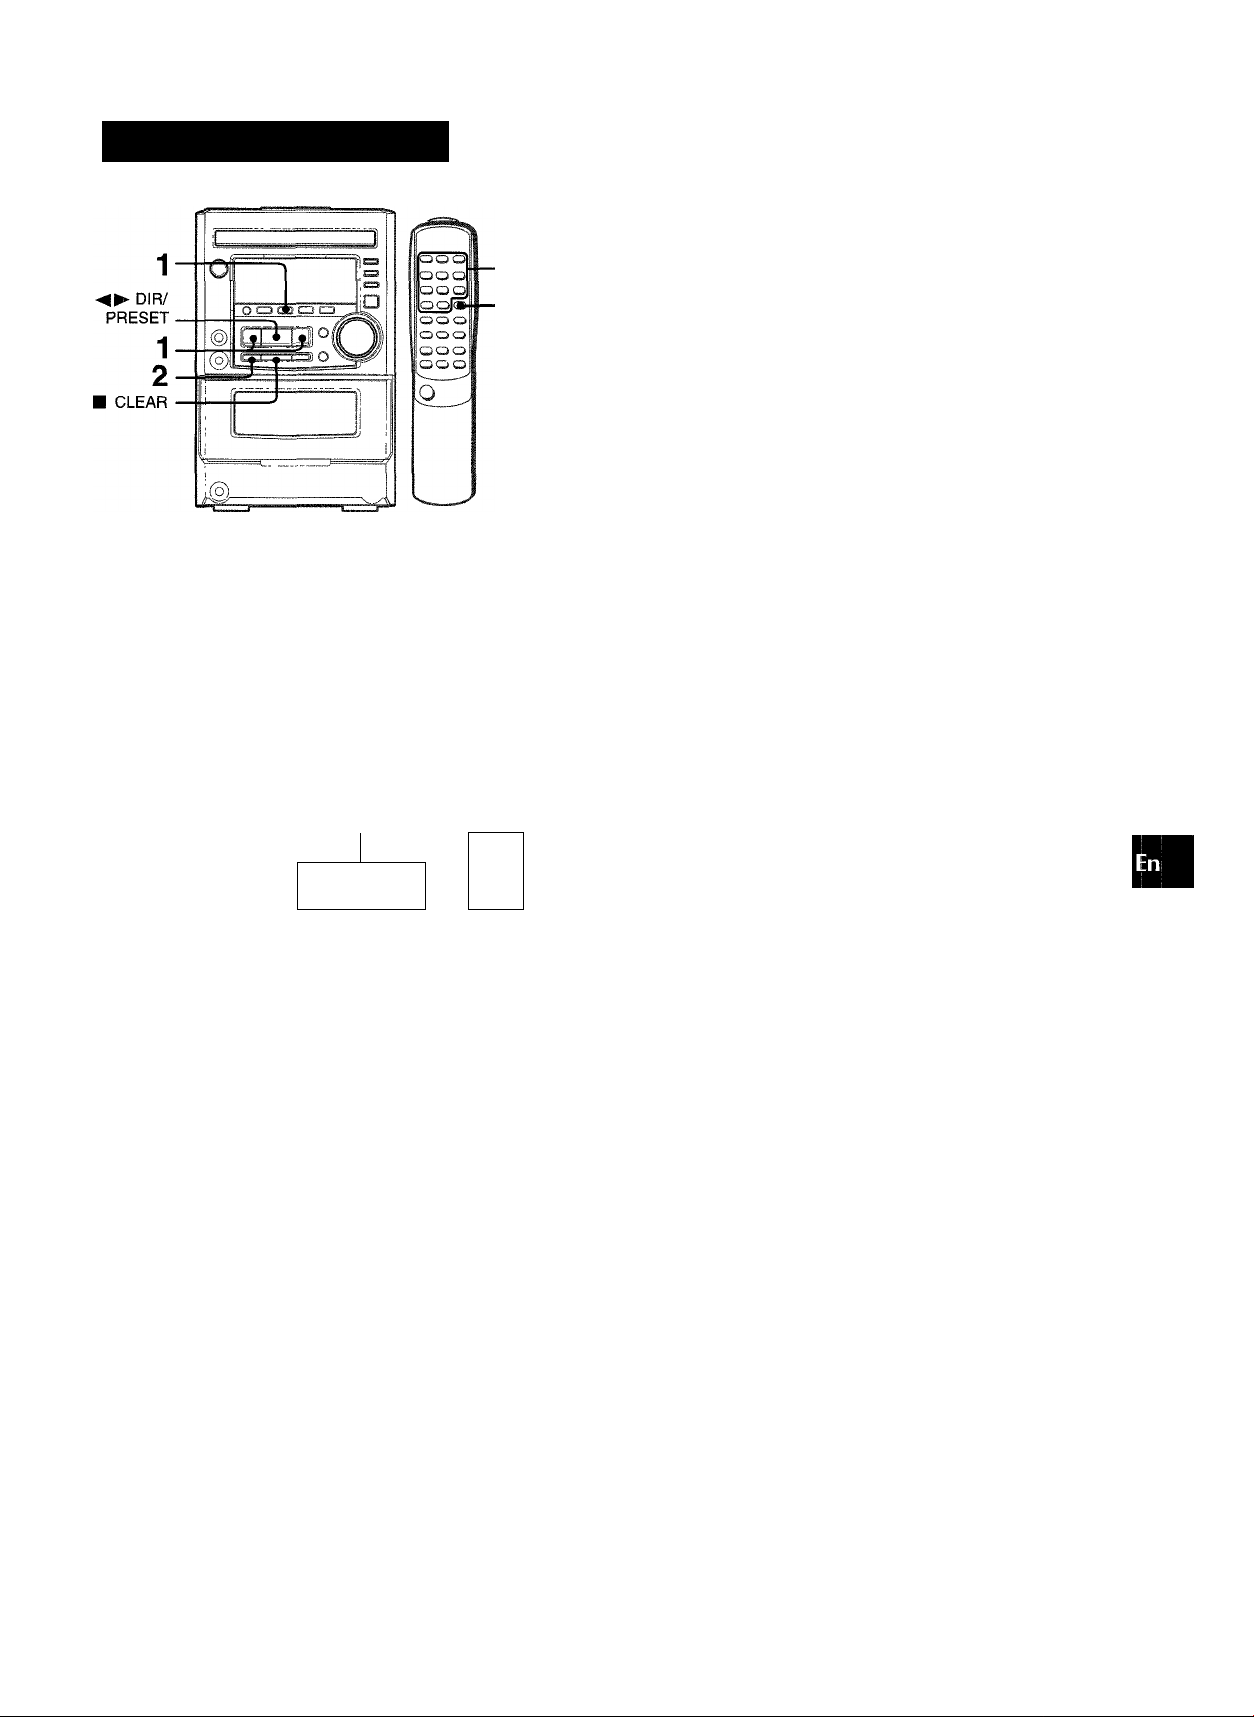
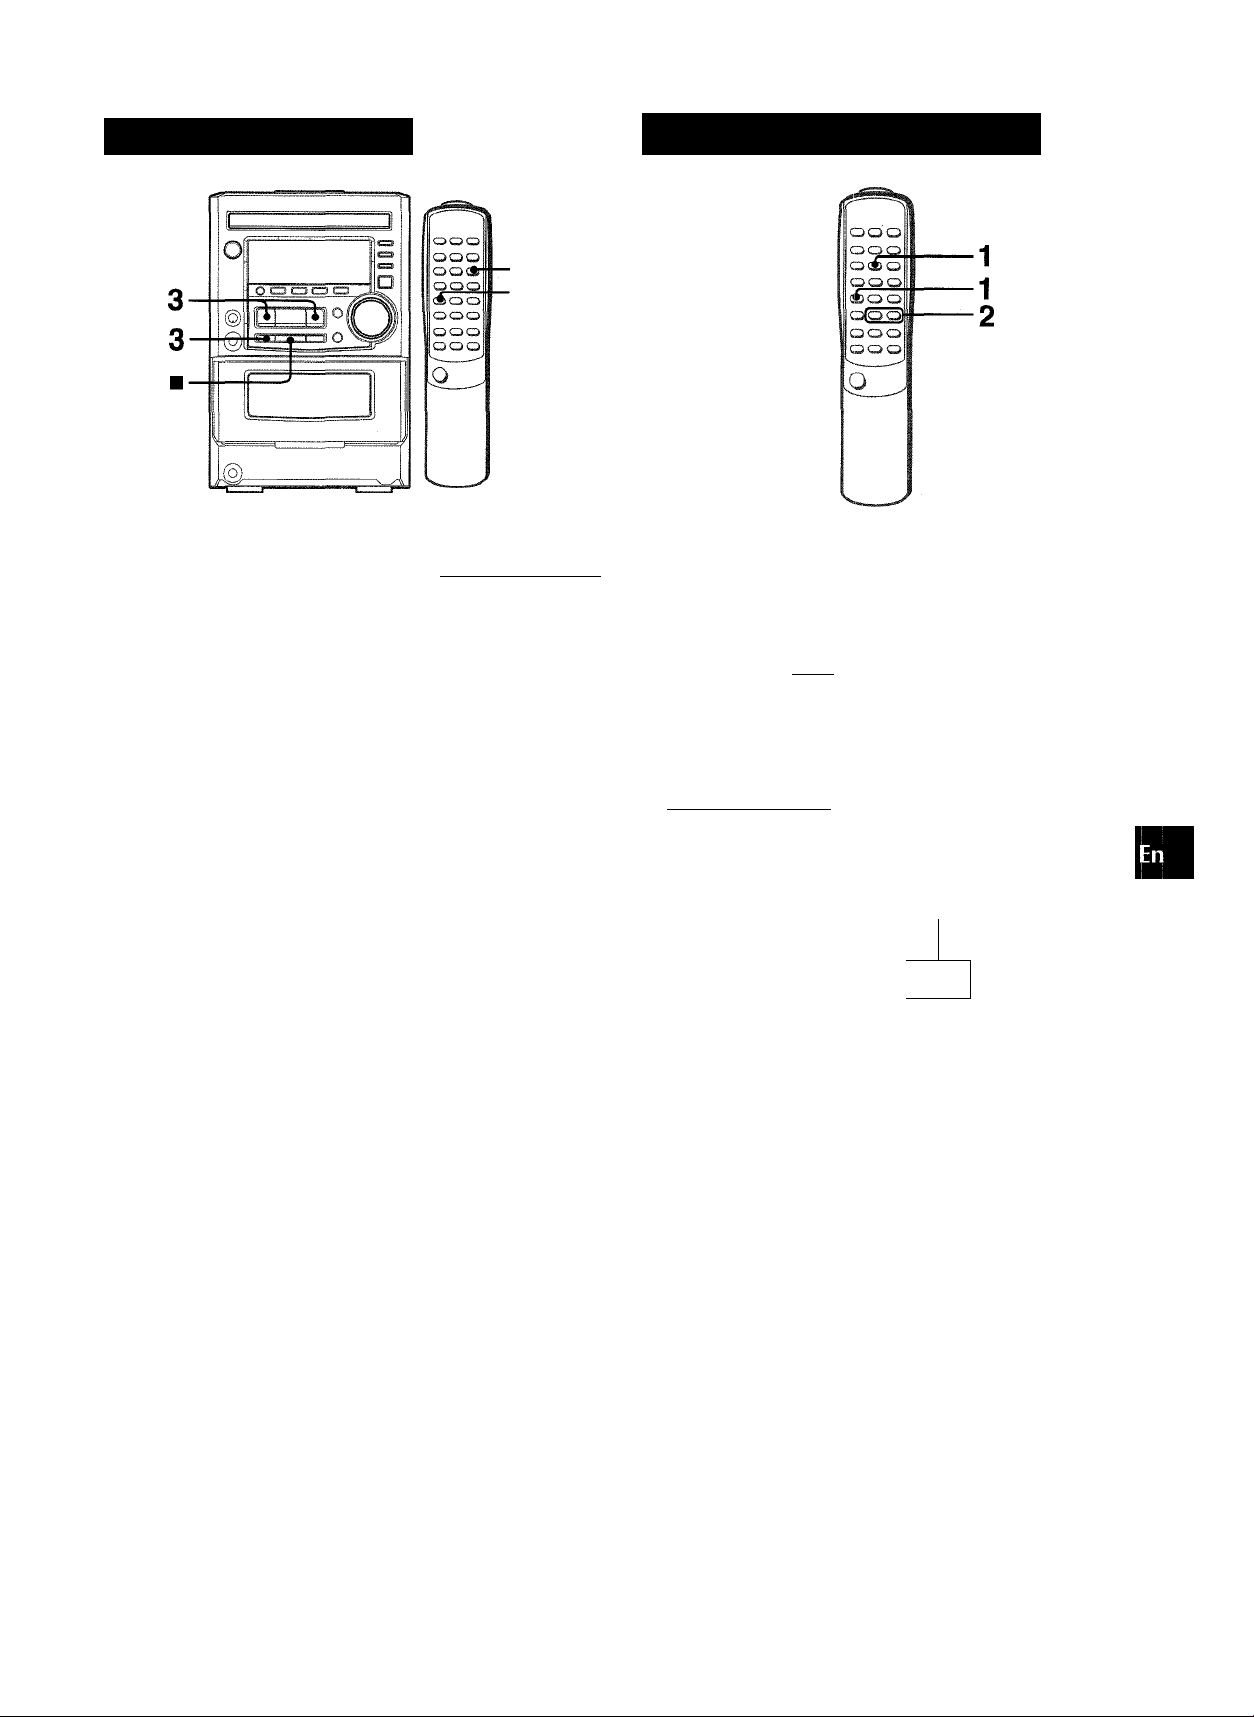
The unit can store a total of 32 preset stations (Each band has a
maximum of 20 available preset stations). When a station is
stored, a preset number is assigned to the station. Use the preset
number to tune in to a preset station directly.
1 Press TUNER/BAND to select a band, and press
I DOWN or P>-UP to select a station.
PRESET NUMBER TUNING
Use the remote control to select the preset number directly.
1 Press BAND/MODE TUNER to select a band.
2 Press numbered buttons 0-9 and +10 to select a
preset number.
Example:
To select preset number 20, press +10, +10 and 0.
To select preset number 15, press +10 and 5.
Selecting a preset number on the main unit
Press TUNEIVBAND to select a band. Then, press DIR/
PRESET repeatedly.
Each time DIR/PRESET is pressed, the next ascending
number is selected.
To clear a preset station
Select the preset number of the station to be cleared. Then,
press ■ CLEAR, and press II SET within 4 seconds.
The preset numbers of all other stations in the band with higher
numbers are also decreased by one.
O
£
Q
m
m
o
S
<
BC
2 Press II SET to store the station.
A preset number beginning from 1 in consecutive order for
each band is assigned to the station.
Frequency
......^
1 -
fl/t
1 ■
mz
Preset number
Repeat steps 1 and 2.
The next station will not be stored if a total of 32 preset stations
for all the bands or a total of 20 preset stations for one band
have already been stored.
ENGLISH
8
Page 10
CD PLAYING
BASIC OPERATIONS
RANDOM
REPEAT
0-9, +10
EDIT/
CHECK
SHIFT
To Start play when the power is off (Direct Piay Function)
Press CD. The power is turned on and play of the loaded disc
begins.
When CD OPEN/CLOSE is pressed, the power is also turned
on and the disc compartment is opened.
To check the remaining time
During play, press EDIT/CHECK while pressing SHiFT on the
remote control. The amount of time remaining until all tracks
finish playing is displayed. To restore the playing time display,
repeat the above.
Seiecting a track with the remote controi
Press numbered buttons 0-9 and +10 to select a track.
Example:
To select the 25th track, press +10, +10 and 5.
To select the 10th track, press +10 and 0.
The selected track starts to play and continues to the end of that
disc.
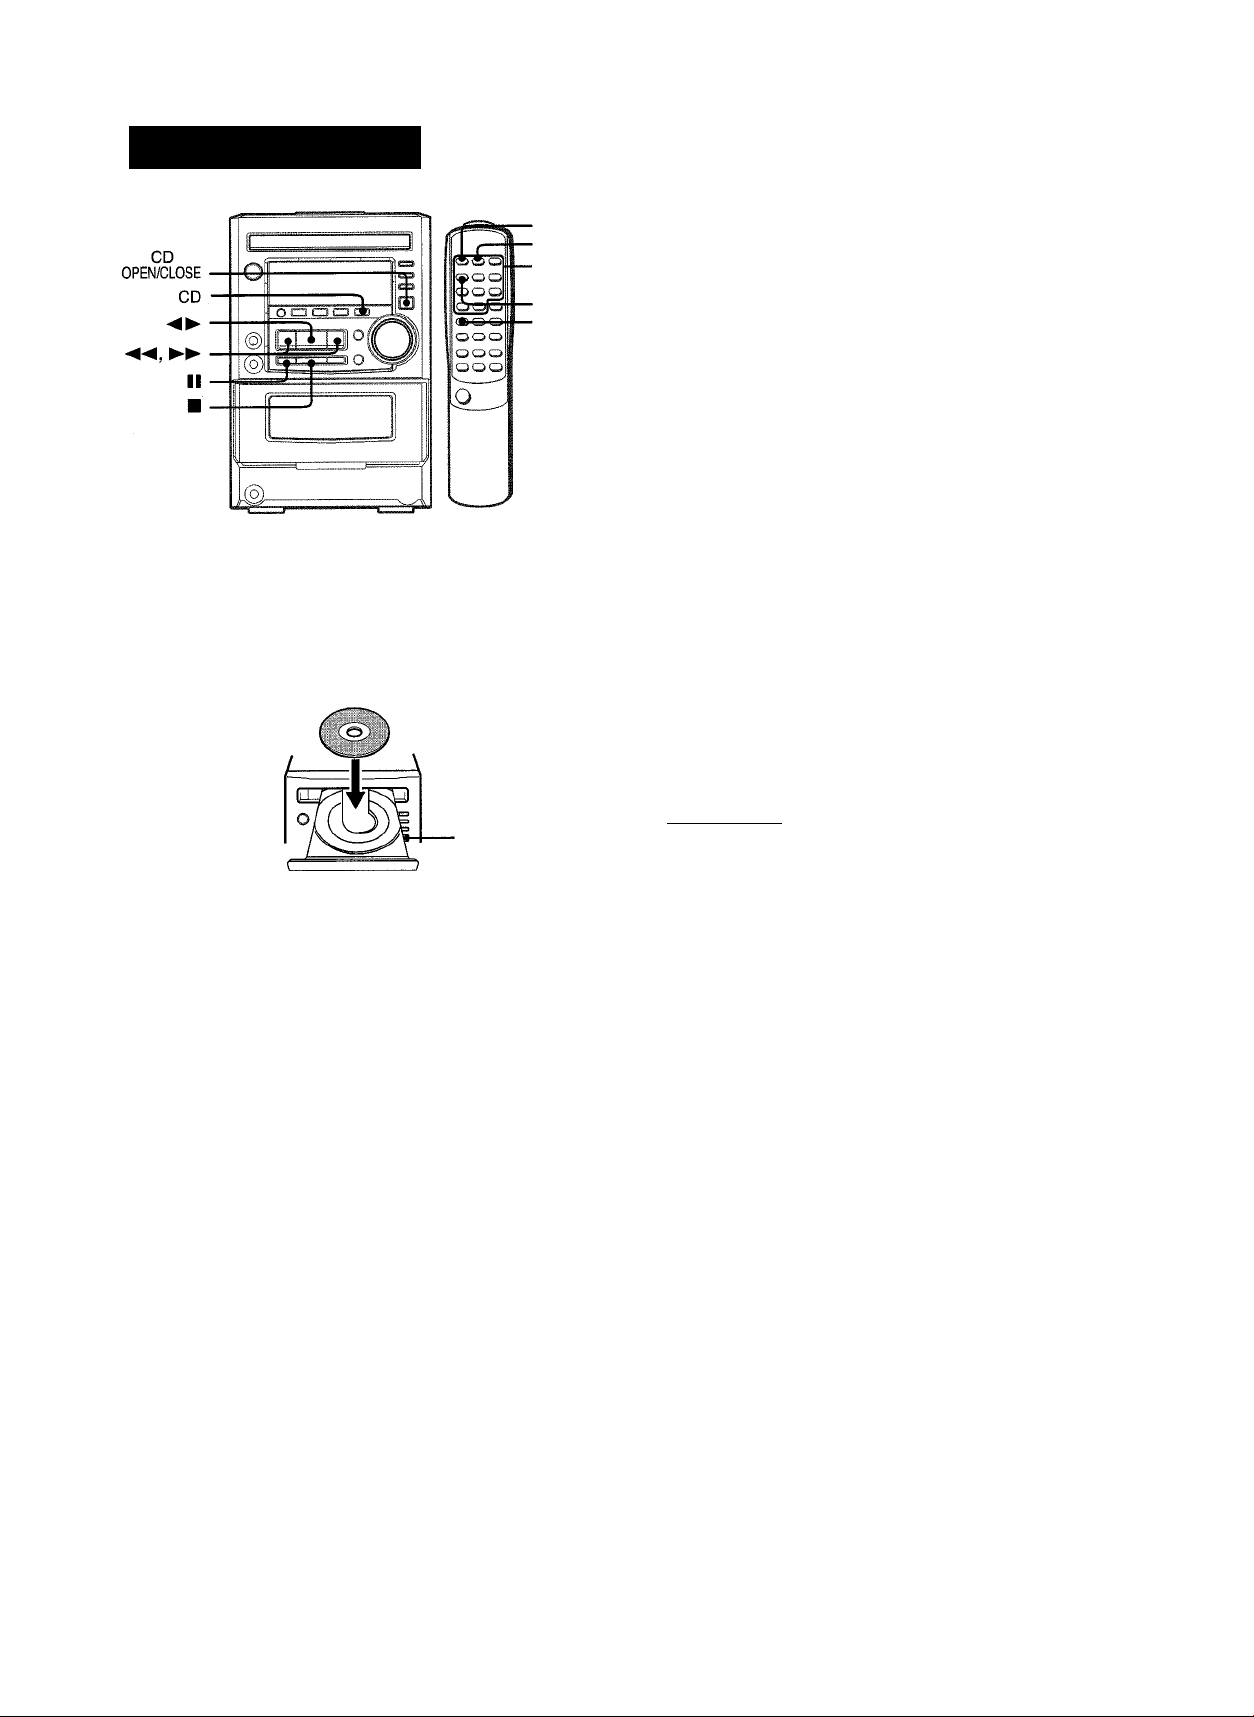
LOADING DISC
Press CD, then press CD OPEN/CLOSE to open the
disc compartment. Load a disc with the iabel side
up. Close the disc compartment by pressing CD
OPEN/CLOSE.
CD
. OPEN/CLOSE
Music calender (only
the first 20 tracks are
Total playing time
SI
rr--
Total number of tracks
i ! ! ■; i
..
/ / / • ■■■■■/ ;■■■
displayed)
(1 2 3
s'«'
' When removing the disc, press ■ to stop play before pressing
CD OPEN/CLOSE.
> When loading an 8-cm (3-inch) disc, put it onto the inner circle
of the tray.
• Do not place more than one compact disc on one disc tray.
• Do not tilt the unit with disc loaded. Doing so may cause
malfunctions.
RANDOM/REPEAT PLAY
RANDOM play
All the tracks on the disc can be played randomly.
Press RANDOM while pressing SHIFT on the remote control
“RANDOM” lights up on the display.
To cancel random play, press the buttons again.
• During random play, it is not possible to skip to the previously
played track with ◄◄.
• During random play, direct selection of the tracks with the
numbered buttons will cancel random play.
• During random play “^+-1” play cannot be performed.
PLAYING DISC
Load a disc.
Press
Play begins with the first track.
Elapsed playing time
B)
/ / •/ i
/ f •; / ;
Number of track being played
I
•il + 3 4
li's' •
To stop play, press ■.
To pause play, press II. To resume play, press again.
To search for a particular point during playback, keep
or ►► pressed and release it at the desired point.
To skip to the beginning of a track during playback, press
◄◄ or ►►repeatedly.
To remove disc, press CD OPEN/CLOSE.
9 ENGLISH
Page 11
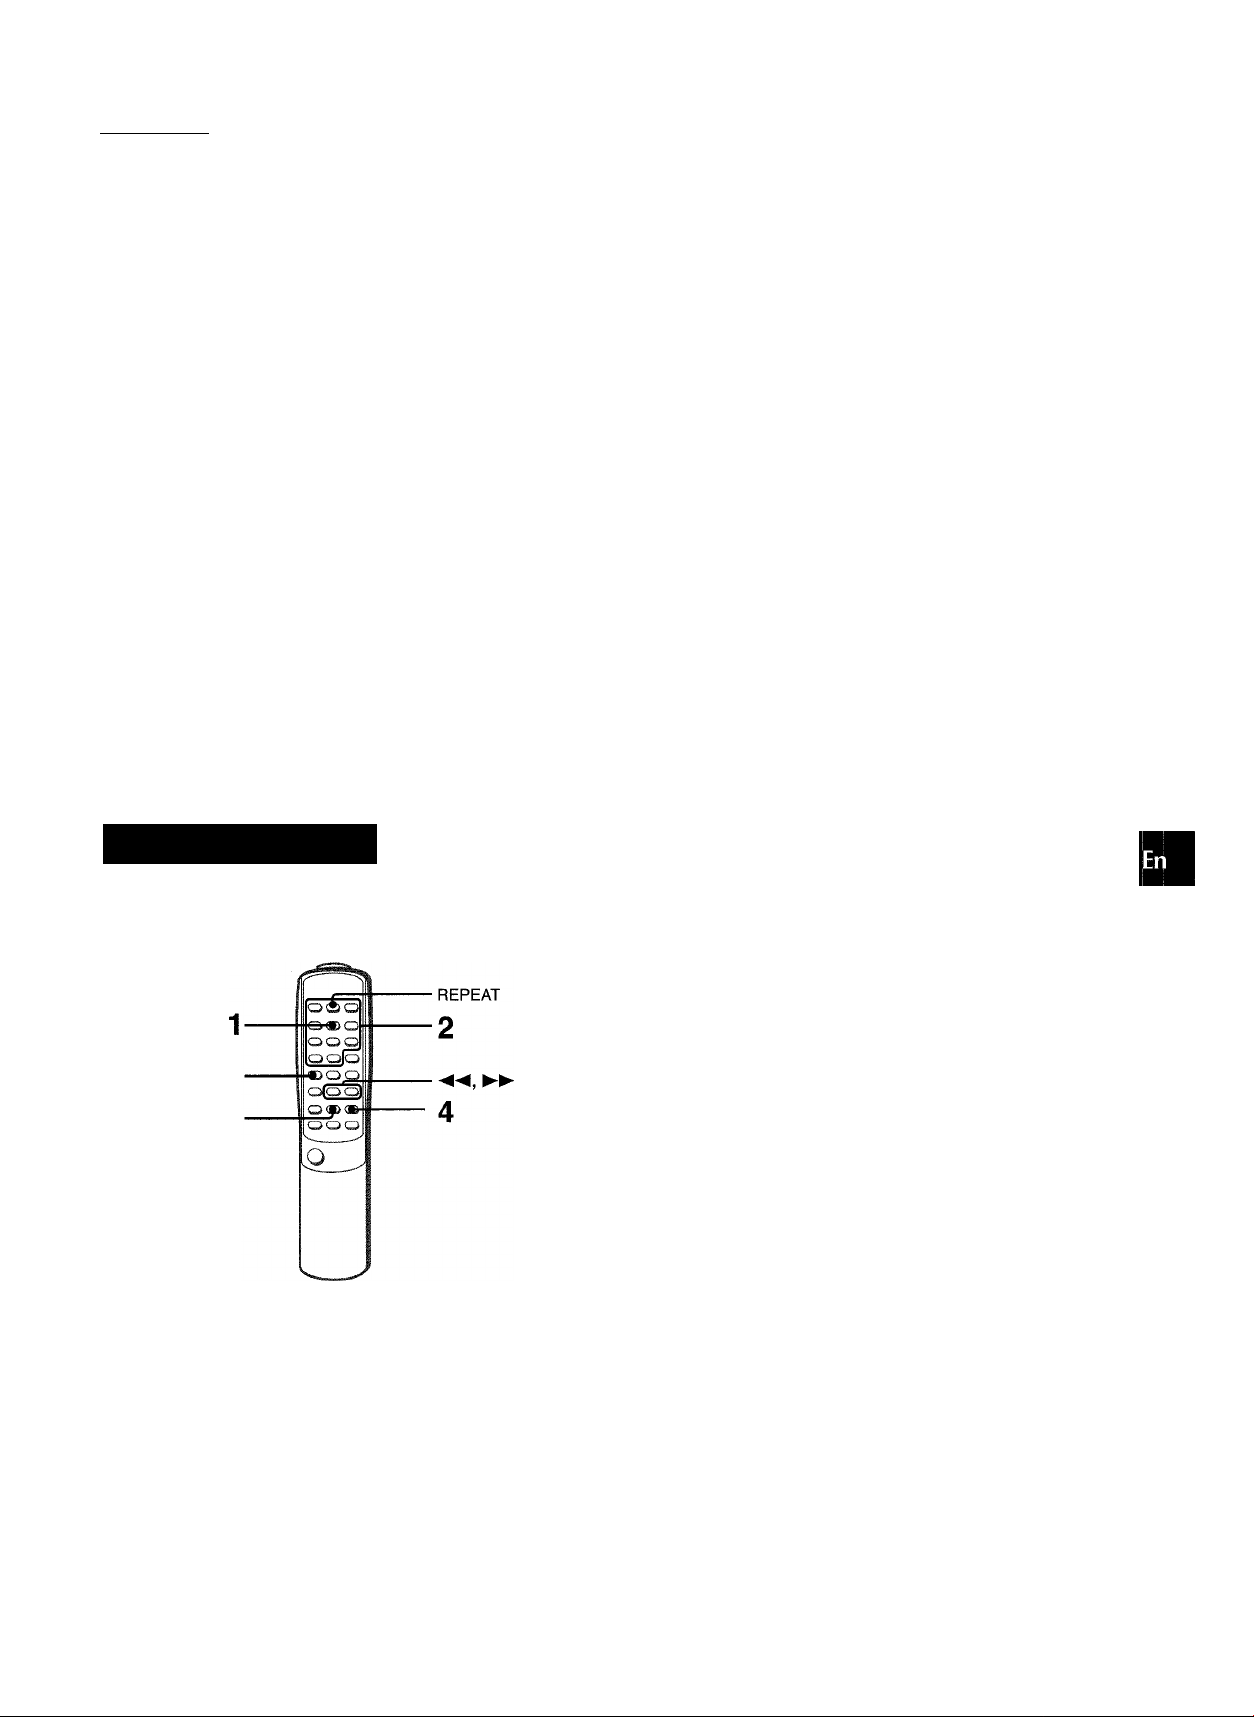
REPEAT Play
One or all the tracks can be played repeatedly.
To repeat the entire disc, turn on
To repeat the desired track, turn on “C*. i”.
Press REPEAT while pressing SHIFT on the remote control.
Each time they are pressed, the operations can be seiected
cyclically.
©ct
® Ci- 1
© Cancel
ci-
J-,
©
• During piay, random piay can be performed.
•When you start randorn play during 1” piay, the repeat
play will be canceled.
• To repeat only selected tracks, program the desired tracks (see
below) before choosing “C*.” function.
To cancel repeat play, press the buttons again.
ci- 1
—f !
.J 'IJ C?
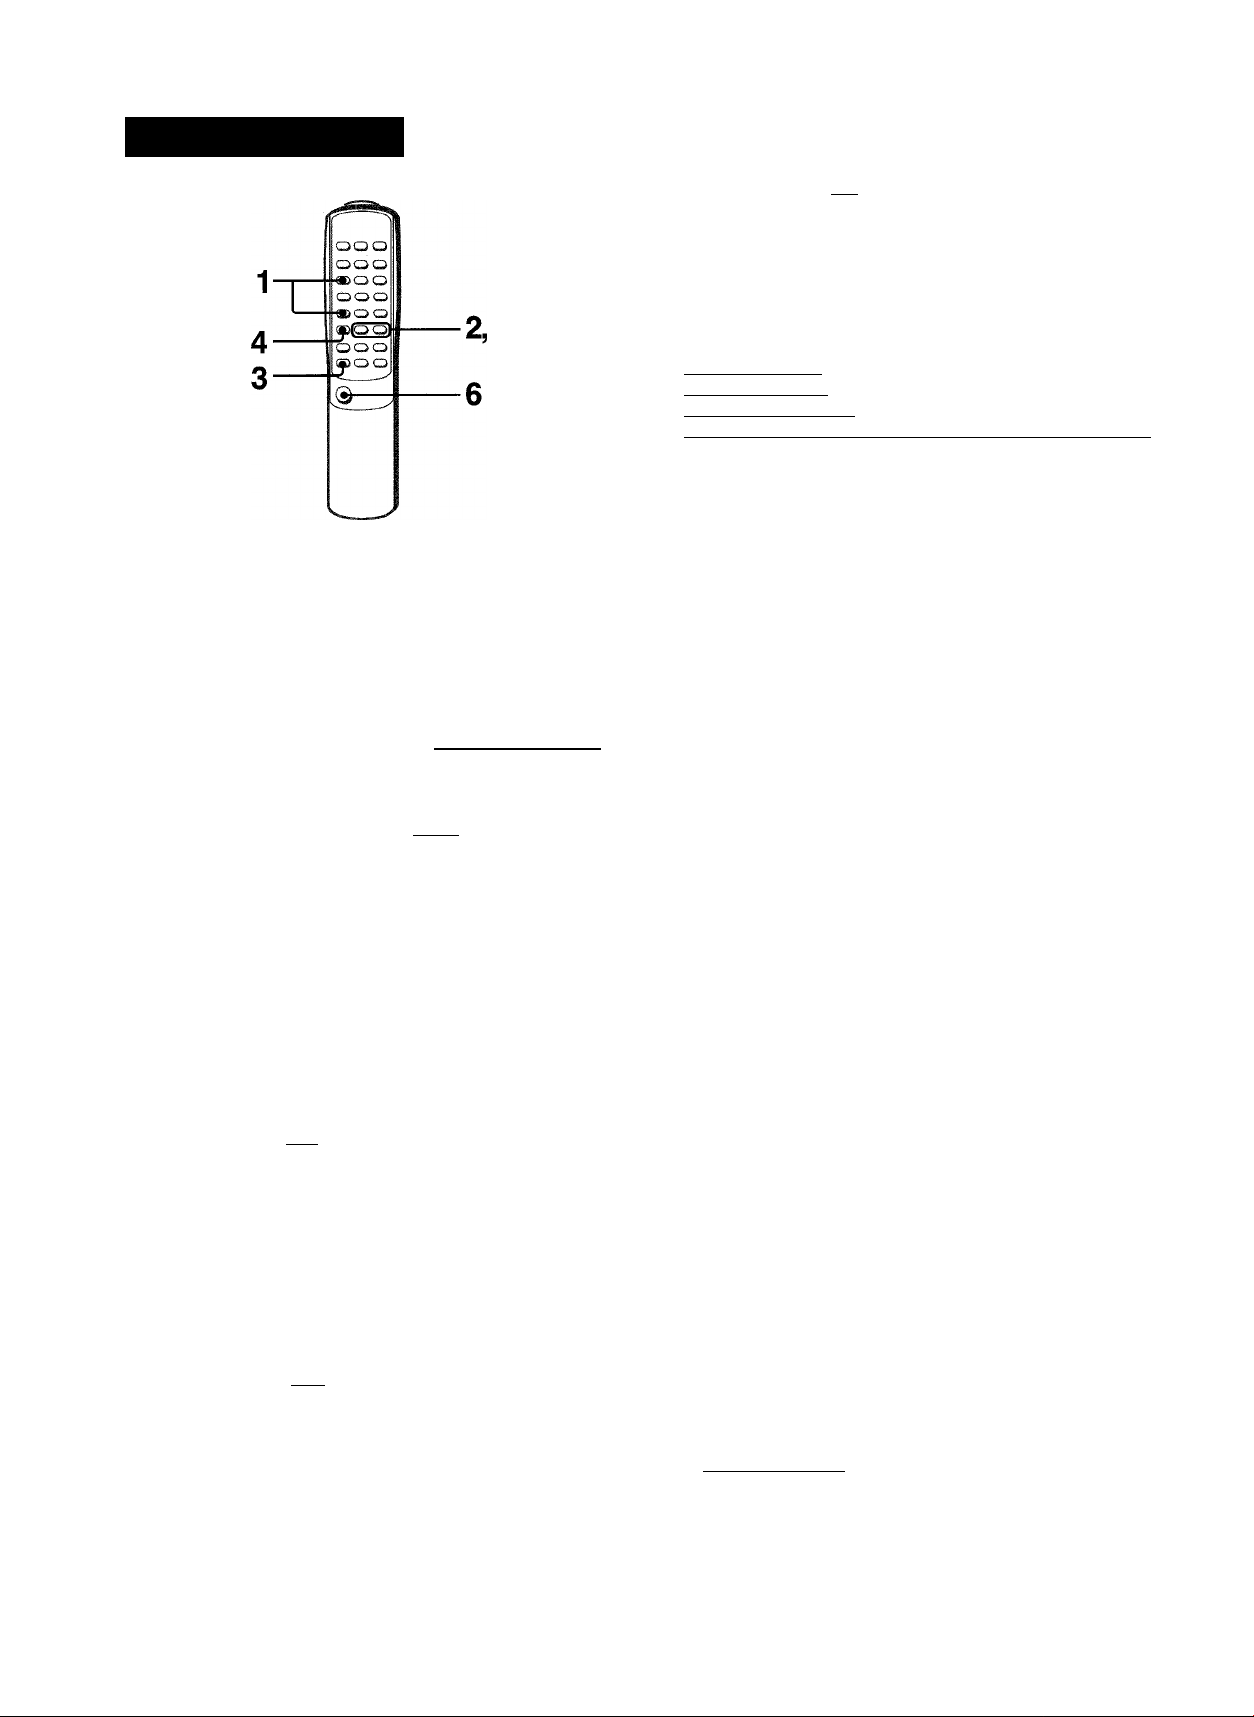
2 Press numbered buttons 0-9 and +10 to program
a track.
Example:
To select the 12th track, press +10 and 2.
To select the 20th track, press +10, +10 and 0.
Program number
. “ ' -
Selected track number
I
Total playing time of
the seiected tracks
Totai number of
selected tracks
3 Repeat step 2 to program other tracks. 4 Press ► to start play.
To check the program
Each time ◄◄ or ►► is pressed in stop mode, a track number
and program number wiii be displayed.
To clear the program
Press ■ CLEAR in stop mode.
To add tracks to the program
Before playing, repeat step 2. The track will be programmed
after the last track.
To change the programmed tracks
Clear the program and repeat all the steps again.
O
a
PROGRAMMED PL
Up to 30 tracks can be programmed from the inserted disc.
SHIFT
I CLEAR
Use the remote control.
1 Press PRGM while pressing SHIFT in stop mode.
“PRGM” flashes on the display.
To play the programmed tracks repeatedly
After programming the tracks, press REPEAT while pressing
SHIFT on the remote control, “C+-” lights up on the display.
' During programmed piay, the following operations cannot be
performed:
- Random piay.
- One-track repeat (C>- l).
■ If programmed time is more than 99:59 minutes, or the disc
track number 31 and above is programmed, totai playing time
show in the display.
S
; ; ■/ ; ; I
ENGLISH
10
Page 12
TAPE PLAYBACK
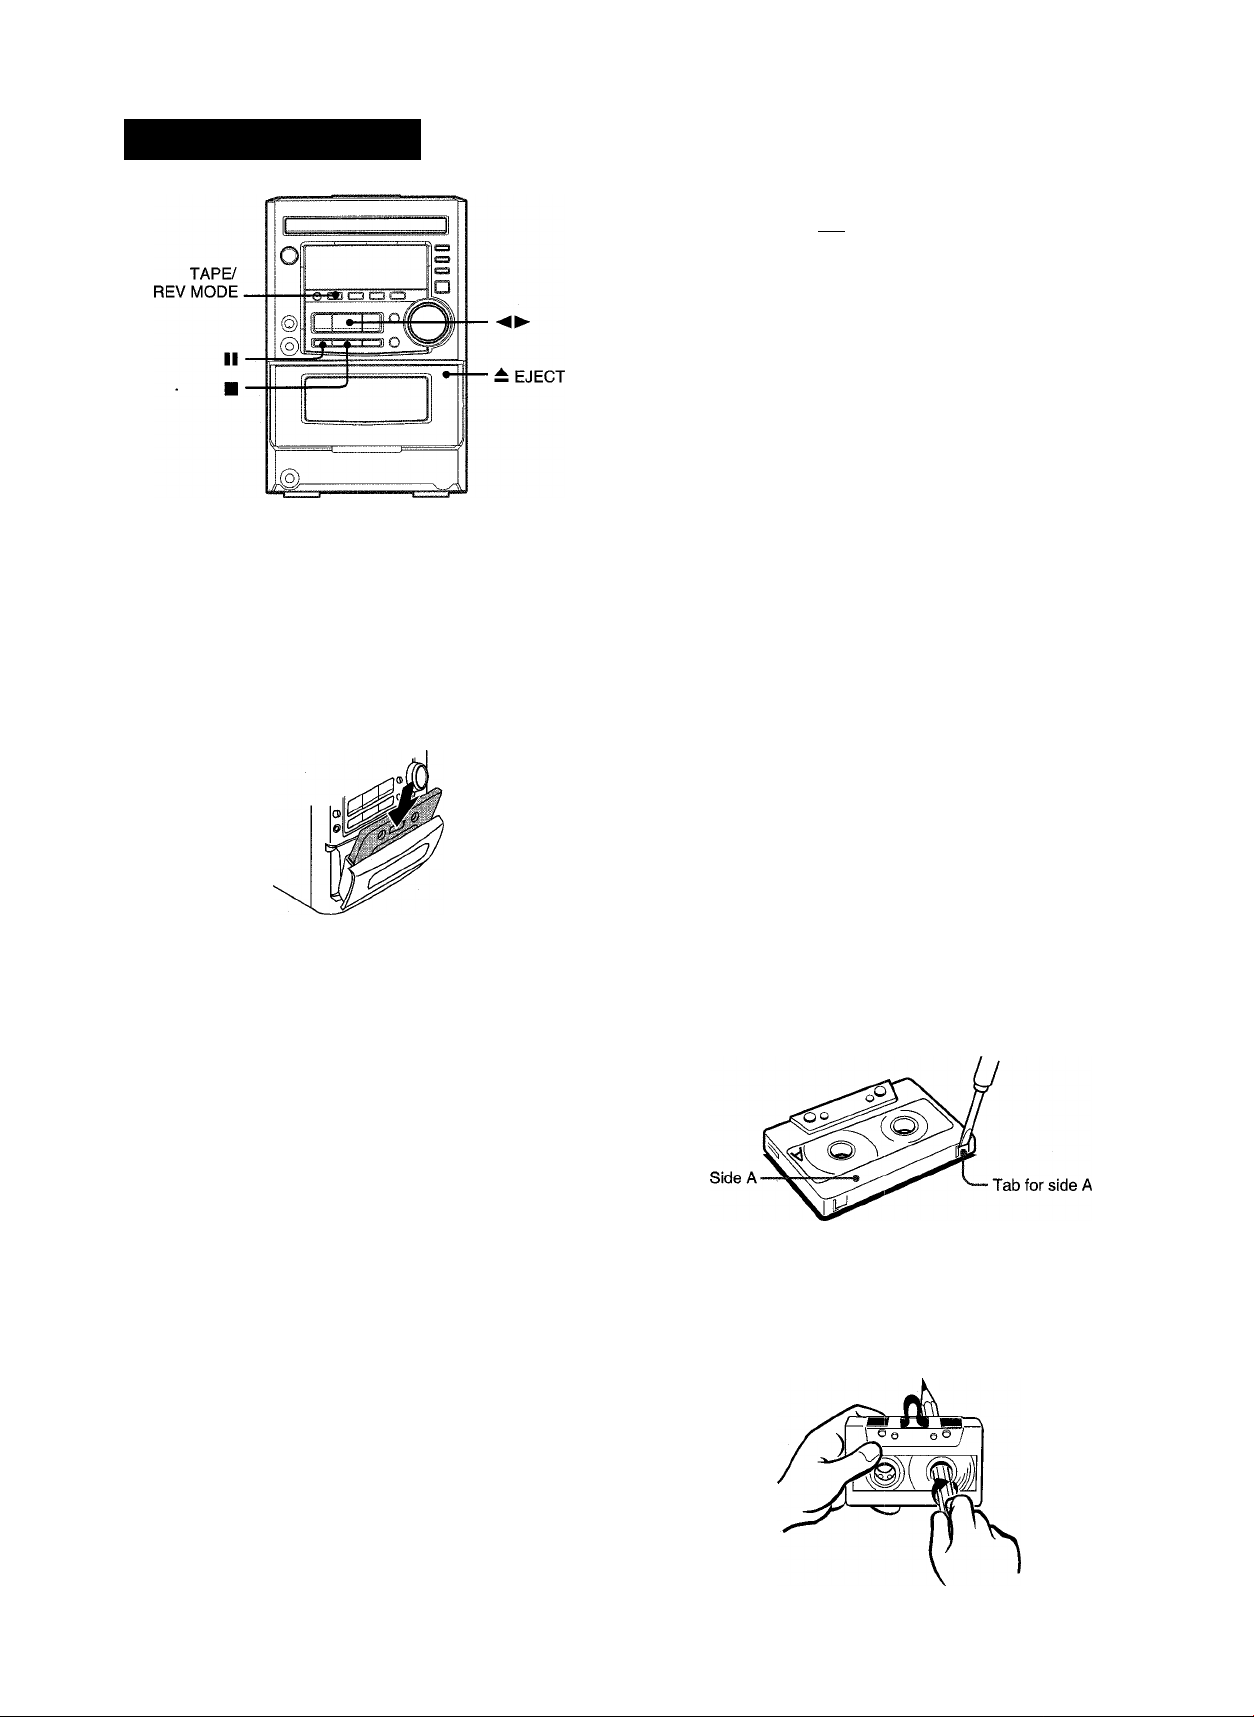
BASIC OPERATIONS
J
INSERTING A TAPE
• You can select a reverse mode to playback one or both sides.
• Use Type I (normal), Type II (high/Cr02) or Type IV (metal)
tapes for playback.
Press TAPE/REV MODE and press ± EJECT mark
to open the cassette holder
PLAYING BACK A TAPE
Insert a tape. Then press to start play.
Playback side of the tape
fiW; -5
/../ !
....
/■■■; / : ; / / / /
The tape counter indicates the
tape running length
► : The front side is being played (forward).
◄ : The back side is being played (reverse).
To stop play, press ■.
To pause play, press II. To resume play, press again.
To change the playback side, press ◄ ► DIR/PRESET in play
or pause mode.
To fast forward or rewind, press ◄◄ or ►► in stop mode.
Then press ■ to stop the tape.
To start play when the power is off (Direct Piay Function)
Press TAPE. The power is turned on and play of the inserted
tape begins.
To set the tape counter to 0000
Press ■ CLEAR in stop mode.
The counter is also set to 0000 when the cassette holder is
opened.
]_
Insert a tape with the exposed side down. Push the cassette
holder to close.
To select a reverse mode
Each time TAPE/REV MODE is pressed, the reverse mode
changes.
CZ3
¿51
/ ;
.......
/ ;...... /■.. ; / ; ; / ; ; /
To play one side only, select Z.
To play from front side to back side once oniy, seiect Z.').
To play both sides repeatedly, select CT5.
L
About cassette tapes
• To prevent accidental erasure, break off the plastic tabs
on the cassette tape after recording with a screwdriver or
other pointed tool.
To record on the tape again, cover the tab openings with
adhesive tape, etc.
> 120-minute or ionger tapes are extremely thin and easily
deformed or damaged. They are not recommended.
' Take up any slack in the tape with a pencil or similar tool
before use. Slack tape may breaker jam in the mechanism.
11 ENGLISH
Page 13
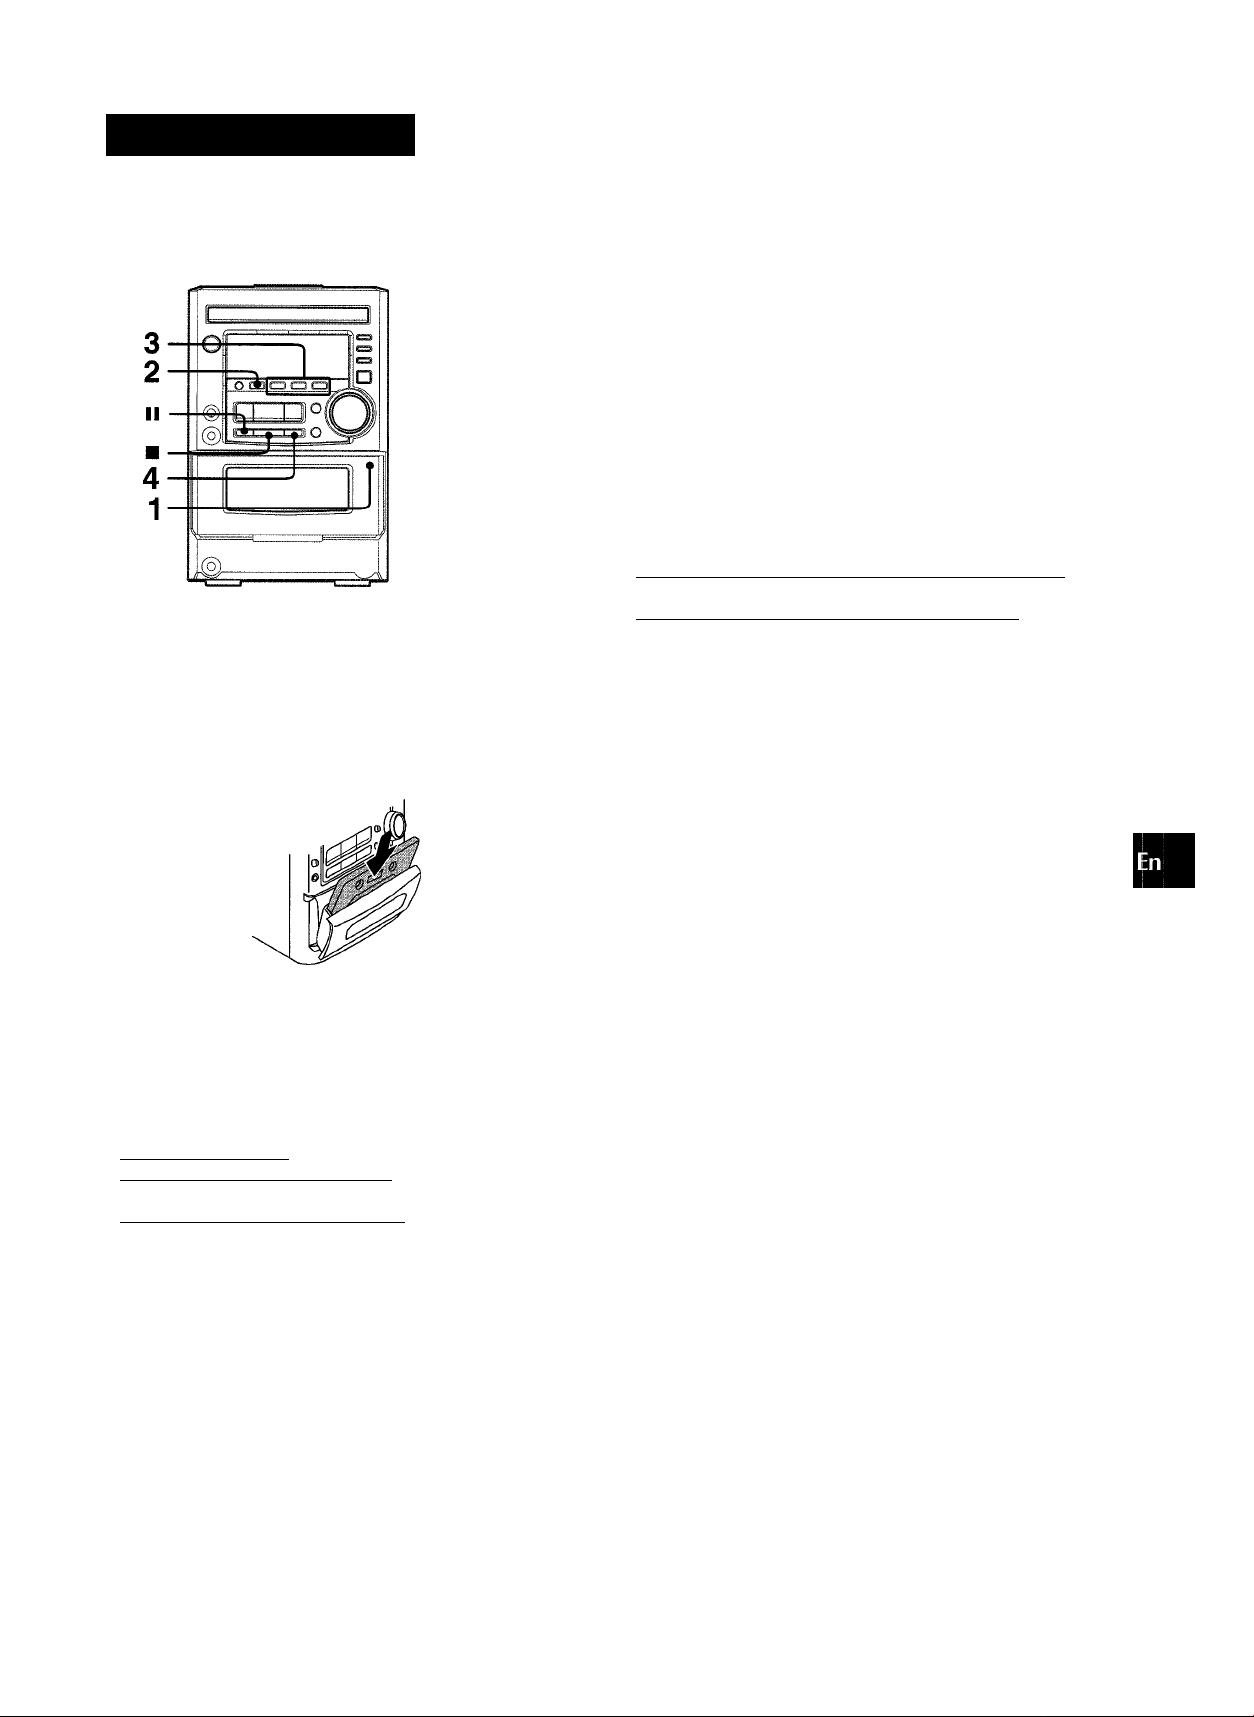
RECORDING
BASIC RECORDING
This section explains how to record from the tuner, CD player, or
external equipment.
ooo
ooo
ooo
ooo
ooo
ooo
(BOO»-
ioo
Preparation
• Use Type I (normal) tapes only.
• Set the tape to the point where recording will start.
1 Insert the tape to be recorded on into deck.
Insert the tape with the side to be recorded on first facing out
from the unit and the exposed side down.
► TAPE REC/
REC MUTE
To start recording with the remote controi
First press 9 TAPE REC/REC MUTE, and then press I
2 seconds.
Sound adjustment during recording
The output volume and tone of the speakers or headphones may
be freely varied without affecting the recording.
within
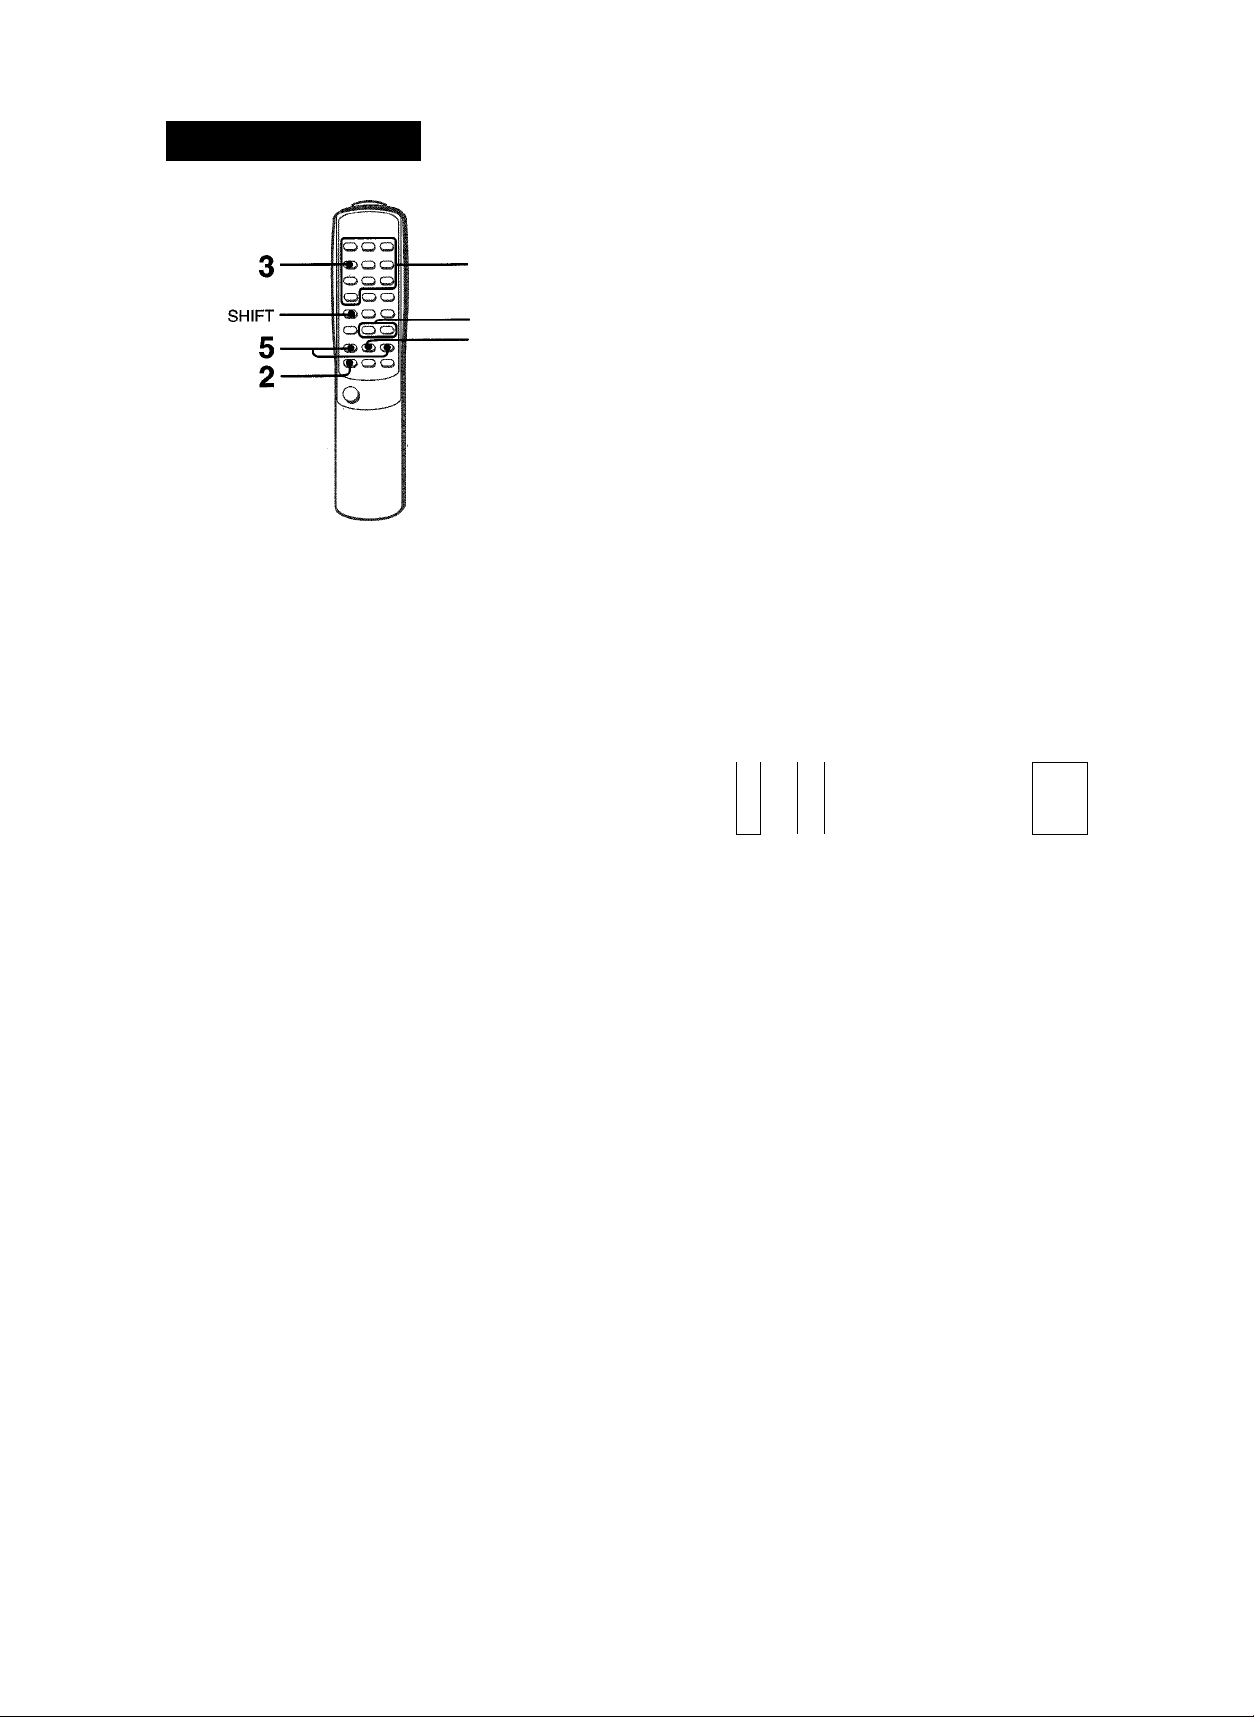
INSERTING BLANK SPACE
Insertion of 4-second blank spaces may help you to locate the
beginning of the track on other equipments. This unit can add
blank spaces only when the source is TUNER or AUXA/iDEO.
1 Press
2 Press II to resume recording.
To insert a blank space of less than 4 seconds, press
9REC/REC MUTE again while is flashing.
To insert blank spaces of more than 4 seconds, after the deck
enters the recording pause mode, press 9REC/REC MUTE
again.
Each time
space is added.
"This unit does not have the fuhction to locate the beginning of track.
Recording cannot be done when TAPE function is selected.
9
REC/REC MUTE during recording or while in
recording pause mode.
on the display flashes for 4 seconds and the tape runs
without recording. After 4 seconds, the deck enters the
recording pause mode.
9
REC/REC MUTE is pressed, a 4-second blank
O
<
a
>
5
a
111
a
<
h-
O
z
5
B
s
2 Press TAPE/REV MODE to select the reverse
mode.
To record on one side only, select Z..
To record on both sides, select D or C!I5.
3 Press function (TUNER, AUX/VIDEO or CD) and
prepare the source to be recorded.
To record from a CD. press CD and load the disc.
To record from a radio broadcast, press TUNER/BAND and
tune in to a station.
To record from a connected source, press AUX/VIDEO and
play.
4 Press 9 REC/REC MUTE to start recording.
When the selected function is CD, playback and recording
start simultaneously.
/ /I /:
; / ;
;
...
/
r
To stop recording, press ■.
To pause recording, press II (applicable when the source is
TUNER or AUX/VIDEO). To resume recording, press it again.
To erase a recording
Make sure the microphone is not connected to this unit.
1 Insert the tape to be erased into the deck.
2 Set the tape to the point where the erasure is to be started.
3 Set the reverse mode by pressing TAPE/REV MODE.
4 Press AUX/VIDEO and turn the connected equipment off.
5 Press
9
REC/REC MUTE to start the erasure.
ENGLISH 12
Page 14
EDIT RECORDING
m
Tape length
slii
Number of Selected
programmed tracks
tracks for side A
4
4
The Al edit recording function enables CD recording without
worrying about tape length and track length. When a CD is
inserted, the unit automatically calculates the total track length.
If necessary, the order of tracks is rearranged so that no track is
cut short.
(Al: Artificial Intelligence)
Al edit recording will not start from a point halfway into the tape.
The tape must be recorded from the beginning of either side.
Use the remote control from steps 2 to 5.
1 Insert the tape into deck.
Insert the tape with the side to be recorded on first facing out
from the unit.
2 Press FUNCTION repeatedly until “CD” is
displayed and load the disc.
3 Press EDiT/CHECK once whiie pressing SHIFT
button.
“EDIT” lights up and “Al” flashes on the display.
Al EDIT
I
■ / / :
, /..; i
Each time it is pressed, the display changes as follows,
H)
! i i I
; / / !
-Al EDIT —► PRGM EDIT
Tape side Remaining
A: First recording side time of
B: Second recording side side A
5 First press • TAPE REC/REC MUTE and then
press ^ within 2 seconds to start recording.
The tape is rewound to the begirining of the front side, the
lead segment is played through for 10 seconds, and recording
starts. When recording on the front (side A) ends, recording
on the back (side B) starts.
To stop recording
Press ■. Recording and CD play stop simultaneously.
To clear the edit program
Press ■ CLEAR twice so that “EDIT” disappears on the display.
To check the order of the programmed track numbers
Before recording, press EDIT/CHECK while pressing SHIFT to
select side A or B, and press ◄◄ or ►► repeatedly.
Programmed
Tape side
SSB ►
.....
='
■lllllo H iliii
:
Track number
Time on cassette tapes and editing time
The actual cassette recording time is usually a little longer than
the specified recording time printed on the label. This unit can
program tracks to use the extra time. When the total recording
time is a little longer than the tape’s specified recording time
after editing, the display shows the extra time (without a minus
mark), instead of the time remaining on the tape (with the minus
mark).
’ Recording is inhibited if the erasure prevention tab on either
side of the tape is broken off.
' The Al edit function cannot be used with discs containing 31
tracks or more.
/
Program number track number
ivaT'
4 Press numbered buttons 0-9 to designate the tape
length.
10 to 99 minutes can be specified.
Example: When using a 60-minute tape, press 6 and 0.
In a few seconds, the tracks to be recorded on each side of
the tape are determined.
and ►► are also available to designate the tape length.
1 3 ENGLISH
Page 15
PROGRAMMED EDIT RECORDING
4,5
6 Repeat step 5 for the rest of the tracks for side A. (¡>
A track whose playing time is longer than the remaining time 2!
cannot be programmed. ci
Seiected Program
tracks number
SO ¡(Til
ilii
Remaining
time of side A
ilzc
Programmed i|
tracks ipif
............
I W
1 ►
o;
4
In the programmed edit recording function, the track can be
programmed while checking the remaining time on each side of
the tape as the tracks are programmed.
The programmed edit recording will not start from a point halfway
in the tape. The tape must be recorded on from the beginning of
either side.
Use the remote control from step 2 to 8.
1 Insert the tape into deck.
Insert the tape with the side to be recorded on first facing out
from the unit.
2 Press FUNCTION repeatedly until “CD” is
displayed and load the disc.
3 Press EDIT/CHECK twice while pressing SHIFT
button.
“EDIT” lights up and “PRGM” flashes on the display.
PRGM
EDIT
:i3
■ ■ ■ ■ ■ / /■ ■ ■ ■ ■ / /
=■ ; I / / ! i I .......................... / / / /
................
/;.// .;
.............
;■ ■ ■ ■ ■ /
7 Press EDIT/CHECK while pressing SHIFT to
select side B and program the tracks for side B.
After confirming “B” on the display, repeat step 5.
Tape side B (reverse side)
03
.PRaup/":
eiTr
____
aaa / /111*1
/ ; i •/ / ; ;
"■ ; ; •; / / ;
8 Press • TAPE REC/REC MUTE and then press
► within 2 seconds to start recording..
The tape is rewound to the beginning of the front side, the
lead segment is played through for 10 seconds, and recording
starts. When recording on the front (side A) ends, recording
on the back (side B) starts.
To stop recording
Press ■. Recording and CD play stop simultaneously.
To check the order of the programmed track numbers
Before recording, press EDIT/CHECK while pressing SHIFT to
select side A or B, and press ◄◄ or ►► repeatedly.
Program
Track number
/ /■■■■/ /
Slif tigig
Tape side
To change the program of each side
Press EDIT/CHECK while pressing SHIFT to select side A or B,
and press ■ CLEAR to clear the program on the selected side.
Then program tracks again.
/
number
i i ../ f
■"/ ;
~3
Programmed
track numbers
►
. . .
4 Press numbered buttons 0-9 to designate the tape
length.
10 to 99 minutes can be specified.
Example: When using a 60-minute tape, press 6 and 0.
• The « and are also available to designate the tape
length.
Maximum recording
Tape length time for side A
_ri
Tape side A
(front side)
III
ilii
5 Press the numbered buttons 0-9 and -1-IO to
program a track.
Example-. To select the 10th track, press +10 and 0.
To clear the edit program
Press ■ CLEAR twice so that “EDIT” disappears on the display.
Recording is inhibited if the erasure prevention tab on either side
of the tape is broken off.
ENGLISH 1 4
Page 16
KARAOKE
MICROPHONE MIXING
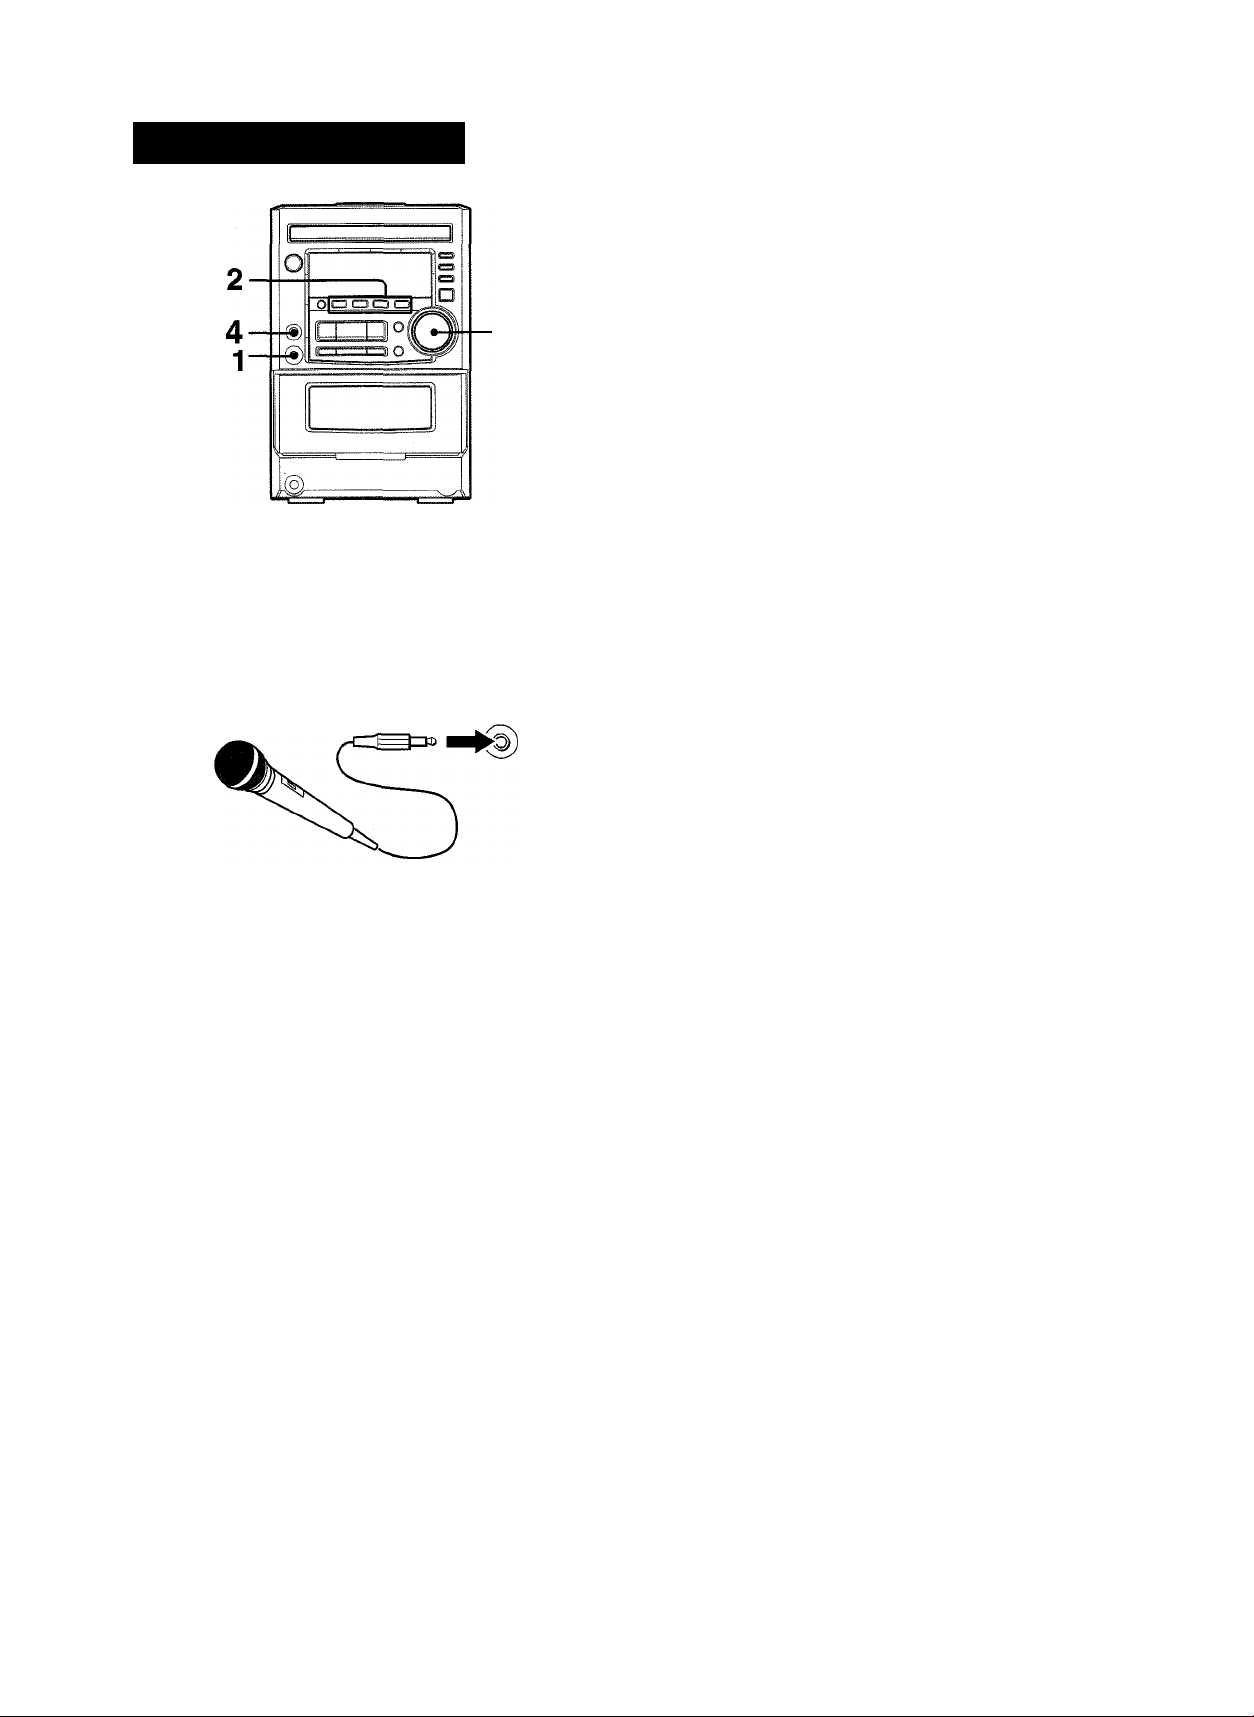
A microphone (not supplied) can be connected to this unit,
allowing you to sing along to music sources.
Use a microphone with mini plugs (03.5 mm. Vs inch).
Before connecting a microphone
Set the MIC VOL to MIN.
• If a microphone is held too near the speakers, a howling sound
may be produced. In this case, hold the microphone away from
the speakers, or decrease the microphone volume.
• If sound through the microphone is extremely loud, it may be
distorted. In this case, decrease the microphone volume.
Recommended microphone
The use of unidirectional type microphone is recommended to
prevent howling. Contact your local Aiwa dealer for details.
1 Connect your microphone to MIC jack.
MIC
2 Press one of the function buttons to select the
source to be mixed, and play the source.
3 Adjust the volume and tone of the source. 4 Turn MIC VOL to adjust the microphone volume.
If TAPE function Is selected as the source, the microphone
sound can only be output from the speakers when the tape is
being played.
To record microphone sound mixed with source sound
Follow the procedure for recording from the sound source (see
page 12).
The TAPE function cannot be used for mixing recording.
When the microphone Is not in use
Set MIC VOL to MIN and remove the microphone from the MIC
jack.
15 ENGLISH
Page 17
CLOCK AND TIMER
SEniNG THE CLOCK
CLOCK
SHIFT
1 Press CLOCK while pressing SHIFT on the
remote control and press 11 SET within 4 seconds.
The hour flashes.
/ / /i-V
/ ■ ■ ■ ■ ■) / ;
2 Press ■« DOWN or UP to designate the
hour, then press II SET.
The hour stops flashing and the minute starts flashing.
3 Press ◄◄ DOWN or ►► UP to designate the
minute, then press II SET.
The minute stops flashing on the display and the clock starts
from 00 seconds.
To display the current time
Press CLOCK while pressing SHIFT on the remote controi. The
time is displayed for 4 seconds.
However, the time cannot be displayed during recording.
; / ■/ i / =•
/ i " ■/ i ; ■■
.
......................
SETTING THE SLEEP TIMER
The unit can be turned off automatically at a specified time.
Use the remote control.
1 Press SLEEP while pressing SHIFT.
■tfissl 1.3
;
...
/ /
... /....
..
) £ ;
SLEEP
....... £...
;■■■■■; /
;■.. £
2 Within 4 seconds, press ◄◄ or ►► to specify
the time until the power is turned off.
Each time the button is pressed, the time changes between 5
and 240 minutes in 5-minute steps.
h I £
C C C:
............
...
¡""i
) £ £
Specified time
13
......
£ ■■;
£
LJ
■
ui
O
ft
UI
S
P
a
To switch to the 24-hour standard
Press CLOCK whiie pressing SHIFT on the remote control and
then press ■ within 4 seconds.
Repeat the same procedure to restore the 12-hour standard.
If the clock display flashes
This is caused by a power interruption. The current time needs
to be reset.
If power is interrupted for more than approximately 24 hours,
all settings stored in memory after purchase need to be reset.
To check the time remaining until the power is turned off
Press SLEEP once while pressing SHIFT. The remaining time is
displayed for 4 seconds.
To cancel the sleep timer
Press SLEEP twice while pressing SHIFT so that “SLEEP oFF”
appears on the display.
ENGLISH
16
Page 18
SETTING THE TIME
The unit can be turned on at a specified time every day with the
built-in timer.
Preparation
Make sure the clock Is set correctly. (See page 16).
Use the remote control.
l
1 Press TIMER once while pressing SHiFT to
dispiay then press II SET within 4 seconds.
“©” Is displayed and the hour flashes.
EPill
IpiliiSiliilSI
; /;
: i
©
If you press II SET after 4 seconds, another operation may
start.
i / '""iSilaiB
■¡■ii
; :
....
■/ / / /
2 Designate the hour of the timer-on time by
pressing ◄◄ DOWN or ►► UP, then press
II SET. Repeat to designate the minute of the
timer-on time.
iTCiSS!
: n/i
©
After you designate the timer-on time, one of the source names
flashes on the display.
i.../ ; /
/
;..;
13
; i
; i
3 Press FUNCTION repeatedly to select a source,
then press II SET.
The selected source name flashes.
\ ! /
/
.........
/ / /
1^-;
' The ◄◄ and ►► are also available to select a source.
' if TUNER is pressed, the band cannot be selected in this
step.
(fiisa
■ /■ ■ /'
13
J
4 Select the duration for the timer-activated period
with ◄◄ DOWN or ►► UP, then press II SET.
ISsl
i
iiSiSipiil
The duration for the timer-activated period can be set between
5 and 240 minutes in 5-minute steps.
i i i
■ ; ;
i r
5 Prepare the source.
To listen to a CD. load the disc.
To listen to a tape, insert the tape into deck.
To listen to the radio, tune in to a station.
To listen to the equipment connected to VIDEO/AUX jacks.
set the timer of the connected source (with an external timer)
and prepare for the play.
6 Press POWER to turn the unit off after adjusting
the volume and tone.
“©” remains on the display after the power is turned off (timer
standby mode).
0
When the timer-on time is reached, the unit turns on and
begins play with the selected source.
The volume level is automatically set to 20 when the power is
turned off with the volume level set to 21 or more.
To check the specified time and source
Press TiMER while pressing SHIFT on the remote control. The
timer-on time, the selected source name and the duration for
the timer-activated period flash alternately for 4 seconds.
To cancel timer standby mode temporarily
Press TIMER repeatedly while pressing SHIFT on the remote
control until “©” or “0 REc” disappears on the display.
To restore the timer standby mode, press TIMER once or twice
while pressing SHIFT to display “©” or “© rec”.
Using the unit while the timer is set
You can use the unit normally after setting the timer.
Before turning off the power, carry out step 5 to prepare the
source, and adjust the volume and tone.
■ Timer playback and timer recording will not begin unless the
power is turned off.
’ Connected equipment cannot be turned on and off by the built-
in timer of this unit. Use an external timer.
TIMER RECORDING
Timer recording is applicable for TUNER and AUXA/IDEO (with
an external timer) sources oniy.
Press TIMER repeatedly while pressing SHIFT on the remote
control until “0 rec” appears on the display, then press II
SET within 4 seconds. Carry out the steps of “SETTING THE
TIMER” from step 2 and insert the tape to be recorded on into
deck after step 5.
1 7 ENGL ISH
Page 19
OTHER CONNECTIONS
CONNEOING OPTIONAL EQUIPMENT
LISTENING TO EICTERNAL SOURCES
OC
Ui
a
a:
<
»
o
o
(A
2!
O
c>
UJ
a:
Refer to the operating instructions of the connected equipment
for details.
• The connecting cords are not supplied. Obtain the necessary
connecting cords.
• Consult your local Aiwa dealer for optional equipment.
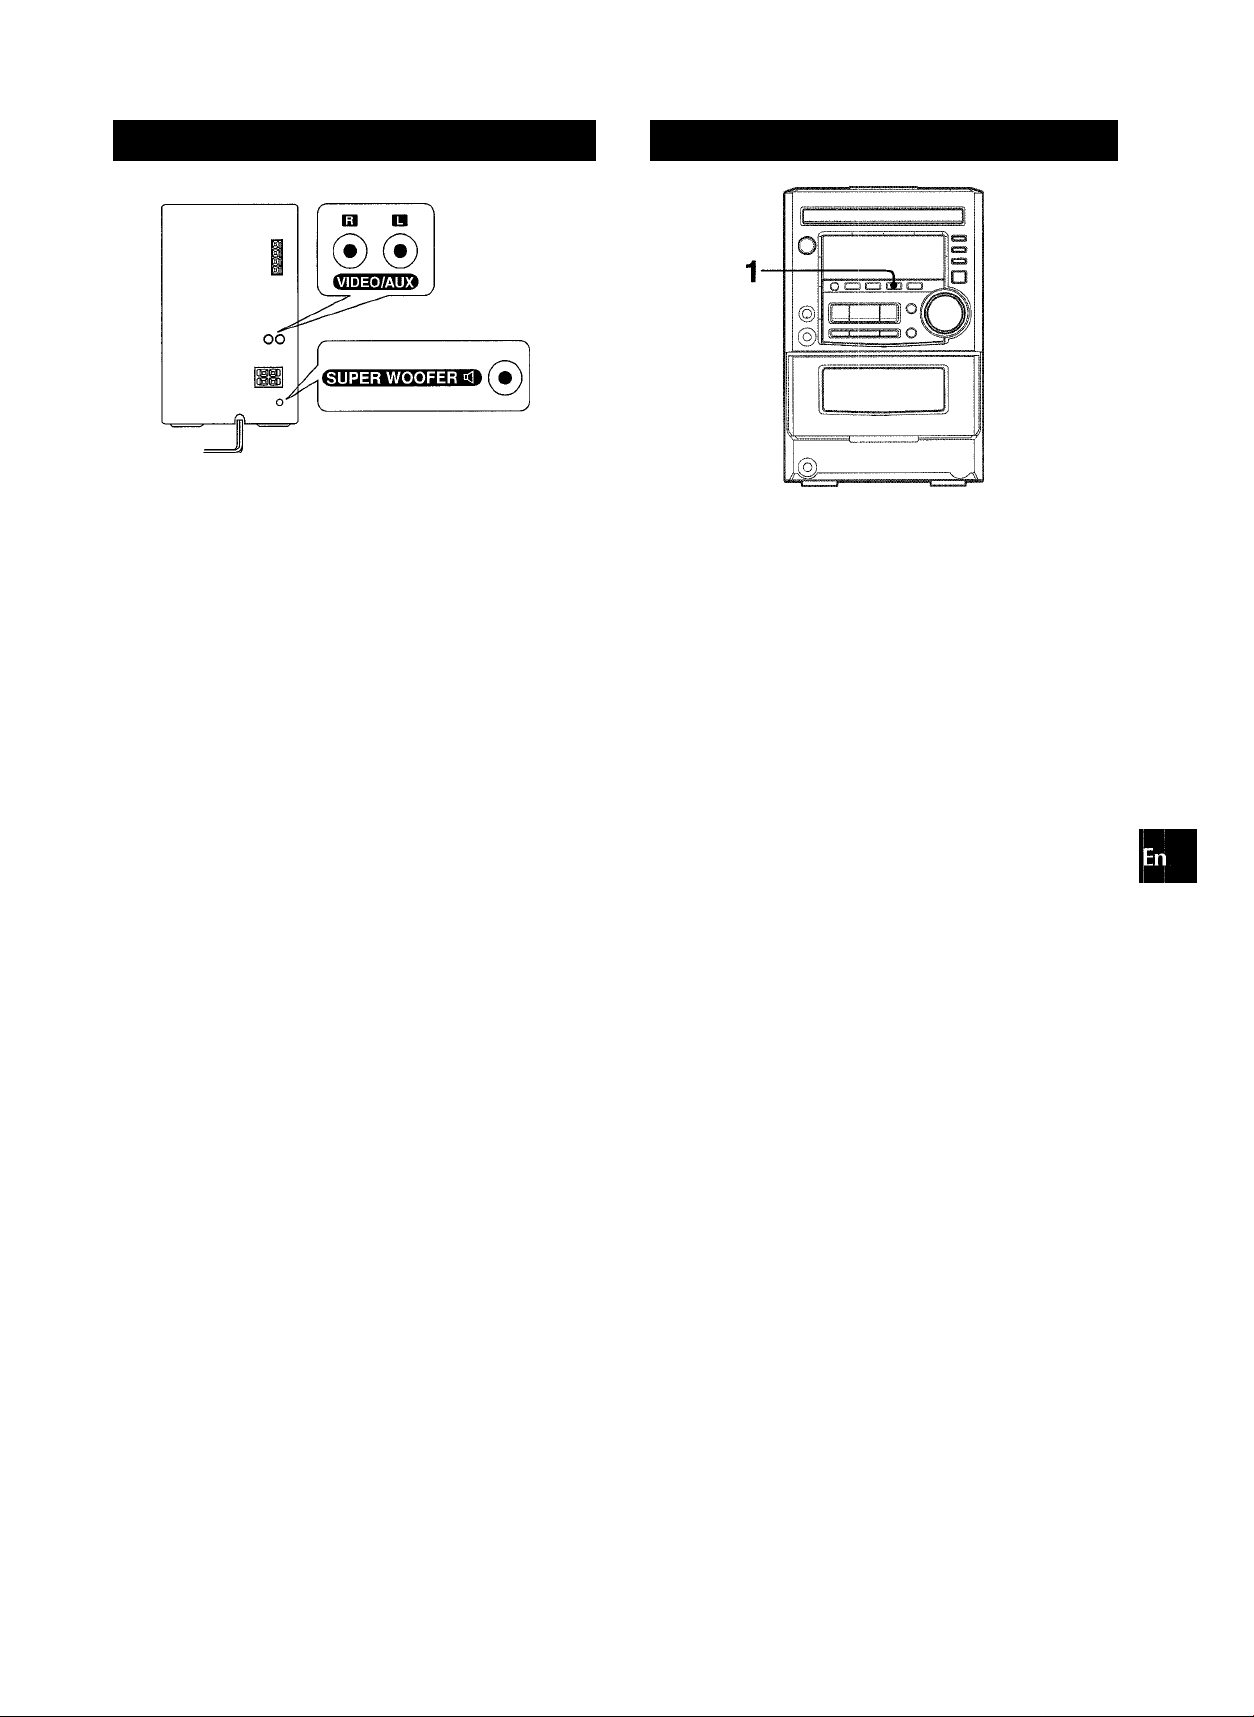
VIDEO/AUX JACKS
This unit can input analog sound signals through these jacks.
Use a cable with RCA phono plugs to connect audio equipment
(turntables, LD players, VCRs, etc.).
Connect the red plug to the VIDEO/AUX R jack, and the white
plug to the VIDEO/AUX L jack.
When connecting a turntable
Use an Aiwa turntable equipped with a built-in equalizer amplifier.
SUPER WOOFER <1 JACK
Connect an optional powered sub woofer with a built-in amplifier
to the jack.
To play equipment connected to the VIDEO/AUX jacks, proceed
as follows.
1 Press AUX/VIDEO.
“AUX” appears on the display.
2 Play the connected equipment.
To change a source name in the display
When AUX/VIDEO is pressed, “AUX” is displayed initially. It can
be changed to “TV” or “VIDEEO”.
With the power on, press POWER while pressing AUX/VIDEO.
Repeat the procedure to select one of the source names.
a:
K
o
ENGLISH
18
Page 20
GENERAL
CARE AND MAINTENANC
Occasional care and maintenance of the unit and the software
are needed to optimize the performance of your unit.
To clean the cabinet
Use a soft and dry cloth.
If the surfaces are extremely dirty, use a soft cloth lightly
moistened with mild detergent solution. Do not use strong
solvents, such as alcohol, benzine or thinner as these could
damage the finish of the unit.
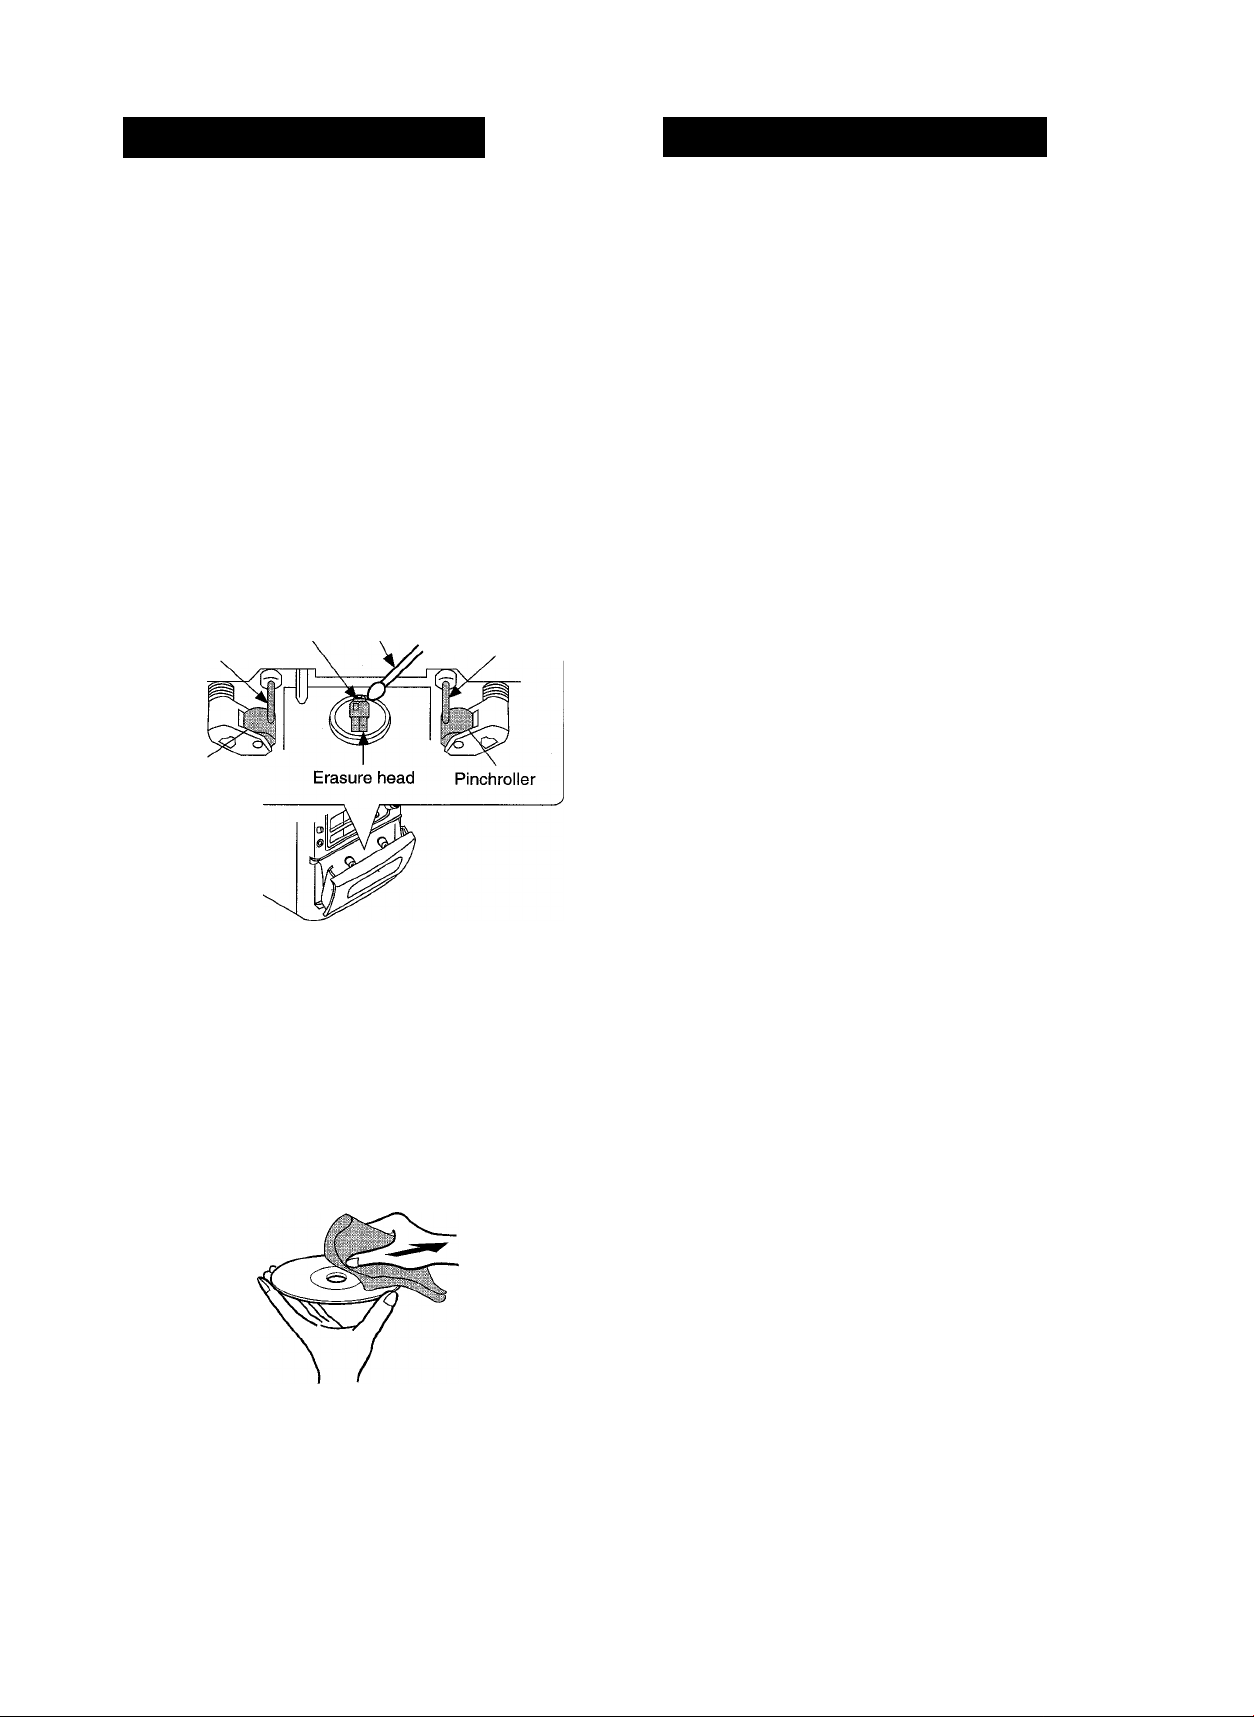
To clean the heads and tape paths
After every 10 hours of use, clean the heads and tape paths
with a head cleaning cassette or cotton swab moistened with
cleaning fluid or denatured alcohol. (These cleaning kits are
commercially available.)
When cleaning with a cotton swab, wipe the recording/playback
head, erasure head, capstans, and pinchrollers.
Recording/
Playback head
Capstan
Pinchroller
After cleaning the heads and tape paths with a liquid head
cleaning cassette or a moistened swab, wait until the cleaned
parts are completely dry before inserting the tapes.
To demagnetize the heads
The heads may become magnetized after long-term use. This
may narrow the output range of recorded tapes and increase
noise. After 20 to 30 hours use, demagnetize the heads with any
commercially available demagnetizer.
Care of discs
• When a disc becomes dirty, wipe the disc from the center out
with a cleaning cloth.
Cotton swab
Capstan
TROUBLESHOOTING GUIO
If the unit fails to perform as described in these Operating
Instructions, check the following guide.
GENERAL There is no sound.
• Is the AC cord connected properly?
• Is there a bad connection? (-+ page 3)
• There may be a short circuit in the speaker terminals. ,
-» Disconnect the AC cord, then correct the speaker
connections.
• Was an incorrect function button pressed?
Sound is emitted from one speaker oniy.
• Is the other speaker disconnected?
An erroneous display or a malfunction occurs.
->■ Reset the unit as stated below.
TUNER SECTION
There is constant, wave-like static.
• Is the antenna connected properly? (-» page 3)
• Is the signal weak?
-r Connect an outdoor antenna.
The reception contains noise interferences or the sound
is distorted.
• Is the system picking up external noise or multipath distortion?
Change the orientation of the antenna.
-r Move the unit away from other electrical appliances.
CASSETTE DECK SECTION The tape does not run.
• Is deck in pause mode? (-> page 11)
The sound is off-balance or not adequately high.
• Is the playback head dirty? (-> page 19)
Recording is not possible.
• Is the erasure prevention tab on the tape broken off? (-* page
11)
• Is the recording head dirty? (-> page 19)
Erasure is not possible.
• Is the erasure head dirty? (-» page 19)
• Is a metal tape being used?
High frequency sound is not emitted.
• Is the recording/playback head dirty? (-+ page 19)
CD PLAYER SECTION
The CD player does not play.
• Is the disc correctly placed? (-> page 9)
• Is the disc dirty? (-» page 19)
• Is the lens affected by condensation?
-» Wait approximately one hour and try again.
• After playing a disc, store the disc in its case. Do not leave the
disc in places that are hot or humid.
Care of tapes
• Store tapes in their cases after use.
• Do not leave tapes near magnets, motors, television sets, or
any source of magnetism. This will downgrade the sound quality
and cause noise.
• Do not expose tapes to direct sunlight, or leave them in a car
parked in direct sunlight.
19 ENGLISH
To reset
If an unusual condition occurs in the display window or the
cassette decks, reset the unit as follows.
1 Press POWER to turn off the power.
2 Press POWER to turn the power back on while pressing
■ CLEAR. Everything stored in memory after purchase is
canceled.
If the power cannot be turned off in step 1 because of a malfunction,
reset by disconnecting the AC cord, and connect it again. Then
carry out step 2.
Page 21

SPECIFICATION
Main unit XR-M25
FM tuner section
Tuning range
Usable sensitivity (IHF)
Antenna terminals
AM tuner section
Tuning range
Usable sensitivity
Antenna
Amplifier section
Power output
Total harmonic distortion
Inputs
Outputs
Cassette deck section
Track format
Frequency response
Signal-to-noise ratio
Recording system
Heads
Compact disc piayer section
Laser
D-A converter
Signal-to-noise ratio
Harmonic distortion
Wow and flutter
General
Power requirements
Power consumption
Dimensions of main unit
(W X H X D)
Weight of main unit
—
I
87.5 MHz to 108 MHz
13.2 dBf
75 ohms (unbalanced)
530 kHz to 1710 kHz (10 kHz
step)
531 kHz to 1602 kHz (9 kHz step)
350 pV/m
Loop antenna
20W + 20W(1kHz,T.H.D. 10%,
6 ohms)
0.08 % (10.5 W, 1 kHz, 6 ohms)
VIDEO/AUX: 0.4 V
MIC: 1.8 mV (10 kohms)
SUPER WOOFER: 1.0 V
SPEAKERS: accept speakers of
6 ohms or more
PHONES (stereo minijack):
accepts headphones of 32 ohms
4 tracks, 2 channels stereo
Cr02 tape: 50 Hz - 16000 Hz
Normal tape: 50 Hz - 15000 Hz
50 dB (CrOa tape peak level
above 1 kHz)
AC bias
Recording/playback head x 1
Erase head x 1
Semiconductor laser (X = 780 nm)
1 bit dual
75 dB (1 kHz, 0 dB)
0.1% (1 kHz, OdB)
Unmeasurable
AC : 120 V, 60 Hz
50 W
173x255.2x248.8 mm
(67s X lOVs X 97b in)
3.65 kg
(8 lbs loz)
Speaker system
Cabinet type
Speakers
Impedance
Output sound pressure level
Dimensions (W x H x D)
Weight
Specifications and external appearance are subject to change without
notice.
2 way, bass reflex (magnetic
shield type)
Woofer:
120 mm (4^/4 in) cone type
Tweeter:
20 mm (’Vi6 in) ceramic type
6 ohms
87 dB/W/m
155 X 253 x 220 mm
(6Vs x 10 X 8V4 in)
2.6 kg
(5 lbs 12 oz)
COPYRIGHT
Please check the laws on copyright relating to recordings from
discs, radio or external tape for the country in which the machine
is being used.
NOTE
This equipment has been tested and found to comply with the
limits tor a Class B digital device, pursuant to Part 15 of the FCC
Rules. These limits are designed to provide reasonable protection
against harmful interference in a residential installation.
This equipment generates, uses, and can radiate radio frequency
energy and, if not instaiied and used in accordance with the
instructions, may cause harmful interference to radio communi
cations. However, there is no guarantee that interference wiii not
occur in a particular installation. If this equipment does cause
harmful interference to radio or television reception, which can
be determined by turning the equipment off and on, the user is
encouraged to try to correct the interference by one or more of
the following measures:
- Reorient or relocate the receiving antenna.
- Increase the separation between the equipment and
receiver.
- Connect the equipment into an outlet on circuit different
from that to which the receiver is connected.
- Consult the dealer or an experienced radio/TV technician
for help.
CAUTION
Modifications or adjustments to this product, which are not
expressly approved by the manufacturer, may void the user’s
right or authority to operate this product.
.J
•4
K
lU
X
LJ
(9
ENGLISH 20
Page 22

H
PARTS INDE
POWER
o
TAPE/REV MODE
o
TUNER/BAND
AUX/VIDEO
CD........................................
MIC VOL
e
MIC
!◄◄/◄◄ DOWN...................
o
◄ ► DIR/PRESET..............
►►!/►► UP.......... . .. .. .. .. .. .. .. ..
II SET
■ CLEAR.............................
• REC/REC MUTE
PHONES.............................
0
GRAPHIC EQUALIZER
0
(ROCK,POP,JAZZ)
CD OPEN/CLOSE...............
G
T-BASS...............................
0
...............................
.....................
.........................
.............................
......................................
..................................
...............
..............
............
.....
5 <D
.....
11
.....
7,8
.....
18
.....
9
.....
15
.....
15
.....
7-11,13,14,16
.....
7-14
.....
7-11,13,14,16
.....
8-12,16,17
.....
8-14
.....
12-14
.....
5
.....
6
.....
9
.....
6
0-9, +10
RANDOM
REPEAT
EDIT/CHECK.........................
PRGM....................................
TIMER....................................
SLEEP...................................
CLOCK..................................
BAND/MODE TUNER
SHIFT
0
FUNCTION............................
©
POWER.................................
©
II SET
©
!◄◄/◄◄ DOWN.....................
►►!/►► UP.......... . .. .. .. .. .. .. .. .. ..
• TAPE REC/REC MUTE....
■ CLEAR
► PRESET................................... ... 9-14
VOLUME (-,+)
EQ
©
.................................
.............................
................................
...........
....................................
....................................
.............................
......................
.........................................
... 8-10,13,14
... 9
... 10
... 9,13,14
... 10
... 17
... 16
... 16
... 7
.... 5
.... 5
.... 5
.... 8-12,16,17
.... 7-11,13,14,16,17
.... 7-11,13,14,16,17
.... 12
.... 8-14
.... 6
.... 6
VOLUME.............................
0
DEMO
.................................
21 ENGLISH
.....
.....
6
5
0
T-BASS
.................................
.... 6
Page 23

Page 24

lESPAÑOLI
ADVERTENCIA
PARA REDUCIR EL RIESGO DE INCENDIOS O DESCARGAS
ELECTRICAS. NO EXPONGA ESTE APARATO A LA LLUVIA
NI A LA HUMEDAD.
CAUTION
RISK OF ELECTRIC SHOCK
DO NOT OPEN
“CAUTION;TO REDUCE THE RISK OF
ELECTRIC SHOCK,
DO NOT REMOVE COVER (OR BACK).
NO USER-SERVICEABLE PARTS INSIDE.
REFER SERVICING TO QUALIFIED
SERVICE PERSONNEL.”
Explicación de los símbolos gráficos:
El simbolo del rayo con punta de flecha, dentro
do un triángulo equilatero, tiene como fin aiedar
al usuario do la presencia de un voltaje
peligroso sin aislar presente dentro do la unidad
que puede sor de una magnitud suficiente como
para constituir un riesgo do descarga eléctrica
para las personas.
El símbolo de exclamación dentro de un
triangulo equilatero tiene como fin alertar al
usuario de la presencia de instrucciones
importantes de operación y mantenimiento
(servicio) en la literatura que acompaña al
PRECAUCIONES
Lea cuidadosa y completamente el manual de instrucciones antes
de utilizar la unidad. Asegúrese de guardar el manual de
instrucciones para utilizarlo como referencia en el futuro. Todas las
advertencias y precauciones del manual de instrucciones y de la
unidad deberán cumplirse estrictamente, así como también las
sugerencias de seguridad mencionadas más abajo.
Instalación
1 Agua y humedad — No utilice esta unidad cerca del agua, como
al lado de una bañera, lavabo, una piscina, o similar.
2 Calor — No utilice esta unidad cerca de fuentes de calor,
incluyendo salidas de aire caliente, estufas u otros aparatos que
generen calor.
Tampoco deberá someterse a temperaturas inferiores a 5°C ni
superiores a 35°C.
3 Superficie de montaje — Ponga la unidad sobre una superficie
plana y nivelada.
4 Ventilación — La unidad deberá situarse donde tenga suficiente
espacio libre a su alrededor, para que la ventilación apropiada
quede asegurada. Deje un espacio libre de 10 cm por la parte
posterior y superior de la unidad y 5 cm por cada lado.
- No ponga la unidad sobre una cama, una alfombra o superficies
similares que podrían tapar las aberturas de ventilación.
- No instale la unidad en una librería, mueble o estantería cerrada
herméticamente donde la ventilación no sea adecuada.
5 Entrada de objetos y líquidos—Tenga cuidado de que objetos
y líquidos no entren en la unidad por las aberturas de ventilación.
6 Carros de mano y soportes — Cuando
ponga o monte la unidad en un soporte
o carro de mano, ésta deberá moverse
con mucho cuidado.
Las paradas repentinas, la fuerza
excesiva y las superficies irregulares
pueden hacer que la unidad o el carro
de mano se dé vuelta o se caiga.
7 Condensación — En la lente del fonocaptor del reproductor de
discos compactos, tal vez se forme condensación cuando:
- La unidad se pase de un lugar frío a uno caliente.
- El sistema de calefacción se acabe de encender.
- La unidad se utilice en una habitación muy húmeda.
- La unidad se enfríe mediante un acondicionador de aire.
Esta unidad tal vez funcione mal cuando tenga condensación en
su interior. En este caso, deje en reposo la unidad durante unas
pocas horas y repita de nuevo la operación.
8 Montaje en pared o techo — La unidad no se deberá montar
en una pared ni en el techo, a menos que se especifique lo
contrario en el manual de instrucciones.
_
1 ESPAÑOL
Energía Eléctrica
1 Fuentes de alimentación — Conecte solamente esta unidad a
las fuentes de alimentación especificadas en el manual de
instrucciones y como está marcado en la unidad.
2 Polaridad — Como medida de seguridad, algunas unidades
están equipadas con clavijas de alimentación de CA que solo
pueden ser insertadas de una sola forma a la toma de corriente.
Si es difícil o imposible insertar la clavija de CA a la fuente, voltee
la clavija e inténtelo de nuevo. SI aún no es fácil insertarla a la
fuente, llame un servicio técnico cualificado para que dé servicio
o cambie la fuente de alimentación. Para no ir en contra de la
función de seguridad de la clavija polarizada, no la fuerce dentro
de la fuente de alimentación.
3 Cable de alimentación de CA
- Al desconectar el cable de alimentación de CA, quite el enchufe
de la toma. No tire del cable mismo.
- Nunca maneje el enchufe con las manos mojadas, pues eso
puede traducirse en incendio o electrochoque.
- El cable de alimentación deberá colocarse de forma que no
quede muy doblado, prensado y que nadie pueda pisarlo. Preste
especial atención al cable que va de la unidad a la toma de
corriente de CA.
- Evite sobrecargar las tomas de CA y los cables de extensión
más allá de su capacidad porque esto podría causar un incendio
o una sacudida eléctrica.
Page 25

4 Cable de extensión — Para ayudar a evitar una sacudida
eléctrica, no utilice una clavija polarizada de CA con un cable de
extensión, receptáculo o cualquiera otra toma de corriente a
menos que la clavija polarizada pueda ser completamente
insertada para prevenir la exposición de las cuchillas de la clavija.
5 Periodos de no utilización — Desconecte el cable de
alimentación de CA o el cable si la unidad no va a ser utilizada
durante vanos meses o más. Cuando el cable de alimentación
esté conectado, por la unidad continuará circulando una pequeña
cantidad de corriente, aunque la alimentación esté desconectada.
Antena Exterior
1 Cables de alimentación — Cuando conecte una antena exterior,
asegúrese de que está ubicada lejos de otros cables de
alimentación.
2 Puesta a tierra de la antena exterior — Asegúrese de que el
sistema de la antena esté puesto a tierra de forma correcta para
dar protección contra descargas de voltaje inesperadas o
formación de electricidad estática. El artículo 810 del National
Electrical Code, ANSI-NFPA70, provee información de la forma
adecuada de puesta a tierra del poste, la estructura de soporte y
del cable conductor de la unidad de descarga de la antena, así
como la medida de la unidad de la puesta a tierra, conexiones a
las terminales de la puesta a tierra y requerimientos para las
terminales de la puesta a tierra.
Puesta a tierra de acuerdo al National Electricai Code (Código Nacional de Electricidad)
CABLE CONDUCTOR DE LA
ANTENA
UNIDAD DE DESCARGA DE LA
ANTENA (SECCION NEC 810-20)
CONDUCTORES A TIERRA
(SECCION NEC 810-20)
ABRAZADERA CABLE A TIERRA
NEC CODIGO NACIONAL
DE ELECTRICIDAD
SISTEMA DE ELECTRODO PARA EL
SERVICIO DE ALIMENTACION DE LA PUESTA
TIERRA (POWER SERVICE GROUNDING
ELECTRODE SYSTEM)
(NEC ART 250 PARTE H)
Mantenimiento
Limpie ia unidad soio como se recomienda en el manual de
instrucciones.
Daños que necesitan ser reparados
Haga que un técnico cualificado en reparaciones dé servicio a las
unidades si:
- El cable de alimentación de CA o su clavija está estropeado.
- Objetos extraños o líquido han entrado en la unidad.
- La unidad ha estado expuesta a la lluvia o al agua.
- La unidad no parece funcionar normalmente.
- La unidad muestra un cambio considerable en su función.
- La unidad se ha caído o la caja se ha estropeado.
NO TRATE DE REPARAR LA UNIDAD USTED MISMO.
INDICE
PRECAUCIONES.................................................................1
PREPARACIONES___________________________
CONEXIONES.................
CONTROL REMOTO
ANTES DE LA OPERACION...............................................5
SONIDO
___________________________________
AJUSTANDO EL SONIDO..................................................6
ECUALIZADOR GRAFICO
RECEPCION DE LA RADIO____________________
SINTONIZACION MANUAL
PREAJUSTE DE EMISORAS
REPRODUCCION DE DISCOS COMPACTOS
OPERACIONES BASICAS
REPRODUCCION PROGRAMADA..................................10
REPRODUCCION DE CINTAS
OPERACIONES BASICAS............................................. 11
GRABACION
_______________________________
GRABACION BASICA
Al EDICION DE GRABACION
EDICION DE GRABACION PROGRAMADAS.................14
KARAOKE
_________________________________
MEZCLA CON MICROFONO............................................15
RELOJ Y APAGADO AUTOMATICO
AJUSTE DEL RELOJ........................................................16
AJUSTE APAGADO AUTOMATICO PARA DORMIR
(TEMPORIZADOR) EDITADA
AJUSTANDO EL TEMPORIZADOR
OTRAS CONEXIONES________________________
CONEXION DE UN EQUIPO OPCIONAL
ESCUCHA DE FUENTES DE SONIDO EXTERNAS
GENERALIDADES
CUIDADO Y MANTENIMIENTO
GUIA PARA LA SOLUCION DE PROBLEMAS
ESPECIFICACIONES........................................................20
INDICE DE LAS PIEZAS
.....................................................
..........................................................
.................................................
................................................
.............................................
.................................................
_________________
.....................................................
........................................
12
13
____________
..........................................
...............................
........................
.........
16
17
18
18
___________________________
.......................................
...............
................................................
19
19
21
7
8
9
3
5
6
Registro del propietario
Para su conveniencia, anote el número del modelo y de serie (los
encontrará en la parte trasera del conjunto) en el espacio propuesto
más abajo. Por favor refiérase a ellos cuando contacte a su
distribuidor Aiwa en caso de alguna dificultad.
Modelo No. No. de serie (Lote No.)
XR-M25 U
ESPAÑOL
Page 26

PREPARACIONES
CONEXIONE
Verifique su sistema y accesorios
Antes de conectar el cable de alimentación de CA
La tensión nominal de su unidad indicada en el panel posterior de
su unidad es de 120V CA. Compruebe si esta tensión coincide con
la de la red local.
IMPORTANTE
• Conecte primero los altavoces, antenas y todos los demás equipos
opcionales. Luego conecte el cable de alimentación de CA.
• No existen diferencias entre los altavoces frontales. Ambos
altavoces pueden ser conectados como L (izquierdo) o R (derecho).
1 Conecte los cables de los altavoces a la unidad
central.
XR-M25 Receptor
de Disco compacto
casete estéreo
Control remoto
Antena AM
Manual de Instrucciones, etc.
Altavoces
[L (izquierdo), R (derecho)]
Los cables con la franja blanca deberán conectarse a la terminal
O y los cables negros a la terminal ©.
Antena FM
Page 27

2 Conecte las antenas suministradas.
Conecte la antena de FM a las terminales FM 75 fí y la antena
de AM a las terminales de AM LOOP.
3 Conecte el cable de CA a la toma de CA.
CONEXION DE UNA ANTENA EXTERIOR w
Para obtener una mejor recepción de FM se recomienda utilizar O
una antena exterior. ^
Conecte la antena exterior a las terminales FM 75 Í2. )<||
SE»
K
te
a
Para poner la antena cuadrada de AM sobre una superficie
Fije el gancho en la ranura.
Para posicionar las antenas Antena coaxial de FM:
Extienda esta antena horizontalmente en forma de T y fije los
extremos a la pared.
Antena cuadrada de AM:
Colóquela de forma que encuentre la mejor dirección.
’ No conecte mas altavoces a la unidad que aquellos que se han
suministrado.
' Asegúrese de conectar correctamente los cables de los altavoces.
Las conexiones mal hechas podrían causar un cortocircuito en las
terminales SPEAKERS.
Para conectar otro equipo opcional página 18
' No deje objetos que generen magnetismo, como tarjetas de crédito,
etc; cerca de los altavoces. Ya que estos objetos pueden dañarlos.
' No ponga la antena de FM cerca de objetos metálicos o rieles de
cortinas.
' No ponga la antena de AM cerca de otros equipos opcionales, el
propio sistema estéreo, el cable de alimentación de CA o los cables
de los altavoces, porque se captarán ruidos.
’ No desbobine el cable de la antena de AM.
ESPAÑOL 4
Page 28

CONTROL REMOTO
Inserción de las pilas
Quite la tapa de las pilas, ubicada en la parte trasera del control
remoto, e inserte dos pilas tamaño AA (R6)
0
Cuando reemplazar las pilas
La distancia máxima de operación entre el control remoto y el sensor
de señales de la unidad principal deberá ser de 5 metros
aproximadamente. Cuando disminuya esta distancia, reemplace las
pilas por otras nuevas.
Utilización del control remoto
Las instrucciones de este manual se refieren principalmente a los
botones de la unidad principal. Los botones del control remoto con
los mismos nombres que los de la unidad principal también podrán
utilizarse.
Uso del SHIFT en el control remoto
Los botones ® tienen dos funciones distintas. Una de las funciones
está indicada en el botón mismo y la otra en la placa que está sobre
el botón.
Para usar la función sobre el botón, solo presione el mismo.
Para usar la función de la placa que está sobre el botón, presione
al mismo tiempo que SHIFT.
ANTES DE LA OPERACIO
Botones de
■ función
■DEMO
Para encender la unidad
Pulse uno de los botones de función (TAPE, TUNER, AUX/VIDEO
CD). La reproducción del disco o de la cinta insertada empezará o
se recibirá la emisora previamente sintonizada (función de
reproducción directa).
También podrá utilizar POWER.
Para apagar la unidad
Presione POWER.
Demo (Demostración)
Cuando el cable de alimentación no está conectado, aparecerán en
la pantalla las funciones de la unidad. Cuando la unidad está
encendida DEMO es sustituida por la operación display. Cuando la
unidad esté apagada DEMO aparecerá otra vez.
Uso del FUNCTION en el control remoto
FUNCTION se sustituye a los botones de función (TAPE, TUNER,
AUX/VIDEO, CD) de la unidad principal.
Cada vez que FUNCTION es presionado estando la unidad
encendida, la siguiente función es seleccionada en forma cíclica.
► PRESET en el control remoto
La función es la misma que la de en la unidad principal.
©
SHIFT
FUNCTION
' Si la unidad no va a ser utilizada durante mucho tiempo, quite las
pilas para evitar las posibles fugas de electrolito.
■ El control remoto quizá no funcione correctamente cuando:
- La línea de visión entre el control remoto y el sensor del control
remoto al lado de TAPE sea expuesta a una luz intensa como la
luz directa del sol.
- Otros controles remotos (de un televisor, etc.) estén siendo
utilizados cerca de esta unidad.
PRESET
Para cancelar DEMO
Pulse DEMO. Aparece la visualización del reloj. (Para ajustar la
hora actual, vea “AJUSTE DEL RELOJ” en la página 16.) Para
reactivar DEMO, pulse
Utilización de los auriculares
Conecte los auriculares a la toma PHONES con una miniclavija
estéreo (o3,5 mm).
Mientras estén conectados los auriculares, no saldrá sonido de los
altavoces.
DEMO de nuevo.
ESPAÑOL
Page 29

SONIDO
AJUSTANDO EL SONID
T-BASS
VOLUME
VOLUMEN
Haga girar VOLUME en la unidad principal, o pulse
VOLUME en el control remoto.
El nivel de volumen aparece en el visualizador en forma de número
entre 0 y MAX (31).
El volumen se ajusta automáticamente al nivel 20 cuando se apaga
el equipo con el volumen puesto en el nivel 21 o más.
ECUALIZA
GRAPHIC
EQUALIZER
(ROCK, POP,
JAZZ)
Esta unidad provee las siguientes tres diferentes curvas de
ecualización.
ROCK: Sonido potente que realza los agudos y los graves.
POP: Más presencia en las voces y en la gama de registro medio.
JAZZ: Frecuencias inferiores desacentuadas para música tipo jazz.
Pulse uno de los botones GRAPHIC EQUALIZER
La ecualización seleccionada aparecá en la pantalla.
m
Ull
z
0
Ü
<
oc
<
a.
Ili
0[
&
§
z
s
SISTEMA SUPER T-BASS
El sistema T-BASS realza el realismo del sonido de baja frecuencia.
Pulse T-BASS.
Cada vez que es pulsado, el nivel cambia. Seleccione según su
preferencia uno de los tres niveles o la posicicón de apagado.
(ñ
El sonido de baja frecuencia tal vez se distorsione cuando se utilice
el sistema T-BASS con un disco o una cinta cuyo sonido de baja
frecuencia haya sido realzado originalmente. En este caso, cancele
el sistema T-BASS.
ÜiilUI- ■III III
; ;
i !
(cancelar)
T.3
?... i
...
; /
LJ L... L..)‘
Para cancelar la ecualización
Pulse el botón seleccionado de nuevo. “GEQ oFF” se visulaiza.
Para seleccionar con el control remoto
Pulse EQ varias veces. El modo GEQ se visualiza según el siguiente
ciclo.
GEQ ROCK GEQ oFF
(cancelar)
; / / / ;
/
...
/ / ;
.........
GEQ POP GEQ JAZZ -
ESPAÑOL 6
Page 30

RECEPCION DE LA RADIO
SINTONIZACION MANU
Cuando una radiodifusión estéreo tenga ruido
Pulse BAND/MODE TUNER al mismo tiempo que SHIFT en el control
remoto. “MONO” aparecerá en el visualizador.
El ruido se reduce aunque la recepción es monoaural.
Para restaurar la recepción estéreo, vuelva a pulsar esos botones
de manera que desaparezca “MONO”.
SHIFT
BAND/
MODE
TUNER
1 Pulse TUNER/BAND repetidamente para seleccionar
la banda preferida.
FM AM
c
Si la pulsa TUNER/BAND mientras que la alimentación está
desconectada, se recibirá la emisora previamente sontonizada
(función de reproducción directa.)
Para seleccionar una banda con el control remoto
Pulse BAND/MODE TUNER repetidamente.
DOWN oPulse « DOWN o UP para seleccionar una
emisora.
Cada vez que pulse el botón la frecuencia cambiará.
Cuando se reciba una emisora, “TUNE” se visualizará durante 2
segundos.
Durante la recepción estéreo por FM, se visualizará “(liffi»))”.
ifsa
=■; ;;
i i
MONO
Para cambiar el intervalo de sintonización de AM
El ajuste por omisión del intervalo de sintonización de AM es de 10
kHz/paso. Si utiliza esta unidad en una zona donde el sistema de
asignación de frecuencias sea de 9 kHz/paso, cambie el intervalo
de sintonización.
Pulse POWER mientras pulsa DIR/PRESET cuando la unidad
esté encendida.
Para reponer el intervalo, repita este procedimiento.
Cuando se cambie el intervalo de sintonización de AM, todas las
emisoras preajustadas se borrarán. Las emisoras preajustadas
tendrán que ajustarse de nuevo.
Eísfi
T i i a i !
! i i ; \i i
Para buscar rápidamente una emisora (búsqueda automática)
Mantenga ◄◄ DOWN o ►► UP pulsado hasta que la frecuencia
se ponga a cambiar rápidamente. Después de sintonizar una
emisora, termina la búsqueda.
Para detener manualmente la búsqueda automática, pulse
DOWN o ►► UP.'
• La búsqueda automática quizá no pare en estaciones cuyas
señales sean muy débiles.
7 ESPAÑOL
Page 31

PREAJUSTE DE EMISORA
0-9,
+10
BAND/
MODE
TUNER
La unidad puede almacenar un total de 32 emisoras (Cada banda
tiene un máximo de 20 emisoras sara ajustar). Cuando almacene
una emisora, a esa emisora se le asignará un número de preajuste.
Utilice el número de preajuste para sintonizar directamente una
emisora preajustada.
1 Pulse TUNER/BAND para seleccionar una banda, y
pulse « DOWN o UP para seleccionar una
emisora.
2 Pulse II SET para almacenar la emisora.
A las emisoras de cada banda se les asigna un número de
preajuste en orden consecutivo empezando por el 1.
Frecuencia
I
SINTONIZACION MEDIANTE NUMERO DE
PREAJUSTE
utilice el control remoto para seleccionar directamente el número
de preajuste.
1 Pulse BAND/MODE TUNER para seleccionar una
banda.
2 Puise ios botones numéricos para 0-9 y +10 para
seleccionar un número preajustado.
Ejemplo:
Para seleccionar el número de preajuste 20, pulse +10, +10 y 0.
Para seleccionar el número de preajuste 15, pulse +10, y 5.
Selección de un número de preajuste en ia unidad
principal
Pulse TUNER/BAND para seleccionar una banda. Luego, pulse
DIR/PRESET repetidamente.
Cada vez que pulse DIR/PRESET se seleccionará el siguiente
número más alto.
Para borrar una emisora preajustada
Seleccione el número de memorización de la emisora que desee
borrar con los botones numéricos. Luego, pulse H CLEAR y el
botón II SET antes de que pasen 4 segundos.
Los números de preajuste de más alta numeración de entre todas
las demás estaciones, también disminuirán en uno.
O
ñ
<(
a:
<i
.1
ui
Q
s:
o
m
O
ui
K
/!//
i i
Repita los pasos 1 y 2.
La próxima estación no se grabará si el total de emisora
preajustadas es 32 para todas las bandas o un total de 20 emisora
preajustadas por una banda ha sido ya almacenada.
O = ■ ■ ■ ■ ■/ =■ ■ ■ ■ ■ ■/ ■ ■ ■ ■ ,,u,
[1¿ LJ (....■■ I ■/. .
Número de preajuste
ESPAÑOL 8
Page 32

REPRODUCCION DE DISCOS COMPACTOS
OPERACIONES BASICAS
• RANDOM
REPEAT
0-9, +10
EDIT/
■ CHECK
SHIFT
INTRODUCCION DEL DISCO
Pulse CD, luego pulse CD OPEN/CLOSE para abrir
el compartimiento de los discos. Introduzca el disco
con el lado de la etiqueta hacia arriba y cierre el
compartimiento pulsando CD OPEN/CLOSE.
Para iniciar la reproducción cuando la alimentación esté
desconectada (función de reproducción directa)
Pulse CD. La alimentación se conectará y la reproducción del disco
introducido empezará.
Cuando pulse CD OPEN/CLOSE la unidad se conectará y se abrirá
el compartimiento de los discos.
Para comprobar el tiempo restante
Durante la reproducción pulse EDIT/CHECK al mismo tiempo que
SHIFT en el control remoto. El tiempo total restante hasta el final de
todas las canciones aparecerá. Para restaurar el tiempo de
reproducción, repita lo arriba indicado.
Selección de una pista con el control remoto
Pulse los botones numéricos 0-9 y +10 para seleccionar una canción.
Ejemplo:
Para seleccionar la canción número 25, pulse +10, +10 y 5.
Para seleccionar la canción número 10, pulse +10 y 0.
La canción seleccionada empezará a reproducirse y la reproducción
continuará hasta que termine el disco.
> Cuando quite un disco, pulse ■ para parar la reproducción antes
de pulsar CD OPEN/CLOSE.
> Cuando introduzca discos de 8-cm, póngalos en la bandeja circular
interior.
' No introduzca más de un disco compacto en la platina.
’ No incline la unidad con disco adentro. Puede causar
funcionamiento defectuoso.
■ OPEN/CLOSE
Calendario de música
Tiempo de
reproducción total
i i i ■/ ;
i I
ri
Número total de canciones
"1 ; ; • Ì
(solo las primeras 20
canciones se visualizarán)
...
REPRODUCCION DE DISCO
Introduzca un disco.
Pulse
La reproducción inicia con la primera canción.
Tiempo de reproducción transcurrido
Bili
i
r'i
LJ -i
■■■; /
..' iJ
REPRODUCCION ALEATORIA/ REPRODUCCION REPETIDA
REPRODUCCION ALEATORIA
CD
ij
1 -i 3 4
s.'! ;
.
Todas las canciones del disco pueden reproducirse de forma
aleatoria.
Pulse RANDOM mientras presiona SHIFT en el control remoto.
“RANDOM” se enciende en el visualizador.
Para cancelar la reproducción aleatoria, presione los botones de
nuevo.
' Durante la reproducción aleatoria no es posibie saitar por medio
de ◄◄ a la pista previa.
' Durante una reproducción aieatoria, la selección directa de las
canciones con los botones numéricos cancelará la reproducción
aleatoria.
' Durante la reproducción aleatoria, “C*. 1” no se puede llevar a
cabo.
Número de la canción que está siendo reproducida
Para detener la reproducción, pulse ■.
Para hacer una pausa en la reproducción, pulse II. Para reanudar
la reproducción, púlselo de nuevo.
Para buscar un punto particular durante la reproducción,
mantenga pulsado ■« o ►► y suéltelo en el punto deseado.
Para saltar hasta el principio de una canción durante la
reproducción, pulse repetidamente ◄◄ o
Para quitar el disco, pulse CD OPEN/CLOSE.
ESPAÑOL
Page 33

REPRODUCCION REPETIDA
Una de las canciones puede ser reproducida en forma repetida.
Para repetir el disco entero, encienda “C*-”.
Para repetir la canción deseada, encienda “Cí-1
Pulse REPEAT al mismo tiempo que SHIFT en el control remoto
Cada vez que es pulsado, las operaciones pueden ser seleccionadas
cíclicamente.
©cí-
© Cancelar
@ -
Ci-
I
/N
1
©
•Durante la reproducción puede llevarse a cabo la
reproducción aleatoria.
• Al iniciar la reproducción aleatoria durante una reproducción
1”, se cancelará la reproducción repetida.
• Para repetir solo las pistas seleccionadas, programe las pistas
deseadas (vea abajo) antes de elegir la función “C¿”.
Para cancelar la reproducción repetida, pulse el botón de nuevo.
Pulse los botones numéricos 0-9 y +10 para programar una canción.
Ejemplo:
Para seleccionar la canción número 12, pulse +10, y 2.
Para seleccionar la canción número 20, pulse +10, +10 y 0.
Tiempo de reproducción
total de las canciones
Número de programa
Número de canción
seleccionada
seleccionadas
Número total de canciones
seleccionadas.
I
3 Repita el paso 2 para programar otras canciones. 4 Puise ^ para iniciar la reproducción.
Para comprobar el programa
Cada vez que se pulsa ◄◄ o en el modo de parada, un número
de canción y un número de programa aparecen en el visualizador.
Para borrar el programa
Presione ■ CLEAR en el modo de parada.
Para añadir canciones ai programa
Antes de reproducir, repita el paso 2. La canción se programará
después de la última canción.
Para cambiar las canciones programadas
Borre el programa y repita todos los pasos de programación.
09
O
H
O
SE
O
ü
w
o
u
<n
E¡
Ul
ci
2!
O
O
O
3
O
O
b:
a.
Ul
B¡
REPRODUCCION PROGRAMADA
Se podrá programar un máximo de 30 canciones del disco
introducido.
■REPEAT
2
4
Utilice el control remoto.
1 Pulse PRGM mientras presiona SHIFT en el modo de
parada.
“PRGM” parpadeara en el visualizador.
Para reproducir canciones programadas repetidamente
Después de programar las canciones, pulse REPEAT al mismo
tiempo que SHIFT en el control remoto. Se enciende en el
visualizador.
' Durante la reproducción programada, las siguientes operaciones
no podrán ser realizadas:
- Reproducción aleatoria.
- Repetición de una pista (C+- 1).
' Si el tiempo programado es más de 99:59 minutos o si ia pista 31
y en adelante del disco son programadas, el tiempo total de
reproducción mostrará en el visualizador.
laiiílilii
itilliiiijl
ESPAÑOL 10
Page 34

REPRODUCCION DE CINTAS
OPERACIONES BASICAS
■± EJECT
INSERCION DE UNA CINTA
• Puede seleccionar un modo de inversión para reproducir uno o
ambos lados.
• Utilice cintas tipo I (normaies), tipo II (alta/CrOa) o tipo IV (metal)
para la reproducción.
Pulse TAPE/REV MODE y pulse la marc-i AEJECT para abrir el porta casete.
REPRODUCCION DE UNA CINTA
Introduzca una cinta. Luego pulse para iniciar la
reproducción.
Cara de reproducción de la cinta
n
■■ ■ ;-■= r "; i"": |
■ ! / / i / / / / ■
El contador de cinta indica el movimiento de ia cinta
► : La cara deiantera está siendo reproducida, (hacia adelante)
◄ : La cara trasera está siendo reproducida, (invertida)
Para detener la reproducción, pulse ■.
Para hacer una pausa en la reproducción, pulse II. Para reanudar
la reproducción, púiselo otra vez.
Para cambiar la cara de reproducción, puise DIR/PRESE:T
en ei modo de reproducción o en ei de pausa.
Para avanzar rápidamente o rebobinar, puise ◄◄ o ►► en el
modo de parada. Luego pulse ■ para detener la cinta.
Para iniciar ia reproducción cuando ia aiimentación esté
desconectada (función de reproducción directa)
Puise TAPE. La alimentación se conectará y la reproducción de ia
cinta insertada comenzará.
Para poner el contador de cinta a 0000
Pulse ■ CLEAR en el modo de parada.
El contador también se pondrá en 0000 cuando se abra el porta
casete.
Introduzca una cinta con ei lado expuesto hacia abajo. Empuje el
porta casete para cerrar.
Para seleccionar ei modo de inversión
Cada vez que presione TAPE/REV MODE, ei modo de inversión
cambiará.
Œ5
c
O
fjtiiiigiilgiiii
Para reproducir una cara solamente, seleccione T.
Para reproducir de ia cara delantera a la trasera una vez solamente,
seleccione TX
Para reproducir repetidamente ambas caras, seieccione CT3.
■iSiaiSMliB
/ i ! i t i ; /
D
Acerca de las cintas de casete
• Para evitar el borrado accidental, después de la grabación
rompa con un desatorniiiador u otra herramienta puntiaguda
ias lengüetas de plástico del casete.
Para volver a grabar en una cinta, tape ias aberturas con cinta
adhesiva, etc.
' Las cintas de 120 minutos o más son extremadamente finas
y se deforman o estropean fácilmente. No son recomendadas.
' Tense la cinta con un lapicero o herramienta similar antes
de utilizarla. La cinta fiojá podrá romperse o atascarse en ei
mecanismo.
1 1 ESPAÑOL
Page 35

GRABACION
GRABACION BASICA
Esta sección explica cómo realizar una grabación desde el tuner, el
tocador de discos compactos, o desde una equipo externo.
• TAPE REC/
REC MUTE
Preparación
• Solo las cintas tipo I (normal) pueden ser grabadas.
• Rebobine la cinta hasta el punto donde vaya a empezar la
grabación.
1 Inserte la cinta que vaya a grabar en la platina.
Introduzca la cinta con el lado en que va a grabar primero dando
la cara hacia afuera de la unidad y con el lado expuesto hacia
abajo.
Para iniciar ia grabación con ei control remoto
Pulse primero • TAPE REC/FíEC MUTE y luego pulse ► antes de
que pasen 2 segundos.
Ajuste del sonido durante ia grabación
El volumen y tono de los altavoces o auriculares pueden variarse
libremente sin que afecten a la grabación.
PARA INSERTAR UN ESPACIO EN BLANCO
La inserción de blancos de 4 segundos puede servirle para localizar
el comienzo de una canción en otros equipos. Esta unidad puede
insertar blancos sólo cuando la fuente es TUNER o AUX/VIDEO.
1 Pulse • REC/REC MUTE durante la grabación o mientras ia
pausa de grabación.
parapadeará en menos de 4 segundos la cinta correrá sin
grabar. Después de los 4 segundos, la platina entrará la pausa
automáticamente.
2 Pulse II para reanudar la grabación.
Para insertar un espacio en blanco de menos de 4 segundos,
pulse • REC/REC MUTE de nuevo, mientras está parpadeando.
Para insertar un espacio en blanco de más de 4 segundos.
después de que la platina entre el modo de pausa, pulse
• REC/REC MUTE.
Cada vez que pulse • REC/REC MUTE se introducirá una pausa de
4 segundos.
*Esta unidad no tiene ia función que le permite iocaiizar ei comienzo de una
canción.
tf>
<
2;
o
Ul
o
u
u
fil
o
flC
a
lU
flC
2
o
0
<
a
1
2 Pulse TAPE/REV MODE para seleccionar el modo de
inversión.
Para grabar en una cara solamente, seleccione H.
Para grabar en ambas caras, seleccione D o CZÍ.
3 Pulse función (TUNER, AUX/VIDEO o CD) y prepare la
fuente para grabar.
Para grabar de un disco compacto, presione CD e introduzca
el disco.
Para grabar de una radiodifusión, pulse TUNER/BAND y
sintonice la emisora.
Para grabar de una fuente de sonido conectada, pulse AUX/
VIDEO y comience la reproducción.
4 Presione • REC/REC MUTE para iniciar la grabación.
Cuando la función seleccionada sea CD, la reproducción y la
grabación empezarán simultáneamente.
ii .4
i i
a
...I....
iffel
; / " "i ; ■ ■
►íT
mi
La grabación no podrá realizarse cuando tenga seleccionada la
función TAPE.
Para detener la grabación, presione ■.
Para detener la grabación, pulse II (puede aplicarse cuando la
fuente sea TUNER o AUX/VIDEO). Para continuar la grabación,
pulse de nuevo.
Para borrar una grabación
Asegúrese de que el micrófono no está conectado a la unidad.
1 Inserte la cinta que vaya a borrar en la platina.
2 Ponga la cinta en el punto donde vaya a empezar a borrar.
3 Ponga el modo de inversión pulsando el botón TAPE/REV MODE.
4 Pulse AUX/VIDEO y apague el equipo conectado.
5 Pulse • REC/REC MUTE para iniciar el borrado.
ESPAÑOL 12
Page 36

Al EDICION DE GRABACIO
Longitud de la cinta
L
....
Número de Canciones
canciones seleccionadas
programadas para la cara A
ßz
___
b
U-b b
4
4
La función de edición de grabación Ai permite grabar un disco
compacto en una cinta sin tener que preocuparse de ia longitud de
la cinta o de las canciones. Cuando disco compacto está introducido,
la unidad automáticamente calcula el total de la duración de las
canciones. Si es necesario, el orden de las canciones se cambiará
para que ninguna de ellas esté cortada.
(Al: inteligencia Artificial)
Al no funcionará desde un punto en la mitad de la cinta. La cinta
debe ser grabada desde el principo de cada cara.
Utilice el control remoto desde los pasos 2 a 5.
1 Introduzca la cinta en la platina.
Introduzca la cinta con la cara para grabar primero mirando hacia
fuera de la unidad.
2 Pulse FUNCTION repetidamente hasta “CD” aparezca
entonces cargue el disco compacto.
3 Pulse EDIT/CHECK una vez mientras al mismo tiempo
que SHIFT.
“EDIT" encenderá y “Al” parpadeara en el visualizador.
Al EDIT
Cara de la cinta Tiempo
A : Primera cara para grabar disponible de
B : Segunda cara para grabar una cara A
Pulse primero • TAPE REC/REC MUTE y luego pulse
^ en menos de 2 segundos para comenzar la
grabación.
La cinta se rebobinará desde ei principio de ia cara mirando hacia
afuera, dejando un segmento de 10 segundos, depués de eso ia
grabación comenzará. Cuando (ia cara A) termine, comenzará ia
grabación de (la cara B).
Para parar ia grabración
Pulse ■ . La grabación y
simultáneamente.
el disco compacto se pararán
Para borrar ei programa de edición
Pulse ■ CLEAR dos veces para que “EDIT” desaparezca del
visualizador.
Para comprobar el orden de las canciones programadas
Antes de grabar, puise EDIT/CHECK al mismo tiempo que SHIFT
para seleccionar ia cara A o B, después puise ◄◄ o
repetidamente.
Cara de la cinta Número de Programa programada
Si
U
Ateon
Número de canción
(..í i Í
i / /
Número de canción
-3
TrTI)
Tiempo de casetes y de edición
El tiempo real de grabación de ia cinta es normalmente un poco más
largo que el especificado en la etiqueta. Esta unidad puede programar
las canciones para utilizar un tiempo extra. Cuando el tiempo total de
grabación es un poco más largo el especificado después de la edición,
ei visualizador muestra el tiempo extra (sin una marca negativa) en
lugar del tiempo disponibie en la cinta que aparecerá (con una marca
Cada vez que pulse, el visualizador cambiara de la manera
siguiente.
Ai EDIT PRGM EDIT
:
4 Pulse los botones numéricos 0-9 para designar la
longitud de la cinta.
Pueden especificarse de 10 a 99 minutos.
Ejemplo: Cuando utilice una cinta de 60 minutos, pulse 6 y 0.
En unos pocos segundos, las canciones para grabar en cara de
la cinta son determinadas.
• y ►► puede utilizar para designar la longitud de la cinta.
13 ESPAÑOL
grabación de la cinta están rotas.
• La función Al de edición no puede usarse con discos que contengan
31 canciones o más.
Page 37

EDICION DE GR; PROGRAMADAS
ioool 1
3,7
SHIFT-
8
2
po J|
yQQ
4,5
4
6 Repita ei punto 5 para ei resto de las canciones para
la cara A.
Una canción que dure más tiempo que el disponible no puede
ser programada.
Canción Número de Tiempo disponible Canciones
seleccionada programa para la cara A programadas
.1," ^ -L-... )^.L
io
,H
.........................................
7 Pulse EDIT/CHECK al mismo tiempo que SHIFT para
seleccionar la cara B y programar canciones para esta
cara B.
Después de confirmar “B” en el visualizador, repita el punto 5.
Cara B de la cinta (cara reversa)
I
iPRGMpfn
II ... L
EDltr
y¿J
ÍT-BASSl
; i / ■; ! / /
".= / : •/ / : f
1)
TTTIi
m
L.
m
________
=
O
■■
0
<
01
4
o:
a
En la función de grabación de edición programada, las canciones
pueden ser programadas al mismo tiempo que comprueba el tiempo
en cada una de las caras de la cinta.
Esta función no comenzará desde un punto en la mitad de la cinta.
La casete debe ser grabada desde el principio de cada cara.
Utilice el control remoto desde los pasos 2 a 8.
1 Introduzca la cinta en la platina.
Introduzca la cinta con la cara para grabar primero mirando hacia
fuera de la unidad.
2 Puise FUNCTION repetidamente hasta “CD” aparezca
entonces cargue el disco compacto.
3 Pulse EDIT/CHECK dos veces al mismo tiempo que
SHIFT.
“EDIT” encenderá y “PRGM” parpadeara en el visualizador.
PRGM
EDIT
1
i i i i
4 Pulse los botones numéricos 0-9 para designar la
longitud de la cinta.
Pueden especificarse de 10 a 99 minutos.
Ejemplo: Cuando utilice una cinta de 60 minutos, pulse 6 y 0.
• ◄◄ y ►► puede utilizar para designar la longitud de la cinta.
;\!i i "
: : :
: ;
..............
/ i i 1
: : : :
___ ..„ .....
8 Pulse # TAPE REC/REC MUTE y luego pulse ► en
menos de 2 segundos para comenzar la grabación.
La cinta se rebobinará desde el principio de la cara mirando hacia
afuera, dejando un segmento de 10 segundos, después de eso
la grabación comenzará. Cuando (la cara A) termine, comenzará
la grabación de (la cara B).
Para parar de grabar
Pulse ■ . La grabación y el disco compacto se pararán
simultáneamente.
Para comprobar el orden de las canciones programadas
Antes de grabar, pulse EDIT/CHECK al mismo tiempo que SHIFT
para seleccionar la cara A o B, después pulse ◄◄ o ►►
repetidamente.
Número de canción Programa canción programadas
O
/ /
Cara de la cinta
Para cambiar el programa de cada cara
Pulse EDIT/CHECK al mismo tiempo que SHIFT para seleccionar la
caraAo B y después pulse ■ CLEAR para borrar el programa en la
cara seleccionada. Luego programe las canciones de nuevo.
Para borrar el programa editado
Pulse ■ CLEAR dos veces para que “EDIT” desaparezca del
visualizador.
/
Número de Números de
a
/■■■■/ /
i
...
T.3
"/ /
J ;
Tiempo máximo de
Longitud de la cinta
-■ ►
O
5 Pulse los botones númericos 0-9 y +10 para programar
una canción.
Ejemplo: Para seleccionar la canción número 10, pulse +10 y 0.
grabación para la cara A
.............
ii;::
Cara A de la cinta
(cara frente)
La grabación no se producirá si cualquiera de las lengüetas de
grabación de la cinta están rotas.
ESPAÑOL
14
Page 38

KARAOKE
MEZCLA CON MICROFONO
Un micrófono (no incluido) puede ser conectado a esta unidad,
permitiéndole cantar junto con las fuentes de música.
Utilice el micrófono con una mini clavija (03.5 mm)
Antes de conectar un micrófono
Ajuste el MIC VOL al MIN.
1 Conecte su micrófono a ia toma de MIC.
MIC
• Si el micrófono es sostenido muy cerca de los altavoces, un chirrido
puede producirse. En este caso, aleje el micrófono de los altavoces
o disminuya el nivel de sonido usando el volumen.
• Si el sonido por el micrófono es extremadamente alto, puede ser
distorsionado. En este caso, gire el control del volumen.
Micrófono recomendado
Se recomienda el uso de un micrófono tipo unidireccional para la
prevención de chirridos. Contacte a su distribuidor Aiwa para más
detalles.
2 Puise uno de ios botones de función para seleccionar
ia fuente para mixar, y comience ia reproducción de
esa fuente.
3 Ajuste ei voiumen y tono de ia fuente.
4 Ajuste ei voiumen dei micrófono con ei MiC VOL.
Si se selecciona la función TAPE como fuente, el sonido del
micrófono sera emitido por los altavoces sólo durante la
reproducción de la cinta.
Para grabar el sonido del micrófono mezclado con la fuente de
sonido
Siga el procedimiento usado para grabar de una fuente de sonido
(vea la página 12).
No se puede utilizar la función TAPE para mezclar grabaciones.
Cuando no utilice el micrófono
Ajuste el MIC VOL en MIN y retire el micrófono de la toma MIC.
15 ESPAÑOL
Page 39

RELOJ Y APAGADO AUTOMATICO
AJUSTE DEL BELO
Pulse CLOCK una vez al mismo tiempo que SHIFT en
el control remoto, y luego pulse II SET en menos de
4 segundos.
La hora parpadeará.
/ / ;!// i i •/ ; ; /
/■■■■; / ; / : •: ; i i
Pulse DOWN o UP para designar ia hora, y iuego puise II SET.
La hora dejará de parpadear y empezará a parpadear el minuto.
3 Puise -<4 DOWN o UP para designar ei minuto,
y iuego puise II SET.
El minuto dejará de parpadear en el visualizador y el reloj
empezará desde 00 segundos.
Para visuaiizar ia hora actuai
Pulse CLOCK al mismo tiempo que SHIFT en el control remoto. La
hora aparece en menos de 4 segundos.
Sin embargo, la hora no puede visualizarse durante la grabación.
Para cambiar por el sistema de 24 horas
Pulse CLOCK al mismo tiempo que SHIFT en el control remoto, y
luego pulse ■ en menos de 4 segundos.
Repita el mismo procedimiento para restaurar el sistema de 12 horas.
I
CLOCK
SHIFT
AJUSTE APAGADO AUTOMATICO PARA DORMIR (TEMPORIZADOR) EDITADA
ooo
ooa.
0(£"o
c^o
tfoo
QlQOl
La unidad puede apagarse automáticamente a una hora especificada.
Utilice el control remoto.
1 Pulse SLEEP al mismo tiempo que SHiFT.
i?gi
; / / ;
2 En menos de 4 segundos puise
especificar ia hora de apagado.
Cada vez que pulse el botón el tiempo cambia entre 5 y 240
minutos 5 minutos cada vez.
=./ i
..
; /._ ;
..
büÏ!'
Para comprobar ei tiempo disponible antes de apagarse
Pulse SLEEP una vez al mismo tiempo que SHIFT. El tiempo
aparecerá en menos de 4 segundos.
/ / /
(siB
SLEEP
a
.......... (....i.....
...........
Tiempo especificado
;
iiiiaatiiag
ÄiiSi
■
i
1
1
2
para
U
lU
o
<
a
<
>c
UI
b;
Si ia visuaiización dei reioj parpadea
Esto se deberá a una interrupción en el suministro de
aiimentación. La hora tendrá que ponerse de nuevo.
Si ia alimentación se interrumpe durante más de 24 horas,
todos los ajustes almacenados en la memoria después de
adquirir la unidad tendrán que ajustarse otra vez.
Para cancelar el temporizador de sueño
Pulse SLEEP dos veces al mismo tiempo que SHIFT para que
“SLEEP oFF” aparezca en el visualizador.
ESPAÑOL
16
Page 40

AJUSTANDO EL TEMPORIZADOR
La unidad puede encenderse a una hora especifica cada dia con ei
temporizador.
Preparación
Asegúrese que ei reioj tiene ia hora correcta (ver pag. 16)
Utiiice ei controi remoto.
1 Puise TiMER una vez ai mismo tiempo que SHiFT para
visualizar y iuego puise II SET en menos de 4
segundos.
“©” aparecerá y ia hora parpadeará.
|1№S|
/ / 5
©
Si pulsa II SET después de 4 segundos otra operación puede
comenzar
2 Ajuste ia hora de timer-on puisando DOWN o
UP, y iuego puise II SET. Repita la operación
para ajustar ios minutos.
©
Después de designar ia hora de encendido automático, uno de
los nombres de fuente parpadeará en el visualizador.
3 Puise FUNCTiON repetidamente para seieccionar una
fuente, y iuego puise II SET.
Ei nombre de ia fuente seleccionada parpadeará.
' i
©-7
• Los ◄◄ y ►► también están disponibles para seleccionar
una fuente.
• Si pulsa TUNER, la banda no puede ser seleccionada en este
momento
;..I ; ; i i ■/ ; ; i
/ ; /:.4 i ■ i i i
/ ■ ■ ■ ■ ■) / i í ’ i ■
.......
Ti'
•
i i i ~
SB
Ata
..
/ / i
4 Pulse ◄◄ DOWN o ►► UP para seleccionar el tiempo
de activación dei temporizador, y iuego pulse II SET.
a
■iiiilï
Puede ajustar la duración del temporizador de 5 a 240 minutos,
5 minutos cada vez.
. \
/ ■
■ ■/ / ■ ■ ■ ■ ■/
/ r
/ /
5 Preparación de ia fuente.
Para escuchar el disco compacto, introduzca el disco.
Para escuchar la cinta, introduzca ésta en la platina
Para escuchar la radio, busque una emisora.
Para escuchar el equipo conectado a tomas VIDEO/AUX.
ajuste el temporizador de la fuente elegida (con un temporizador
externo) y prepárelo para la reproducción.
6 Pulse POWER para apagar la unidad después de
ajustar ei voiumen y ei tono.
“©” Permanecerá en el visualizador después de apagar la unidad
(Timer Standby Modo).
iiEjipgl
©
Cuando iiega ia hora seleccionada en timer-on, la unidad se
enciende automáticamente en la fuente seleccionada.
Ei voiumen se ajusta automáticamente a 20 cuando se apaga la
unidad cuando ei nivei del volumen está ajustado a 21 ó más.
Para comprobar el tiempo especificado y la fuente.
Pulse TIMER al mismo tiempo que SHIFT en ei controi remoto. La
hora de encendido automático, ei nombre de ia fuente seieccionada
y el tiempo de activación dei temporizador parpadearán por 4
segundos y por turno en ei visuaiizador.
/ ■ ■ ■ ■ ■} / :
/ i i ■/ / ; /
/ / / •; / / /
Para cancelar el modo stanby del temporizador temporalmente
Puise TIMER varias veces ai mismo tiempo que SHIFT en ei controi
remoto, hasta que “©” o “© rec” desaparezca dei visuaiizador.
Para restaurar ia función stand-by dei temporizador, puise TIMER
una o dos veces al mismo tiempo que SHIFT, para que “©” o “© rec”
aparezca en el visualizador.
Utilizando la unidad mientras el temporizador es ajustado
Usted pued utilizar la unidad normalmente después de ajustar el
temporizador.
Antes de apagar la unidad, siga el paso 5 para preparar la fuente y
ajustar el volumen y el tono.
• El temporizador para reproducción y grabación no funcionarán a
no ser que la unidad esté apagada.
• El equipo conectado no puede ser encendido o apagado por el
temporizador de esta unidad. Utilice un temporizador externo.
GRABACION CON TEMPORIZADOR
Es aplicable para las fuentes TUNER y AUXA/IDEO solamente (con
un temporizador externo).
Pulse TIMER varias veces al mismo tiempo que SHIFT en el
control remoto, hasta que “© rec” parpadea en el visualizador,
luego pulse II SET en menos de 4 segundos. Continue igual
que en los pasos explicados para el “AJUSTANDO EL
TEMPORIZADOR” a partir del punto 2, introduzca la cinta para gra
bar en la platina después del punto 5.
17 ESPAÑOL
Page 41

OTRAS CONEXIONES
CONEXIO
HlîTlîffRîlïïï!
OPCIONA
Consulte e! manual de Instrucciones del equipo conectado para tener
más detalles.
• Los cables de conexión no han sido suministrados. Obtenga los
cables de conexión necesarios.
• Consulte con su concesionario Aiwa en cuanto al equipo opcionai.
TOMAS VIDEO/AUX
Esta unidad puede introducir señales de sonido análogo a través
de estas tomas.
Utilice un cable con clavijas fono RCA para conectar equipos de
audio (tocadiscos, reproductores de discos láser, videos, etc.).
Conecte la clavija roja a la toma
toma VIDEO/AUX L.
VIDEO/AUX R y la blanca a la
ESCUCHA DE FUENT SONIDO EXTERNAS
Para reproducir equipo conectado a ias tomas de VIDEO/AUX,
proceda de la forma siguiente:
1 Pulse AUX/VIDEO.
“AUX” aparece en el visualizador.
2 Haga la grabación en el equipo conectado.
Para cambiar u nombre de base en el visualizador
Cuando se pulsa AUX/VIDEO, “AUX” aparece inicialmente. Puede
cambiarse a “TV” o “VIDEO”.
Con la alimentación conectada, pulse POWER al tiempo que pulsa
AUX/VIDEO. Repita el procedimiento para seleccionar uno de los
nombres de base.
I
O
o
MI
I-
<
s
o
I-
3
<
o
o
<
o
t
<
>
o
_i
III
1C
111
z
o
Ñ
Ul
z
o
Ü
(A
<
fiC
I
o
Cuando conecte un tocadiscos
utilice un tocadiscos Aiwa provisto de amplificador con ecuaiizador
incorporado.
TOMA SUPER WOOFER <
Conecte un altavoz opcional de subgraves con un amplificador
incorporado a esta toma.
ESPAÑOL 1 8
Page 42

GENERALIDADES
CUIDADO Y MANTENIMIENTO
El mantenimiento y cuidado ocasional de la unidad y software
resultan necesarios para optimizar el funcionamiento de su unidad.
Para limpiar la caja
Utilice un paño suave y seco.
Si las superficies están muy sucias, utilice un paño suave
humedecido un poco en una solución de detergente suave. No utilice
disolventes fuertes tales como alcohol, bencina o diluyante porque
éstos podrían estropear al acabado de la unidad.
Para limpiar las cabezas y los puntos por donde pasa la cinta
Después de cada 10 horas de uso, limpie las cabezas y los puntos
por donde pasa la cinta con un casete de limpieza de cabezas o
con un palillo con algodón humedecido con un líquido limpiador o
con alcohol desnaturalizado. (Estos juegos de limpieza pueden ser
obtenidos en comercios.)
Cuando limpie con un palillo con algodón, limpie la cabeza de
grabación/reproducción, la cabeza de borrado cabrestante rodillos.
GUIA PARA L PROBLEMAS
Si la unidad no funciona como se describe en este manual de
instrucciones, compruebe la guía siguiente:
GENERALIDADES
No hay sonido.
• ¿Está bien conectado el cable de alimentación de CA?
• ¿Hay alguna conexión mal hecha? (—► página 3).
• Puede haber un cortocircuito en los terminales de los altavoces.
-♦ Desconecte el cable de alimentación de CA y corrija las
conexiones de los altavoces.
• ¿Se ha pulsado un botón de función equivocado?
Sólo sale sonido de un altavoz.
• ¿Esfá el otro altavoz desconectado?
Ocurre un error en el visualizador o un mal funcionamiento.
-> Ajuste de nuevo la unidad como se menciona arriba.
SECCION DEL SINTONIZADOR
Hay un ruido de estática constante en forma de onda.
• ¿Está conectada correctamente la antena? (—► página 3).
• ¿Es débil la señal?
-► Conecte una antena exterior.
La recepción tiene interferencias o el sonido está distorsionado.
• ¿Capta el sistema ruidos externos o distorsión de múltiples
trayectorias?
-♦ Cambie la orientación de la antena.
-r Separe la unidad de otros aparatos eléctricos.
I
Después de limpiar las cabezas y los puntos por donde pasa la
cinta con un casete de limpieza de cabezas líquido o con un palillo
con algodón húmedo, espere a que las partes que ha limpiado hayan
secado completamente antes de introducir una cinta.
Para desmagnetizar las cabezas
Las cabezas se magnetizan después de utilizarlas durante mucho
tiempo. Esto puede reducir la gama de salida de las cintas grabadas
y aumentar el ruido. Después de 20 a 30 horas de utilización,
desmagnetice las cabezas con un desmagnetizador de venta en el
comercio del ramo.
Cuidado de los discos
• Cuando un disco esté sucio, limpíelo pasando un paño de limpieza
desde el centro hacia afuera.
SECCION DE LA PLATINA
La cinta no se mueve.
• ¿Está la platina en el modo de pausa? (-> página 11)
Ei sonido está desequilibrado o no alcanza la altura
suficiente.
• ¿Está sucia la cabeza de reproducción? (-♦ página 19).
No es posibie grabar.
• ¿Está rota la lengüeta de prevención contra borrado? (-» página
11).
• ¿Está sucia la cabeza de grabación? (-» página 19).
No es posible borrar la grabación.
• ¿Está sucia la cabeza de borrado? (-> página 19).
• ¿Está utilizando una cinta de metal?
No se emite sonido de alta frecuencia.
• ¿Está sucia la cabeza de grabación/reproducción? (página 19).
SECCION DEL REPRODUCTOR DE DISCOS COMPACTOS
El reproductor de discos compactos no puede reproducir.
• ¿Está bien insertado el disco? (-+ página 9).
• ¿Está sucio el disco? (-> página 19).
• ¿Afecta la condensación a la lente?
—► Espere una hora aproximadamente y pruebe otra vez.
• Después de reproducir un disco, guárdelo en su caja. No deje los
discos en lugares calientes o húmedos.
Cuidado de las cintas
• Guarde las cintas en sus cajas después de utilizarlas.
• No deje las cintas cerca de imanes, motores, televisores o cualquier
otra fuente de magnetismo. Esto reducirá la calidad del sonido y
causará ruidos.
• No exponga cintas a la luz directa del sol, ni las deje en el interior
de un automóvil estacionado bajo la luz directa del sol.
ESPAÑOL
19
Para reajustar la unidad
Si se produce alguna condición extraña en ei visualizador o en las
platinas, reajuste la unidad de la forma siguiente;
1 Pulse POWER para desconectar la alimentación.
2 Pulse POWER para conectar la alimentación mientras pulsa
■ OLEAR. Todo lo que haya sido almacenado en la memoria
después de haber adquirido la unidad se borrará.
Si no puede desconectarse la alimentación en el paso 1 debido a
algún mal funcionamiento, reajuste la unidad desconectando el cable
de alimentación de CA y conéctelo de nuevo y repita el paso 2.
Page 43

ESPECIFICACIONE
Unidad principal XR-M25
Sección del sintonizador de FM
Gama de sintonización 87.5 MHz a 108 MHz
Sensibiiidad útii 13.2 dBf
Terminaies de antena 75 ohmios (desequilibrada)
Sección del sintonizador de AM
Gama de sintonización 530 kHz a 1710 kHz
(pasos de 10 kHz)
531 kHz a 1602 kHz
(pasos de 9 kHz)
Sensibilidad útil 350 p.V/m
Antena Antena de cuadrada
Sección del amplificador
Potencia de salida
Distorsión armónica total
Entradas
Salidas
Sección platina de casete
Formato de pista
Respuesta de frecuencia
Relación de señal a ruido
Sistema de grabación
Cabezas
Sección reproductor de discos compactos
Láser
Convertidor D-A
Relación de señal a ruido
Distorsión armónica
Fluctuación y trémolo
20W + 20W (1kHz, T.H.D. 10%,
6 ohmios)
0,08% (10,5 W, 1 kHz,
6 ohmios)
VIDEO/AUX:0,4 V
MIC: 1,8 mV (10 kohms)
SUPER WOOFER: 1,0 V
SPEAKERS: Acepta
altavoces de 6 ohmios o más
PHONES (minitoma estéreo):
Acepta auriculares de 32
ohmios o más.
4 pistas, 2 canales estéreo.
Cinta de Cr02: 50 Hz - 16000 Hz
Cinta normal: 50 Hz - 15000 Hz
50 dB (nivel de cressta de cinta
Cr02 por encima del 1 kHz)
Polarización de CA
Grabación/Reproducción x 1
Cabeza de borrado x 1
Láser de semiconductor
{X = 780 nm)
1 bit dual
75 dB (1 kHz, 0 dB)
0,1% (1 kHz, OdB)
No se puede medir
I
Sistema de altavoces
Tipo de caja
Altavoces
Impedancia
Nivel de presión acústica
Dimensiones (An x Al x Prof)
Peso
Las especificaciones y el aspecto exterior están sujetos a cambios
sin previo aviso.
2 vías, reflejo de graves
(de tipo pantalla magnética)
Altavoz para graves :
tipo cónico 120 mm
Altavoz para agudos:
tipo cerámico 20 mm
6 ohmios
87 dB/W/m
155 X 253 x 220 mm
2,6 kg
DERECHOS DE AUTOR
Sírvase comprobar las leyes de derechos de autor relacionadas con
la grabación de discos, de la radio o de cintas del país en el que se
utilice el aparato.
NOTA
Este equipo ha sido puesto a prueba y se encontró que cumple con
los límites para un aparato de la clase B digital, siguiendo la Parte
15 de las Regulaciones de FCC. Estos límites están diseñados para
proveer una protección razonable contra interferencias en una
instalación residencial.
Este equipo genera, usa y puede radiar energía de radio frecuencia
y, en caso de no ser usado e instalado de acuerdo a las instrucciones,
podría causar interferencia nociva a la radio comunicación. Sin
embargo, no existen garantías de que la interferencia no ocurrirá
en una instalación en particular. Si este equipo llega a causar una
interferencia nociva a la recepción de televisión o radio, que puede
determinarse al encender o apagar la unidad, se aconseja al usuario
que trate de corregir la interferencia con una o más de las siguientes
medidas:
- Vuelva a orientar o a colocar la antena de recepción.
- Incremente la distancia de separación entre el equipo y el
receptor.
- Conecte el equipo a una toma o a un circuito distinto de aquel
en que conectó el receptor.
- Para ayuda consulte al distribuidor o a un técnico de radio/
TV con experiencia.
PRECAUCION
Los ajustes o modificaciones hechos a este producto, que no hayan
sido aprobadas expresamente por el fabricante, podrán anular el
derecho o autoridad de operar este producto.
CD
Ul
■I
m
Ili
as
Ul
o
GENERALIDADES
Alimentación
Consumo
Dimensiones de la unidad
principal (An X Al X Prof)
Peso de la unidad principal
CA: 120 V, 60 Hz
50W
173x255,2x248,8 mm
3,65 kg
ESPAÑOL 20
Page 44

INDICE DE LAS PIEZAS
Piezas
CD
MIC.
CLEAR
O GRAPHIC EQUALIZER
Páginas
5
11 REPEAT
7,8
18 PRGM
9 TIMER
15
15
7-11,13,14,16
7-14
7-11,13,14,16
8-12,16,17
8-14
12-14
5
6 ■ CLEAR
9 VOLUME(-,-l-)
Piezas Páginas
0-9, +10
©
RANDOM .................................... 9
EDIT/CHECK
SLEEP..................................... .... 16
CLOCK
BAND/MODE TUNER
SHIFT.......................................
©
FUNCTION
©
POWER
©
II SET.......................................
©
!◄◄/◄◄ DOWN
►>!/►► UP
• TAPE REC/REC MUTE....
► PRESET
...................................
..................................
....................................... 10
......................................
....................................
..............................
...................................
.......................... . . . . . . .
.................................
..............................
...........................
.............
.......................
..........................
.... 8-10,13,14
.... 10
.... 9,13,14
.... 17
.... 16
.... 7
.... 5
.... 5
.... 5
.... 8-12,16,17
.... 7-11,13,14,16,17
.... 7-11,13,14,16,17
.... 12
... 8-14
... 9-14
.... 6
O T-BASS
© DEMO
...........................................
21 ESPAÑOL
EQ
6
6
©
©
............................................
T-BASS
....................................
... 6
... 6
5
Page 45

Page 46

I FRANÇAIS!
AVERTISSEMENT
POUR REDUIRE TOUT RISQUE DE COURT-CIRCUIT OU
D'ELECTROCHOC. VEILLER A CE QUE L'APPAREIL SOIT
A L'ABRI DE LA PLUIE OU DE L'HUMIDITE.
CAUTION
RISK OF ELECTRIC SHOCK
DO NOT OPEN
“CAUTION:TO REDUCE THE RISK OF
ELECTRIC SHOCK,
DO NOT REMOVE COVER (OR BACK).
NO USER-SERVICEABLE PARTS INSIDE.
REFER SERVICING TO QUALIFIED
SERVICE PERSONNEL.”
Explication des symboles:
L'oclair se terminanl par uns lleche dans un
triangle equilateral provient i'utiiisateur de In
presence do ’tension dangeroule non insolé a
I'inteiieur do I'appareil co qui peut provoquer des
déchargés électriques.
1 e point d'exclamation dans un triangle équilatéral
prévient l'utiüsatcur qu'il y a dos instructions
importantes concernant I entretien et lo
fonctionnement dans les manuols ;oint.s a
PRECAUTION
Lire bien attentivement et complètement le mode d’emploi avant
de faire fonctionner l’appareil. Garder le mode d’emploi pour
toute référence ultérieure. Tous les avertissements et précautions
donnés dans ce manuel et sur l’appareil doivent être strictement
suivis ainsi que les conseils de sécurité ci-dessous.
Installation
1 Eau et humidité — ne pas utiliser cet appareil à proximité
d’une source d'eau comme une baignoire, un lavabo, une
piscine ou autres endroits humides.
2 Chaleur — ne pas utiliser cet appareil à proximité de source
de chaleur, comme les sorties de chauffage, les fours et autres
appareils générateurs de chaleur. Il ne doit pas être placé
dans un endroit dont la température est inférieure à 5°C
ou supérieure à 35°C.
3 Surface d’utilisation — Poser l’appareil sur une surface plane.
4 Ventilation — Veiller à ce qu’il y ait suffisamment d’espace
autour de l’appareil afin qu’il y ait une bonne ventilation.
Donner un espace de 10 cm à l’arrière et sur le dessus de
l’appareil et 5 cm de chaque côté.
- Ne pas placer l’appareil sur un lit, un tapis ou toute surface
similaire ce qui pourrait bloquer les orifices de ventilation.
- Ne pas installer l’appareil dans une bibliothèque, une
armoire ou des étagères fermées où l’aération est
insuffisante.
5 Insertion d’objets et de liquide — Veiller à ce qu’aucun
objet ou liquide ne pénètre dans l’appareil par les orifices de
ventilation.
6 Chariots et support — Manipuler
l’appareil avec précaution lorsqu’il est
posé sur un chariot ou un support.
Des arrêts brusques ou une pression
trop forte ou des surfaces inégales
peuvent renverser le chariot ou
l’appareil et le faire tomber.
7 Condensation — De la condensation peut se former sur la
lentille du capteur du lecteur de CD lorsque:
- l’appareil passe d’un endroit froid à un endroit chaud
- le chauffage vient d’être mis
- l’appareil est dans une pièce très humide
- l’appareil est dans une pièce où se trouve une climatisation
S’il y a de la condensation à l’intérieur de cet appareil, il risque
de ne pas bien fonctionner. Dans ce cas, laisser l’appareil
pendant quelques heures; essayer ensuite de le faire
fonctionner.
8 Installation sur mur ou plafond — Cet appareil ne doit pas
être fixé à un mur ou un plafond, à moins que le mode d’emploi
ne le précise.
Alimentation électrique
1 Sources d’alimentation — Brancher cet appareil uniquement
sur les secteurs précisés dans le mode d’emploi et comme
indiqué sur l’appareil
2 Polarisation — Par mesure de sécurité, certains appareils
sont munis de prises polarisées qui ne peuvent être branchées
que d’une seule façon sur secteur - S’il est difficile voire
impossible de brancher la prise sur secteur, retourner la prise
et essayer de nouveau.
Si vous avez toujours des difficultés à l’insérer dans la prise
secteur, veuillez appeler un technicien pour remplacer la prise.
Afin de ne pas abimer le système de sécurité de la prise
polarisée, ne pas forcer en la branchant sur secteur.
3 Cordon d’alimentation secteur
- Pour débrancher le cordon d’alimentation secteur, retirer la
fiche de la prise électrique. Ne pas tirer sur le câble lui-
même.
- Ne jamais manipuler la fiche électrique les mains mouillées,
il y aurait risque d’électrocution ou d’incendie.
- Les cordons d’alimentation ne doivent être pliés, pincés ou
piétinés. Faire particulièrement attention au cordon allant
de l’appareil à la prise d’alimentation.
- Eviter de surcharger les prises d’alimentation et les cordons
de raccordement au-delà de leur capacité ce qui pourrait
provoquer un court-circuit ou un électrochoc.
1 FRANÇAIS
Page 47

4 Cordon de raccordement — Afin d’éviter toute décharge
électrique, ne pas utiliser une prise polarisée avec un cordon
de raccordement, un connecteur ou autre prise de courant à
moins que la prise polarisée puisse être compètement insérée
afin d’éviter que les broches de la prise soient exposées.
5 Période de non-utilisation — Débrancher le cordon
d’alimentation secteur si l’appareil ne doit pas être utilisé
pendant plusieurs mois ou davantage. Lorsque le cordon est
branché, un courant de faible intensité continue de passer
dans l’appareil, même si l’alimentation est coupée.
Antenne extérieure
1 Lignes de tension — Lorsque vous posez une antenne
extérieure, veillez à ce qu’elle soit éloignée de toute ligne de
tension.
2 Mise à la terre de l’antenne extérieure — Veiller à ce que
l’antenne extérieure ait une mise à la terre afin d’apporter
toute protection en cas de survoltage soudain ou bien d’une
formation d’électricité statique. L’article 810 du Code National
de l’Electricité (NEC) ANSI/NFPA70, fournit toute information
concernant la mise à la terre du mât, de la structure de support
et du fil d’entrée allant à l’unité de décharge de l’antenne,
ainsi que la taille de l’unité de mise à la masse, les connexions
aux bornes de mise à la terre et les caractéristiques des
bornes de mise à la terre.
Mise à ia terre de l’antenne selon le Code National de rElectricité
TABLE DES MATIERES
PRECAUTIONS.................................................................1
PREPARATIONS
CONNEXIONS....................................................................3
TELECOMMANDE.............................................................5
AVANT L’INSTALLATION.................................................5
SON_______________________________________
REGLAGE DU SON......................................................... 6
EGALISEUR GRAPHIQUE................................................6
RECEPTION RADIO__________________________
REGLAGE MANUEL
PRESELECTION DES STATIONS
LECTURE DE CD
FONCTIONNEMENT DE BASE....................................... 9
LECTURE PROGRAMMEE........................................... 10
LECTURE DE CASSETTES____________________
FONCTIONNEMENT DE BASE
____________________________
.........................................................
....................................
____________________________
......................................
11
7
8
Entretien
Nettoyer l’appareil en suivant scrupuleusement les instructions
du mode d’emploi.
Pannes nécessitant un entretien
Faire appel à un technicien qualifié uniquement si:
- le cordon d’alimentation ou la prise est endommagé
- des corps étrangers ou du liquide on été introduits dans
l’appareil
- l’appareil a été exposé à la pluie à ou l’humidité
- l’appareil ne semble pas fonctionner normalement
- la performance de l’appareil a changé
- l’appareil est tombé ou son coffre a été endommagé
N’ESSAYEZ PAS DE REPARER VOUS-MEME.
Références du propriétaire
Vous pouvez inscrire les numéros de modèle et de série (que
vous trouverez au dos de votre appareil) dans les cases ci-
dessous. Vous les aurez tout de suite à disposition si vous devez
contacter votre concessionnaire Aiwa en cas de problème.
ENREGISTREMENT__________________________
ENREGISTREMENT DE BASE.......................................12
ENREGISTREMENT AVEC MONTAGE INTELLIGENT. 13
ENREGISTREMENT AVEC MONTAGE PROGRAMME. 14
KARAOKE
MICROPHONE MIXING...................................................15
HORLOGE ET MINUTERIE
REGLAGE DE L’HORLOGE
REGLAGE DE LA MINUTERIE SOMMEIL
REGLAGE DE LA MINUTERIE
_________________________________
____________________
..........................................
....................
.......................................
16
16
17
AUTRES CONNEXIONS_______________________
CONNEXION D’UN APPAREIL OPTIONNEL................
ECOUTE DE SOURCES EXTERNES
...........................
18
18
GENERALITES______________________________
ENTRETIEN
GUIDE DE DEPANNAGE
FICHE TECHNIQUE.........................................................20
NOMENCLATURE......................................................... 21
..................................................................
................................................
19
19
Modèle №
XR-M25 U
№ de Série
FRANÇAIS 2
Page 48

CONNEXIONS
Vérifier ie système et ses acccessoires
■v ' j
XR-M25 Radio
magnétocassette
lecteur de disques
compacts stéréro
Enceintes
[L (gauche), R (droite)]
/
-------------
-------
\ '' y
Avant le branchement du cordon sur secteur
La tension nominale indiquée sur ie panneau arrière de votre
appareil est de 120V CA. Bien vérifier que ia tension nominale
correspond à la tension locale.
IMPORTANT
\
-
• Brancher les enceintes, les antennes et tous les équipements
optionnels en premier. Brancher ensuite le cordon
d’alimentation secteur.
• Il n’y a pas de différences entre les enceintes. Les deux peuvent
être branchées en tant que L (gauche) ou R (droite).
1 Relier les câbles des enceintes à l’unité
principale.
et les câbles noirs aux bornes O.
Télécommandé
Antenne AM
Mode d’emploi, etc.
Antenne FM
Page 49

2 Branchement des antennes fournies
Relier l’antenne FM aux bornes FM 75 Q et l’antenne AM aux
bornes AM LOOP.
BRANCHEMENT D’UNE ANTENNE EXTERIEURE
Pour une meilleure réception FM, il est recommandé d’utiliser p;
une antenne extérieure. <(
Connecter l’antenne extérieure aux bornes FM 75 Q. “■
w
Z
3 Brancher le cordon d’alimentation sur secteur.
Pour placer l’antenne cadre AM sur un support
Fixer la griffe dans la rainure.
Positionnement des antennes
Antenne d’aiimentation FM:
Placer cette antenne à l’horizontal en forme de T et fixer ses
extrémités au mur.
Antenne cadre AM
L’orienter afin d’obtenir la meilleure réception possible.
REMARQUE
' Ne pas brancher sur l’appareil des enceintes autres que celles
qui ont été fournies.
■ Veiller à bien brancher les cables d’enceintes. Un mauvais
branchement provequerait des courts-circuits dans les bornes
SPEAKERS.
Pour connecter tout autre équipement optionnel page 18
- Ne pas laisser près des enceintes des objets produisant un
champ magnétique, tels que les cartes de crédit, car ces objets
risquent d’être endommagés.
> Ne pas mettre l’antenne FM à proximité d’objets métalliques
ou de tringles à rideaux.
« Ne pas mettre l’antenne AM près de tout autre équipement
optionnel, de la chaîne stéréo elle-même, du cordon
d’alimentation ou des câbles d’enceintes ce qui pourrait
intercepter les parasites.
• Ne pas dérouler le fil d’antenne AM.
FRANÇAIS 4
Page 50

TELECOMMAND
Insertion des piles
Retirer le couvercle au dos de la télécommande et insérer deux
piles taille AA (R6).
0
Remplacement des piles
Il est possible de faire fonctionner la télécommande à une
distance d’environ 5 mètres du télédétecteur situé sur l’unité
principale. Lorsque cette distance diminue, remplacer les piles.
Utilisation de la télécommande
Les instructions dans ce manuel font référence aux touches de
l’unité principale. Il est également possible d’opérer à partir des
touches de la télécommande qui portent le même nom.
Utilisation de SHIFT sur la télécommande
Les touches © ont deux fonctions différentes. Une de ces
fonctions est indiquée sur la touche même, et l’autre sur la plaque
au-dessus de la touche.
Pour utiliser la fonction sur la touche, presser simplement la
touche.
Pour utiliser la fonction indiquée sur la plaque au-dessus de la
touche, appuyer à la fois sur cette touche et sur SHIFT.
Utilisation de FUNCTION sur la télécommande
FUNCTION remplace les touches de fonction (TAPE, TUNER,
AUX/VIDEO, CD) de l’appareil principal.
A chaque pression sur cette touche FUNCTION alors que
l’appareil est en marche, la fonction suivante du cycle est
sélectionnée.
^ PRESET sur la télécommande
La fonction est la même que celle de sur l’appareil principal.
AVANT L’INSTALLATIO
Touches de
■ fonction
•DEMO
Pour mettre l’appareil en marche
Appuyer sur une des touches de fonction (TAPE, TUNER, AUX/
VIDEO, CD). La lecture du disque ou de la cassette en place
commence ou bien la station écoutée en dernier est reçue
(fonction de lecture directe).
La touche POWER est aussi disponible.
Arrêt de l’appareil
Appuyer sur POWER.
Mode DEMO (Démonstration)
Lorsque le cordon d’alimentation est branché sur secteur,
l’affichage montre les différentes fonctions de l’appareil. Au
mement d’allumer l’appareil, l’affichage DEMO est remplacé par
l’affichage du mede de fonctionnement en cours. Au moment
d’éteindre l’appareil, l’affichage repasse en mode DEMO.
Pour annuler le mode DEMO
Appuyer sur DEMO. L’horloge disparaît de l’affichage. (Pour
régler l’heure courante, voir “REGLAGE DE L’HORLOGE”
en page 16.) Pour réactiver le mode DEMO, appuyer de
nouveau sur DEMO.
Utilisation du casque
Brancher le casque sur la prise PHONES au moyen d’une mini
fiche stéréo (03,5 mm).
Lorsque le casque est branché, le son des enceintes est coupé.
SHIFT
FUNCTION
REMARQUE
• Si la télécommande ne doit pas être utilisée pendant une
période prolongée, retirer les piles pour éviter les fuites
éventuelles d’acide.
• La télécommande risque de ne pas fonctionner correctement
dans les cas suivants:
- L’espace linéaire entre la télécommande et le capteur situé à
côté de la touche TAPE est exposé à une lumière intense,
comme p.ex. la lumière directe du soleil.
- D’autres télécommandes sont utilisées à proximité (téléviseur,
etc.)
PRESET
5 FRANÇAIS
Page 51

SON
REGLAGE DU SON
^ —
.......................
IL-
O
VOLUME
T-BASS
@
.
......... .
«'---yy.'««
O
>1501 —
!
Jl
T-BASS
VOLUME
CONTROLE DU VOLUME
Tourner le bouton VOLUME sur l’unité principale, ou
appuyer sur la touche VOLUME de la télécommande.
Le niveau du volume est affiché sous forme d’un numéro entre
0 et MAX (31).
Si au moment d’éteindre l’appareil le volume était réglé au niveau
21 ou plus, ce niveau est automatiquement ramené à 20.
EGALISEUR GRAPHIQUE
h
S
ô!
Z
O
Cet appareil permet d’obtenir les trois différentes courbes
d’équalisation suivantes;
ROCK: Son puissant renforçant les aigus et les graves.
POP: Plus de présence dans les voix et la plage moyenne.
JAZZ: Fréquences plus basses accentuées pour les musiques
de type Jazz.
Appuyer sur une des touches GRAPHIC EQUALIZER.
Le mode d’égalisation sélectionné s’affiche.
SYSTEM SUPER T-BASS
Le système T-BASS améliore le réalisme du son à basses
fréquences.
Appuyer sur T-BASS
A chaque pression, le niveau change. Sélectionner selon vos
préférences un des trois niveaux ou bien la position arrêt.
c:
ÜUIIII-I
.. ! ._.
.
..........
.
■III III P
(Annuler)
siiiliiiiai
REMARQUE
Il peut se produire une distorsion dans le son à basse fréquence
lorsque le système T-BASS est utilisé pour un disque ou une
cassette dans lesquels la basse fréquence est augmentée à
l’origine. Dans ce cas, annuler le système T-BASS.
B) 53
/ ;
; / ■
Annulation du mode sélectionné
Appuyer de nouveau sur la touche sélectionnée. “GEQ oFF”
s’affiche.
Pour sélectionner à l’aide de la télécommande
Appuyer plusieurs fois sur EQ. Les différents modes GEQ
s’affichent dans le cycle suivant.
GEQ ROCK ■
GEQ oFF
(Annuler)
msmsmMrniSÊ
GEQ POP GEQ JAZZ -
»
IsiiJ
FRANÇAIS 6
Page 52

RECEPTION RADIO
REGLAGE MANU
SHIFT
1
2
◄ ►DIR/
PRESET
1 Appuyer plusieurs fois sur TUNER/BAND pour
sélectionner la bande souhaitée.
FM AM
r
En cas de pressior. sur la touche TUNER/BAND alors que
l’appareil est éteint, la dernière station captée sera
sélectionnée (Fonction Lecture Directe).
:
BAND/
MODE
TUNER
Lorsqu’une émission FM stéréo comporte des parasites
Appuyer à la fois sur les touches BAND/MODE TUNER et SHIFT
de la télécommande; l’affichage indique alors “MONO”.
Le bruit est réduit mais la réception est monaurale.
Pour revenir à la réception en stéréo, appuyer de nouveau sur
ces touches, si bien que “MONO” disparaît.
: i
Pour changer l’intervalle de mise au point AM
La sélection par défaut de l’intervalle de mise au point AM est
10 kHz/palier. Si vous utilisez cette unité dans une zone où le
système d’allocation des fréquences est de 9 kHz/palier, vous
devez changer l’intervalle de mise au point.
Appuyer à la fois sur POWER et ◄► DIR/PRESET alors que
l’appareil est allumé.
Pour remettre l’intervalle, répéter cette procédure.
REMARQUE
■ Lorsque l’intervalle de mise au point AM est changé, toutes les
stations prérégiées sont effacées et doivent être réglées de
nouveau.
...
I ; ; / ; / /
Choix d’une bande de fréquences à l’aide de la
télécommande.
Appuyer plusieurs fois sur BAND/MODE TUNER.
2 Appuyer sur ◄◄ DOWN ou ►► UP pour
sélectionner une station.
A chaque pression de touche, la fréquence change.
Lors de la réception d’une station, “TUNE” s’affiche
pendant 2 secondes. Pendant une réception FM stéréo,
“((toil)” s’affiche.
T i ! i\ ! i "
Pour rechercher rapidement une station (Recherche automatique)
Maintenir la touche ◄◄ DOWN ou ►► UP pressée jusqu’à ce
que les fréquences se mettent à changer rapidement. La
recherche s’arrête quand une station est captée.
Pour arrêter la Recherche Automatique, appuyer sur ◄◄ DOWN
ou ►► UP.
• La recherche automatique “Auto Search” ne s’arrête pas aux
stations ayant de faibles signaux.
7 FRANÇAIS
Page 53

PRESELECTION DES STATIONS
0-9,
+10
BAND/
MODE
TUNER
L'appareil peut mettre en mémoire un total de 32 stations
préréglées (chaque bande disposant d’une mémoire pour 20
stations au maximum). Lorsque’une station est mise en mémoire,
un numéro de mémoire lui est attribué. Utiliser ce numéro de
mémoire pour capter la station directement.
1 Appuyer sur TUNER/BAND pour sélectionner une
bande, puis sur ◄◄DOWN ou ►►UP pour
sélectionner une station.
CAPTER UNE STATION EN MEMOIRE
utiliser la télécommande pour sélectionner le numéro de
mémoire directement.
1 Appuyer sur BAND/MODE TUNER pour
sélectionner une bande.
2 Utiliser les touches numériques 0-9 et +10 pour
sélectionner un numéro de mémoire.
Exemple:
Pour sélectionner le numéro de mémoire 20, appuyer sur +10,
+10 et 0.
Pour sélectionner le numéro de mémoire 15, appuyer sur +10
et 5.
Sélection d’un numéro de mémoire sur l’unité principaie
Appuyer sur la touche TUNER/BAND pour sélectionner une
bande. Ensuite, appuyer plusieurs fois sur DIR/PRESET.
A chaque pression sur DIR/PRESET, le numéro supérieur
suivant est sélectionné.
Pour effacer une station mémoire
Sélectionner le numéro de mémoire de la station à effacer.
Ensuite, appuyer sur ■ CLEAR, puis en l’espace de 4 secondes,
sur II SET.
Tous les autres numéros de mémoire de la bande supérieurs à
la station effacée, sont alors diminués de un.
0
ci
1
2!
O
P
a.
U
O
ui
№
2 Appuyer sur II SET pour mettre la station en
mémoire.
Un numéro de mémoire est attribué à chaque station, à partir
de 1 et ainsi de suite pour chacune des bandes.
Fréquence
!
....
; ;
!/■■■■; ;r 'i r";
Numéro de mémoire
Répéter les étapes 1 et 2.
Lorsque la mémoire contient déjà 32 stations préréglées au
total pour toutes les bandes, ou 20 stations pour une seule
bande, la station suivante ne sera pas mise en mémoire.
FRANÇAIS 8
Page 54

LECTURE DE CD
FONCTIONNEMENT DE BASE
• RANDOM
■ REPEAT
0-9, +10
EDIT/
CHECK
SHIFT
CHARGEMENT DES DISQUE
Pour ouvrir le plateau, appuyer sur CD, puis sur
CD OPEN/CLOSE. Mettre en piace un disque, face
tournée vers le haut, et refermer le plateau en
appuyant sur CD OPEN/CLOSE.
Pour commencer la lecture lorsque l’appareil est arrêté (Fonction de lecture directe)
Appuyer sur CD. L’appareil se met en marche et la lecture du
CD chargé commence.
En appuyant sur CD OPEN/CLOSE, l’appareil s’allume
également et le plateau s’ouvre.
Vérification du temps de lecture restant
Pendant la lecture, appuyer à la fois sur les touches EDIT/
CHECK et SHIFT de la télécommande. L’affichage indique alors
le temps qui reste jusqu’à la fin de la lecture de toutes les plages.
Pour revenir à l’affichage du temps de la lecture en cours,
appuyer à nouveau sur les touches ci-dessus.
Sélection d’une plage avec la télécommande
Appuyer sur les touches numériques 0-9 et +10 pour sélectionner
une plage.
Exemple:
Pour sélectionner la 25ème plage, appuyer sur +10, +10 et 5.
Pour sélectionner la lOème plage, appuyersur +10 et 0.
La plage sélectionnée commence et la lecture se poursuit jusqu’à
la fin du disque.
REMARQUE
• Pour retirer le disque, appuyer d’abord sur ■ pour arrêter la
lecture, avant d’appuyer sur CD OPEN/CLOSE.
• Pour charger un disque de 8 cm, le placer sur le cercle intérieur
du plateau.
• Ne pas mettre plus d’un disque compact sur un plateau.
• Ne pas incliner l’appareil avec un disque en place. Cela risque
d’entraîner des défaillances.
Calendrier musical
(les 20 premières plages
Temps de lecture total
IB
Ml
■■ -• i •/ ; /1
i ■ ' ■ ■ ; ■■ • "1 i
T '
uniquement sont affichées)
Nombre de plages total
LECTURE D’UN DISQUE
Placer le disque.
Appuyer sur
La lecture de la première plage commence.
Temps de lecteure écoulé
■ : ■ ■■ / /
/ / •/ i /"1
Nombre de plages total
CD
■ OPEN/CLOSE
’3
.
-1 +
LECTURE ALEATOIRE/LECTURE REPETEE
LECTURE ALEATOIRE
Toutes les plages du disque peuvent être lues de façon aléatoire.
Appuyer à la fois sur les touches SHIFT et RANDOM de la
télécommande.
“RANDOM” s’affiche sur la fenêtre.
Pour annuler l’écoute aléatoire, appuyerde nouoveau sur les
touches
REMARQUE
• Pendant la lecture aléatoire, il n’est pas possible de sauter à la
plage lue juste avant au moyen de ◄◄.
• Si, en cours de lecture aléatoire, les plages sont sélectionnées
directement à l’aide des touches numériques, le mode de
lecture aléatoire est annulé.
• Lors de la lecture aléatoire. Il n’est pas possible d’opérer le
“Ci. 1”.
Pour arrêter la lecture, appuyer sur ■.
Pour marquer une pause de lecture, appuyer sur II. Pour
recommencer la lecture, appuyer de nouveau.
Pour rechercher un point particulier pendant la lecture,
maintenir -«<◄ ou ►► appuyée et relâcher au moment voulu.
Pour passer au début d’une plage pendant la lecture, appuyer
plusieurs fois sur ◄◄ ou ►>-.
Pour retirer le disque, appuyer sur CD OPEN/CLOSE.
FRANÇAIS
Page 55

LECTURE REPETEE
Il est possible d’écouter à plusieurs reprises une seule ou
l’ensemble des plages.
Pour répéter le disque tout entier, sélectionner “Ci-”.
Pour répéter la plage souhaitée, sélectionner “Ci- 1”.
Appuyer à la fois sur les touches SHIFT et REPEAT de la télécommande.
Chaque pression sur ces touches permet de sélectionner une
des opérations du cycle.
@ci.
® Ci- 1
© Annulation
2 Appuyer sur les touches numériques 0-9 et +10
pour programmer une plage.
Exemple:
Pour sélectionner la plage 12, appuyer sur +10 et 2.
Pour sélectionner la plage 20, appuyer sur +10, +10 et 0.
Temps de lecture total des
Numéro de programme
1
Numéro de la plage
sélectionnées
plages sélectionnées
Nombre total des plages
sélectionnées
41
Ul
CI
Ul
d:
e
O
Ul
CI
Ci- 1
©
REMARQUE
' Lors de l’écoute en “C*-”, Il n’est pas possible d’utiliser la lecture
aléatoire.
■ En cas démarrage de la lecture aléatoire en cours de lecture
1”, la lecture répétéé sera annulée.
' Pour répéter uniquement les plages sélectionnées, programmer
les plages souhaitées (voir ci-dessous) avant de sélectionner
la fonction “C*.”.
Pour annuler la lecture répétée, appuyer de nouveau sur les
touches.
»îSiSâaSîK
/N
LECTURE PROGRAMME
I est possible de programmer jusqu’à 30 plages du disque inséré.
■ REPEAT
2
3 Répéter l’étape 2 pour programmer d’autres
plages.
4 Appuyer sur ^ pour commencer la lecture.
Pour vérifier le programme
A chaque pression de ◄◄ ou ►► en mode d’arrêt, un numéro
de plage et un numéro de programme s’affichent.
Pour effacer le programme
Appuyer sur ■ CLEAR en mode arrêt.
Pour ajouter des plages au programme
Avant la lecture, répéter l’étape 2. La plage sera programmée
après la dernière plage.
Pour changer les plages programmées
Effacer le programme et reprendre à nouveau toutes les étapes.
Répétition de la lecture des plages programmées
Après avoir programmé les plages, appuyer à la fois sur les
touches SHIFT et REPEAT de la télécommande; le voyant “C*.”
s’allume.
REMARQUE
' Lors de la lecture programmée, il n’est possible d’utiliser les
fonctions suivantes:
- Lecture aléatoire.
- Répétition d’une plage (QL 1).
’ Si le temps programmé dépasse 99:59 minutes, ou si la plage
du disque programmée est le numéro 31 ou plus, le temps de
lecture total affiché sur la fanêtre indique
■ ◄ ◄ , ► ►
4
Utiliser la télécommande.
1 Appuyer à la fois sur les touches SHIFT et PRGM
en mode arrêt.
“PRGM” s’affiche à l’écran.
SI
; / ■■■ i ! i
; : -f i ; i
FRANÇAIS 10
Page 56

LECTURE DE CASSETTES
FONCTIONNEMENT OE BASE
■± EJECT
MISE EN PLACE DE LA CASSETTE
• Vous pouvez sélectionner le mode d’inversion pour la relecture
d’un côte ou de deux.
• Pour la lecture, utiliser des cassettes de Type I (normale), Type
II (high/CrOa) ou de Type IV (métal).
Pour ouvrir le logement de cassette, appuyer sur TAPE/ REV MODE et ensuite sur A EJECT.
LECTURE D’UNE CASSETTE
Insérer une cassette. Ensuite appuyer sur la touche pour
démarrer la lecture.
IB
: ■: ;
iiiM
►- : la face avant est lue (orientée vers l’avant).
◄ : la face arrière est lue (orientée vers l’arrière).
I i : i i / i ! :
/ / i i ; ; / ■'
Le compteur indique la durée
de défilement de la bande
Pour arrêter la lecture, appuyer sur ■.
Pour marquer une pause de lecture, appuyer sur II. Pour
reprendre la lecture, appuyer de nouveau.
Pour changer de côté de lecture, appuyer sur DIFl/
PRESET en mode lecture ou pause.
Pour une avance rapide ou un rebobinage, appuyer sur ◄◄
ou ►► en mode arrêt. Ensuite appuyer sur ■ pour arrêter la
bande.
Pour démarrer la lecture lorsque l’appareil est éteint (Fonction de lecture directe)
Appuyer sur TAPE. L’appareil s’allume, et la lecture de la cassette
en place commence.
Face lue de la cassette
‘5
Insérer la cassette avec le côté exposé vers le bas. Pousser le
logement de cassette pour le refermer.
Pour séiectionner ie mode d’inversion
A chaque pression sur la touche TAPE/REV MODE, le sens de
la lecture s’inverse.
c
B
I ;■■■■■/ :■
Pour lire un seul côté, sélectionner
Pour lire la face avant à la face arrière uniquement, sélectionner
Z).
Pour lire les deux faces à plusieurs reprises, sélectionner CZ).
.............
;■■■ : î / i ; / î
Ê2
Pour mettre le compteur à 0000.
Appuyer sur ■ CLEAR en mode arrêt.
Le compteur se met à 0000 lorsque le logement de cassette est
ouvert.
Au sujet des cassettes
• Pour éviter un effacement accidentel, utiliser un tournevis
ou tout autre objet pointu pour casser les ergots en plastique
de la cassette après l’enregistrement.
Pour enregistrer de nouveau sur la cassette, recouvrir les
cavités des ergots avec du ruban adhésif ou autre.
> Le ruban magnétique des cassettes de 120 minutes ou
plus est estrêmement fin et se déforme ou s’abime
facilement. Ces cassettes ne sont pas recommandées.
• Tendre le ruban adhésif avec un crayon ou un objet
similaire avant d’utiliser la cassette. Un ruban magnétique
détendu peut se rompre ou s’emmêler dans le mécanisme.
1 1 FRANÇAIS
Page 57

ENREGISTREMENT
ENREGISTREMENT DE BASE
Cette section explique comment réaiier un enregistrement à partir
du tuner, du lecteur de CD ou d’un équipement externe.
oo
oo
oo
oo
oo
oo
O
O
Préparation
• Utiliser uniquement des cassettes de Type I (Normal).
• Mettre la bande à l’endroit où i’enregistrement doit commencer.
1 Insérer la cassette à enregistrer dans son logement.
Insérer la cassette avec la face à enregistrer en premier vers
l’extérieur de l’appareil et le côté exposé vers le bas.
«TAPE REC/
REC MUTE
Pour démarrer l’enregistrement avec la télécommande
Appuyer d’abord sur • TAPE REC/REC MUTE, puis en l’espace
de 2 secondes, sur ►.
Réglage du son pendant l’enregistrement
Il est possible de varier librement le volume et le son des
enceintes ou du casque sans que cela affecte l’enregistrement.
INSERTION D’ESPACES BLANCS
L’insertion d’espaces blancs de 4 secondes permet de repérer
le début d’une plage sur d’autres appareils. Cet appareil peut
insérer des blancs seulement quand la source est TUNER ou
AUX/VIDEO.
1 Appuyer sur • REC/REC MUTE pendant l’enregistrement
ou en mode pause d’enregistrement.
L’indication iüJh clignote pendant 4 secondes à l’affichage,
et la bande tourne sans enregistrer. Au bout des 4 secondes,
l’appareil se met en mode pause d’enregistrement.
2 Appuyer sur II pour reprendre l’enregistrement.
Pour insérer un blanc de moins de 4 secondes, appuyer de
nouveau sur • REC/REC MUTE pendant que i:l=tH clignote.
Pour insérer des blancs de plus de 4 secondes, appuyer de
nouveau sur • REC/REC MUTE lorsque l’appareil s’est mis en
mode pause d’enregistrement.
Chaque pression sur • REC/REC MUTE ajoute un blanc de 4
secondes.
* Cet appareil ne possède pas la fonction qui permet de repérer te début
d’une plage.
W
Ul
w
<
O
Ul
Q
U
«
3
H
U
lU
Ul
s
Ul
flC
K
<n
flC
Z
Ul
2 Appuyer sur TAPE/REV MODE pour sélectionner
le mode d’inversion.
Pour enregistrer sur une face uniquement, sélectioner "Z..
Pour enregistrer sur les deux faces, sélectionner ID ou CI).
3 Appuyer sur fonction (TUNER, AUX/VIDEO ou
CD) et préparer la source à enregistrer.
Pour enregistrer à partir d’un CD. appuyer sur CD et mettre
le disque en place.
Pour enregistrer à partir d’une émission de radio, appuyer
sur TUNER/BAND et se régler sur une station.
Pour enregistrer à partir d’une source connectée, appuyer
sur AUX/VIDEO et démarrer la lecture.
4 Appuyer sur • REC/REC MUTE pour commencer
l’enregistrement.
Lorsque la fonction sélectionnée est CD, la lecture et
l’enregistrement démarrent simultanément.
i ■■■■; /■ / /■■■■:
;
...
i !
0S
Pour arrêter l’enregistrement, appuyer sur ■.
G
Pour marquer une pause d’enregistrement, appuyer sur II
(applicable dans le cas où la source est TUNER ou AUX/VIDEO).
Pour reprendre l’enregistrement, appuyer de nouveau sur cette
touche.
MHz
REMARQUE
Il n’est pas possible d’enregistrer lorsque la fonction TAPE est
sélectionnée.
Pour effacer un enregistrement
S’assurer que le microphone n’est pas connecté à i’appareil.
Insérer la cassette à effacer dans la platine.
Positionner la bande à l’endroit où vous voulez commencer
l’effacement.
Mettre l’appareil en mode d’inversion en appuyant sur TAPE/
REV MODE.
Appuyer sur AUX/VIDEO et éteindre l’appareil connecté.
Appuyer sur • REC/REC MUTE pour commencer
l’effacement.
FRANÇAIS 1 2
Page 58

ENREGISTREMEhiï AVEC MONTAGE INTELLIGENT (“Al EDIT”
4
Longueur de bande
rcnl
Plages
Nombre de plages
programmées
sélectionnées
pour face A
a
Face de la bande Temps restant
A; Première face enregistrée sur cette face A
B: Deuxième face enregistrée
4
La fonction de montage intelligent permet d’enregistrer des CD
sans se préoccuper ni de la longueur de la bande ni de celle des
plages. Lorsqu’un CD est mis en place, l’appareil calcule
automatiquement la longueur totale des plages. Eventuellement,
l’ordre de lecture des plages sera modifié, si bien qu’aucune
plage ne sera coupée.
(“Al” : Intelligence Artificielle)
REMARQUE
L’enregistrement avec montage intelligent ne peut pas démarrer
à la moitié de la bande. Il faut que la bande se trouve au début
de l’une ou l’autre face.
Utiliser la télécommande pour les étapes 2 à 5.
1 Insérer la cassette dans son logement.
Placer la cassette avec la face à enregister en premier vers
l’extérieur de l’appareil.
2 Appuyer plusieurs fois sur FUNCTION jusqu’à ce
que l’affichage indique “CD”, puis mettre ie
disque en piace.
3 Appuyer à ia fois sur SHIFT et une fois sur EDiT/
CHECK.
Le voyant “EDIT” s’allume et “Al” clignote à l’affichage.
Al EDIT
H
__ ____
-IA TdITI LJ ■■
A chaque pression sur la touohe, l’affichage change comme
suit.
/ / :
Al EDIT
! i
U i....iT' I • .
PRGM EDIT
[I
5 Pour démarrer i’enregistrement, appuyer d’abord
sur • TAPE REC/REC MUTE, puis en j’espace
de 2 secondes sur
La bande est rebobinée au début de la face avant, le segment
de tête défile pendant 10 secondes, puis l’enregistrement
commence. A la fin de de la face avant (A), l’enregistrement
se poursuit sur la face arrière (B).
Arrêt de l’enregistrement
Appuyer sur ■. L’enregistrement et la lecture du CD s’arrêtent
en même temps.
Annulation du programme de montage
Appuyer deux fois sur ■ CLEAR. L’indication “EDIT” disparaît
de l’affichage.
Vérification de l’ordre des numéros de plages programmées
Avant l’enregistrement, appuyer à la fois sur SHIFT et EDIT/
CHECK pour sélectionner la face A ou B, puis appuyer plusieurs
fois sur ◄◄ ou
Face de la bande
; i
’ /
Numéro de
programmée
liwsl
Numéro de plage
programmée
T
Numéro de plage
Durée des cassettes et temps de montage
La vraie durée des cassettes est généralement un peu plus
longue que celle indiquée sur l’étiquette. Cet appareil est capable
de programmer les plages en tenant compte de ce temps
supplémentaire. Lorsque, après montage, la durée totale
d’enregistrement est un peu plus longue que la durée spécifiée
sur la cassette, l’affichage indique le temps supplémentaire (sans
le signe moins) au lieu du temps restant sur la bande (avec le
signe moins).
REMARQUE
• L’enregistrement n’est pas possible si l’ergot anti-effacement
de l’une ou l’autre face de la cassette a été cassé.
• La fonction de montage intelligent ne peut pas être utilisée
pour des disques de 31 plages ou plus.
4 Appuyer sur les touches numériques 0-9 pour
indiquer la longueur de la bande.
Il est possible d’indiquer des longueurs de 10 à 99 minutes.
Exemple: Pour une cassette de 60 minutes, appuyer sur 6 et 0.
En quelques secondes, l’appareil détermine les plages à
enregistrer sur chaque face de la cassette.
• Il est également possible d’indiquer la longueur de la bande
à l’aide des touches et
13 FRANÇAIS
Page 59

ENREGISTREMENT AVEC MONTAGE PROGRAMME
Cette fonction d’enregistrement permet de programmer ies
plages tout en vérifiant le temps restant disponible sur chaque
face de la cassette en cours de programmation.
REMARQUE
L’enregistrement avec montage programmé ne peut pas
démarrer à la moitié de la bande. Il faut que la bande se trouve
au début de l’une ou l’autre face.
Utiliser la télécommande pour les étapes 2 à 8.
6 Répéter l’étape 5 pour les autres plages à
enregistrer en face A.
Il n’est pas possible de programmer une plage dont la durée
est plus longue que le temps restant disponible.
Plage
sélectionnée
Wj
Ël
Numéro de
programme
I
jp
Temps restant Plages
sur face A programmées
I ........................
,....]
.....
7 Appuyer à la fois sur SHIFT et EDIT/CHECK pour
sélectionner la face B et programmer les plages
à enregistrer en face B.
Lorsque la confirmation de “B” apparaît à l’affichage, répéter
l’étape 5.
Face de la bande B (face arrière)
na
; i ■/ /
/ /
; i
igpiSIlijl
Hi
8 Pour démarrer l’enregistrement, appuyer sur
• TAPE REC/REC MUTE, puis en l’espace de 2
secondes sur
La bande est rebobinée au début de la face avant, le segment
de tête défile pendant 10 secondes, puis l’enregistrement
commence. A la fin de de la face avant (A), l’enregistrement
se poursuit sur la face arrière (B).
H
S
U
s
U
a
M
Ö
lU
te
Z
III
1 Insérer la cassette dans son logement.
Placer la cassette avec la face à enregister en premier vers
l’extérieur de l’appareil.
2 Appuyer plusieurs fois sur FUNCTiON jusqu’à
ce que l’affichage indique “CD”, puis mettre le
disque en place.
3 Appuyer à la fois sur SHIFT et deux fois sur EDIT/
CHECK.
Le voyant “EDIT” s’allume et “PRGM” clignote à l’affichage.
PRGM
EDIT
’5
U C /................
—I i I / / i ■; !
liJ
4 Appuyer sur les touches numériques 0-9 pour
indiquer la longueur de la bande.
Il est possible d’indiquer des longueurs de 10 à 99 minutes.
Exemple: Pour une cassette de 60 minutes, appuyer sur 6 et 0.
• Il est également possible d’indiquer la longueur de la bande
à l’aide des touches ◄◄ et ►>-.
Durée maximum
Longueur de bande d’enregistrement face A
Arrêt de l’enregistrement
Appuyer sur ■. L’enregistrement et la lecture du CD s’arrêtent
en même temps.
Vérification de l’ordre des numéros de plages programmées
Avant l’enregistrement, appuyer à la fois sur SHIFT et EDIT/
CHECK pour sélectionner la face A ou B, puis appuyer plusieurs
fois sur ◄◄ ou
Face de la bande
Modification du programme de chaque face
Appuyer à la fois sur SHIFT et EDIT/CHECK pour sélectionner
la face A ou B, puis appuyer sur ■ CLEAR pour effacer le
programme pour la face sélectionnée. Reprogrammer ensuite
les plages.
Annulation du programme de montage
Appuyer deux fois sur ■ CLEAR. L’indication “EDIT" disparaît
de l’affichage.
O r.
io»
Face de la bande A
(face avant)
5 Appuyer sur les touches numériques 0-9 et +10
pour programmer une plage.
Exemple: Pour sélectionner la plage 10, appuyer sur +10 et 0.
REMARQUE
L’enregistrement n’est pas possible si l’ergot anti-effacement de
l’une ou l’autre face de la cassette a été cassé.
FRANÇAIS 14
Page 60

KARAOKE
MICROPHONE MIXING
Un microphone (non fourni) peut être branché sur cet appareil,
ce qui permet de chanter avec accompagnement par une source
musicale.
Utiliser un microphone muni d’une mini-fiche (o3,5 mm).
Avant de connecter un microphone
Régler le volume MIC VOL sur MIN.
REMARQUE
• Si le microphone est trop près des enceintes, un soufflement
peut se produire. Dans ce cas, éloigner le microphone des
enceintes ou baisser le volume du microphone.
• Si le son du microphone est très fort, il y a risque de distortion.
Dans ce cas, baisser le volume du microphone.
Microphone conseillés
Il est conseillé d’utiliser un microphone de type unidirectionnel
afin d'éviter une réaction acoustique (hurlement). Pour plus de
détails, contacter le revendeur Aiwa.
1 Brancher le microphone sur la prise MIC.
MIC
2 Appuyer sur une des touches de fonction pour
sélectionner la source à mixer et procéder à la
lecture de la source.
3 Régler le volume et la tonalité de la source. 4 Tourner MIC VOL pour régler le volume du
microphone.
Si la fonction TAPE est choisie comme source, le son du
microphone est émis par les enceintes seulement quand la
cassette est en lecture.
Pour enregistrer le son du microphone mixé avec la source sonore.
Suivre la procédure d’enregistrement à partir de la source sonore
(voir page 12).
La fonction TAPE ne peut être utilisée pour le mixage
d’enregistrements.
Non-utilisation du microphone
Régler MIC VOL sur MIN et retirer le microphone de la pris^
MIC.
15 FRANÇAIS
Page 61

HORLOGE ET MINUTERIE
REGLAGE DE L’HORLOGE
CLOCK
SHIFT
1 Appuyer à la fois sur SHIFT et CLOCK, puis en
l’espace de 4 secondes sur II SET.
L’heure clignote.
: :
/ /
2 Appuyer sur ◄◄ DOWN ou ►► UP pour spécifier
l’heure, puis appuyer sur II SET.
L’heure s’arrête de clignoter sur i’affichage alors que les
minutes ciignotent.
3 Appuyer sur ◄◄ DOWN ou ►► UP pour spécifier
la minute, puis appuyer sur II SET.
Les minutes s’arrêtent de clignoter sur l’affichage, et l’horloge
se met en marche avec 00 secondes.
I
1
1
2
Il est possible de laisser l’appareil s’éteindre automatiquement
après un laps de temps donné.
Utiliser la télécommande.
1 Appuyer à la fois sur SHIFT et SLEEP.
SI
; / / ;
...; / / /■ ■
SLEEP
; i
►► pour indiquer le laps de temps à la fin duquel
l’appareil doit s’éteindre.
Chaque pression sur la touche augmente ce temps de 5
minutes, dans les limites de 5 à 240 minutes.
iSflwli
~5
r
OU2 En l’espace de 4 secondes, appuyer sur ^ ^
ui
O
<
BC
<
ÌC
U
s
Ul
llr
3
Z.
s
ü;
lU
ÌE9
O
■■J
IK
O
X
Affichage de l’heure courante
Appuyer à la fois sur les touches SHIFT et CLOCK de la
télécommande. L’heure s’affiche pendant 4 secondes.
Toutefois, i’affichage de l’heure n’est pas possible pendant un
enregistrement.
Commutation sur le système de 24 heures
Appuyer à la fois sur les touches SHIFT et CLOCK de la
télécommande, puis en l’espace de 4 secondes, sur ■.
Répéter ce processus pour revenir au système de 12 heures.
L’horloge clignote alors
Cela signifie qu’il y eu une coupure de courant du secteur. Il
faut alors refaire le réglage de l’heure courante.
Si le courant est coupé pendant plus de 24 heures environ, il
faut refaire le réglage de tout ce qui a été mis en mémoire
après l’achat de l’appareil.
Laps de temps donné
1
; ; / / / / ! i /
O L. C." C ' ■’ U_
&Ü ; !» ■
Vérification du temps qui reste avant que l’appareii s’éteint
Appuyer à la fois sur SHIFT et SLEEP. Le temps qui reste
s’affiche pendant 4 secondes.
Annulation de la minuterie sommeil
Appuyer à la fois sur SHIFT et deux fois sur SLEEP, pour que
“SLEEP oFF” apparaisse à l’affichage.
FRANÇAIS 1 6
Page 62

REGLAGE DE LA MINUTERIE
4 Choisir ia durée d’activation de ia minuterie à
i’aide des touches ◄◄ DOWN ou ►► UP, puis
appuyer sur II SET.
Grâce à la minuterie incorporée, il est possible de laisser
l’appareil s’allumer chaque jour à une heure donnée.
Préparation
S’assurer que l’horloge est correctement réglée (Se référer à la
page 16).
Utiliser la télécommande.
1 Appuyer à la fois sur SHIFT et une fois sur TIMER
pour que le signe “0” s’affiche, puis, en l’espace
de 4 secondes, appuyer sur 11 SET.
Le signe “©” s’affiche et l’heure clignote.
a
;
....
T:
fcwü
0
La durée d’activation de la minuterie est réglable entre 5 et
240 minutes, par intervalles de 5 minutes.
/
/ /■■
../ .....^
■ i /
5 Préparation de ia source
Pour écouter un CD. mettre le disque en place.
Pour écouter une cassette, insérer la cassette dans son
logement.
Pour écouter la radio, se régler sur une station.
Pour écouter un appareil connecté sur prises VIDEO/AUX.
régler la minuterie (externe) de la source connectée et
préparer la lecture.
6 Après avoir régié ie voiume et ie son, appuyer
sur POWER pour éteindre i’appareii.
Le signe “©” reste affiché une fois que l’appareil est éteint
(mode “veille” de la minuterie).
D ;\/i
:■
.
©
Lorsque l’heure donnée est atteinte, l’appareil s’allume et
commence la lecture de la source choisie.
Si au moment d’éteindre l’appareil le volume était réglé au
niveau 21 ou plus, ce niveau est automatiquement ramené à
i / /
20.
i ; i •/ ; / /
F™=*SSISlB
5
: ■
■/ /
....
■
T‘.
,IÇ
tSfsl
; !
; i
©
Une pression sur II SET après 4 secondes risque de
déclencher une autre opération.
2 Spécifier i’heure de mise en marche de i’appareii
en appuyant sur DOWN ou UP, puis
appuyer sur II SET. Répéter ce processus pour
spécifier ia minute.
a
©
Une fois que l’heure de mise en marche est donnée, un des
noms de sources clignote à l’affichage.
;..Ì / /
h ■
......
Ì \ /
3 Appuyer piusieurs fois sur FUNCTiON pour
séiectionner une source, puis appuyer sur
Il SET.
Le nom de la source sélectionnée clignote.
a
/ .;
/
■yr_
„ =■ ’i
■iÜîilSJ
• Il est également possible de sélectionner une source à l’aide
des touches ◄◄ et
• En cas de sélection de TUNER, il n’est pas possible de
choisir une bande de fréquences au cours de cette étape.
PPSrlIEiP
/ I i i
_J
17 FRANÇAIS
Vérification de i’heure donnée et de ia source
Appuyer à la fois sur les touches SHIFT et TIMER de la
télécommande. L’heure donnée de mise en marche, le nom de
la source choisie et la durée d’activation de la minuterie clignotent
en alternance pendant 4 secondes.
Annulation provisoire du mode veille de la minuterie
Appuyer à la fois sur les touches SHIFT et plusieurs fois TIMER
de la télécommande jusqu’à ce que le signe “©” ou “© rec”
disparaisse de l’affichage.
Pour revenir en mode veille de la minuterie, appuyer à la fois
sur SHIFT et une ou deux fois sur TIMER pour afficher soit le
signe “©”, soit “© rec”.
Utilisation de l’appareil avec minuterie réglée
L’appareil peut s’utiliser normalement même lorsque la minuterie
est réglée.
Avant d’éteindre l’appareil, effectuer l’étape 5 pour préparer la
source et régler le volume et le son.
REMARQUE
• La lecture et l’enregistrement avec minuterie ne pourra
commencer que si l’appareil est éteint.
• La minuterie incorporée de cet appareil ne peut allumer ou
éteindre une source connectée. Utiliser pour cela une minuterie
externe.
ENREGISTREMENT AVEC MINUTERIE
Cette fonction ne s’applique qu’aux sources TUNER et AUX/
VIDEO (avec minuterie externe).
Appuyer à la fois sur les touches SHIFT et plusieurs fois
TIMER de la télécommande jusqu’à ce que le signe “© rec”
apparaisse à l’affichage, puis en l’espace de 4 secondes.
appuyer sur II SET. Suivre les instructions de “REGLAGE DE
LA MINUTERIE” à partir de l’étape 2, et insérer la cassette à
enregistrer dans son logement après l’étape 5.
Page 63

AUTRES CONNEXIONS
CONNEXION
OPTIONNEL
Se référer au mode d’emploi de l’appareil connecté pour plus
de détails.
• Les cordons de raccordement ne sont pas fournis. Se procurer
les cordons de raccordement adéquates.
• Se renseigner auprès du concessionaire Aiwa local pour les
appareils optionnels.
ECOUTE DE SOURCES EXTERNES
Pour la lecture des équipements branchés sur les prises VIDEO/
AUX, procéder de la façon suivante.
1 Appuyer sur AUX/VIDEO.
“AUX” apparaît à l’affichage.
2 Mettre l’appareil connecté en marche.
Ul
E
lU
H
3
lyy
O
O
.J
IK
O
X
w
Z
O
X
IIJ
Z
Z
O
O
(A
lU
K
I-
3
PRISES VIDEO/AUX
Cet appareil peut recevoir des signaux sonores analogiques par
ces prises. Utiliser un câble à fiches phono RCA pour connecter
un appareil audio (tourne-disque, lecteur de disque compact,
magnétoscope, etc.).
Relier la prise rouge à la fiche VIDEO/AUX R et la prise blanche
à la fiche VIDEO/AUX L.
Connexion d’un tourne-disque
Utiliser un tourne-disque Aiwa muni d’un amplificateur equaliseur
intégré.
PRISE SUPER WOOFER "d
Connecter un caisson de graves alimenté optionnel muni d’un
amplificateur intégré à cette prise.
Modification d’un nom de source à i’affichage
En appuyant sur AUX/VIDEO, l’affichage indique d’abord “AUX”.
Il est possible de changer entre “TV” ou “VIDEO”.
L’appareil étant allumé, appuyer à la fois sur AUX/VIDEO et
POWER.
Répéter la procédure pour sélectionner un des noms de source.
FRANÇAIS 18
Page 64

GENERALITES
ENTRETIEN
Un entretien régulier de la chaîne et du logiciel est nécessaire
afin d’optimiser les performances de cet appareil.
Nettoyage du coffret
Utiliser un chiffon doux et sec.
Si les surfaces sont très sales, prendre un chiffon légèrement
humecté d’une solution détergente douce. Ne pas utiliser des
solvants forts tels que l’alcool, la benzine ou le diluant car ils
pourraient endommager le fini de l’appareil.
Nettoyage des têtes de lecture et des chemins de bande
Nettoyer les têtes de lecture et les chemins de bande toutes les
dix heures d’utilisation, avec une cassette de nettoyage ou un
coton-tige imbibé d’un liquide de nettoyage ou d’alcool dénaturé.
(Vous pouvez vous procurer ces kits de nettoyage dans le
commerce).
Lors du nettoyage avec un coton-tige, essuyer la tête
d’enregistrement/de lecture, la tête d’effacement, les cabestans
et les galets ponceurs.
J
GUIDE DE DEPANNAG
Si l’appareil ne fonctionne pas comme décrit dans ce mode
d’emploi, contrôler le guide suivant:
GENERALITES
Il n’y a pas de son.
• Le cordon d’alimentation est-il branché correctement?
• N’y-a-t-il pas une mauvaise connexion? {-♦ page 3)
• Il y a peut-être un court-circuit dans les bornes d’enceinte.
-► Débrancher le cordon d’alimentation puis corriger les
connexions d’enceinte.
• Une mauvaise touche de fonction a-t-elle été appuyée?
Le son sort que d’une seule enceinte.
• Est-ce que l’autre enceinte est débranchée?
De mauvais affichage ou fonctionnement se produisent.
-♦ Réinitialiser l’appareil comme indiqué ci-dessous.
PARTIE TUNER
Il y a des charges statiques constantes en forme d’onde.
• L’antenne est-elle branchée correctement? (-+ page 3)
• Le signal est-il faible?
-► Connecter une antenne extérieure.
La réception présente des parasites ou le son présente
de la distorsion.
• Le système ne capte-t’il pas des bruits extérieurs ou des ondes
réfléchies?
-♦ Changer l’orientation de l’antenne.
-► Eloigner l’appareil de tout appareil électrique.
Après le nettoyage des tâtes de lecture et des chemins de bande
à l’aide dune cassette de nettoyage ou d’un coton-tige humide,
attendre que les parties nettoyés soient complètement sèches
avant d’introduire une cassette.
Pour démagnétiser les têtes
Il se peut que les têtes deviennent magnétisées après un certain
temps d’utilisation. Ceci peut réduire la plage de sortie des
cassettes enregistrées et augmenter les bruits. Après 20 à 30
heures d’utilisation, démagnétiser les têtes avec un
démagnétiseur disponible dans le commerce.
Soin des disques
• Lorsqu’un disque est sale, l’essuyer en partant du centre et en
allant vers l'extérieur avec un chiffon propre.
• Après la lecture d’un disque, le ranger dans son étui. Ne pas
laisser le disque dans un endroit chaud ou humide.
Soin des cassettes
• Ranger les cassettes dans leur boite après utilisation.
• Ne pas laisser les cassettes près d’aimants, de moteurs
électriques, de téléviseurs ou toute autre source de champ
magnétique. Ceci dégraderait la qualité du son et provoquerait
des bruits.
• Ne pas exposer les cassettes à la lumière du soleil directe; ne
pas les laisser dans une voiture garé au soleil.
19 FRANÇAIS
PARTIE PLATINE CASSETTES La bande ne défile pas.
• La platine est-elle en mode pause? (-♦ page 11)
Le son n’est pas équilibré ou pas assez haut.
• La tête de lecture est-elle sale? (-» page 19)
Enregistrement impossible.
• Un ergot de sécurité de la cassette n’est-il pas cassé? (-♦ page
11)
• La tête d’enregistrement est-elle sale? (-► page 19)
Effacement impossible.
• La tête d’effacement est-elle sale? (-+ page 19)
• Une cassette au métal a-t-elle été utilisée?
Il n’y a pas de sons aigus.
• La tête d’enregistrement/de lecture est-elle sale? (-► page 19)
PARTIE LECTEUR DE CD La lecture ne fonctionne pas.
• Le disque est-il correctement inséré? (-> page 9)
• Le disque est-il sale? (-* page 19)
• La lentille de lecture a-t-elle de la condensation?
Attendre environ une heure et essayer de nouveau.
Pour réinitialiser
Si une anomalie apparaît sur la fenêtre d’affichage ou dans la
platine cassettes, réinitialiser l’appareil de la manière suivante:
1 Appuyer sur POWER pour éteindre l’appareil
2 Appuyer à la fois sur ■ CLEAR et POWER pour rallumer
l’appareil. Toutes les données mémorisées après l’achat sont
effacées.
Si, à cause d’une défaillance, il est impossible d’éteindre
l'appareil comme indiqué à l’étape 1, remettre à zéro en
débranchant puis reconnectant le cordon d’alimentation secteur.
Continuer ensuite par l’étape 2.
Page 65

FICHE TECHNIQ
Unité principale XR-M25
Partie tuner FM
Plage d’accord
Sensibilité utile (IHF)
Bornes d’antenne
Partie tuner AM
Plage d’accord
Sensibilité utile
Antenne
Partie amplificateur
Puissance de sortie
Distorsion harmonique totale
Arrivés
Sorties
Partie platine cassettes
Format des plages
Réponse de fréquence Bande
Rapport signal/bruit
Système d’enregistrement
Têtes
Partie Lecteur CD
Laser
Conversion N/A
Rapport signal/bruit
Distorsion harmonique
Pleurage et scintillement
Généralités
Alimentation électrique secteur
Consommation électrique
Dimensions de
l’unité principale (L x H x P)
Poids de l’unité principale
87,5 MHz à 108 MHz
13,2 dBf
75 ohms (asymétrique)
530 kHz à 1710 kHz
(pas de 10 kHz)
531 kHz à 1602 kHz
(pas de 9 kHz)
350 pV/m
Antenne cadre
20W + 20W (1 kHz,
T.H.D. 10%, 6 ohms)
0,08% (10,5 W, 1 kHz,
6 ohms)
VIDEO/AUX: 0,4 V
MIC: 1,8 mV (10 kohms)
SUPER WOOFER: 1,0 V
SPEAKERS: acceptent des
enceintes de 6 ohms ou plus
PHONES (mini prise
stéréo): accepte un casque
de 32 ohms ou pius
4 plages, 2 canaux stéréo
Bande CrOz:
50 Hz - 16000 Hz
Bande normale:
50 Hz - 15000 Hz
50 dB (bande Cr02 niveau
de crête, 1 kHz)
Polarisation CA
1 tête d’enregistrement/
lecture X 1
1 tête d’effacement x 1
Laser à semi-conducteurs
(X = 780 nm)
1 bit double
75 dB (1 kHz, 0 dB)
0,1 %(1 kHz, OdB)
Non mesurable
AC: 120 V, 60 Hz
50 W
173x255,2x248,8 mm
3,65 kg
Enceintes
Type de caisson
Enceintes
Impédance
Niveau de pression
accoustique de sortie
Dimensions (L x H x P)
Poids
Les spécifications et l’aspect extérieur peuvent être modifiés sans
préavis
2 voies, basse reflex
(de type écran magnétique)
Woofer:
120 mm type conique
Tweeter:
20 mm type céramique
6 ohms
87 dB/W/m
155 X 253 X 220 mm
2,6 kg
DROITS D’AUTEUR
Pière de vérifier les lois sur la propriété artistique relative à
l’enregistrement de disques, de la radio ou de cassettes dans le
pays dans lequel l’appareil est utilisé.
REMARQUE
Cet appareil a été testé et a été déclaré correspondre aux limites
pour un appareil digital de classe B, selon la Section 15 de la
régulation FCC. Ces limites sont destinées à fournir une
protection raisonnable contre toute interférence néfaste dans
une installation résidentielle.
Cet appareil génère, utilise et peut radier de l’énergie de
fréquence radio et s’il n’est pas installé et utilisé selon les
instructions il peut engendrer des interférences néfastes pour
les communications radio. Cependant, il n’y a pas de garantie
qu’aucune interférence n'interviendra dans une installation
précise. Si cet appareil ne cause pas d’interférence néfaste aux
réceptions radio et télévision, ce qui peut être déterminé en
mettant l’appareil sous et hors tension, l’utilisateur est encouragé
à essayer de corriger l’interférence en prenant les mesures
suivantes;
- réorienter ou changer de place les antennes réceptrices.
- augmenter la séparation entre l’appareil et le récepteur.
- connecter l’appareil sur une prise ou un circuit différent de
celui du récepteur.
- consulter le concessionnaire ou un technicien radio/TV
compétent.
ATTENTION
Les modifications ou ajustements de cet appareil, qui ne sont
pas expressément approuvés par le fabricant, peuvent annuler
les droits ou le pouvoir de i’utilisateur à opérer ce produit.
(«1
Ul
H
ü'
<
GE
U
Z
U
O
FRANÇAIS
20
Page 66

NOMENCLATUR
Nom
CD
MIC.
O GRAPHIC EQUALIZER
Page
5
11 REPEAT...................................... 10
7,8 EDIT/CHECK
18
9
15
15
7-11,13,14,16
7-14
7-11,13,14,16
8-12,16,17
8-14
12-14
5
6
9
Nom
0-9, +10
0
RANDOM
PRGM......................................
TIMER......................................
SLEEP
CLOCK.................................... .... 16
BAND/MODE TUNER
SHIFT.......................................
©
FUNCTION
©
POWER
©
II SET.......................................
©
!◄◄/◄◄ DOWN
►►!/►► UP......... . . . . .. .. .. .. . .. .. .. .. . .
• TAPE REC/REC MUTE ....
■ CLEAR
► PRESET
VOLUME
...................................
...............................
..........................
.....................................
.............
..............................
...................................
.......................
.................................
..............................
.................................
Page
.... 8-10,13,14
.... 9
.... 9,13,14
.... 10
.... 17
.... 16
.... 7
.... 5
.... 5
.... 5
.... 8-12,16,17
.... 7-11,13,14,16,17
.... 7-11,13,14,16,17
.... 12
.... 8-14
.... 9-14
.... 6
® DEMO
.................................................
21 FRANÇAIS
EQ
6
6
5
©
©
............................................
T-BASS
....................................
.... 6
.... 6
Page 67

Page 68

For assistance and information,
call toll free 1-800-BUY-AIWA. (United States and Puerto Rico)
Printed in China
AIWA CO., LTD.
 Loading...