

Airtraq CAM Video Camera Instructions

AIRTRAQ – VIDEO CAMERA
Model – ATQ-032
INSTRUCTIONS
INDEX
1. DESCRIPTION AND INDICATIONS
2. CAMERA COMPONENTS
3. OPERATING INSTRUCTIONS
3.1. Camera Switches, Indicators and connectors
3.2. Battery Charge
3.3. Mounting the camera onto the Airtraq
3.4. Viewing on a monitor
3.5. Viewing on a Laptop Computer
3.6. Recording
3.6.1 DVD recorder
3.6.2 Laptop computer
4. CLEANING INSTRUCTIONS
5. STORAGE AND TRANSPORT
6. TECHNICAL DATA
7. FCC and IC INFORMATION
8. MANUFACTURER’S WARRANTY
1 of 7

1. DESCRIPTION AND INDICATIONS
The Airtraq Camera has been specially designed to work as an accessory for the
AIRTRAQ Optical Laryngoscope. It should be mounted on top of the AIRTRAQ after
removing the original rubber viewfinder. Placing and removing the Camera of the
Camera from the AIRTRAQ is a simple and quick operation.
The Camera provides the ability to transmit the images of the glottis obtained
when intubating to an external monitor (e.g. any monitor In the operating room, any
other portable monitor which has a composite (RCA) video input or even a laptop
computer through a video capture card. It provides full color, real-time images.
The Camera automatically transmits images by Radiofrequency at 2.4 Ghz.
making it possible to work wireless when using the optional Airtraq Wireless Receiver.
Radiofrequency signal is only emitted when the video cable is not connected.
The Camera allows one to also record the intubation, via a DVD recorder or to a
laptop computer with a video capture card.
2. CAMERA COMPONENTS
Camera Set ATQ-032
2.1.1. Camera
CMOS video camera with rechargeable Li-Ion Battery and wireless
2.4 GHz emitter.
2.1.2. Video Cable
Coaxial cable to connect the Camera to an external monitor (RCA
connector). Length: 6 m.
2.1.3. Camera stand-alone battery charger
Charger for the Li-Ion Battery of the Camera.
2.1.4. RCA / BNC Adaptor
Adaptor needed to connect the video cable to most monitors found in
Operating Theaters
2.1.5. Camera case
2 of 7
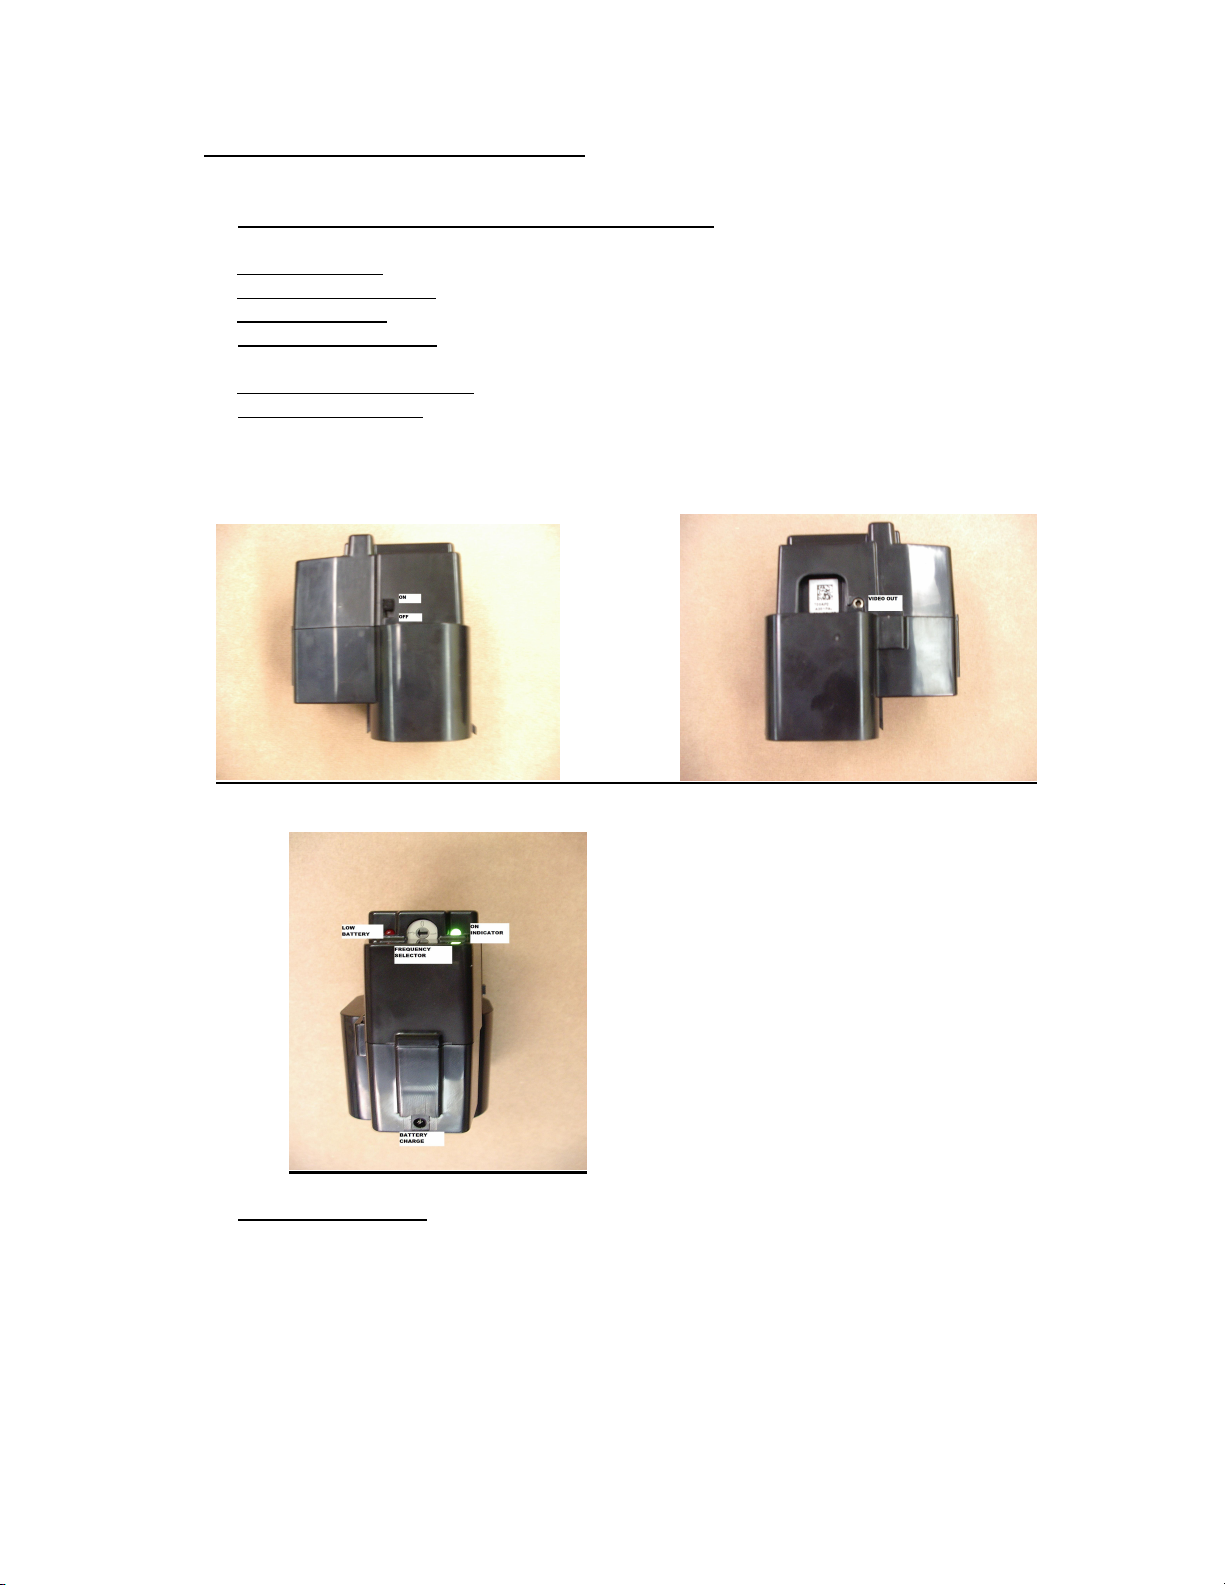
3. CAMERA OPERATING INSTRUCTIONS
3.1 Camera Switches, Indicators and connectors
On- Off Switch :
Video Out Connector:
Ready indicator:
Low Battery indicator:
Turns green when the camera is switched on
Turns red when the camera batteries are below 10% of its capacity.
The camera will still operate for approximately 20 to 30 minutes.
Battery charge connector:
Frequency Selector:
To be used only in conjunction with the optional Wireless Receiver.
See Wireless Receiver instructions for use.
3. 2 Battery Charge
The camera DOES NOT WORK WHEN IT IS BEING CHARGED.
1. Connect the stand-alone battery charger to the electricity supply. The LED of
the charger will give a green light
2. Connect the connector into the camera. Upon connecting the camera to the
charger the camera will automatically turn off and neither of its two LEDs will
light. The LED of the charger change to red to indicate charging.
3 of 7
 Loading...