


Airsmart Technology R602BPWI User Manual

Manual for the MUZEN ORIGINAL Ⅱ AM&FM RADIO & BLUETOOTH SPEAKER(M2)
Thank you for buying the M2 Radio! Please read this manual carefully and make sure to follow
the relevant safety instructions before using it!
Product features
1. The M2 Radio is made of woods such as walnut and rosewood. The materials are hard, yet
delicate and smooth, with anti-cracking, anti-bacterial, corrosion-resistant characteristics and
more! Each radio has a unique texture and personality.
2. The M2 Radio has been cut, degummed, sealed, dried, precast, shaped, paneled, formed, and
had 27 other processes carried out on it while being hand-made over 60 days.
3. It uses a mechanical copper deceleration tuning knob for a smooth user experience!
4. Each radio displays special fluorescent vacuum tube from the 1950s to 1970s that shows
changes in electrical signals.
5. Excellent HiFi sound quality.
6. The M2 Radio uses a two-frequency speaker, a silk film treble, a woolen paper cone, and a
heavy bass speaker which can really show off the characteristics of a variety of music genres.
7. It utilizes the CSR 8645 Bluetooth scheme, NFC quick connection and supports APTX
transmission without disruption.
Packing list (Suggested illustration)
1. Radio x 1
2. Power cord x 1
3. Manual x 1
4. External FM antenna x 1
5. External AM antenna x 1
6. Spare fuse x 1
7. Warranty card x 1
8. Product certificate x 1
9. Postcard x 2
10. Sticker x 2
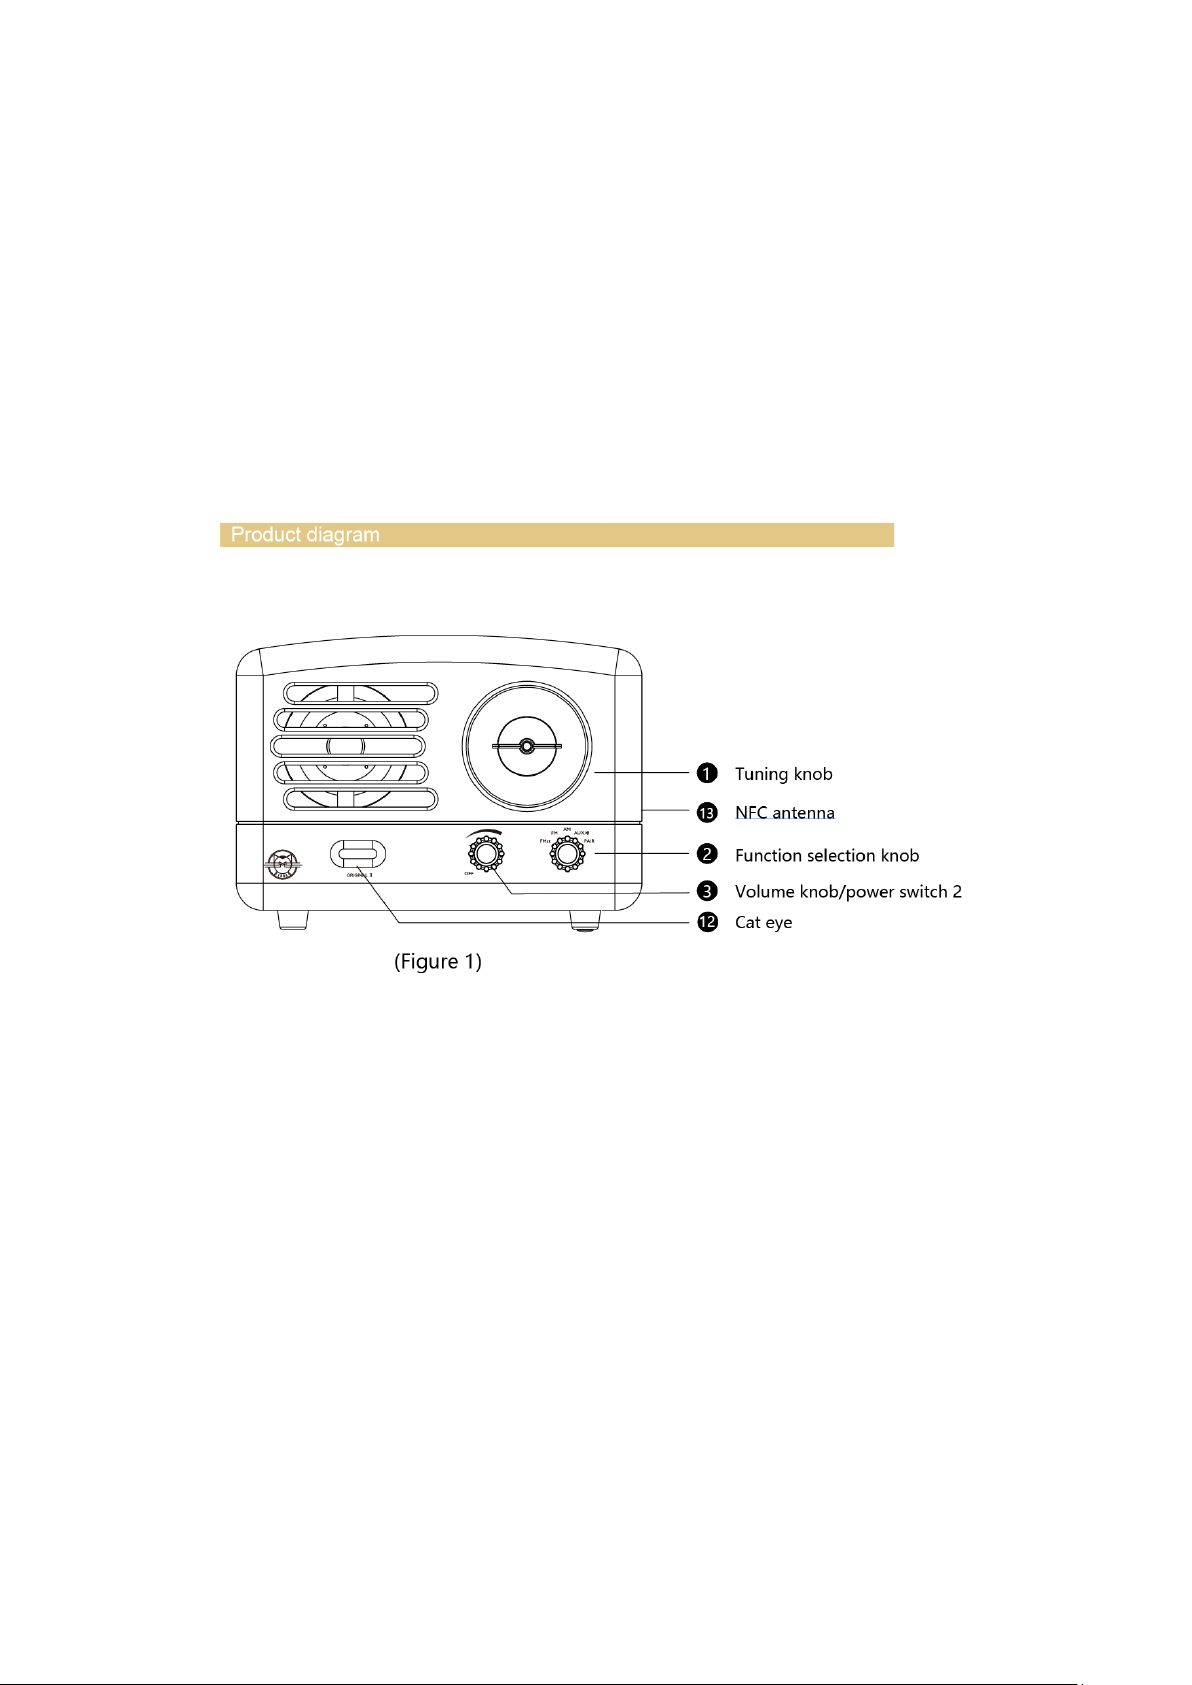
Product diagram
Figure 1
1. Tuning knob
13. NFC antenna
2. Function selection knob
3. Volume knob/power switch 2
12. Cat eye
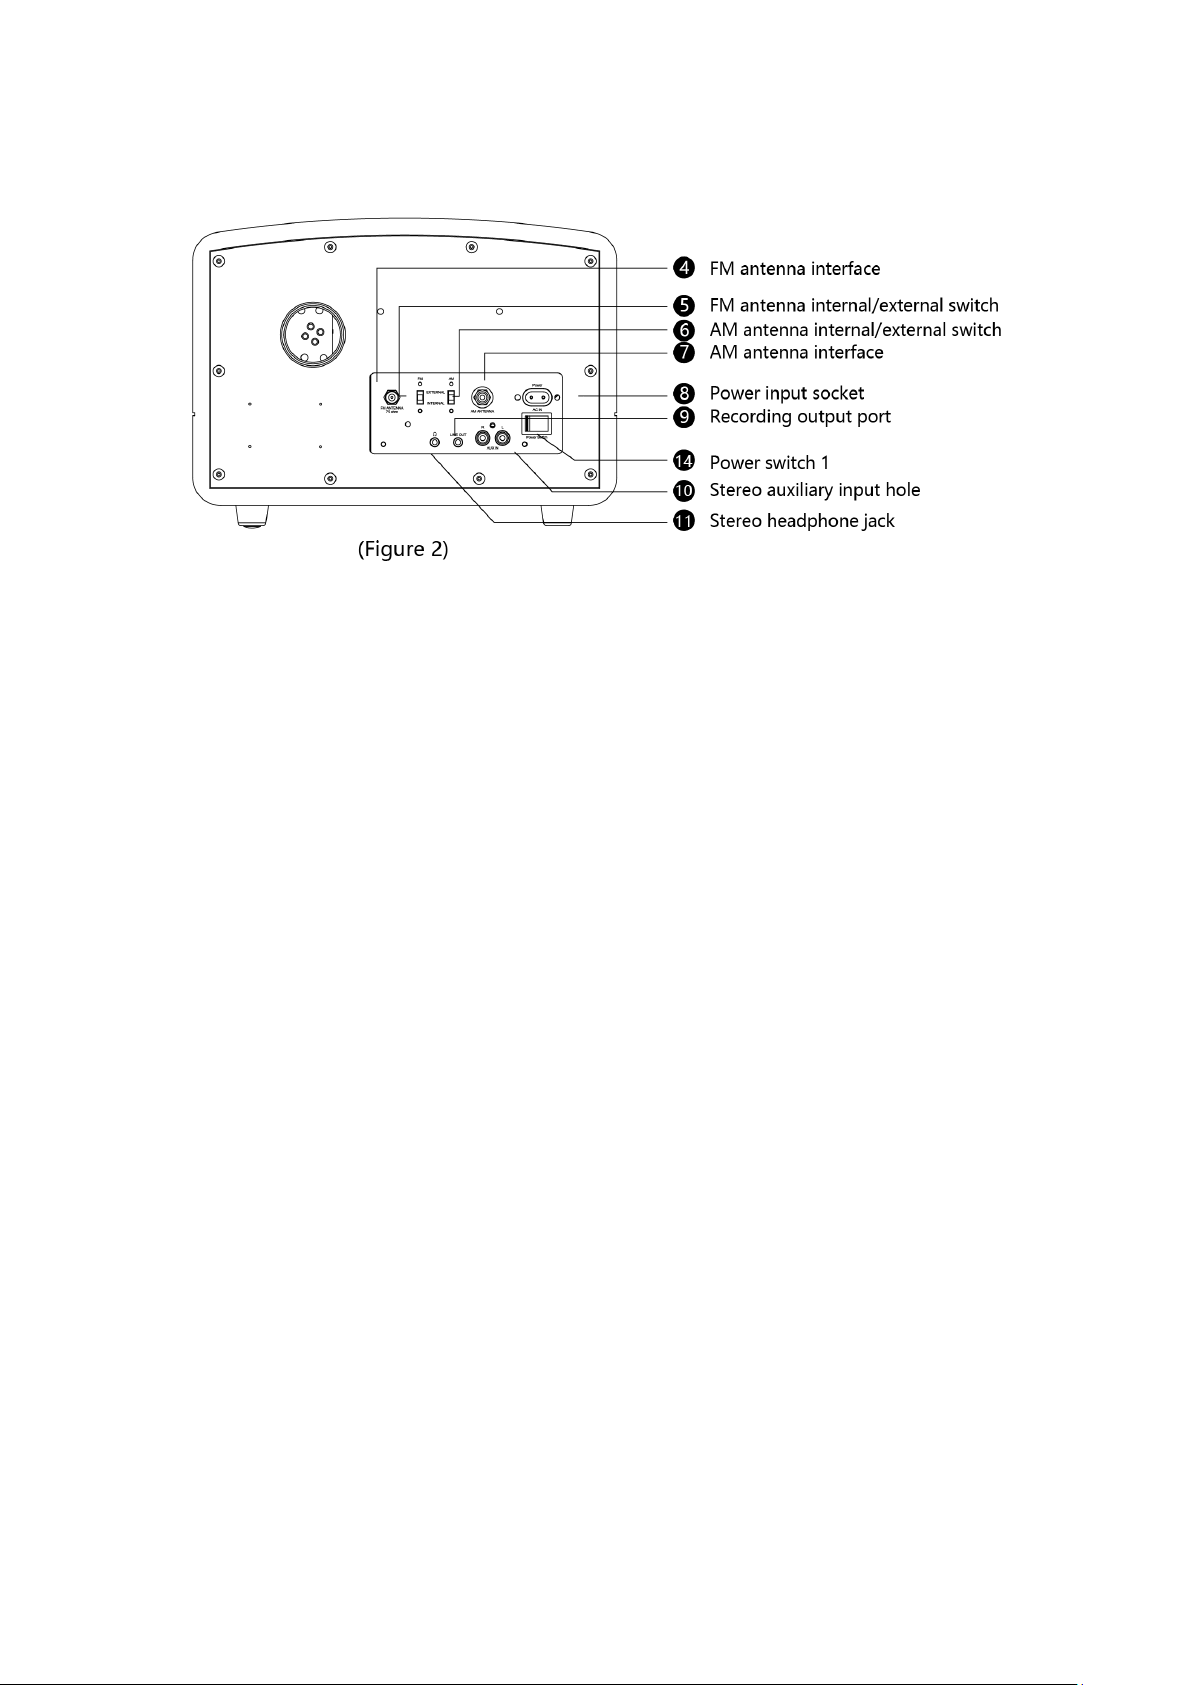
Figure 2
4. FM antenna interface
5. FM antenna internal/external switch
6. AM antenna internal/external switch
7. AM antenna interface
8. Power input socket
9. Recording output port
10. Stereo auxiliary input hole
11. Stereo headphone jack
14. Power switch 1
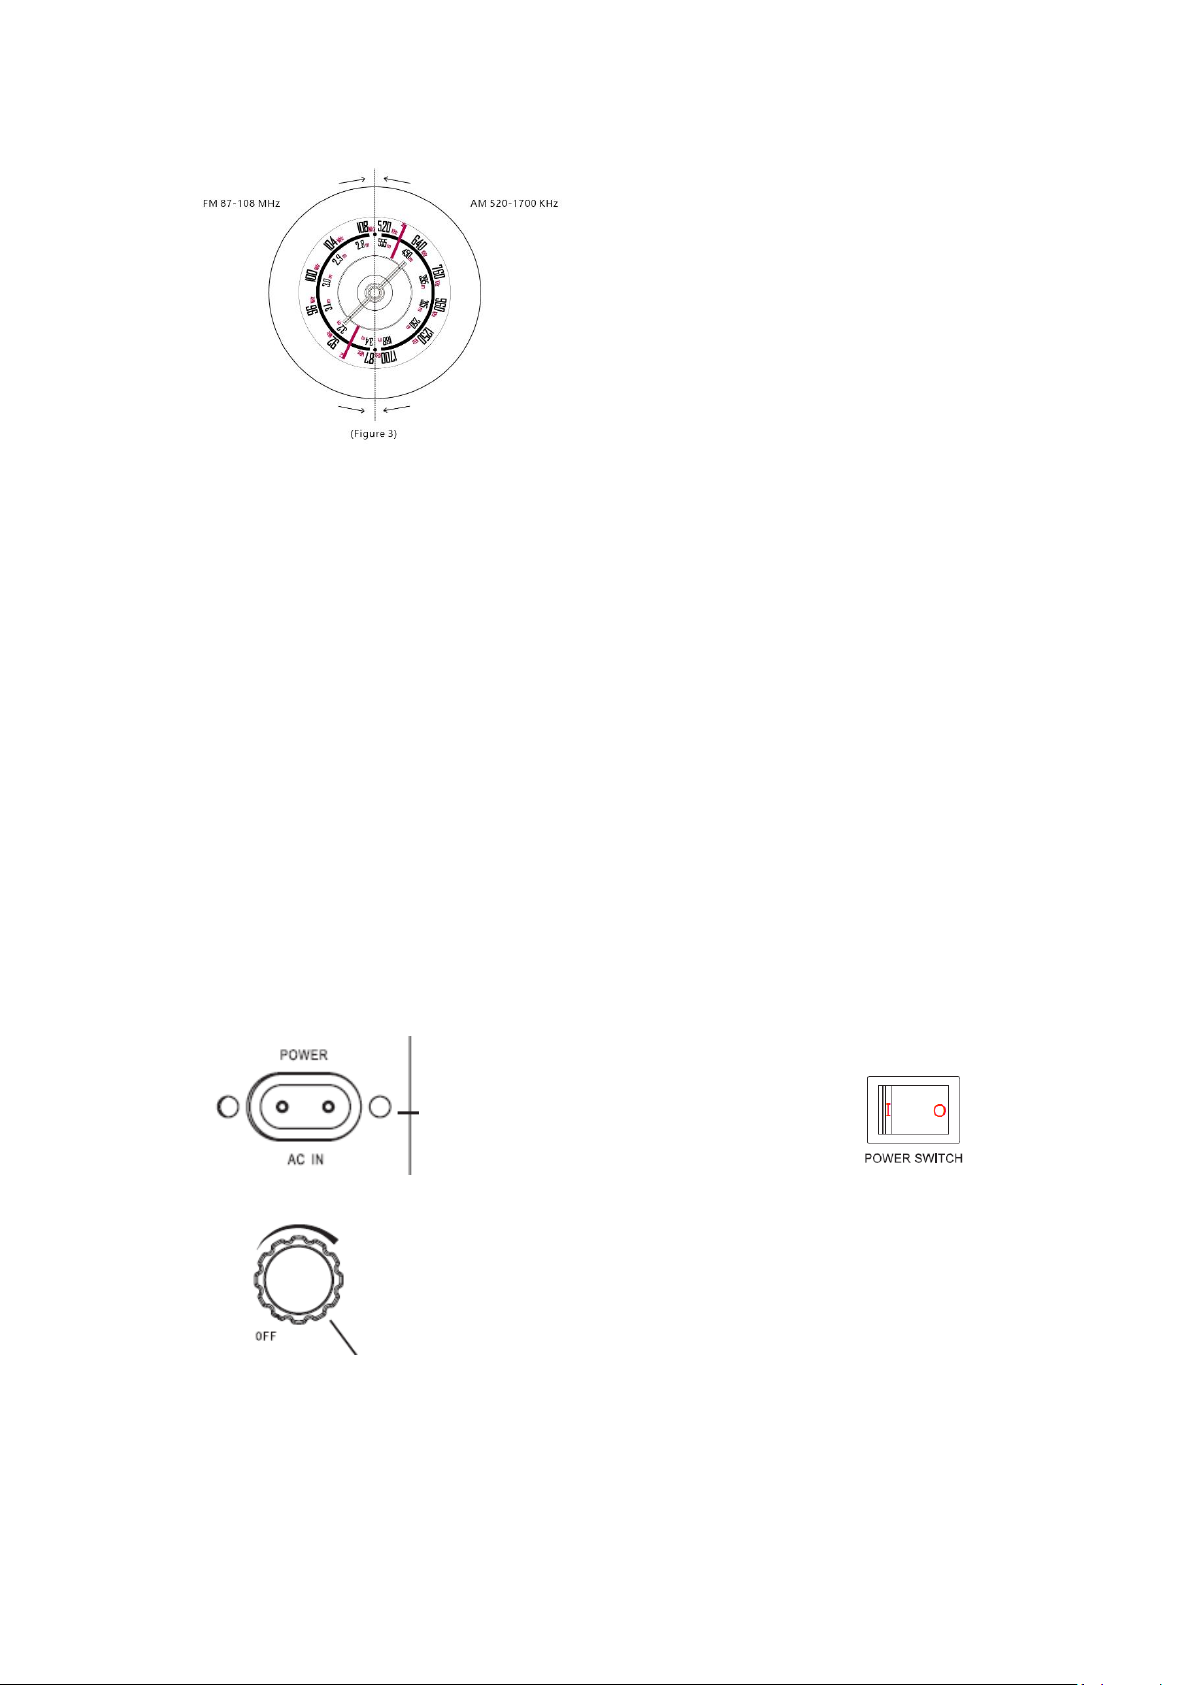
Figure 3 Tuning knob
Usage
1. Startup & Shutdown
1. ·Use the device’s power cord to connect the power.
(It is recommended to use the schematic diagram as illustrated)
2. ·Flip the power switch 1 to “I” and the power will turn on.
3. ·Turn power switch 2/volume control knob clockwise until you hear a snap as the power
switch is turned on. Turn the power off by turning it counterclockwise.
4. ·When not using the machine for long periods of time, flip power switch 1 to “O” to turn
off the power.
5.
2. Volume adjustment
(Diagram of analog power cord connecting machine)