

Page 1

Page 2

AIRSHIP DVR Quick Setup Guide
Manual Revision 1.20
Page 3

2
Table of Contents
AIRSHIP DVR SERVER SETUP ............................................................... 3
1. FIRST LOGIN ............................................................................................. 3
2. CAMERAS .................................................................................................. 4
3. SETUP ....................................................................................................... 5
4. PLAYBACK .................................................................................................. 6
5. RECOMMENDATIONS .................................................................................. 7
ADD IP CAMERAS TO DVR SERVER................................................... 8
1. WHAT TO KNOW ........................................................................................ 8
2. LICENSING ................................................................................................ 9
3. ADDING A NEW IP CAMERA ..................................................................... 10
4. VIEWING AND CONFIGURING IP CAMERAS .............................................. 11
5. RECOMMENDATIONS ................................................................................ 12
AIRSHIP DVR CLIENT SETUP .............................................................. 13
1. MINIMUM SYSTEM REQUIREMENTS .......................................................... 13
2. AIRSHIP WEB CLIENT ........................................................................... 14
3. AIRSHIP DESKTOP CLIENT INSTALLATION ............................................. 15
4. FIRST LOGIN ........................................................................................... 16
5. SETUP ..................................................................................................... 17
6. CONNECTING TO DVR SERVERS .............................................................. 18
7. IF RETRIEVE SERVER PROPERTIES FAILS ................................................. 19
8. VIEWING CAMERAS ................................................................................. 20
9. PLAYBACK ................................................................................................ 21
10. RECOMMENDATIONS ................................................................................ 22
AIRSHIP CLIENT SETUP FOR EMBEDDED DVR ............................... 23
1. CONNECTING TO AN EMBEDDED DVR ...................................................... 23
2. IF RETRIEVE SERVER PROPERTIES FAILS ................................................. 24
3. LICENSING .............................................................................................. 25
REMOTE CONFIGURATION ............................................................... 26
Page 4

3
AIRSHIP DVR Server Setup
1. First Login
Default Username and Passwords
There are 3 default user groups, each with different user
permissions. Use the System account to log in the first time and
to setup other users. The passwords are CaSe SeNsItIvE, so be
sure that the Caps Lock key is not active on the keyboard.
User: system
Password: system
Group: Administrators
Abilities: Can connect from remote. Complete system
configuration and access. This user cannot be deleted or changed
to non-administrator rights. Its password can and should be
changed.
User: admin
Password: admin
Group: Administrators
Abilities: Can connect from remote. Complete system
configuration and access. Its password can and should be
changed.
User: poweruser
Password: poweruser
Group: Power Users
Abilities: Can connect from remote, use all features, and
configure everything EXCEPT User Management and General
System settings. You can give the Power Users Group the General
System settings permission if you deem it necessary.
User: operator
Password: operator
Group: Operators
Abilities: Can access all cameras and playback during both local
and remote usage. Cannot change system settings or manage
users.
Page 5

4
2. Cameras
Change Screen Layout
Click the button to select how many cameras
(screens) to view at one time.
Double-Click a screen to pop it to 1 Screen View; Double-Click
again to return to multiple views.
Right-Click and choose Full Screen or hit the ESC key or your
keyboard to pop the cameras to Full Screen. Hit the ESC key
again to return to normal view.
NOTE: It is not possible to reorder the cameras on the layout
screen. Cameras will only display in their pre-assigned grid space.
Camera List
Explore the Cameras list in the left Security Assets column.
Click the camera icon to turn a Live View off and on.
Click the round icon to manually turn recording off and on.
Click the siren icon to manually turn on alarm monitoring.
This one stays white until an alarm event is detected – then it
turns red until the alarm event is ended.
NOTE:
Manual control is not available when the schedule is active.
Change Camera Color Settings
TIP: Use the Color panel in the Camera Adjust section at the
bottom left to change the Camera color settings – this can
help to make your video as clear as possible!
Page 6

5
3. Setup
Click on the button to open the Server Setup screen.
Folders on the left menu can be branched open by clicking on the
+ signs beside each item. Click on a folder to see its summary.
System
Click the + sign next to the System folder
View the General folder for settings that affect the entire
system, such as Alarm Duration, Audible Alarm sounds, Video
recording storage locations, On-Screen PTZ operation, etc.
View the Network folder to enable or disable remote access
by client or web browser, and to configure Email Server
settings.
Devices
Add, edit and view IP devices in this section, such as IP
cameras or video servers.
User Management
Go to User Management, Users.
Click on Edit User to change each user’s password. Remember:
passwords are CaSe SeNsItIvE, so make sure the Caps Lock
is off.
Add users as needed for Server or Client access. Place users
into groups to restrict their AIRSHIP abilities. Email addresses
are used for Email features throughout the software.
Cameras
Go to the Cameras folder, click the + sign to see the list of
analog cameras. Click on one to see its settings.
On the Display tab on the right, you can give your Camera a
real name.
On the Schedule tab you can create recording schedules for
normal and/or Motion Detection recording periods.
(NOTE: The button back on the Live server screen
needs to be clicked to activate your schedule.)
On the Alarms tab you can tell AIRSHIP what to do when an
Alarm occurs.
Page 7

6
4. Playback
On the main Server screen, click the button on
the upper left.
Drag a camera from the list on the left onto a display screen
on the right. You should see video for that camera, starting
with the first recordings of the current day.
Click on Digital Zoom at the top to zoom in on 3 different
areas of the recording at the same time.
Click the Snapshot button to take pictures of video frames
while you are reviewing the recording.
Double-click on the Timeline to see the video you want at
that point in time.
Playback Options
Use the Calendar panel on the bottom-left to choose from
previous days. A RED date means there is recording data
available for that day, and a WHITE date means no recordings
on that day.
Click on Clip Mode to export a clip of your recorded video.
Use the Motion Search panel to search for movement
recorded by the camera.
Use Seek to pull up a particular time from a camera or
several cameras.
Click Calendar to go back to normal mode viewing.
TIP: Check out the Tools menu for lots of functions like
Snapshot Viewer, License Info, Weekly Review, and
Exported Clips Viewer.
Page 8

7
5. Recommendations
We want you to explore the software, so here is a list of settings
that are beneficial in many environments. See the User’s Guide
for complete details.
Change all Default User Passwords to secure your systems
against unauthorized access.
Activate Pre-Record for 5 seconds.
If you have PTZ cameras, configure them and then turn on
the On-Screen PTZ Control.
Set the Alarm Video Profile on the Video and Schedule Tab
at a higher quality than Normal recordings.
Even if Motion Detection is not being used, alarm
monitoring must be turned on in the schedule for each
camera that will be monitored for any alarms events.
To increase how long past camera recordings are kept (Video
Retention), reduce normal recording quality and/or reduce
the frame rate, or turn off continuous recording altogether.
If no one needs to access the Server remotely, turn off
Remote and Web Client access.
Make and set camera Motion Detection Areas so that trees
in the distance (or other such objects) don’t set off alarms.
Set the Colors on each camera to get the best image. Use
Color Schedule for outdoor cameras.
TIP: Avoid running other applications on your AIRSHIP DVR
Server. Doing so may affect the server’s ability to accurately
record video.
TIP: Low Impact anti-virus software can be run at the same time
with AIRSHIP. However, be sure to configure the AV software so it
does not scan MPG files.
Page 9

8
Add IP Cameras to DVR Server
1. What to Know
Before we can connect an IP Camera to your AIRSHIP DVR, there
are some basic prerequisites that you must know and complete in
setting up your IP Camera. Follow the IP Camera
Manufacturer’s instructions to complete this list:
Determine the Make and Model number of the IP Camera.
The IP Camera must be on the same network as the AIRSHIP
DVR. Determine the IP Camera’s IP Address and Port Number.
You will need to first connect the IP camera to a PC to change
the network settings and password using the setup tool that
comes with the camera to put it on the same network as the
AIRSHIP DVR Server.
The IP Camera must be configured with a User and Password.
We recommend not using the default user and password
combination, as this publicly accessible information can
compromise security.
TIP: To ensure your IP cameras are on the same network as the
AIRSHIP DVR server, be sure that the first three number sets of
the camera’s IP address match the first three number sets of the
AIRSHIP DVR. The last number of the IP address must be less
than 256 and unique to every other device on your network.
Example:
If the AIRSHIP DVR’s IP address is: 10.80.179.5,
then each camera’s IP address should be 10.80.179.xxx, where
xxx is a unique number OTHER than 5.
Page 10

9
2. Licensing
On the AIRSHIP DVR Server, you must have available licenses for
the IP Cameras you want to connect.
To find out what licenses you have:
Login to your AIRSHIP DVR Server
While in Live View, Click on the Tools menu
Click License Info
View the IP DEVICES area to see what licenses are available
and if there are any unlicensed devices configured.
If you already have IP Cameras connected, make sure that
adding your new IP Cameras will not go over the number of
licensed IP Devices listed here.
Click Create License Request to generate a
LicenseRequest.dat file to send to your AIRSHIP Reseller to
purchase new IP Camera Licenses.
Click OK when you are done here.
Page 11

10
3. Adding a New IP Camera
First, make sure you can connect to the IP Camera from the
AIRSHIP DVR Server system. Follow your camera manufacturer’s
instructions for connecting to your IP Camera and make sure you
can see video with the IP Camera’s own software. Usually this is
done with Internet Explorer.
Exit the AIRSHIP DVR Server software if you have it running.
(This will end video recording until we are finished adding the new
IP Camera.) Optionally, IP cameras can be added while the
AIRSHIP Server is running, but the IP cameras will be unavailable
until the AIRSHIP Server application is shutdown and restarted.
Add IP Cameras
Run the Server Setup Tool found on the Desktop or in the
Start Menu.
Click on IP Camera Setup, then the IP Setup button.
Click the + button to add a new IP Camera to the list.
Fill in the IP Address, port number (usually 80), a Name you
can use to recognize it later, and choose the maker’s name
from the Type list.
Click OK to save the new device item. At this time the Enable
column entry will read NO in the device list.
Click and highlight the IP camera on the list and click on
Configure to view the IP Camera’s connection details.
Add the IP Camera’s User and Password.
Click “Retrieve IP Info” to try connecting to the IP Camera.
You should now see the Device Properties filled in, with a
status of Connected.
You can also click Configure to open the web-based
management on the camera, just like using Internet Explorer
before.
Click Close
Now the Enabled column entry should read YES.
Repeat above steps to add more IP Cameras.
Click Save to save the settings of the newly added IP cameras.
Exit the IP Setup Tool, as well as the Server Setup Tool.
Page 12

11
4. Viewing and Configuring IP Cameras
Start the AIRSHIP DVR Server via the icon on the Desktop or
Start Menu.
Login as an administrator user, and by clicking the Live View
icon next to the newly added IP Camera names, you should be
able to see the IP Camera’s live View. Note that some
cameras take longer than others for that initial video
connection.
Go into the AIRSHIP DVR Server Setup (Settings on the Live
screen toolbar) to configure Recording, Alarm, and other
options for the IP Camera.
Note: Recording quality is configured through the Camera’s
built in configuration page. You can access this page from
within AIRSHIP by opening the DEVICES menu on the Server
Setup page. Select the camera and click on the “Configure
Remote Device” button appearing in the right-side of the
window.
Tip: Remember to use the Server Setup Tool to backup your
settings, which now include all of your IP Camera configurations.
Page 13

12
5. Recommendations
Here is a list of settings related to IP Cameras that many
environments benefit from. See the User’s Guide for complete
details.
Do not leave Live View for an IP Camera active on the DVR
Server if you aren’t monitoring it. Displaying the IP Camera
video takes up CPU and other system resources that should
be available to the DVR Server for normal daily work when no
one is actively reviewing video.
IP Camera features vary a lot – go to Settings, Cameras,
and click on each new IP Camera to review all of the
available settings tabs. You’ll find that the available
configuration options change from model to model and vary
greatly from analog cameras.
Don’t forget to review the remote client’s Camera Groups to
add the new IP Cameras to the AIRSHIP User’s Groups list.
Otherwise, the users can’t see your new IP Cameras!
Page 14

13
AIRSHIP DVR Client Setup
1. Minimum System Requirements
If you have an AIRSHIP Workstation, these requirements are
already met. However, if you are installing the AIRSHIP DVR
Client on other workstations or laptops, meeting these
requirements is important. Increased Video, RAM, and CPU
capacities provide increased performance.
High Performance
Mid Range
Entry Level
CPU
Intel Core 2 Quad 3.0
GHz or above
Intel Core 2 Duo 2.66
GHz or above
Intel Pentium 4
2.8GHz or
above
Motherboard
Intel chipset 945 or above
RAM
4 GB
2 GB
1 GB
Display
ATI or nVidia 512MB,
PCIe x16 with DirectX
9.0c. 1024 x 768
pixels and 16 or 32 bit
color.
ATI or nVidia 256MB,
PCIe x16 with DirectX
9.0c. 1024 x 768
pixels and 16 or 32 bit
color
ATI or nVidia
128MB, PCIe
x16 with
DirectX 9.0c.
1024 x 768
pixels and 16 or
32 bit color
Web Browser
Microsoft Internet Explorer 6 or above. Used for Web Client access.
OS
Windows XP Pro, Windows Vista Business or Ultimate Editions.
Windows 7 Pro or above, Windows Server 2003 and 2008 may also
be used. Please contact support@AIRSHIPdvr.com for special
configuration info.
Page 15
14
2. AIRSHIP Web Client
AIRSHIP Web Client provides quick and easy live view and
playback in your web browser.
Pre-Requisite
Your AIRSHIP Administrator must activate the Web Service
from the DVR server’s settings, under System, Network.
You need a User account created on the AIRSHIP DVR Server
for you to use. See Settings, User Management.
You must know the IP Address or Hostname of the DVR
Server on your network.
Use AIRSHIP Web Client
Open Internet Explorer and enter the address using your
DVR Server’s IP Address or Hostname such as:
http://10.2.2.101/ or http://AIRSHIP-sd/
You will be prompted to download an Active X Control. Click
on the information bar to reveal a drop-down menu.
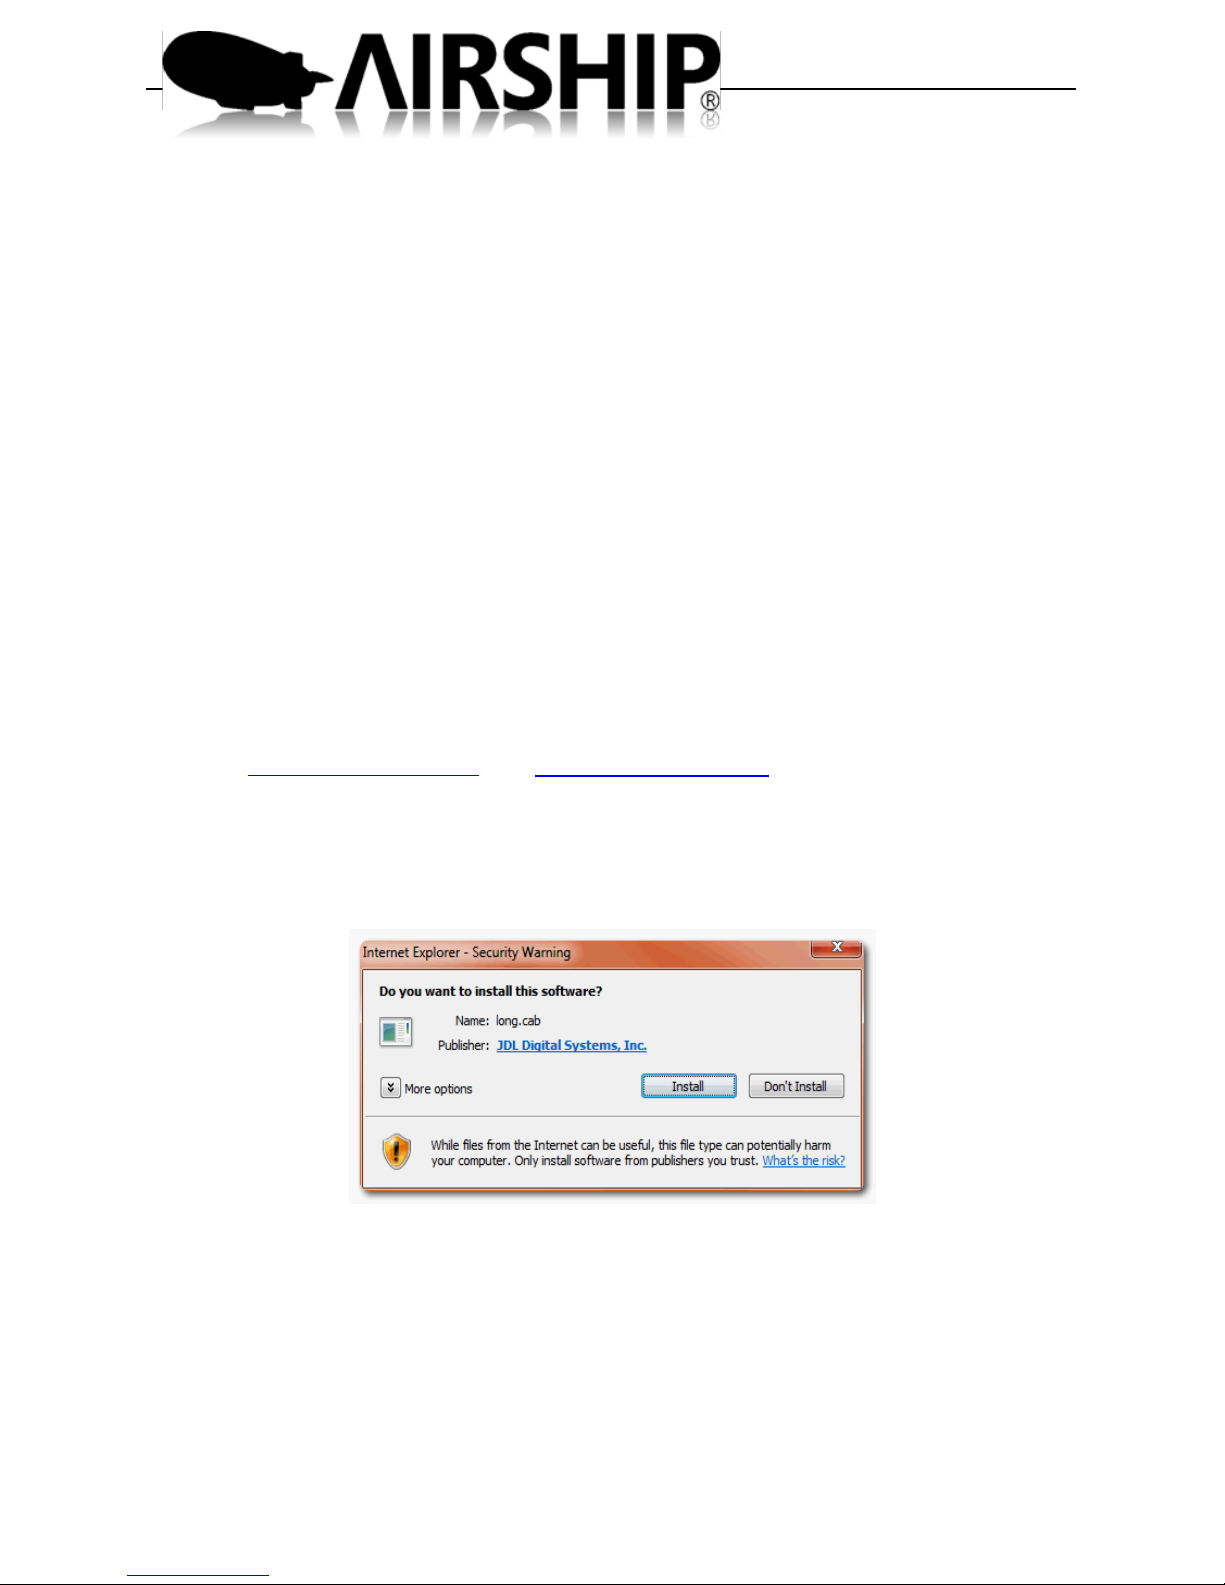
Click on "Install ActiveX Control". A Security Warning dialog
box may appear. Click on the "Install" button.
After the installation is completed, the AIRSHIP Web Client
login window appears. Enter your username and password.
Use the Live View and Playback buttons to switch modes.
Drag and Drop Cameras from the list on the left to the
Display Area on the right to view cameras and recorded
video.
Page 16

15
3. AIRSHIP Desktop Client Installation
Locate and insert your AIRSHIP Software CD into your
workstation’s CD/DVD drive.
If it does not auto run, manually run the Menu.exe program
on the CD.
Click the Install AIRSHIP Client Software link to start the
installation.
Follow the instructions on-screen until the AIRSHIP Client is
installed.
You will find two important shortcuts on the Desktop and in
the Start Menu:
AIRSHIP Client and Client Setup Tool
Use the Client Setup Tool to:
Change settings such as Max Live or Playback Screens
Backup settings or restore in case of a problem
Run analysis programs
Get quick access to Windows settings like Networking and
Date/Time settings
Page 17

16
4. First Login
Default System User
When you first launch AIRSHIP Client, you will be required to
create the password for the 'system' user. Please be sure to
memorize it. This first-run login should be set with a secure
password.
On subsequent logins, you can enter the user 'system' and the
password you set at first login.
You can also go to User Management to change
the 'system' user password, and if you wish, add other new
users.
NOTE: Logging into the Client does NOT necessarily log you into
a DVR Server. See section 7 for more information.
Page 18

17
5. Setup
NOTE: For setup of embedded DVR Servers, please see the
AIRSHIP Client Setup for Embedded DVR section next.
Click on the button to open the Setup screen. Folders
on the left menu can be branched open by clicking on the + signs.
Click on a Folder to see the settings there. Click the buttons
for details.
Systems
Click the + sign next to the System folder
View the General folder for settings that affect the entire
system, such as Auto Login, Audible Alarm sounds, etc.
See the Network folder to configure Email notification settings.
Users
Go to User Management, Users.
Click on Edit User to change each user’s password. Remember:
passwords are CaSe SeNsItIvE, so make sure Caps Lock is off.
Add users as needed for Server or Client access. Email
addresses are used for Email features throughout the software.
Page 19

18
6. Connecting to DVR Servers
You need to know your DVR Server’s IP Address and a user login
to access it. Once you have that…
In Client Settings, click on the Server folder.
Click Add Server.
Enter the DVR Server’s IP Address or Hostname, a Name
that you can recognize it by, and the Server Type.
(“AIRSHIP DVR” is the correct type for an AIRSHIP DVR
Server)
Click OK.
On the left, branch out the Server folder and you’ll see a new
icon for this new Server. Click on the new server icon.
Try clicking on Retrieve Server Properties (see the note
below if Retrieve Server Properties fails).
If your network connection is good and your user has access,
then your Server Properties below will get filled in with the
number of cameras, etc.
A new Group with the newly connected DVR’s cameras listed
will be created for you. See the Groups folder on the left to
see this new Group and make any changes you want. The
Group section is where you can hide cameras you don’t wish
to view.
Click OK at the bottom right to save your new DVR Server
settings for this Client.
On the Main Screen you’ll see the new Group and you can
drag-n-drop the cameras listed onto the Display Area to see
Live Views from the new DVR Server or click on Playback to
review recorded video. (note: Group Camera settings are
displayed in Live and Playback, not Server camera settings)
TIP: If you make a mistake or want to remove a DVR server,
you need to first delete the group and then you can remove the
DVR.
TIP: DVR’s are displayed in the client list in the order they are
entered. To display them alphabetically, right click on the name
of any DVR and select “Sort Alphabetically”.
Page 20

19
7. If Retrieve Server Properties Fails
Here are some things to try:
Verify the IP address of the server is correct.
Click the Server Specific Login option and enter a User and
Password that has been configured on the AIRSHIP DVR
Server for your use.
Check User Group Permissions on the DVR Server to be
sure the user account has permission for Remote access.
Exit Settings and click the Lock icon above twice to log out
and then log in with a user that has been configured for
access to the AIRSHIP DVR Server.
If there are any networking errors, you’ll need to check the
AIRSHIP DVR Server’s network settings and troubleshoot normal
TCP/IP networking issues.
Note the Command Port in use, the default is 6001. If this is
changed on the DVR Server, you must match that change here.
Page 21

20
8. Viewing Cameras
Click the Screens button to select how many cameras to view
at one time.
Double-Click a screen to pop it to 1 Screen View; Double-Click
again to return to multiple views.
Right-Click and choose Full Screen or hit the ESC key or your
keyboard to pop the cameras to Full Screen. (Without the
graphic interface).
Explore the Cameras list on the left.
Drag one camera onto the display area to see just one video.
Drag an entire Group onto the display area to see all the
cameras in that group (up to your configured maximum limit).
TIP: Use the Color panel at the bottom left to change the
Camera color settings – This will help to make your video as clear
as possible!
Page 22

21
9. Playback
On the main Client screen, click the button on
the upper left.
Drag a camera from the list on the left onto a display screen
on the right. You should see video for that camera, starting
five minutes ago.
Use the Calendar panel on the bottom-left to choose from
previous days. Red days have recorded video available to
view. White days indicate no recorded video for that day.
Click on the Timeline to see the video you want at that point
in time.
Click on Clip Mode to export a clip of your recorded video.
You can export to a file, send the video by email, or burn
the video to a CD or DVD.
Use the Motion Search panel to search for movement in a
camera.
Use Seek to pull up a particular time from a camera or
several cameras.
Click Calendar to go back to normal mode viewing.
Click on Digital Zoom at the top to zoom in on 2 different
areas of the recording at the same time. To zoom, hold
down the left-mouse button and drag an area with the
mouse. Lift up mouse button to view the selected area.
Click the Snapshot button to take pictures of video frames
while you are reviewing the recording.
Check out the Tools menu for lots of functions like Weekly
Review, Snapshot Viewer, License Info, and Exported
Clips Viewer.
Page 23

22
10. Recommendations
Here is a list of features and concepts that many users benefit
from. See the AIRSHIP User’s Guide for complete details.
Change all Default User Passwords to secure your systems
against unauthorized access.
Create new Camera Groups to organize your cameras in a way
that makes sense, regardless of which DVR they are from. A
Group for Doors, a Group for Hallways, a Group for Parking
Lots, etc.
Use the Client Setup Tool to tune your Maximum Live and
Playback Screens settings for your workstation. By
monitoring your CPU usage with Windows Task Manager,
you can slowly add more Videos until the CPU usage is near
90%. Then set the Maximum Allowed to keep your AIRSHIP
Client running smooth.
Create an E-Map of your facility so you can easily reference a
camera by location.
Page 24

23
AIRSHIP Client Setup for Embedded DVR
1. Connecting to an Embedded DVR
You need to know your Embedded DVR’s IP Address and a user
login to access it. Once you have that…
In Client Settings, click on the Server folder.
Click Add Server.
Enter the DVR Server’s IP Address or Hostname, a Name
that you can recognize it by, and the Server Type.
(Embedded DVR is the correct type for an AIRSHIP
Embedded DVR)
Click OK.
On the left, branch out the Server folder and you’ll see a new
icon for this new Server. Click on that icon.
Try clicking on Retrieve Server Properties (see the note
below if Retrieve Server Properties fails).
If your network connection is good and your user has access,
then your Server Properties below will get filled in with the
number of cameras, etc.
A new Group with the newly connected DVR’s cameras listed
will be created for you. See the Groups folder on the left to
see this new Group and make any changes you want.
Click OK at the bottom right to save your new DVR Server
settings for this Client.
On the Main Screen you’ll see the new Group and you can drag-ndrop the cameras listed onto the Display Area to see Live Views
from the new DVR Server or click on Playback to review recorded
video.
Page 25

24
2. If Retrieve Server Properties Fails
Here are a few things to try:
Verify the IP address of the server is correct.
Click the Server Specific Login option and enter a User and
Password that has been configured on the AIRSHIP
Embedded DVR for your use. Check the User is
administrator on the Embedded DVR. The default login on
the Embedded Server is:
username: admin, password: 12345
Check User Group Permissions on the DVR Server to be
sure the user account has permission for Remote access.
Exit Settings and click the Lock icon above twice to log out
and then log in with a user that has been configured for
access to the AIRSHIP DVR Server.
If there are any networking errors, you’ll need to check the
AIRSHIP DVR Server’s network settings and troubleshoot normal
TCP/IP networking issues.
Note the default Command Port in use is 8000 for an Embedded
DVR. If this is changed on the Embedded DVR, you must match
that change here.
Page 26

25
3. Licensing
When you first launch the AIRSHIP Client, there will be no license
required. However, once you connect to an AIRSHIP Embedded
DVR and restart the Client software, you will be prompted with
the License window.
You are then in Demo mode, and can only run the Client for 30
days from the date of installation without a license. Some usage
of the unlicensed device will be limited.
When the demo period expires, the embedded devices are no
longer available. Your standard AIRSHIP servers will continue to
be available.
To Generate a License
First be sure you have successfully connected or retrieved
Server properties at least once.
Follow instructions on the License screen to generate a
ClientLicenseRequest.dat file.
Email the ClientLicenseRequest.dat file to your vendor.
You will then receive a clientlicense.dat file in return.
Shut down your AIRSHIP client.
Simply copy the clientlicense.dat file into the C:\Program
Files\AIRSHIP\Client folder.
Restart the AIRSHIP Client to activate your license.
Please see the AIRSHIP User’s Guide for further details on
acquiring a license.
Page 27

26
Remote Configuration
Click the Settings button on the AIRSHIP Client main screen.
Click the + next to Servers.
Click on the icon with the Name of your Embedded DVR.
On the right you see some connection information.
Click Configure Remote Server to open the Remote Server
Settings.
From here, explore the tree of folders on the left to see all the
Embedded DVR settings.
Use the Apply or OK buttons at the bottom to send your
changed settings to the Embedded DVR.
NOTE: Some settings changes require that the Embedded DVR be
restarted for them to take effect.
Page 28

Page 29

AIRSHIP Industries, Inc.
345 118th Ave SE, Ste 120
Bellevue, Washington 98005
Tel: 1-425-462-4250
Fax: 1-425-467-8090
www.AIRSHIPdvr.com
Copyright © 2011 AIRSHIP Industries, Inc.
 Loading...