

Page 1
Super G™ Wireless Access Point
Model # AP421W
Quick Installation Guide
Ver. 1B
Page 2
Section 1
This Quick Installation Guide only provides the basic instructions. For more
detailed information, please refer to the User’s Manual in the supplied CD.
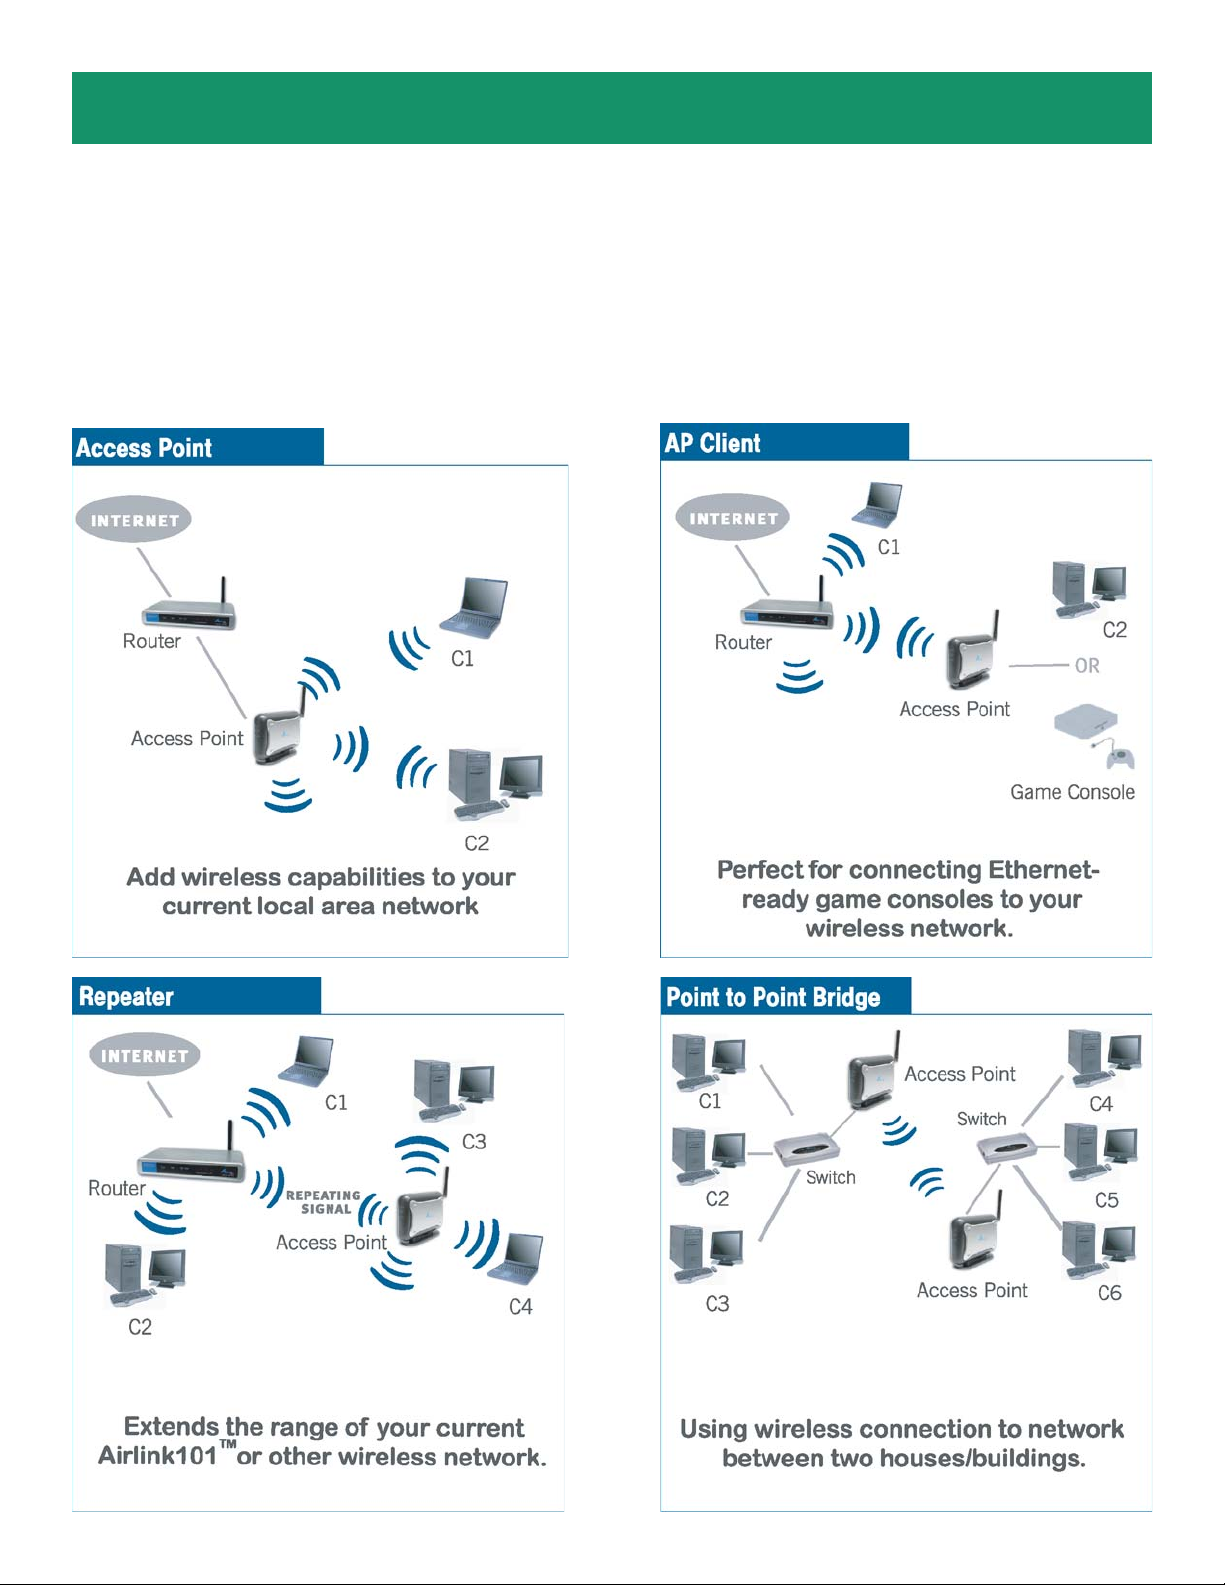
Please refer to the following diagrams to determine which operating mode
you should use for your network.
Getting S tarted
Page 3
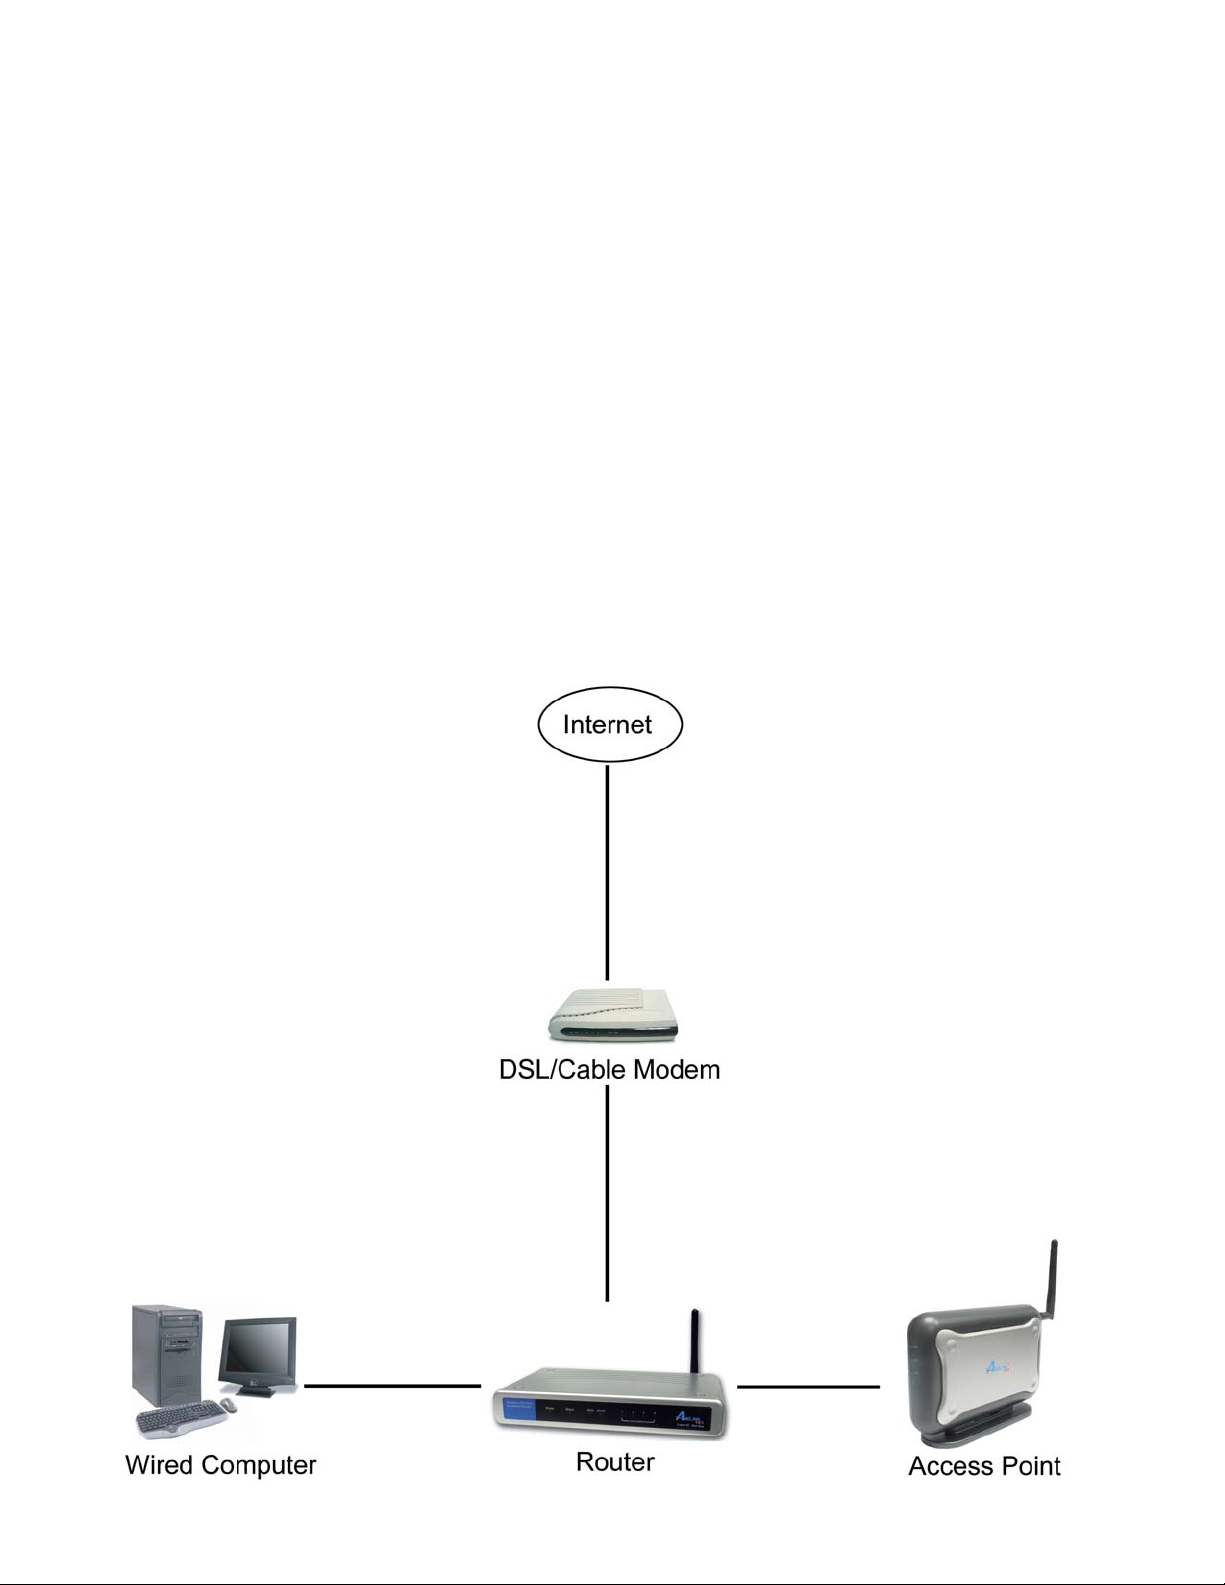
If you want to use the AP421W as an Access Point with minimal configuration, just connect it to your
existing router or switch with a Cat. 5 network cable and then power it on. The Access Point is ready to
use with its default settings:
SSID: default
Channel: 6
Encryptions: disabled
If you want to configure the Access Point’s settings or set it to other operating modes, please follow the
rest of this guide.
Step 1 Connect one end of a network cable to the Network port of the Access Point and connect the
other end to one of the LAN ports of the router (See the diagram below).
Step 2 Power on the Access Point by connecting one end of the supplied power adapter to the power
jack of the Access Point and connecting the other end to an electrical outlet.
Step 3 V erify that all three lights on the Access Point are lit. If not, verify that all the connections are
secure and try again.
Page 4
Section 2
Gathering Information
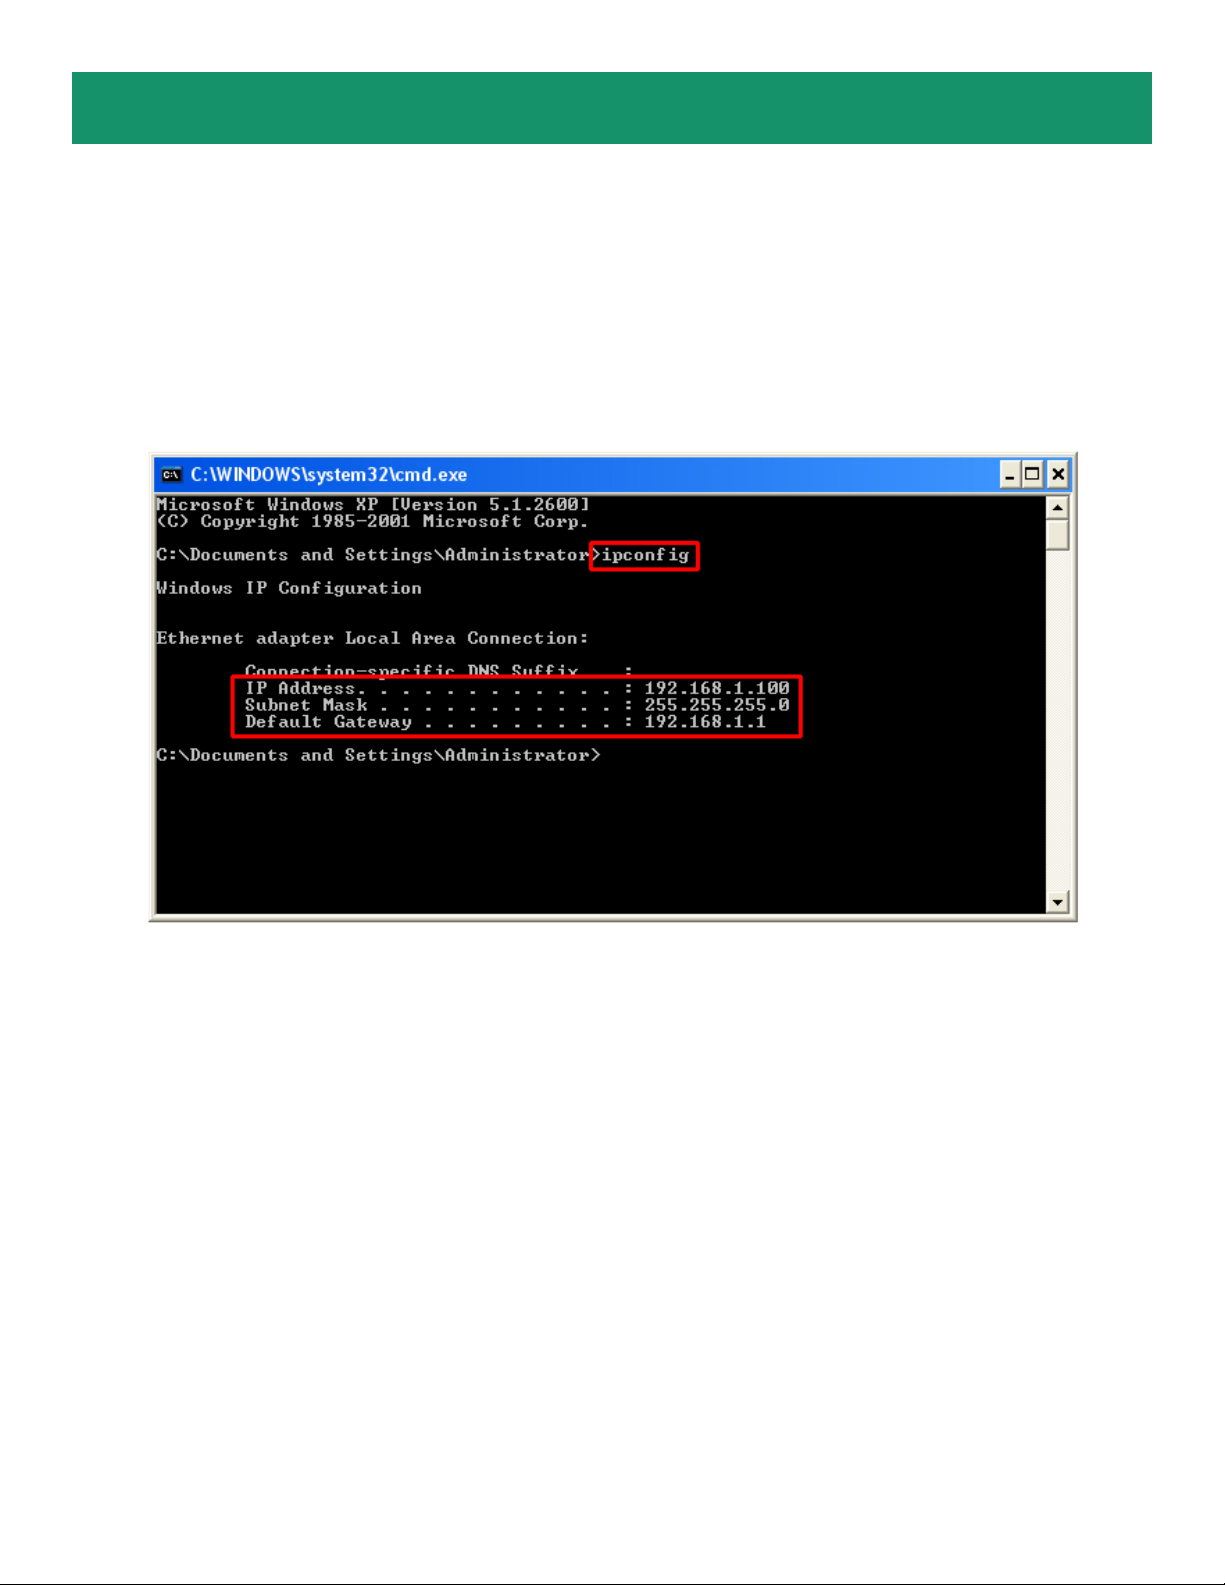
Step 1 On the wired computer, go to Start, Run, type command (for Windows 95/98/ME) or cmd (for
Windows 2000/XP) and click OK.
Step 2 T ype ipconfig and press Enter. Y our network settings will be displayed.
Step 3 Write down the values for the IP Address , Subnet Mask , and Default Gateway on a piece of
paper.
Step 4 If you want to set the AP421W to a mode other than an Access Point, write down the following
values for your existing wireless router or AP:
1. SSID (Network Name)
2. Channel Number
3. Wireless Security Settings
The AP421W needs to use the same wireless settings in order for it to work properly . Y ou may gather
these information from the web configuration utility of your wireless router.
Step 5 Refer to the IP Address you’ve written down from Step 3.
If the first three numbers of your IP Address are 192.168.1, then you do not need to configure your
computer’s IP Address. Please continue to the next page.
If the first three numbers of your IP Address are not 192.168.1, (Ex. 192.168.2), then please refer to
Section 4 of the User’s Manual in the provided CD for instructions on how to change the IP Address.
Page 5
Section 3
Using Web Configuration Utility
Y ou can use the Access Point’s built-in Web Configuration Utility to configure the encryption settings and
operating modes. This section describes how to configure the Access Point’s wireless and security
settings. For information on the different operating modes, please refer to Section 4, Selecting
Operating Modes.
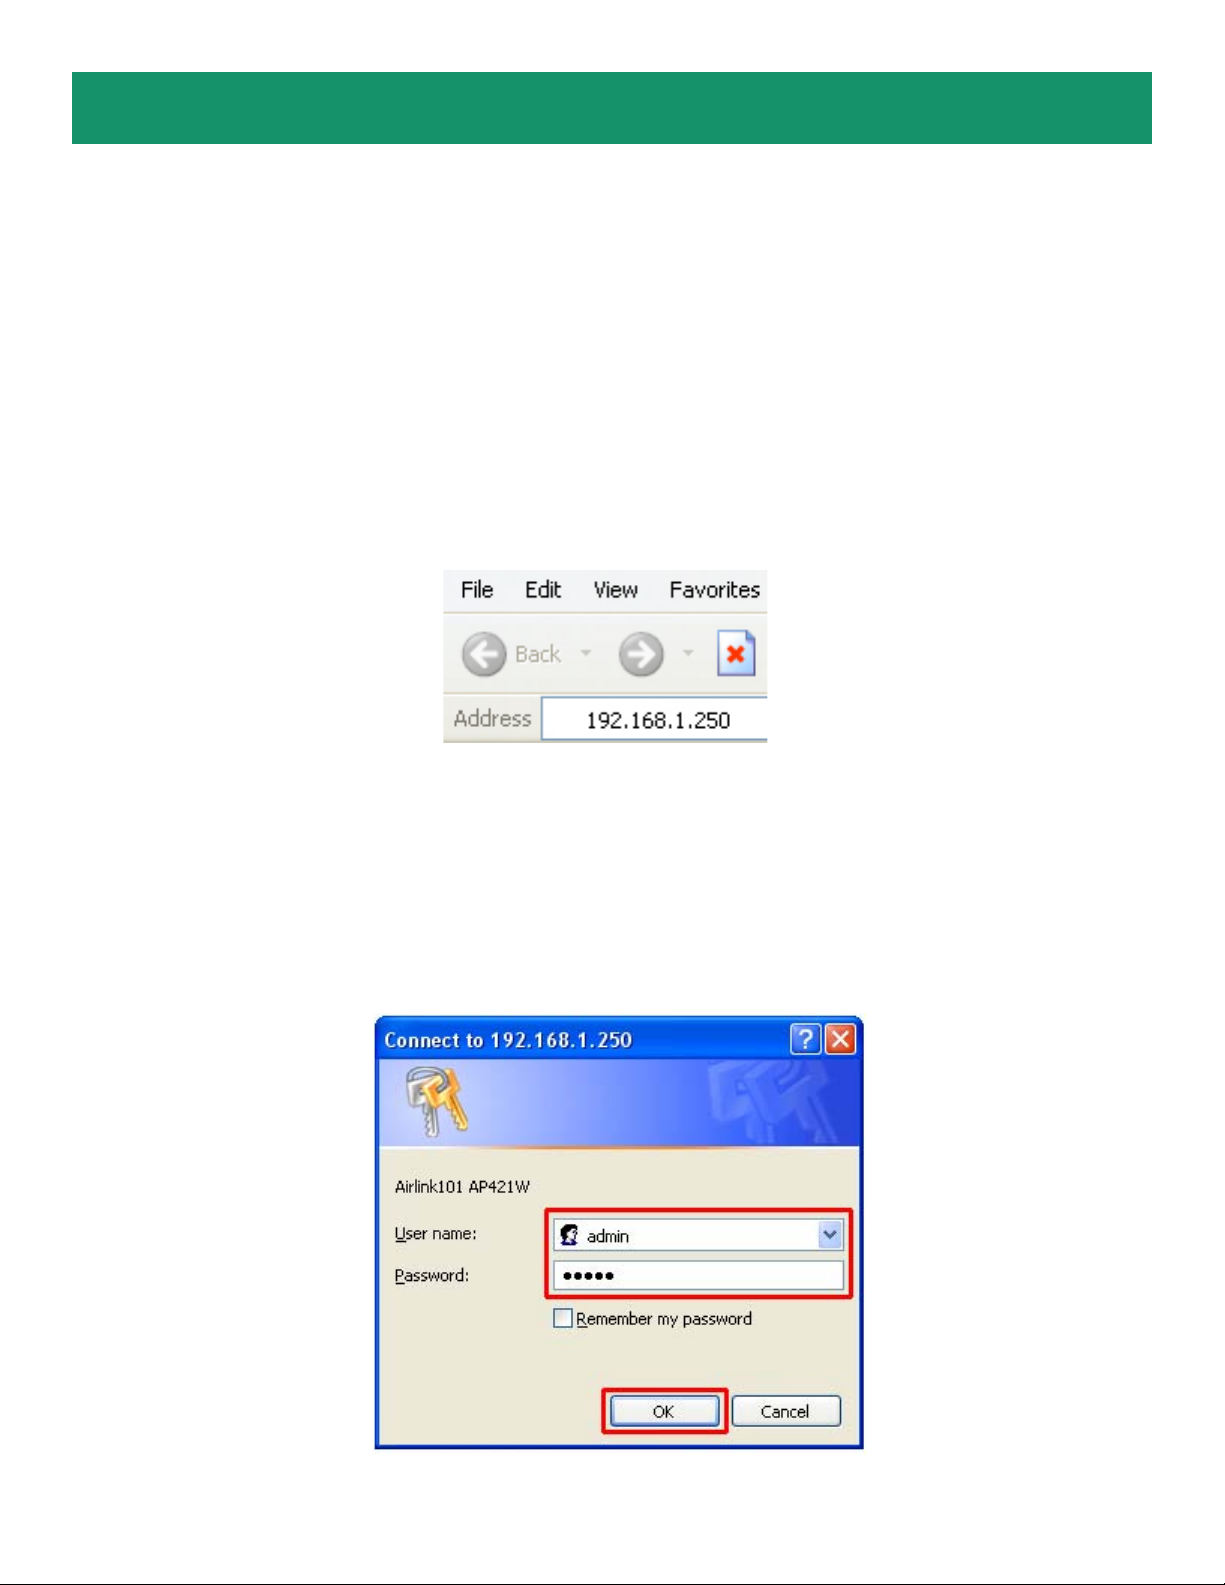
Step 1 Open your Web Browser (Internet Explorer or Netscape), enter the IP Address of the Access
Point (default: 192.168.1.250) in the Address Bar and press Enter.
Note: If you have changed the IP Address of the Access Point, enter its
new IP Address instead of the default.
Step 2 Enter admin for both the User name and Password and click OK.
Page 6
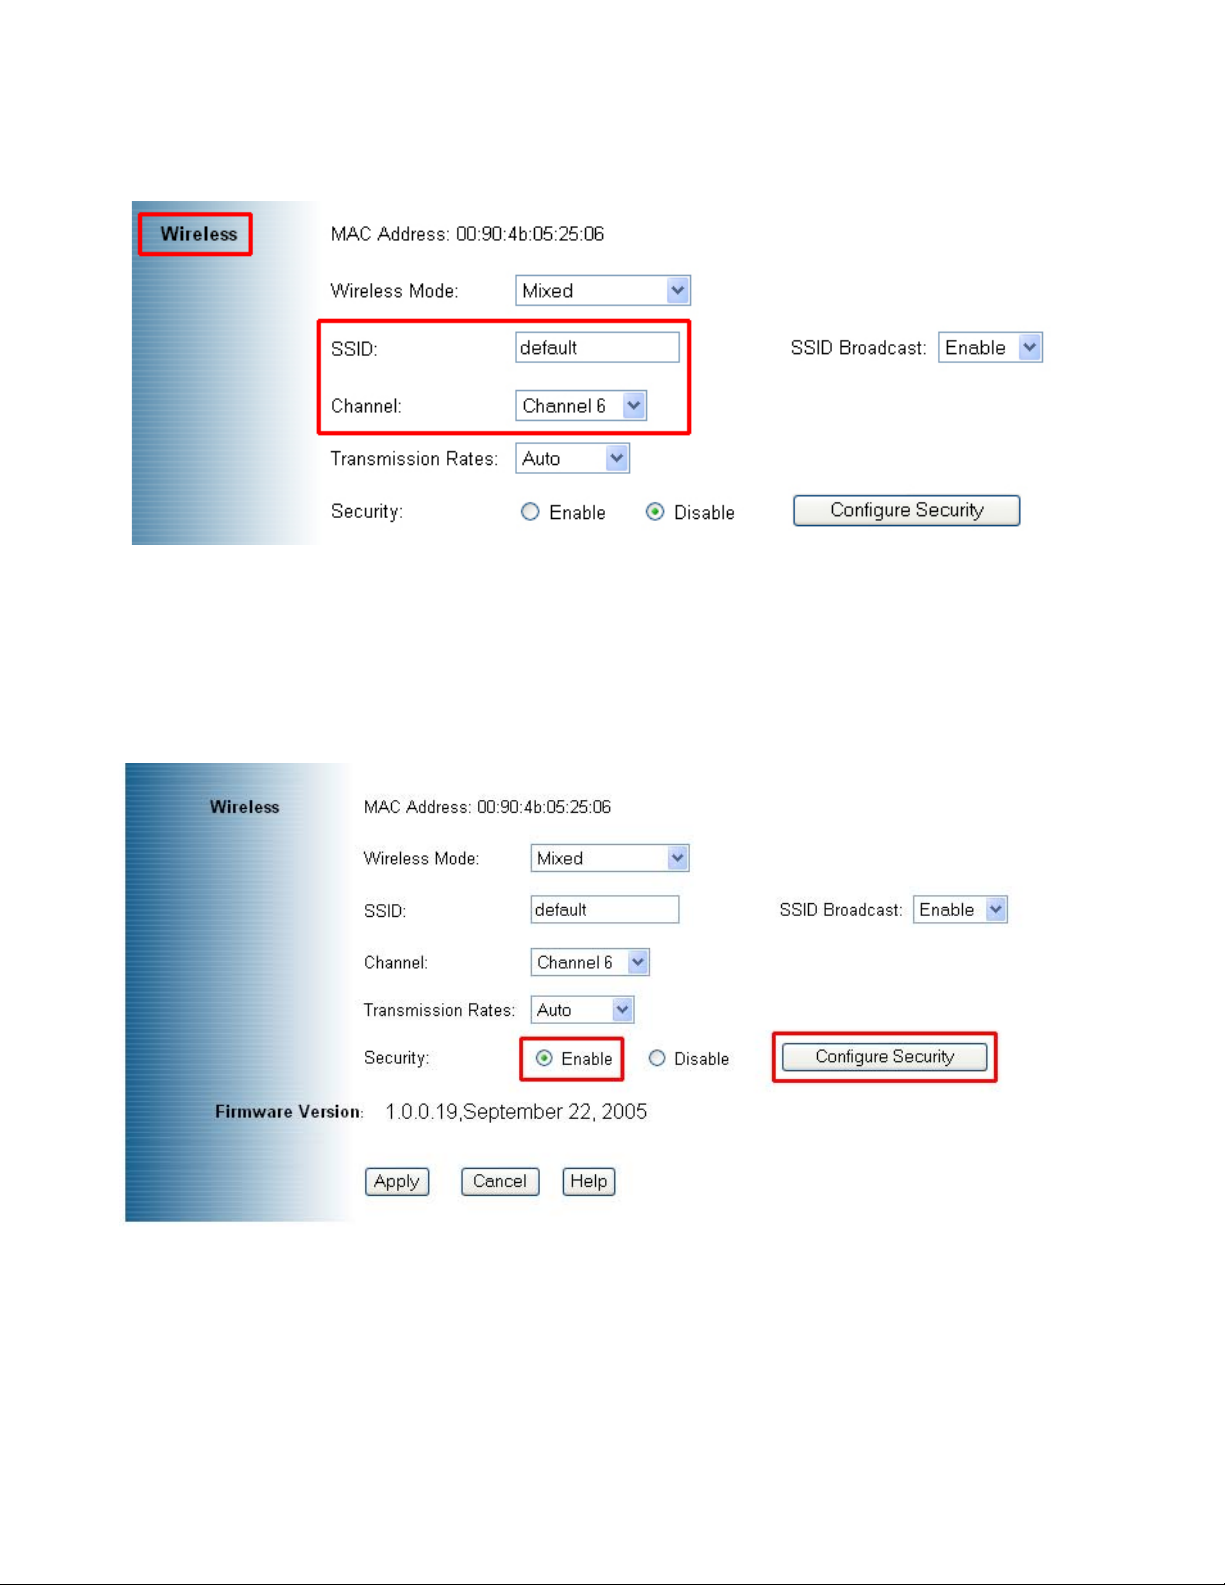
Step 3 At the Wireless section, enter the SSID (Network Name) of your wireless network and the
channel number.
Step 4 If you have enabled encryption for your wireless network, you’ll need to configure the same
security settings on the Access Point as well. Select Enable and click on Configure Security.
Page 7

WEP
Step 5a Select the same level of WEP encryption (64-Bits / 128-Bits) of your wireless network from the
drop-down menu.
Step 5b Enter the same WEP key (password) of your wireless network in the Key 1 field and click
Save. Skip to Step 8.
Page 8

WP A
Step 6 Select WPA from the drop-down menu and enter all the applicable fields. Click Save and
proceed to Step 8.
WPA-PSK
Step 7 Select WPA-PSK from the drop-down menu and enter all the applicalble fields. Click Save and
proceed to Step 8.
Page 9

Step 8 Click Apply to save the changes.
Step 9 For best result, place the Access Point at a central location where it is accessible to all the
wireless computers.
Page 10

Section 4
Selecting Operating Modes
This section describes how to change the Access Point’ s operating modes.
Step 1 Select the Operating Mode tab to display the Operating Mode page.
Step 2 Select the desired mode and enter the remote Access Point’s MAC address. You can find the
target MAC address from the remote A P’s web configuration utility .
Step 3 Click Apply to save the changes.
Page 11

AP Client
The AP Client mode converts the Access Point to a wireless network adapter, allowing the network
device such as your computer or game console to become a wireless client.
Step 1 Select AP Client and enter the MAC address of the remote AP or click on the Available
Networks button to scan for any available wireless network.
Step 2 Select the desired wireless network from the list.
Step 3 Click Apply to confirm the selection.
Page 12

Step 4 Click Apply to save the changes.
Step 5 Once the Access Point has restarted, you may disconnect it from the wireless router and connect
it to the Ethernet port of your computer or game console.
Page 13

AP Repeater
The AP Repeater mode converts the Access Point to a wireless repeater. By extending the wireless
signal of the source AP/wireless router , the wireless coverage is exp anded.
Step 1 Select AP Repeater and enter the MAC address of the remote AP (source AP/wireless router)
and click Apply to save the changes.
Step 2 Once the Repeater has restarted, you may disconnect it from the wireless router . For best result,
place the Repeater at a central location between the wireless router and your wireless computers.
Page 14

Point to Point Bridge (WDS)
The Point to Point Bridge mode converts the Access Point to a wireless bridge. It bridges the network
clients from two physically separate LANS into one virtual LAN.
Step 1 Select Point to Point Bridge and enter the MAC address of the remote AP and click Apply to
save the changes.
Step 2 Configure the other Access Point with reciprocal settings.
Page 15

Section 5
Connecting to the Access Point
Once you have properly configured the Access Point, your wireless computers should be able to detect
its signal.
Use your wireless network adapter’s utility to detect and connect to the Access Point. You can identify the
Access Point by its MAC Address, which is displayed in the BSSID field of your wireless network
adapter’s utility.
Y ou can check the Access Point’ s MAC Address on its bottom label.
If the signal is weak, try reorienting the Access Point’s antenna or relocate the Access Point to a dif ferent
place.
For more detailed information about using the Access Point’s Web Configuration Utility , please refer to
the User’s Manual on the provided CD.
Page 16

Section 6
Technical Support
E-mail: support@airlink101.com
T oll Free: 1-888-746-3238
Web Site: www .airlink101.com
Page 17

* Super G™ technology (108Mbps) can only be obtained when using products with Atheron Super G™ chipset.
* Theoretical maximum wireless signal rate based on Atheros™ Super G™ and IEEE standard 802.11g specifications. Actual data throughput will
vary. Network conditions and environmental factors, including volume of network traffic, building materials and construction, mix of wireless products
used, radio frequency interference (e.g., cordless telephones and microwaves) as well as network overhead lower actual data throughput rate.
Copyright © 2005 AirLink101. All rights reserved. AirLink101, the stylized AirLink101 logo, specific product designations, and all other words and
logos that are identified as trademarks and/or service marks are, unless noted otherwise, the trademarks and service marks of AirLink101. All other
product or service names are the property of their respective holders. AirLink101 products are protected under numerous U.S. and foreign patents
and pending applications, mask work rights, and copyrights.
 Loading...