

Page 1
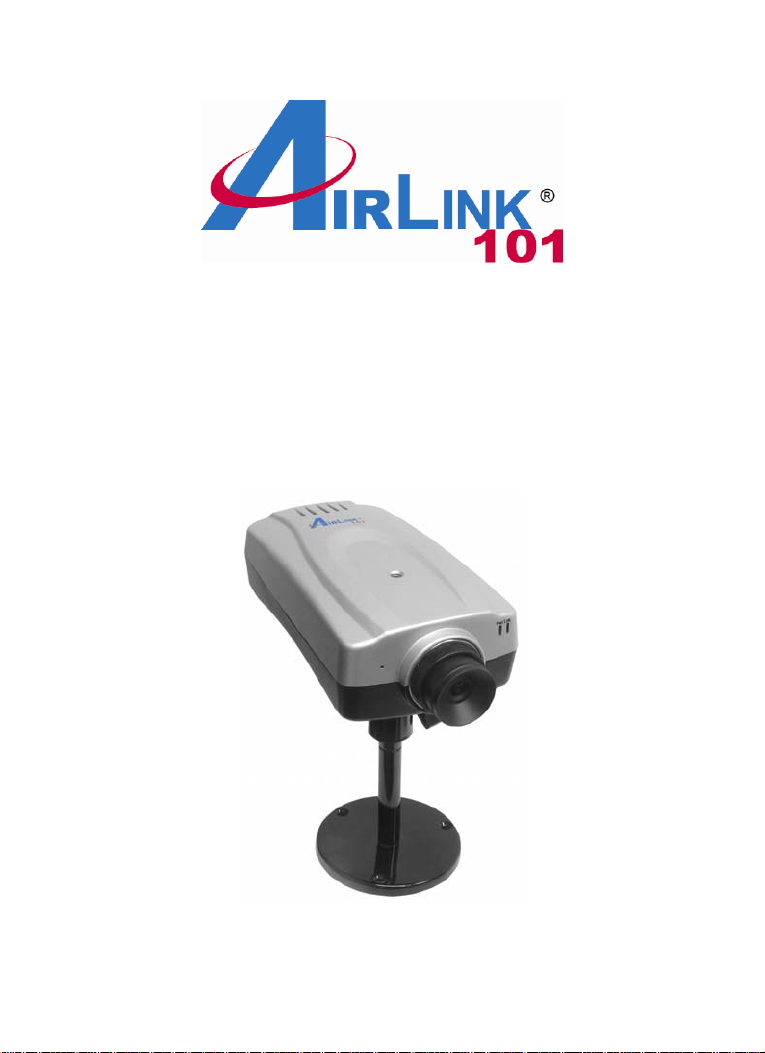
Quick Installation Guide
Power Over Ethernet Network Camera
Model # AICP310
Ver. 1A
Page 2

Section 1
This Quick Installation Guide only provides basic instructions. For detailed
information on using this product and the software IPView Pro, please refer to
the User’s Manual on the supplied CD.
Getting Started
Step 1 Connect one end of a network cable to the IP Camera and connect the
other end to one of the LAN ports on your router or switch.
Step 2 If your router or switch does not support Power over Ethernet function,
you will need to provide power to the camera by connecting the supplied power
adapter. If you are using Power over Ethernet, you do not need to connect the
power adapter.
Step 3 Verify that all of the lights on the camera are lit or blinking. If not, check
to make sure that the Ethernet and power connections are secure, then try
again.
Section 2
Installing the Setup Wizard
Step 1 Insert the provided CD and wait for the autorun screen to appear.
Step 2 Click on Install Setup Wizard.
Page 3
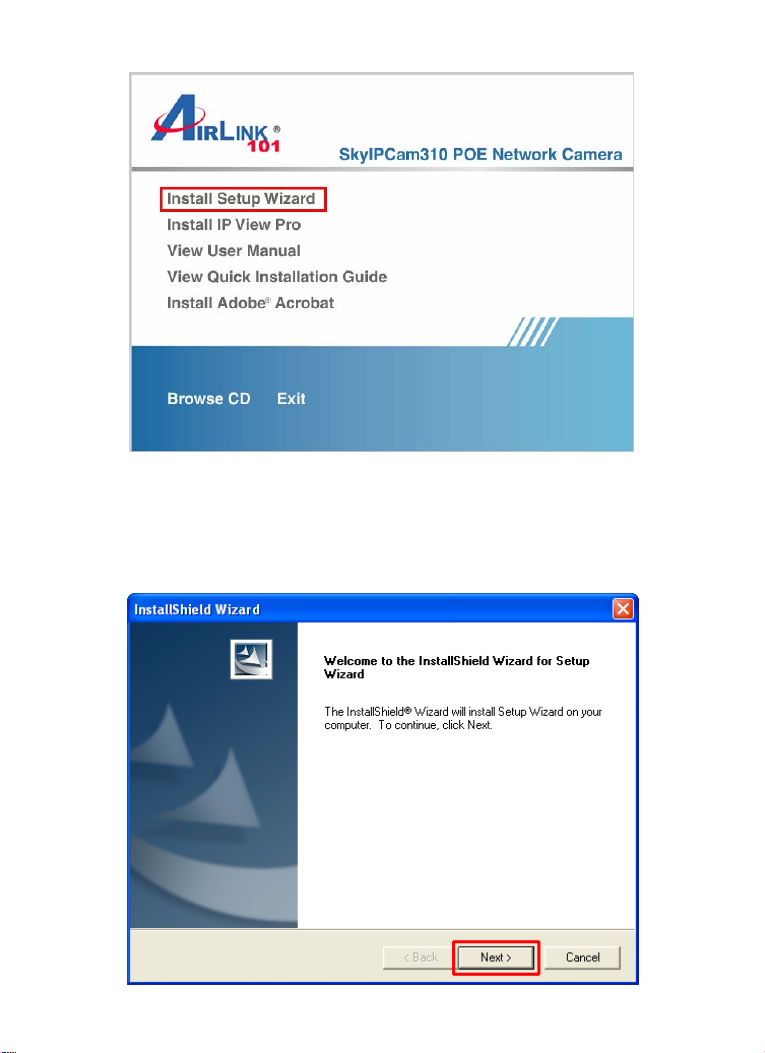
Note: If the autorun screen does not appear automatically, go to Start, Run,
type D:\Wizard\Setup.exe (where D is the letter of your CD drive) and click OK.
Step 3 Click Next.
Page 4
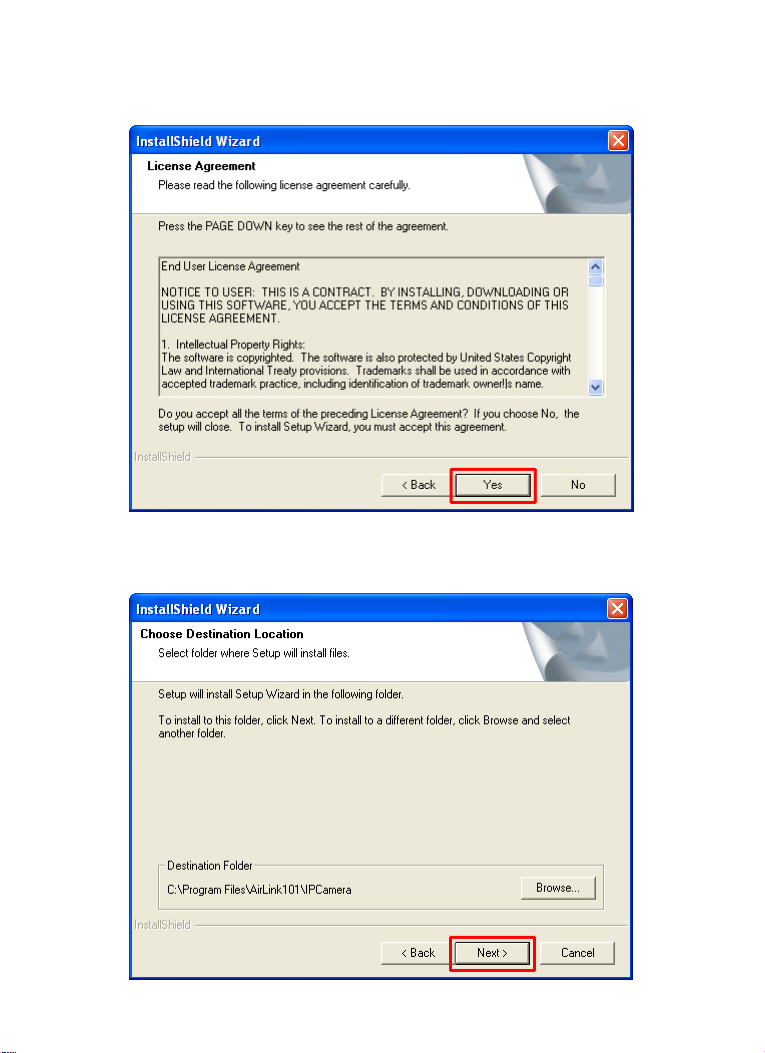
Step 4 Click Yes to accept the License Agreement.
Step 5 Click Next to accept the default Destination Folder.
Page 5
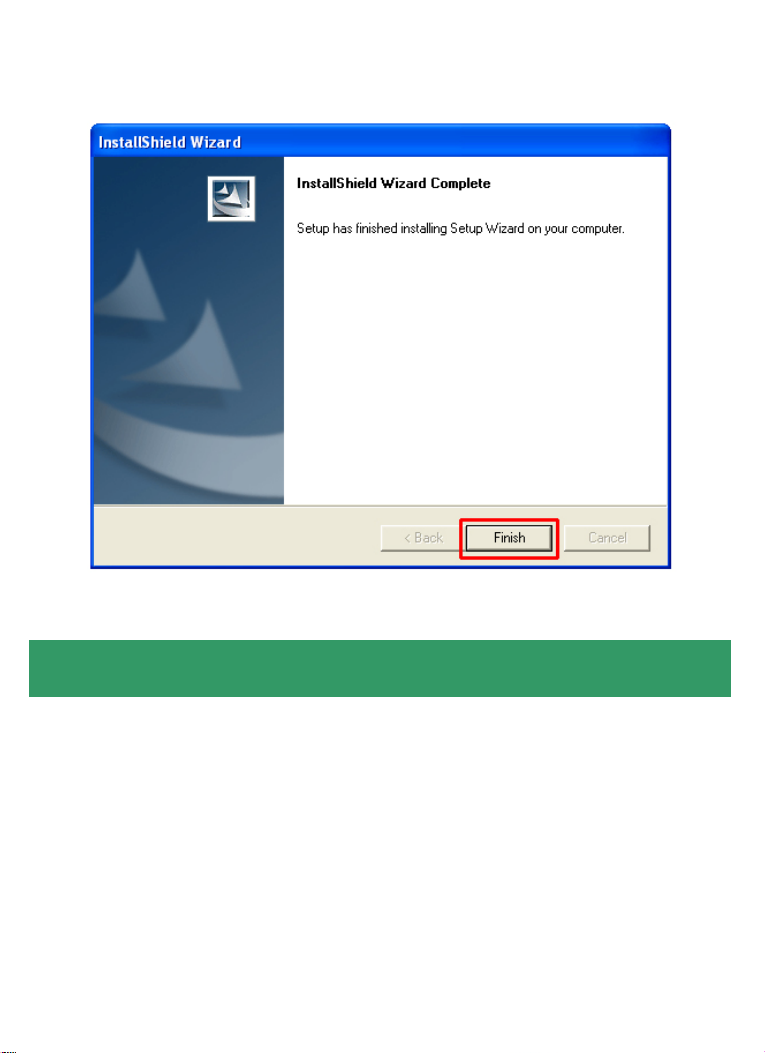
Step 6 Click Finish to complete the installation.
Section 3
Using the Setup Wizard
Step 1 Go to Start > (All) Programs > AirLink101 IP Camera Setup Wizard >
AirLink101 IP Camera Setup Wizard.
Page 6
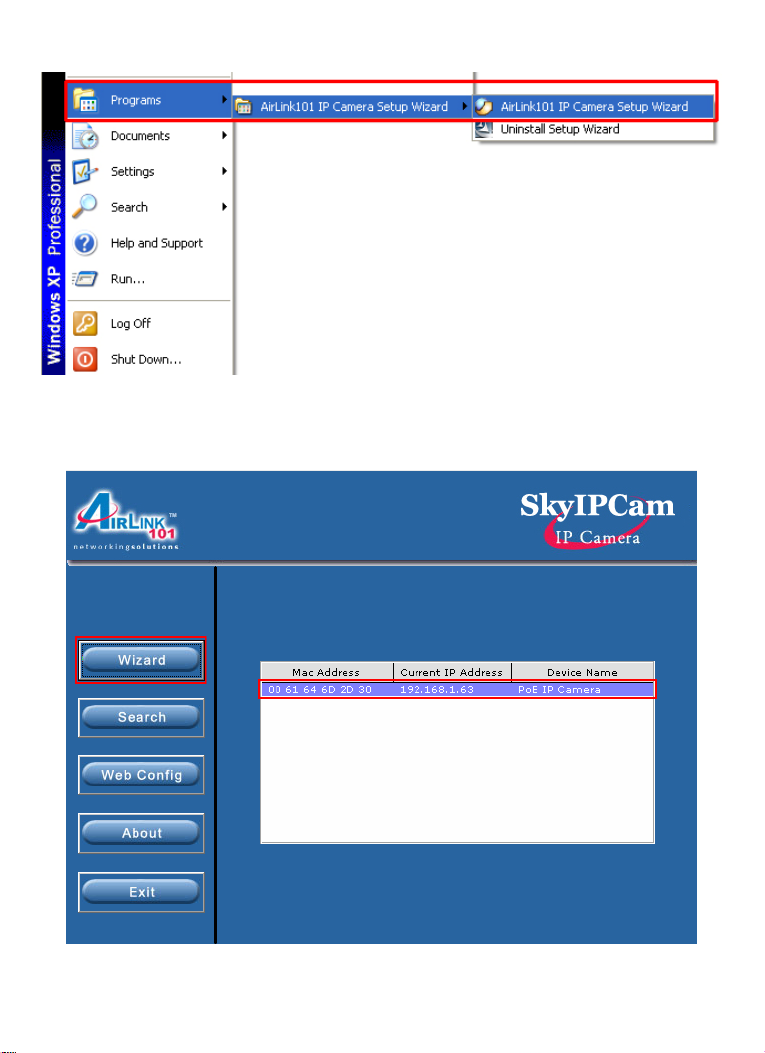
Step 2 Select the IP Camera you want to configure from the list and click on the
Wizard button.
Page 7
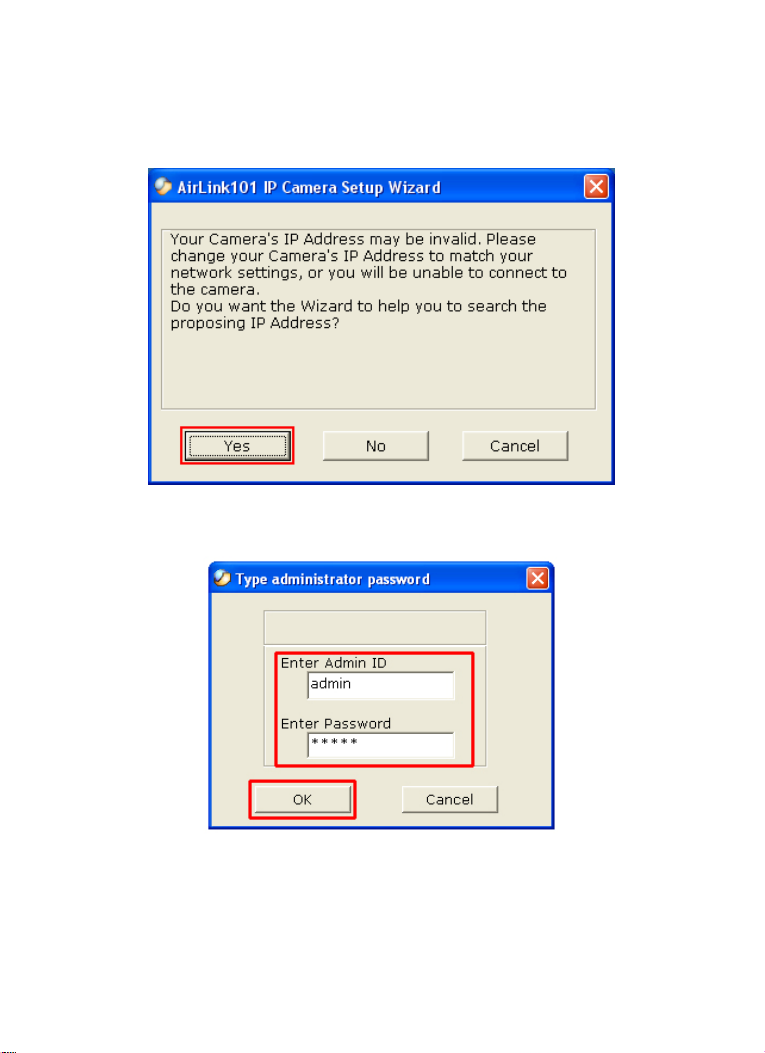
Step 3 If the Camera’s default IP address is on a different subnet, the following
message will appear. Click Yes to continue. If you do not receive this message,
skip to Step 6.
Step 4 Enter admin for both the Admin ID and Password and click OK.
Step 5 The Wizard will automatically generate an IP address for the camera, if
this address is not in use by any other device in your local network, click OK.
Otherwise, enter an available IP address (ex. 192.168.x.240) and click OK.
Page 8
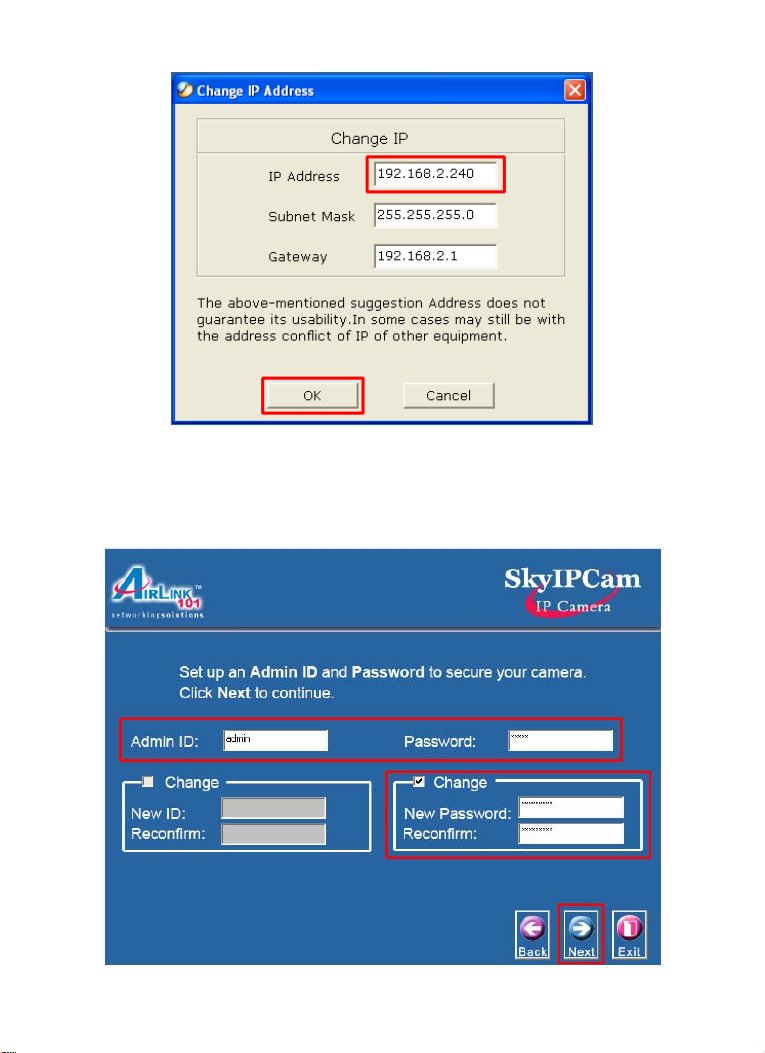
Step 6 Enter admin for both the Admin ID and Password field and click Next.
Optionally, you can change the password by checking on the Change box and
entering the new password.
Page 9
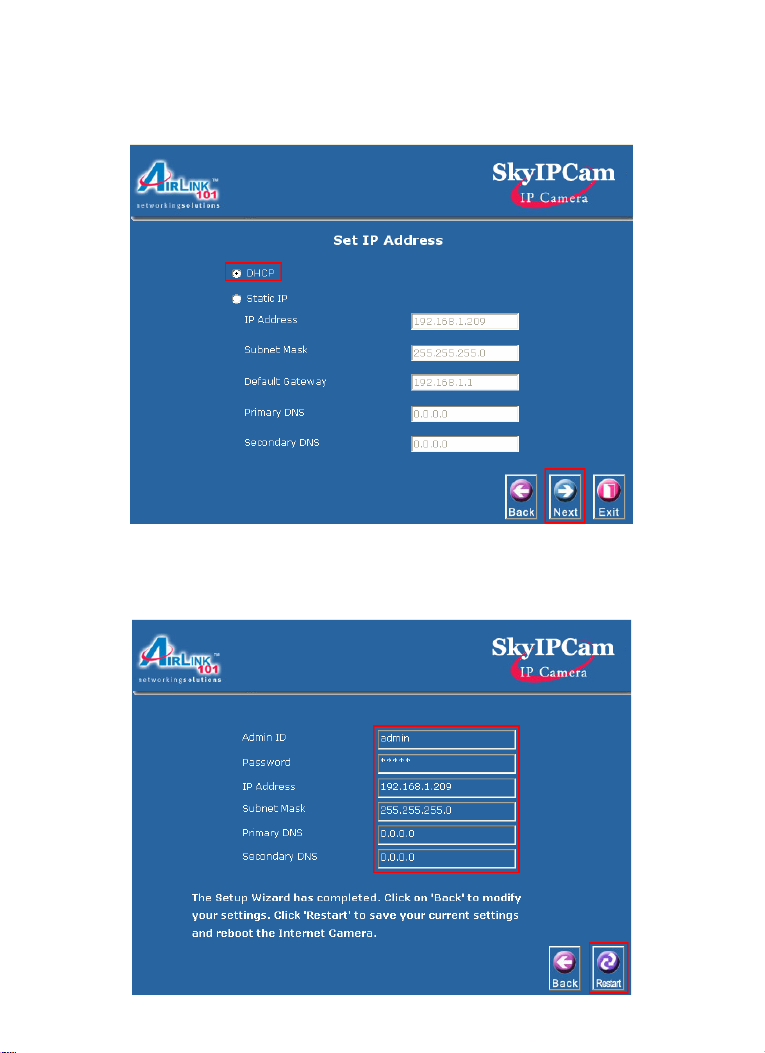
Step 7 If you need to change the Camera’s IP address because another
network device is already using the same address, you can assign a new
address here and click Next.
Step 8 Verify that all the fields are correct and click Restart to save the settings
and reboot the camera.
Page 10
Section 4
Viewing Images
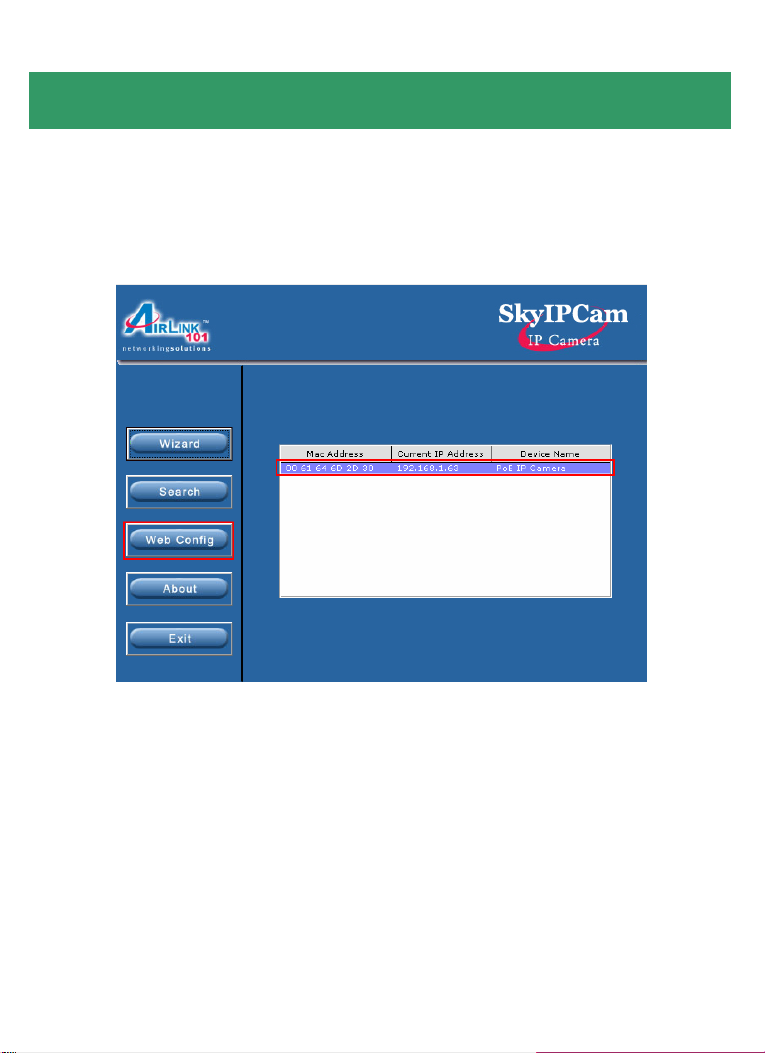
Step 1 At the Setup Wizard, select the desired camera from the list and click on
the Web Config button.
Step 2 Enter the username and password for the network camera. The default
username and password are both “admin”.
Page 11
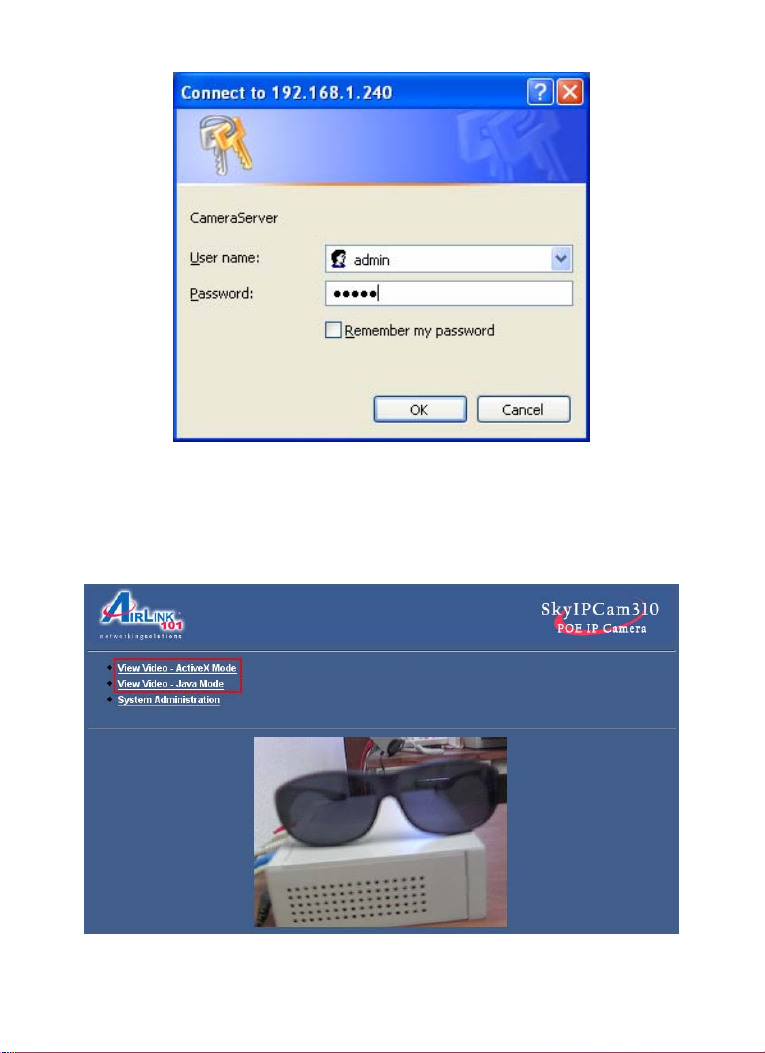
Step 3 The web based viewing page will appear. You can view live video by
selecting either the ActiveX Mode (Internet Explorer only) or the Java Mode
(Internet Explorer and Netscape).
Page 12
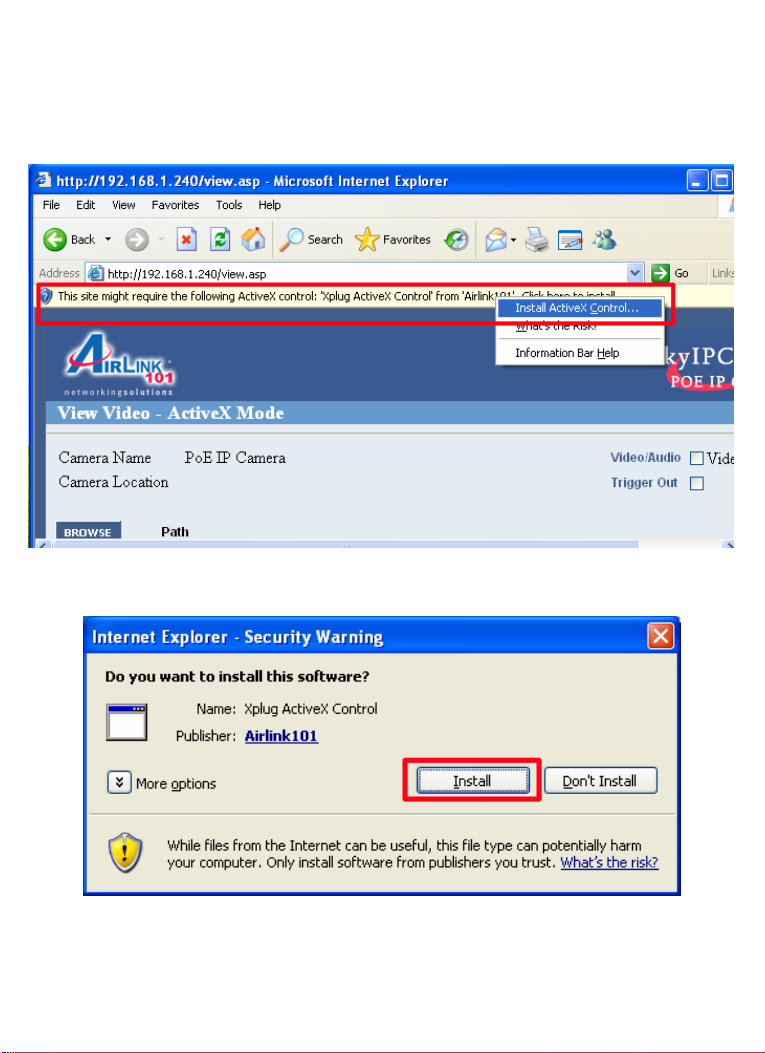
Step 4 If you select ActiveX Mode, you may be prompt to install the ActiveX
Control. Click on the yellow bar to on the top of the screen and click on Install
ActiveX Control.
Step 5 Click on Install.
Page 13
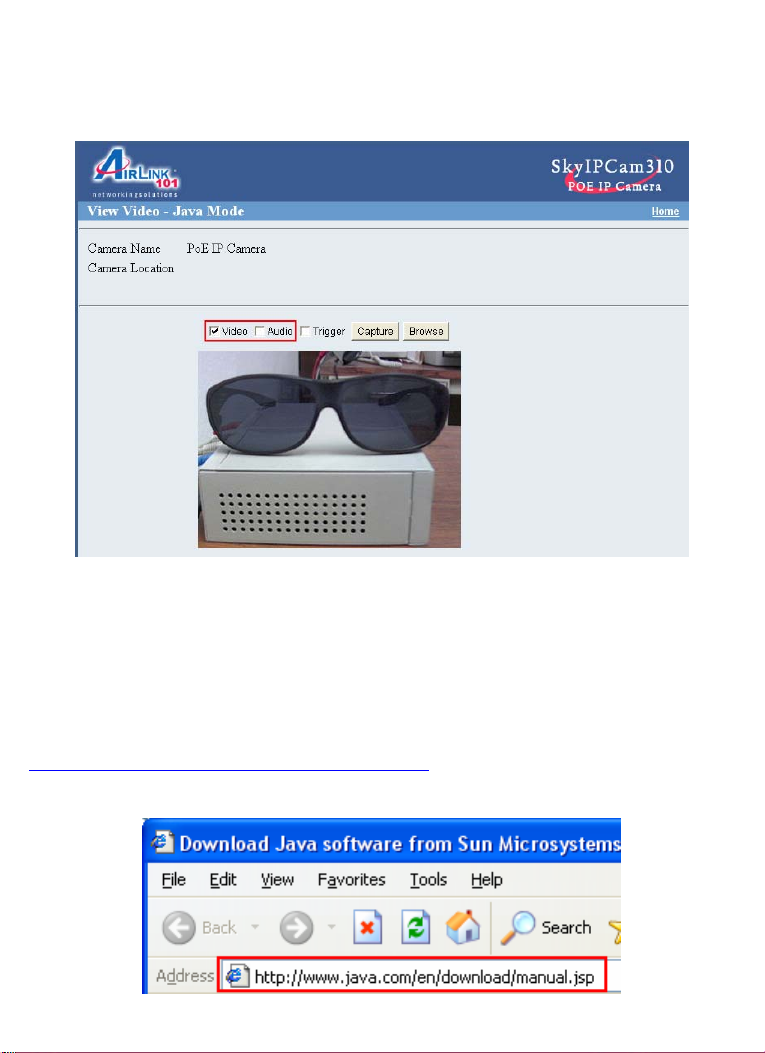
Step 6 You can focus the camera by turning the camera’s lens clockwise or
counter-clockwise.
Note: ActiveX and/or Java Applet must be installed and enabled on your Web
Browser (Internet Explorer or Netscape) before you can view the live videos.
For more information please refer to the User’s Manual in the provided CD.
Step 7 If you need to install Java Virtual Machine on your computer, do not
follow the on-screen browser instructions for installing. Instead, go to
http://www.java.com/en/download/manual.jsp
for installing Java.
and follow the instructions there
Page 14

Section 5
Technical Support
E-mail: [email protected]
Toll Free: 1-888-746-3238
Website: www.airlink101.com
*Actual data throughput will vary. Network conditions and environmental factors lower actual data
throughput rate. Specifications are subject to change without notice. All products and trademarks
are the property of their respective owners. Copyright ©2007 AirLink101®
 Loading...