

Page 1
5.25” USB 2.0 Enclosure Box
Model # AEN-U55W
User’s Manual
Ver. 1A
Page 2

Table of Contents
1. Introduction................................................................................................................................. 3
1.1 Package Contents.................................................................................................................. 3
1.2 Features................................................................................................................................. 3
2. Installation................................................................................................................................... 4
2.1 CD/DVD Drive Installation.................................................................................................. 4
2.2 Hard Drive Installation ......................................................................................................... 7
3. Driver Installation for Windows 98SE ..................................................................................... 12
4. Installation Verification............................................................................................................ 15
4.1 Windows 98SE.................................................................................................................... 15
4.2 Windows ME/2000/XP....................................................................................................... 16
4.3 Mac OS 10.x ....................................................................................................................... 17
5. Drive Usage .............................................................................................................................. 18
5.1 Removing the Enclosure Box Safely.................................................................................. 18
6. Specifications............................................................................................................................ 19
Technical Support......................................................................................................................... 20
2
Page 3

1. Introduction
Thank you for purchasing this 5.25” USB 2.0 Enclosure Box. The Enclosure Box
provides an easy way to add removable disk storage space to your computer. The HiSpeed USB 2.0 interface ensures fast and reliable connection between the external
drive and the computer. With the Hot Swap feature, you can connect and disconnect the
Enclosure Box without having to turn off your computer.
1.1 Package Contents
Before you begin the installation, please check the contents of your package. The
package should include the following items:
• USB 2.0 Enclosure Box
• USB 2.0 Cable
• Power Adapter
• Screws (4)
• Screwdriver
• Driver & Manual CD
• Quick Installation Guide
If any item is damaged or missing, please contact your local dealer immediately. Also,
keep the box and packaging materials in case you need to ship the unit in the future.
1.2 Features
• Compatible with IDE/ATA hard drive
• Compliant with USB 2.0 interface
• Compliant with ATA/ATAPI-6 specification Rev 1.0 (PIO mode 0~4, DMA mode
0~2, UDMA mode 0~5)
• Supports high capacity HDD
• Super quiet fanless design
• Supports 8/16-bit standard PIO mode interface
• Supports 16-bit multi-word DMA and Ultra DMA mode interface (Ultra 33/66/100)
• 64/512 bytes Data Payload for full/high speed Bulk Endpoint
• Supports Power Down mode and USB suspend indicator
• Supports Wake-up ability
• Supports plug-and-play, hot-swap
3
Page 4
2. Installation
Follow the steps below for connecting a 5.25” CD/DVD Drive. If you are
connecting a 3.5" hard drive, please skip Section 2.2, Hard Drive Installation.
2.1 CD/DVD Drive Installation
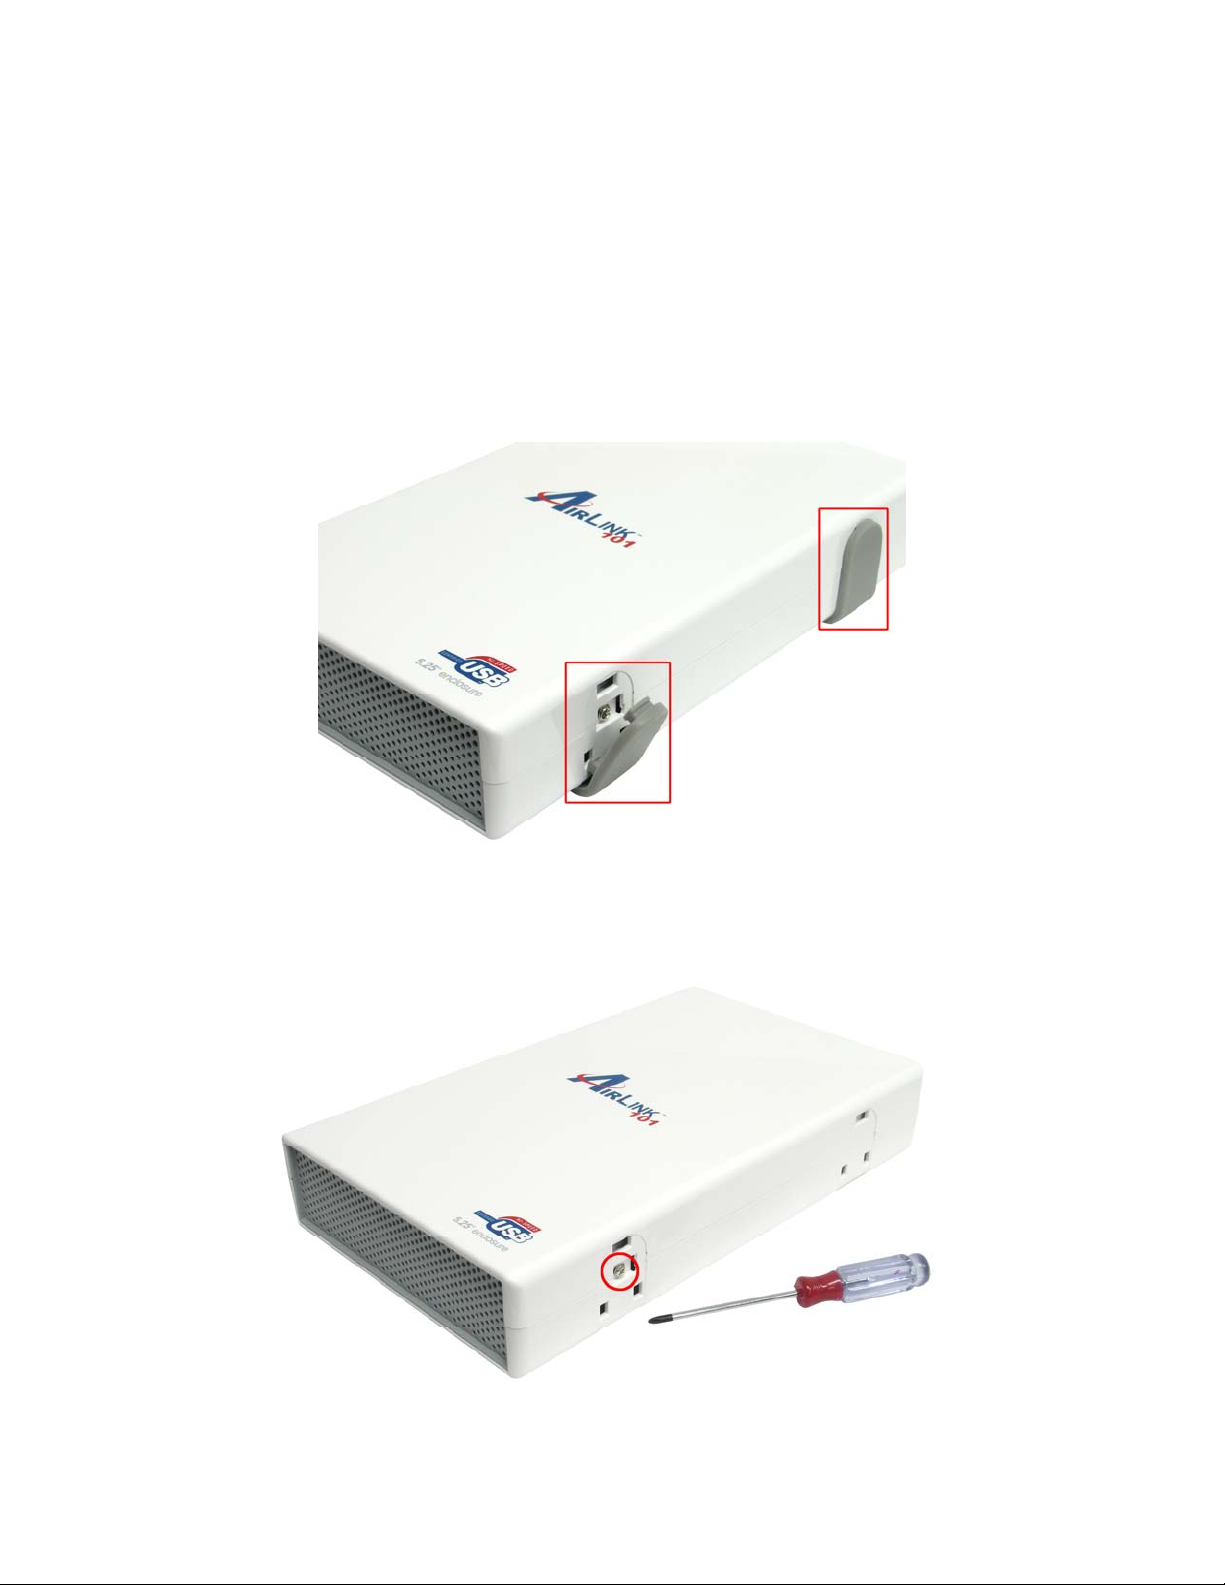
Step 1 Remove the four pads attached to the enclosure box.
Step 2 Use the provided screwdriver to remove the screws on each side of the box.
4
Page 5
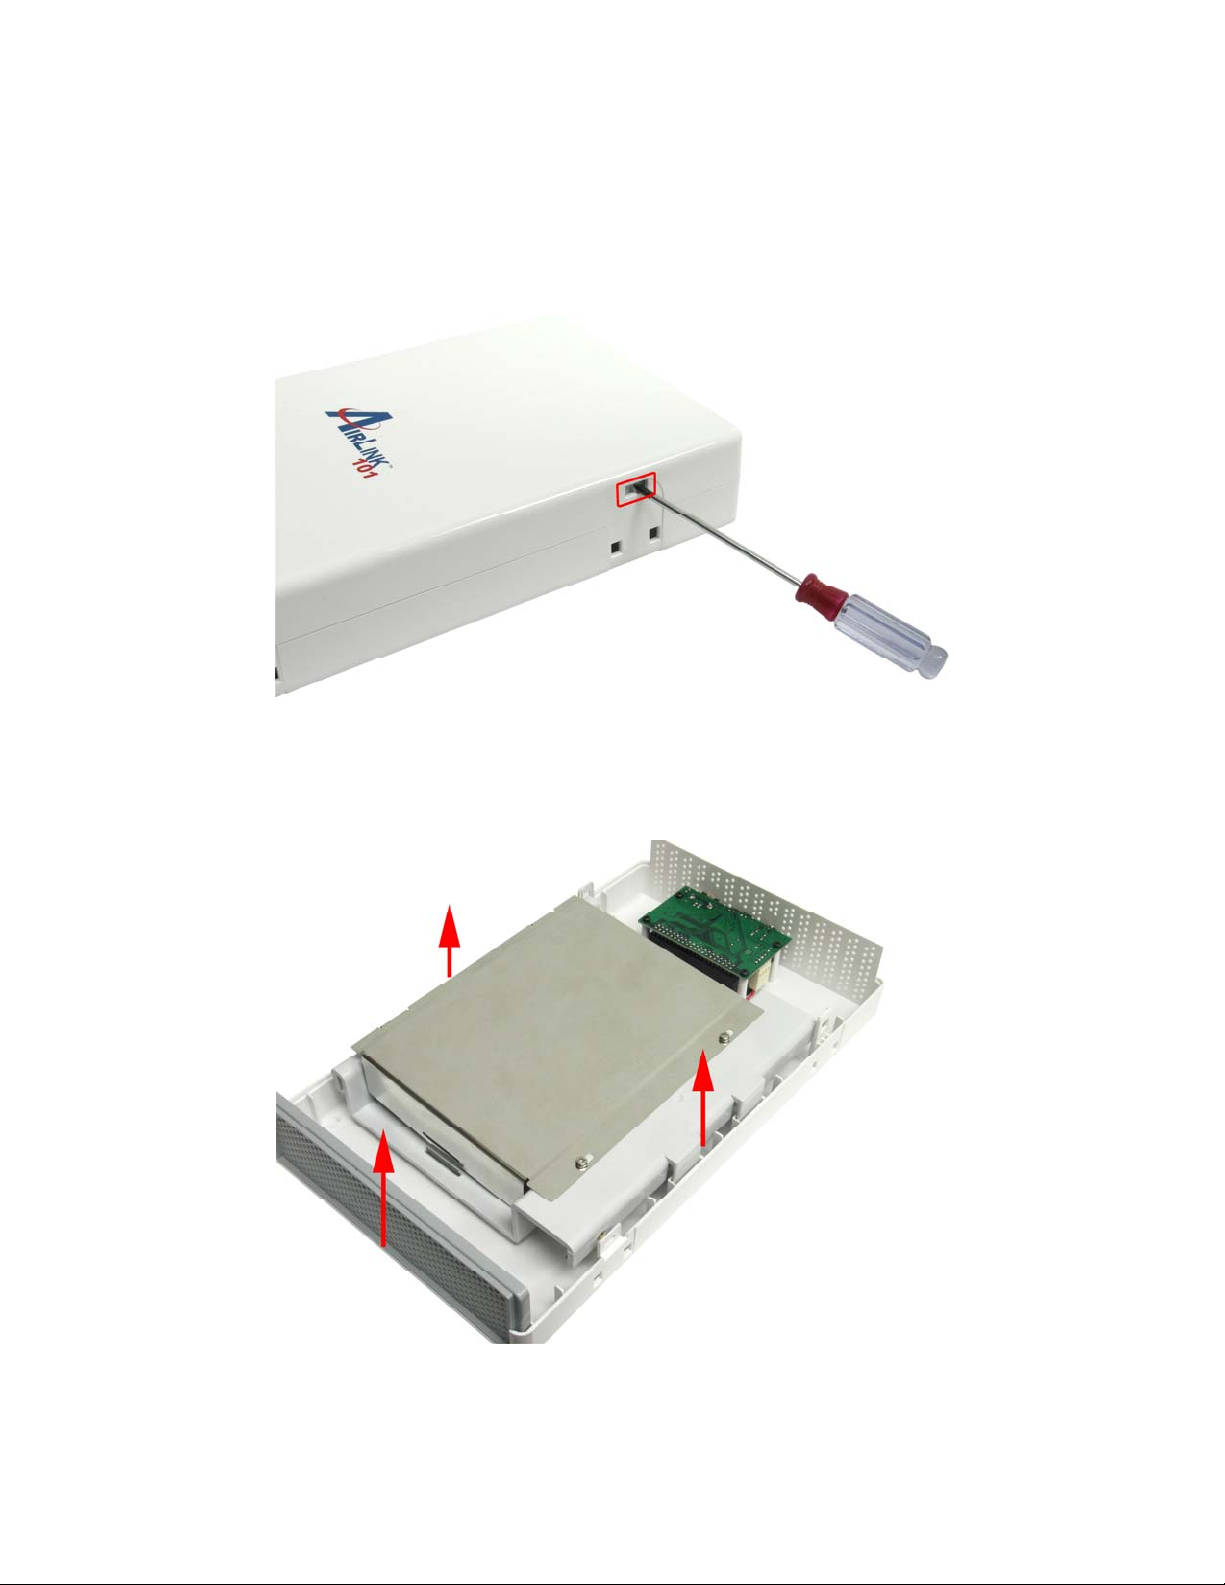
Step 3 Remove the top cover. If you find it hard to open the cover, use the screwdriver
to slightly push the locking tab inside.
Step 4 Lift and remove the front panel and the plastic plate. You will not need them for
attaching a CD/DVD drive, but we suggest that you keep them for future use.
5
Page 6
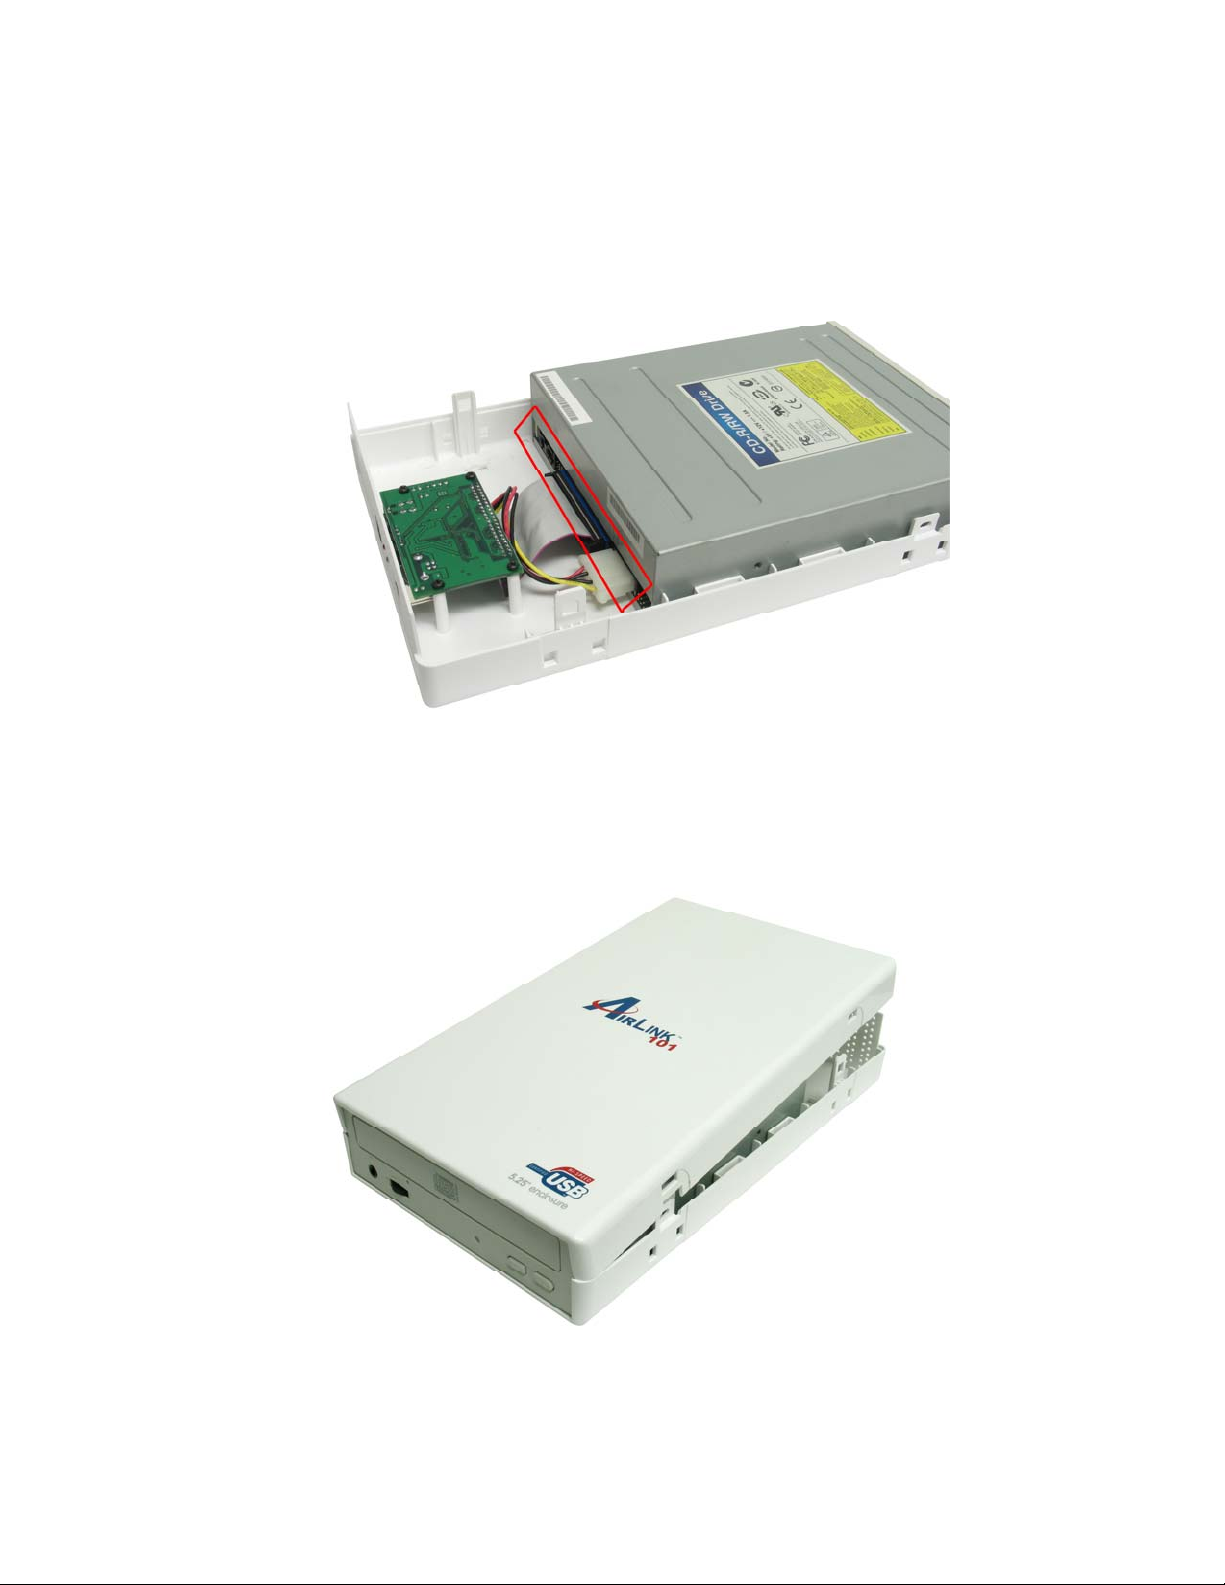
Step 5 Place the CD/DVD drive with the drive's top facing up and then connect the IDE
cable and the power cord to the drive. Make sure the CD/DVD drive you are installing is
set to “Master” (refer to the jumper setting information printed on your CD/DVD drive).
Step 6 Replace the top cover and re-secure the screws removed in Step 1.
6
Page 7

Step 7 Re-attach the four pads to the enclosure box and then connect the supplied
power adapter and USB cable to the enclosure box.
Congratulations! The CD/DVD drive installation is complete.
2.2 Hard Drive Installation
Step 1 Remove the four pads attached to the enclosure box.
7
Page 8

Step 2 Use the provided screwdriver to remove the screws on each side of the box.
Step 3 Remove the top cover. If you find it hard to open the cover, use the screwdriver
to slightly push the locking tab inside.
8
Page 9

Step 4 Remove the two screws holding plate A and then remove plate A from plate B.
Step 5 Remove plate B from the enclosure box and place the hard drive as shown
below. Make sure the hard drive you are installing is set to “Master” (refer to the jumper
setting information printed on your hard drive).
9
Page 10

Step 6 Turn the plate over and secure the hard drive to the plate with the provided four
screws.
Step 7 Turn the plate over again and re-secure plate A back to plate B with the screws
removed in Step 4.
10
Page 11

Step 8 Connect the IDE cable and power cord to the hard drive and then hook plate B
back to the enclosure. (Be sure to apply enough force to properly secure the drive).
Step 9 Replace the front panel.
Step 10 Replace the top cover and re-secure the screws removed in Step 1.
Step 11 Re-attach the four pads to the enclosure box and then connect the supplied
power adapter and USB cable to the enclosure box.
Congratulations! The hard drive installation is complete.
11
Page 12

3. Driver Installation for Windows 98SE
This Enclosure Box supports Plug-and-Play for Windows ME, 2000, XP, and Mac OS. If
you are using Windows 98SE, please refer to the following steps for installing the driver.
Step 1 Connect the Enclosure Box to the computer and insert the provided Driver CD to
the CD-ROM drive.
Step 2 Click Next when the Add New Hardware Wizard appears.
12
Page 13

Step 3 Select Search for the best driver for your device (Recommended) and click
Next.
Step 4 Select the Specify a location check box and click Browse to your CD-ROM
drive and open the Driver/Win98SE folder. Click Next.
13
Page 14

Step 5 Click Next to install the driver.
Step 6 Click Finish to complete the driver installation.
14
Page 15

4. Installation Verification
To verify your installation, please follow the steps below.
4.1 Windows 98SE
Go to Control Panel > System > Device Manager and look for USB Mass Storage
Device under Universal Serial Bus controllers. If it is listed, you have successfully
installed the Enclosure Box.
15
Page 16

4.2 Windows ME/2000/XP
Go to Control Panel > System > Device Manager and look for USB Mass Storage
Device under Universal Serial Bus controllers. If it is listed, you have successfully
installed the Enclosure Box.
16
Page 17

4.3 Mac OS 10.x
Go to Apple System Profiler > Devices and Volumes. If you see the Enclosure Box
listed under USB Information, you have successfully installed the Enclosure Box.
17
Page 18

5. Drive Usage
Now you are ready to use the attached drive as an external storage device. A brand
new hard drive must be formatted and partitioned first. You can use Windows Disk
Management utility in Windows XP/2000, Mac built-in partition utility, or other disk
management software as required to perform disk-related tasks. Please refer to your
software documentation for instructions.
You can read and write files to and from the drive as you would with an ordinary drive.
5.1 Removing the Enclosure Box Safely
Before unplugging the Enclosure Box from your computer or powering it off, please take
the following steps to safely remove the device in order to prevent any data loss.
For Windows
Step 1 In the System Tray, right-click the unplug/eject icon and select Unplug or eject
hardware or Safely Remove Hardware.
Step 2 Select the device you want to unplug, then click Stop and OK.
Step 3 When Windows notifies you that it is safe to
do so, unplug the Enclosure Box from your computer.
18
Page 19

For Mac OS
Drag the corresponding USB disk icon that represents the hard drive to the trash can.
When prompted, click OK and unplug the Enclosure Box from your computer.
6. Specifications
Standards
• USB 2.0
Drive Support
• CD-ROM/RW
• DVD-ROM/RW
• 3.5” IDE HDD
Ports
• 1 USB 2.0 Type B receptacle
• 1 Power port
Power
• Self-Powered
• DC Output: 12V/2A & 5V/2A
LED
• 1 for R/W port (Green)
• 1 for Power (Red)
Material
• Plastic
System Requirement
• Pentium-233MHZ or above
• 64 MB RAM
• One available USB 2.0 Port
• Windows 98SE/ME/2000/XP and
Mac OS 9.0 or above
Environment
• Operating Temp: 0 to 40°C
• Storage Temp: -5 to 60°C
Dimension
• 267 x 157 x 48 mm (L x W x H)
Weight
• 560 g
Safety Approval
• FCC and CE
Warranty
• 1-Year Limited Warrant
19
Page 20

Technical Support
E-mail: support@airlink101.com
Toll Free: 1-888-746-3238
Web Site: www.airlink101.com
*Actual data throughput will vary. Network conditions and environmental factors lower actual data throughput rate. Specifications are
subject to change without notice. All products and trademarks are the property of their respective owners. Copyright ©2006
Airlink101™
 Loading...