

Page 1
Quick Installation Guide
802.11g USB XR™ Adapter
Model # AWLL5025
Ver. 1A
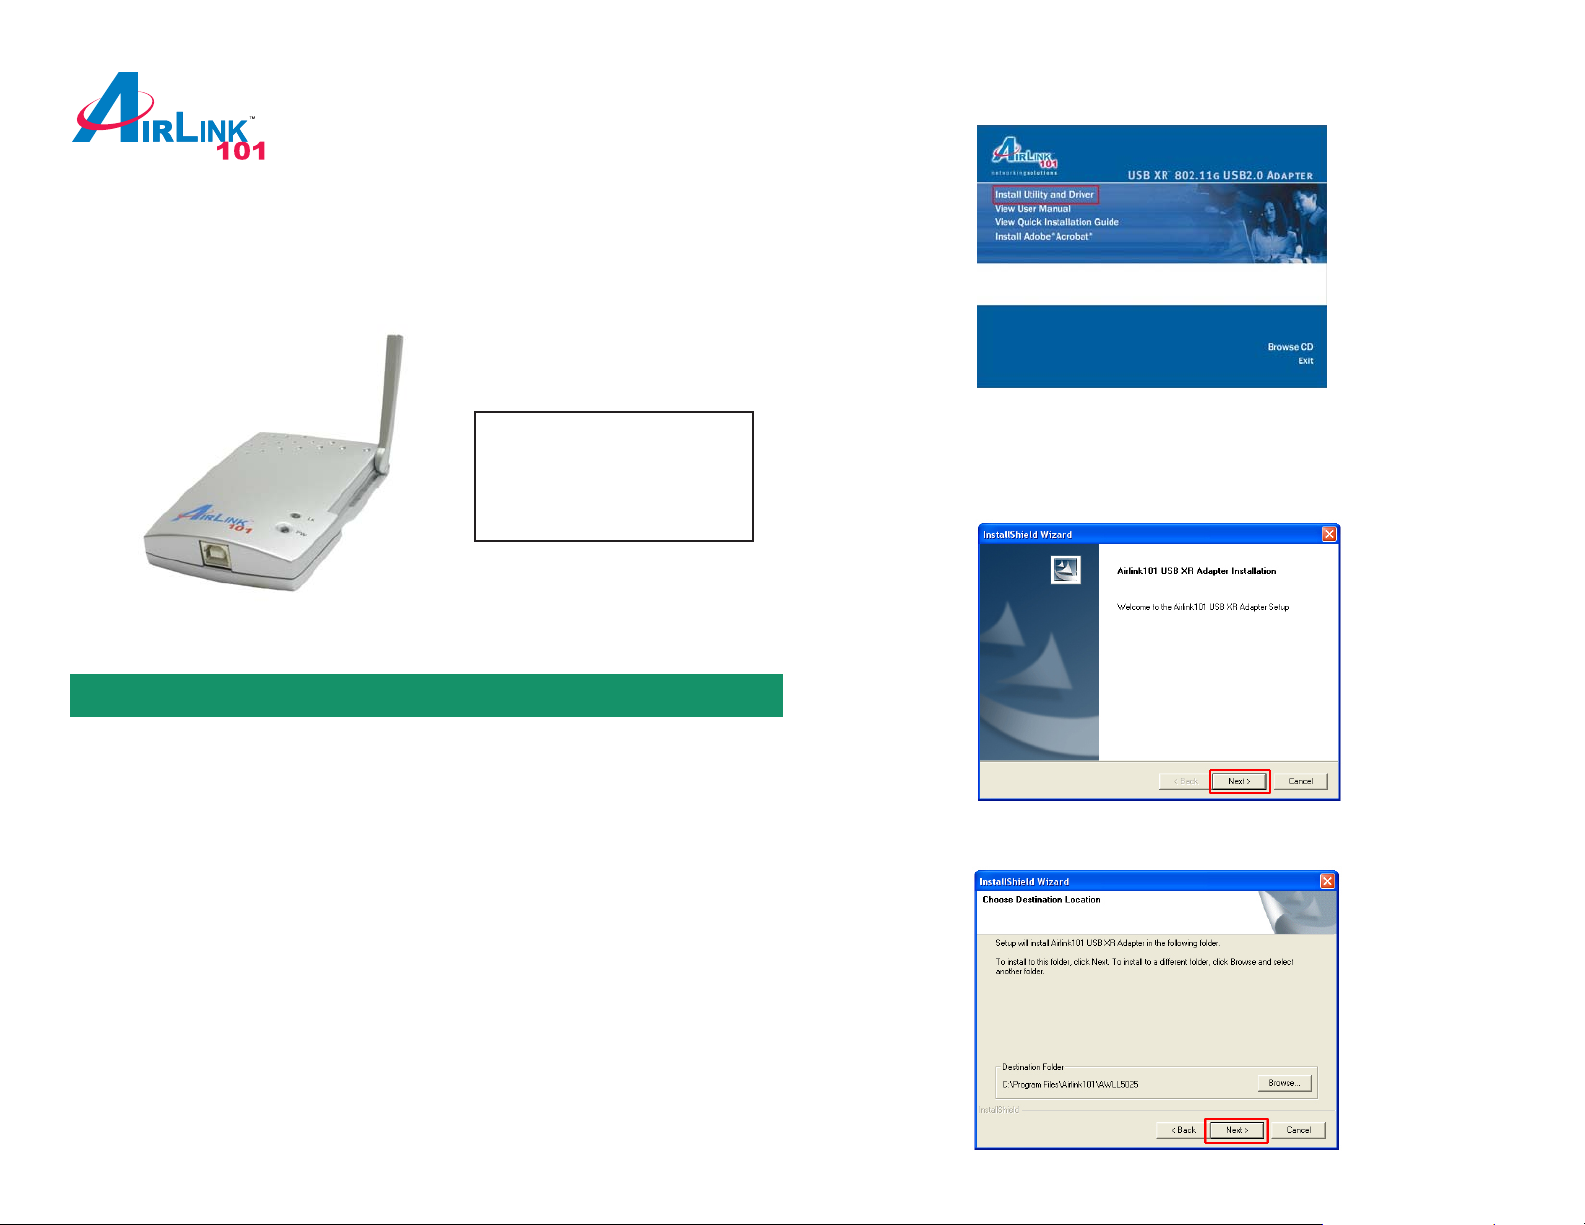
Step 1 Insert the Driver & Utility CD into your CD drive and select Install Utility
and Driver from the menu.
Package Content:
• USB Adapter
• Driver & Utility CD
• Quick Installation Guide
Section 1
Install Utility and Driver
This Quick Installation Guide only provides the basic instructions. For more
advanced features, please refer to the User’s Manual in the provided CD.
Note: Do not connect the USB Adapter to your computer until you have reached
the appointed step.
Note: If the Autorun screen doesn’t appear automatically , go to Start, Run, and
type D:\autorun.exe (where D is the letter of your CD drive) and click OK.
Step 2 Click Next at the welcome screen.
Step 3 Click Next to accept the default destination folder.
For Windows 98SE and ME users, you may be prompted to insert the Windows
98SE or ME CD during the driver installation. Be sure to have your Windows 98SE
or ME CD ready .
Page 2
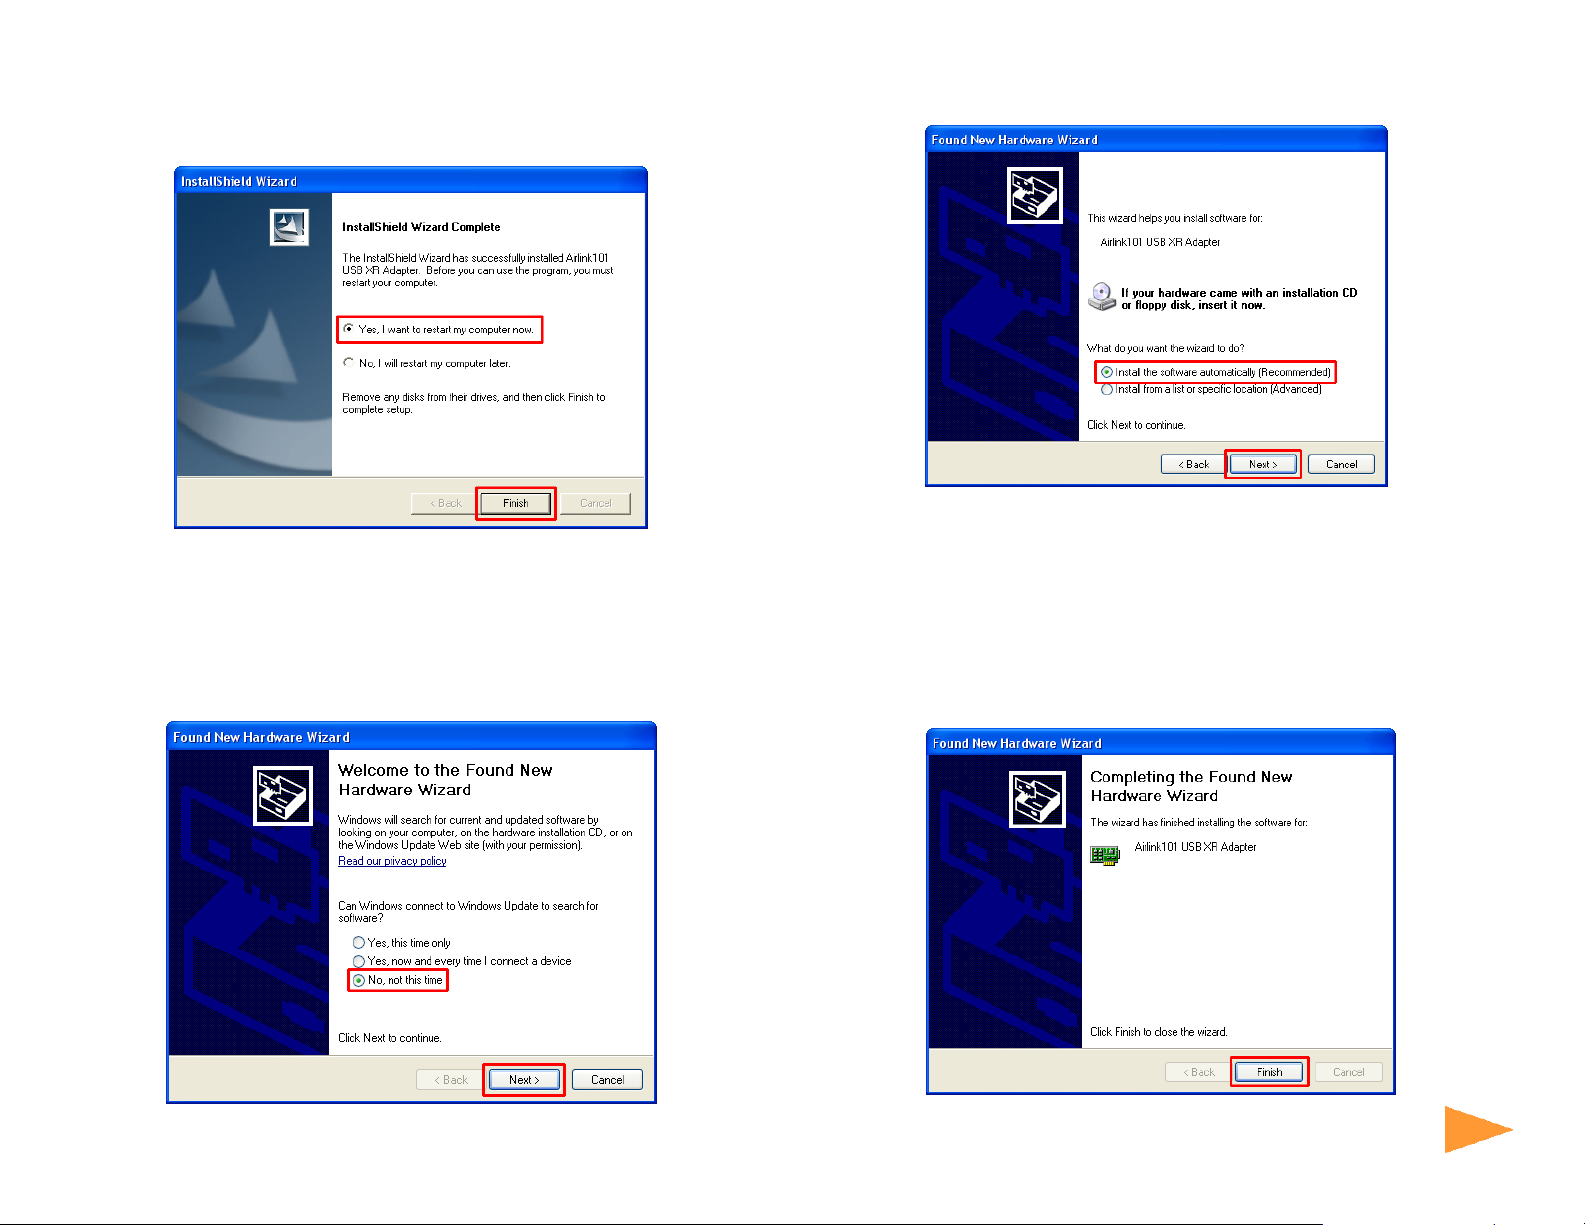
Step 4 V erify Yes, I want to restart my computer now is selected and click
Finish to restart your computer .
Step 5 After the computer is rest arted, connect the USB Adapter to your
computer’s USB port.
Step 6 If Windows asks to connect to Windows Update, select No, not this time
and click Next.
Step 7 Select Install the software automatically and click Next.
For Windows 98SE and ME, select Search for the best driver for your device
and click Next. Verify all the check boxes are checked and click Next.
Step 8 Click Continue Anyway at the Windows Logo Screen.
(For Windows 2000, click Yes at the Digit al Signature Not Found prompt).
Step 9 Click Finish. (Restart the computer for Windows 98SE and ME).
Continue on Back
Continue on back...
Page 3

Section 3
Section 2
Configure the USB Adapter
To open the USB Adapter’s utility go to St art > (All) Programs > Airlink101 USB
XR Adapter Utility > Airlink101 USB XR Adapter Utility.
Step 1 Go to the AP List tab, select the SSID (Network Name) of the wireless
network you wish to connect to, and click Connect.
Step 2 If encryption is not enabled for the selected access point / router, skip to
Step 6. Otherwise, enter a Profile Name for your wireless setting and click Next.
Step 3 V erify that the Network Name matches the SSID of your wireless network
and click Next.
Page 4

Step 4 Select the proper encryption setting for your wireless router or access
point from the drop-down menu and click Next.
Step 5 Follow the on-screen instructions to complete the encryption settings.
Click Complete when finished.
Step 7 Go to the Link Information tab and click on the More button.
Step 8 V erify that you are receiving adequate Signal Strength and Link Quality and
that you have been assigned a valid IP address (instead of all 0’s).
Step 6 Y ou should see a blue circle around the antenna icon indicating a valid
connection.
Section 4
Section 3
Technical Support
E-mail: support@airlink101.com
T oll Free: 1-888-746-3238
Web Site: www .airlink101.com
*Theoretical maximum wireless signal rate based on IEEE standard 802.11g specifications. Actual data throughput will vary . Network conditions
and environmental factors, including volume of network traffic, building materials and construction, mix of wireless products used, radio
frequency interference (e.g., cordless telephones and microwaves) as well as network overhead lower actual data throughput rate.
Copyright © 2005 AirLink101. All rights reserved. AirLink101, the stylized AirLink101 logo, specific product designations, and all other words
and logos that are identified as trademarks and/or service marks are, unless noted otherwise, the trademarks and service marks of AirLink101.
All other product or service names are the property of their respective holders. AirLink101 products are protected under numerous U.S. and
foreign patents and pending applications, mask work rights, and copyrights.
 Loading...